


Izzy Madd
-
Posts
382 -
Joined
-
Last visited
Content Type
Profiles
Forums
Gallery
Events
Posts posted by Izzy Madd
-
-
Playing with hooks - part 2 ( or 3)
And with my nerves. Seems to be well until same end, and then something went wrong
Here is technology I "discovered"
First, lined up ends of 1mm brass wire
Squeeze ends
Fit ends on anvil, with scalpel careful cut little nock on top, and with dremell fit shape
Make two rings of cooper wire 0,5 mm
and fit to this shape
preparing for soldering - it looks like preparing for surgery

Paper tape hold this little pieces on place
After soldering
I did it wrong, but you can catch basic idea - cut excess, and leave what you need
First "done". I do not like it
Both "done". Hmmm ...not good
Tomorow will be smarter than today
Maybe to cheat a while - to solder there little rings. It will be easier
Thing which need rethink
Not quite sure what you are making? But again cut three strand and tape, twist even solder far ends together. Then open them out to the exact position you want then tape all to the table and solder in one go nothing move and less to remove with the file as most is cut off.
Hope this helps.
Best wishes
Izzy
- mtaylor, Piet and CaptainSteve
-
 3
3
-
Ok, I am back. Princess went to town, Hothead is drown in his own model of house which design has to express activity (?) and purpose (?) by its shape abd outside surfaces ( thanks God I am attorney, not architect) and I can hear him going mad looking for some design lines ...
Finished meeting with client, too dark outside for fgarden, nothing on TV, and I heared Her Majesty's call from shipyard ...
Crotchets - I made several unsucesfull attempts, tryin to solder 0,5mm on 1mm brass wire, and then after two hours of @#%#%$'& dropped something that can pass
This is still test piece
It fits to my rescaled C-plans, so, maybe I success to make it well. Space between two crotchets is between 4 and 5mm
Great to have you back on here at your own pace. Take care and war, welcomes.
If it's any help I've found if soldering parts like this repeat her than doing two separate part make a "U" shaped piece then you can solder both at once without needing to hold three things then trim to right size after. Also I found washing soldered parts under the hottest water possible 70-80 degree C straight away washes the flux of with out scrubbing and save corrosion.
Welcome back my friend
- mtaylor, GLakie, CaptainSteve and 1 other
-
4
-
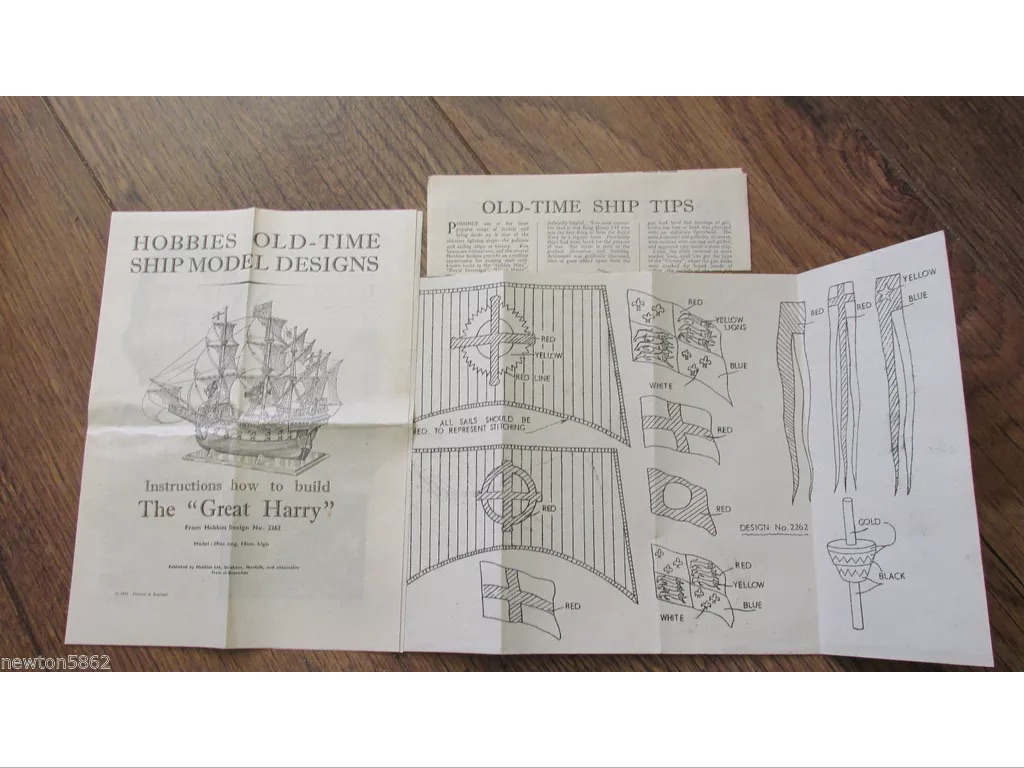
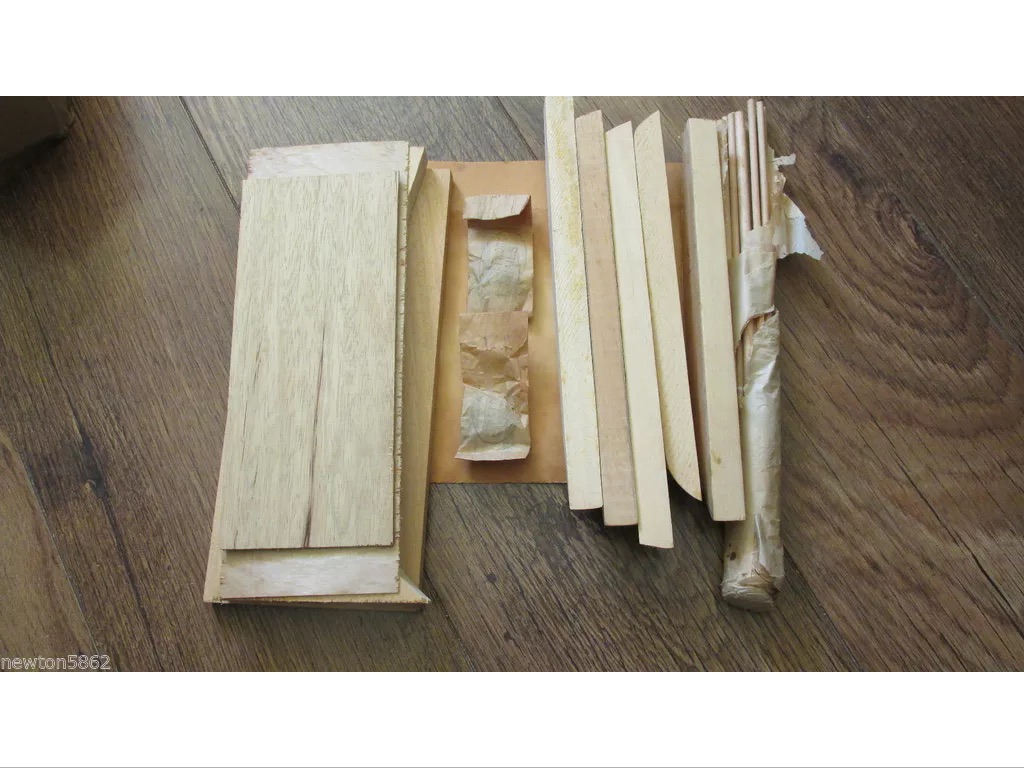
I know this isn't about "Wooden Willy" but it is about vintage wood kits.
Now I know way back when kits were a little more basic than today and you had to guess or discover a lot about what and how things should be but these pictures below are taking the Mickey. And these represent the entire contents...
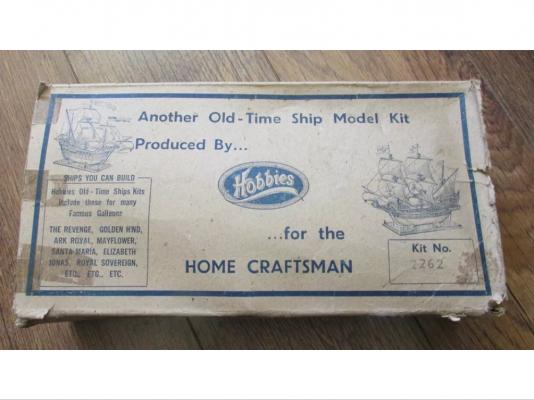
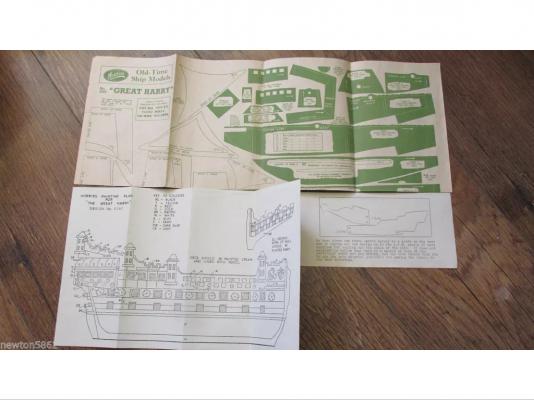
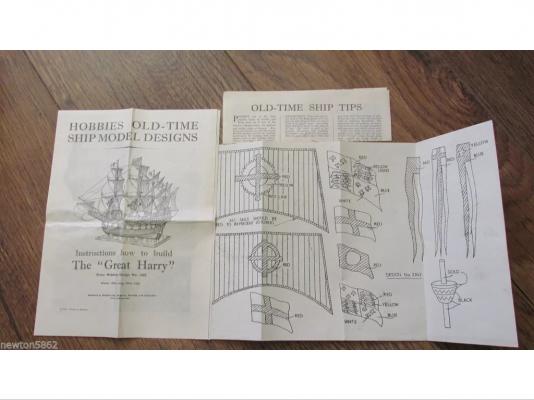
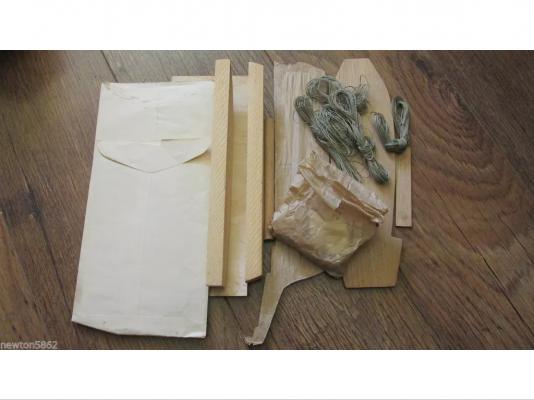
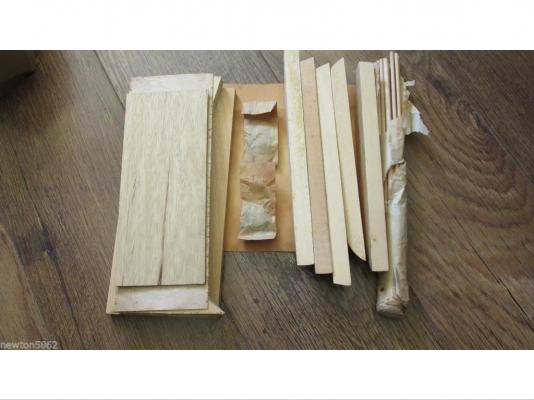
It makes billing look positively generous and molly coddling.
What's the next one down a log and a penknife.
And the one below that an acorn...
-
On weekend I started working in garden and participate on MSW, yesterday I started working in office, and thinking in free time about unfinished catheads, so it seems I am close to continue working in shipyard

Great to see you back my friend.
Small steps taken slowly. Still reach your goal.
Don't rush into anything yet but so long as you move along you are not being overwhelmed by the past.
Pleased to hear your getting time in the fresh air and sun. Especially with those special memories.
Wonderful to hear from you. Take care of yourself.
- capnharv2, Jack12477, CaptainSteve and 2 others
-
5
-
Hi,
I've just been looking at McKays large scale drawings and noticed that the messenger attaches to the capstan at the top.? I'm sure your super accurate and I just wondered why you went for the other way. Which you said worked great. Just wondering which source was used as reference?
-
I only "like your words because it marks, however brief, your return.Dear friends
CaptainSteve, Glakie, mtaylor, Piet, juleslucas, popeye the sailor, Omega1234, SawdustDave, Izzy Madd, Sven, usedtosail, Jack12477, dgbot, UpstateNY, tasmanian, rfolsom, keelhauled, Jan B., ScottRC, capnharv2, Mirabell61, Peter Jenssen
and all others who sent me PMThank you very much for nice words and support in last very very hard week.Very important to me is to have you as friends from all over the world to be with me in this momentBut ... this is lifeLife must go on, so do IIt is fact, and make me drown that every little place and every bit in our house has Her touch, connected with our plans, thoughts during 28 years of really happy and successful marriage, but I am strong, kids also, maybe little more stronger than we have to be, and we will move forward to our destiny olja.jpgIf you wish, you can listen Her favorite song "Caruso" performed by Pavarotti, which we escorted her two days ago
Considering I never used any anxiety medication, and never intend to, It is much easier to go through, applying to me some self-therapy with work, work, work, in office, in garden, everywhere and anytime, so I’ll be soon come back to Her MajestyThank you again!!!!
olja.jpgIf you wish, you can listen Her favorite song "Caruso" performed by Pavarotti, which we escorted her two days ago
Considering I never used any anxiety medication, and never intend to, It is much easier to go through, applying to me some self-therapy with work, work, work, in office, in garden, everywhere and anytime, so I’ll be soon come back to Her MajestyThank you again!!!!Your presence has been missed in many ways. But always with understanding. I'm glad to hear you are all able to shoulder this incredible burden. But don't dismiss sadness as a weakness as it is as needed as copeing.
However long you need to regain some sort of order back is never too long. As you will always be welcomed back with glad heart and open arms.
Don't over do the self therapy. And loose yourself in the process. As with all thing my friend, moderation. And don't dismiss those places and things you shared. As that is how she will remain with you all. In your hearts. As someone not forgotten is never truly gone. Just not quite so close.
The days and weeks ahead will be rough for all. But you will come through the other side.
And while it's wonderful to hear from you. I'm sure in time you'll return as a regular steadying comrade in arms as it were. And you have a beautiful song to treasure along with all the good times. Least of which were the coming of your two children, who will be able to pick you up if you stumble upon this hardest of roads.
The flags will raise tonight in honour of your return and in memory of your loss.
Return soon my friend. But in your own time. And in your own way.
- NenadM, dgbot, CaptainSteve and 6 others
-
9
-
No snideness from me Mr. Madd. I thank you for filling me in on Wills history. He is an honored veteran. Bill in Idaho, where its getting hot and the fire season is upon us. Although no big fires yet.
No problem as regards Wills past any thing else I can tell you just ask. It's my first wood build but as a veteran woodchuck I'm loving it. I'm also doing the Cutty sark 1/350, in plastic, for a bit of fun. And Cutty Sark in 1/130 in plastic at the same time. It makes it more interesting...
That's as well as developing a new caulking medium. And re inventing a lost varnish. That I was assured could only be made using liquid nitrogen and or the assorted concoctions. Up to now I've made enough to make four litres when mixed. It's a dry powder. And the only chemical I've used is elbow grease. That's what education does for you.
Oh and if you want the sails the correct red shade as they always were. It used to be done with fish oil, red oxide and urine...
Nowadays they use red oxide and linseed oil. But if you don't mind taking the p**s by all means use the original recipe.
And here's hopeing you only get the sort of fires you put a nice big juicy steak on.
-
Ahoy there,
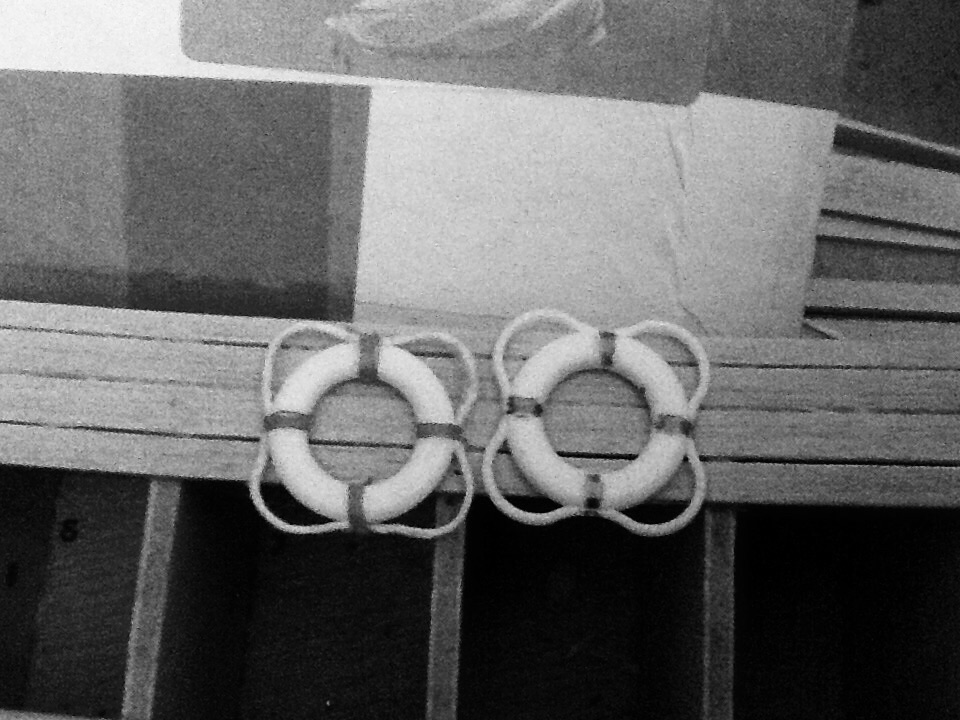
It's the weekend again and what would it be without a whacky weekend quiz. No I don't means what is a tatting shuttle. I mean look at the anti quainter image below. It's in B&W on purpose you'll see why next time.

On the left is the improved version. On the right is the horrible Billing version.
So the question is which looks better and anyone who says they look the same will end up like Cap'n Flint. Oven ready...
And to save you suffering as what the difference is...
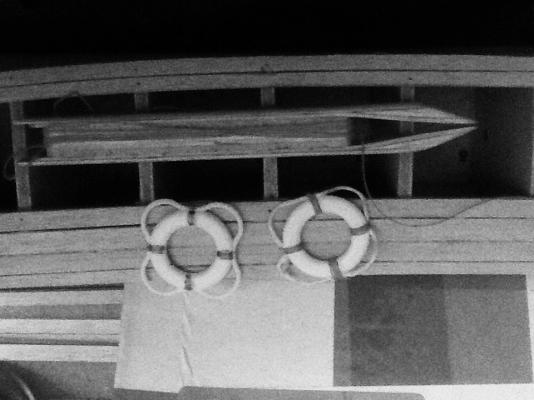
And in case your wondering that at the top is a tasting shuttle. And yes the one right is the left one and the rope is real not plastic. The turnaround is curtesy of Apple.
And unless you want to end up like Bonney here I suggest you don't give me any snide remarks either

-
Haven't ever used a tatting shuttle for rigging, but I have used a crochet hook. Meeanwhile your thread caught my eye as I just litterally inherited the Billings Will Everard from a freind who passed away. He was in the airforce and spent 9 years stationed in England and married English also. The Will was in his collection of kits and his widow asked if I would build it in trade for some model train kits. I also agreed to build a Mamoli Halifax which I am now working on. Anyways Looks like I'll have to do some research on the ship and see why he was worthy of a Billings kit. Know he was steel I think I'll overplate the hull with plastic card to simulate the steel. Might be a fun project. Bill.
I think the main reason for "Will" being used is the fact that it was one of the last four made for Everads transport. All named after members of the family. Sadly Enid ends up stuck on the sands a Dunkirk. While Will made it back. But also in the late seventies it was bought by OCL which was then taken over by P&O. But also had what was called the most beatuiful barge captain a young lady who still part owns it in her own right now. An if you go online you can have a virtual tour. It's a lot different to when OCL first bought it as that's when we first met as it were a friend who worked for OCL obtained two new family members that day so that me and my mother could spend the day on one of the few still remaining. And it was a typical British summers day. Cold wet and raining. And all they had for seating was long HARD benches and not enough of them.
One feature may not discover as I'm one of the few left to know but OCL wanted to rename it along with three others it intended to get. They were all going to be named along the lines of Luggit, Tuggit, Haulit and I've never been able to remember the fourth. But Lady Luck stepped in and it stayed renamed "Will" as part of the last sale agreement.great little boats and right on the cutting edge of there technology. So much so that the captains would wrap chains around the outside of the hull so as to stop loose cargoes shifting and splitting them wide open as they only had one skin on them so as they could carry more. And the deck level would be lower than the sea level. Hence the raised cargo hatches.
-
Quick question
Has anyone one on here ever tried using a "tatting" shuttle for rigging?
-
Hi,
I don't know if your aware or if it would make any difference. But John McKay's book has several alterations especially in the galley area. A steam trunk is added and the magazine forward has been altered.
Also I've never seen the quarter da it's mentioned before. And as they are such a large external feature they would easily be noticed if not included.
-
-
Another day goes by.
And another day this community remains in mourning for your loss.
And another day the flags remain in salute of those not here.
Your pain is shared by many but sadly it is unable to lessen it.
Take stength from each other my friend, you your son and daughter.
But know also to take strength from the feelings of an entire global community that has no borders. Just feelings.
Until your return.
- SawdustDave, NenadM, Piet and 4 others
-
7
-
-
Has anyone any suggestions as to what I can use to replace these hideous life belts Billing give you?
And by suggestions I mean ones you tell the vicar. Please.
-
Several seeds and a plant pot, plus a pen knife. And a lot of time learning how to use the wood that will eventually grow from the seeds...
-
I've found after many years dealing with slow witted apprentices that K.I.S.S(keep it simple, stupid) works best.
So I just used to tell them "keep the soft fleshy bits away from the hard sharp bits. Works for any tool especially the thick ones...
-
Thanks Izzy and Mike for your input.
I will need to do lots of practice. I've never stropped a block, seized a line, or tied much other than shoelaces.
I have Chuck's Servo-matic almost all sanded and ready to assemble. I need to go buy some line to practice with. Make some blocks (to try stuff; I have Chuck's for the real thing). Try a few knots. Finish the software. Start entering the data. Re-read my books a few times. Steal some paint. Decide if I need to make something to put the model on while I rig (so I don't mess my back up changing heights all the time).
I think this is going to take a while
:).Still, I'm in no hurry.
Richard.
As regards stropping and whipping and a lot of other parts "Ashley's book of knots" spelling may be wrong but it's free if you look around the web. But this is the ultimate bible of knots even now. And contains every knot you'll ever hear of never mind use. Also it's from the 50's so is relive the to the way sailing knot work was done. But I'd suggest getting some cordage about two or three metres. And make the knots splices and whippings full size so you know what your trying to recreate. And same as with the stropping of blocks actually test the strength of the joint as what can seem weak will tighten and vica versa. As well as going overhand as opposed to underhand can make a lot of difference even on scale models. Just whipping an eye loop looks terribly weak but just by wrapping thin cord around a doubled rope four times its width can hold incredibly well. Yes the originals were also stitched through as part of the whipping. But you'll be or I would adding PVA/ water mix to hold it all. I'd also suggest adding a drop or two of liquid soap as this aids the penetration. And I'd mix the two 4 part glue to 1 part water. And it's wired as it makes it dry dull and harder. But almost as strong because it gets into the fibres. Some say use CA for me this is a disaster waiting to happen. As firstly if there's any nylon polyester or such in the lines they will begin to melt and weaken the thread so leading to potential snapping. Secondly the line goes rigid and this causes two problems sooner or later. If the line is not in its final position you've then got a rigid line pointing the wrong way. And a rigid line snaps not bends. Thirdly. Sorry to go on but I've seen some awful rope work on what is a beautiful job all because people want a quick job. Thirdly the thread will wick the CA probably as much as 20mm easy. And this makes the thread change colour compared to the rest and the previous issues. Fourthly if the glue gets on wood or plastic fitting, not sure what you are using. With wood same as the thread it will soak in changing it and plastic melts. Fifthly PVA and water can be dissolved with neat Dettol if you put a line in wrong. IMO. And dries within 20seconds so not much longer than CA. So for what it's worth avoid CA in my opinion.
-
Sounds like you guys are very well prepared on the rigging. I've only done one ship so far, but one thing I would suggest (echoing the others) is taking a little time to understand the various lines, and then planning out your strategy on the order in which you will tackle the lines. There are all kinds of strategies, and sometimes, I think there are better approaches than those suggested by the kit instructions. Here are some thoughts from my experience that I can share:
1. On my Badger, I did all the standing rigging first, then the running rigging, mostly starting from the bowsprit and working my way aft. I can't tell you how many times I bumped the bowsprit, which caused me to have to go back and repair those lines. So, I think on my next build I will try to work from the stern to the bow.
2. Another suggestion is to figure out which lines will be belayed to the center of the model, and work from the center outwards. It really gets hard to get to the center as you start adding lines to the ship. In particular, I remember adding lines like the backstays much later than the kit instructions suggested. Frankly, I have no idea how I would have belayed some of the lines if they were on.
3. Make sure that your blocks are securely stropped and that you watch the tension on your lines. I had some issues where as I put tension on the line, the stropping came off my blocks. Stropping your blocks the right way from the beginning helps a lot to avoid this issue.
Also, as you start adding tension to a line, it could result in adding too much tension to other lines leading to things popping off. I don't know the best way to avoid this. I secured my lines as I went along (and in pairs to the extent you had a particular set of rigging that went both starboard and port), but I know some people run all their lines and then secure most or all of them at the end.
Rigging can be very frustrating at times, but overall I thought it was a fun part of the build. So, try to have fun!
On my little model as simplified as it was I found front to back for standing and back to front running. As for the tension I fully agree I just left all lines over long hence the colours and went around after they were all on and adjusted the tensions repeatedly. Thank the gods for half hitches easy to tighten and slacken until they are right.
- RichardG, Canute, usedtosail and 1 other
-
4
-

Valar dohaeris
For a friend...
-

Valar dohaeris
For a friend...
-
-
no problem as regards images.
Take care my friend I await your return with a sad heart.
- CaptainSteve, GLakie, SawdustDave and 2 others
-
5
-
No words can say how I feel for you and the rest of your crew.
But in spirit I'll be there by your side I just wish I was possible to be there for you in person.
The flags will lie at half mast in respect until your return.
Valar dohaeris

I to could not "Like" you message. I can hardly imagine your pain.
- Jack12477, GLakie, CaptainSteve and 2 others
-
5


Cutty Sark by NenadM
in - Build logs for subjects built 1851 - 1900
Posted
Looking at the picture Nenad. If you got a short length of copper wire hammered the end flat then curled the ends and bent the wire into a U shape then soldered. The trim down when it's all solid and bigger to hold? If you need I can supply images.