HOLIDAY DONATION DRIVE - SUPPORT MSW - DO YOUR PART TO KEEP THIS GREAT FORUM GOING! (Only 24 donations so far out of 49,000 members - C'mon guys!)
×


rafine
-
Posts
2,932 -
Joined
-
Last visited
Content Type
Profiles
Forums
Gallery
Events
Everything posted by rafine
-
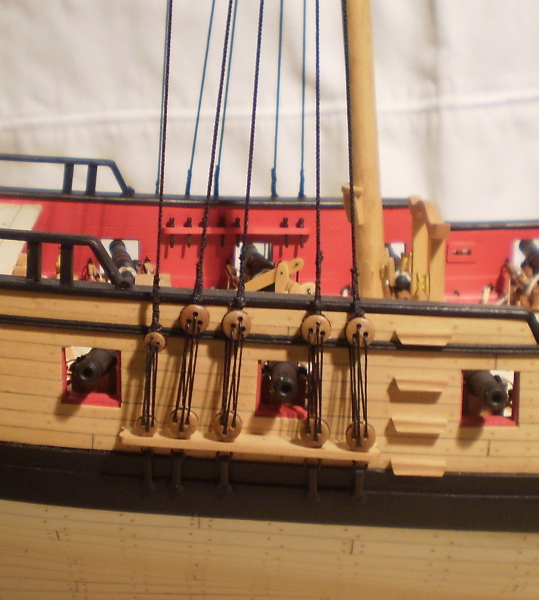
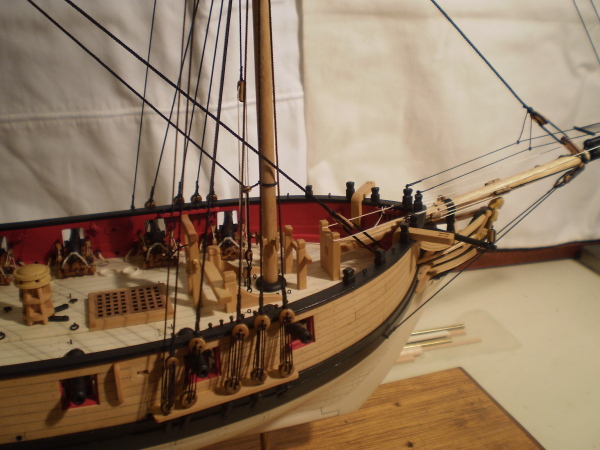
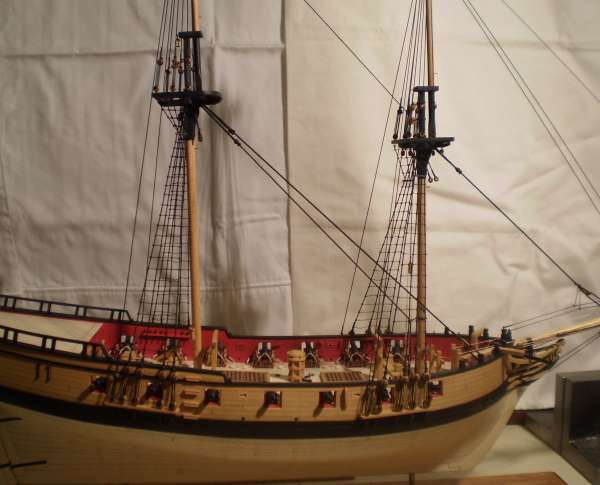
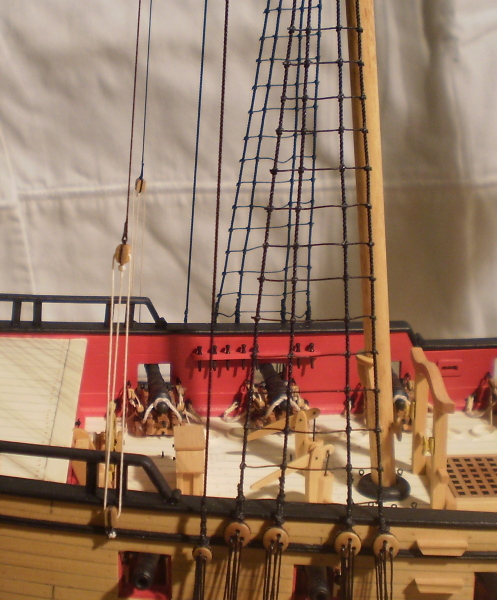
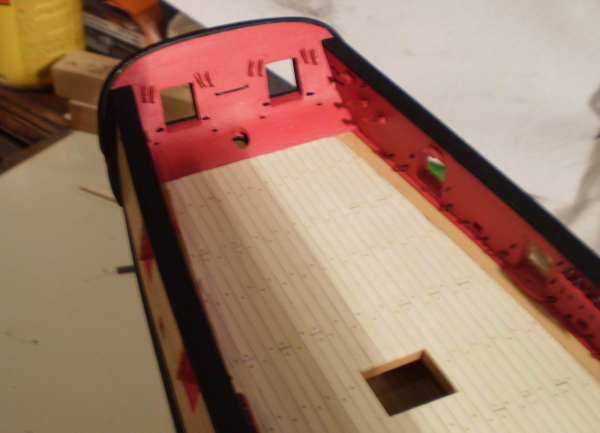
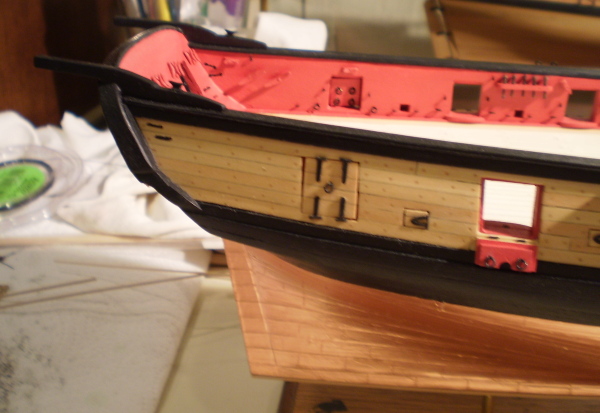
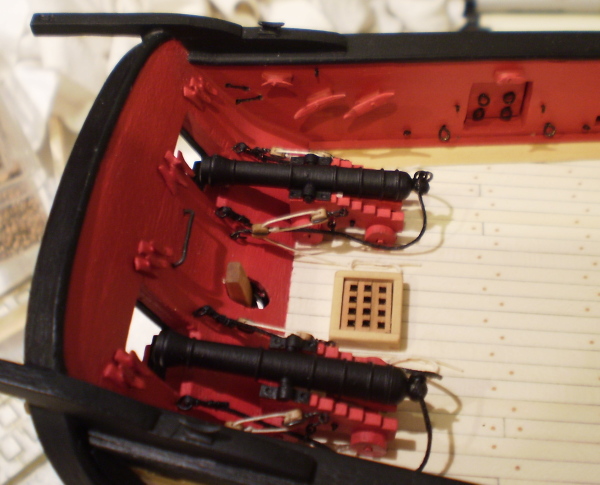
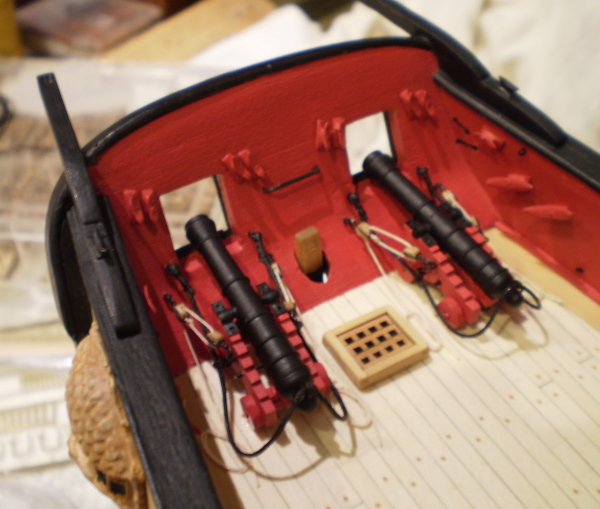
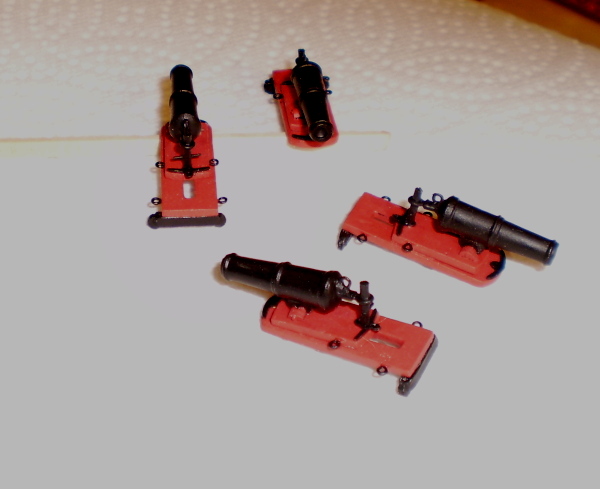
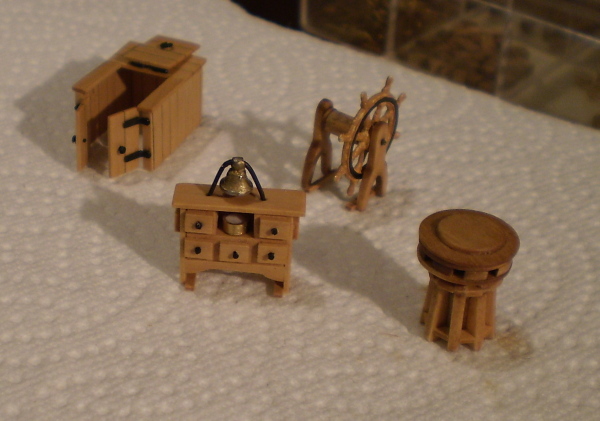
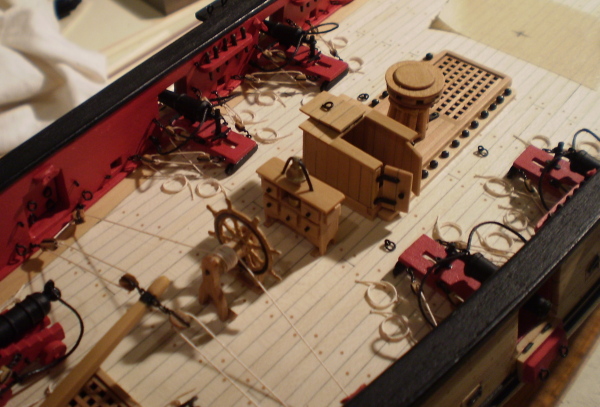
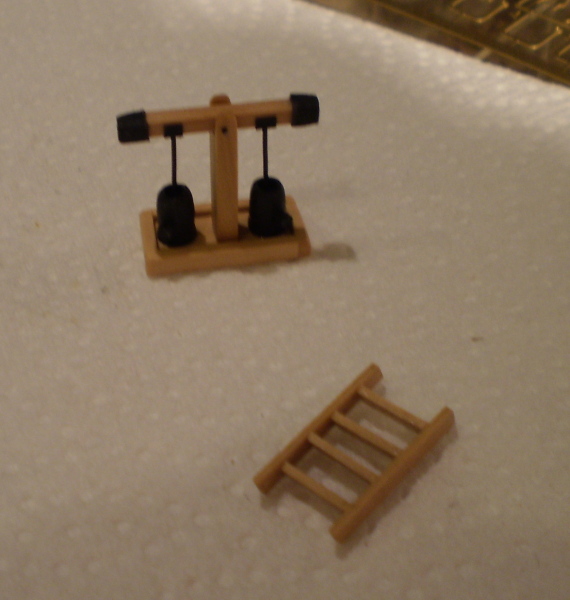
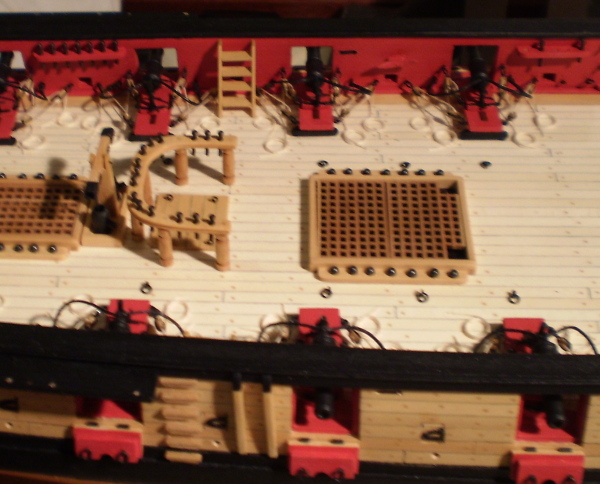
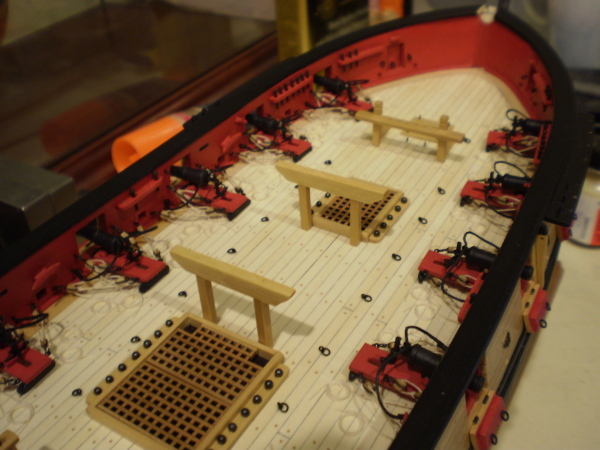
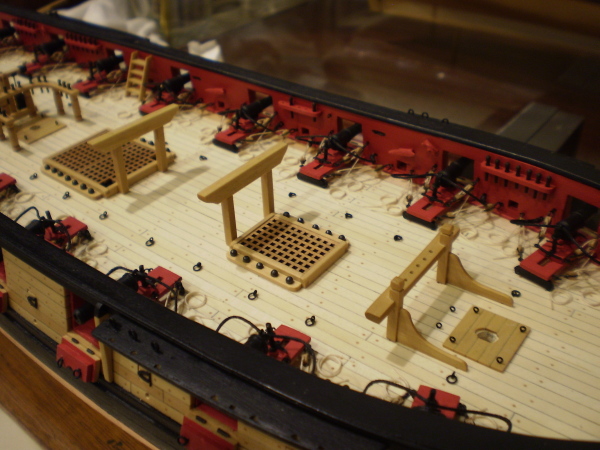
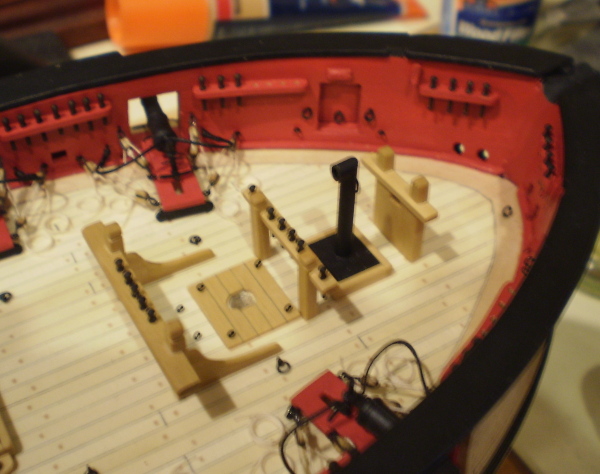
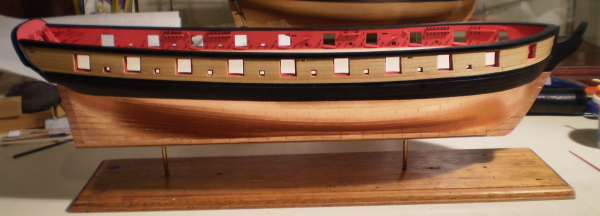
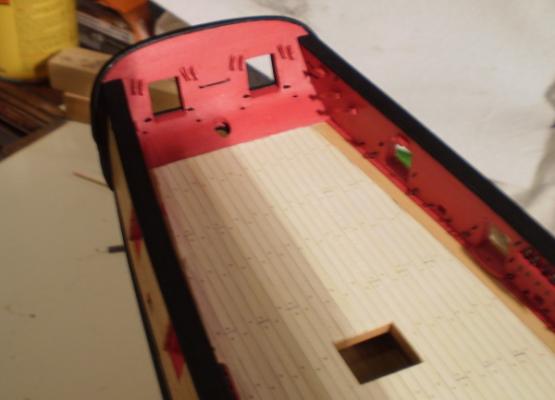
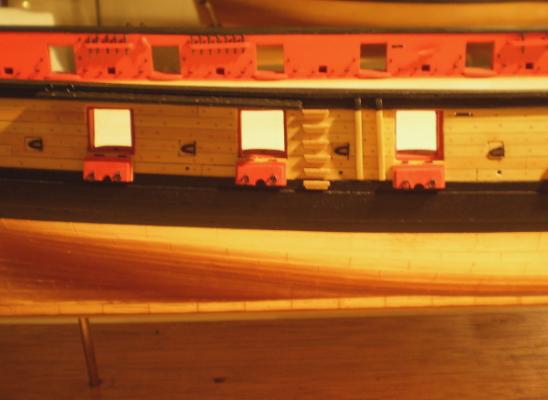
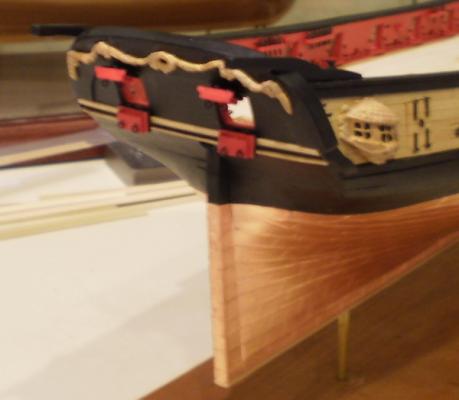
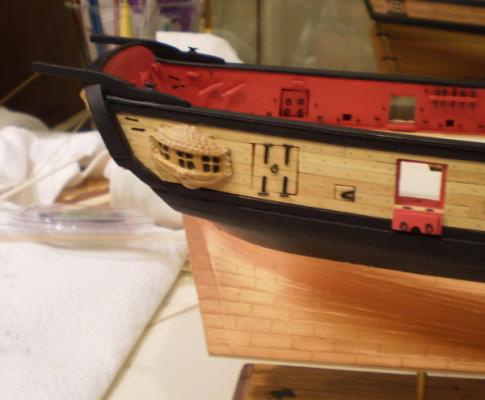
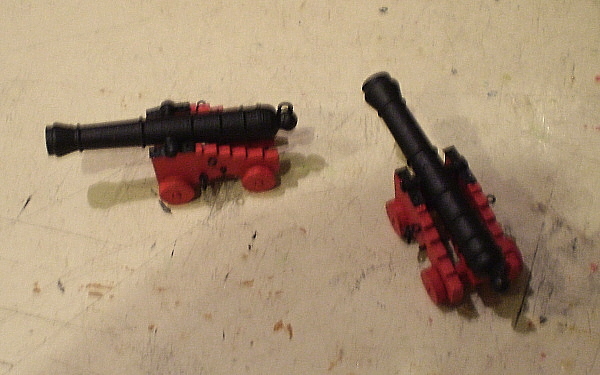
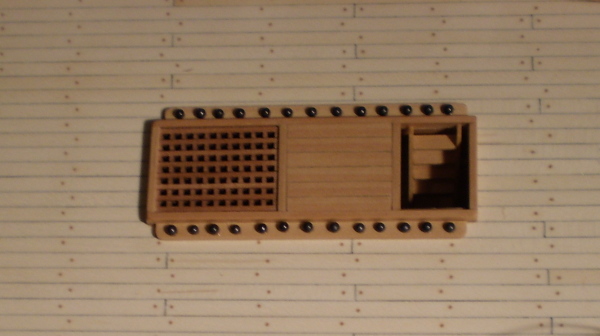
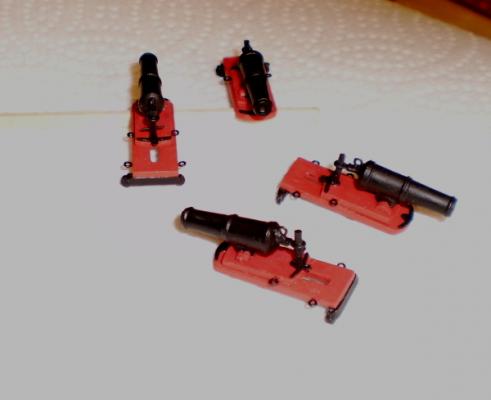
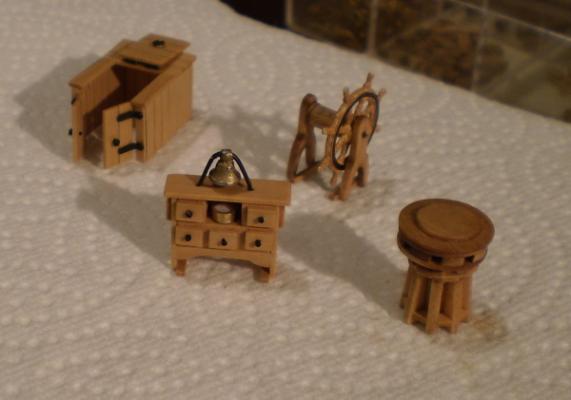
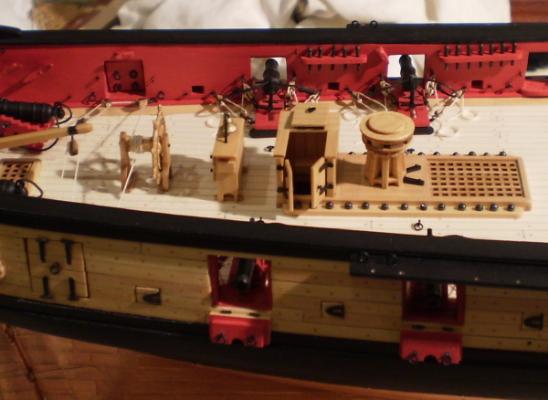
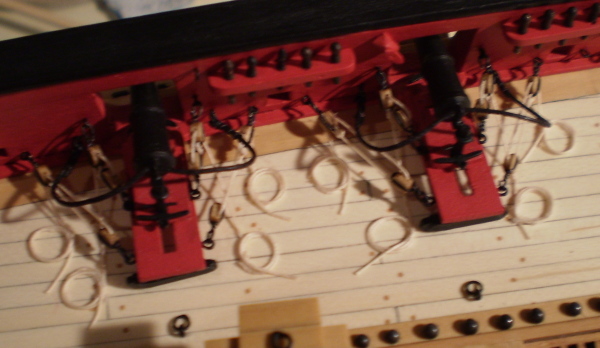
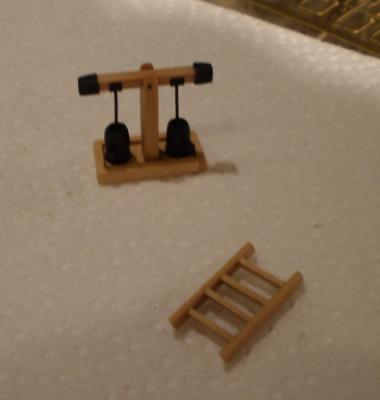
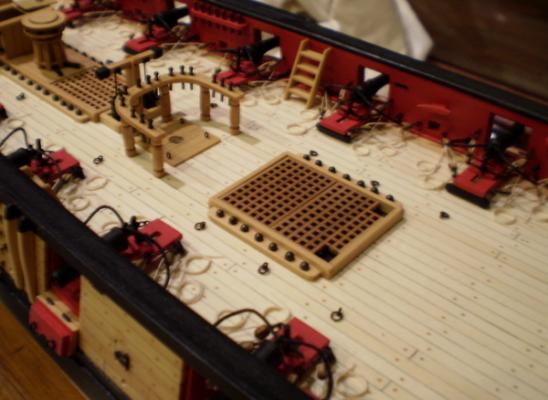
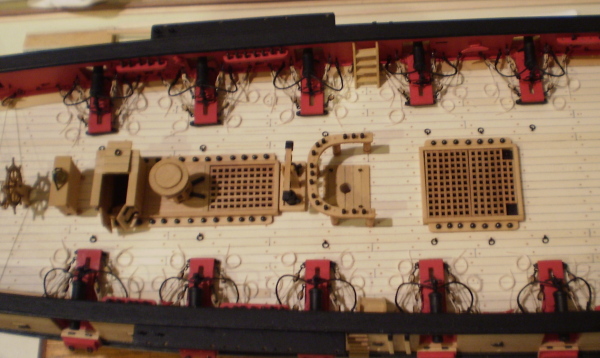
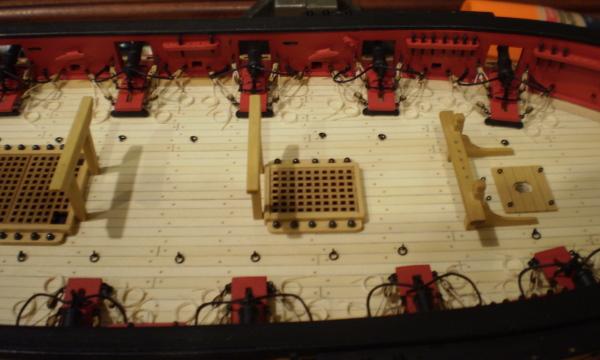
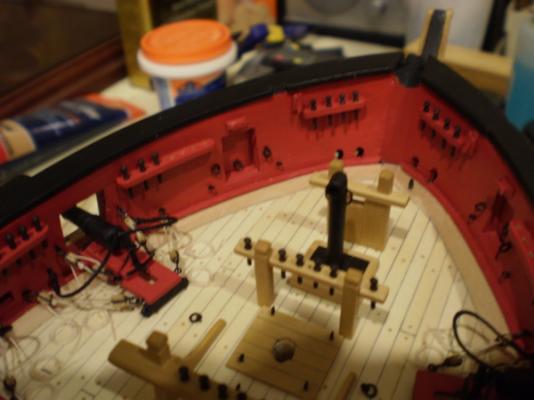
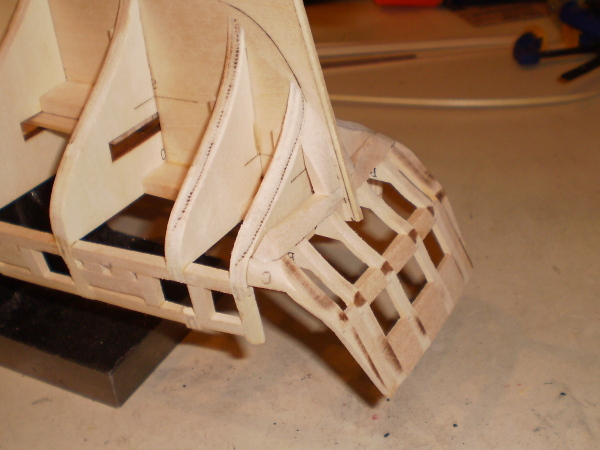
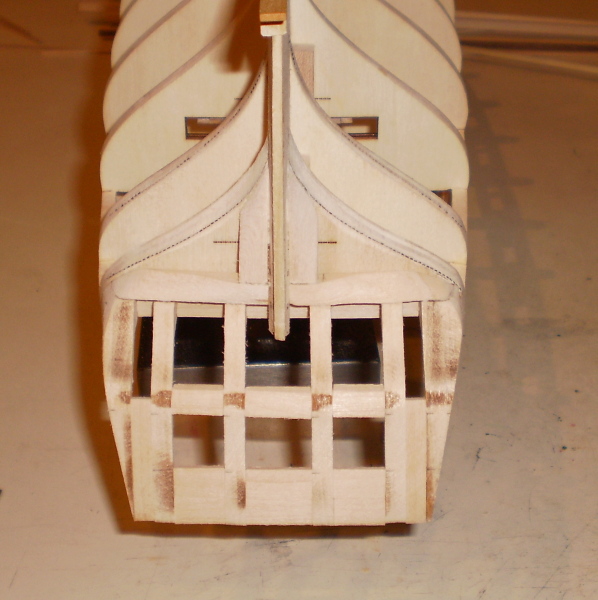
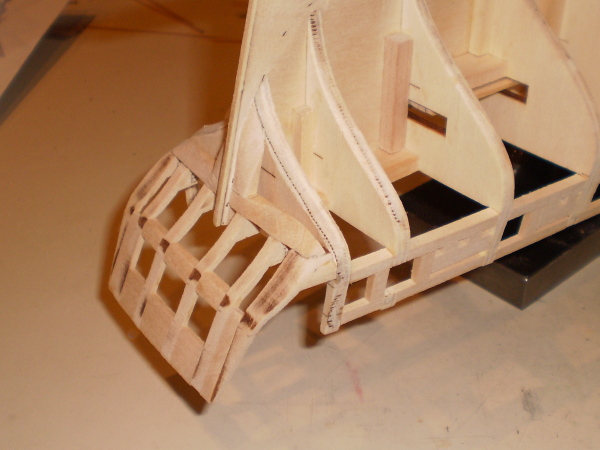
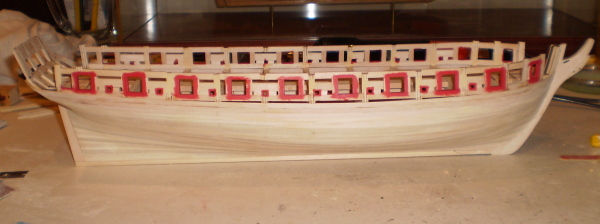
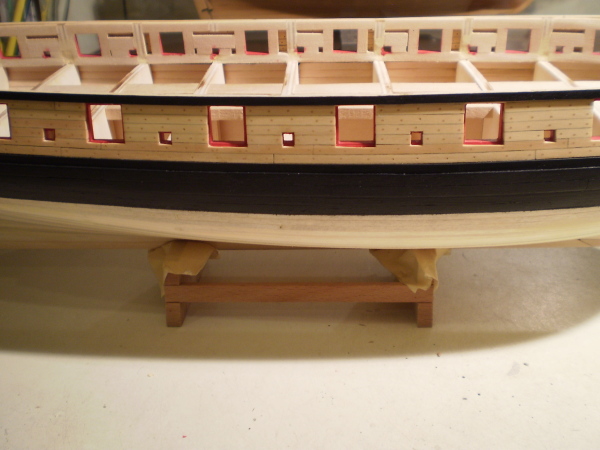
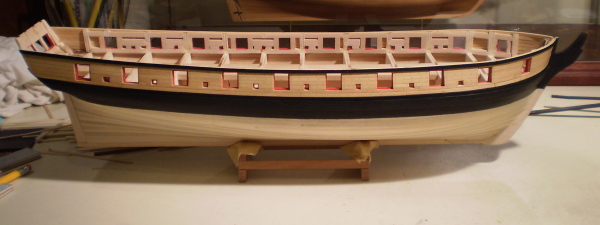
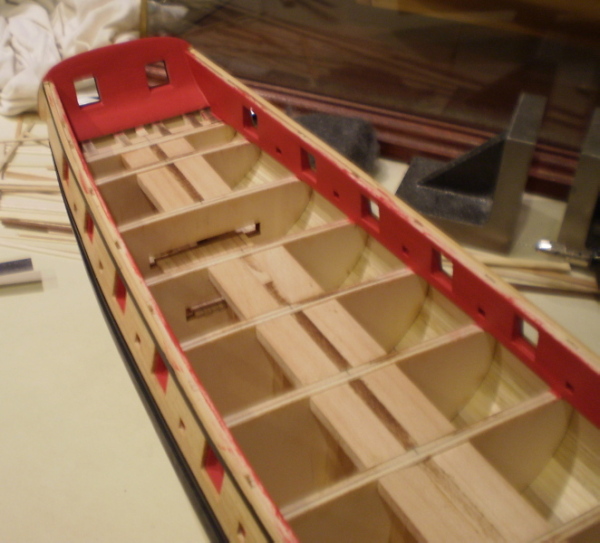
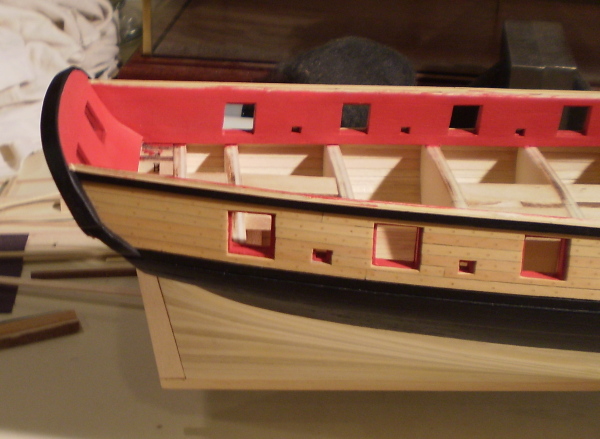
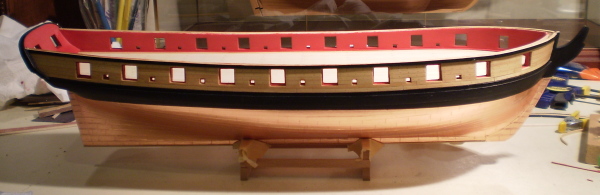
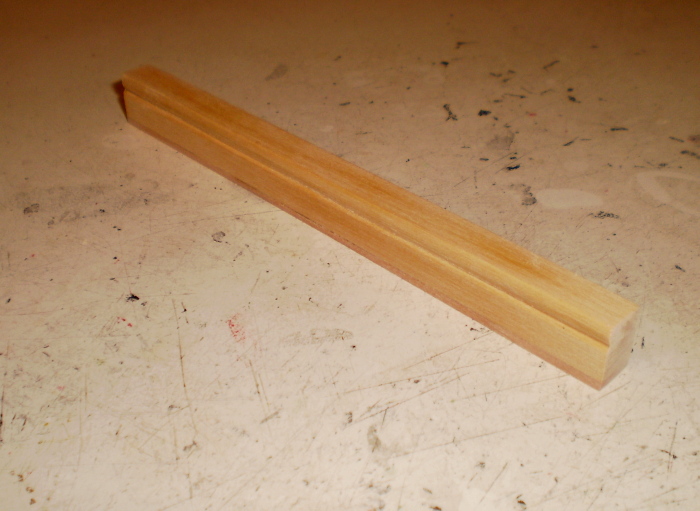
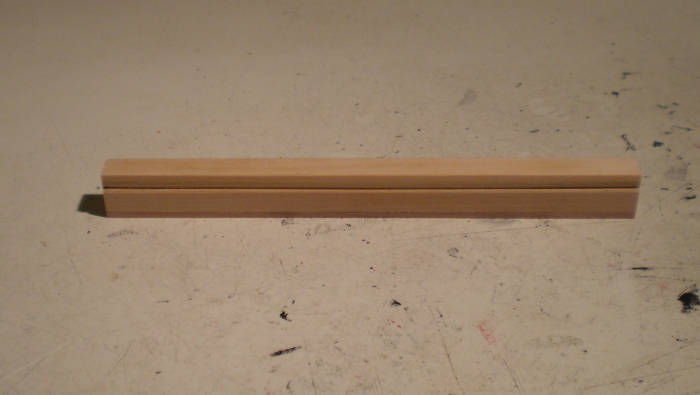
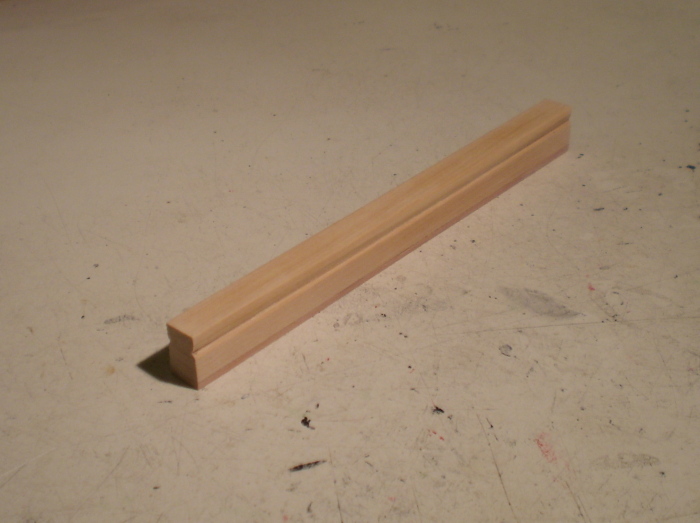
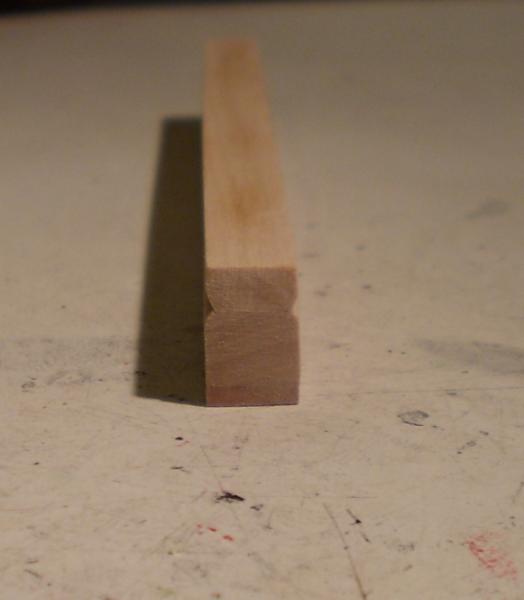
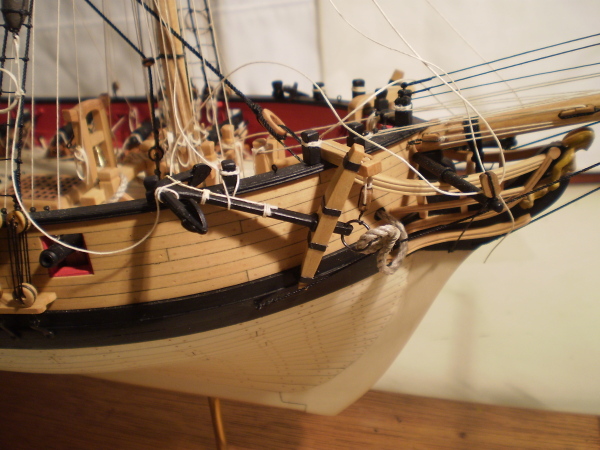
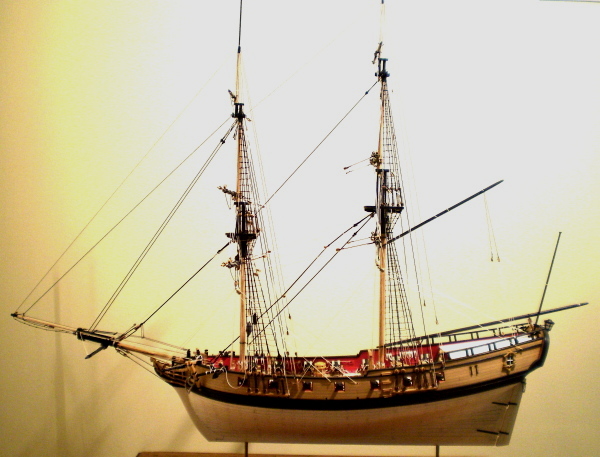
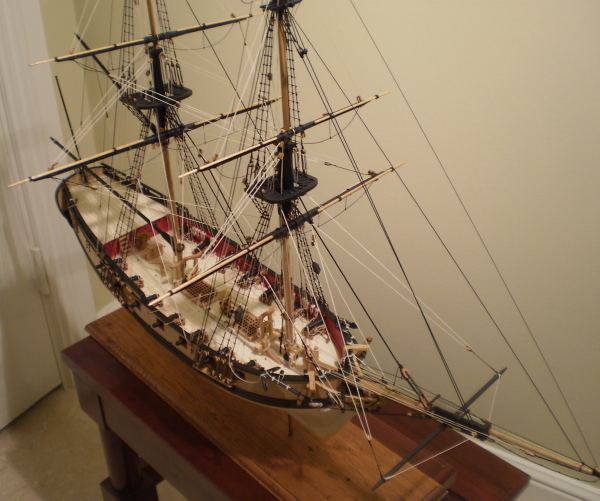
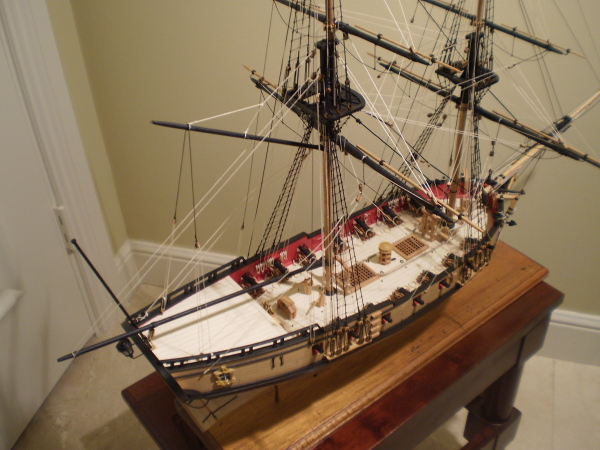
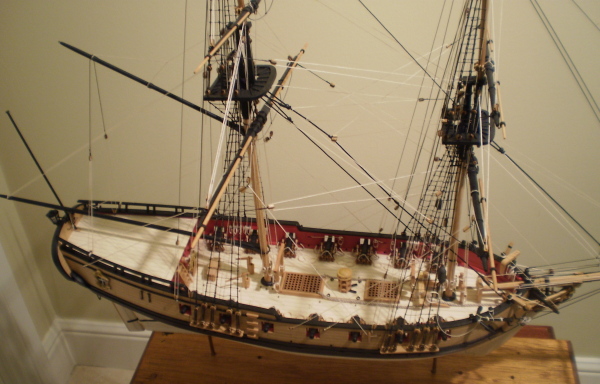
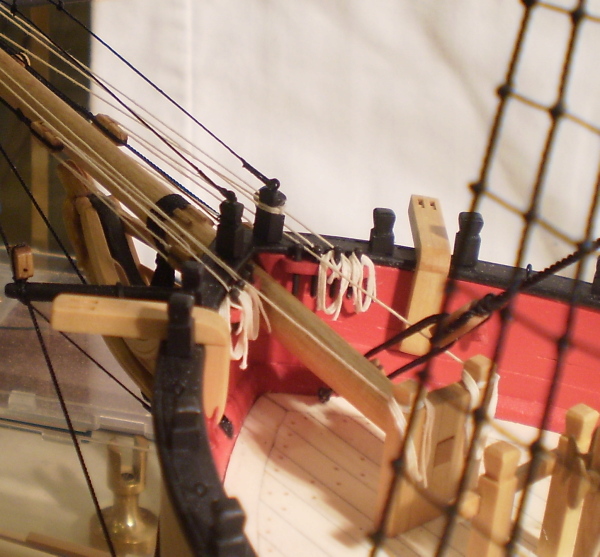
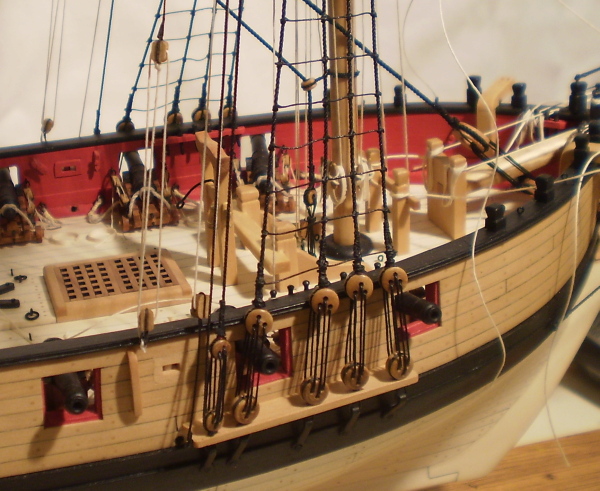
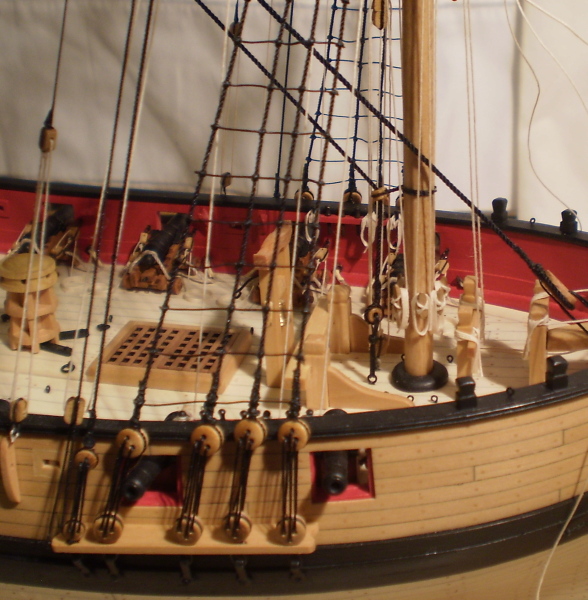
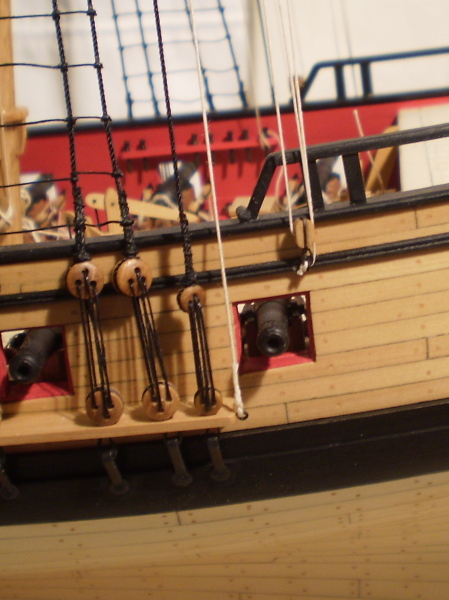
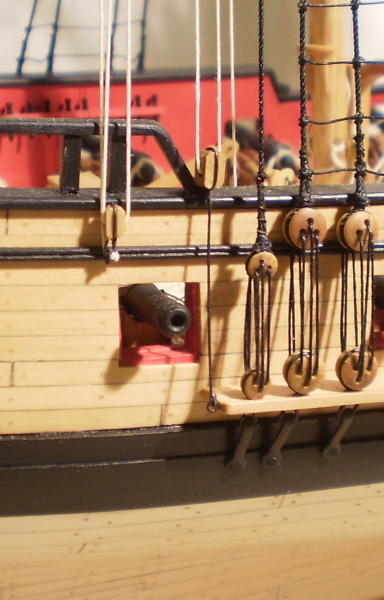
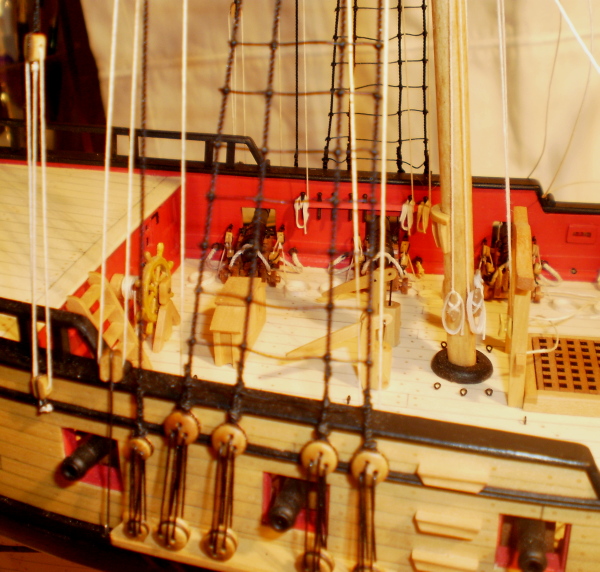
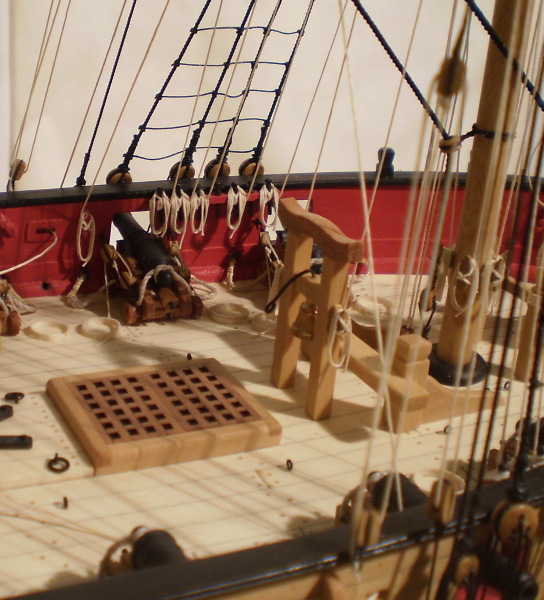
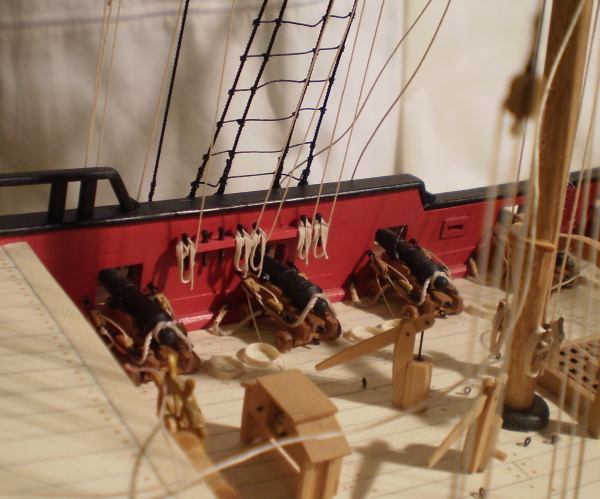
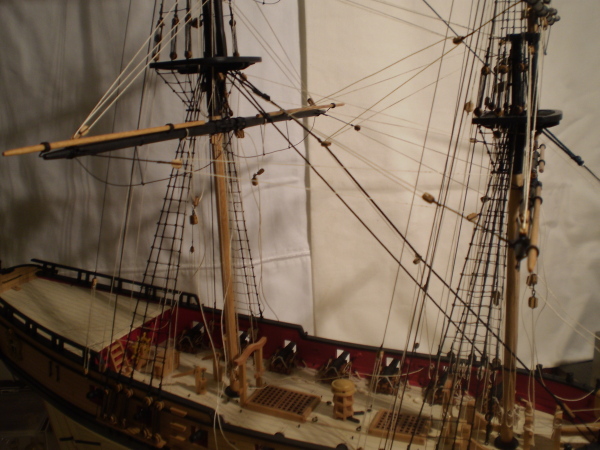
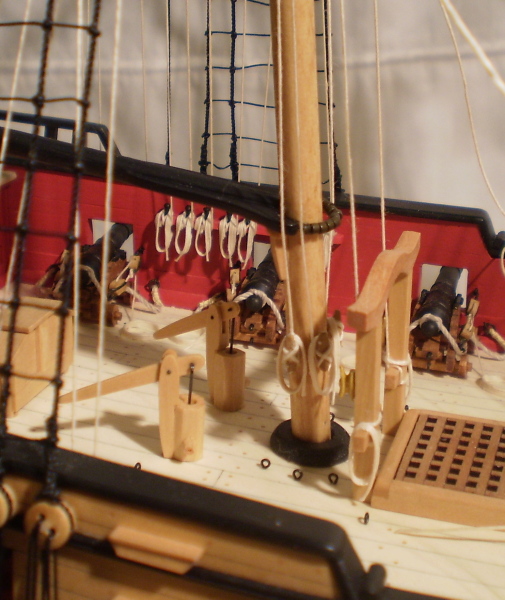
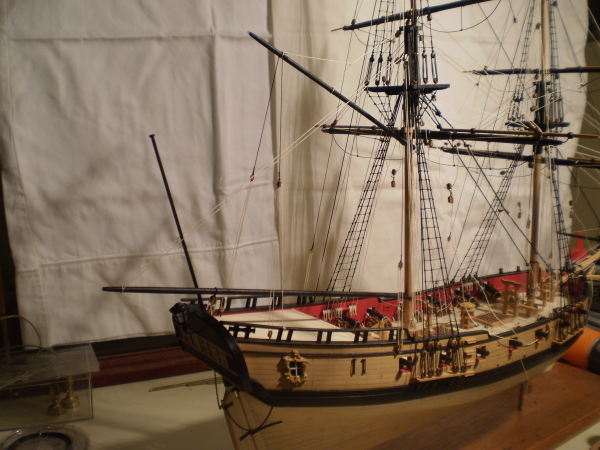
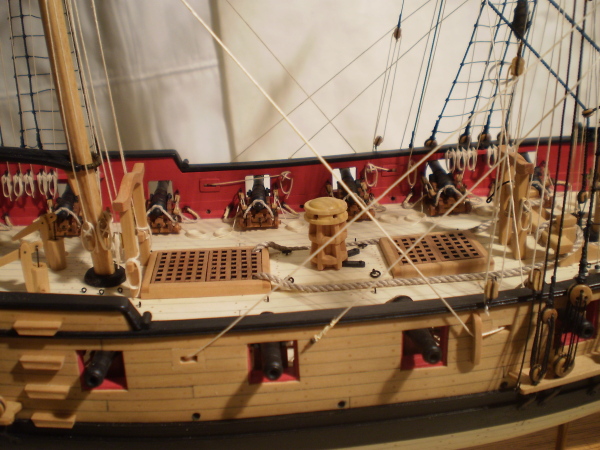
 Hull and bulwark fittings and deck furniture and fittings: This installment covers a variety of work done on the hull, the bulwarks and the deck. It includes the channels, steps, gunport lids, oarport lids, fenders, chesstrees, rudder and chains, quarter badges and stern on the hull, the pin rails, cleats and eyebolts on the bulwarks and the guns and gun rigging, the steering gear, hatches, bitts, rails, ladders, capstan, pumps, eyebolts and ringbolts on the deck. The wooden kit parts and strip wood for this work were replaced by boxwood. I did use the kit castings for the wheel, the stern carving and the quarter badges. The carronade castings were replaced by castings from Bluejacket. After now seeing Thomas Gahm's work, I wish that I had made new quarter badges. Bob
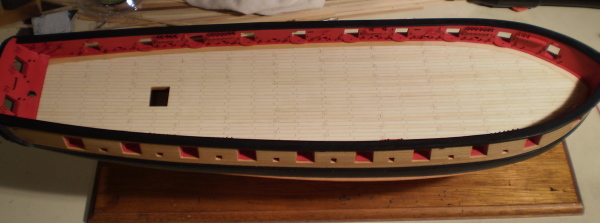


- 31 replies
-
- 4
-

-
- syren
- model shipways
- (and 1 more)
-
US Brig Syren by Gahm - Model Shipways
rafine replied to Gahm's topic in - Kit build logs for subjects built from 1801 - 1850
Thomas, that is simply beautiful work. I wish that I had done what you did with the quarter galleries. Bob -
Thanks very much guys. Your interest and kind words are appreciated. Bob
-
The planking looks very good. Bob
-
Thanks, Chuck and Augie. I hope it's of use to someone. Bob
-
It's looking great Augie. The way yours is going, I shouldn't even be bothering to repost mine. Bob
-
Rusty, what kind of chisels do you use for the mortises? Bob
-
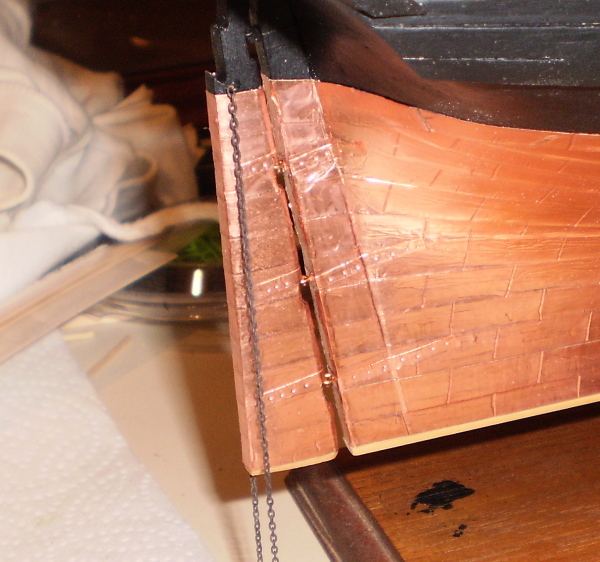
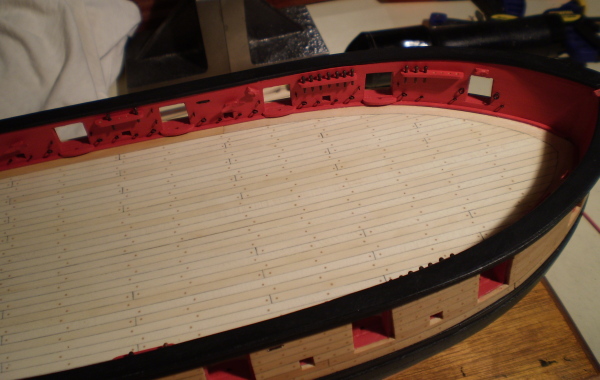
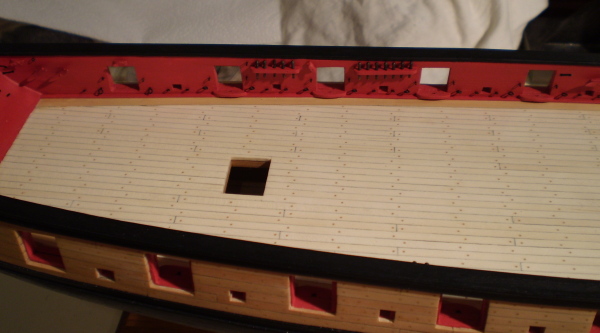
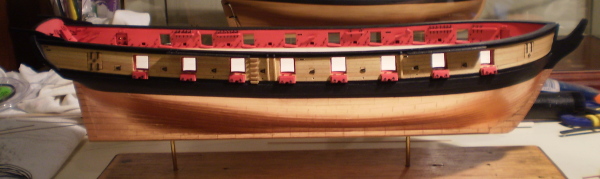
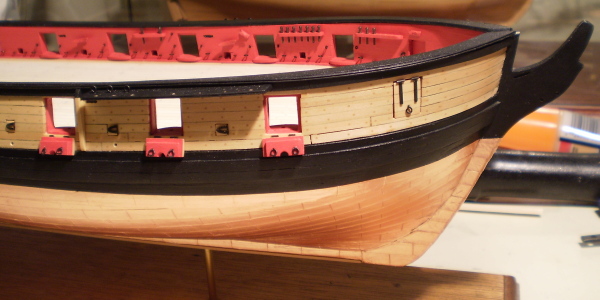
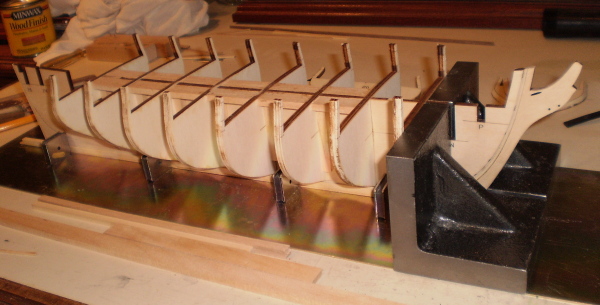
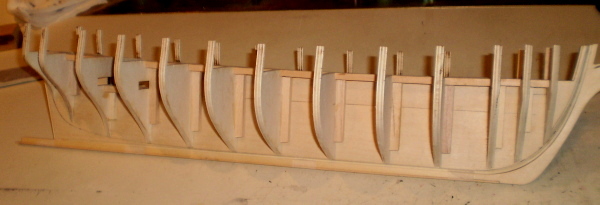
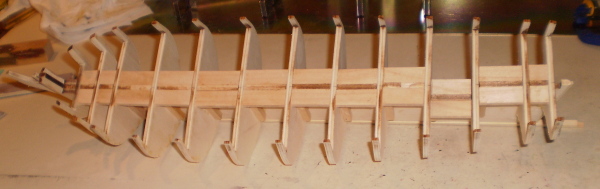
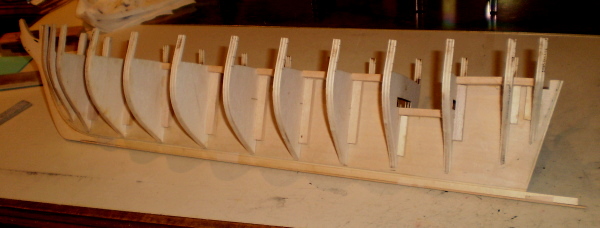
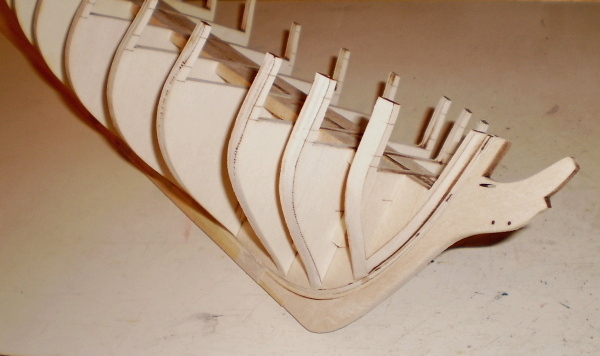
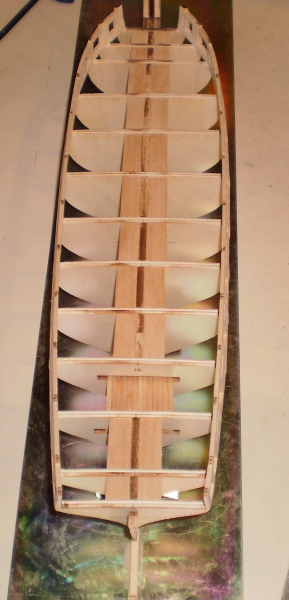
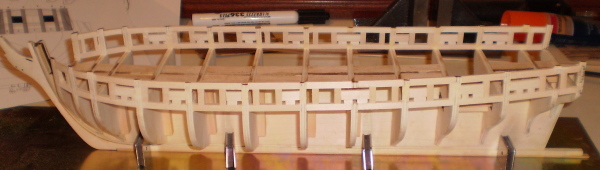
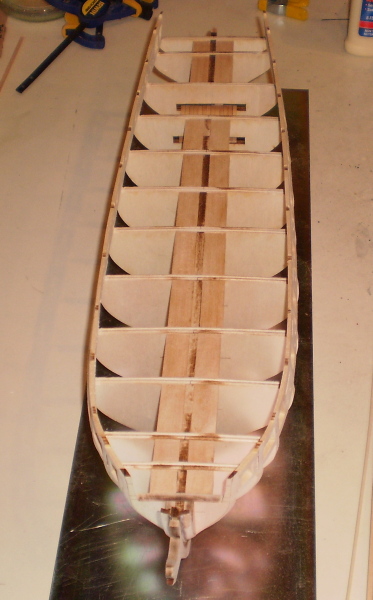
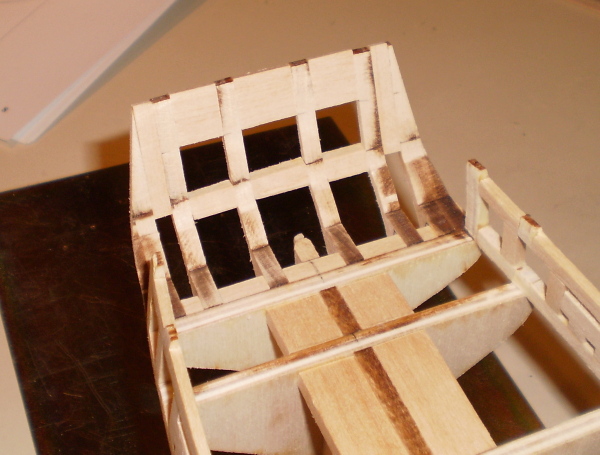
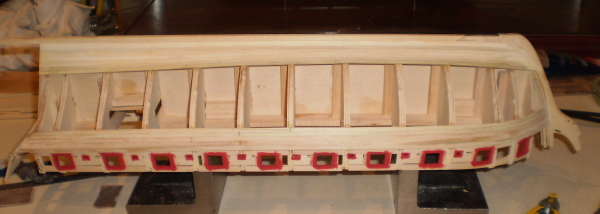
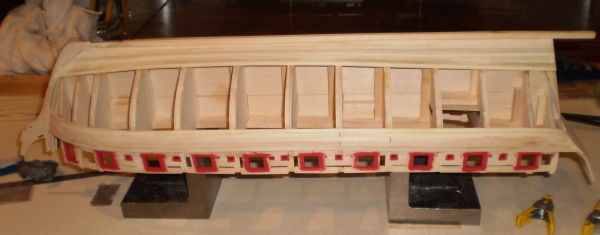
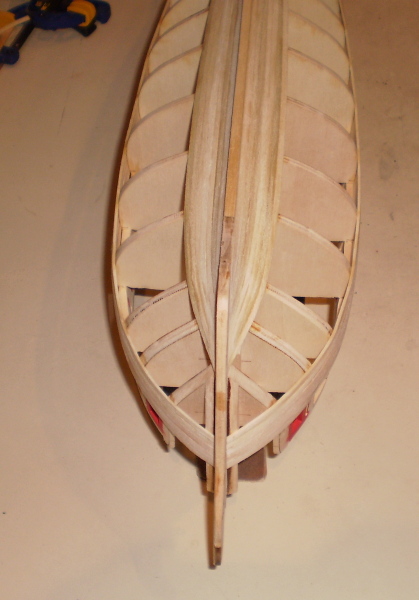
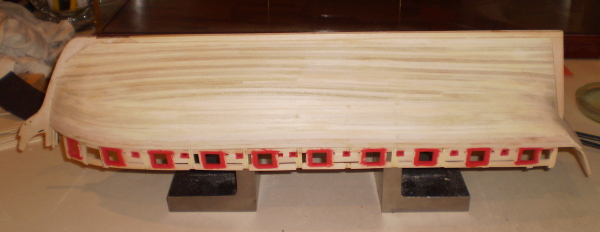
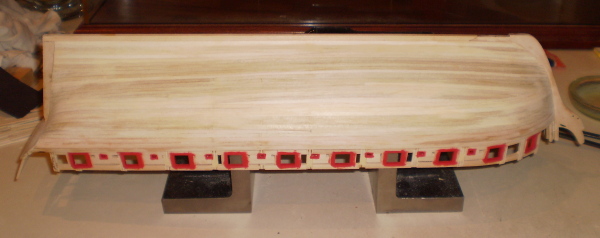
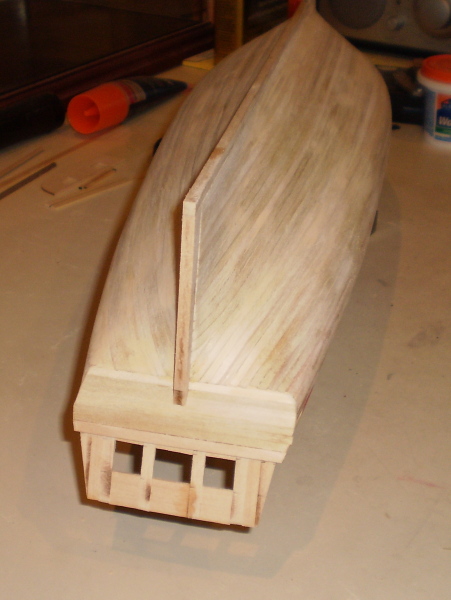
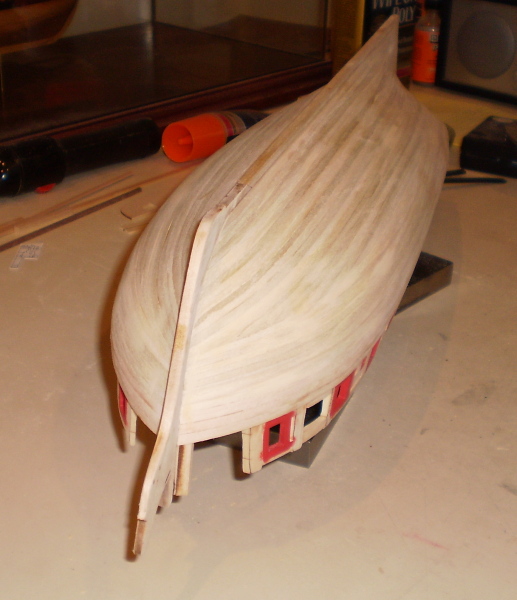
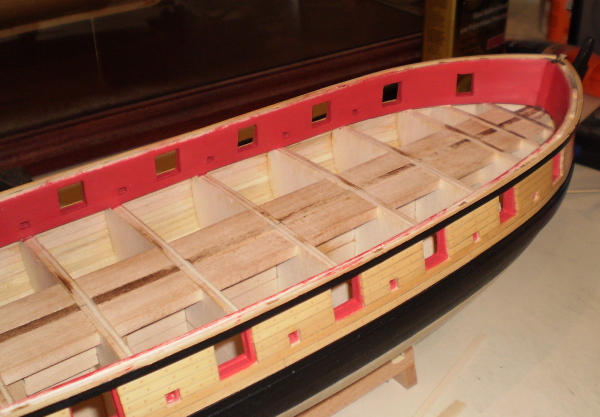
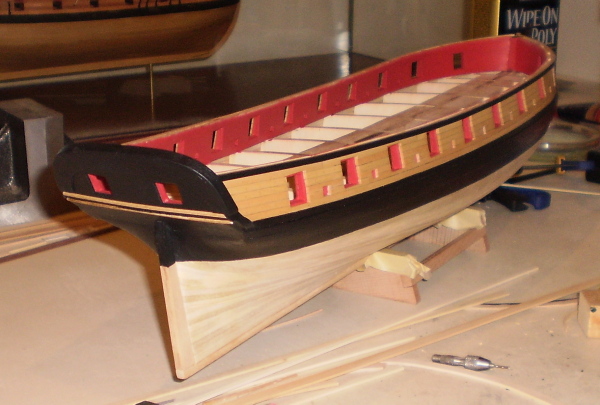
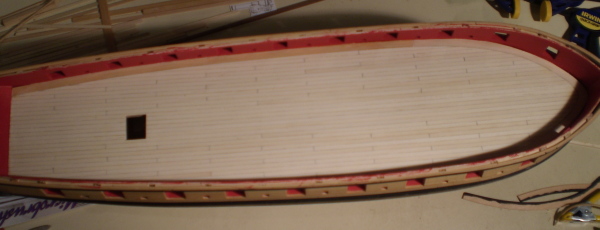
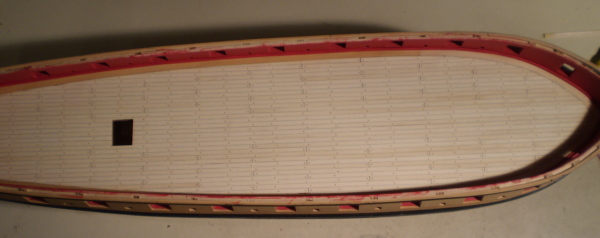
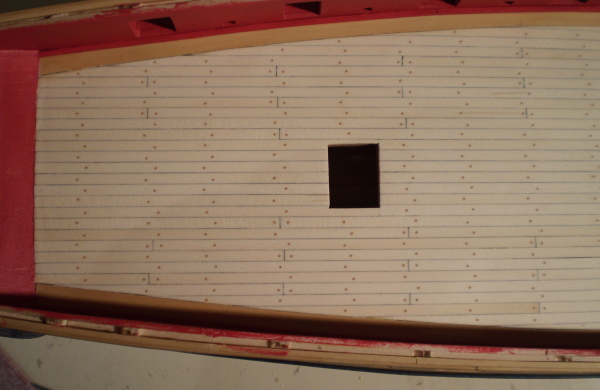
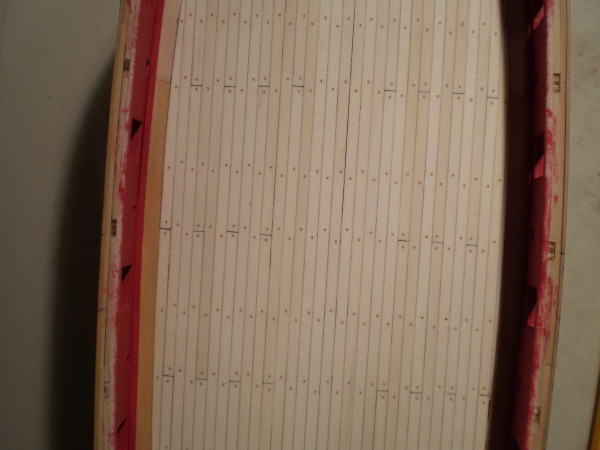
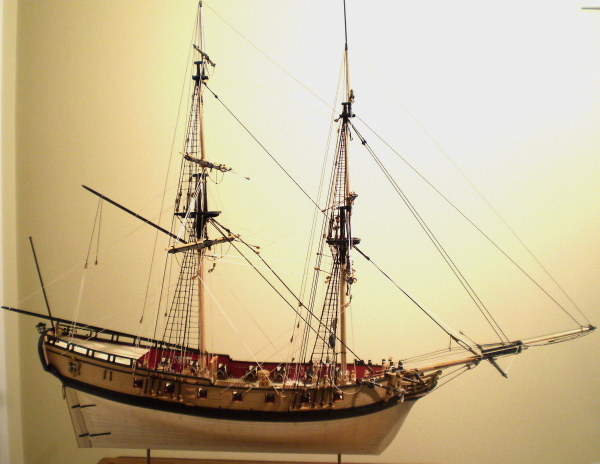
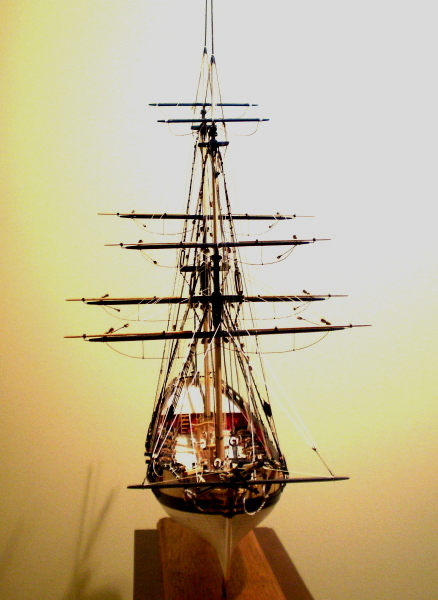
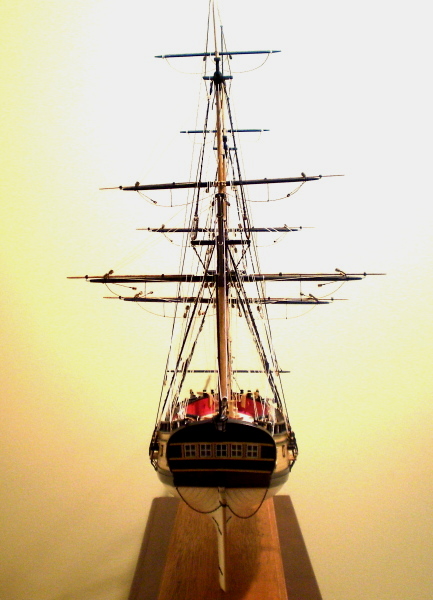
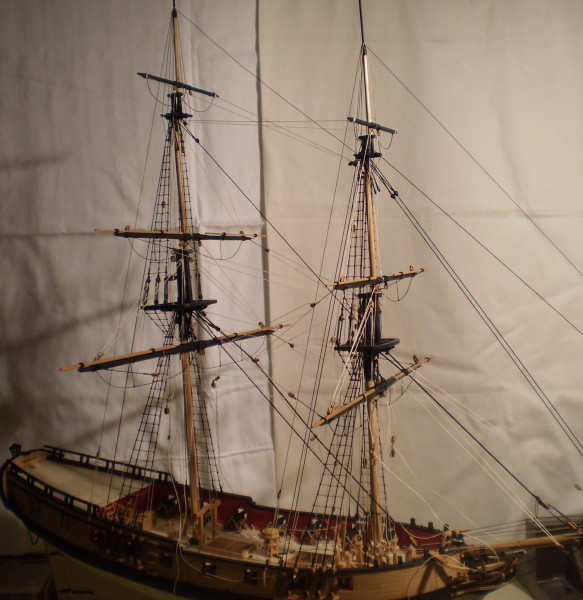
This is a reposting of my build a couple of years ago of Syren. As I'm sure that all who have done the model would agree, it is a beautifully designed kit with great plans and practicum by Chuck. I did choose, however, to make some changes. The principal change was to substitute boxwood for the kit wood for the upper hull, bulwarks and deck furniture and holly for the kit wood for the deck planking. Construction generally followed standard procedures and Chuck's instructions. The reposting will be in a number of installments. I have my photos, but the original text is all gone. Brief summaries of each section of work will be added to the photos. Framing, hull and bulwark planking, deck planking and coppering: Framing was straight forward and followed the kit procedures, with the exception that, as I always do, I added extra bracing to the bulkhead-- center keel attachment for additional strength and stability. For the lower hull planking, I used the kit basswood, since it would all be covered by the coppering of the lower hull. For the same reason, I did not spend any effort on reproducing an exact reproduction of a correct planking pattern, but concentrated on getting a fair and smooth surface for the copper. Caulking of the upper hull and deck planks was simulated by using a pencil on one edge and one end of each plank. Treenailing of the upper hull and decking was simulated using the method shown by Chuck of filling drilled holes with golden oak filler. The unpainted boxwood was finished with Wipe-on poly and the painted portions were done with Pollyscale paints. The coppering was done using the kit supplied copper tape. Bob


- 31 replies
-
- 7
-
-
- syren
- model shipways
- (and 1 more)
-
I'll bet you are, John. It's looking so good that it has to be frustrating not to be able to work on it when you want. Bob
-
Thanks, Joss. I hope that's the good news, Rusty. Bob
-
So neat and precise. You set a very high bar for the rest of us, as usual. Bob
-
Thanks, B.E. Augie, if Syren is what you want, then Syren is what you'll get. Bob
-
Lovely work on the deck framing, Remco. Be very careful with those masts when you put them away. We certainly wouldn't want to see anythinfg happen to them. Bob
-
Thanks, all for the overly generous comments. I think that I'll try to get my other prior logs up as well. Bob
-
Thankls, Mark. How come I'm not being given access to the plans? Bob
-
Very nice looking frames, Marius. Bob
-
Thanks guys. I'm afraid no jig saw for me. It will be a jewelers saw all the way. Bob
-
Thanks to all for the warm welcome. I'm looking forward to participating with the group. Bob
-
USF Confederacy by Rustyj - FINISHED
rafine replied to Rustyj's topic in - Build logs for subjects built 1751 - 1800
Rusty, it's nice to be reminded just how good your work is. Bob -
Neat and precise, Russ, and good support for those delicate bulwarks. Bob
-
Well, I've finally gotten tired of waiting for Model Expo to release Essex .As a result, I decided to at least dip a toe into the waters of the " darkside". I downloaded the Triton keel parts plan and found some wood and made the keel and false keel. The keel is boxwood and the false keel is pear. At this point, this project is an experiment for me. I have no power tools other than a Dremel. Although I've done a number of kitbashes and semi-scratch builds, I've been unwilling to try to do complete framing by hand tools alone. This will be that try. I haven't gotten wood yet or really even thought through what to use. I have no jig or build board yet. In short, when I get permission to download the full plans ( which I'm asking for here), I'll start making decisions and see where it takes me. Bob
-
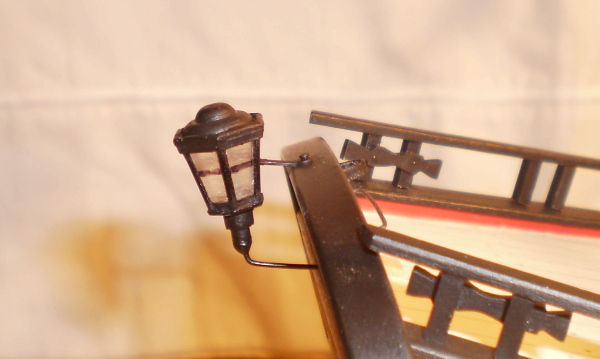
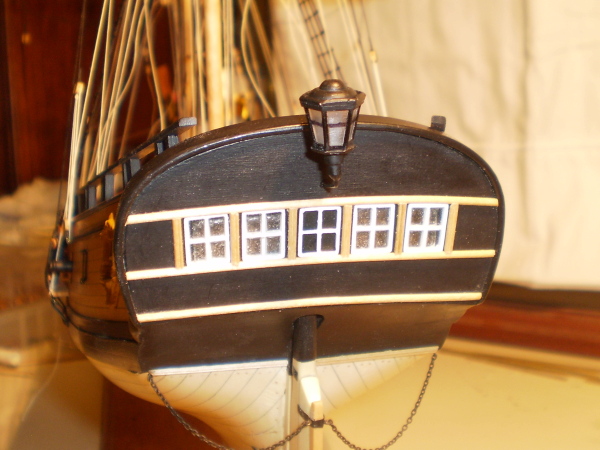
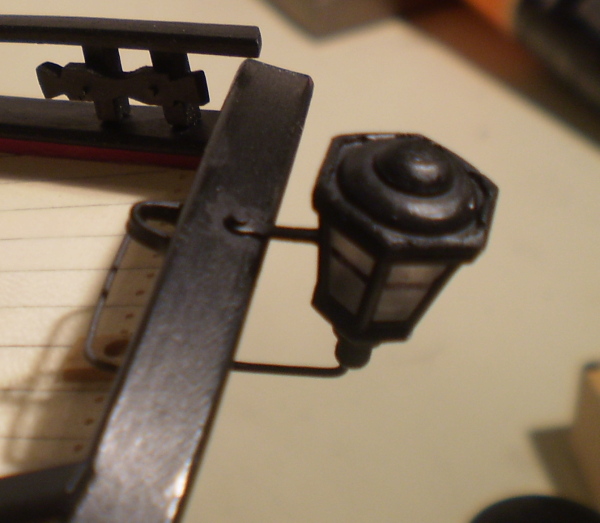
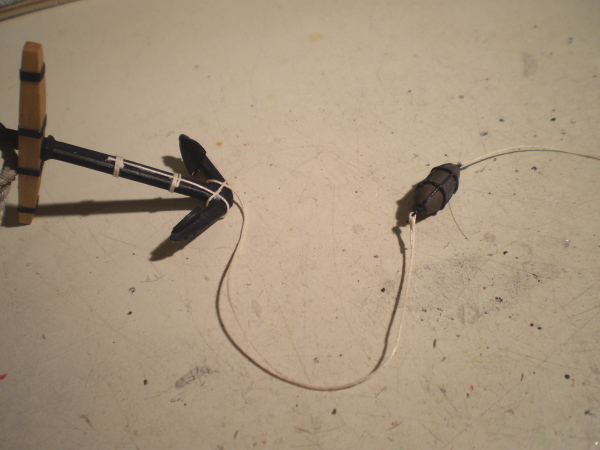
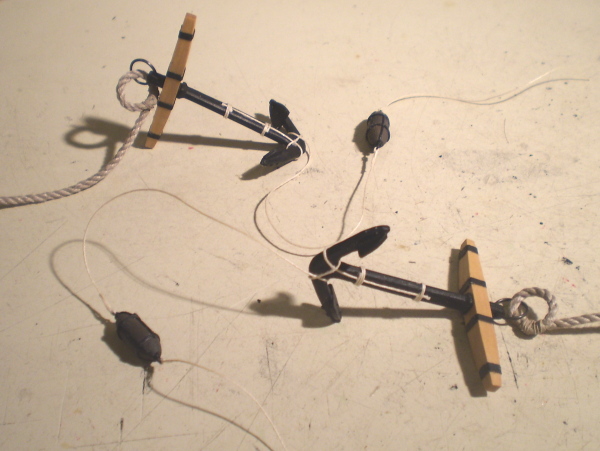
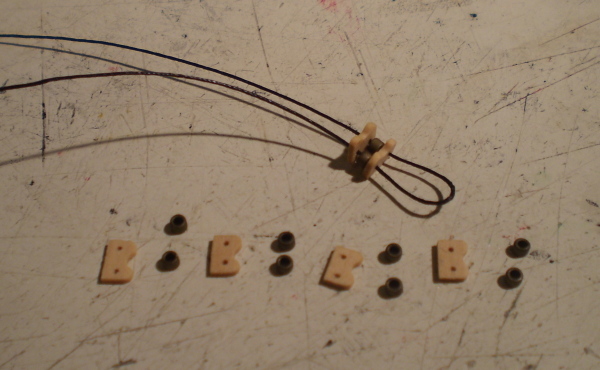
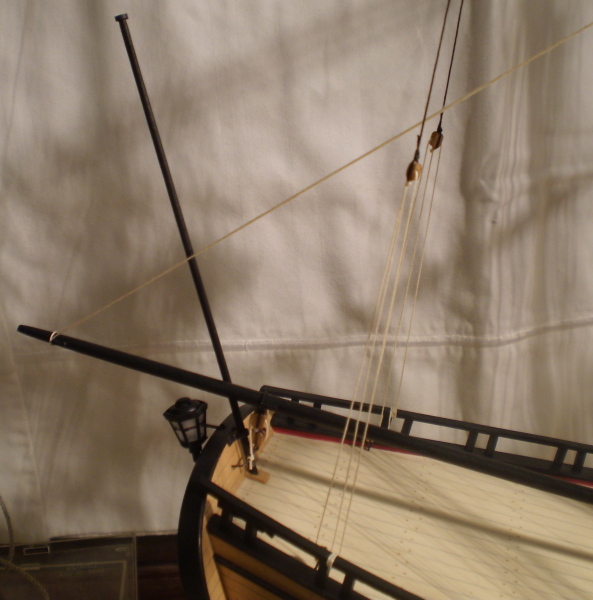
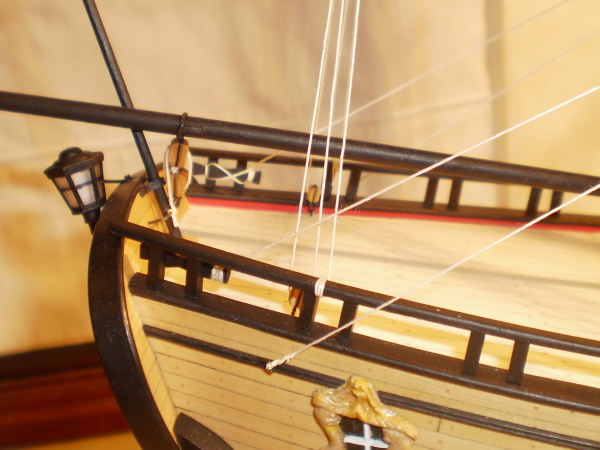
Figuerres: You're right about the lantern. See below. Thanks, Russ. If you do enough of those coils, you start to get the hang of it. Final details and the finished model: Although they weren't actually the very last items done, I'm treating the lantern, the anchors and the flagstaff as the final details. The lantern was made from an old street lamp that I found in my model railroad scrap box. The lamp portion was heavily reworked and the brackets were made from brass rod and brass strip. The anchors were made using the kit castings with the stocks made from boxwood. The cable was run back over the bitts back to the main hatch. The anchor bouys were made from pieces of tapered dowel and then rigged. The flag staff is shown on the plans, although it seems awkward with the boom. I chose to install it mostly because I liked the way it looked. Photos of the finished model follow the photos of the final detail work. Bob


-
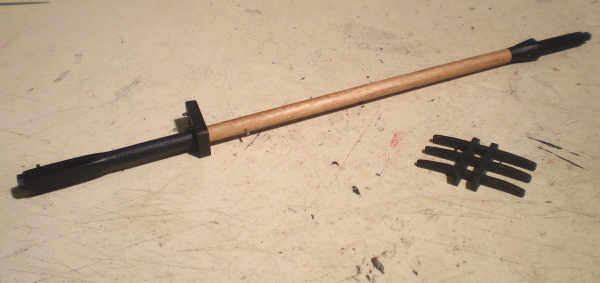
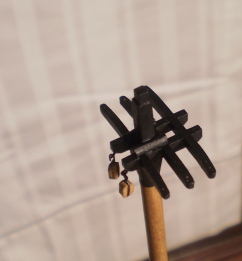
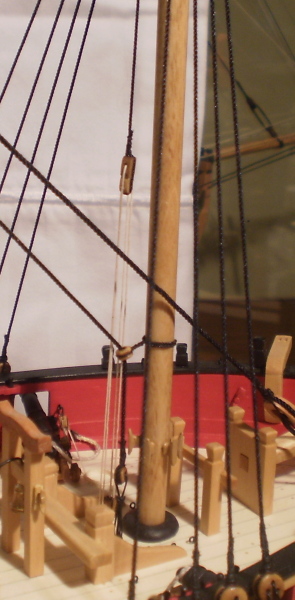
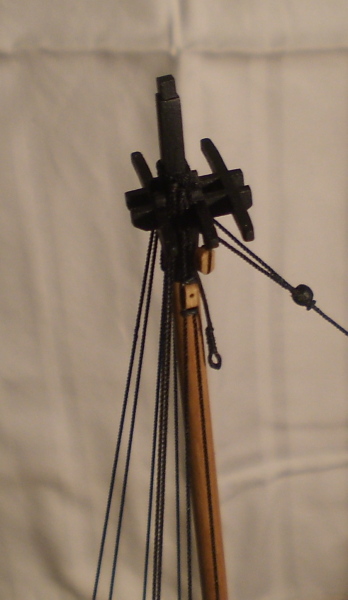
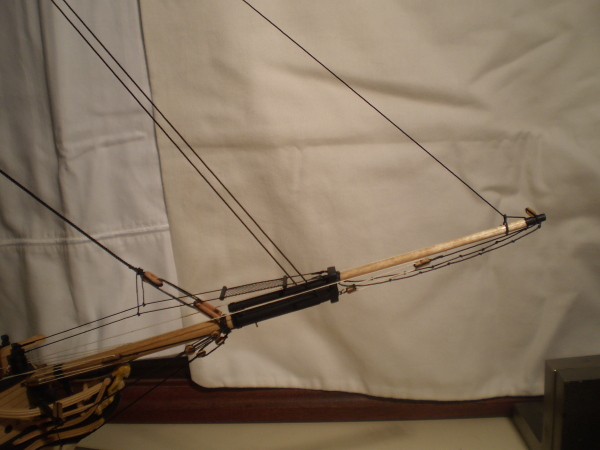
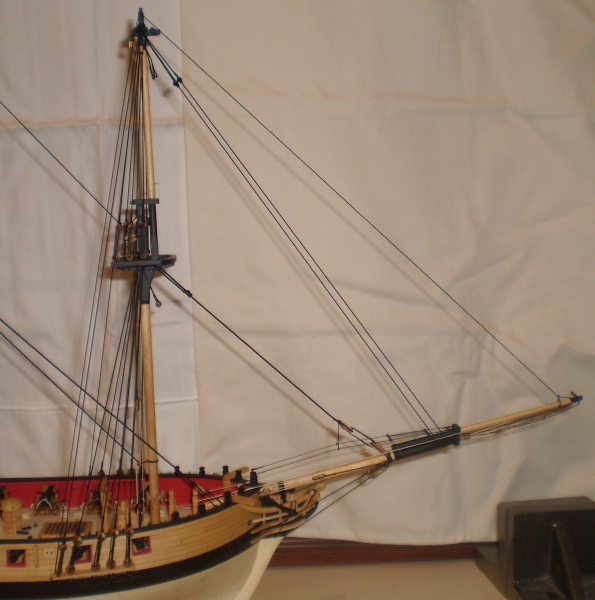
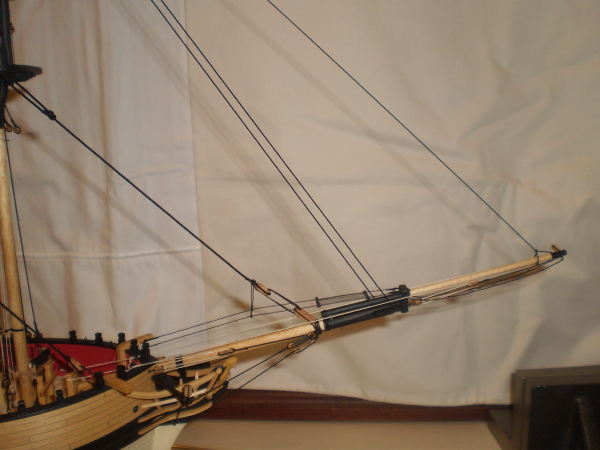
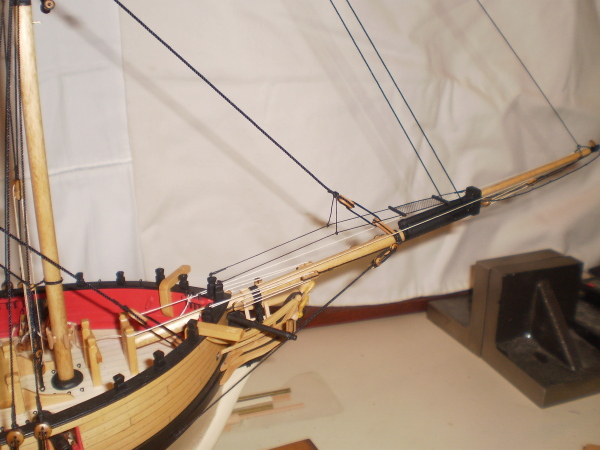
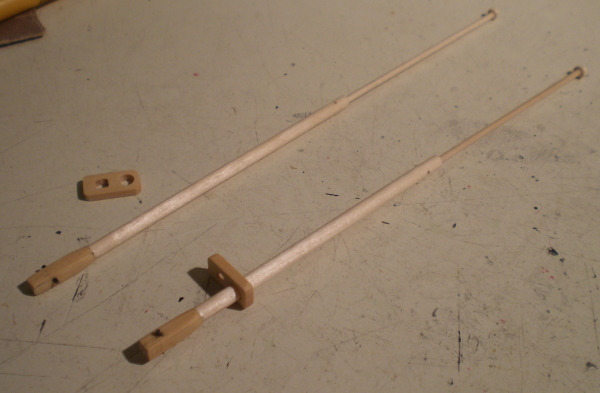
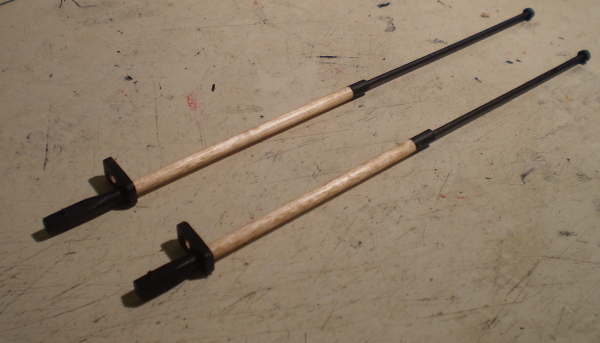
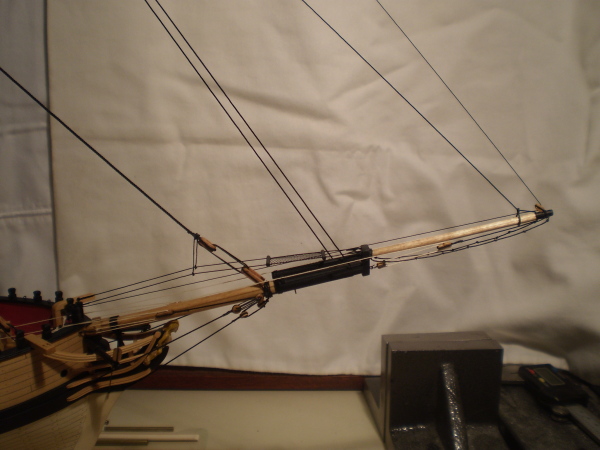
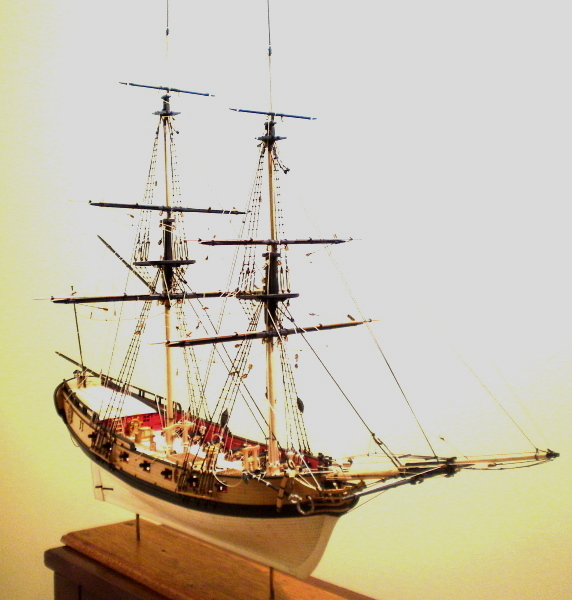
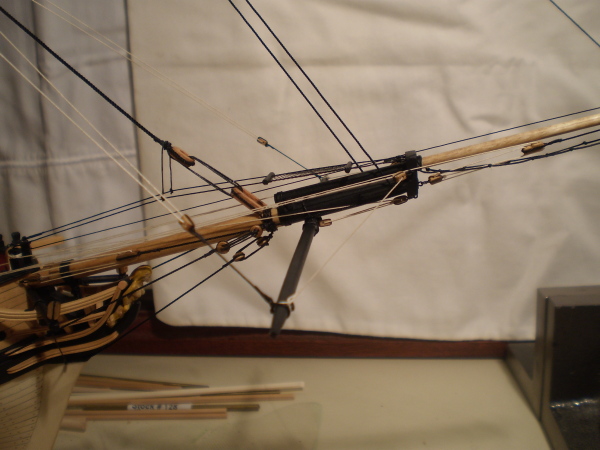
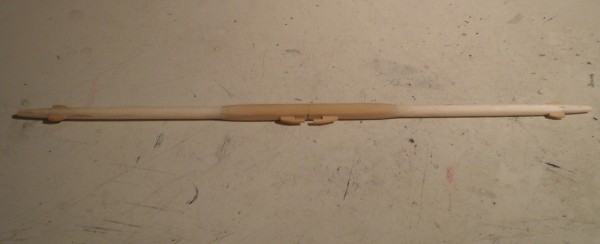
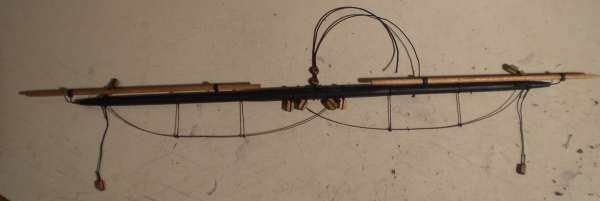
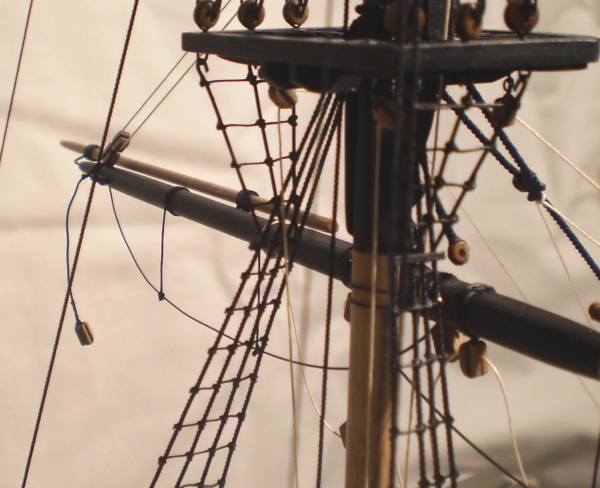
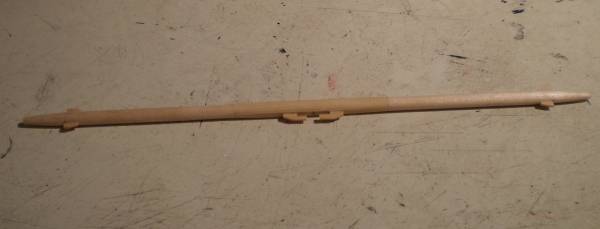
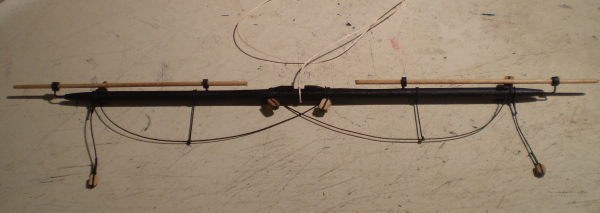
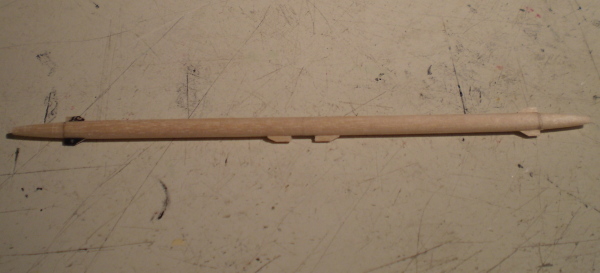
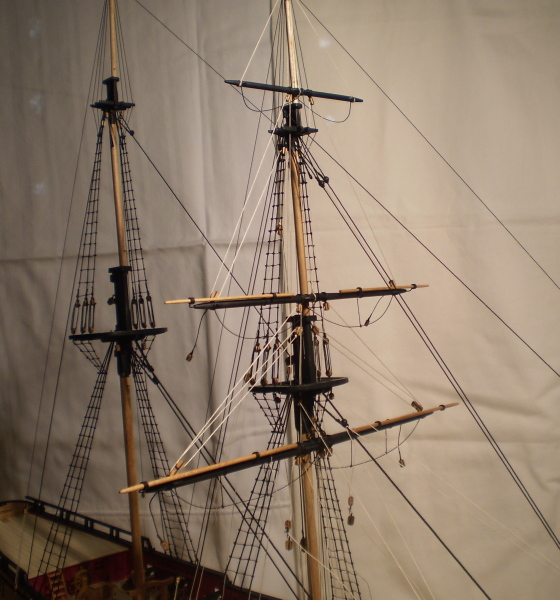
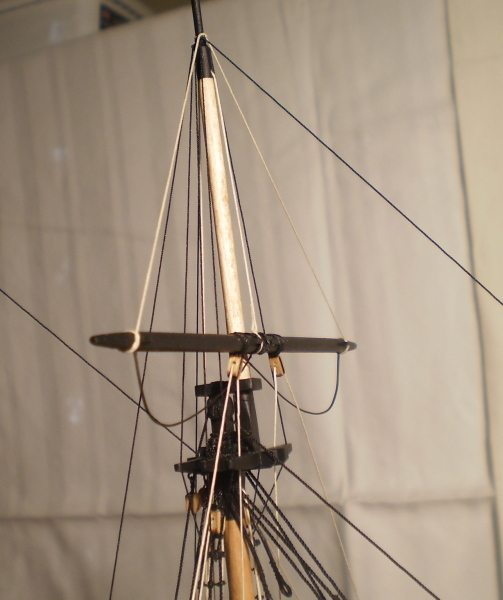
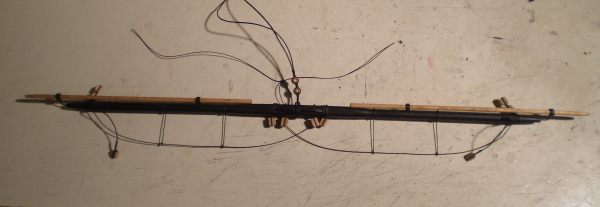
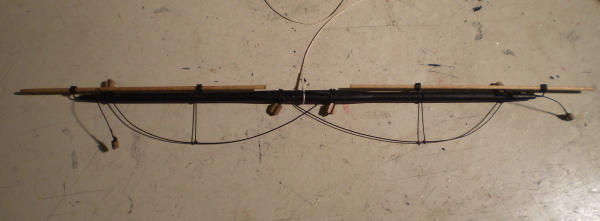
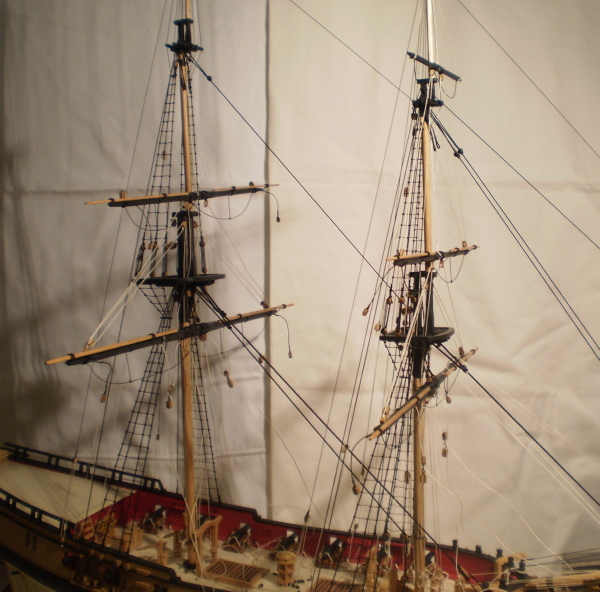
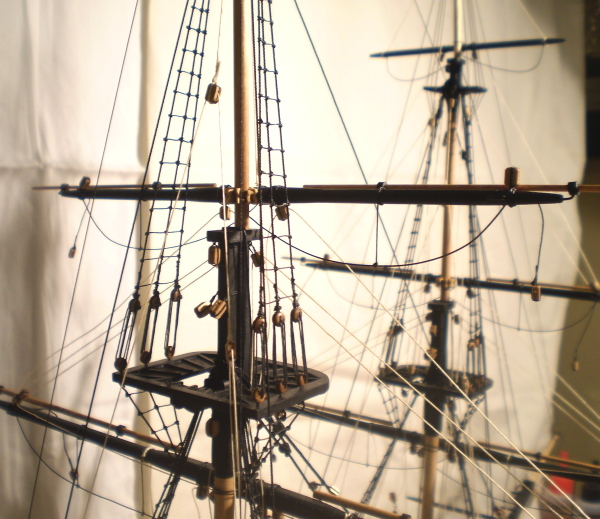
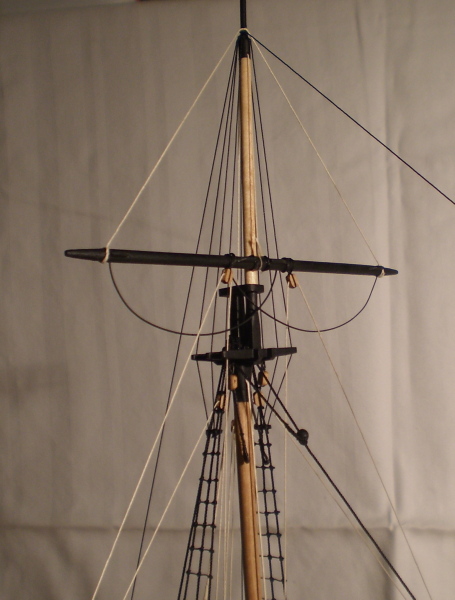
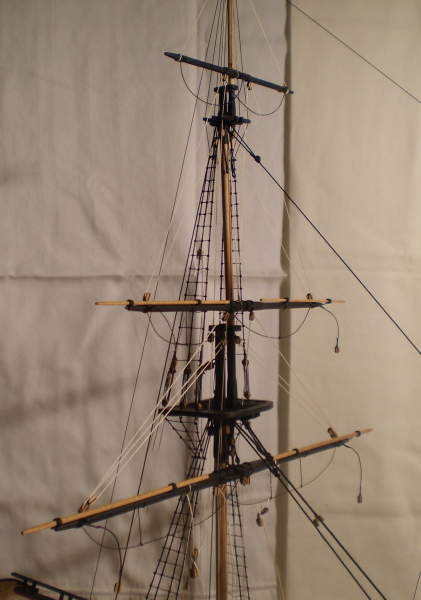
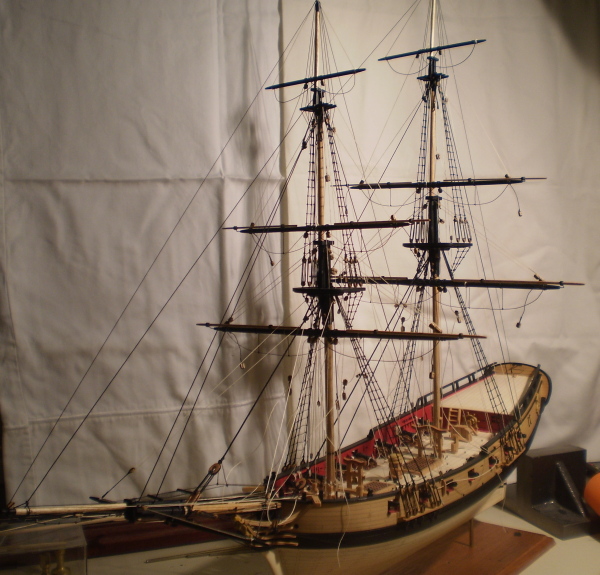
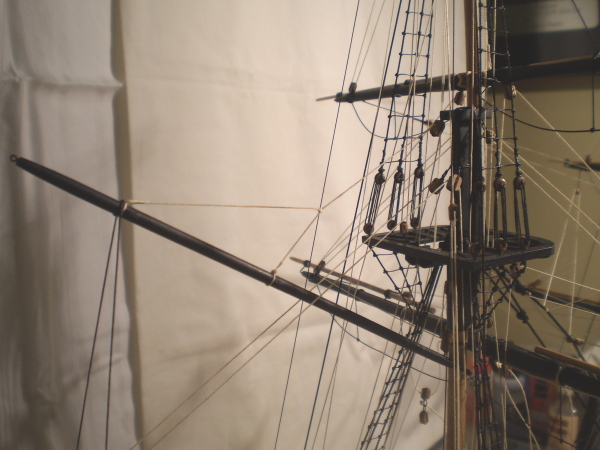
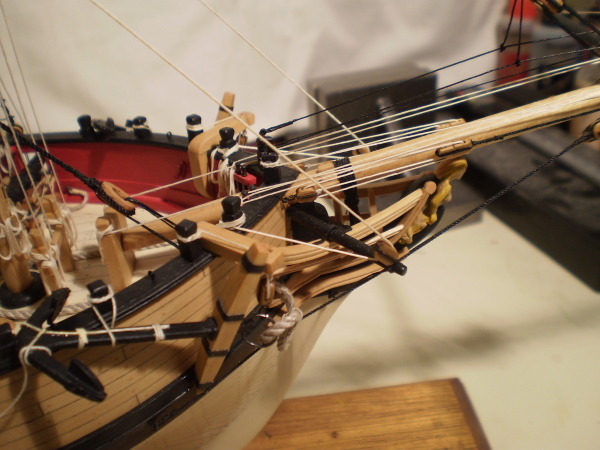
Yards and running rigging: This involved the making and installing of the square yards and stun'sail booms, the boom and gaff and all of the associated rigging. Because I do not have a lathe, I have become accustomed to creating the square and octagonal sections of masts and yards by building them up with boxwood on round dowels. That practice was followed here. The fittings for the stun'sail booms were made from brass rod and slices of styrene tube. The various yard cleats and the boom and gaff jaws were made from boxwood. Topsail parrels were made from boxwood with small wood colored beads for the trucks. The same beads were used on the boom and gaff. In doing the running rigging, some choices have to be made as to inclusion and exclusion. On this build , I opted to do all of the lines that control the yards ( trusses, slings, lifts, halliards, braces) and some, but not all, of the sail control lines ( clews, tacks and sheets for the square sails, but no bunt lines, reef lines or leech lines and no rigging for the fore and aft sails). As always, such choices are largely arbitrary. I made some changes from the rigging plan to better conform to the rigging shown in Lees and Steel. Bob


-
Russ, how could anyone ever get tired of hearing such nice things. Always appreciated. Bob
-
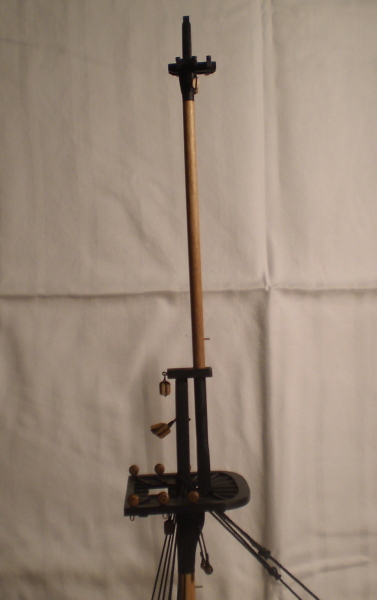
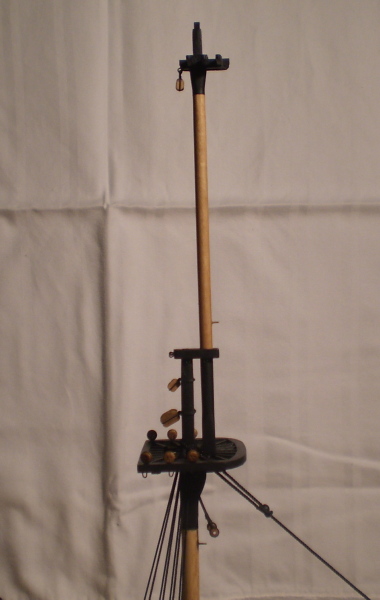
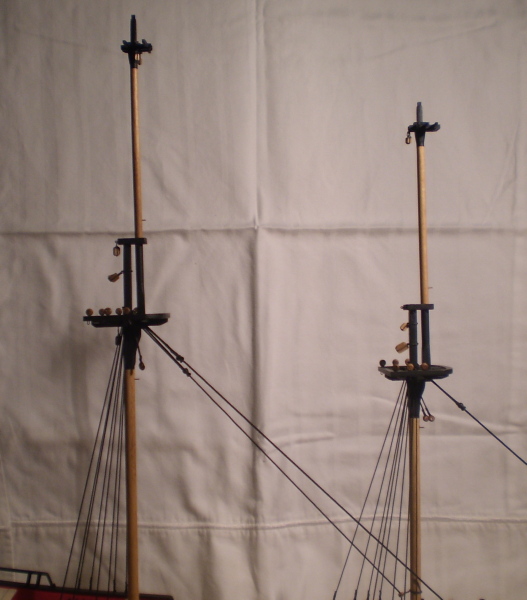
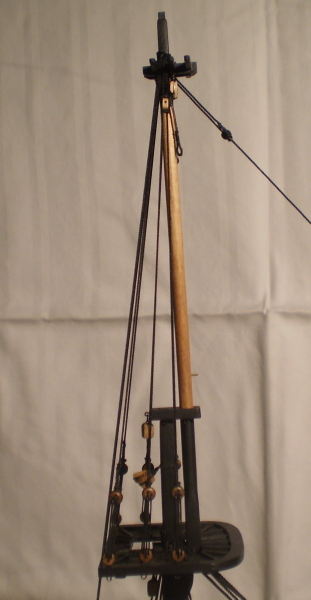
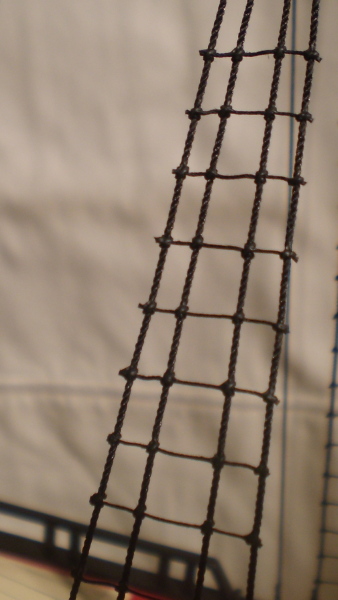
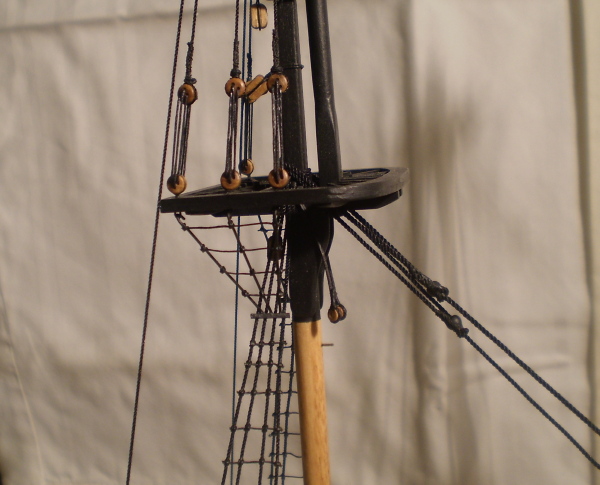
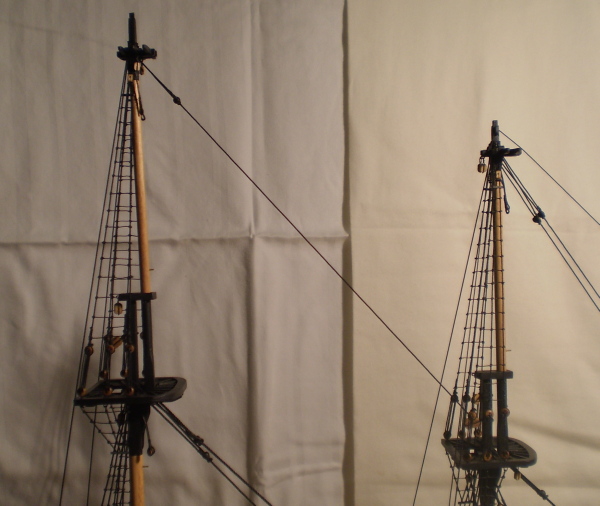
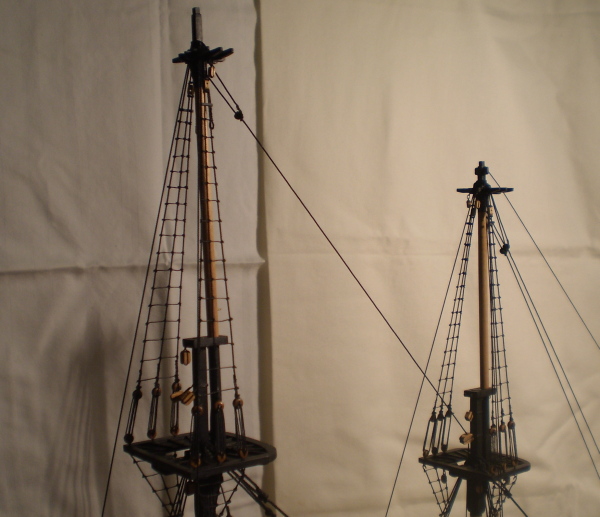
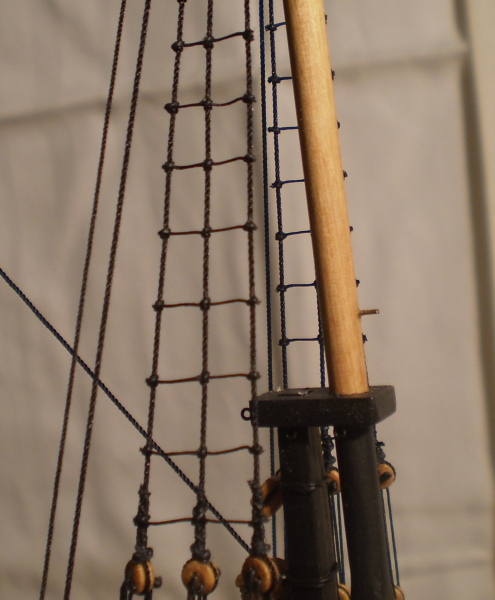
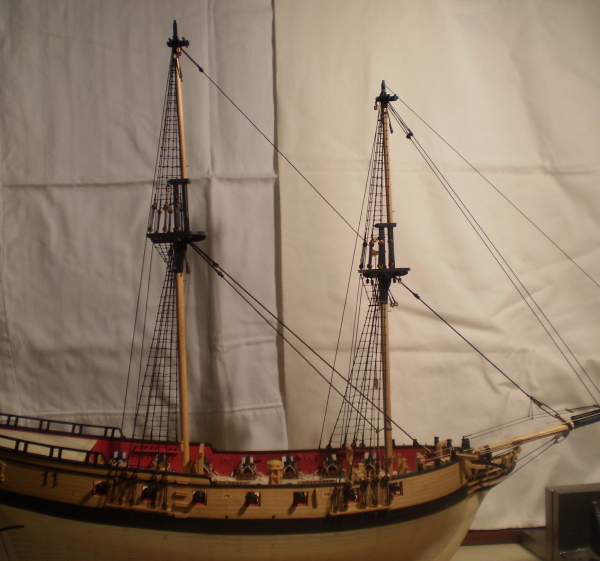
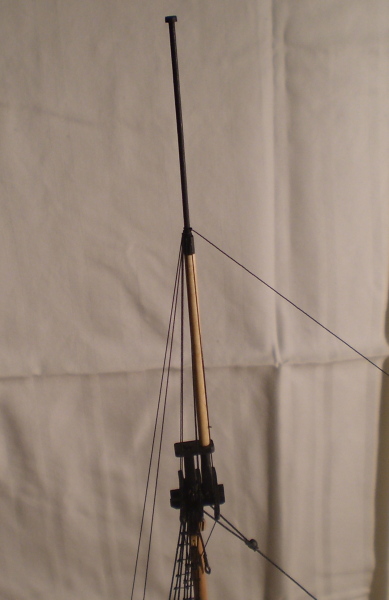
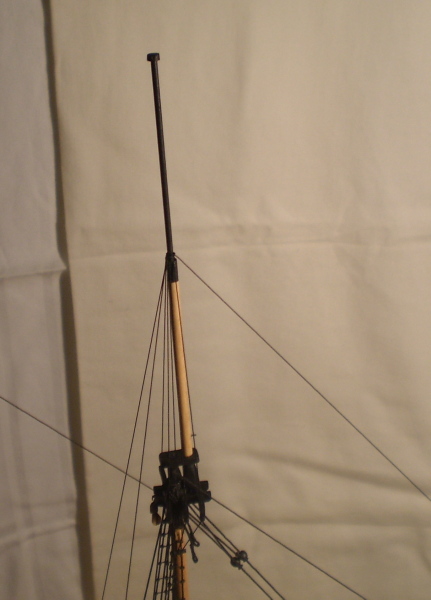
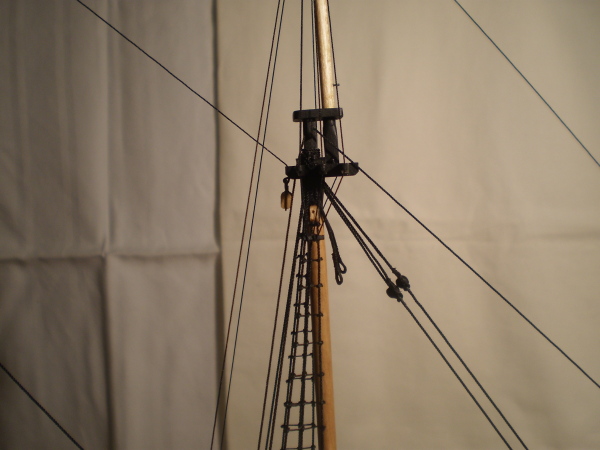
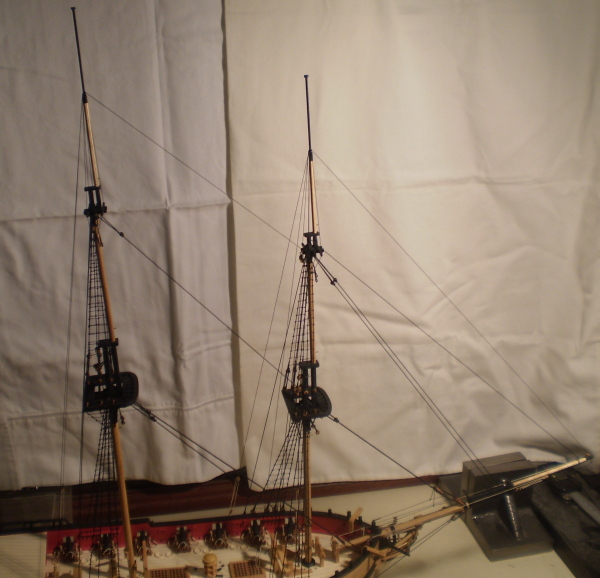
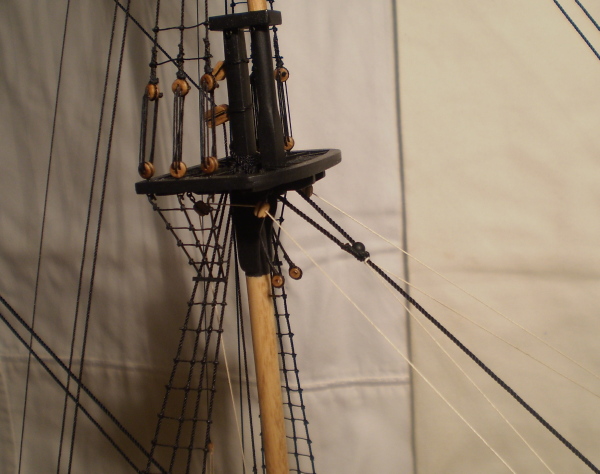
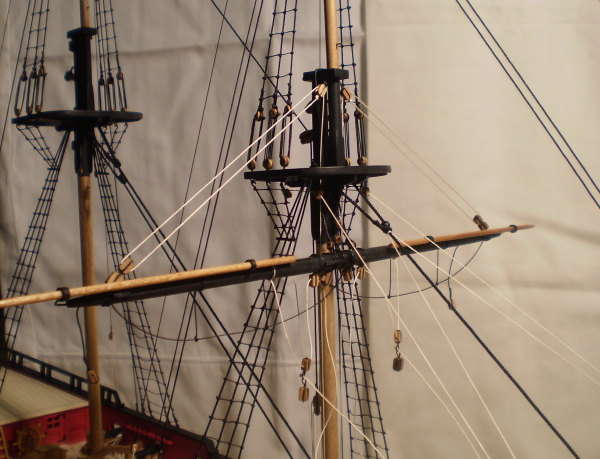
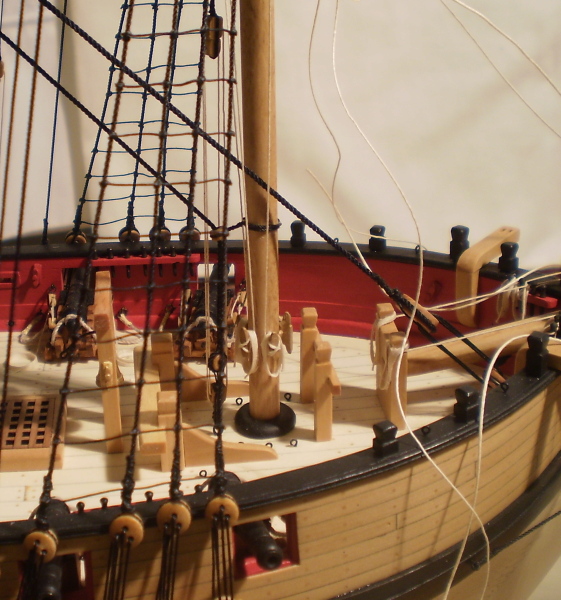
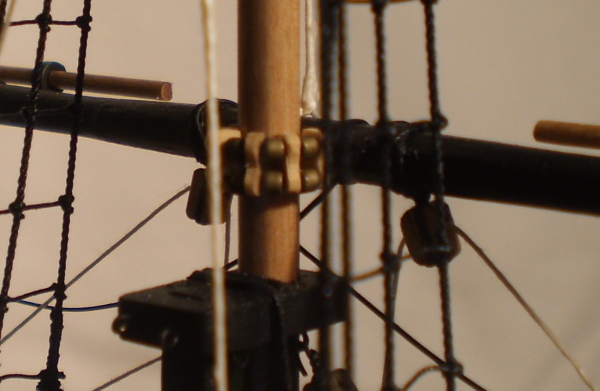
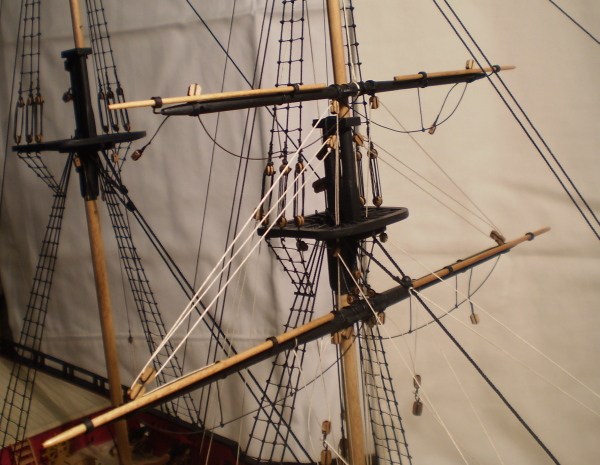
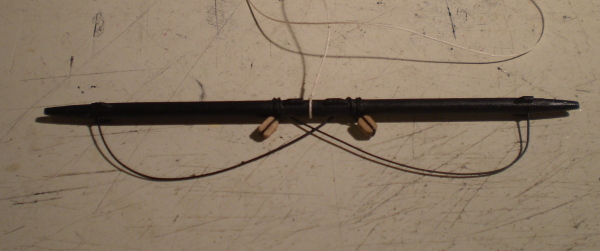
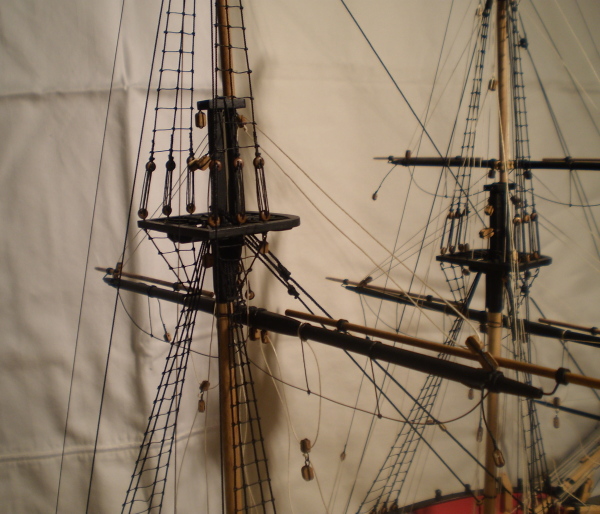
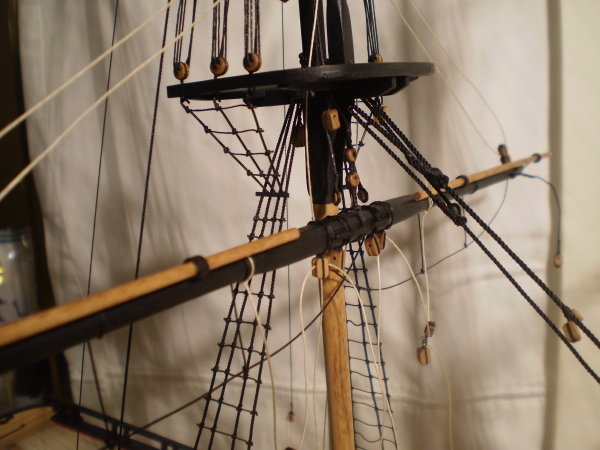
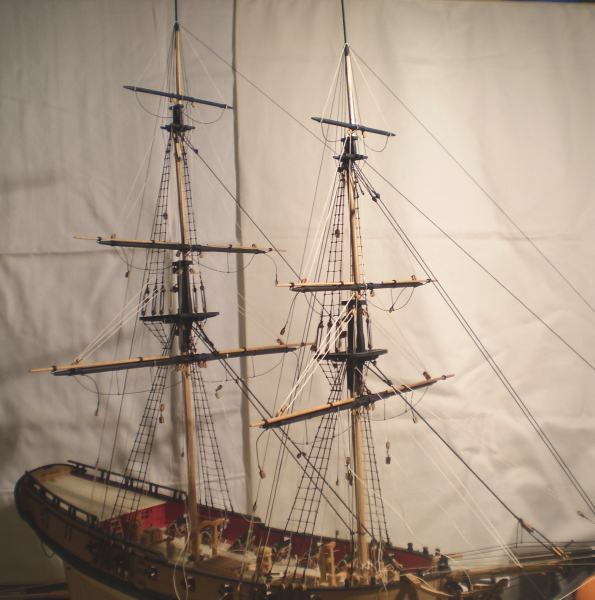
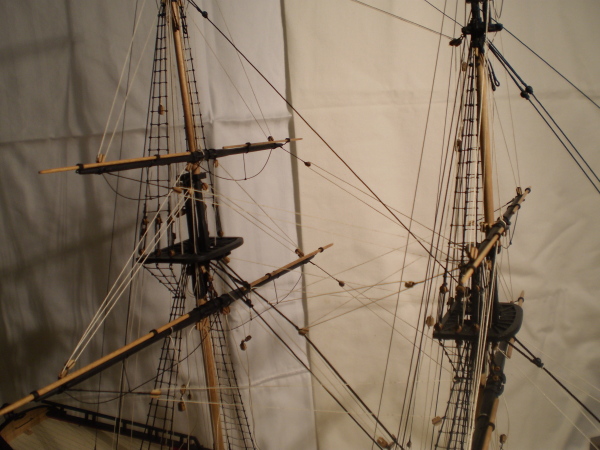
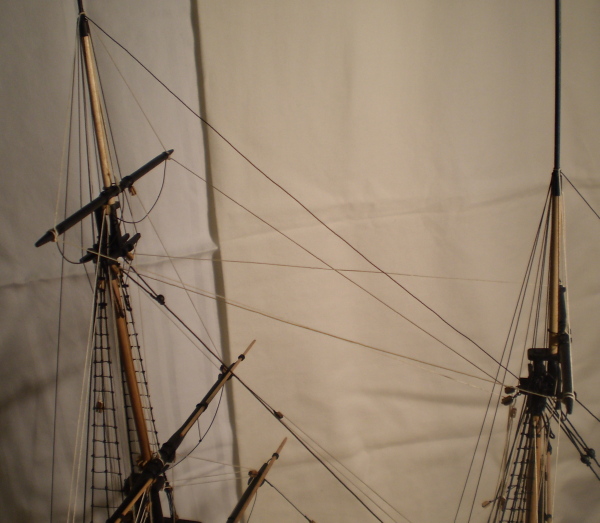
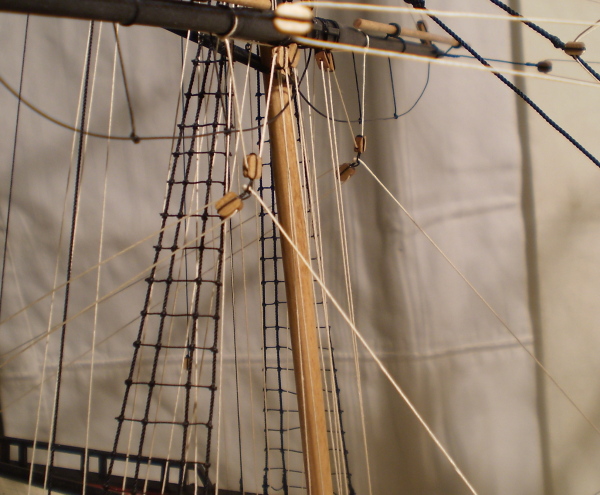
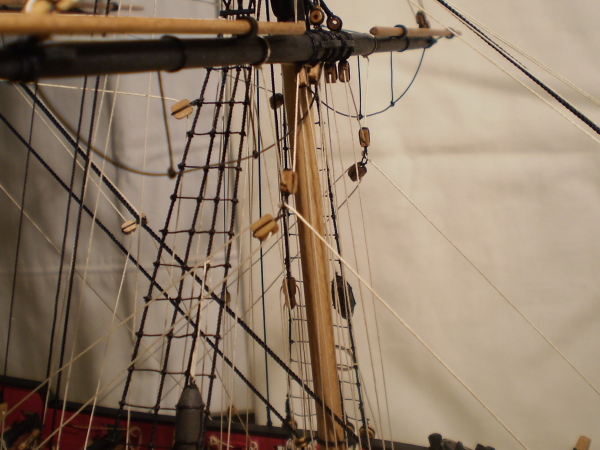
Topmasts, topgallants and ratlines: After completion of the lower masts and their standing rigging, I made and installed the top masts and then the topgallant masts. I did all of the standing rigging for the topmasts ( pendants, shrouds, futtock shrouds, stays and backstays ) and the ratlines for both the lower and topmasts. I also did the bowsprit horses and netting. I then did the topgallant rigging ( shrouds, futtock shrouds, stays and backstays). Also added were various lead blocks for running rigging. Bob