MORE HANDBOOKS ARE ON THEIR WAY! We will let you know when they get here.
×


rafine
-
Posts
2,932 -
Joined
-
Last visited
Content Type
Profiles
Forums
Gallery
Events
Everything posted by rafine
-
 Thanks, Daniel. If I were doing the full hull like you, I don't know if I'd ever finish the frames. Bob
 -
Thanks, Garry and Ben. Always appreciated. Bob
-
Thanks very much, Druxey. Aren't we all our own worst critics? Bob
-
Thanks, B.E. You know that I feel the same way about yours. Bob
-
Very nice work on the rigging, John. Bob
-
Thanks, guys. Planking is now underway and is going smoothly so far. Bob
-
Thanks, guys. Planking is much more fun than sanding, at least until you get to treenailing. Bob
-
I'll join the chorus, Augie. Your work just gets better and better. Bob
-
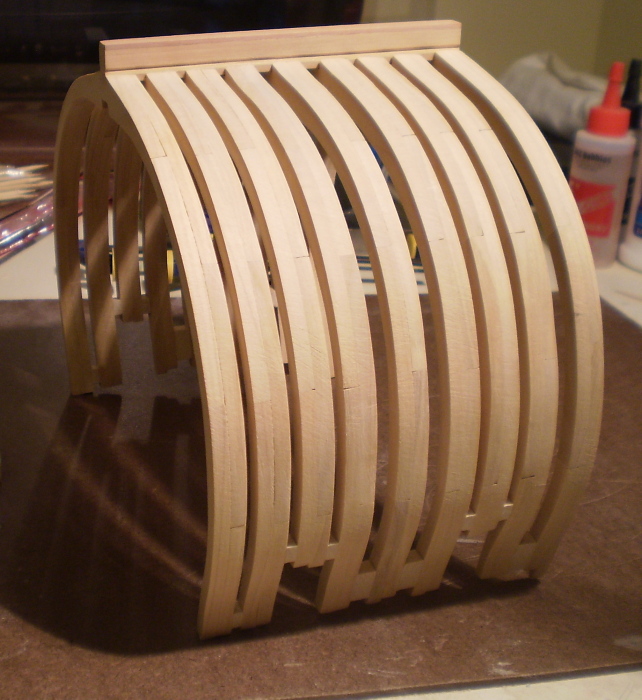
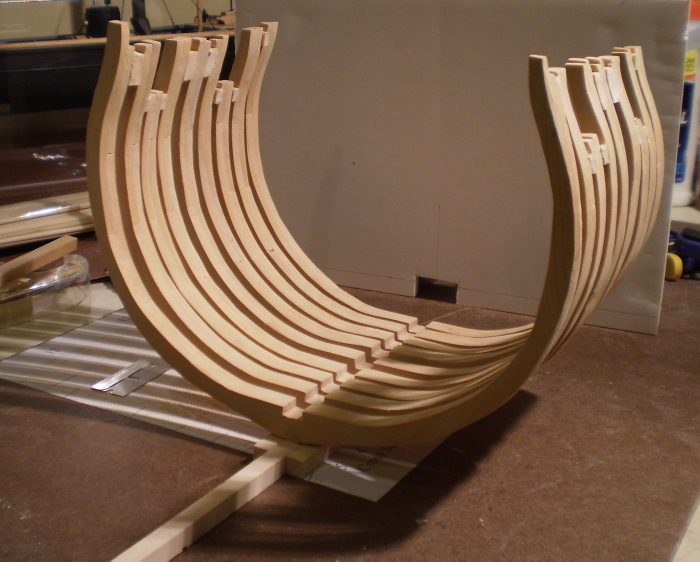
After three days of sanding my finger tips off, I've come to two conclusions: first, the frames are now ready to begin planking (the uppermost portion of the frames has not been fully faired yet); second, I don't like the frames enough to leave any part of the hull unplanked. I'm now starting work on the interior planking. Bob

-
Looking good, Olphart. Bob
-
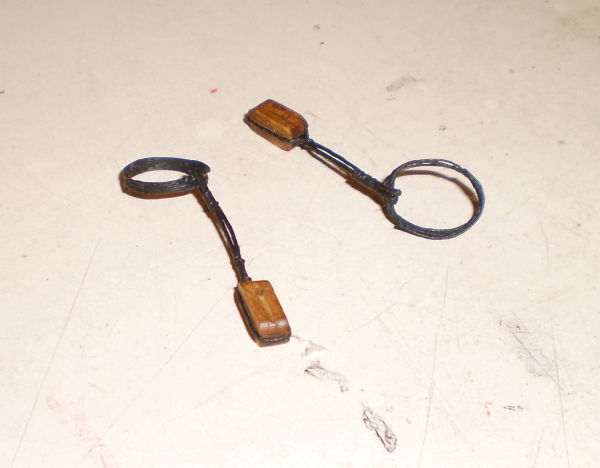
Nice looking machine and rope, Grant. I'm afraid that I'll stick to commercial rope. Bob
-
Thanks so much to all of you for your continuing interest and kind words. Bob
-
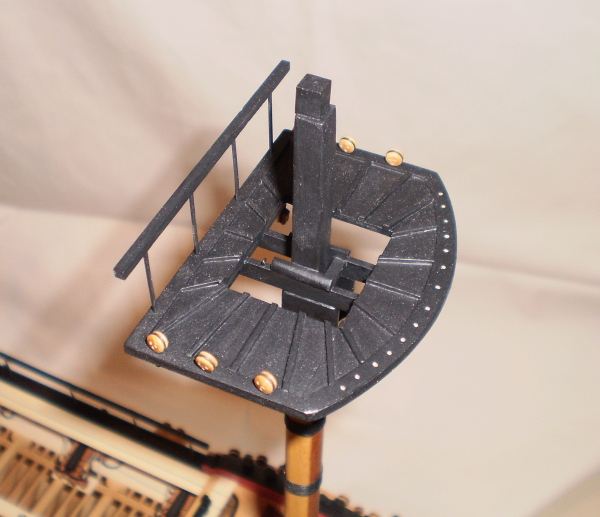
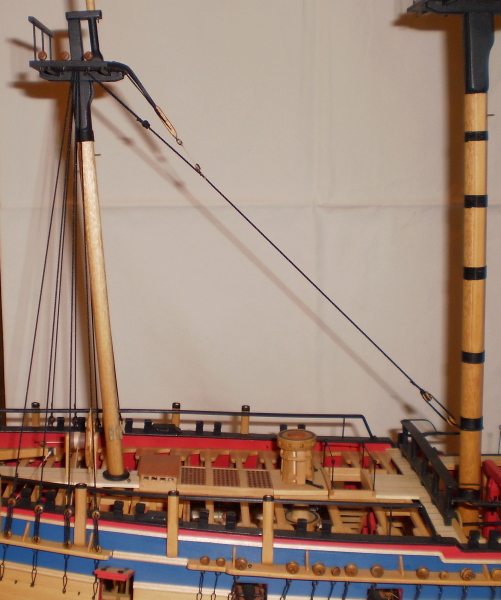
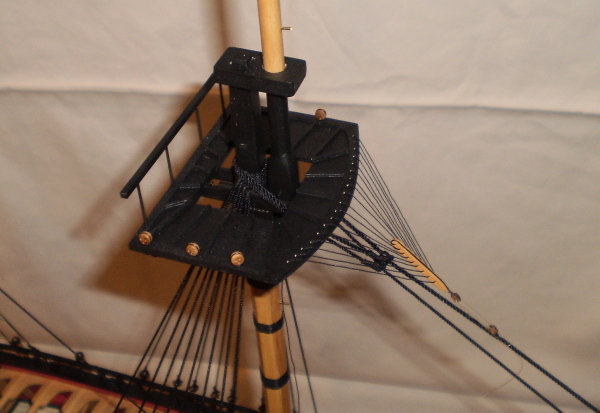
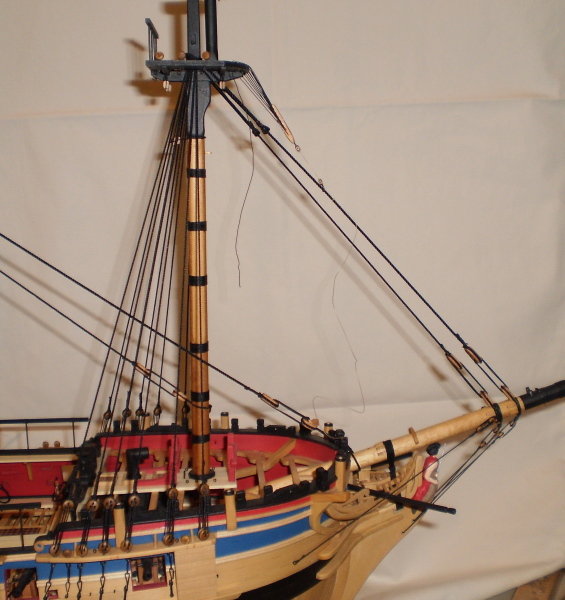
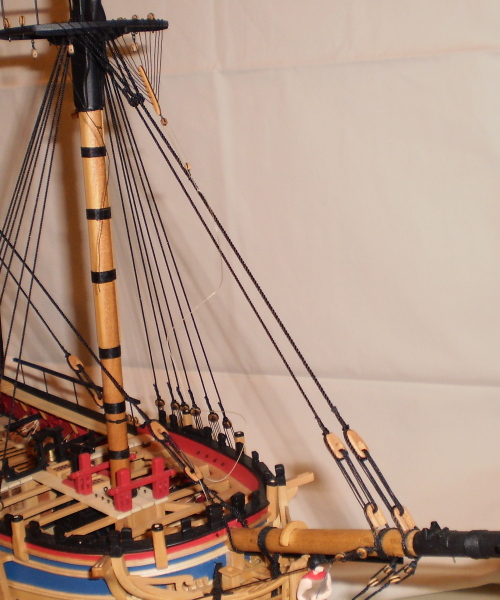
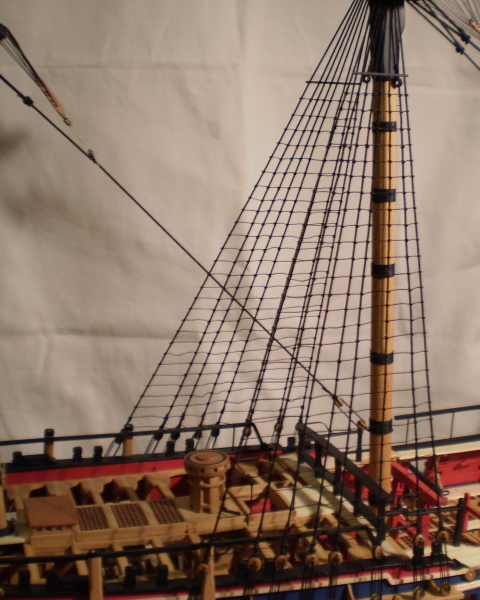
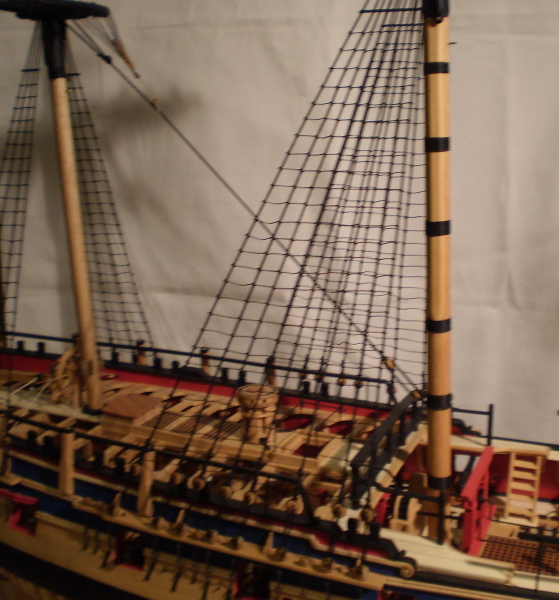
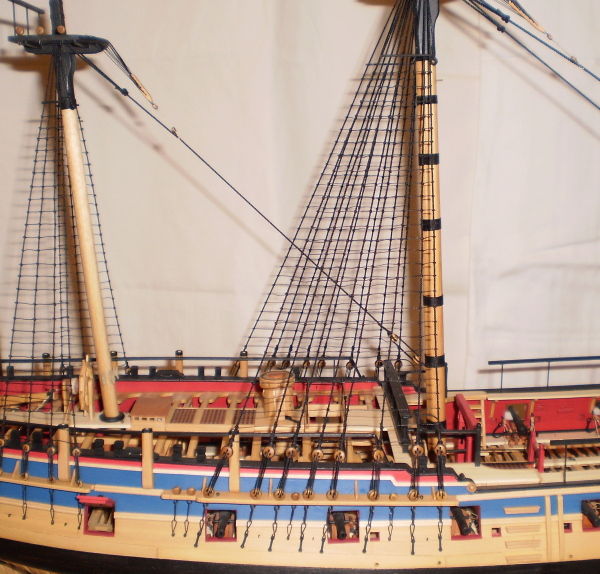
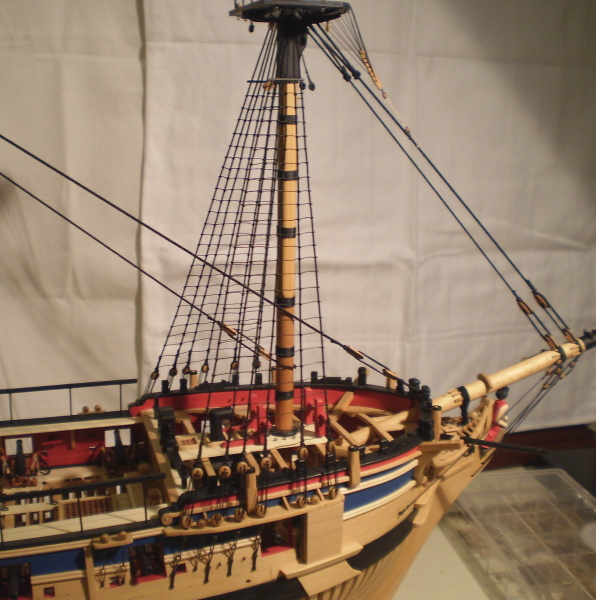
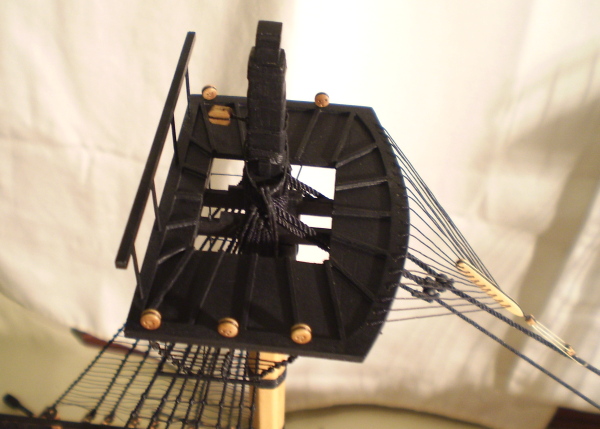
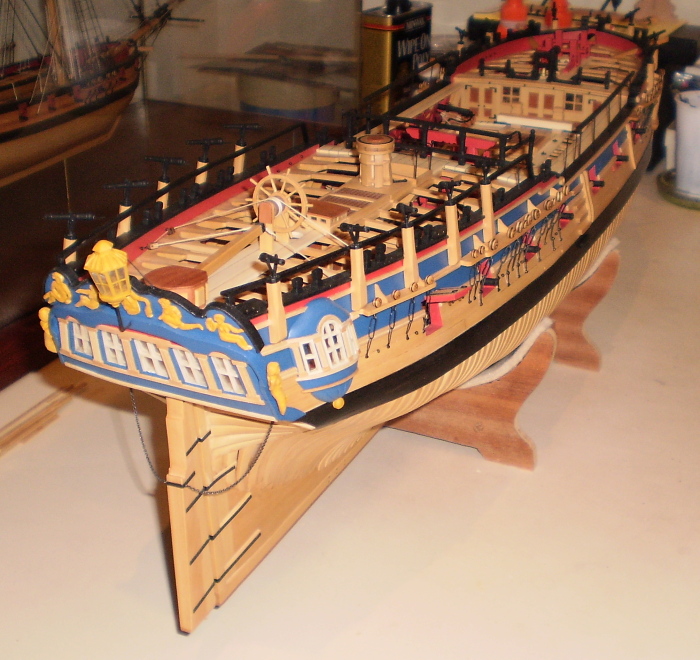
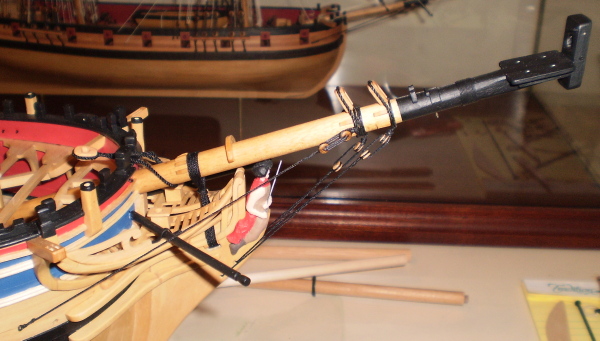
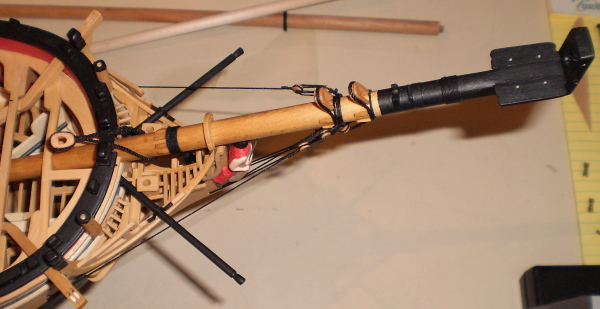
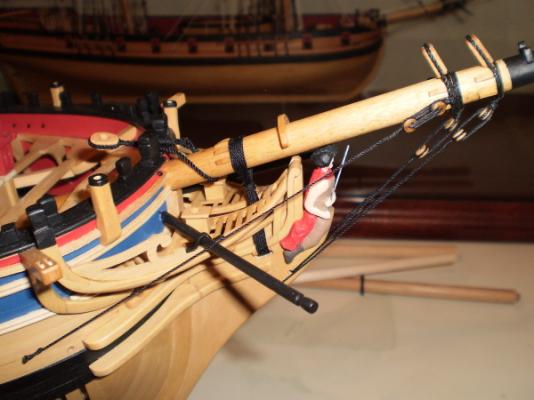
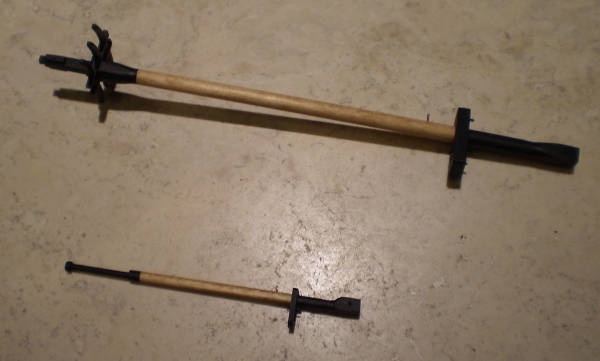
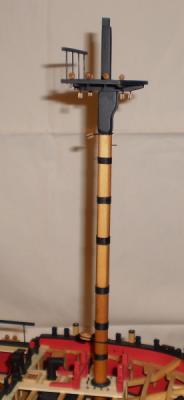
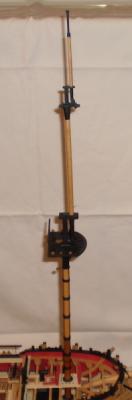
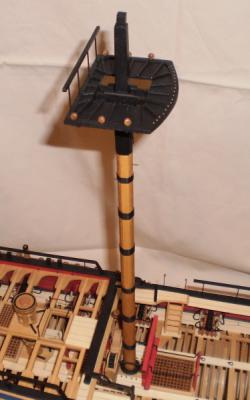
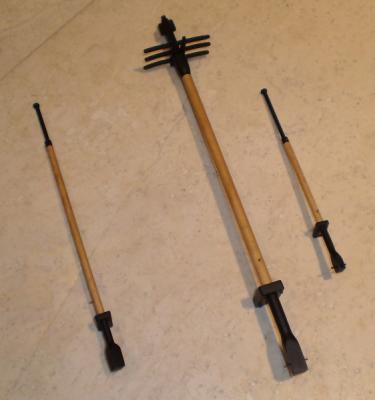
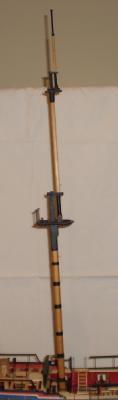
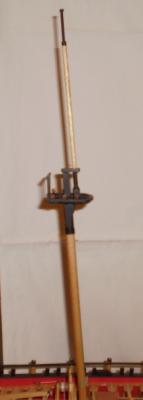
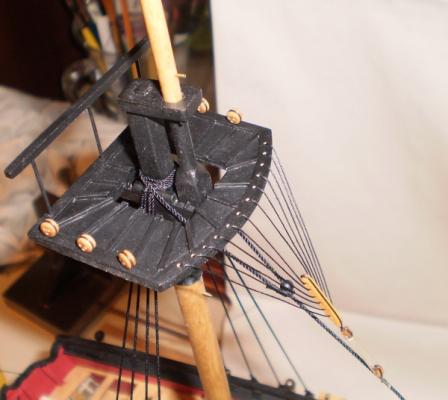
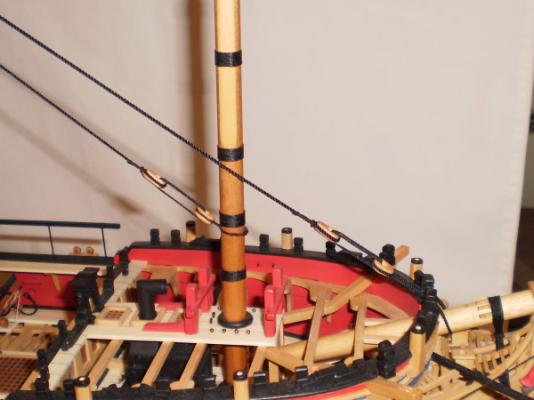
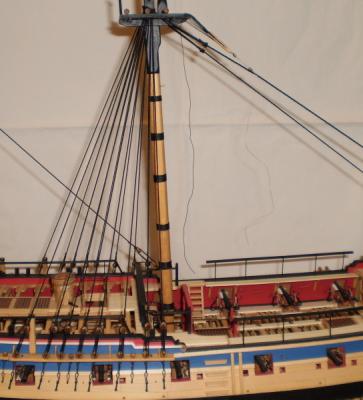
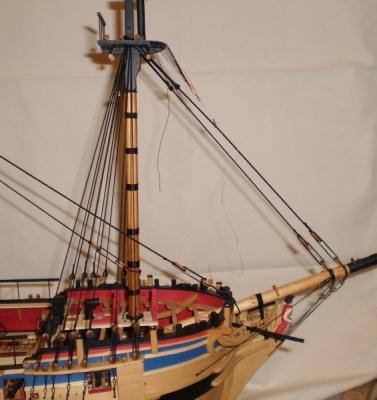
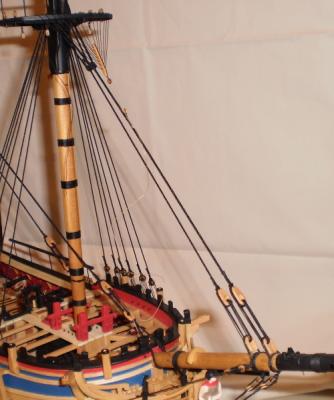
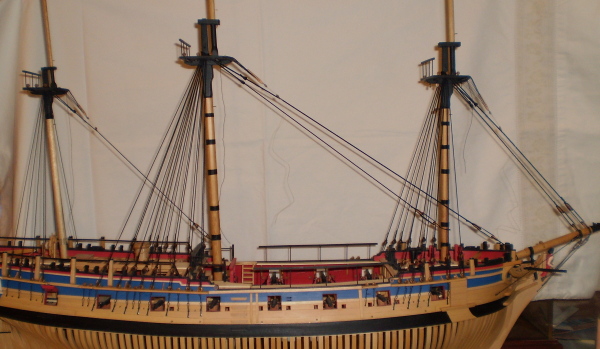
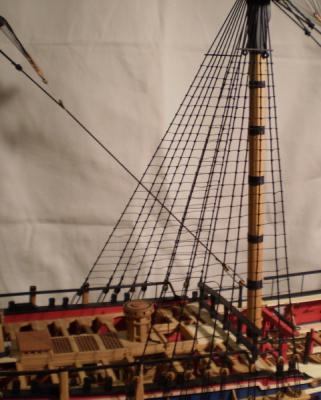
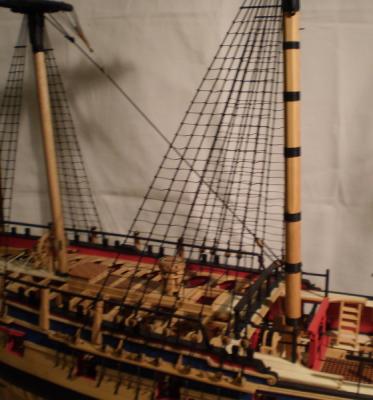
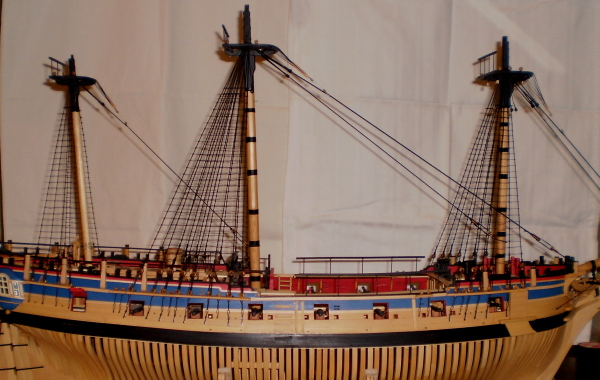
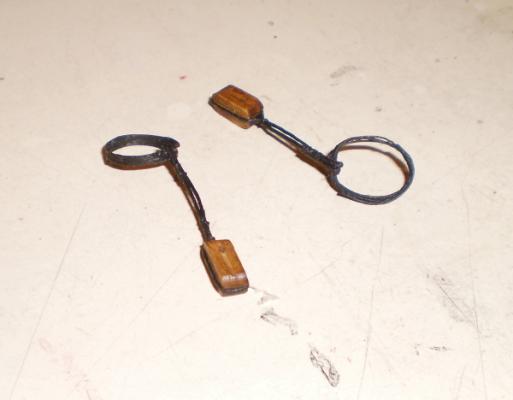
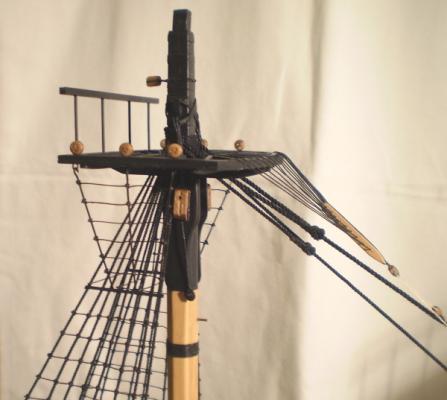
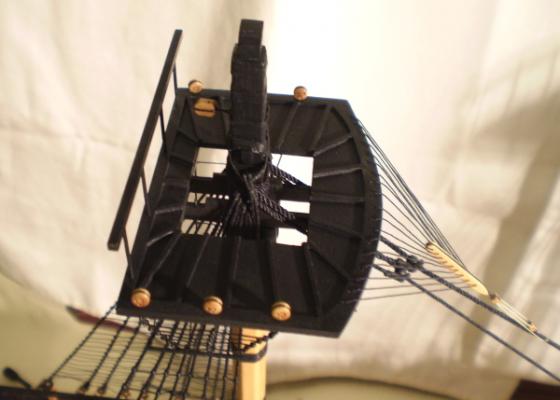
Time now to move on to the making and installing of the masts and the standing rigging. This installment will go through to the rigging to the lower masts. The kit contained neither materials nor plans for the masting and rigging. The work was done with reference to TFFM Vol. IV and to Lees, "The Masting And Rigging Of English Ships Of War". The bowsprit and the masts were all made from dowel, tapered and shaped as necessary. The square sections of the lower masts were cut in and flats filed for the addition of the cheeks, hounds and bibbs. On the top masts, the square heads were cut in and the other square and octagonal sections were built up. Lacking a lathe, I have found this easier than working from square stock. The caps and tops were made from boxwood. Having now seen the work of Remco and Blue Ensign, my list of "I wish I hads" includes the detailing found on their masts. The deadeyes used were all commercial, but all of the hearts and the long tackle and sister blocks in the standing rigging were made using boxwood strip. The standing rigging was all done with black Morope. As is my habit, I started with the bowsprit and then proceeded to the lower mizzen and worked forward. The rigging started with the bowsprit gammoning, bobstays and shrouds and then proceeded through the pendants, shrouds, stays, preventer stays, catharpins, futtock shrouds, ratlines and crowsfeet for the lower masts. I also added various lead blocks including those for the upper stays and the jeer blocks and pendants. I had never done crowsfeet before and found them to be a considerable challenge. Bob


- 81 replies
-
- 10
-

-
- kingfisher
- lauck street shipyard
- (and 1 more)
-
I can really understand your staement about the amount of sanding, since that's where I am too. Looking good. Bob
-
Thanks, Grant. Bob
-
Thanks, Pete. There should be no problem, Russ. I can get the frame dimensions by use of the plans at both ends and then simply fair between them. Bob
-
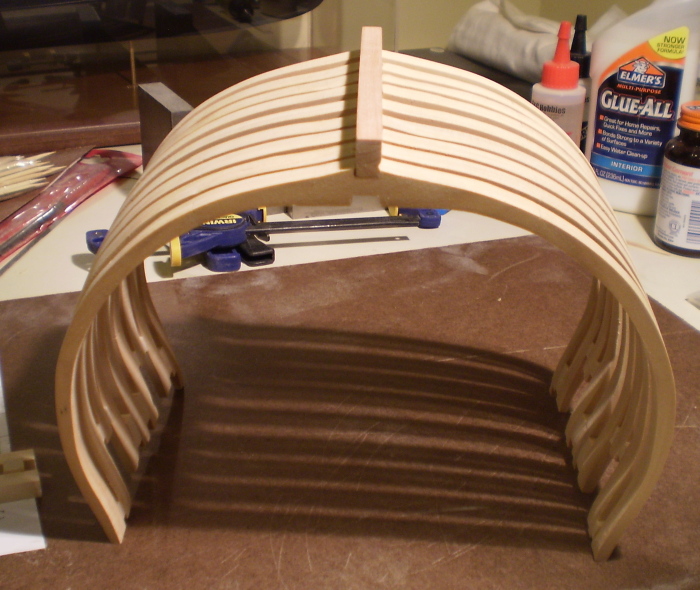
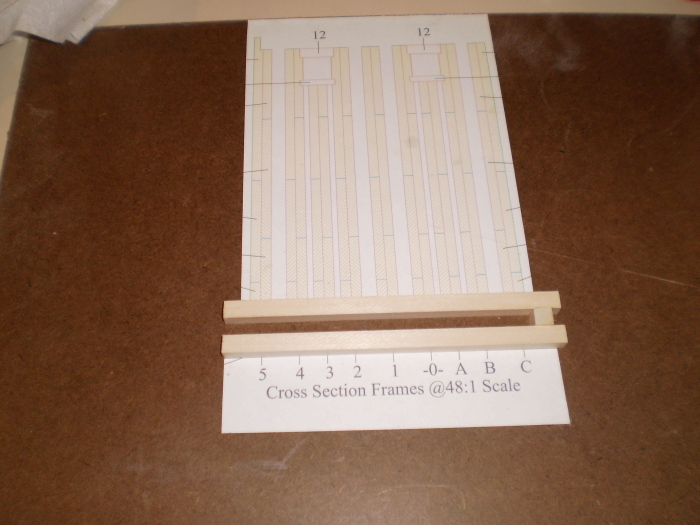
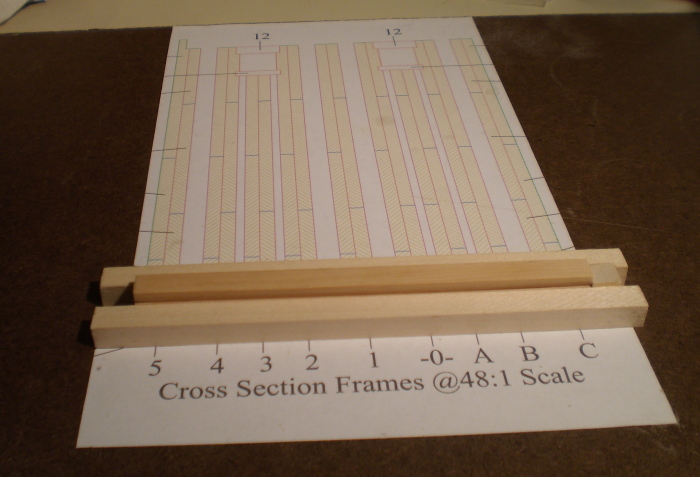
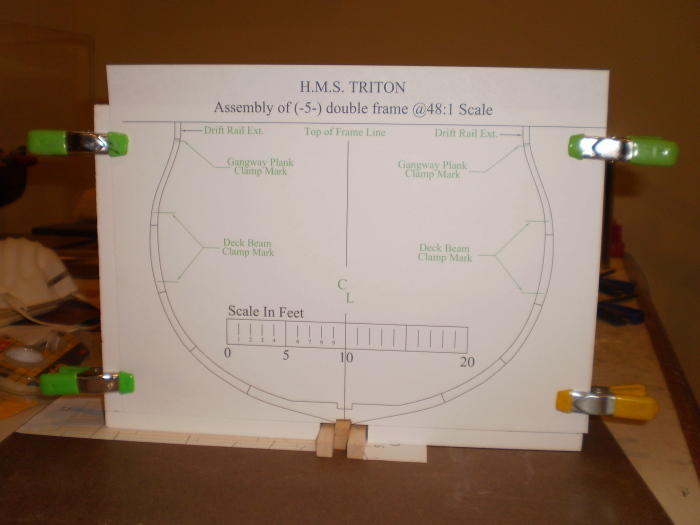
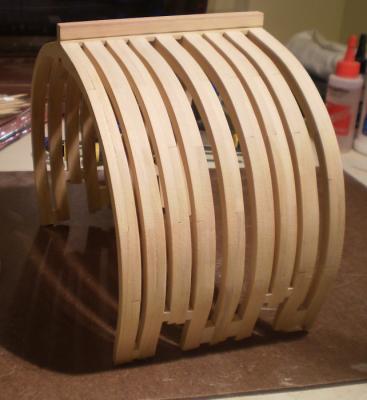
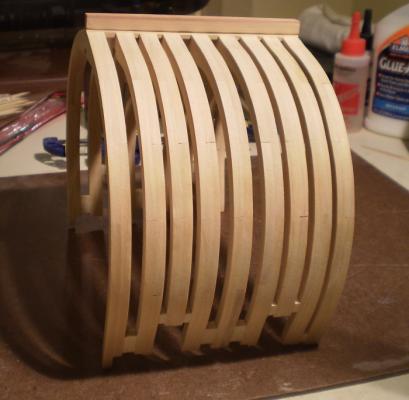
Time for another low tech tutorial. I've now raised all of the frames, using a very simple jig. My keel simply rests between two pieces of strip wood that come up to the bottom of the rabbet. The jig consists of a piece of foamcore, notched at the bottom to clear the keel and the supports, which is attached by double sided tape to two steel 90 degree weights. These slide along the keel supports as the frames proceed. A plan sheet for each frame was attached to the foamcore for reference. A temporary spacer was positioned on the keel between the frames and permanent spacers were glued to the tops of the frames as each was raised. Clamps were used to hold each new frame in place while the glue dried. Now it's on to the tedium of sanding. Bob


-
Nice work on the deck framing, Ron. Bob
-
The planking looks very good. Bob
-
Thanks very much, Grant and Jeff. It's funny you should mention the blue color Jeff. I was just looking at the model and realized that the blue in the photos is considerably lighter than the actual color on the ship. A bad photographer using a flash is probably the cause. Bob
-
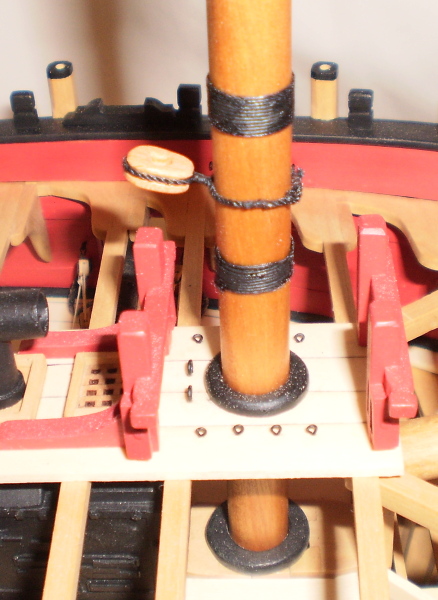
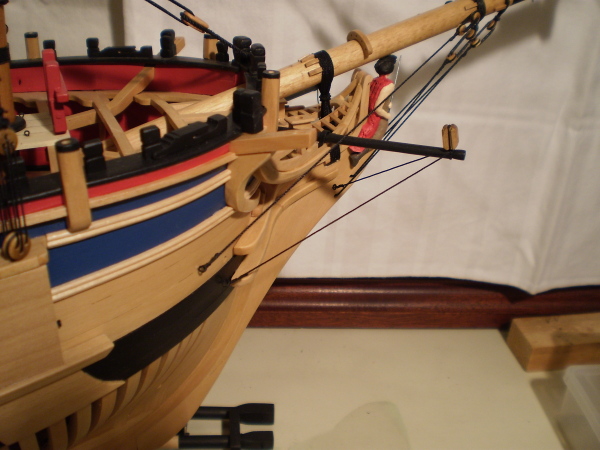
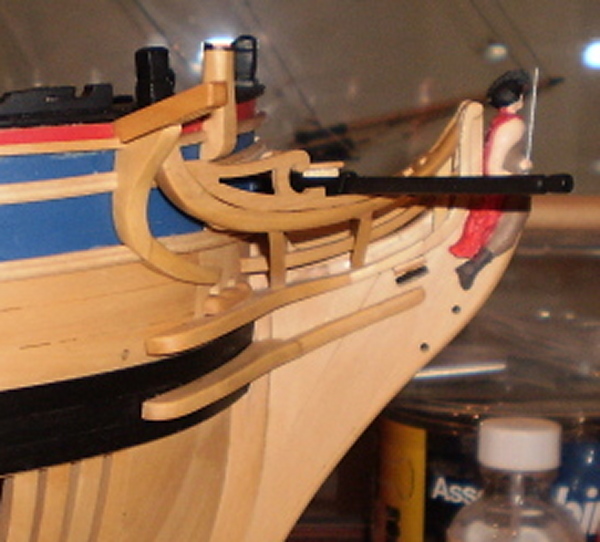
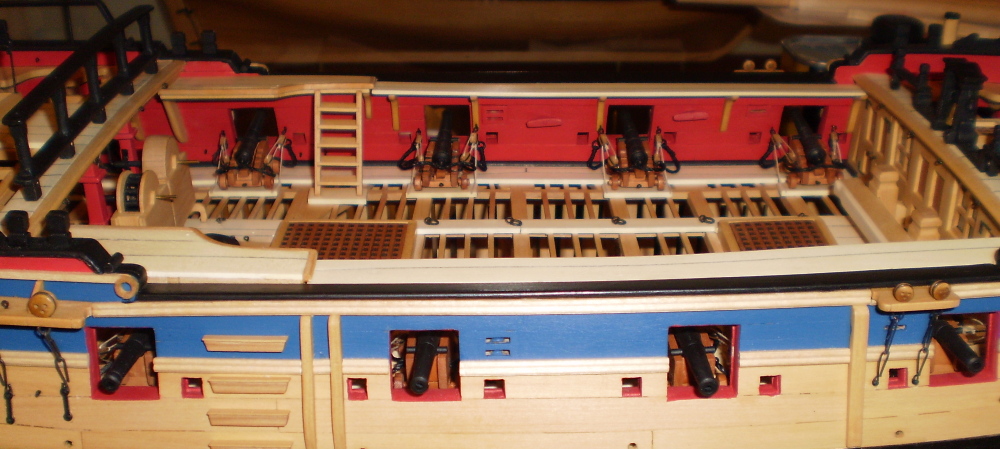
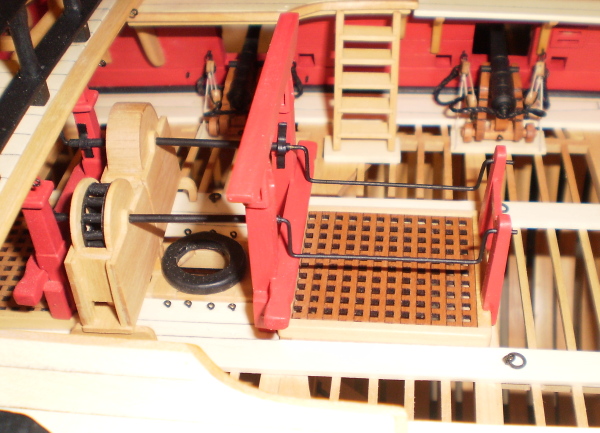
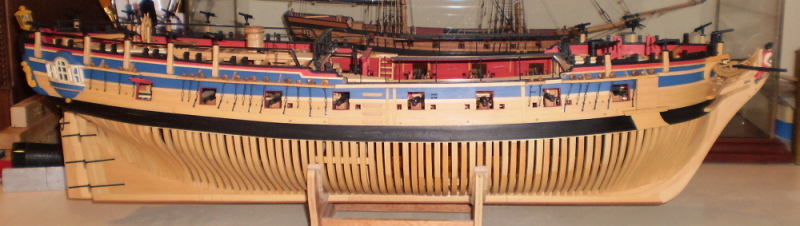
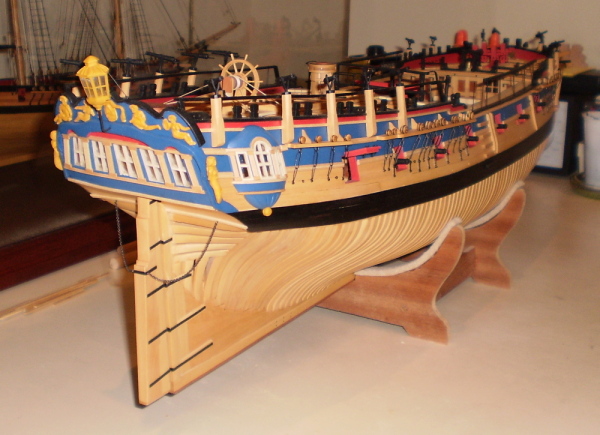
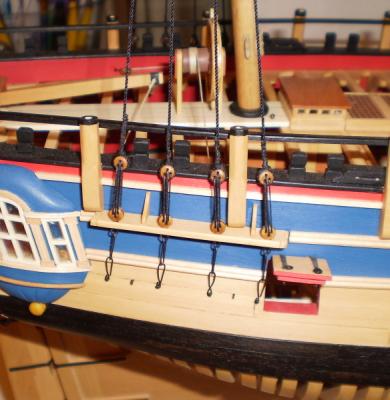
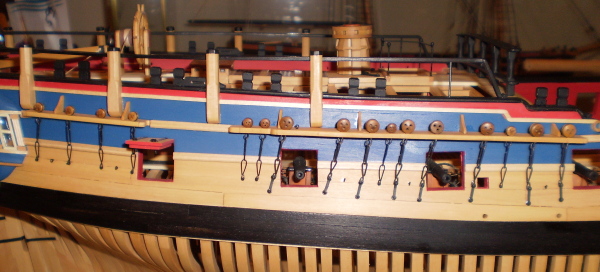
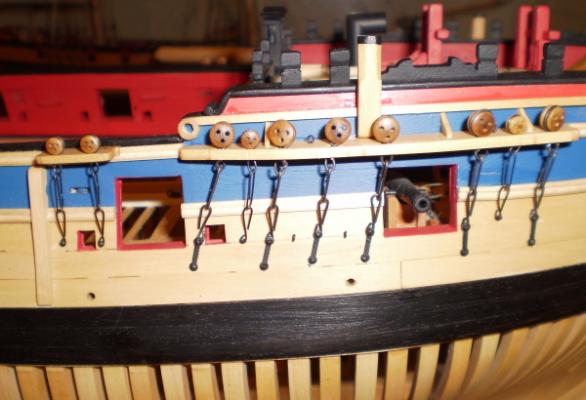
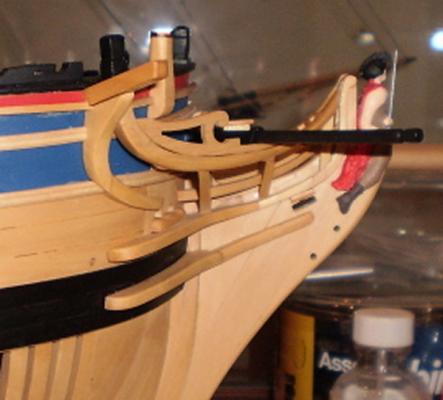
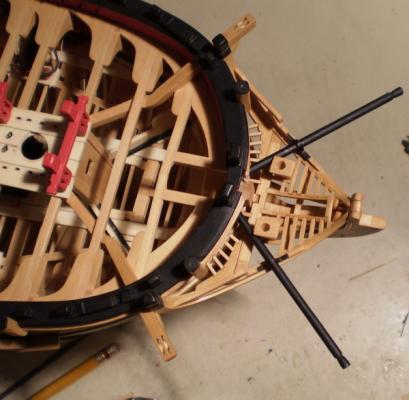
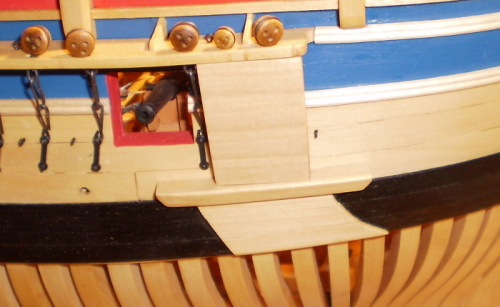
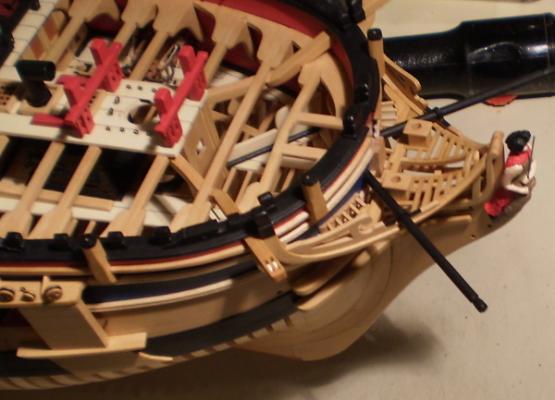
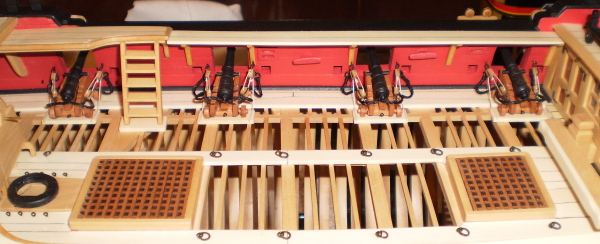
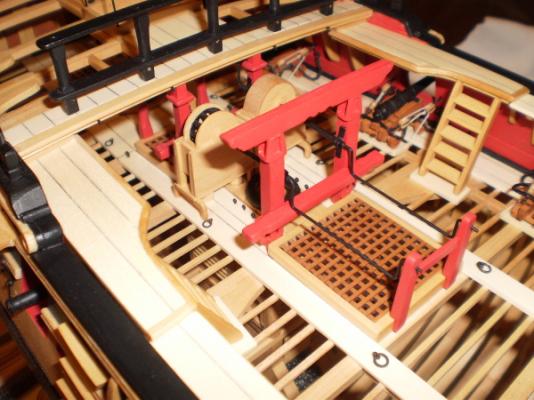
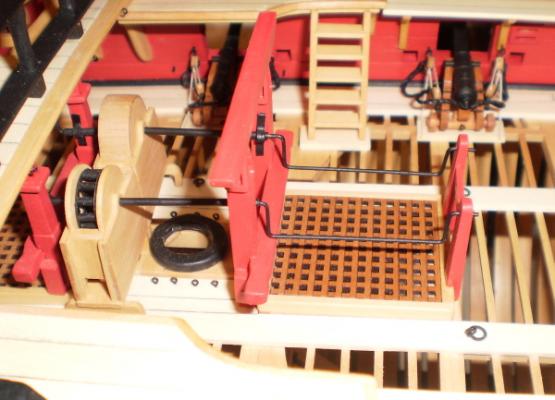
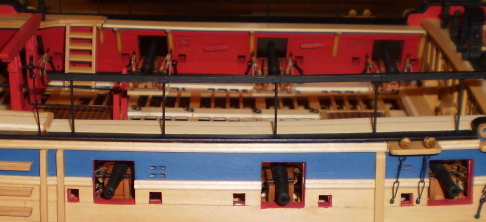
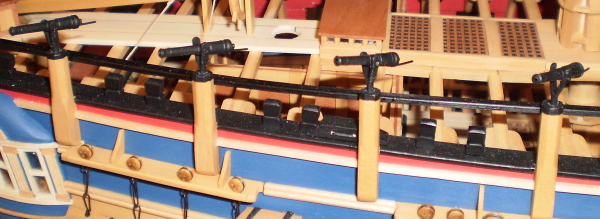
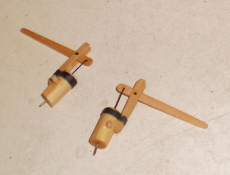
Thanks, Grant and Martin. Now it's on to finishing off the work on the hull portion of the build. The first item was the deadeyes and chains. The deadeyes are commercial. The chains are wire bent around simple nail jigs. The chain plates are brass strip. I also added the preventer bolts shown in TFFM. I then turned to doing the work on the head doing the knees, head rails, head timbers, gratings, seats of ease and boomkins. The cathead supporters and eking rail were not shown in the kit and were made in accordance with TFFM. I also painted and installed the figurehead casting from the kit. The fore outer hull was finished by making the anchor billboard assembly as shown in TFFM and added the remaining moldings and the eyebolts needed for the rigging. Last was the work in the midship area. This included the remaining cannon, the fixed gangways and their ladders and railings, the gangboards and their knees and and the gangboard railing. I also finished work on the chain pump handles and their supports. Two items were made but not permanently installed at this point: the elmtree pumps and the swivel guns. The guns were from the Lumberyard, like the larger cannon At this point, construction was suspended for about a year, waiting for the publication of Vol. IV of TFFM on masting and rigging.The last photos attached to this post show the completed hull prior to masting and rigging. Bob


- 81 replies
-
- 12
-
-
- kingfisher
- lauck street shipyard
- (and 1 more)
-
Absolutely fantastic looking work, Rusty. The joinery looks perfect. Bob
-
Good to have you back, Grant. I look forward to seeing the work product of that neat looking jig. Bob
-
Thanks, Garward. Alistair, you are much too kind, but your thoughts are certainly appreciated. Bob
-
Really nice job on that frame and the treenails, Paddy. Bob