


rafine
-
Posts
2,932 -
Joined
-
Last visited
Content Type
Profiles
Forums
Gallery
Events
Posts posted by rafine
-
-
-
-
Rain, rain, and then more rain. That was the weather in sunny Florida for a week. Bad for golf, but good for modeling.
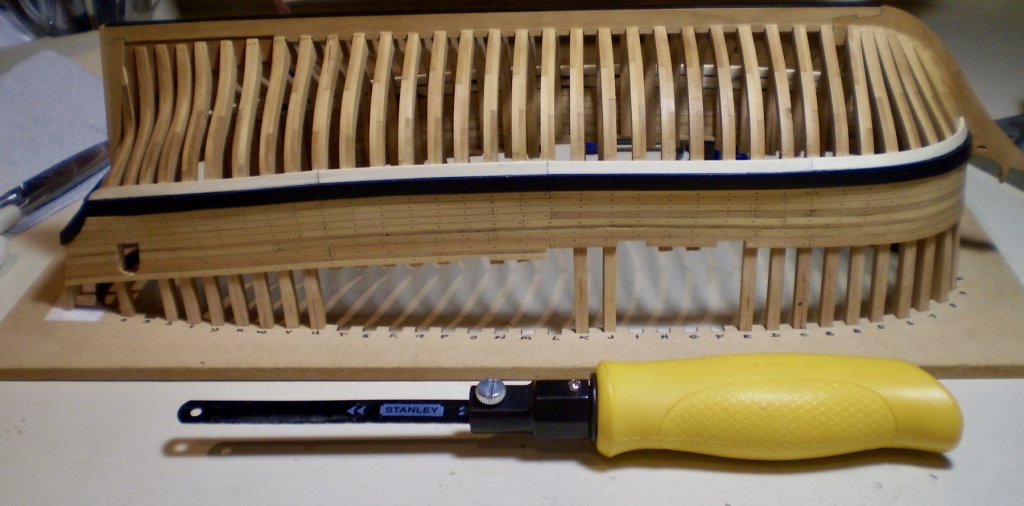
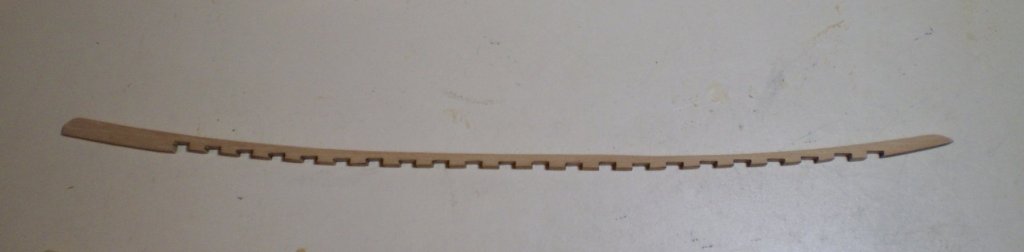
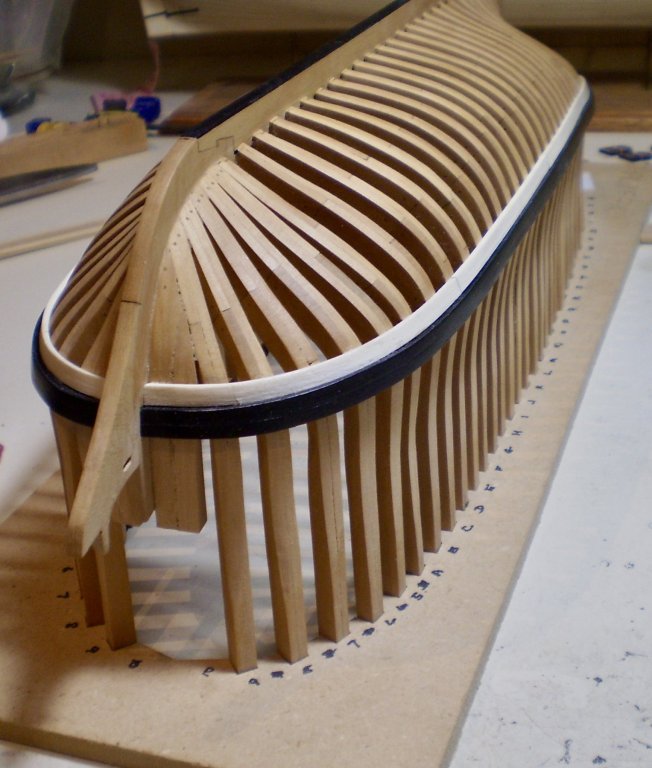
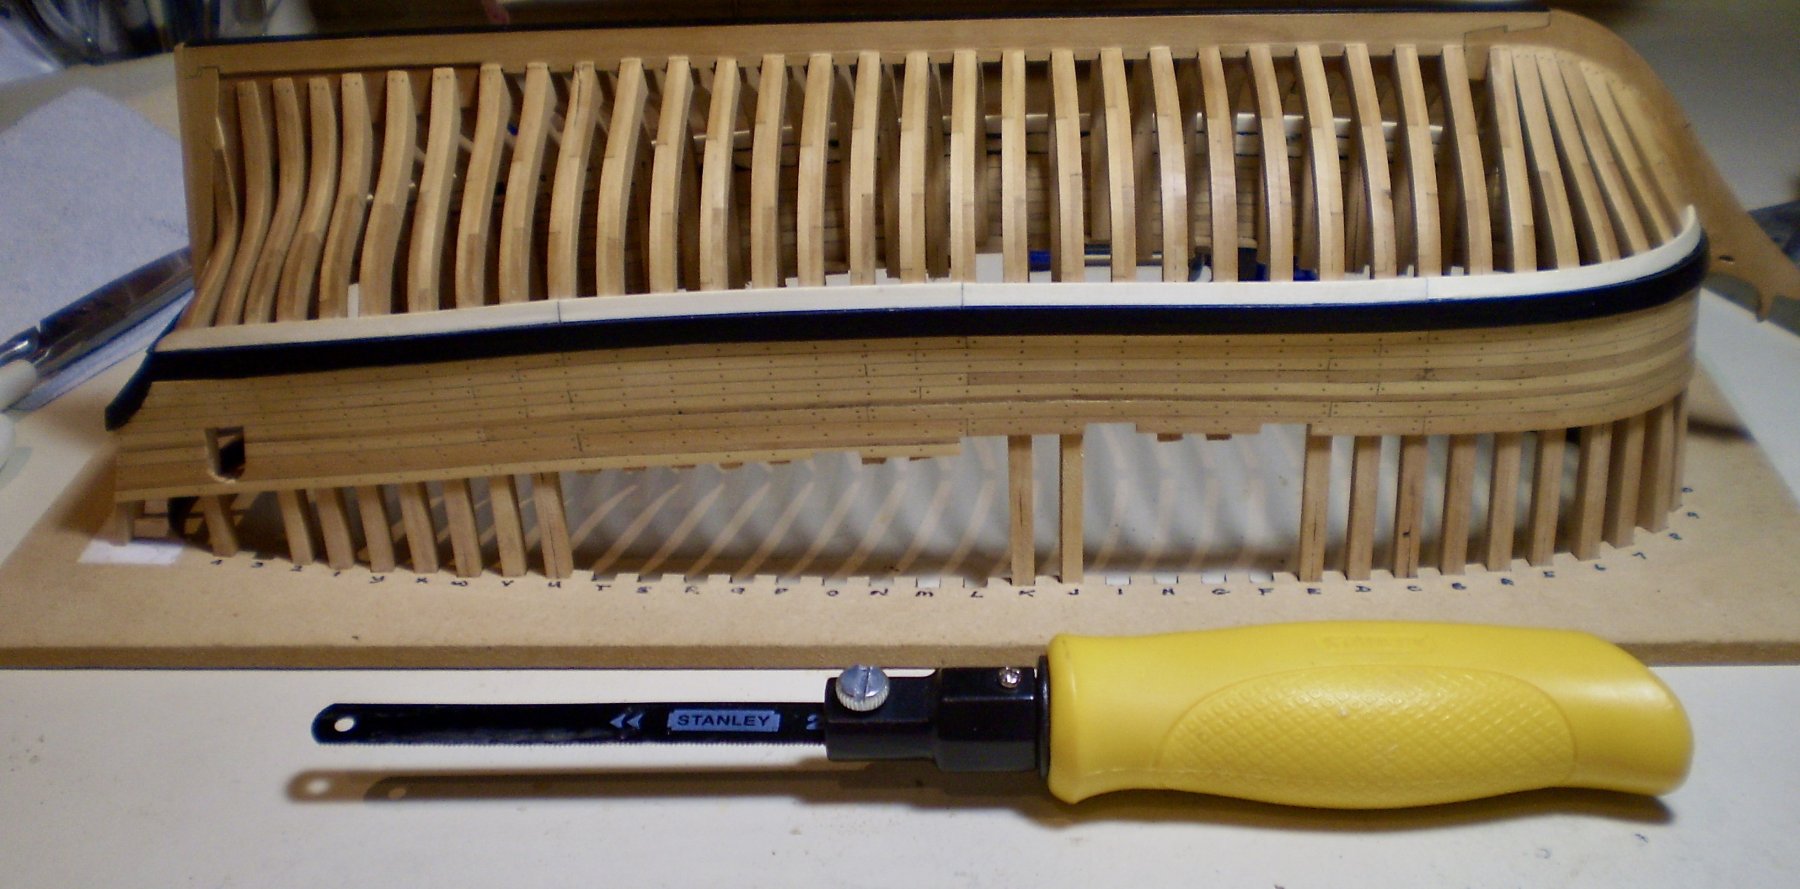
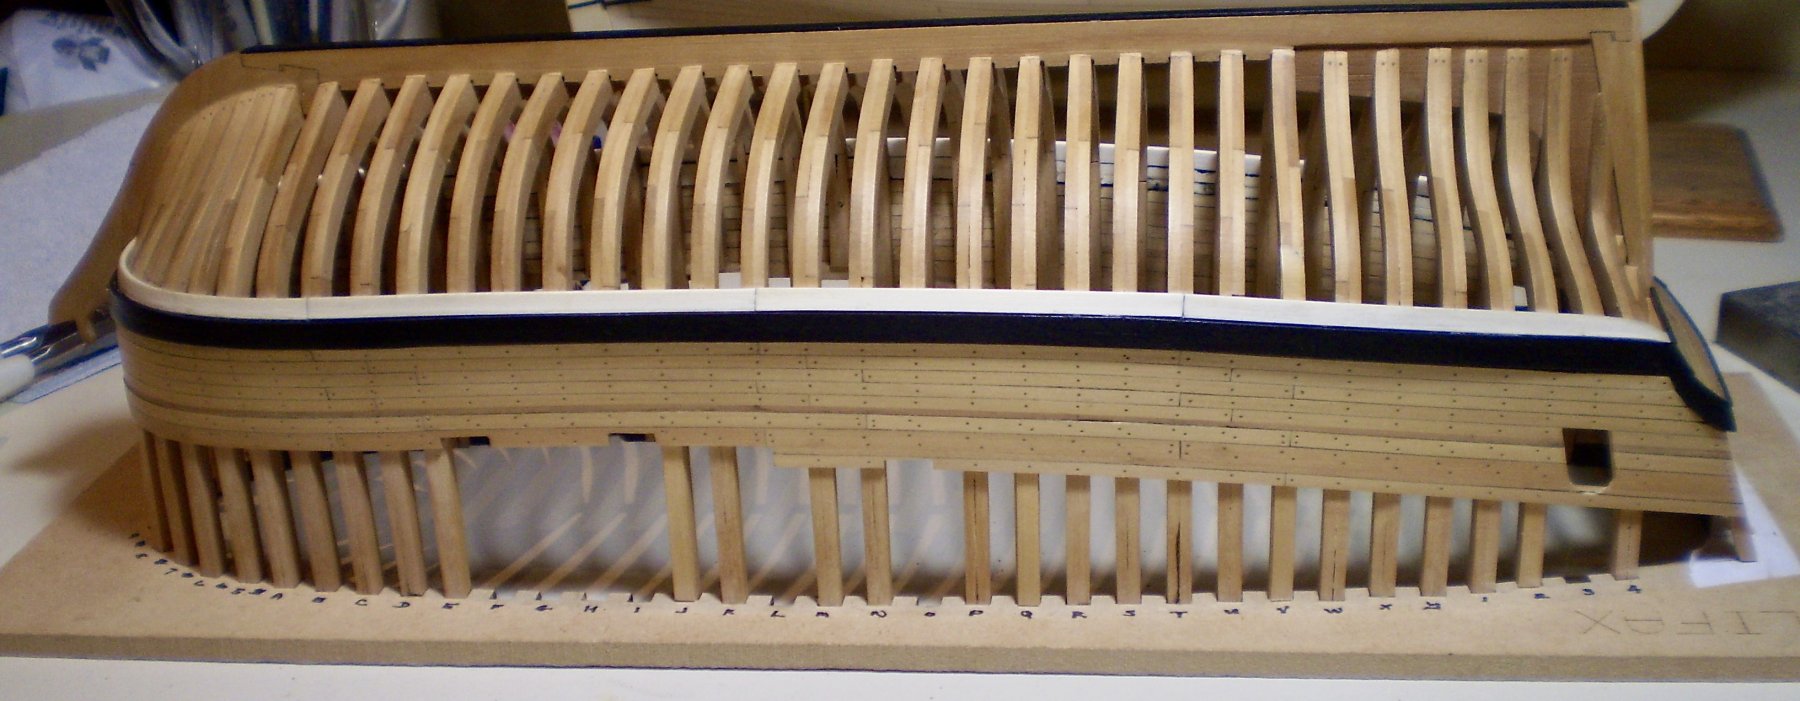
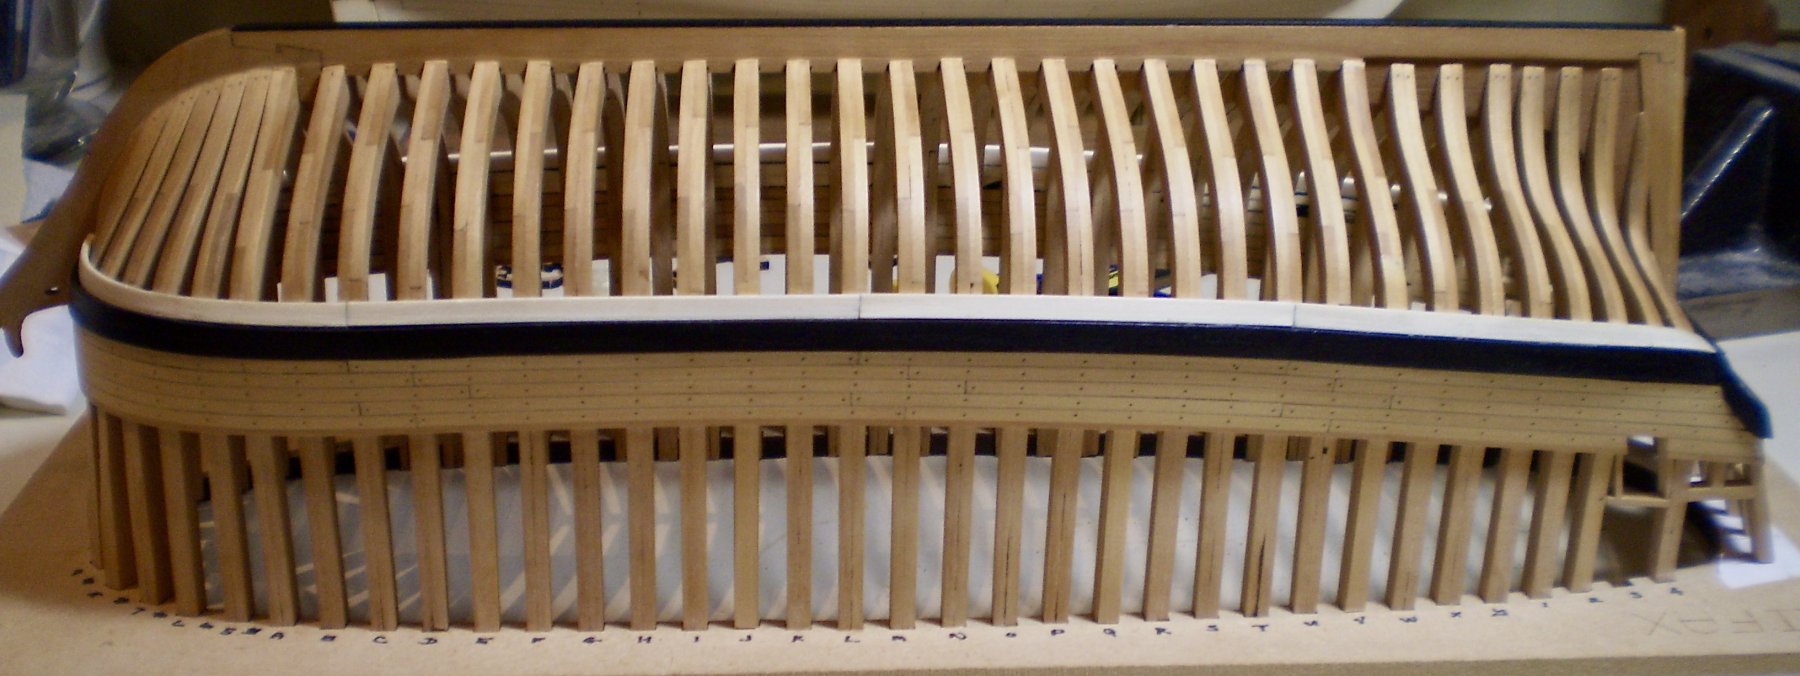
With all that indoor time, I was able to get by a couple of tedious tasks. First, was cutting the hull loose from the framing jig. This proved more time consuming and difficult than I had imagined it would be. I first tried to do it with keyhole saw blades in an X-acto handle, but this seemed like it would be an endless job, and I have no patience for those. I rummaged through my tool box and found a Stanley handle with a hacksaw like blade and this ended up doing the trick, although still slowly and carefully. It is pictured below.
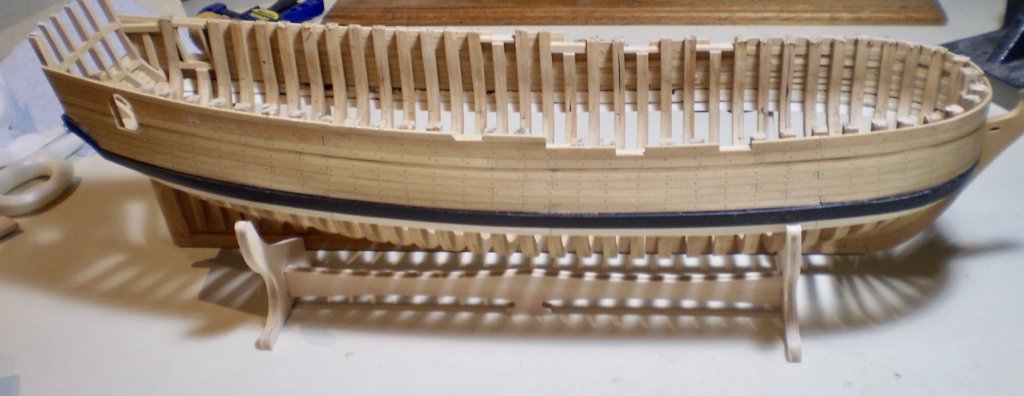
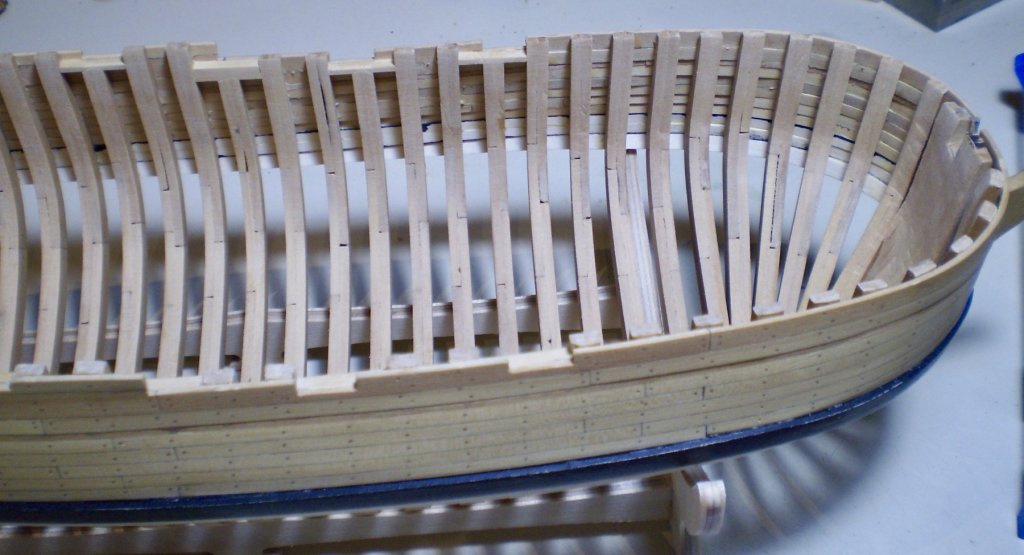
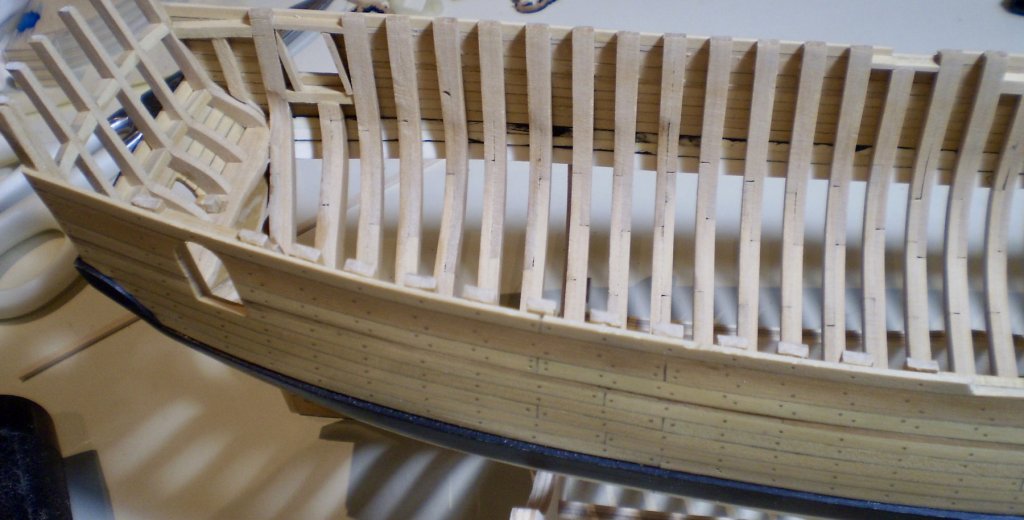
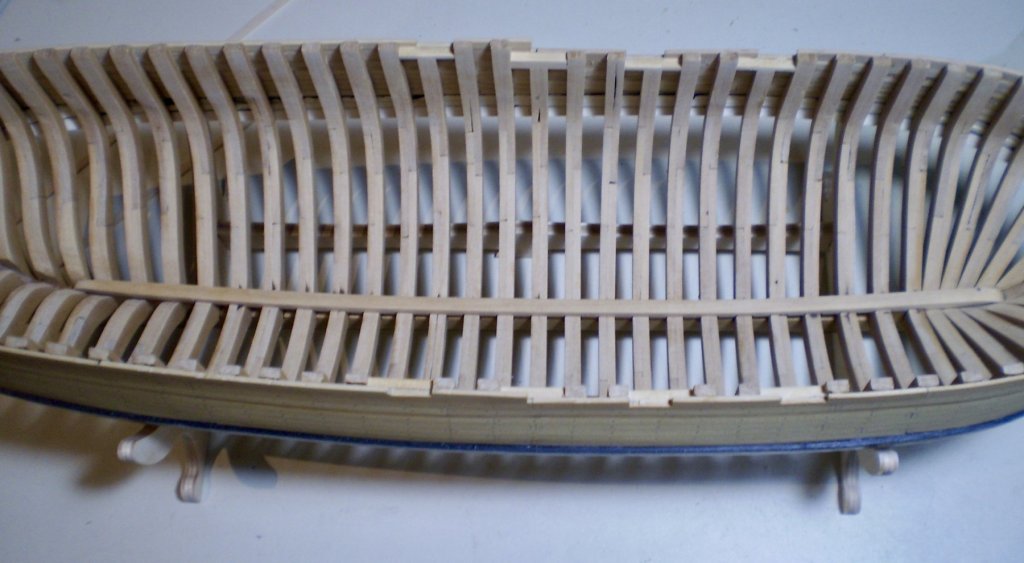
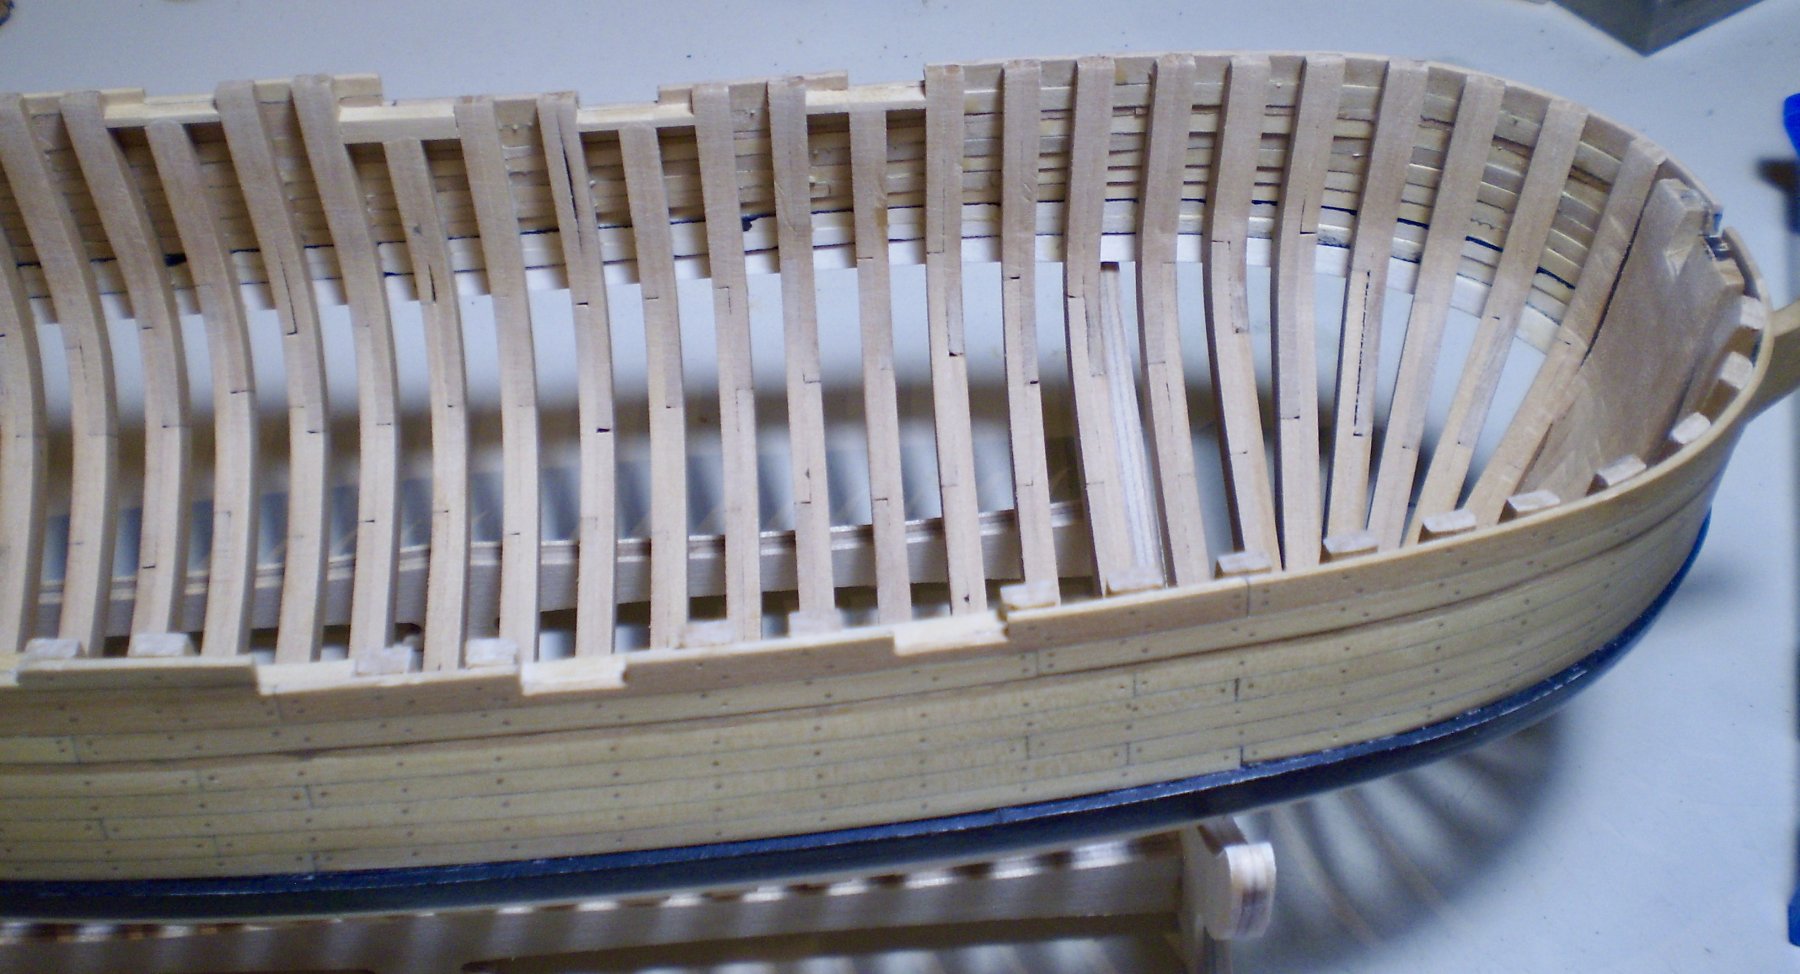
After freeing the hull, I then turned to the task of fairing the interior. This turned out to be quite a chore, because the frames needed to be thinned considerably to reach their proper final proportions. Beginning with a Dremel with a sanding drum, and then using various grades of sandpaper with different sticks and blocks, and some freehand sanding as well, I worked my way through it. This took me days of tedious work. It's likely that I may still need some more work at the bow and stern as I proceed with interior work.
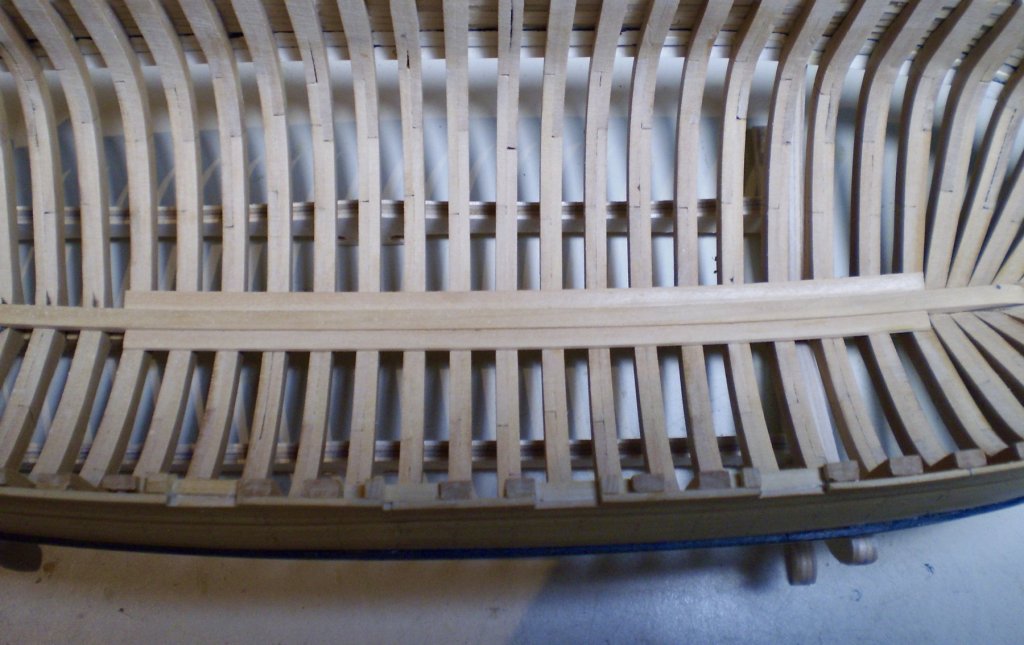
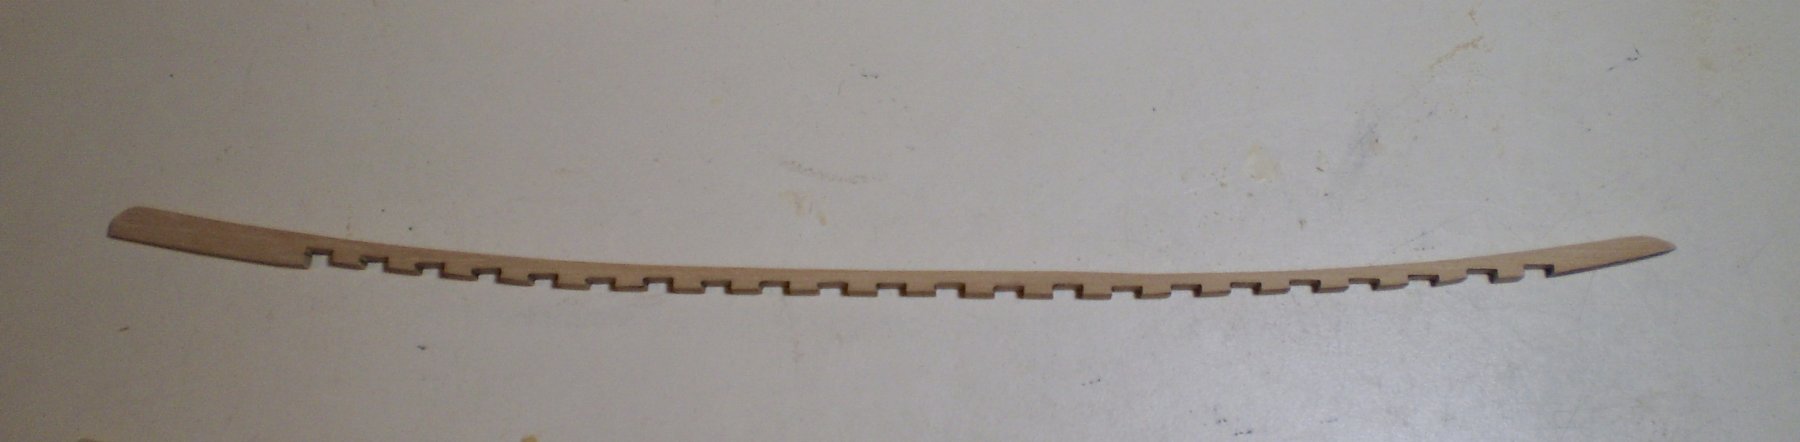
My next job was to add the keelson. Although this is a laser cut part , it still required considerable fiddling and adjustment to get it to fit tightly and properly. Lastly, I added the first strakes of interior planking along the keelson in the hold area, just to get a feel for that process. I'm now deciding just what interior work to do and how to go about it. I would like to show as much of it as I can, but we'll have to see how that works out.
Bob
- cwboland, John Allen, Mike Y and 35 others
-
 38
38
-
-
Thanks so much Chuck, Michael, John and the "likes".
Absolutely right Chuck. The moldings will be painted before mounting them.
Bob
-
Thanks so much Denis, Dave and the "likes". I think it will look even better when I ultimately put on the black moldings.
Bob
- popeye the sailor, Canute, MEDDO and 2 others
-
5
-
-
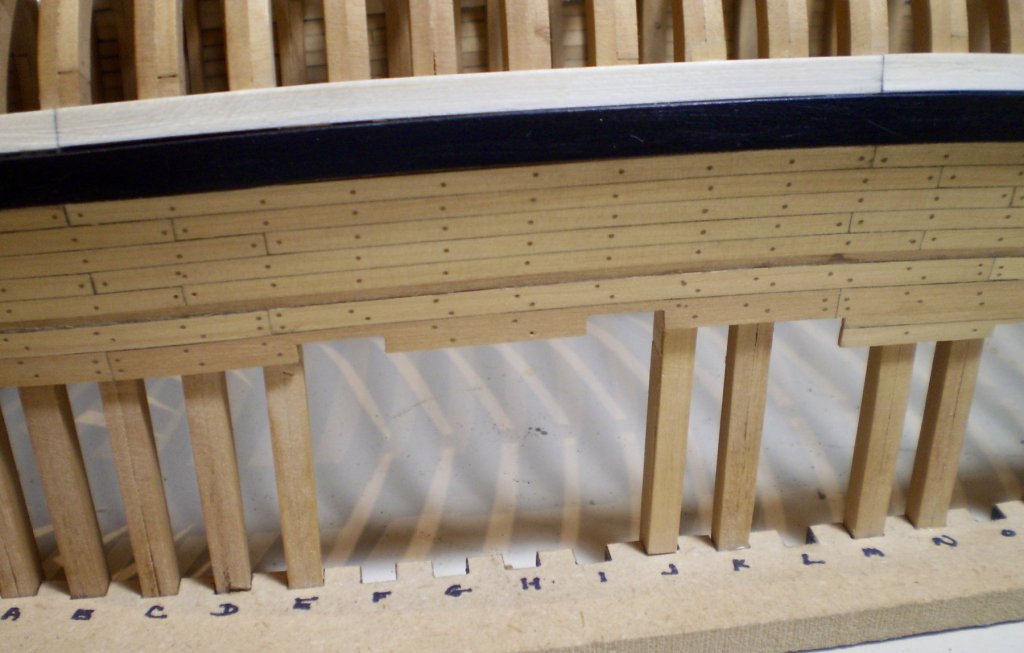
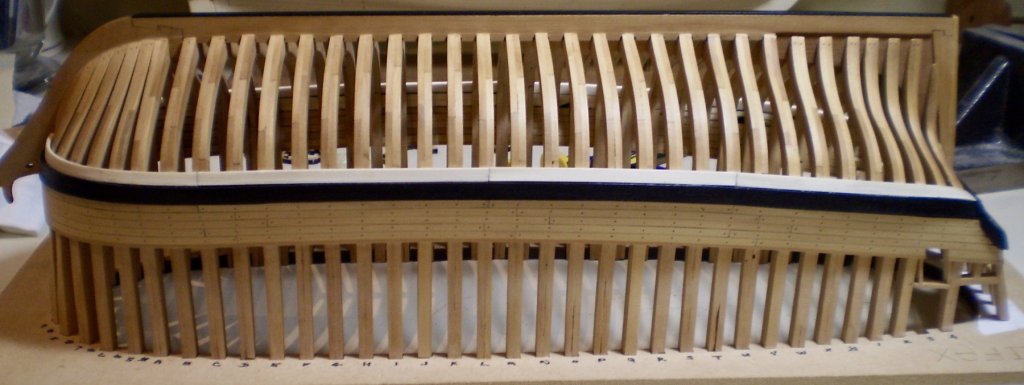
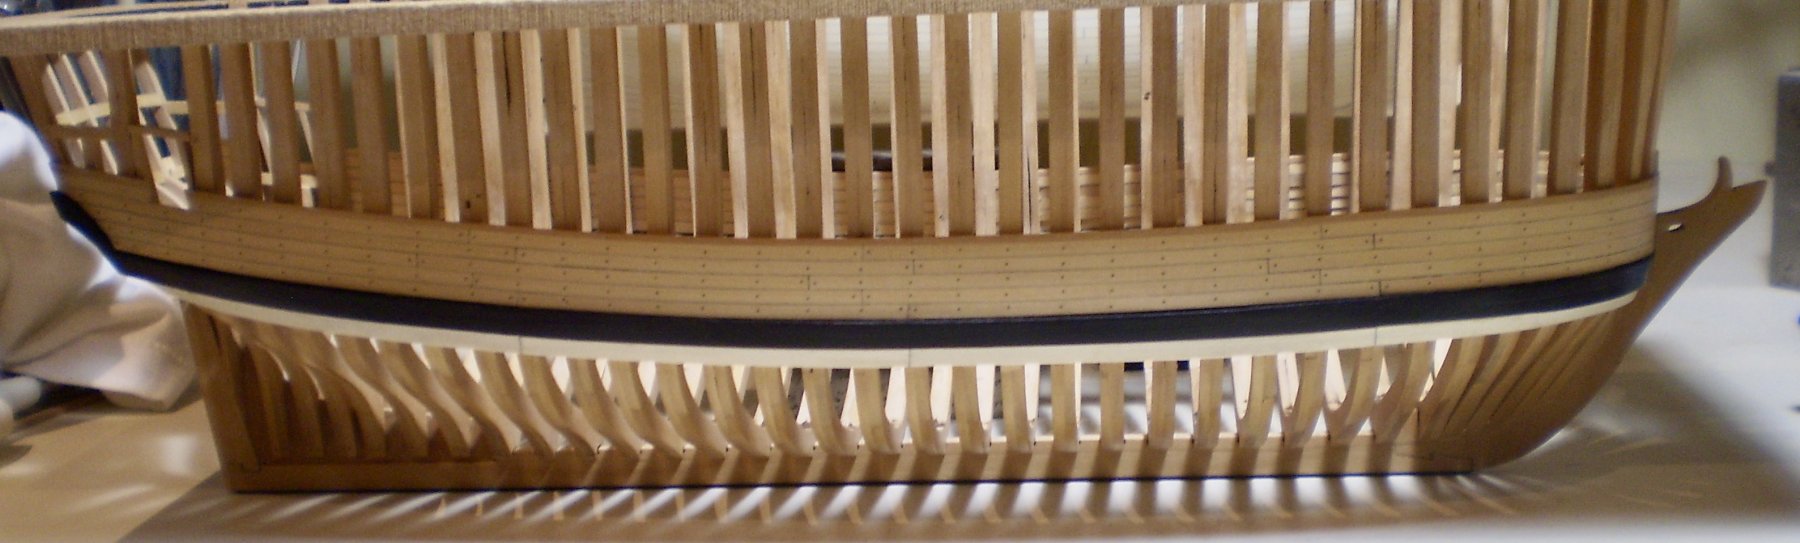
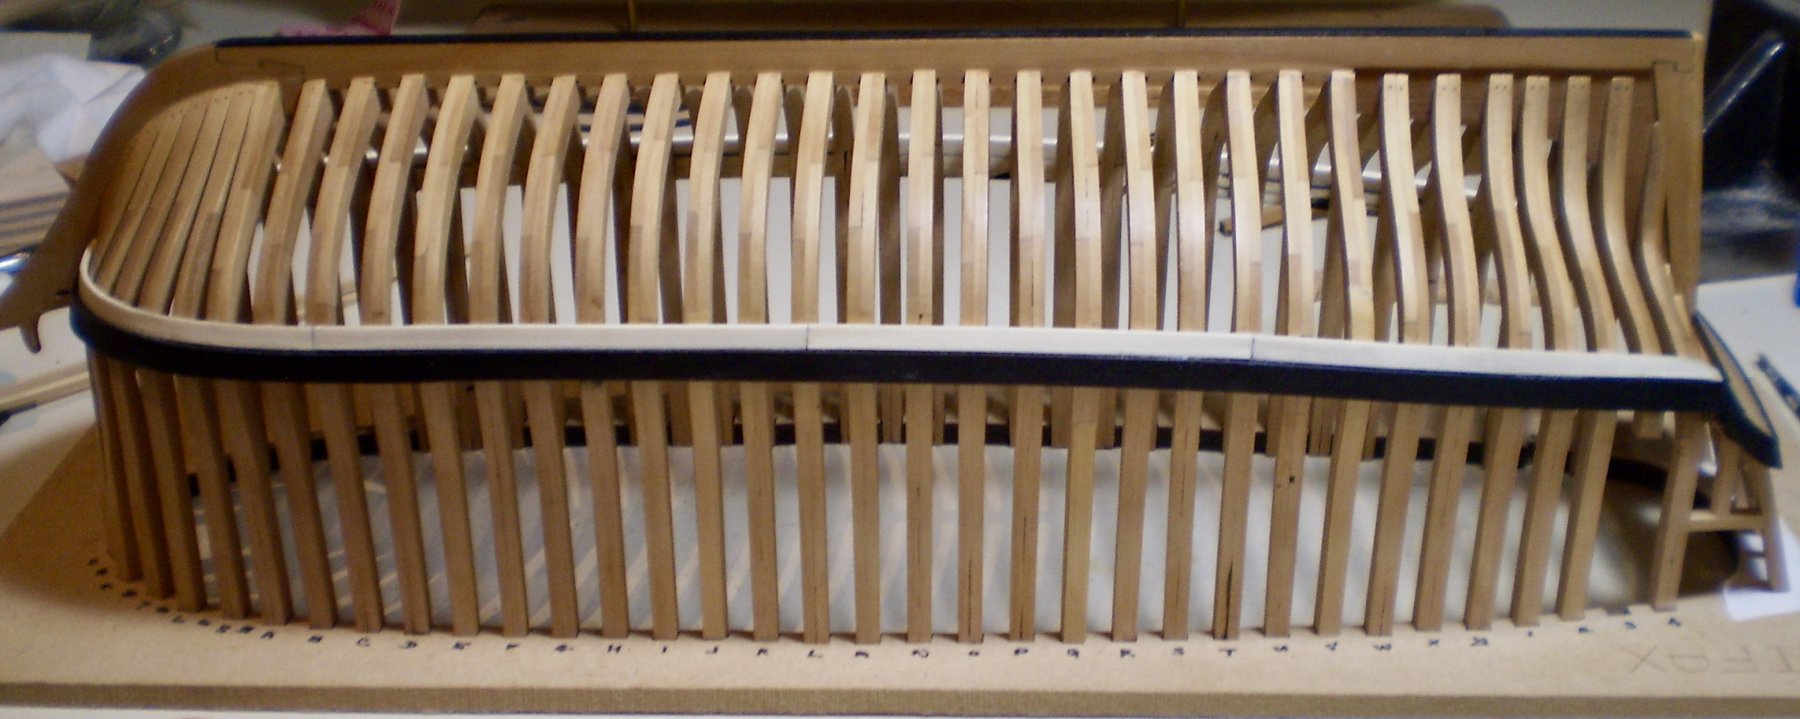
I have now completed the upper hull planking. Before beginning, I had to cut away three of the frames to allow for the small gunport openings. As with the previous belt, this was done with boxwood strips without taper, first edge bent and then bent again horizontally to fit the severe bow curve. This planking was done with a combination of 1/16" x5/32 ", 1/16" x 3/16" and 1/16" x 1/8" strips to fit the dimensions shown on the drawings. BTW, the Lumberyard provided pear strips to do this planking, but I didn't like the material supplied and chose to use boxwood that I had on hand. The treenailing was done as before. After treenailing, the area was final sanded and finished with a coat of Wipe-on Poly. No further work will be done on the outer hull at this point
The next task is to cut the hull away from the jig.
Bob


- Beef Wellington, Sjors, hexnut and 26 others
-
29
-
Don, you're off to a very nice start. I really like your approach.
Bob
-
Looks great Michael. You have every reason to be proud of this work.
Bob
- Mirabell61 and MEDDO
-
2
-
-
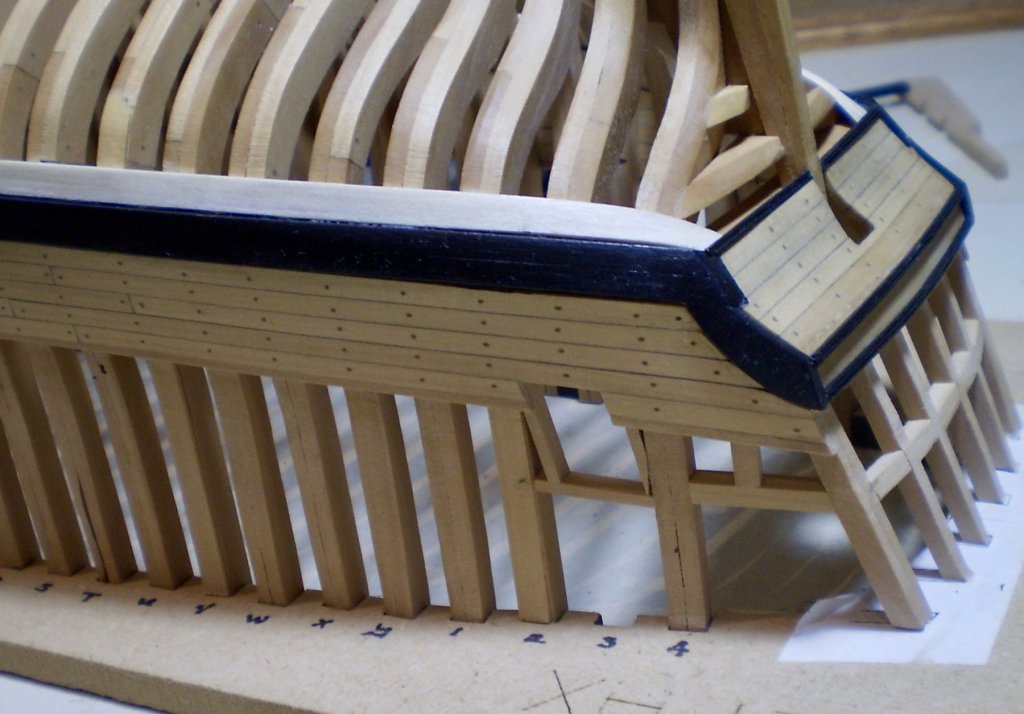
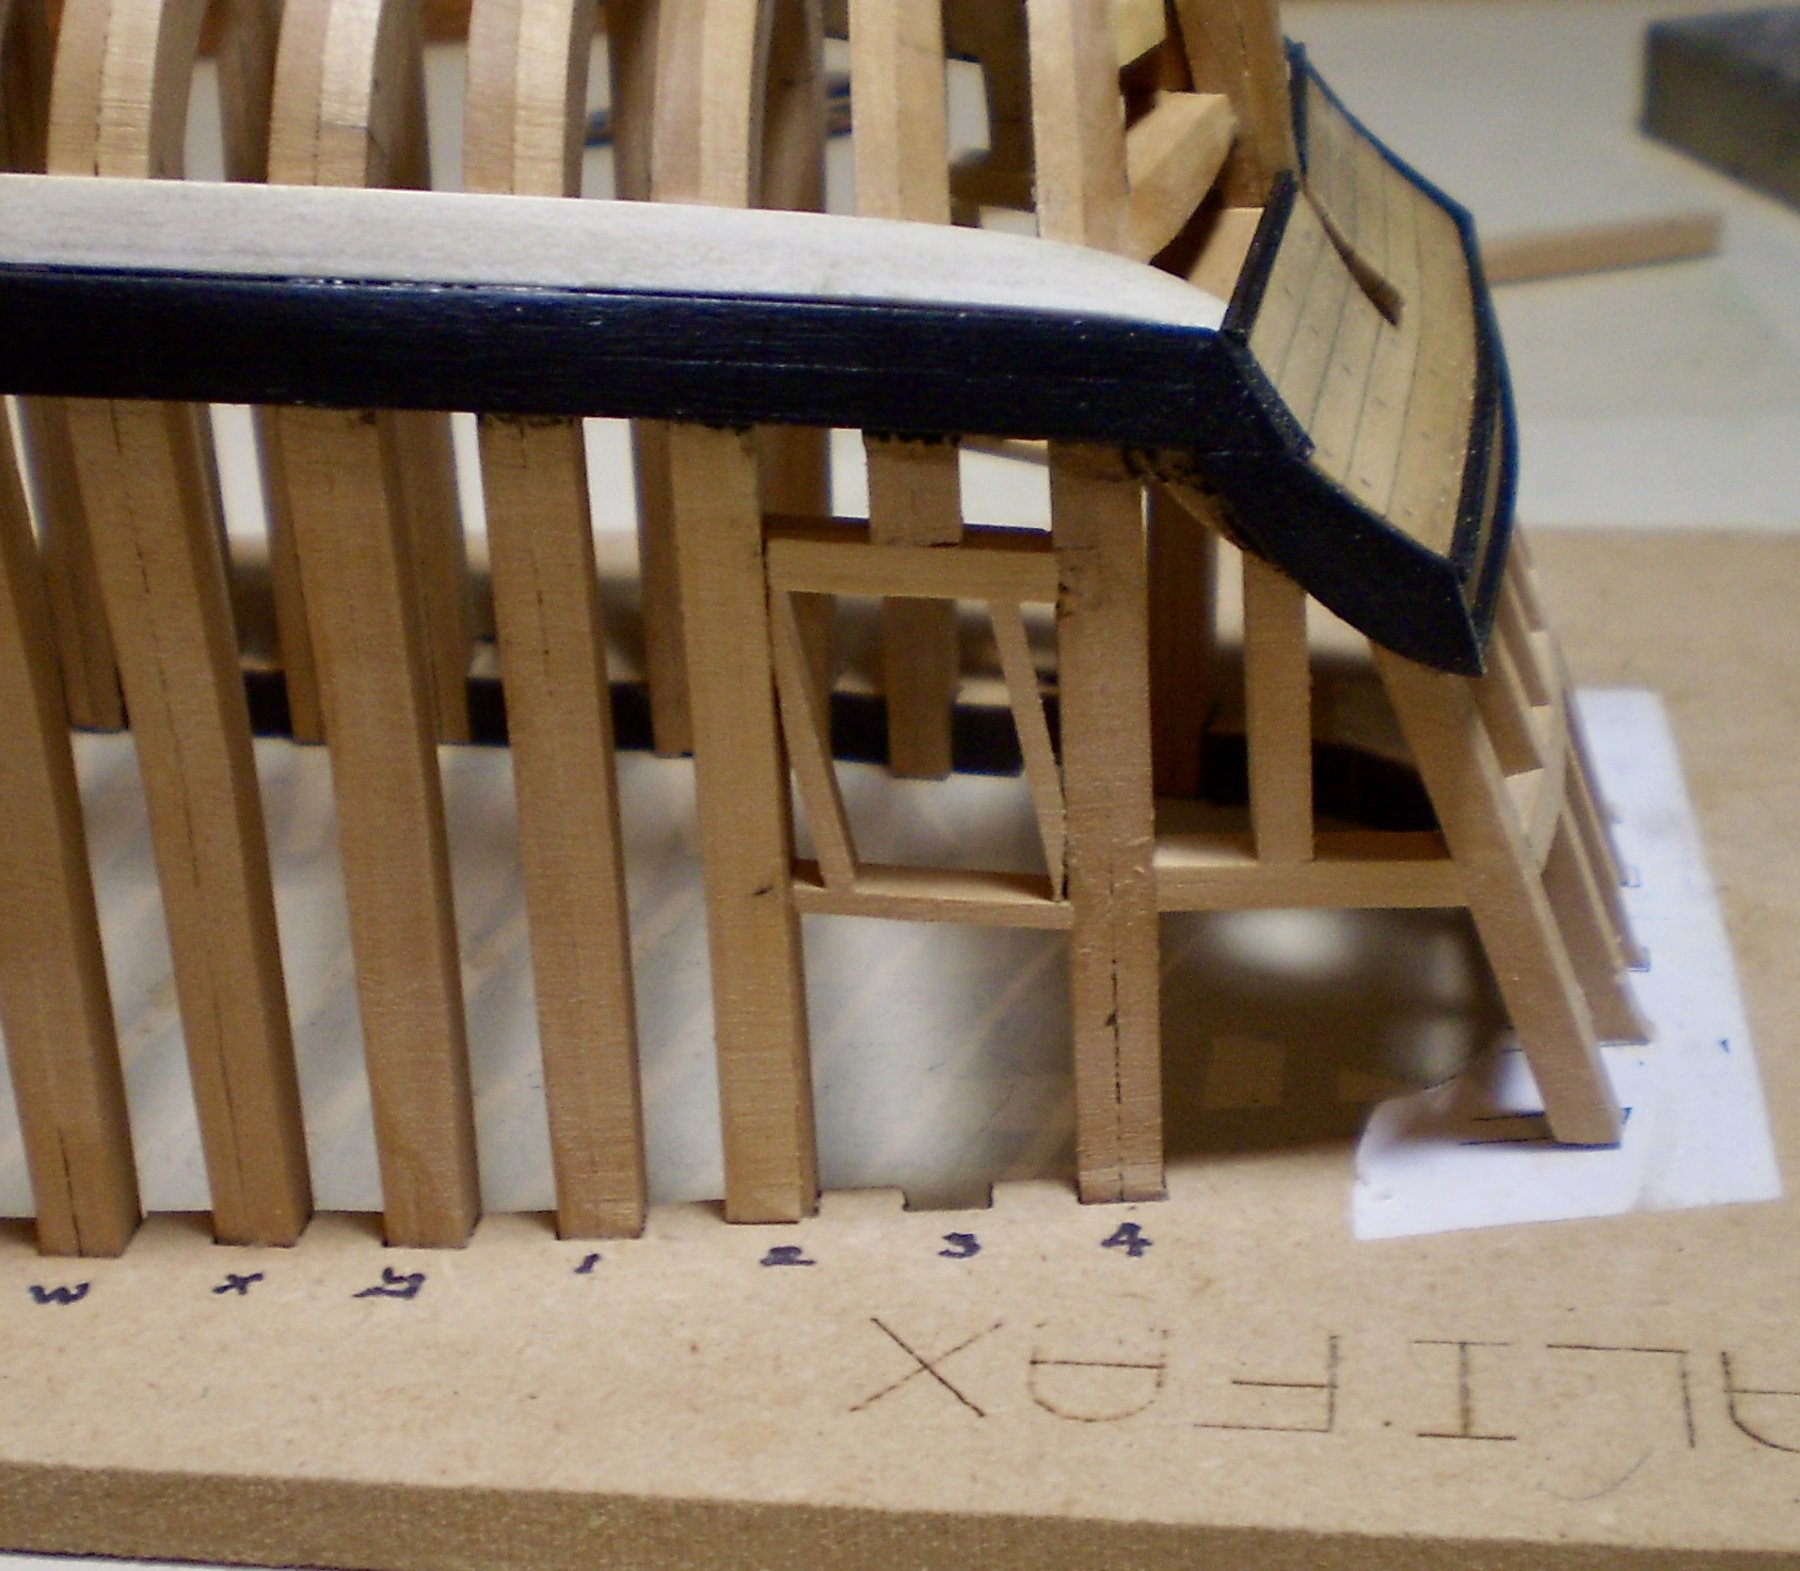
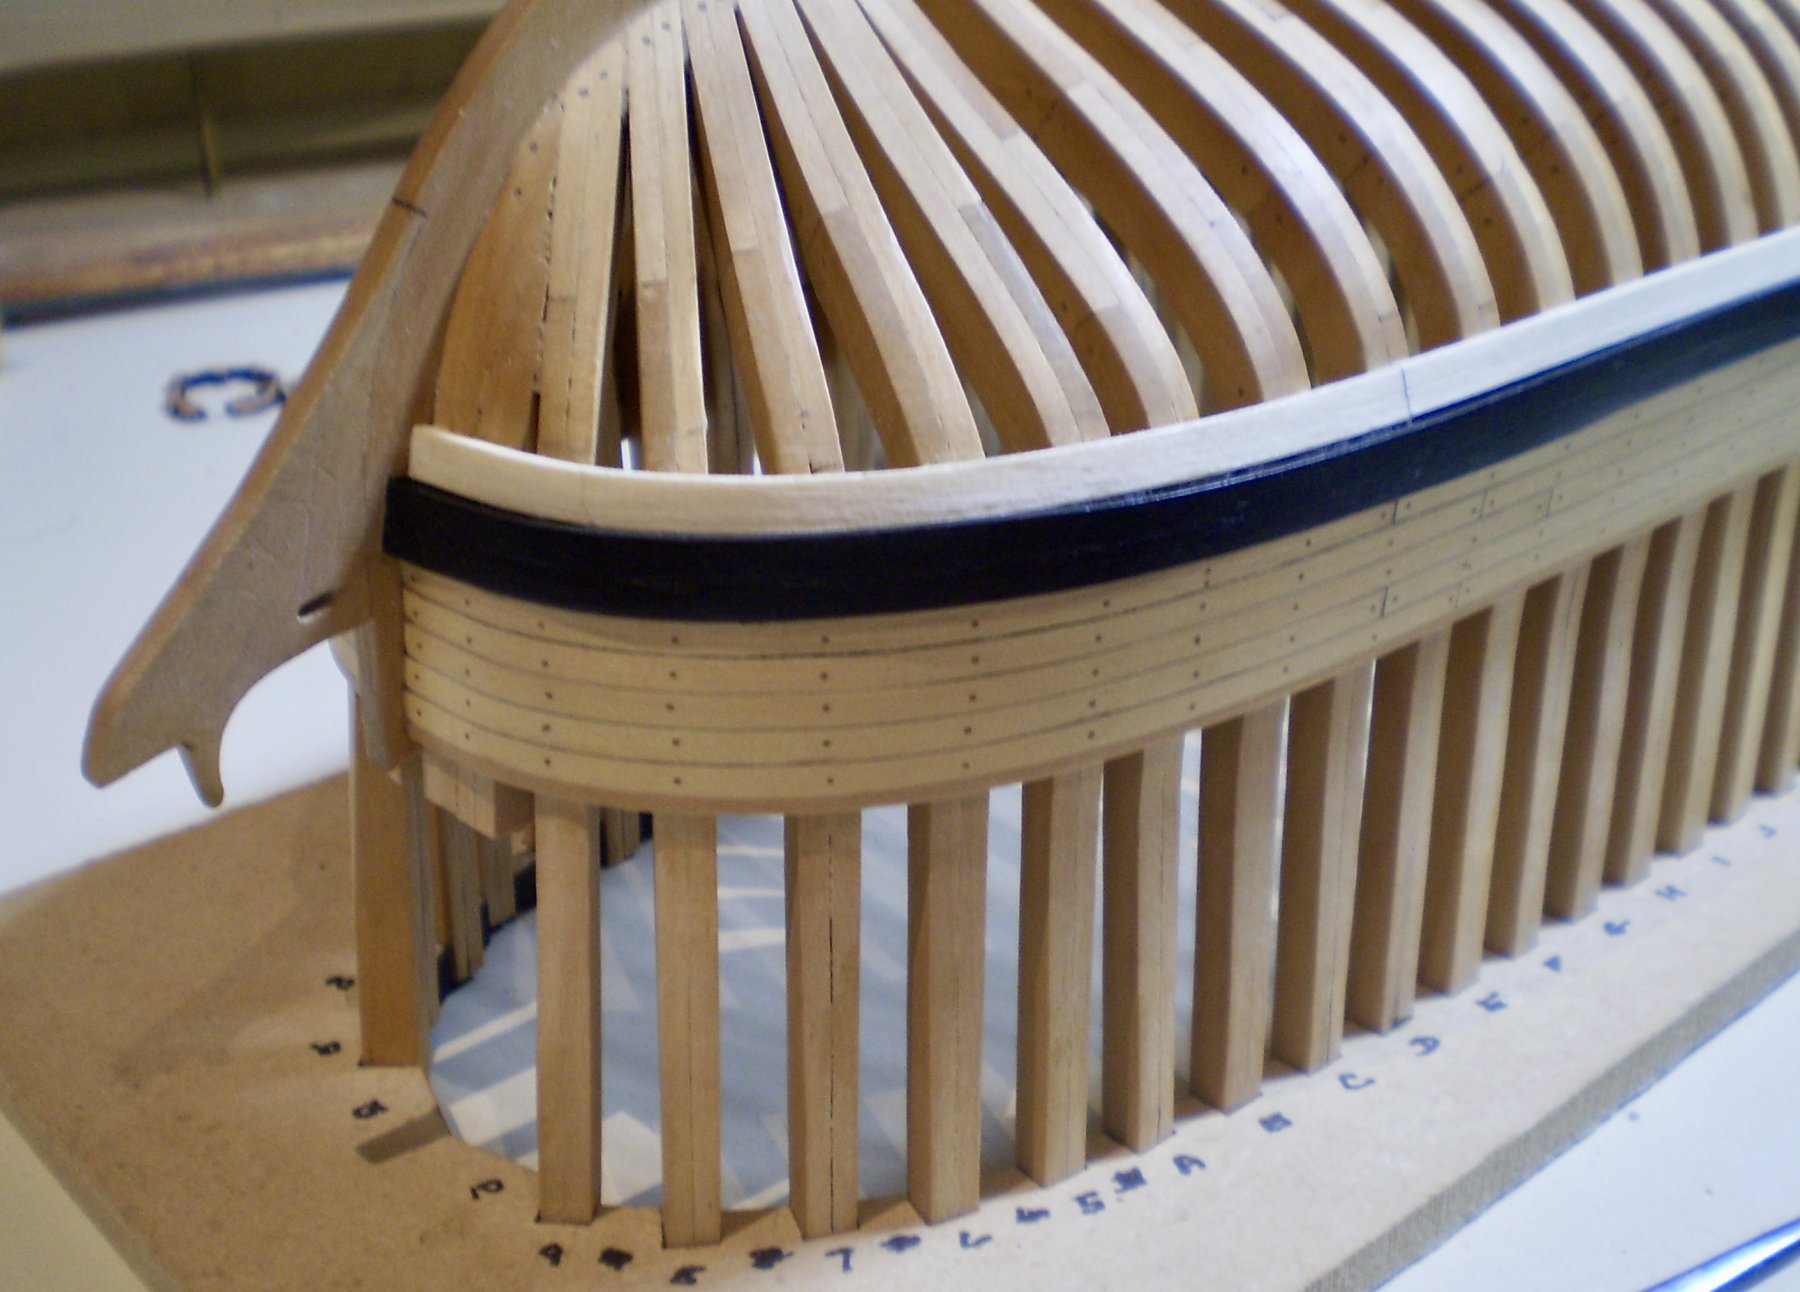
Before beginning the upper hull planking, I had one more task: framing the quarter window opening. I first cut down one of the aft frames and then added strip pieces to create the framing.
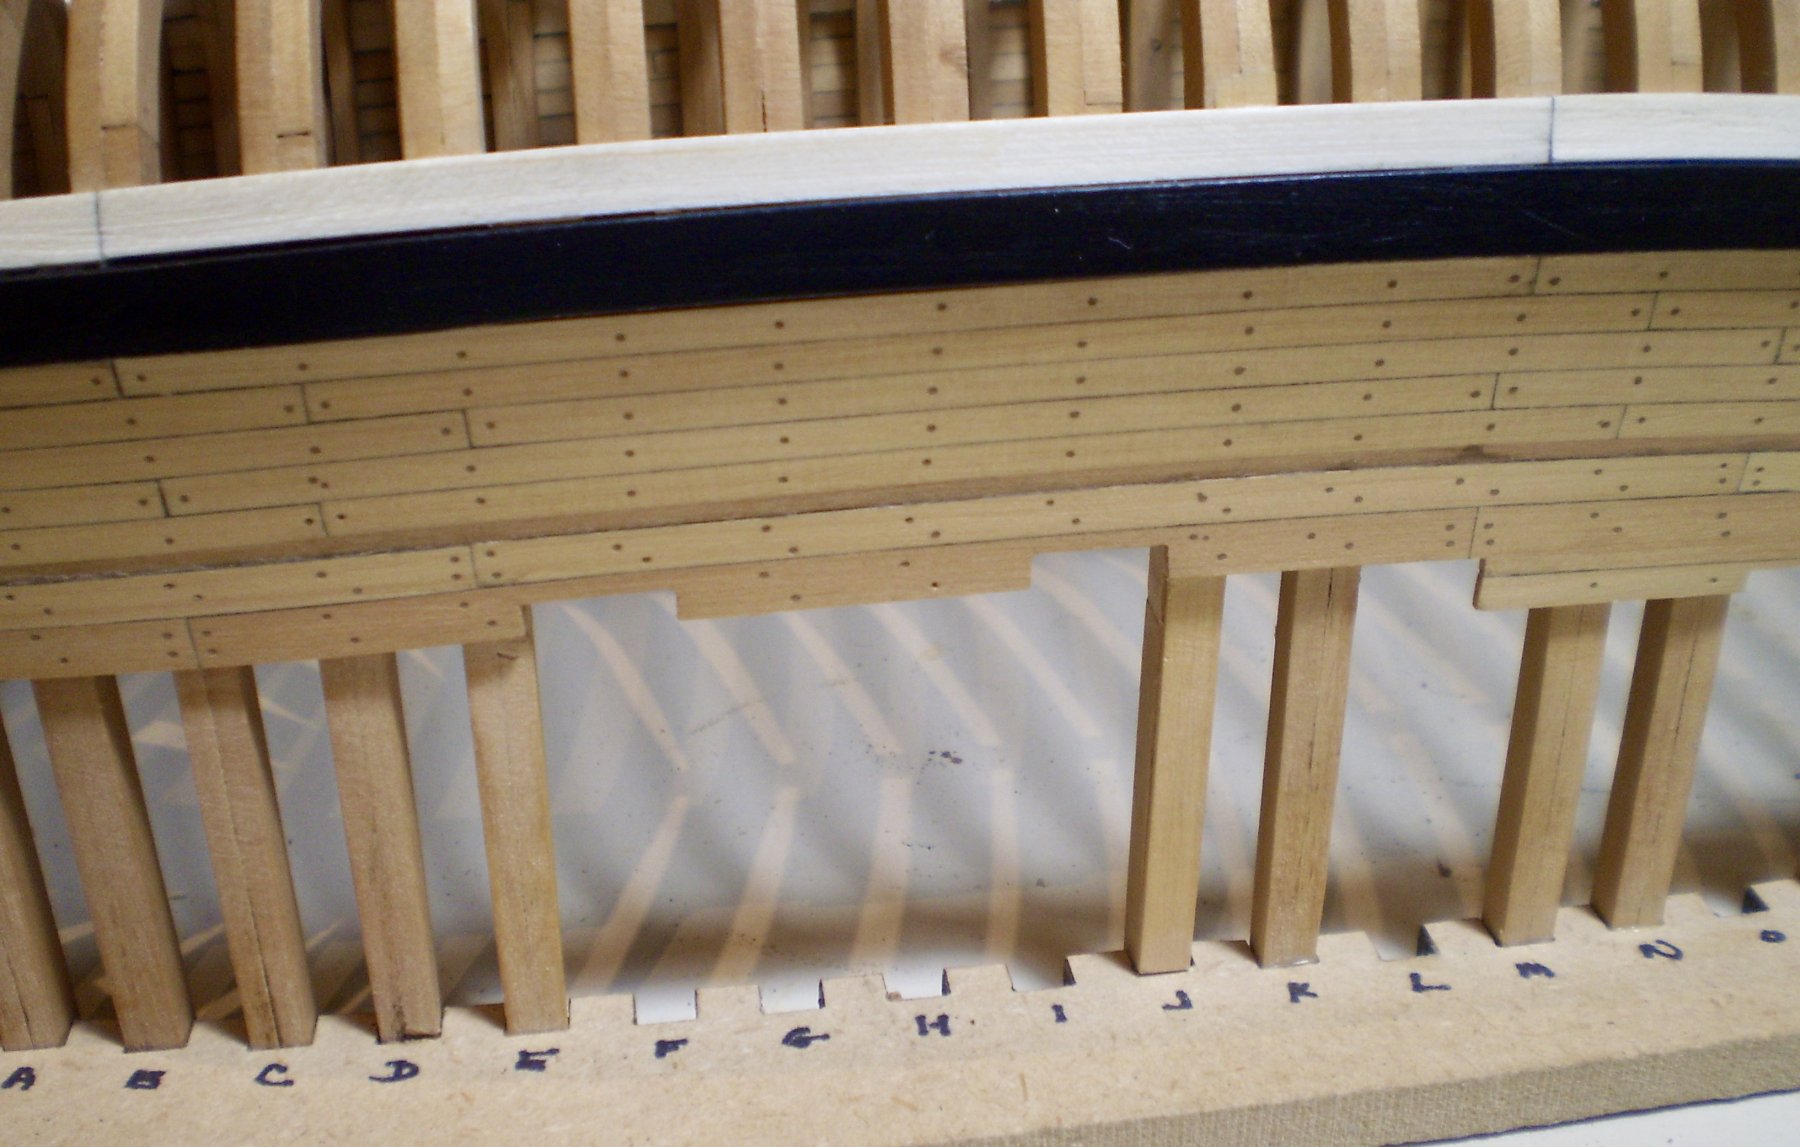
After that, it was on to the planking. The main belt consisted of five strakes of 1/8" x !/16" boxwood strip.I also added a 1/16" square strip as a base for the molding that will go above this planking belt. The good news was that the planks are of even width throughout their length and did not require tapering. The bad news was that the bow is extremely blunt and required compound curves to obtain a good fit. My method to do this was to first soak the planks in boiling water, then edge bend them and then use my old heated plank bending tool (an Aeropiccola product that I've had for decades) to make horizontal bends. Some beveling was employed where necessary to ensure tight fit. I used a carpenters pencil to simulate caulking on one side and one end of each plank and glued each in place using carpenters glue on each frame and the mating edges of each plank. I'm sure that some will laugh at my "clamping" method. I've always found it more difficult than useful to fit fancy clamps to planking, and rely on low tech "five finger clamps" (my hands) to hold the planks in place with pressure until the glue grabs sufficiently. After rough sanding, I drilled and filled for the "treenails", using a #75 drill and walnut filler. After final sanding, I applied a coat of Wipe-on Poly and touched up the black paint on the wales.
Now, it's on to the remaining planking.
Bob


-
Thanks so much Rusty, Dave and the "likes".
Dave, at this point it is my intention to do only the one holly strake.
Bob
- popeye the sailor, Elijah and Canute
-
3
-
-
Thanks so much Mike and the "likes".
Actually Mike, the planking that I'm doing is not too bad. I did do the wales in two layers to make the bending easier. I 've started the upper planking and it's going pretty well. I have to admit that at least some part of my decision to not plank one side of the bottom was based on the degree of difficulty that it might involve.
Bob
- Elijah, popeye the sailor, MEDDO and 3 others
-
6
-
-
Wonderful, Nils. The boats are just another example of your incredible attention to detail at this small scale.
Bob
- Piet, Mirabell61, cog and 1 other
-
4
-
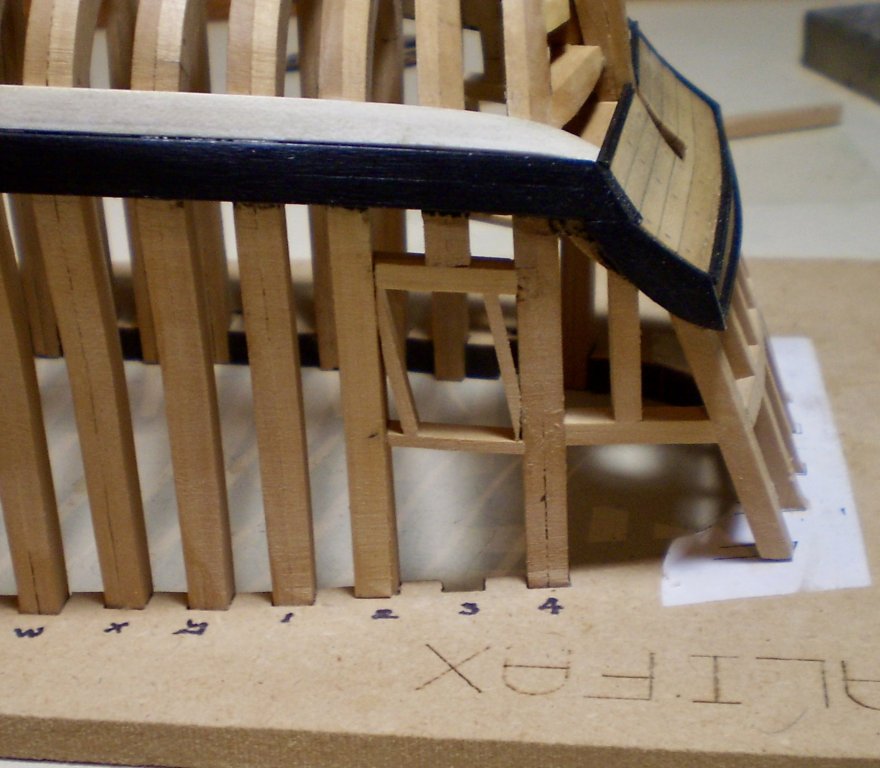
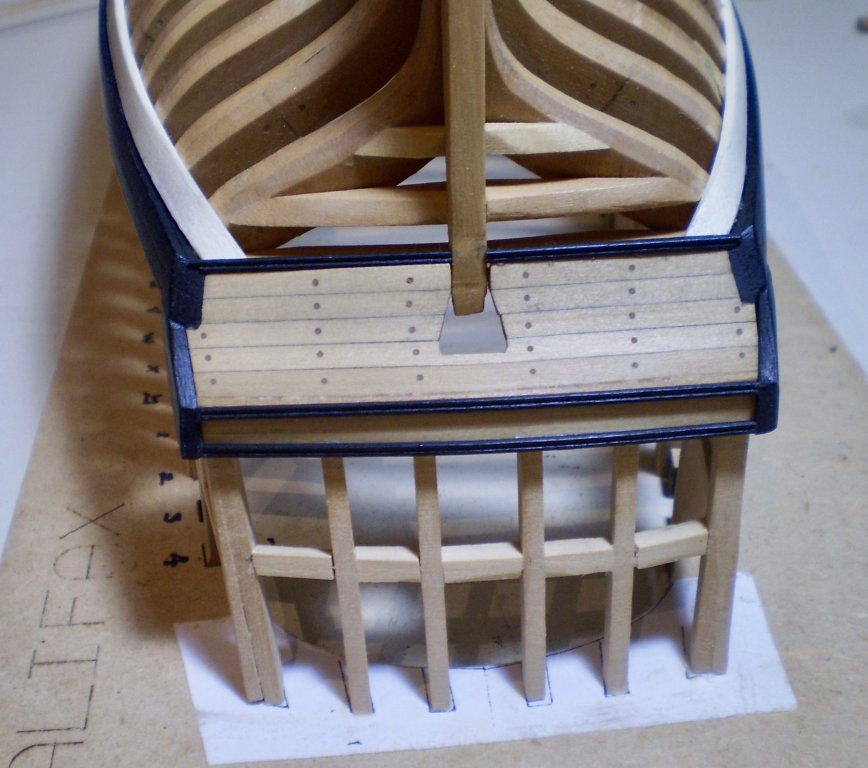
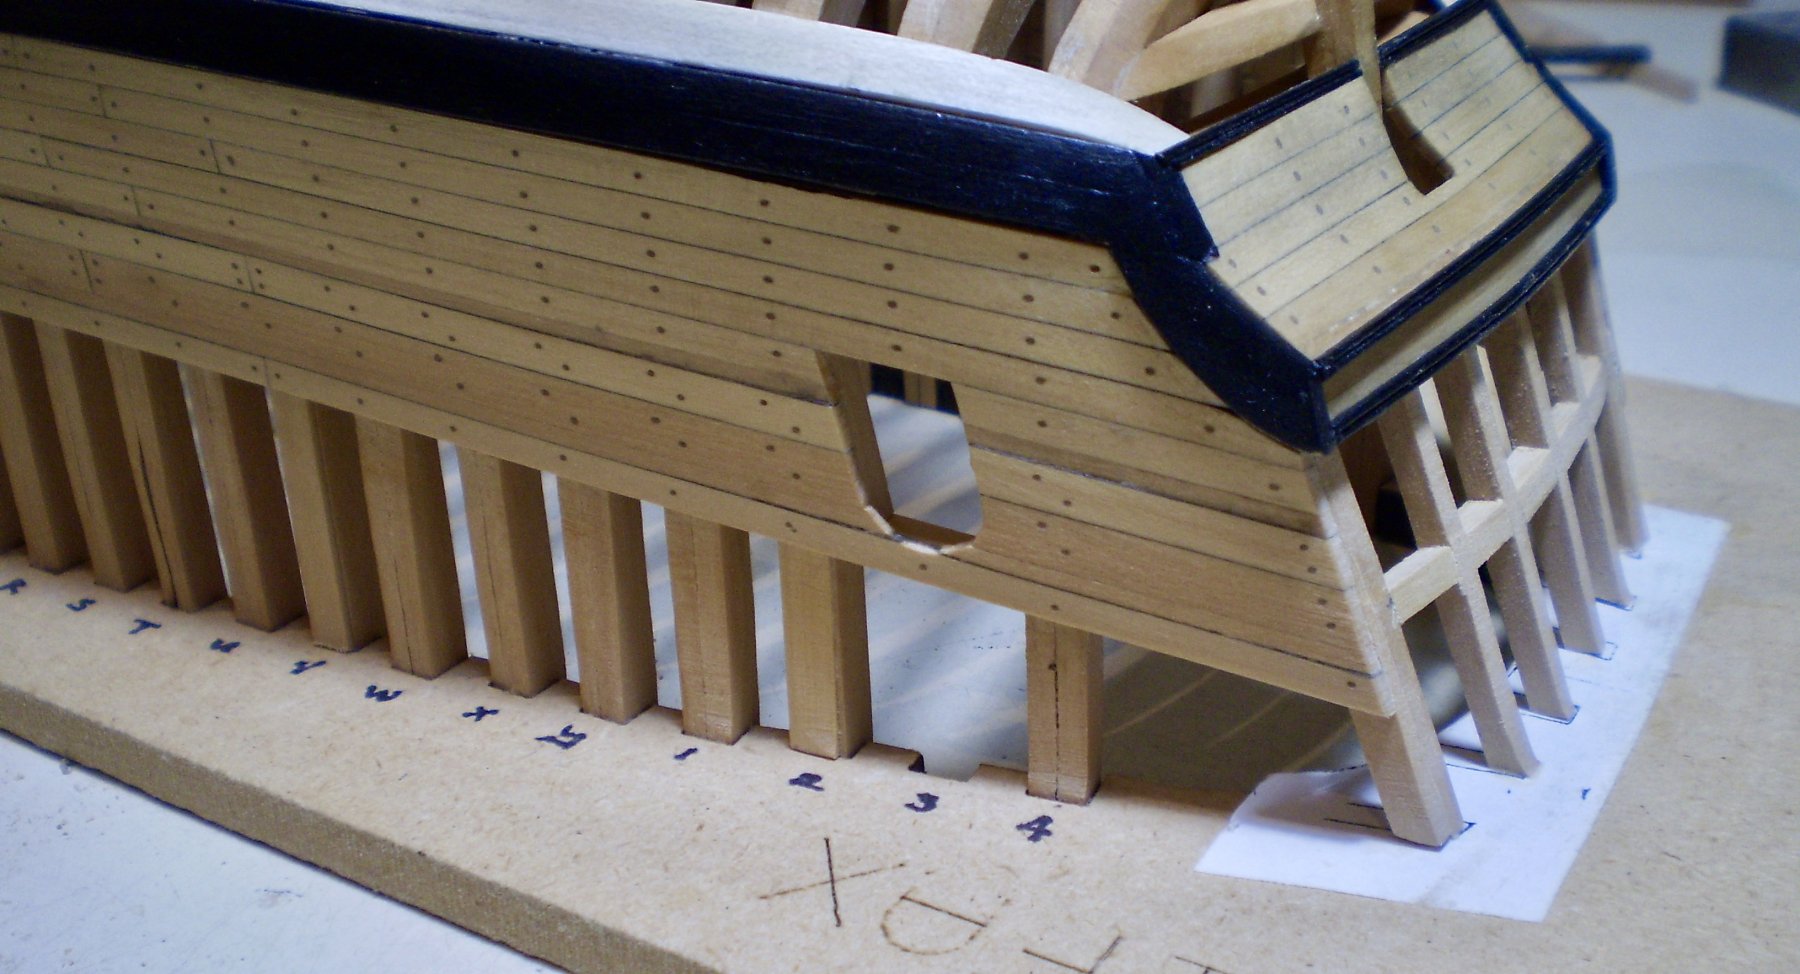
A number of things have been accomplished. First, I added the single strake of holly planking that I intend to have below the wales. Then, I made the fashion pieces that border the counter at the stern. These were cut from boxwood sheet and sanded to shape to fit. They were painted black and mounted. Next, I added black painted moldings to the lower and upper counter. Lastly, I applied a coat of Wipe-on Poly to the counter and the lower hull from the wales down.
Next up will be the planking above the wales.
Bob

-
-
She looks great Mike. Terrific work.
Bob
- Stuntflyer, Jack12477, Canute and 2 others
-
5
-
-
-
Thanks so much Albert, B.E. and the "likes".
Why do the frames B.E., if you're not going to let them show.

")
Bob
-


Halifax by rafine - FINISHED - The Lumberyard - 1:48 - semi-scratch schooner
in - Kit build logs for subjects built from 1751 - 1800
Posted
Thanks so much Thomas, John and the "likes".
Bob