


rafine
-
Posts
2,932 -
Joined
-
Last visited
Content Type
Profiles
Forums
Gallery
Events
Posts posted by rafine
-
-
Thanks so much Denis and the "likes". I hope you're right about the fairing Denis, but I'm guessing there will be more than you think .

Bob
-
Great choice to replace the kit parts Jason and a great start on the replacement parts.
Bob
- cog, mtaylor and Beef Wellington
-
 3
3
-
-
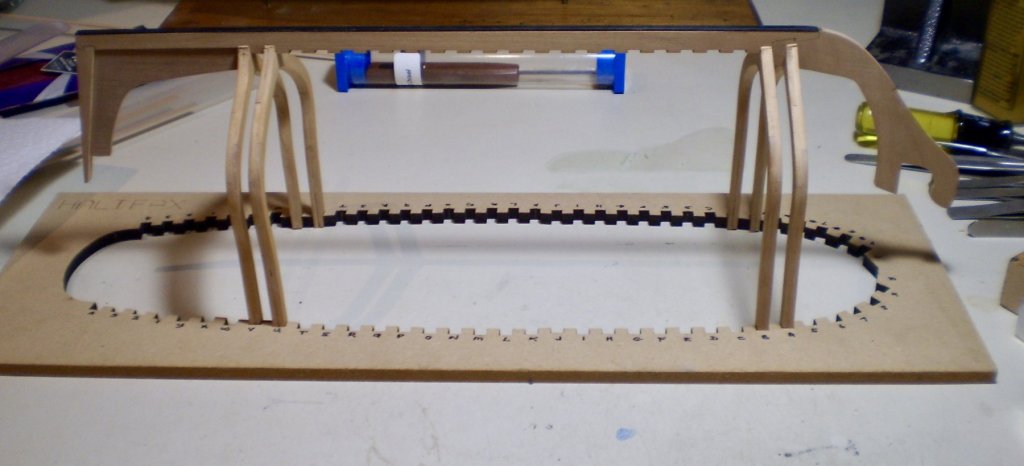
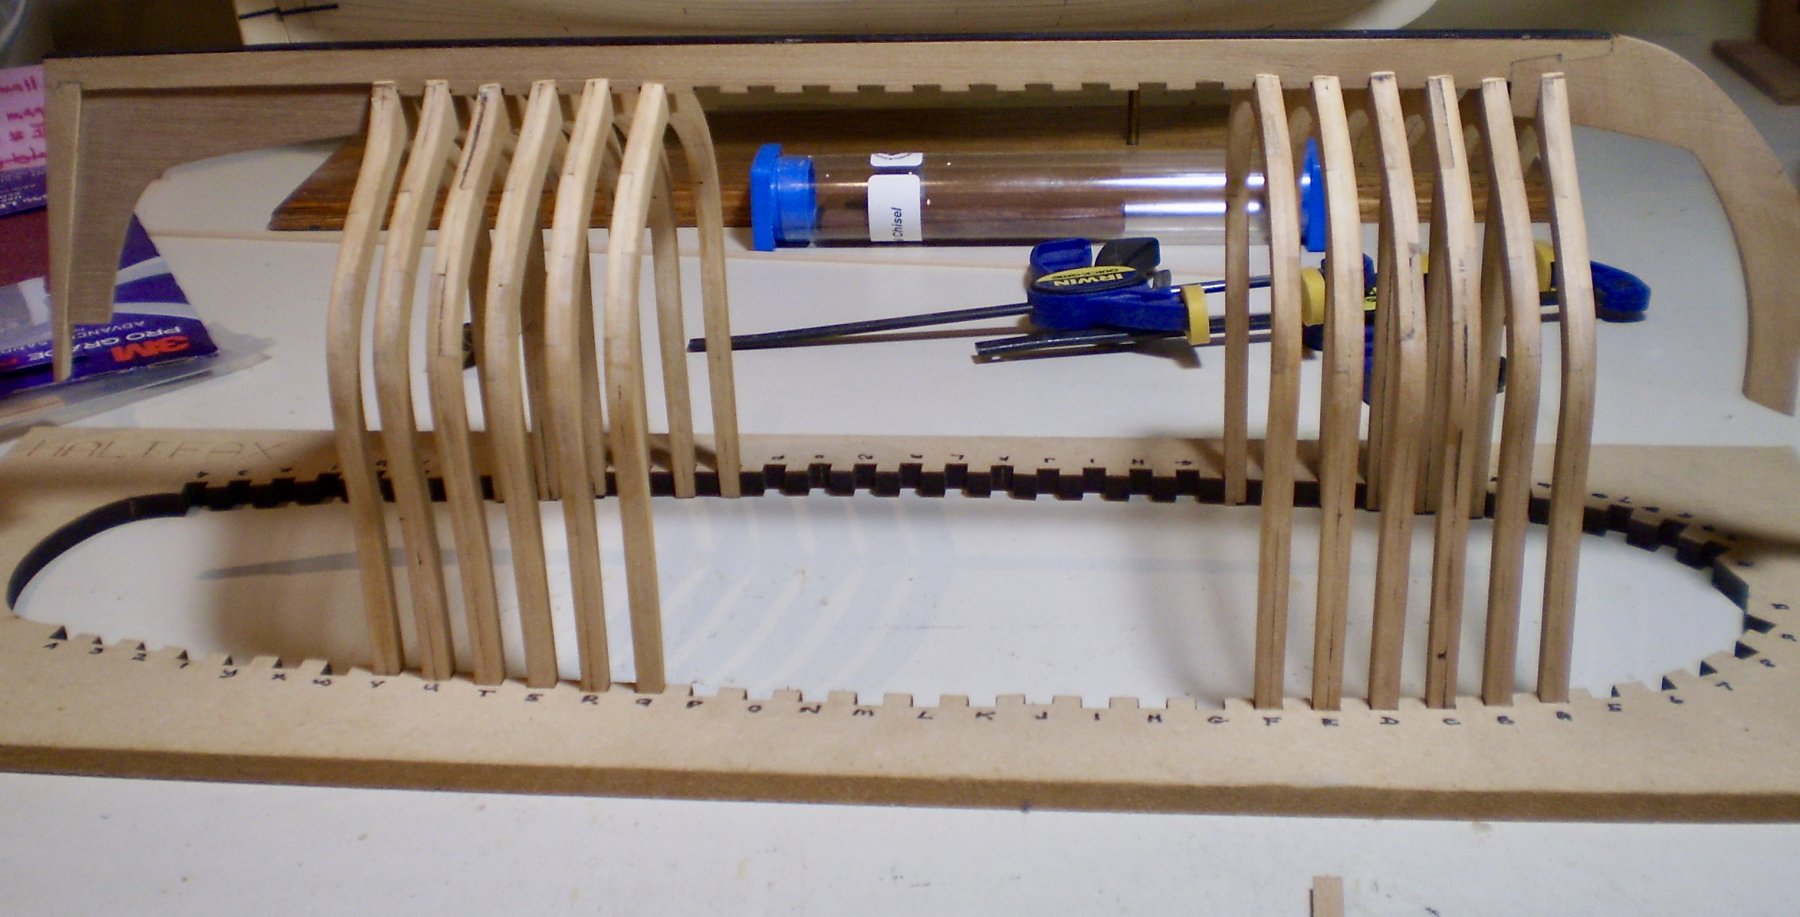
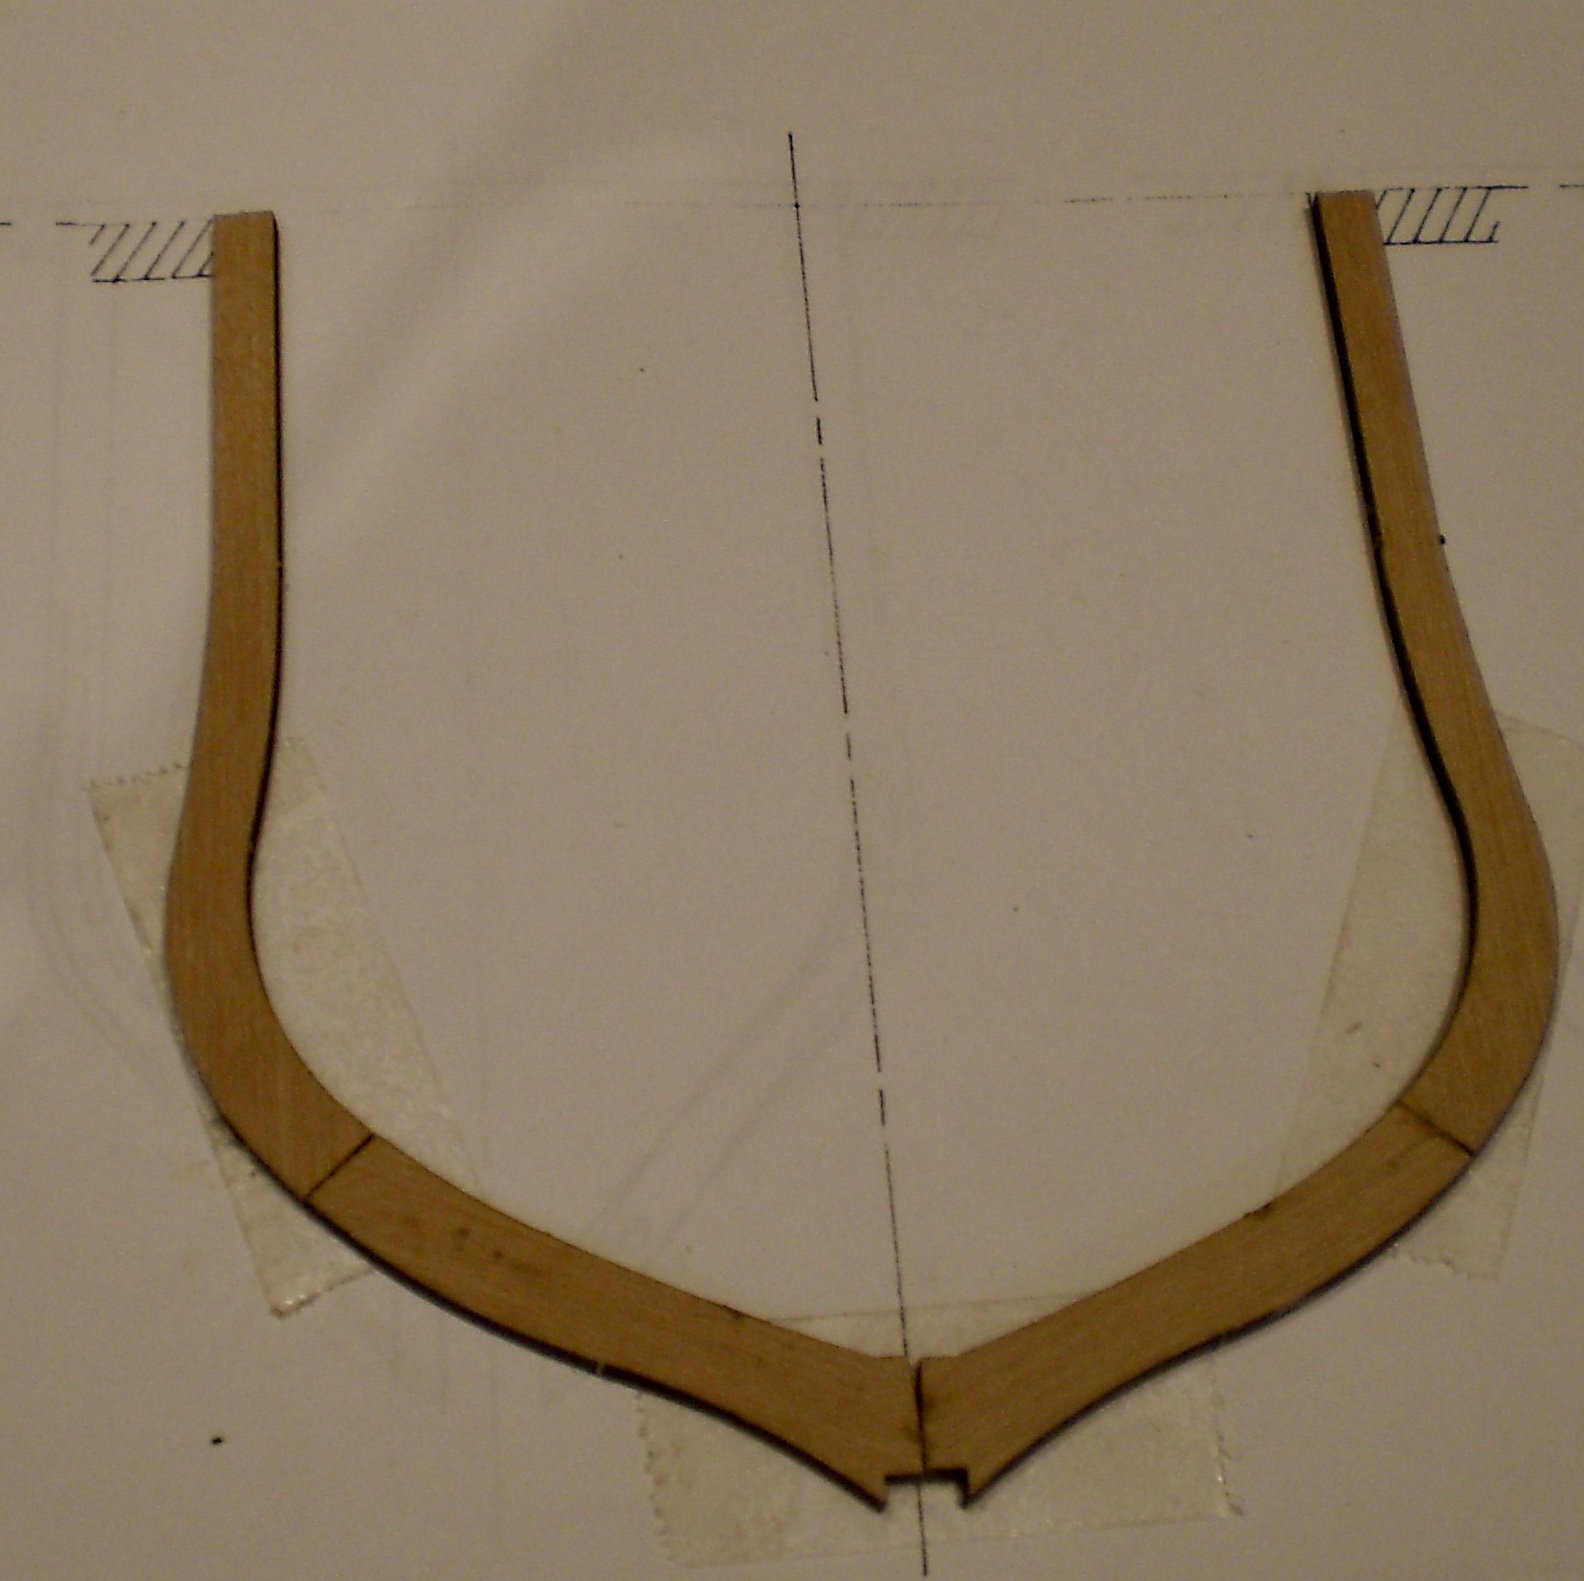
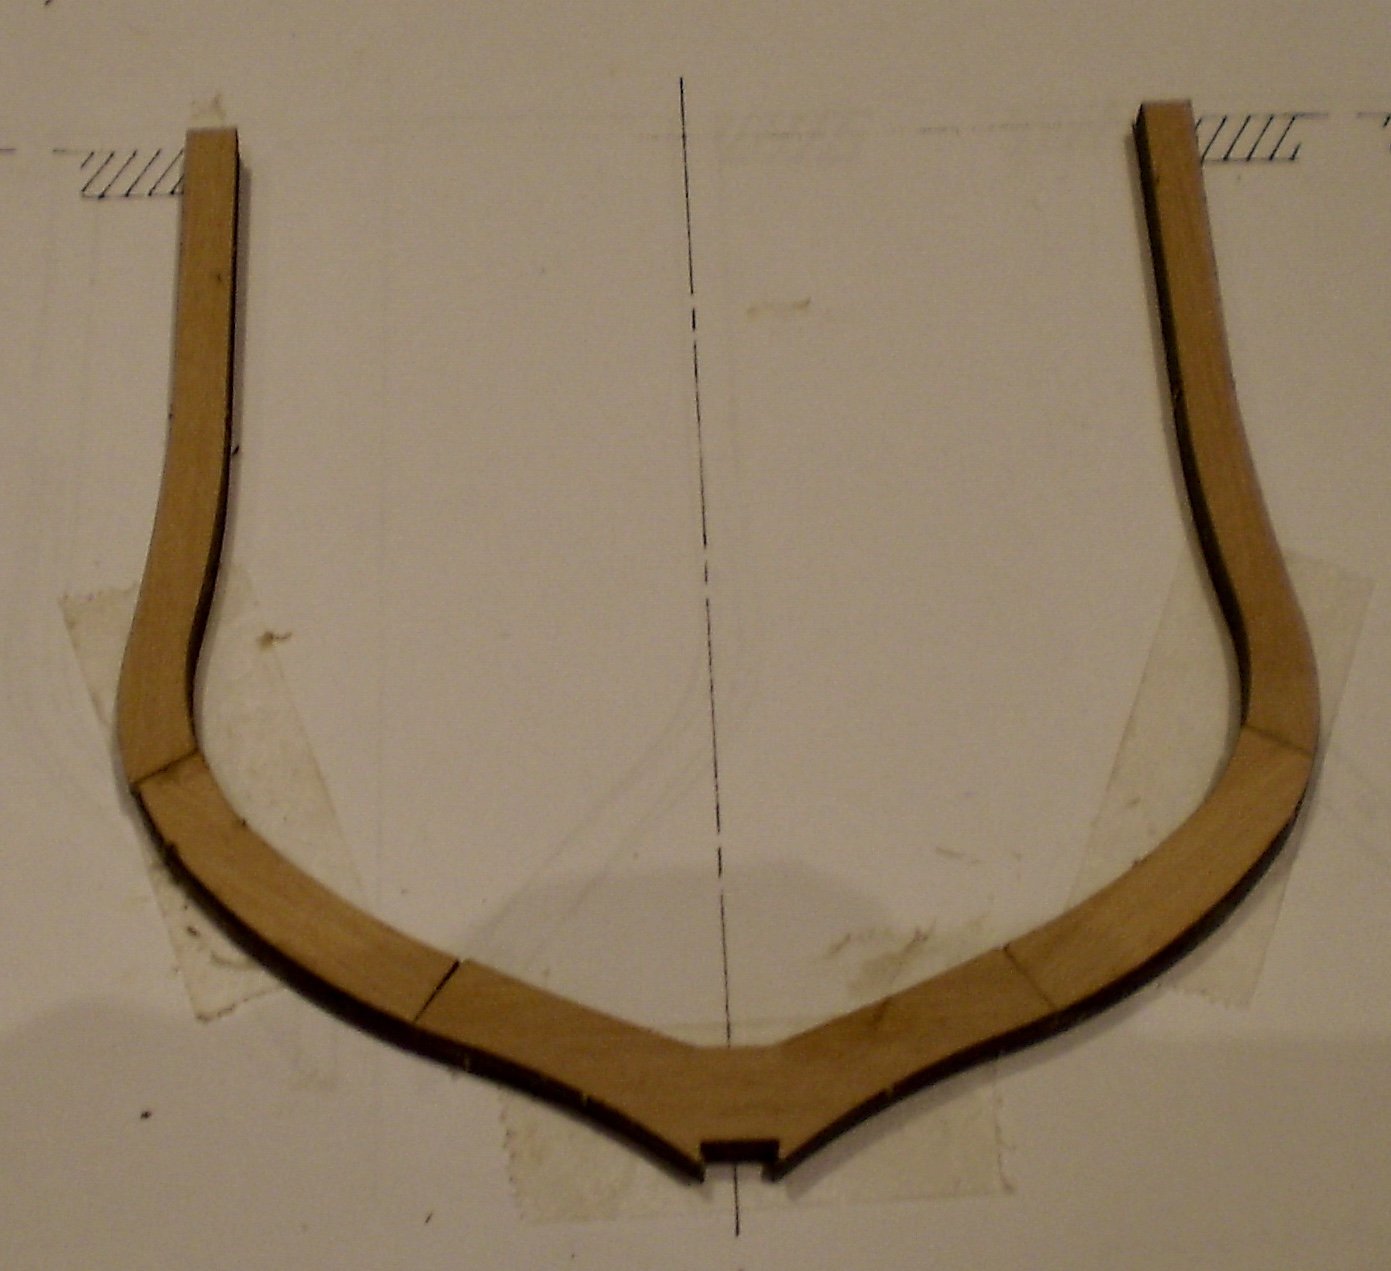
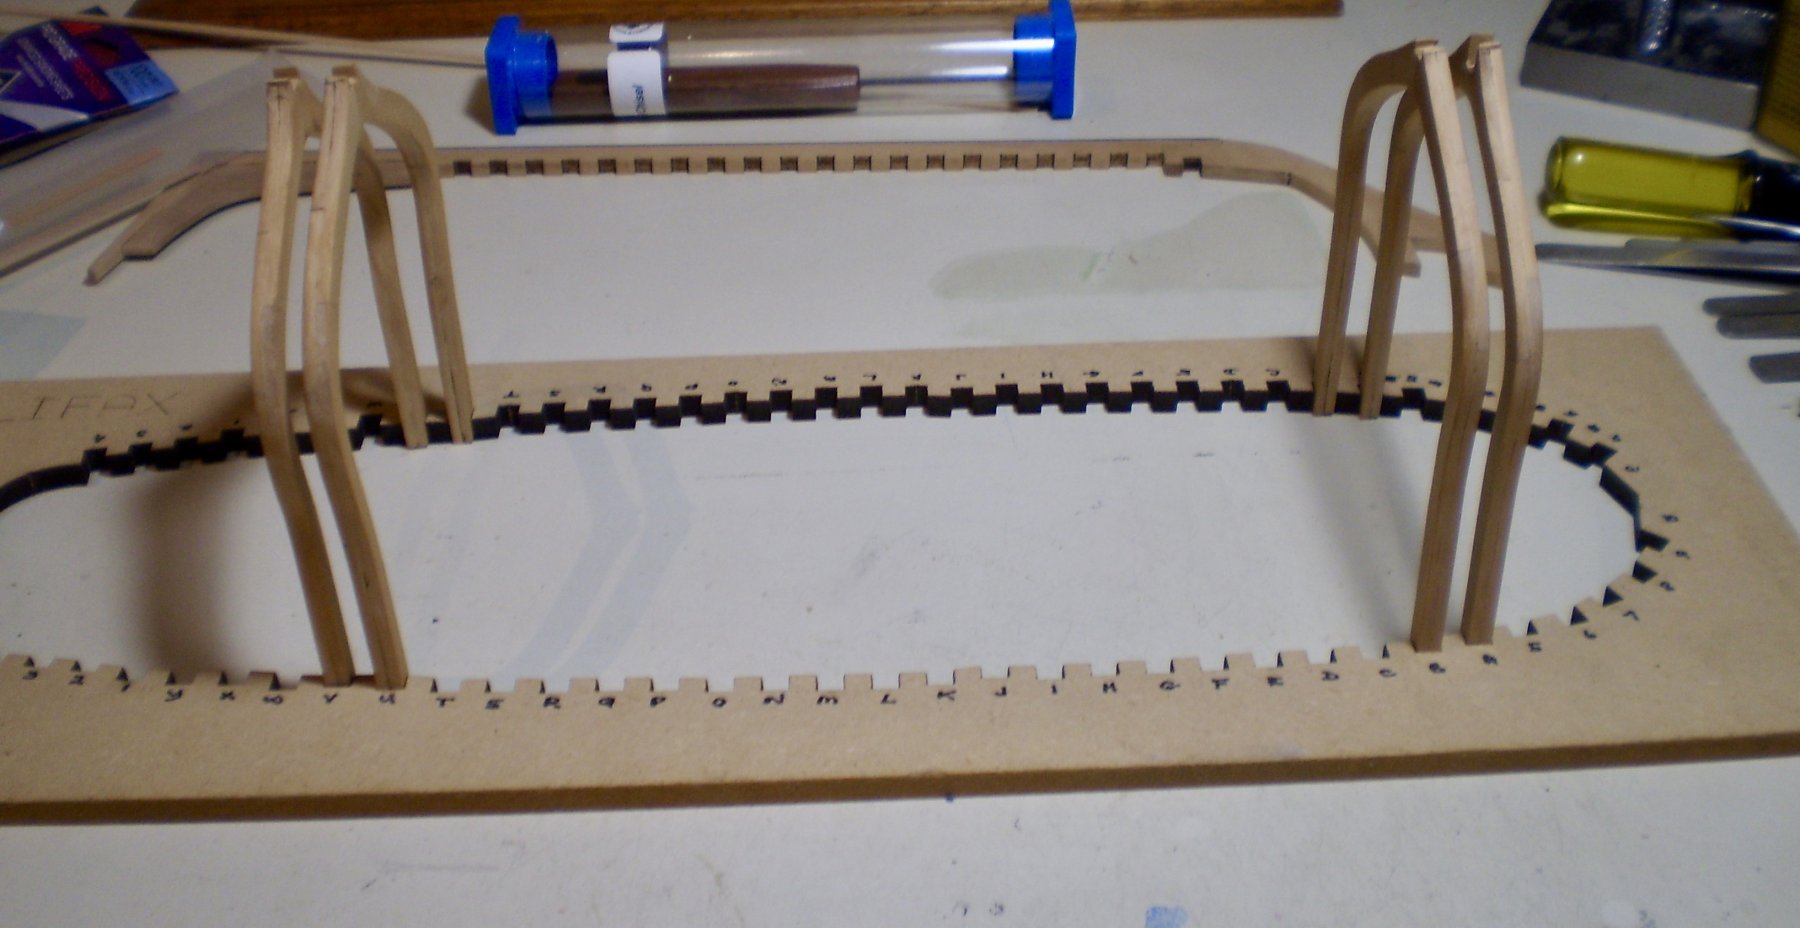
A small update. I'm making and mounting the full frames at the rate of about one per day, following the procedures previously set out. At this point, twelve full frames have been set, and ten more remain. After that, I will move to the half frames at bow and stern.
Bob
-
-
Thanks so much Thomas, Nils and the "likes". So far, I'm pleased. The fun of a POF build without some of the drudge work.
Bob
- Martin W, Elijah, Mirabell61 and 1 other
-
4
-
-
-
Thanks so much Rusty. Greatly appreciated.
Bob
- Canute and popeye the sailor
-
2
-
Thanks so much Don, Denis, John, Carl, Michael and the "likes".
Don, I have to admit that it was less a matter of pre-planning than some trial and error on the first couple of frames that led to the seemingly organized sequence.
")
Carl, the keel will be glued in place after the full frames are completed. This is how Hahn shows it in his book.
Michael, since the keel is used to insure proper positioning after every couple of frames, the effect is the same, but without having to maneuver the frames between the jig and keel to get them mounted. BTW, judging from your results on Halifax, you wouldn't have had any problem, however you went about it.
Bob
-
While I understand the reasons given for leaving masts unglued, my personal preference is to glue them in place. I would rather have the stability of a permanently mounted mast. Proper tensioning of rigging is difficult enough without having to worry about the mast moving about.
Bob
- mtaylor, md1400cs, John Allen and 3 others
-
6
-
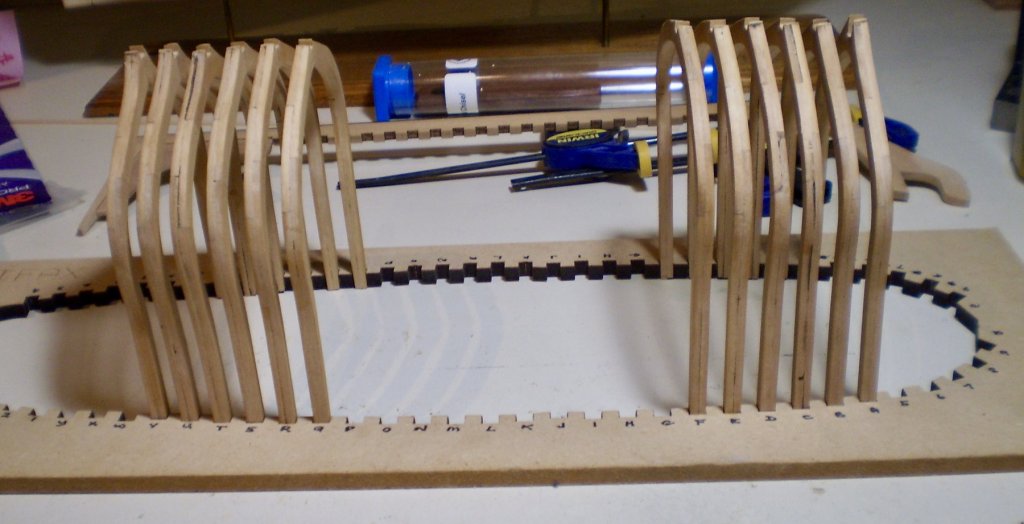
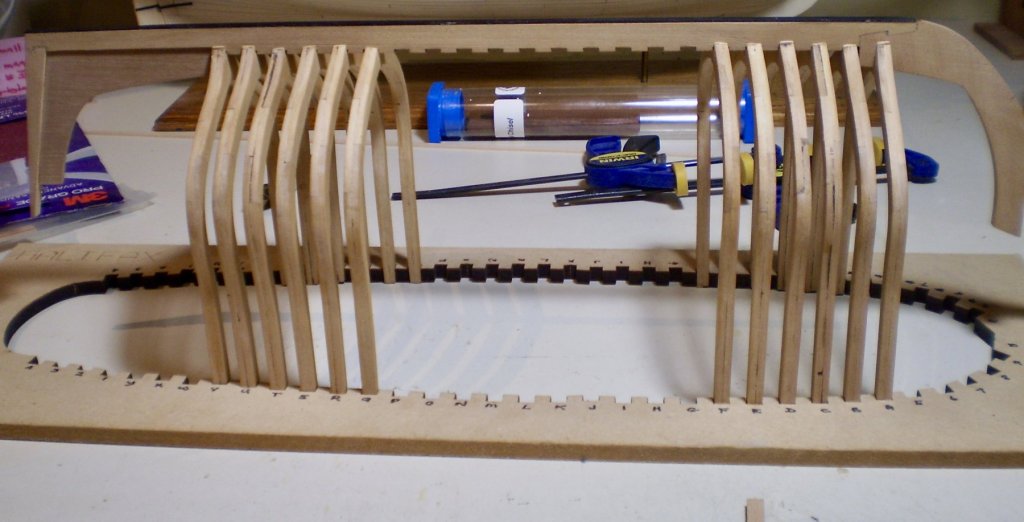
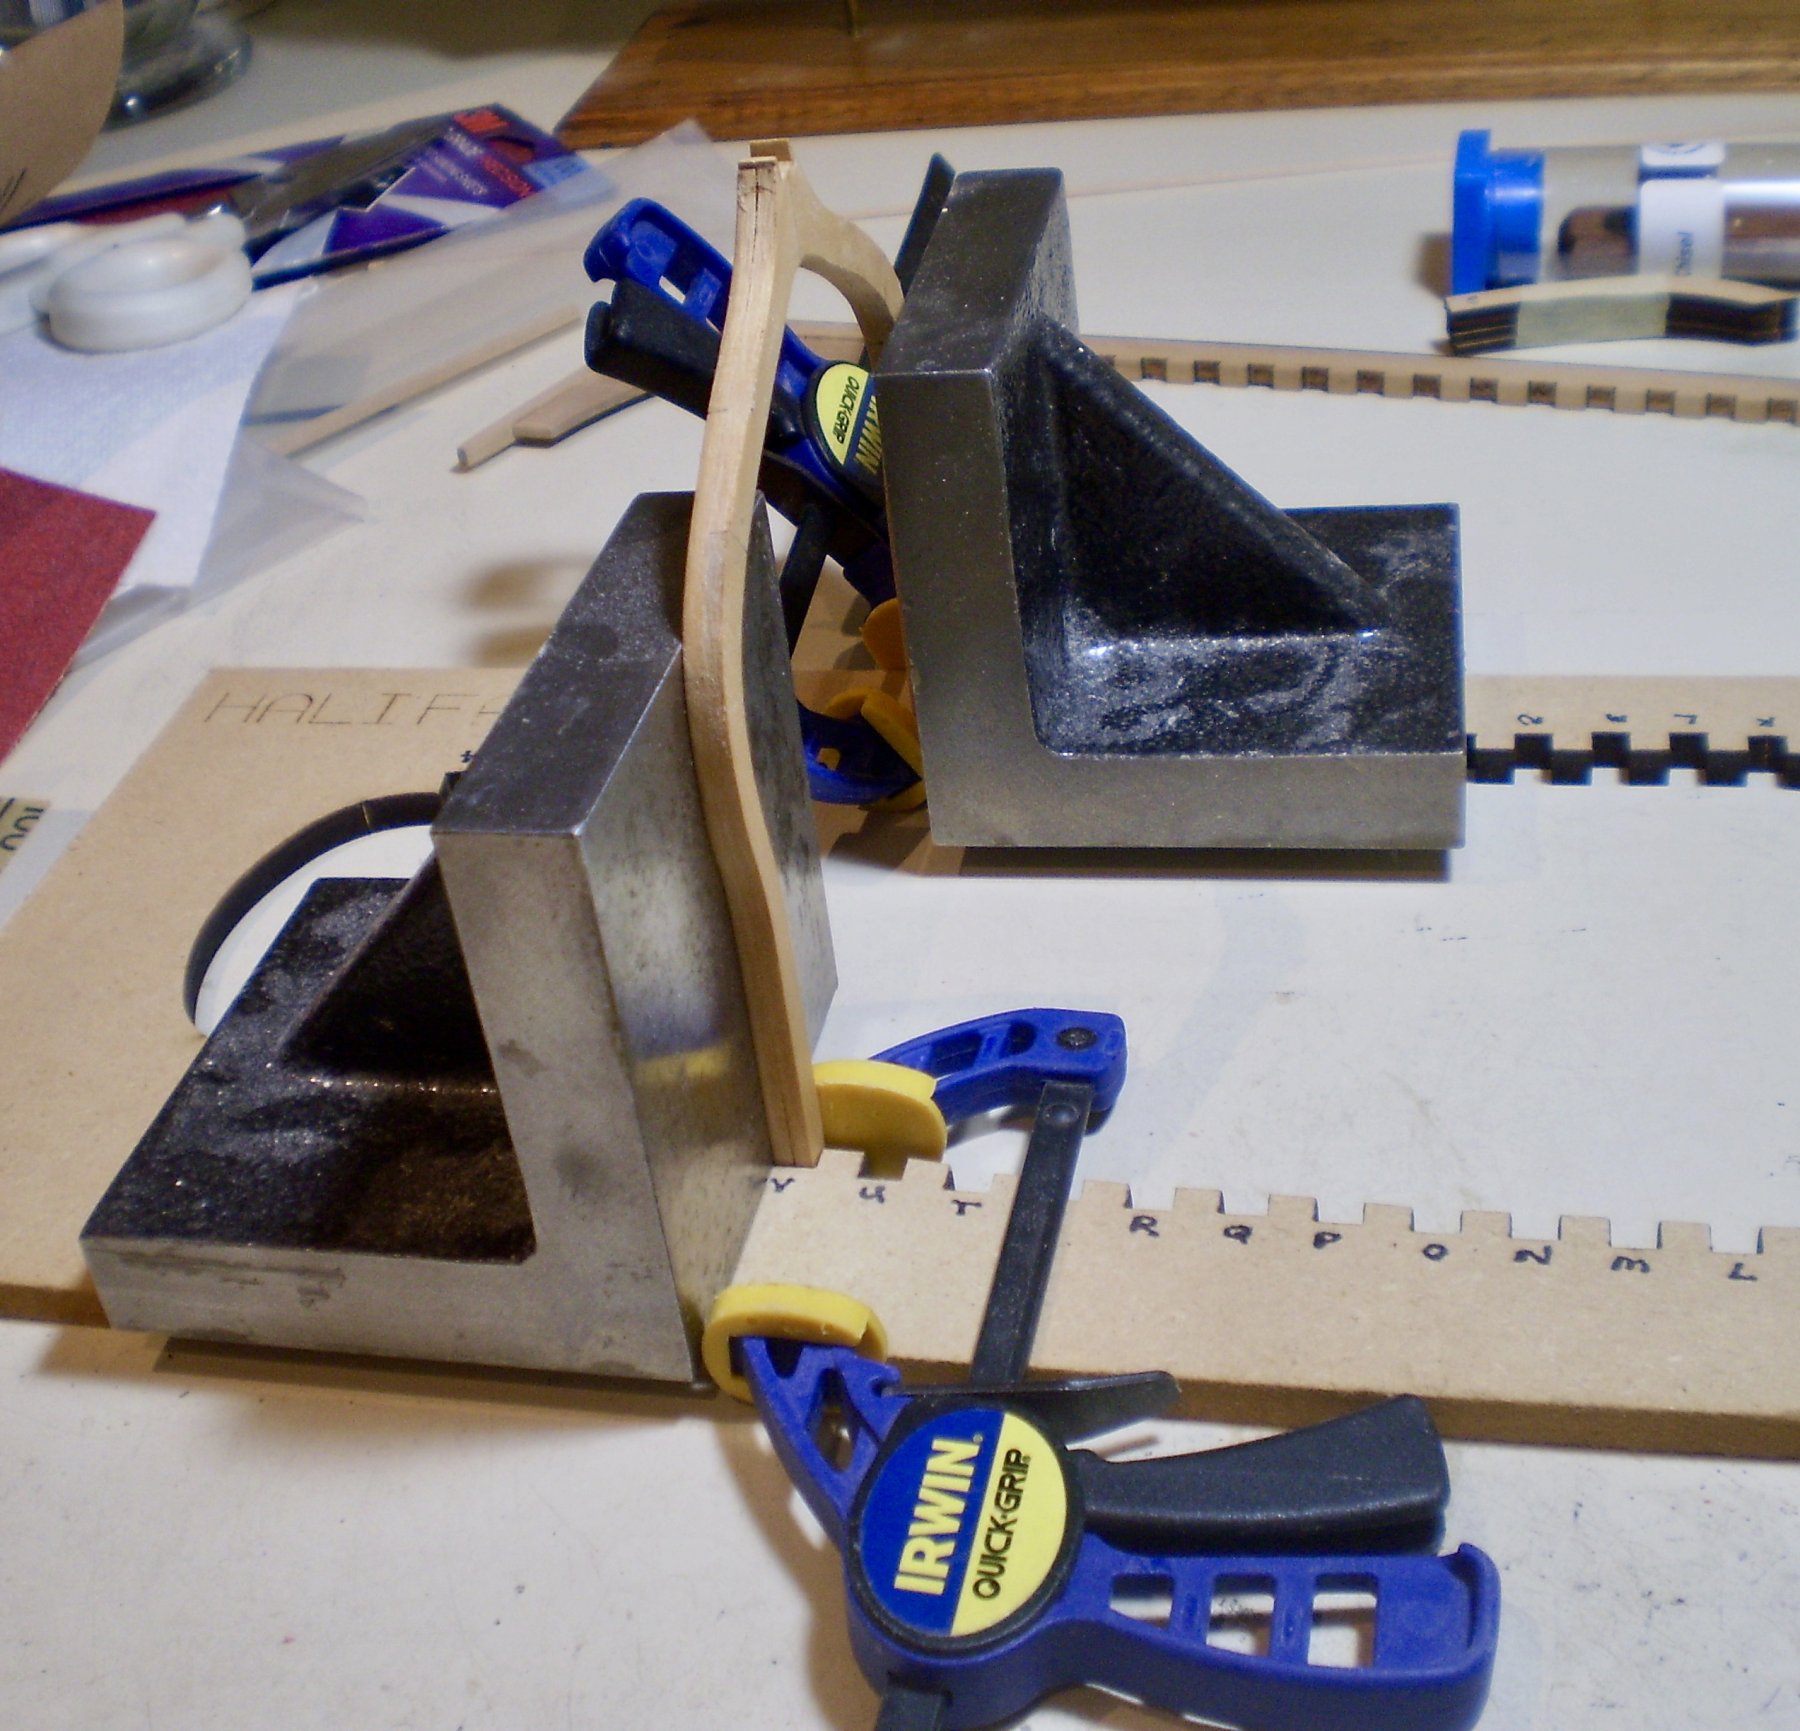
Time to get started on the frames. I've settled on the following procedure for doing them:
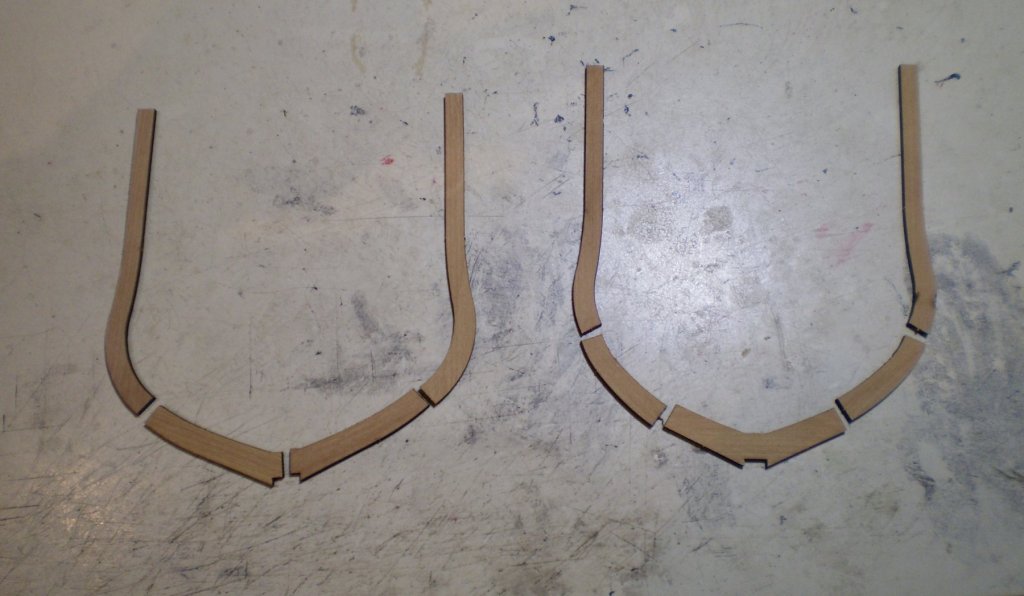
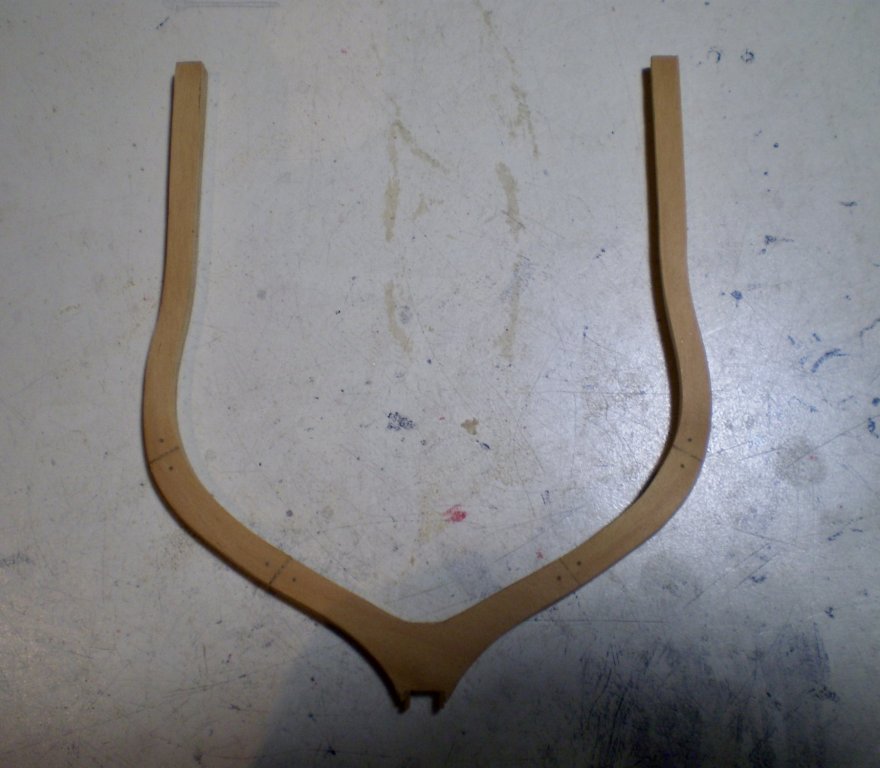
1) Remove the 9 parts for a frame from the laser sheet
2) Remove the laser char from the joints between futtocks
3) Using double sided clear tape, attach one layer of parts to the plan sheet for that frame, with the joints glued
4) Glue the second layer of futtocks on top of the first
5) Sand the faces of the frame until there is a fit to both the keel and the jig
6) Fill any joints, as necessary, with filler made of sanding sawdust and glue
7) Use strip wood to make any adjustment necessary to the keel notch on the frame
8) do some preliminary fairing to both the outside and inside edges of the frame
9) Treenail the futtock joints using the "drill and fill" method
10) Apply Wipe-on poly to the faces of the frame
11) Glue the frame into the appropriate jig notch using clamps to hold it in place and a straight edge to keep it square
12) Use the keel to insure proper fit and spacing after each pair is set at opposite ends
I've completed two pairs of frames now and so far, so good. The good news has been that using the laser cut pieces is a whole lot easier than cutting them all out by hand. The parts also fit the drawings fairly well. The not so good news is the amount of work necessary to get a snug fit to the keel. Also, as I feared, the frame drawings and parts don't match up to the jig exactly, causing some need for further tweaks. All in all, I'm pretty satisfied with how it's going to this point.
Bob


-
-
-
-
The other side of the coin is that having done it early on, I didn't get the benefit of that correction. Now, looking at mine, I'm thinking that the yards look too long.
Bob
- Stuntflyer, Canute, Erik W and 1 other
-
4
-
-
Thanks so much CaptMorgan. I'm now working on the schooner Halifax. A build log has been started under kit builds.
Bob
- mtaylor, popeye the sailor, Canute and 1 other
-
4
-
-
Thanks so much Captain Poison and Zoltan.
Bob
- popeye the sailor, Canute and mtaylor
-
3
-
Thanks so much JP.
Bob
- mtaylor, popeye the sailor and Canute
-
3
-
Grant, there will always be a front row seat for you.
Michael, I originally received the resin parts, but remembered that they used to do laser cut wood and asked Ev at Lumberyard if they still had them.
Glad to have you aboard, Anja and Steve.
Good question Mark. The frame parts seem to match up to the drawings, so it's hard to know where the problem lies or how it will impact the build.
Bob
- Canute, popeye the sailor, Anja and 4 others
-
7
-
A truly beautiful and impressive piece of work Sjors. You have every reason to feel proud of your accomplishment.
Bob
- Hennie, popeye the sailor, mtaylor and 3 others
-
6
-
Once again, welcome aboard to all. your interest is always appreciated.
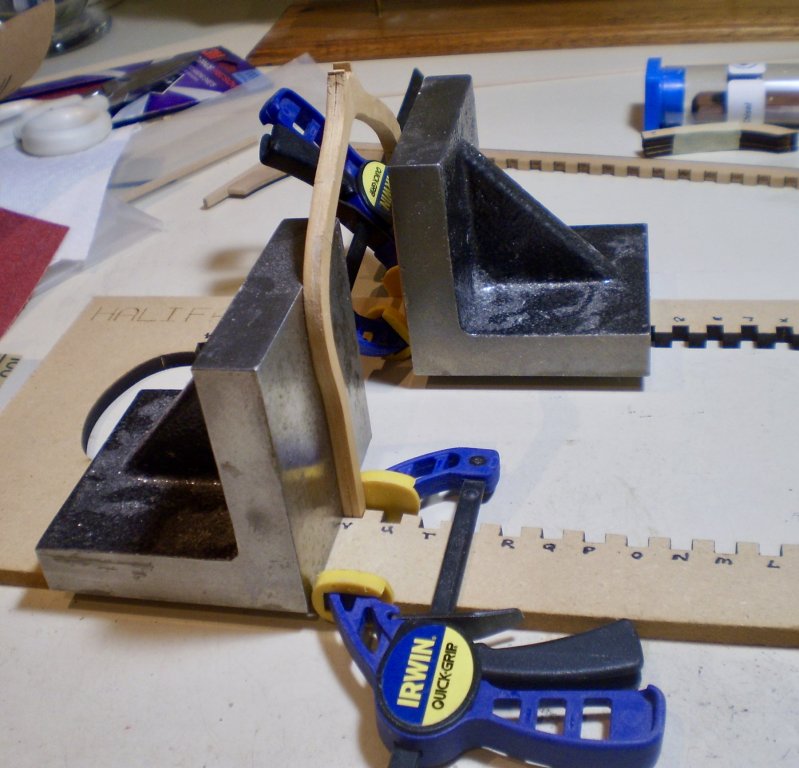
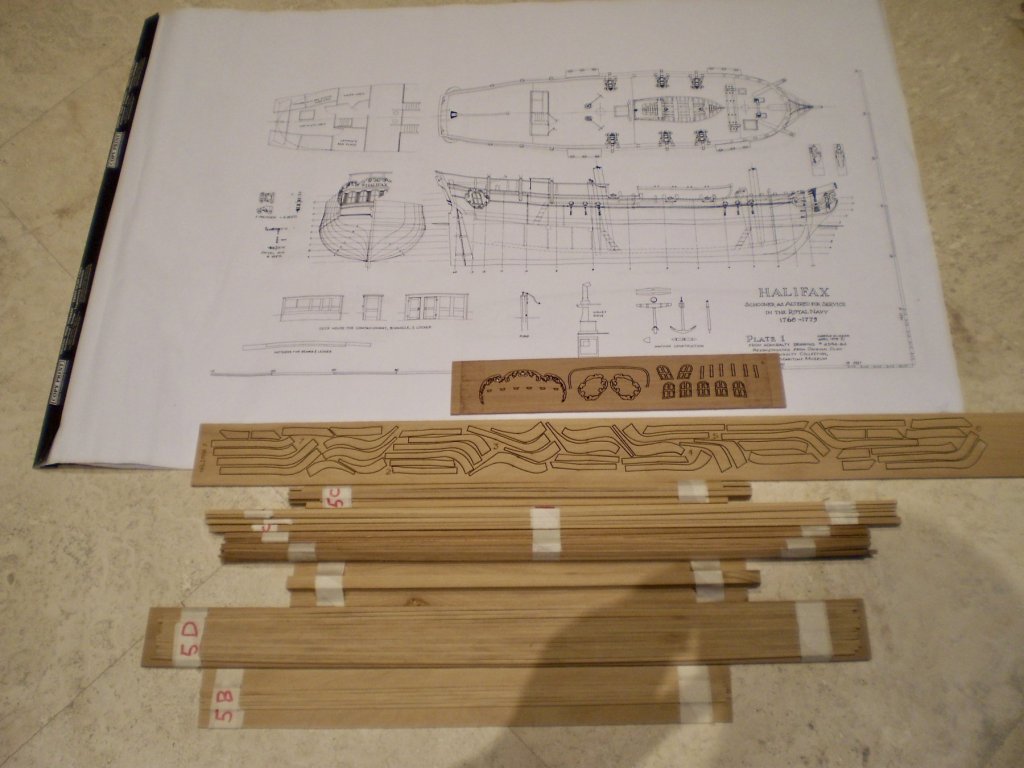
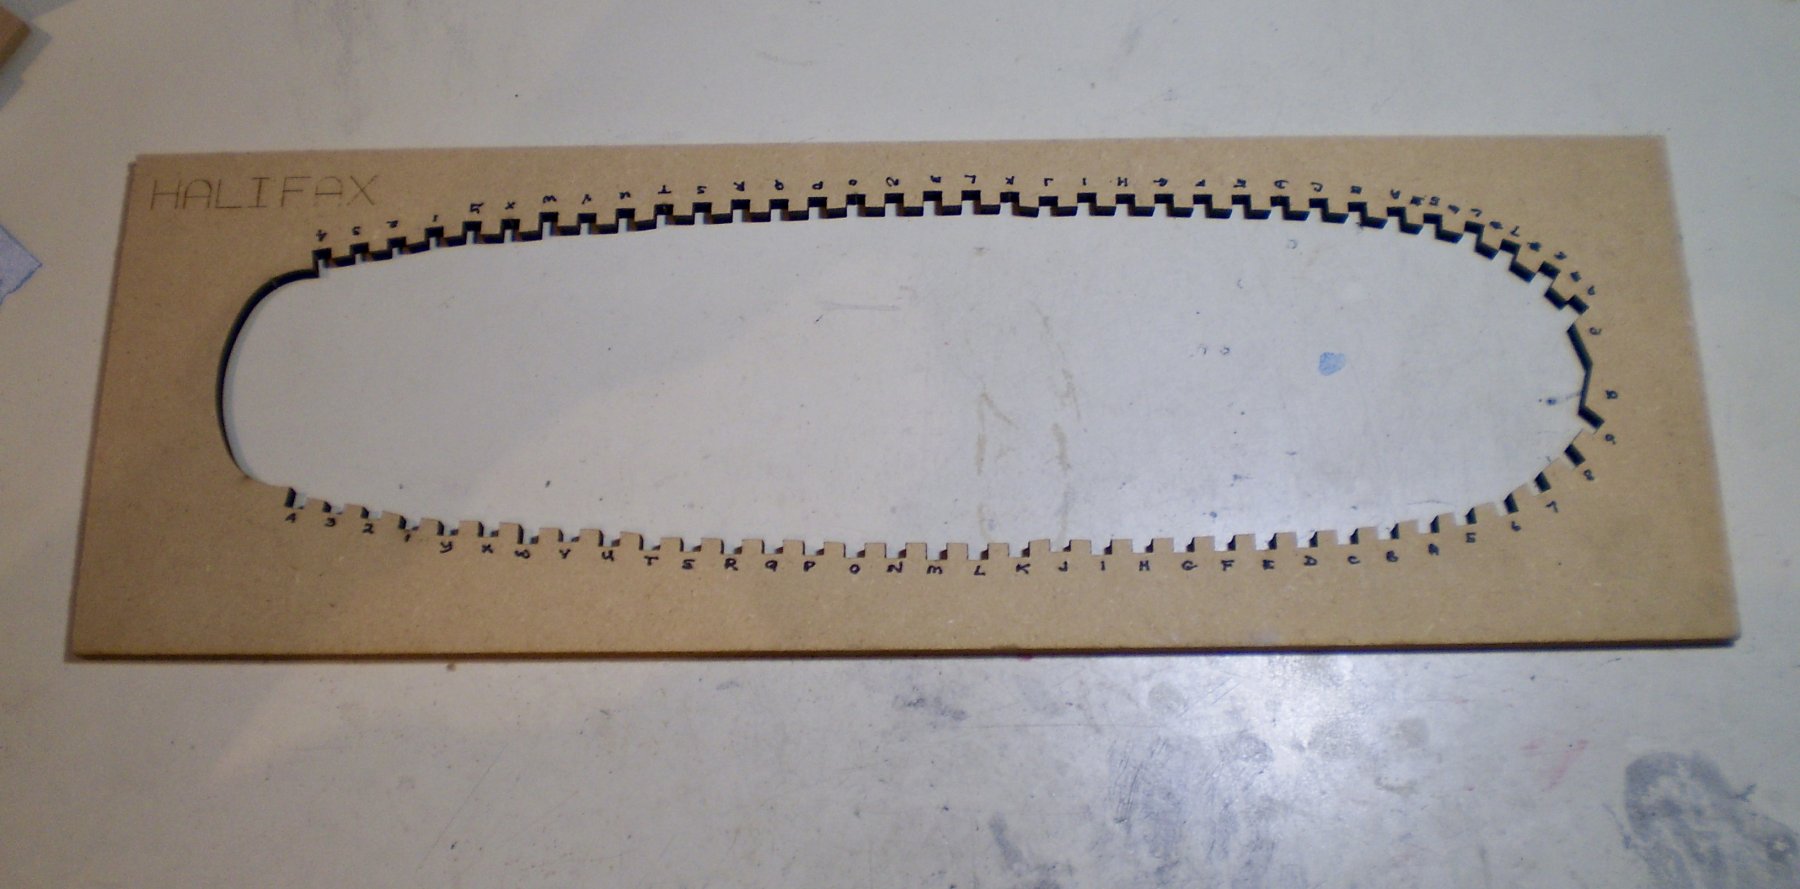
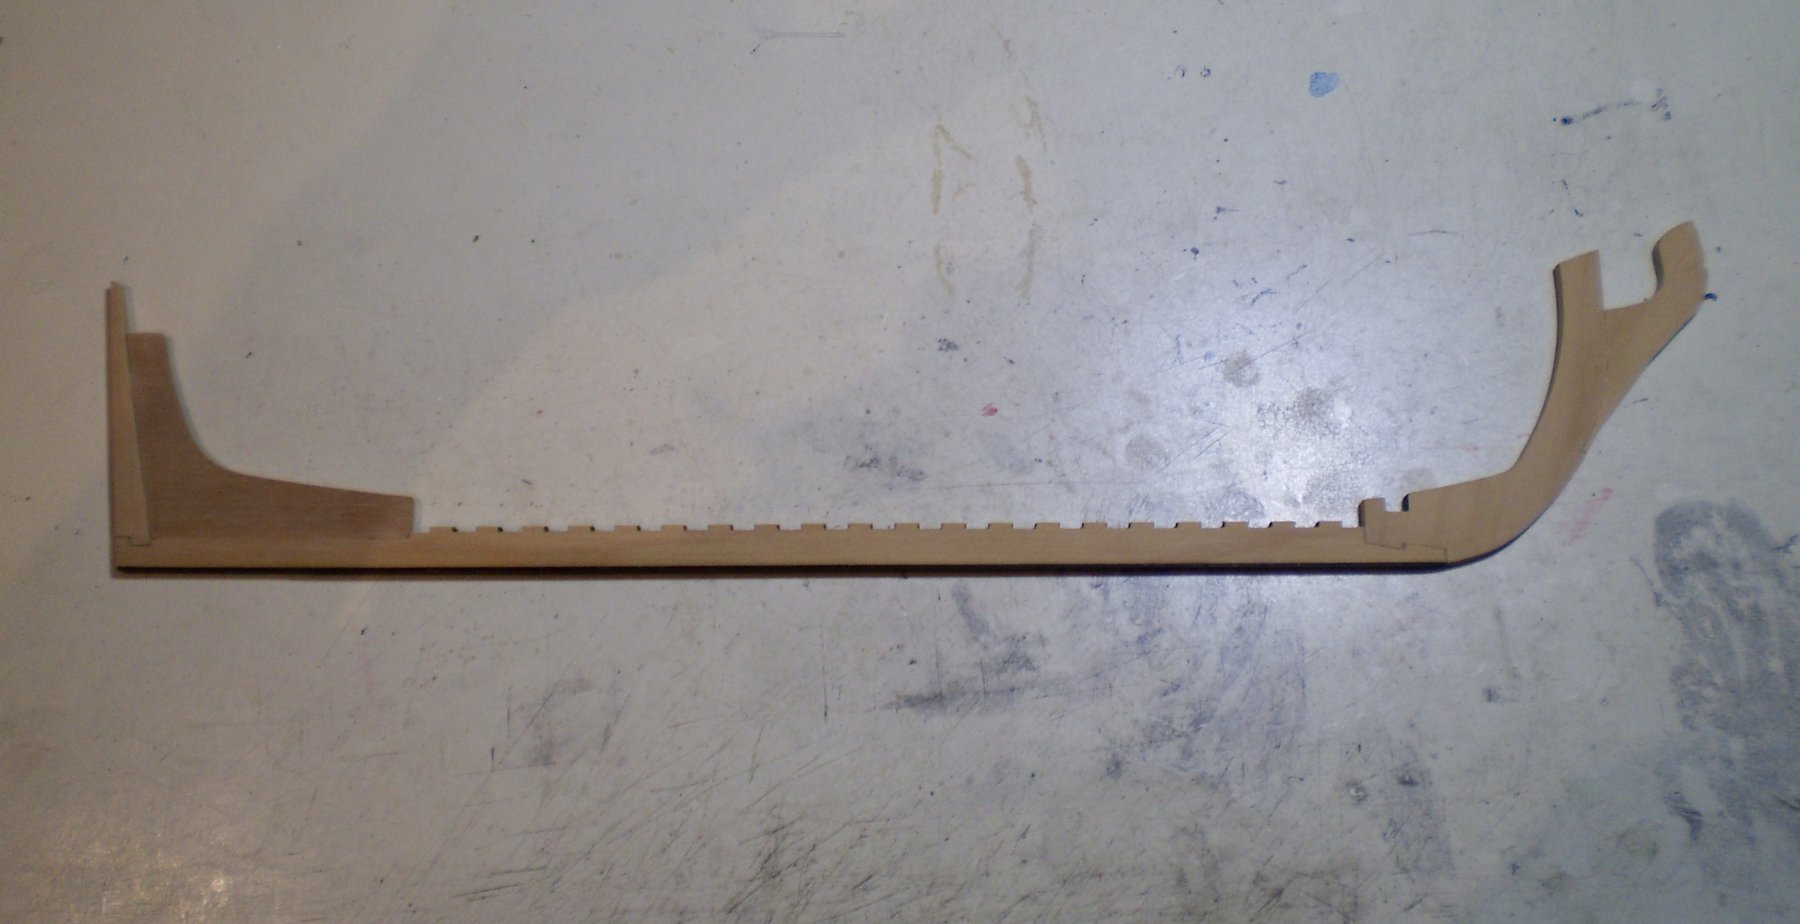
A few words about what I received from the Lumberyard, and about the direction that I intend to take. To begin with, this is a build using Hahn plans (included in the package), and the Hahn upside down construction method (a laser cut framing jig is included). The package contains laser cut framing pieces, including the keel, stem, stern post, rudder, keelson and frame futtocks. I ordered all of that in boxwood. There are various other laser cut pieces such as deck beams. I also got a sheet with laser cut pieces for the stern transom windows and carvings and the quarter badges and windows. The package also contains a good deal of sheet and strip wood in boxwood, pear and some other woods for planking and other purposes. In general, the laser cutting appears to be very good and the strip and sheet looks good, but not as smoothly finished as that from Crown. One potential problem looms. The jig and the keel assembly ( which I have put together) don't match the drawings in length. They do, however, exactly match up to one another. Hopefully, this means that the construction will proceed without difficulty, although yielding a model slightly longer than that shown in the drawings.
I have obtained a copy of Hahn's book "The Colonial Schooner 1763- 1775" to assist in construction. It is my present intention to plank both sides from the wales up and to leave the lower hull unplanned, although I may decide to fully plank one side of the lower hull. I intend to detail the interior of the hull, with lower decking, partitions, etc. Upper decking will be left partially open to allow a view of the lower interior.
I am attaching a photo of the jig, a rather poor photo of the package contents and a photo of the assembled keel. It's now time to get to work on the frames.
Bob


HM Cutter Cheerful 1806 by Erik W - 1:48 scale
in - Build logs for subjects built 1801 - 1850
Posted
Looks close to perfect to me Erik.
Bob