rafine
-
Posts
2,932 -
Joined
-
Last visited
Content Type
Profiles
Forums
Gallery
Events
Everything posted by rafine
-
 Thanks so much Red, Nigel and Ian for the nice comments. Red, you should post a log. Nigel, glad to have you back. I've missed updates on your beautiful builds. Bob
 -
I love what you're doing with the planking Brian. It looks great. Bob
-
As usual Mobbsie, a while between updates, but filled with impressive and beautiful progress. Bob
- 129 replies
-
- 5
-

-
- armed launch
- panart
- (and 1 more)
-
Thanks so much Martin. I' really not very happy about using the walnut, but so many of the kit parts are made from it. While I replaced the planking wood, I didn't want to totally replace all of the kit parts. The walnut is, as you say, a nice contrast. Bob
-
Thanks so much Ken, Grant, Frolick and the "likes". Hopefully, the deck will look even better when the treenailing is done. Bob
-
Beautiful Ken -- simply beautiful. Bob
-
You're off to a good start Don. You should be more than ready for this one. Bob
-
Thanks so much Don, Brian and the "likes". Can't worry about it now Don. The holes have begun (and there are a lot of them ). Me too, Brian. Bob
-
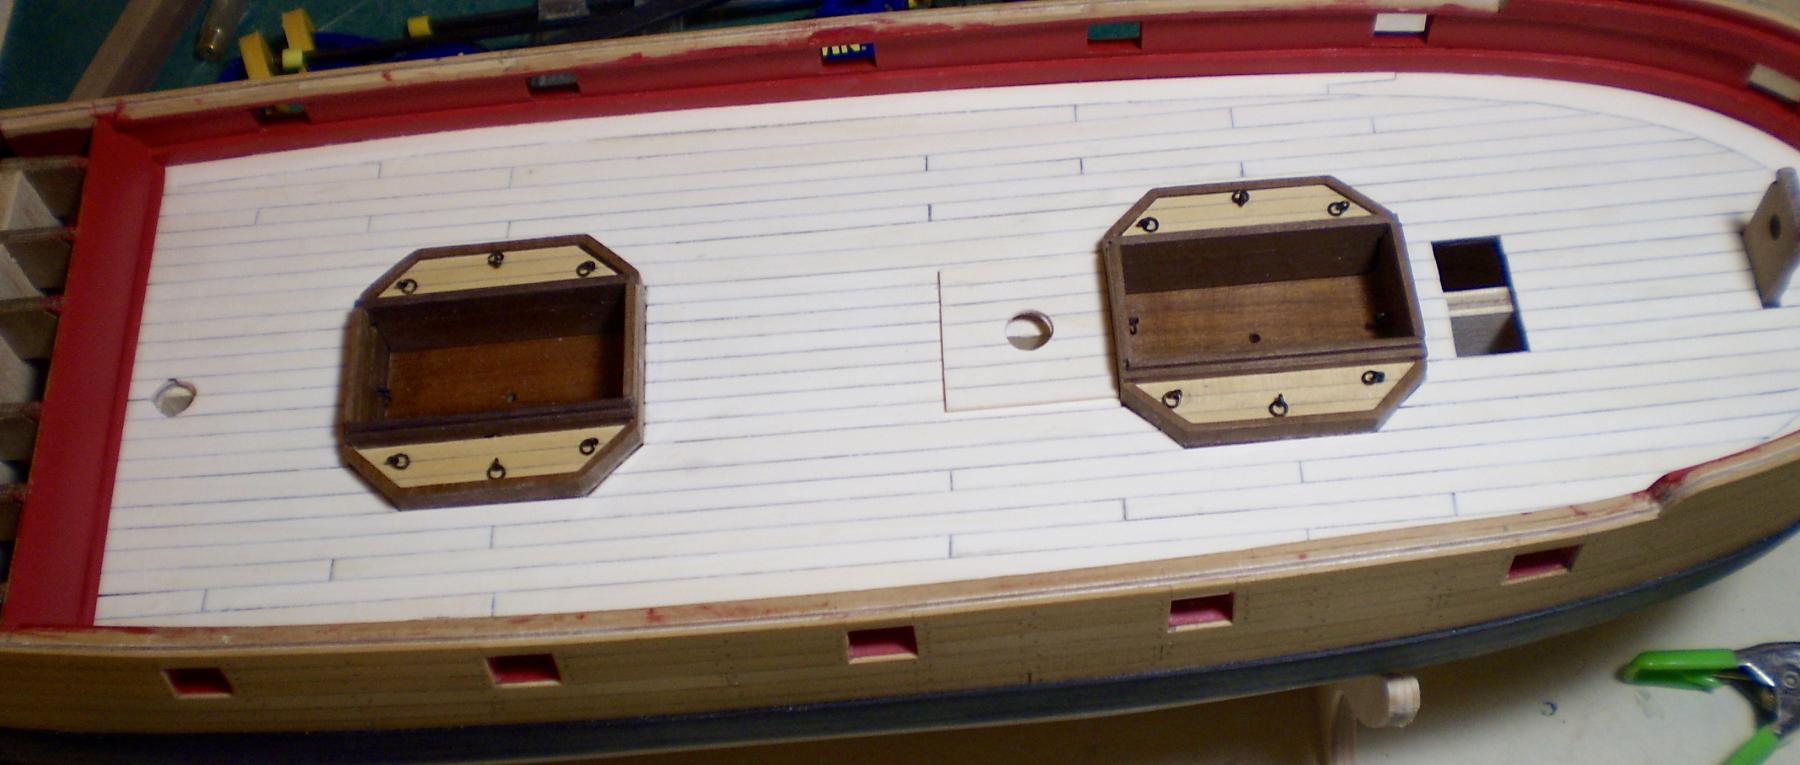
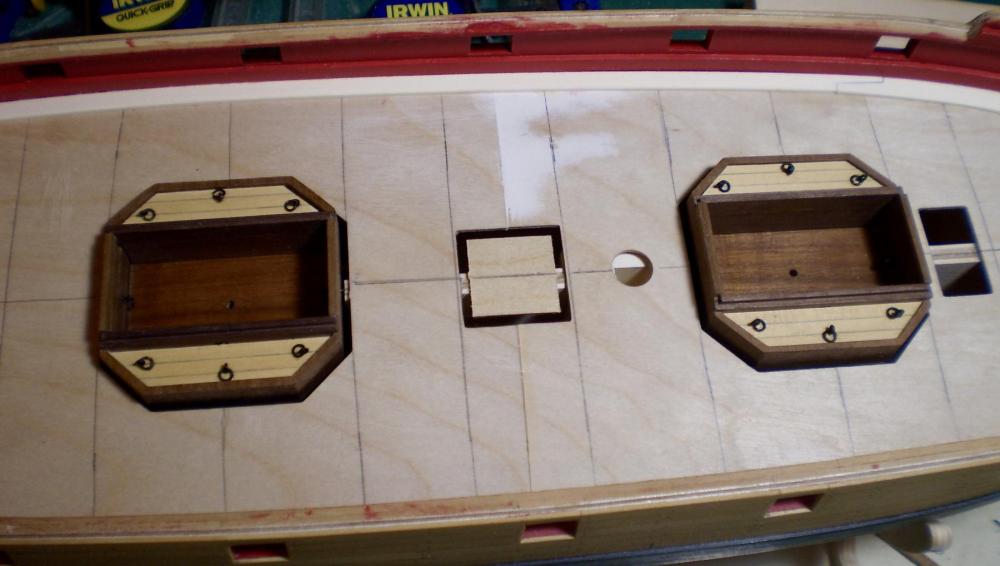
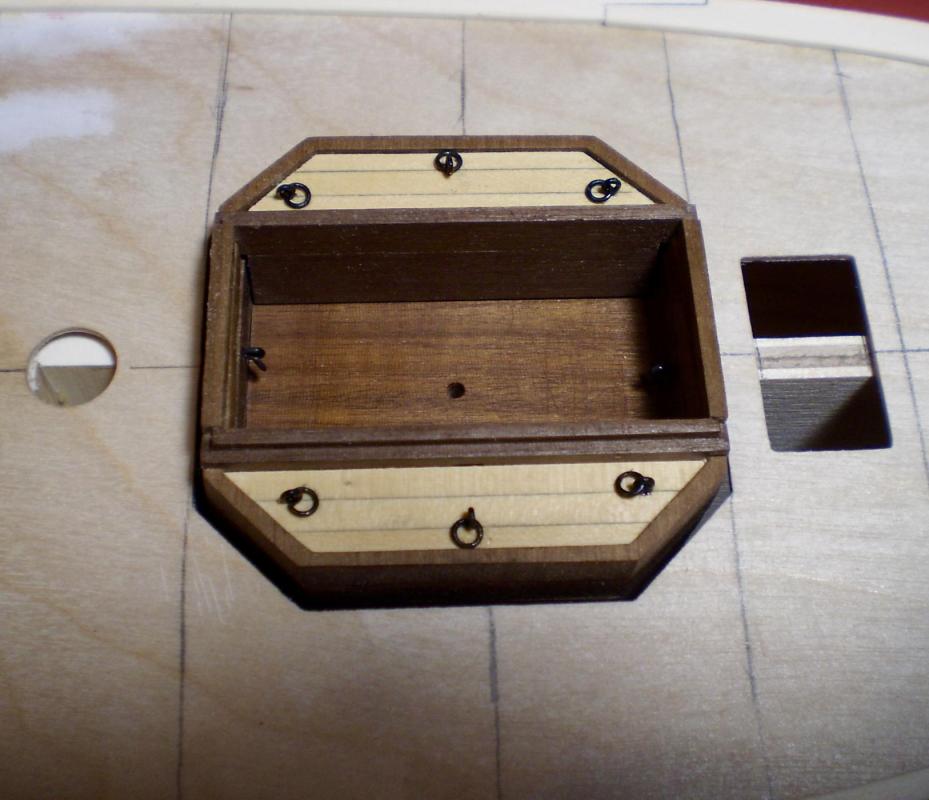
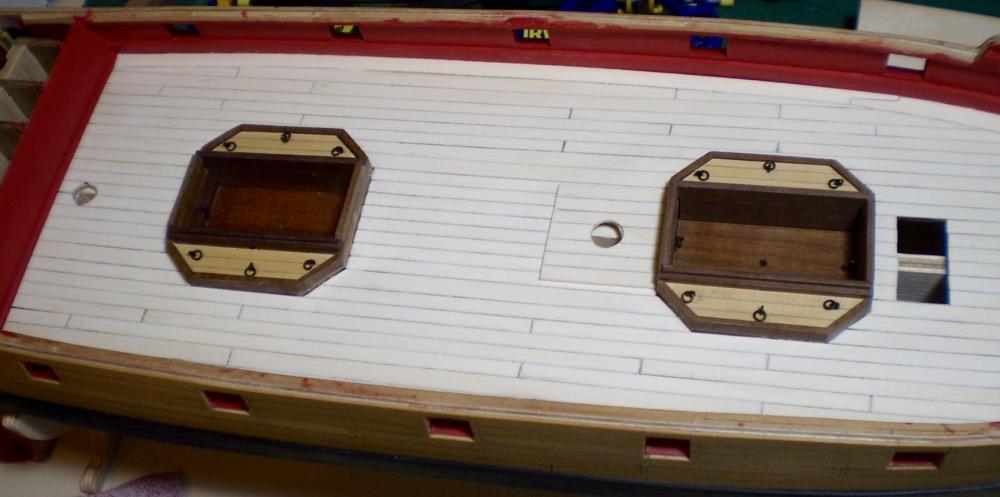
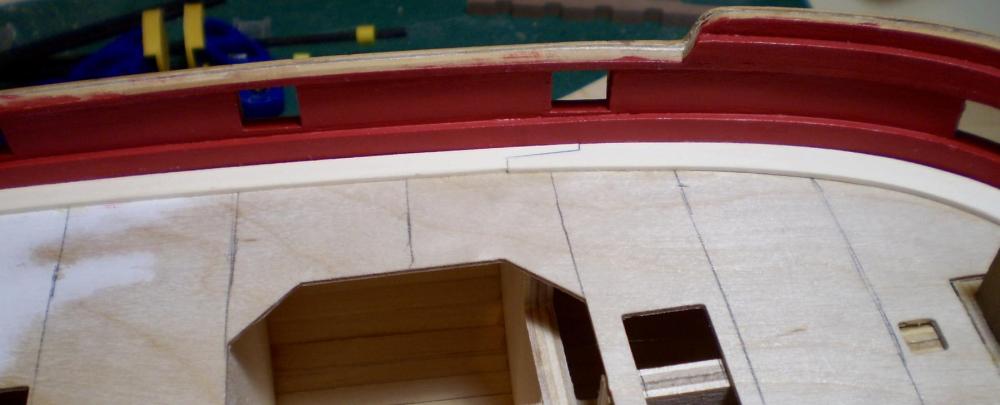
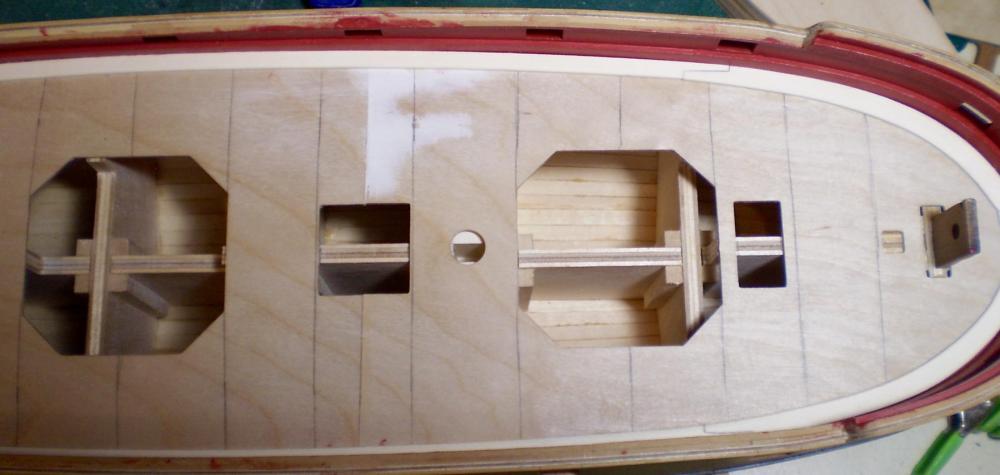
I've now completed planking of the main deck (other than treenailing). The planking is holly strip, with pencil caulking on one side and end of each plank. The pattern follows that shown in AOTS and uses the lines previously drawn on the subdeck for joint positioning. The waterway-margin planks were sanded down, as necessary, to meet the deck planking. I also added the additional section of raised planking at the mainmast and a quarter round waterway piece at the base of the quarterdeck bulkhead. Prior to doing the planking, I had to make and install the two mortar pits, since the planking had to be laid up against them. I used the kit's walnut parts to make the pits, but used boxwood strip to plank the outer housings. The assemblies were finished with multiple coats of Wipe-on Poly and ringbolts were added before installation. I am now going to do the treenailing. Bob

- 563 replies
-
- 27
-
-
It's looking very good. I hope you have a full recovery with your shoulder and look forward to more progress on Essex. Bob
-
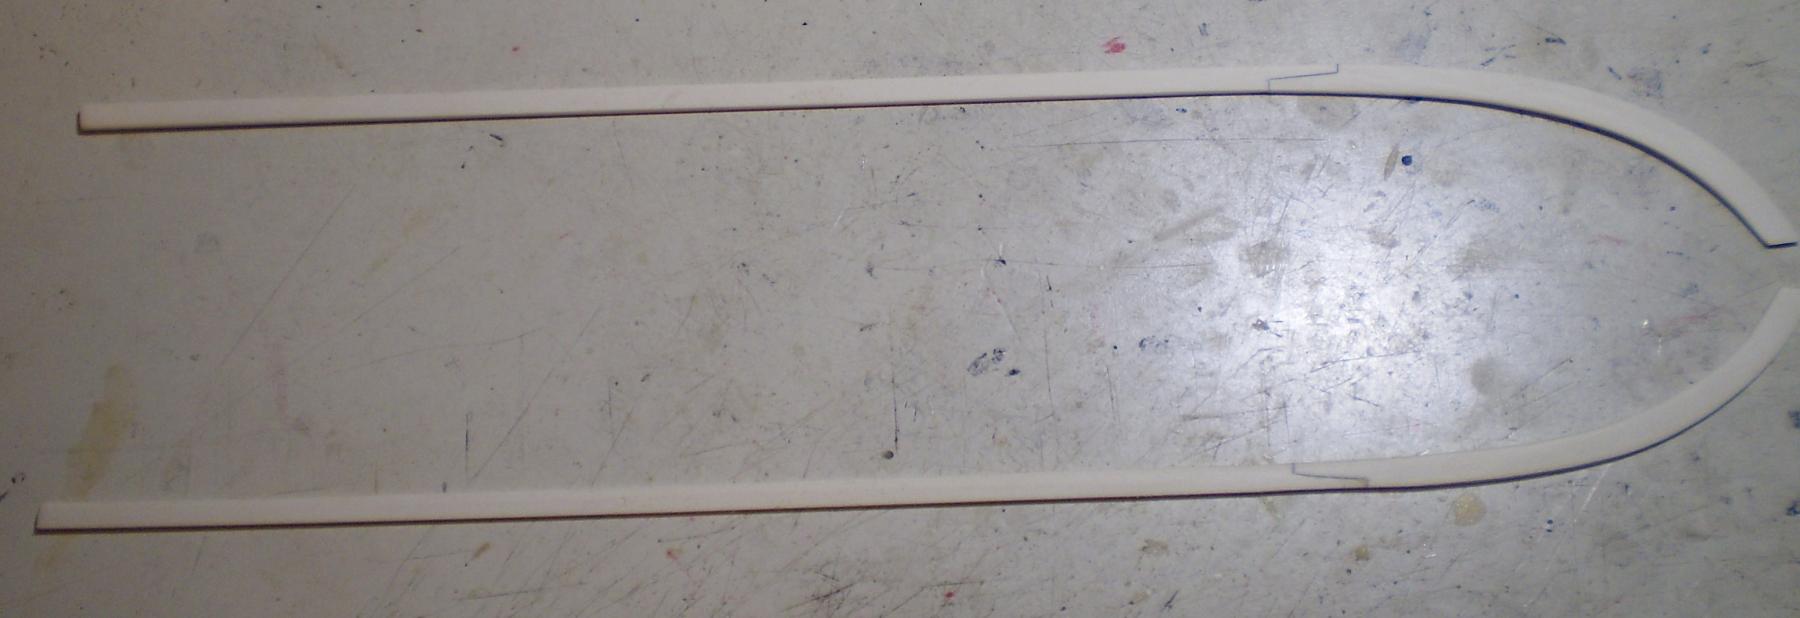
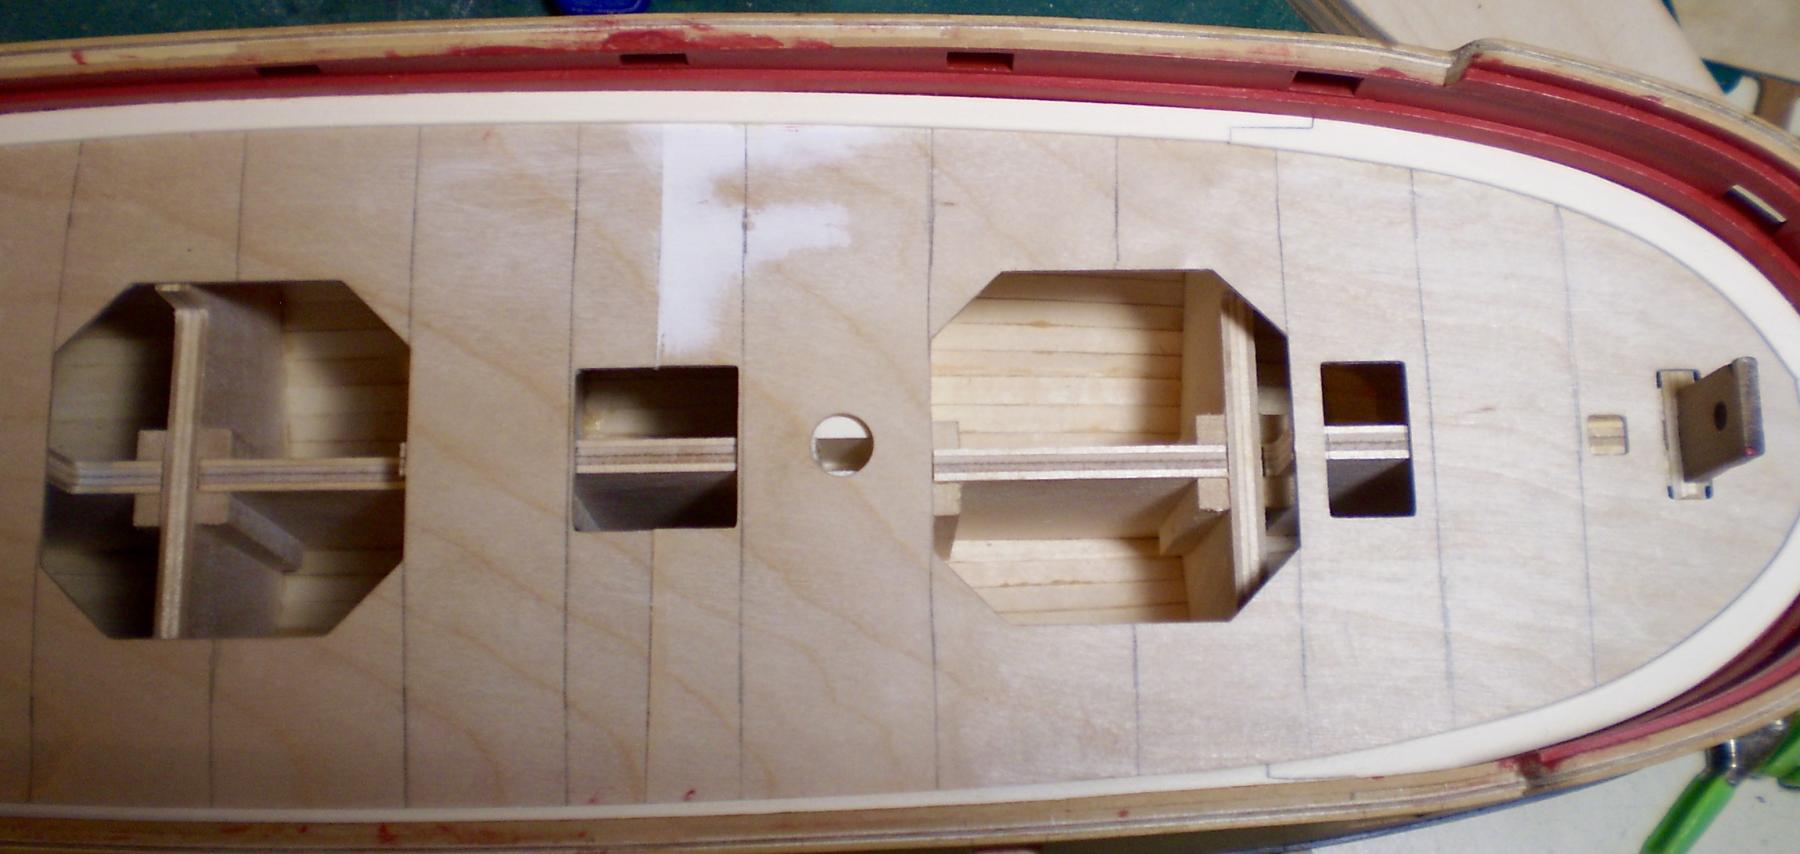
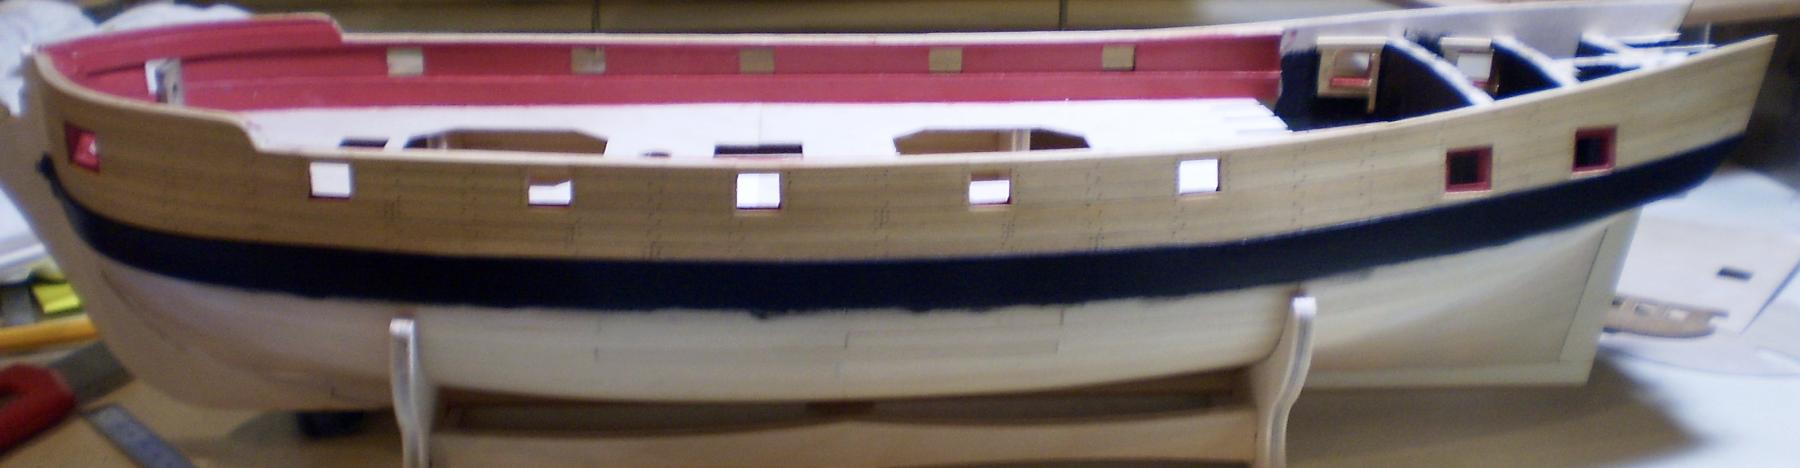
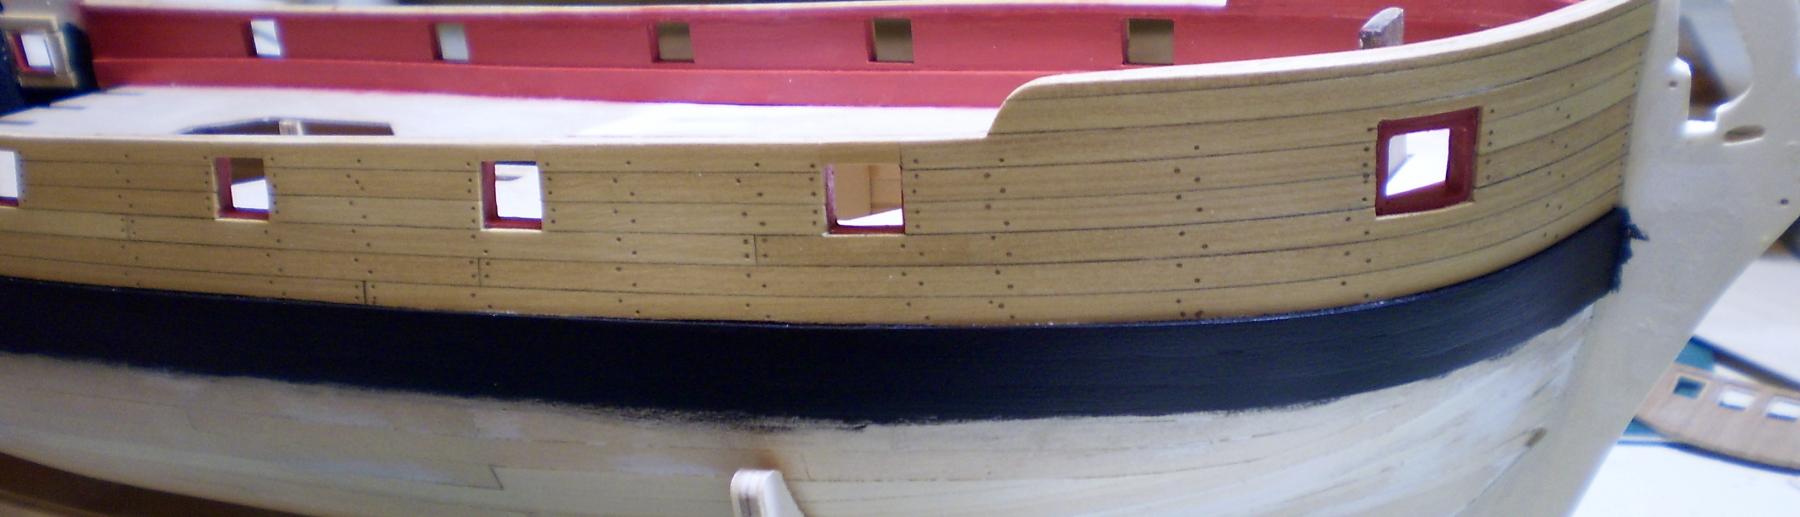
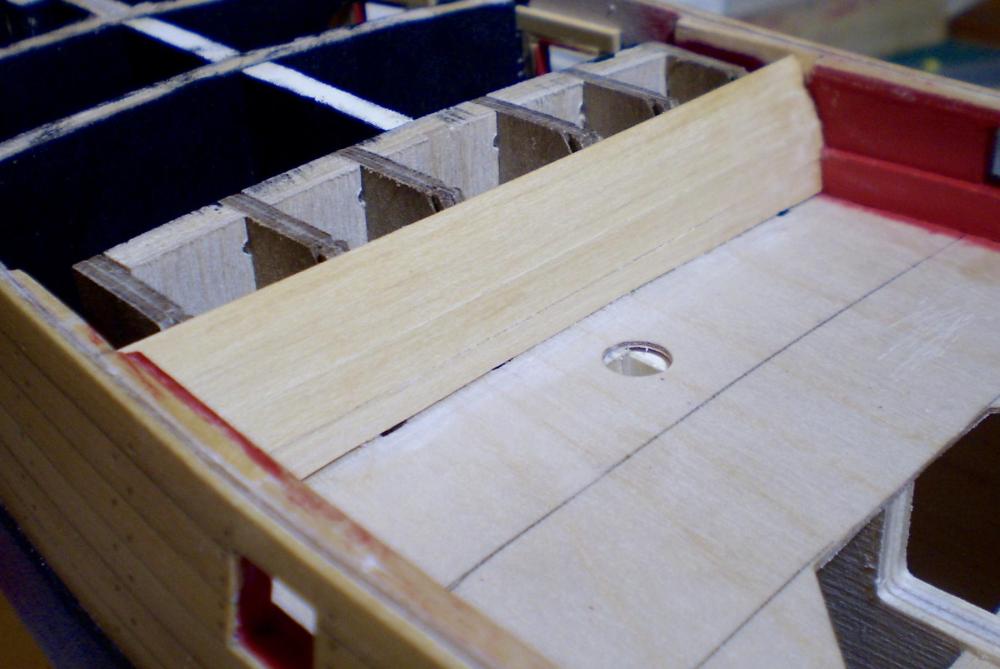
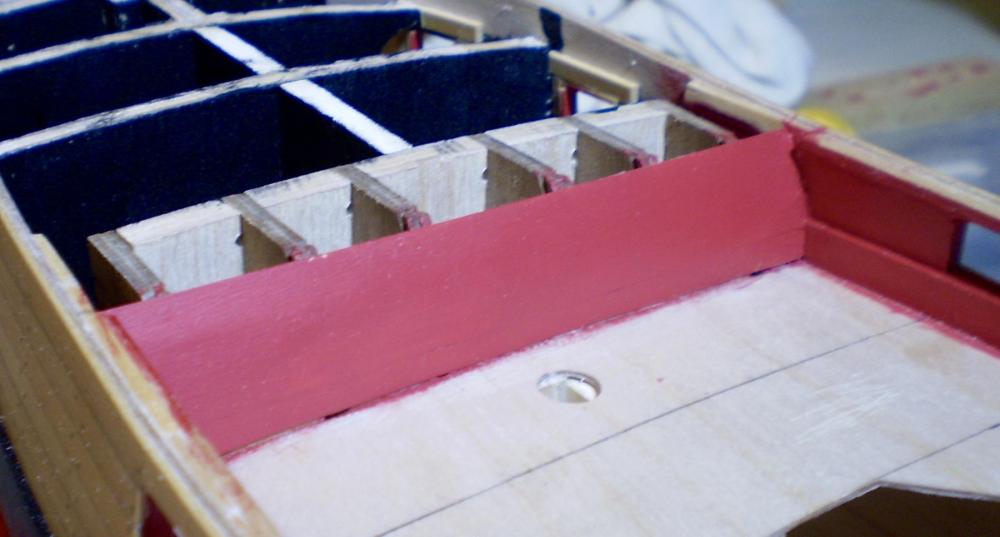
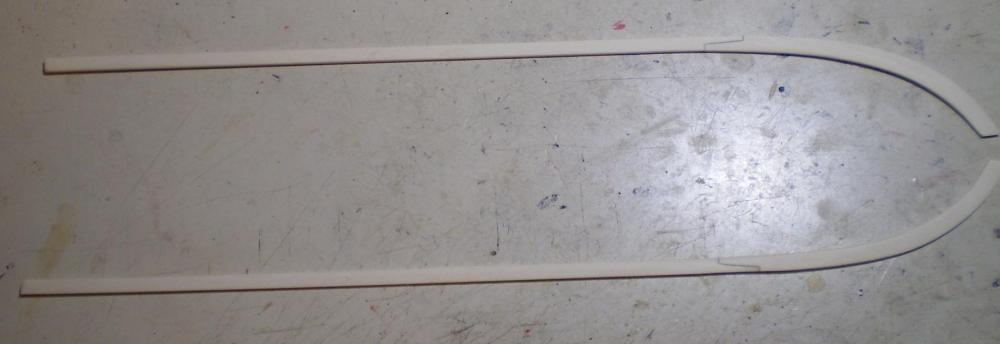
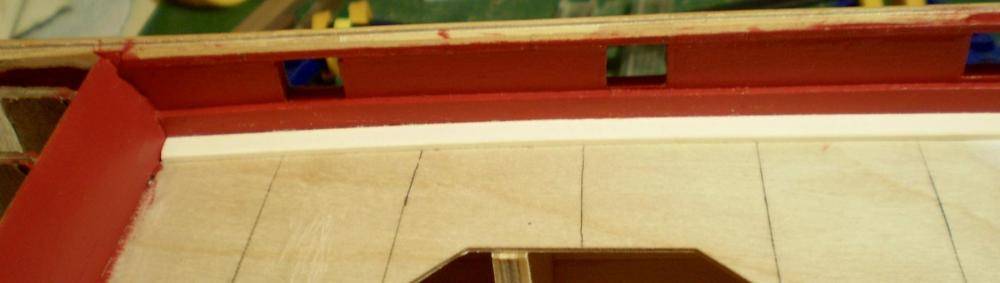
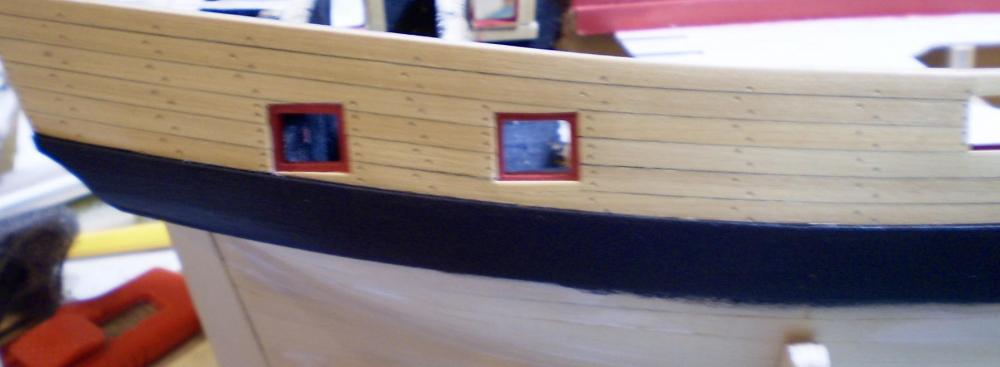
I have chosen to defer the second planking of the lower hull in favor of doing work on the interior. so far, this has involved adding view blocks behind the rear ports (as per the suggestion of Joe V), adding the quarterdeck bulkhead and adding waterway-margin planks on the main deck. The view blocks are simply black painted pieces glued in place to prevent viewing through the hull at the rear ports. The quarterdeck bulkhead presented some uncomfortable decisions for me. The kit provides walnut pieces to support curved panels in slots precut in them. These kit pieces were virtually unusable in the manner intended. The kit also provides black decals to be applied to the curved panels. I didn't like the look. Joe V and Timmo had painted the decoration on the panels, in lieu of the black decals, and did it beautifully. My attempts at this didn't look so good. AOTS shows an alternative bulkhead consisting of plain planking .With this "official" sanction, my lack of artistic talent and the state of the kit pieces, I opted to do the alternative bulkhead. I planked it with beveled boxwood planks to make the curved surface and painted it red to match the bulwarks. A cowardly solution, perhaps, but better in my mind than something that I would have been totally unhappy with. After completing that work, I penciled in lines on the sub-deck to mark out the deck beam lines for the deck planking joints, as shown on the AOTS deck plan. The last item of work was to make the waterway-margin planks from holly sheet and strip.The kit plans do not show them, but they clearly appear in the AOTS drawings, which I chose to follow. The bow sections were cut from holly sheet, using card stock templates. The remainder were made using holly strip bent to shape.The waterway-margin planks were made from thicker stock than that to be used for the deck planking, and were sanded to provide a slanted profile from the bulwarks down to meet the planking height, as shown in AOTS. Next will be the deck planking, which will also require that work be done on the mortar pits before the deck planking can be installed. Bob
- 563 replies
-
- 25
-
-
Like everyone else, I'm blown away by the quality and beauty of your work Nils. Bob
- 2,625 replies
-
- 7
-
-
- kaiser wilhelm der grosse
- passenger steamer
- (and 1 more)
-
Looking good Sjors. Seems like she'll be catching up to Aggie in no time. Bob
-
Thanks so much Albert, Mobbsie, Joe and Jason for the nice comments and thanks also to the "likes". Bob
-
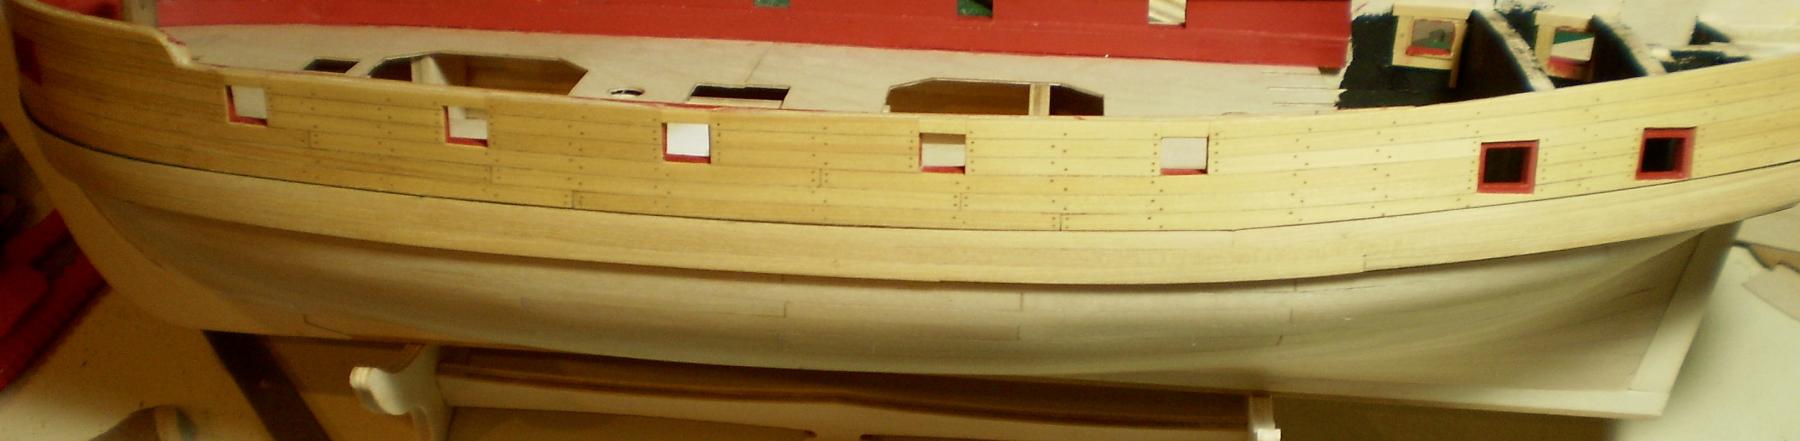
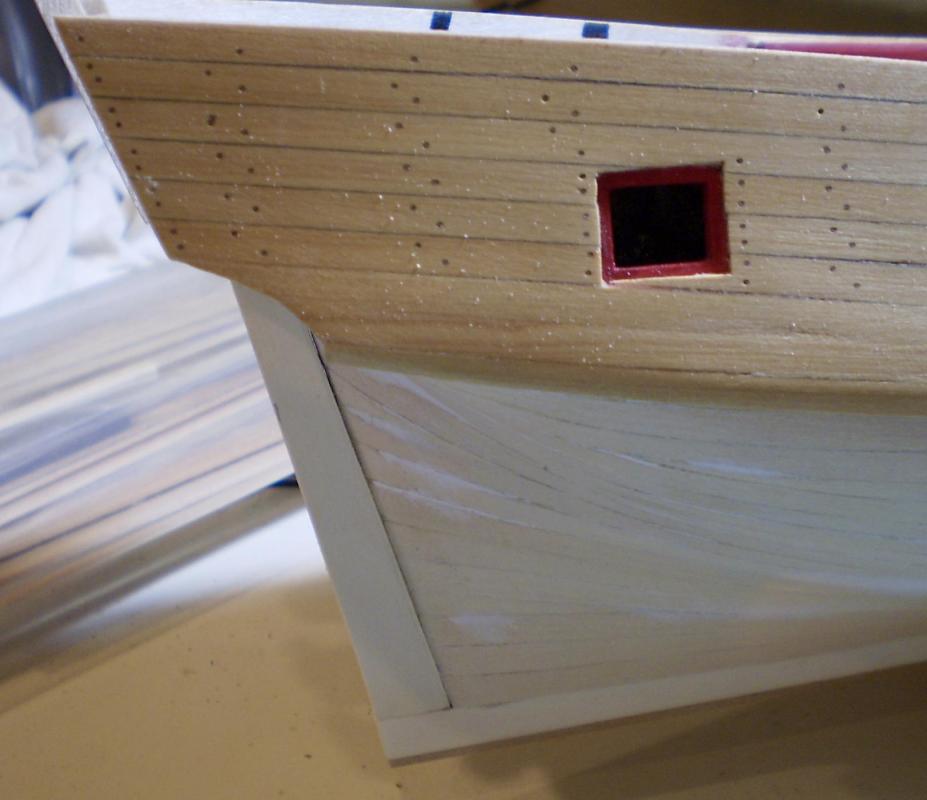
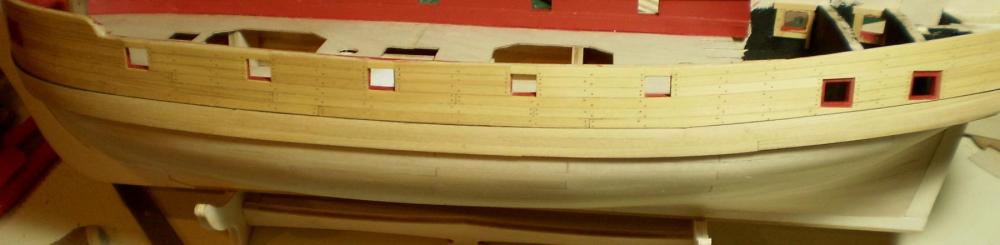
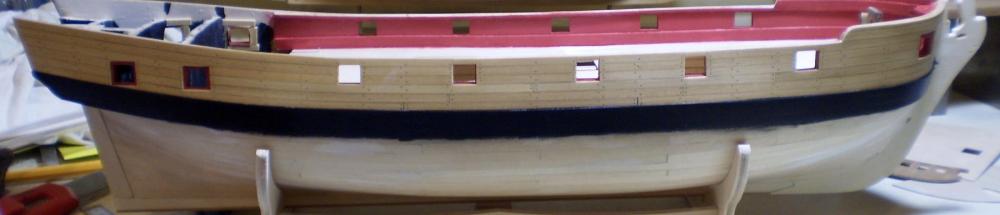
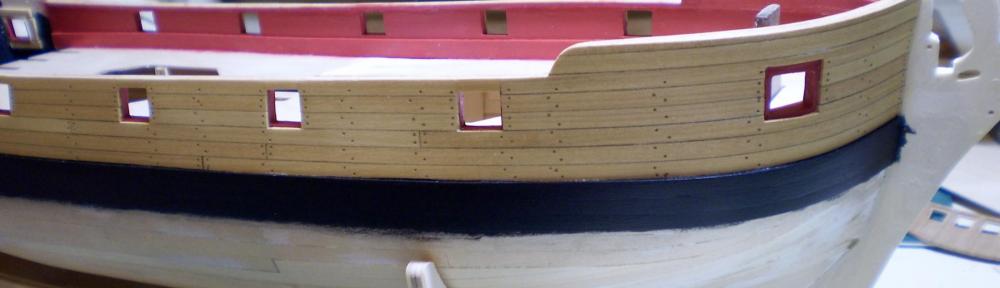
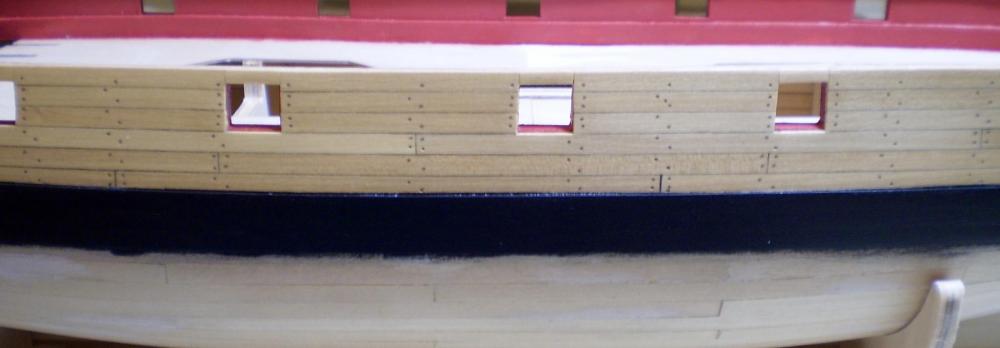
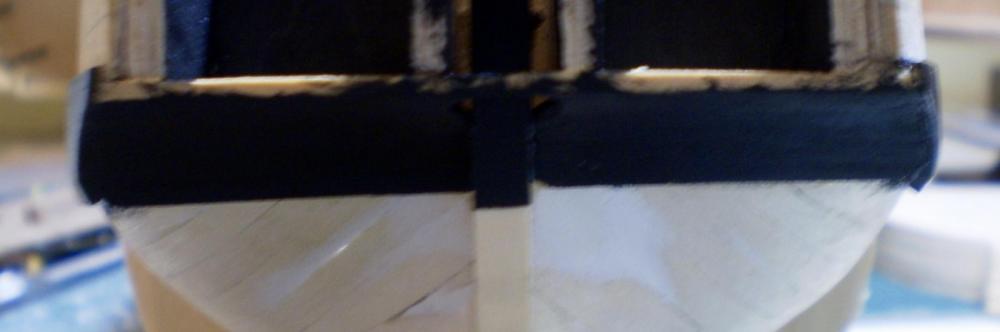
After some time up north with family, it was back to work on Granado. I've done a few things: I added the stern post, cut from holly sheet; I planked the counter; and lastly, I planked the second layer of the wales. The counter and wales were done with boxwood strip. In doing the counter, I omitted using the kit base piece, as it seemed more trouble than useful, and used thicker planking material. After the planking was done, I painted both the wales and counter black. While I carefully taped the top of the wales prior to painting (using Tamiya tape) I left the bottom untaped, since any paint will be covered by the lower holly planking to come. This accounts for the sloppy appearance and excess width of the wales in the attached photos. I'm still deciding today whether to next do the lower planking or do some interior work. Bob

- 563 replies
-
- 31
-
-
An update that was well worth the wait Mobbsie. It looks great. Bob
- 129 replies
-
- 5
-
-
- armed launch
- panart
- (and 1 more)