rafine
-
Posts
2,932 -
Joined
-
Last visited
Content Type
Profiles
Forums
Gallery
Events
Everything posted by rafine
-

Cutter Cheerful 1806 by rafine - FINISHED
rafine replied to rafine's topic in - Build logs for subjects built 1801 - 1850
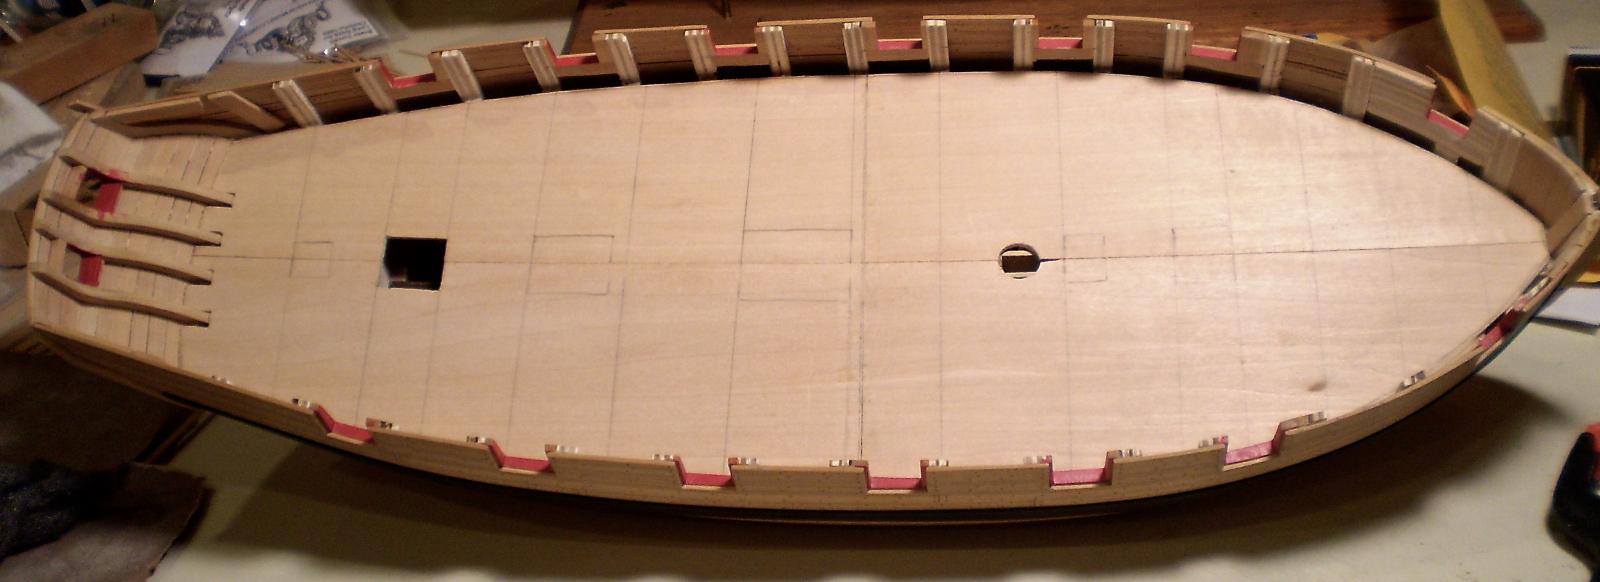
Inboard work underway. I have thinned down the bulkheads and made and added the false deck. This involved a fair amount of effort, but nothing that was particularly difficult or interesting to see. For the bulkhead thinning, I followed Chuck's lead and started with a Dremel with a rough sanding drum, followed by sanding sticks and chisels. I also added filler strips at the bow and stern to aid in planking and to facilitate the drilling of various holes. When I was satisfied that all was thin enough and fair, I moved on to the false deck. The deck was cut from basswood sheet using the template in the plans. I cut it a little oversize and trimmed to fit. Before gluing it in place, I cut the mast hole, the opening for the skylight and the notches for the stern frames. I also marked out the positions of the hatches and companionway and also marked the position of the "deck beams" in preparation for deck planking. I cut the deck into four pieces to make gluing it in place a little easier. Now, it's on to the interior bulwark planking. Bob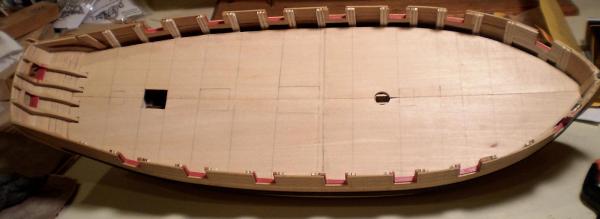
- 525 replies
-
- 24
-

-
- cheerful
- Syren Ship Model Company
- (and 1 more)
-
Cutter Cheerful 1806 by rafine - FINISHED
rafine replied to rafine's topic in - Build logs for subjects built 1801 - 1850
Thanks so much Thomas. Bob- 525 replies
-
- 3
-
-
- cheerful
- Syren Ship Model Company
- (and 1 more)
-
Cutter Cheerful 1806 by rafine - FINISHED
rafine replied to rafine's topic in - Build logs for subjects built 1801 - 1850
Thanks so much Rusty. I'm looking forward to doing it, as well. Bob- 525 replies
-
- 3
-
-
- cheerful
- Syren Ship Model Company
- (and 1 more)
-
I can attest to the fact that Chuck really means it. I took him up on his invitation when I was in his area. A truly enjoyable time. Bob
- 1,051 replies
-
- 7
-
-
- cheerful
- Syren Ship Model Company
- (and 1 more)
-
Cutter Cheerful 1806 by rafine - FINISHED
rafine replied to rafine's topic in - Build logs for subjects built 1801 - 1850
Thanks so much Augie. When are we going to see more of your Confederacy? Bob- 525 replies
-
- 2
-
-
- cheerful
- Syren Ship Model Company
- (and 1 more)
-
Nicely done J. One of the pleasures of this kit was how well the engine parts were designed. Bob
- 105 replies
-
- 1
-
-
- picket boat
- model shipways
- (and 1 more)
-
Cutter Cheerful 1806 by rafine - FINISHED
rafine replied to rafine's topic in - Build logs for subjects built 1801 - 1850
Thanks so much Brian, Nils, Mark and the "likes". Greatly appreciated. Bob- 525 replies
-
- 3
-
-
- cheerful
- Syren Ship Model Company
- (and 1 more)
-
The first word that comes to my mind Nils is "amazing". I love the look of it.. Bob
- 2,625 replies
-
- 6
-
-
- kaiser wilhelm der grosse
- passenger steamer
- (and 1 more)
-
Cutter Cheerful 1806 by rafine - FINISHED
rafine replied to rafine's topic in - Build logs for subjects built 1801 - 1850
Thanks so much Dirk, Lionfish, Chuck, Grant, Druxey, Tim and George for the generous comments and also to the "likes" for their continuing interest . Always appreciated. Bob- 525 replies
-
- 2
-
-
- cheerful
- Syren Ship Model Company
- (and 1 more)
-
Cutter Cheerful 1806 by rafine - FINISHED
rafine replied to rafine's topic in - Build logs for subjects built 1801 - 1850
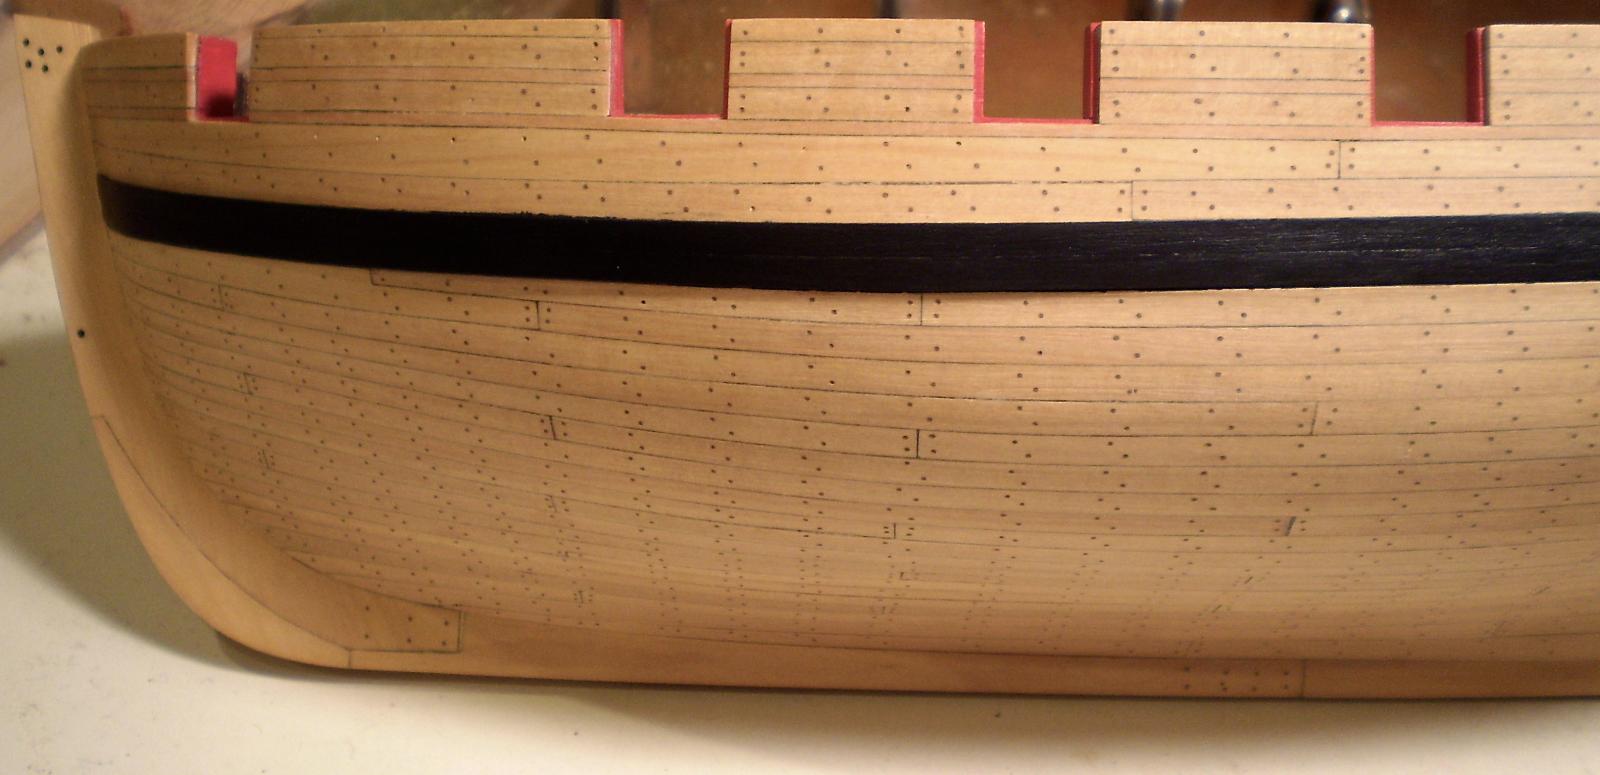
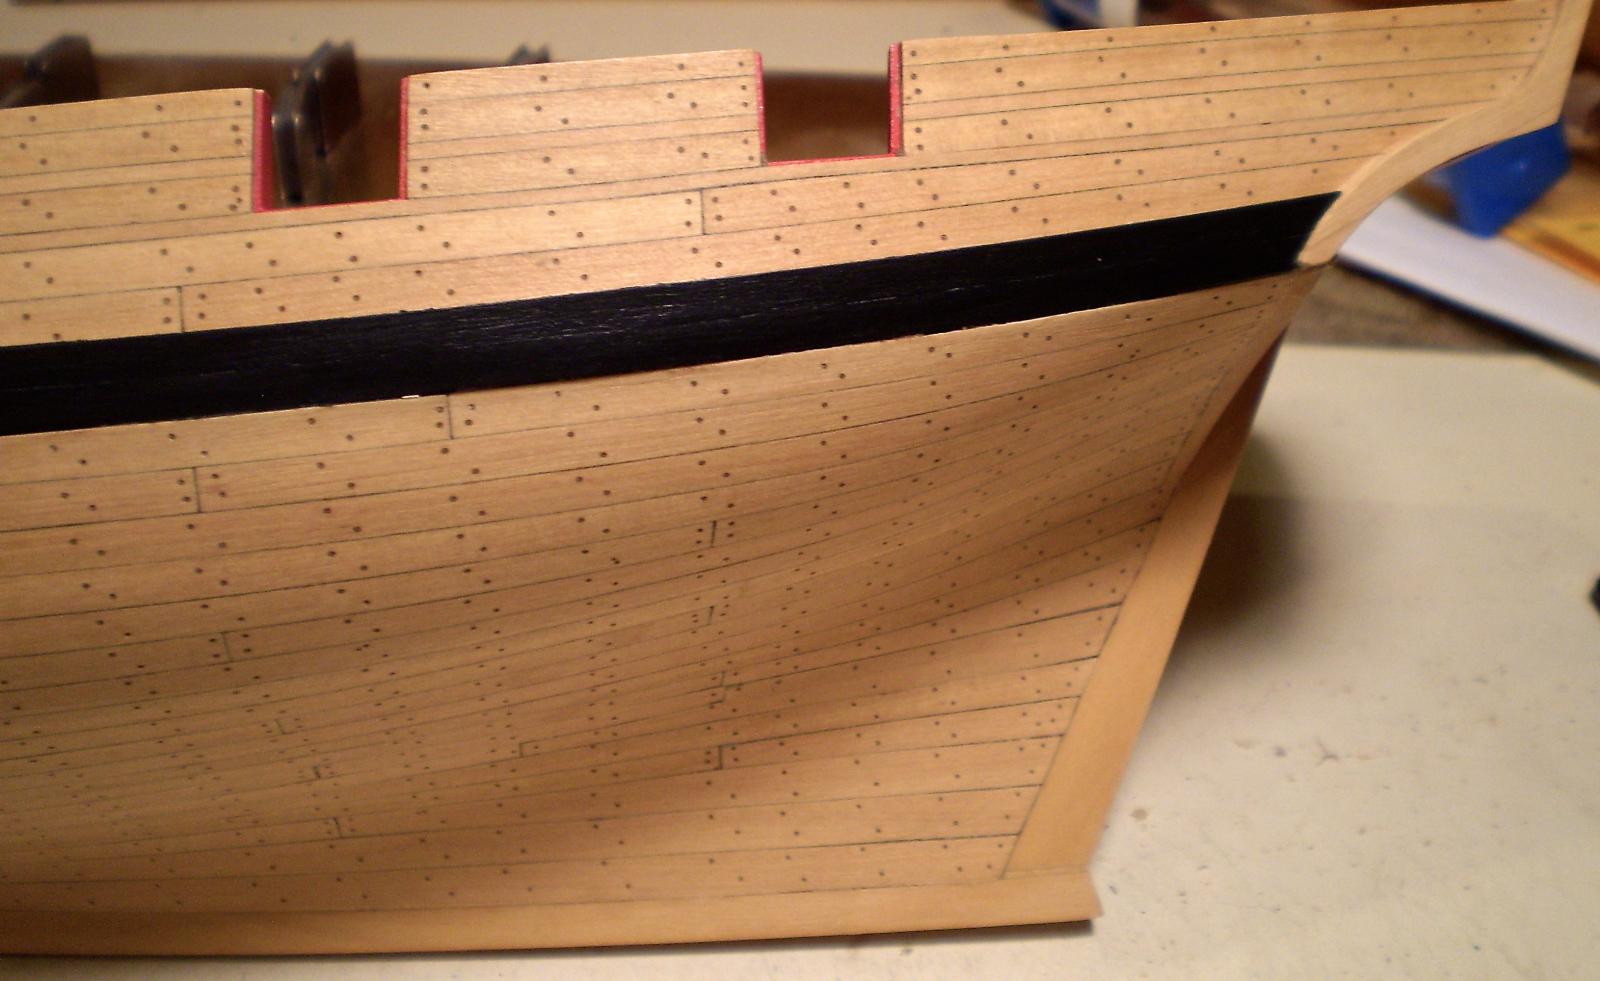
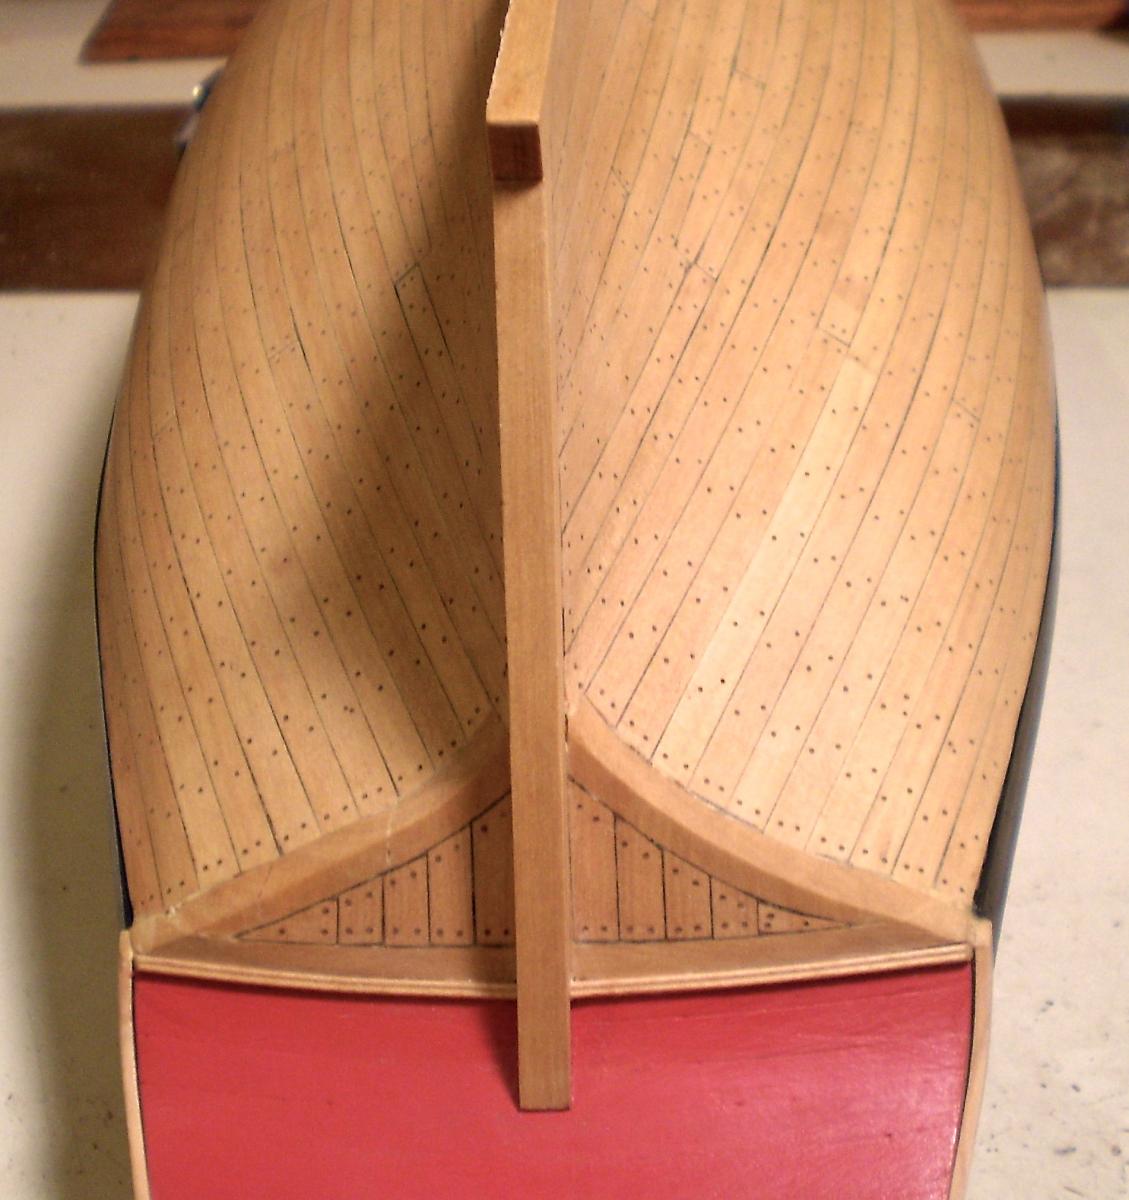
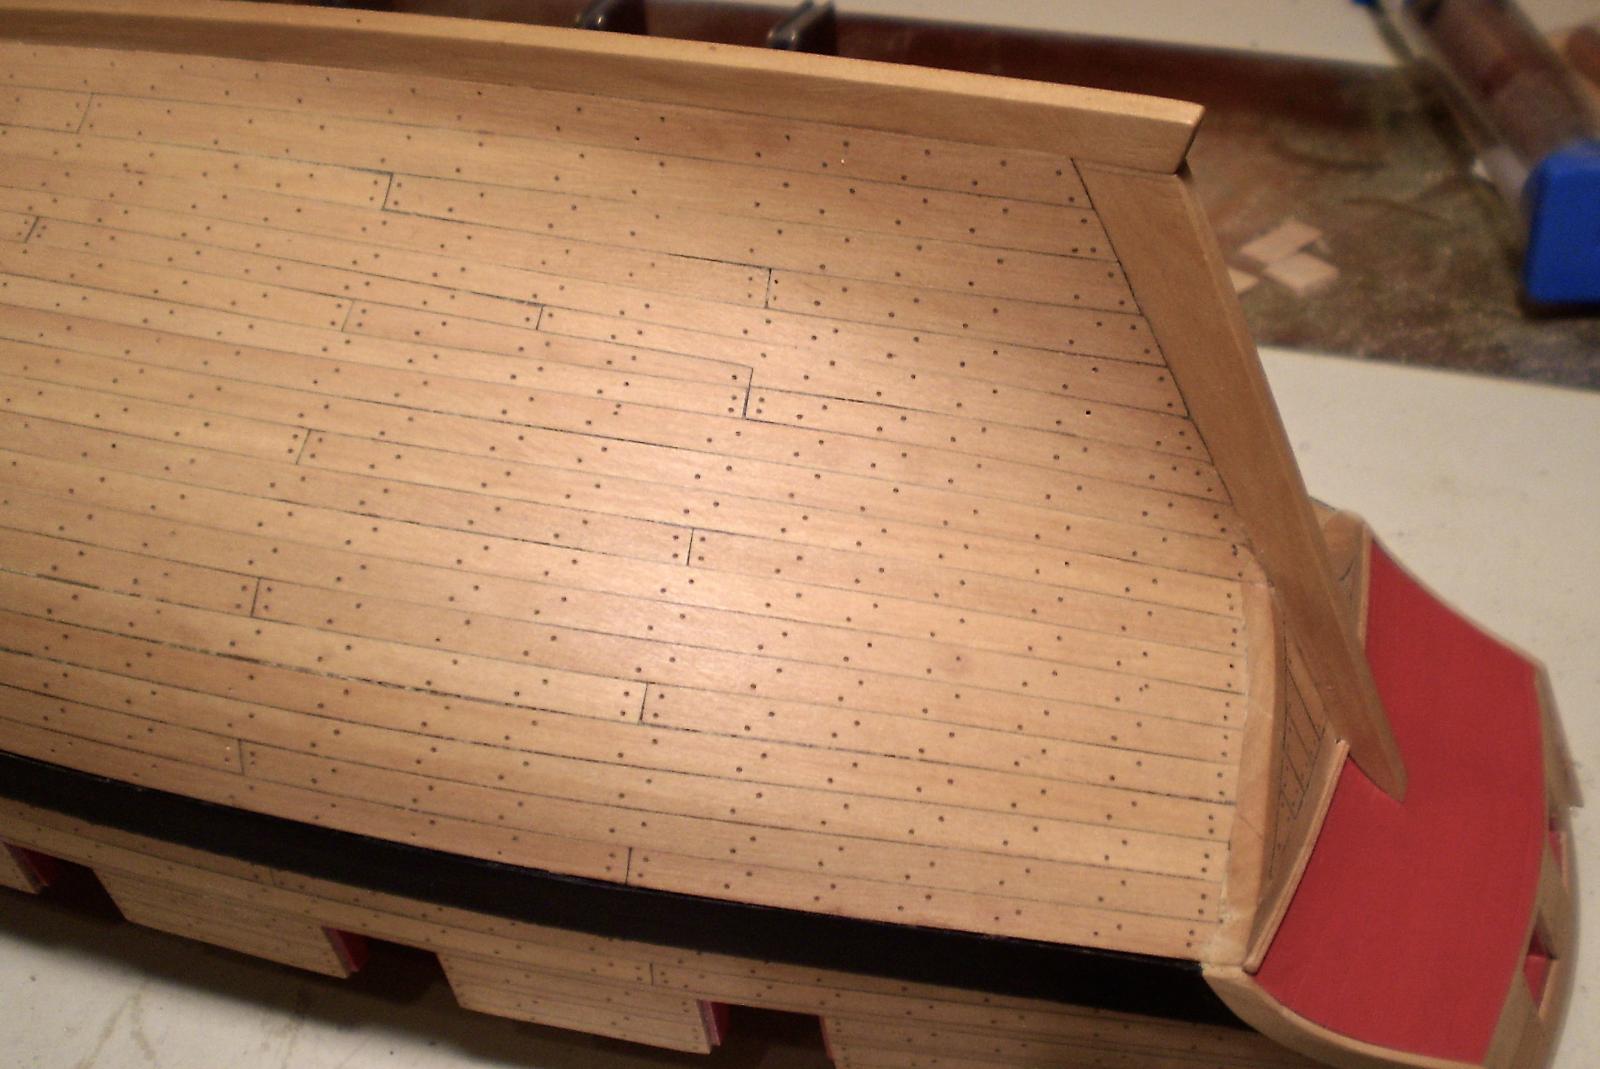
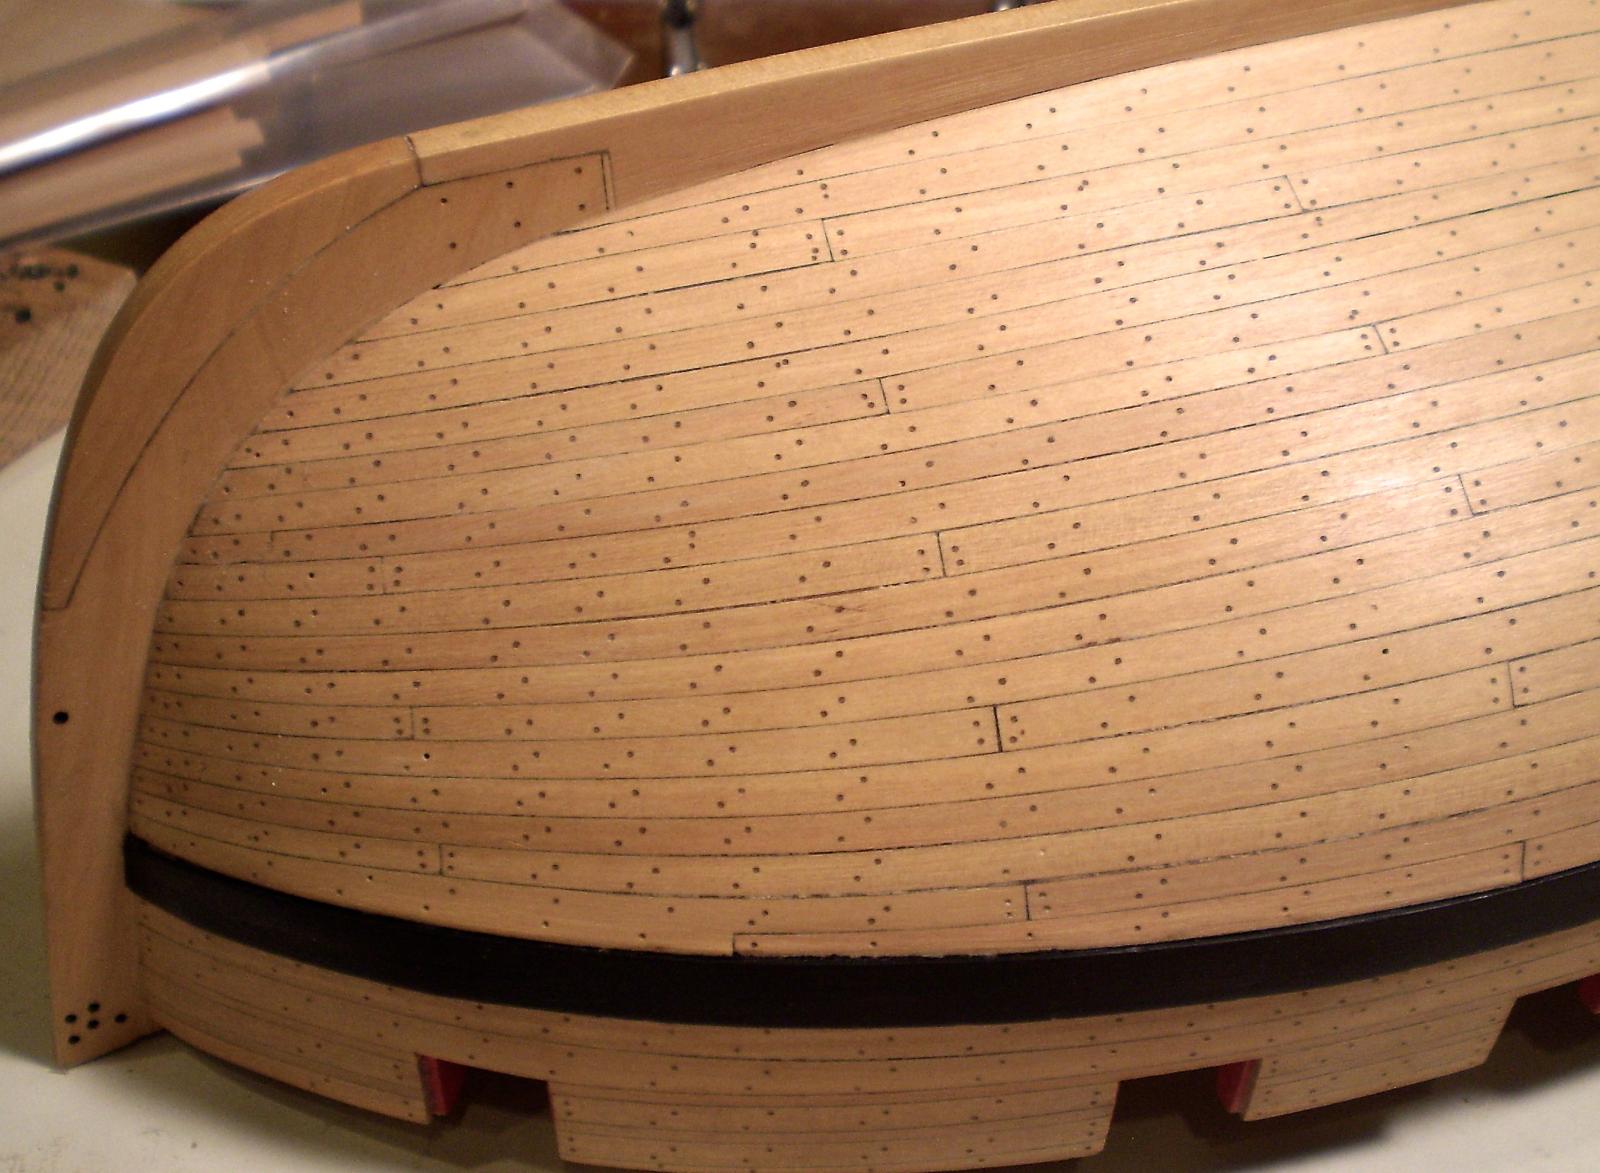
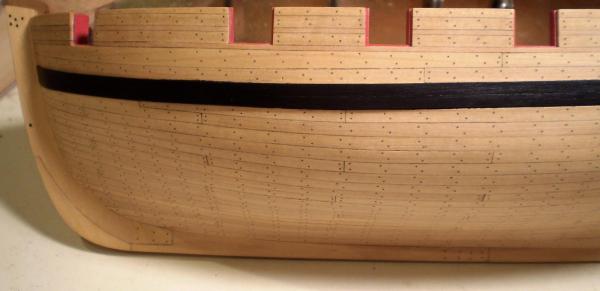
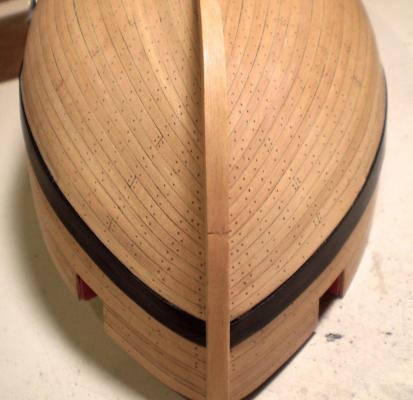
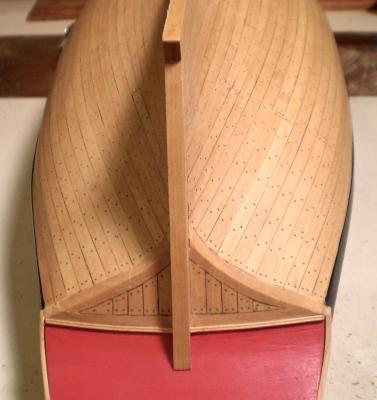
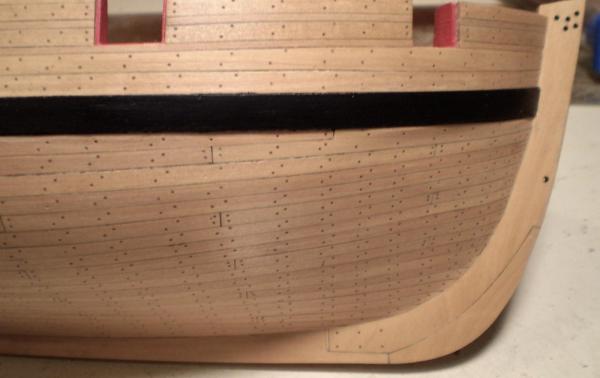
I have now completed the lower planking on the port side. This involved the same process used on the starboard side -- planking, tree nailing, final sanding and repainting of the wale. Although the two sides didn't come out exactly identical, they are very close. The hull is now fully planked. With the completion of this work, it is time to turn my attention inboard and thin down the bulkheads in preparation for the bulwark planking. Bob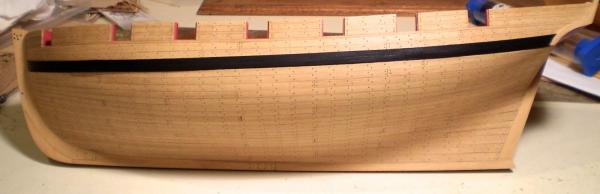

- 525 replies
-
- 34
-
-
- cheerful
- Syren Ship Model Company
- (and 1 more)
-
Really nice work on the coils Brian. Well worth the effort. Bob
- 831 replies
-
- 4
-
-
- Armed Virginia Sloop
- Model Shipways
- (and 1 more)
-
Cutter Cheerful 1806 by rafine - FINISHED
rafine replied to rafine's topic in - Build logs for subjects built 1801 - 1850
Thanks so much Thomas. Bob- 525 replies
-
- 3
-
-
- cheerful
- Syren Ship Model Company
- (and 1 more)
-
Cutter Cheerful 1806 by rafine - FINISHED
rafine replied to rafine's topic in - Build logs for subjects built 1801 - 1850
Thanks so much Hamilton, Druxey, Johann and the "likes". Druxey, actually I've done it both ways -- drilling starter holes by hand and finishing with a Dremel, and drilling all the way by hand. It seems to take about the same time and effort each way. Bob- 525 replies
-
- 4
-
-
- cheerful
- Syren Ship Model Company
- (and 1 more)
-
Cutter Cheerful 1806 by rafine - FINISHED
rafine replied to rafine's topic in - Build logs for subjects built 1801 - 1850
Thanks so much Wes and the "likes". I would reach for the rotary tool as well, but, truthfully, i can't use one to drill those holes without slipping and skipping unless i drill starter holes by hand first. Bob- 525 replies
-
- 4
-
-
- cheerful
- Syren Ship Model Company
- (and 1 more)
-
Cutter Cheerful 1806 by rafine - FINISHED
rafine replied to rafine's topic in - Build logs for subjects built 1801 - 1850
Thanks so much Terry. Did you ever finish Essex? Are you working on Cheerful now? If so, I'd again urge you to post a log. Bob- 525 replies
-
- 2
-
-
- cheerful
- Syren Ship Model Company
- (and 1 more)
-
The plating is looking wonderful Nils. I can't wait to see it finished and painted. Bob
- 2,625 replies
-
- 5
-
-
- kaiser wilhelm der grosse
- passenger steamer
- (and 1 more)
-
Cutter Cheerful 1806 by rafine - FINISHED
rafine replied to rafine's topic in - Build logs for subjects built 1801 - 1850
Thanks so much George and the "likes". Bob- 525 replies
-
- 2
-
-
- cheerful
- Syren Ship Model Company
- (and 1 more)
-
Cutter Cheerful 1806 by rafine - FINISHED
rafine replied to rafine's topic in - Build logs for subjects built 1801 - 1850
Thanks so much to all for the very kind and generous comments and also to the "likes". Greatly appreciated and very gratifying. David and Ken, there will be no paint on the outer hull other than the wales, which BTW were repainted to repair the damage caused by sanding of the lower planking. I do expect to paint the interior bulwark planking. Bob- 525 replies
-
- 7
-
-
- cheerful
- Syren Ship Model Company
- (and 1 more)
-
Cutter Cheerful 1806 by rafine - FINISHED
rafine replied to rafine's topic in - Build logs for subjects built 1801 - 1850
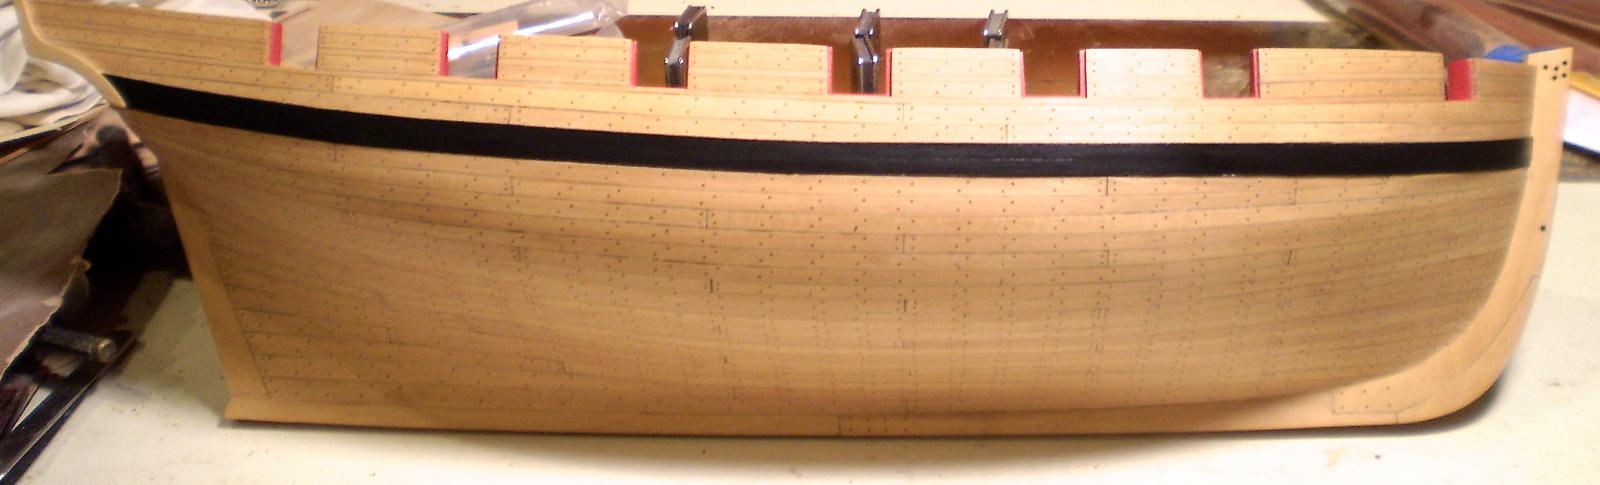
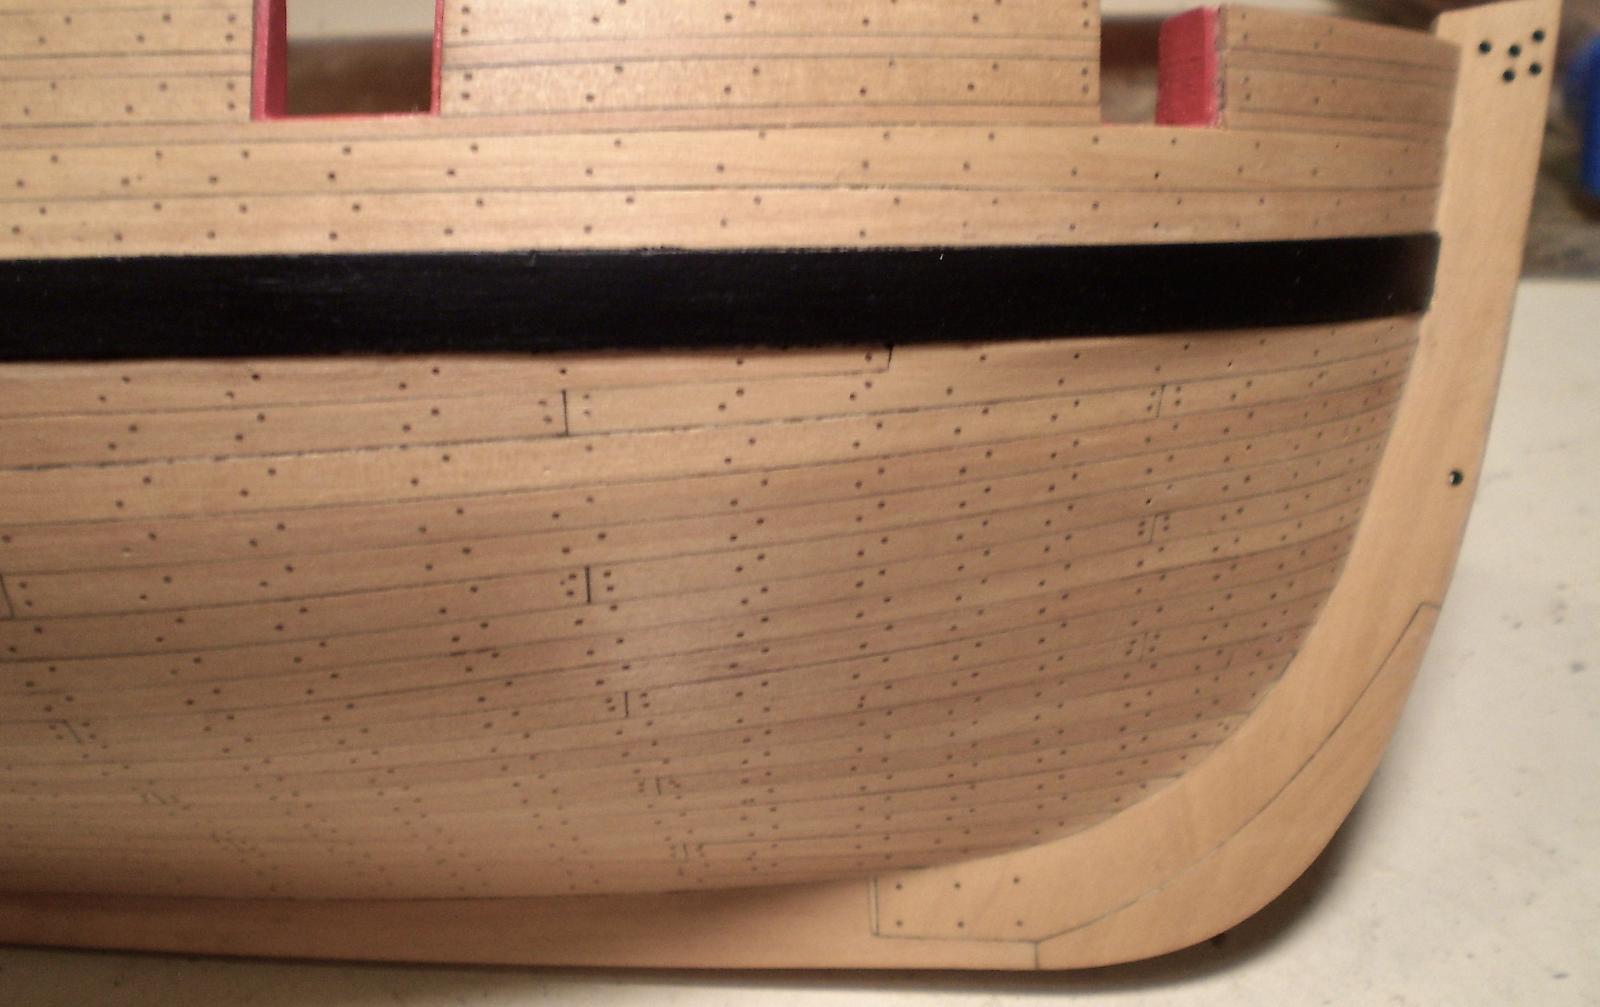
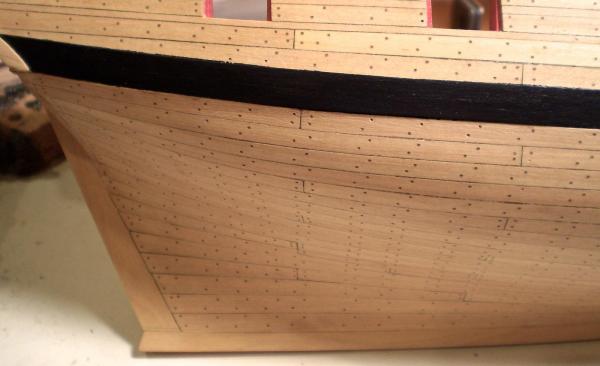
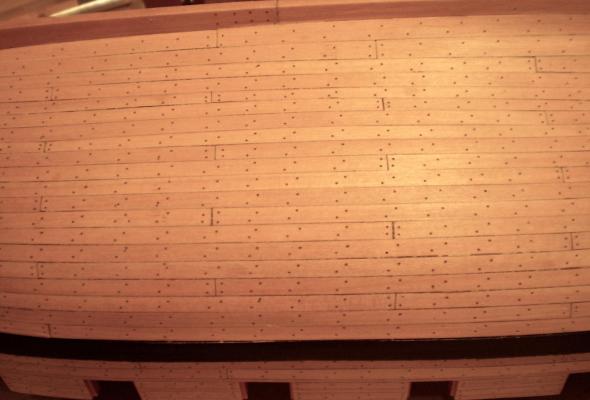
Lower hull planking on the starboard side is now finished. This involved drilling and filling over 1300 holes for the simulated treenails, final sanding with multiple grades of sandpaper and a coat of Wipe-on Poly to seal and protect the work. Although my hand seems to be permanently cramped into the position of gripping the pin vise drill , I am generally pleased with the result. Now, it's on to the port side to do it all over again by adding and finishing the lower planking there. Bob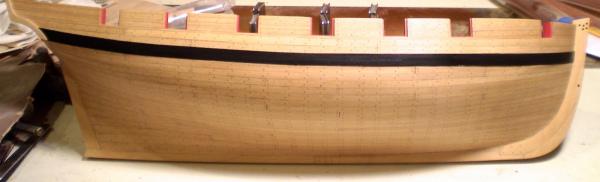


- 525 replies
-
- 41
-
-
- cheerful
- Syren Ship Model Company
- (and 1 more)
-
You're going to enjoy this build Ed. It's a really nice kit and Chuck's plans and instructions are great. Bob
-
Cutter Cheerful 1806 by rafine - FINISHED
rafine replied to rafine's topic in - Build logs for subjects built 1801 - 1850
Thanks so much Hamilton and the "likes". Bob- 525 replies
-
- 3
-
-
- cheerful
- Syren Ship Model Company
- (and 1 more)
-
Cutter Cheerful 1806 by rafine - FINISHED
rafine replied to rafine's topic in - Build logs for subjects built 1801 - 1850
Thanks so much Grant, George, Mike and all of the "likes". Bob- 525 replies
-
- 2
-
-
- cheerful
- Syren Ship Model Company
- (and 1 more)