Seventynet
-
Posts
797 -
Joined
-
Last visited
Content Type
Profiles
Forums
Gallery
Events
Everything posted by Seventynet
-
 Wonderful work! Ian
 -
Hi Paul, I just discovered this interesting build and am pulling up a chair. Beautiful work as always! ian
-
Looking really good! Nice clean transition of the frames into the deadwood. Ian
-
Sherline Mill Ring Light
Seventynet replied to Some Idea's topic in Modeling tools and Workshop Equipment
Mark, I don’t foresee any problems making the carrier out of aluminum, I am just a bit hesitant about drilling the hole through the spindle headstock. It seems like drilling through 4 or 5 inches of aluminum would be quite an adventure and I don’t own a drill press. But it might be easy enough to mill a slot in a 1/2 square piece and epoxy it into the headstock inside corner to hide the wire. I’ll figure it out. Thanks again for the excellent design. Ian -
Sherline Mill Ring Light
Seventynet replied to Some Idea's topic in Modeling tools and Workshop Equipment
Hi Mark, Thanks for the explanation. The hole in your spindle stock stumped me until I realized that the headstock I have predates yours by a few years when there was no through hole, which as you say is perfect to run the wires up out of the way. That’s too much aluminum for me to tackle so I’ll try to find a different solution. Best, Ian -
Sherline Mill Ring Light
Seventynet replied to Some Idea's topic in Modeling tools and Workshop Equipment
That is a nice idea, Mark. Since I see you are not CNC did you use a fly cutter to make the hole? I think I will make this too. I notice there are dimmable RBG and possibly white light rings on Amazon that could address brightness levels. How did you run the wires up? It looks like the wire comes out the top of the headstock spacer…? Regards, Ian -
I agree with Yves. I used some 40 grit to start, eventually getting it to 220 grit and used fairing strips as I went. Lots of elbow grease. Ian
-
Your planking job looks first rate. As far as what to finish it with I can’t help you but I do understand your sentiment as I felt the same way when I finished the walnut on my catboat. I often look at it and think I’ll paint a waterline and some colour below it, and maybe I will someday. Anyway your beautiful ship inspires me to get at my kit. Ian
-
Such outstanding work!
-
Beautiful work, Rusty! Ian
-
Absolutely gorgeous!
-
Looking very nice Rusty!
-
Really nice work!
-
Greg thank you so much for the kind words; although continuing to impress you will be tough indeed. 😀 Ian
-
Thanks so much Rusty. It is a very interesting build and I am really enjoying it.
-
Coming along very nicely Mikki!
-
Really nice explanation of how you made the windows. I remember that same challenge with my Haying Hoy. Now I am configuring the windows using cnc which should do a good job. The biggest obstacle is figuring out how to get a good enough bitmap and then converting that to vectors. I really like your project. Ian
-
Thank you billocrates, Mikki, Cisco, and Sfotinos for your overly generous praise. I know that there are lots of mistakes but hopefully not too noticeable. Ian
-
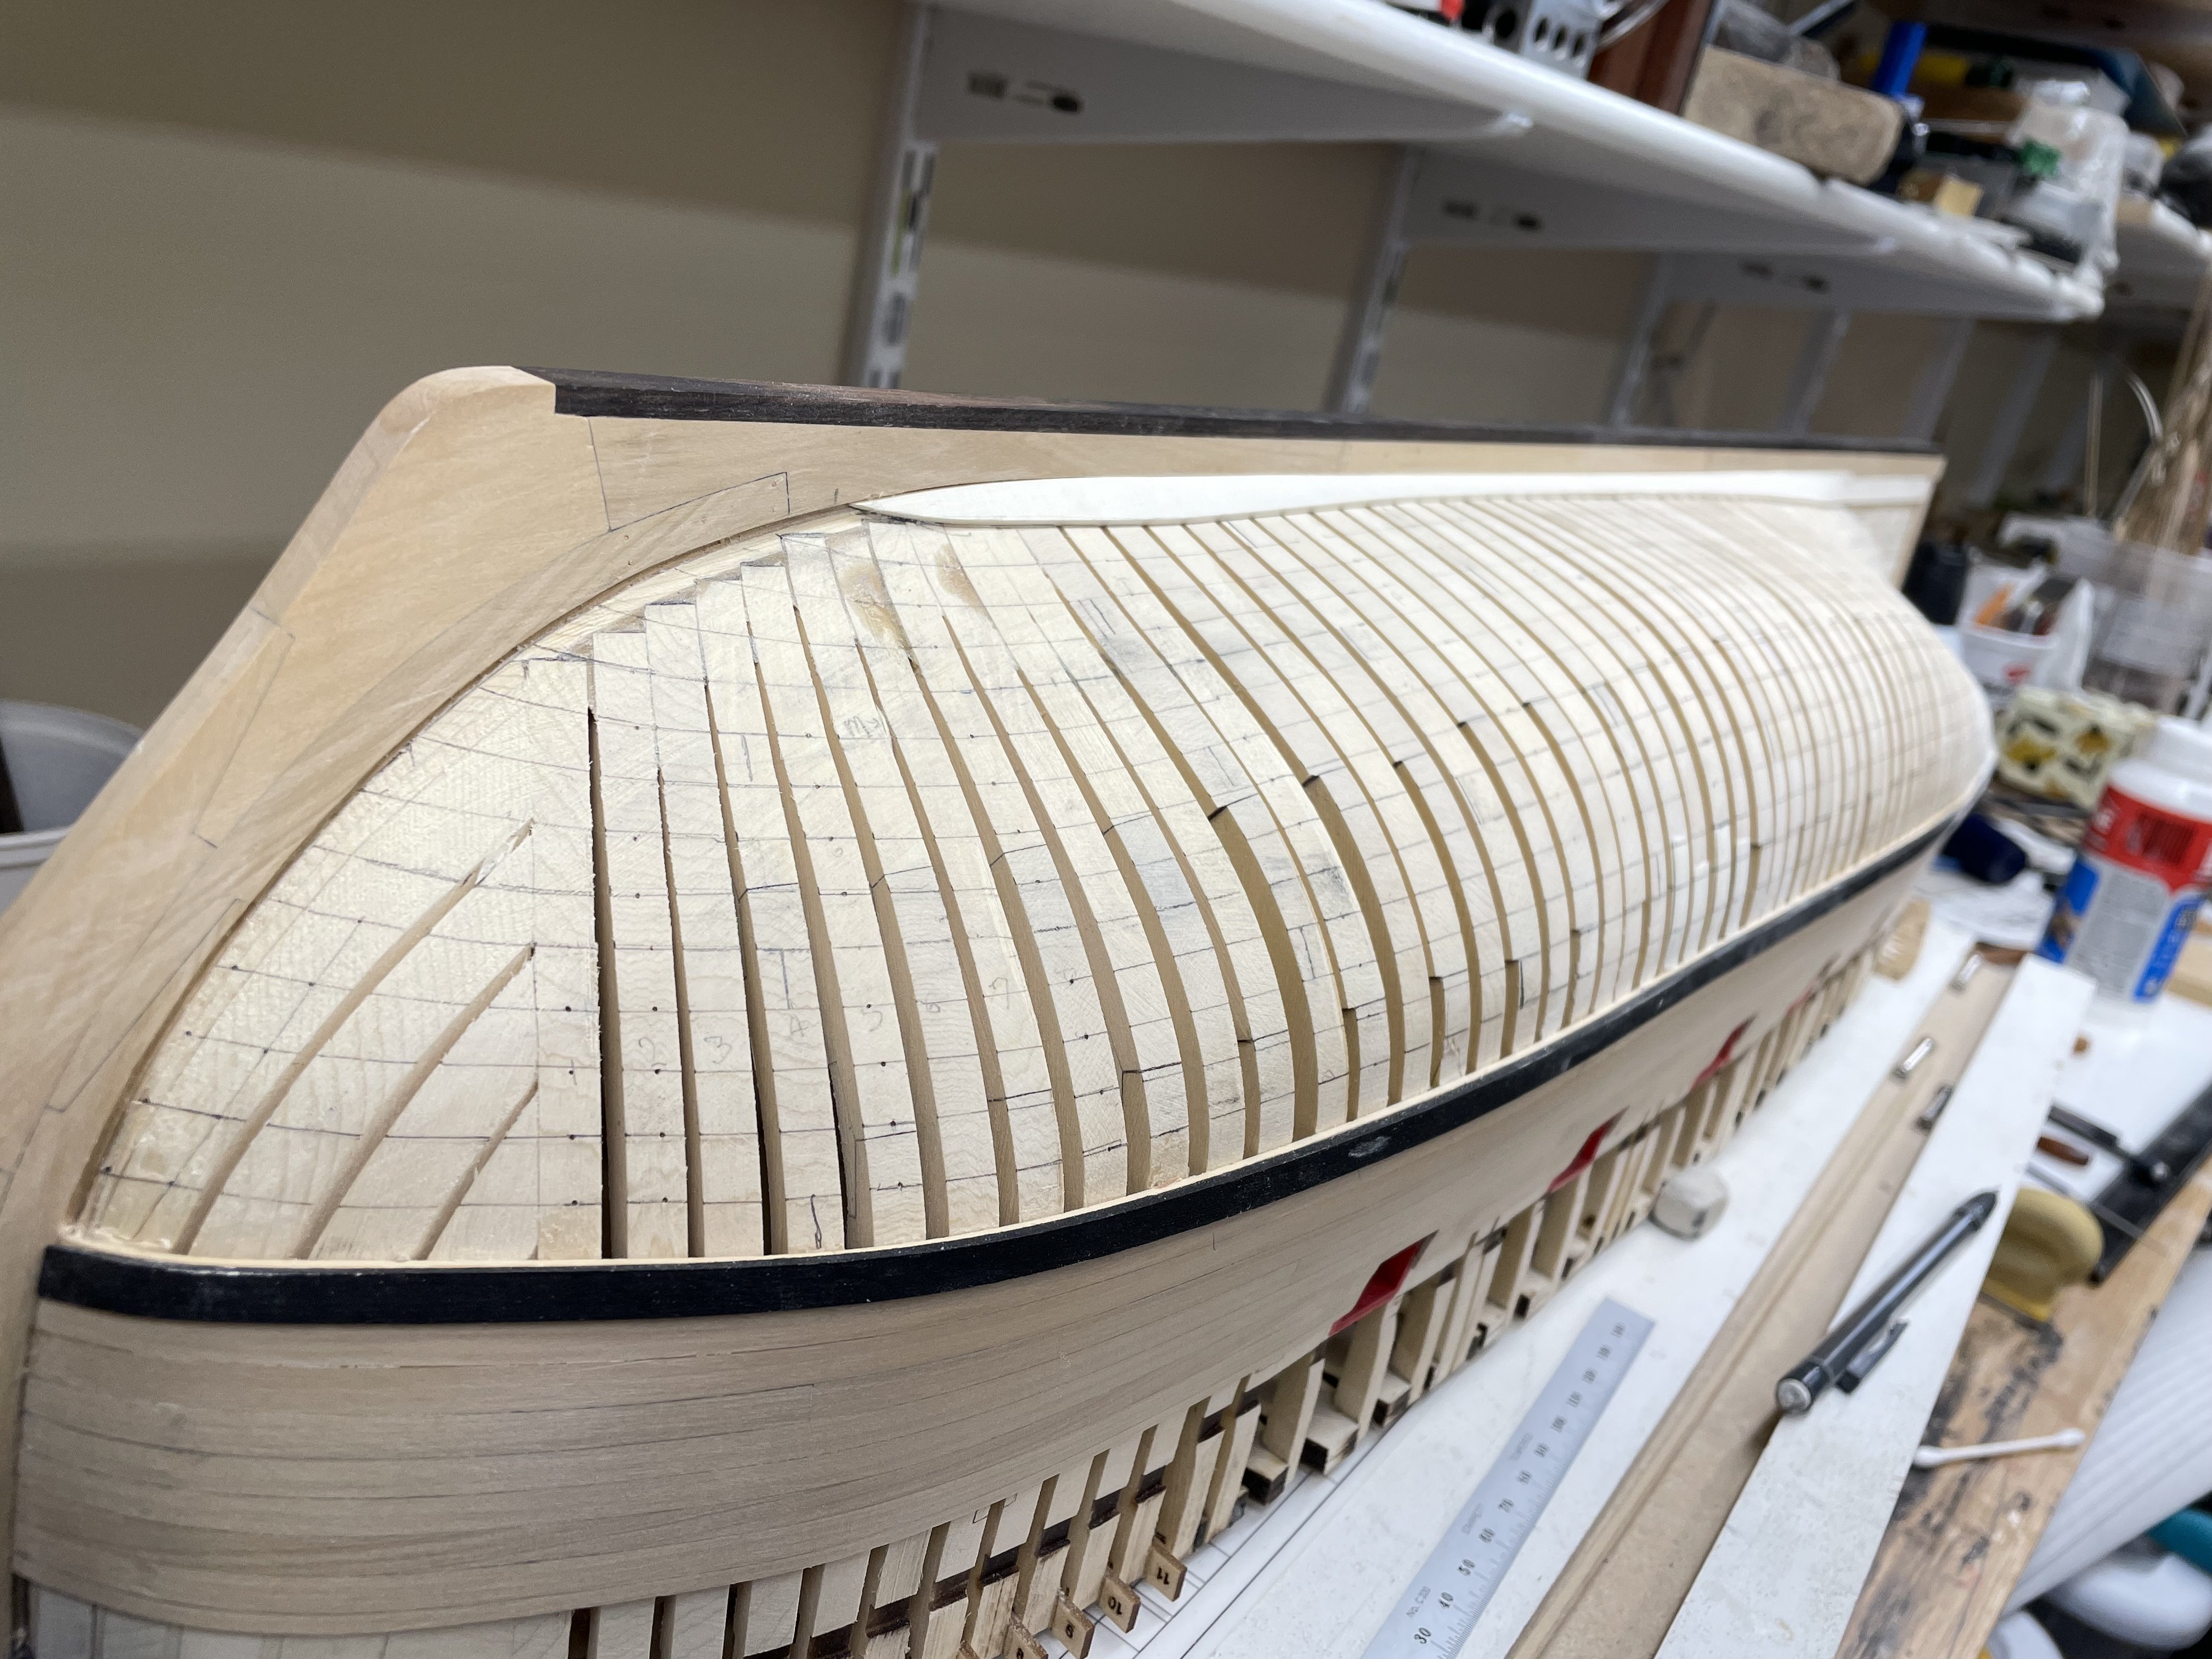
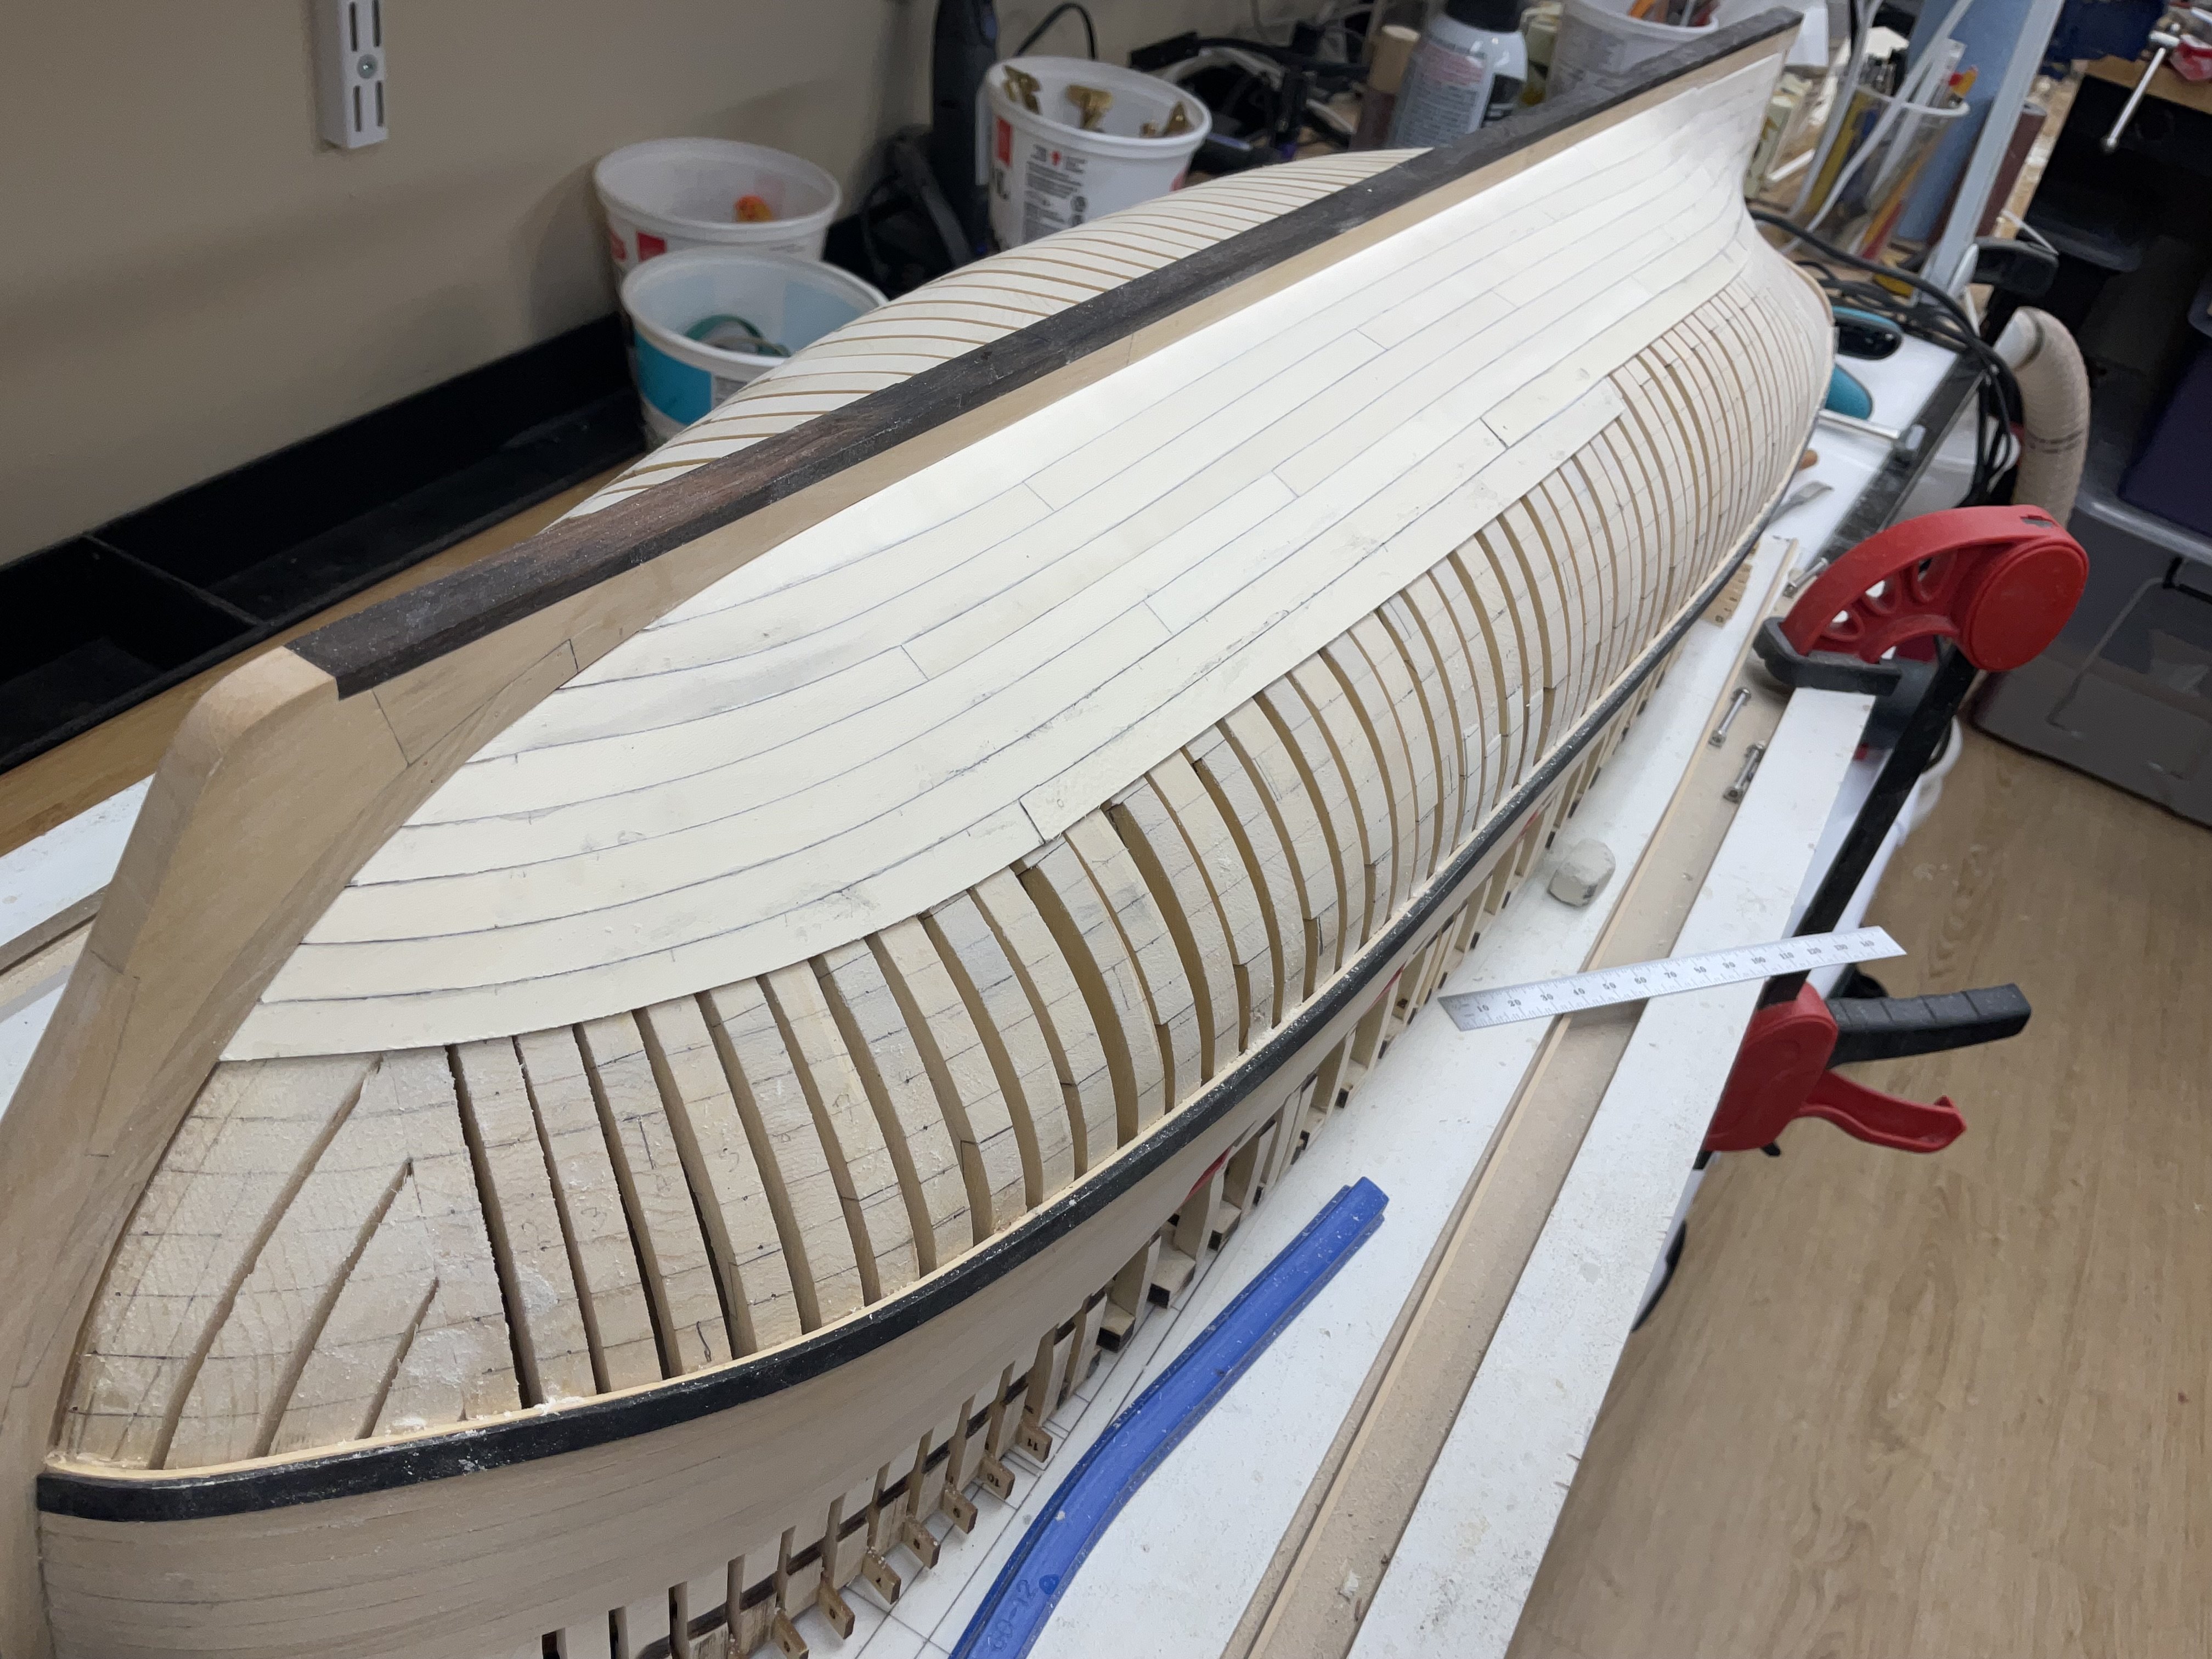
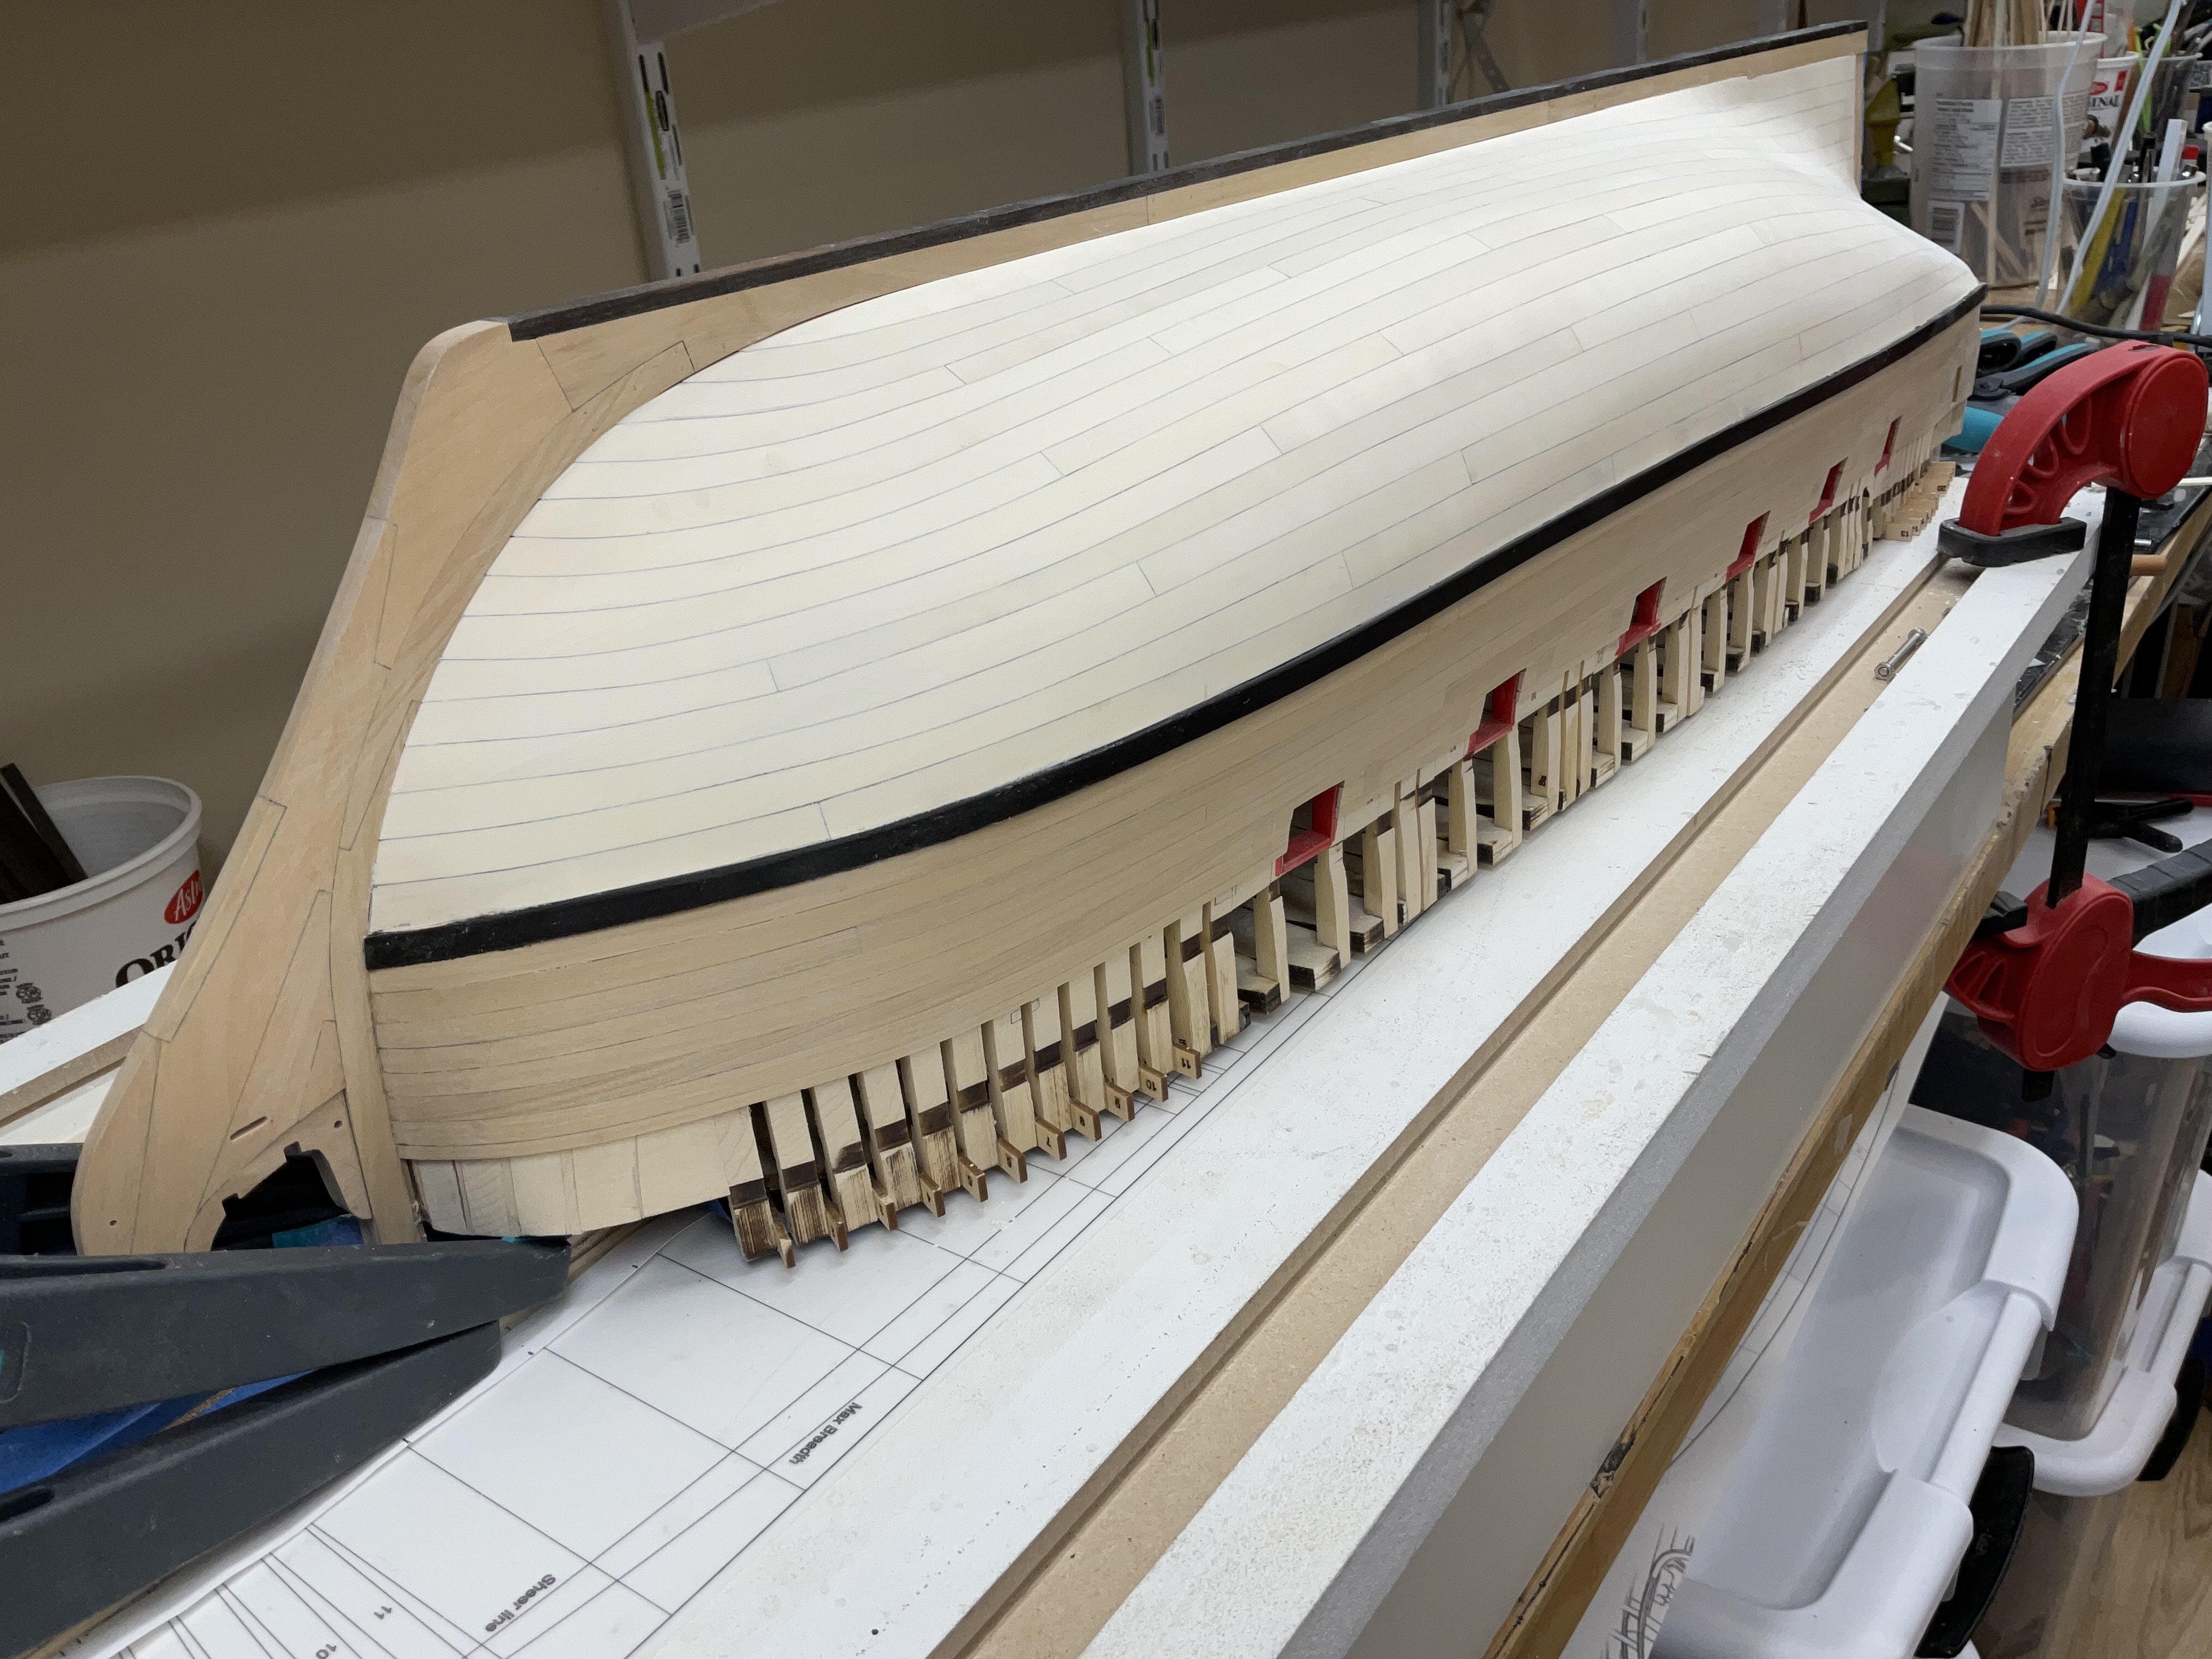
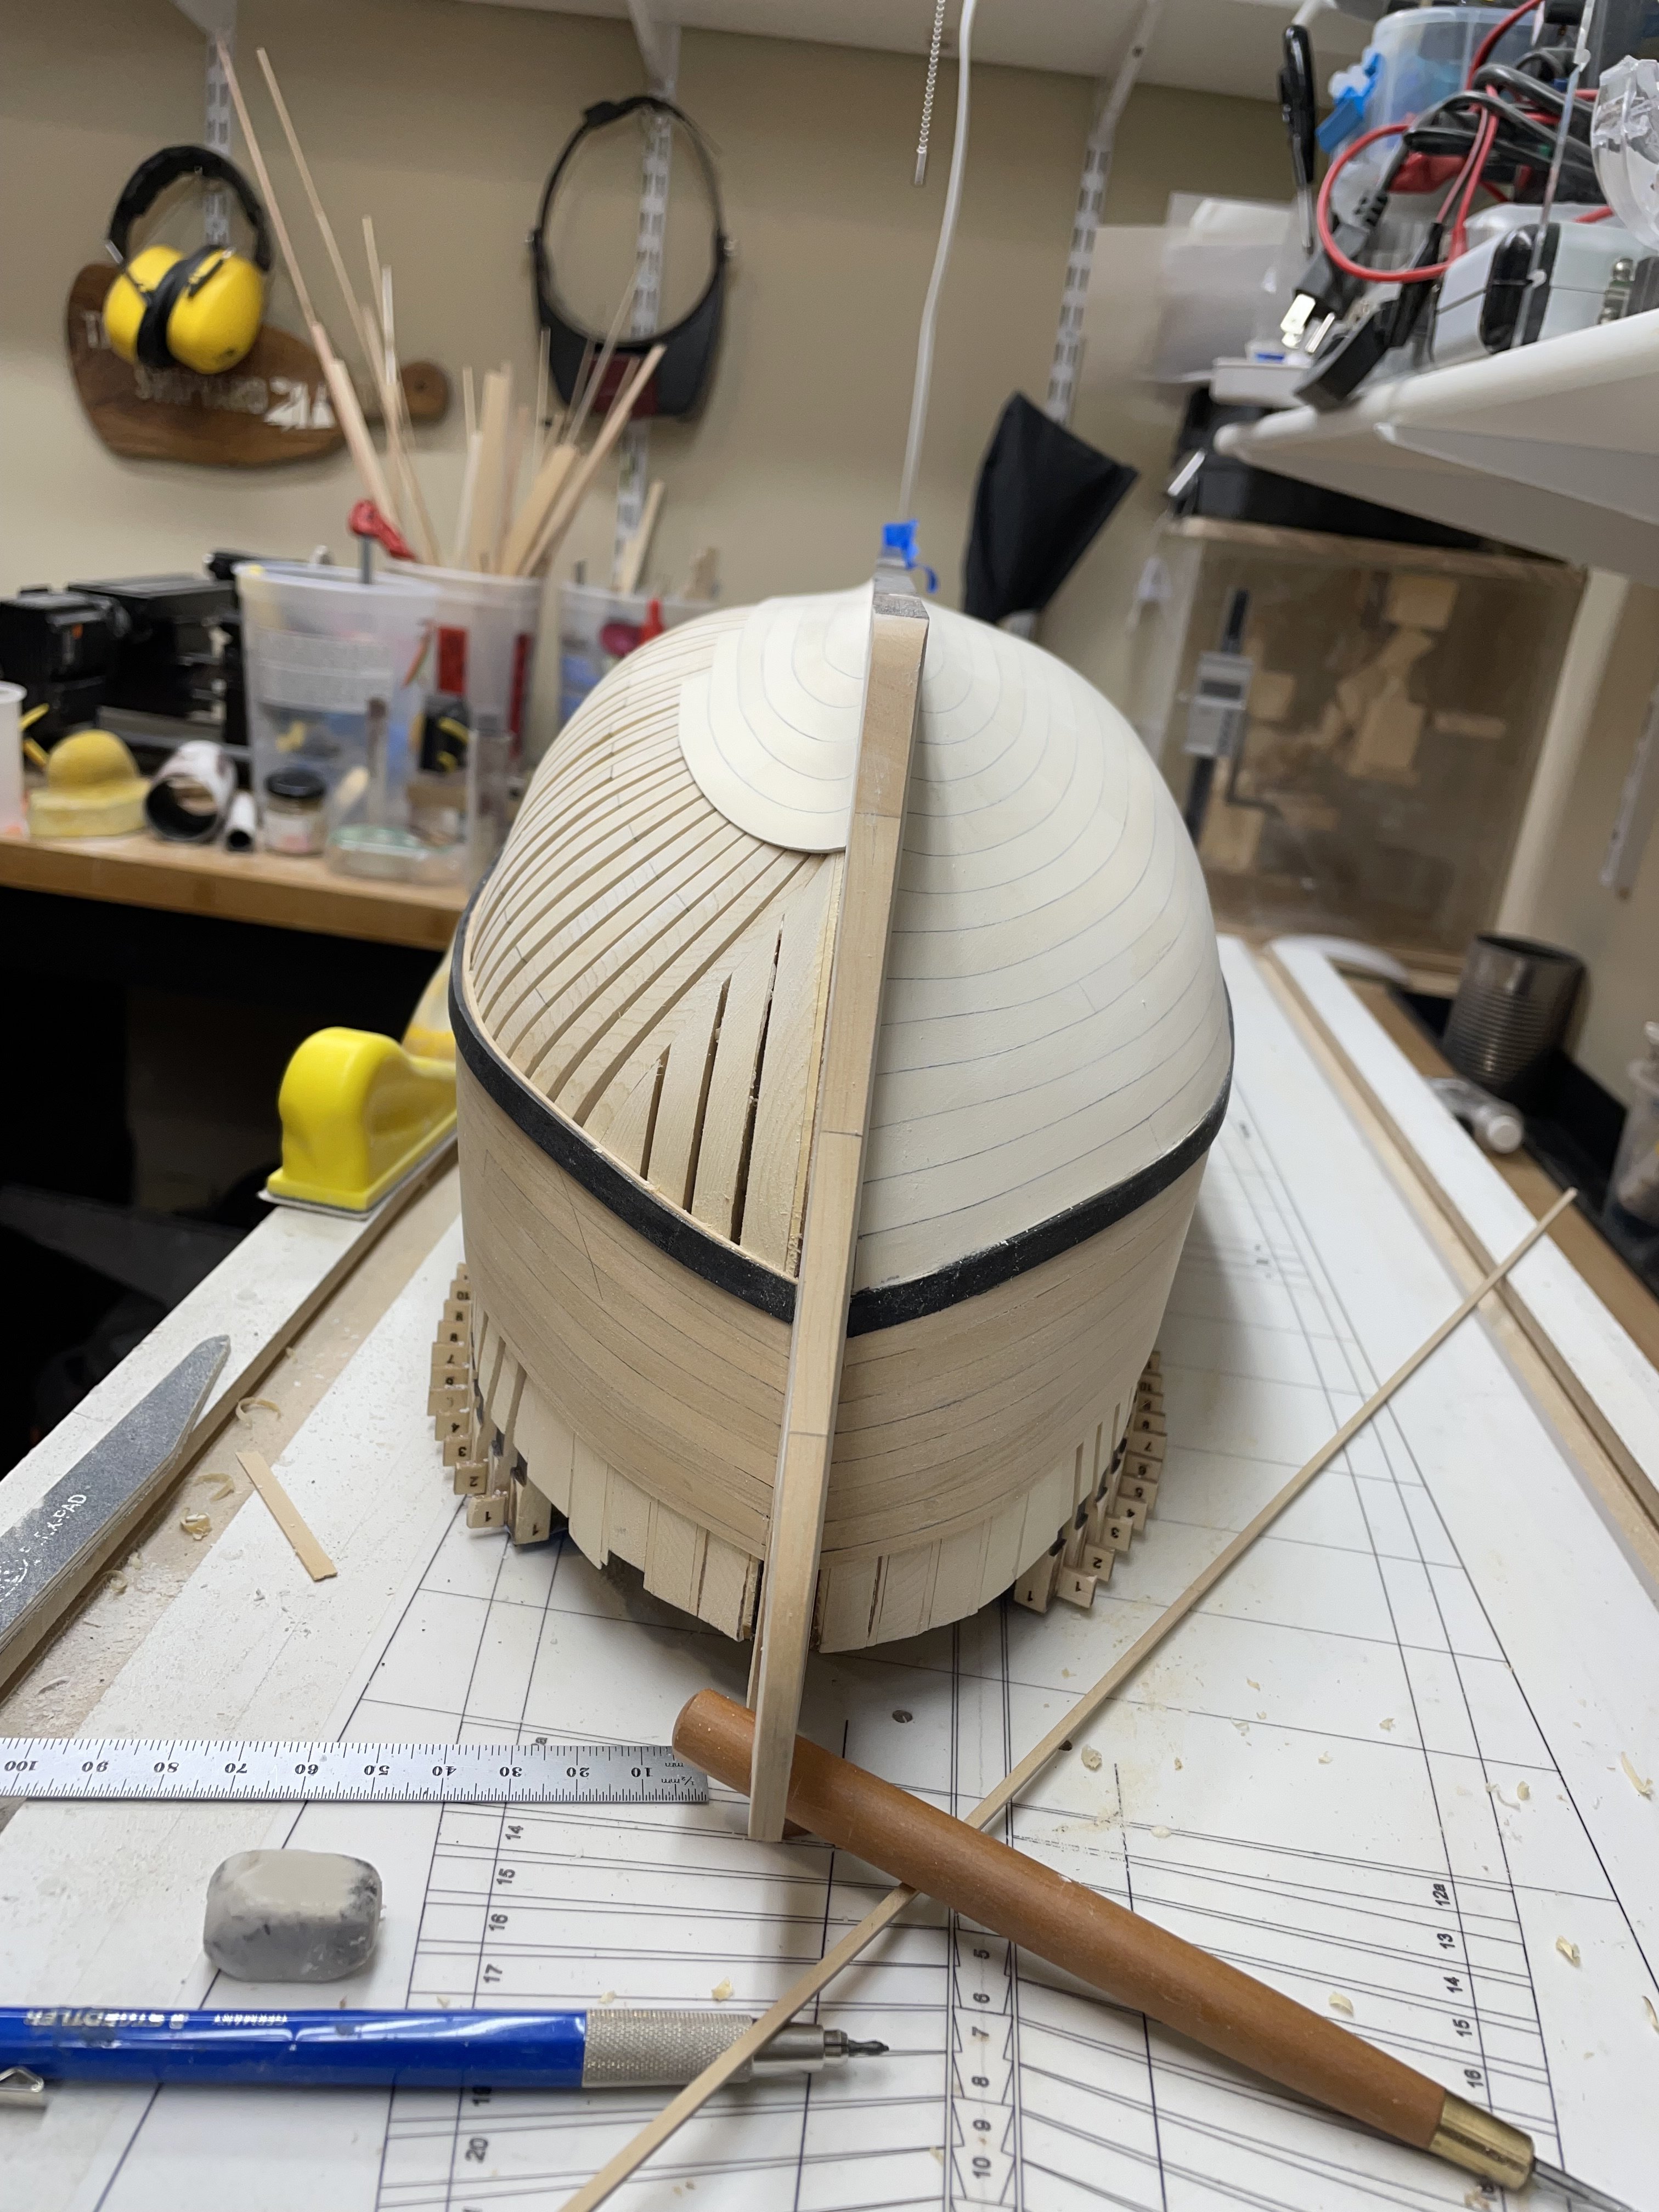
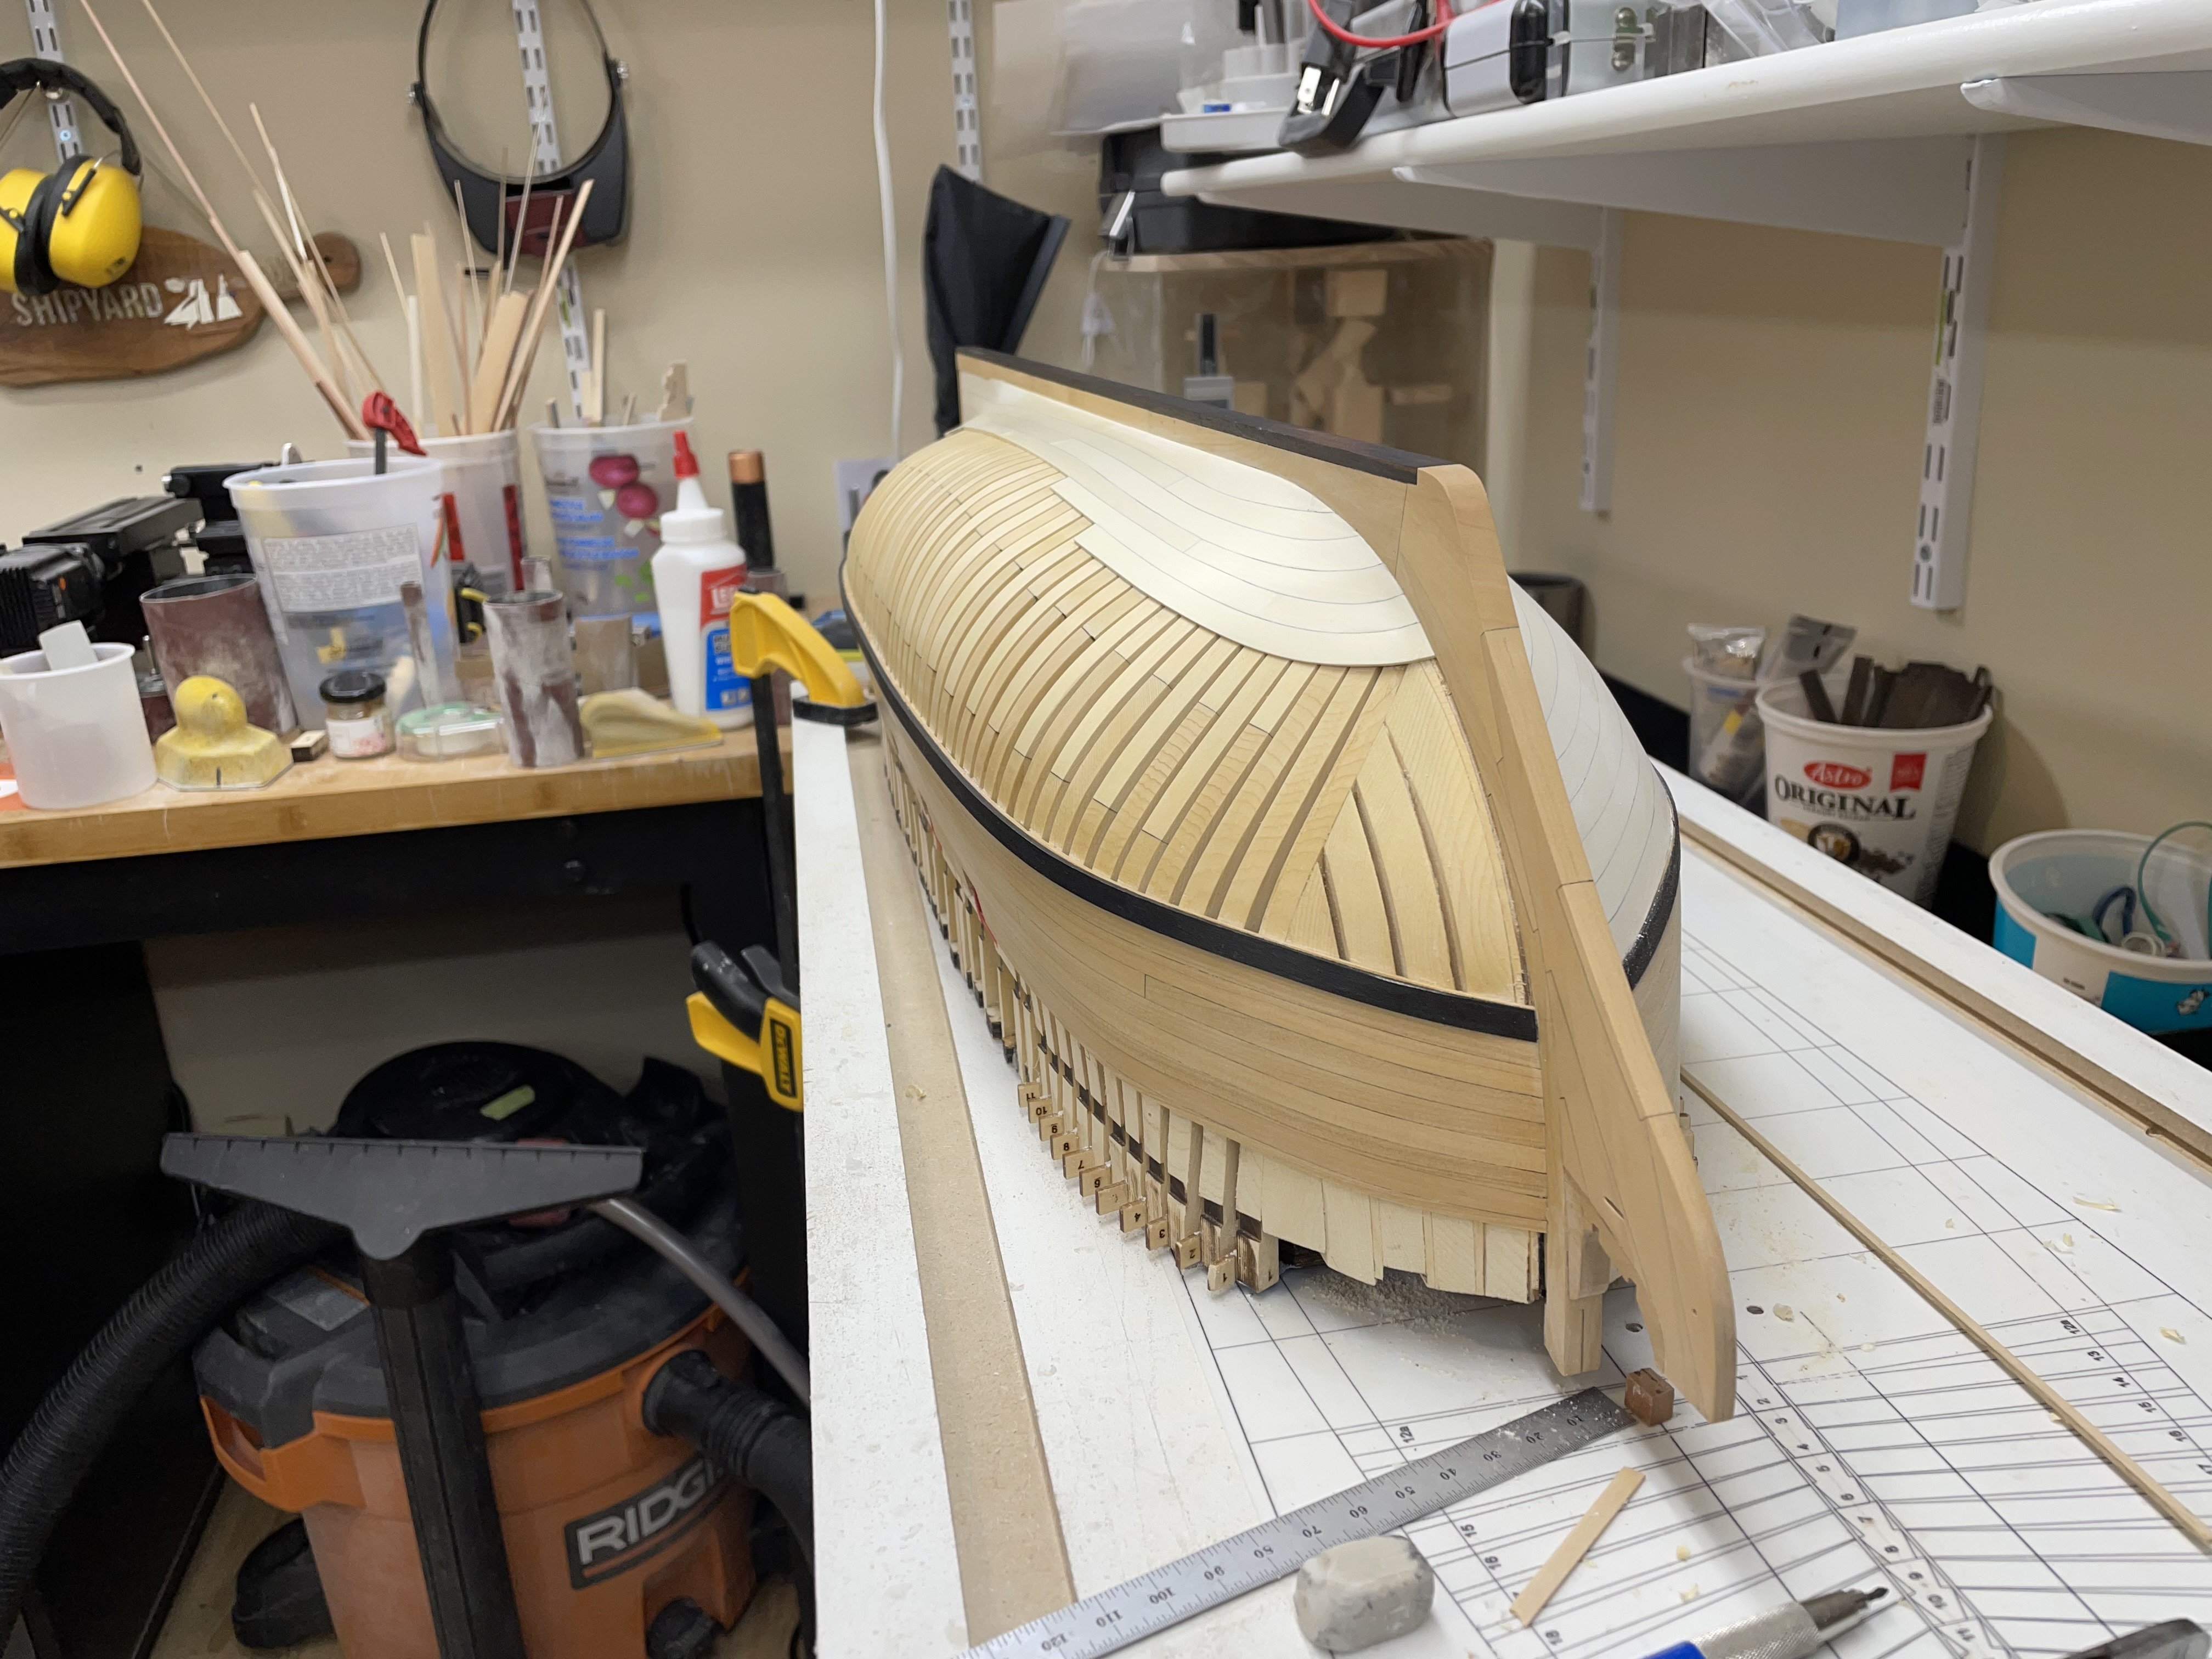
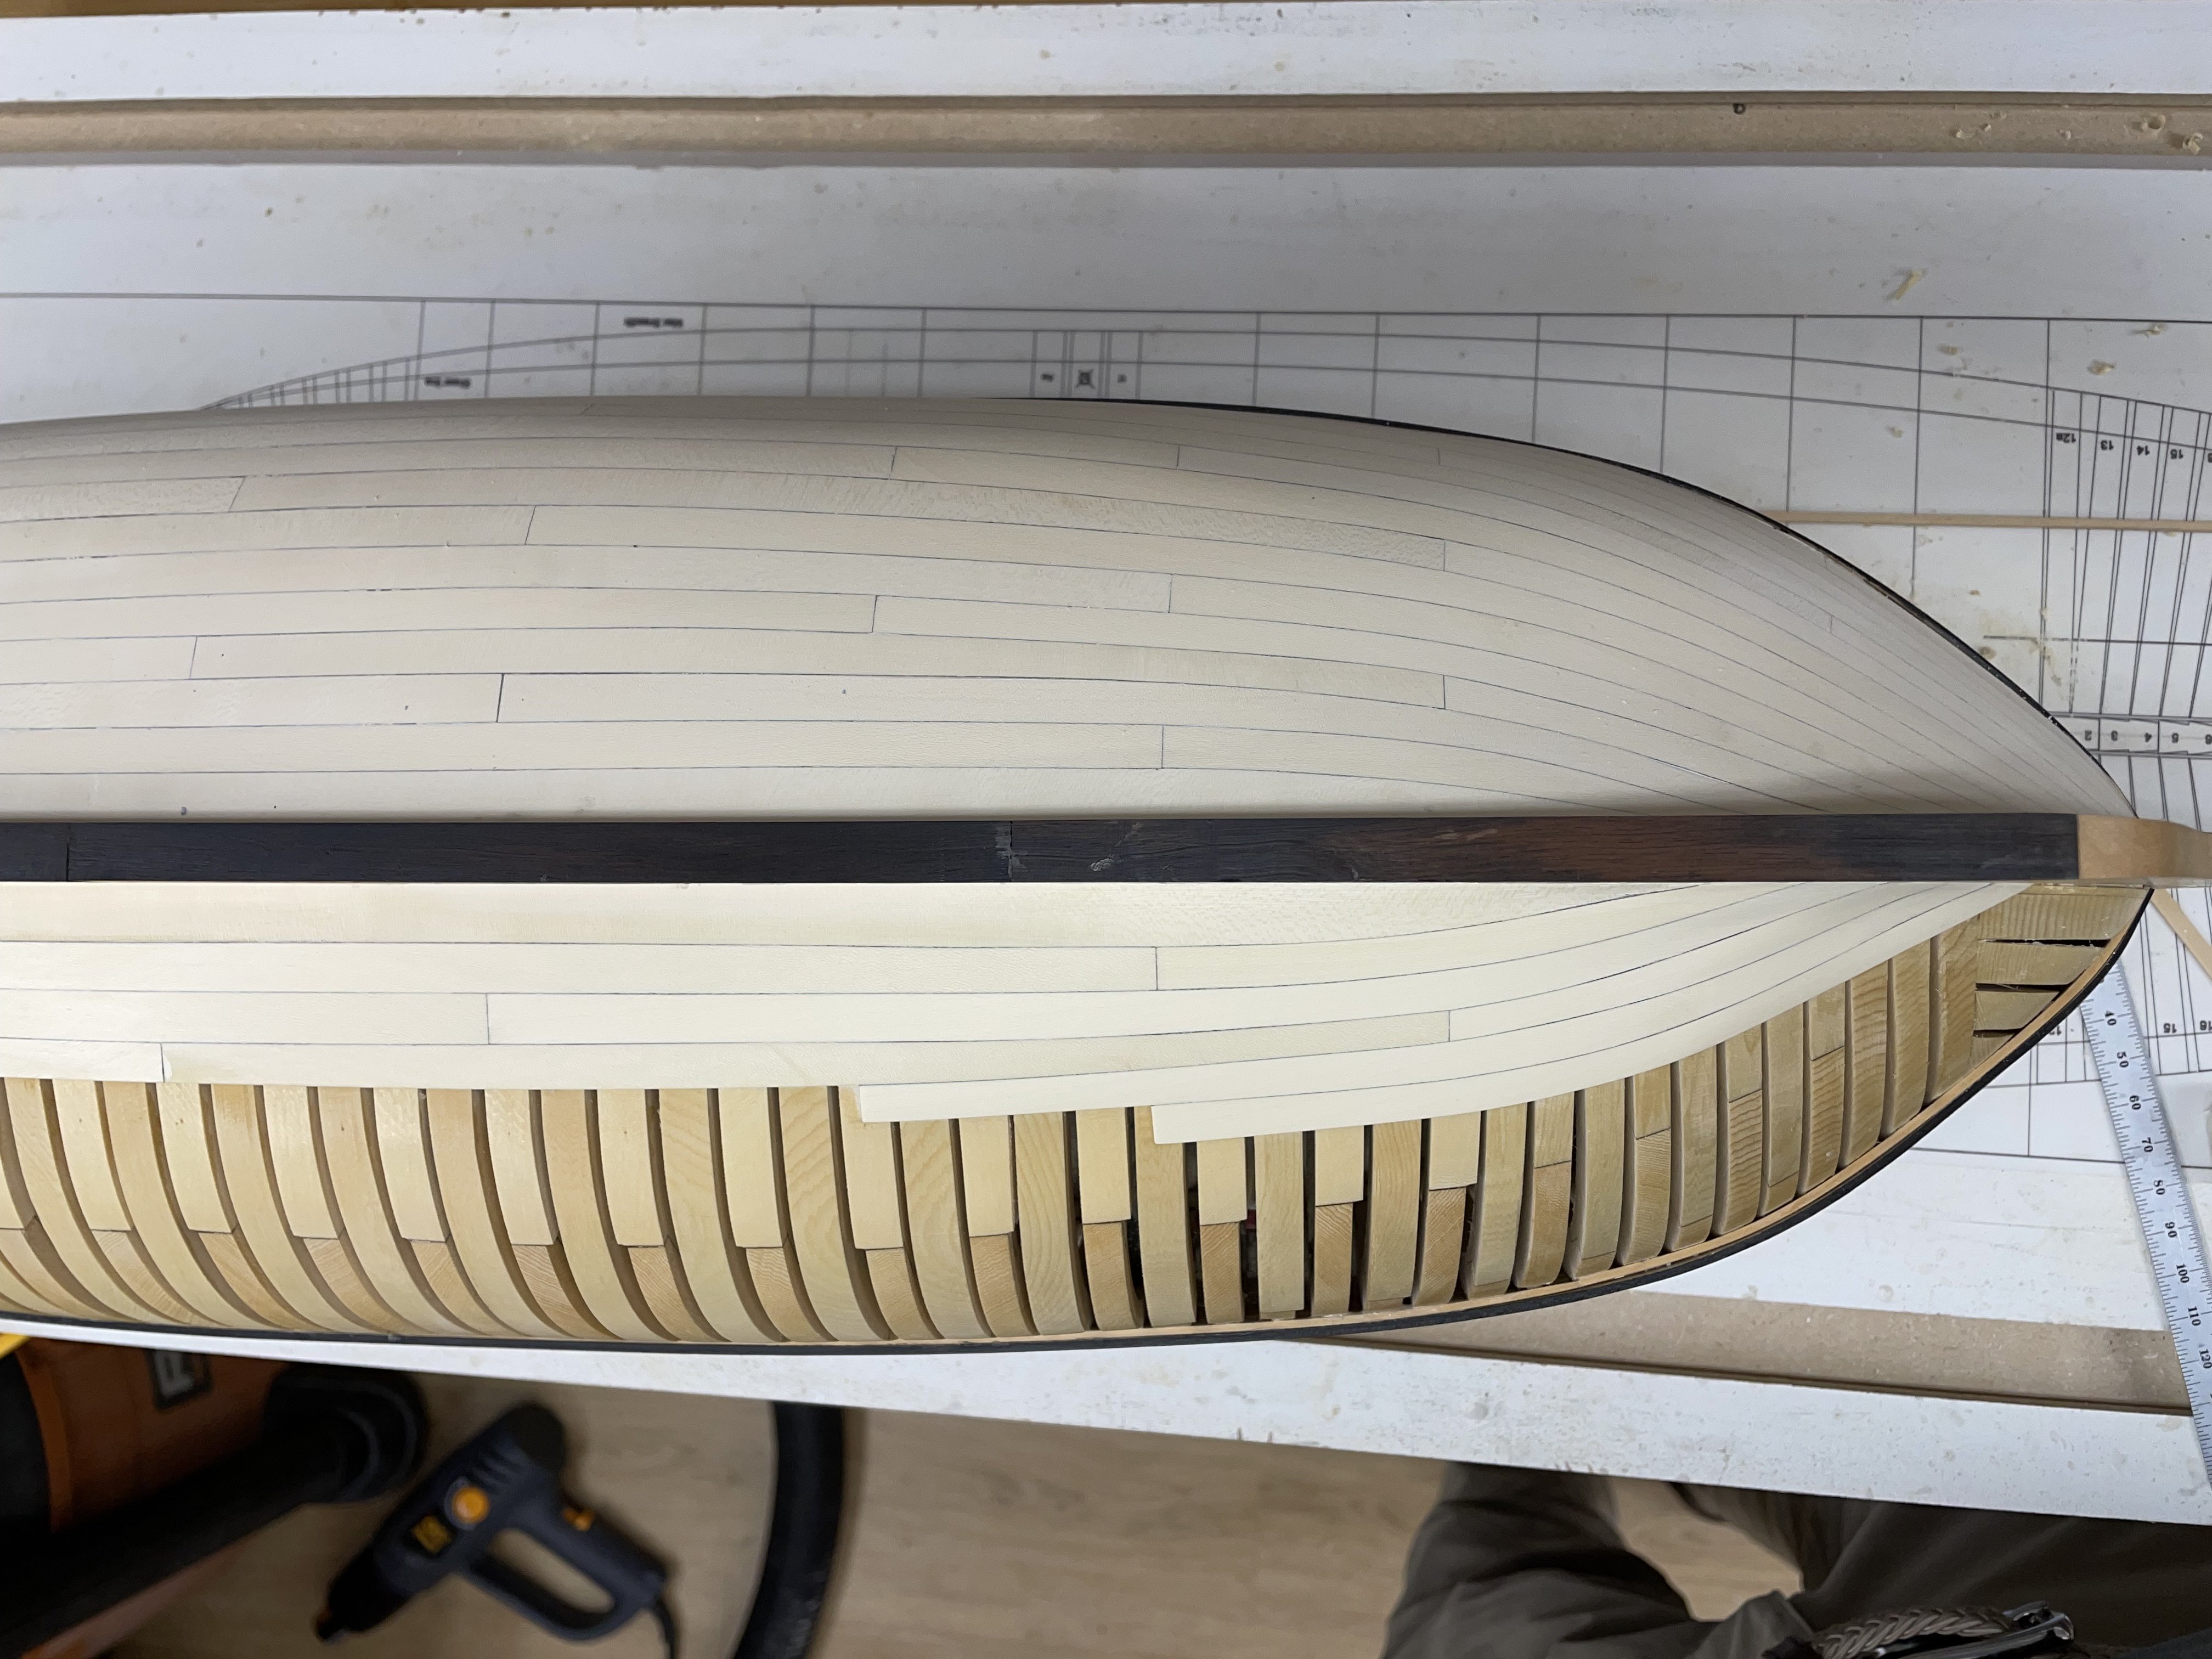
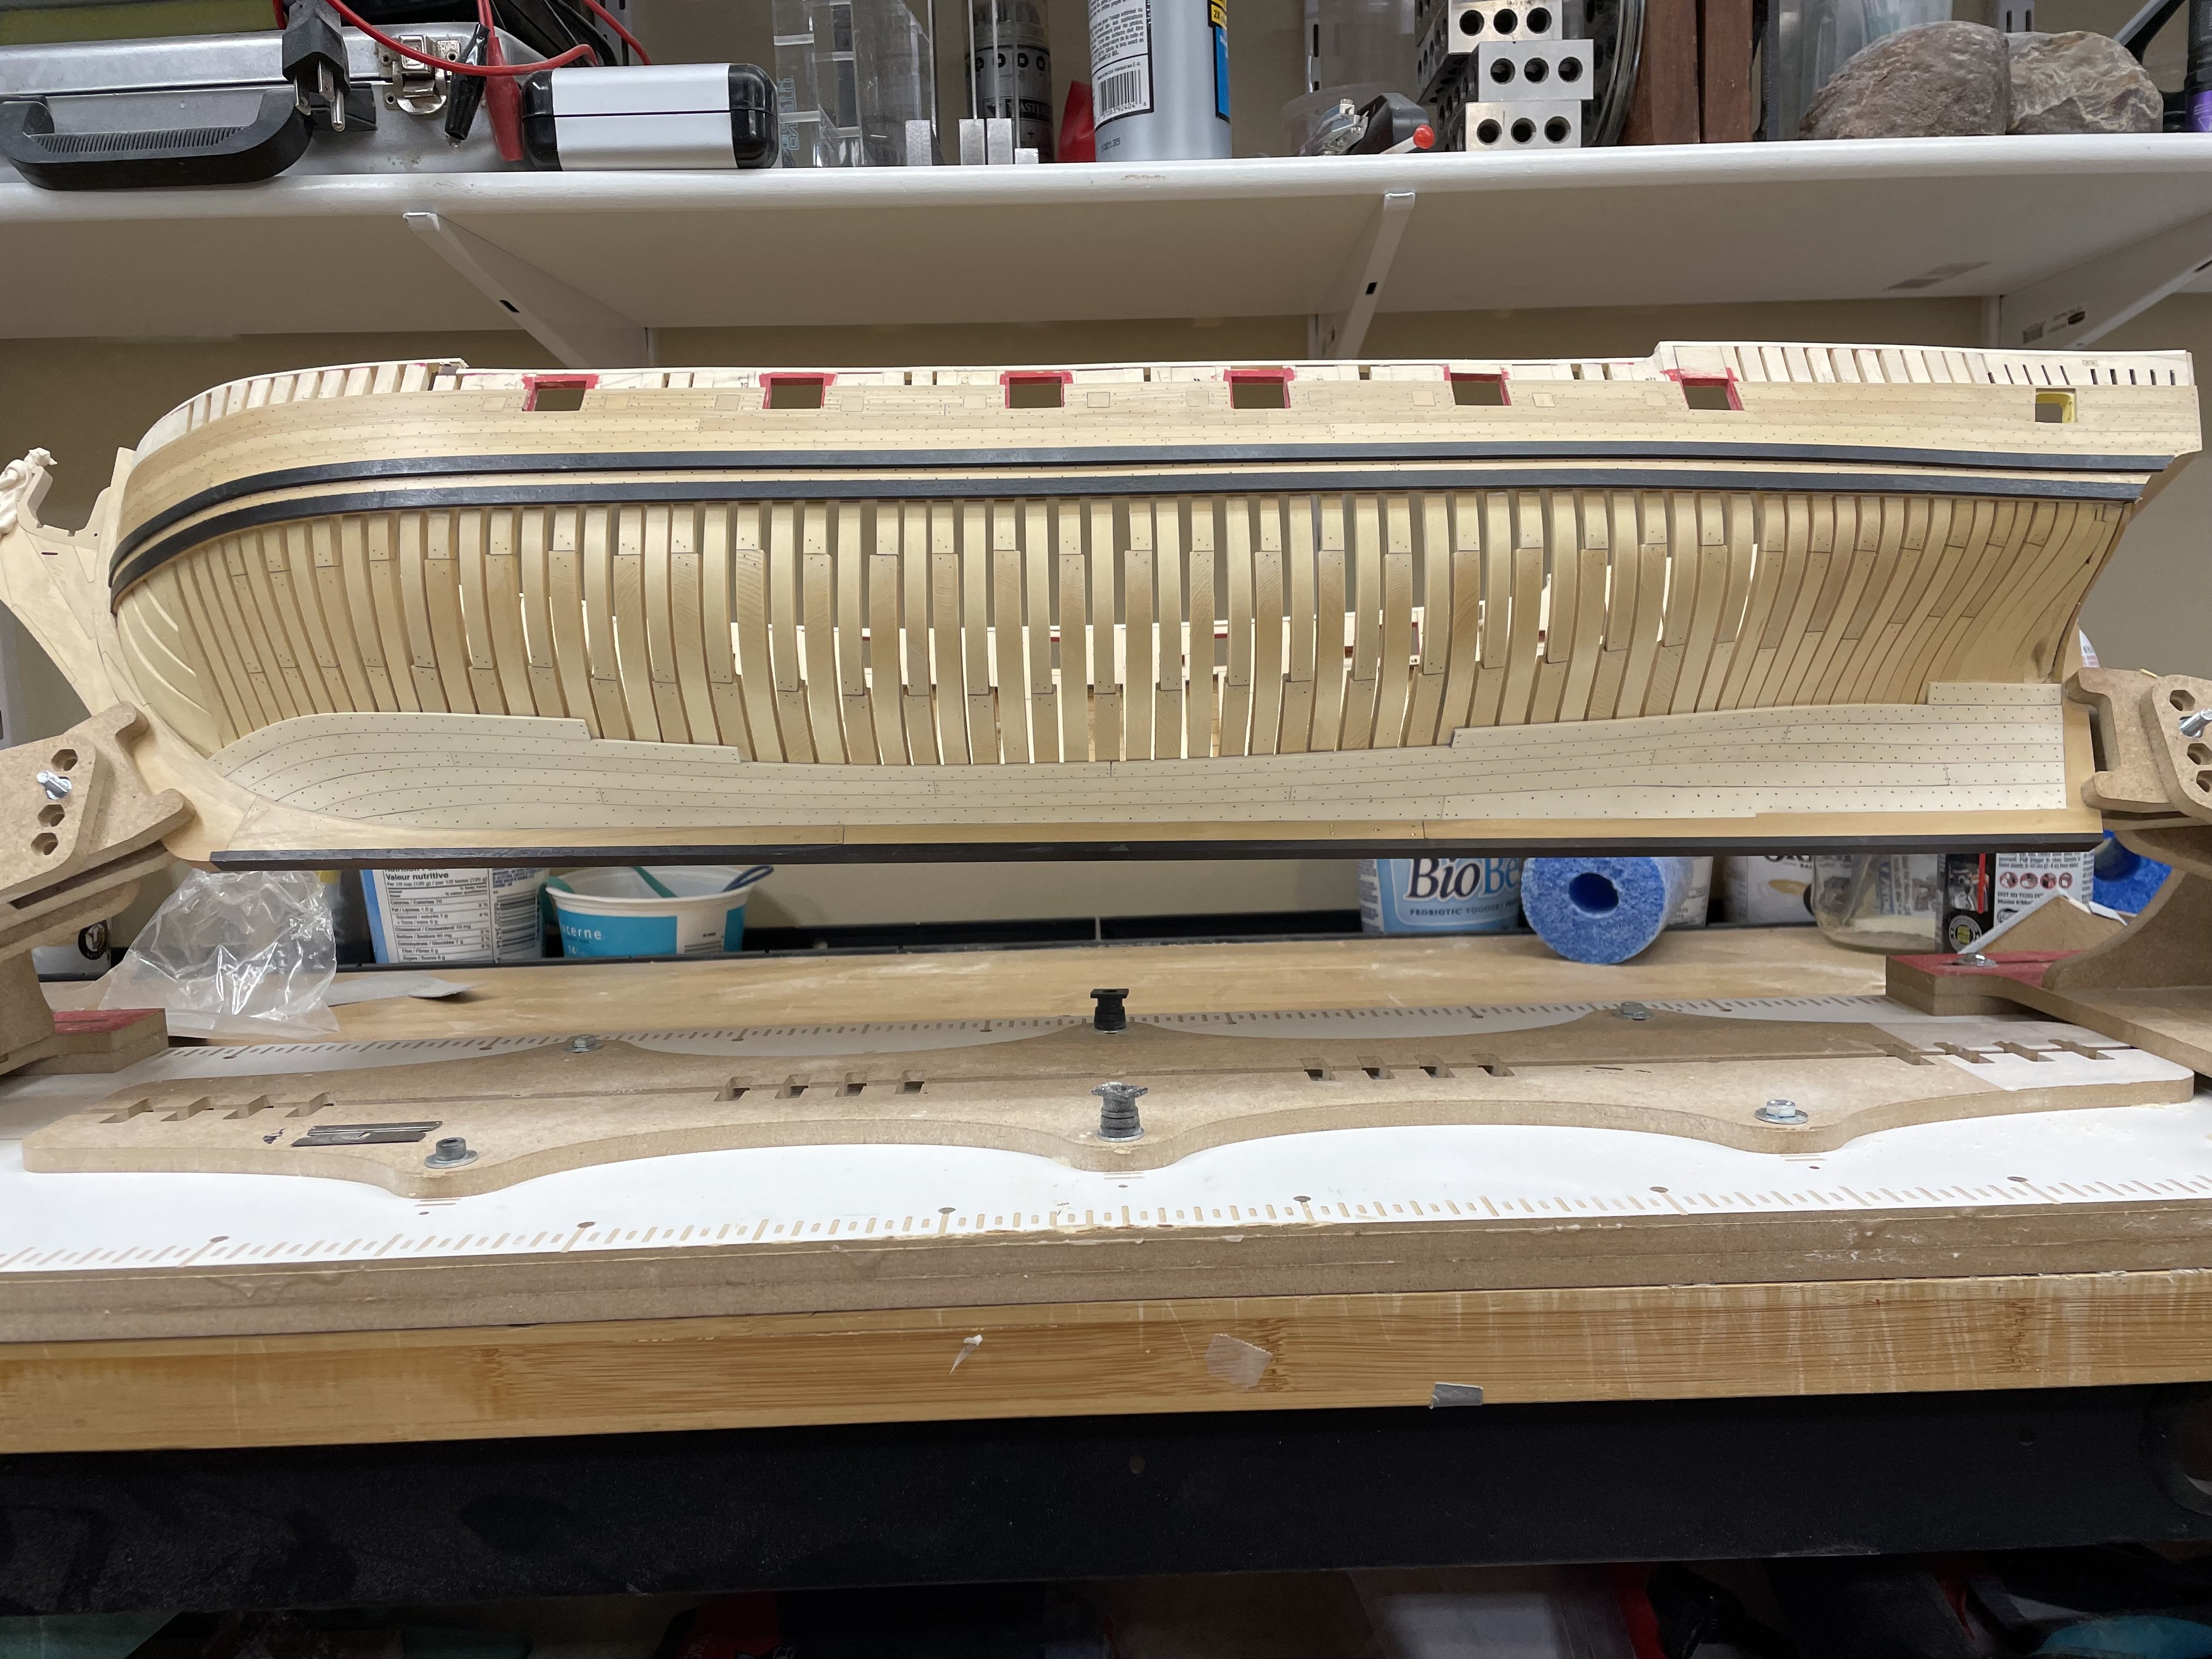
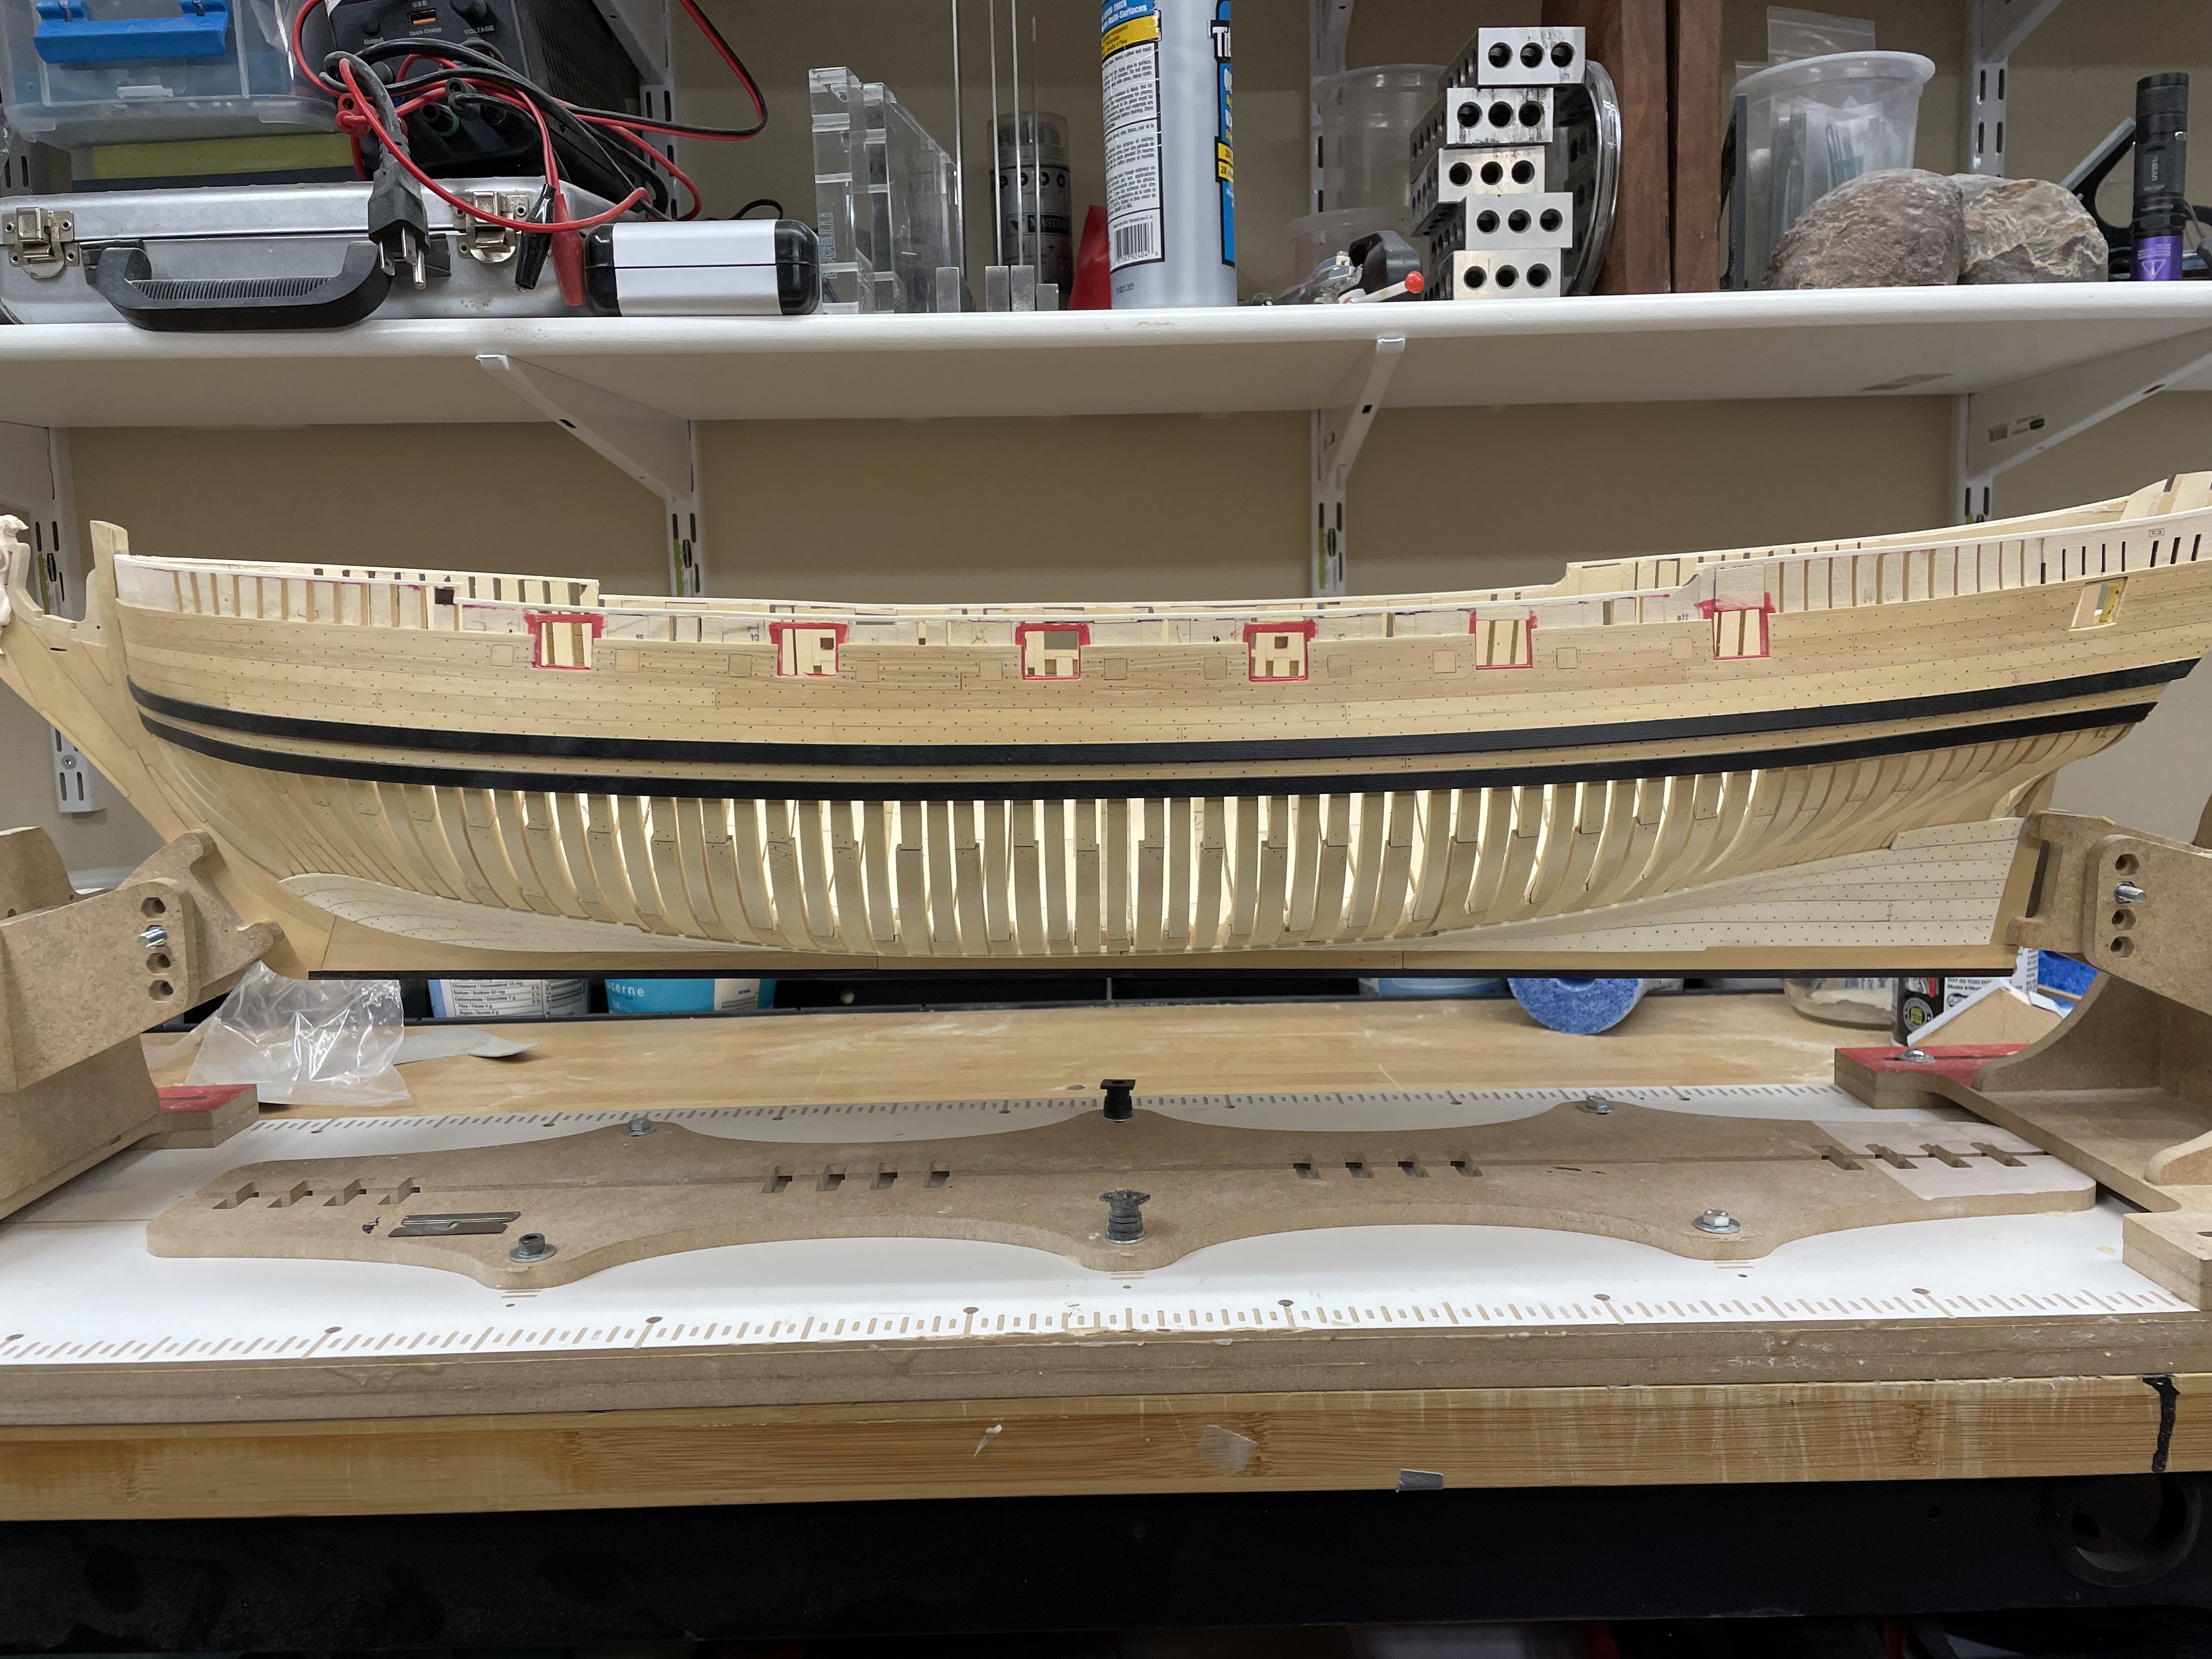
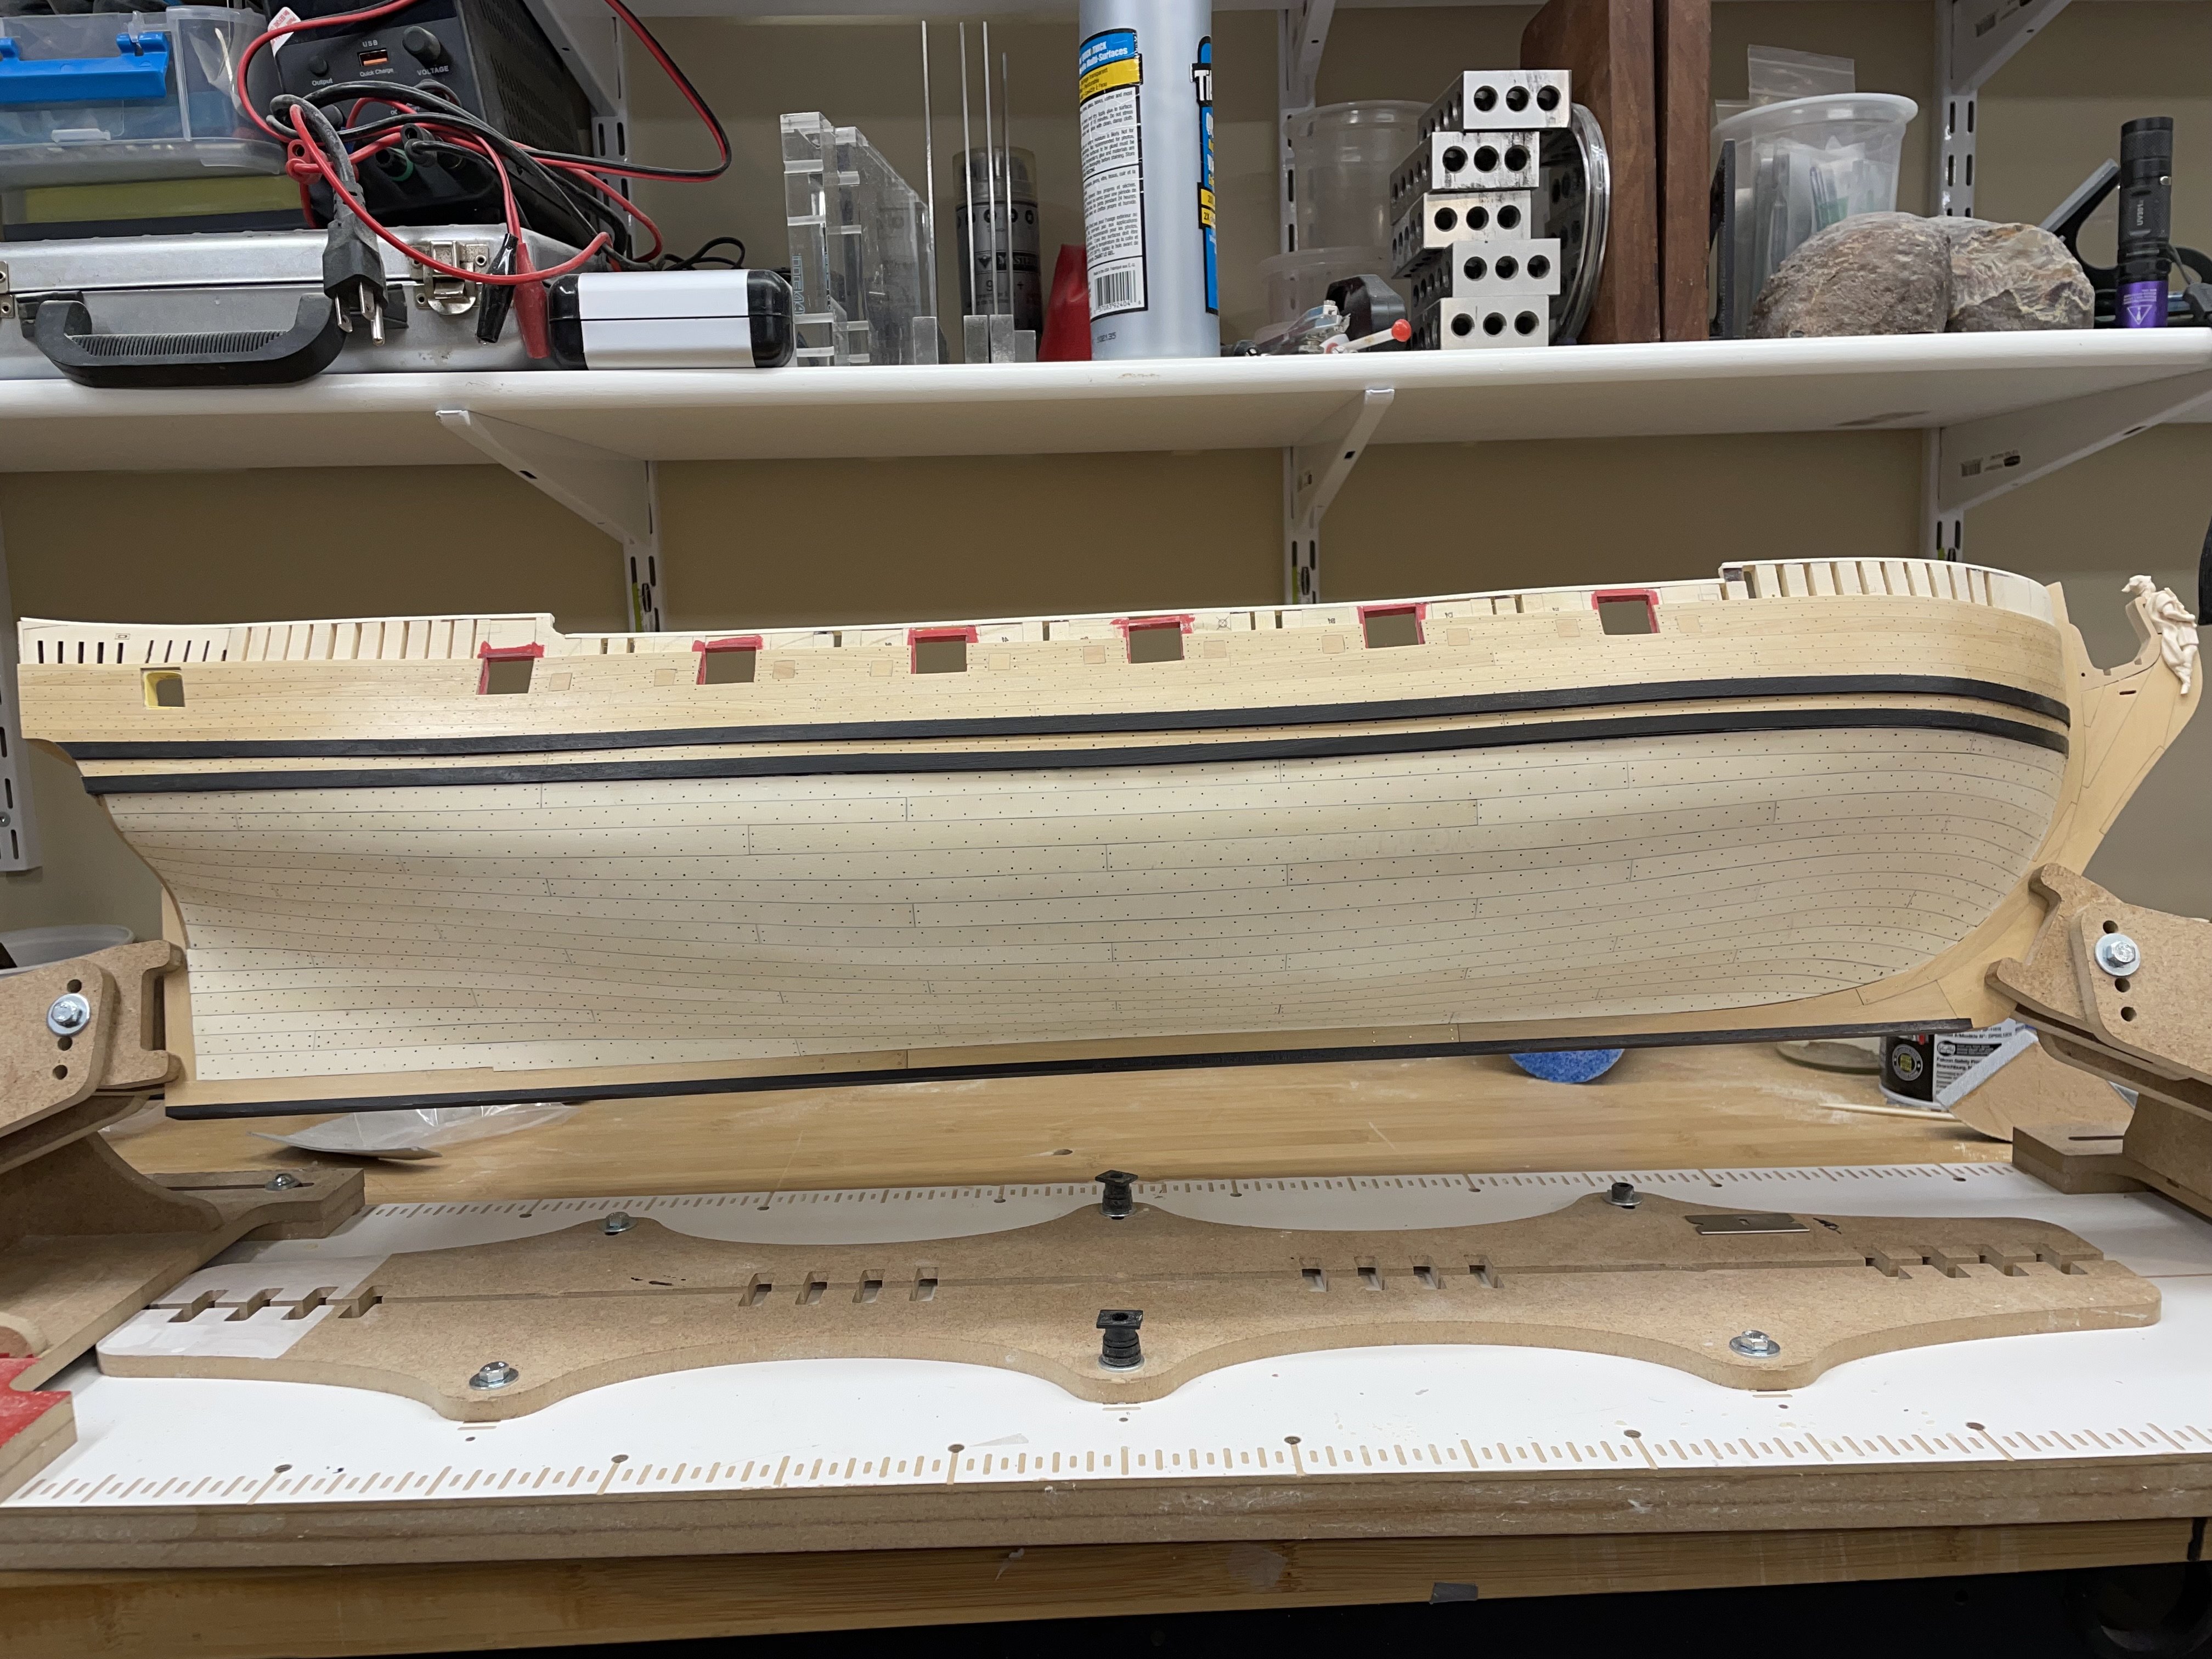
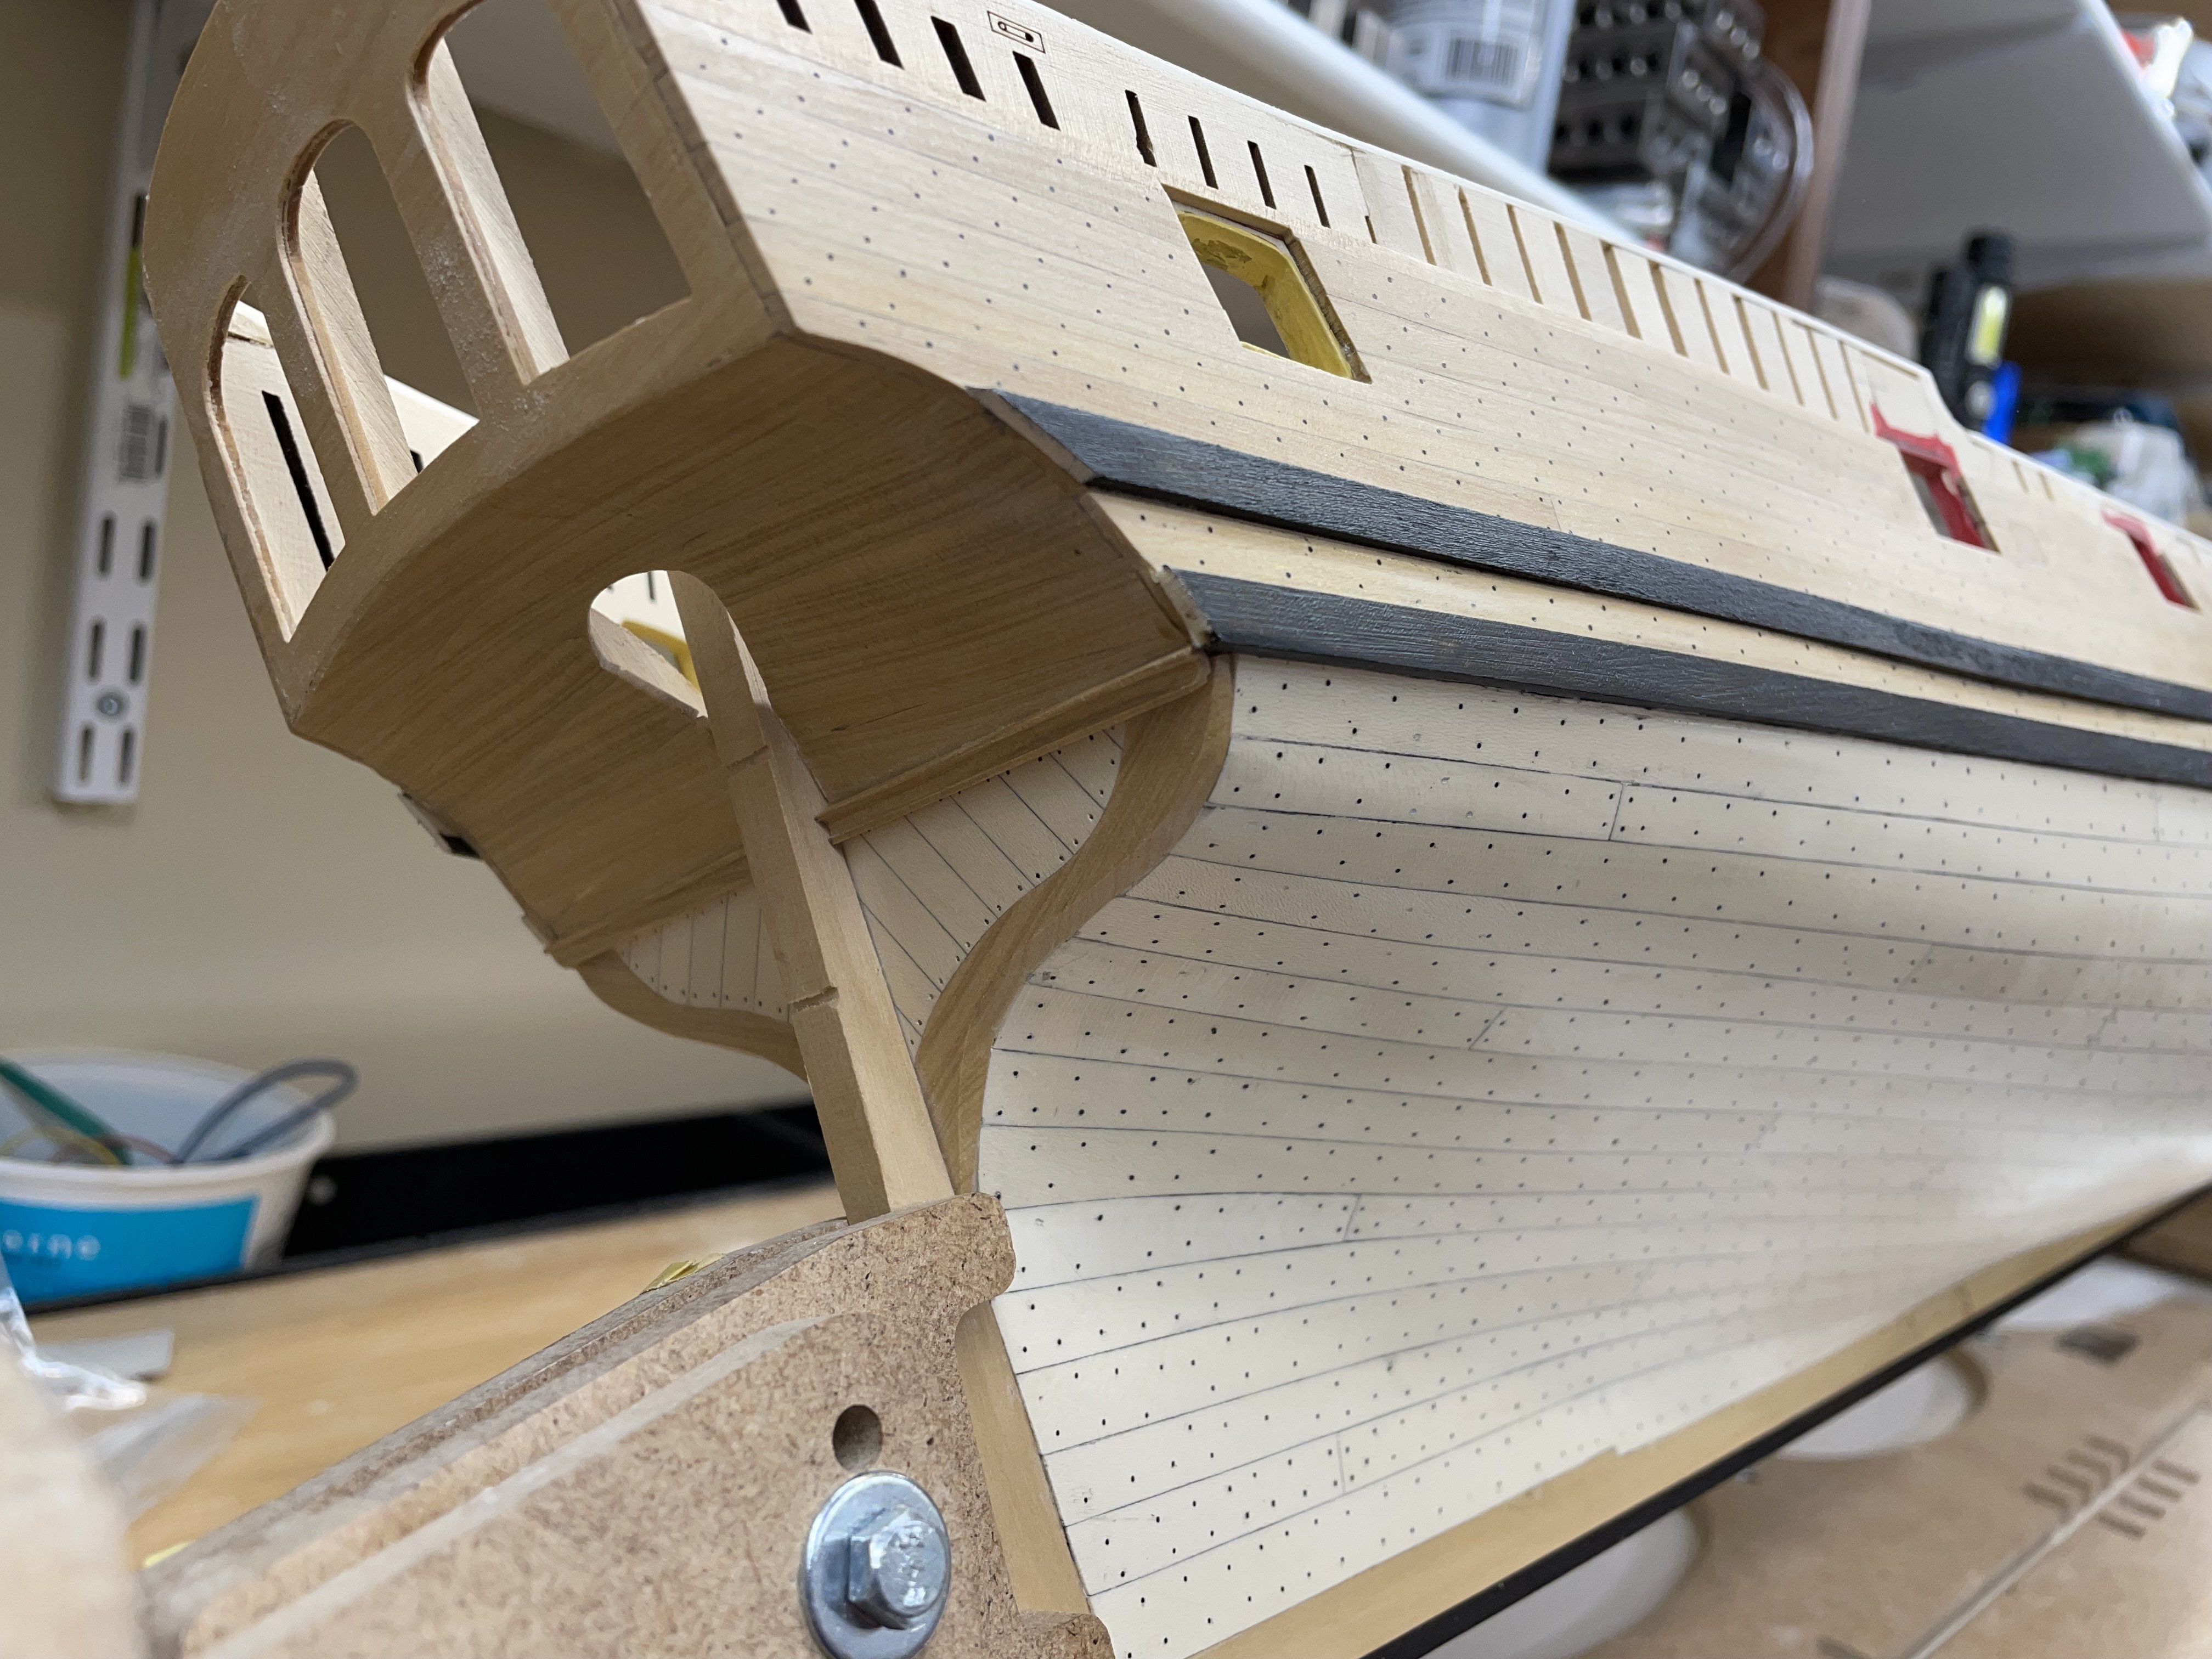
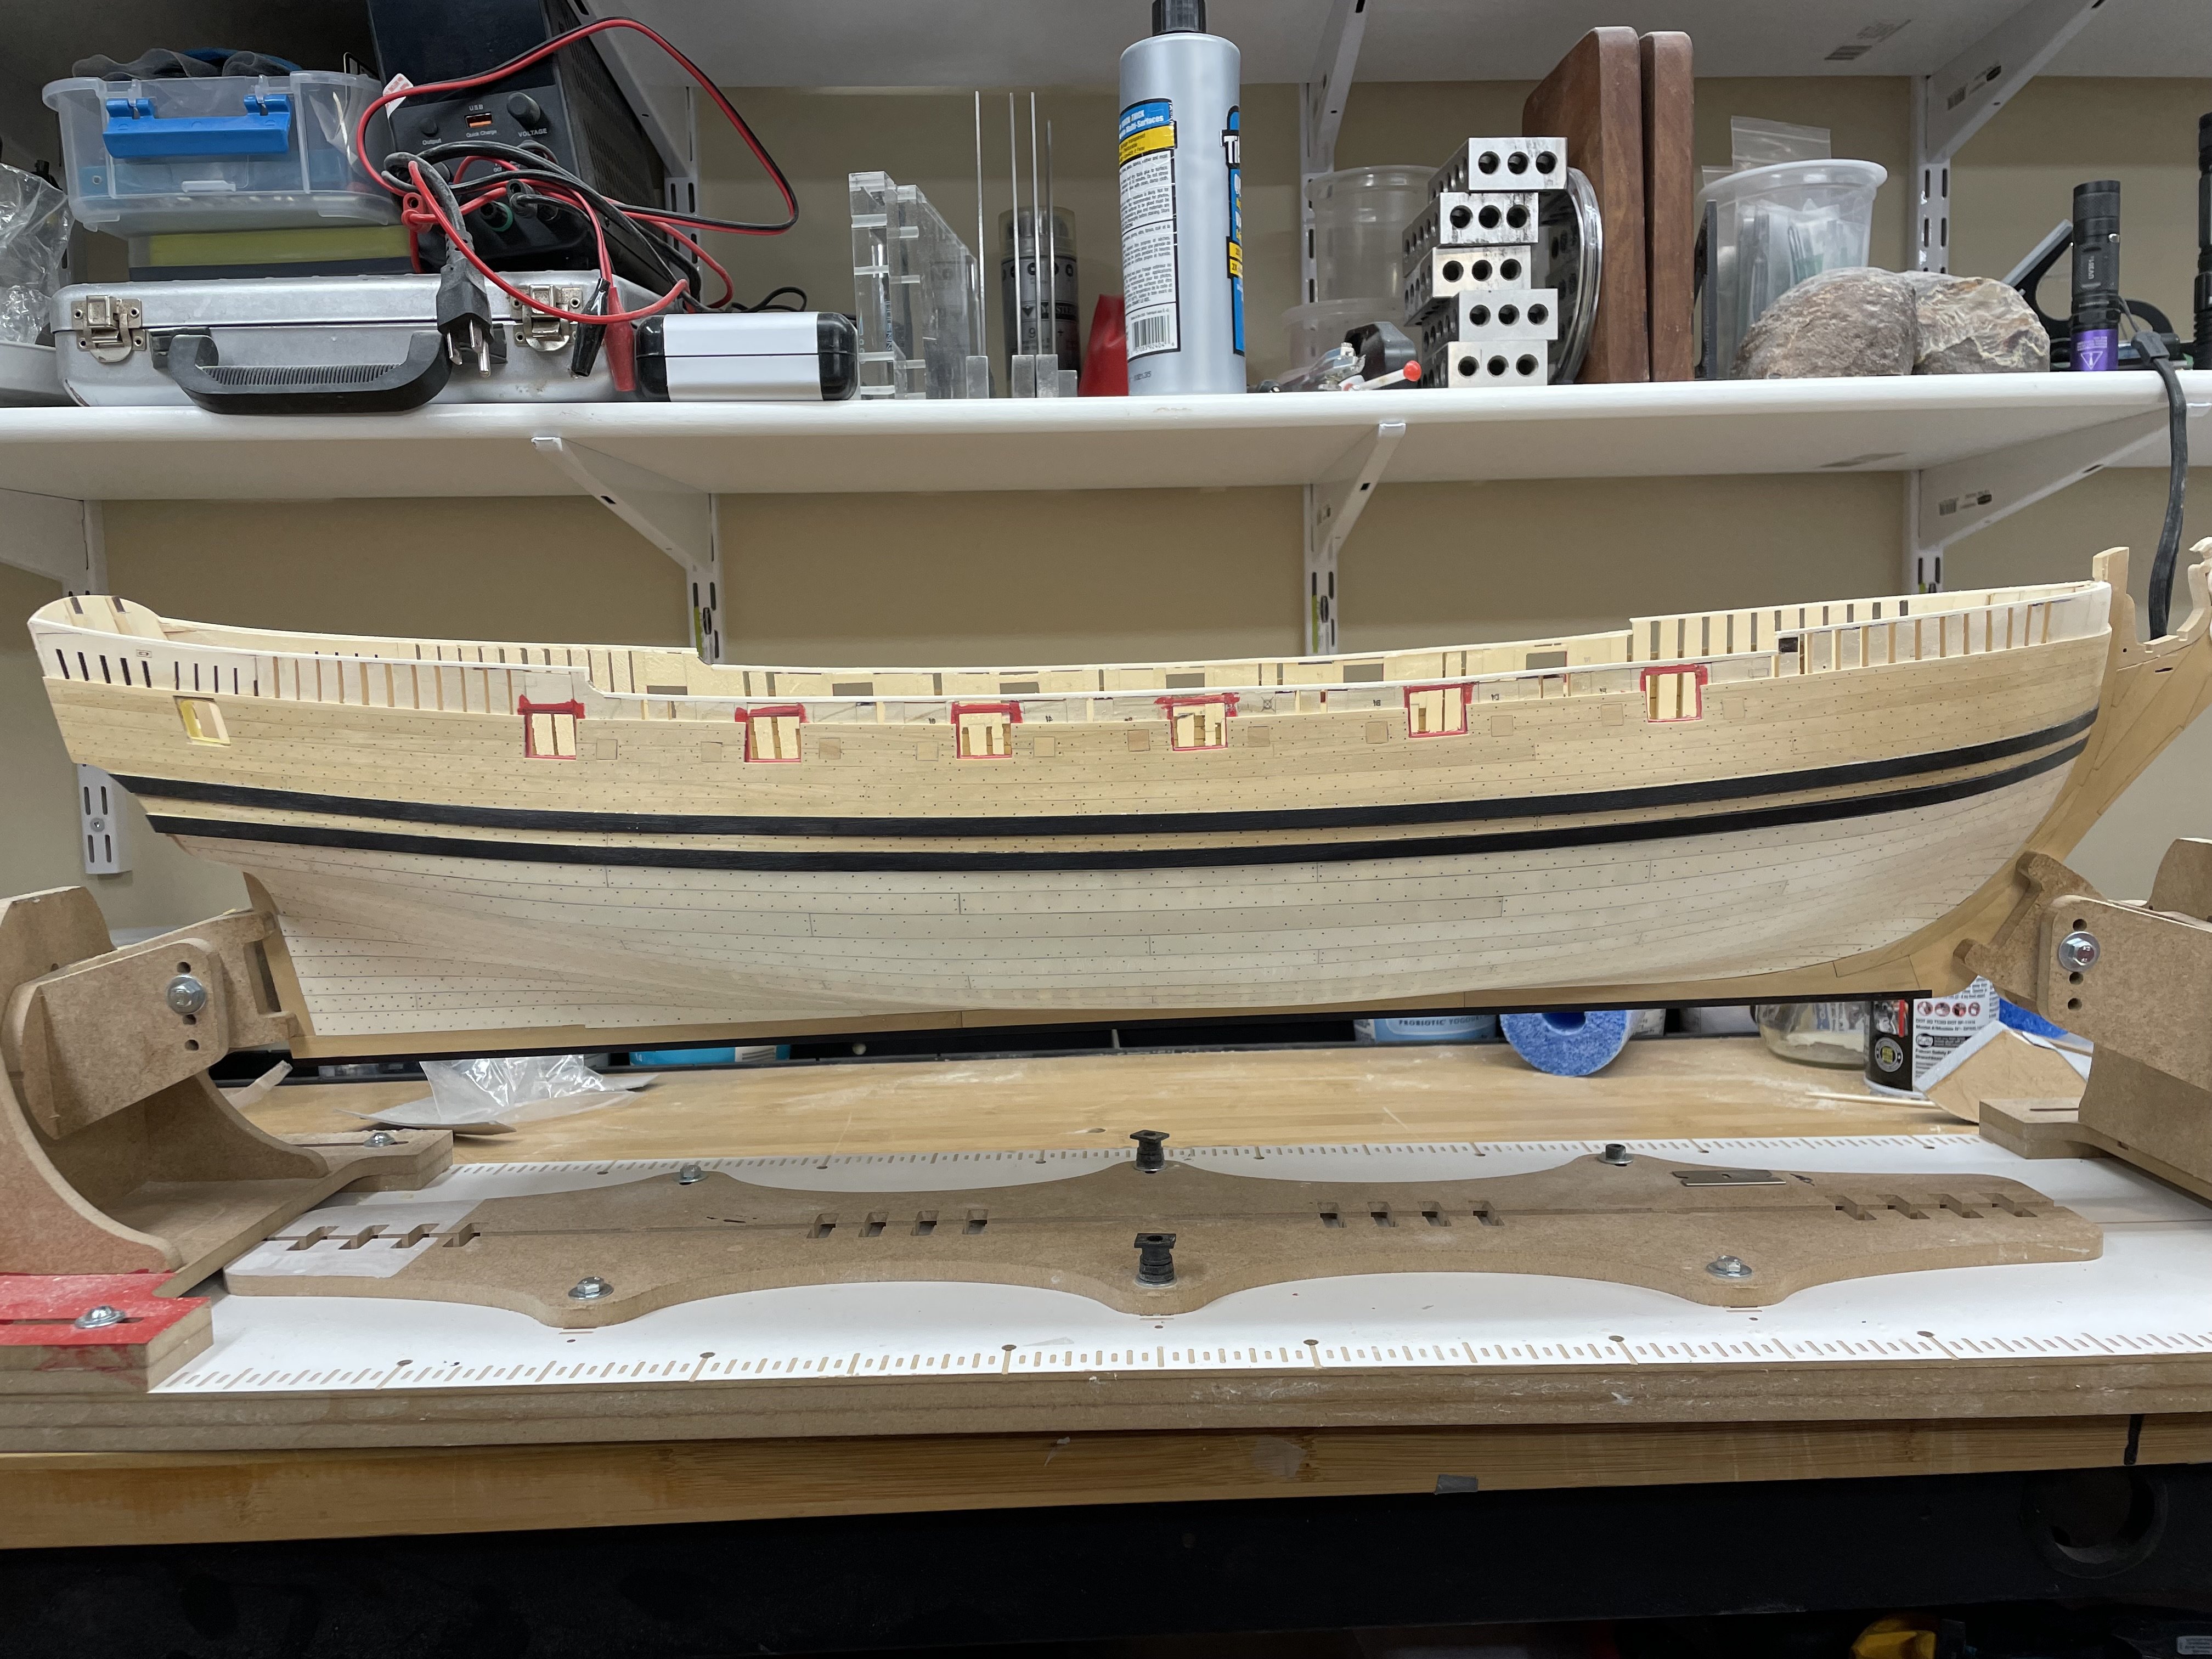
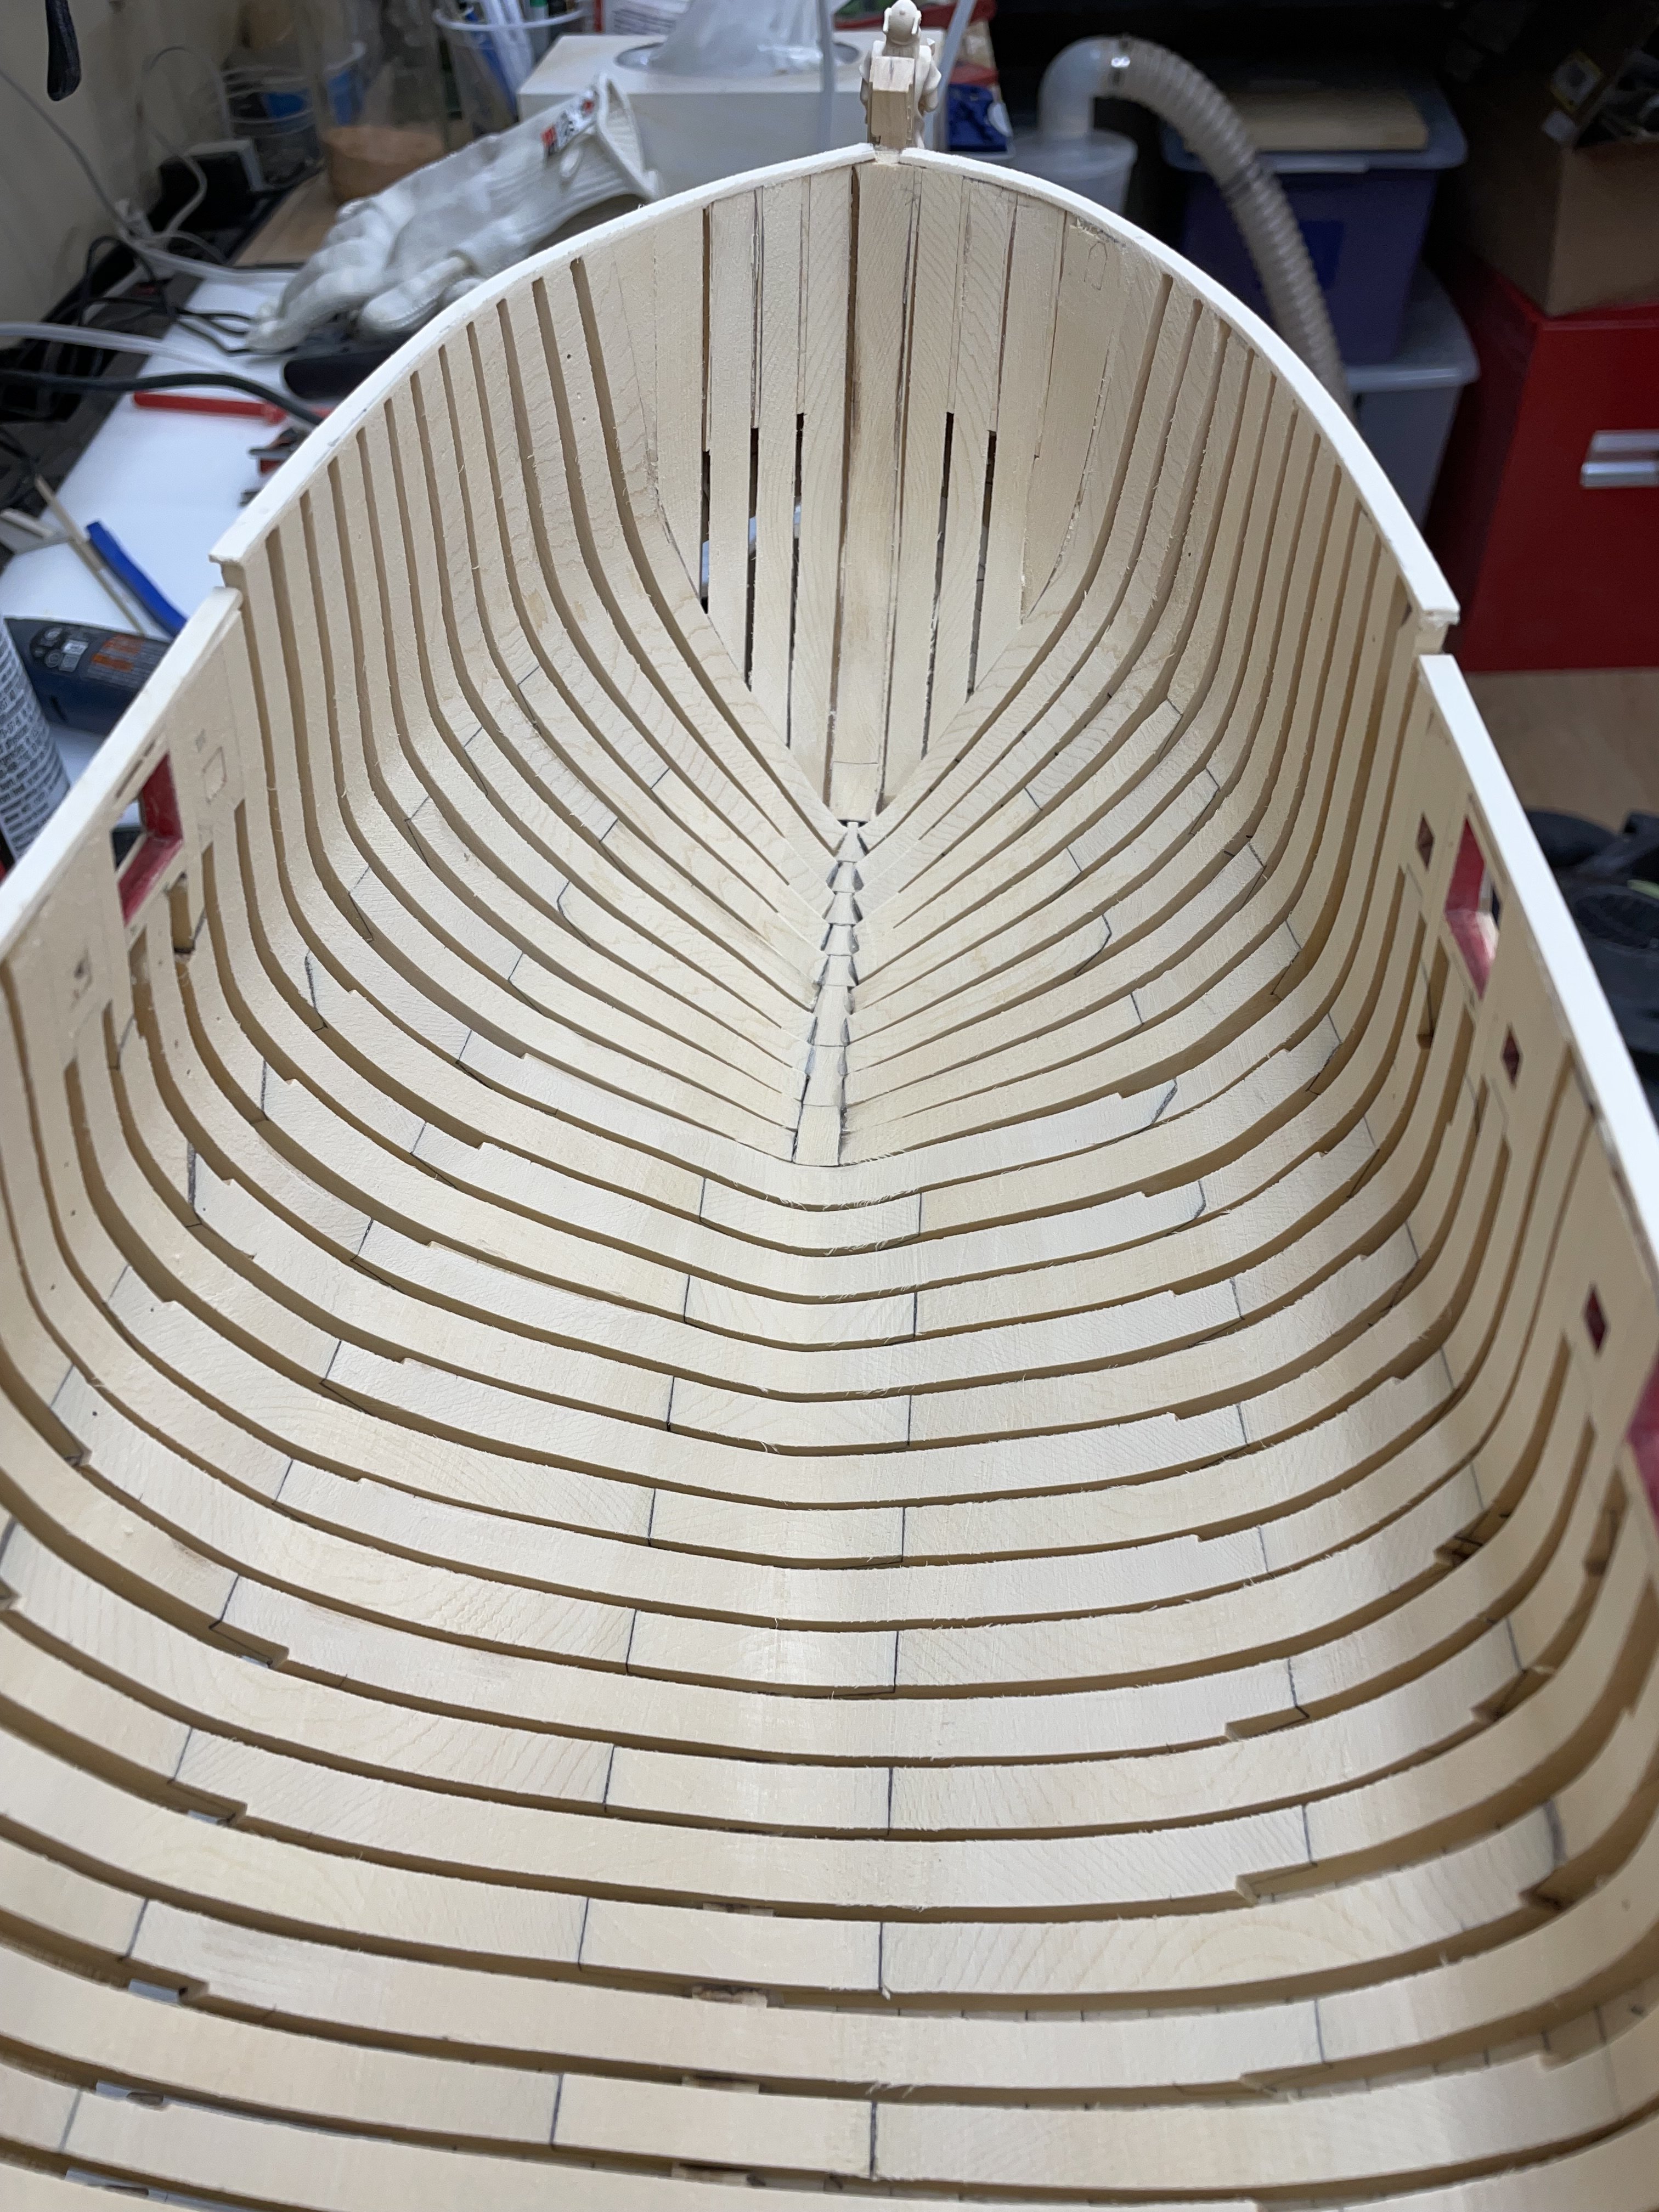
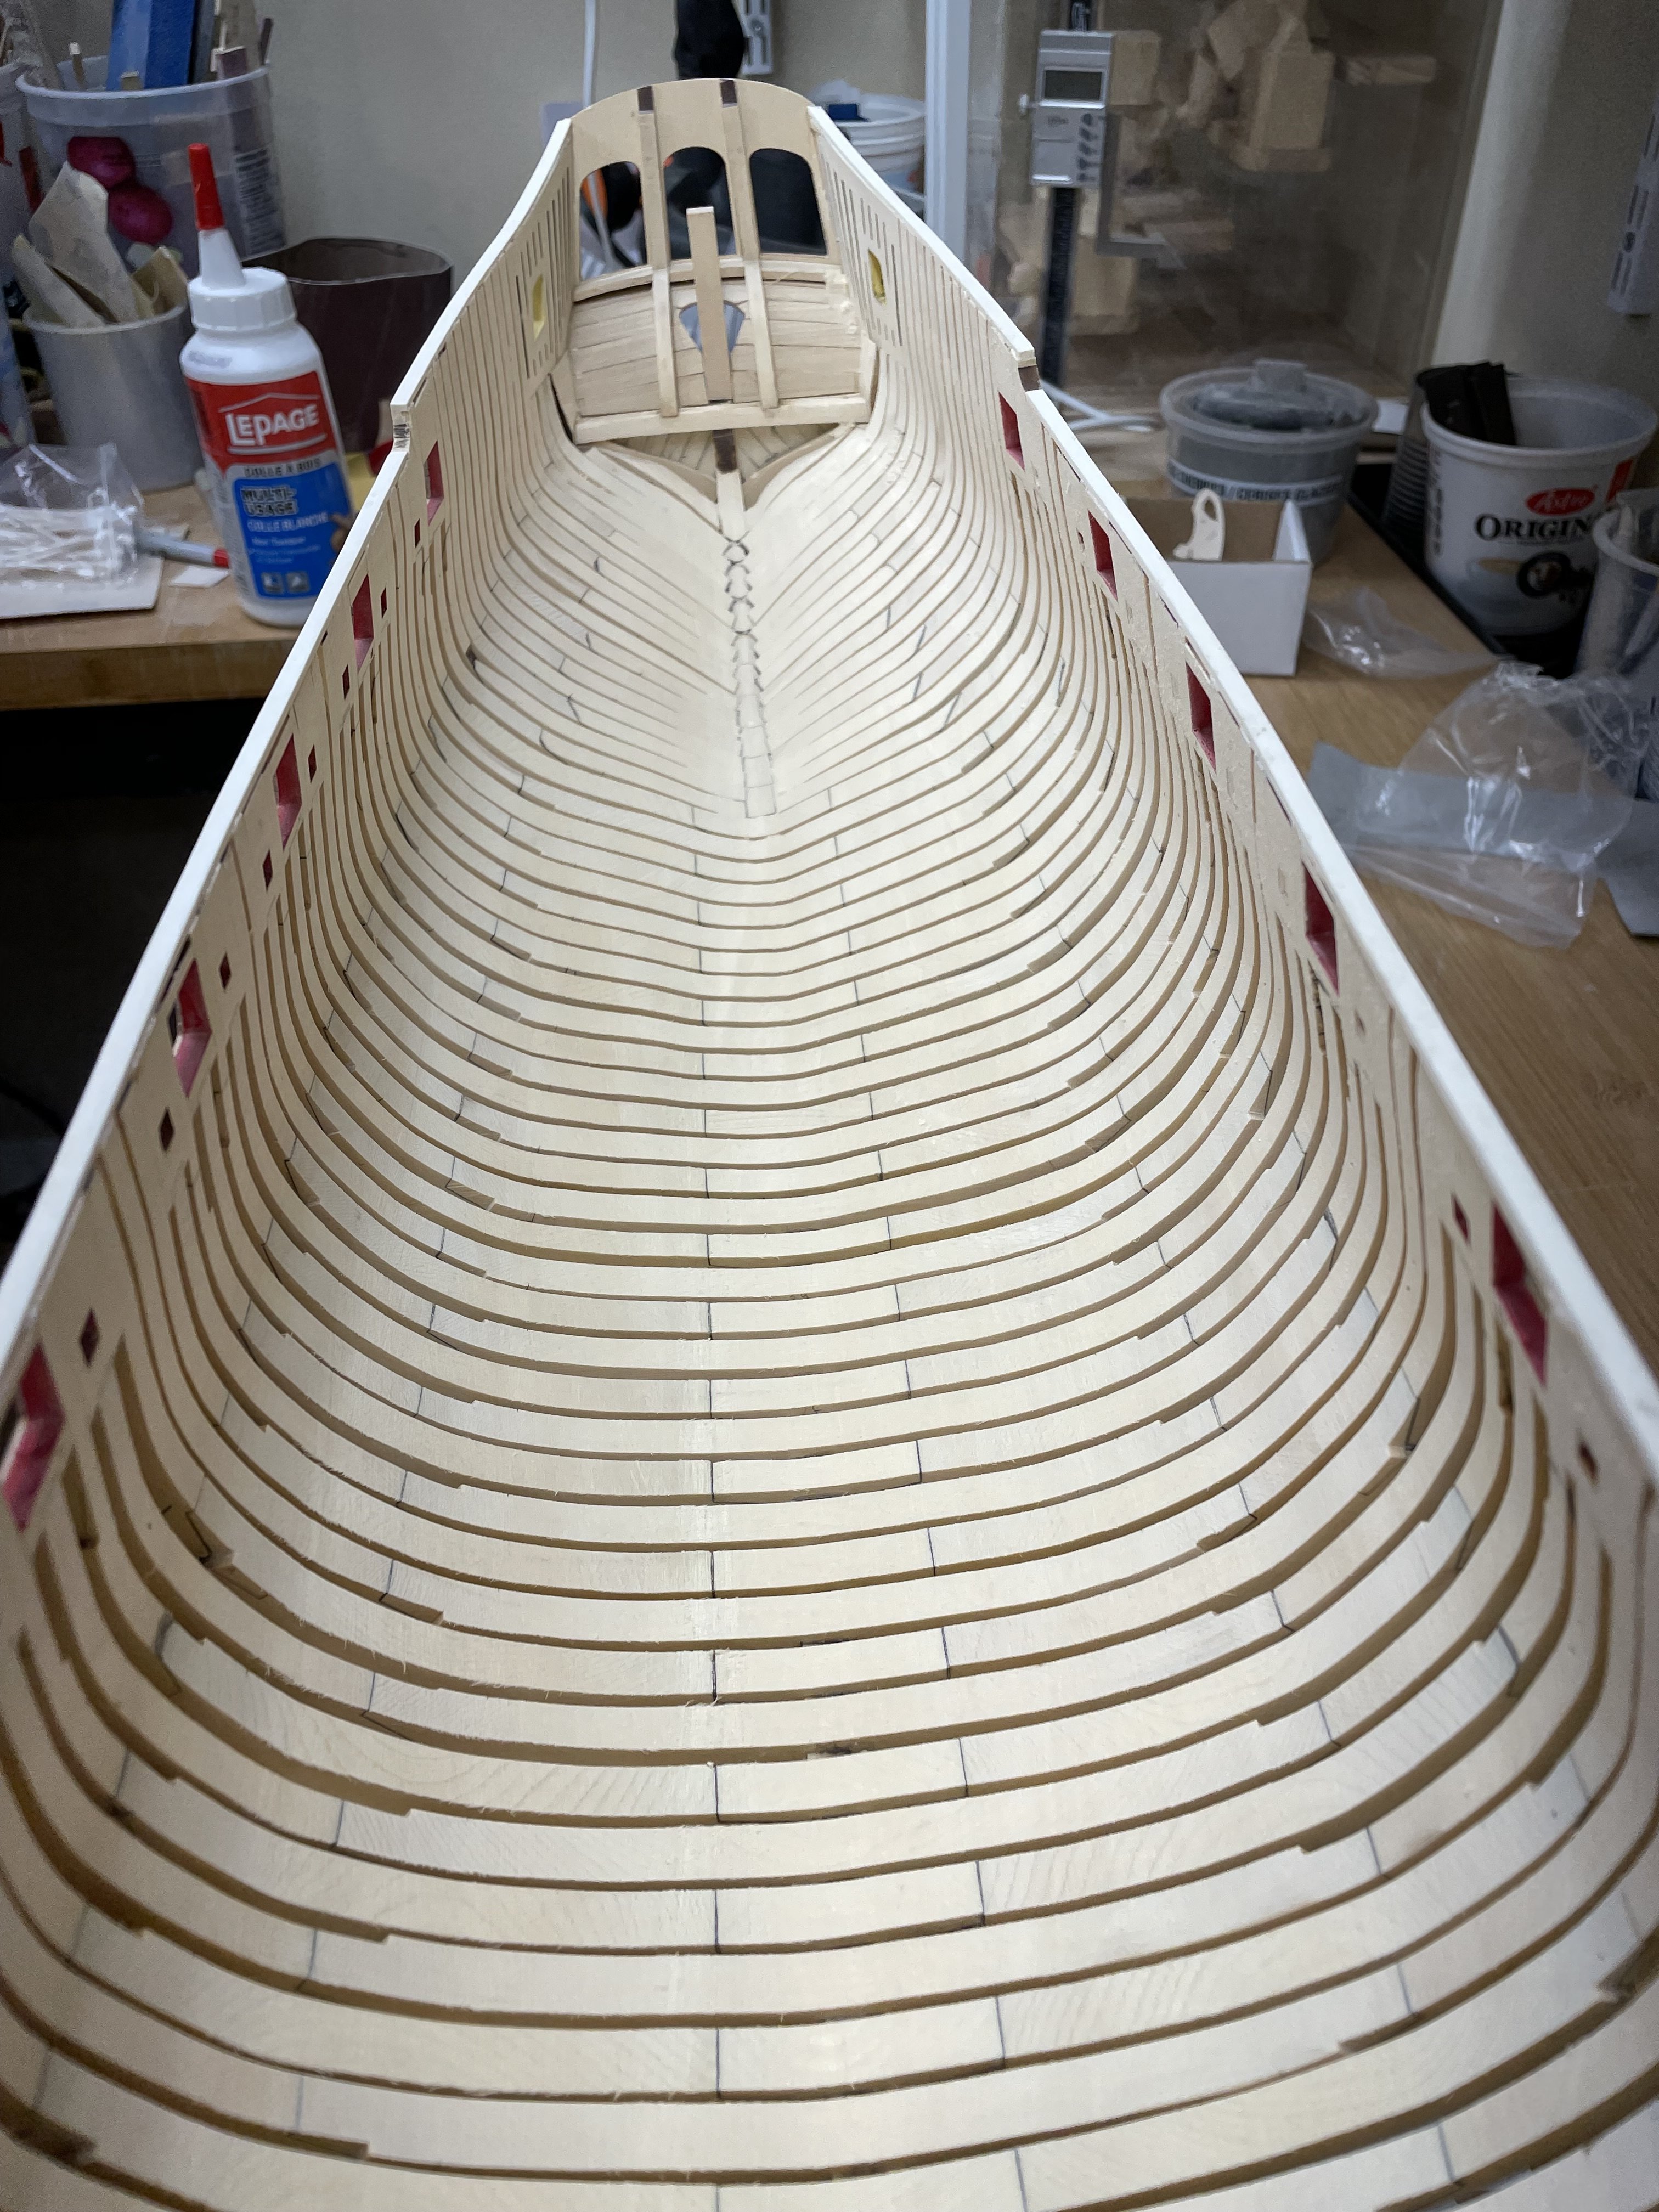
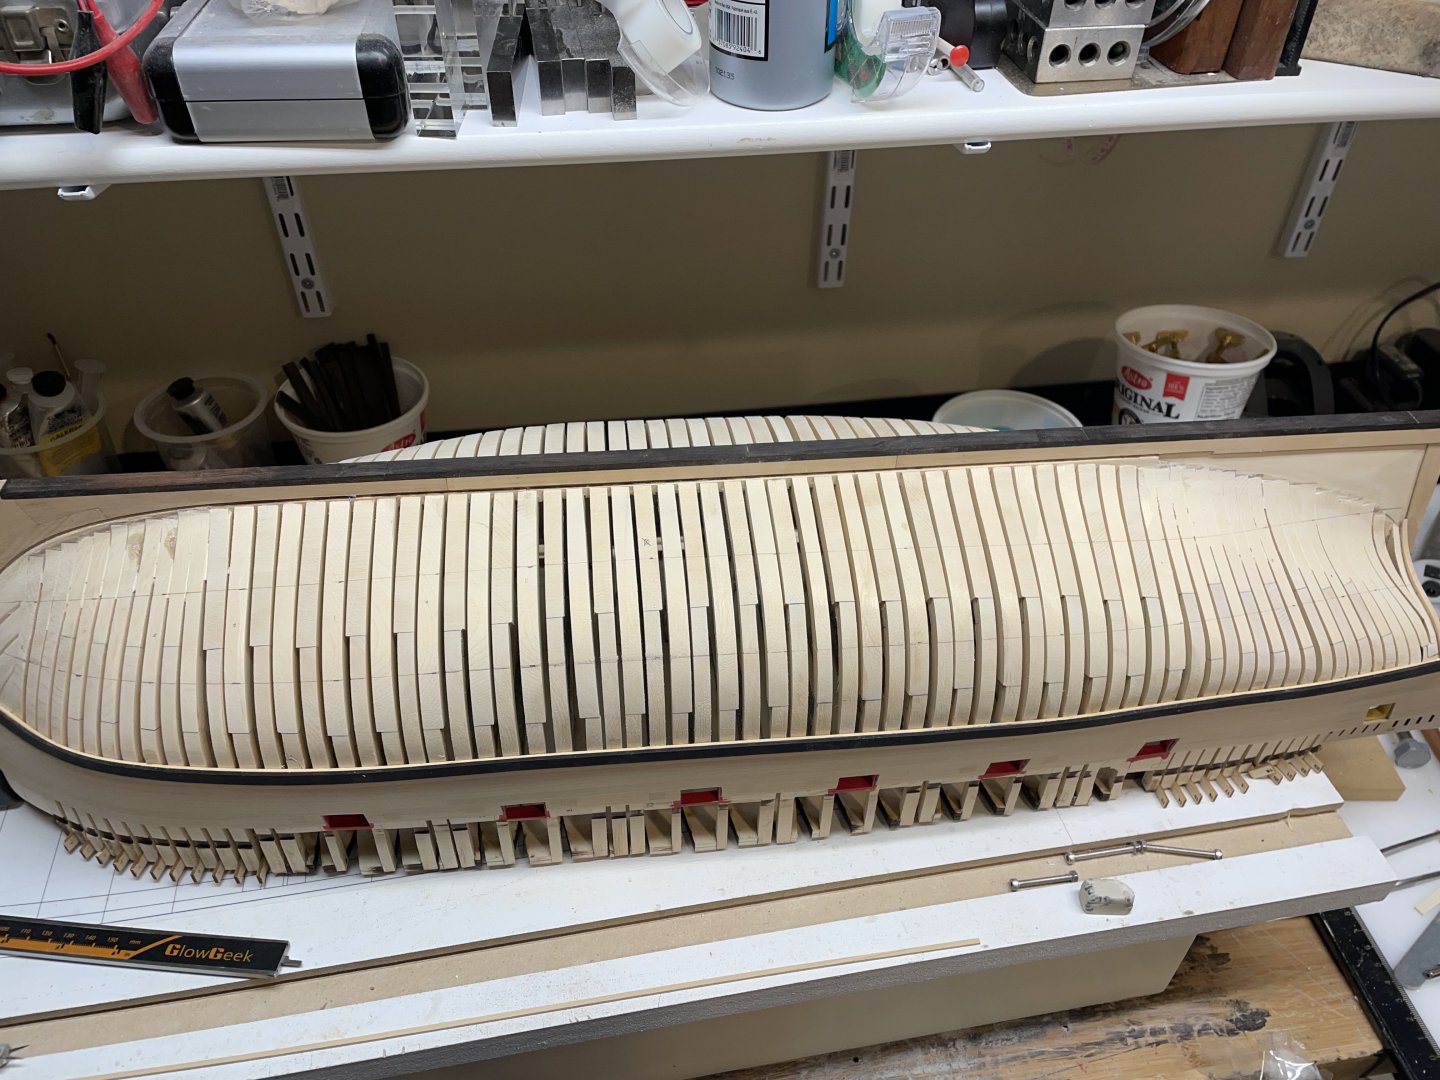
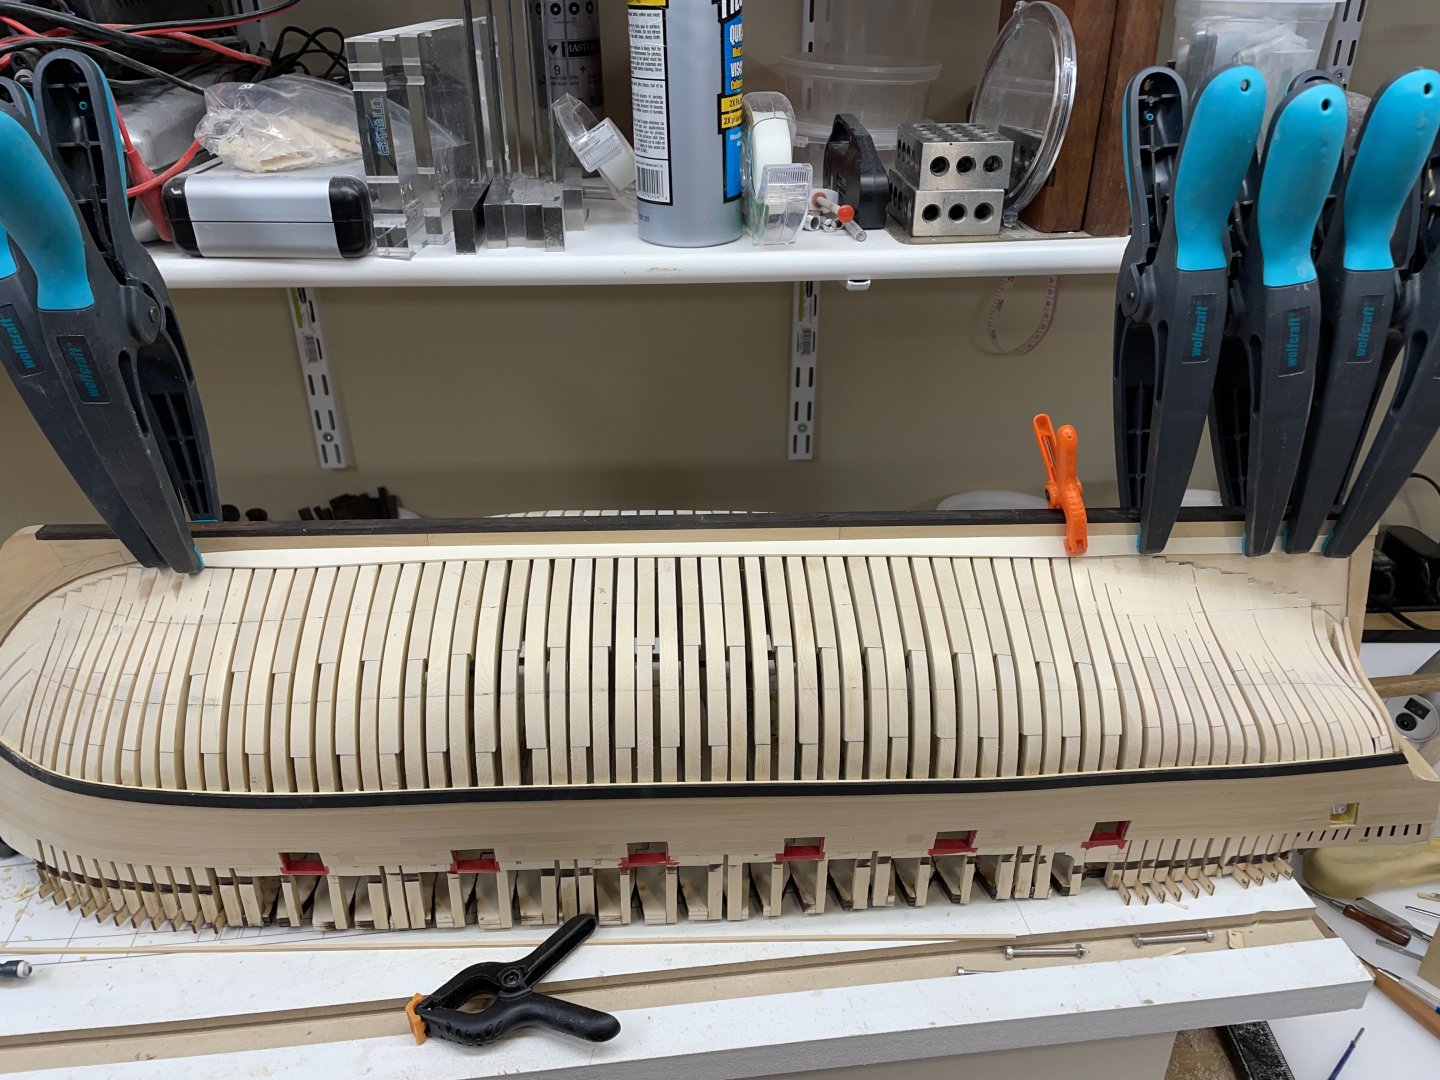
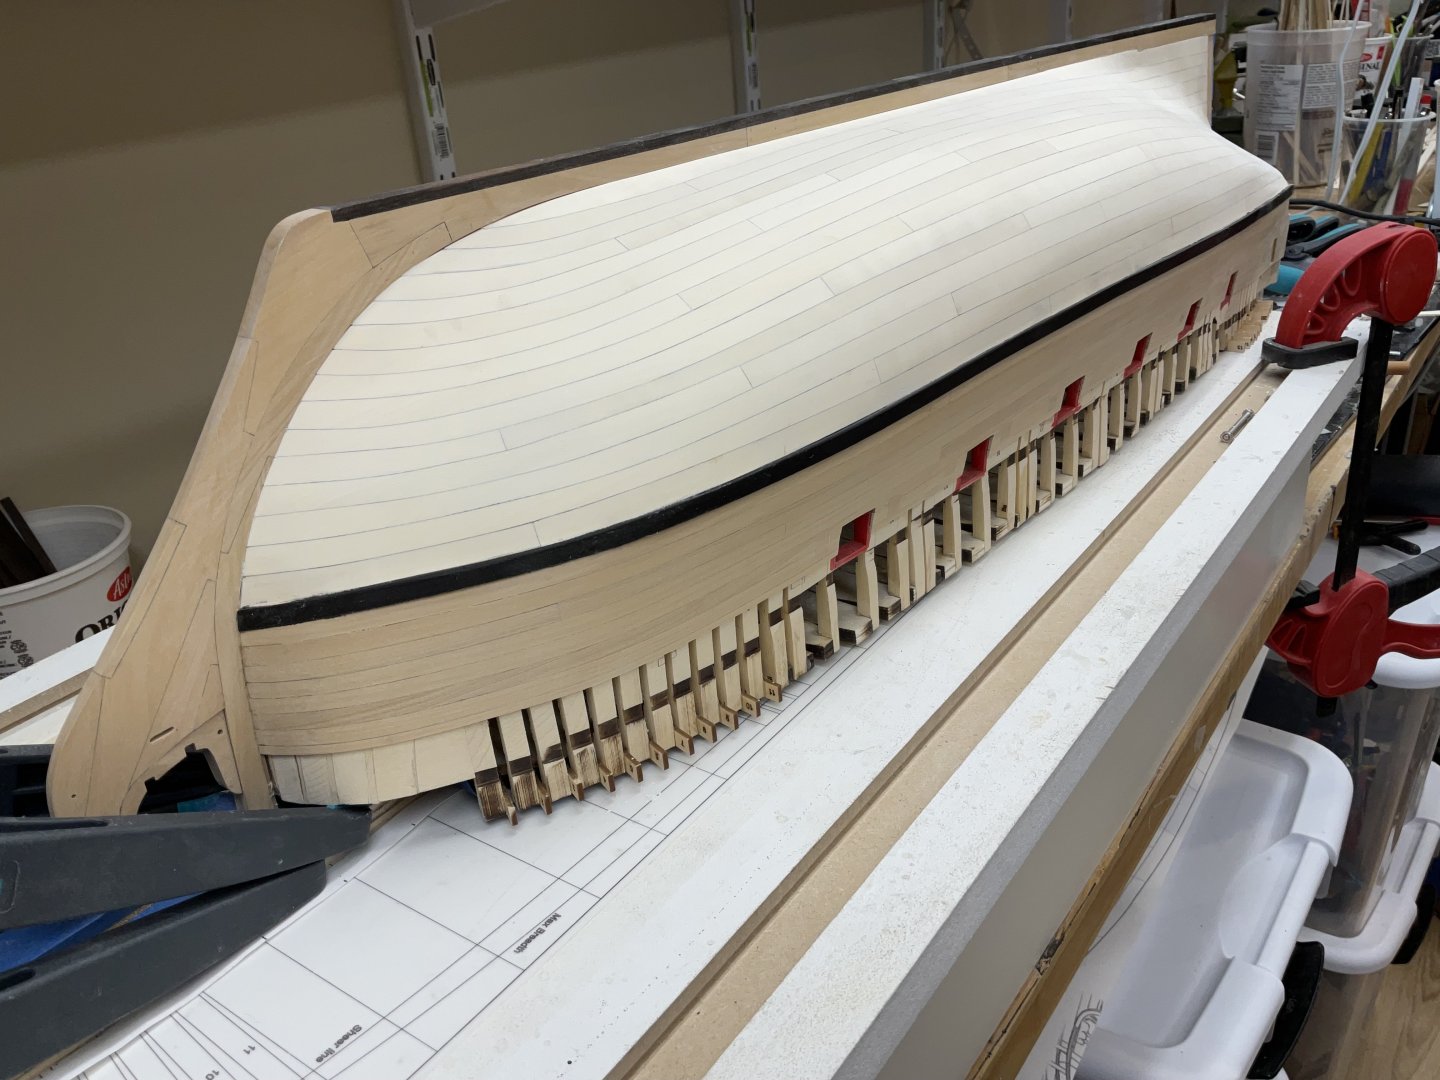
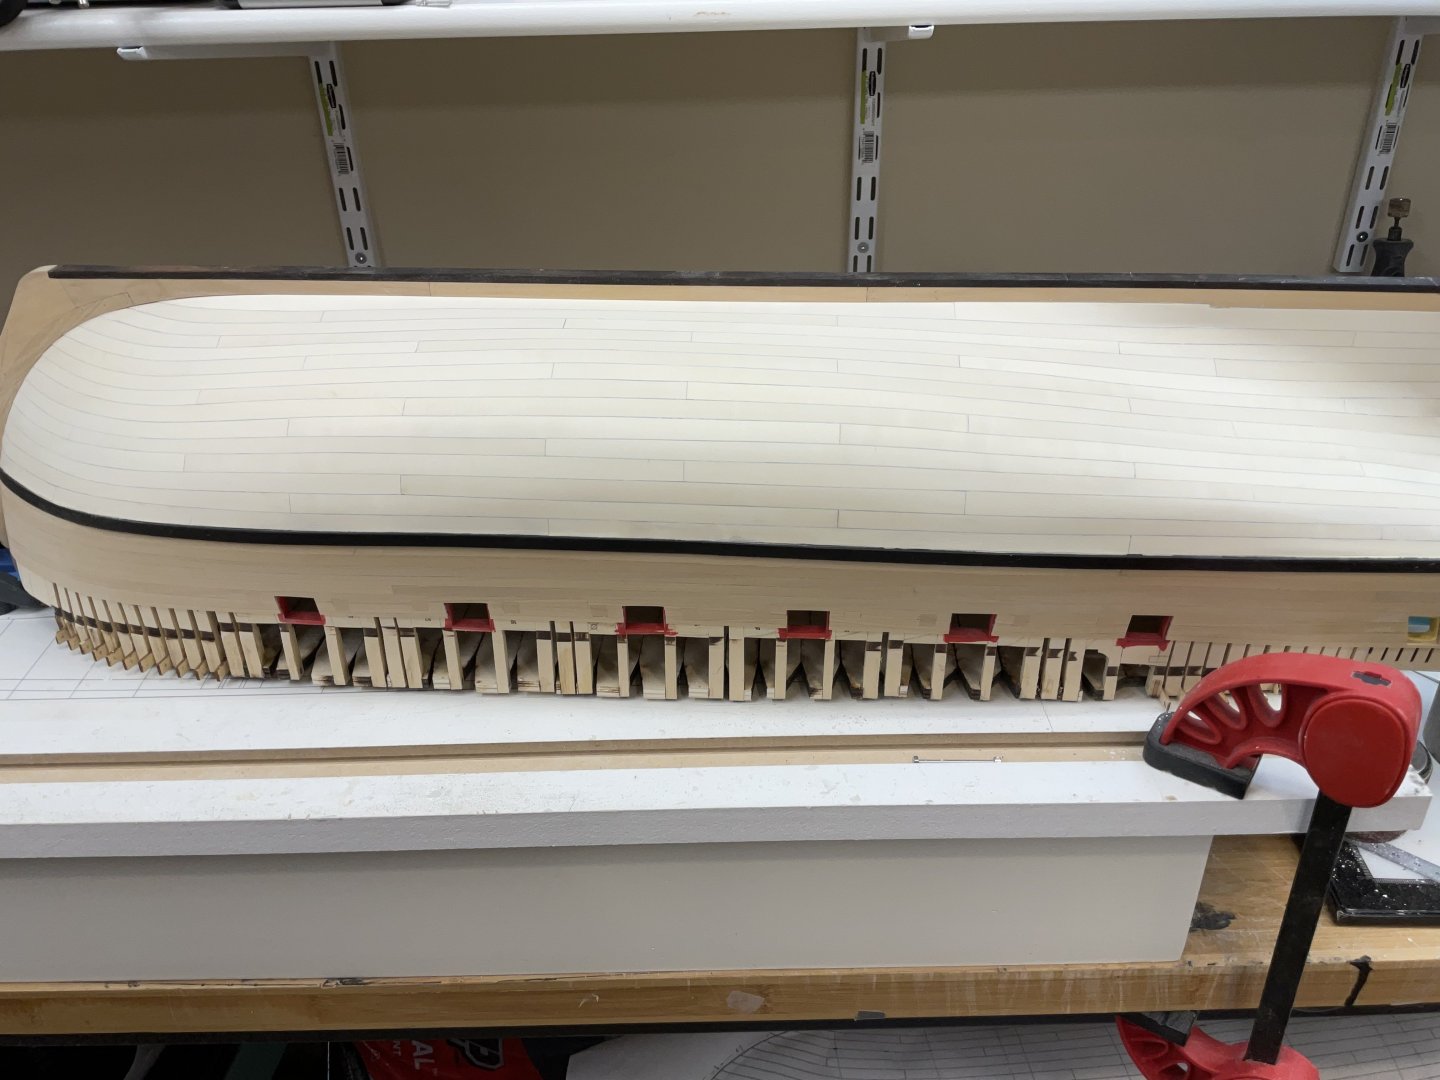
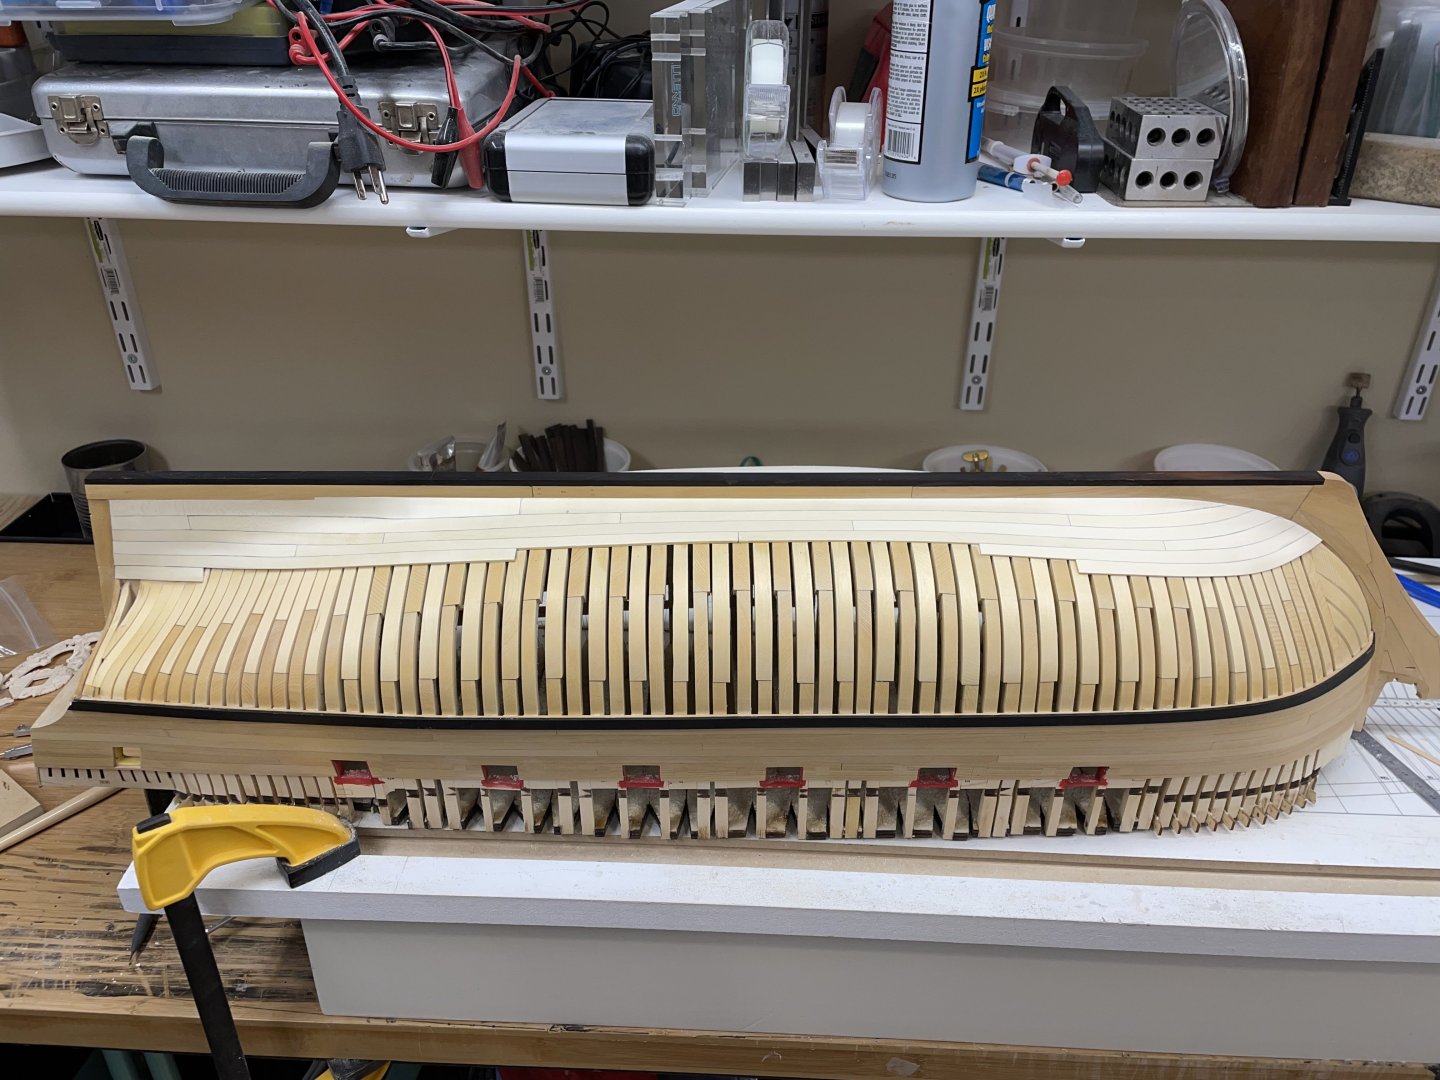
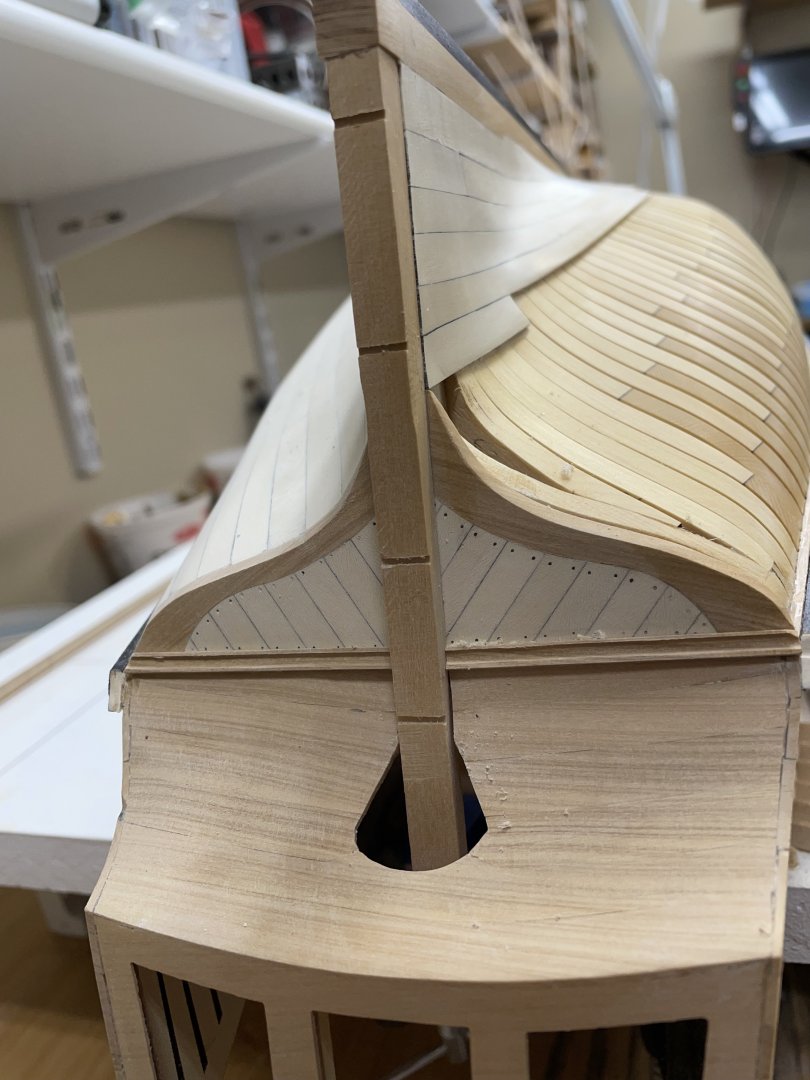
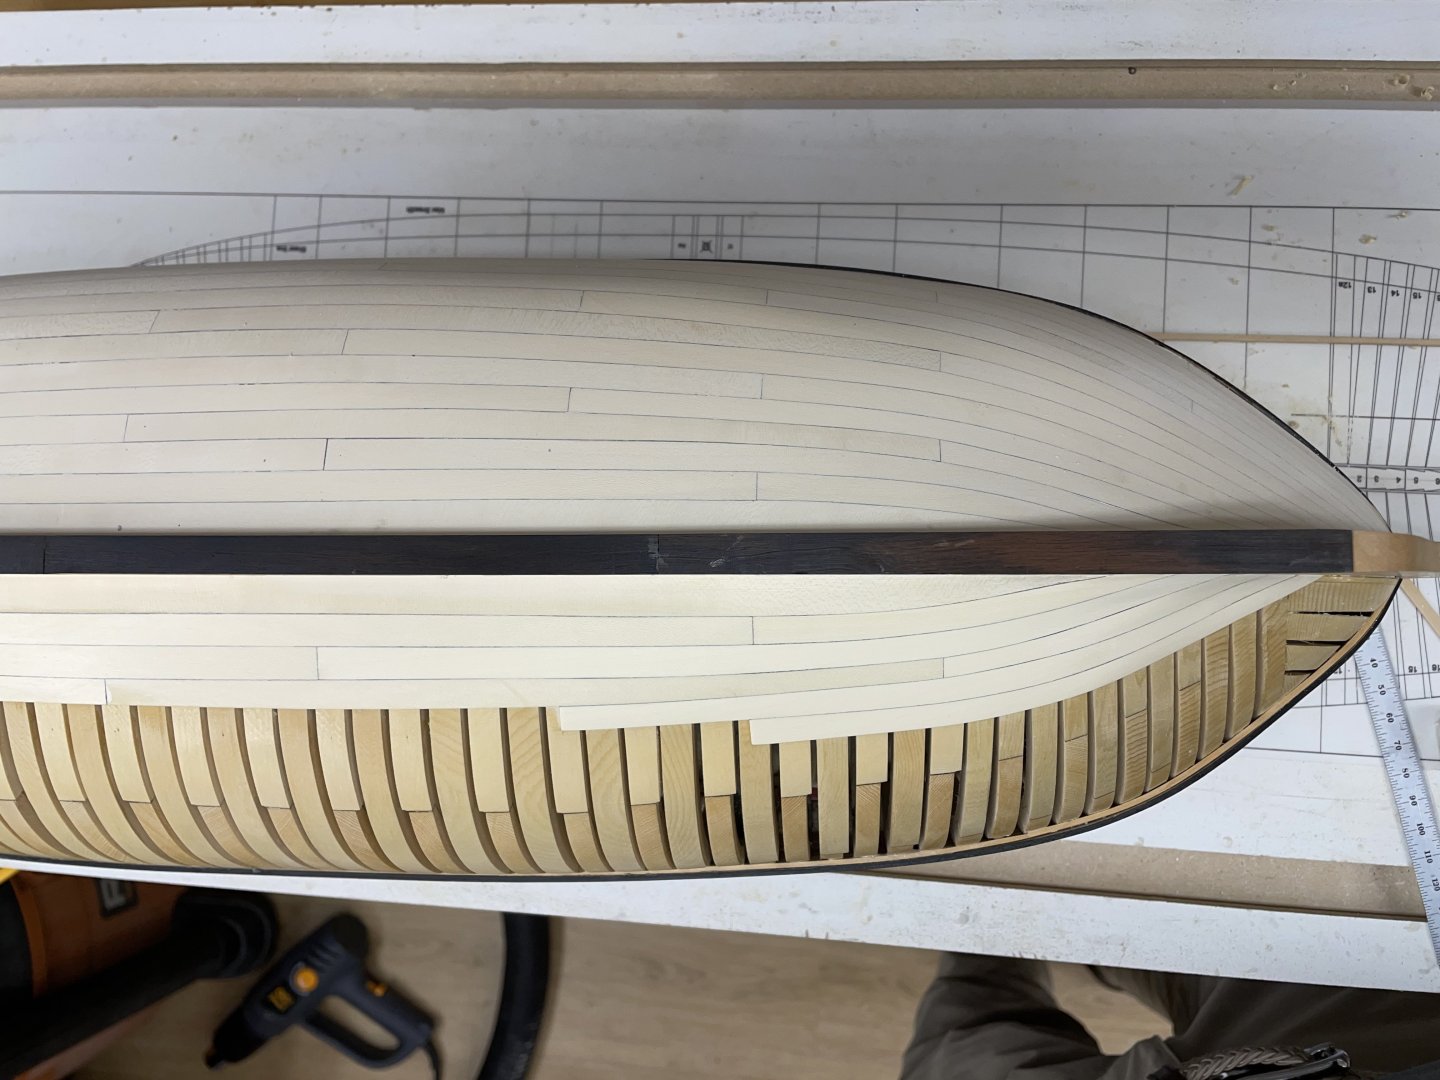
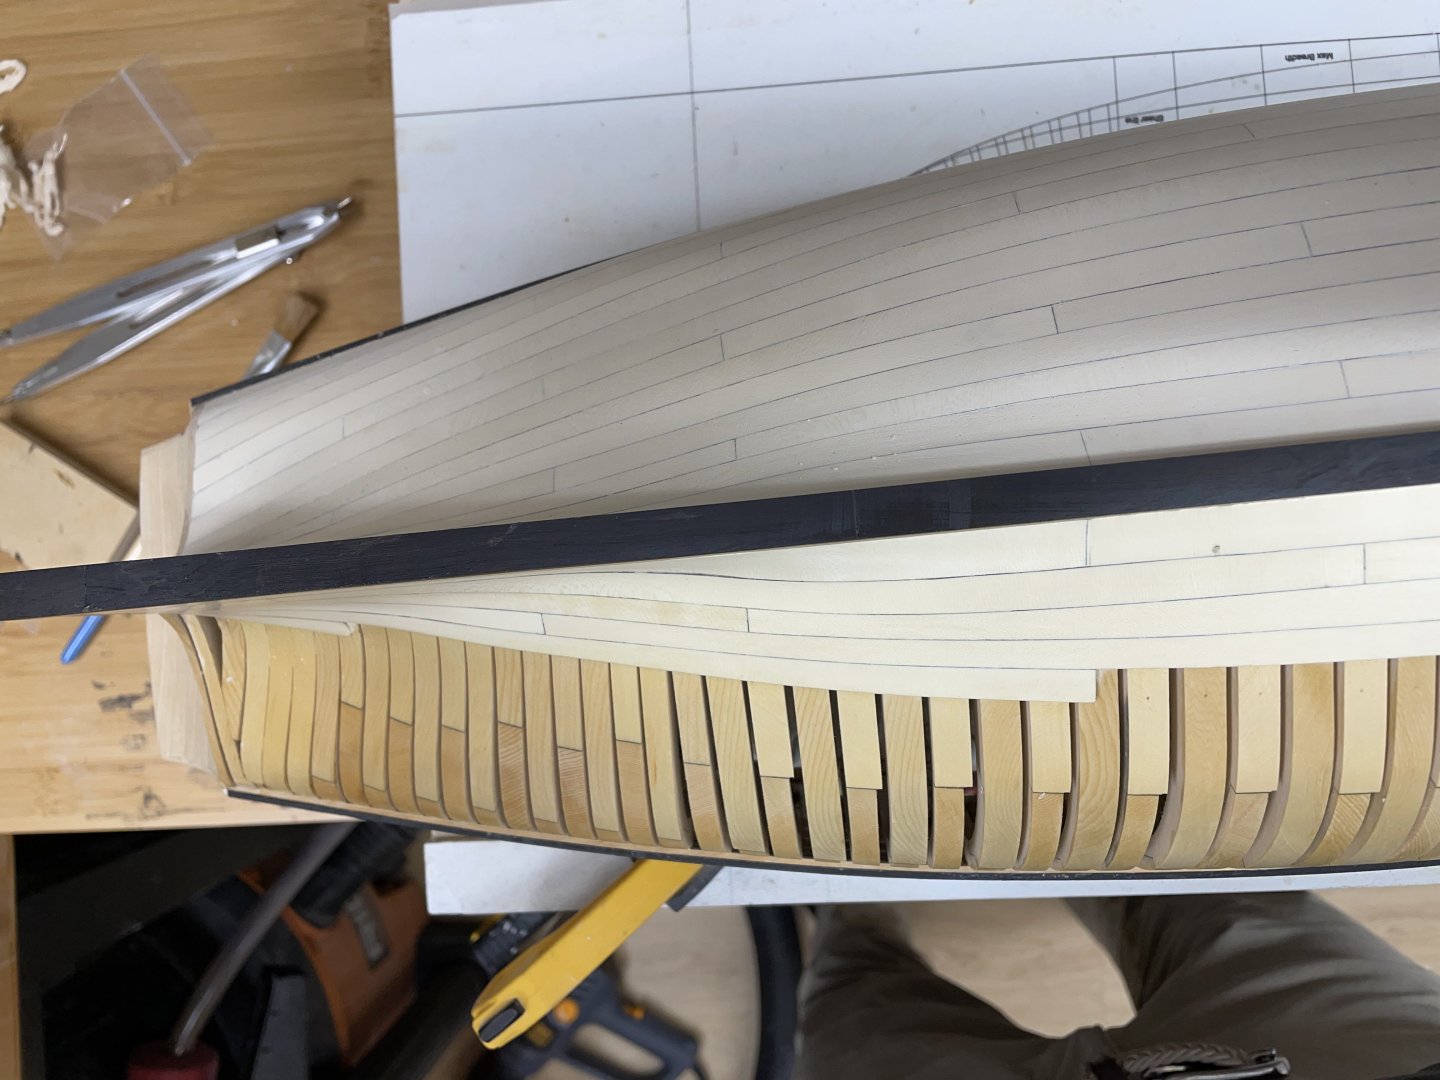
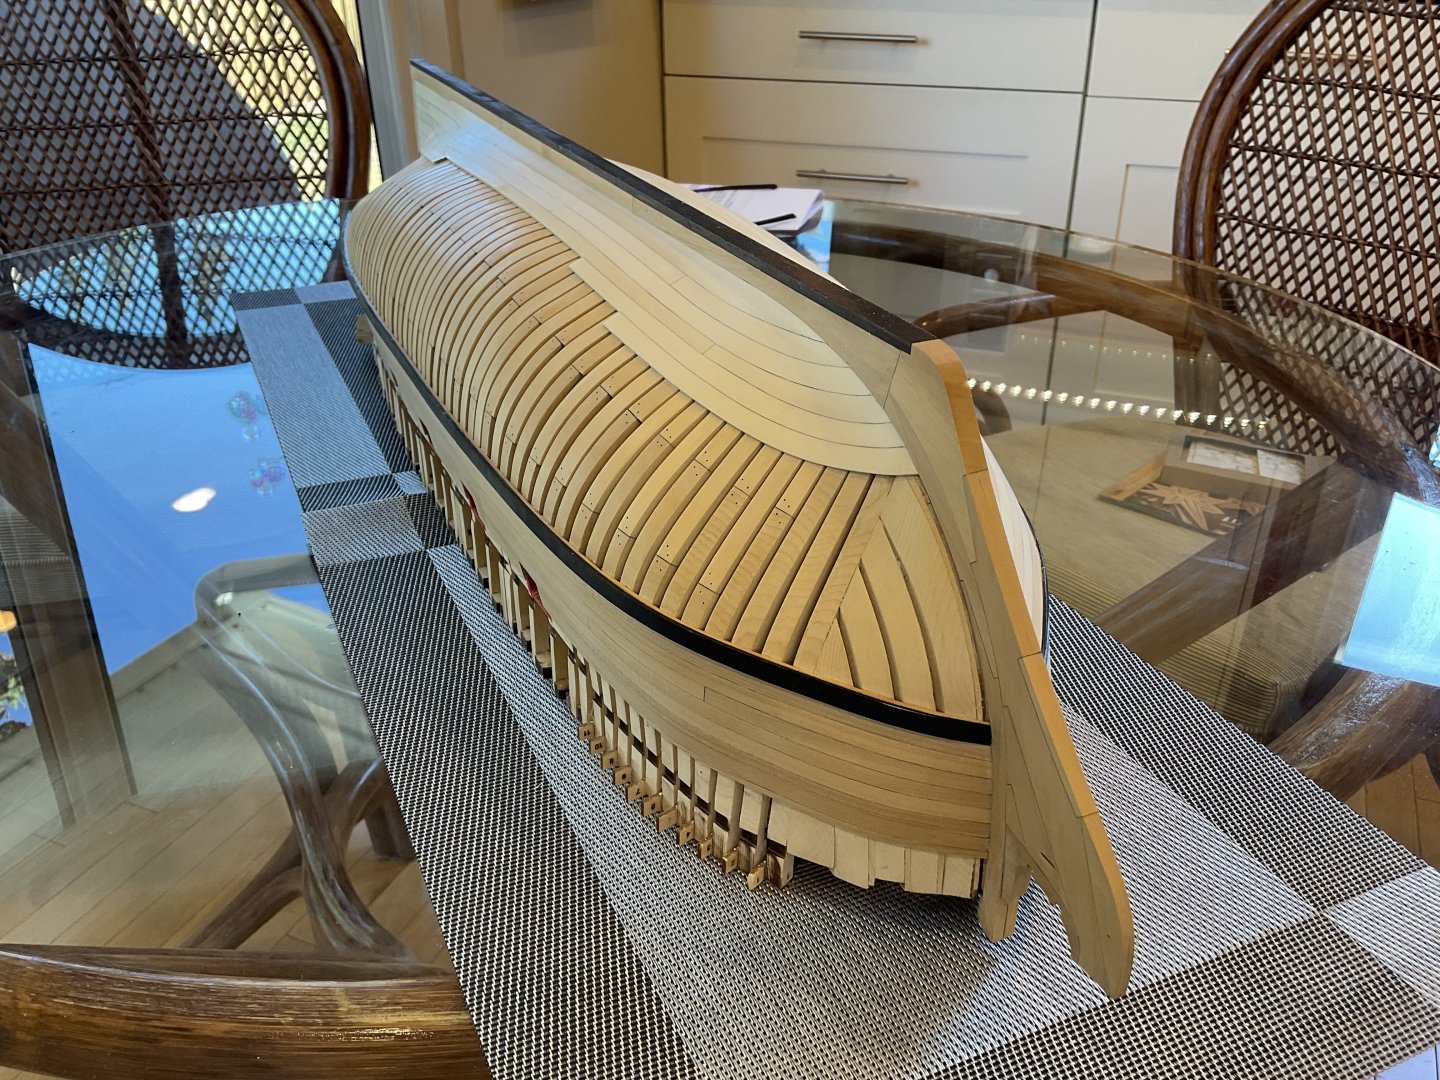
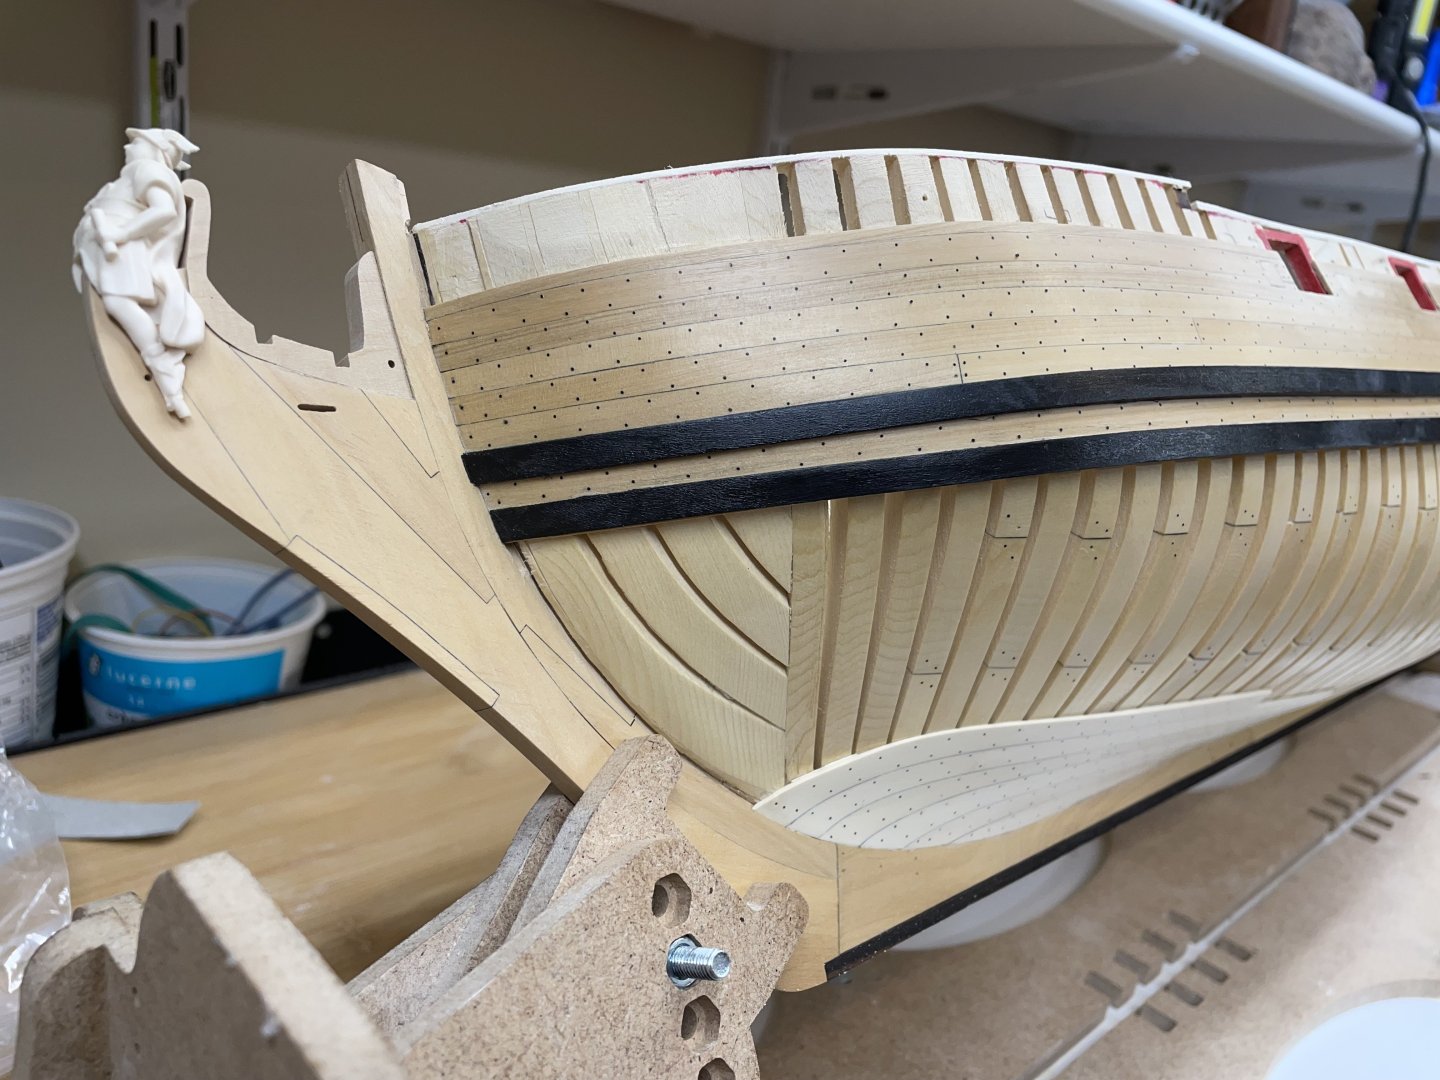
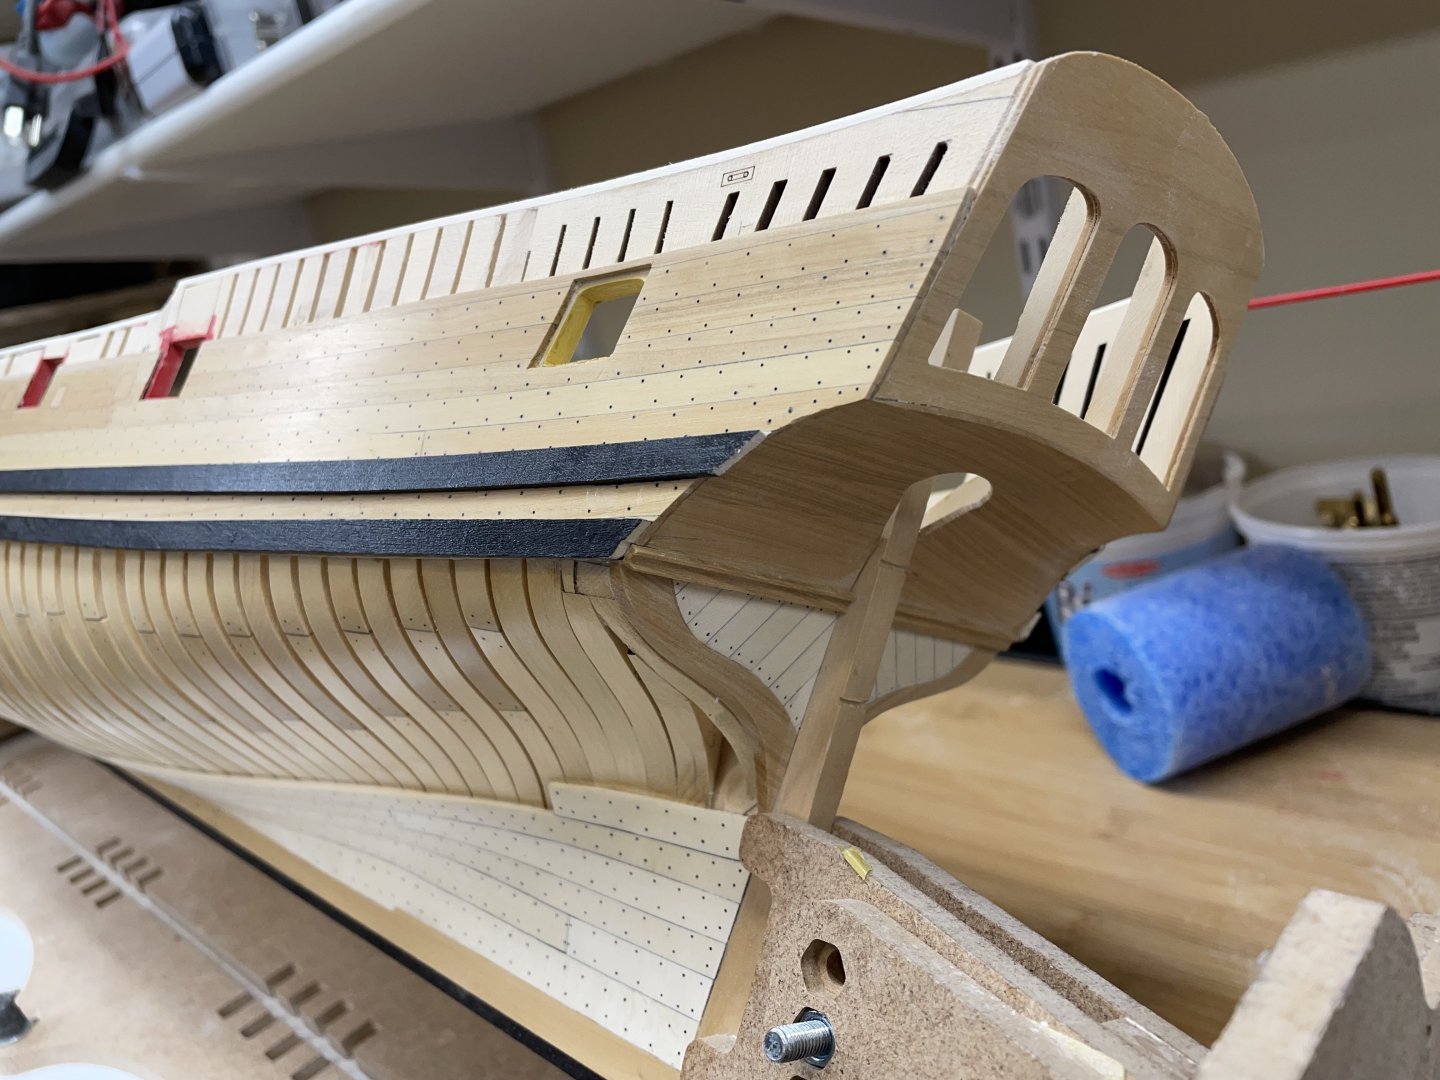
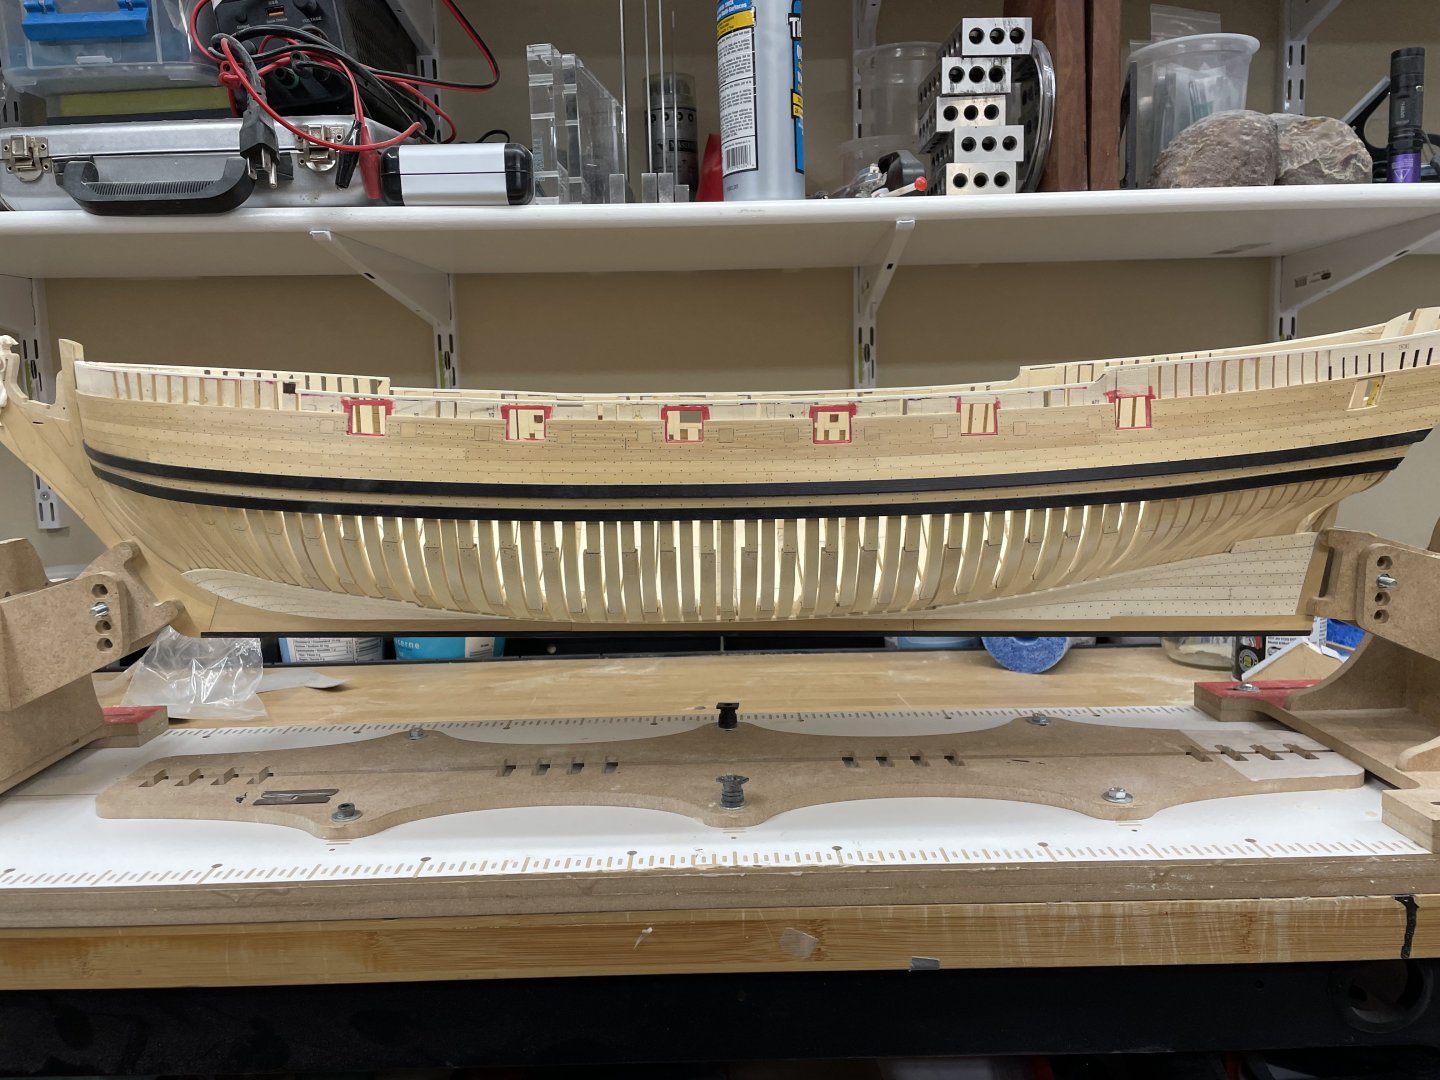
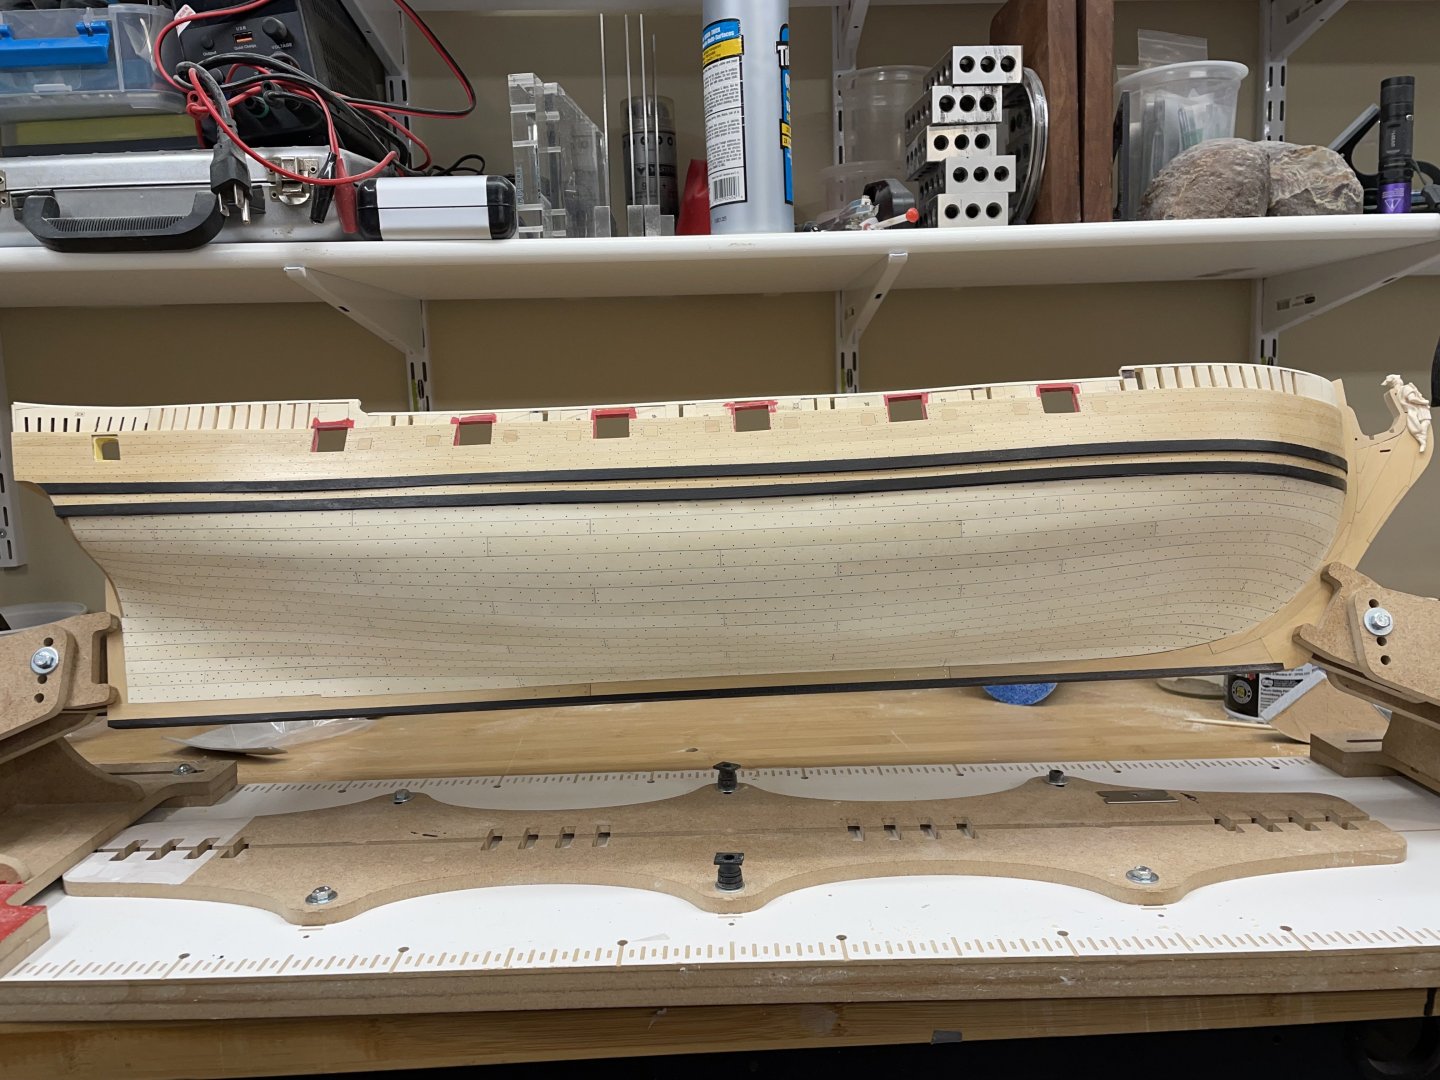
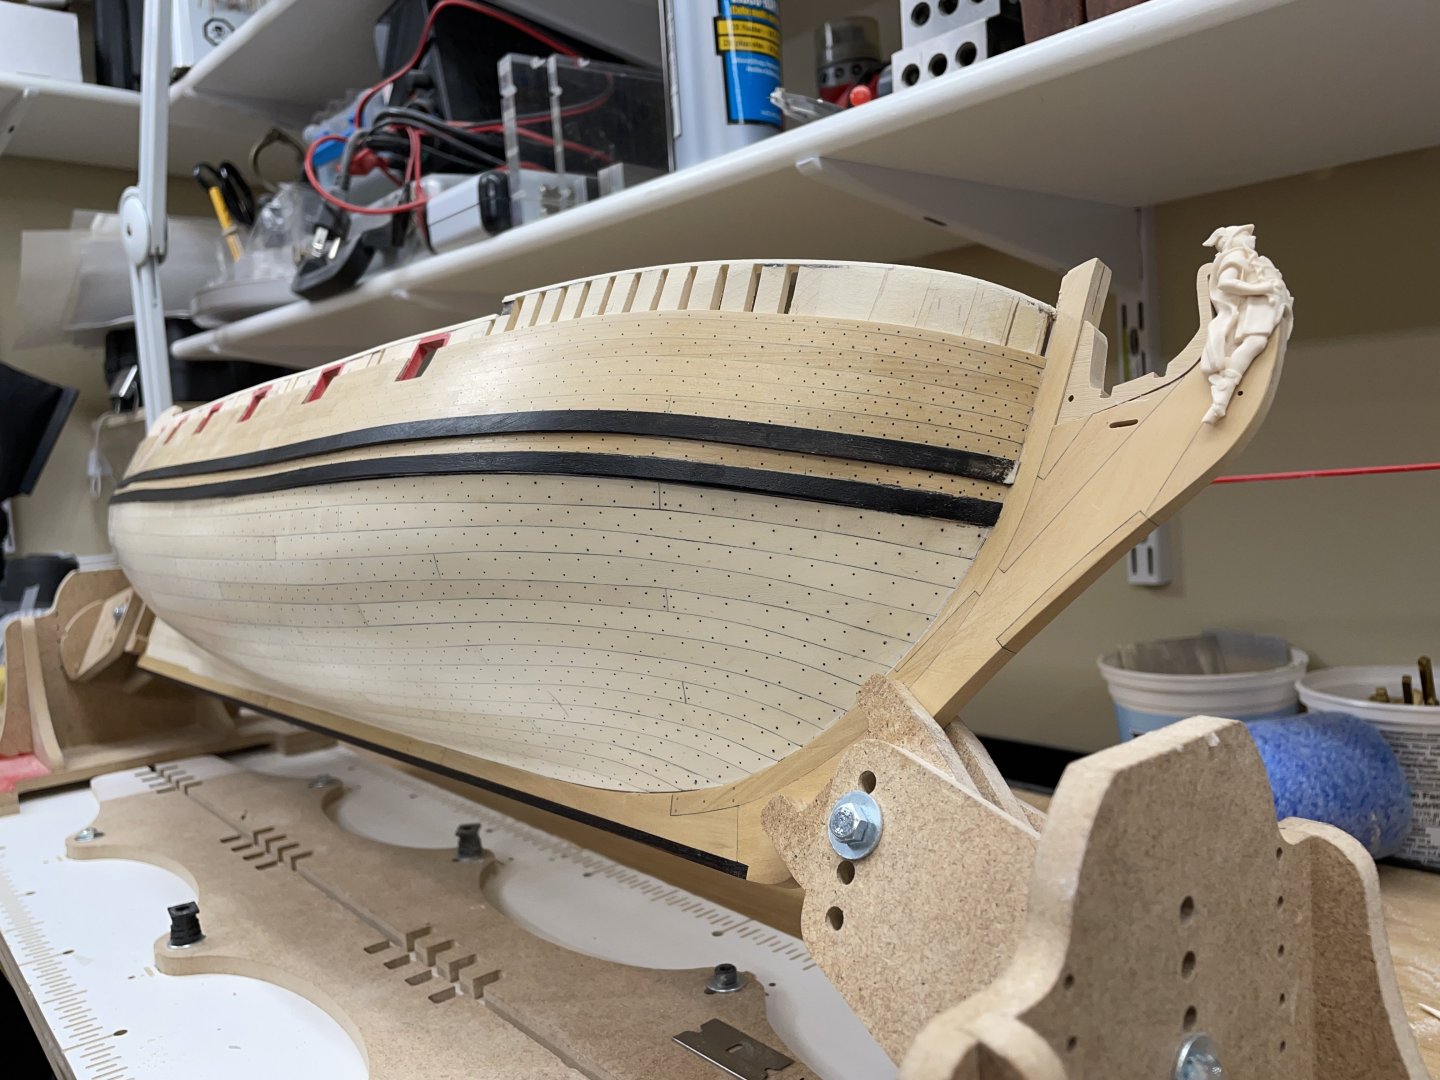
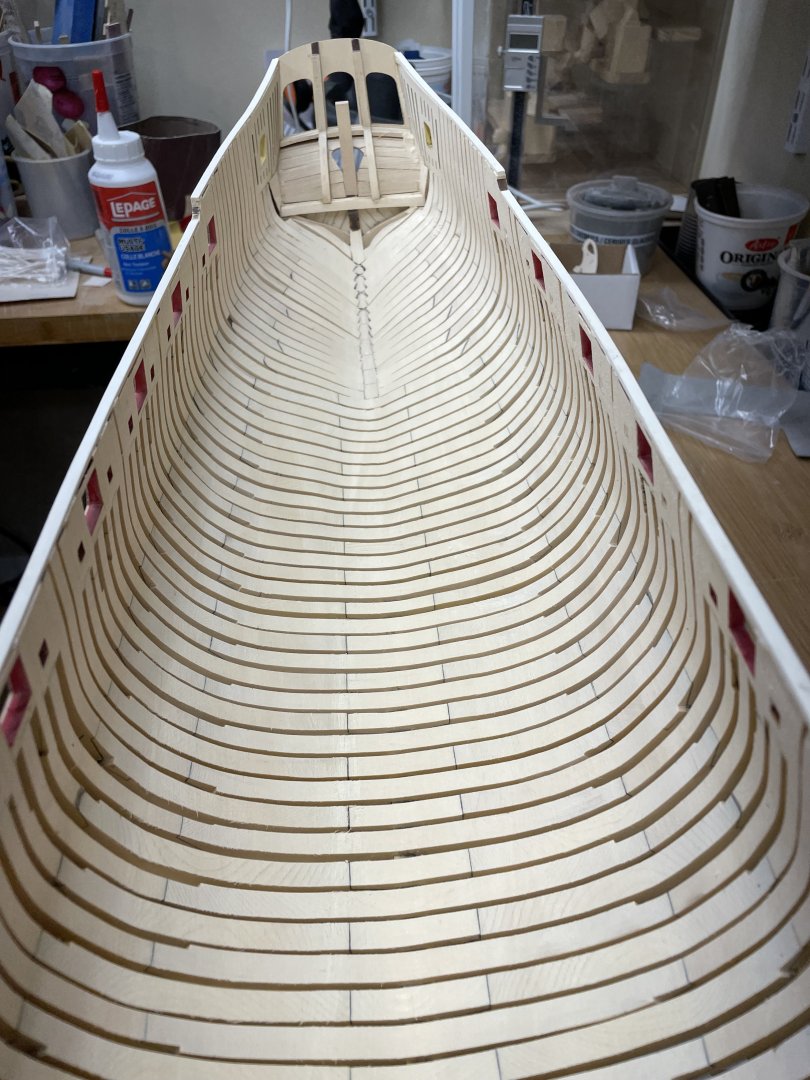
So a little bit of progress. I’m going pause work until the next chapter has arrived. As you can see I decided to partially plank the port side and fully plank the other side. This is how I did my Hayling Hoy and I really liked the effect. I know I’ve made more work for myself because now I will have to plank the corresponding insides. Lining the hull into 3 sections: Laying the Garboard strake: Lining out the rest of the hull: Half way there: Finished starboard side: From the bow: Port side finished: Treenailed with 25lb monofilament: Notice how translucent Holley is. You can see the frames through the hull. If I turn off the overhead light you can’t see the frames anymore. 5/32 Cap rails installed. Inside faired: Cheers all, Ian


-
Great work Tom! Your project has given me some ideas for my Gokstadt. Could I ask what you used for the hinges and clasps for your sea chests? The benches are the one thing I never got around to. ian
-
Such nice clean work Rusty. I am going to slow down so I can benefit from your excellent work. Ian