

goetzi73
-
Posts
78 -
Joined
Content Type
Profiles
Forums
Gallery
Events
Posts posted by goetzi73
-
-
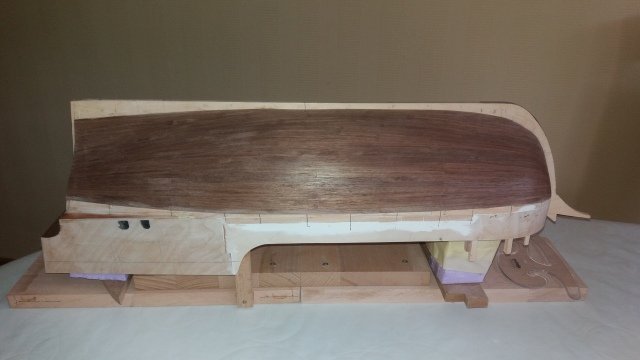
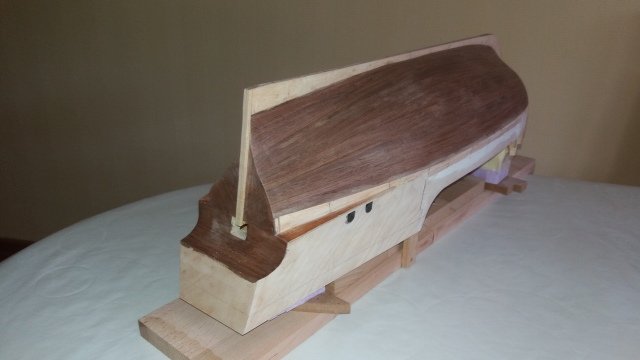
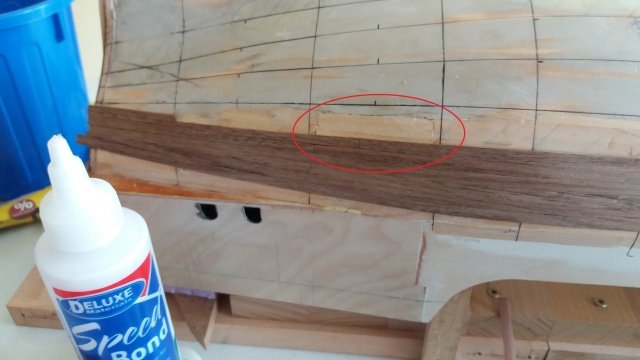
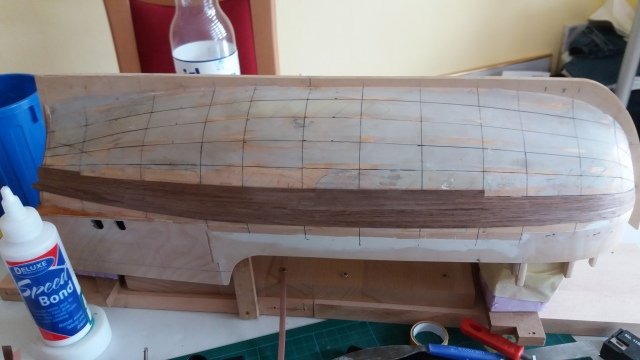
A little update - finished the starboard planking and gave it a little rough sanding. Fine tuning will follow the next days. Next in line are the rudder and the ships stand.
-
-
Hello there in outer space,
my job keeps me quite busy the last months. But now I wil have more time for my hobbies. This is just a note I'am not raising the white flag on this model.
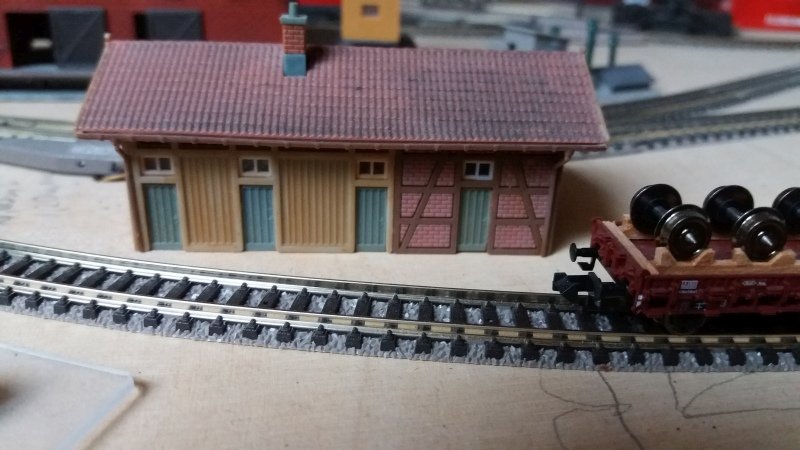
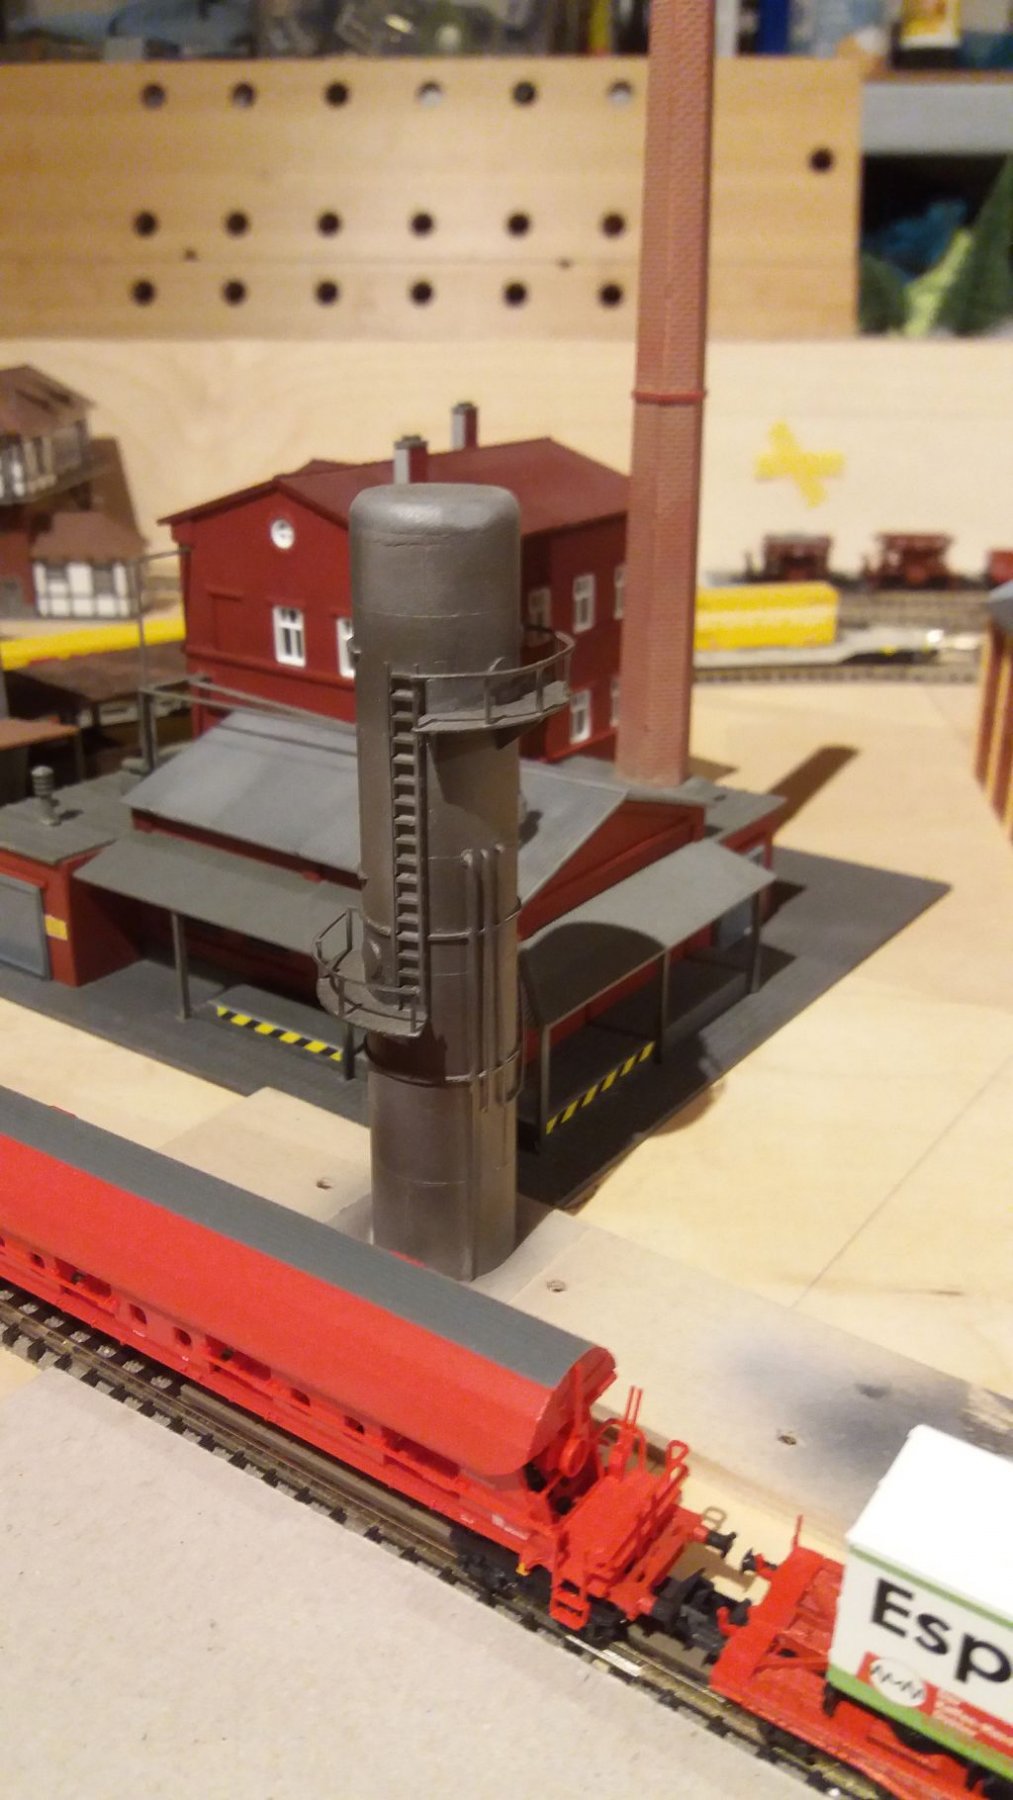
As a good dad, I finished a fractionating column for my sons model railway first. It's 1/160 scale, made from scrap plastic and cardboard.

-
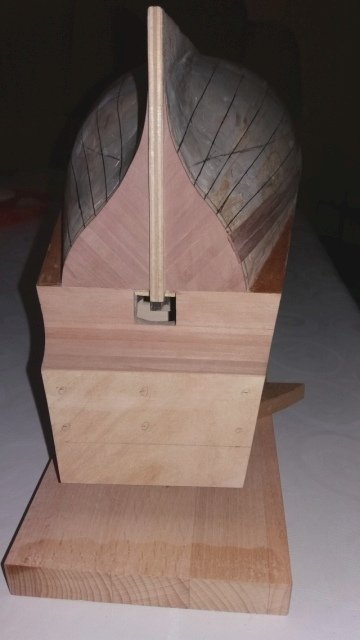
I'am back at the shipyard. I was not able to do any work the last weeks, due to a "little" shoulder surgery.
But now I started planking the starboard side.
A little picture, just for the proof, I'am not telling any tales...
")
- woodrat, mtaylor, John Allen and 1 other
-
 4
4
-
Work keeps me quite busy, don't have much time left for my hobbies.
So I don't know if anyone is still following this build log.
Nevertheless, I managed to plank the port side of the false keel.
klein.jpg.9fedf1325718702e60d3a04f04e992a1.jpg)
That's it for today. I'll go and have glass (or two) of good beer. Cheers to all.
Götz
- woodrat, mtaylor, John Allen and 3 others
-
6
-
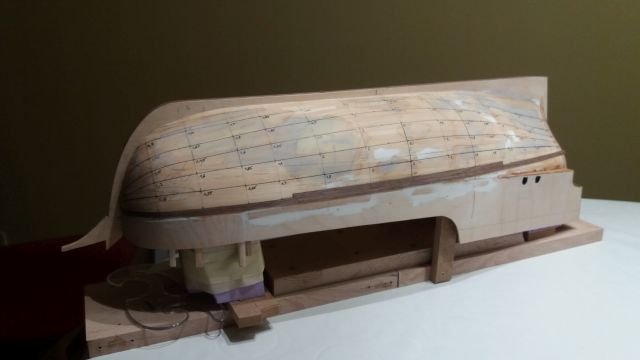
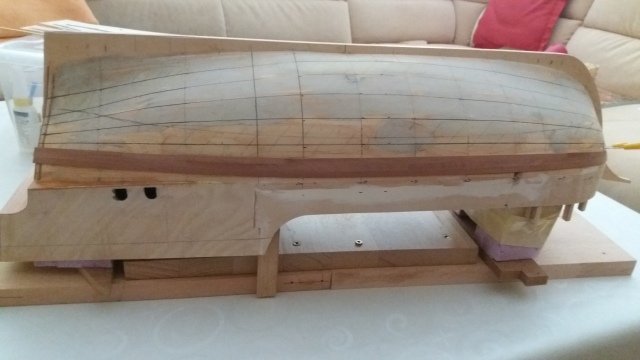
Time for an update. I've finished the planking on the lower port side. After sanding the surface smooth, i put som liquid wax on it. Looks quite good.
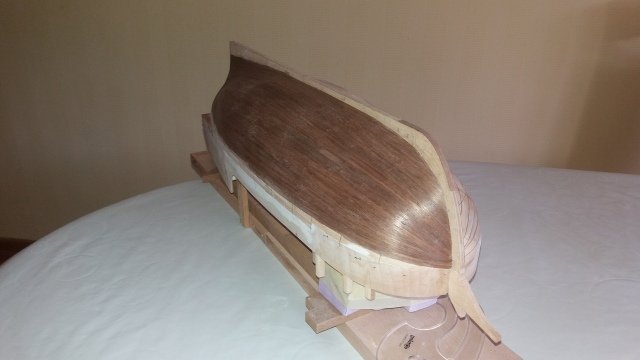
It's not that glossy in real life. Maybe it's time for a new camera.
Next will be planking the false keel.
And then ... nothing spectacular - still the starbord side is to be done. Stay tuned, it still will take some time until I can start working on the forecastle.
Götz
-
-
1 hour ago, Mirabell61 said:
Interesting Log Götz,
and a nice built hull of the "Lisa von Lübeck"
Nils
Thanks Nils,
I'll do my best.
Götz
- Mirabell61 and mtaylor
-
2
-
I'am still alive.
My job keeps me very busy, not much time to work on the ship.
This is were I'am up to now.
- John Allen, hexnut, Mirabell61 and 2 others
-
5
-
I wanted to post this earlier, but I was also affected by the problems with the site.
I found another picture of the jabob's ladder, which seems to be fixed on the deck and the maintop.
Perhaps it helps on your decision.
Götz
- CaptainSteve, cog, Archi and 2 others
-
5
-
a short update - the project was close to the final end.
My wife was looking for some tools on my workbench and managed to kick of the ship from the table

In the end, there were several holes in the planking.
So I ended up cutting away some areas of the first planking. I glued some supporting strips to the bulkheads and started planking, filling and sanding.
One of the smaller repairs:
There was a nasty crack in the stern end of the castle. I used Milliput in the end, to get it fixed. Remove of the planking at the stern was no option.
On the other hand, I had to use wood stain (walnut) on the planking. That means I have to change the wood for the second planking also.
So heres planking 2.0.
Next update won't be soon. It's time for holidays.
-
On to the next step.
I had do decide, wether to do the forecastel construction or start with the second planking.
forecastle - pro: I get the final shape
cons: It can break very easily when the hull is turned upside down for the second planking
I don't need to be a clairvoyant, to foresee what will happen, so second planking ist the match winner.
Starting with the lower part of the stern:
Hull lined up and start of the second planking
It will take some time. There's a lot of other things that will slow down (Family, work, fire brigade, etc.).
- John Allen, knightyo, hexnut and 1 other
-
4
-
-
Dick, thanks for your answer. My plans show ratlines, but I'am not sure yet. On drawings of ships from the baltic sea, I've seen both. Also I found the ladder you mentioned.
I will follow your built. As it will take quite a few month until I come to masting and rigging, I can learn from your quite tremendous and professional build.
Götz
-
I recoverd some pictures. Some time ago I made an approach to build the crow's nest.
I started to make some forms from ply:
planked:
four side pieces glued in place. It took several approaches for a perfect geometric alignment:

planking finished:
Maybe this could be a method for construction these items.
Nevertheless the crow's nest is to large. It simple did not look right compared to the size of the model.
But some questions arose:
- Is there a closed planking of the side walls? I'am not sure if I look at all the paintings of periode ships.
- How to enter the crow's nest? If you climb up the ratlines, you must be a monkey with six arms or denier of gravity to enter the crow's nest.
Hopefully I find answers in one of Louie da fly's links. My plans are not any helpful in this aspect.
so long,
Götz
-
-
14 hours ago, KAT said:
Thank you for the answer, i bought the book and the sets also the washes that they recommend in the book but the truth is i don't own an airbrush, i always use brushes, do u av any experience on those with brushes?
I like to use the airbrush, because one will get a very thin and even surface. Especially when you are priming the surface. I think using a brush is possible. It's only my personal experience. When you paint on all the small details and for blending you have to use a brush.
Here's an example were I used only the washes on plastic, primed with matt varnish:
- Ben752, thibaultron and Canute
-
3
-
2 hours ago, thibaultron said:
Is that the AK 259 REALISTIC WOOD EFFECTS , book?
Yes. It emphasises on AFV Modelling, but the techniques can be used on plastic - or even wood- of ship models as well.
- Canute and thibaultron
-
2
-
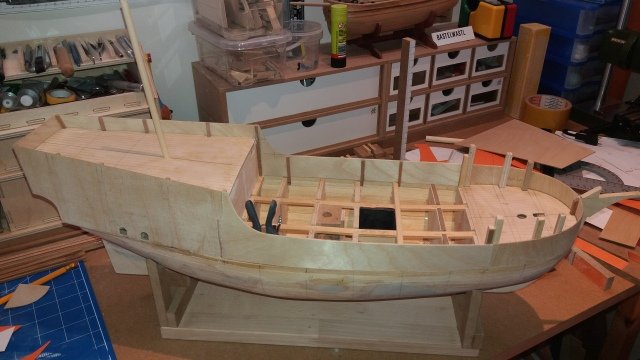
So next was adding balsa filler blocks at the bow, fairing the bulkheads and starting the first planking.
Unfortunately there was a malfunction of the HDD and I was not able to recover all of the data.
I think the pictures of the first planking are lost.
In the course of the planking process, I discovered there were some errors in the drawings (the ones from the modeler, not the plans), that made the planking
very frustrating. Up to that point, I had the feeling, scratch building is very much the same, as building a nice kit. -> o.k. lesson learned
So I did not work very often on the hull, and it took about 6 and a half years to finish the first planking.
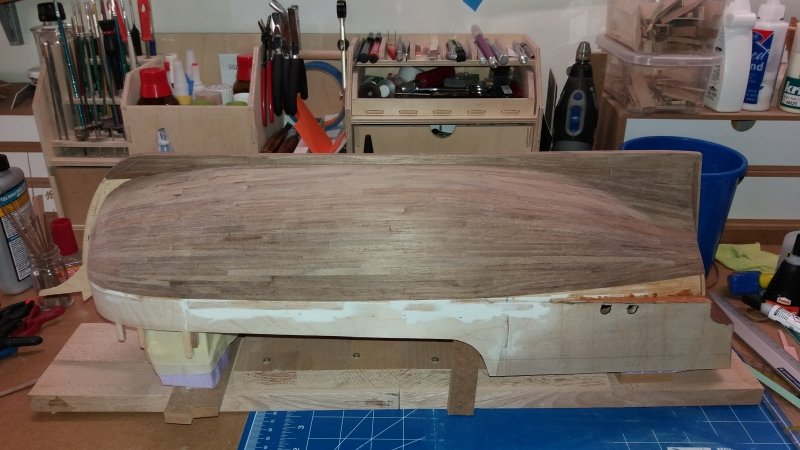
I made the sides of the upper aft hull from 0,8 mm plywood. I choose this material for two reasons. The upper and lower hull sides begin to diverge in this area. This results in a vertical bend and an slight upright twist.
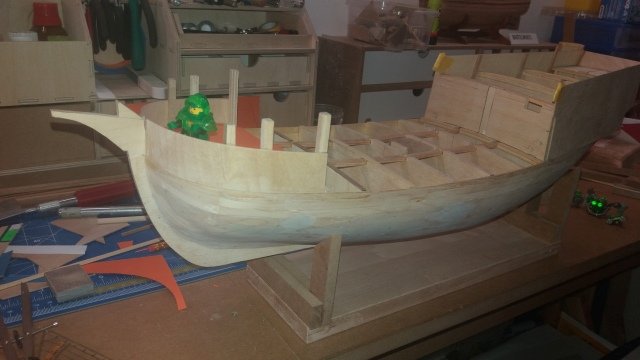
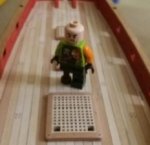
My son instisted to put the LEGO knight there.
Upper aft deck and lower forecastle deck in place:
More pics later.
Götz
-
Just came to this post. Not to late I hope. I have used the Vallejo set and the Ak weathering set on buildings for my sons model railway. It needs a little practice. An airbrush is recommended. There is also a small book by Ak about wood weathering.
Regards Götz
- Canute, thibaultron, KAT and 1 other
-
4
-
You are right. It's a shame to hide your knowledge. But I talked to some of the members of the captains society, and they got the information, that part of this work should be part of a PhD-thesis. I asked some former collegues that stayed at the university if they can get a copy, but it seems, nothing has been published yet. I think it never will. But these members also told me, that the scientists reconstructed parts of the ship, from remains of ships. You will indeed, as stated on the website I mentioned before, find remains of these ships, as parts of interior fitting. An good example are the planks used as tables in the Restaurant "Schiffergesellschaft" (Breite Str.2, Lübeck). I don't know if there are right in the end, but from the scientific point of view it's a good approach.
As you are not that far from the baltic sea, I would recommend a visit to Lübeck, if you haven't done yet. Espescially the museums and also the churches have a lot of pictures and votive ships. The baltic sea is nice also, and more reliable than the north sea (water stays 24 hours
 )
)
When reading all your historic links and advices, I fear i will not come even near to the standard you are expecting.
-
When I started this log, I thougth I could post some more frequently, but as always - the devil is waiting in every corner..
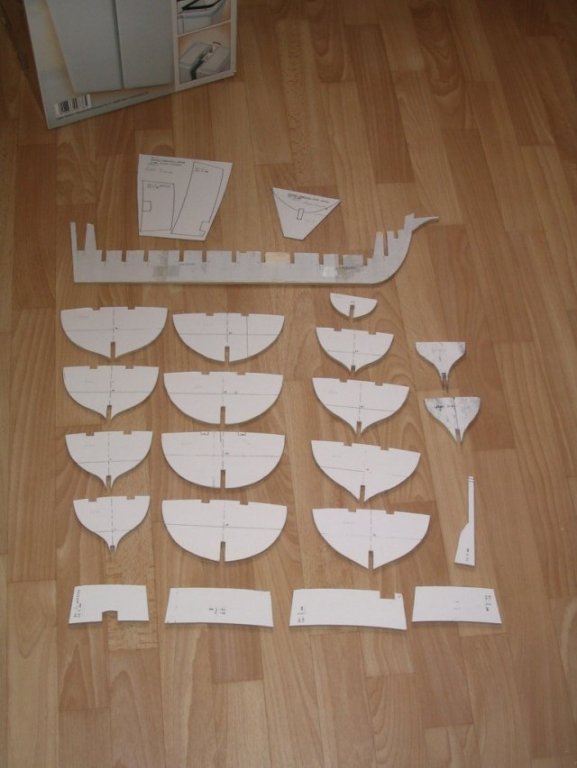
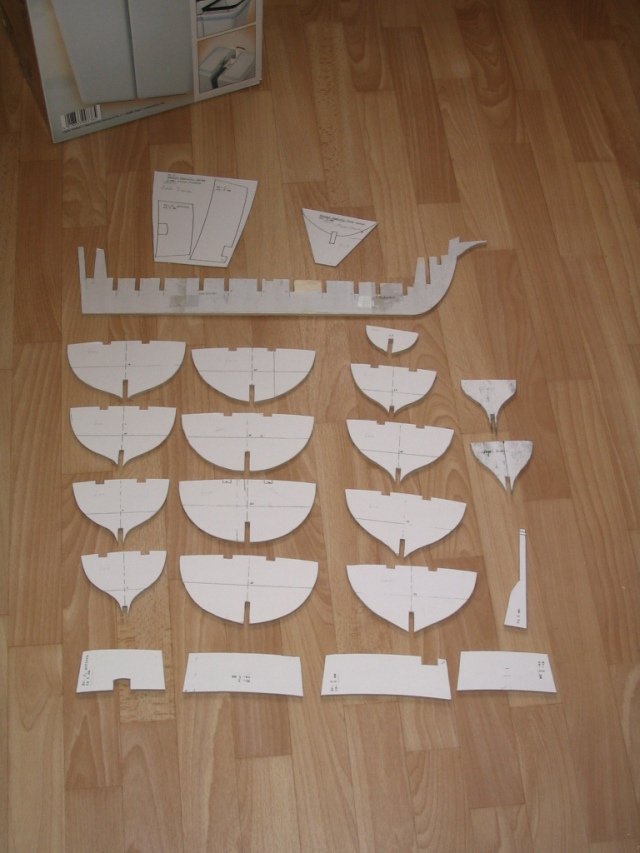
I started this build from the plans, as they seemed reliable. As there were also some nice drawings of the keel and bulkheads, provided by an unknown ship modeler, i used them.
Here's the result, back seven years ago. After the fog (sawdust) lifted, I got some nice parts to get started:
Dry fitted, and finally glued into place (anno 2010):
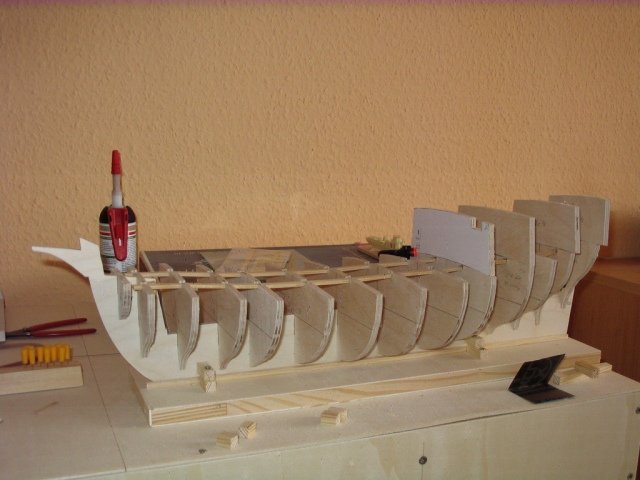
The upper parts at the stern are not glued, waiting for proper alignment.
-
Dear Steven,
thanks a lot for the information. That will be a good source for information, especially on details, as these are only sparse information in the plans.
Sorry for the delayed reply, but at work there occurred some unforeseeable incidents. That prevented me from doing anything else.
I also have an interesting link for you:http://hanseschiff-luebeck.de/projekte/das-hanseschiff/wissenswertes/nachbau-ohne-vorbild/
It’s in german, but maybe google translator creates some useful text out of it - or it will be that japanese manual style...
So the main problem is, that there are no ship wrecks of this type of ship. The known wrecks are of the earlier period. So the plans were a result of experimental archeology.
Götz
-
I've been using this site as a source for inspiration for more than a year now (certainly too late for the first steps of this build). So my wife thought it would be an good idea to share it.
I don't think it will be one of the numerous excellent builds in this forum, but hopefully i will get advice if I'am steering towards an iceberg.
Nevertheless, as my teachers in school said, it's always enough for a good laugh.
On to the start. This will be am birthday present for my sisters 40th birthday in two years. So I started 7 years ago.
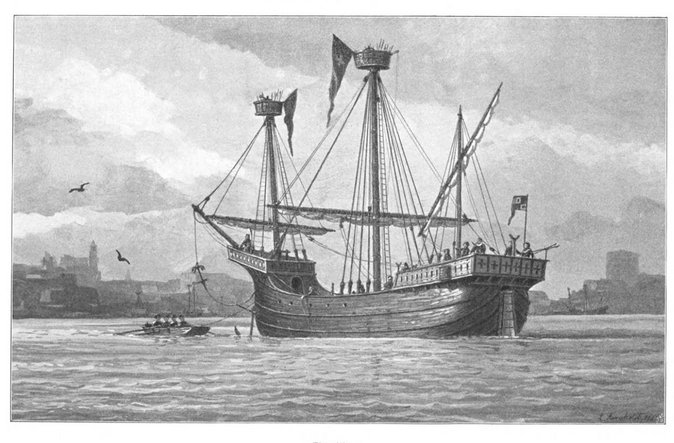
As we come from the hometown of the hanse - Lübeck - it has to be an hanseatic ship. My father provided me with plans, he got from a navy collegue.
After visiting several museums, I learned, that the general shape of the ships was similar. Other details, like amount of armament, etc. on the other side could be very different.
According to the plans, it's not a cog, but the follow up a Kraweel.
Here's an nice drawing from the reconstruction of a 1:1 replica

More will follow the next days.

Hanseatic Ship c. 1500 by goetzi73 - 1:50 - first scratch build
in - Subjects built Up to and including 1500 AD
Posted
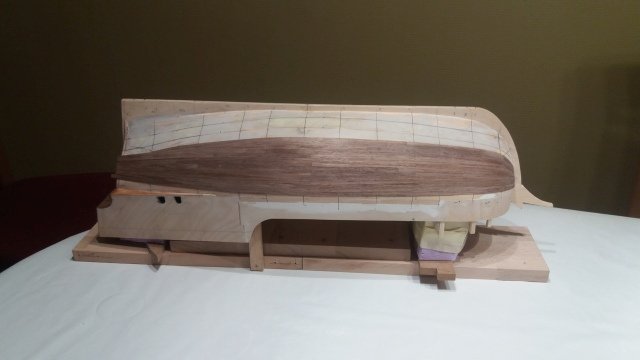
Hello to all,
made a little progress.
I've varnished the second planking on the lower side of the hull. This was quite some days ago. Nothing spectacular. Here is piece of evidence A: