DONATION DRIVE - SUPPORT MSW - DO YOUR PART TO KEEP THIS GREAT FORUM GOING!
×


Chuck
-
Posts
9,693 -
Joined
-
Last visited
Content Type
Profiles
Forums
Gallery
Events
Everything posted by Chuck
-
 That looks really good. Well done. Those are tricky planks. Chuck
- 99 replies
-
- 2
-

-
- winchelsea
- Syren Ship Model Company
- (and 1 more)
-
I just use gutteman polyester thread. I get 100 weight thread the same color at any craft store. For thinner ropes you can use fly tying thread.
- 421 replies
-
- 3
-
-

-
- medway longboat
- Syren Ship Model Company
- (and 1 more)
-
Yes Jeff certainly spoiled us all. I miss the service every day.
-
No unfortunately in the USA there are no longer sources for milled strips of Boxwood, holly or Swiss Pear. There are only a few businesses left and they are all outside of the USA. I am afraid that the only way folks are going to get stripwood like this moving forward is to invest in a good hobby saw like the Byrnes and buy sheets to mill your own strips. Not only is it cheaper but after a short time you will get really good at it. you can find domestic stuff like basswood or cherry but the sizes are limited. Taking your models to the next level means learning how to use a saw like the Byrnes saw to rip your own strips. Its not a good business to be in and it is unlikely that anyone will jump into this space to replace hobbymill.
-
Dont forget to check out the many photos of the contemporary model posted in out gallery. They are located in the contemporary model section of the gallery.
-
It looks very good. Your care in planning has paid off. It is important at this stage and she looks great!!!
-
Wouldnt this make an excellent model project or even a kit maybe? I believe she launches on Feb. 20th. Please visit their Facebook page....really great stuff on there. Chuck
- 4 replies
-
- 10
-
-
That looks really good. Nicely done. That type of planking with all of those tabs is not the easiest thing to accomplish. Yours looks neat and tidy. Chuck
- 99 replies
-
- 2
-
-
- winchelsea
- Syren Ship Model Company
- (and 1 more)
-
I made it curve up just a little because I would avoid a completely straight horse. Just for aesthetics. There is no curve towards the transom. It is always equal distance from the transom.
- 421 replies
-
- 3
-
-
- medway longboat
- Syren Ship Model Company
- (and 1 more)
-
Very nice progress. That is some neat and tidy craftsmanship. Those parts can get tricky to make and install.
- 77 replies
-
- 3
-
-
- model shipways
- pinnace
- (and 1 more)
-
She is a beauty. Beautifully executed.
- 170 replies
-
- 2
-
-
- medway longboat
- Syren Ship Model Company
- (and 1 more)
-
Really looking good. Dont be afraid to sand the heck out of that planking. Get it nice and smooth.
- 99 replies
-
- 3
-
-
- winchelsea
- Syren Ship Model Company
- (and 1 more)
-
Thank you all for the kind words!!!! and Likes!!! I think its time to move inboard and get some work done.
- 1,784 replies
-
- 11
-
-
- winchelsea
- Syren Ship Model Company
- (and 1 more)
-
Straightening aftermarket rigging line
Chuck replied to DonInAZ's topic in Masting, rigging and sails
Its nylon or plastic so All of the traditional methods wont work. You need to heat it up and hang a wright on the end. -
It will be opened. But that will be done later.
- 1,784 replies
-
- 1
-
-
- winchelsea
- Syren Ship Model Company
- (and 1 more)
-
Try not to over think it. Never got any bubbles. Not even a little bit. I just use a glue stick. Works perfectly. Make sure no lumpy glue. Stick it on. Its really that simple. For a finish I spray them with matte fixative and let them dry before cutting them out. if you are curious....print one out and glue it to some scrap as a test. It should answer all your questions. Spray mount would also work but less open time. With the glue stick you can move it around and slide it before it sets.
- 1,784 replies
-
- 6
-
-
- winchelsea
- Syren Ship Model Company
- (and 1 more)
-
thanks guys. Its not too tough Bob. Its about the same difficulty as my other designs like the long boat. Just bigger with more parts. no more difficult to build in my opinion...but i am probably not the best person to ask since I designed it.
- 1,784 replies
-
- 5
-
-
- winchelsea
- Syren Ship Model Company
- (and 1 more)
-
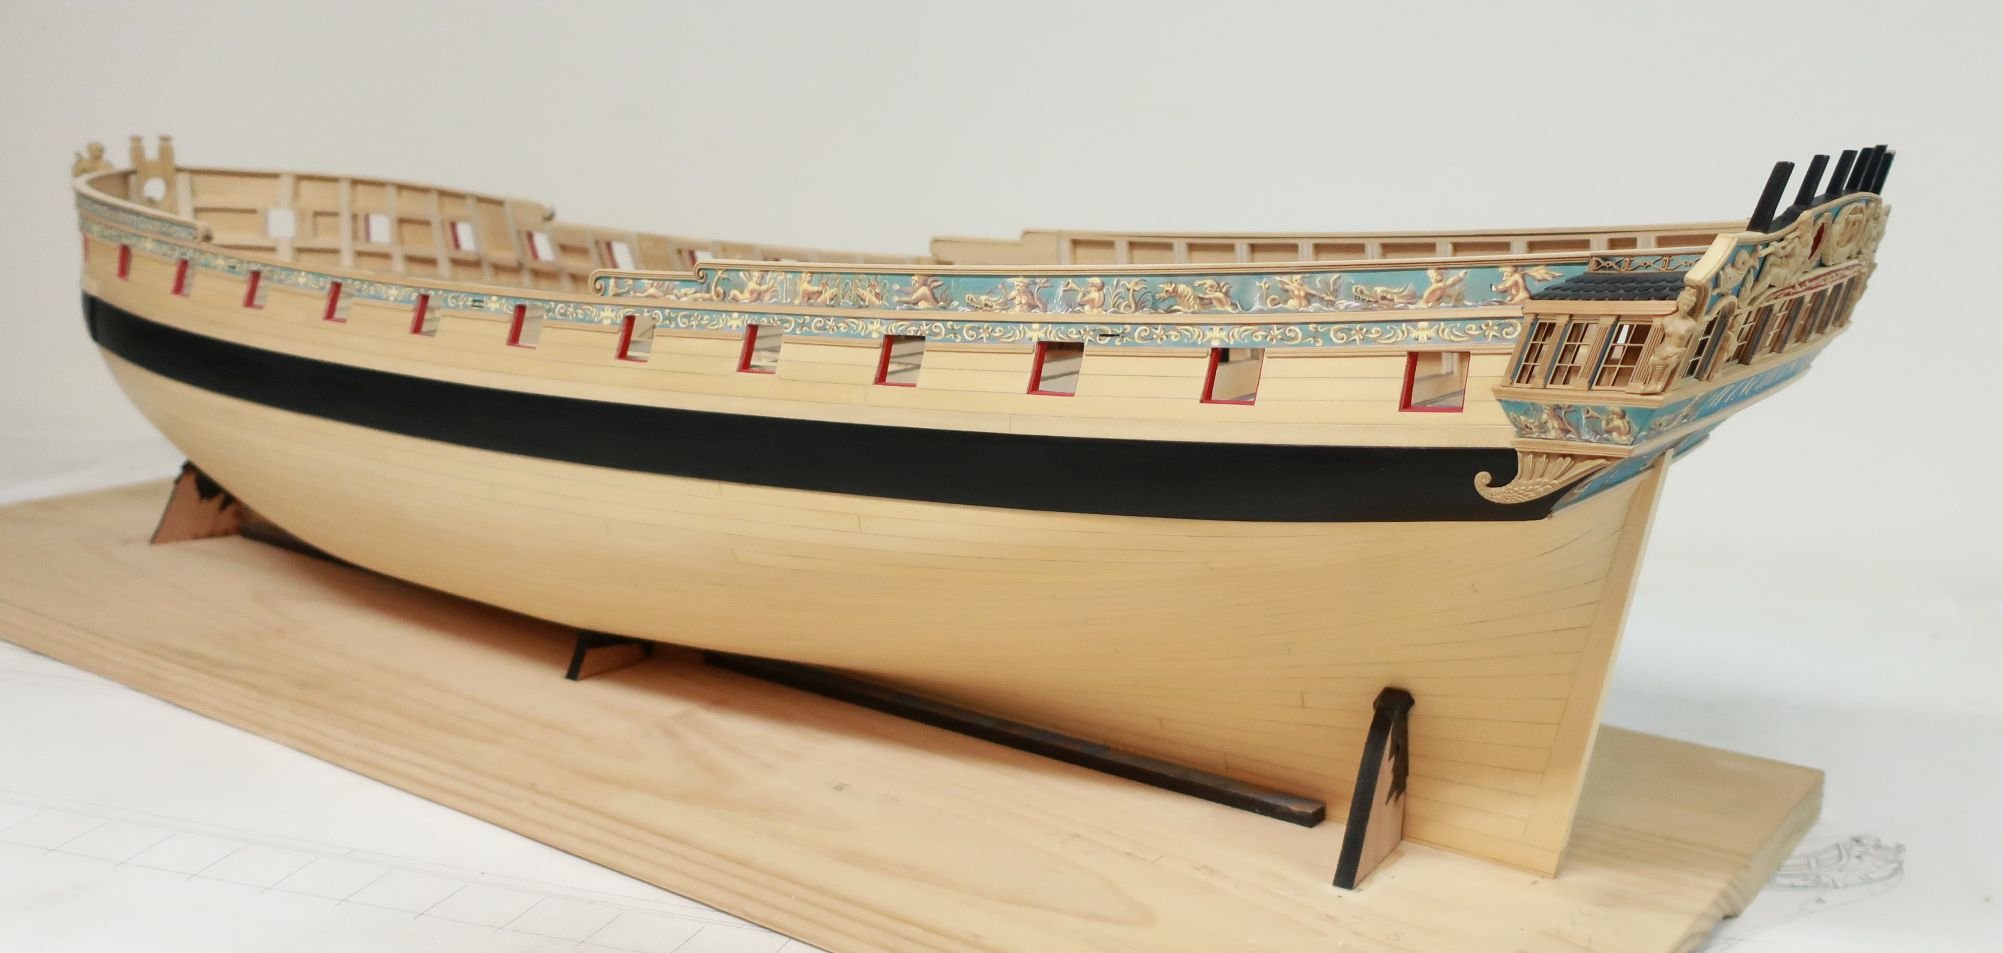
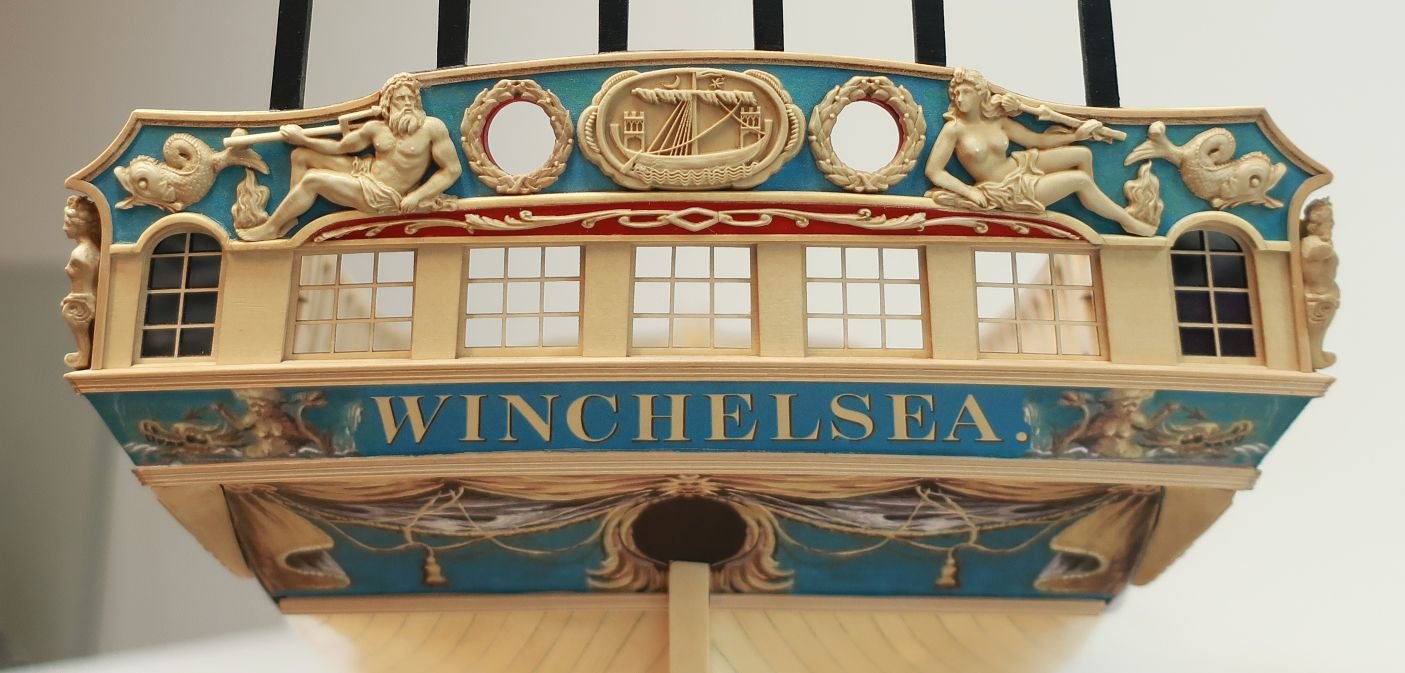
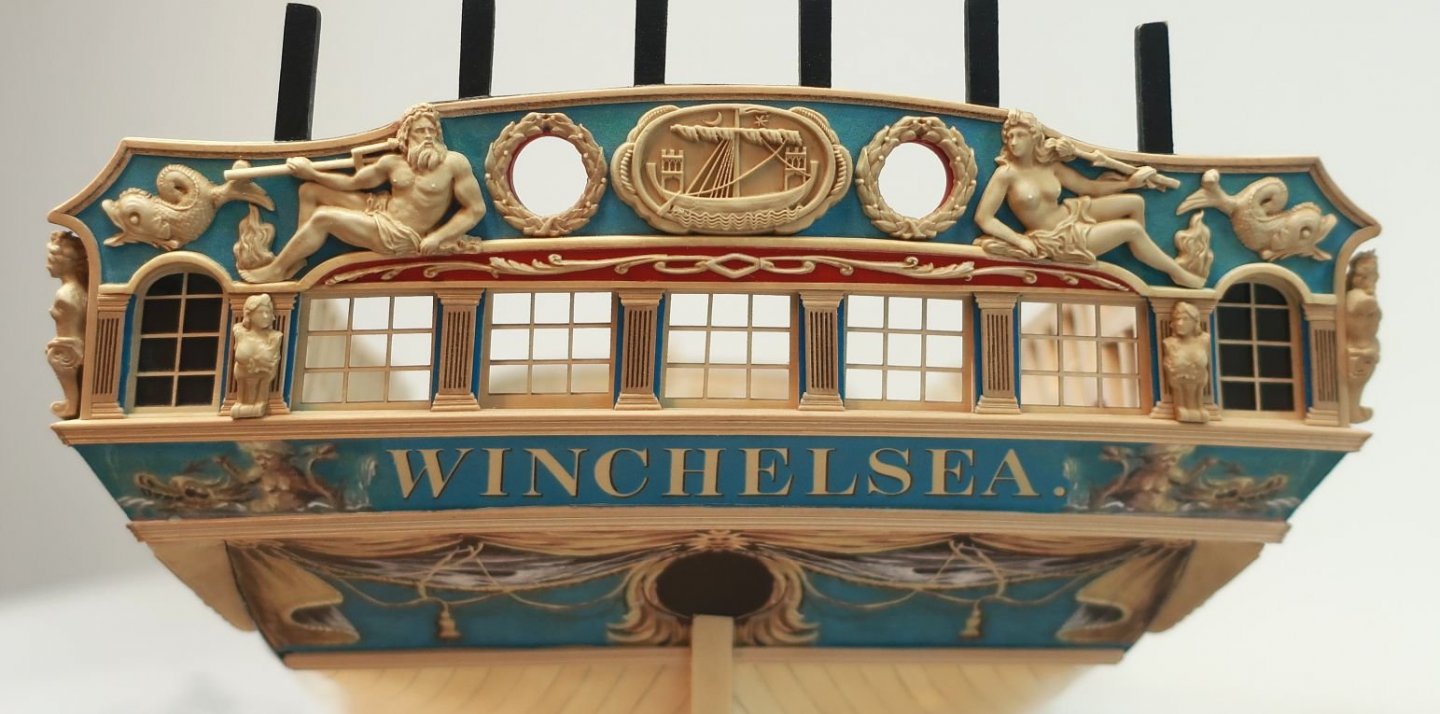
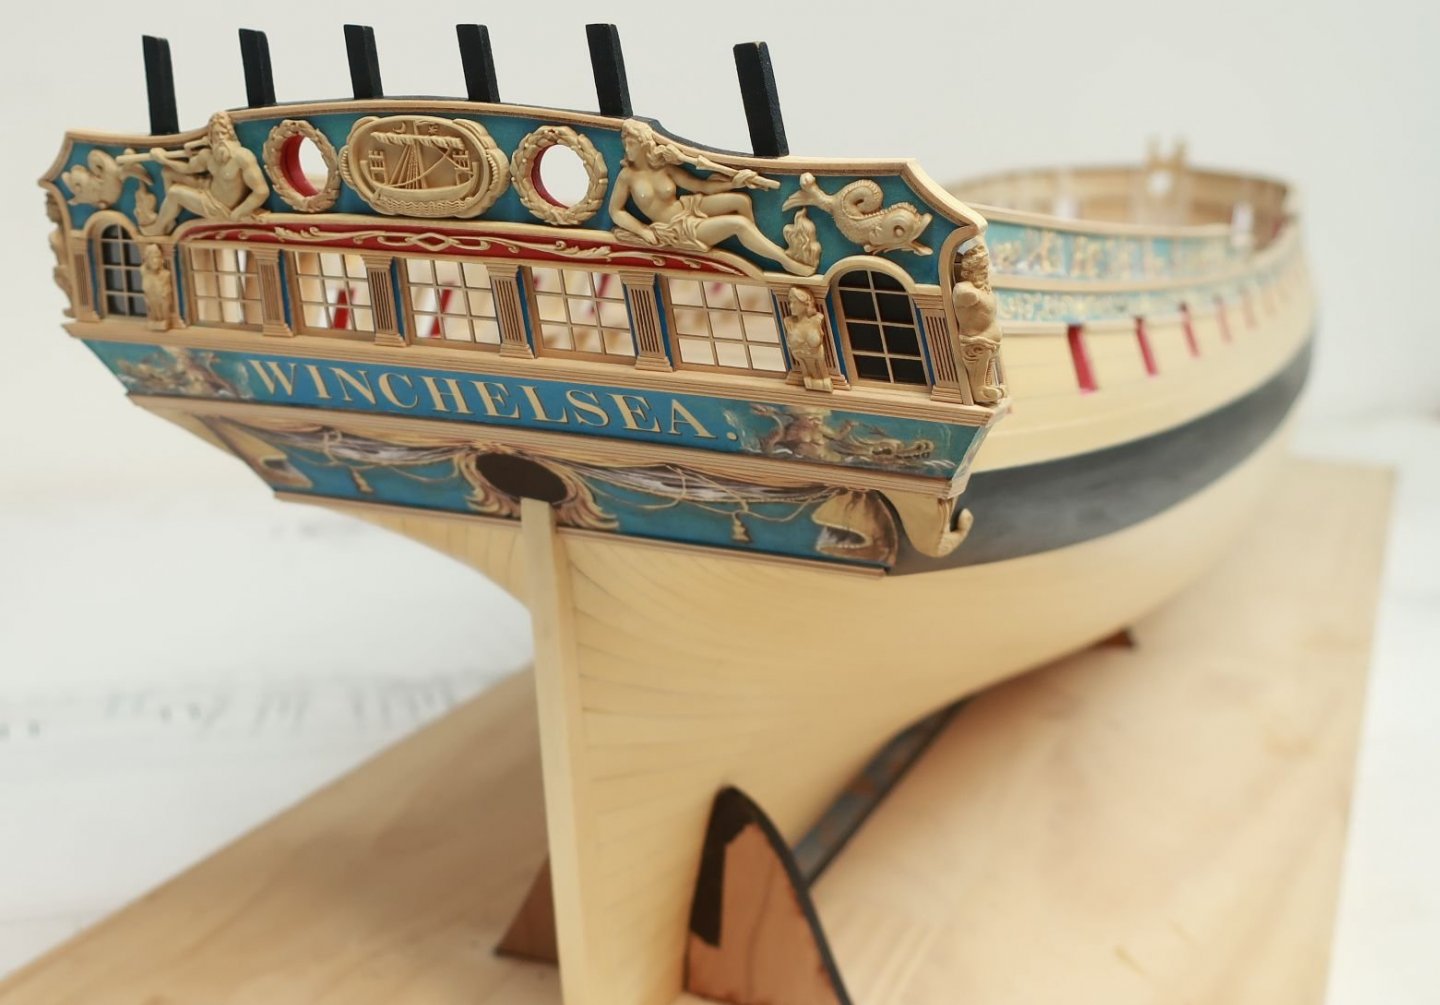
The stern transom details are now completed....along with chapter 3. I still have to finish writing it though. Then I will start getting the laser cut pieces together for you folks. The columns were added to finish it off. These were done exactly like those on the quarter galleries. The outside face of each upright between the windows were painted blue first. I was careful not to get the paint on the sides of the uprights. The top and bottom of each column was was cut to length from a strip of 3/32 x 1/32" boxwood. This strip was first scraped to create the profile needed (all those steps in each base and top). Once I cut and angled each piece I used a needle file to also shape the ends to match the profile. Then the center fluted column which is laser cut and etched was glued between them. I just removed the char and then tweaked the length for a tight fit. Lastly, the two small figures were glued to the front of those wider columns. That really finished the look of the stern. I am quite happy with the results so far. The color of the resin was tinted a bit as previously mentioned. Chuck

- 1,784 replies
-
- 50
-
-

-
- winchelsea
- Syren Ship Model Company
- (and 1 more)
-
For some folks yes but its not too bad.
- 1,784 replies
-
- 1
-
-
- winchelsea
- Syren Ship Model Company
- (and 1 more)
-
Its not really good at all. The grain is far too pronounced. I have tried.
-
Really nicely done.
-
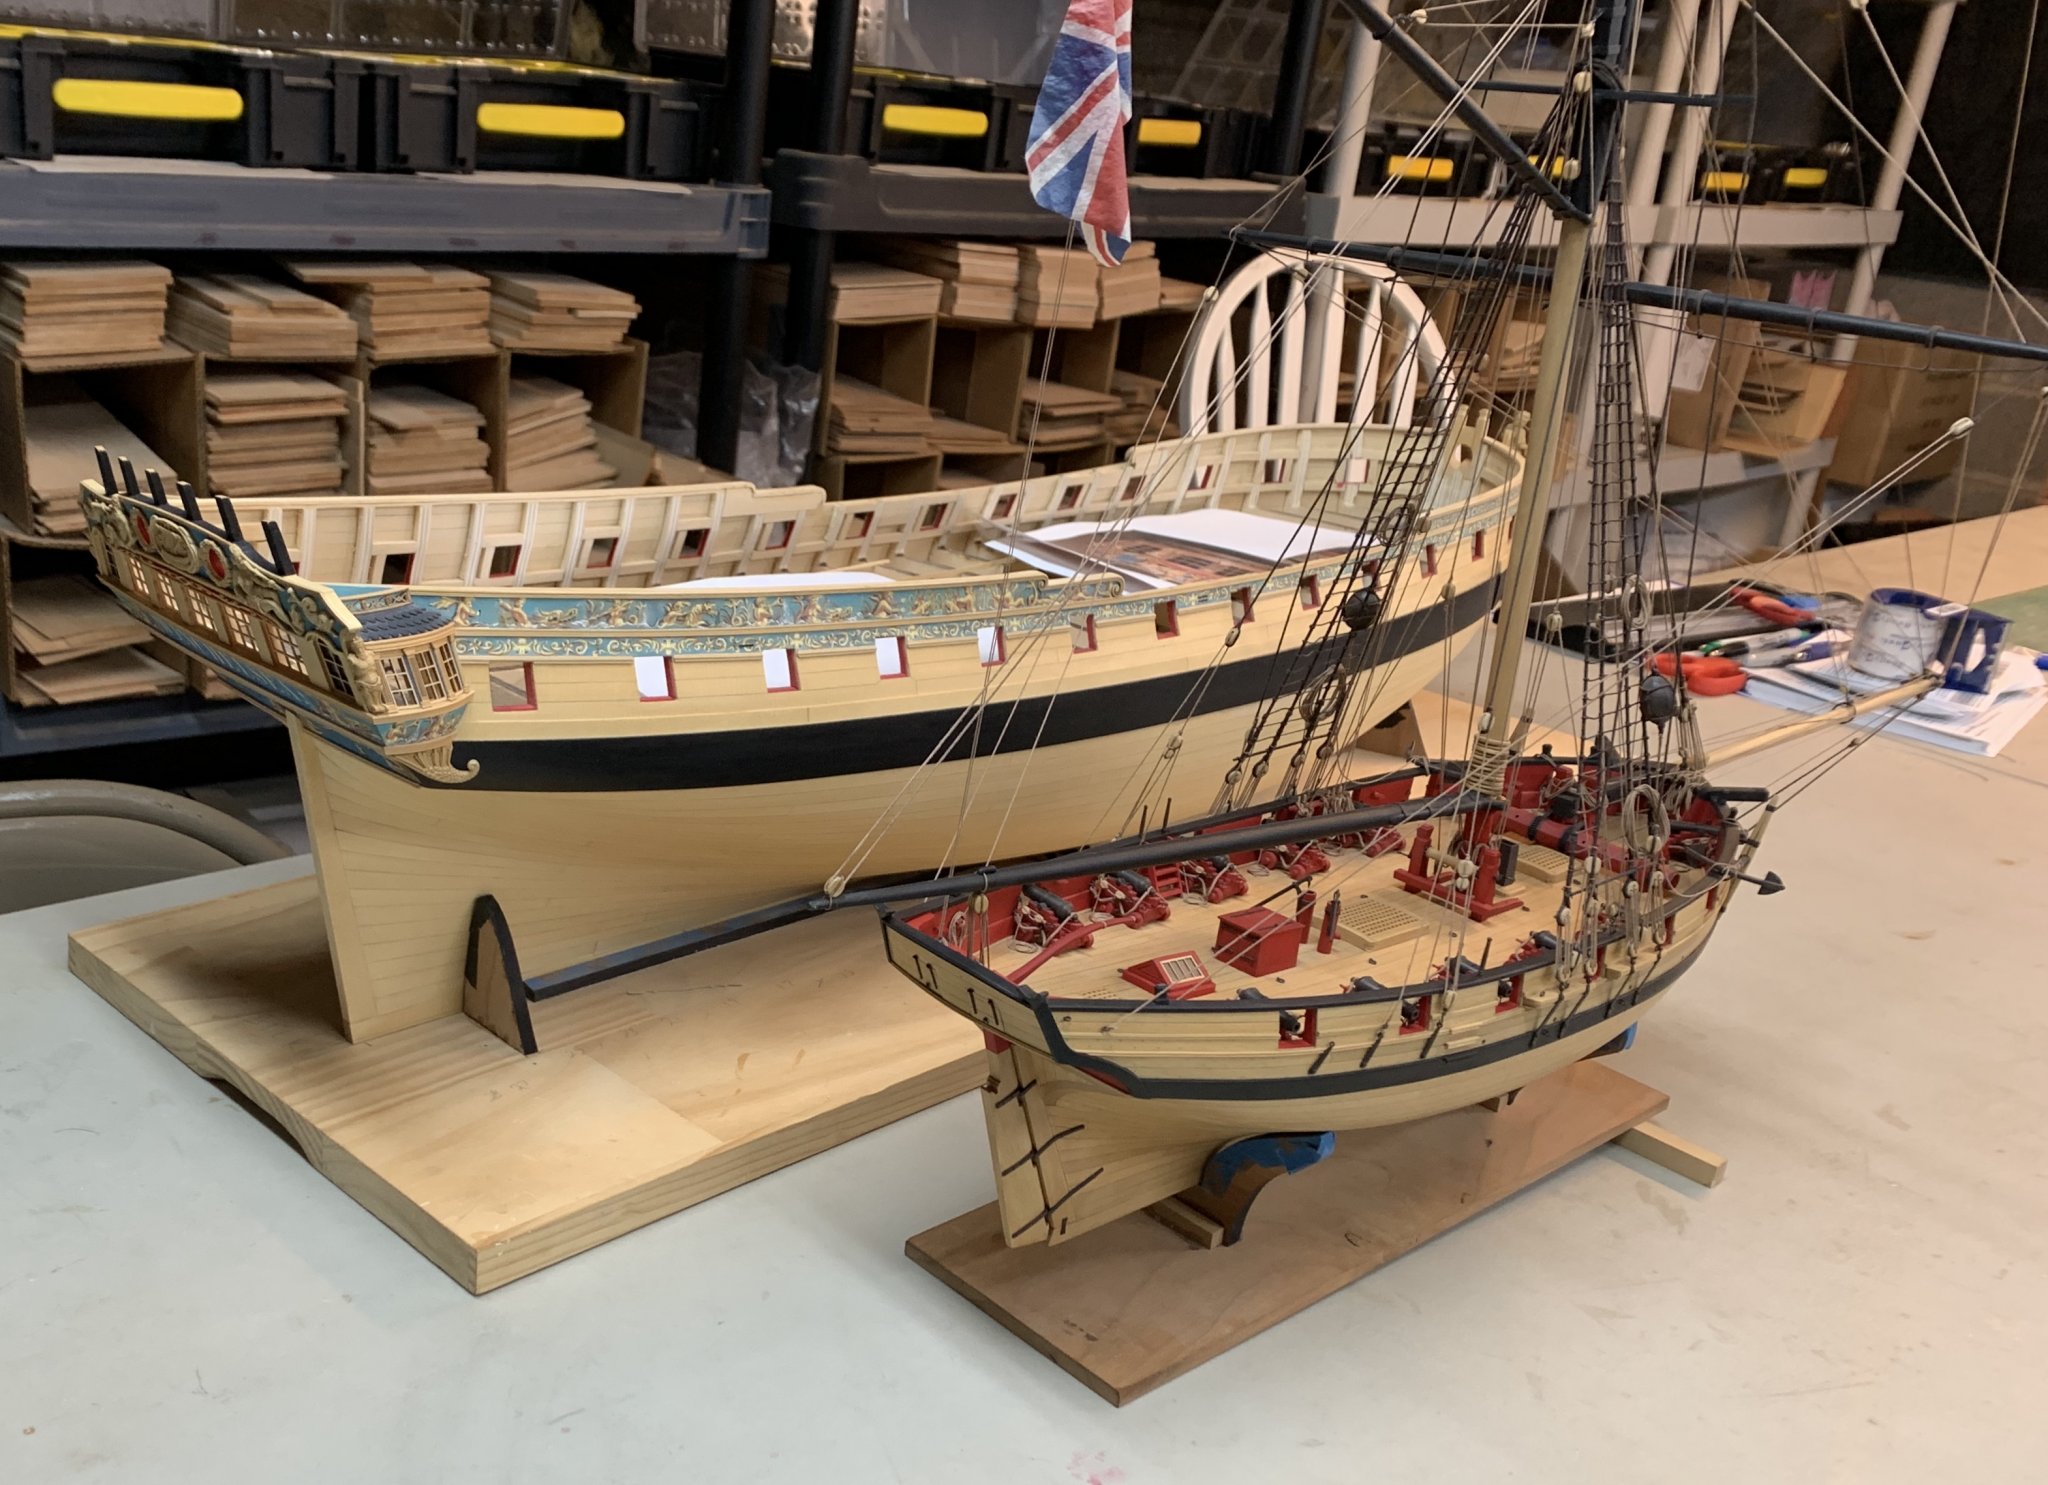
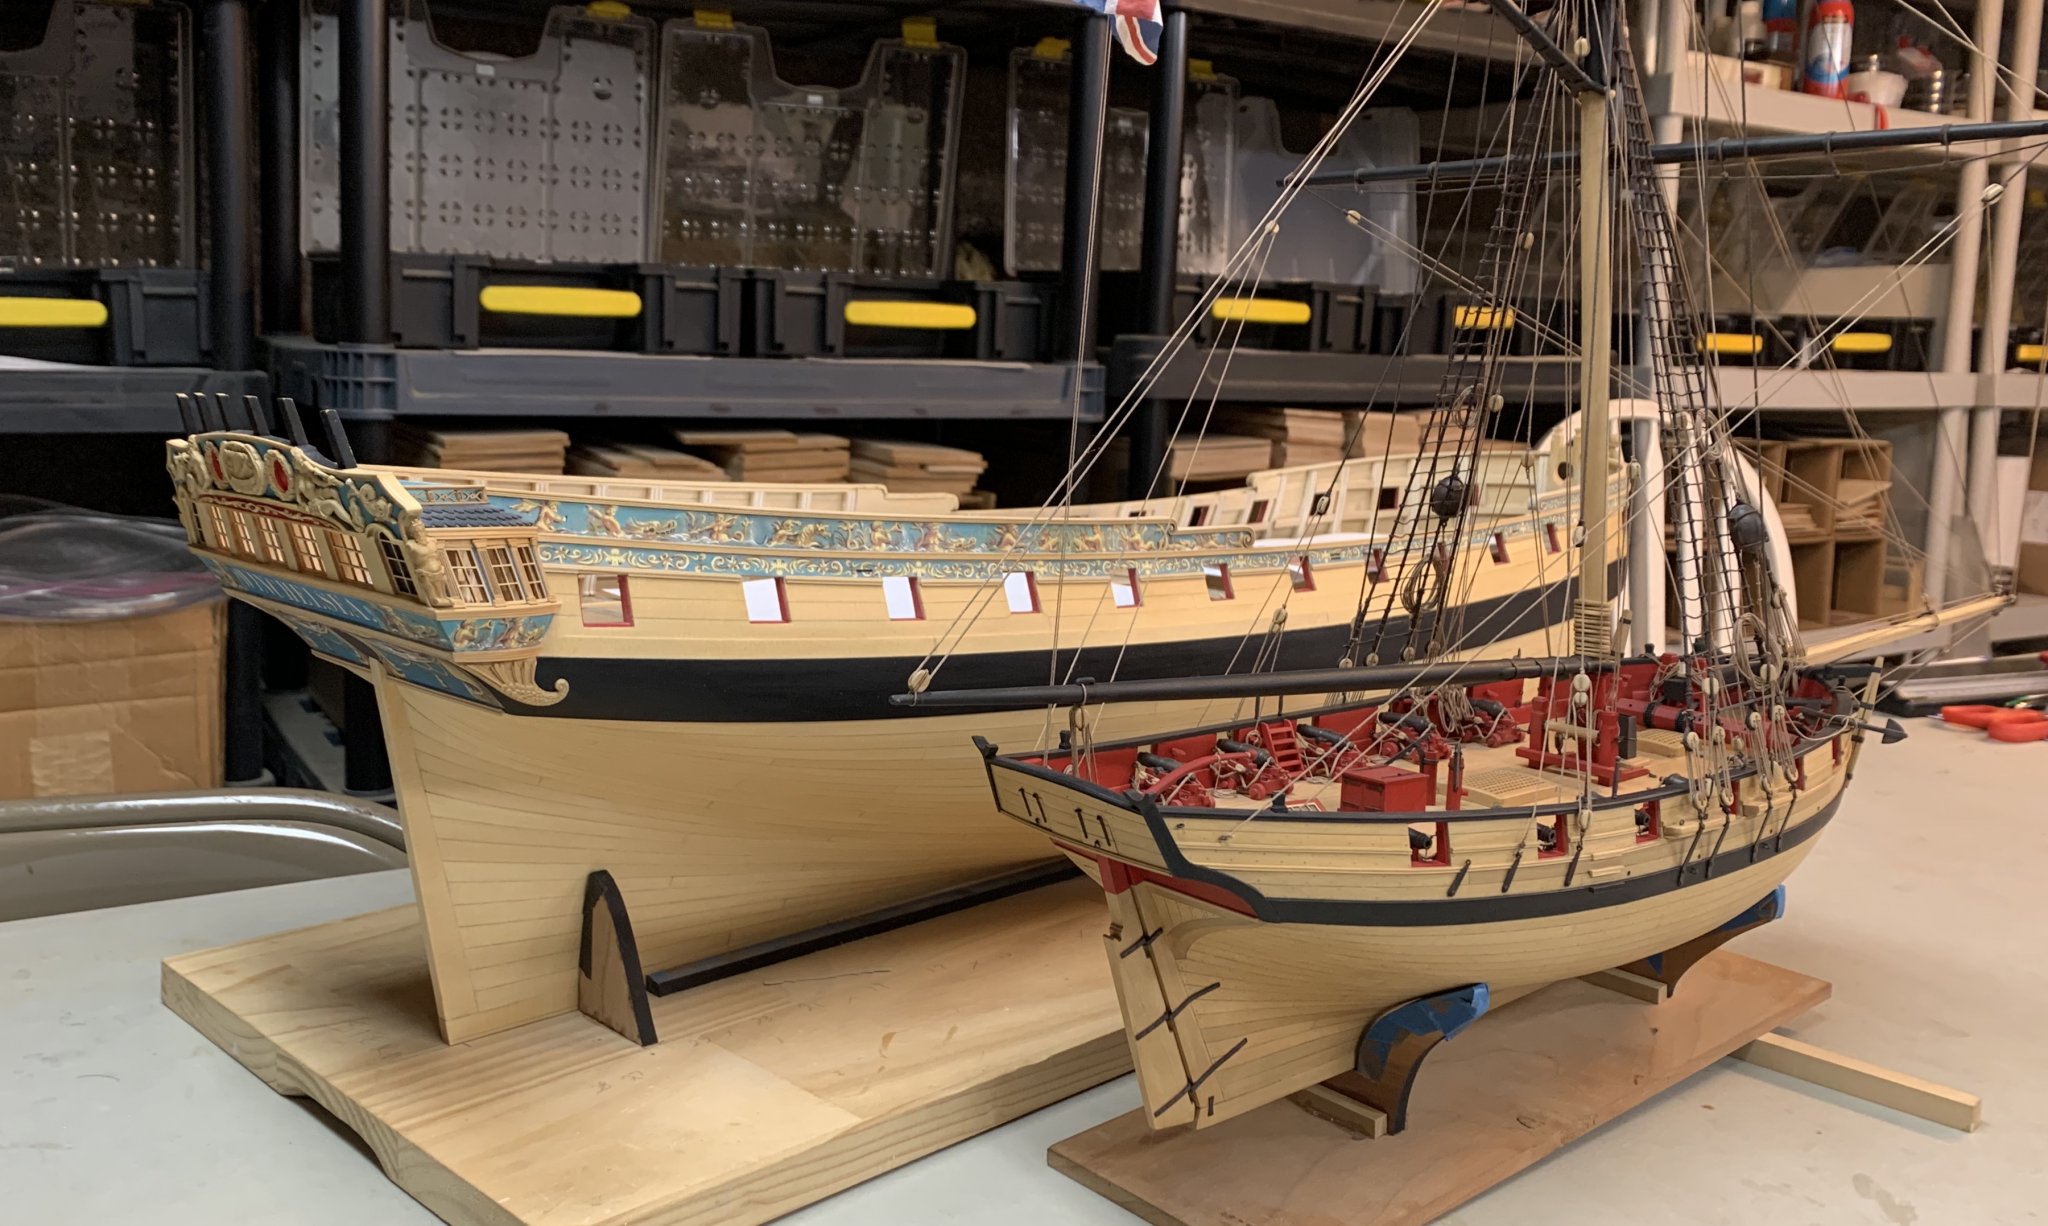
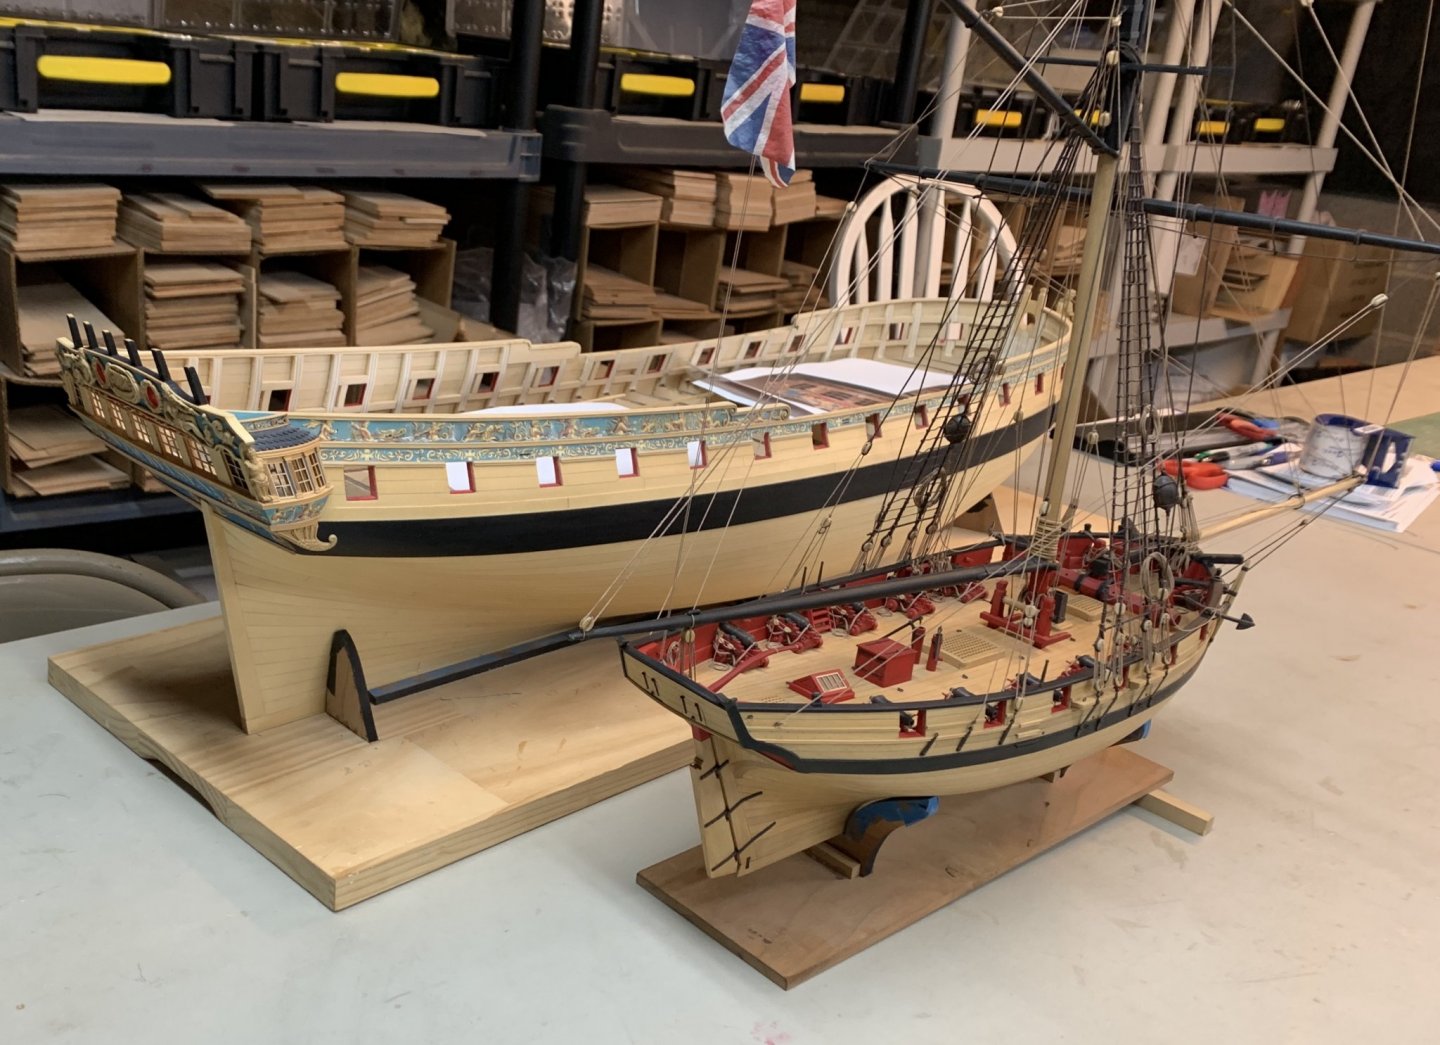
No progress on my Winnie but I finally found a day to fix my Cheerful. It got severely damaged when i brought it to the joint clubs show. The model got smashed on the ride back and the rigging pulled off the pin rails and the stern knees. It was a bear to position those pin rails against the bulwarks with so much tension on the lines. But i managed it without having to re rig anything except for the rope coils on the pin rails. The rigging on the bowsprit was also ripped away from the tip of the bowsprit. and that needing fixing. Bigger job than i would have liked. They are never the same after such a repair but I am glad its done. It was also filthy and covered with webs and dust. i will now put it away where it will be safe and protected. Interesting size comparison and note the color. The cheerful is all boxwood. The cedar Winnie really looks good in comparison and its 75% cheaper.

- 1,784 replies
-
- 40
-
-
-
- winchelsea
- Syren Ship Model Company
- (and 1 more)
-
Echo by davec - FINISHED - cross-section
Chuck replied to davec's topic in - Build logs for subjects built 1751 - 1800
It really looks fantastic. Sharp looking model. -
That is looking awesome. Well done. You got a nice run of those planks.