Chuck
-
Posts
9,711 -
Joined
-
Last visited
Content Type
Profiles
Forums
Gallery
Events
Everything posted by Chuck
-
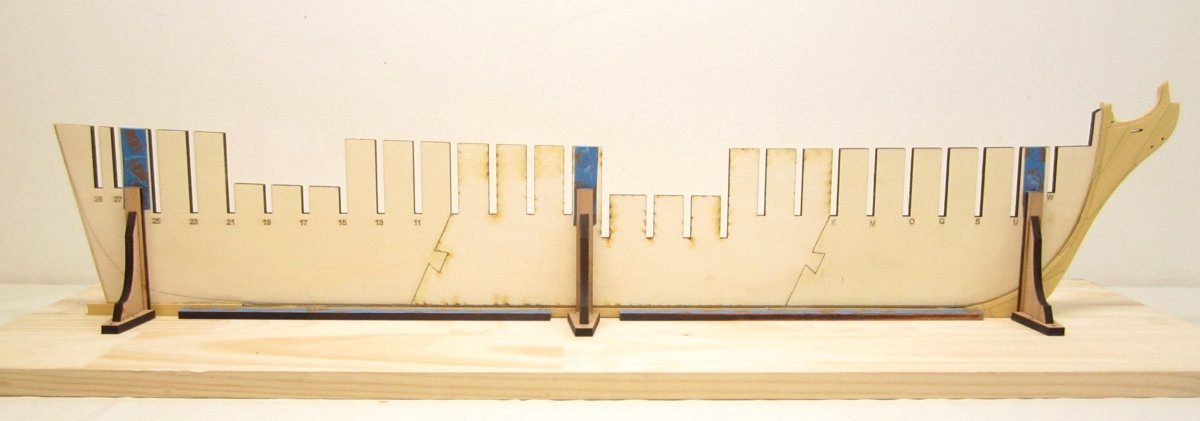
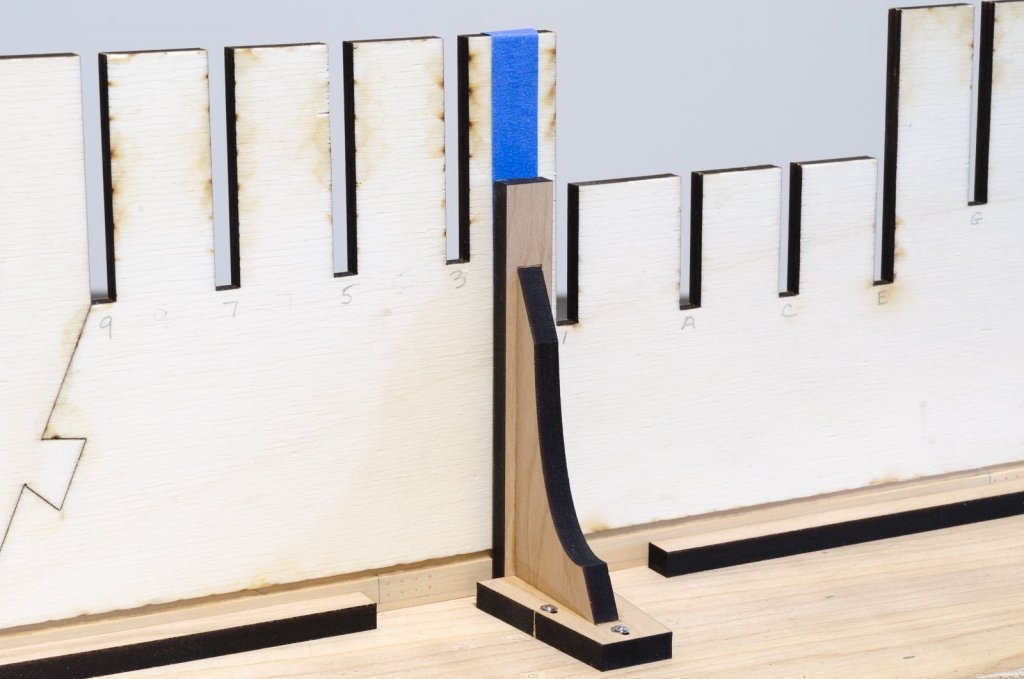
 It wont matter if you remember to use many brackets on your build board. It will straighten any twist and warp. I used three but you can use 4 or 5 if you want. These are super easy to make. You just need to make little triangles (right angles) with a base. These are a bit fancier but they dont need to be. They should be screwed into the baseboard so you can remove them when planking the lower hull. I hesitate to sell these because they are so easy to make on your own. In fact I removed them from the installment for chapter one because some folks complained they could make them on their own and didnt need to pay extra for them. I havent laser cut any more of them but if some of you need these I could cut more of them and sell them as a separate item. They can be reused on any project. You can line the inside with tape or even felt so they wont damage your keel. They work a treat. Just note that the first ten 1st installments have three of these. So you guys got a bonus!!!! Screws and washers not included.
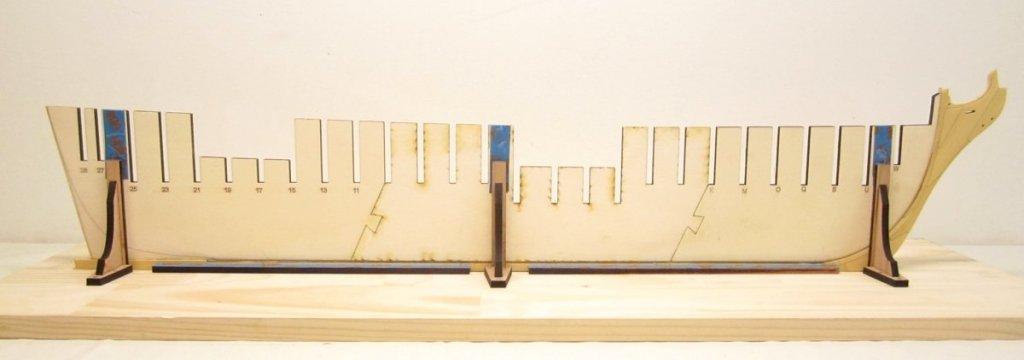
-
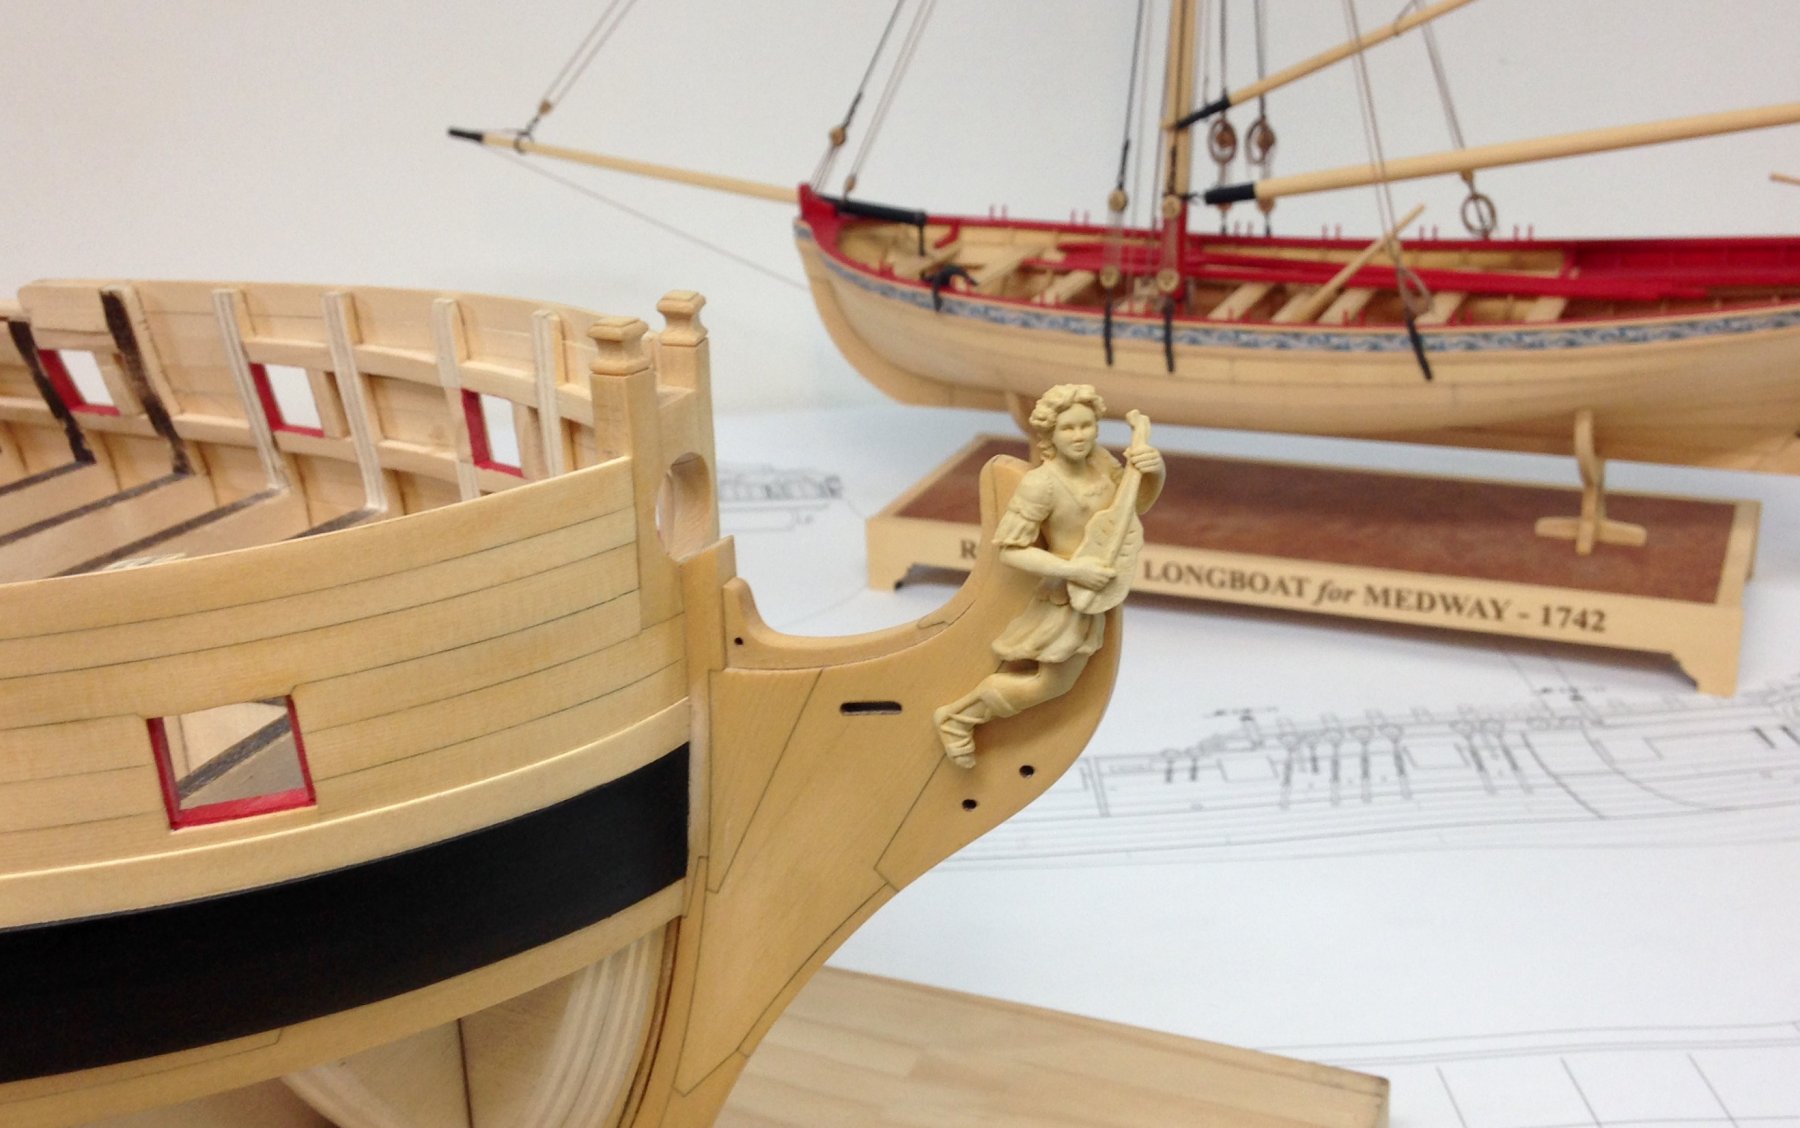
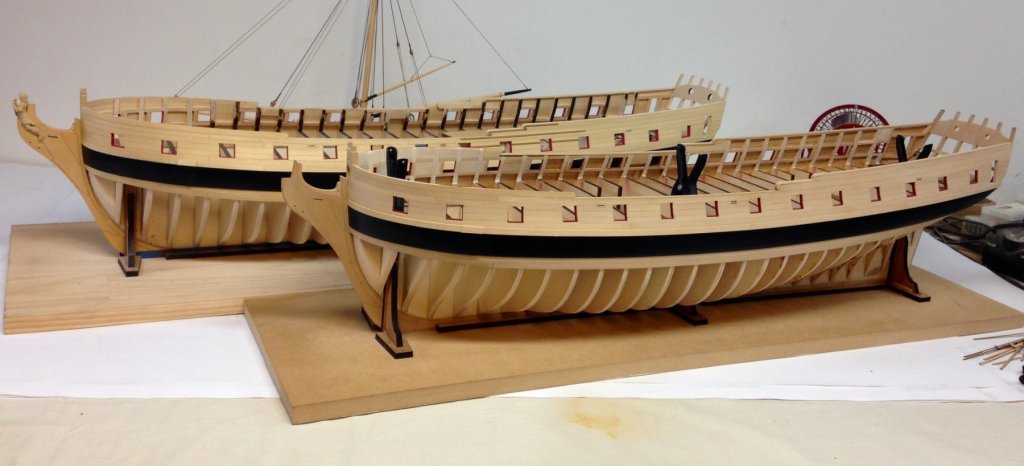
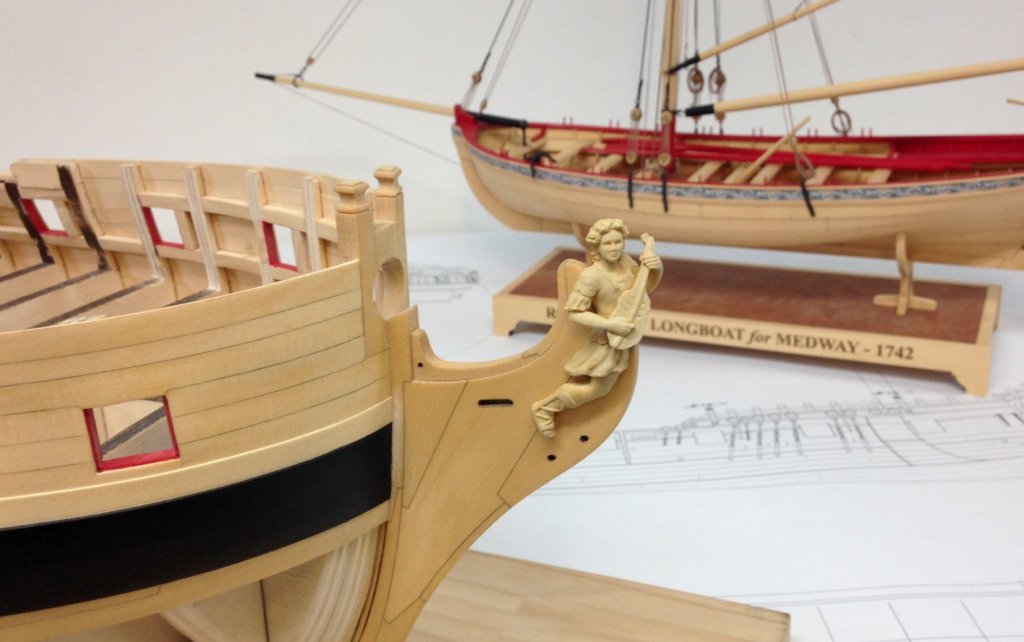
Just had the guys over for a nice Saturday get-together at my shop. Mike brought his Winnie. Side by side siblings....Mike's is in the front and is Boxwood. Mine is Yellow cedar and in the background. I just took these with my cell phone but here you go. Dropped my camera so its what I need to use until I get a new one. And also...here is a look (I know you guys are getting bored of seeing the figurehead at this point) at the figurehead and our latest experiment. This is another resin casting but I am experimenting with trying to cast them in a tan color that already looks like wood. This is a very very hard thing to do with success. But this figurehead has not been painted or touched up. This is the color right out of the package. I may go with it as its not perfect but very close. You guys can just do a light brushing with some weathering powders if you want it more golden or less tan. It depends on what wood you are building the model with. I am so happy with the results.
- 1,784 replies
-
- 34
-

-
- winchelsea
- Syren Ship Model Company
- (and 1 more)
-
You need to watch warping when you do that on a model this size. The reason you make three pieces is to help prevent twisting and warping of the false keel. Yes it is good to get it done in one piece, but it tends to want to warp and twist because of the slots cut into it on such a long single piece. So you must be very careful. Chuck
-
HMS Winchelsea (1764) 32 gun frigate GROUP PROJECT INFO
Chuck replied to Chuck's topic in Group Projects on Model Ship World
There are now about 25 members who were invited to the downloads forum. But they havent accepted yet. Remember, you must click on the invite in your notifications and click "accept" or "join". Otherwise you wont have access. Your notifications are at the top of the screen. It looks like a little globe and its where you get all of your other notifications. Its real easy to do. -
Very nice...the first dawdust made by the group. An excellent start. Glad to see you cutting your own bulkheads. Chuck
-
Welcome and have fun with the project. The installment one packages should be on the site and available again in about two hours. Chuck
-
Excellent!!!
-
Its there now.!!! And remember that they may also be on the main larger sheets. I may have just forgot to copy them onto the 8 1/2" x 11" sheets. So let me know. Send me a PM though next time.
-
you can buy those seperately but they are not included in the chapter one installment. I seperated them out so folks who wish to cut their own can do so and then buy the cedar or cherry parts only for that chapter.
-
Bollards on on one of the sheets. In fact i have supplied 3 sets becausr I know they are tricky. Just in case. Badswood will so for the framing and yes yhere is a sheet of laser cut port uprights just as mentioned in chapter one
-
I have been corresponding with a lot of you folks who signed up. Many of you will be using the laser cut cedar parts which is awesome. In fact I have sold 20 first installments already. But it wasnt clear how many cedar sheets you would need to buy so you can mill your strips for Chapter two. I listed the number of strips needed but not how many sheets would be needed to mill them. Remember that it all depends on your saw and how thick your blade is. But if you are like me and have a .030 kerf blade to rip your strips, I have reworked the materials list for chapter two. It still lists the sizes and numbers of strips you will need. But now I have listed the number of sheets you will need to mill them. Please have a look and let me know if it is understandable. Another interesting point. Many of you have asked to ship the two laser cut installments in one box to save on shipping. This is what I have been doing if you buy them at the same time obviously. But after selling 20 of these, not one of you have bought any cedar sheets which would have also fit in the same box and saved you so much more on shipping. So if you are building it in cedar, dont forget to buy the planking sheets you need for chapter two.......those are the two inch sheets I am selling. You have to mill a lot of planking strips. Also you will need one regular width 1/16" cedar sheet for the caprail at the bow. You may also be interested in the fact that those cedar sheets will cost you about $48 so you can mill your strips. Had I milled them for you....all 350 strips for chapter two, it would have cost you about $260 for the labor. So this is the way to go. I sure am glad I dont have to mill the 7,000 cedar strips that would have been needed for those first 20 packages I sold. That would be insane. Thats how many I would have actually needed to mill. Crazy.
-
I would buy a thicker sheet and just cut the piece out to the exact shape you need. no bending at all. But be careful not to break it along the grain.
-
That looks very good. 😀
-
Just an update. I must have received a dozen emails and PMs about this today. The laser cut plywood Bulkhead set is being outsourced. I am not laser cutting them in my shop. In fact, Nic at Bluejacket is cutting all of my plywood bulkheads for this Winnie project. Just the plywood bulkhead set. Thank You Nic!!!! It will probably be another two weeks before he ships me the next batch of ten plywood bulkhead sets. The laser cut packages for the first two chapters are however in stock right now. They are the Yellow Cedar versions. I am going to try and laser cut a few in Cherry next week for those of you who are waiting for those. In addition, as mentioned several times before. This is not a complete "in the box" kit. You will need to mill your own planking strips etc. I have plenty of milled cedar sheets available for the project. And you can buy cherry sheets just about anywhere. https://ocoochhardwoods.com/scroll-saw-lumber/ these guys are a great source. I will provide the laser cut pieces/fittings for each chapter in Cedar and in Cherry. Probably more than you would have thought. I will have all of the carvings and cannon available too. BUT I will not be cutting any parts in any other woods . Sorry, its just too much to handle, two woods are my limit!!!! So please, if you want to use another wood other than those, you must scratch everything....or simply select another subject for your next project. If you ask , and you send me a PM or email and ask anyway, I am going to say "no". So keep this in mind. This is why we released this as an alternative scratch/semi-scratch project so you can build everything in any wood and in any scale you like. Thank You Enjoy the project. Chuck
-
I was talking to Chris and he had a wonderful idea. If you are cutting your own bulkheads......take advantage of the stronger birch ply because it has less tendency to warp, you could cut your false keel out of that. BUT you can switch to lite ply for all of your bulkheads which will make it easier to sand and fair later. Best of both worlds. Use both. Chuck
-
HMS Winchelsea (1764) 32 gun frigate GROUP PROJECT INFO
Chuck replied to Chuck's topic in Group Projects on Model Ship World
There are about 15 members who were given access and invited to the downloads forum. But they havent accepted yet. Remember, you must click on the invite in your notifications and click "accept". Otherwise you wont have access. Your notifications are at the top of the screen. It looks like a little globe and its where you get all of your other notifications. Its real easy to do. At least I thought it would be for folks, LOL . -
Yes they will be made available. The first three or four packages will contain a group of parts to get yhe framing and planking and big construction done. But the individual fittings will be sold separately like cheerful.
-
Ok the first chapter is now available for download so you guys can get started. This should keep you guys busy for a while. I will now try and catch up with making blocks and rope and more laser cut packages. Let me know if you guys have any questions on the first chapter. At 26 pages, by the time this project is completed we will be looking at several hundred pages of instructional material. In just a couple of days we have had over 50 people sign up for access to the plans and join the project. I would love to see more build logs set up for those who intend to build her. As I cant be on every forum with so much production work to do. I would appreciate if you could create a topic and maybe announce that this project has been started on other forums you belong to. Maybe even comment on facebook as well. I would love to get the word out there and any help you can give would HUGE!!!! Thanks in advance. Chuck
-
Download the chapters below. New chapters will be added as I complete the work on the prototype. Chapterone.pdf- Chapter One
-
Wonderful!!! Have fun with the project.
-
That is correct. You could probably squeeze them into 7 but it all depends on how you lay them parts out. So 8 would do it comfortably. When I laser cut them I use 7 sheets but they are packed together tightly.
-
HMS Winchelsea (1764) 32 gun frigate GROUP PROJECT INFO
Chuck replied to Chuck's topic in Group Projects on Model Ship World
You are very welcome. I hope you will build her and start a build log. Chuck -
Yes....just tell them to print the files at 100% on 30 x 40 paper
- 1,784 replies
-
- 3
-
-
- winchelsea
- Syren Ship Model Company
- (and 1 more)
-
The trade off is that only the lite ply can be used for laser cutting. That is what you will get when you buy the laser cut package. BUT, the Birch is actually better and stronger and leaves a nice clean edge without splintering. Laser cutters cant cut through the Birch ply at all, especially at 1/4" thick. The glue layers are too tough. So if you dont mind sanding the birch stuff, that is the best way to go. But man-oh-man it is tough to sand when you fair the hull. Especially inboard. And this model has a lot of bulkheads.
-
I will let everyone know when the bulkhead sets are back in stock.