Chuck
-
Posts
9,389 -
Joined
-
Last visited
Content Type
Profiles
Forums
Gallery
Events
Everything posted by Chuck
-
 There is very little curve there actually and you would be surprised how much it will still show when done. So I would use very little curve up there. You show so much more than is needed. See below. Chuck
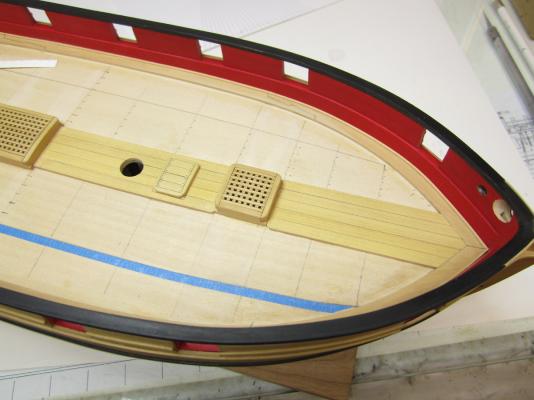

- 574 replies
-
- 7
-

-
- cheerful
- Syren Ship Model Company
- (and 1 more)
-
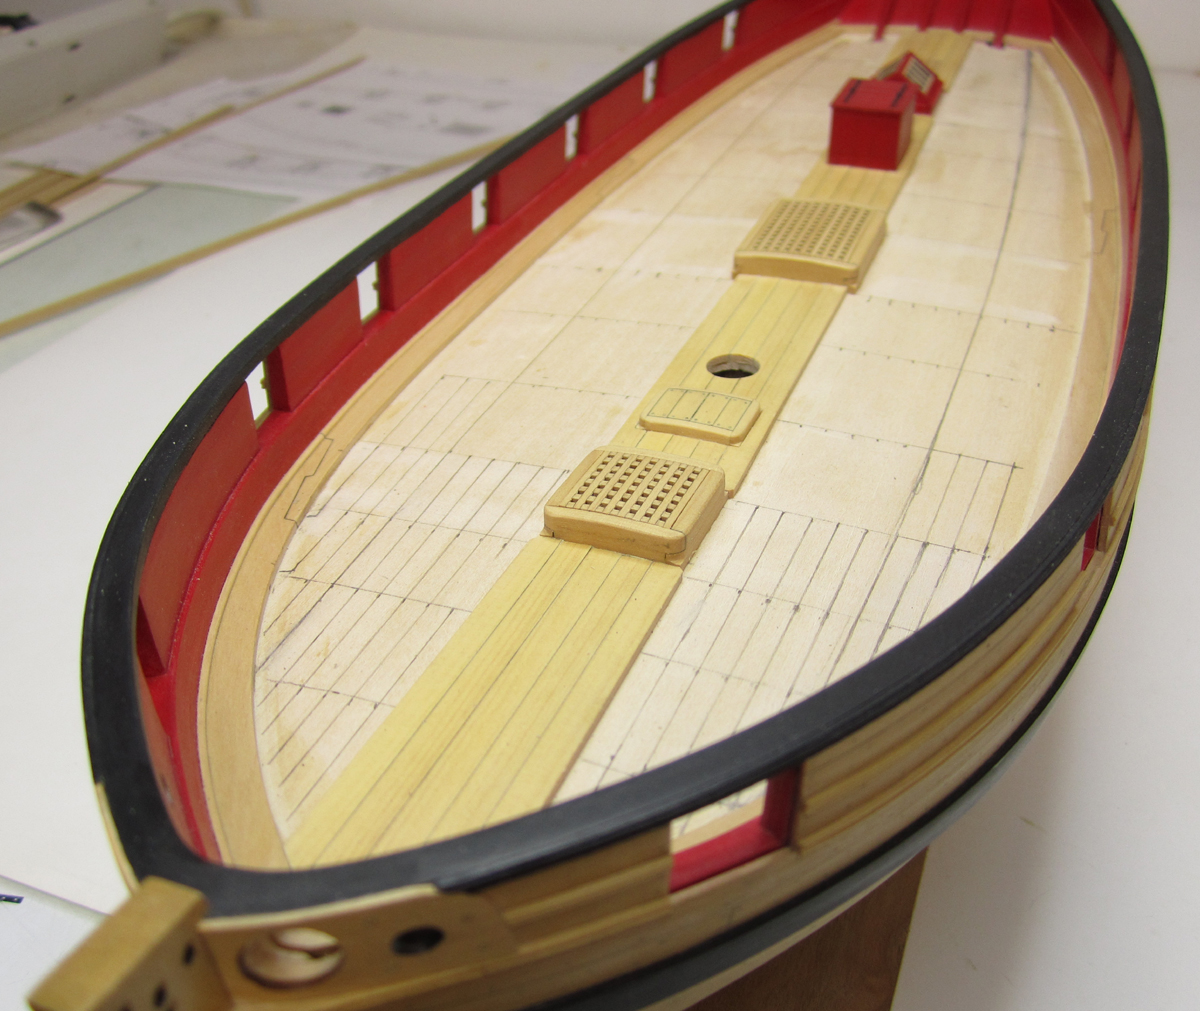
That looks very good. I would also mention that you should try not to remove any char from the edges of these planks other than what is needed to adjust them for a tight fit. If you get any gaps between strakes, sand the to close the gaps but that should be it otherwise you run the risk of sanding your planks too narrow and you wont be able to follow your lining out marks. It really isnt needed to get a tight fit....and you will be running a pencil over the edges to simulate caulking anyway. Chuck
- 152 replies
-
- 2
-
-
- medway longboat
- Syren Ship Model Company
- (and 1 more)
-
Really nice...everything fit just perfectly...😊
- 32 replies
-
- 1
-
-
- medway longboat
- Syren Ship Model Company
- (and 1 more)
-
They both look great. The joints are nice and crisp. You should be very happy with those results. I also hope this little project gets your modeling juices flowing again.
-
That looks good to my eye..... Chuck
-
That looks good. Dont forget to use those two templates at the bow and stern to check how your lining off matched with mine. This is important only because you guys are using planks that are laser cut and spiled to fit my lining off. Chuck
- 152 replies
-
- 3
-
-
- medway longboat
- Syren Ship Model Company
- (and 1 more)
-
Yes that is correct.....they should match up so both sides are the same.
-
Yes you should line off both sides.
-
Looking really good. Nice crisp photos as well.
-
Part Three - PartThree.pdf is now available
-
Really nice work. Might want to add the bolts first before you add the transom.
- 32 replies
-
- 1
-
-
- medway longboat
- Syren Ship Model Company
- (and 1 more)
-
I believe its just this famous photo......no copyright isues so its OK to post.

- 108 replies
-
- 8
-
-
- leon
- brigantine
- (and 1 more)
-
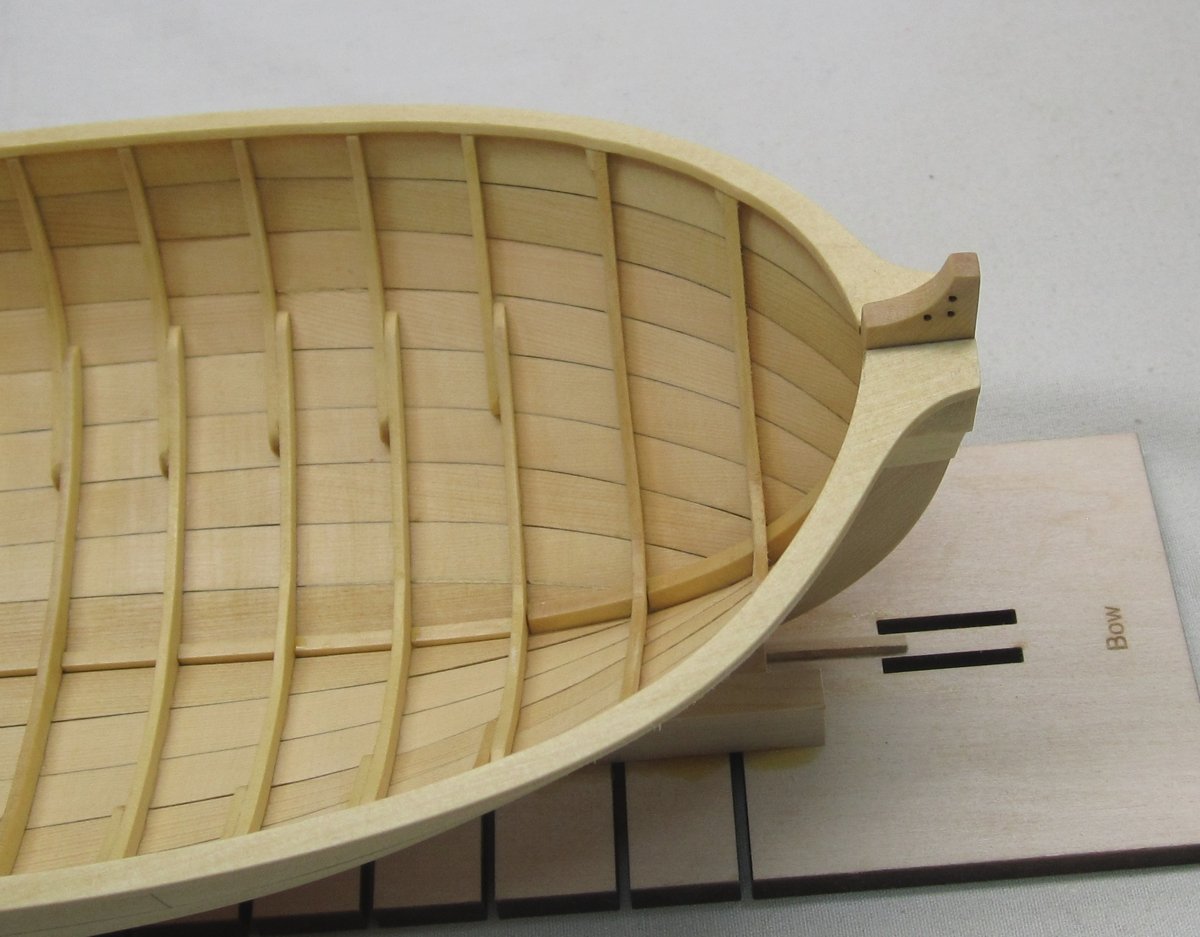
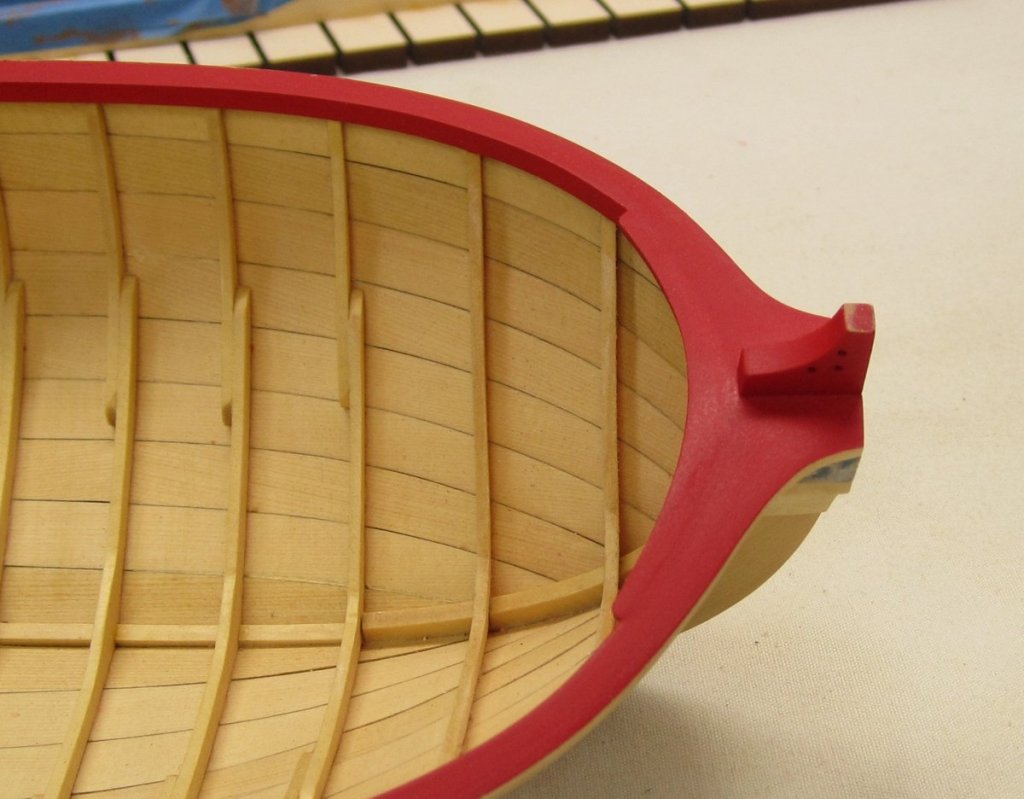
They go above it to increase the thickness of that area. In fact best placed along the top edge of the frame. The direction of the grain being opposite in most cases to the frame piece. This gives it strength and will not be seen after the frame centers are removed and the inboard sheer strake is added. If you use a thin strip that is only 3/64" wide or 1/16" wide...you dont even have to remove them. Just leave them at the top of each frame after you remove the centers. They wont be seen at all. Notice them on the top of each frame below (the first two frames at the bow)....after fairing. The second photo shows the same area after the inboard sheer strake is added. They are completely concealed. Having said this..they can easily be shaved off with a sharp xacto blade if you insist on doing so before you finish planking. Once you have planked the exterior except for the last two sheer strakes, you can slice and shave them away down to the frame edge. But that is up to you.

-
Even if you didnt remove it at all.....it wont be seen. There is an inboard sheer strake that is wide enough to completely cover these little strips. It wont be seen even if you leave them there. Try not to over think it!!!!! Also.....you will be thinning down the frames at the sheer so much that the frame will only be about 3/64" - 1/16" wide. See the photo.....I never removed the strengthening strips on the frames. Everything is just peachy!!!

- 152 replies
-
- 8
-
-
- medway longboat
- Syren Ship Model Company
- (and 1 more)
-
I have seen your affliction many many times before. Being in a hurry wont do you any favors. This is not a project that will take you much time so there is no need to race through it. In this scale and with this subject....any sloppy craftsmanship will stick out like a sore thumb. SLOOOOW and steady. Chuck
-
Fill the gaps with elmers wood filler. Its almost an exact match to the color of the cedar. Especially after sanding and applying wipe on poly. Chuck
-
I am sure it will look just fine. Try not to get discouraged. I am enjoying watching your progress... Chuck
-
Really nice!!!! Just as it is supposed to look at this stage. Chuck
- 152 replies
-
- 1
-
-
- medway longboat
- Syren Ship Model Company
- (and 1 more)
-
Thats pretty normal for shipping wood actually. Although the handling charge is crazy. It doesnt matter what the species. I am fortunate to have a local source for my Cedar and just drive to pick it up. I would recommend that you try and find such a source. You would be surprised by what your local lumberyards carry. In addition please keep calling different places.....you will find a place that doesnt rip you off on shipping. There are dozens of such suppliers. My local guy doesnt ship at all. He just supplies local builders. Its pick-up only. Chuck
- 421 replies
-
- 5
-
-
- medway longboat
- Syren Ship Model Company
- (and 1 more)
-
You can actually still use the first version. It doesnt matter a whole lot that it doesnt fit snug. The inboard side will be painted red. It will be fine. Chuck
-
How goes progress on this beauty? 😊 You are doing such a great job on this Cheerful.
-
Not if your careful. But i think that would be too much of the light wood visually speaking. At least for my tastes, but this is a very personal thing based on your own tastes.
- 421 replies
-
- 4
-
-
- medway longboat
- Syren Ship Model Company
- (and 1 more)
-
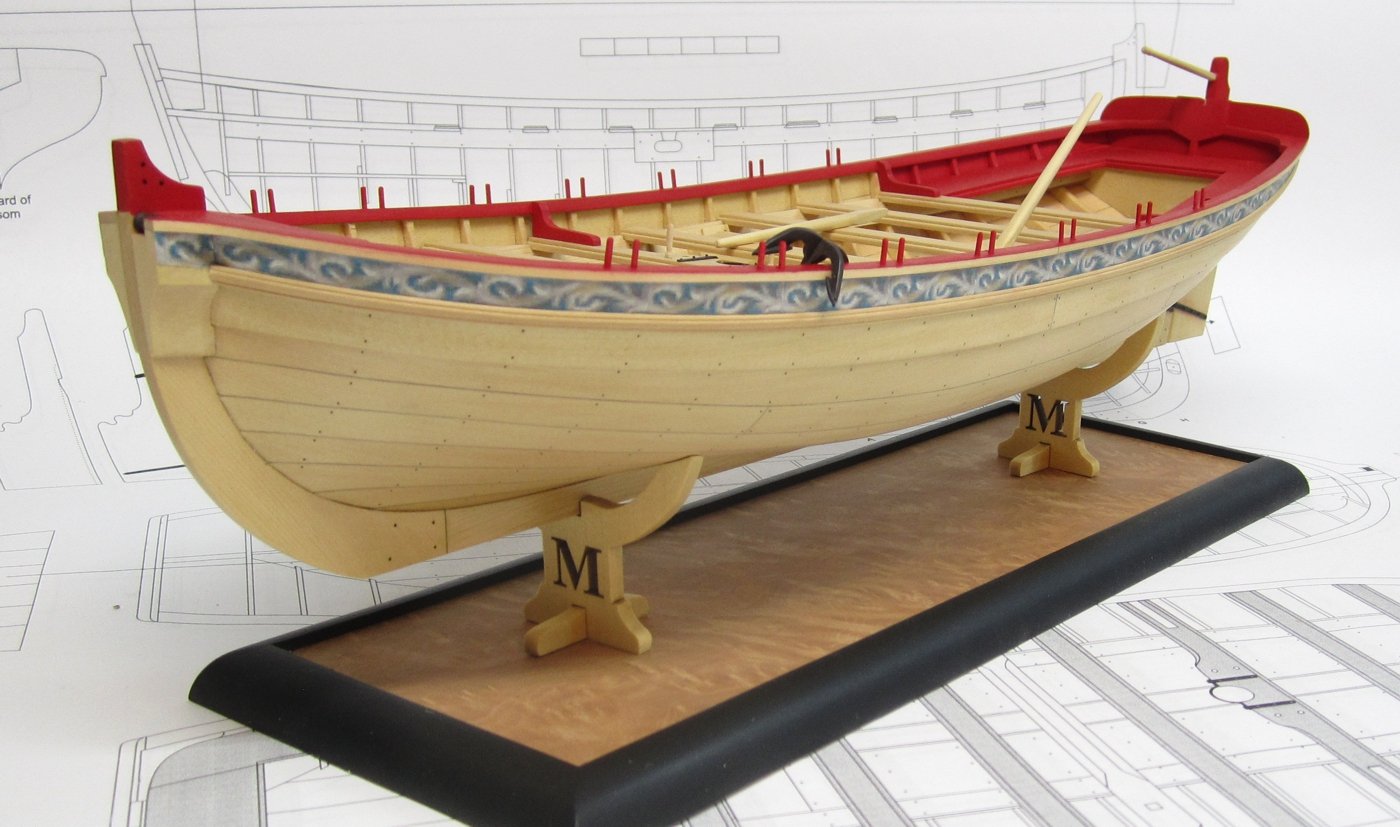
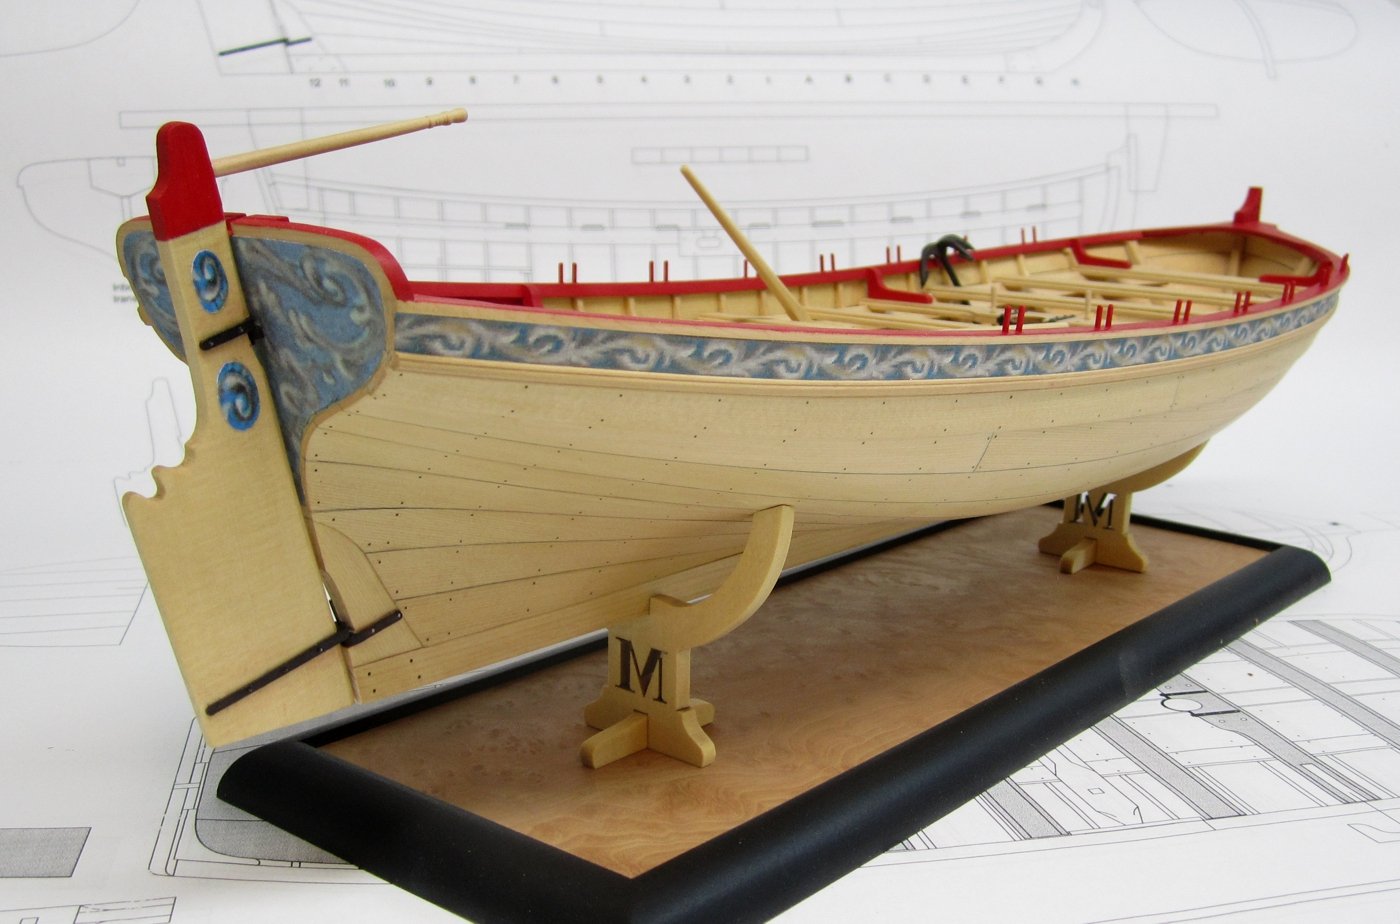
Ken the baseboard is a piece of MDF I think. Then it had a veneer glued to it. Lastly some quarter round molding was glued all around it and painted black. I have to measure it...but I think its just 4 x 12" before the quarter round was added. Mike made that for me and I will bring it on Tuesday. Chuck
- 421 replies
-
- 9
-
-
- medway longboat
- Syren Ship Model Company
- (and 1 more)
-
Plank length for longboats
Chuck replied to tkay11's topic in Building, Framing, Planking and plating a ships hull and deck
Look in Mays book and you will see an original draft of a longboat with a planking expansion. That is where I took my planking scheme from with a little adjustment to make it easier to plank in kit form. You should start a build log for this......this is a great scratch project to watch as it develops. Chuck -
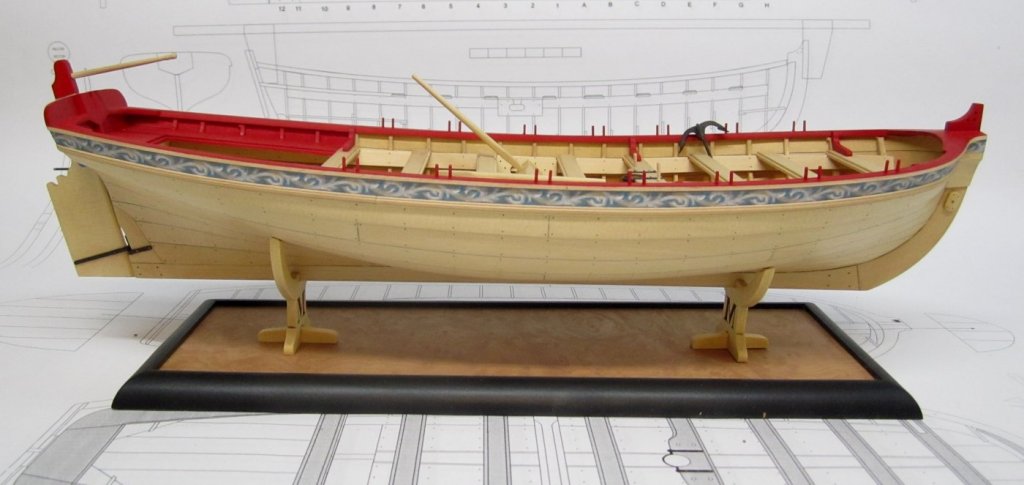
Indeed she will be fully rigged.....first with no sails, because that is probably what most will do. Then I will rig it again with sails. VERSION TWO of the stand. In yellow cedar. I like this one better.


- 421 replies
-
- 27
-
-
- medway longboat
- Syren Ship Model Company
- (and 1 more)