HOLIDAY DONATION DRIVE - SUPPORT MSW - DO YOUR PART TO KEEP THIS GREAT FORUM GOING! (Only 24 donations so far out of 49,000 members - C'mon guys!)
×


michael mott
-
Posts
5,198 -
Joined
-
Last visited
Content Type
Profiles
Forums
Gallery
Events
Everything posted by michael mott
-
 Mark the sander looks like a good tool for a lot of things, I would be very Leary of using it for the decks though.and this is my reason; 1) Wood fibres run along the length in straight grained wood and it seems that you have straight grained wood. 2) no matter how lightly you use the sander it will cut across the grain tearing up the fibres and they will need to be removed in order to get a fine polish to the deck. Unless you have very uneven thicknesses to the planking, Might I humbly suggest a bit of scraping followed by steel wool using both along the grain. I think you would be happier with the results in the "long run" (pun intended). Michael
 -
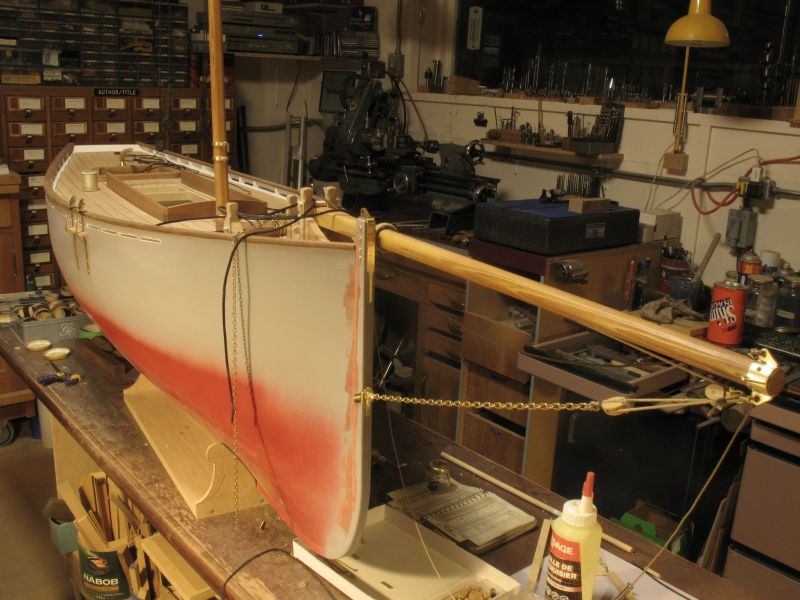
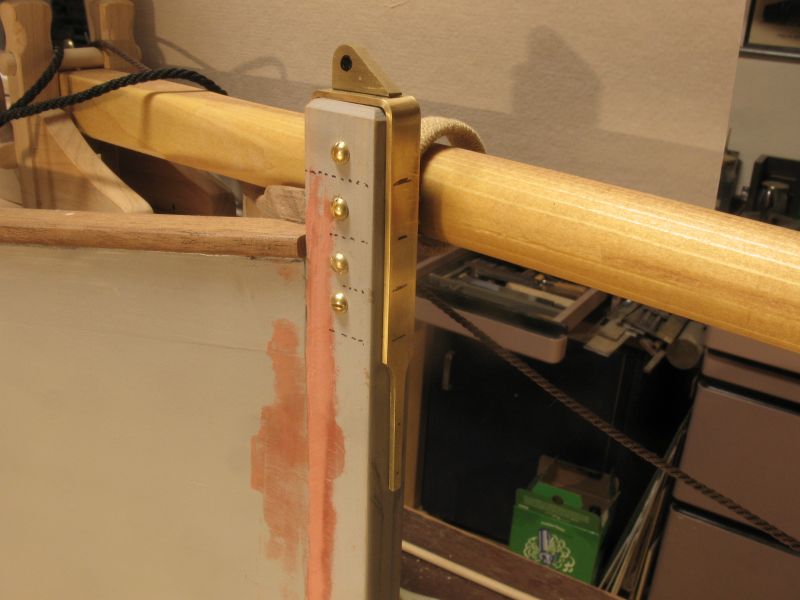
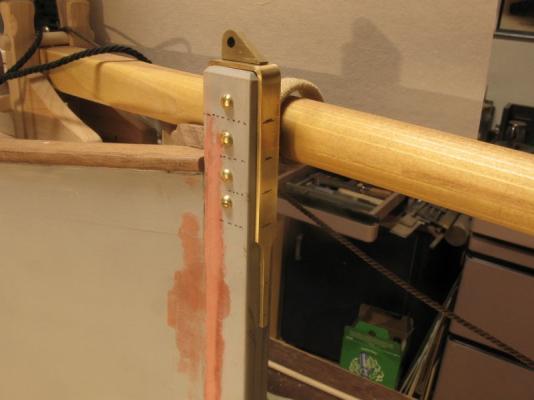
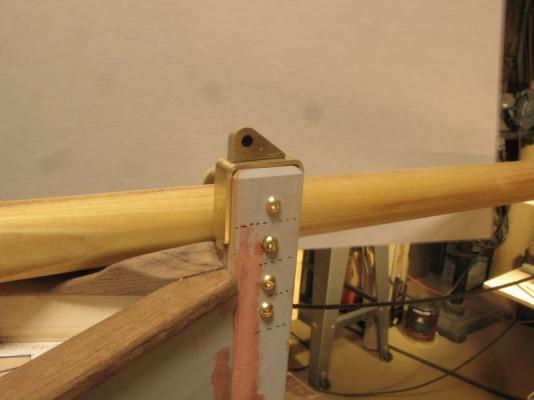
John thanks. Germanus, Yes you are thinking as I was with regard to the strap washer, the shape will mirror that of the gammon iron. My thoughts about the finishing are to keep the bright work bright and to keep paint to the absolute minimum, basically the hull outside, all the other woodwork will get a coat of clear varnish, the deck will be oiled with teak oil. When I make another model and it follows an actual boat I will make the model look like the prototype, as for this model (which is essentially my learning exercise in boat building) I feel that I can be close to tradition and also be creative. and draw from many boats mixing older with more modern. Michael
-
So you're in the club too Mark! Druxey thanks for the welcome This evening I started on the forestay fitting for the stem. tomorrow I will silver solder the parts together, and drill the holes. I will make a separate keeper plate for the Gammon Iron. Michael

-
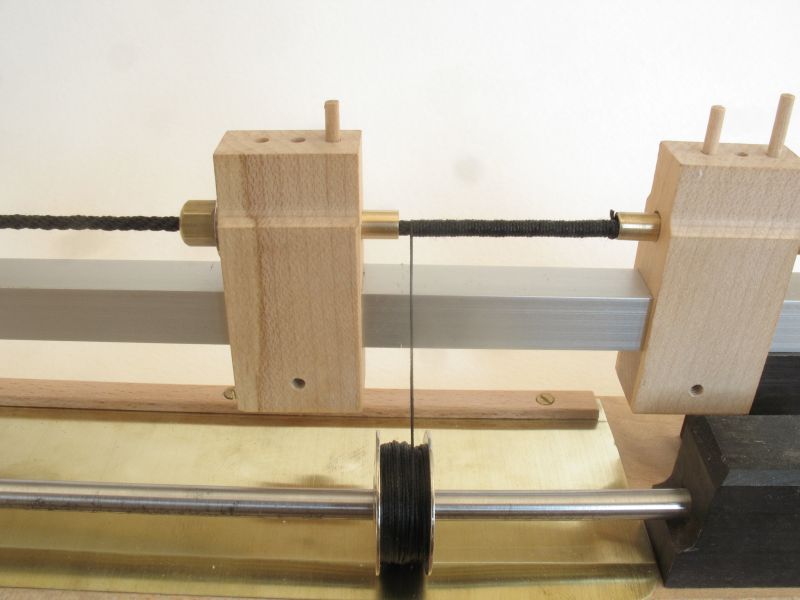
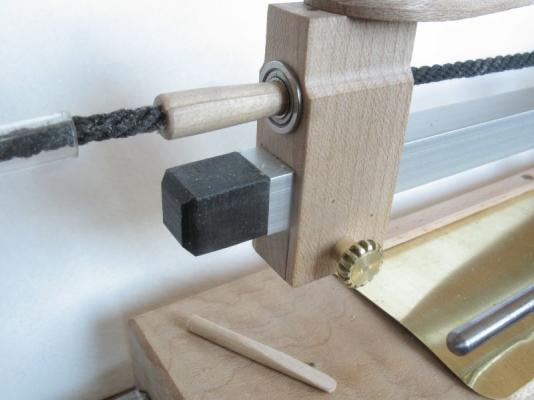
Janos, I rotate the rope by hand at the outside of the right hand clamp By simply using my fingers I find that I have a lot of control and can wind pretty fast if I want but mostly just roll the index finger accross the top of the brass hex on the right it is longer for that reason. The forestay was the largest rope and so that is why I had to change my clamping method. The rotation was done by rotating the wedged clamp in the same way. I will see if I can set up a small video in the next little while to demonstrate the serving machine in action. Michael
-
Germanus I was thinking that this set up would also work independent of the the gammon iron this is a shot from the bow. These are on the smack Betty CK 145. I think that you are also suggesting that a plate on the port side of the stem a a keeper plate for the gammon iron would be good idea. Michael
-
Carl, John, Germanus, you comments made me smile this morning, perhaps there is a club called the shroud snippers somewhere in the universe. I have almost finished remaking the shroud and served the dead eye end. All that remains is to make the stem end of the forestay now and I will be able to finally support the mast. I am thinking that a metal fitting that wraps over the top of the stem rather than a series of holes through the top side to side, or the hole fore and aft. Michael
-
Stelios we must have been posting at the same time, thank you for your kind remarks. This evening I made one of those critical errors that one wishes they could take back but alas I will have to make one more of these. Yes I cut the shroud instead of the tail when trimming to length....... Arrrrrrrrgh!!! when preparing to serve the dead eye end. Michael
-
I cannot see any of the last two sets of pictures just the JPEG number in a box. Michael
-
That lathe is brilliant the headstock and tailstock have been made from a couple of engine pistons so it is homemade and would not take much to get it into a usable condition by the looks of it. a bit of a clean up and a motor A 3/8 or 1/2 inch drill chuck and you coul;d be in business soon enough. Michael
-
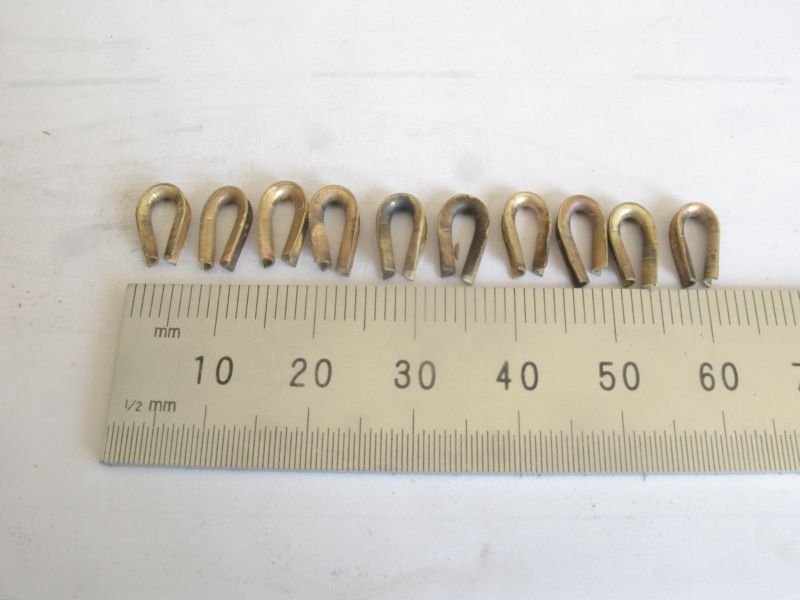
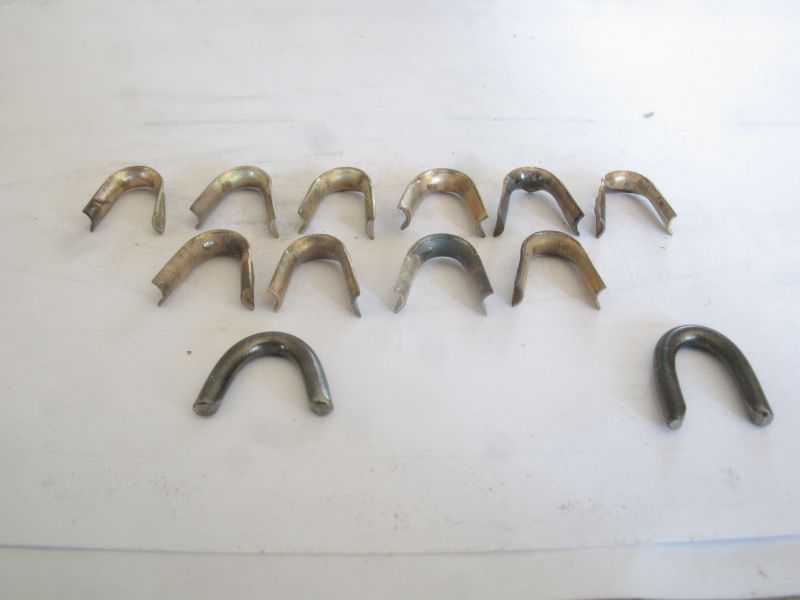
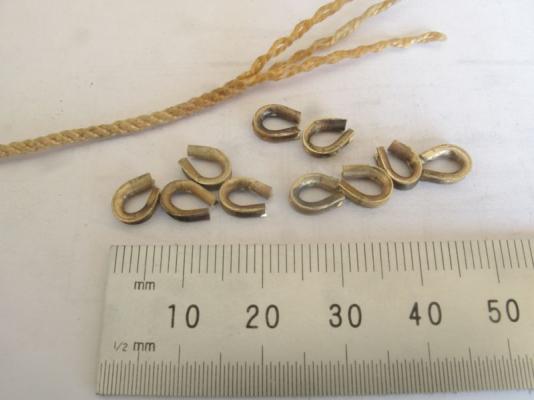
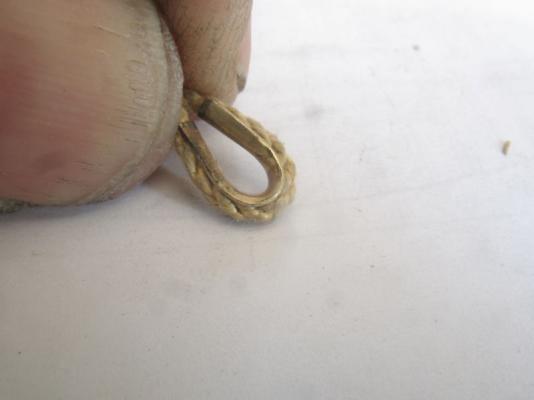
Andy, Bob, Timothy, Thanks for the great feedback, Yes regarding the thimbles now that I know how to bend them and my practice seems to have worked out well enough the next step will be figuring out the filing of the ends to make them close the way they do in full size practice. Michael
-
A little break from the brass work, I have made the four shrouds,and served and seized the tops, the bottoms need to be done next. I made some mods to the serving machine which I posted over in tools. the shrouds are made from 4 three strand ropes of 6 yarns per strand and they are .093" diameter and the forestay is from 4 three strand ropes of 10 yarns per strand and is .120" diameter. Michael
-
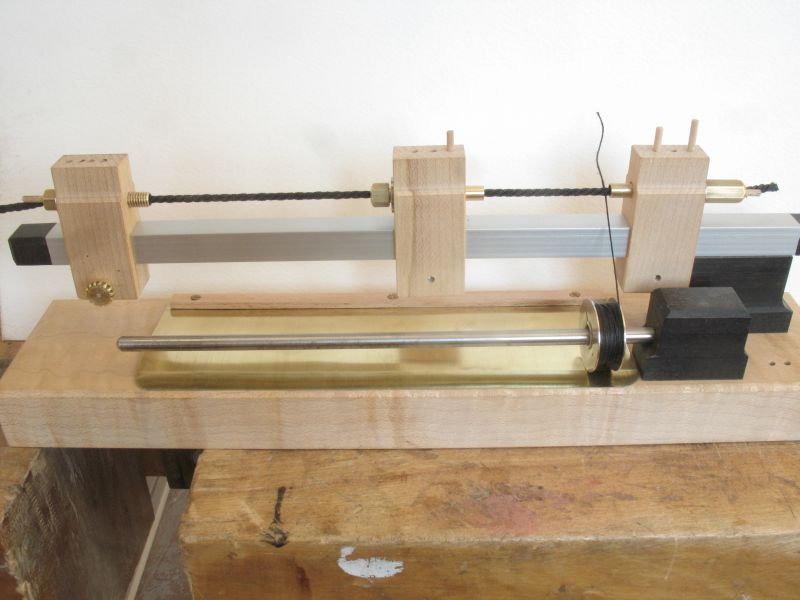
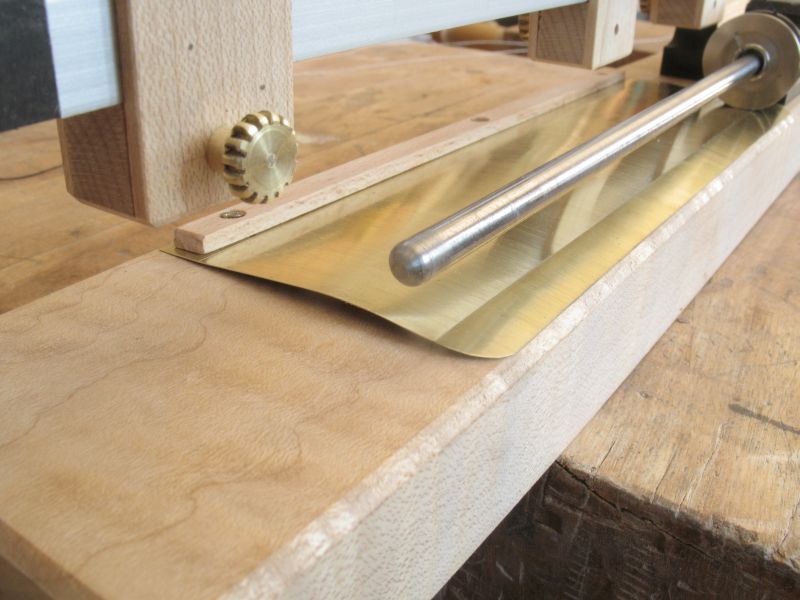
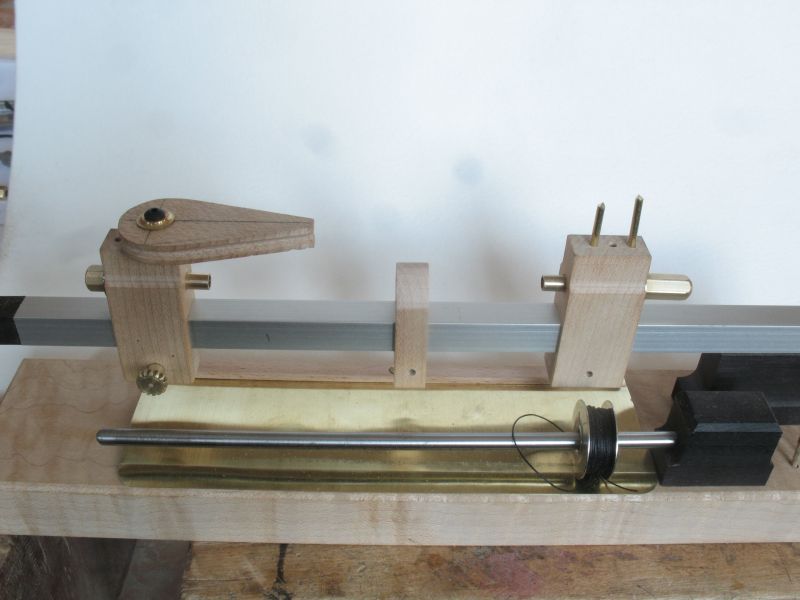
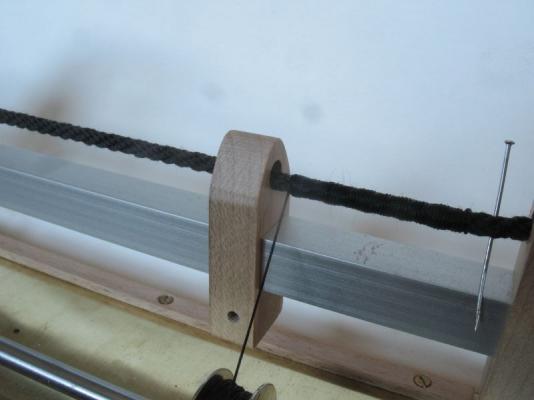
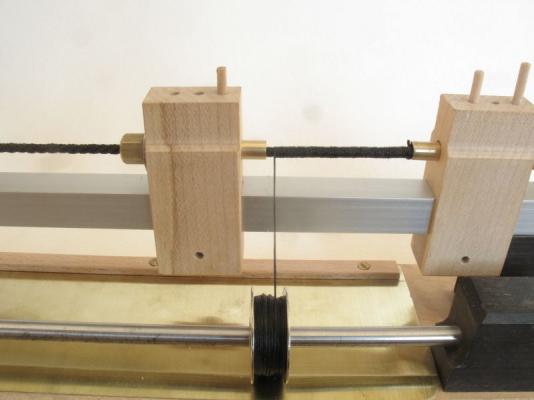
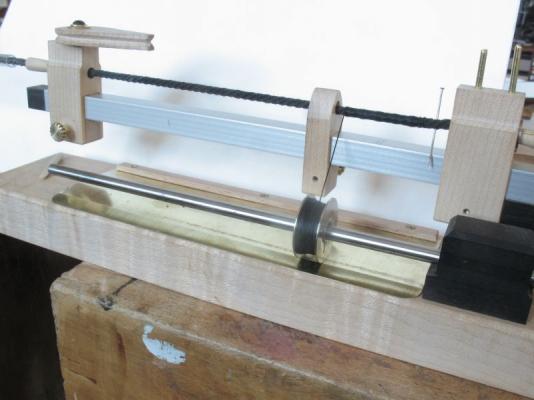
Good morning everyone, A couple of modifications to the serving machine. I have been working on the shrouds and a couple of modifications came out of working with them. First the third clamp proved useful as a sort of traveling steady I kept it just ahead of the line being wrapped around the shroud, and Also I needed to add a tensioning device for the bobbin. So first the tensioning device, it followed along the same concept of the card wedged under the bobbin, I used a piece of .005" brass shimstock it comes in a roll and can be purchased at automotive repair shops. I used the curl to advantage for the spring tension. I made the spring lay the whole length of the bobbin rod and clamped it to the rear of the machine with a small strip of maple and 3 small wood screws. The third clamp used as a traveling steady. This was then modified and narrowed down so that I have more room betweed the rotating clamps. I also added a former that is removable for siezing the tops of the strouds and beefed up the pegs to brass after snapping one of the maple pegs. The shrouds are about the biggest ropes that slide through the clamps easily and are held with the wedges. The forstay was a bit too large to slide through though. The shrouds were .093" diameter made up of 4 ropes of 3 strands each with 6 yarns of Gutterman CE50 Black 100% cotton. The forestay was formed from 4 ropes 3 strands x 10 yarns and is .120" diameter so I slid out the brass winders from the ball races and used a split collet of maple in each end, I will use this method in the future because it clamps the rope evenlyand the collets ar easy to whip up in the lathe out odf some 1/4 inch maple dowel. The forestay being served. I probably should have wormed the stay first but I will do that on the next one. slipping a pin through allows for a stopage to give my fingers a rest The clear plastic tube for the long length of the rope not being worked on works very well and just revolves. Michael


-
Neat work on the sails Dave. Michael
-
hello Mark, great to hear your wife is healing well. The hull planking is one of those areas that if you are not happy with the way it looks it is much better to rework than to compromise, because you know at some later point it would get redone anyway, so why wait. Michael
-
the hull is coming together well now Walter. it wont be long now befor you get the planking finished. Michael
-
C'mon John nobody needs a lathe, But they sure do help when it comes to roundy things Nice going so far Andy. Perhaps you could post a picture of the lathe that is in the shed, we might be able to help. Michael
-
Kevin thanks for thisthe timing is perfect for I am making ropes and shrouds right now. Michael
-
Outstanding Matt! I too look forward to your next build. Let me try to run that one past my Admiral...LOL Michael
-
HMS Victory by EdT - FINISHED - 1:96 - POB
michael mott replied to EdT's topic in - Build logs for subjects built 1751 - 1800
Ed it is really interesting and a great help reading about how you tackled the rope making and serving at this small scale, your photgrasph of the details of the blocks and ropework are evidence of your superior craftsmanship and attention to accuracy. Thank you for reposting this valuable contribution to our knowledge of this aspect of modelwork . Michael -
Hi John just in case you missed my question I will ask it again Would those backstays have been let out on the leeward side when running? otherwise it would seem that they would resrtict the travel of the boom. Michael
-
Hi John the link want me to download adobe Flash player and I already have flash player so I am not getting the info but I did find this page which seems pretty good. the download is a line drawing with all the sizes for different thimbles. I just swiched over to firefox because IE kept getting hung up. Michael
-
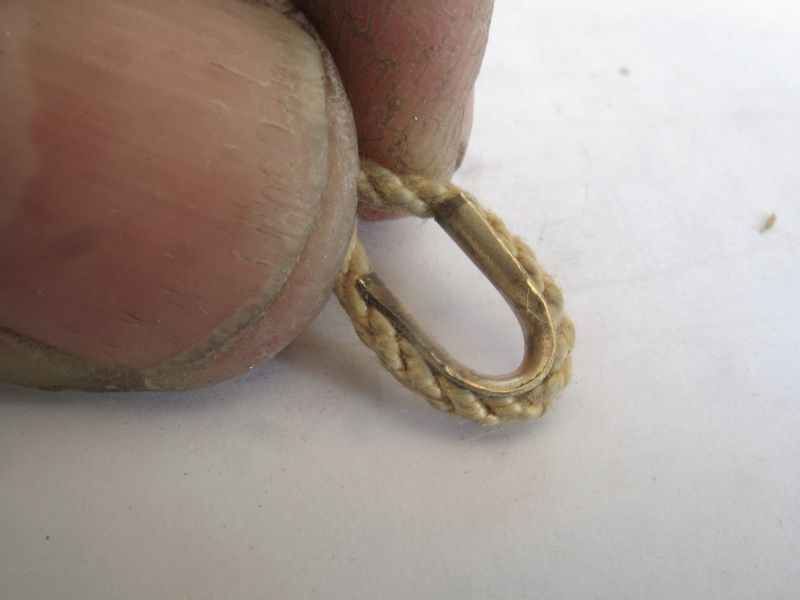
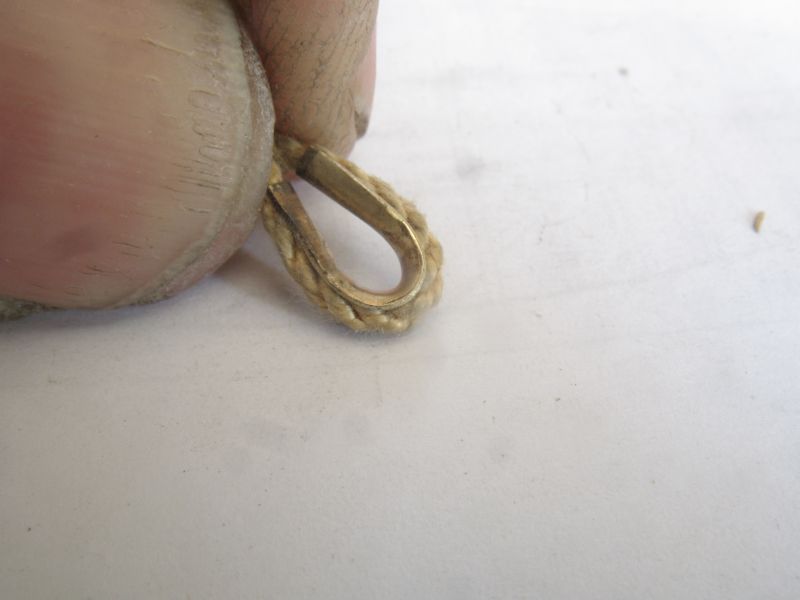
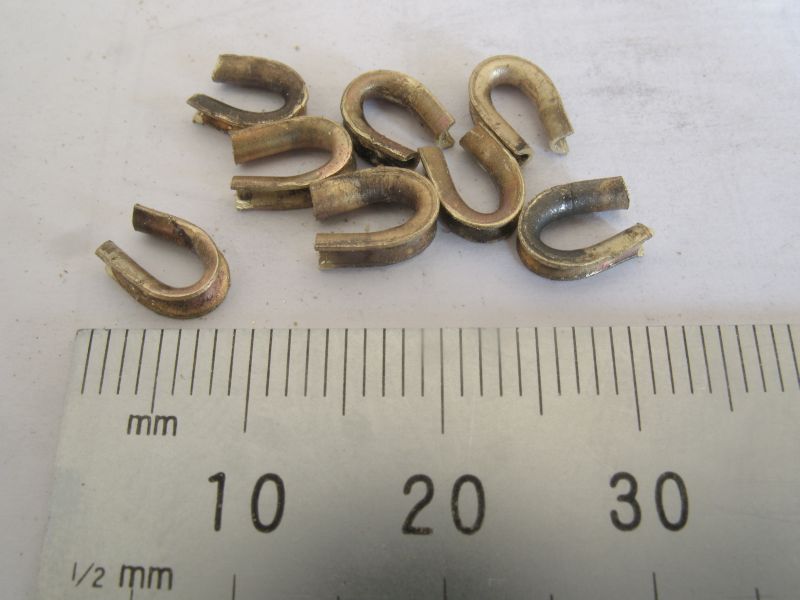
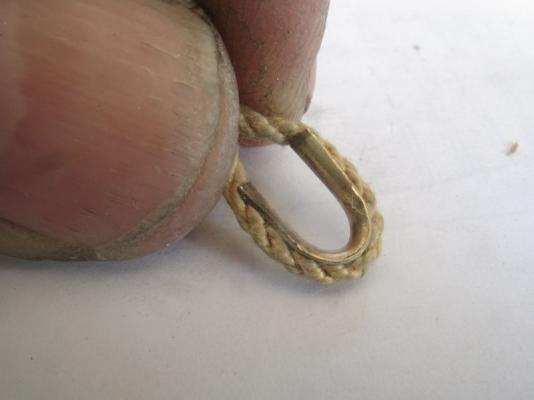
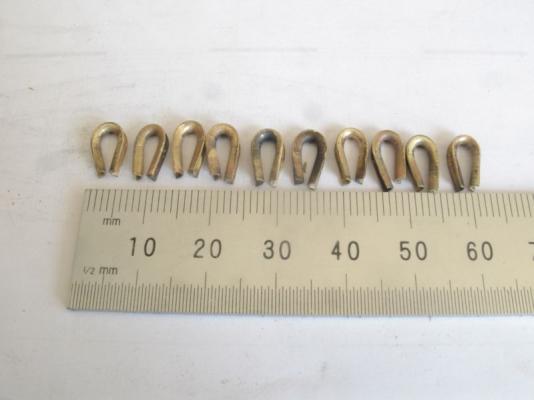
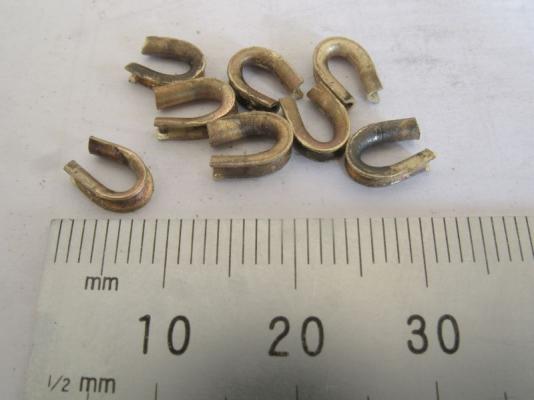
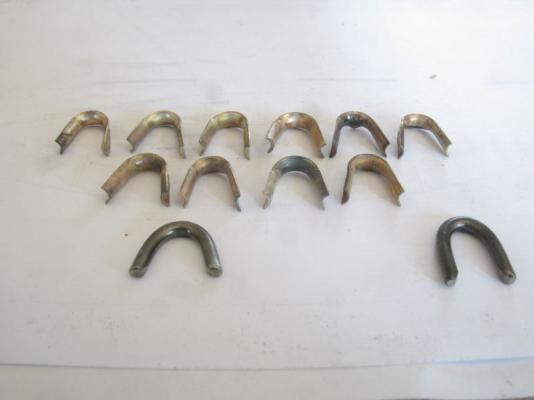
Bob, thanks for your kind words. John, what Dinghy? Andy yes when I looked up the term bottlescrew up came Turnbuckles. Ron thanks for your kind thoughts. So today I think I might have screwed up the first batch of thimbles Started out well enough these after the initial bendings following the earlier sequence. I closed up the thimbles by wrapping the rope and then squeezing the open end between my thumb and index finger. thimble closed a mottly crew of thimbles lined up but then I shortened them because I thought they were too long. Now I am not so sure, and think they are too short. I will need to do some reading now and find some real thimbles to get the proportions correct. Oh well! Michael
-
Russ, If I could find a way to make these relatively easily I would be happy to oblige. John, not really a blacksmith more like a brassbasher. Druxey thanks. Andy, bottle screws and turnbuckles are out because I do not have the left handed taps and dies otherwise they are not too dificult. Senhouse slips, now that one I had to look up, clever device that. Those would be easy enough but I don't think I will need one. Thanks all for your kind remarks. Of course the proof will be making a few more without taking all day. All these different items are all about sorting out how to make things that will be needed for completing this model and then will be useful knowledge for the next build, when this one is finished. Every time I turn around it seems there is something new to figure out. Michael
-
Nico very clean installation I am looking forward now to seeing her in the water. Michael