HOLIDAY DONATION DRIVE - SUPPORT MSW - DO YOUR PART TO KEEP THIS GREAT FORUM GOING! (Only 13 donations so far - C'mon guys!)
×


michael mott
-
Posts
5,195 -
Joined
-
Last visited
Content Type
Profiles
Forums
Gallery
Events
Everything posted by michael mott
-
 Very nice build, another fan of McNarry I see. Michael
 -
Wow Mark that is some mighty fine woodwork. The gratings are beautiful. Michael
-
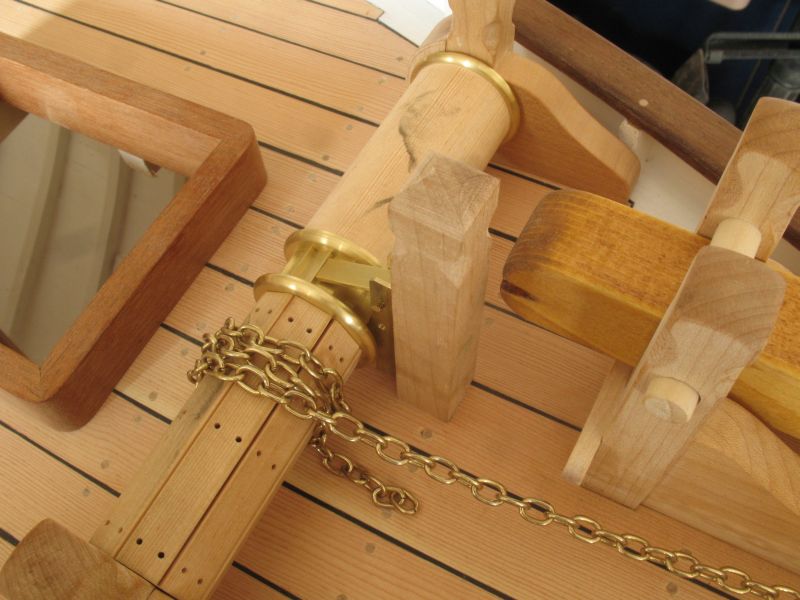
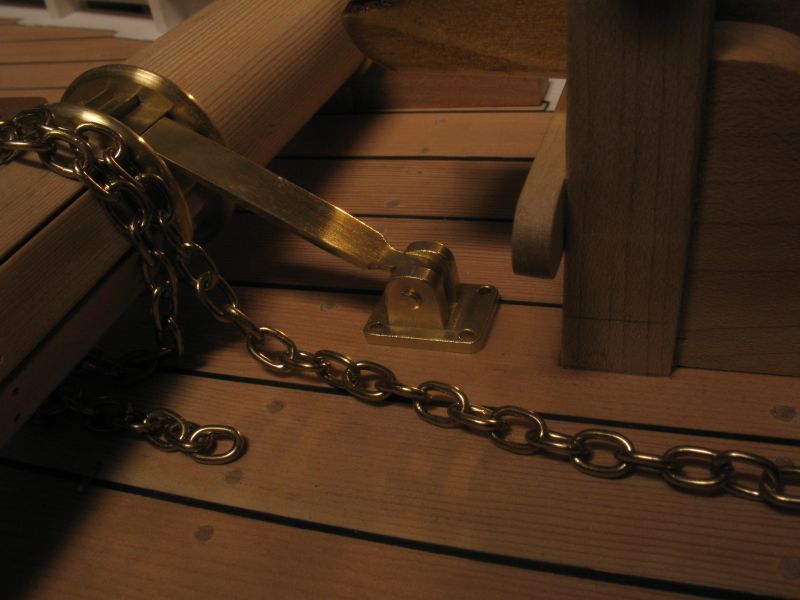
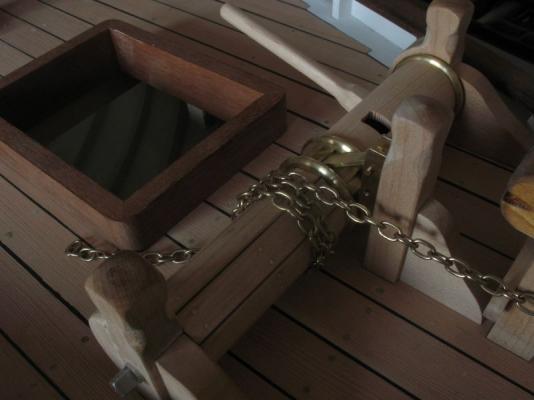
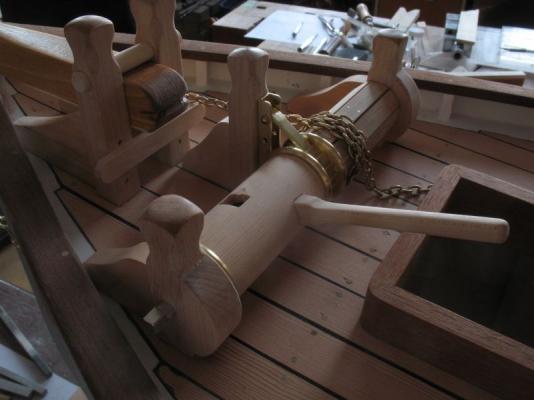
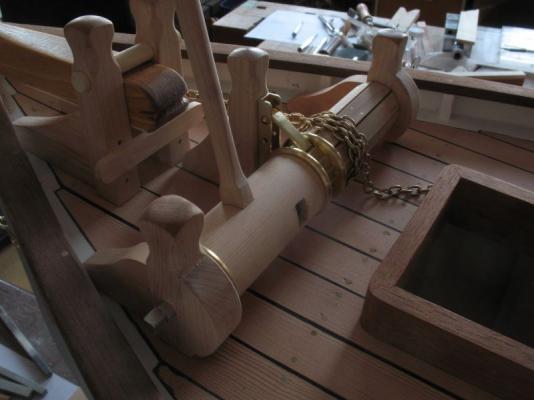
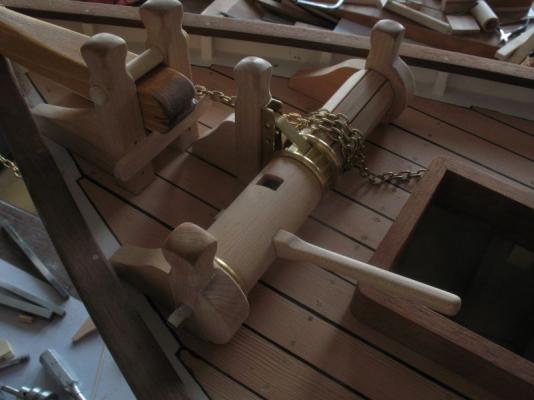
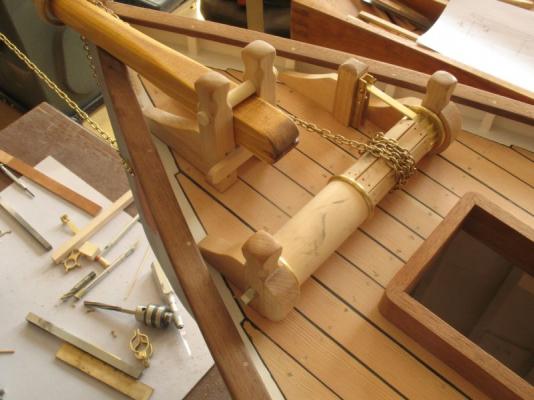
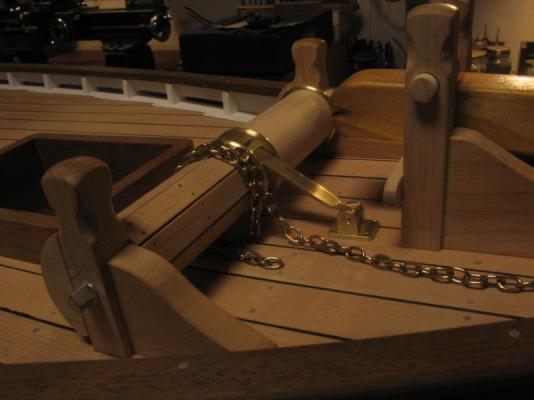
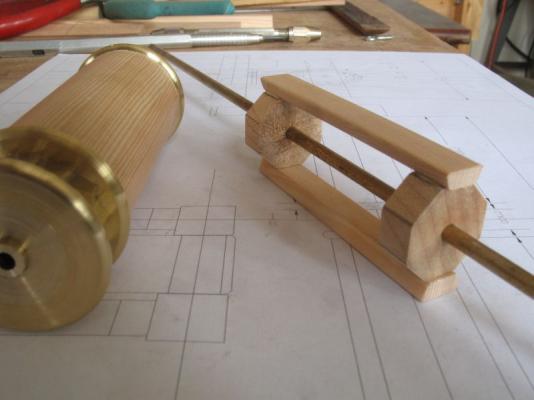
John thanks for all your help this afternoon. Mark, thank you for your confidence in my abilitiy. Well I finally got down to brass tacks and set the bolts in the staves cut the hole in the deck made a new knee for the post, I made the post a little smaller in cross section than the other posts. The anchor chain was pretty heavy so I used the extra leverage with the special bar. The pawl dropped onto the next tooth nicely as I turned the winch all the brass and wood are now glued together on the shaft I will make the small brass plates with the square holes to reinforce the square holes on the barrel, and the second pawl tomorrow. The winch and post are still removable from the deck at the moment. It's been a pretty long day so now a cup of tea and relax Michael

-
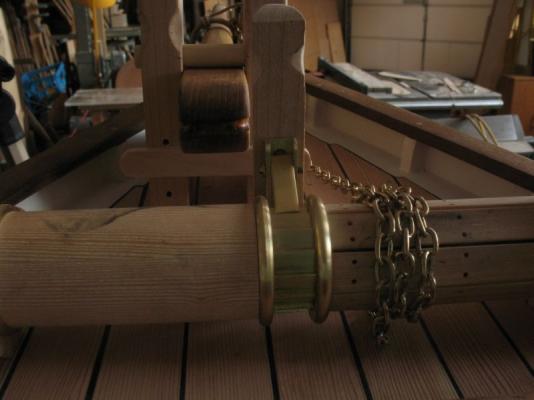
Ok so I will clean up things and set the post close to the winch like this and add the second pawl and a small knee in front of the post. I need to smooth out the brass rings and solder the parts together now, plus cut the square holes for the mooth part of the drum. Michael

-
Steve thanks for that compliment. Michael
-
Steve, John. The source for my design was this set of pictures from Working Sail the pictures are in the set called "on deck" in the banner. John that is very close. Michael
-
John My only concern with placing the post here is that there is little room for a knee other than bridging between the posts. I can shorten the pawl a bit so that i can get the post a little closer. Michael
-
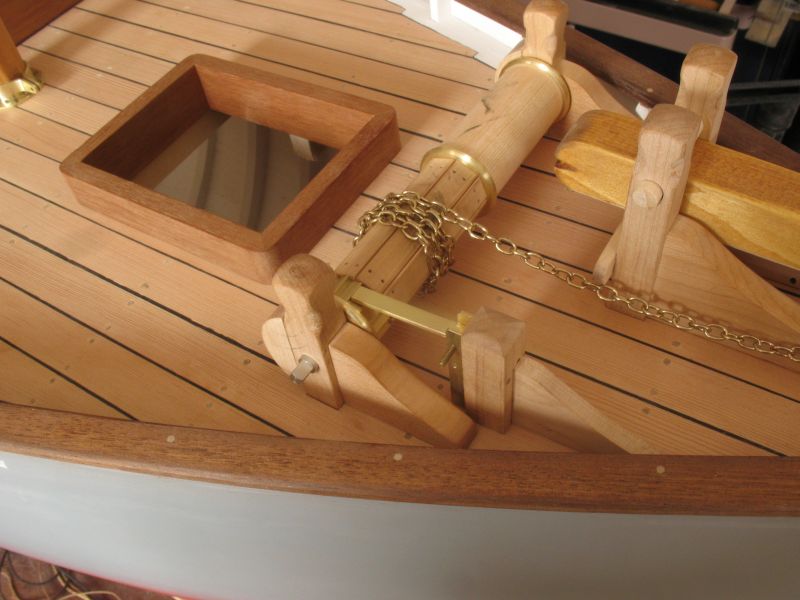
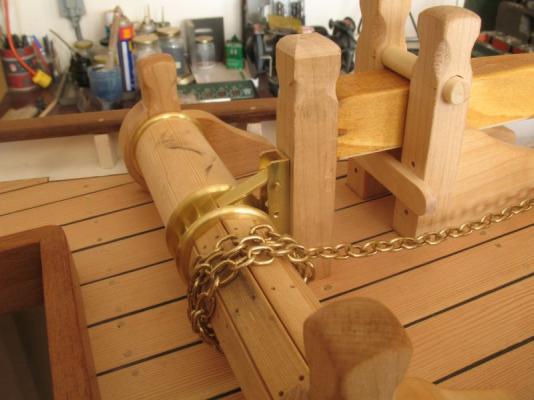
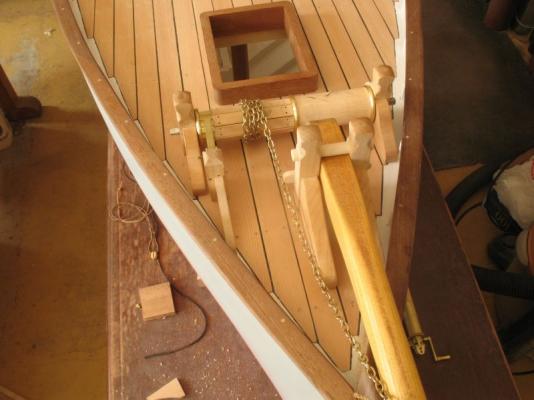
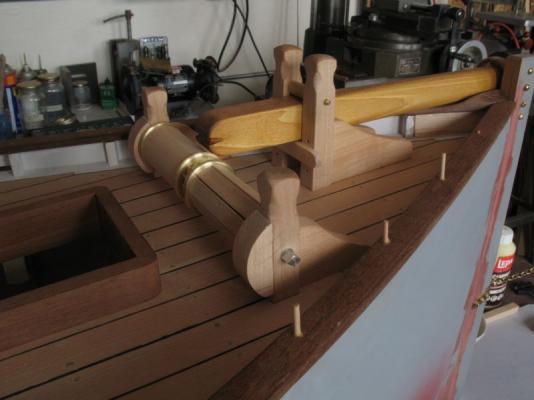
Germanus, Your comment makes sense, I have sorted out the chain clearance and the boom can retract without pulling out the top bar now. I do like the ratchet on the outside but putting it back on the centre line looks Ok too. Michael
-
Robert you have raised the bar very high indeed. exquisite work with a challenging material. Michael
-
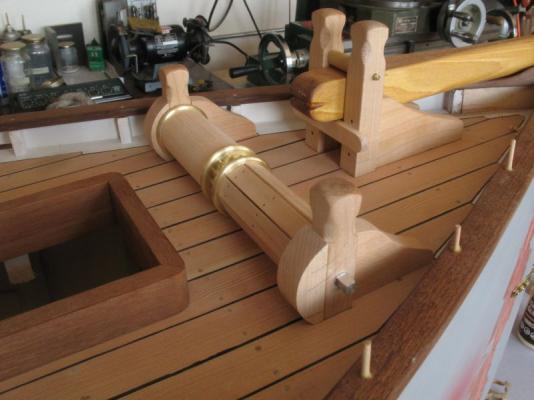
Bob, Thanks for that information, it makes a lot of sense to me. So thinking about the post and the position of the ratchet, I rearranged the items on the shaft to shift the ratchet to the starboard side this gives me a lot more room for the post I also machined up a less complex channel to take the second pawl, everything is just held in place with double sided tape. If this looks like a reasonable set up I will cut the hole in the deck and make the post with the top so that it can be used as another "hitching post". What do you think? Michael


-
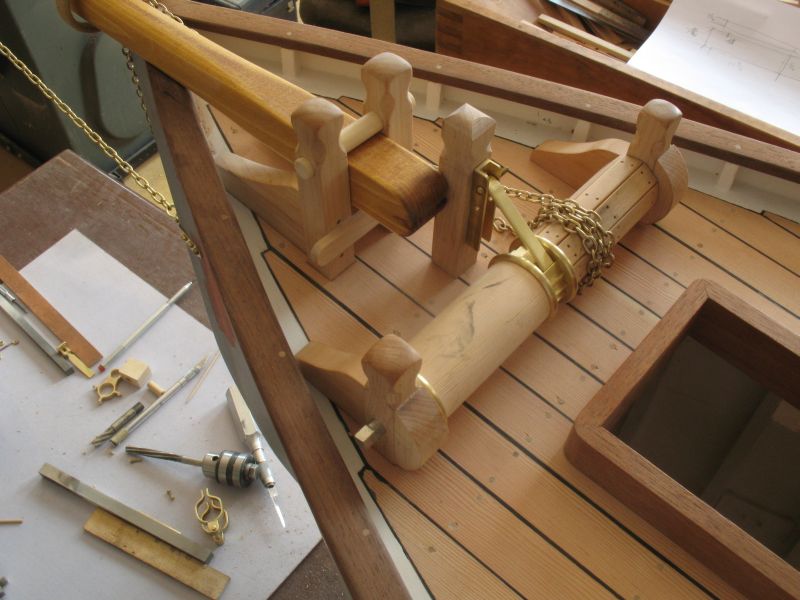
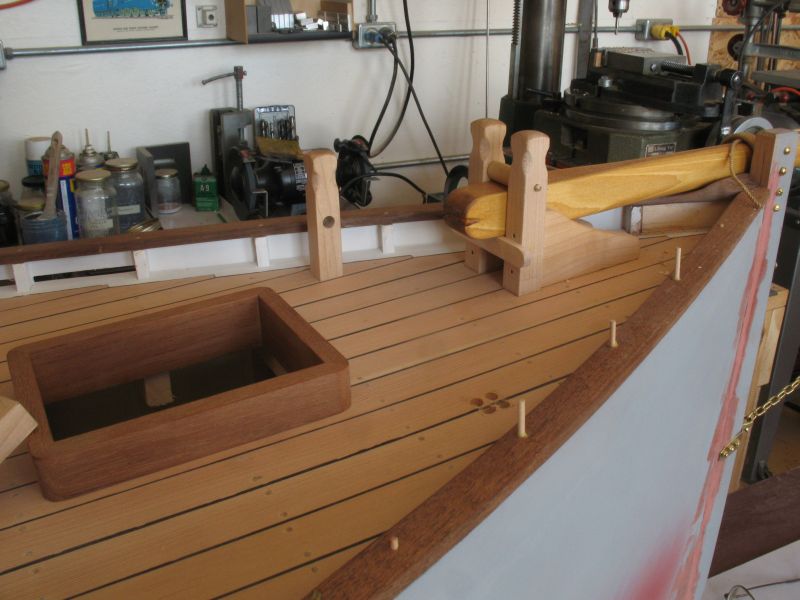
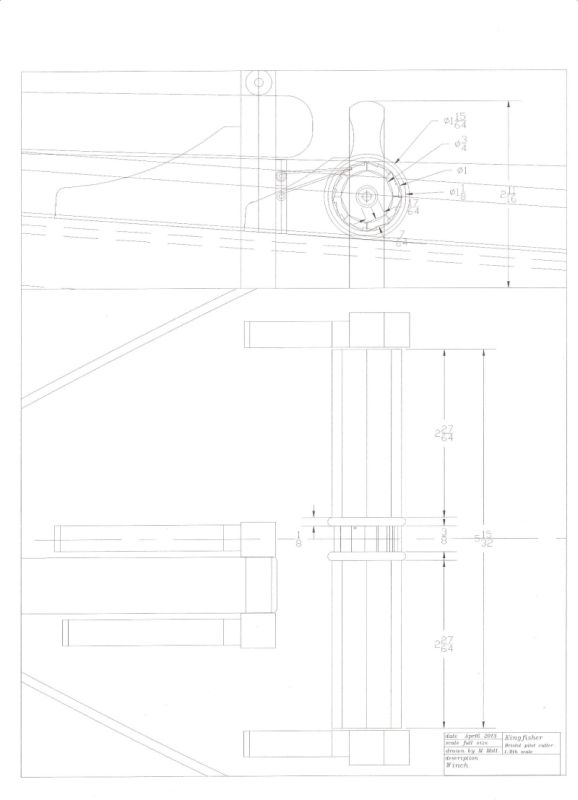
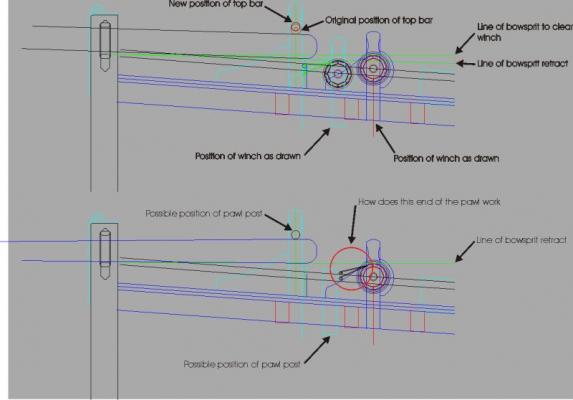
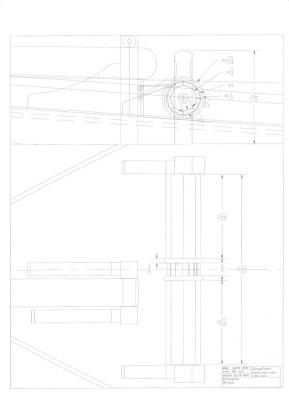
John, Russ, thanks for your thoughts and suggestions, Dave thanks for looking in. I have attached a drawing showing the current position of the winch and the original drawing as I had thought it would work before the chain issue. winch alt.pdf The PDF is clearer than the JPEG My question relates to the end of the pawl I have circled it, in some of the photographs of winches that I can see, there seems to be a double bar one above the other, I do not see any springs or why this is so. I will certainly heed the advice and set up a post for the pawl, any better information would be greatly appreciated. Michael
-
The framing is looking good so far , How are you finding the framing in Maple? Michael
-
Ok now I see what you are doing. So if it was me doing this I would add some strips of wood to the inside of the sheerline to strengthen the edges so that I could glue in some deck beams I would also think about taking the middle four formers and cut the centres out and fit them permanently into the hull That would strengthen the whole hull. As far as sanding it would be easy enough to use some Styrofoam sheet and use it to place the hull onto when you go to sand. This is just the way I would approach it, which is not necessarily the best way, but once you seal the deck in place it will limit your access if you are only going to have that small hatch to get into the hull. The inside of the hull will also need to be fully sealed before you do attach the deck. Michael
-
Alexandru A very nice work unto itself. Michael
-
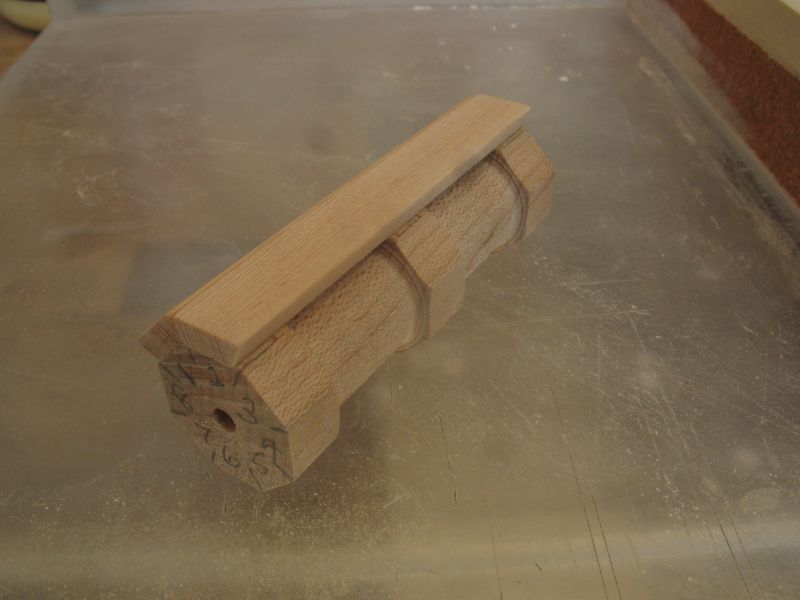
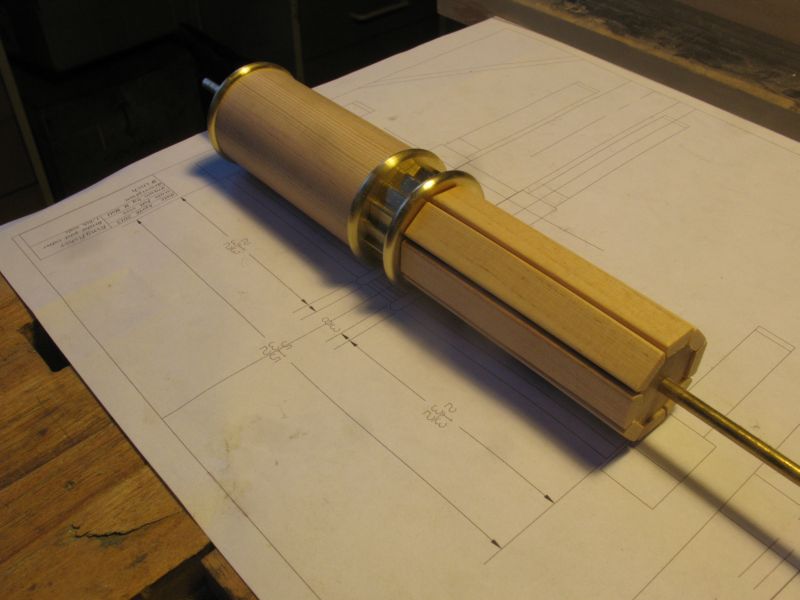
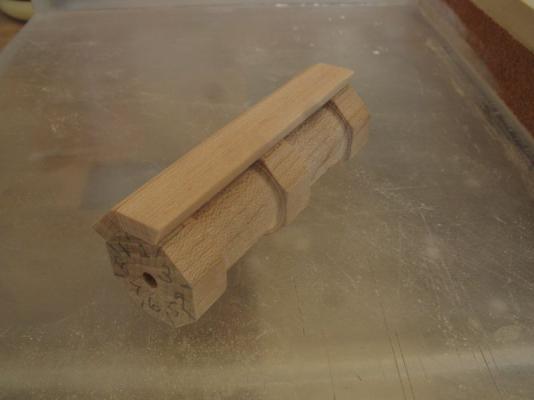
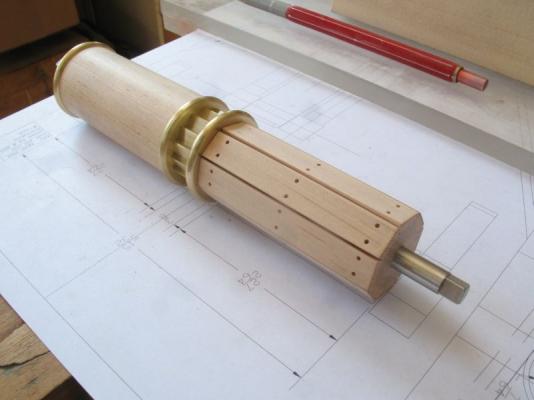
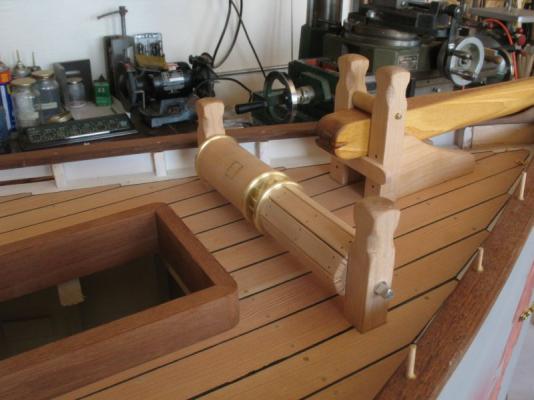
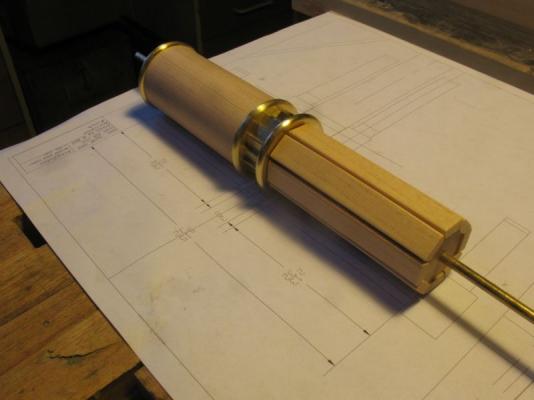
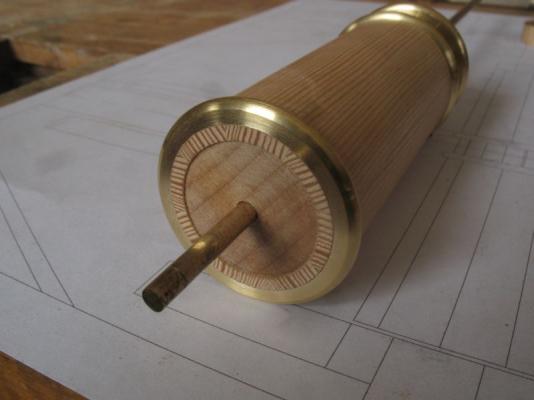
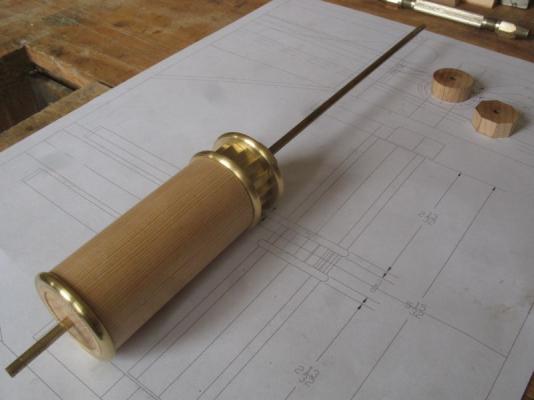
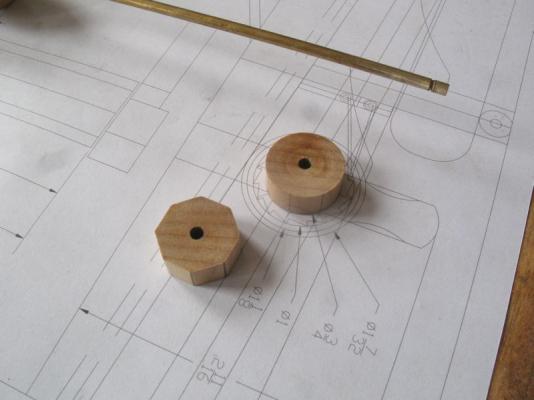
The saga continues... The new sub-frame for the anchor side it is turned up from some maple broom handle. After gluing up I set up and drilled all the bolt holes these are .046 or 3/64th I also increased to shaft to 1/4 which is scale is 2 inches and added square ends for fast winding with a handle I still need to cut the square holes for the extra leverage handles. The posts needed to be set through the deck so the holes were drilled and swan then filed square Set in place not glued yet so that I can add the other parts of the winch supports. The added parts glued in place. Then about ten minutes after the glue had been applied I realized that the whole winch was too low for the chain to go under , I was so focused on clearing the under side of the bowsprit when it is retracted. after getting all that sorted I also noted that to clear the bowsprit I had already moved the winch a little further to the stern so the distance between the bowsprit posts and the winch barrel was longer that the pawl I had drawn for the ratchet (don't you just love dominoes) I decided to cross that bridge later. I snapped off the newly glued parts and raised the posts so that there was clearance under the staves for the chain. so then I had to re-drill the holes for the top bar of the bowsprit posts, this did not go as well as planned the 1/8 drill was not aligned properly and came out the second post off to the stern about 3/64ths. It took a while to sort out I used a scrap of oak and drilled a hole 5/16 in diameter. This guide block was clamped to the port post and I used a 5/16 end mill in the hand drill to start the new larger hole to encompass both 1/8th holes. I marked a datum across the oak and the posts so that I could re-clamp it to the starboard post. After both holes were drilled I used a 5/16 reamer to ensure that a 5/16 dowel would slide through smoothly. I still needed to shave about 1/16th off the bottom side of the bowsprit after that was done the bowsprit cleared the winch barrel as it was retracted. I made a compromise and formed a bracket that will be screwed to the deck with 4 screws to hold the hinged end of the pawl. I will sleep on this solution and see how it feel tomorrow. Michael


-
Nicely done Sherry, it is amazing what one can do with a scalpel when put to "better use". Michael
-
ancre Le Fleuron 1729 by rekon54 - 1:24
michael mott replied to rekon54's topic in - Build logs for subjects built 1501 - 1750
Wonderful to hear things are fine Giorgio. The capstans look great. Michael -
Qwerty 1 Perhaps a couple of pictures showing the formers and how you are presently using them. 2 Are you intending to have the whole deck lift off? 3 If you are not going to lift off the whole deck will you be creating an opening that will lift off to access the controls? Michael
-
Lami the control system looks amazing any further information on how it works would be most interesting. Michael
-
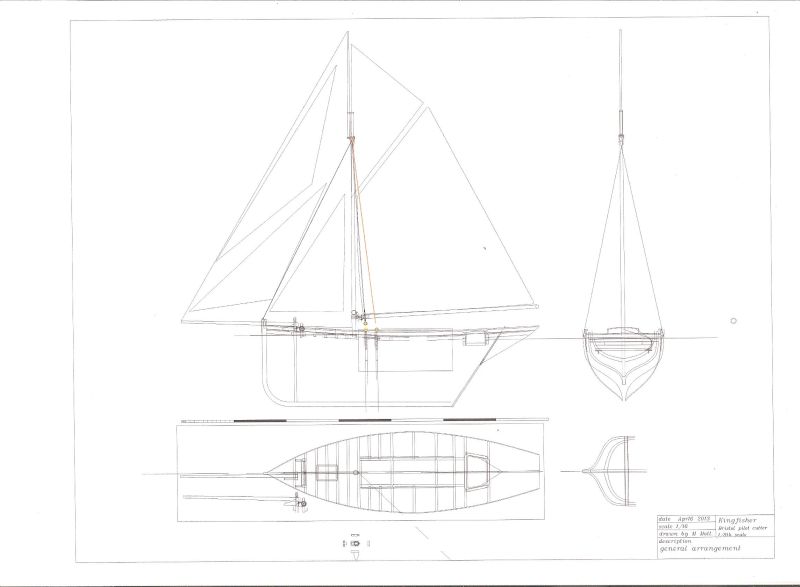
John Thanks Bob, the plans are my own based on a single sheet from the original MAP plans. The only part of the original plan that I used were the station lines. here is a shot of where the plans are at the moment The first drawing is one that was done in Corel These drawings are from Autocad As I finish parts if I modify it I go back and modify the cad drawings, some parts get made then I do a drawing. The challenge on the next model will be to do the research then the drawings and then follow the drawings. This model it is really a hybrid of pilot cutters and fishing smacks, and is giving me the experience and confidence to work on the next one when this one is finished. Michael
-
Daniel , The printed windows work very well at this scale. Michael
-
Qwerty I am a little confused, the last two pictures show the decking and a hull that has no Bondo on it are they the same hull? Am I in a time warp? Michael
-
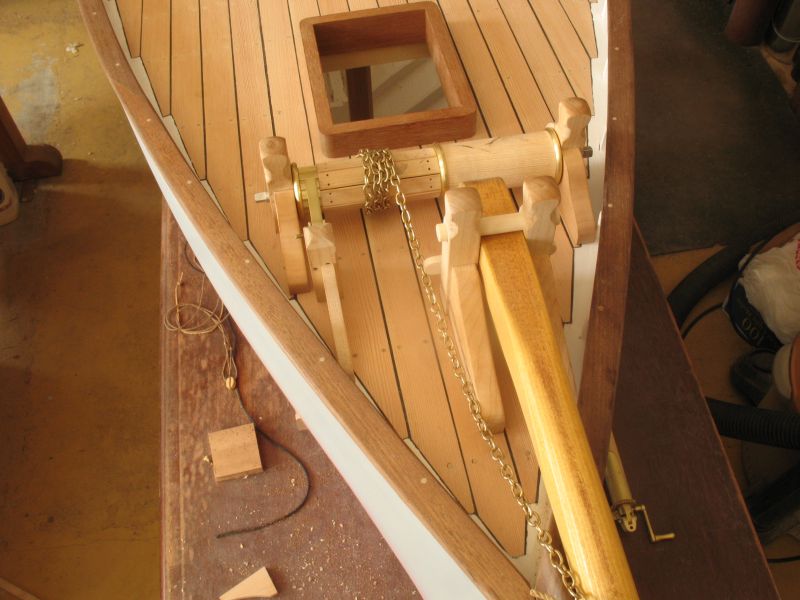
The barrel staves were machined to take the brass rings and plates The ratchet was milled using the same 30 tooth gear as a guide that was used to make the gear for the roller reefing, I just indexed it 2 teeth at a time to give 15 teeth on the ratchet. The section that is for the anchor chain was made with individual strips spaced around the maple formers, as I glued the last piece on I realized that I had missed the middle former and looking closely I also realized that I had made it a bit uneven so tomorrow I will cut some new discs and staves and redo that end. adding the middle one so that when it comes to adding the bolts there will be the three formers inside. I will soft solder the discs to the gear Michael
-
SS Vinal Haven by TBlack - FINISHED
michael mott replied to TBlack's topic in - Build logs for subjects built 1851 - 1900
following along Tom I like the brass plate on the door, nice touch. The netting on the handrail looks great. Michael