HOLIDAY DONATION DRIVE - SUPPORT MSW - DO YOUR PART TO KEEP THIS GREAT FORUM GOING! (Only 24 donations so far out of 49,000 members - C'mon guys!)
×


michael mott
-
Posts
5,198 -
Joined
-
Last visited
Content Type
Profiles
Forums
Gallery
Events
Everything posted by michael mott
-
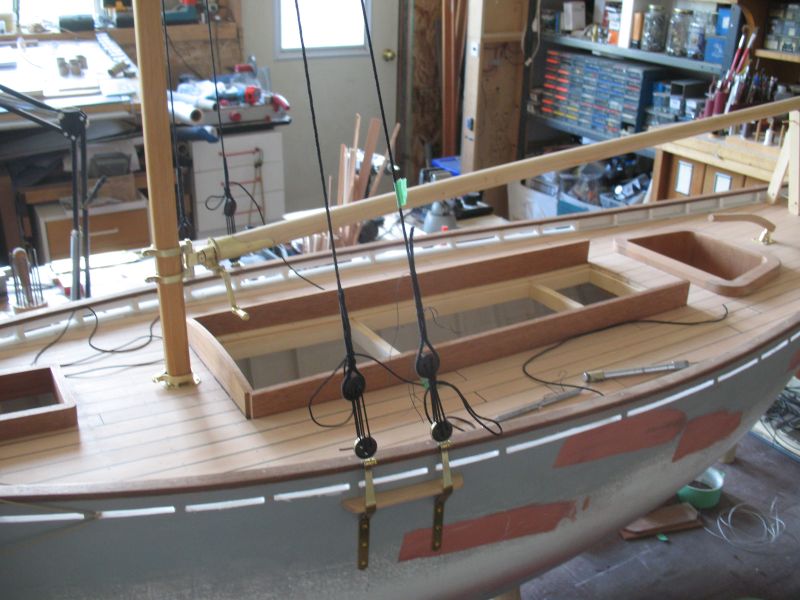
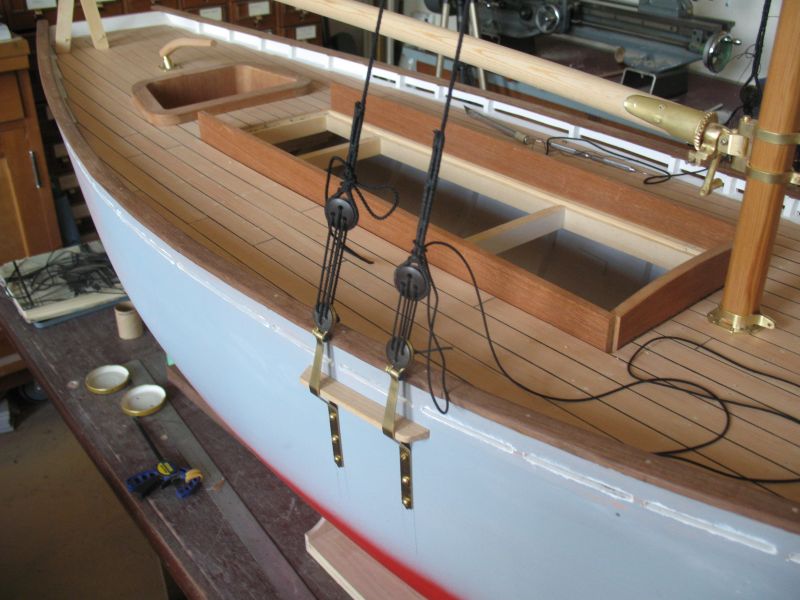
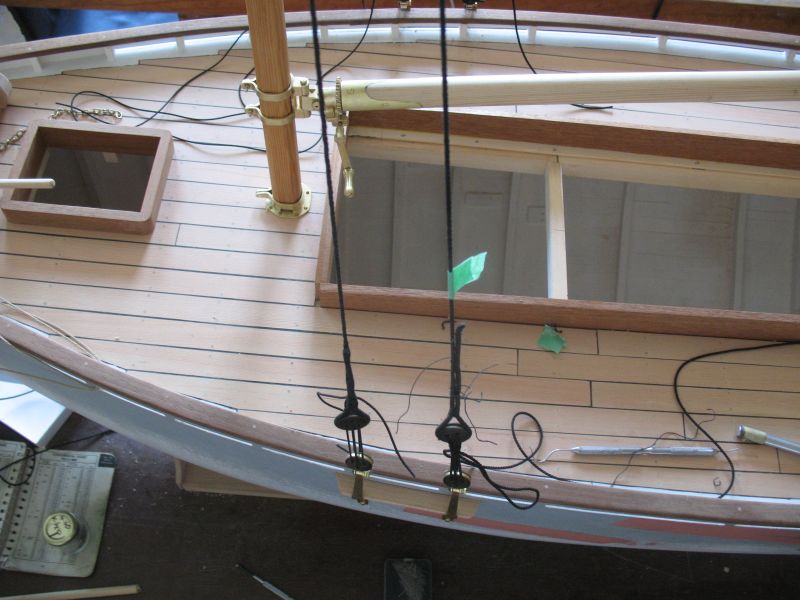
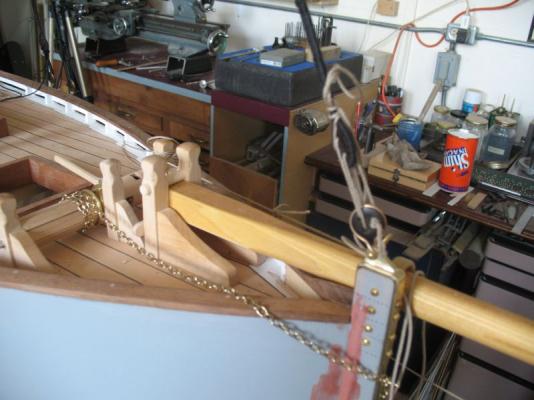
 Brethren, I have been busy doing a few things. Lots of memory work for those of you who know of what I speak out of the Blue and into the Red Installed as "Z" yesterday and will be past Master of Meridian Lodge 129 as of June 12th. The boat has been sitting with the shrouds and forestay straining to be heard for a few days now and they are giving me a bit of agro as it was coined by my brother a few years ago. the one with green flag is needing to be re seized because it was to long. The thing is I stretched these shrouds and then they need more stretching. At this scale perhaps I should be thinking wire rope. Michael


-
Where's the bottle indeed! I'm workin' on it...... Hic! Michael
-
John all your shenanigans with the shrouds is pulling at my soul. I am trying to get it right myself and it is tough. Kudos to you Sir for getting it done. Michael
-
What a sweet looking boat. Nice work on the restoration Russ. Michael
-
Bob Thanks for your thoughts, The look of Draftsight is close to what I am used to with the Autocad 2002LT I will play with it a bit. Michael
-
recently I had a crash on my older computer. I took it o be fixed at a local computer repair business that has been in business for over 10 years, they told me that my AVG virus protection was a viral type program and that it was what caused the problem and that my computer was full of viruses? I could not afford to get a newer computer, I am running Windows XP and it is pretty stable. They fixed the problem and added Norton virus protection (I agreed to this) removed the AVG and now my Autocad LT2002 crashes and aborts after 3 or four commands. The auto desk help group told me to reinstall AVG dump Norton and that will fix the problem. I did pay for a years license of AVG in February and I presently have Norton installed. I was also advised that there are newer free CAD programs that run look and behave in a similar way to the Autocad LT 2002. I have downloaded Draftsight it looks good and has the same sort of feel so far as my LT2002. My question is has anyone out there in model shipworld any experience either with Draftsight or the Norton/ AVG debacle Sincerely Michael
-
great recovery John. Michael
-
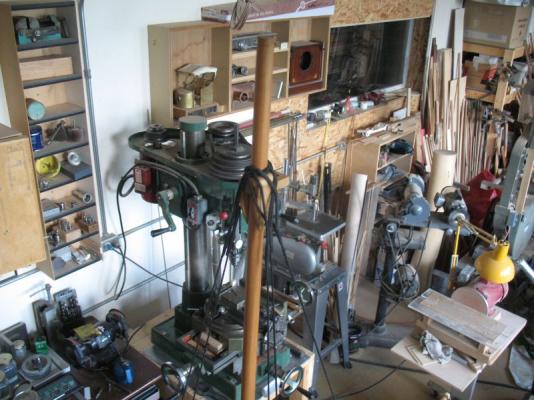
Mark, you were lucky sir! Always clamp stuff in mills and drills. Unless it is a Japanese pull plane of course Mark, Russ is right on regarding knocking off the corners with a plane it is safe quick and give a great finish. When you make your support the same really as the v groove one you set in the mill vice just glue a short piece of square in one end as a stop. I would not recommend using a screw or nail because eventually one ends up hitting it with a plane blade. Sharpening the nick out of a plane blade is a pain in the rear. I wish you a speedy recovery of the fingers. Michael
-
Ok I have an idea in order to keep to the sheerline, what about a marking gauge type device that will punch a divet into the side of the hull, you move it along and make the next divet. the divets will need to be filled with something black then wiped off Ok I'm clutching at straws Michael
- 84 replies
-
- 1
-

-
- esmeralda
- training ship
- (and 1 more)
-
Thank you Karl, so if I understand correctly, someone had to unhook the block from the rope that held the block and hook it through the ring of the Anchor before letting the Anchor down. From a purely practical point of view that looks like a very difficult task given the size of the block and the position of the Anchor. Michael
- 662 replies
-
- 1
-
-
- bonhomme richard
- frigate
- (and 1 more)
-
SS Vinal Haven by TBlack - FINISHED
michael mott replied to TBlack's topic in - Build logs for subjects built 1851 - 1900
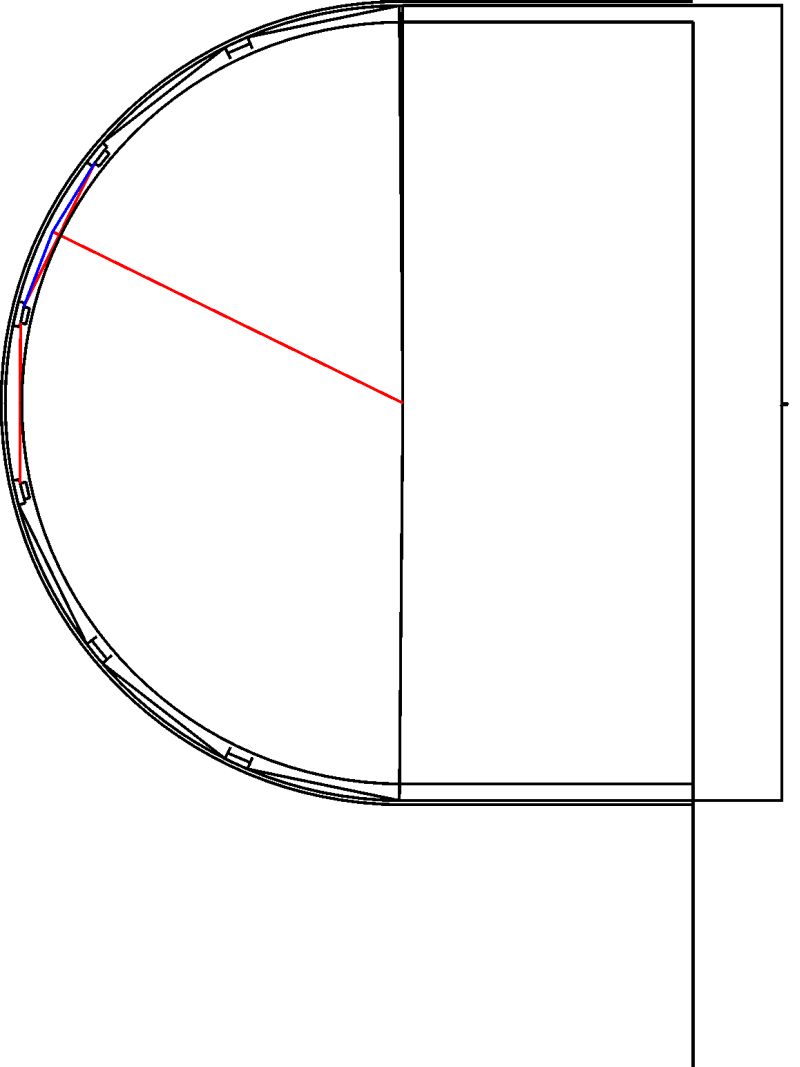
Tom the split window panes follow the curve more closely. if you zoom in to the PDF the window remains about 3/4 of (scale) inch from the outside curve. Sorry about the 4 decimal places I forgot to round up with the program basically we are looking at 3/16ths (.187) for the split pane and 3/8ths (.375) for the full opening the difference of a few thou is not worth worrying about. Igf you print out the PDF at 100% then you can see exactly the shapes and sizes. In reality Tom these are quite small pieces. So I hope that I haven't opened too big a can of worms. Michael -
SS Vinal Haven by TBlack - FINISHED
michael mott replied to TBlack's topic in - Build logs for subjects built 1851 - 1900
Tom since it is 2 inches across I have rescaled the drawing to your dimension the PDF will show the amount of bevel or angle to the uprights between windows are a scale 3 inches on the outside edges. vinal haven48.pdf I hope this is of use. Michael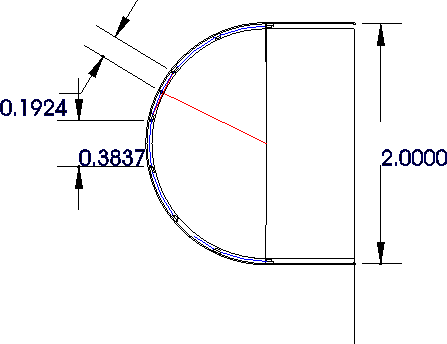
- 326 replies
-
- 1
-
-
- vinal haven
- steam ship
- (and 1 more)
-
The modelwork looks fantastic, I am having difficulty understanding how the block is used and how it would be handled. can you detail how it works? for me or point me in the right direction to glean the same. Michael
- 662 replies
-
- 1
-
-
- bonhomme richard
- frigate
- (and 1 more)
-
Lovely shots of the work so far, we are not so green here yet. Michael
-
SS Vinal Haven by TBlack - FINISHED
michael mott replied to TBlack's topic in - Build logs for subjects built 1851 - 1900
Tom Your compromise sound great, From a perfectly practical point of view the windows are too small to warrant the split pane I still believe that they are split to accommodate the curve which is quite a sharp one. If they could have used flat panes I think they would have, it is not as if they could only make small panes or that small panes were the only available option. Tom what is the radius of the curve both in real life and on your model. I would gusee that it is no more than 4 feet radius 5 at the absolute outside. vinal haven.pdf This is a cad drawing showing the window pane as a flat and a split using 48 inches as the radius. I do think that the split is correct and that the windows were split and angled. Michael
- 326 replies
-
- 1
-
-
- vinal haven
- steam ship
- (and 1 more)
-
Nice work on the planking so far Sherry, Michael
-
Wow!!! those handrails are going to be amazing. Thinking about the portholes could you use a punch and stamp them out of brass shim that is .001" or .002" they could be blackened either chemically or by heating them, the way to heat them would be to place them on a plate of thicker metal and heat from below say on an electric hotplate. Michael
-
SS Vinal Haven by TBlack - FINISHED
michael mott replied to TBlack's topic in - Build logs for subjects built 1851 - 1900
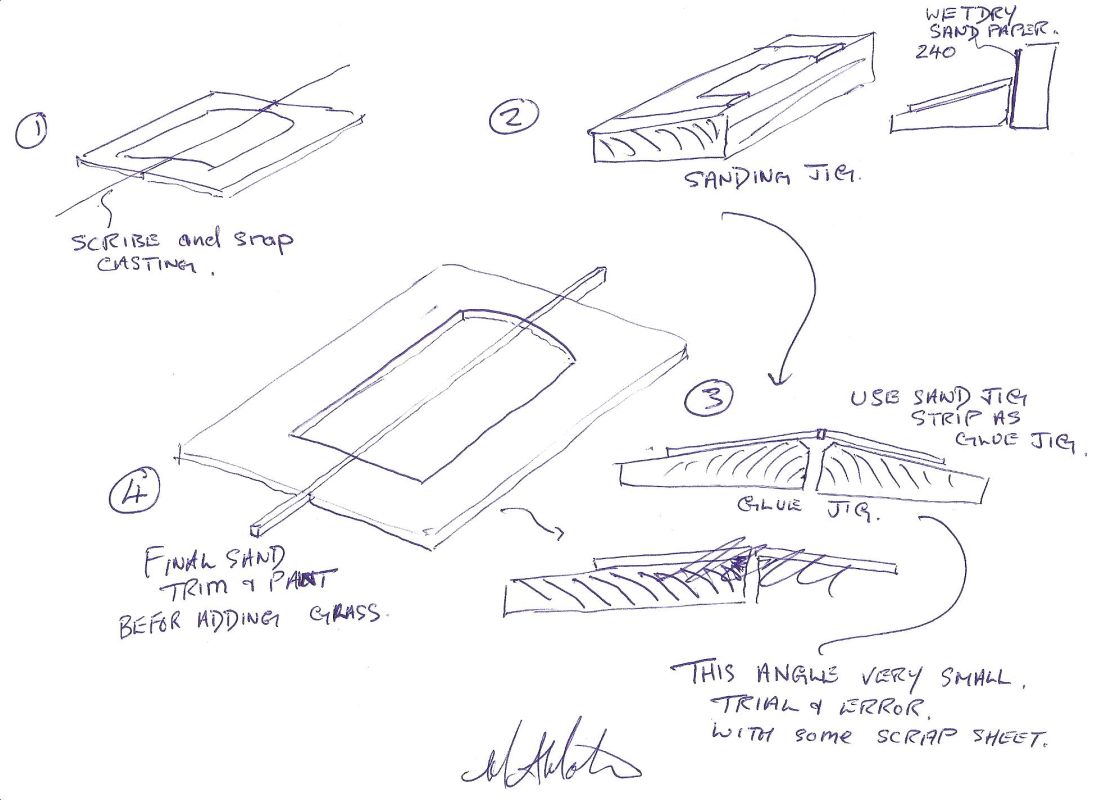
Tom when you do the pilot window castings you can use the same mould, if you can snap the casting down the center then glue in a strip of evergreen the glass can be from a clear plastic cake cover the kind that have the vac formed shell over them this stuff can be cut easily with scissors and can take a fold to get the right shape for the two sheets. The fold is best done by pressing the plastic over the edge of a clean square edge of a metal rule or similar edge. Here's a pic of what I am trying to describe. Hope this is useful Michael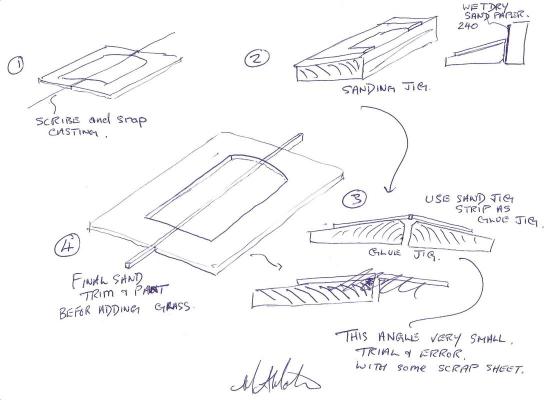
-
Russ thanks for re-posting this log, Your work on this originally was before my joining the forum so I definitely missed it the first time round. I will be following along. The grey paint to produce a muted caulking is a "greyt" idea. Michael
-
SS Vinal Haven by TBlack - FINISHED
michael mott replied to TBlack's topic in - Build logs for subjects built 1851 - 1900
Tom Thanks for you kind remarks, and yes this really is a great place, the thing I most like about it is the incredibly positive nature of the people who visit here and the effort taken by so many to share their knowledge and skill. I have learned so much in the past year and a half being a member of this very generous community. I am also looking forward to that beer when you get here The small paddle wheelers that were so instrumental in opening up the northwest have always fascinated my imagination. I had a great book called Stern Wheelers of the Frontier, or something like that. I lent to a chap about 25 years ago and have not seen it since. Such is life. Your comment about using the wood former makes a lot of sense also. I am curious about the top moulding that you mention. One of the great things about styrene is that you can use the scraper type formers that so many here use for creating those shapes in boxwood and pear wood, they work just as well. Michael -
SS Vinal Haven by TBlack - FINISHED
michael mott replied to TBlack's topic in - Build logs for subjects built 1851 - 1900
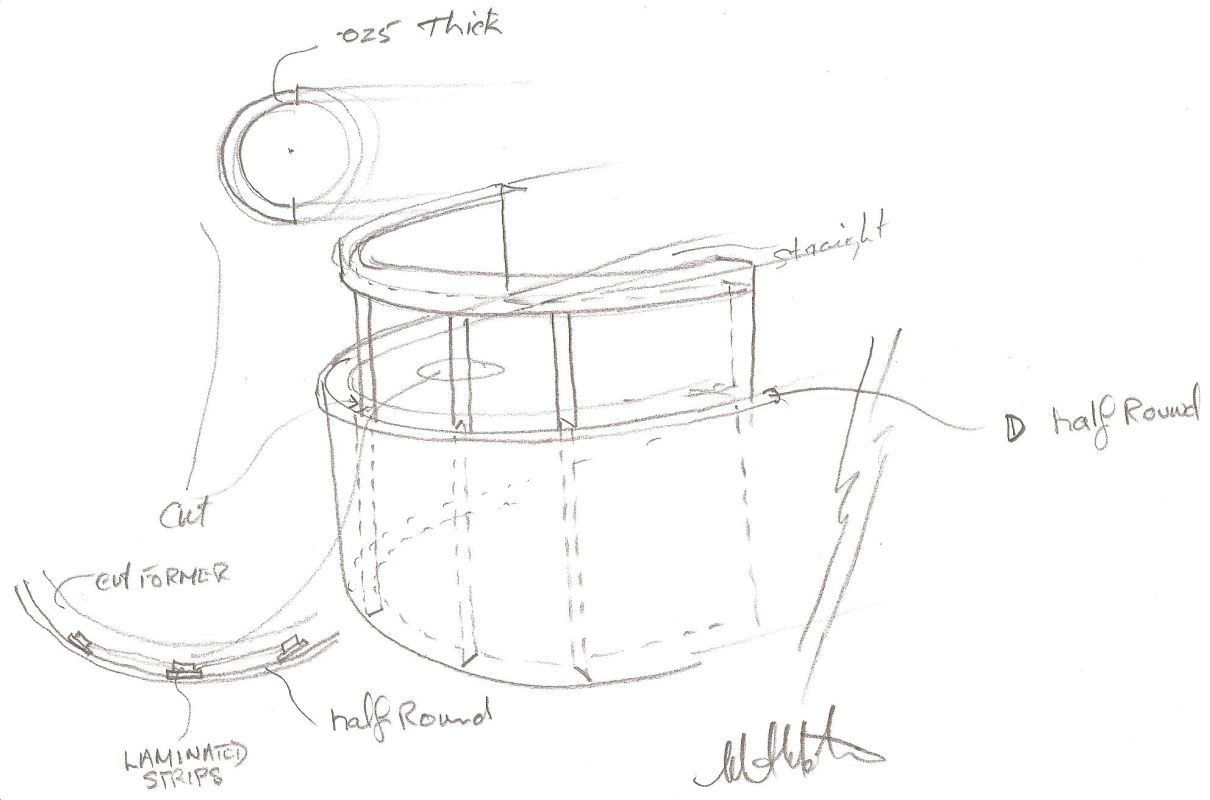
Tom I have done a lot of work with styrene over the years (architectural model building commercially) I would build this up with two small pieces one for the bottom and one for the top. the window posts would be rectangular in cross section with possibly a slight curve on the outside but would be rabbeted on the inside to accept the glass of the windows. With regard to the curve if you use something as thin as .010" and use a couple of layers they can be bend and glued around some cut styrene forms and use a couple of layers. I notice that the bottom of the windows there is a rounded trim, evergreen make a few different half round sections and they bend and glue very easily. If you take a strip of styrene and pull it between your finger you can impart a fairly tight curve. Use the liquid capillary type glue where you hold the parts together first then using a small paint brush add a drop of glue and move along the length. Use this same method when attaching the sheet to a former, the former semicircular shape inside the wheel house cut four the same 2 for the top and two for the bottom. sort of like this. Michael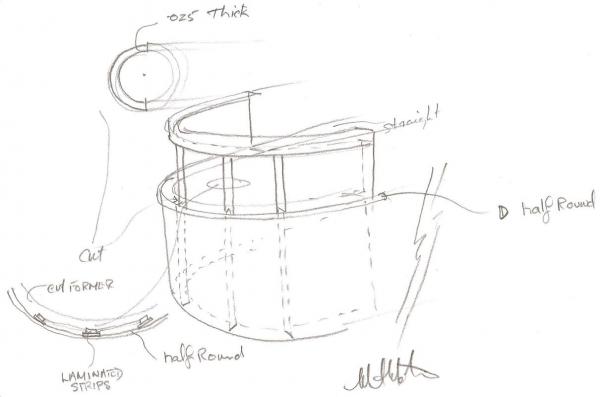
-
That is a lot of fine detail Daniel. Michael
-
I like the second one better as well. the finished cutter looks great. Michael
-
Gripos-kaiki by Giorgos - FINISHED
michael mott replied to Giorgos's topic in - Build logs for subjects built 1851 - 1900
Giorgos I am enjoying watching this build, what a great start. It is great to see the hand drawn lines and frames. such a peaceful way to get there. Michael -
Walter I think that the model airplane folks carry some very light weight Fiberglass. Michael