michael mott
-
Posts
5,200 -
Joined
-
Last visited
Content Type
Profiles
Forums
Gallery
Events
Everything posted by michael mott
-
 Alex I went looking for the brass that you specified, because it looked like it stretched very nicely I did fine one supplier in the Ukraine, did you use a strip of rolled brass or was it a sheet that you cut into the plates? Fantastic work on the die. Michael
 -
I bet Bassett Lowke would have liked the brass etching methods back in the day. Lovely work as always Nils. Michael
- 2,625 replies
-
- 7
-

-
- kaiser wilhelm der grosse
- passenger steamer
- (and 1 more)
-
Mike great thread posts regarding your experiments and others thoughts about the ebony issue. Your grandfathers clamp is very nice is there a name on it or is it made by your grandfather? Michael
- 969 replies
-
- 5
-
-
- hahn
- oliver cromwell
- (and 1 more)
-
Another third hand
michael mott replied to michael mott's topic in Modeling tools and Workshop Equipment
Thanks for the positive comments, I mentioned in the restoration thread that i would add the PDF of the way that the blue post clamps to the horizontal bar. here it is. new soldering tool.pdf Michael -
Actually Keith I can't sorry. Carl, no these are one offs Pat, Just for you new soldering tool.pdf I will post the PDF in the tool section as well. The drawing is basically accurate the sizes are all nominal and is drawn 1:1 the PDF is a broad sheet size the reason being that I did not work from a drawing originally but from material I had in the scrap boxes more or less. and whipped up the drawing this morning. I am thinking about a design that could be easily made from stock supplies, wood and brass, and nuts and bolts that can be purchased at any local hardware store. it needs to be simple and with the sort of control that I am able to achieve with the fancy ones. Now back to the ship. Michael

- 749 replies
-
- 14
-
-
- albertic
- ocean liner
- (and 2 more)
-
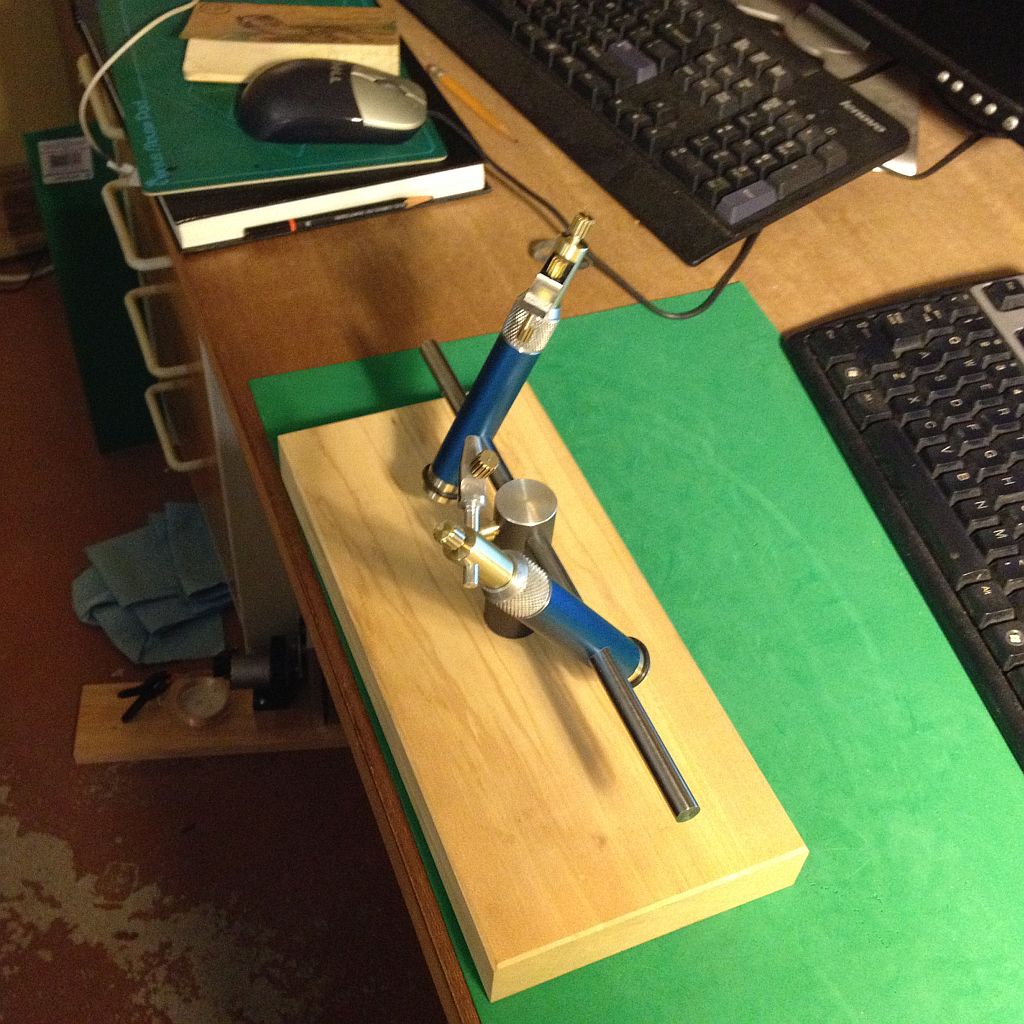
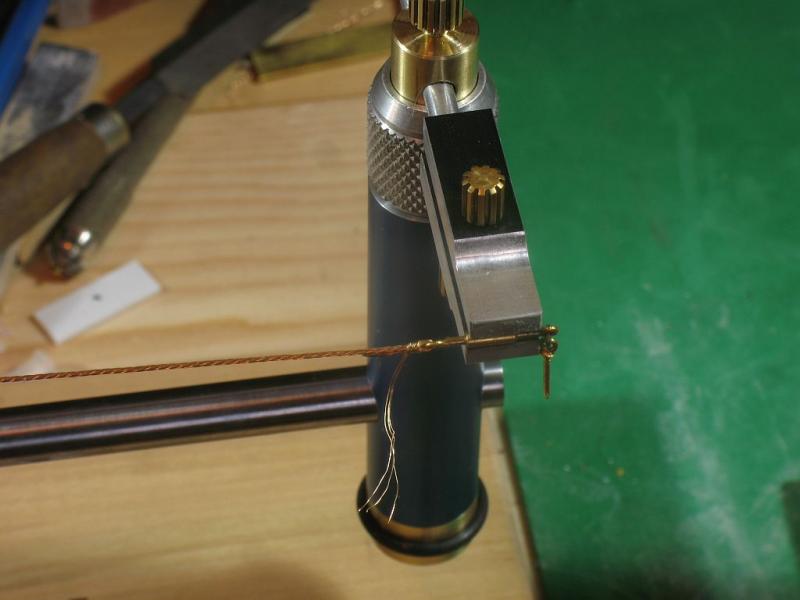
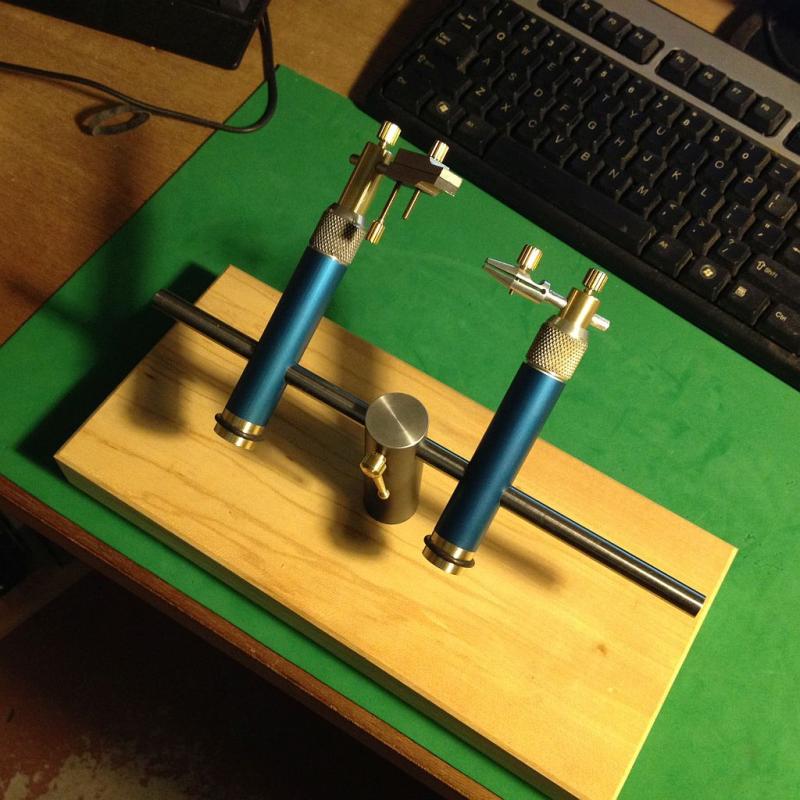
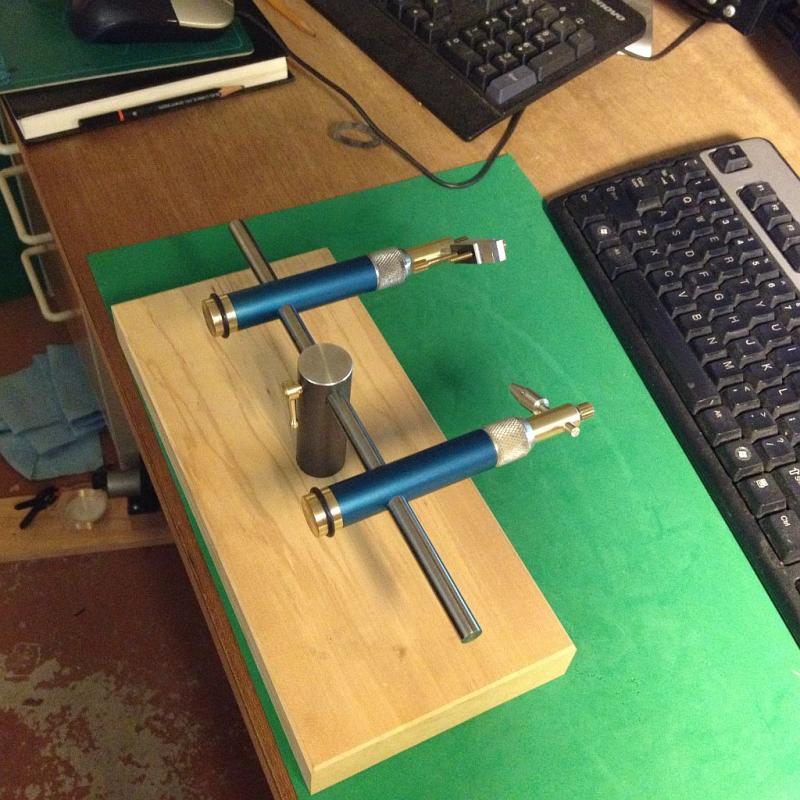
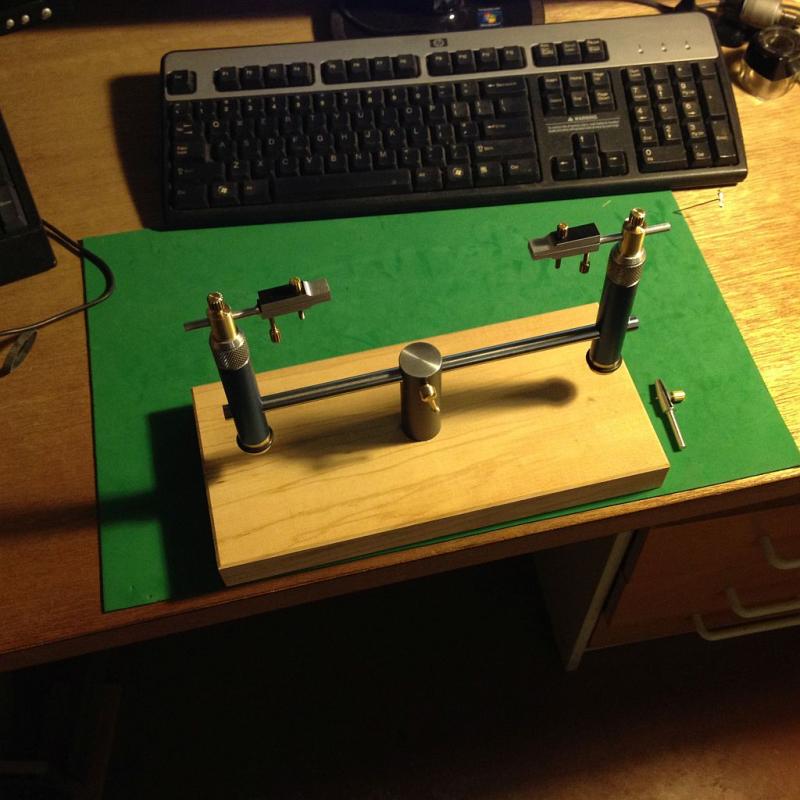
I have started using the new third hand to work on the cable stays, the longer reach is helpful, Of course I could have just made a longer bar for the first one, but why only have one third hand when you can have two. What can I say?.... I'm a tool Junkie, and it is fun making them. Michael
- 749 replies
-
- 20
-
-
- albertic
- ocean liner
- (and 2 more)
-
Once again Ed I see that your skill and methodology fits the task at hand. The solution to the grouping of eye-bolts through the band and into the wood makes perfect sense for the scale that you are working at. I think that we often forget that we cannot scale nature, and at the small scale we work at we often impart massive "scale" tensions on our modelwork, as you noted the thin nature of the copper bands would be potentially compromised by these pressures, your solution is both very elegant and practical. You do us all a great service with your knowledge and sharing. Michael
- 3,618 replies
-
- 5
-
-
- young america
- clipper
- (and 1 more)
-
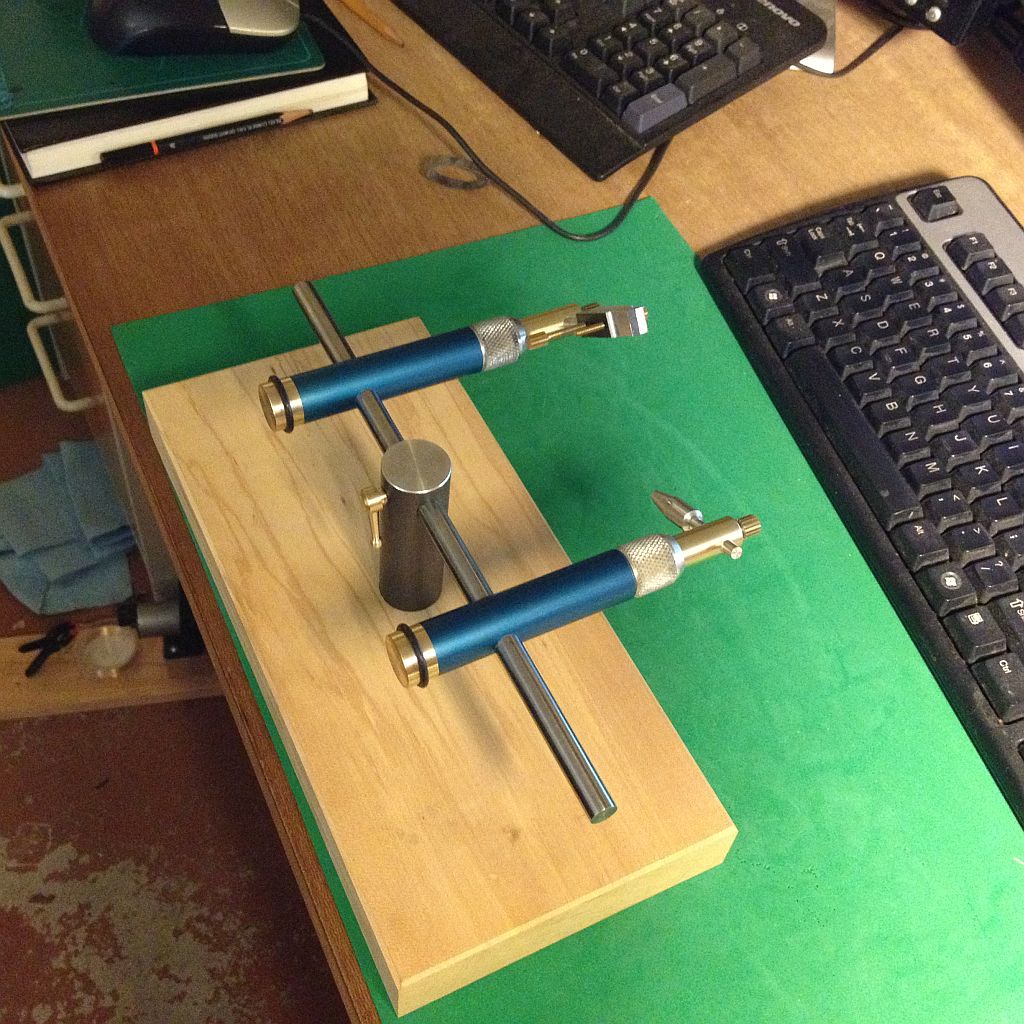
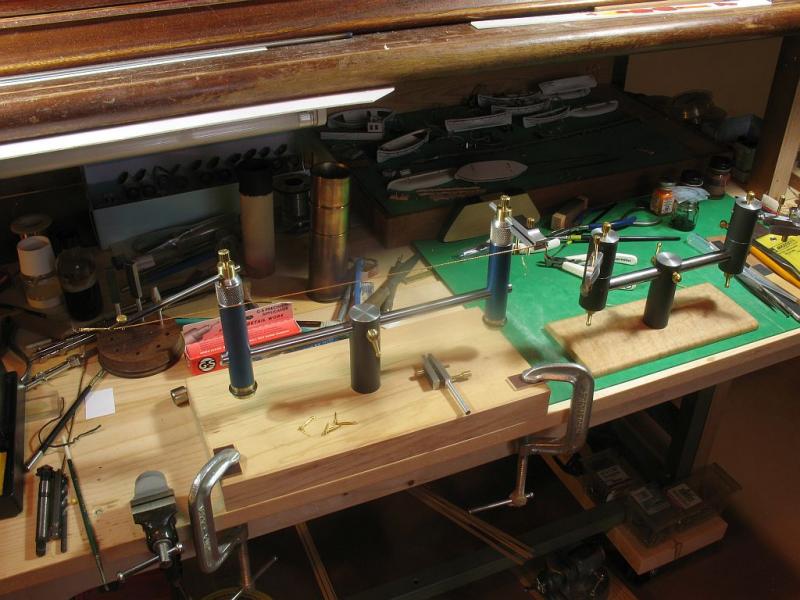
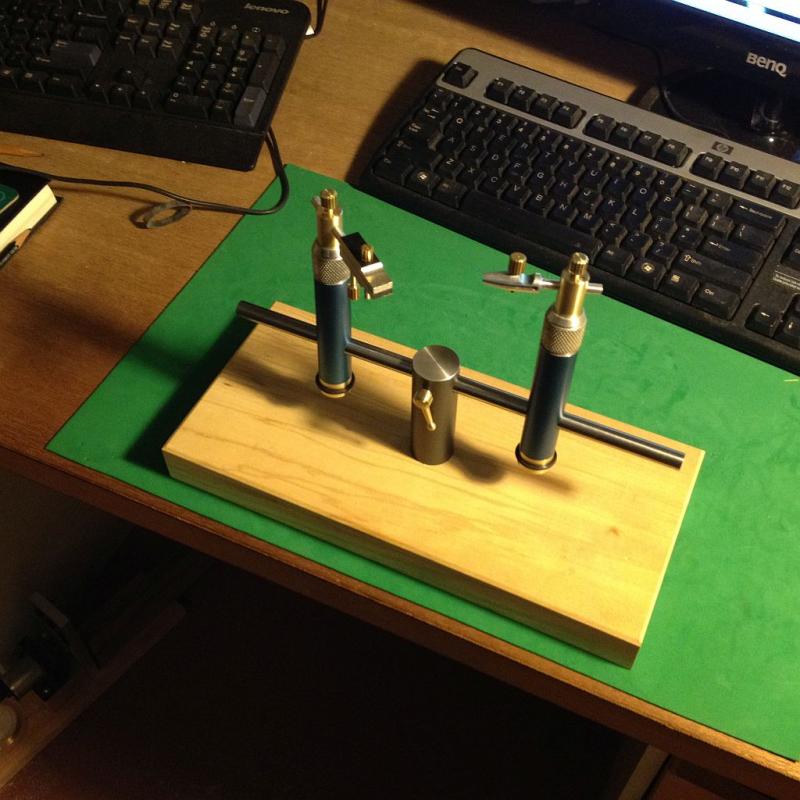
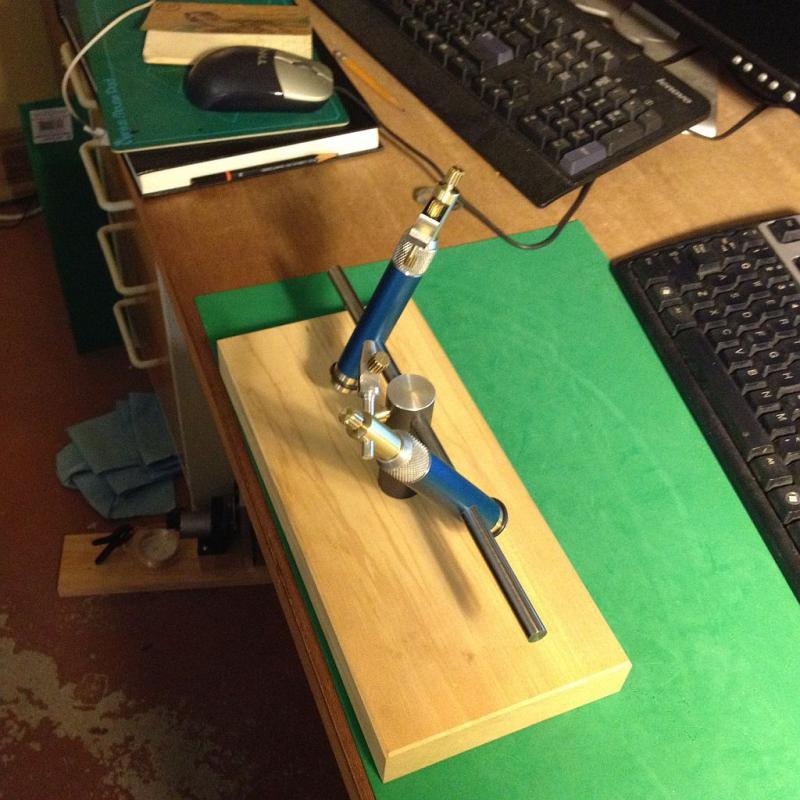
I have really enjoyed working with the third hand clamping fixture that I took the day off work and made a new one from the proverbial scrap box. I am also going to link to all the other small clamping devices clamps and fixtures for holding small parts. I know that the forum is well organized by sections I just wanted to get the clamp threads linked into one place to save having to scroll through all the 26 pages of the tool section. I used some old legs from a tripod, A bit of blue anodized aluminum tube left over from a project. a scrap of spalted maple that I have had hanging around for years. some " O" rings for gripping the brass locking nuts. The blue tube and the tripod leg parts are a slide fit and by pushing them offset with the o ring nuts the units lock onto the scrap of 3/8th drill rod. The holes in the brass bars are the same as on the other third hand that i made a couple of weeks ago. Now for the links to the other ones I found in the 26 pages of tools A third hand for high places Holding tool for small parts Clamp for holding rope for splicing make your own clamps Clamps and old trick revisited Preac clamps Homemade Mini clamps Another type of clamp Cheap keel clamp Tilt a whirl positioning fixture small wooden clamps I hope this helps. Michael
- 13 replies
-
- 23
-
-
Carl, thanks for your compliment. Druxey thanks for the tip on the Bondo. Pat welcome aboard. Jan, you are correct the ship has been repaired in the past and the damage did occur in a similar place along the edge of the deck. There is no record that we know of that covers that part of the ships history. and the missing ports were as you have stated just painted over. Michael
- 749 replies
-
- 7
-
-
- albertic
- ocean liner
- (and 2 more)
-
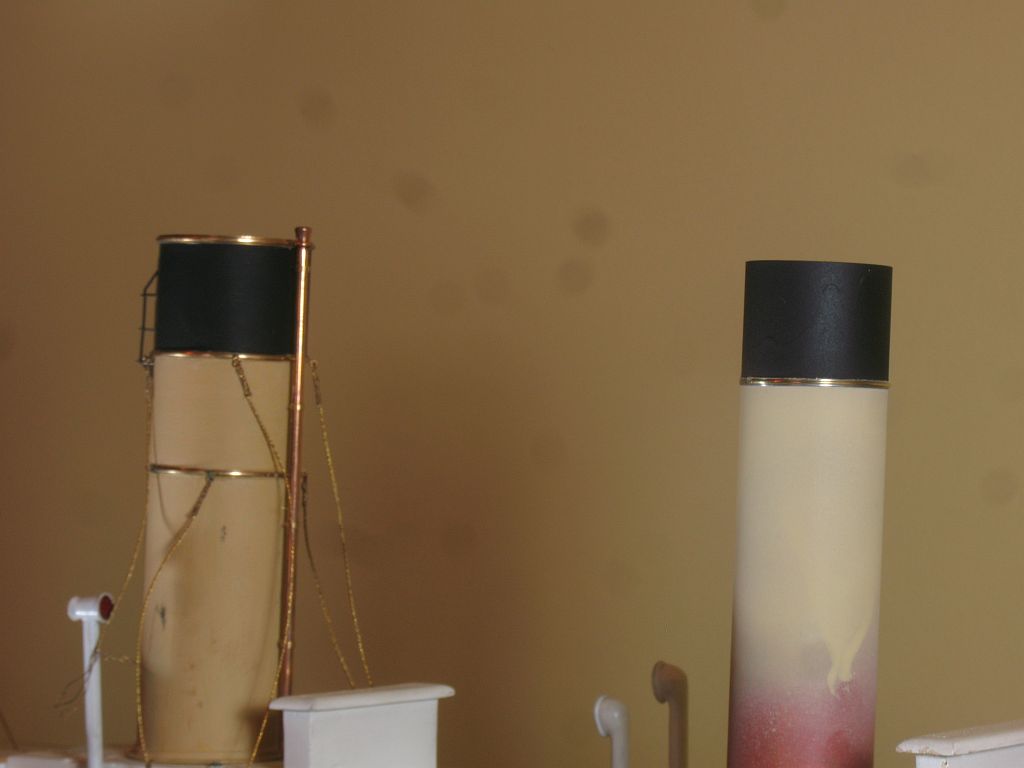
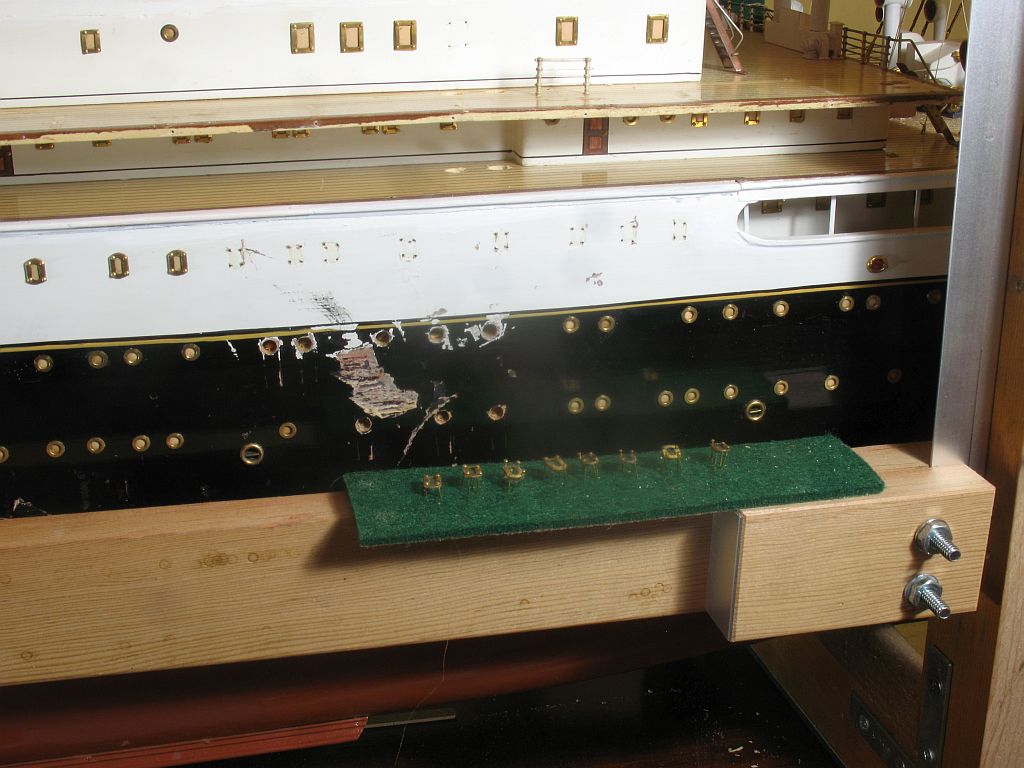
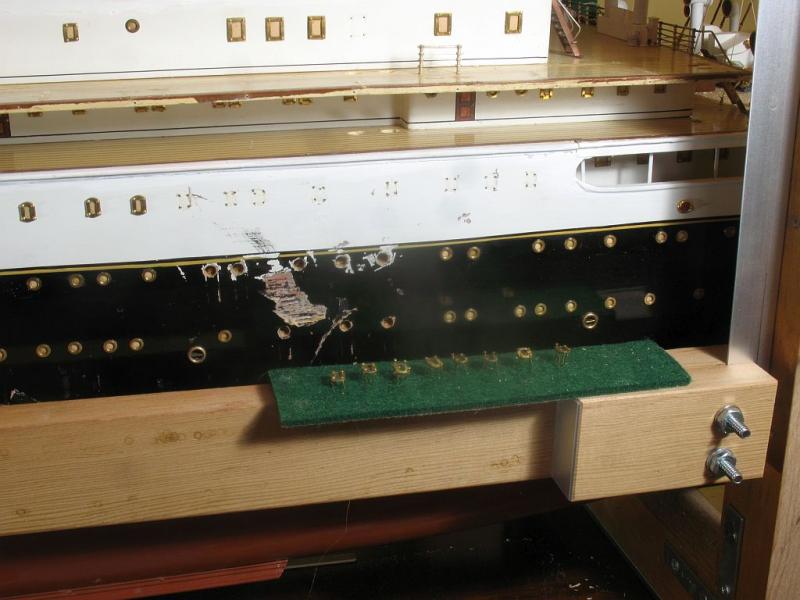
Thanks for all the visits, and the likes. it continues to be encouraging. I unmasked the dummy funnel and decided that the "no sew" works well as a mask even after a week the mask was still strong and pliable and peeled off easily. The color of the black is good the tan still needs work. I have been using the third hand for all sorts of little tasks now. I am very happy that I took the time to make it. here I used it to solder one of the jump rings back together. after setting everything up I used a tiny brush and put a drop of Duzall flux on the joint and took a .5 x .5mm small flat of solder placed it on the ring then with the hot air soldering gun with low flow air a couple of strokes 15mm away and the solder flowed over the joint Today I began removing a few of the ports where the most damage to the side of the hull was sustained I used the flush cut nippers to grip and pull out the ports, because these are each unique..... yes indeed unique I placed them in order on some green felt (no I didn't cut it off the billiard table Denis) it only took ten minutes to find the one I dropped one of the pins fell into the waste basket (I found it under the flap of an envelope). Finally I am putting some primer along the joint I will let it harden for a few days then re-sand and repeat a few times to blend in the crack. Michael


- 749 replies
-
- 19
-
-
- albertic
- ocean liner
- (and 2 more)
-
Nicely done, I think that we often forget that a fine line makes a great clamp sometimes. Michael
-
San Martin by augustus
michael mott replied to augustus's topic in - Build logs for subjects built 1501 - 1750
Very interesting Laci, Your imagination is showing just how much you already know about this type of ship and your woodworking skills look pretty advanced. I like the mini woodworking lathe a great solution. Where in Edmonton are you I get in to the city quite often perhaps we could meet up for a coffee somewhere? Michael -
I'm just wondering how the fishermen get inside the sorting area, or do they just walk over the white table in the middle? Michael
-
Keith, I am surprised that you didn't print the gauges on label paper and mount it on the plasticard before punching them out. Michael
-
Hi Wefalck yes these things do have a tendency to expand, being retired and not really treating this as a needed project for survival but an opportunity to give back to my community and to share some of the methods and work that might benefit the model community at the same time, is the main reason for taking on this project. That it includes some remuneration to cover some time and costs is welcome. If I were doing this as a commercial project as I used to do I would be working in an entirely different mode, and the project would most likely be out of range financially for the client. That said I realize that there are those who are doing this sort of work for their livelihood, and I have no intention of moving into this line of work on any scale this is a one off as far as I am concerned. I am confident that this project would not have happened at commercial rates and this model would have been written off. Eventually it will return to public display, which in my view is a good thing. Michael
- 749 replies
-
- 21
-
-
- albertic
- ocean liner
- (and 2 more)
-
Just to be clear Denis the piece that is cracked was completely off the model when the side was twisted away from the boat deck I reattached it after splicing in the new section, and was prepared to sand and fill the gap along the crack what I had not realized at the time was that the crack was part of an earlier damage and not the recent one. It was when moving my lighting around that the difference in color and the lower quality paint at the forward end became apparent. the crack is not quite as bad as the pictures make it appear the wood is solid and well glued. the hull and deck joint are solid along the side of the hull. I hope this clarifies the situation. Yes this is definitely one thing that I am considering I have the pins to attach new ones and I can put the patina on them with the hot soldering gun. Michael

- 749 replies
-
- 7
-
-
- albertic
- ocean liner
- (and 2 more)
-
Keith I am glad that you mentioned that you had used an elastic band I did a double take because it looks a bit like a really smooth bit of holly woodwork in a couple of the picks.....hint, hint. Michael
-
Nicely reworked shop Kees.The production line looks great things ought to start flying along now. Michael
- 434 replies
-
- 6
-
-
- pelikaan
- beamtrawler
- (and 2 more)
-
Bob You know that this is the nature of the Universe. The hull looks so elegant, there is something that just oozes out of builds like this that is almost contagious... I want one! Michael
-
John, that is certainly my intuitive reaction,.....I don't want to fall down that rabbit hole so far though that it would be a long climb back out. Keith this is a really tough one, as I am sure that all of us strive to do our best when we do things. It is hard to change character and do different "work" (this must be one of the most difficult aspects of an actors career to portray a person who is abhorrent to their own personality) it just goes against the grain, although philosophically being able to represent "what is" takes some careful work in its own right. Druxey, this is the path I am taking at this point because the earlier damaged area will only become more apparent if it is not addressed, I am not comfortable with that, but I do have to follow the clients wishes. I sometime think that some of the Classic Yachts out there are really just modern iterations of their old selves with a couple of token parts that were part of the original. Jan, a good point, the only difference regarding this is that I did state in my proposal to the owner that the funnels would need to be repainted, because the damage was obvious. If I go about redoing the earlier damage it could become a never ending story regarding a hull repaint...... and I really don't want to go there. I did state that if the side of the hull needed to be redone because of the damage amidships where the paint is scratched and dented it would change the nature of my engagement. So the client does have that option, or perhaps a portion of it. The issue being that the side cannot be repainted properly without removing all the brass fixings that are embedded. and that is a huge task. Well for the time being I shall continue with the work that I can and needs to be done. Thanks for all your thoughts. Michael
- 749 replies
-
- 7
-
-
- albertic
- ocean liner
- (and 2 more)
-
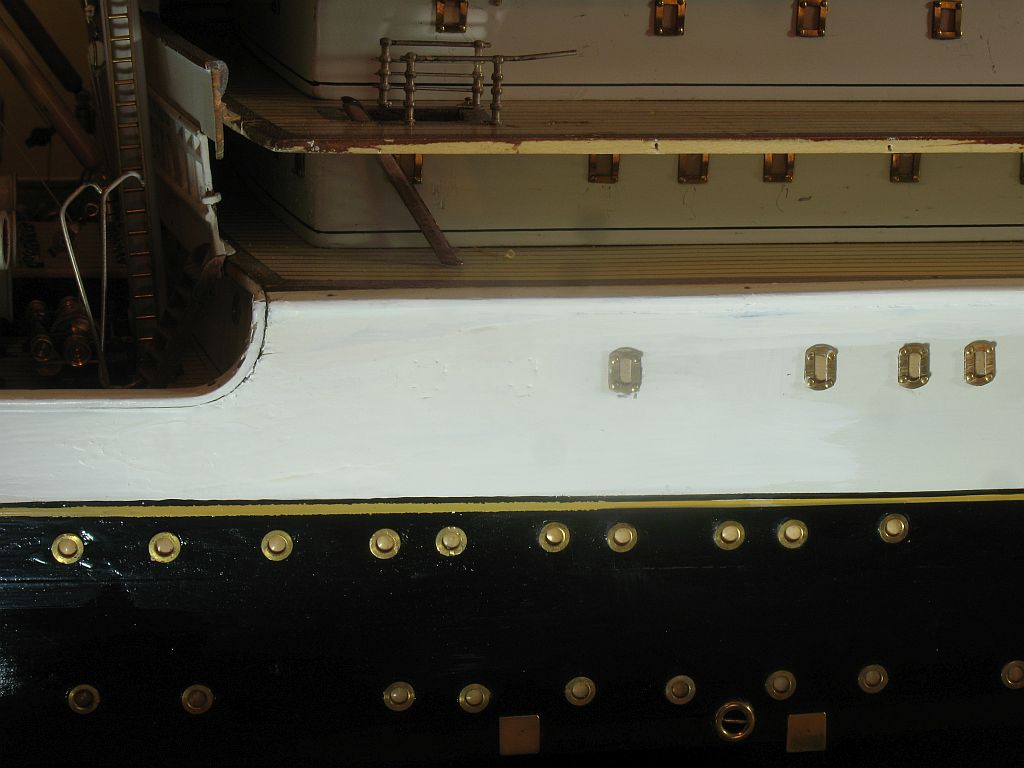
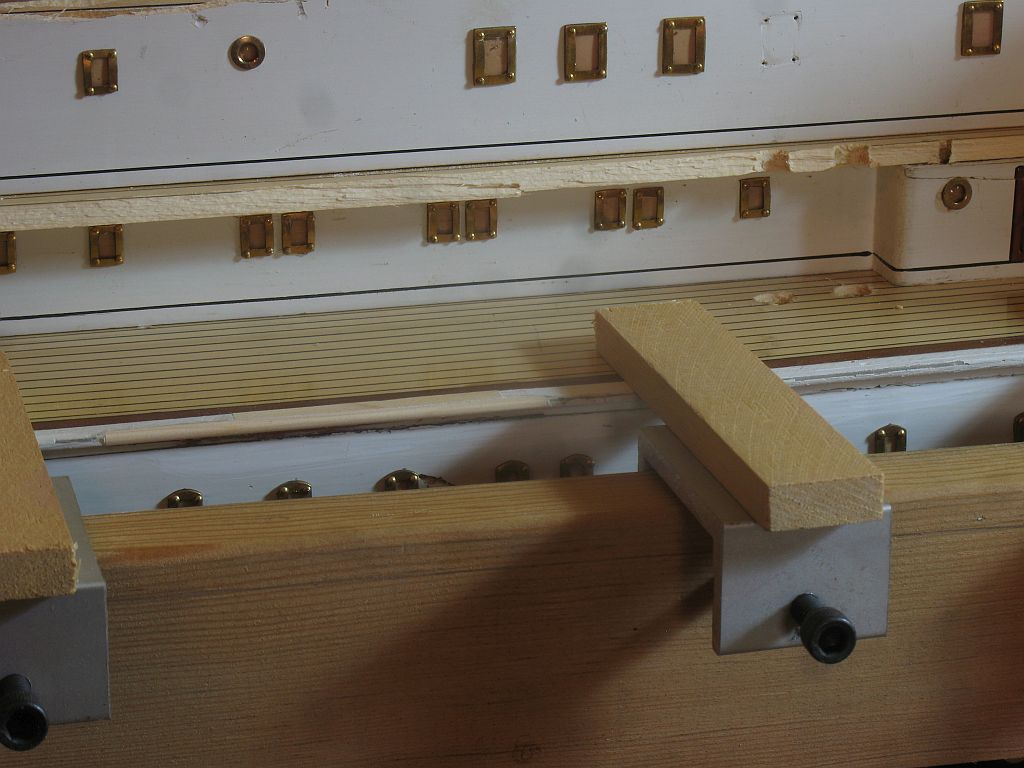
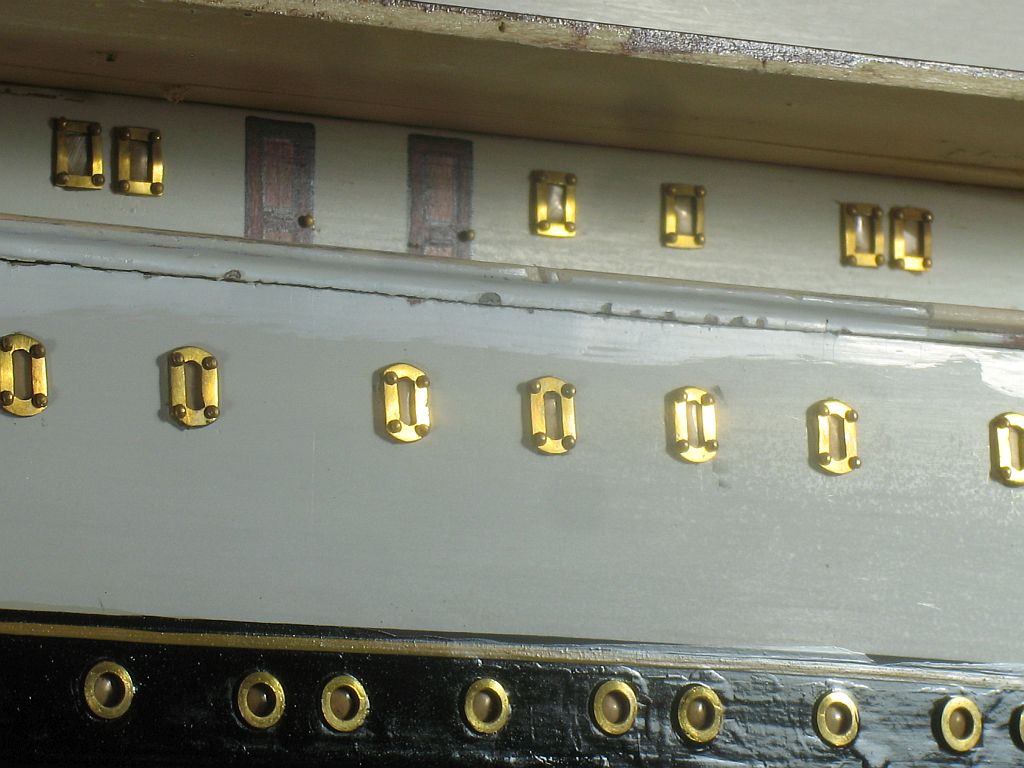
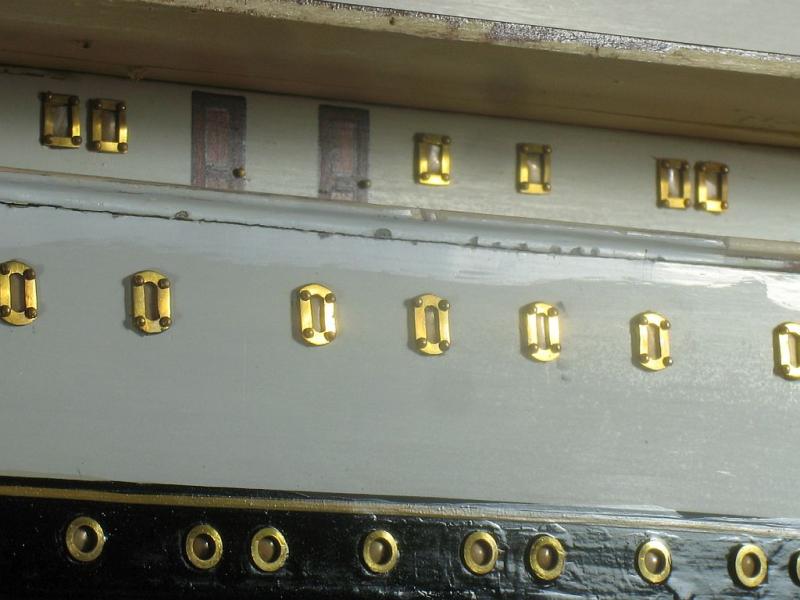
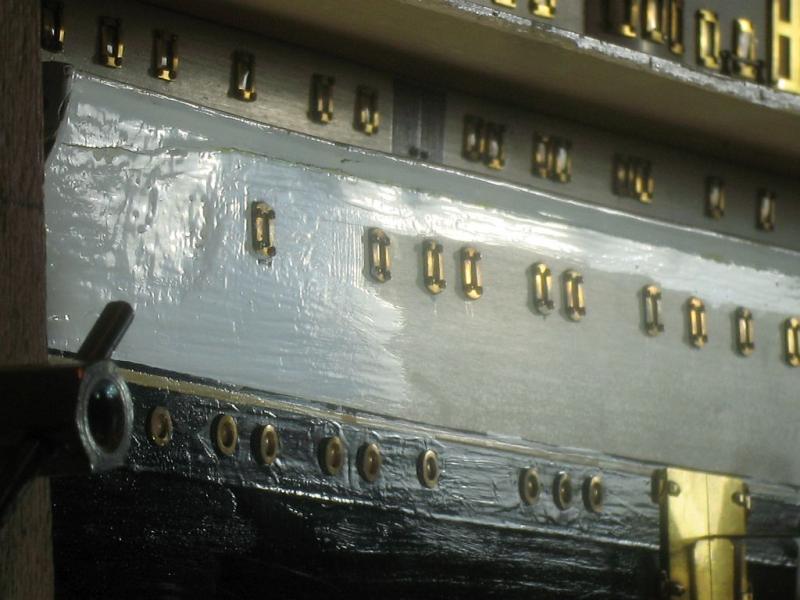
I once again want to thank all who are visiting this work. I am working on the painting of the sheet metal that will go back along the side under the boat deck. I keep finding evidence of earlier damage that was repaired. Here are a couple of pictures that are particularly relevant to the rework of the side because it fits so close to the previous repair work. The fracture line along the deck edge is the recent damage, you can see that the edge was repainted in the past, the color and patina difference is quite evident on close inspection. I am documenting this because I am concerned about the overall finish as my work comes together, because this earlier damage and repair was not apparent during the initial inspection. The other question is I am wondering when this earlier work was carried out. My guess is that it was carried out before the present owner took possession of it. and knowing the reputation of the owner before them I am guessing that the work was done potentially more than 30 years ago. My scope of work does not include reworking earlier repairs to a higher standard, so it is a little concerning. This particular edge is going to be right next to the reworked side sheet metal, I am going to make a couple of shaped detail sanding sticks in order to smooth out the fracture paint line and match the best I can the original slightly more satin finish of the original. there were two ports that were painted over during the first repair of this area I am considering replacing them even though they have been missing for some time. Michael
- 749 replies
-
- 18
-
-
- albertic
- ocean liner
- (and 2 more)
-
Mike that looks very good, incidentally what sort of camera are you using? Michael
- 452 replies
-
- 3
-
-
- cheerful
- Syren Ship Model Company
- (and 1 more)
-
MONTAÑES by Amalio
michael mott replied to Amalio's topic in - Build logs for subjects built 1751 - 1800
Brilliant results. You mentioned earlier that the journey and not the end was more important, your work shows that both are like hand in glove. Michael