michael mott
-
Posts
5,200 -
Joined
-
Last visited
Content Type
Profiles
Forums
Gallery
Events
Everything posted by michael mott
-
 It just occurred to me that my own little steam box was not new at all I had seen yours Hakan and forgot about it then built mine patting myself on my own back when it was your Idea all along. Credit where credit is due. Michael
 -
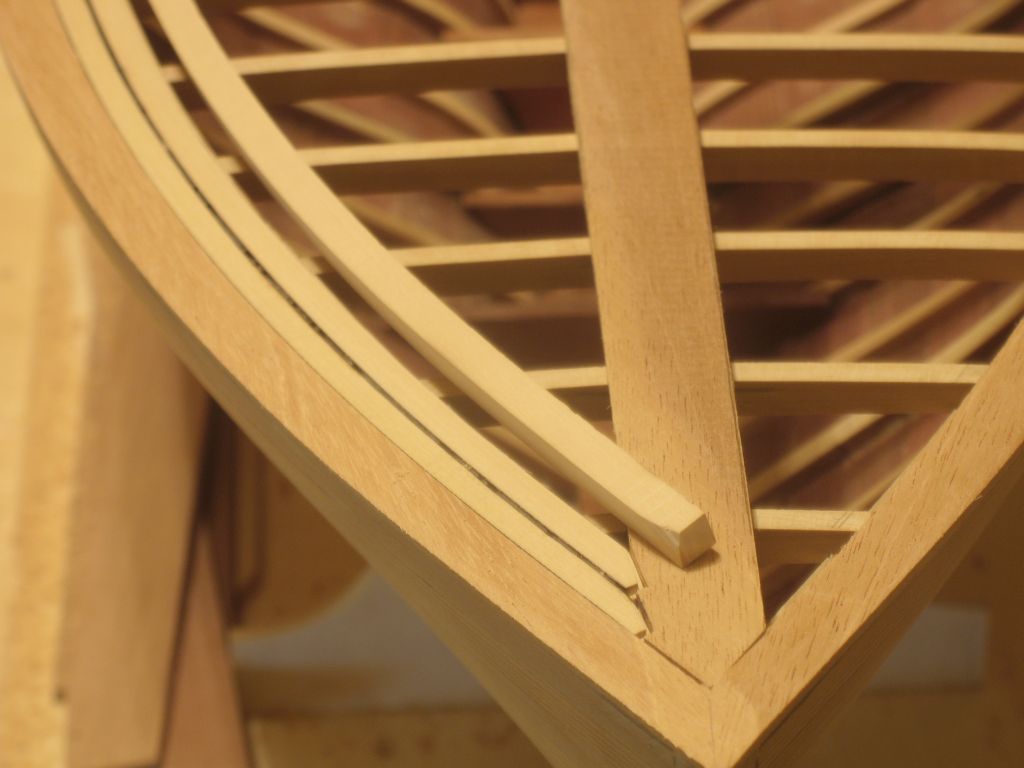
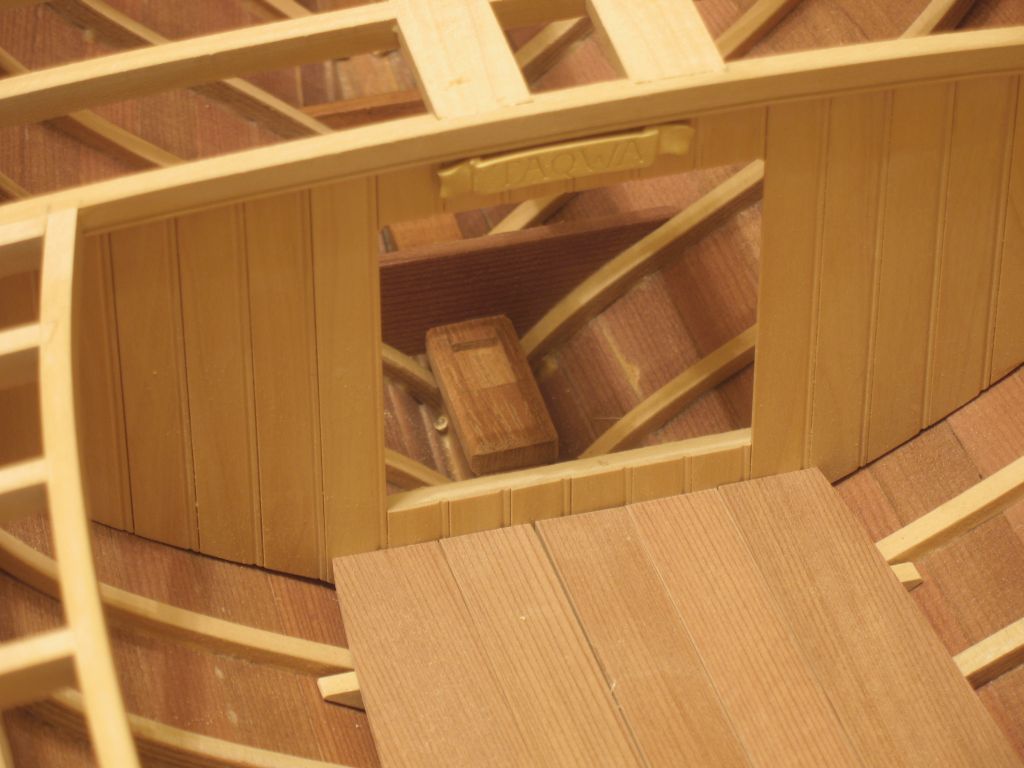
Thanks for the compliments and the likes and visits, they are really appreciated. Build part 32 I made a new scraping tool to create a rebate for the caulking it is scale 5/16 wide and 3/8th deep, after sanding the plank smooth the rebate is scraped on the inboard side. I mixed up some coloured Titebond III I used some Windsor and Newton Burnt Umber and Ultramarine Violet to make a deep brown, I think black is a bit harsh on small boats. The channel already has a fair bit of the glue filling it as a result of the initial liberal application of the glue with a brush. It will need further applications of glue done the same way as the caulking on the pilot cutter using a syringe, that will come when the planking is completed. I decided to nib the planks into the king plank. The next plank heat bent and ready for splitting, fortunately there are only 3 long planks on each side then they are much shorter so the scraping will not be a tiring on my fingers. I was a little heavy handed with my scraping tool and snapped off the corner of the blade so tomorrow I shall have to make another. Michael


-
Great to see the progress Hakan Michael
-
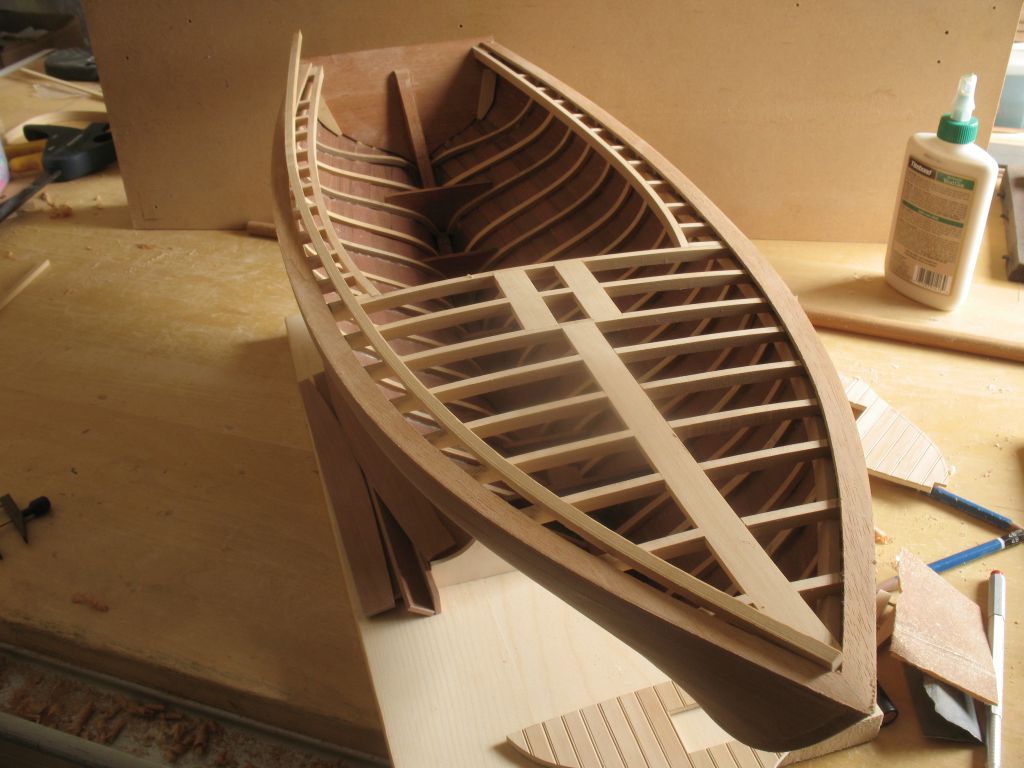
Thanks for all the likes. Build part 31 Thinking about the curved deck planks and the issues of bending wood along the wide dimension I thought I would see if I could split a square section along its length after it was curved. I used the heat gun to bend the Costello and then checked the curve I did leave a little spring in the wood. Then using the jewelers saw I cut it along its length, my saw seems to set the blade very slightly out of perfect alignment with the frame which makes it easy to cut a long piece. this was the longest single cut I have ever made with a jewelers saw, it cut very well. I will use this same technique for the rest of the planks. Michael
-
Thanks Pete, the reason I asked is to compare it to the gaff rigged mast. at the step it is elliptical 5 inches on one axis an 4 1/2 on the other tapering to round at the peak at 3 1/2. I think a Gaff mast is a bit heavier than a Marconi one, but I could be out to lunch on that. michael
- 258 replies
-
- 5
-

-
- buzzards bay
- herreshoff
- (and 1 more)
-
Nils, I like the way you approached the gypsies for the capstan. Fitting the chains into the larger blanks show the detail in principle better than after they have taken their final shape, which although still there are harder to see. Michael
- 2,625 replies
-
- 3
-
-
- kaiser wilhelm der grosse
- passenger steamer
- (and 1 more)
-
ancre La Salamandre by tadheus - 1:24
michael mott replied to tadheus's topic in - Build logs for subjects built 1751 - 1800
Paul, nice work shaping the mast. Michael -
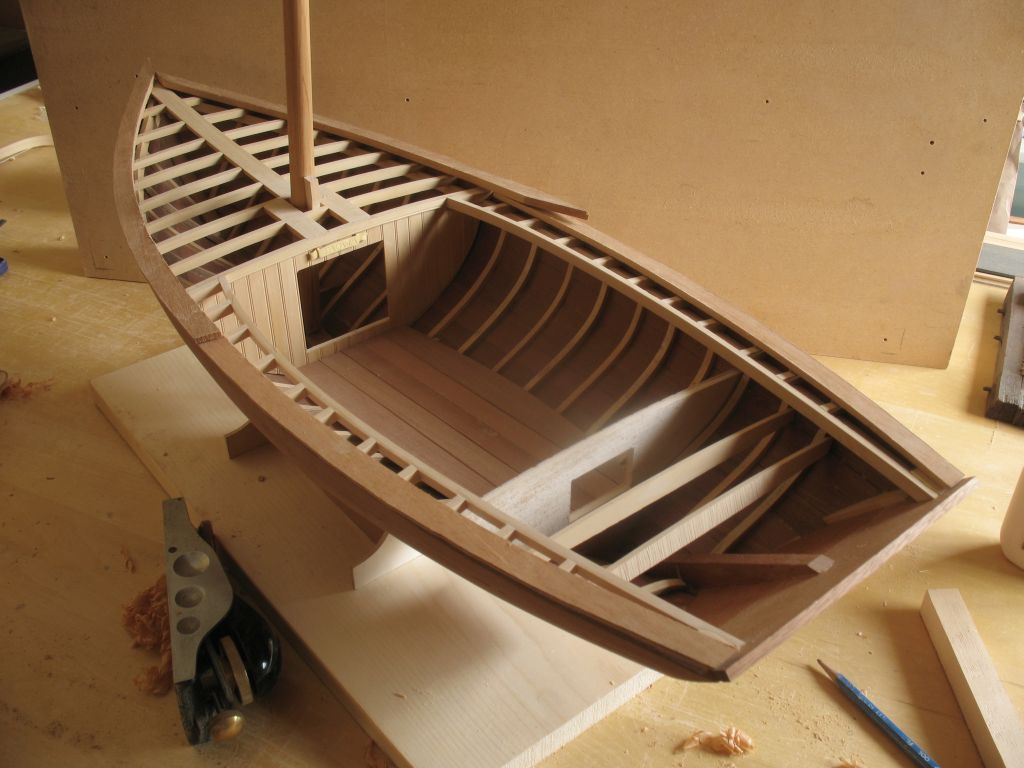
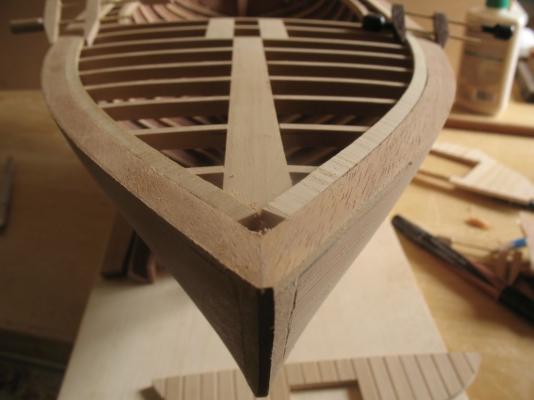
Thanks for all the likes. Build part 30 Today I made a start on the cover-boards they are cut from some left over mahogany coaming from Maria, the off cut already had the curve of the sheer a happy coincidence. The rough cut After further thinning to 3/4" thickness Michael


-
Pete I am curious about the scale dimensions of your mast and boom. they look great By the way. Michael
- 258 replies
-
- 5
-
-
- buzzards bay
- herreshoff
- (and 1 more)
-
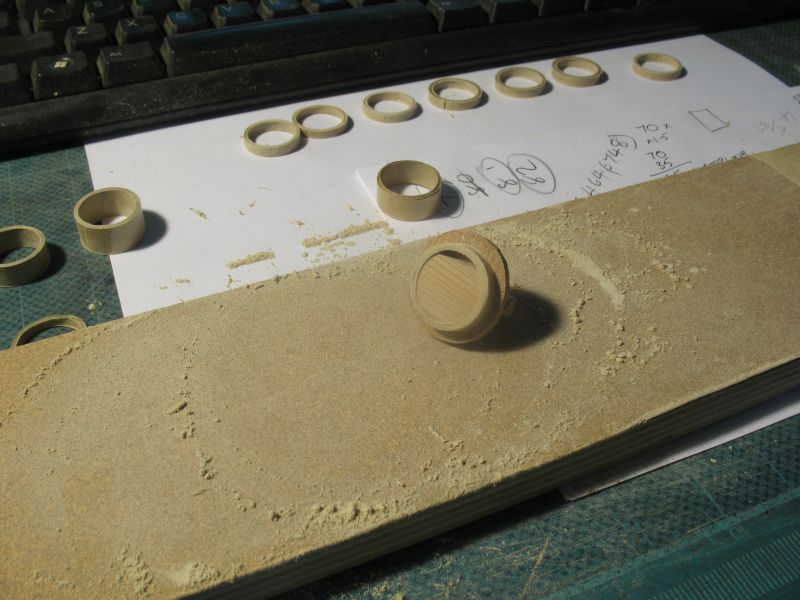
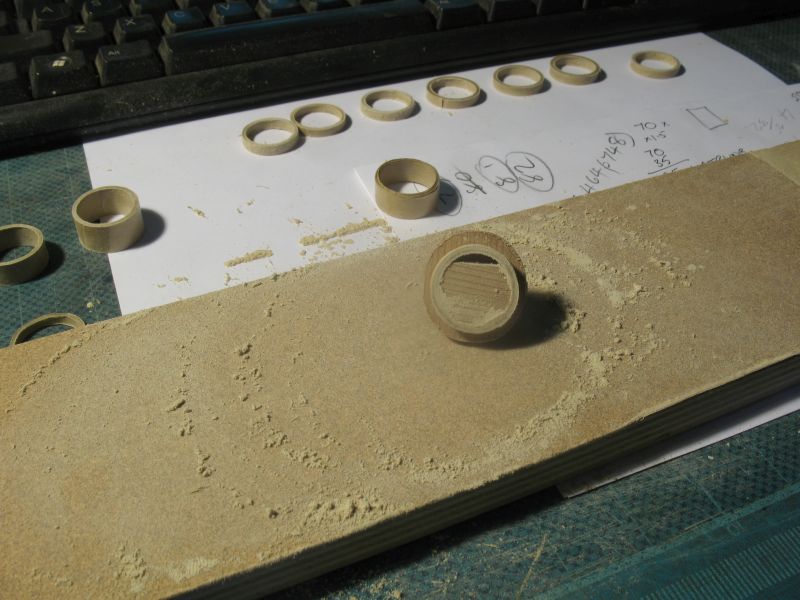
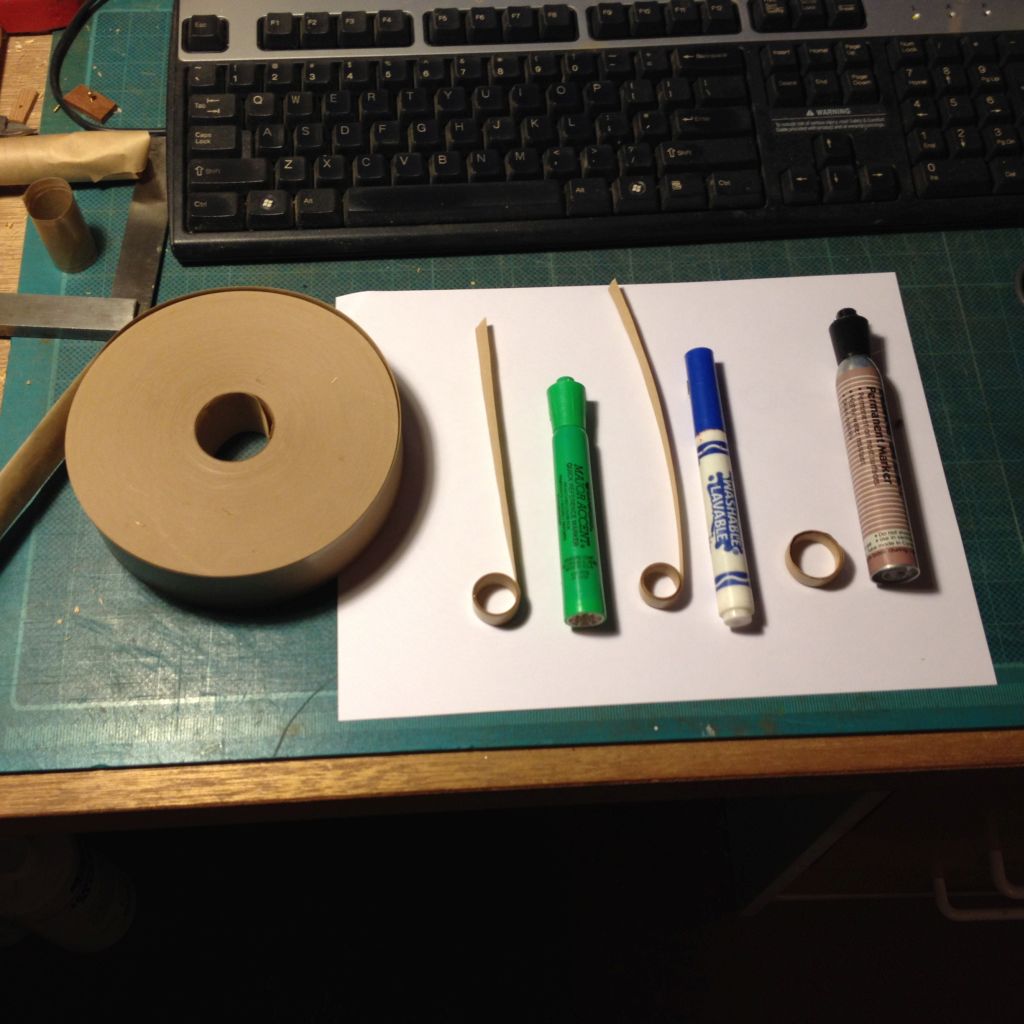
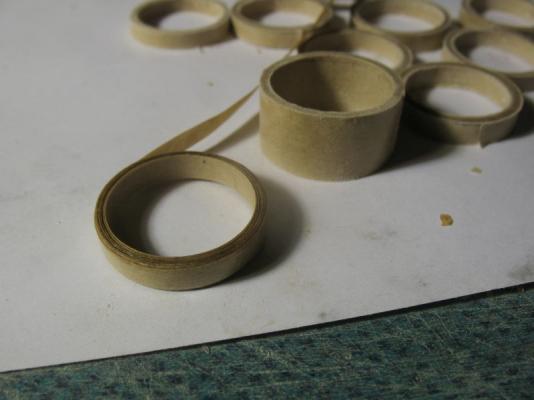
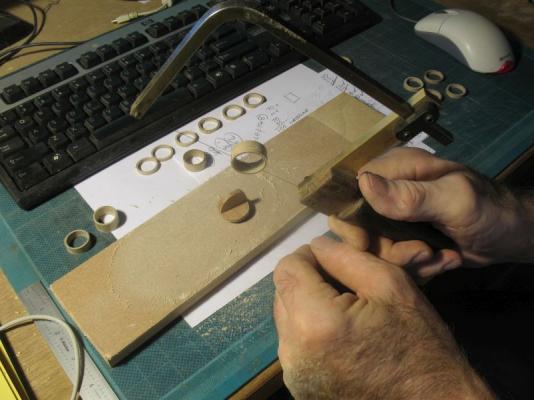
Druxey, Ed, and all thanks for the comments and the likes. Thinking about this method further and the issue of cutting freehand with a jeweler saw the easier method is of course to not have to cut them at all. It becomes a matter of finding the right tapered mandrel. There are thousands of old pens out there folks. a smaller pen works just as well the trickiest part of the whole operation becomes the first layer because the tape is upside down, if the mandrel was waxed then I suppose the tape could be used the tradition way. The smallest ring is 6.5 mm or just over 1/4 inch a sanding holder really helps with the edges before any other shaping is done. michael
-
Hi Druxey Holding the 1/4 inch wide ring between the thumb and index finger is actually much easier than it looks , the back of my hand is actually resting on the edge of the table. As my jewelers saw cuts on the pull I have a lot of control over the actual cut by keeping the saw just cutting on the tangent and gently allowing the blade to pull it round a little after a few strokes the cut stays well centered, when it finally does cut through it moves to the middle easily but in a smooth motion. The feel of the blade working is also part of the operation. The round gizmo is a simple holder that the ring just fits over and by putting a little pressure on it as I move the holder in a circular motion it sands the surface of the ring that is facing the sandpaper. after a few swirls I lift it off the holder flip it over and sand the opposite side until I get down to the surface of the part that is inside the ring. the upstanding part is just the handle. This is the way I am able to sand them to thickness without wearing away my finger tips I had thought about doing this as a video which might actually be better than just stills, perhaps i will do that tomorrow morning. Regards Michael
-
Hi Jeff, I am sorting out how you cut the tube, am I correct in that you cut the tube by rotating it in the v slot sort of like a miniature tube cutter, or am I missing something? Michael
-
Not to mention the Accuracy needed to pull that off. Michael
- 641 replies
-
- 6
-
-
- greenwich hospital
- barge
- (and 1 more)
-
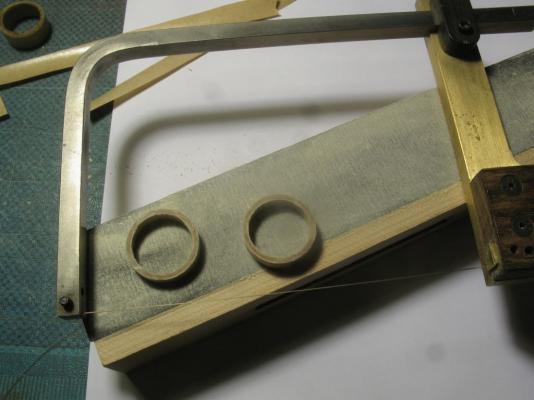
Thanks for the likes and visits. After a slicing through a few hoops, I thought that a couple of pics of the sequence might be useful. I did find that the best way to cut the rings was to go round the perimeter a few times this ensures that the cut is even. the rings were sanded with a simple sanding fixture in a circular motion Checking for the correct thickness next the rounding is done with a sanding stick. Michael


-
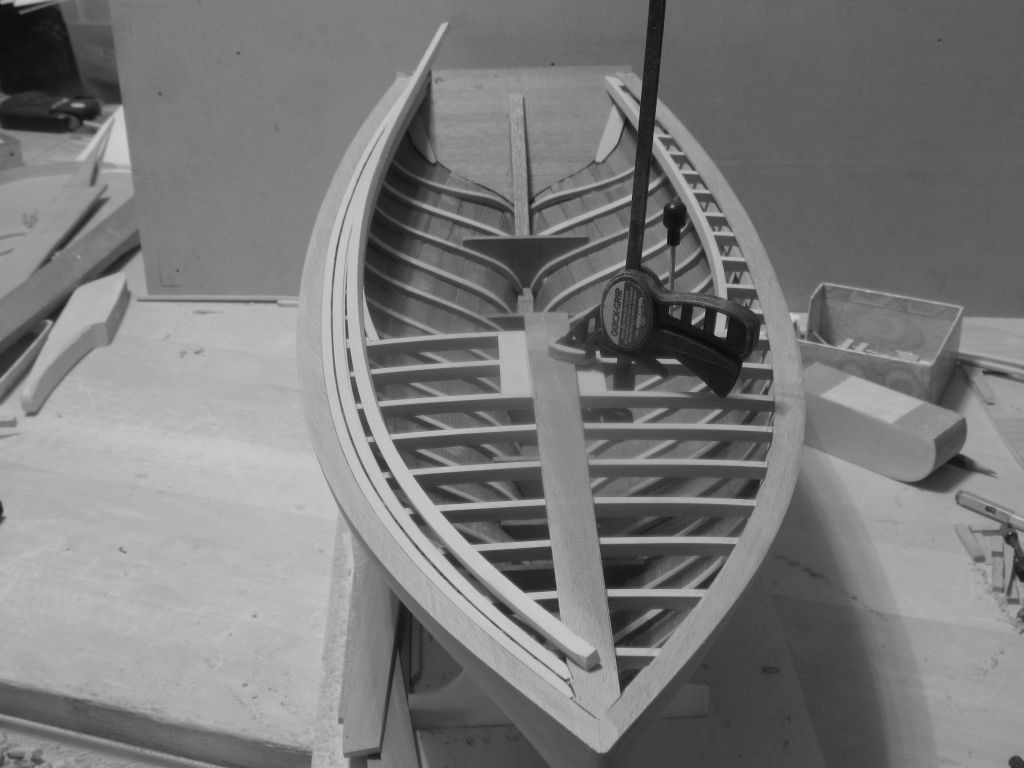
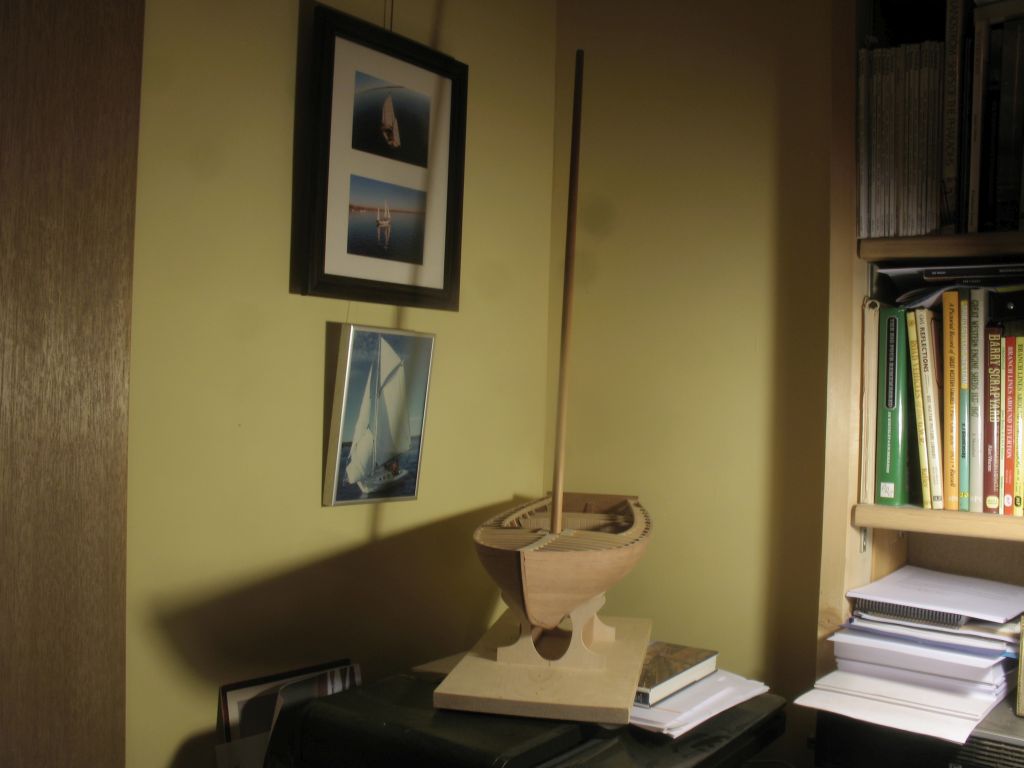
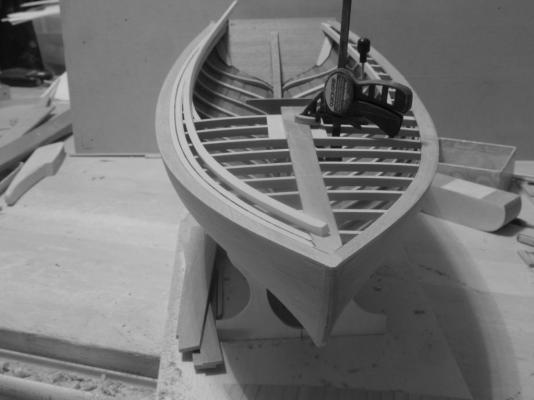
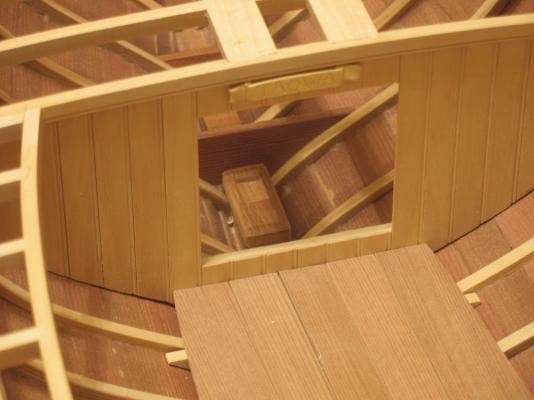
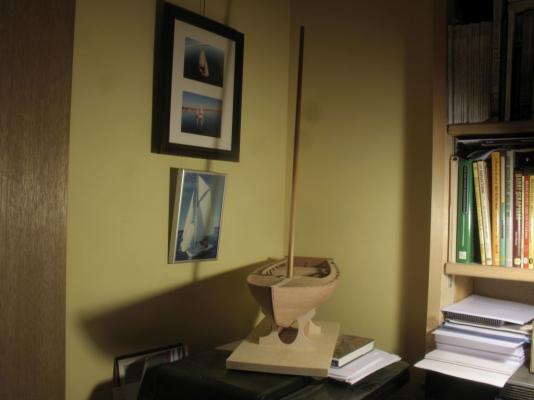
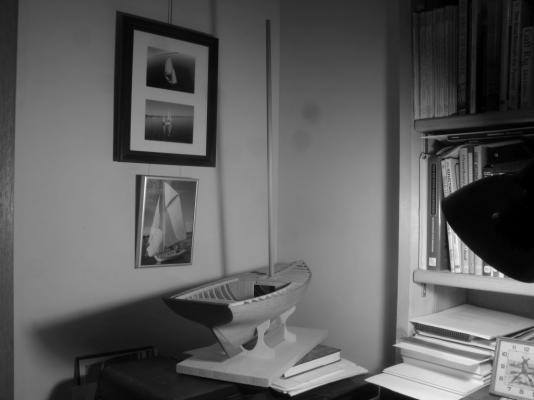
Thanks for the kind remarks and the likes. build part 29 I made the mast today, I decided on a cedar one, it was a matter of having the right piece with the right grain. it is also quite light but strong. Strong enough for a model and I particularly like the colour. I made the mast step from some 1 1/2 mahogany and cut a 2 1/2 inch x 4 inch recess 1/2 inch deep the blocking is also now installed port and starboard, I still need a block aft of the mast. then I can begin installing the deck planks. Michael
-
Albert, looking at your joinery is inspiring and shows me what is possible. You set an example for me to see how well it can be done. Michael
-
Very nice work on the anchors Piet, you must be pleased. Michael
-
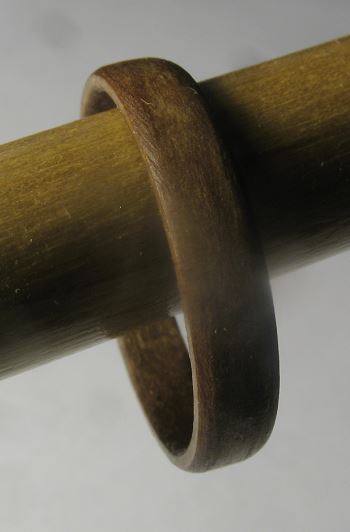
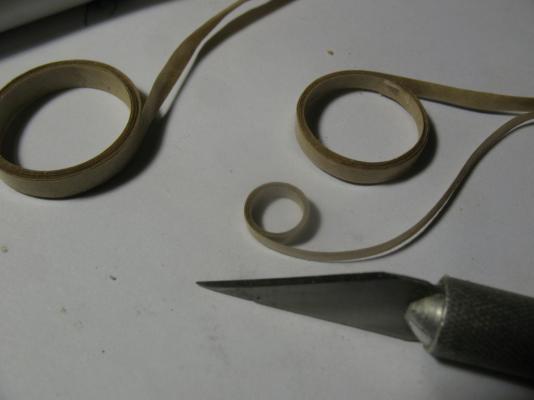
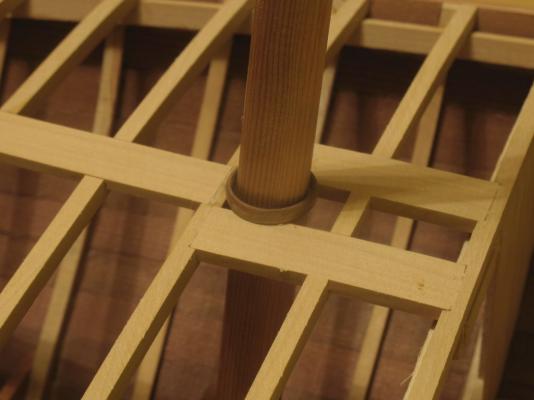
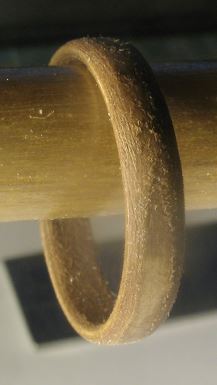
Thanks for the visits and likes. build part 28 The experiment is a go as far as I am concerned I need to make 10 more. step 2 was to cut the ring in half which I did with the jewelers saw with a #3 blade (very fine) the next step was to rough shape it with a sanding stick with some 220 wet and dry this was then coloured with a Prismacolor dark brown felt marker, then polished up with some Trewax a clear carnauba paste wax. I hung it on a varnished paint brush handle to see it is a context. Michael

-
Mehmet I like the detailing that you have done to give this model a well worn but maintained look, I wonder if displaying it on a piece of beach by the edge of the water would be a fitting way to display it? It seems to be more suited to that sort of display than a typical cradle. Michael
- 83 replies
-
- 4
-
-
- sponge boat
- finished
- (and 1 more)
-
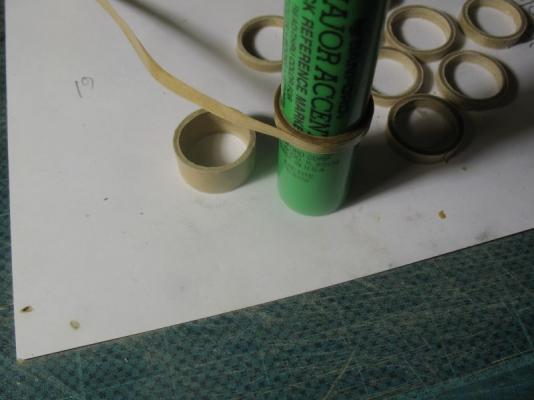
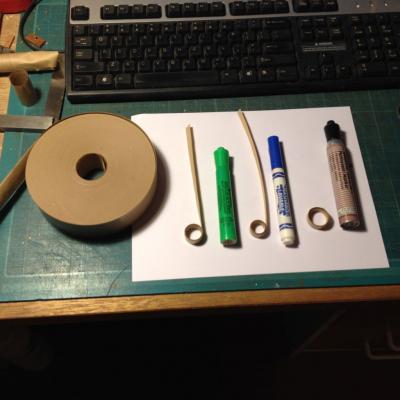
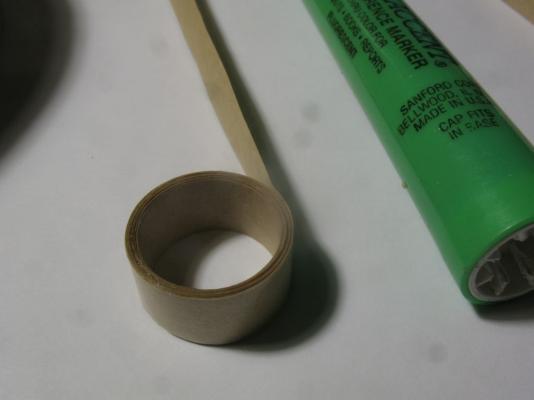
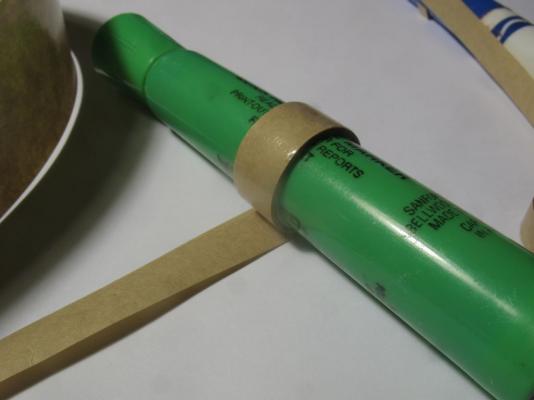
While waiting for things to dry I remembered a method I used for something else regarding some mast hoops. So an experiment to test the strength and look of some laminated hoops. I have a large roll of Butchers tape or Gummed paper. I cut the paper into 4 strips aprox 1/4 inch wide by 3 feet long. I discovered that the green highlighter pen is very slightly tapered, almost imperceptible this worked to my advantage by allowing the loop to become wedged after a couple of turns. I glued the strip on so that the glue was on the outside which made it easy to moisten. tomorrow when it is good and set I will see how it cleans up and whether it will work as a ring. I might end up making them just a little larger then cutting them with a scarph joint and using a copper rivet. Michael
-
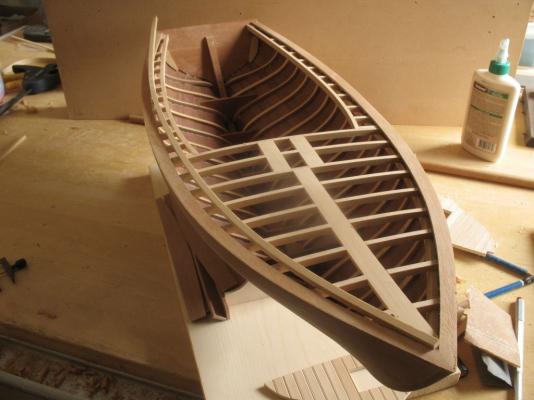
Glenn thanks, I will be getting back to this, I have been using the Herreshoff to get a better handle on planking. The hull of Skipjack has 11 strakes and has a canoe stern as well. Once the weather warms up a bit and i can comfortably work out in the shop it will be easier to proceed with the engine as well. Michael
-
Nice, now one doesn't see shingles on too many small vessels, on the small roofs of the galleries on the sterns of some of the big three masters yes, but Denis you are breaking new ground here. Michael
-
Cutty Sark by NenadM
michael mott replied to NenadM's topic in - Build logs for subjects built 1851 - 1900
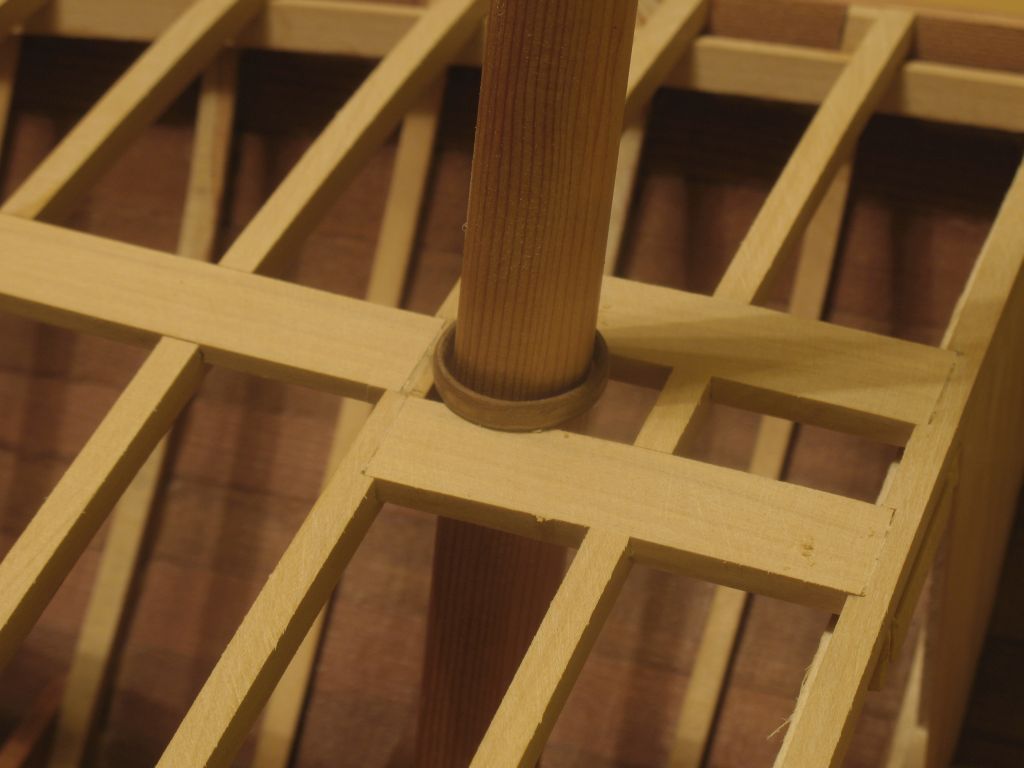
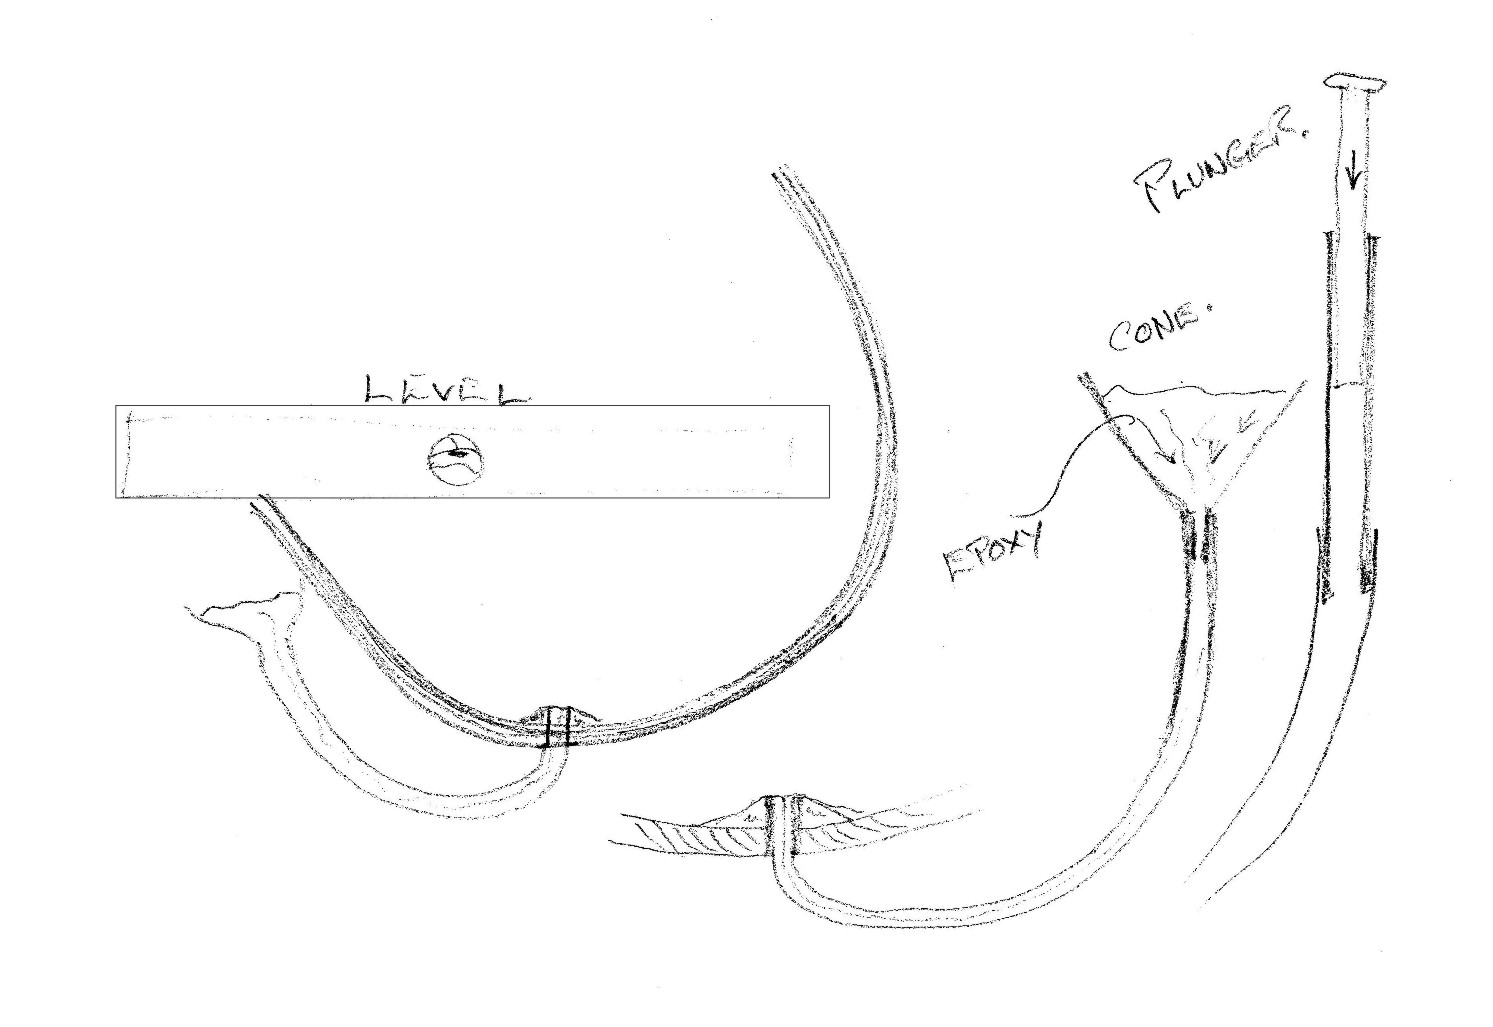
Nenad Thinking about your hull mounting I wonder if a small dowel with a hole through the middle and some hose or tube connected to it like this diagram then if you were to force some epoxy down the tube it would overflow inside and create a large washer like surround. similar to a wall mount in plasterboard. Just an Idea. Michael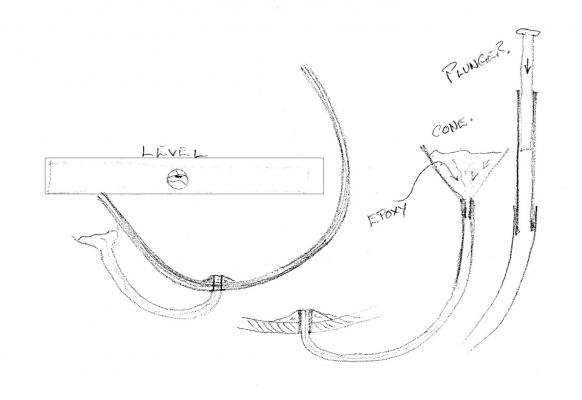
- 4,152 replies
-
- 9
-
-
- cutty sark
- tehnodidakta
- (and 1 more)