michael mott
-
Posts
5,200 -
Joined
-
Last visited
Content Type
Profiles
Forums
Gallery
Events
Everything posted by michael mott
-
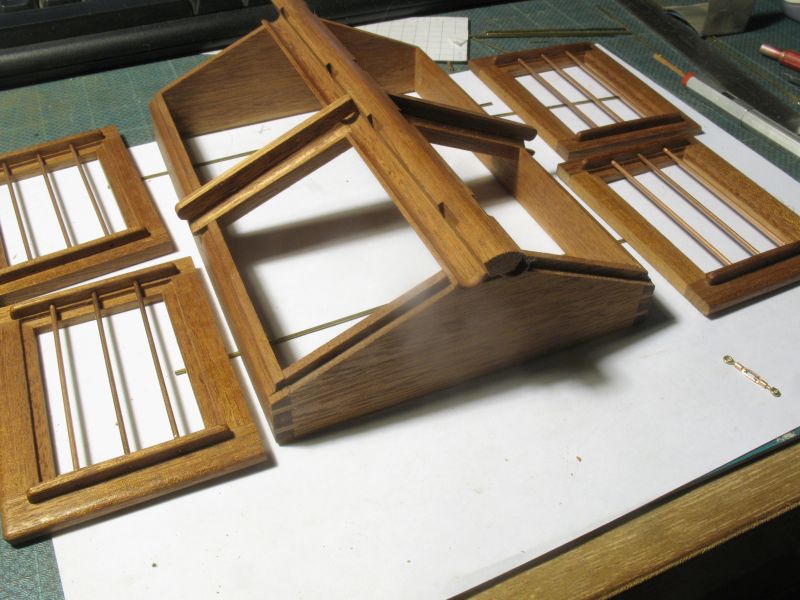
 Thanks again for all the positive feedback. I gave the skylight parts a quick coat of Tung Oil last evening and am pleased with the results. Today i shall see about the hinges and the other internal hardware and the Lexan. Michael
-
Great to see you back in the shipyard Hakan, The clamps look good too. Michael
-
I will be following along too Jack, I must say I am partial to peaceful work and recreational boats.. Michael
- 203 replies
-
- 6
-

-
- artesania latina
- marie jeanne
- (and 1 more)
-
I am pulling up a chair to watch this one Marcus. Michael
- 165 replies
-
- 5
-
-
- cape cod catboat
- Finished
- (and 1 more)
-
Andrew thanks for the reference pics they are great. Michael
-
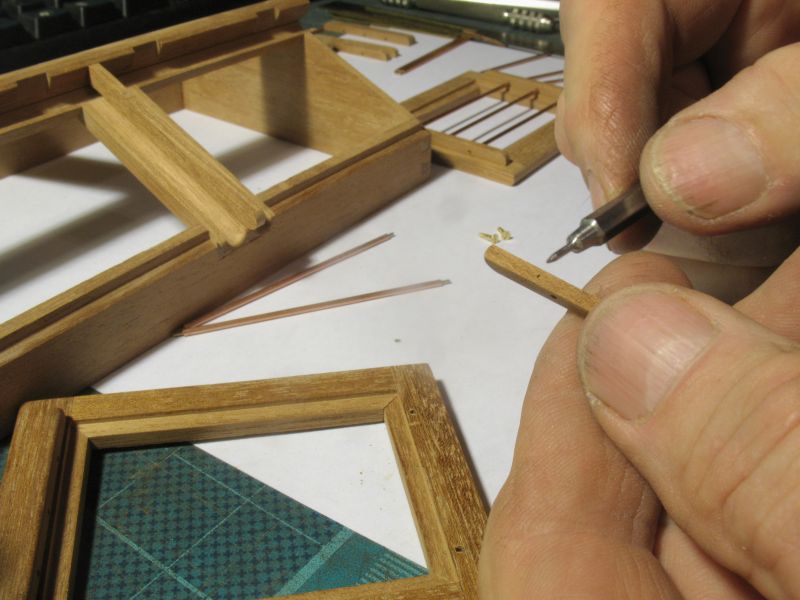
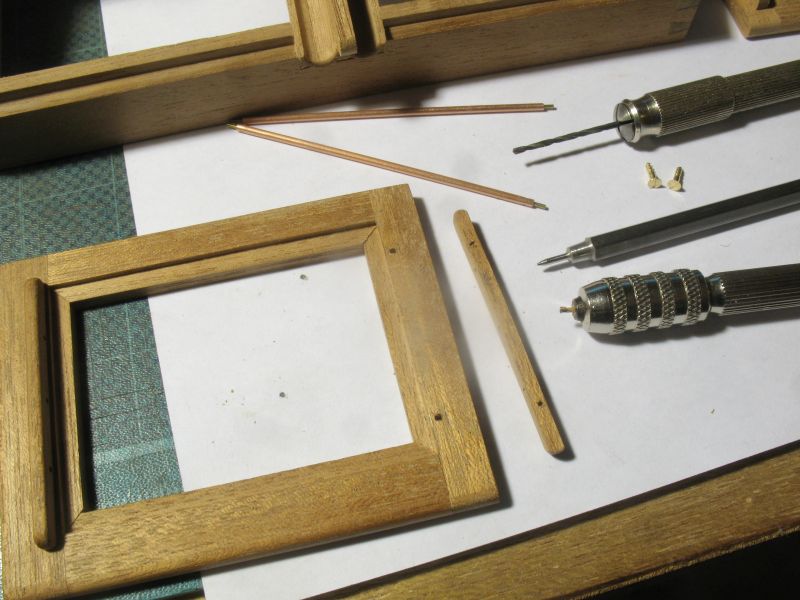
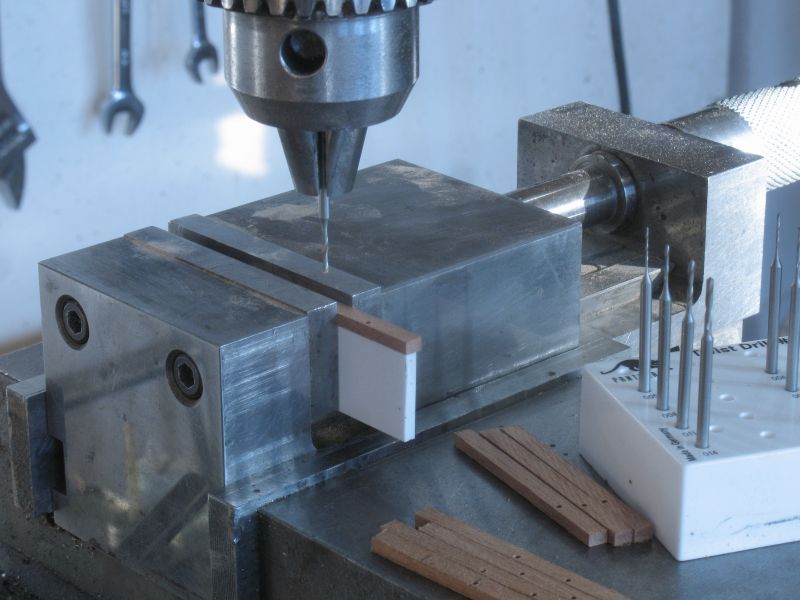
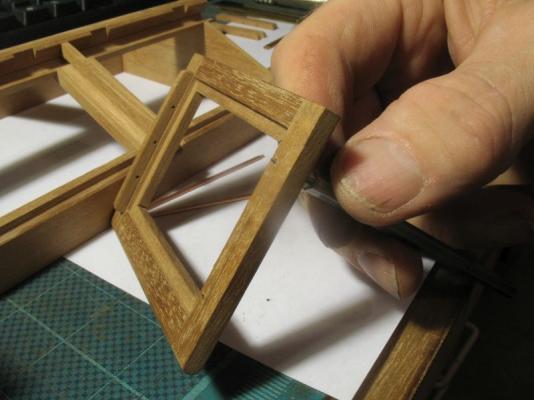
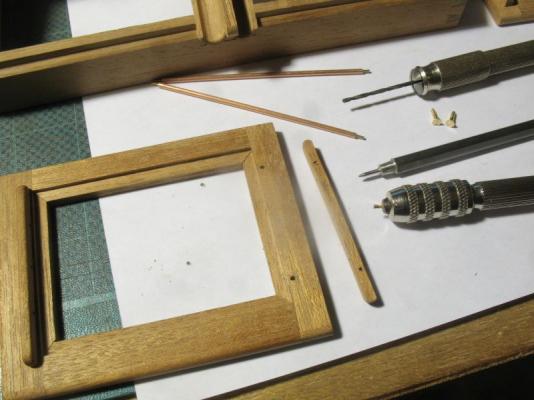
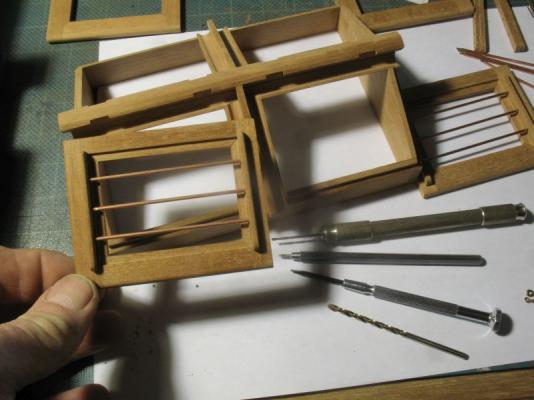
John, Pete, thanks for following along and all who have visited and liked what I am doing. In order to be able to set in the Lexan after every thing is varnished I needed to be able to fix the cleats with the bars afterwards, fortunately I had some very small brass flat head wood screws, I purchased them from Lee Valley page 203 they are #0 x 1/4 Step 1 was to make a small self centering awl for transferring the hole position to the cleat. I used a bit of 3/16 steel hex stock I had on the rack. after they were marked I used the same awl to make the indent larger for the #60 drill the next pic shows all the tools for setting the holes. I did have to countersink the frames so that the screws had enough purchase on the cleats I did this with #33 drill just twirled it between my fingers. seems to hold well enough. one down three more to go


-
Excellent Andrew that looks fantastic. Michael
-
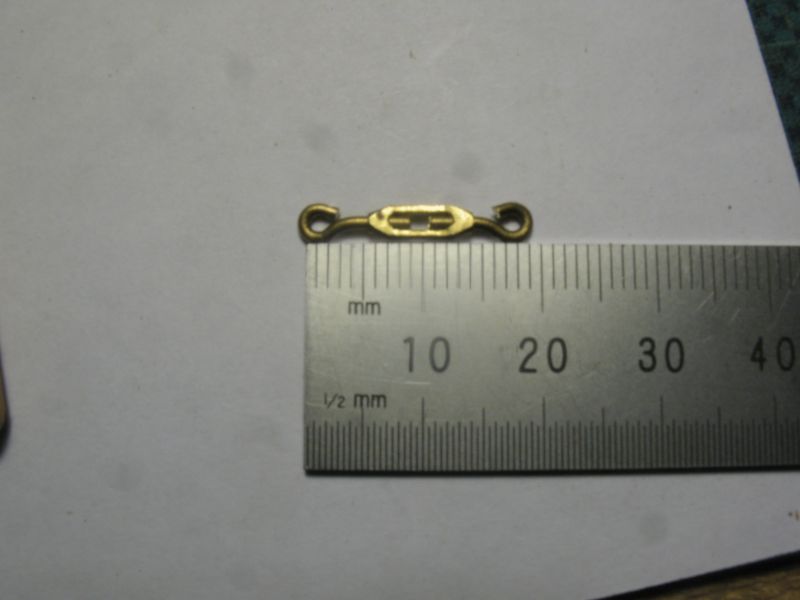
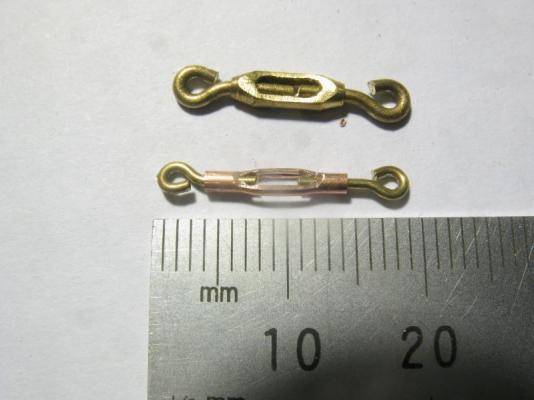
That looks great Andrew, and here is a further quick fake with some 1/16 copper tube and some 1/32 brass rod alongside the first one, unless the turnbuckles need to actually work this method would work well. Michael
-
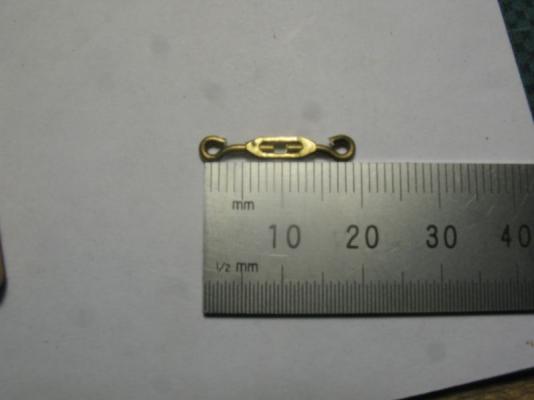
sailboat 392, you can easily modify the Turnbuckles that Andrew has used by filing away some of the body on each side like this I could not find the ones I originally had so this is a quick fake. but I have done this to the same ones that Andrew showed. Michael
-
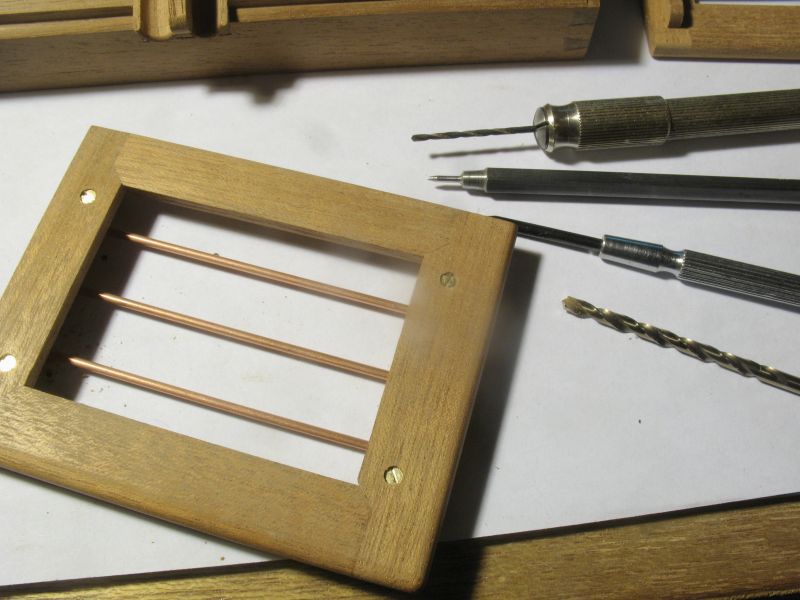
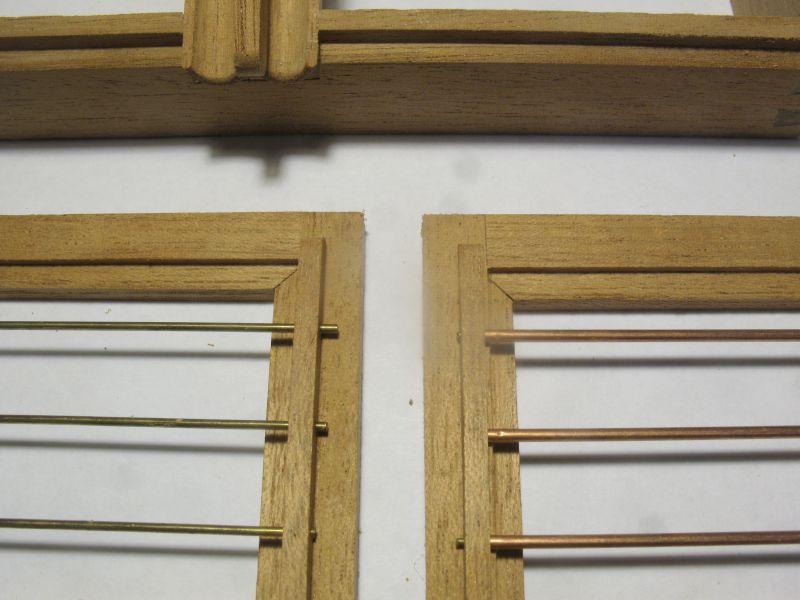
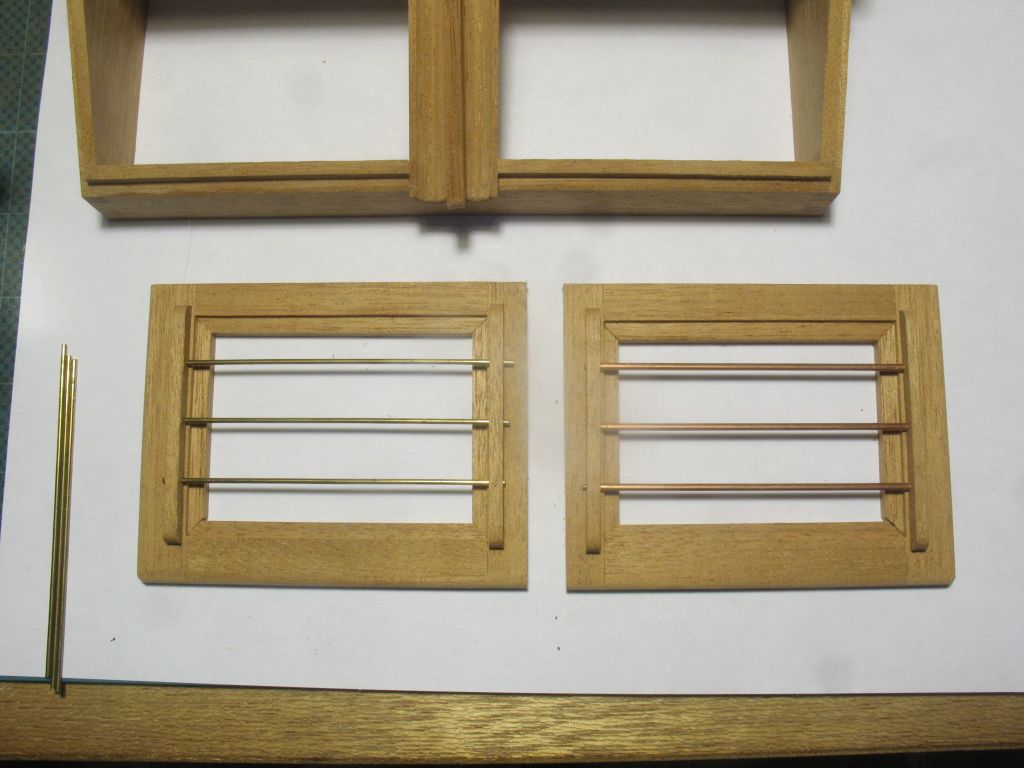
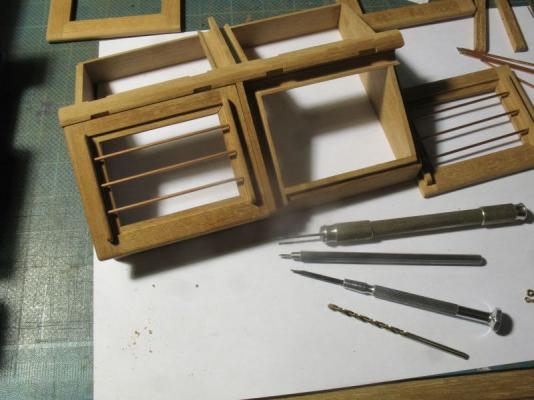
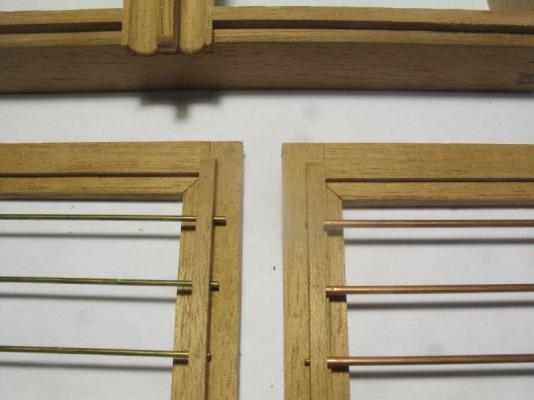
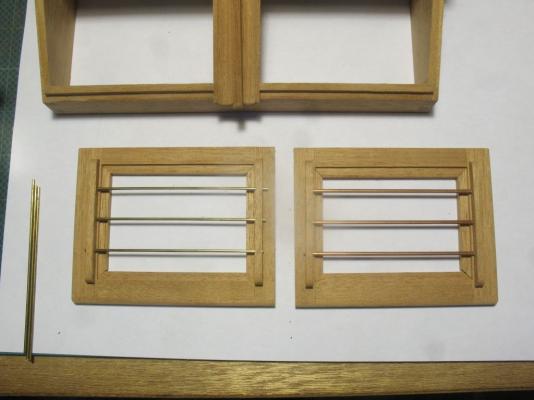
Druxey, Bob, Ian, Steve, thanks for your positive comments, and all who pressed the like button. I finished rough sanding the four lights and am starting to work on the cleats with the bars that protects the Lexan. after cutting the cleats they were drilled with an .046 drill to accept some 3/64th brass rod 3/8 scale size. the cleats were then given an initial shaping, by stacking them on foundation with 2 sided tape to sand them after assembling the first one the bars looked a bit small so I up sized them to 1/2 inch (1/16) but did not want to re-drill the holes. after cutting the copper tube to length I inserted some 1/32 brass rod in each end and gave the tube a gentle squeeze with some round nosed pliers to hold the rods in place. I am thinking that the copper looks better anyway. Michael
-
Gerald, I see no reason that your modelwork would not fit into the scratch build log section, I am pretty sure that metal was not listed on the header simply as an oversight. I would like to see you posting here. Michael
-
Andrew perhaps you could just start at the bow and work toward the stern, post a few at a time with a description. Michael
-
An obvious concern for your safety Ed shown by the above posts. We all get more or less comfortable with the methods we choose to work with. My own thoughts when seeing your set up was one of less concern about the exposed blade than a snag caused by a slip of the clamps. I only use spring clamps where any slippage is not critical. my preference is always a screw type clamp when clamping to a substrate for milling or sawing with the mill with lateral movements. when cutting vertically with drill or mill a back stop to prevent rotation is either clamped with screw clamps or wood screws. Then a spring clamp for me would be OK. Regards Michael
- 3,618 replies
-
- 6
-
-
- young america
- clipper
- (and 1 more)
-
Cutty Sark by NenadM
michael mott replied to NenadM's topic in - Build logs for subjects built 1851 - 1900
Nenad that looks like a great challenge, perhaps you can do something along the lines of what Dan did on the funnel like this Michael- 4,152 replies
-
- 9
-
-
- cutty sark
- tehnodidakta
- (and 1 more)
-
Cutty Sark by NenadM
michael mott replied to NenadM's topic in - Build logs for subjects built 1851 - 1900
Ah! Nenad you have discovered why I work in 1:8 and not 1:92... it is much easier. Michael- 4,152 replies
-
- 5
-
-
- cutty sark
- tehnodidakta
- (and 1 more)
-
Hi Dimitris, I just finished going through you entire build, what a great job you have done with the ship so far. Great to see the youngster looking so happy, those are indeed very special moment that I am sure will be remembered long into adulthood. Michael
-
Andrew I beg to differ on this point. some of us drool at pictures like that Nice work on the kit model by the way. And yes I to am looking forward to your getting into the scratch building of one of these beauties, I think you should build it to 1:8 scale that way it would be 28 1/2 inches long which would be stunning. I would also think that 1:12 would be nice too at 19 inches. Michael
-
Looking forward to seeing the planking... perhaps a couple of pics before you complete the planking.... just sayin' since you are clipping along at such speed. Michael
- 258 replies
-
- 4
-
-
- buzzards bay
- herreshoff
- (and 1 more)
-
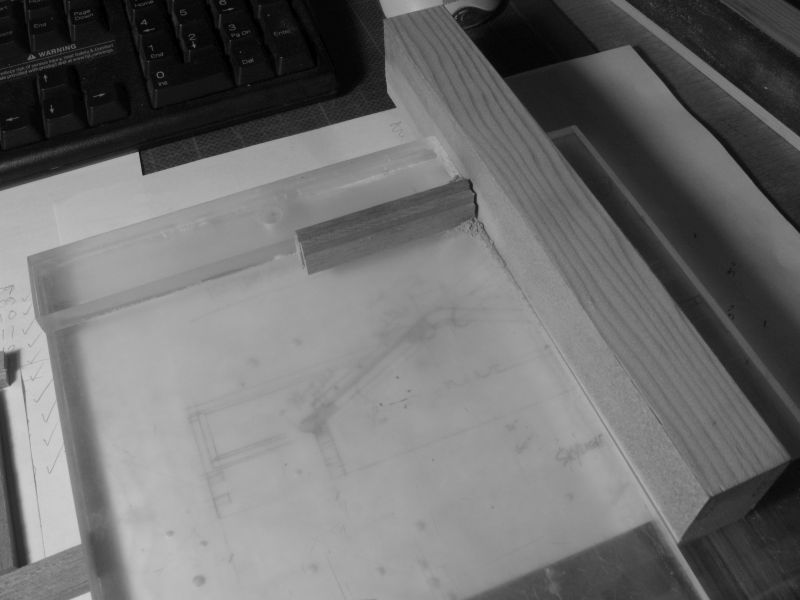
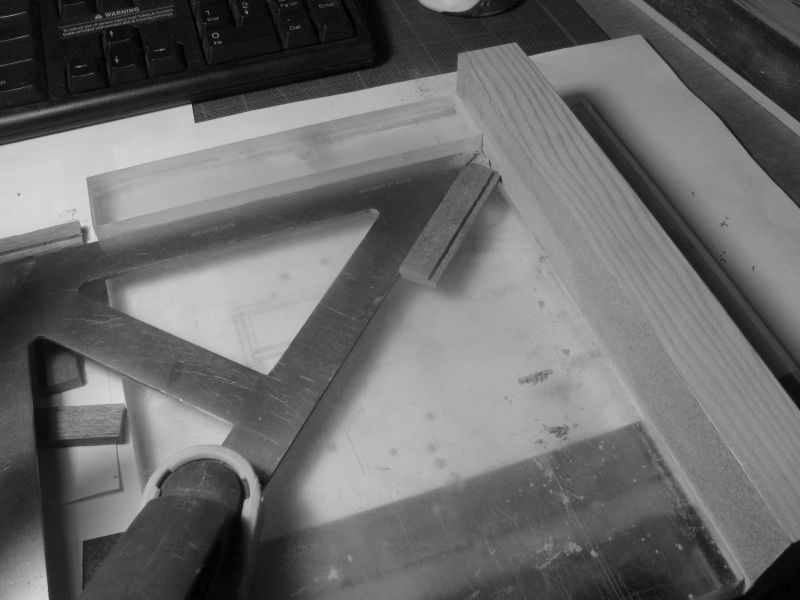
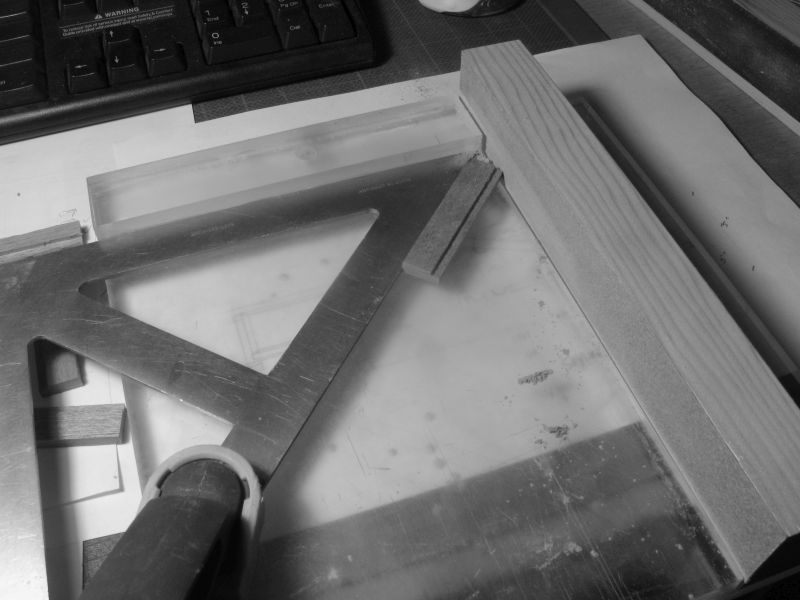
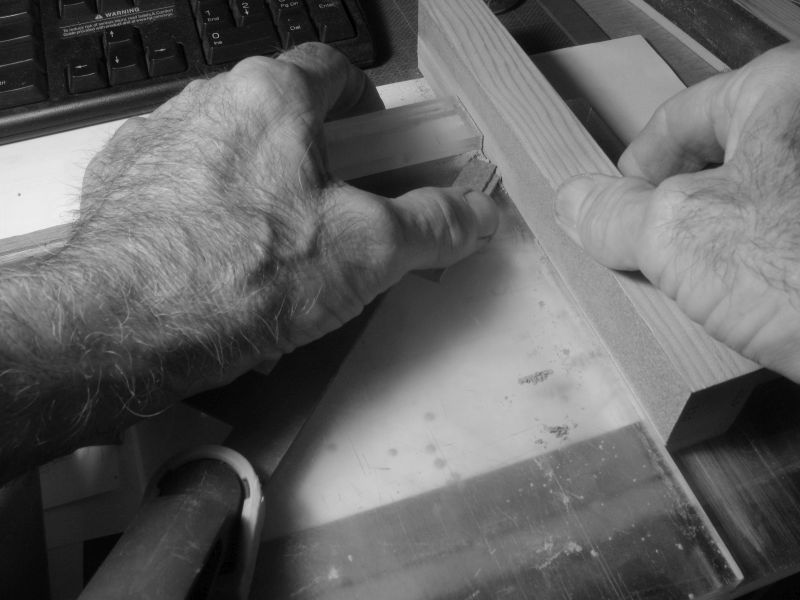
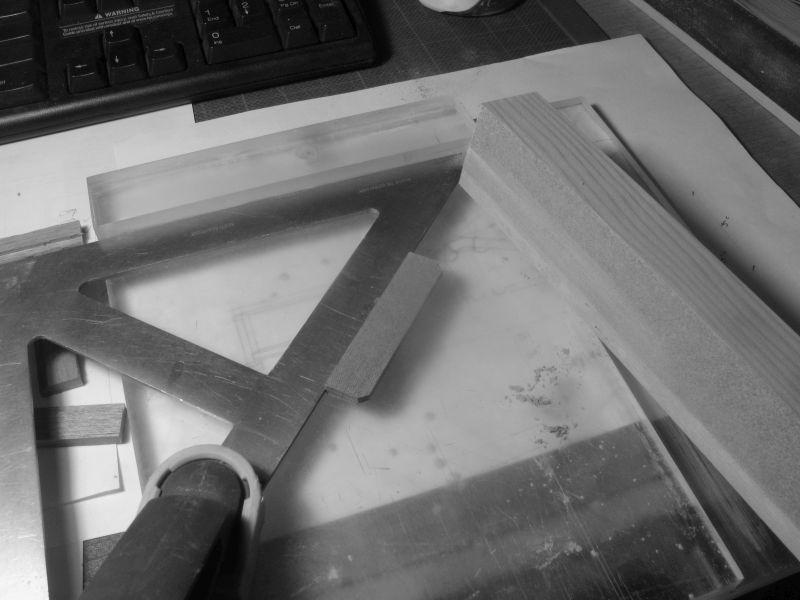
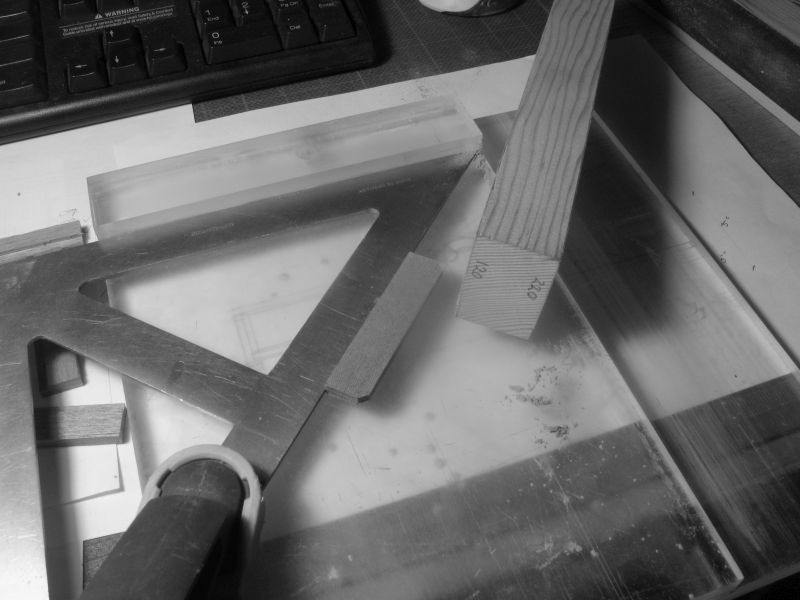
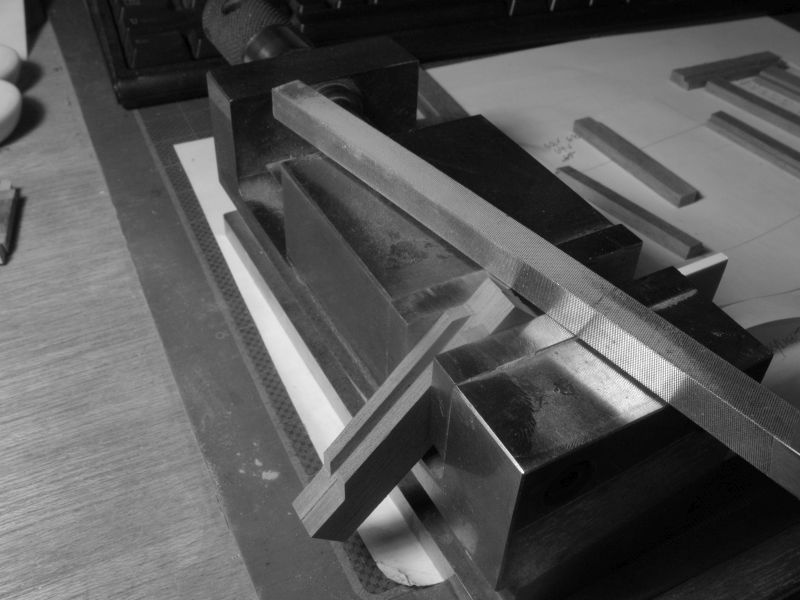
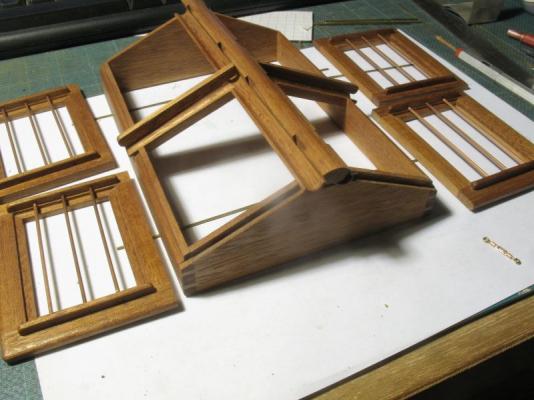
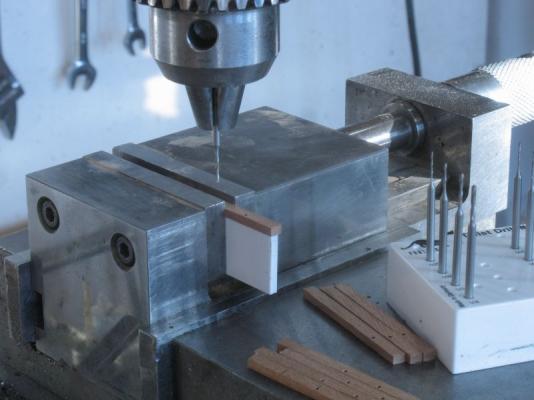
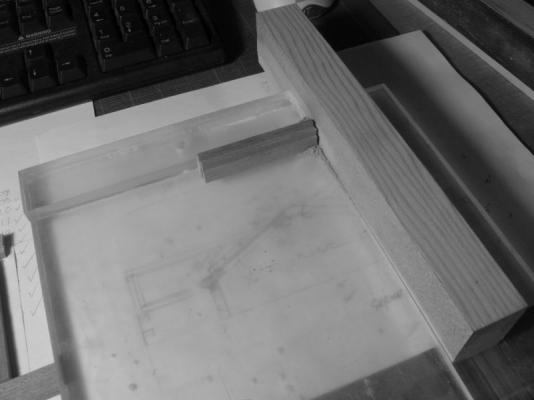
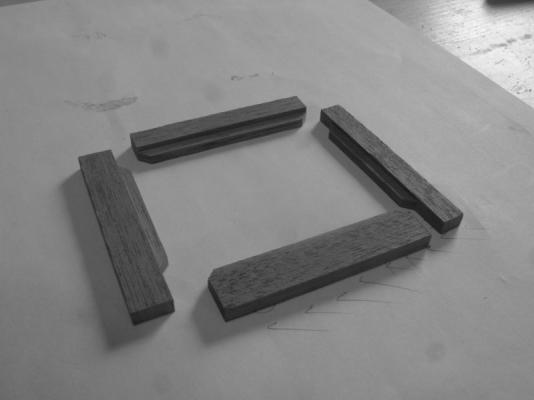
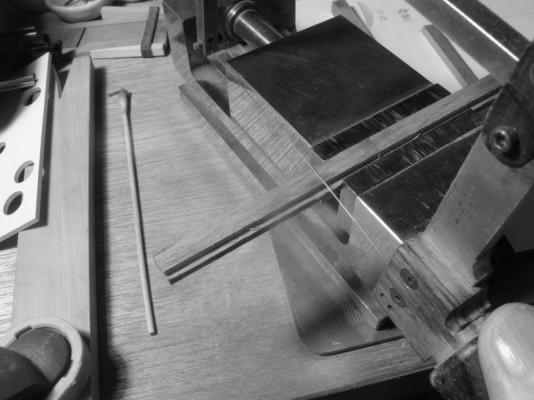
Thank you all for the positive feedback. Here is a Step by Step of the preparation of the light frame for the skylight. The way of working at the computer desk is different that in the workshop in that I am only able to use small hand tools at the desk. With a little preparation a high level of accuracy can be accomplished with simple tools. To be fair I started with a few strips that were prepared in the shop on the table saw. the first task was to cut the profile to length, using the square vice that I use a great deal for both machine work and hand work. the design of the vice is almost the same as this one with the exception that mine has a dovetail slide and I made it myself as an apprentice 52 years ago. Next the lengths are squared up using the shooting board hooked onto the edge of the desk with a sanding stick instead of a block plane. The sanding stick has the sandpaper set in such a way that the sandpaper cannot wear away the shooting board by removing a strip from the bottom like this. I have a number of these sticks made from scraps of dimension lumber such as 2x4 the section varies depending on what I have available but I like to keep enough material so that is stays flat and square on the board. a little candle wax keeps them well lubricated on the bottom. I also generally use both sides each a different grit. I mark the ends for quick reference. To cut the 45 degree corners on the top and bottom rails I just clamped a steel 45 degree square to the shooting board. The way I use the board is to shift the work out a little so that I can see how much will be sanded off like this you can see there is a gap close to the stop. After sliding the stick back and forth a few strokes the stick ceases to cut like this Rinse and repeat as much as needed to remove the require amount, this works much faster that one would first think, I use this method far more that a powered sanding disk. The next task is to cut away the areas on the vertical sides this is done by transferring the angle to them from the top and bottom rails then cutting away the waste with the jewelers saw. The cut pieces were then cleaned up with the square file that has 2 edges polished smooth as safe edges this is one of my favourite files. then they are ready to be glued up. Michael


-
Ergonomically it makes sense the way it is from a balance point of view, one step higher and then it would be easier to lose your balance swinging over the rail. because you would be too high. Nice profile Chuck. Michael
- 1,051 replies
-
- 4
-
-
- cheerful
- Syren Ship Model Company
- (and 1 more)
-
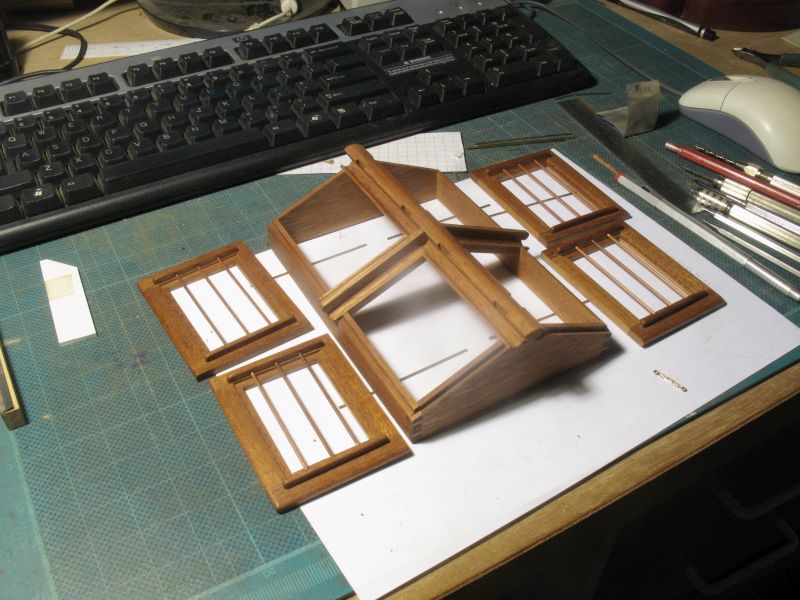
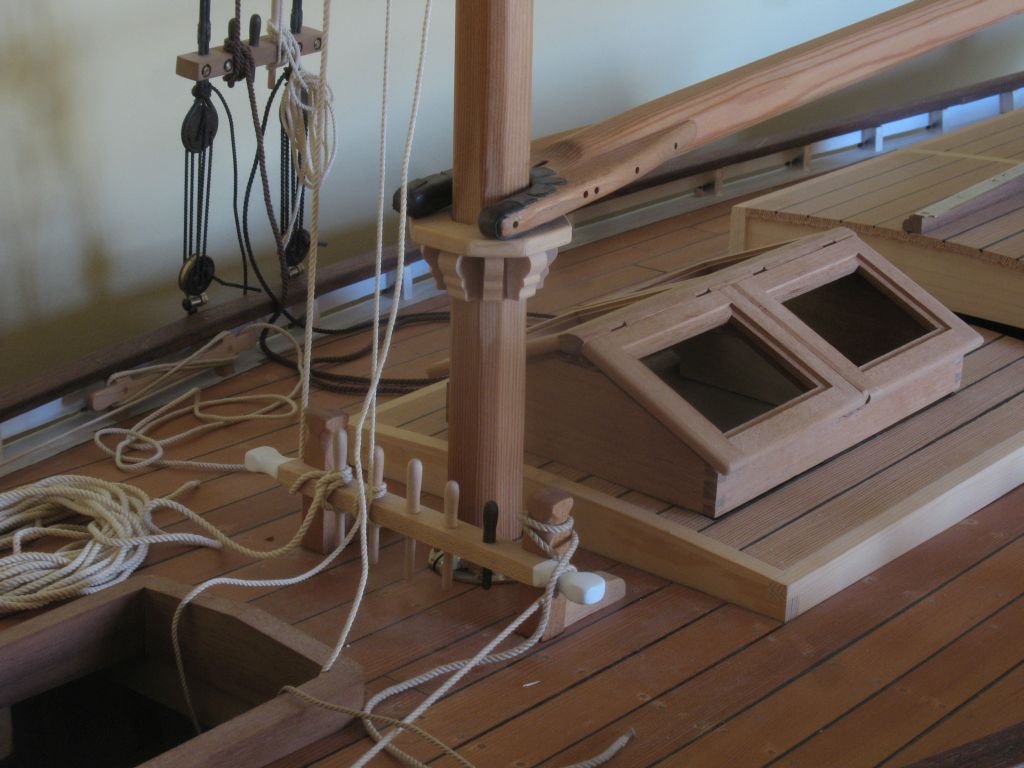
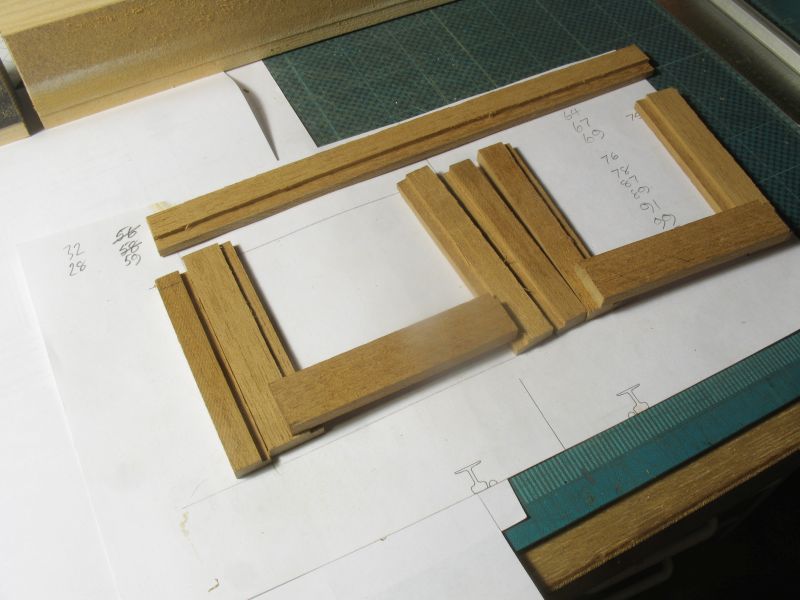
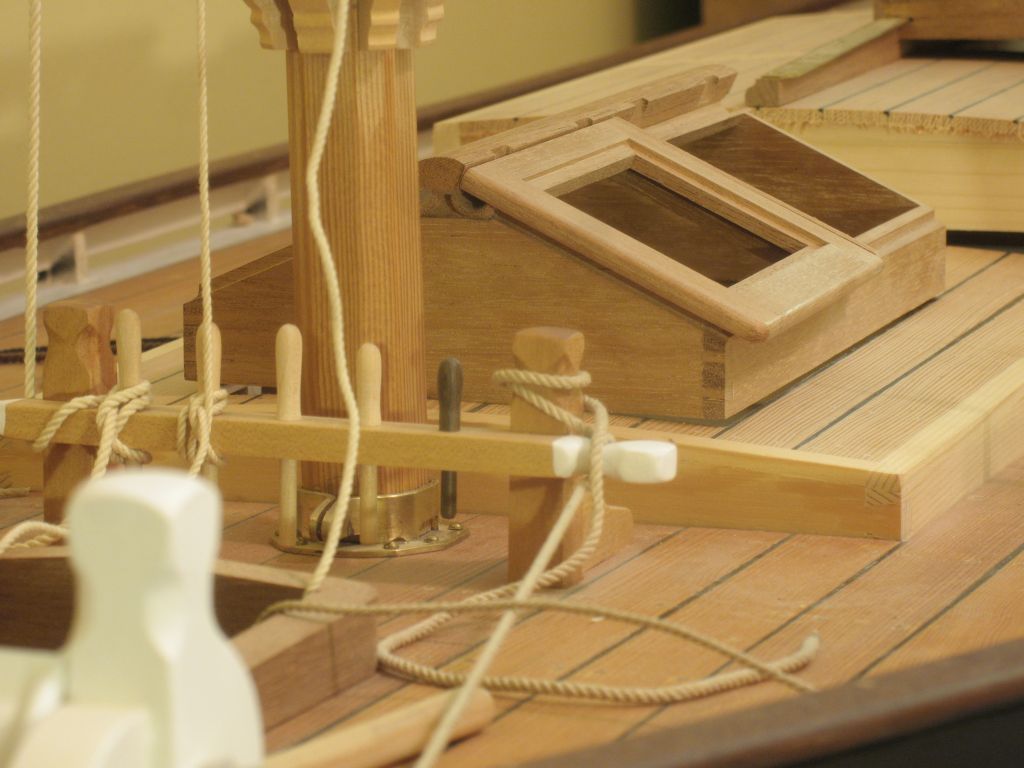
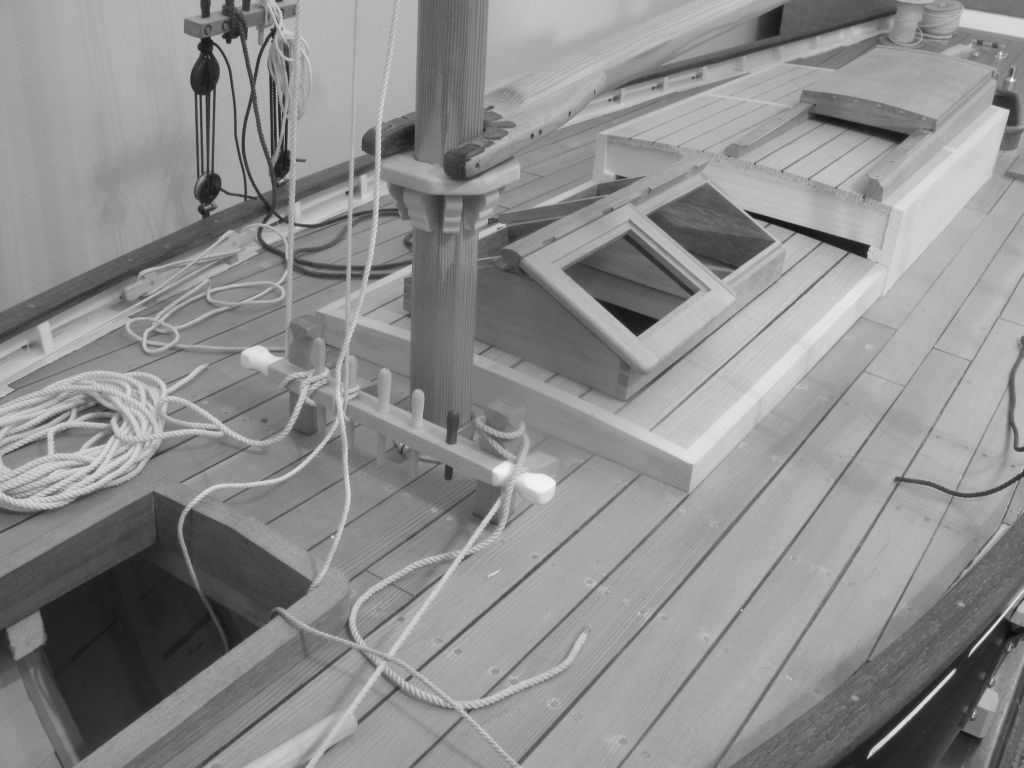
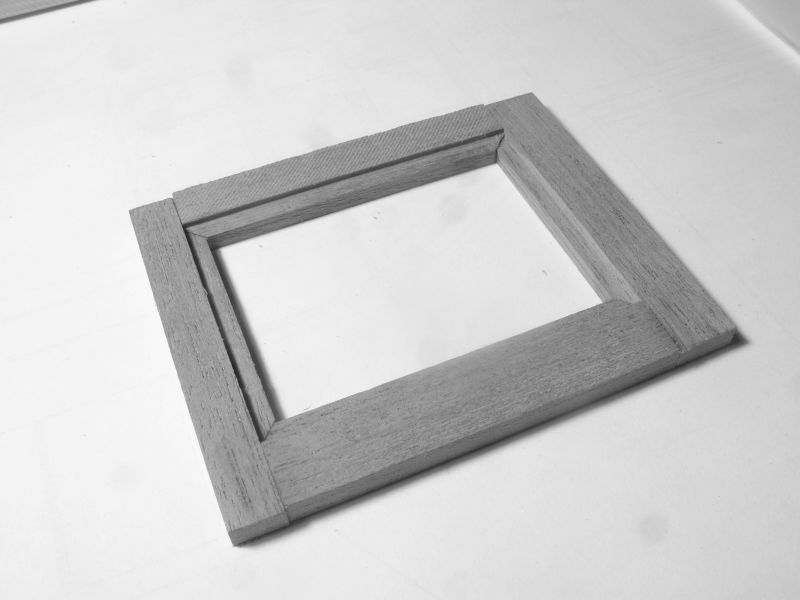
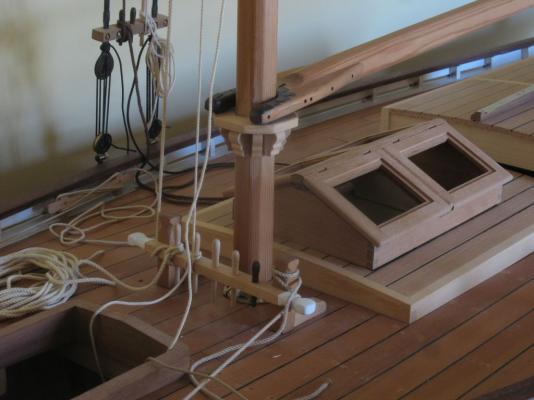
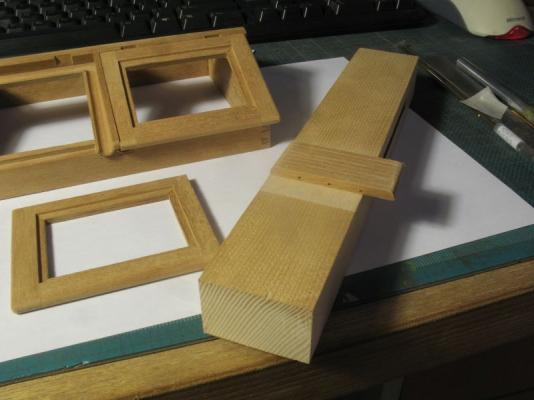
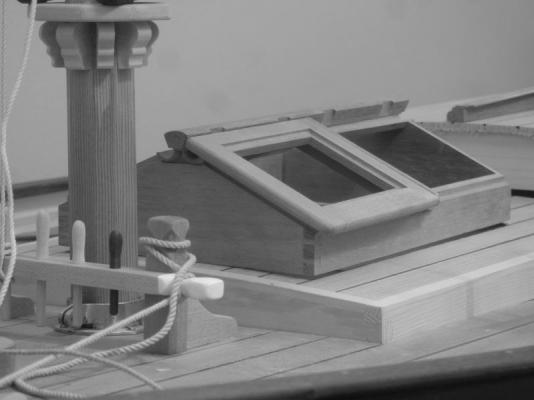
Thanks for all the positive comments and likes it is very encouraging, and appreciated. The recent file organization has been completed and during the process I was able to fix a few photo issues in some of the early posts, a couple of links have gone AWOL (the nature of the net it seems). This evening I continued the work on the skylight. The frame material has been roughed out for all four lights. these are the 3rd and 4th sets This is the second frame glued up. and some in situ shots. Once all the frames are assembled I will make a few more hinges the same way as the ones for the cabin doors, I will also add the wooden bars with the horizontal metal bars to protect the glass (lexan). Michael


-
Clever solution (pun intended) for the badges Nils. Michael
- 2,625 replies
-
- 4
-
-
- kaiser wilhelm der grosse
- passenger steamer
- (and 1 more)