HOLIDAY DONATION DRIVE - SUPPORT MSW - DO YOUR PART TO KEEP THIS GREAT FORUM GOING! (Only 44 donations so far out of 49,000 members - C'mon guys!)
×


gak1965
-
Posts
720 -
Joined
-
Last visited
Content Type
Profiles
Forums
Gallery
Events
Everything posted by gak1965
-
 Just saw the disaster, but a truly amazing recovery! I feel your pain, caught a bowsprit line in my drill on the Niagara. Pin vices for me from now on. Anyway, she's looking great! George K
 -
Hi Alex. Build is really looking great. We must be about the same age, because I built the Revell Connie about 15 years ago after having watched my grandfather start one in '68, and in my case, fail to complete it as a tween in the mid '70's (my grandfather having died in early '69).
-
I make my stirrups from black fine guage wire. With thread, I find that the loop on the bottom is generally not heavy enough to make it hang neatly, whereas the wire hangs nice and straight and looks fine at 1:96 or 1:64. Also, I'm pretty sure that the stirrups and foot ropes hang from the jackstays. I wound up hanging them the same way you did here on my Revell Connie since there were no jackstays on the yards, but if you are going to put the jackstays on anyway, you might consider making the change. FWIW, I use annealed, black steel wire from Bluejacket. You can get that kind of wire all over the place, but I try to support companies that produce relatively unique things for ship modelers and every little bit helps. Looking good! George K
- 248 replies
-
- 1
-

-
- Cutty Sark
- Revell
- (and 2 more)
-
In the second photo (and it appears on the Cutty Sark) the stuns'l irons (and hence the boom) are below the yard, on Constitution, Pride of Baltimore, and Flying Fish, they are on top of the yard. @rwiederrich do you know if this was some American vs. British thing, or just individual preferences?
- 248 replies
-
- 1
-
-
- Cutty Sark
- Revell
- (and 2 more)
-
Another instance of what my wife calls the "great scaffolding conspiracy", to wit, all the photos of man made things you want to see are always free of people and repairs, but when you go to see them, they are in some state of repair and at least partially covered by scaffolding.
- 248 replies
-
- 3
-
-
- Cutty Sark
- Revell
- (and 2 more)
-
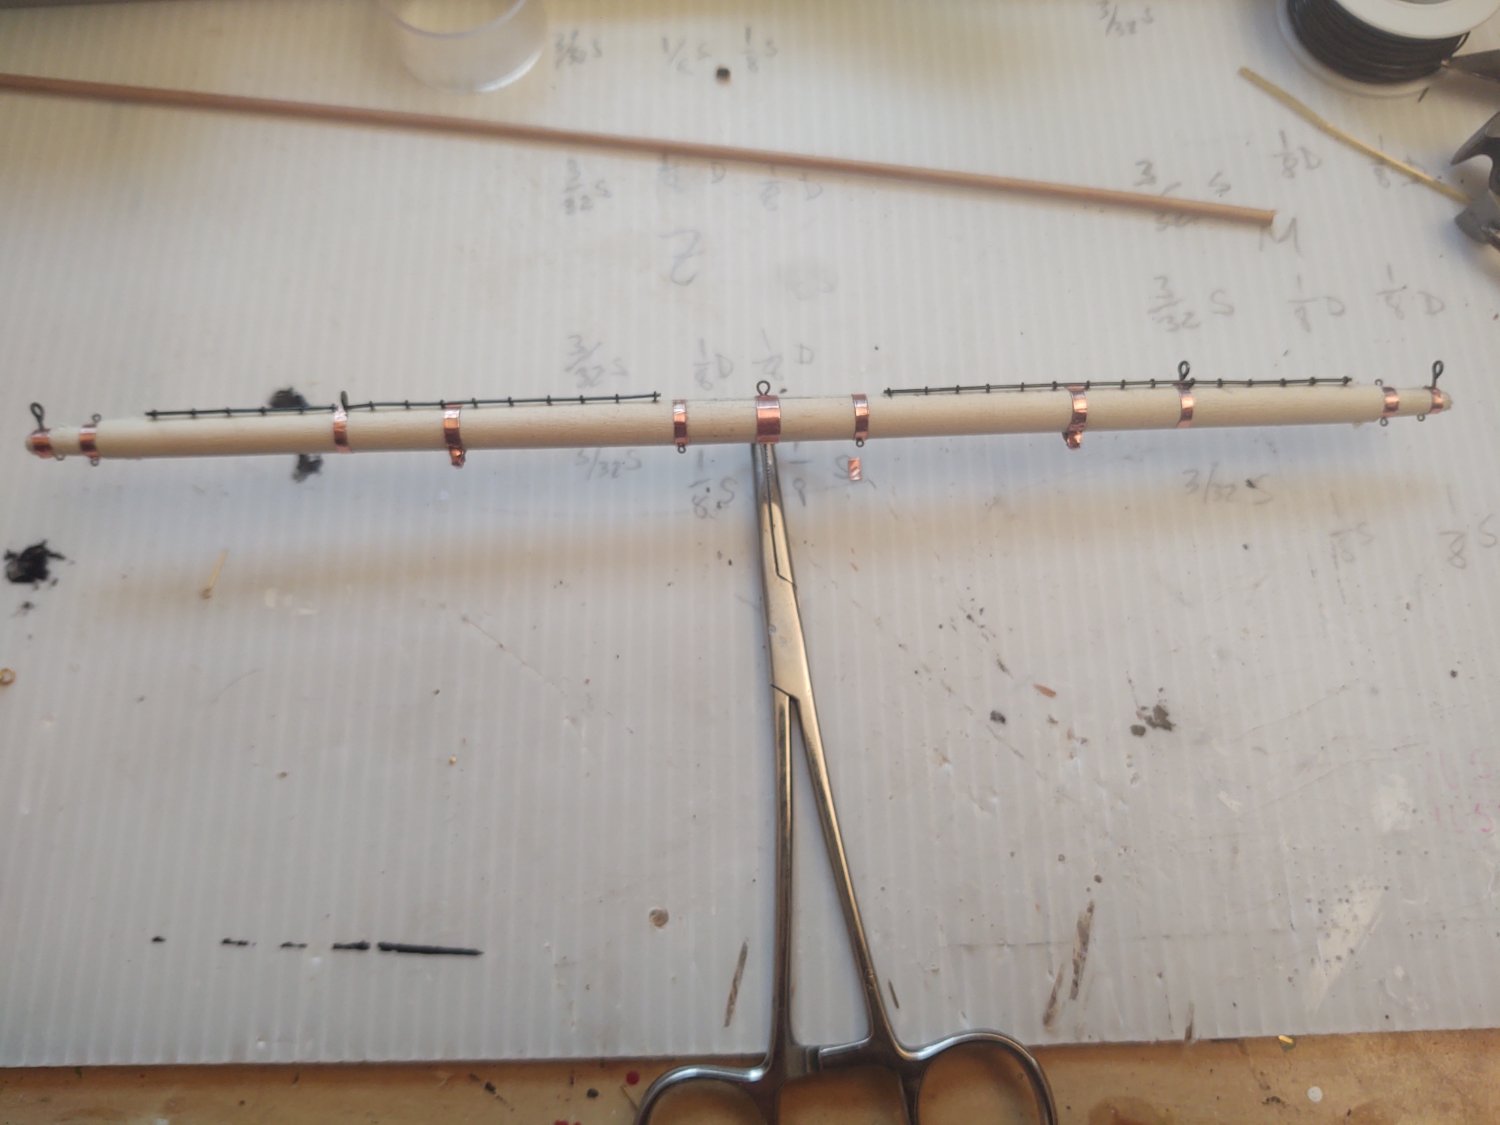
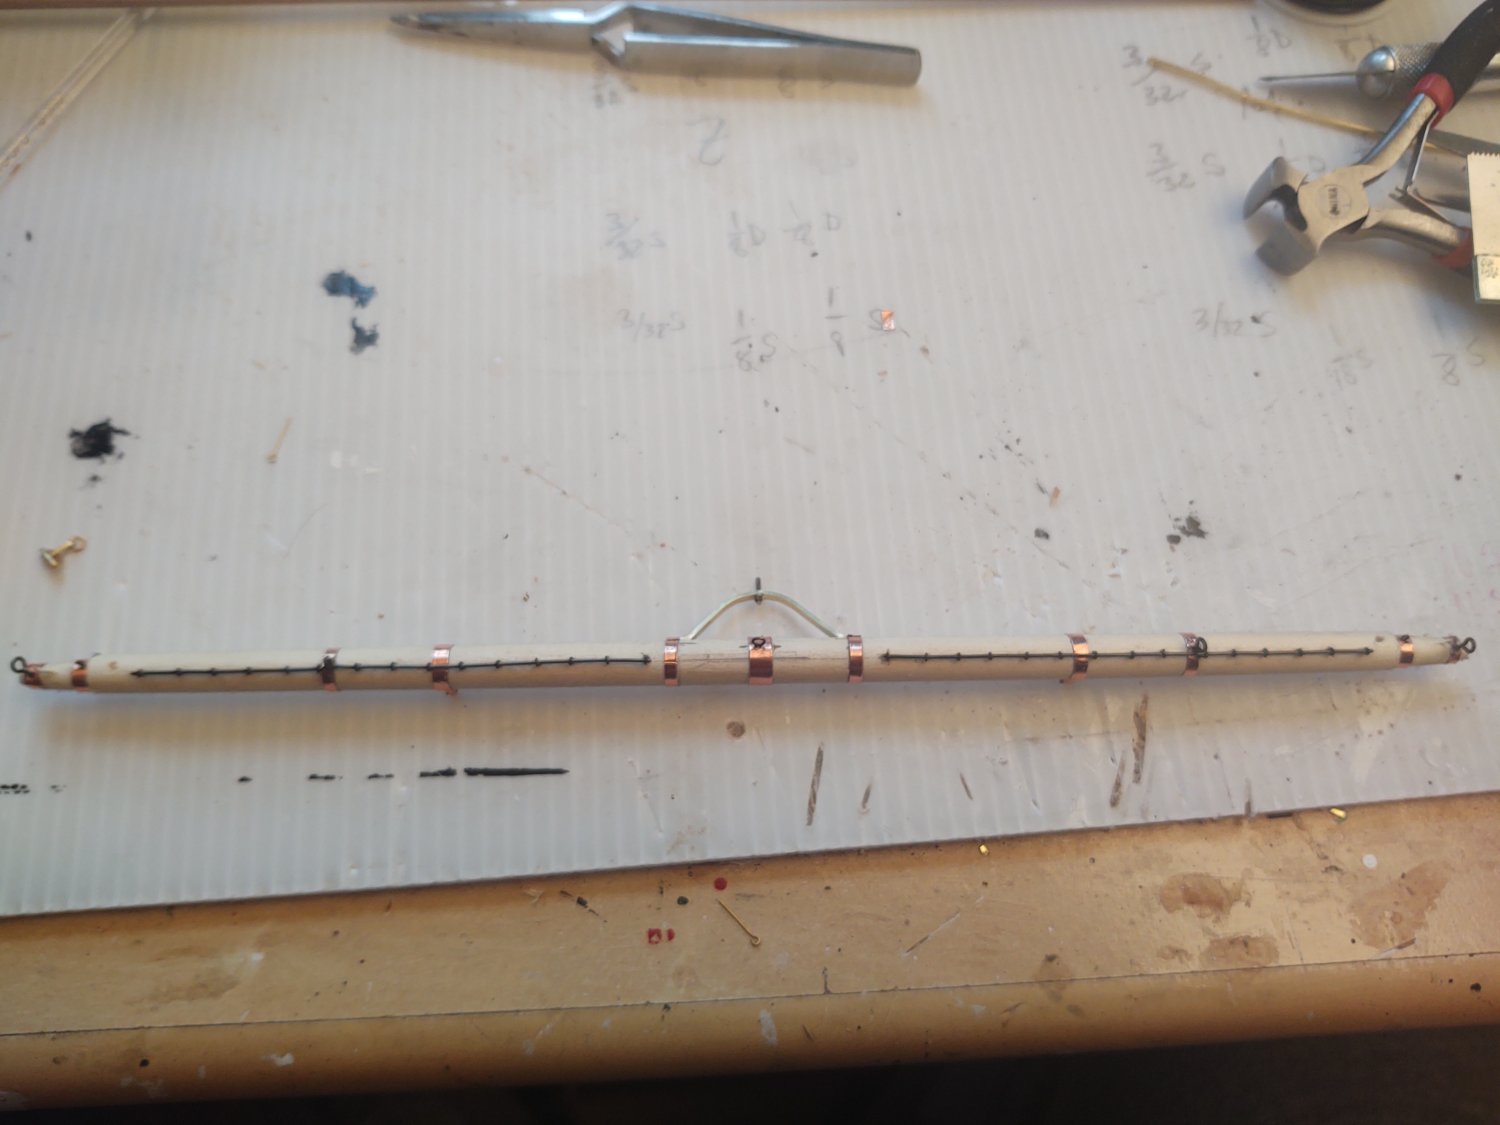
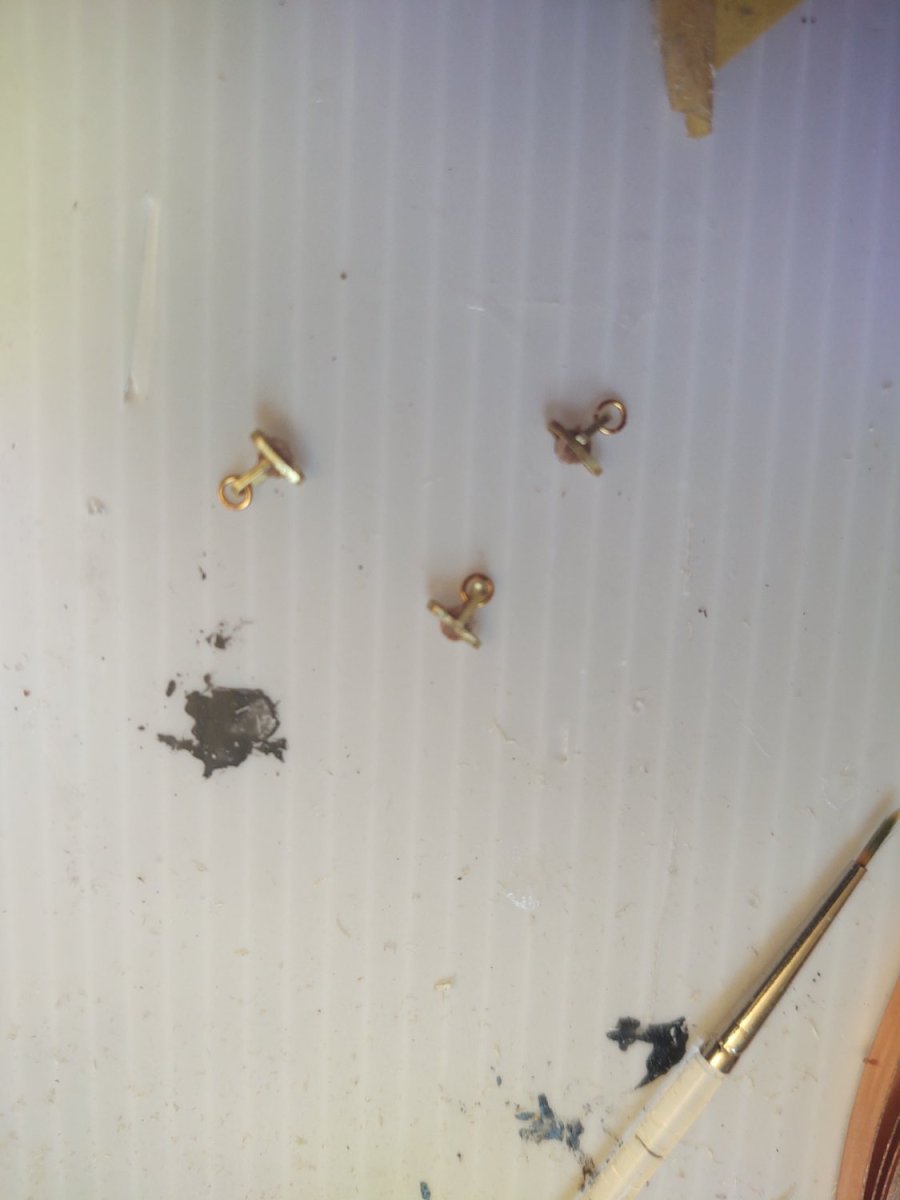
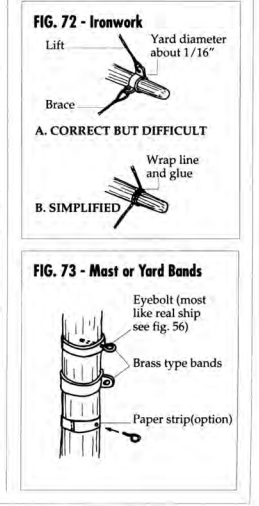
So, a few updates during my break from tying ratline knots. First, I made the remaining 3 gin blocks I need for the trusses on the topsail yards. They still need to be painted, but you can see how I made them from some of my (dwindling) stock of 1/32 x 1/64 brass. I've also done almost all of the work on the main course yard. At 1/8" = 1 foot, 1 inch ironwork would be 0.25 mm thick, and most of available sizes of brass were way more than that, so I made the iron bands from copper tape that I cut to the proper width. For the mast bands and the yardarm ironwork I took the approach shown at the top of Fig 73 below - basically use the tape to create the bands/ironwork, then drill holes in the band and put in eyebolts to represent the attachment points that were more like those shown at the top of Fig 72 from the instructions. The truss was made from 1/32 by 1/16 brass that I drilled a hole in, and then inserted a brass belaying ping in (having cut off most of the pin's head) to act as the link between the truss and the mast band. It was glued onto the yard, and the copper tape "iron bands" wrapped over the mounting point for extra strength, and to mimic the attachment points between the truss and band. I tried a bunch of ways to make the sheet fairlead. At the end of the day, I drilled a hole in the yard, inserted an eyebolt, and then used the eyebolt to guide the copper tape that represents the mast band that the fairlead is attached to. I think it turned out okay, and will look better once painted. The yard currently looks like the below: I'm still missing the iron sheet block. Several fabrication methods have thus far failed, so I'm going to get some thin sheet styrene to make the two sides of the block body, and I have some parrel beads that should actually be a pretty good set of "rollers", either glued in place, or using a small nail to allow them to rotate. We'll see what works. So, the plan for the moment is to finish up the main and fore course yards, and then get tying knots again. I've been thinking about the best way to start raising the yards, and I think I'm going to work fore to aft, finishing each mast (including the gaffs, but not the braces) before moving on. The logic here is that the bulk of the rigging is to the rear of the masts, so it will be the most accessible that way. I'll probably break up the tedium with more yards, and hopefully I can start on the running rigging pretty quickly once the ratlines are done. We shall see. As always, thanks for looking in! Regards, George K


- 602 replies
-
- 5
-
-
- Flying Fish
- Model Shipways
- (and 2 more)
-
Hi @Cathead. Doesn't make it much better, but I was under the impression that you could rotate a cowl vent so that you could work better with the direction of air flow, especially on smaller ships and when not moving. In that sense the particular aim of the vents just needs to be consistent rather than specific. Exactly what consistent would be I'm less certain but you would presumably want some facing into the wind for air to enter, and some facing away for it to leave. MY $0.02. Ship is looking good despite the limitations of it's design. Good luck on those davits, I really hate working with those types of things myself. George K
- 113 replies
-
- 6
-
-
- Cairo
- BlueJacket Shipcrafters
- (and 1 more)
-
That's a great way to make the gin blocks and movable. Where do you get your drill bits? I find I snap a lot of the really narrow ones putting holes in brass and wonder if I'm buying from the wrong place The ship is looking magnificent, looks like you are getting close to finishing! George K
- 399 replies
-
- 3
-
-
- cutty sark
- revell
- (and 2 more)
-
@Bruma I put the main up against the 1:1 drawing and it seemed to be pretty much the correct size (the drawings only include the main). I am pretty certain about the center diameter (the 5/16 dowel is .015 inches too large but I doubt that would be noticable). I will double check the taper though while it's still easy to change. FWIW, The main and fore have length:center diameter ratios of 33.6 and 40 respectively. If I read the plans right Cutty's main course is about the same length (plus or minus 20-30 cm), what is the center diameter on her main course? Regards, George K
-
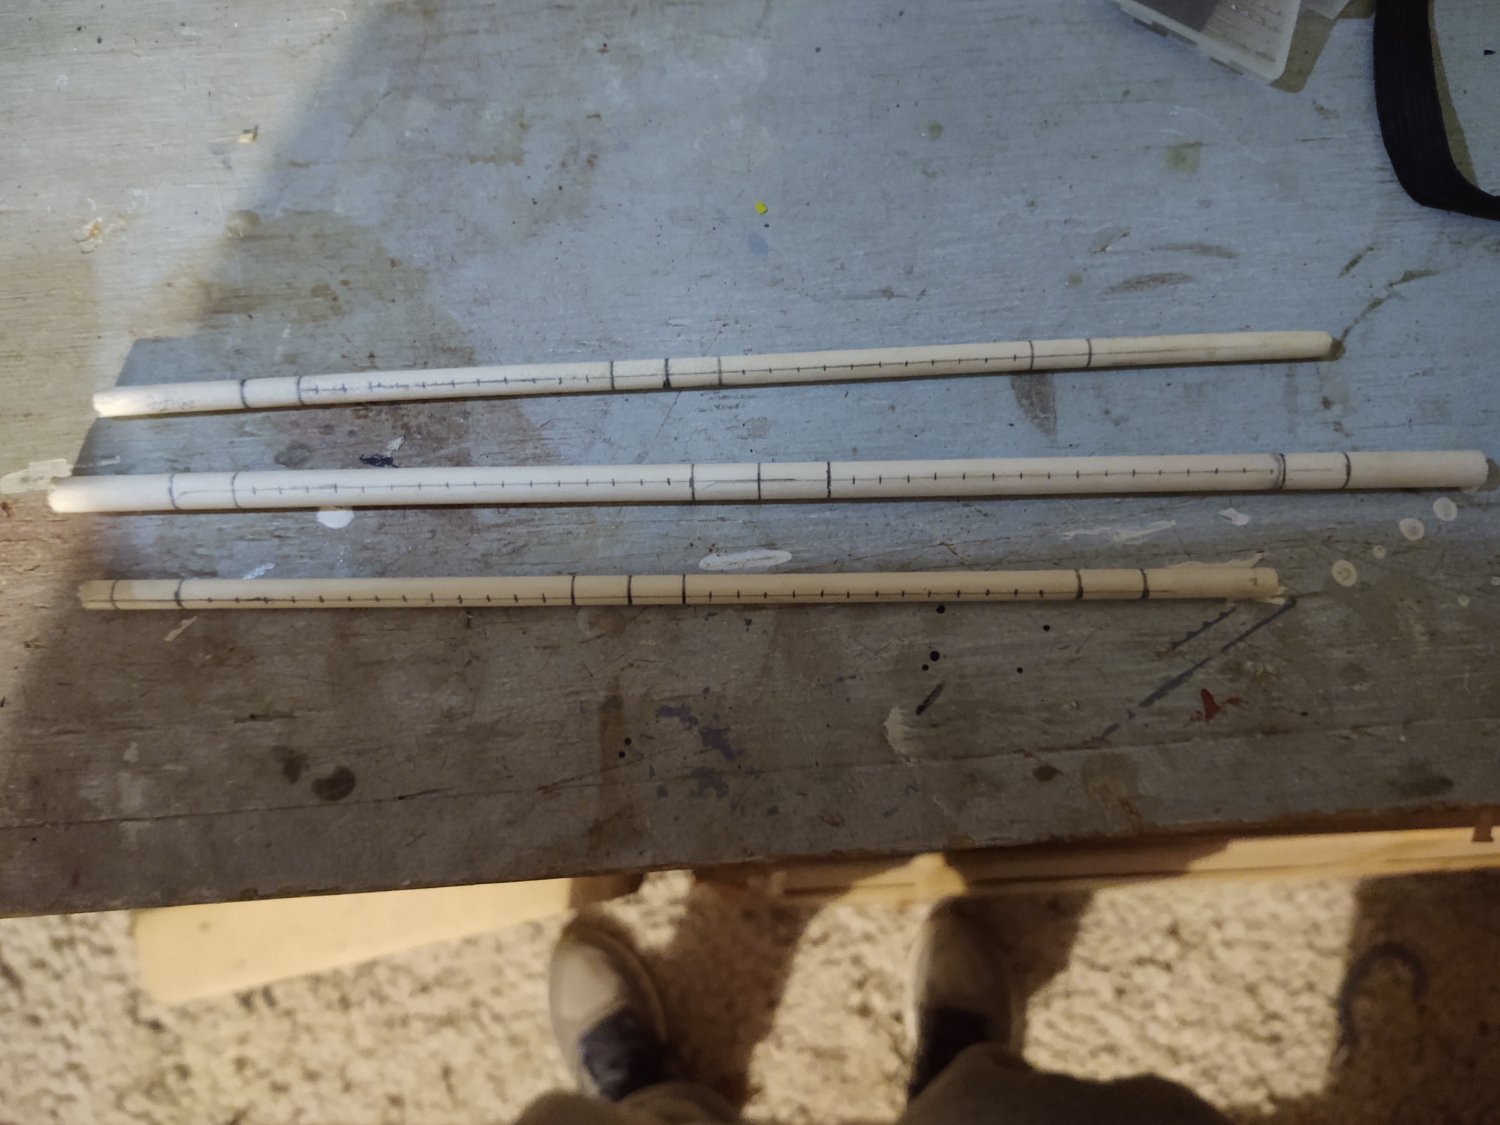
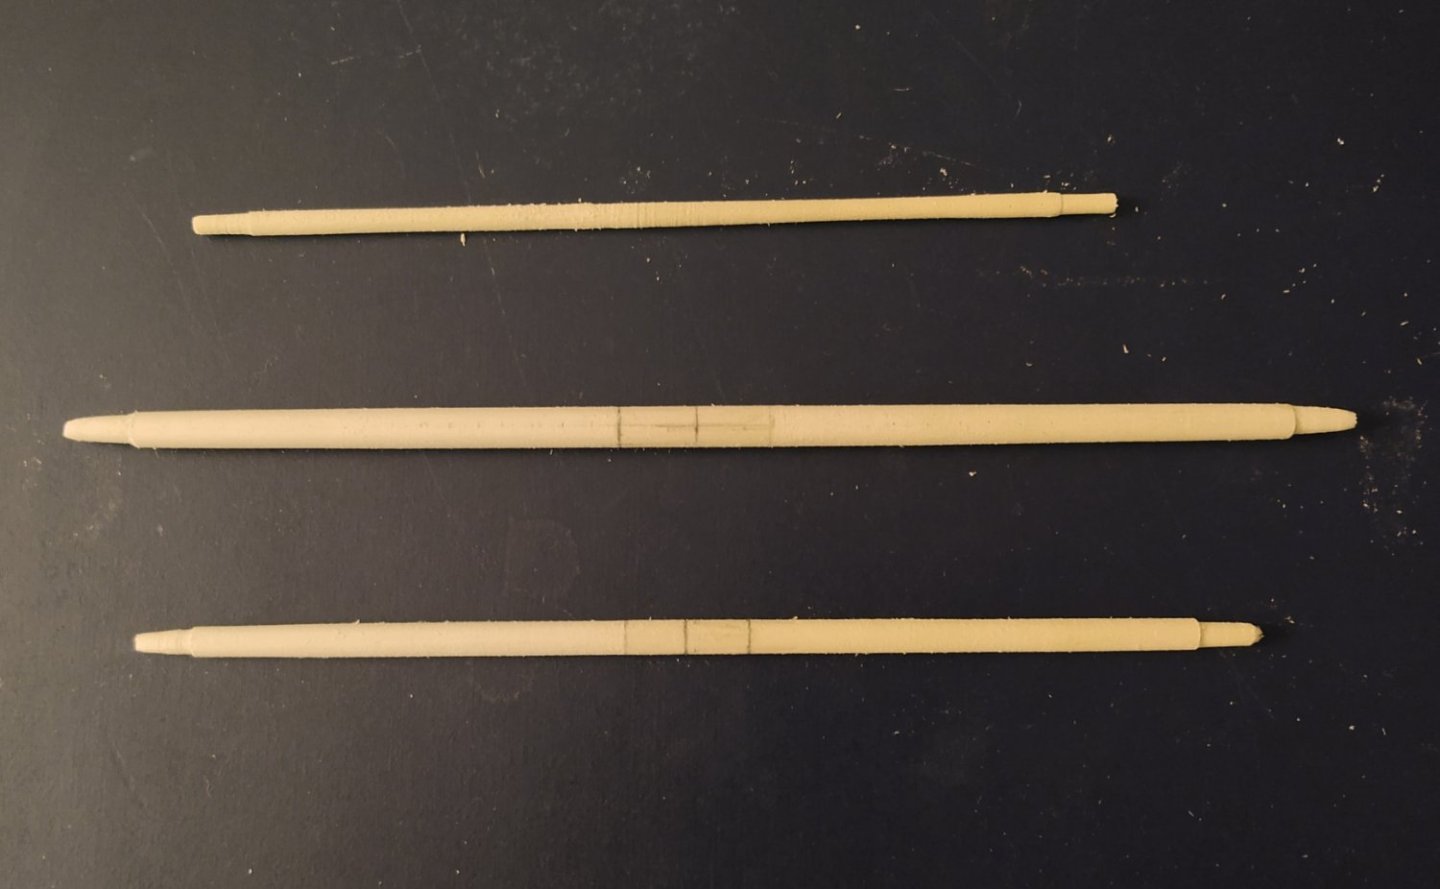
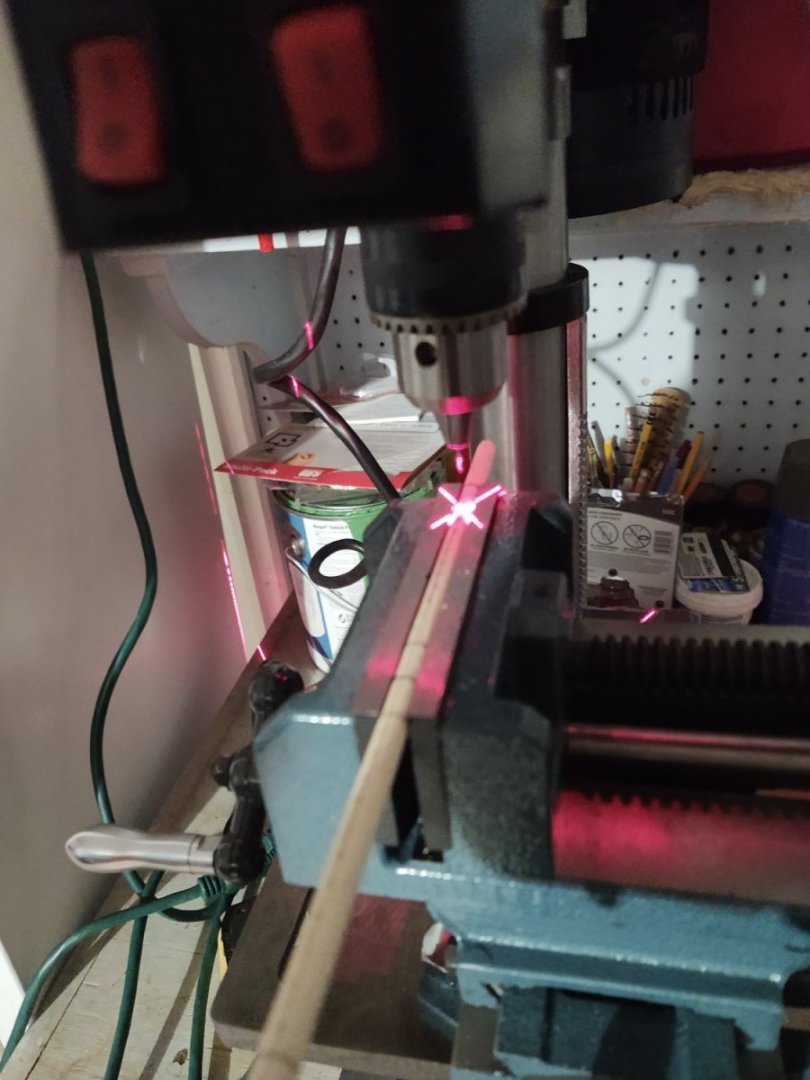
Taking a brief break from tying ratlines and starting to make some the yards. Trying an experiment to see if this is easier than the way I made the yards on the Niagara. I start by marking the dowels that will become the yards, indicating the end of the yard, the iron band on the yardarm, and three lines at the center that defines the center itself and the iron bands that the trusses are attached to. I also marked the location of the holes that I need for the jackstay eyebolts. I then went in and drilled all the jackstay eyebolt holes using my drill press (Santa was very good to me this year) From there it was off to my mini-lathe to turn the yards. Of the first three, I think that the fore and main turned out fine (bottom and middle in the picture, but I'm going to bin the mizzen which is just a mess. It was half the diameter of the main and needed a gentler hand, I suspect. A couple of things I learned. One is that I should have drilled the jackstay eyebolt holes larger, they often gotten filled in the process of turning the yard, to the point where I could barely or couldn't find them. I still think that drilling first is the right idea, I just need to actually make the hole a little bigger so it will survive the sanding. The other thing is that I really need to be careful about putting pressure on the yard with the sandpaper. One reason I'm binning the mizzen is that the narrow point between the yardarm and the unmodified wood snapped just as I was finishing up, and it was because I put too much pressure on. I still think that cutting the yardarms first is the correct move (it gives me a nice template to work against, but care is required. Thanks for looking in, George K

- 602 replies
-
- 6
-
-
- Flying Fish
- Model Shipways
- (and 2 more)
-
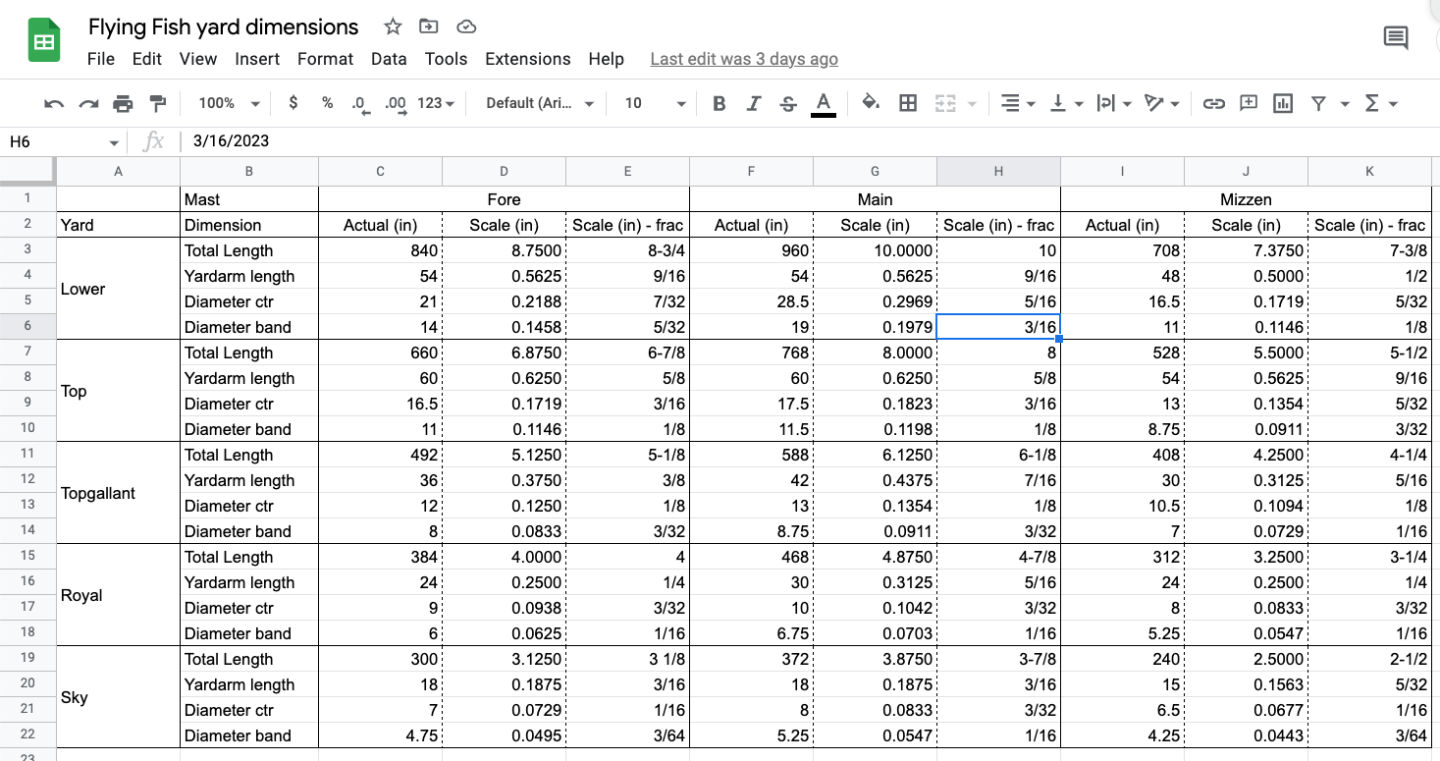
Well, it turns out that once you get started, the ratlines go faster than you originally thought. I was hoping for 3 weeks on the rest of the port side, and finished in 2, so, not too bad. Some photos of the ship overall and separate masts, although, I find it doesn't look all that different with and without the ratlines, at least at a macro level. I'm about to make the first of the yards, seeing as I should only be few weeks away from finishing the ratlines. Step 1 was just to build out a table with the actual dimensions of the yards, the yardarms, and the diameter at center and iron bands and their corresponding scale size. I pulled the values off the plans, but they are also in the article from the Boston Daily Atlas that Lars Bruzelius transcribed (http://www.bruzelius.info/Nautica/News/BDA/BDA(1851-11-04).html). For me, given that there are 15, all different yards, this is way easier than doing the calculations one at a time from the plans. I will note that in the section marked 'Scale (in) - frac', I selected the nearest measurement that I could realistically build to. A couple of observations/questions. First, the plans suggest that all of the spars used 3/4 inch iron rod as a jackstay. Was it common to use the same size jackstay on all the yards? I mean the mizzen skysail was only 6.5" at the center and 4.25" at that iron band that demarcates the beginning of the yardarm, that seems, I dunno, kind of overbuilt for the size of the spar. Given the physical properties of the materials, an iron jackstay with a spar attached if you will. Second, the kit has a really weird set of Britannia fittings. There are 4 (nominally 3), identically sized "upper yard trusses" and that is it. Given that there are 9 yards secured with trusses, and six yards that use (hopefully correct term here) truss cranes to attach the yard to the halyards, so, I'd need 15 of these, not 4 or 3. Given that they are all different sizes, and the kit has 1/32 thick brass, I guess I'll just scratch build them (although I see that bluejacket has 3 sizes of trusses - so if the scratch ones are a disaster, I can default back to those). Third, was the use of a deadeye on a shroud or backstay as a truck for fairleads a McKay thing? Usually I see this as a board attached across multiple shrouds. Just curious - another one of those repeat tasks, a bit of a nuisance (I think I need 34 of them total). Finally, the instructions say to leave out the course clew and reefing tackle if you aren't going to install sails. Is that common? When I rigged the Niagara the instructions suggested (and I followed) including the clew and reefing tackle, and attaching the clew garnet to the reefing tackle. Was this just the difference between 1813 and 1851 or just two ways that one can handle the situation? Above the course, I need the clew to have something to attach the sail end of the sheet so they will be there - it just feels a little asymmetrical, but if they were really removed I'll probably leave them off. As always, thanks for looking in! Regards, George K.

- 602 replies
-
- 4
-
-
- Flying Fish
- Model Shipways
- (and 2 more)
-
The carving (and the ship overall) is looking great, Vlad! I'll echo @BANYAN, you're a braver man than I for even trying at such a small scale. George K
-
Following as well.
-
I like the look of the knots as long as they are reasonably tight so I don't mind the time (absurdly) much, although I am with you on the copper tape. I am curious about adhesives and thread that you use for your ratlines. This ship is also 1:96 and when I get near the tops and the shrouds start to get really close together, I will tie knots on the outer shrouds only, and use glue on the intervening ones, and then at the very top I find that the only practical thing is to glue the line on. But particularly the final (only glued) line is always a royal pain in the posterior. Getting the glue to stick and the line to stay can take longer than tying the darn knots. I'm using CA on cotton thread, should I be using something different that won't slide around so much? Regards, George K.
- 602 replies
-
- 1
-
-
- Flying Fish
- Model Shipways
- (and 2 more)
-
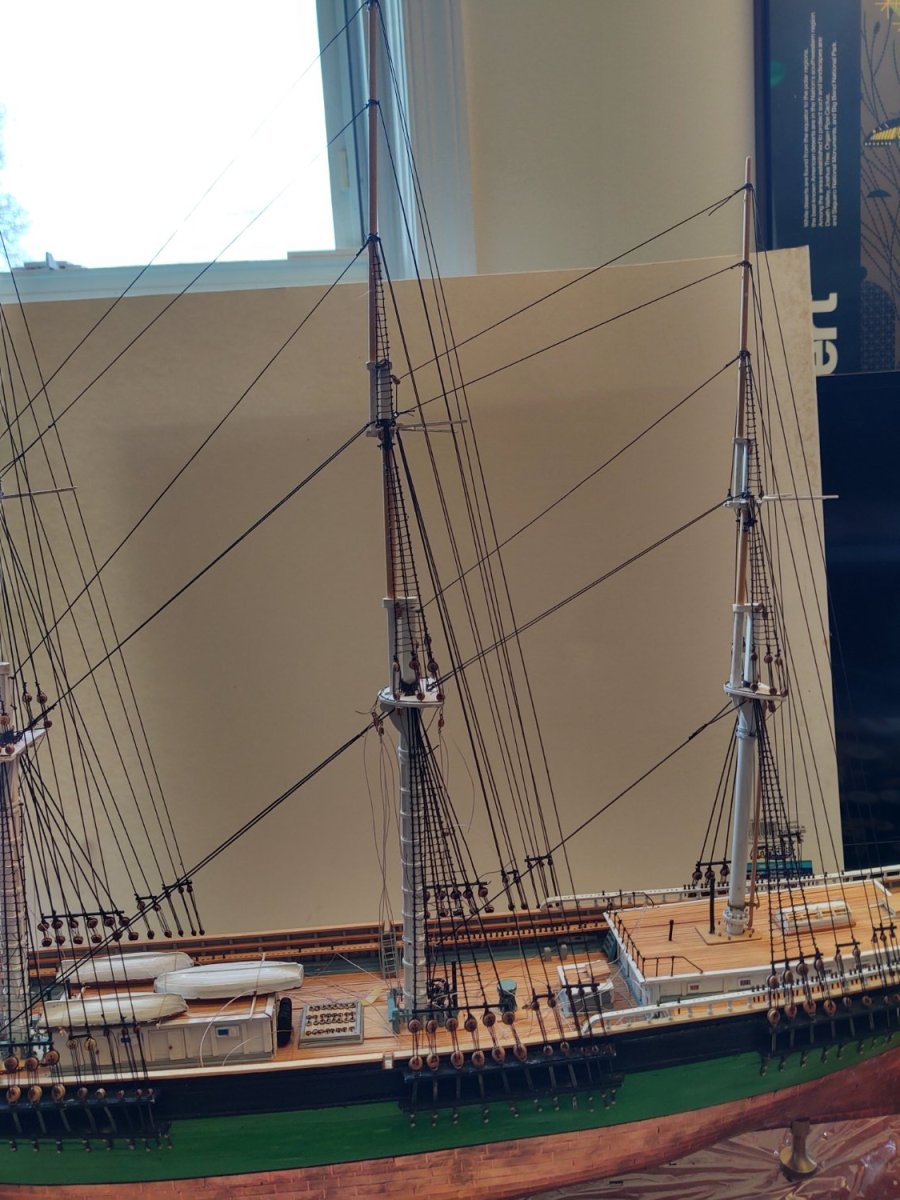
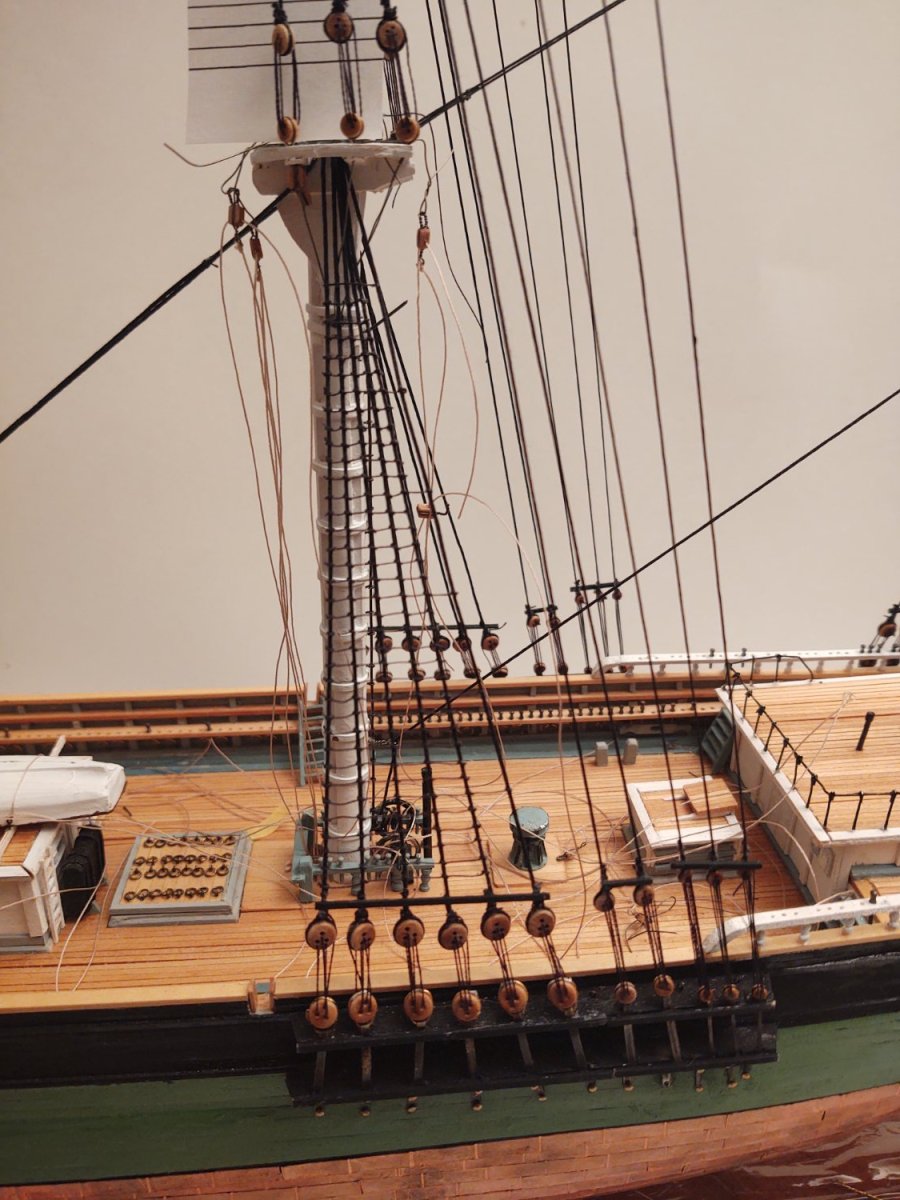
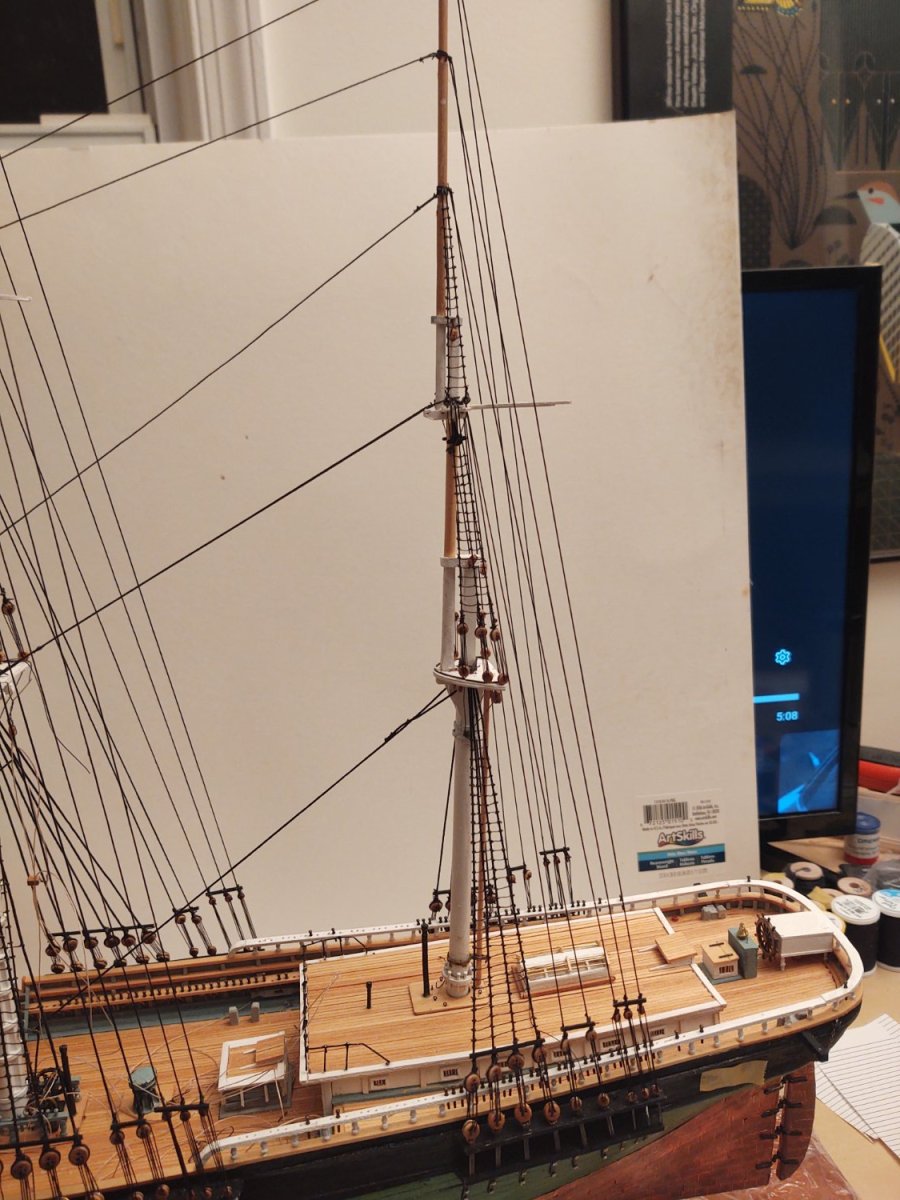
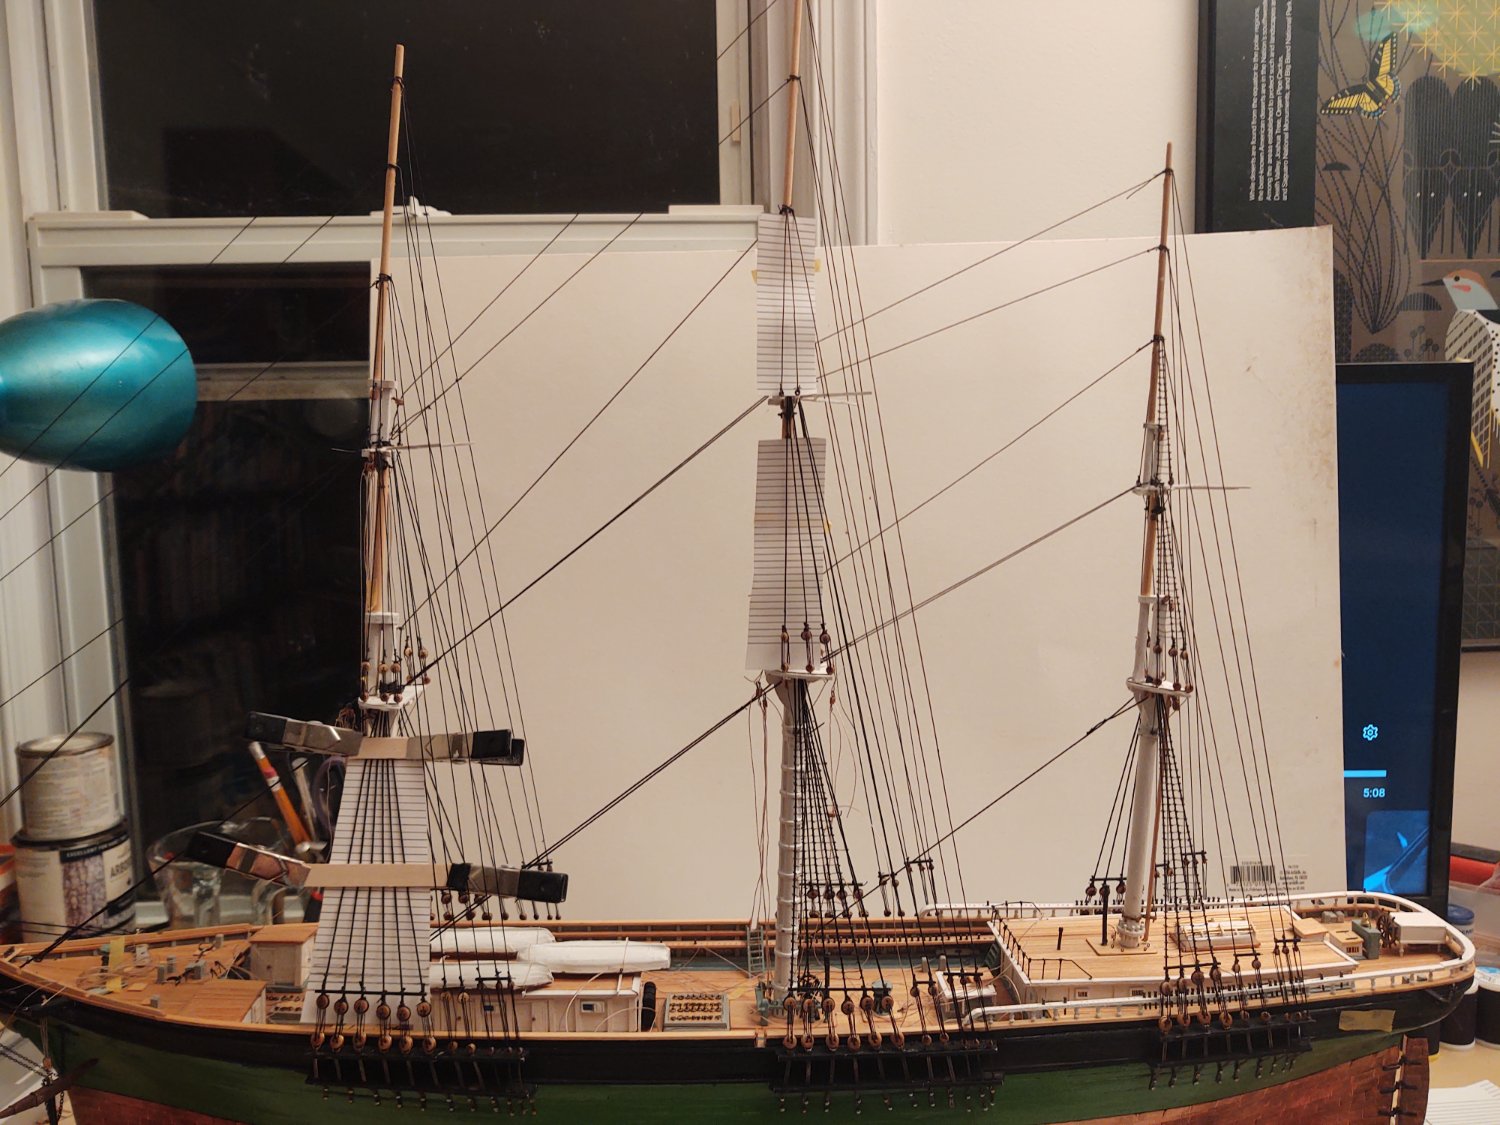
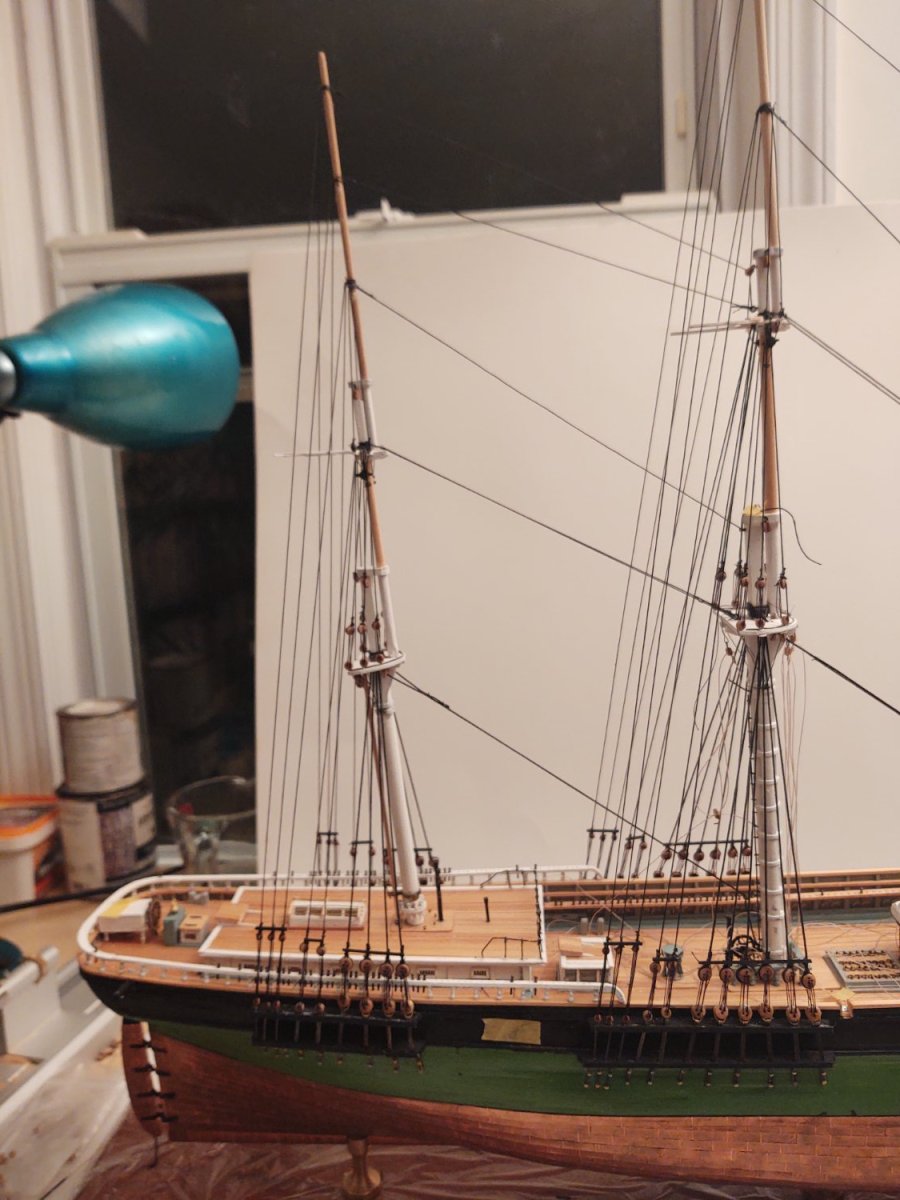
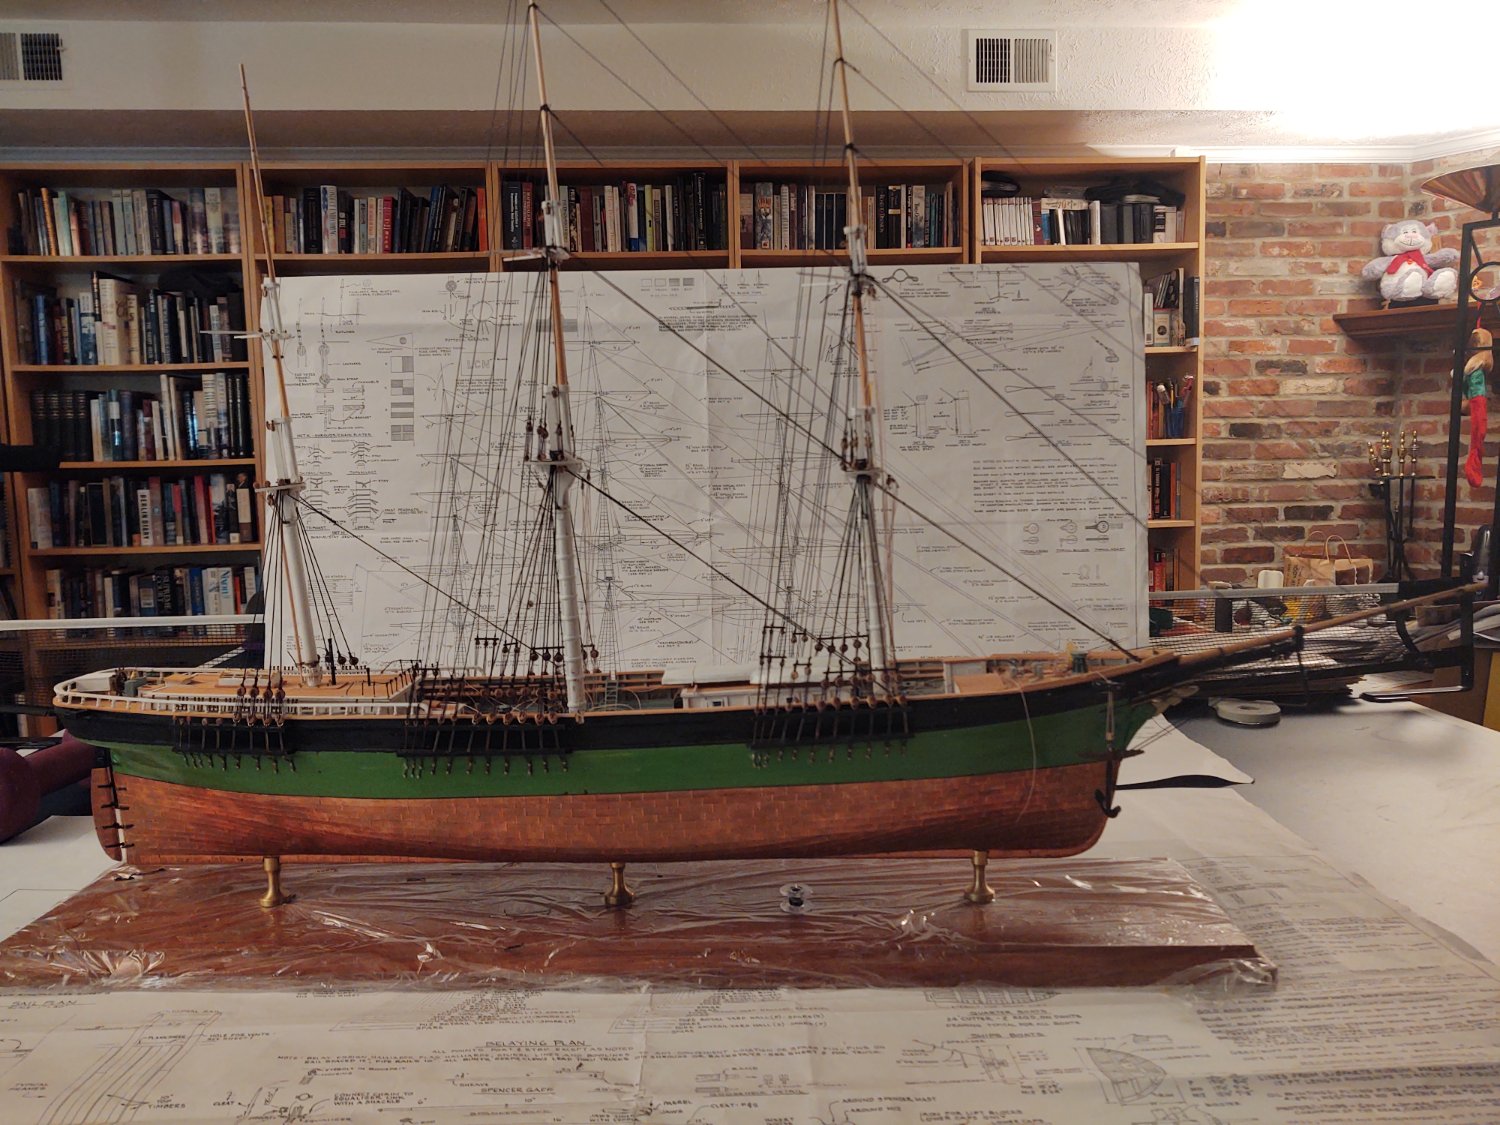
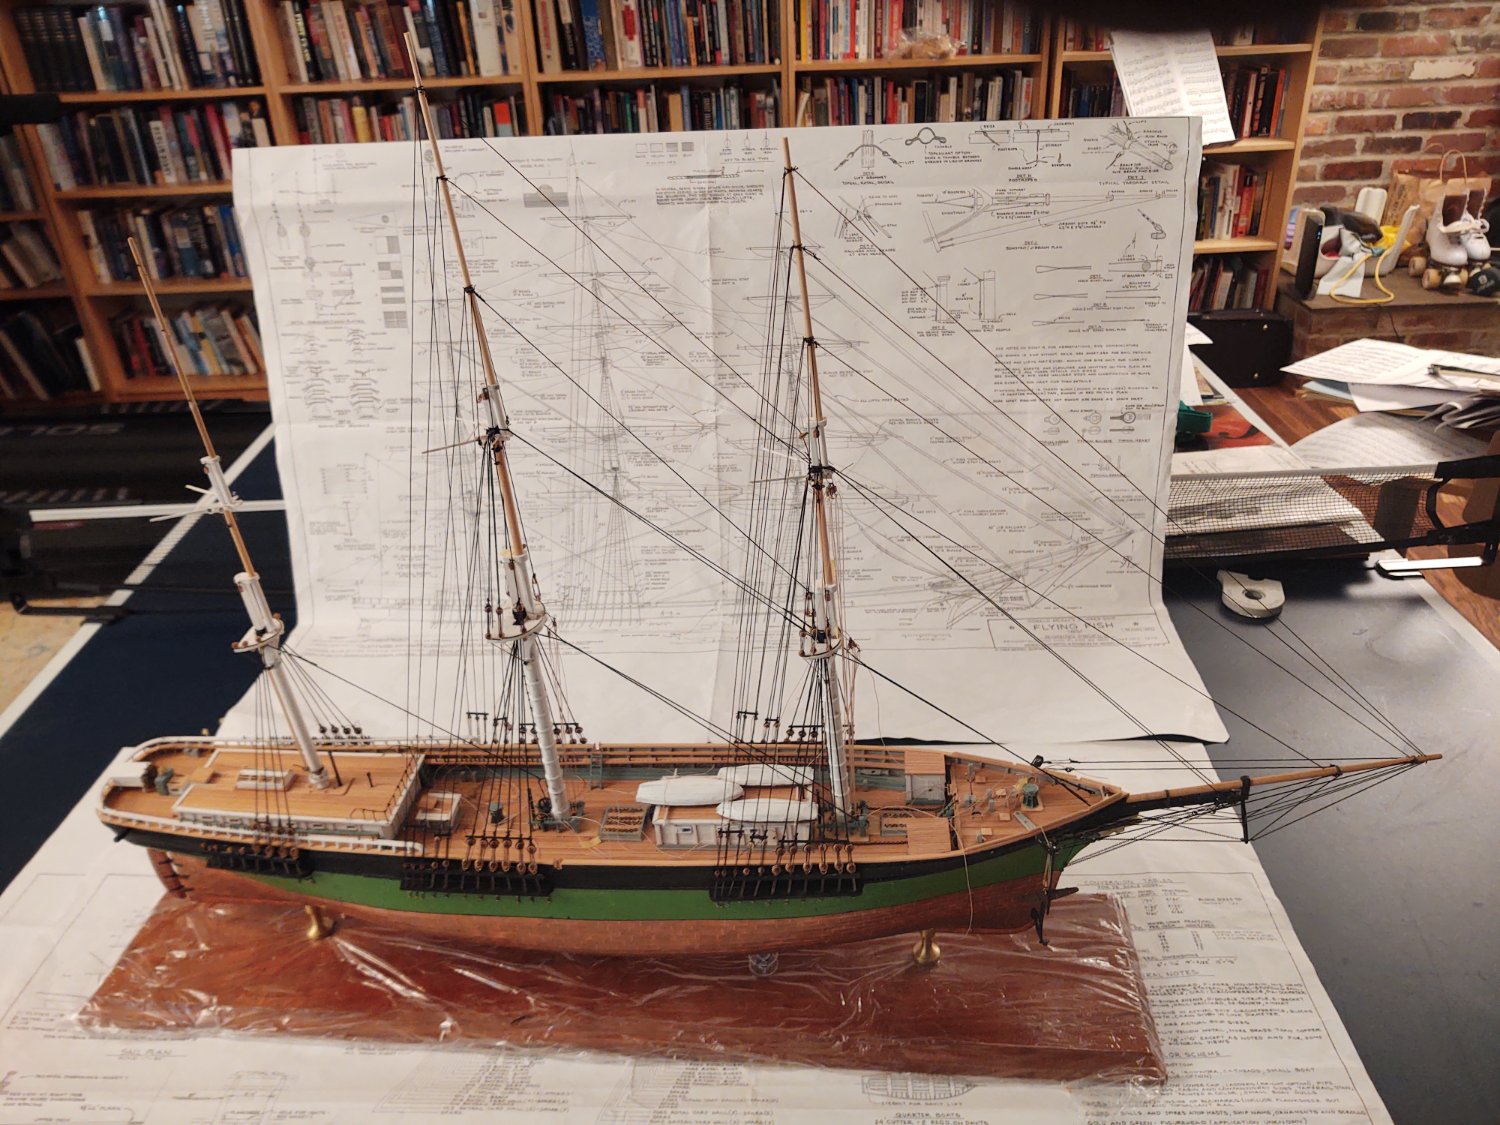
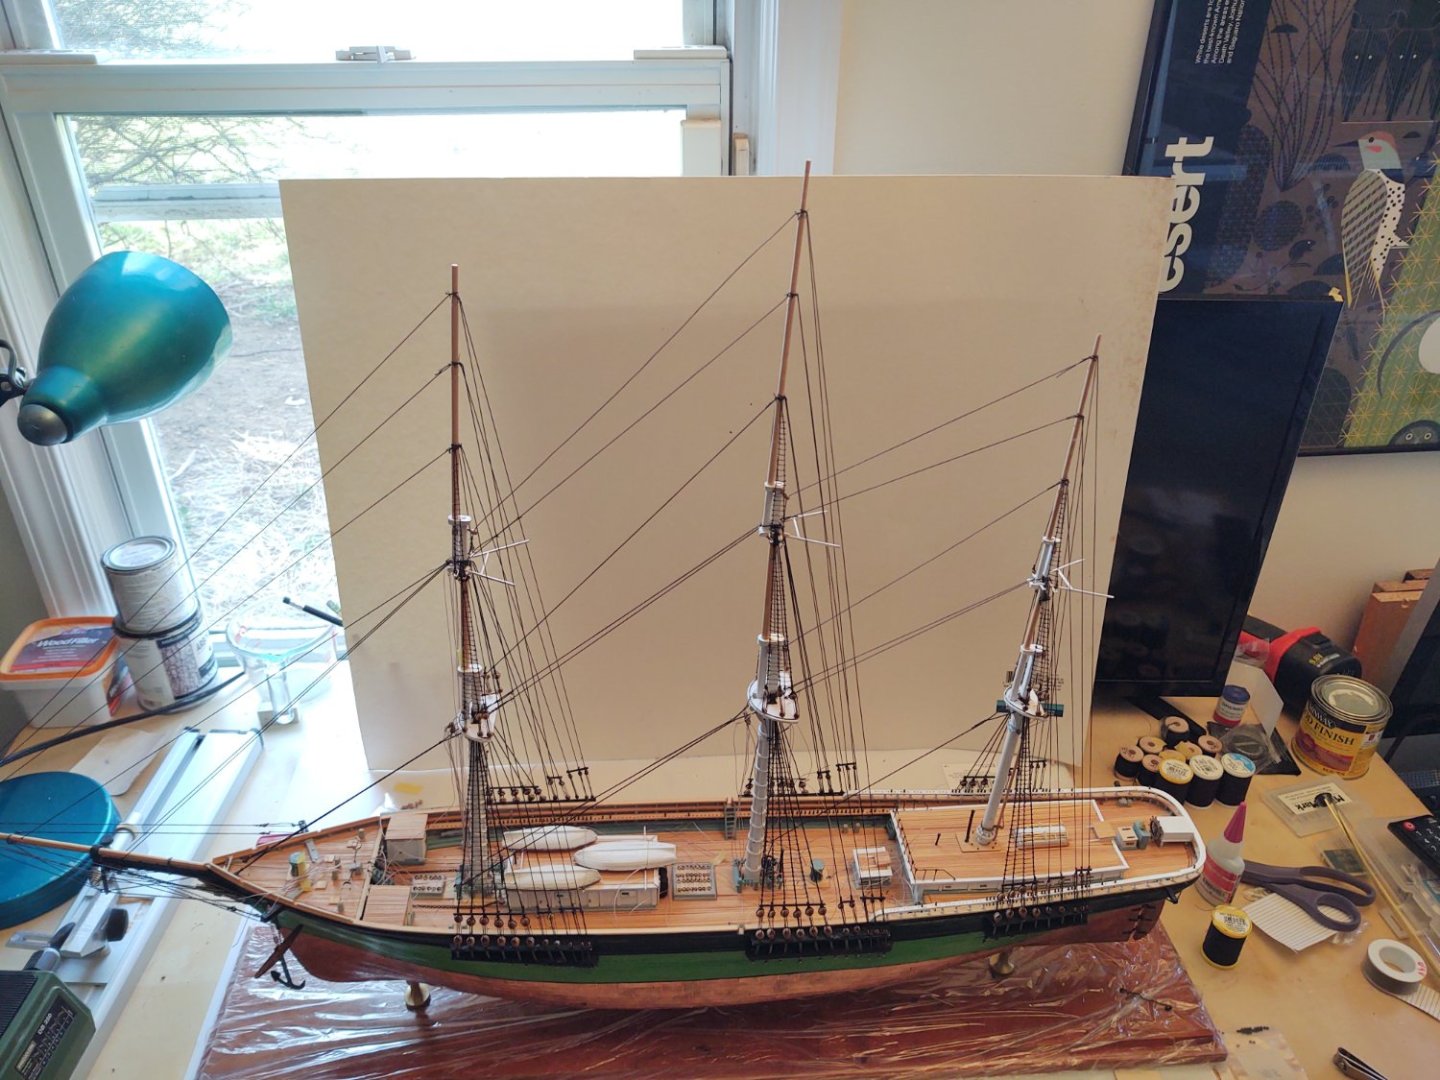
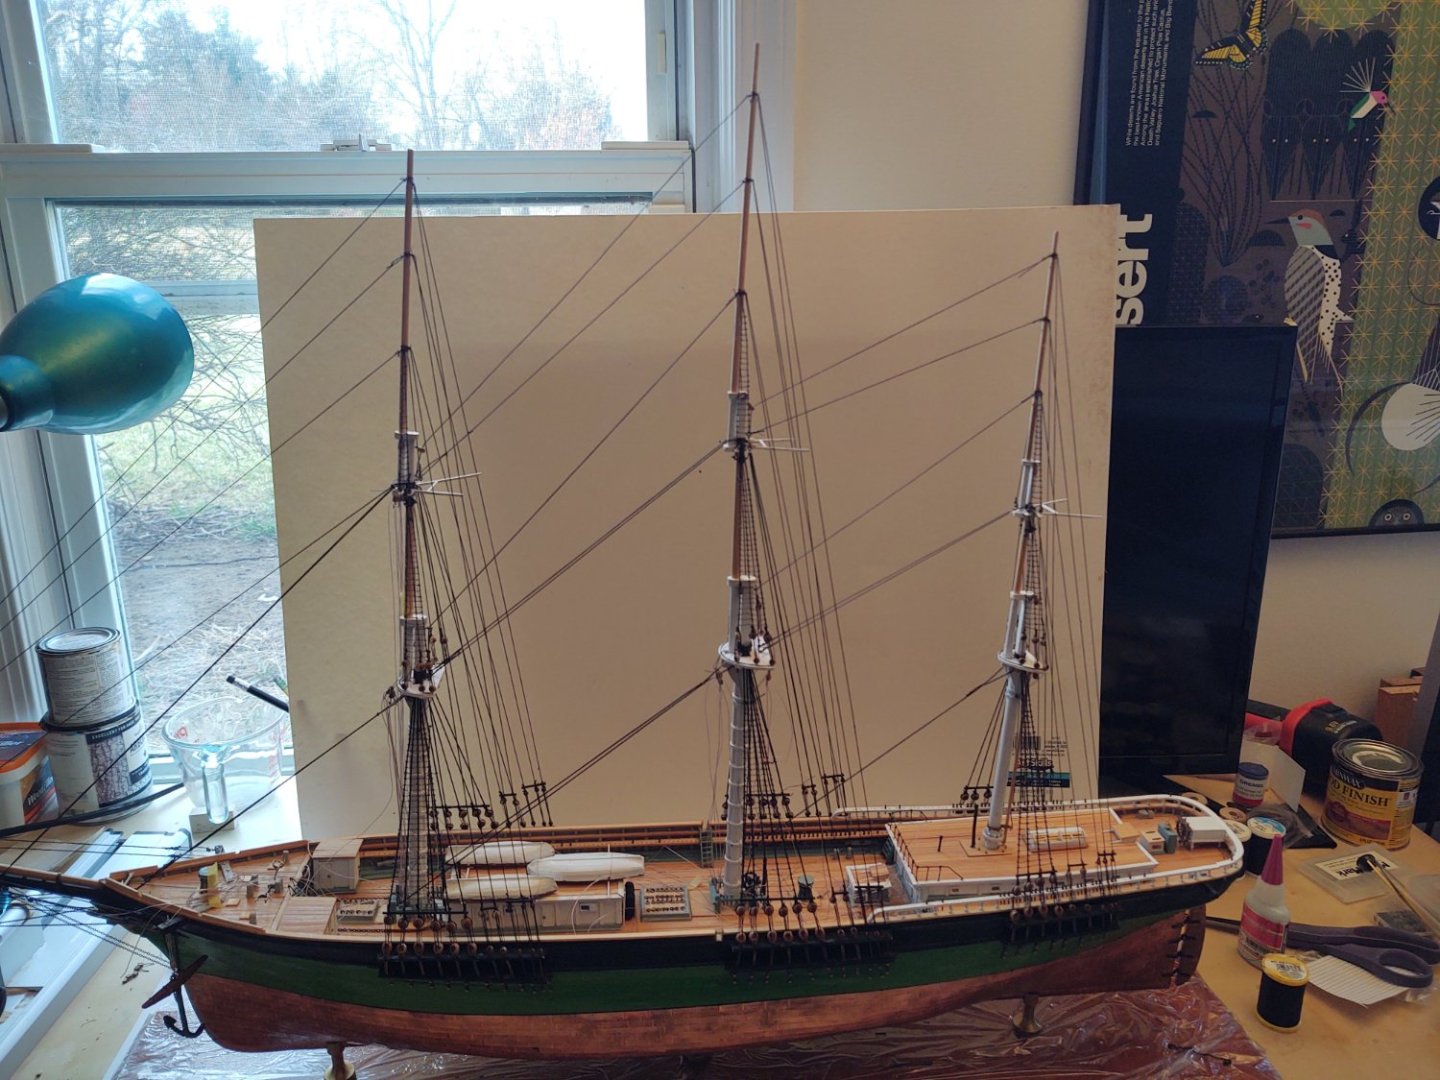
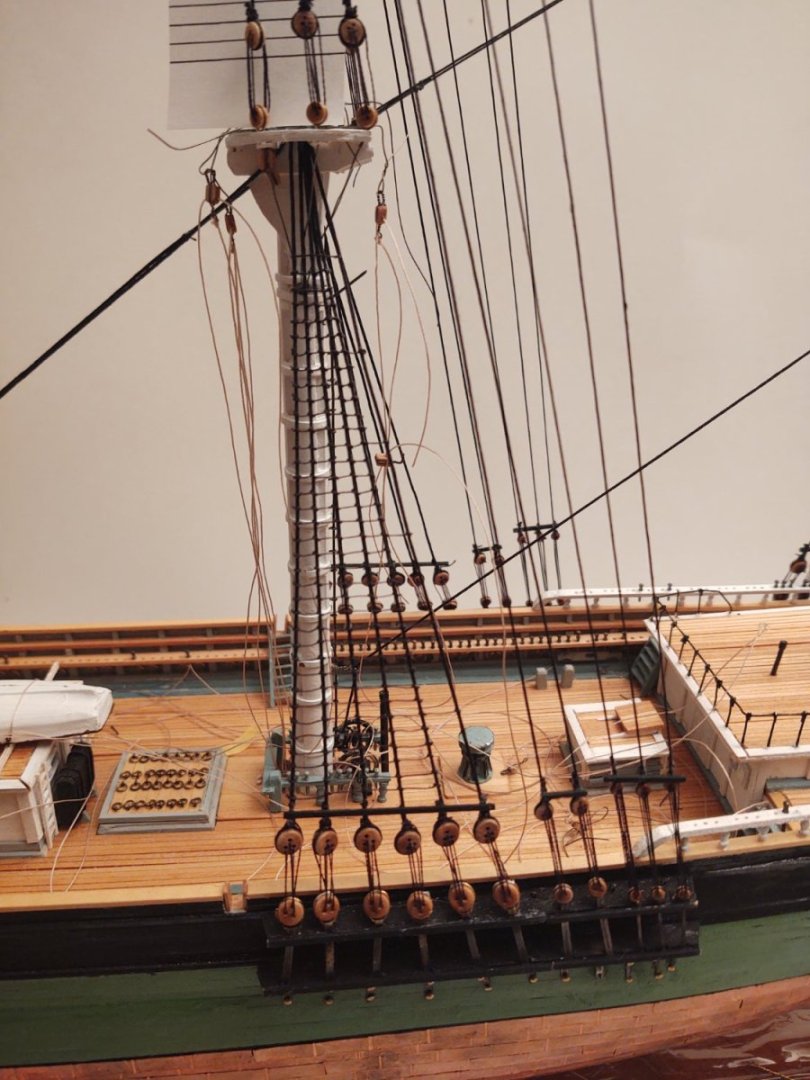
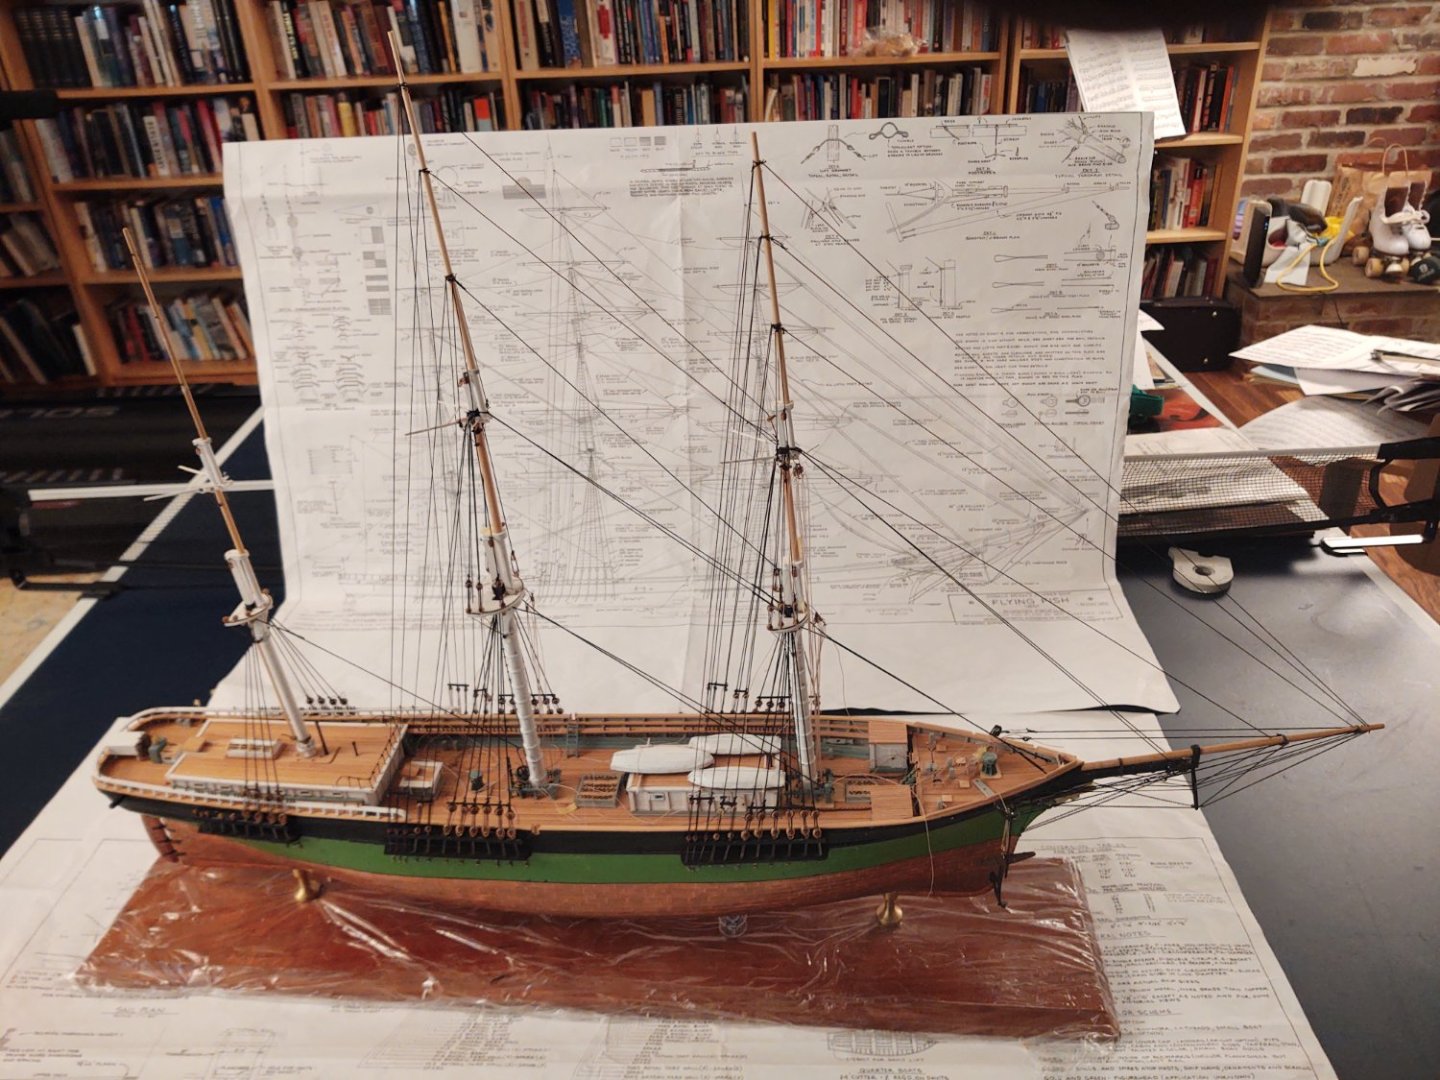
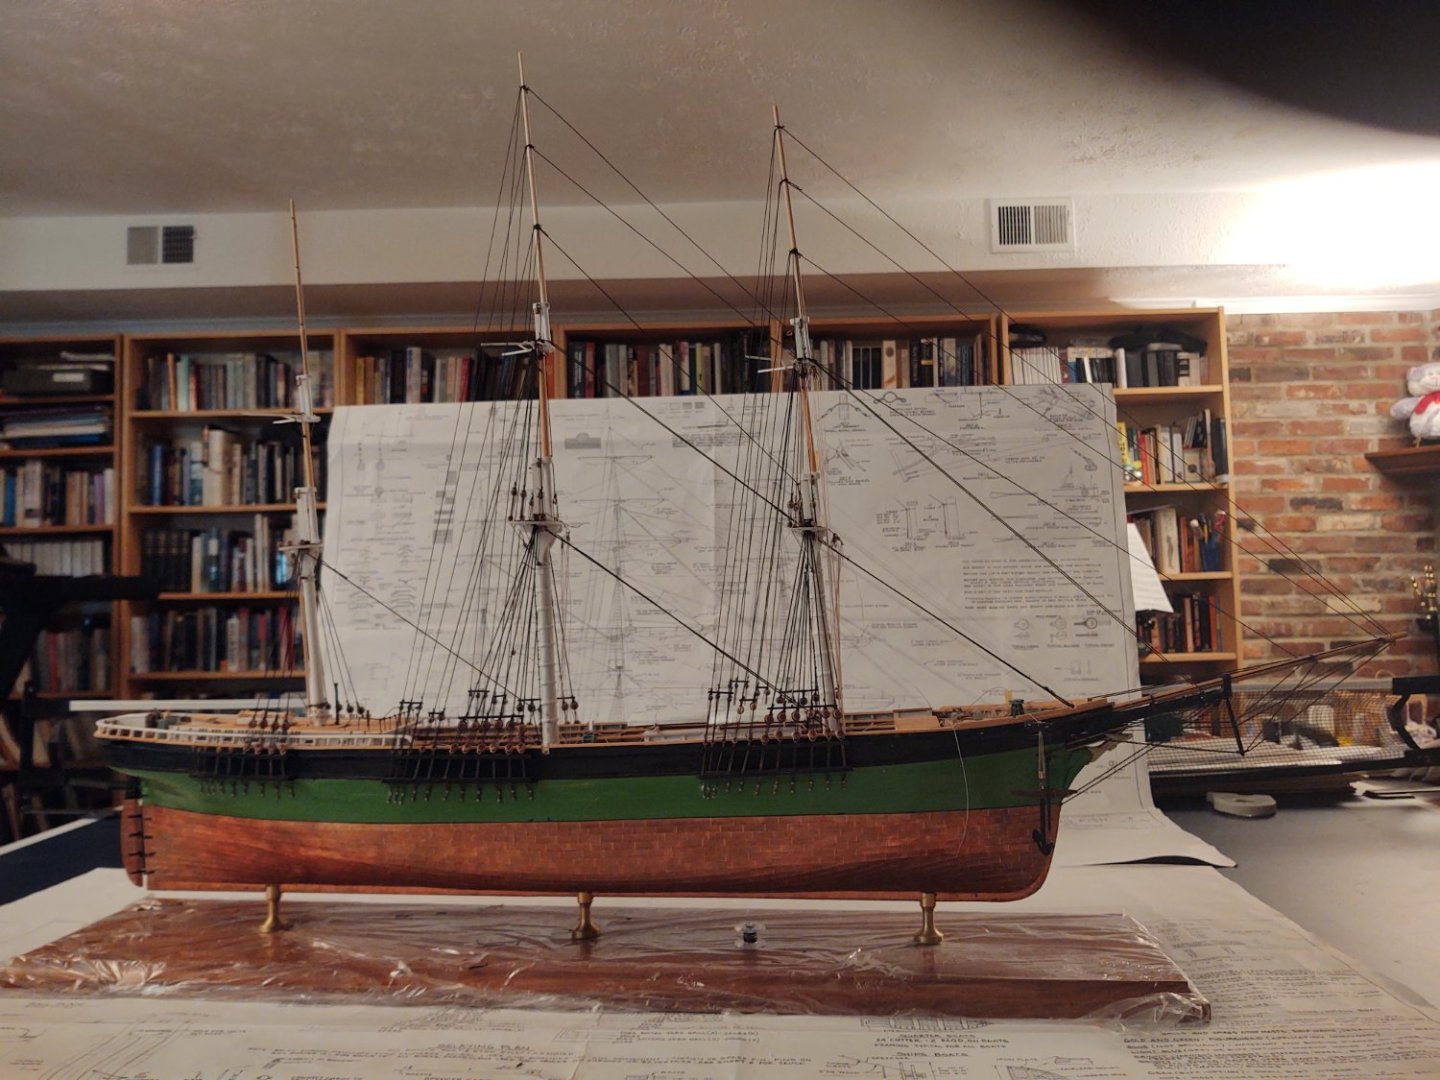
Well, just shy of two weeks since the last update, and progress has been made, even if it is slow. As I mentioned I am in the delightful stage known as tying ratlines, and these are simple overhand knots using pretty vanilla black cotton sewing thread. So, I've completed the port side mizzen mast (lower, topmast, and topgallant shrouds), and the lower shrouds on the port side main mast. First, the mizzen: And the lower main: For the main, I tied as per the plans, across 5 of the 6th shrouds, except every sixth line at which point I went across all 6 shrouds. A few photos of multiple masts with with (where relevant) the templates for the next batch of shrouds. You will note that I clamped the lower shrouds to keep them from spreading, but didn't do this anywhere else, principally because the topmast shrouds aren't in a line; if I had clamped them it would have stretched the shrouds in a way I didn't want to happen. Finally, here is a shot of (most) of the ship as it stands today. I'm hoping about 3 weeks to get the port side finished, and another 5 (ish) to do the starboard side. My recollection is that I got a lot faster toward the end of Niagara so, we'll see. It would be nice to finish this chore before the end of March, but that seems to be the schedule. My intention was to work on the yards once I made progress on the ratlines, and I think that this constitutes 'progress', so, hopefully some pics of yards when the next update comes along. Thanks for looking in! George K.


- 602 replies
-
- 5
-
-
- Flying Fish
- Model Shipways
- (and 2 more)
-
Well, at a minimum you can say that chipped paint would have been realistic for the ship in life . I had vaguely thought about getting this as a 'simple' project to have going once I start the Discovery, I'm a lot less certain of that now. Keep it up, I know you'll get there. George K
- 113 replies
-
- 5
-
-
- Cairo
- BlueJacket Shipcrafters
- (and 1 more)
-
I believe @MrBlueJacket called it "hours of fun"
- 602 replies
-
- 3
-

-
- Flying Fish
- Model Shipways
- (and 2 more)
-
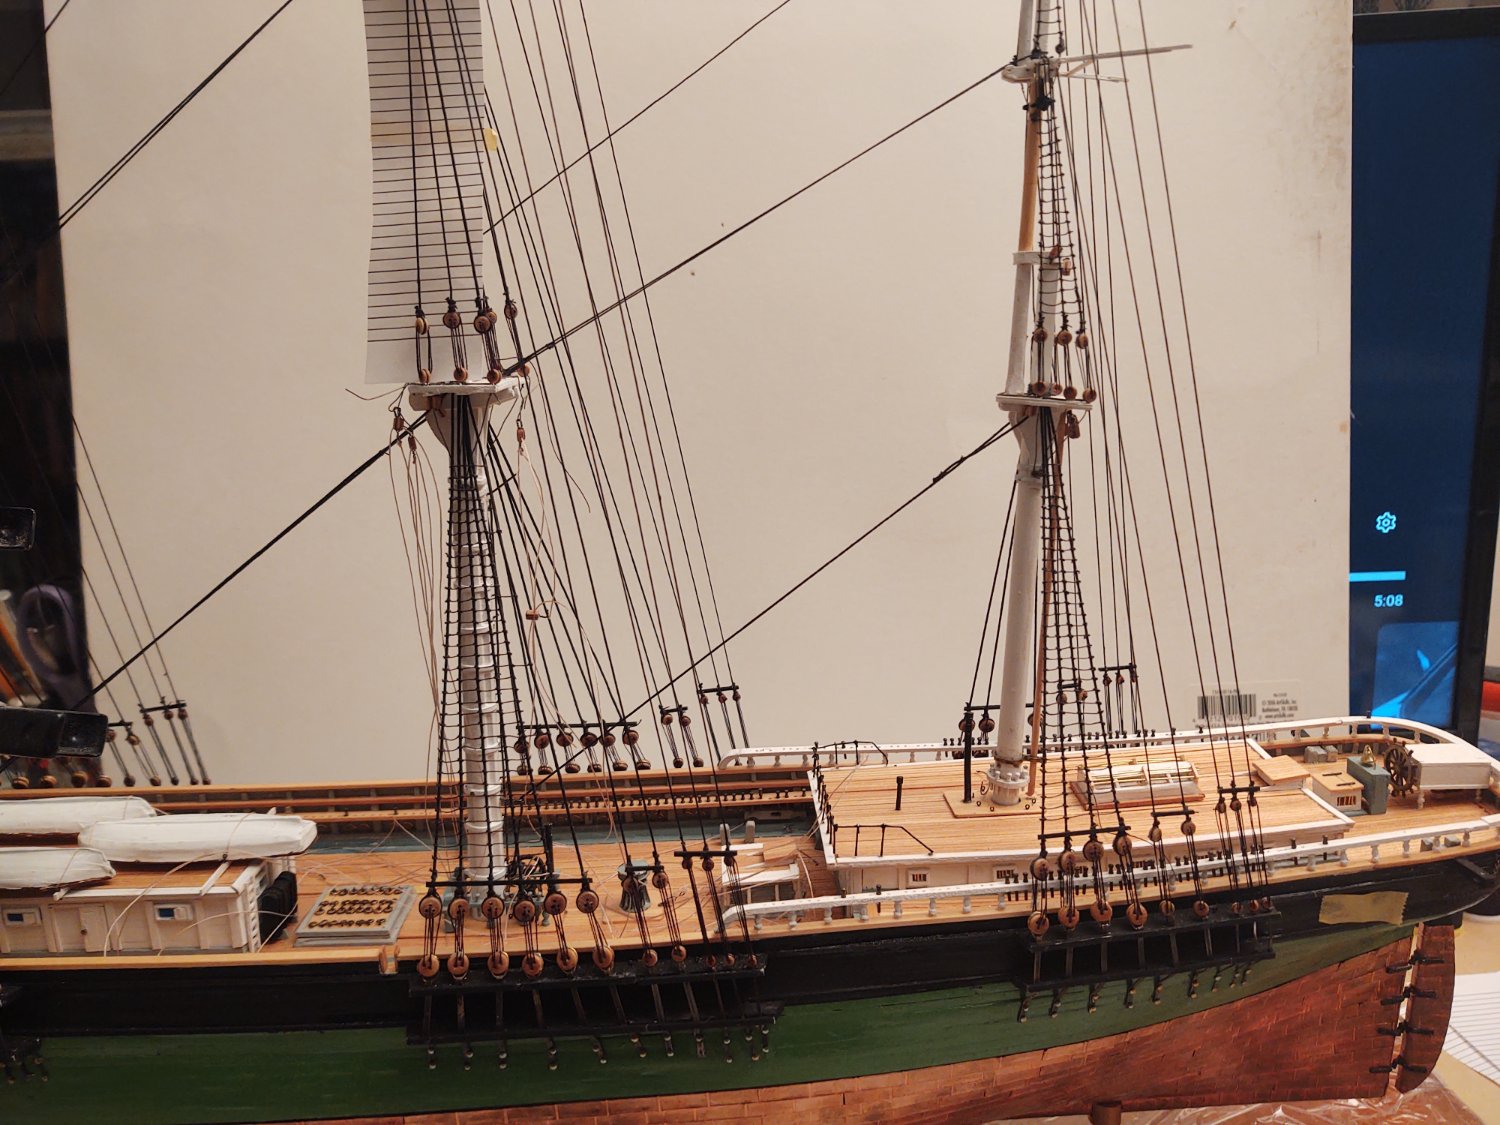
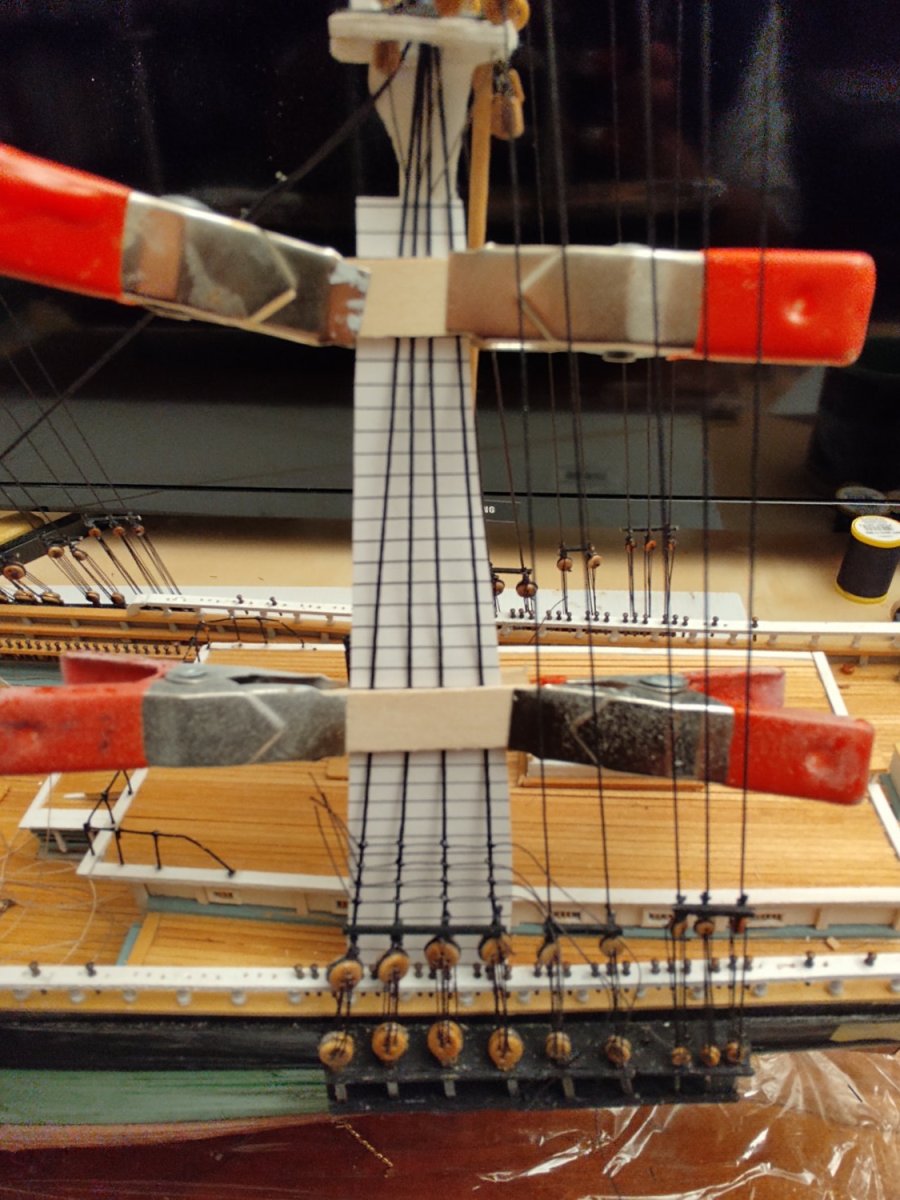
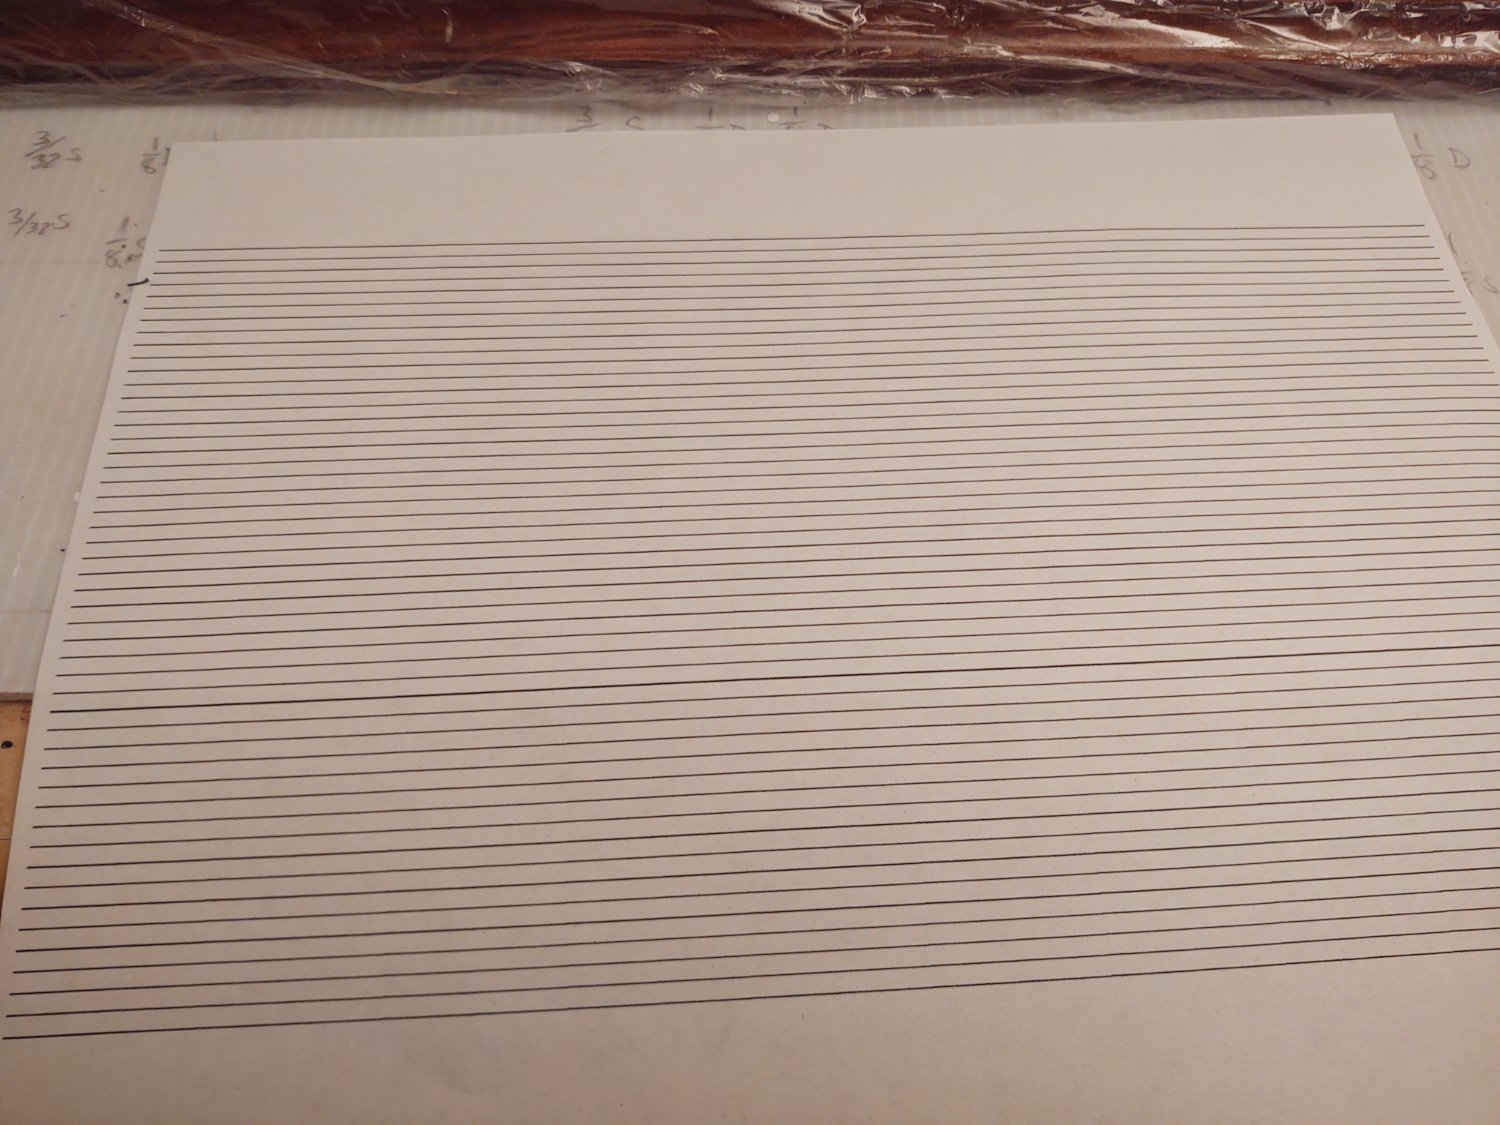
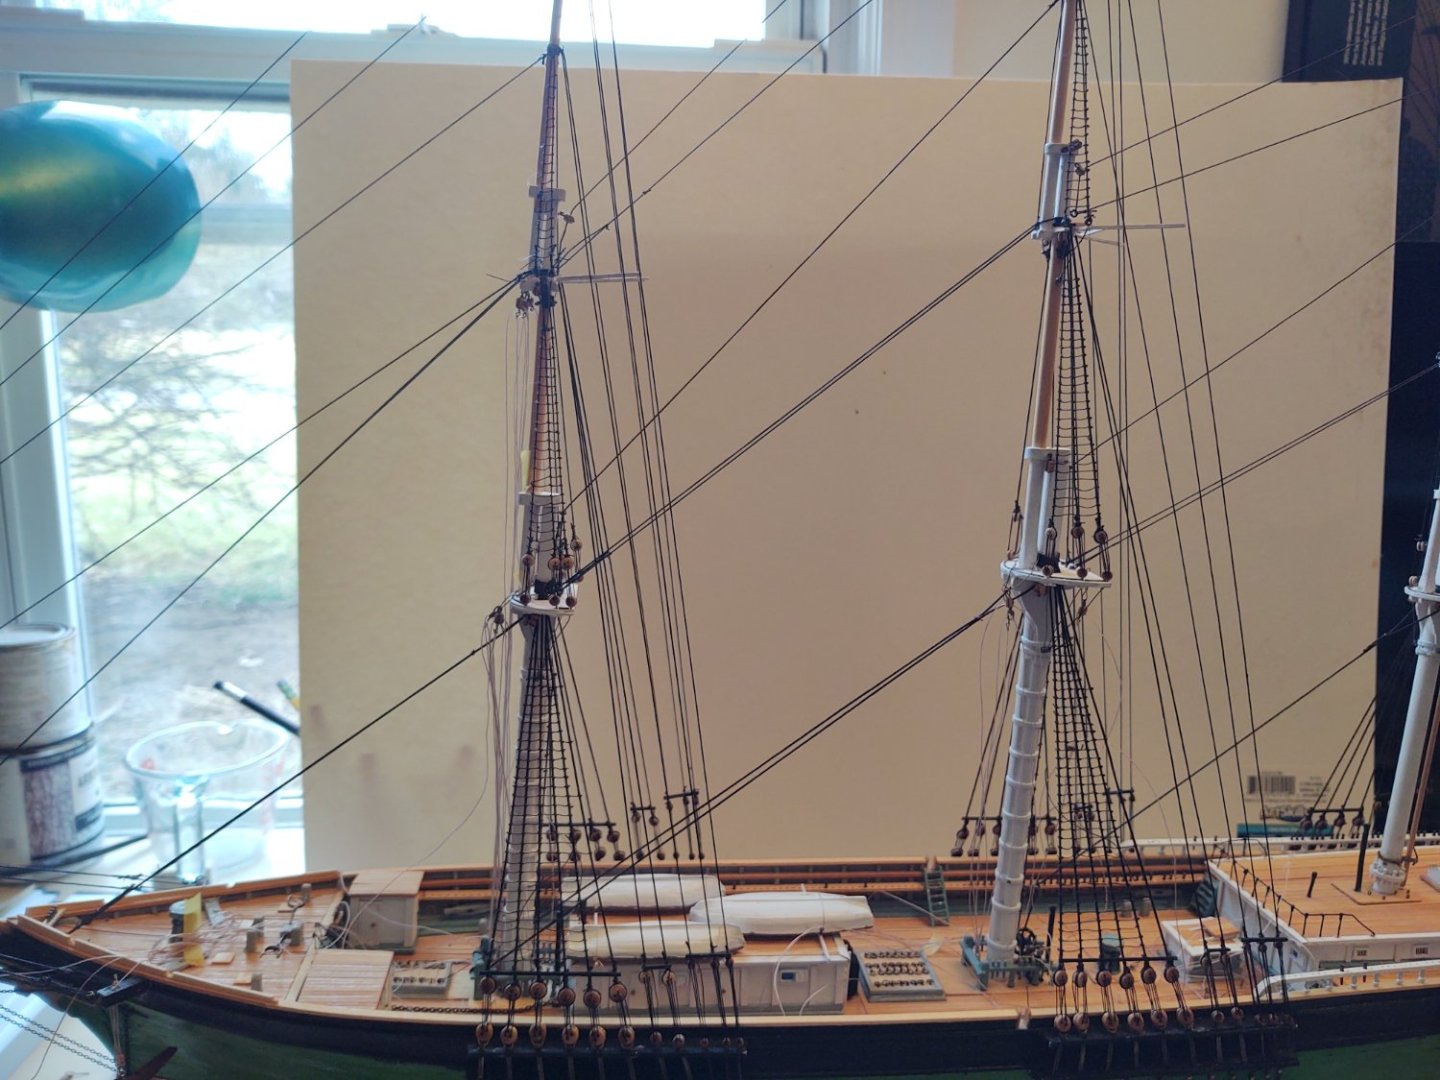
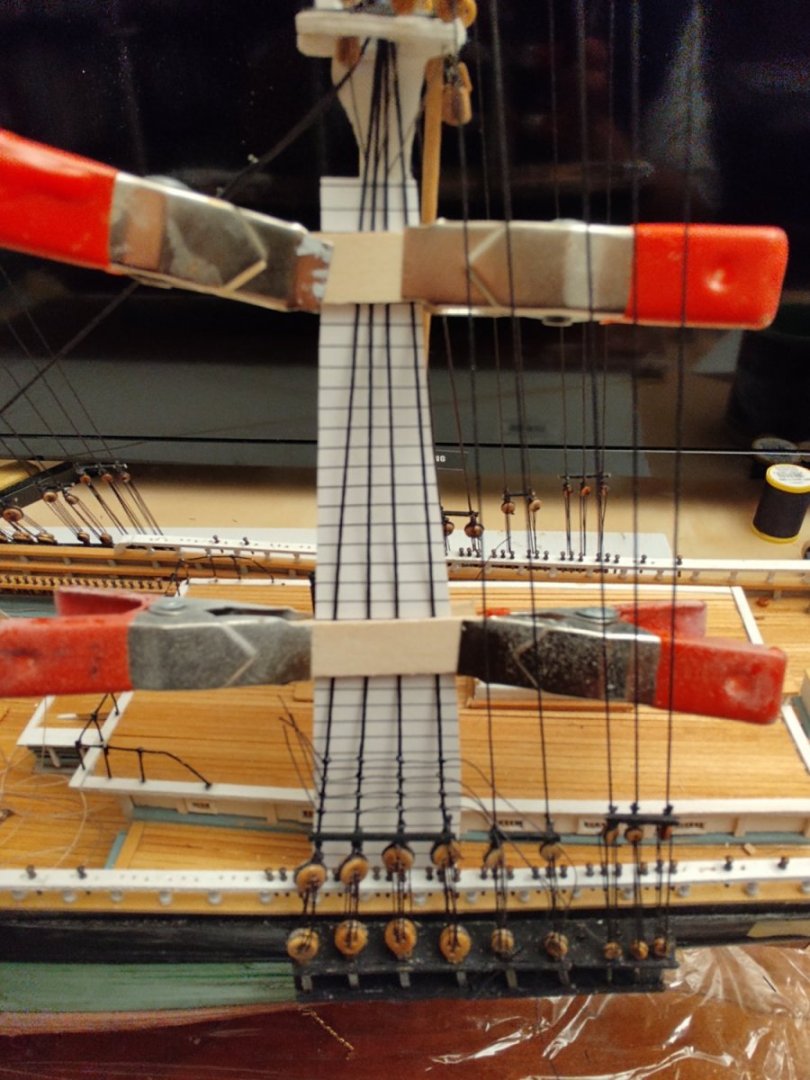
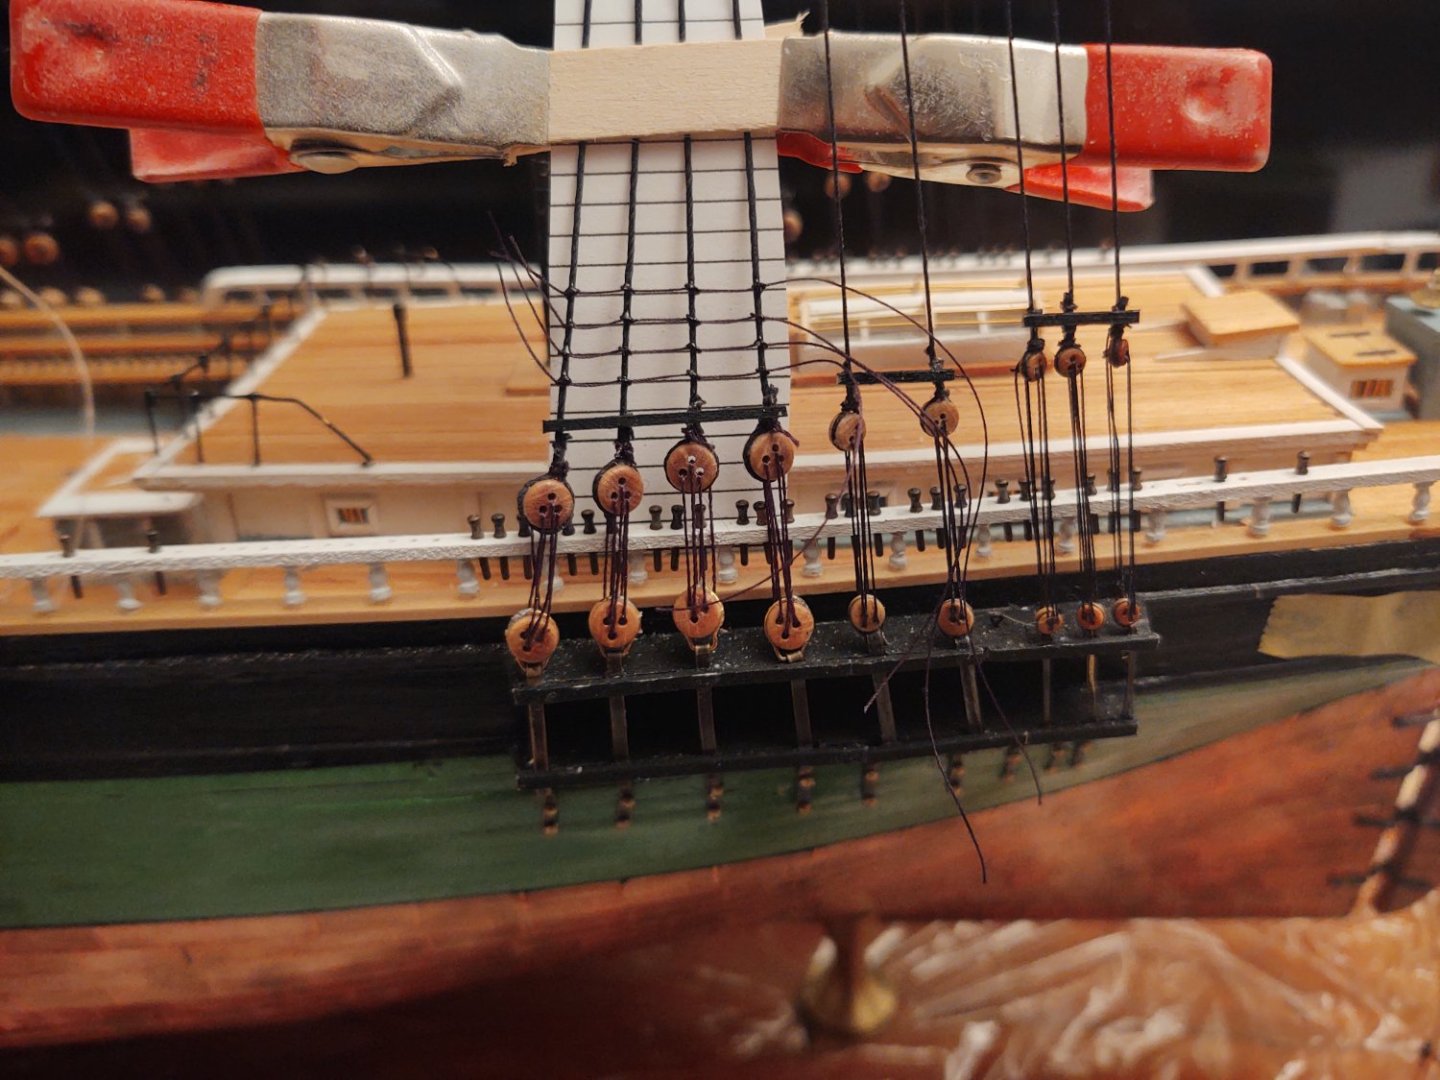
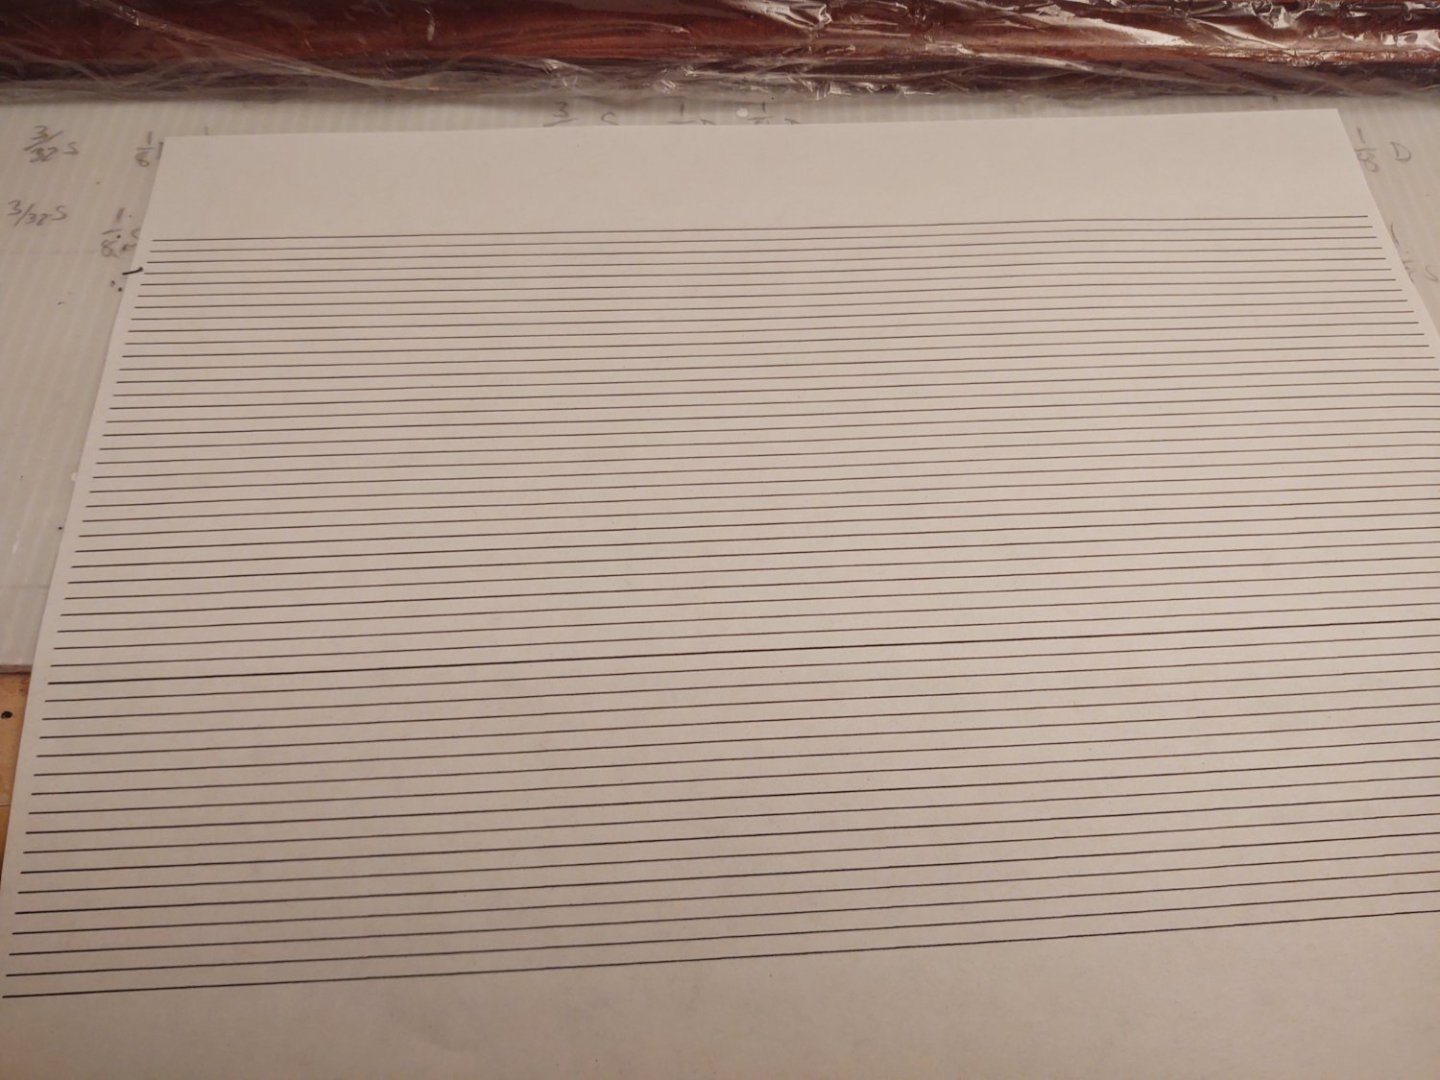
Well, "one week" of effort appears to have been more like 17 days, but the mizzen is mounted and rigged. This is the end of the standing rigging (except the ratlines), and actually, there are 12 clew tackles installed, so I guess the running rigging has been started. The mizzen is relatively clear since there are no fife rails, and rather than have the lines in place cluttering things, I haven't installed them there yet. Now for the ratlines. I intend to make the yards and supporting hardware (e.g. trucks, gin blocks) while tying the ratlines. That way if I do 5-10 lines (20 - 50 knots) per day, I should be done with them in a month or so. At 1:96, 15" is 5/32 inch, so I made a sheet of lines with that spacing in PowerPoint and printed it out to use as a guide: I attach that at the top (I'm working on the lower port mizzen shrouds, now) using clamps and two pieces of scrap wood. The similar feature toward the deadeyes is to try to keep the shrouds from compressing in - I'll move up as I move up the shroud. The above photo makes it look like they aren't very straight, but as can be seen below they aren't bad at all, if I do say so myself. The knots are simple overhand, stabilized with a bit of glue. I find that anything larger (a) starts to get very big and out of scale, (b) puts more strain on the outer shrouds, contributing to the squeezing in, and (c) is radically more difficult to set up with the proper distance between the knots. Anyway, I hope everyone is having a good year, and thanks for looking in. George K


- 602 replies
-
- 7
-
-
- Flying Fish
- Model Shipways
- (and 2 more)
-
Just my $0.02 here, but if you overcut the bottom, is it really that much of a problem? Mount the "armor", fill in any bottom gaps with putty, then glue the whole thing on the deck. Looking good and I'm sure you'll find something that works. George K
- 113 replies
-
- 5
-
-
- Cairo
- BlueJacket Shipcrafters
- (and 1 more)
-
Just found your log and it's looking great. Two quick observations from someone who has built the Niagara kit. First, buy a lot more of the small eyebolts. I don't know what they were thinking; I wound up ordering 240 additional eyebolts in order to finish. Maybe they didn't include the bolts needed for the jackstays, or perhaps I missed something, but I went through those things like there was no tomorrow. The other observation is that all Model Shipways kits (I'm on my third) don't ship all of the line diameters indicated on the plans; this is also true with regard to deadeyes, bullseyes, wire, etc. The plans are frequently of the ship, rather than the model, and then the kit has a subset of the needed sizes. Not looking to beat up on Model Shipways - I like the fact that they are "semi-scratch", you really get to build skills - but I always wind up with a pile of leftover wood and having to order a bunch of things that fall into the 'fittings' bucket. Good luck going forward, George K
-
Well, it's the end of the year, so here is the Fish as of the end of 2022. The mizzen is mounted, and the lower mast rigging (shrouds and forestay) are in place. I need to make two more gin blocks before fitting the topmast and topgallant shrouds and stays, but shouldn't take more than a week to get to the point where the standing rigging is done except for ratlines, at which point I'll start making the yards while getting them done. Have a safe and happy New Year. George K

- 602 replies
-
- 6
-
-

-
- Flying Fish
- Model Shipways
- (and 2 more)