


Bob Fraser
-
Posts
276 -
Joined
-
Last visited
Content Type
Profiles
Forums
Gallery
Events
Posts posted by Bob Fraser
-
-
Building continues - delay due to lack of pics.
First up the second deck side railings.
I made a mistake - nothing new there then you might say!
When I measured the height of the uprights I measured vertically and forgot they are angled inwards 😒
Fortunately I had only cut the one length, so each was measured with eyeball MK2 - glasses 😄
All the railings had been made up previously so it was a case of line up the posts and fit them in.
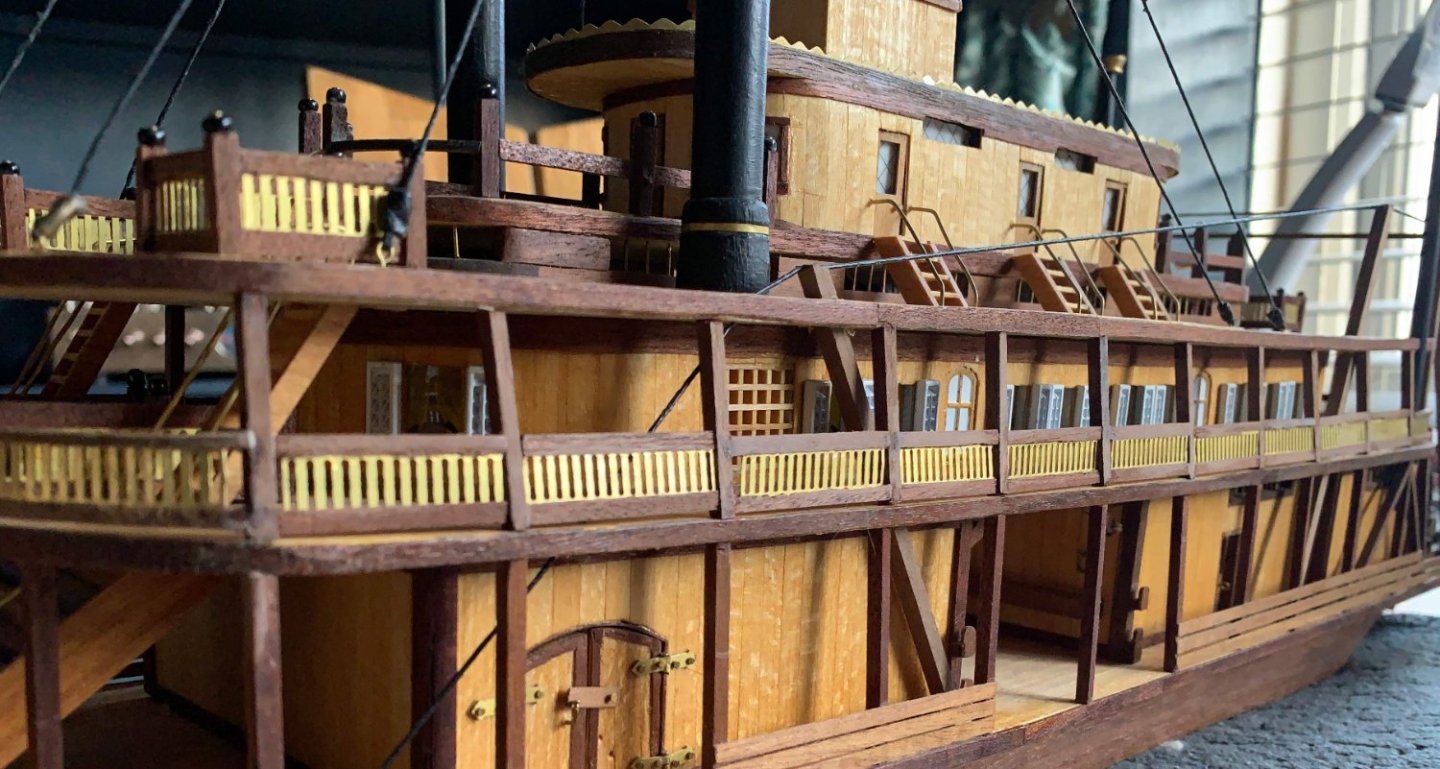
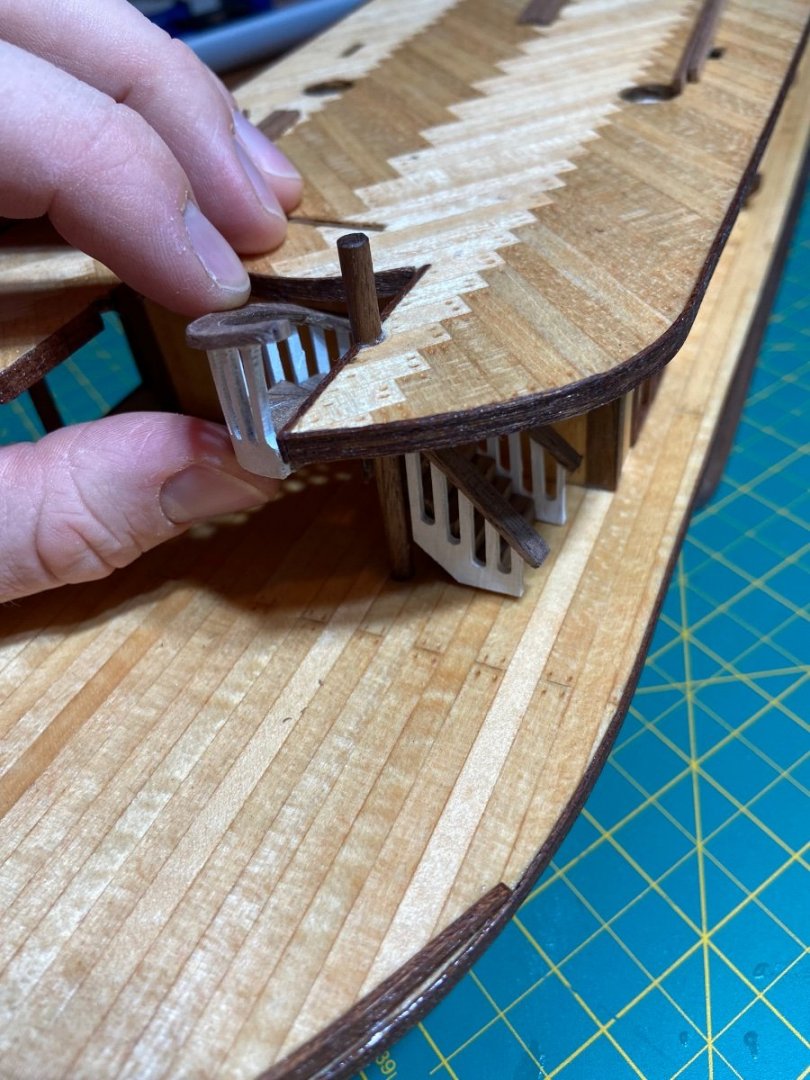
Then came the stern railings The central two uprights and single railing were fitted into place to give, as much as possible, a central single rail instead of the two in the instructions.
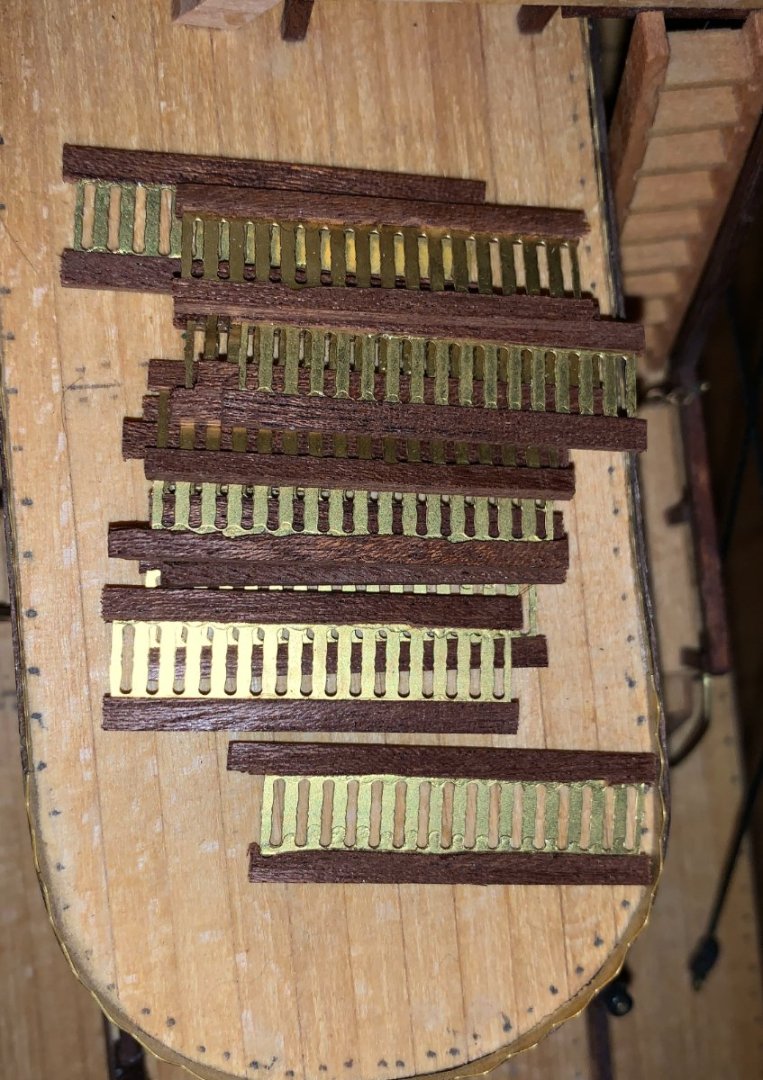
After that the curved sections to connect to the sides. Once the 4 curves were selected from the box the were roughly shaped and angled to fit don't forget that this is not as AL intended!

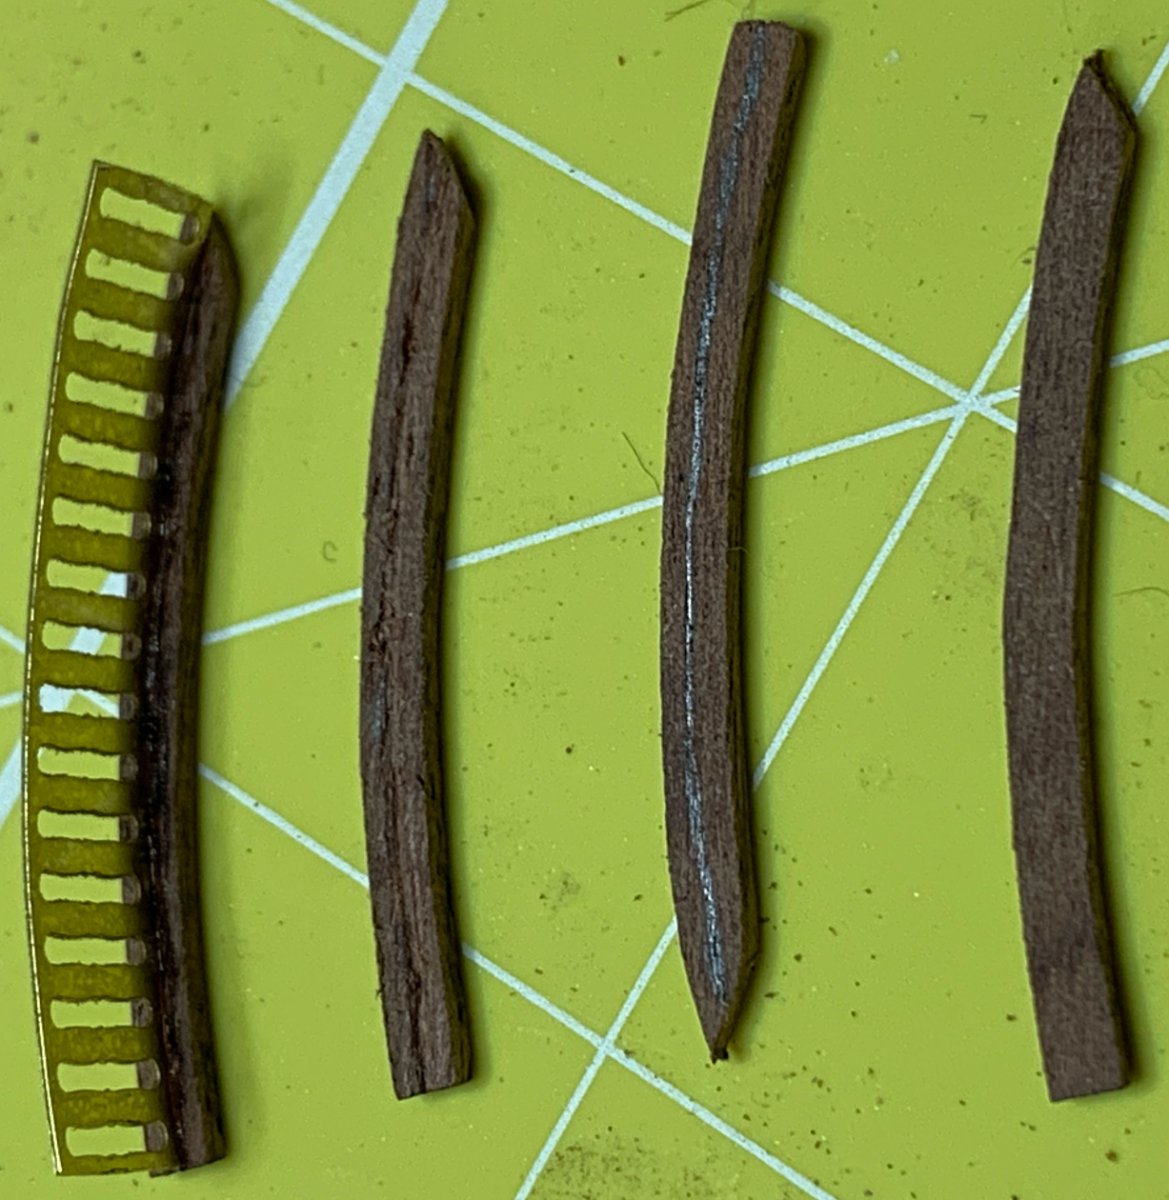
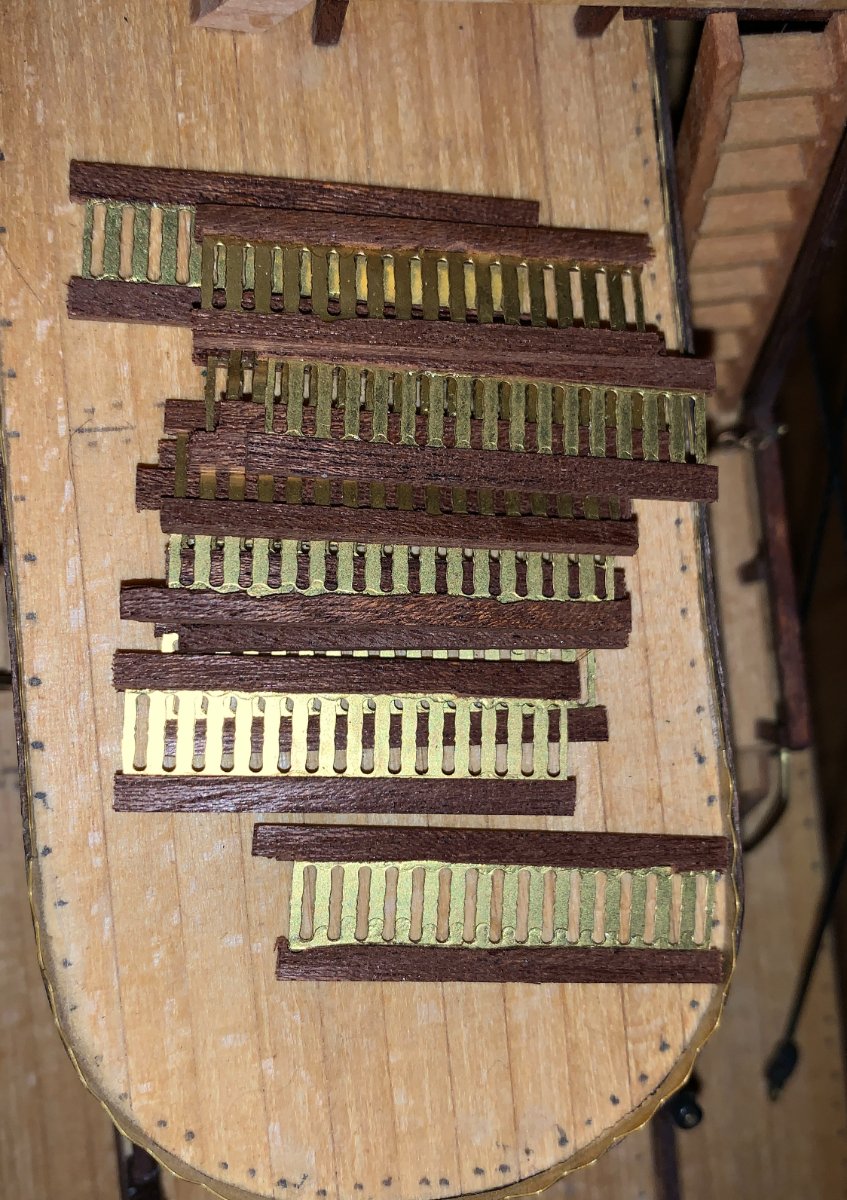
Right to left - As is after preliminary shaping, marked for grooving, grooved using a pointed diamond file, flat pointed file and the corner of a razor saw to cross the grain, and finally the PE fitted in.
Finished items fitted - just noticed I need to adjust that right hand one, it's dropped, as has one one the side!
Doesn't look like much but it was close to 8 hours.
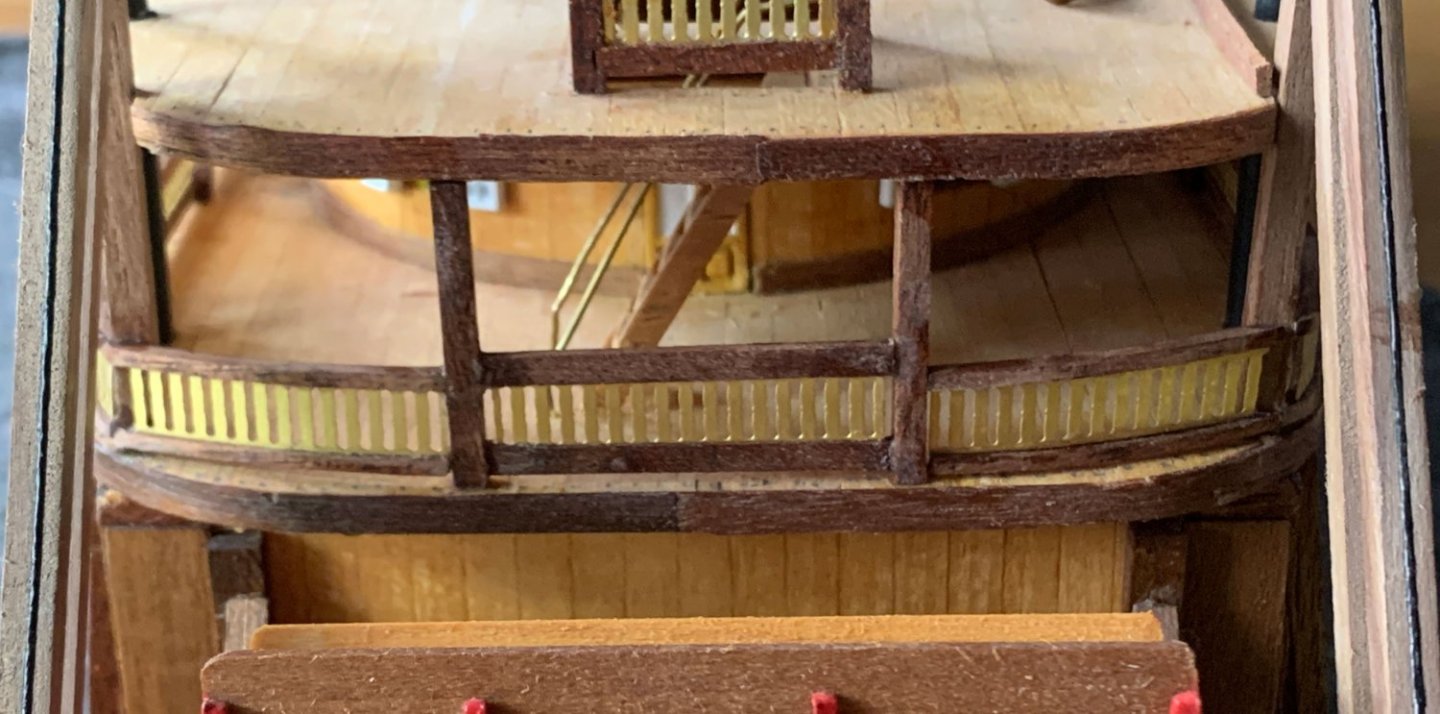
Once the drops are fixed a touch of sanding and then oil the bare woods to match the old ones.
Upper deck railings after that - don't think I'll be using the PE work. Each deck will be different so i've got something in mind, just need to think about working it out.
Thanks for following along, more mods on the bow to come to individualise the build further later onCheers!.
- yvesvidal, Prowler901, Cathead and 2 others
-
 5
5
-
Hi Jerry.
Sorry, I'm not much help.
It looks like I did a Captain Kirk and cheated - it's so long back I can't recall if I made a mistake, or probably just decided that the 1.5 was too thick for the railings to start with.
Part 90 is 1.5mm x 3mm. Scale 1:80 -> 1mm = 80mm, 1.5mm = 120mm = 4.7" approx thick.
I used 0.5mm x 3mm (1:80 = 40mm = 1.5" approx thick) which seems more appropriate for the planked railings - even farm fences aren't as thick as AL want to to use!
To bend the wood Al use I have used a plank bender that puts indents - cuts - onto the inside of the plank for the radius of the curve needed. Unfortunately these will still be visible once bent.
I have also made a pinboard with the radius and hot soaked 'til pliable enough and put it into the curve until dry enough to keep its shape and test fit.
You could try one of the other guys who've finished their build tho - @bobandlucy is the most recent.
-
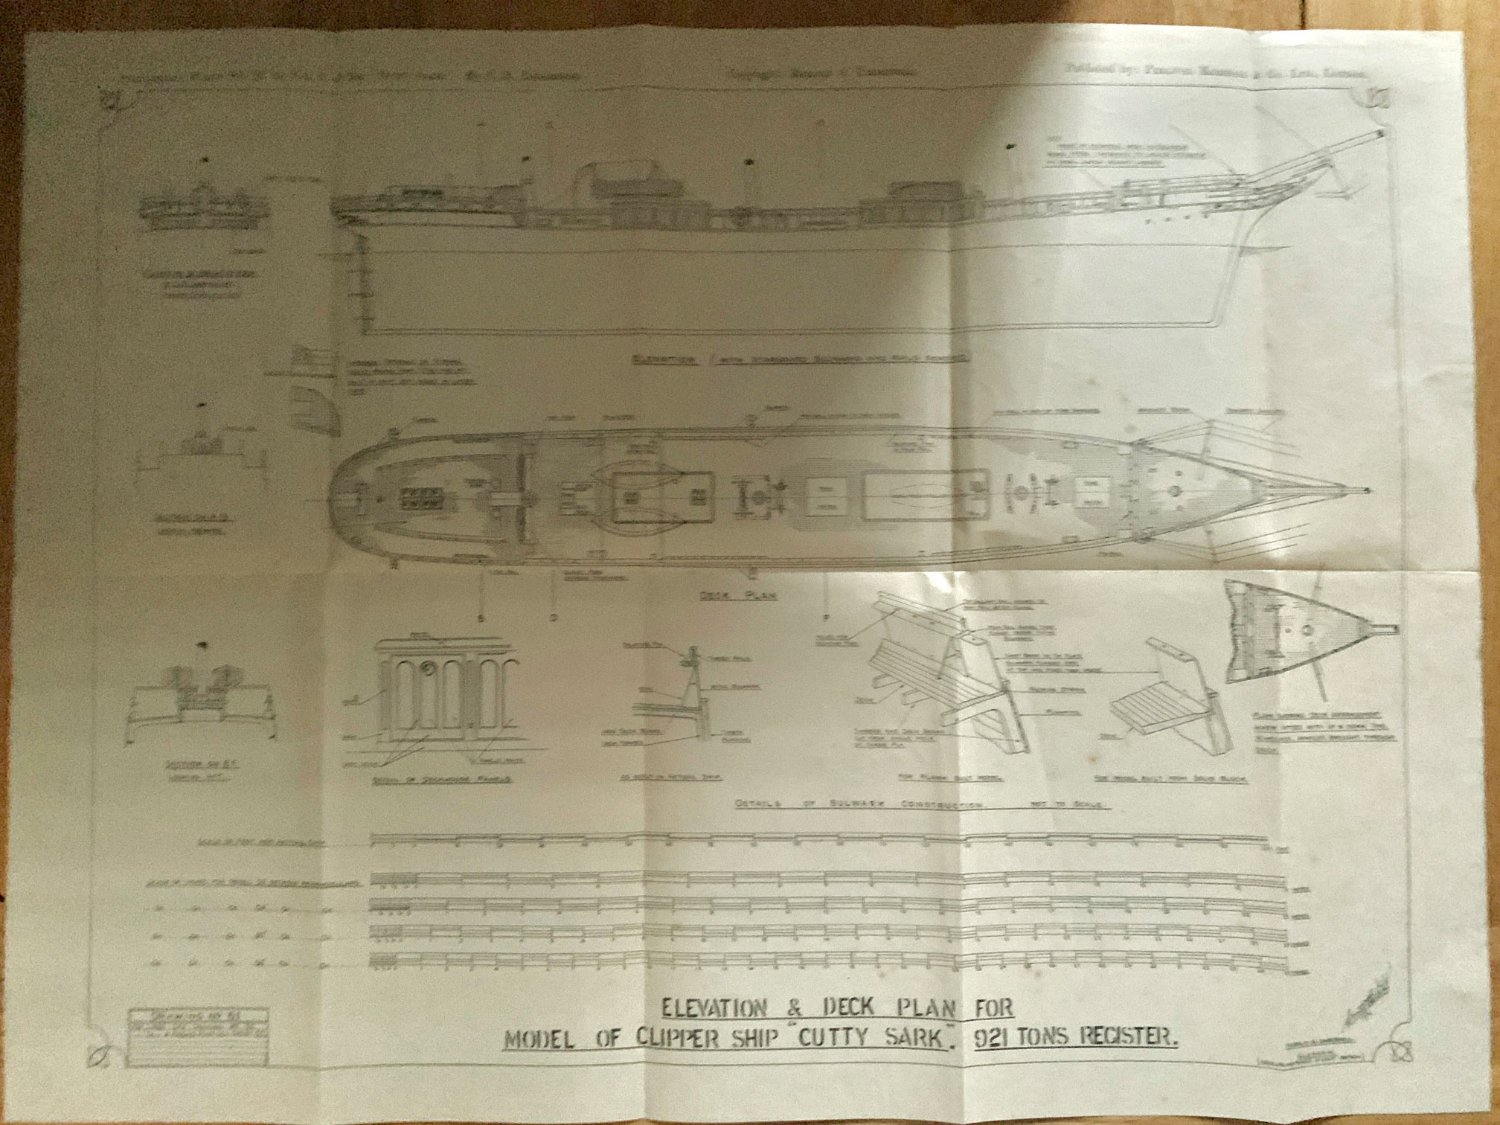
Campbells drawings have the info on chain and wire runs and he gives dimensions, but you'll need a magnifying glass to read some of them!
-
6 hours ago, Cleat said:
I test fit the structures and noticed the the wheel house platform is warped and I'm wondering how to flatten it. I need to find some material for the openings along the top of the state room. And I need to determine how to trim the front windows of the state room
Hi Cleat.
As Cathead (Eric) suggested soak it and flatten between layers with a heavy weight on top - it should flatten well.
With the windows I fitted the plastic inside and made a frame for the outside to hide the ply edges.
To hide the gaps top and bottom I used spare (not from this model!) 0.5mm x 3mm planking to form a contrasting skirting.
-
7 hours ago, grsjax said:
What do you get for the high cost of the monthly installments.
It looks like there are 12 packs - 96 installments at 8 packs a delivery hence the high monthly cost. NO magazines, just the PDF downloads.
Here's a link to the finished version on thier modelspace forum, what they call an Official Build , of only 3 builds
It's done by a subscriber and is itself a modified build.
Hope this helps.
-
Thanks guys, life in my house ad the needs of otherfamilymembers gets in the way a lot, but she was staring at me ad the other thingshave quietened down for now, so onwards we go! 👍
-
19 minutes ago, Warnerade said:
those stairs were QUITE a PITA, they’re still not done.
☹️
Congratulations on your new youngster, and the residency! Add those to a new house and it all takes time away from time needed for other things, as I know all too well.
Like me, you'll get back to it when you can. Looking forward to any updates!
All the best,
Bob
-
Pin rails look good, Daryll. Are they HisModel?
I've dug my Underhill plans out, and they're the same scale as the Campbell ones.
There are several differences between the Revell model, Underhill and Campbell, notably the number and position of boats, and Underhill has 3 different forecastle arrangements depending on date.
The original specs that I have a typed copy of call for the Revell and Campbell layout of the forecastle, and this is the way she was restored originally as noted on Underhills 3rd drawing.
My own model, started OOB, is laid up for the time being as it was knocked from a shelf and has a few bits gone missing and broken. 😭 I'll get back to her one day soon.
If you need any info from the big Underhill plans let me know.
Cheers,
Bob
-
So - after a year and a half of upheaval, (whole house redecorated, some rooms twice, more cupboards and shelves built into all rooms and kitchen, craft room for SHWMBO, garden levelled and tiered, grass replaced with astroturf and polytunnel greenhouse installed), I've finally got somewhere to work again, albeit the dining table!
During this break the ships cat has been hard at work re-arranging the tensioning rigging for the Chimneys.
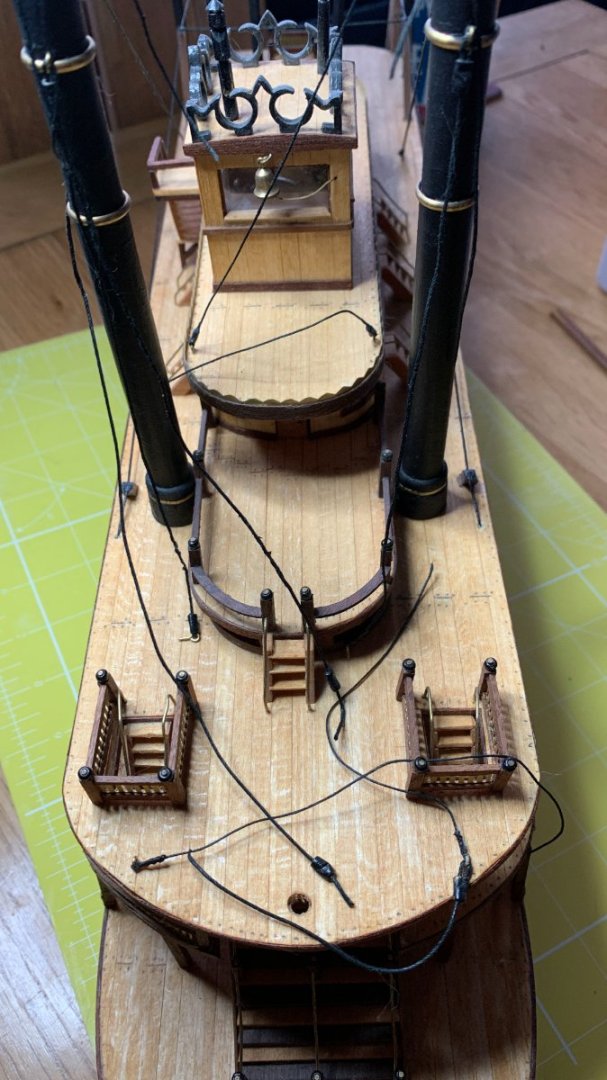
The captain examines the damage - 8 ropes cut!

Says "You should fire that ships cat!"
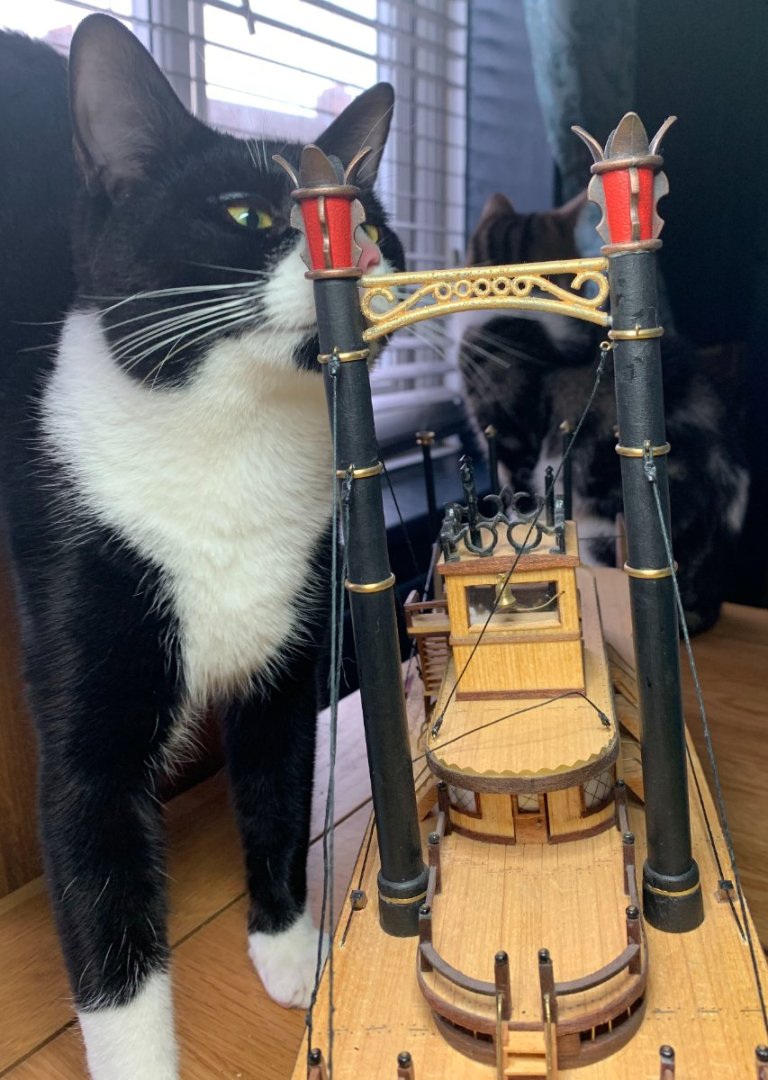
Ships cat, Cooper, in the background not impressed, his new first mate, Styx, checks out the ongoing repairs.
Rope repairs done, and railings refixed that came off whilst repairs were being done.
Next job - more railings. 12 made up for the stern and other side, ready for exact fitting as each upright is fitted.
Uprights measured and 5 different heights for 11 of them due to the curve of the decks.
More soon!
- Prowler901, VitusBering, Cathead and 1 other
-
4
-
Hi Daryll
Have you seen Sailcats CS ?
The Noel Hackney book is available at Alibris AbeBooks and is the most expensive of his set.
In the Longridge books Underhills plans are 50cm x 39cm and are dated 1974 in the edition I have.
In the intro to the book by Longridge, dated 1933, he says that Underhill did indeed alter his original plans to take into account the new research in the book.
From the RMG the original date is 1932 for the Underhill drawings, and Campbells are the 1950s. (I do have both sets on modern printings)
Each drawing has the original scale, and then 4 more scales below for the modeller to upscale for different sizes of model. Pic from the book insert.

If you wanted to go really mad the RMG has drawings going to 1/12 scale but has a Set at 1/96th done in 1922. Drawing list is lower on the page.
These would be a special order though, as they haven't yet been digitised, and likely at a higher cost.
From the restoration dates the 1922 / 1932 plans could well be the closest to the original, with Campbells possibly being based on the 1950s restoration.
Hope this helsps a little,
Bob
- Cirdan, shipman and VitusBering
-
2
-
 1
1
-
Hi both
41 minutes ago, hof00 said:The plans that I had enlarged were from the Museum.
I got them enlarged to the largest "B" size. (I think that's a "B2?" Not sure sorry.....
The largest B size is B0, which isn't quite big enough to make them 1/96. ☹️
By my maths, admittedly a bit shakey, At 1/128 they'd need to be scaled up by 1.3333 and the paper size to fit that is 2A0 (5'6 x 4')😲
There'd be a fair margin to cut off though!
You could always measure off the plan and multiply.
Longridge must have used Underhills drawings for his model, as they are the ones provided in the book.
Another book to look for could be the Noel Hackney one for the Airfix smaller scale model which gives quite a few changes and upgrades for it.
- hof00 and VitusBering
-
2
-
-
3 hours ago, Jerry Berenson said:
wiring but nothing else. Also how to access the motor if the elastic comes off. Any ideas? I have enclosed a few pictures. Regards. Jerry
Hi Jerry
On the older model the back wall of the engine room is fixed in place, on the new version the complete back wall and paddle assembly is removable.
If you look at the new instructions, Section 4 pic 2 it shows extra slots in the deck, and Section 9 Pic 9 clearly shows the tabs on the bottom of the axle bearers.
You'd need to unglue your back wall and axle bearers as one piece, and work out a way of making them fixed but removable.
It looks like the switch and battery should be inside the second deck, with the upper deck removable to access?
Welcome to the "King" club 😁 - please, consider a build log so we can follow along.
Cheers,
Bob
-
Looks nice and clean from here!
A bit late, but painting the bolt heads can be done with a toothpick or a "dotting pen" (a steel ball headed implement) from a nail art tools set.
Our middle lad uses one on his tank wheels to good effect.
- Cleat and Prowler901
-
2
-
Looks good. Those stairs are the most difficult part of the build!
-
-
Hi Alan.
Your work is an achievement that will benefit many now and in the future.
This was just a quick and dirty method for getting hold of the plans in the interim. In no way is it a replacement for your work! I apologise if it came across as that, it was not intended.
I originally used it a few years ago to get plans for ships some distant, but interesting, relatives sailed on to create a family history, rather than have to search the RMG individually and filter, with the idea of maybe one day being able to scratch one. Highly unlikely as my skillset really isn't up to it, although I have bought some plans. Turned out most are already available as models.
But I do enjoy and really appreciate the reading, watching and learning from others, and the time and effort they have taken to produce and log what they have done.
And maybe after that then I can incorporate a few tweaks into my waiting models when i am able to restart.
Best wishes,
Bob
-
Hope this may help with the plans. Apologies if this is a hijack.
There used to be a program called Imker that would batch download images from Wikimedia but Wiki broke that when they changed the compression type for downloading.
There is a way of downloading but it downloads them all. - I have no affiliation with these sites, it's just the simplest free solution I could find.
I used this to download them last night to make sure there were no issues and that it worked properly,
Install FreeDownloadManager, an open source free downloader program. - no ads, no malware, no adware.
Use Wikimedia list generator this to make a single list or multiple smaller list of images in the category you want to download.
The plans category is "Ship plans of the Royal Museums Greenwich"
This downloads a list, or lists, in a zip file that needs extracting, containing the URLs of each individual image, currently 3680, as a text file which can be edited to remove ones you don't want.
Run FreeDownloadManager and click on the three lines in the top right.
Click "Paste URLs from File" and navigate the file explorer to your list. Select it and click "import"
This then loads all the URLs - can take a while! - and then downloads them to a specified folder and creates a sub folder if needed.
There are close to 78 Gigabytes of plans in all
Unfortunately you'll have to sort them yourself ☹️
-
18 hours ago, KeithAug said:
We have all gone soft. Don’t you remember the electric fires with coiled wire behind a grid wide enough for kids to push their fingers through.
Had one of them on the wall in the bathroom as a kid early 60s! ⚡💀 😅
- BLACK VIKING, mtaylor and Canute
-
3
-
Hi Cleat.
I didn't fit the spiral stairs at all but I would suggest sanding off the paint on the tops of the rails, and a light sand under the rail tops to help them stick.
I'd check the other builds to see how they managed this issue, but personally I would fit the steps before cutting a filler piece so you can see the shape and size needed.
Don't forget, unless you have spare wood there is very little scrap to spare with this kit.
Looking ahead when you get to part 30 stop! Parts 88 I found are NOT all the same length as suggested due to the curve of the deck each can be 0.5 to 1.5mm different depending on the individual fit of the upper deck and whether or not you've planked the ceiling. They are also angled inwards which isn't very clear on the plans or instructions so you'd need to allow a 0.5mm for that too, but seperation distances using the big plan are good. I had to use calipers to get the right lengths.
-
8 hours ago, Srenner said:
I also bought the book recommended by hamilton and others for the belaying plan for a 20 gun ship of 1720. What I don't understand is there seems to be an order you rig in... is that because multiple ropes go to multiple belaying points or because other rigging runs of things already there?
That's a good buy! The order is inside to outside and I believe standing to running rigging so that you're not trying to fit things like stays after shrouds or have other other ropes in the way. Stilltrying to learn this stuff myself.
There are other rigging books but a free one on google books is Biddlecombe, The Art of Rigging 1848 gives an idea of the naval practices.
Another book is Marquardt that deals only with 18th century rigging but is now, to me anyway, hugeley expensive, cheapest i found is Fleabay at £75
I have both Lees and Marquardt bought cheaply years ago before they became "much wanted" and shot up in price.
- Srenner, Old Collingwood and mtaylor
-
2
-
1
-
Hi Thomas.
It looks like it doesn't it!
Took me a while to find this as the newer instructions are diferent to mine.
Are you using the motorising kit? Even if not don't glue the plate on just yet!
The backplate is made up and held in place with elastic bands (page 77) to help with the positioning of the upper deck, uprights and fencing.
It's not glued into place just yet because it needs to be removed complete a future stage more easily.
Look ahead to page 228 section 34 in the instructions where it details the paddle making and attching process.
There aren't any locating lugs for the backplate for a reason - the paddlearms go through the outside slots and a rubber band through the inside one on the left to attach to the motor.
See pages 234 and 235.
If you're not using the motor then the inner slot can be planked over.
-
-
The new style instructions and my old picture instructions are different to your piece!
I'd hazard a guess that the pointy ends fit under the upper deck to either make your steps level or leave the deck as the last step.
The picture instructions, pic 29 old instructions, don't show the pointy bit on the railings either, (although it is there on the part!) and the step fits below the deck level.
Other modellers appear to have cut them off, but this image by @Warnerade appears to show, even though it's removed, that it should fit below the deck.


King of the Mississippi by Bob Fraser - FINISHED - Artesania Latina - Scale 1/80 - 1st Build
in - Kit build logs for subjects built from 1851 - 1900
Posted · Edited by Bob Fraser
Thanks for the looks and likes, appreciated!
Ok - best laid plans and all that meant I didn't sand and oil.
I did fix the middle deck railings though!
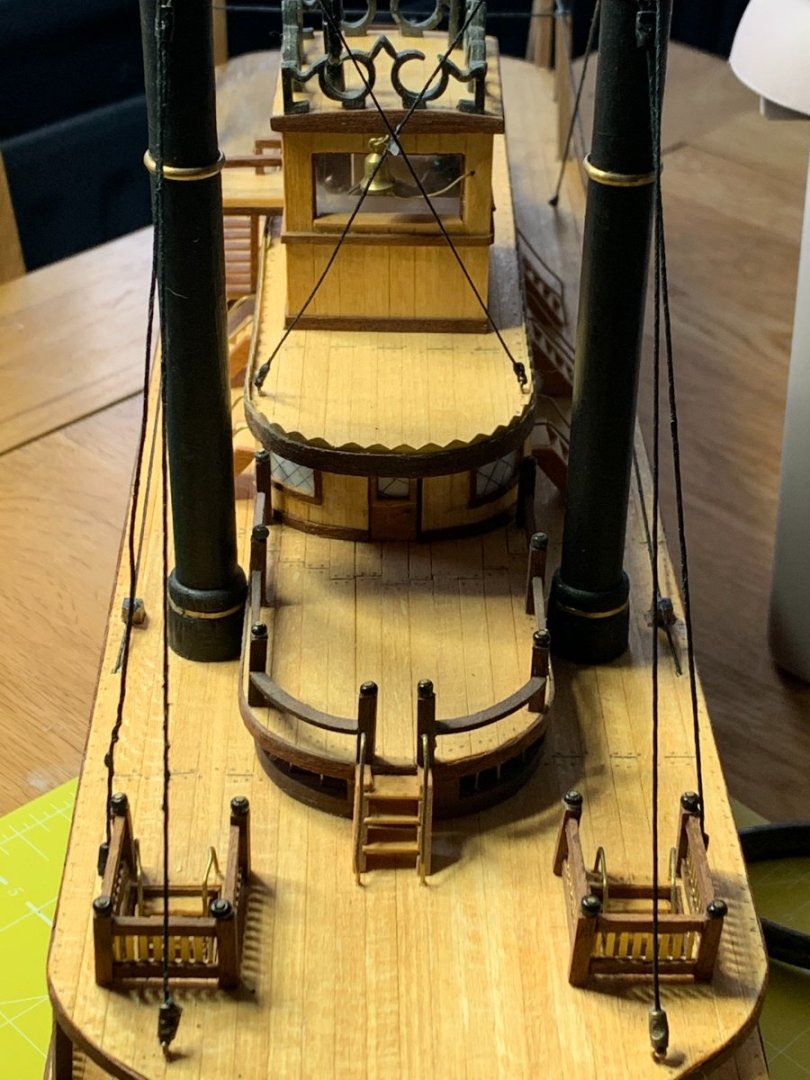
Instead I decided I didn't like the wooden rails on the upper deck. I wasn't really enamoured of them in the first place.
Off they came and have been replaced with shiny new double brass rails.
Showing the contrast between the original and new.
A lot cleaner and neater lines, pleasanter to view.
Cheers for now!