-
Posts
2,246 -
Joined
-
Last visited
Content Type
Profiles
Forums
Gallery
Events
Everything posted by EJ_L
-
Thanks Frank. Have not seen you around in a while. Good to have you with us on this build.
- 961 replies
-
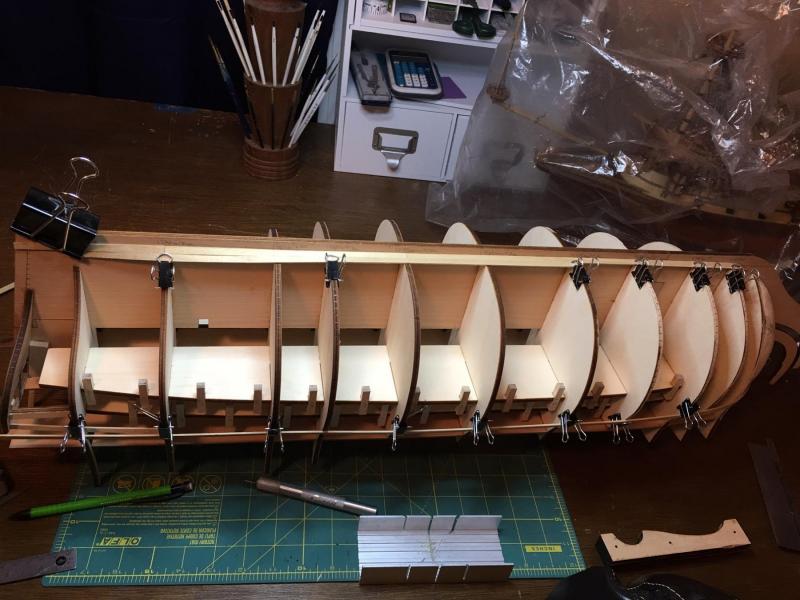
The spacing is truly horrible and yes very irregular. Fortunately this is a double planked hull so while I am attempting to stay true to proper planking, the spacing is presenting a challenge. I thought about adding more filler blocks but my first layer of planking is on the thicker side between 1-1/2 and 2mm thick. I think that once I have them glued in place, they will be stiff enough to provide a solid base for the second layer. The second layer is only .5mm thick. I am going to keep a close eye on spacing as I get further alone g. If it does not look like the planks will be stiff enough I will get some extra supports in there. The bulkhead spacing has always frustrated me. I always have to modify, adjust and add to them so much that I am really thinking more and more about trying to do a fully framed ship. That mite box has been around for a long time. Dad bought that for me over 20 years ago and it has served me well since. Not bad for a cheap miter box. Been through a few saws though over that same time. I have learned a lot about what materials can and cannot be cut well with them...
- 961 replies
-
Not on this build. Planking will take me a while on her as she is a big one. I will keep updating with pics as she progresses. This is always a fun stage for pictures in my opinion as with each update you can see the hull take shape.
- 961 replies
-
I keep looking at it and I still don't know how else they would fit in there. I think it is better to have them than not as at least there is a way to get up to the forecastle. Not the fist head scratcher I have come across in building model ships.
- 50 replies
-
- cutty sark
- artesania latina
-
(and 1 more)
Tagged with:
-

Royal Louis by fmartins - multi-media
EJ_L replied to fmartins's topic in - Build logs for subjects built 1751 - 1800
A lot of variation was in the details that at first glance are overlooked. Hull shape, displacement, planking patterns, rigging practices, materials used and the unseen such as framing like Mark said. To most of us these things are hard to pick out but to a ship's Captain, these details could be noticed at great distance. They were some of the features that allowed them to recognize an enemy ship in disguise vs a friendly. A lot of combinations of different countries building styles would cross over though. Like most things, builders would see a ship that worked well and try to copy it to make it their own. Limited by the resources available to them due to either geographical locations, money or war, they would adapt to make it work. For instance, if they were having a hard time finding large trees for planking, smaller planks might be used or a mast may be built of multiple trees cut and bound together. Even "sister" ships could have differences in details if the first ate up more resources than the second. Another factor was the architect. During a big build time, there would have been several architects who each would design and build slightly different. While staying true to the countries overall building practices, they would add their personal touches to the design in the ultimate goal to build the best ship. This is one of the more fascinating features about this hobby to me. Each ship has it's own uniqueness in design, usage and history. Some vessels we know a lot about and others, even famous ones, we are still learning. While most of these things do not need to find their way into every model we build and honestly would be impossible at the scale you are currently building, they are still worth reading about if you are interested in ship architecture. English ship building practices are some of the most and best documented around but there are some good articles on French and Dutch building practices also. -
Planking has started!! I know, not much to look at yet, only a few pieces in place but I am off and running. More to follow soon.
- 961 replies
-
Look around at the various builds that are on here. There are some huge ships with a lot of details and ornamental carvings or there are smaller ships with less decoration but, due to the design of the hull, rigging and colors it can be even more beautiful to behold. As said, this is mostly in the eye of the beholder as to what qualifies as "epic". As to a kit being "epic", it has already been said that that won't happen. However, any kit can be bashed into an epic model with enough patience and determination of the modeler. As with all projects I say, find the ship that you think is cool and sparks that passionate interest in. Then however you choose to build it, be it kit or scratch, go above and beyond what it called int eh instructions and push your skill past your comfort zone and into the next level. Then you will have an epic model.
-
Nice job on the deck furniture! Those out houses came out great. Very impressive indeed. I do feel bad for the sailors though having to climb up over the edge of the forecastle deck since the ladders tuck so far underneath it. Is that simply due to the limited room behind the out houses or was there another reason I don't know of? I have seen a lot of strange designs when it comes to the placement of ladders, and other deck furniture so I am mostly curious.
- 50 replies
-
- cutty sark
- artesania latina
-
(and 1 more)
Tagged with:
-

Royal Louis by fmartins - multi-media
EJ_L replied to fmartins's topic in - Build logs for subjects built 1751 - 1800
There were differences in English and French construction in many aspects. For the purposes of this model though I would not worry to much about it. -
Oh no!!!! Reasons why I am glad my Admiral stays out of my shipyard. We each have our own spaces that we do not mess with the stuff in there. At least this time you know how to make them so it is just the time required to build and not to design. As horrible as that is, the story did make me laugh a little. Forgive me though as I do feel your pain.
- 473 replies
-
- greek bireme
- dusek
-
(and 1 more)
Tagged with:
-
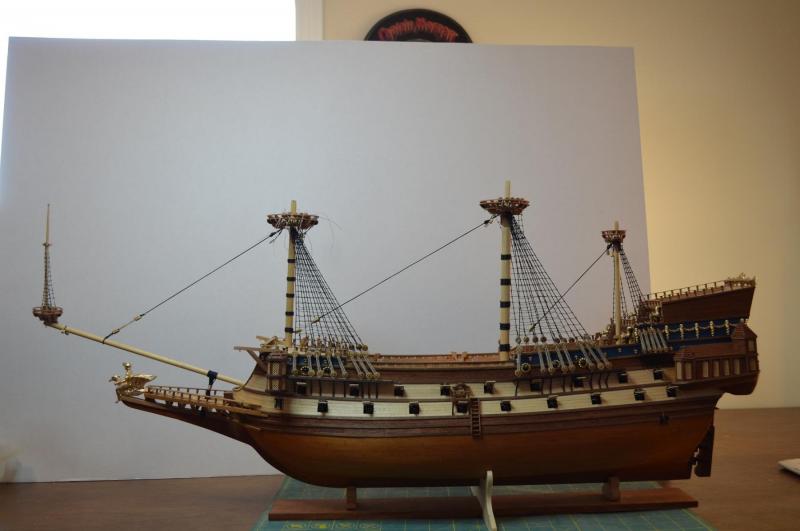
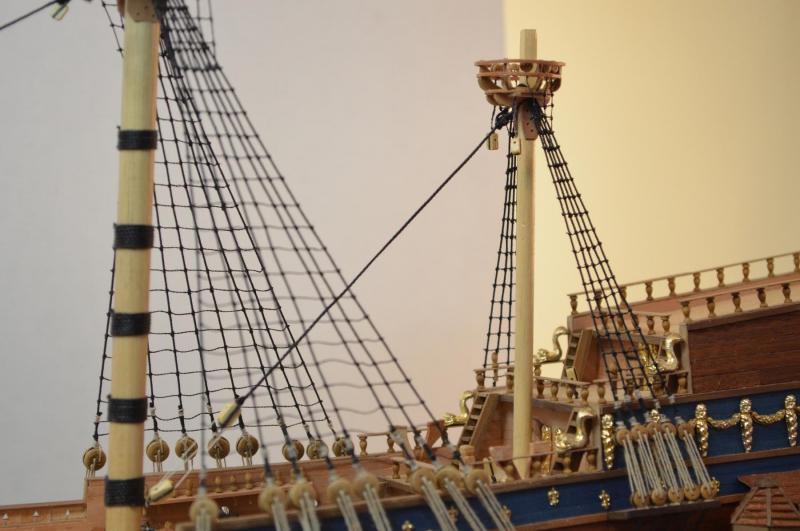
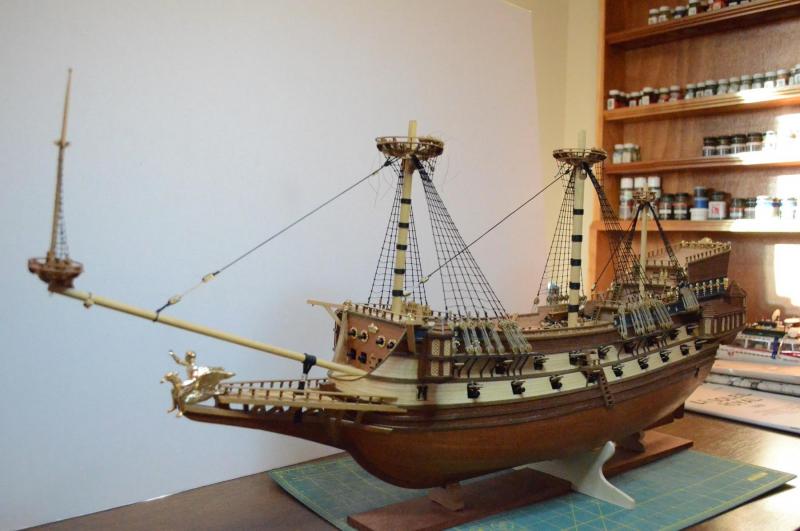
After completing hour 705 today La Couronne has her mizzen mast in place with shrouds ratted down and the forestay in place. She is starting to look like a proud tall ship sitting there now. Next up will be the top masts. I am going to take a break though from her for a little while to work on S.R.'s planking. The top mast's rigging starts to get more intricate with the way the stays are run on ships of this era. Fortunately as a trade off the ratlines get fewer as you go up. I want to give the eyes a break before diving into the first set on the fore topmast. So back under the plastic she goes for a week or so. Till then....
- 608 replies
-
- la couronne
- corel
-
(and 1 more)
Tagged with:
-
Welcome to MSW Len! Good luck to you on finishing your Emma C. Berry and on the Chaperon!
-
Welcome back to ship modeling and welcome to MSW! Having a place like this will be night and day difference in how you model. I did a few ships before finding here and while all my models improved through the natural course of experience, since being here those skills and knowledge has grown exponentially. Now only having access to research and techniques but just being around a community of people that are sharing in the hobby makes a huge difference in the way I feel about modeling, not to mention the support to get through those frustrating times when quitting sounds good. Good luck to you on your new build! I look forward to seeing your work!
-
That is a common problem with working with small wooden parts. See how your grain is running the short way across the top of the bracing. Wood most easily splits along the grain and so it does not take much effort to cause the part to break. This can and does happen regardless of if they are laser cut or saw cut. This is why choosing the right type of wood for the job is important especially for tiny details. Still, you recovered those pieces well and the completed railing and ships bell look great!
-
Call them what you want it's your log! I do like to try to use the proper word for a part both for my education and that of who ever is reading my post. That being said, I still don;t always do that. Often times I am trying to explain something that either I or my readers do not fully understand and therefore common wording must be used. I run into that a lot on facebook when I am sharing with my friends and family. If I use wording like abaft, gunwale, bulwark, even port and starboard they can easily get lost. At that time I have to decide how much typing I want to do. Do I explain every term or do I just simplify? Simplify usually wins. Anyway, welcome back to your build! As you said, it may not be much but it is another step forward and a little closer to finishing.
- 473 replies
-
- greek bireme
- dusek
-
(and 1 more)
Tagged with:
-

Royal Louis by fmartins - multi-media
EJ_L replied to fmartins's topic in - Build logs for subjects built 1751 - 1800
I think that I would run them a solid plank the entire length of you model. To try to cut short planks for something that size may be more difficult than it's worth. You can always score the planks to make individual ones if you wish later. As for the pictures, I do not know for certain what that is. To the best of my knowledge there wasn't a double planking at the bow. My best guess is that is reinforcing and protection for the anchor. A lot of ships had strips of wood where the anchor would rub against the hull when being hoisted up. These strips would protect the actual hull from damage. It is possible that on this ship, those strips were built into the hull and blended better. Or it could be a whoops in the model. Hopefully someone knows better than I do. -

Royal Louis by fmartins - multi-media
EJ_L replied to fmartins's topic in - Build logs for subjects built 1751 - 1800
Veneer would be a very good option but, it will require more exact fitting as like you said, there is not much room for sanding out errors. I would give it a try especially since you already have some on hand. -

Royal Louis by fmartins - multi-media
EJ_L replied to fmartins's topic in - Build logs for subjects built 1751 - 1800
Planking something that small, definitely a challenge! You can get 1mm x 1mm strips of wood and use those. I do not think you could get anything that would be to scale but 1 x 1 would at least give you several rows of planks to simulate the planking and I think would look good. Once in place, you can sand down the thickness so there is a better definition between the planks and the wales. -
Good news! I may have some drawings that could help. They are too big for my home scanner though so I will take them into work in the morning and scan them there. They are from Corel plan sheets and are clear enough to read the numbers. How accurate they are, who knows but, I will be using them for mine so we can both be wrong together!
- 213 replies
-
- la couronne
- 74 gun
-
(and 2 more)
Tagged with:
-
No worries on the hull planking. I've done a solid hull without planking also. Just applied the wales for accents and painted the hull. I've also simply scored the wood deck instead of planking. Makes a nice look, the trick is keeping everything straight. A hobby knife is all you need to do it. I see no reason you could not stain and varnish prior to installing. As for the glue, as long as you spread it thin and evenly over the surface there should not be any problems. I would use a contact glue such as one that would be used for laminate counter tops. It is designed for this type of application and can be found at any hardware store. Just make sure that whichever glue you use, you lay it on thin and even so there are no bare places for air pockets to form or lumps to create waves. Just make sure your deck pieces fit the way you want them to so you do not have to fight them going in. Contact glue can set up fast and getting them back out will be tough. Do several dry fits and you will be good.
- 74 replies
-
- Marine Model Company
- Joe Lane
-
(and 2 more)
Tagged with:
-

Royal Louis by fmartins - multi-media
EJ_L replied to fmartins's topic in - Build logs for subjects built 1751 - 1800
Having fun is the most important thing! Without fun it's just work and that is no good! Seeing that model in your hands really shows just how small it is and makes this even more impressive! -
Michael, Adam, good to have you here! I do love the large models but I will admit that finding homes for them in the house can be a challenge when done. I am starting to design the display cabinet and stand for La Couronne now. I build my own cases which helps cut down on the costs and I can get a good deal on glass through work. For La Couronne, I am designing a cabinet that will have shelving underneath it for books and such. We have a nice empty corner in the new house that I think will work out perfectly for it but, in order to meet the admiral's approval it has to serve a purpose more than just being a display for a ship, therefore, bookshelf! I am going to install a turntable on my model table soon. I got the bearing that I needed from my dad finally and now I just have to take the time to do it. I think that will be this weekends project now that the wood shop is in working order and I can find my tools again.
- 961 replies
-
I have had a lot of similar trouble with finding the tie off points on the belaying pins too. When I get home tonight I will look through my papers and see if I have anything that will help you out. I have not done much yet in terms of the pins as I have not got to running rigging yet as I'm still working my stays and shrouds. I know a lot of my decisions have been educated guessing though based off of the plans I have and Anderson's books on 17th century rigging. If I can find some good layouts I will scan them and send them your way.
- 213 replies
-
- la couronne
- 74 gun
-
(and 2 more)
Tagged with:
-
Off to a good start. I can be easier to lay down the deck planking before planking the hull as you can trim off any excess planking to fit nice and tight to the bulwarks that way. Also that was a smart decision to make a cradle to support the hull while you work. Pedestals are nice for a display but they do not provide a stable platform when building. Nothing wrong with "ancient" tools. A few of mine in my shop are much older than me but they still work just fine. I figure as long as I can still get parts, blades and bits that fit and they do what they are supposed to do, no need in replacing them.
- 74 replies
-
- Marine Model Company
- Joe Lane
-
(and 2 more)
Tagged with:
-
Welcome to MSW Jedd! I will echo the earlier comments about finding something that interests you. The great thing about the second build is that you now have a foundation of skills to work with. From there, it is just a matter of enlarging and multiplying what you know for a larger build. Mark gave a good link to the discussion on kits, manufacturers and instructions. In short, be prepared to figure a lot out for yourself no matter what you go with. That is why you are lucky to be here! More than likely, the ship you pick has been done before and has several build logs on here that you can look through to work out the difficult spots and of course, starting your own will get you any help you could need plus encouragement from us. That also brings me to another piece of advice for picking out a ship. If you see one that you like, look it up on here. See if there is a log that matches both the kit and manufacturer. Chances are good there will be. Read through it or even send the builder a message and see if there was any major issues to be aware of. That may help you find the kit for you. Good luck and I look forward to seeing what you choose!
About us
Modelshipworld - Advancing Ship Modeling through Research
SSL Secured
Your security is important for us so this Website is SSL-Secured
NRG Mailing Address
Nautical Research Guild
237 South Lincoln Street
Westmont IL, 60559-1917
Model Ship World ® and the MSW logo are Registered Trademarks, and belong to the Nautical Research Guild (United States Patent and Trademark Office: No. 6,929,264 & No. 6,929,274, registered Dec. 20, 2022)
Helpful Links
About the NRG
If you enjoy building ship models that are historically accurate as well as beautiful, then The Nautical Research Guild (NRG) is just right for you.
The Guild is a non-profit educational organization whose mission is to “Advance Ship Modeling Through Research”. We provide support to our members in their efforts to raise the quality of their model ships.
The Nautical Research Guild has published our world-renowned quarterly magazine, The Nautical Research Journal, since 1955. The pages of the Journal are full of articles by accomplished ship modelers who show you how they create those exquisite details on their models, and by maritime historians who show you the correct details to build. The Journal is available in both print and digital editions. Go to the NRG web site (www.thenrg.org) to download a complimentary digital copy of the Journal. The NRG also publishes plan sets, books and compilations of back issues of the Journal and the former Ships in Scale and Model Ship Builder magazines.


