HOLIDAY DONATION DRIVE - SUPPORT MSW - DO YOUR PART TO KEEP THIS GREAT FORUM GOING! (Only 75 donations so far out of 49,000 members - C'mon guys!)
×


EJ_L
-
Posts
2,246 -
Joined
-
Last visited
Content Type
Profiles
Forums
Gallery
Events
Everything posted by EJ_L
-
 Great work Elijah! Those whole days to build are nice when they happen.
- 701 replies
-
- 3
-

-
- phantom
- model shipways
- (and 1 more)
-
San Martin by augustus
EJ_L replied to augustus's topic in - Build logs for subjects built 1501 - 1750
I always enjoy seeing masts go up. They add a whole other dimension to the ship and also to me at least, mark the passing of the halfway point in the build. Nice oveall pictures too. Sometimes when looking at closeups for so long it is easy to forget just how large these ships are. Truly a beautiful sight to see. Well done! -
Thank you Frank for the kind words. They are always appreciated. I am hoping to have some pictures of the launch up soon. Almost done building her just need to add a few details then lash her into place. Bob, I know what you mean. I'm constsantly trying to find ways to stay organized and keep the work top in a semi clean state but no matter what I do it always ends up with piles of wood scraps and tools scattered everywhere. Racks, shelves and drawers are nice but right in front of me is apparently where I want everything!
- 608 replies
-
- 4
-
-
- la couronne
- corel
- (and 1 more)
-
Yeah I just noticed that those are probably the messiest table pictures I have taken in a while. I usually try to tidy things up for photos. That way the pictures look nice and it helps keep up with the mess but since these were spur of the moment ones you can now see how I truly work. Lol The plus side to all that mess is that I must have been getting a lot of work done on something!
- 608 replies
-
- 6
-
-
- la couronne
- corel
- (and 1 more)
-
Mike, and anyone else who may be interested, I uploaded some step by step photos on my La Couronne log of how to make eye bolts. Hope that helps you out. Quick link is in my signature.
- 701 replies
-
- 3
-
-
- phantom
- model shipways
- (and 1 more)
-
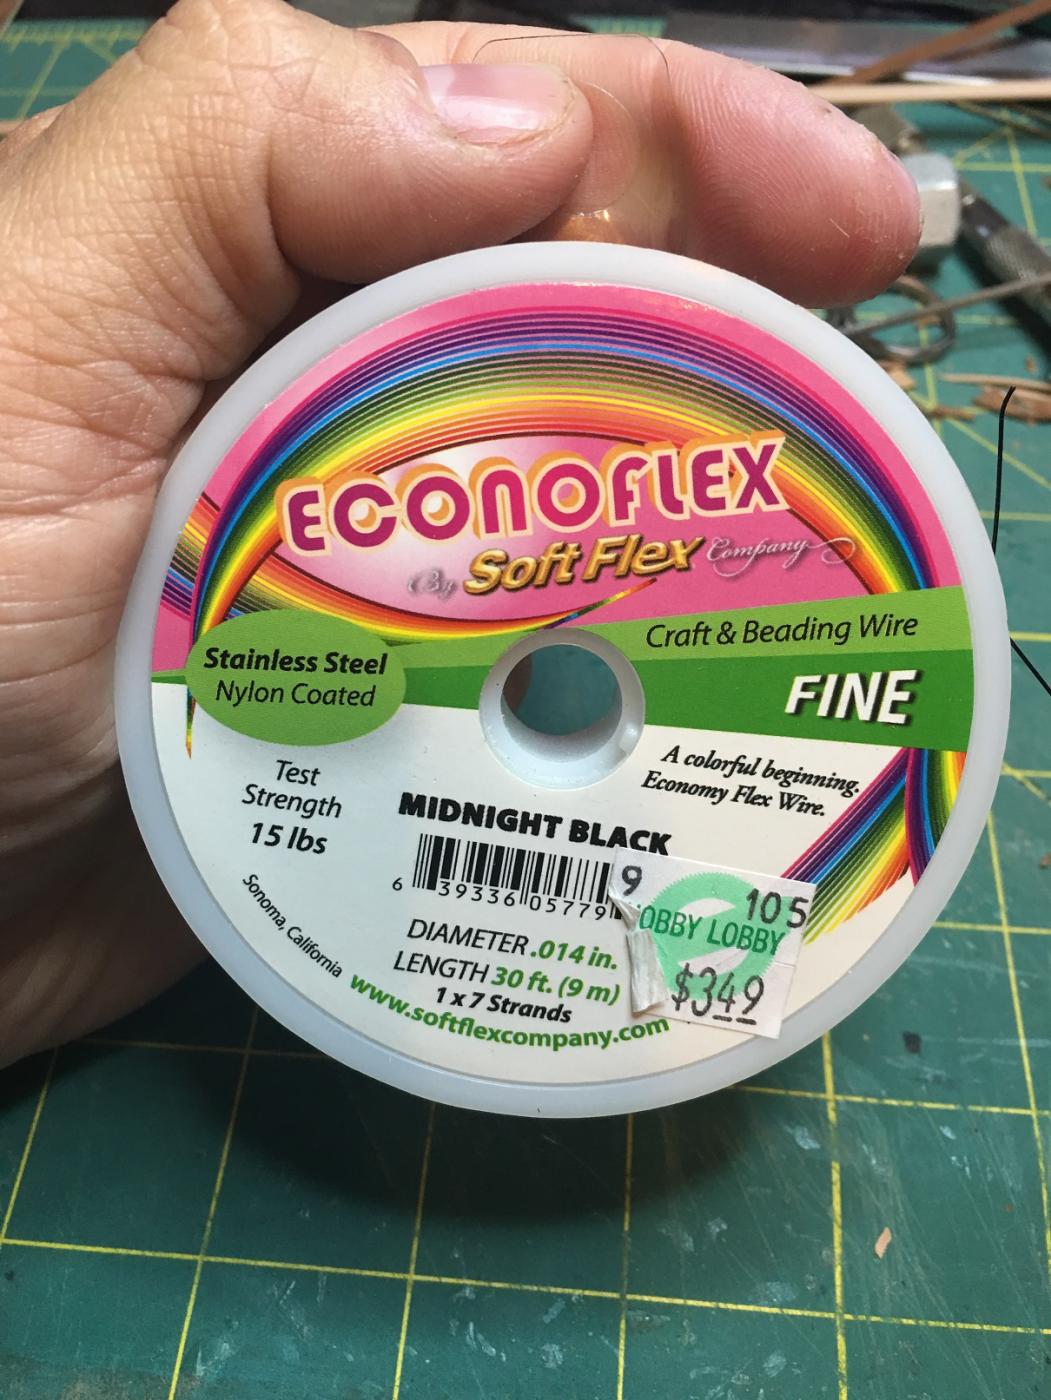
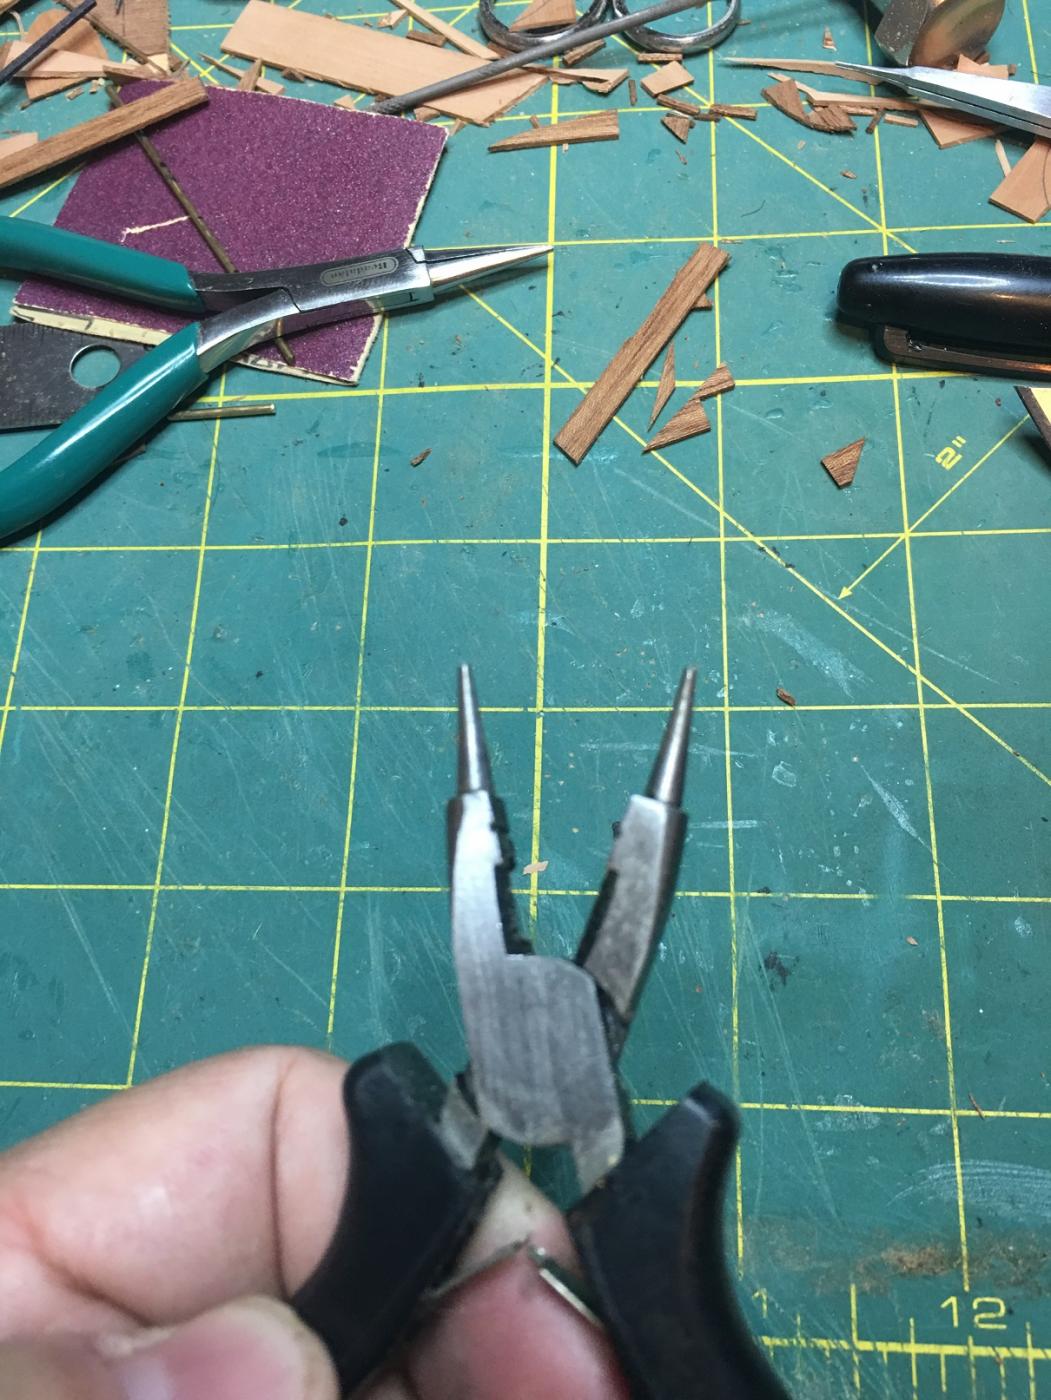
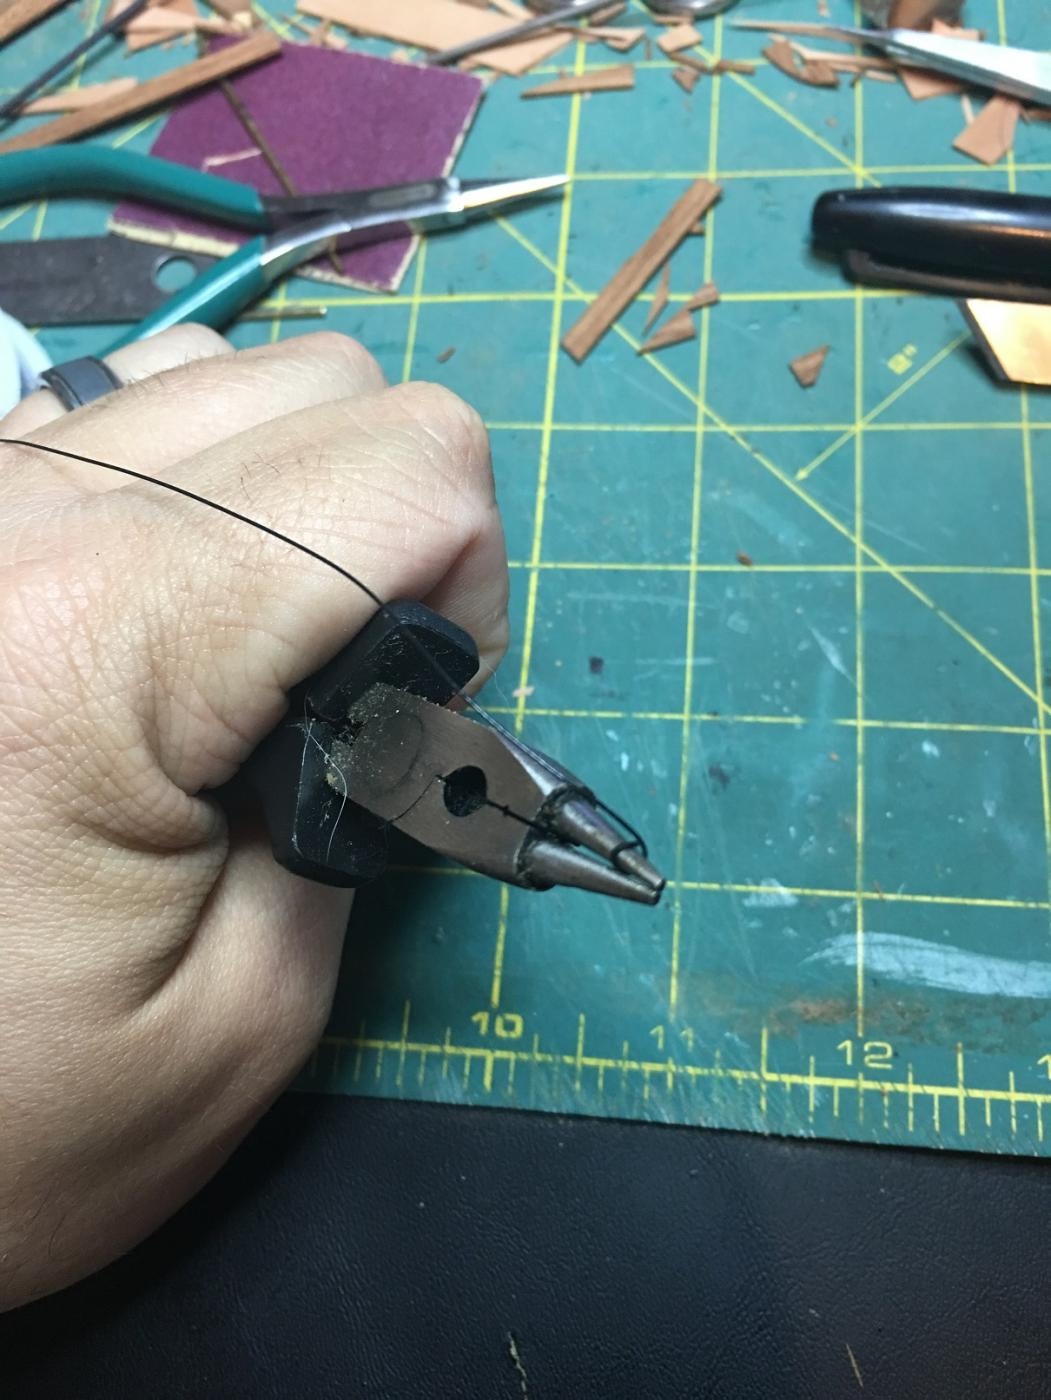
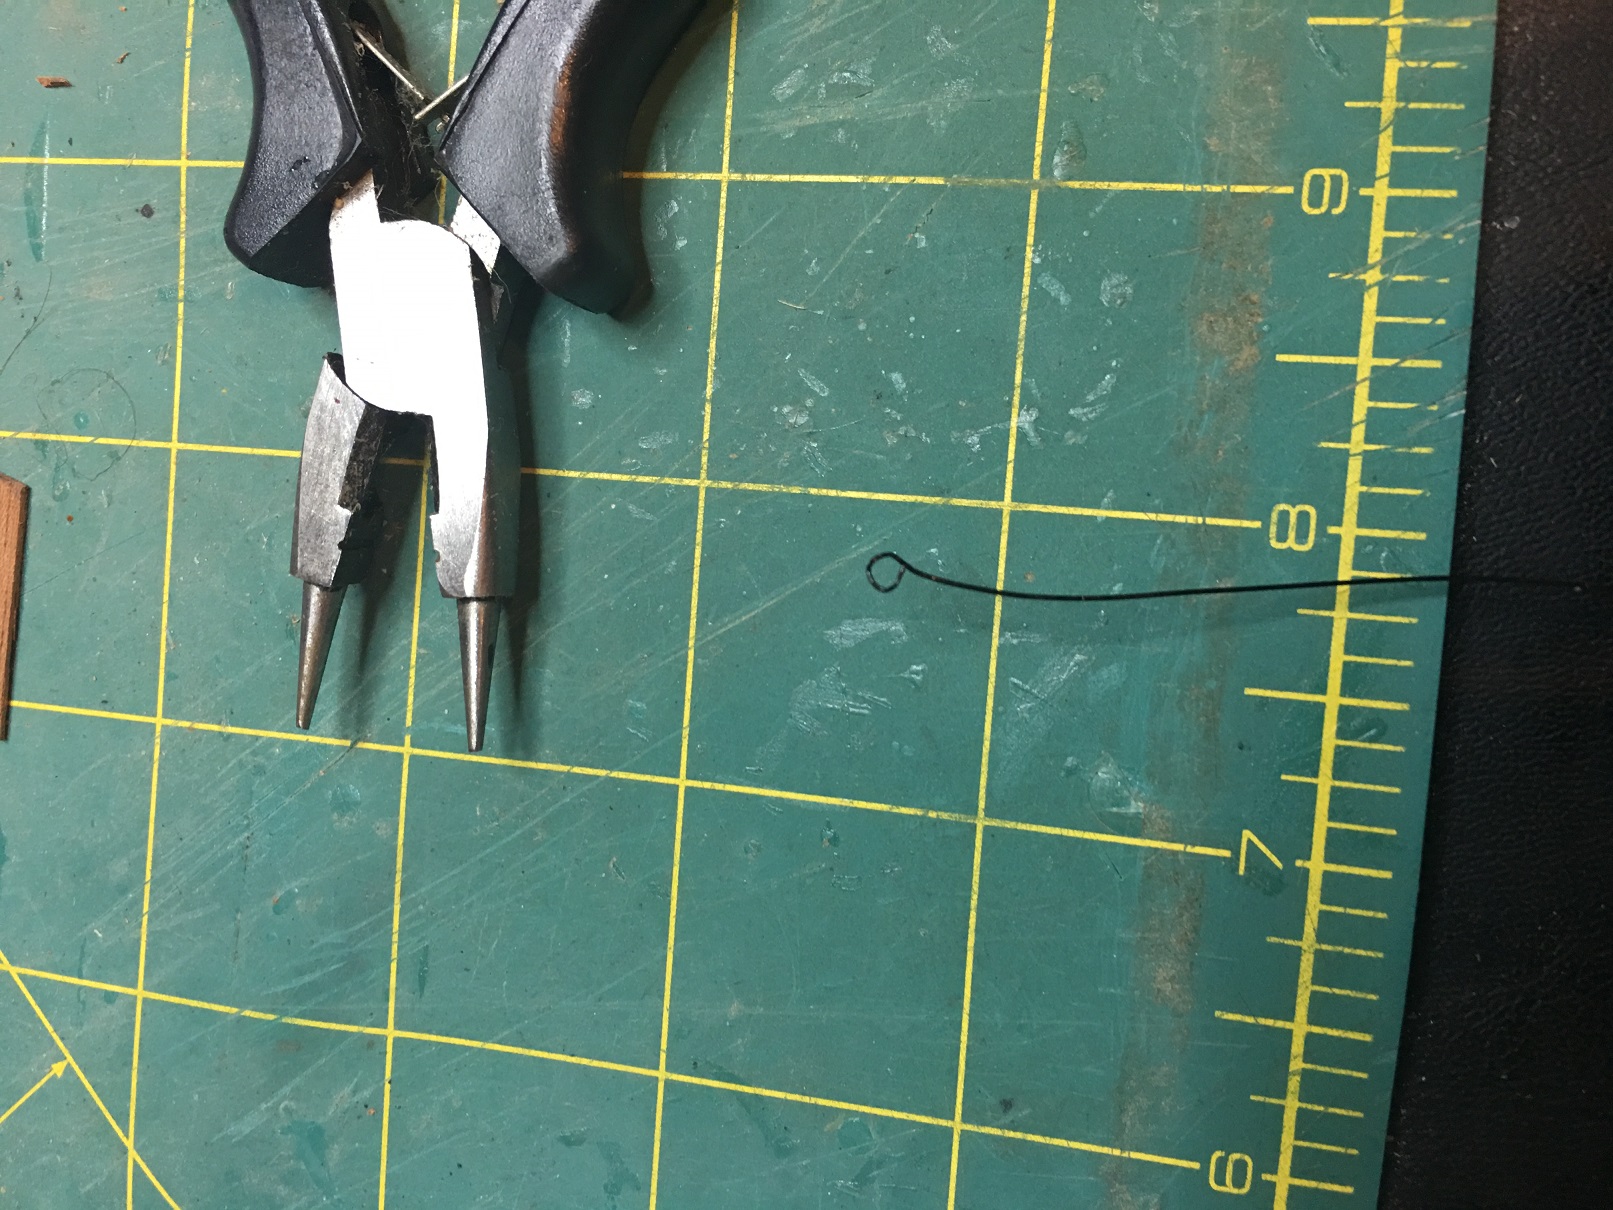
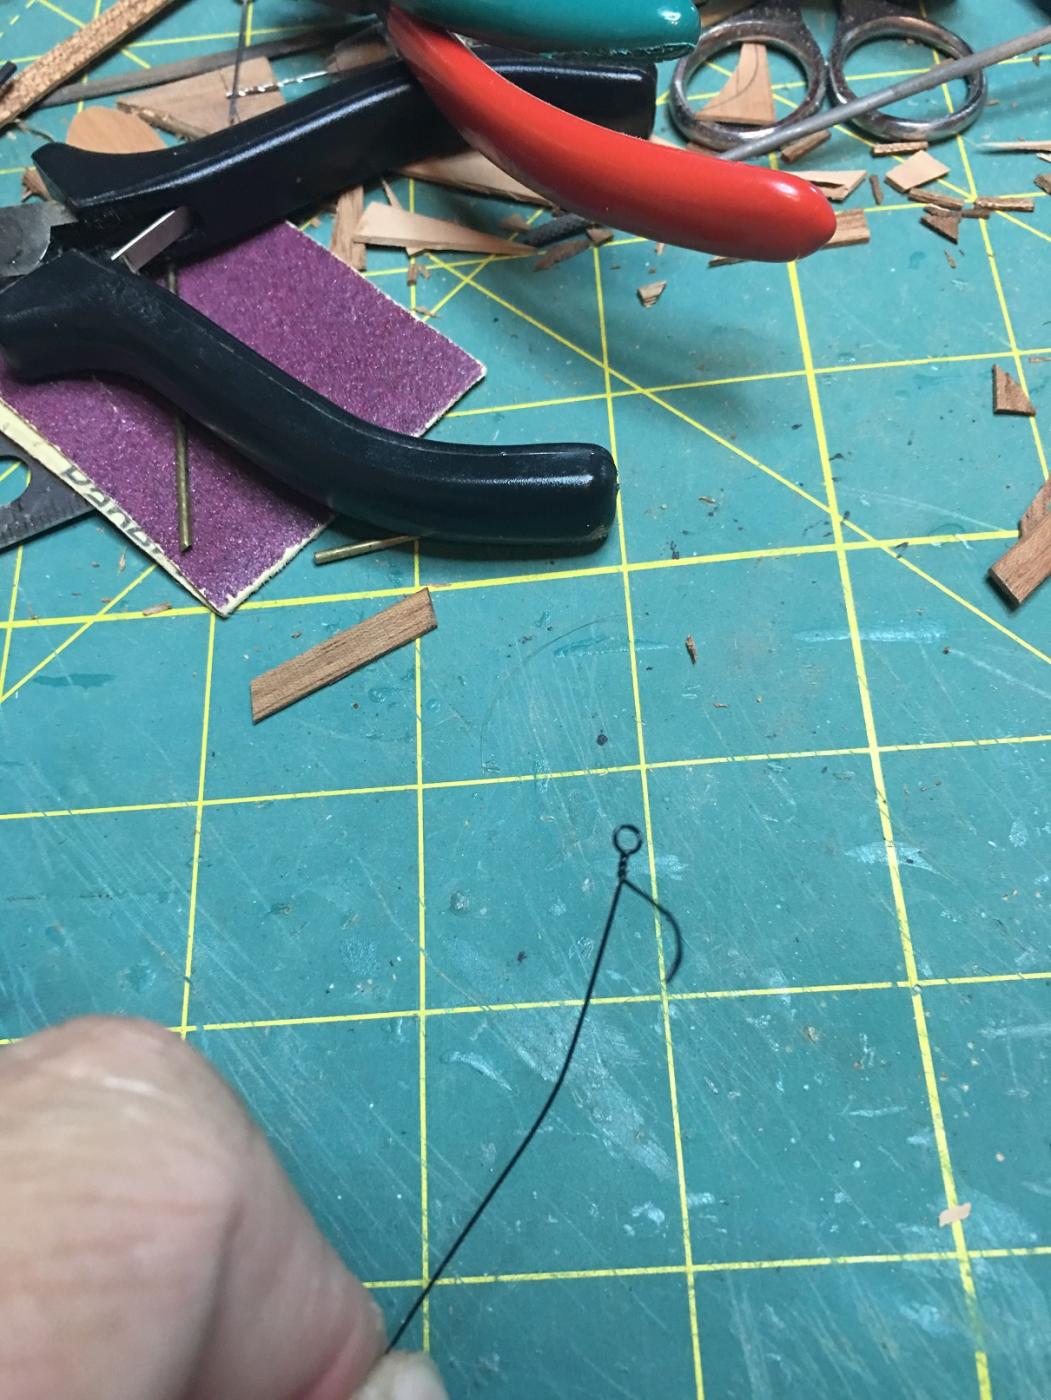
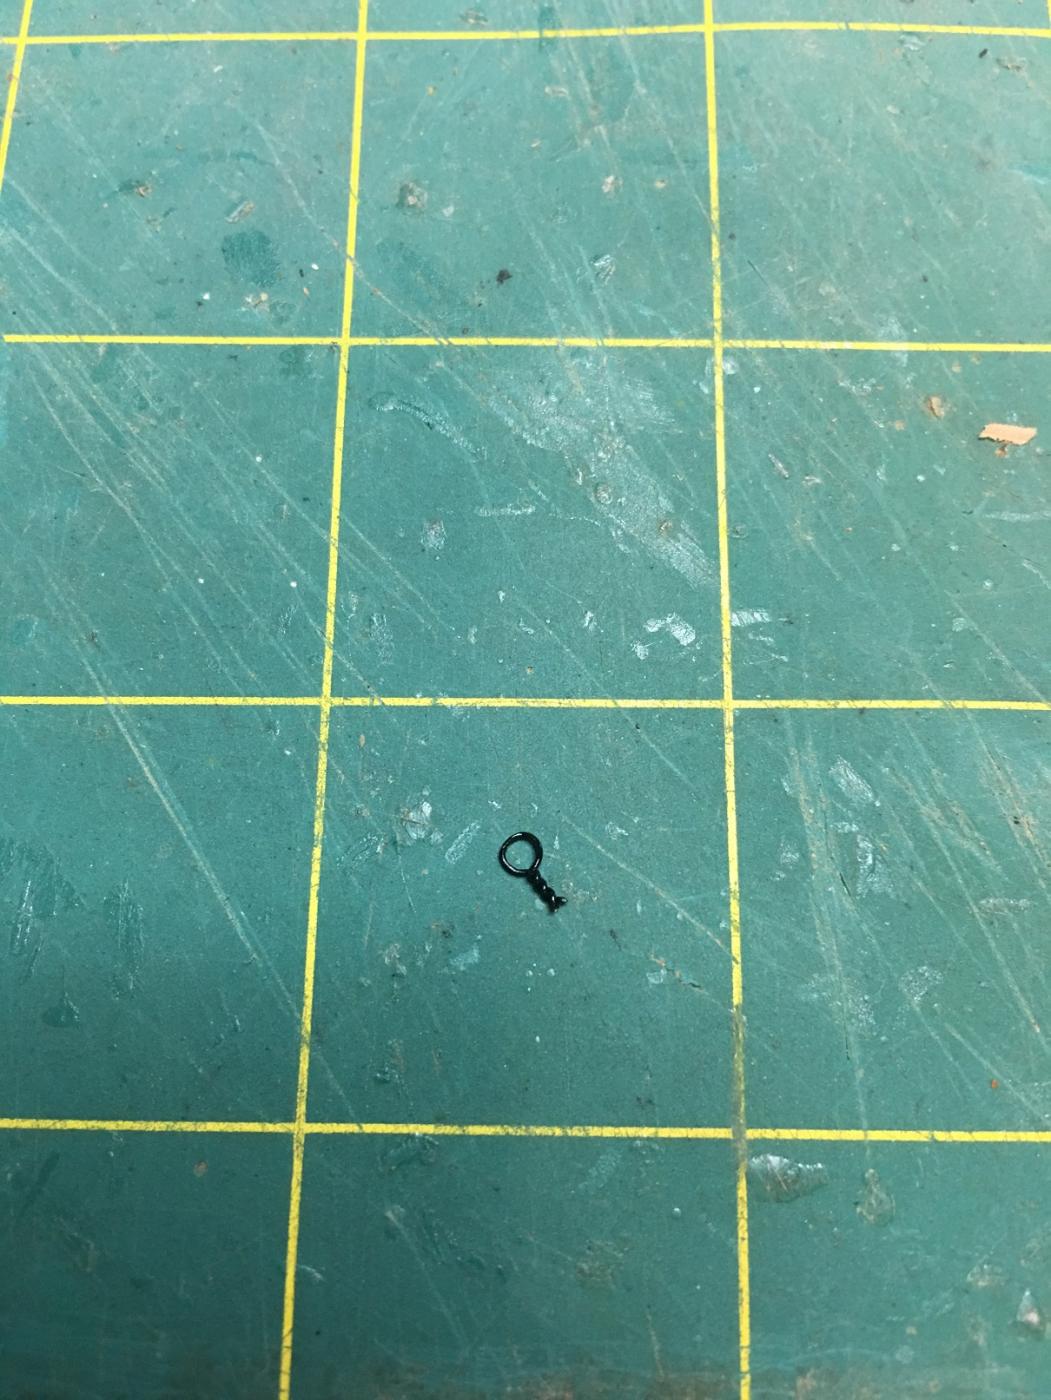
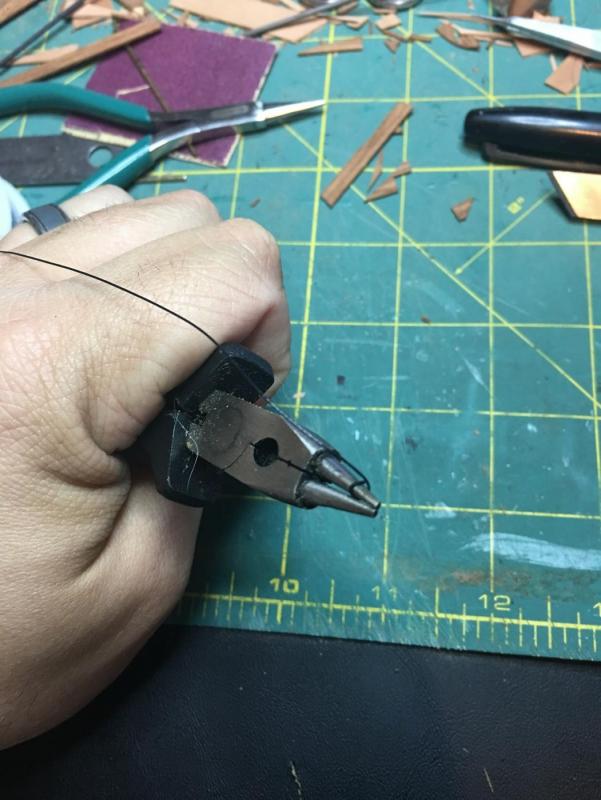
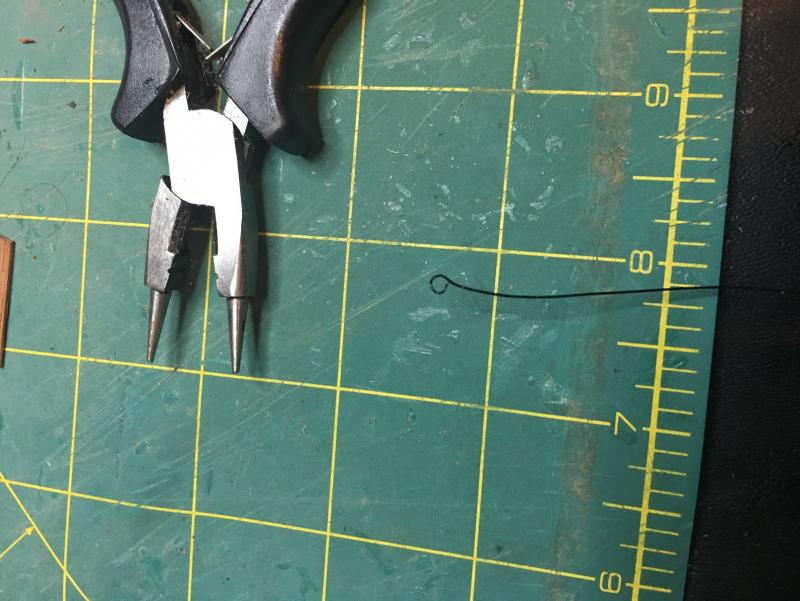
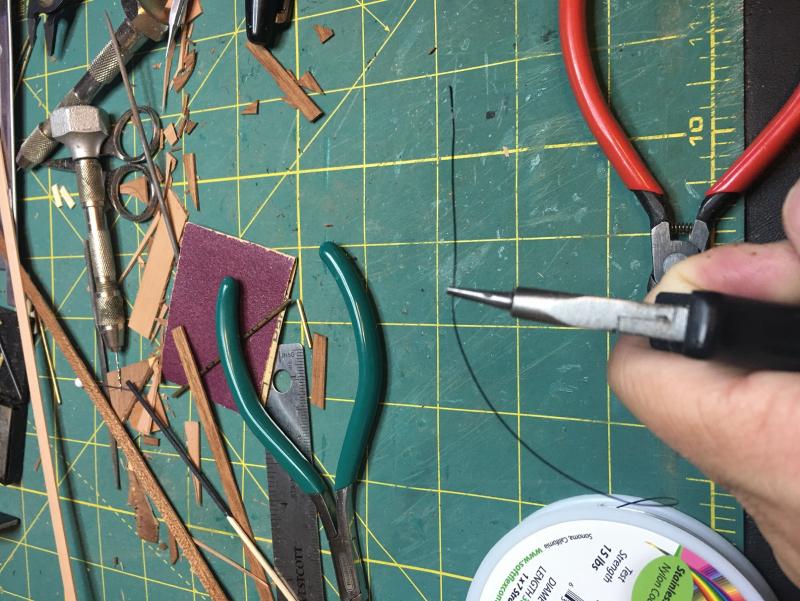
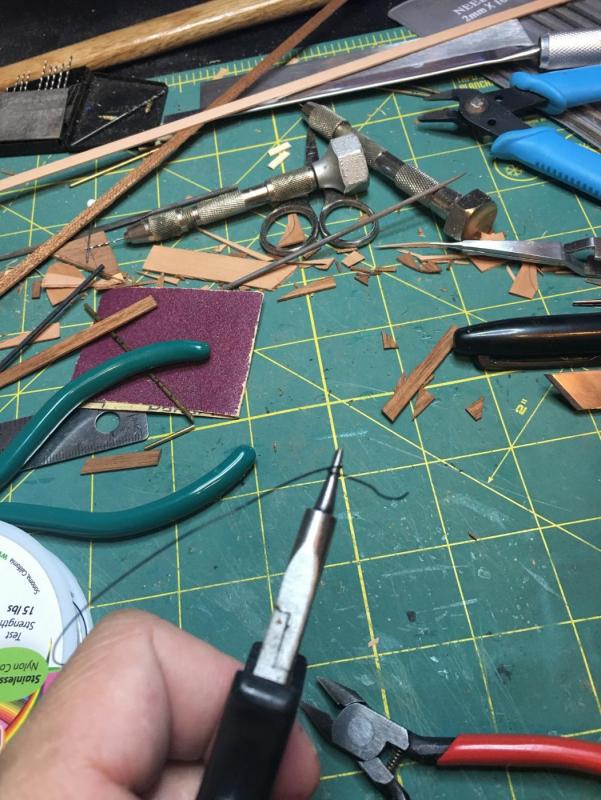
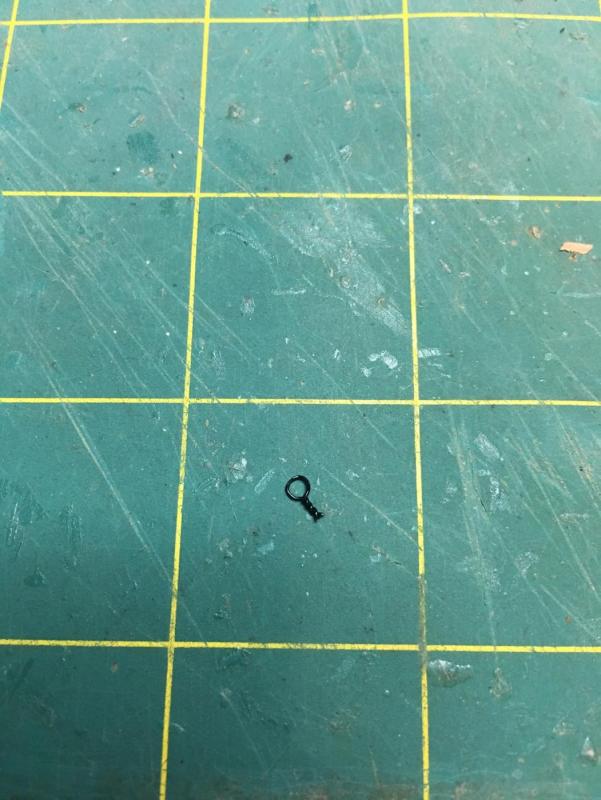
I was asked to show how I make my eye bolts out of jewelry wire so I took a few pictures and I hope this helps. First off I bought different size diameter black coated wire. This eliminates having to blacken the brass eye bolts that typically come with a kit. As you can see from the label and price sticker I got it at Hobby Lobby for about $3.50. This is for a 30 foot roll so I will have plenty to work with for a few builds. Next use a pair of pliers to bend the wire. If you have a pair with jaws that are completely round such as the ones in the picture those work best. If not any pair or needle nose pliers will work you will just have to round out the flat edge the gets created from the inside face of the jaws. The first way I will show you creates an eye bolt that is more realistically shaped but does not hold up well to tension. To make this simply wrap the wire around the jaw till the looped end touches back to the shaft. Then snip off the shaft to the desired length. That is it for the first one. The next one I will show is equally simple but less realistic though far stronger. For this eye bolt, grip the wire at a mid point. I am over exaggerating how much wire you need to use for the purpose of these picture. These eye bolts can be made with about an inch or less of wire. Next bend both ends of the wire around the jaw so the the ends cross over each other. Twist the ends together to form a solid shaft. This can be made to whatever length you need. Finally snip off the extra wire and there you have it. Using this method the eye bolts can be made with any diameter eye needed or shaft length. With the wide variety of diameter wire also available you should be able to find something for whatever scale you are building in. I apologize that the pictures are not with their descriptions. I was having trouble getting the pictures to go through.


- 608 replies
-
- 10
-
-
- la couronne
- corel
- (and 1 more)
-
Mike, I have not made any hooks yet but eye bolts are fairly simple. You might look on my log where I built one of the gun port lids it might show. I will be making some more soon to lash down the ships launch which I am wrapping up building. I will be sure to show some detail pictures on making them. In short, it is basically just wrapping the wire around the jaw of a set of small pliers to create whatever diameter eye you need. The depending upon how much tension you will be putting on it you can either cut the end so it simply tucks back to the shaft much like a real eye bolt would or you can twist the ends together to form a stronger eye. The twists are not real but as they are sunk down into the wood know one will know. Again, I will try to upload some pictures later tonight or tomorrow.
- 701 replies
-
- 3
-
-
- phantom
- model shipways
- (and 1 more)
-
Your planking is off to a great start! Looks nice and even, joints in line and good job on the caulking.
- 50 replies
-
- 2
-
-
- cutty sark
- artesania latina
- (and 1 more)
-
As said, due to the tar on the ropes most eyebolts wouldn't be clean. Even ones that had non tarred rope would still be dulled, or otherwise worn and corroded over time. There are blackening solutions you can use, (I have not used them myself). Typically with brass parts that I need black I will spray a coat of black paint on them before assembly and then touch them up with a small paint brush afterwards. The other thing I have begun doing lately is just making my own eyebolts out of black jewelry wire I bought at Hobby Lobby. It comes in many different sizes so matching your scale should be simple and one roll lasts a long time as you only use a tiny bit for each bolt. I bought 30 foot rolls for $3.50. This way I can make any shape/size I need and I don;t have to worry about painting them or the paint coming off.
- 701 replies
-
- 2
-
-
- phantom
- model shipways
- (and 1 more)
-
They could have kept a couple of wood carvers busy almost nonstop had that ship ever gotten into a fight repairing the damage to all those figures. I guess if you didn't have anyone skilled enough to re-carve them you would look even more terrifying chasing ships with an army of headless people strapped to the sides of your hull. Excellent job on the painting. I don't know if the eyes are that important. Maybe try one or two and decide if the results are worth the risk and effort.
- 305 replies
-
- 2
-
-
- deagostini
- vasa
- (and 1 more)
-
Nicely done on the decking. Joints and treenails look fantastic and I like that grain pattern in the wood a lot. Excellent job!
-
I like the look of the blue on the seats. As you said it is very fitting for the time period. Smart thinking with painting the ends separately as that keeps the lines crisp with no bleed over. I too like the second color better. The first looked heavy like it was painted on. The second attempt looks like it is new dyed leather. Excellent work on the varnish as well. She sure is looking sharp.
- 414 replies
-
- 2
-
-
- riva aquarama
- amati
- (and 2 more)
-
Looking good Don. I will echo many of the others in saying those colors do look great. They compliment each other nicely and even match well with the natural wood on the lower hull.
- 653 replies
-
- 5
-
-
- trabakul
- marisstella
- (and 1 more)
-
Would it be feasible to stain all the lime wood a walnut color before installing it on the ship? That way all the wood would be the proper coloring and only touch ups would be needed after it has been cut and installed. I guess another option would be to replace the lime with actual walnut and since the kits are cheaper that might be affordable.
-
Thanks for stopping by and the compliments Mike and Bob and to all the likes also. Well it is good to know I'm not hallucinating features onto the ship! I may have to pick up that book and take a look. It is on my wish list, may have to bump up closer to the top.
- 608 replies
-
- 3
-
-
- la couronne
- corel
- (and 1 more)
-
Very nice. Are you going to do a virtual tour of your model when done? If so then all those little details will be visible and really cool to see then. That is one advantage of 3D models, you can zoom in or remove layers to see those hidden gems much easier than physical models.
-
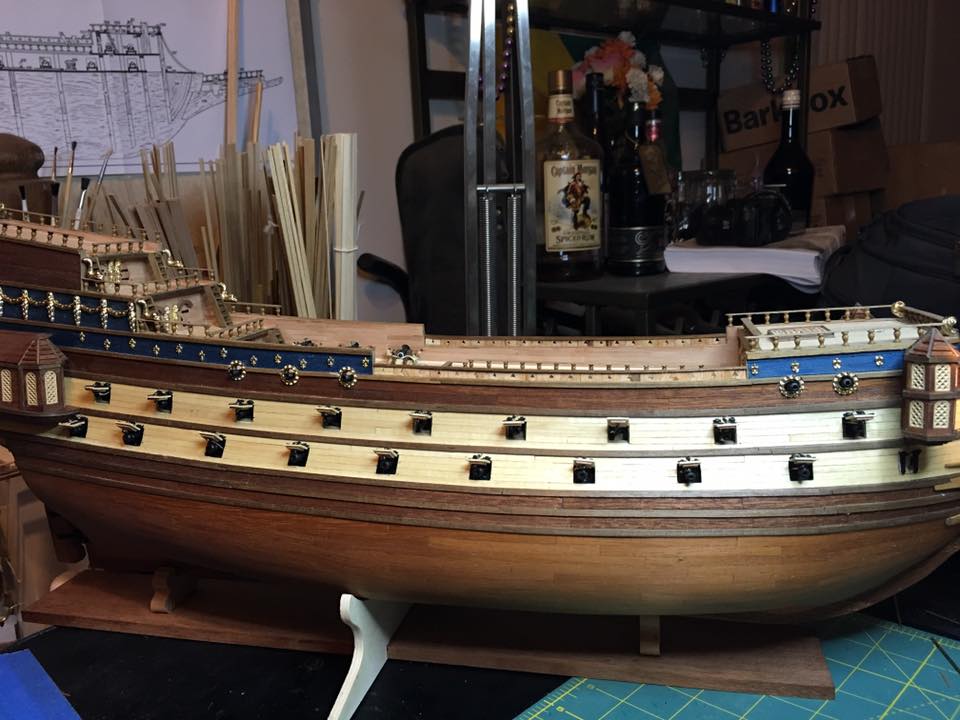
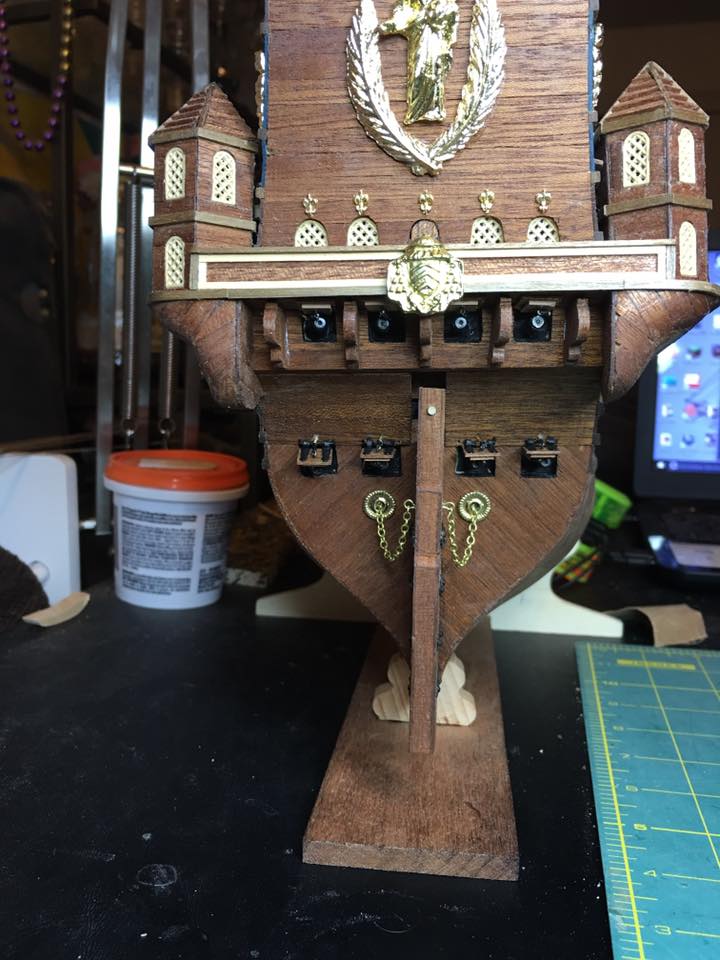
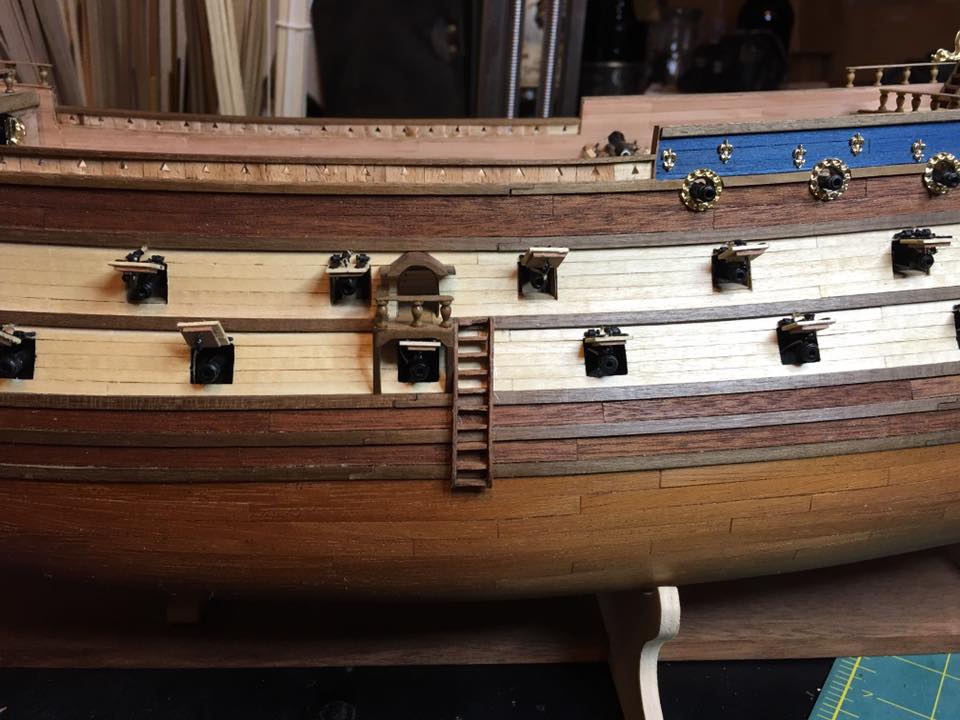
Gun port lids on the starboard side and stern are now complete! Honestly they were not the most tedious pieces I have built but for some reason they just felt like they were taking forever to build. I think mostly cause I have been wanting to get started on the ship's launch and I had to keep telling myself to push through them and get them done. I usually hit this point at some step along the way and I guess on this ship this was that step. Anyway, I also built the ladder up to the entry balcony so that item is now complete. Now it is time to build the launch. This is also the last major on board item to be built. After it is done the remaining deck items are all related to the rigging, bits, pin rails, kevels, etc. A lot of these I have been holding off on building until I start getting into building the masts and planning the rigging. As that will be a whole other endeavor in research and guessing it almost feels like I will be starting a new build soon. For now, enjoy the latest pictures! I have noticed after looking at the pictures that I need to raise the stern lids. Those crews must have gotten into the rum a little too much.


- 608 replies
-
- 12
-
-
- la couronne
- corel
- (and 1 more)
-
Well done on all those eye bolts. Your hawse holes look nice on their as well. One more step done!
- 701 replies
-
- 4
-
-
- phantom
- model shipways
- (and 1 more)
-
My good and bad sides are constantly changing as my mess ups move around. You fix isn't too bad. You may look ahead some and see how much of that will be covered by the ram and bowsprit rigging. Often the stem and the first few feet of the bow are covered in a lot of rigging, anchor ropes and such that you may not even notice it later on.
-
I managed to get it downloaded. Thanks for that link! Now I just have to learn to read Italian but that I can manage. There are some nice details and pictures that I did not have. It still amazes me how much difference there can be between the different kits.
- 608 replies
-
- 2
-
-
- la couronne
- corel
- (and 1 more)
-
Paint definitely has the advantage of being able to use wood fillers and such for repairs easier than if you were going to leave it natural. Some filler here and sanding there and you should have her right back on track.
-
So the good news is that a lot of progress has been made on the gun port lids as I now have 36 of them complete. The bad news is that I need 52 of them. I was hoping to get them all finished this weekend but I spent a lot of time up at the new shipyard checking on its progress and so lid production dropped. New goal is to be done by next weekend. We shall see....
- 608 replies
-
- 4
-
-
- la couronne
- corel
- (and 1 more)
-
That is unfortunate. I've had that happen and it is a tough decision on what to do about it. I don't think you would have to redo all of your planking. It looks like on your starboard side there are some gaps between the 2nd and 3rd and 3rd and 4th stakes. I think if you were to just pull the planks in that area off and close up those gaps that your alignment will be good to go. Elsewhere, your planking is coming along very well. I am curious as to the two different colors of wood. Are some of them painted already?
-
Hi Don! Just found your log and thought I would follow along. I built a small, simple plastic version of Cutty Carl about 5 years ago. Nothing special but she did make a nice decorative ship that found a home on a small shelf. Looking forward to seeing how your turns out!
- 50 replies
-
- 2
-
-
- cutty sark
- artesania latina
- (and 1 more)
-
Hey Bob! I've been keeping an eye out for you to start this one. Hope you don't mind me pulling up a chair to join you. Brought plenty of drinks and snacks for everyone! Looking forward to seeing her come together.