AntonyUK
-
Posts
1,190 -
Joined
-
Last visited
Content Type
Profiles
Forums
Gallery
Events
Everything posted by AntonyUK
-
 Hi Aydin. I do like Finland. I was in the North west neer Munnikurkkio (I think that's what's it's called) a few years back Interesting place. You can walk for days and not find a road.. never mind people. Regards Antony.
- 414 replies
-
- 3
-

-
- riva aquarama
- amati
- (and 2 more)
-
Hi Aydin. Were are you from ? Just being nosey Regards Antony.
- 414 replies
-
- 3
-
-
- riva aquarama
- amati
- (and 2 more)
-
Hi Aydin. Nice looking kit in a huge box. Will be following you with this one. Regards Antony.
- 414 replies
-
- 3
-
-
- riva aquarama
- amati
- (and 2 more)
-
Thanks for the likes. It's easy working from drawings. Pictures are a little more to the imagination and resurch. The fact is no one knows the true details of the ship. Some evidence comes from ship wrecks that have been found. And scriptures that reference the turtle ship. So it's my imagination that provides the rest of the jigsaw. Just done a little resurch into the way they used there oars to propelled and steer the ship. Inresting to note that the oar has a tie-down at the top end of the oar. Will do a mockup of this as it's interesting on how it works. Thanks again. Regards Antony.
- 99 replies
-
- 5
-
-
- turtle ship
- korean
- (and 1 more)
-
Hi Mike. Nice choice. We have made this mini kit and it's quality is good. Link to our build below. http://modelshipworld.com/index.php/topic/7782-black-queen-by-alex-s-mini-mamoli-scale-1-135-first-build/?hl=%2Bblack+%2Bqueen It's so nice to do modeling with your son or daughter and to pass on skills and interests. All the best. Regards Antony.
-
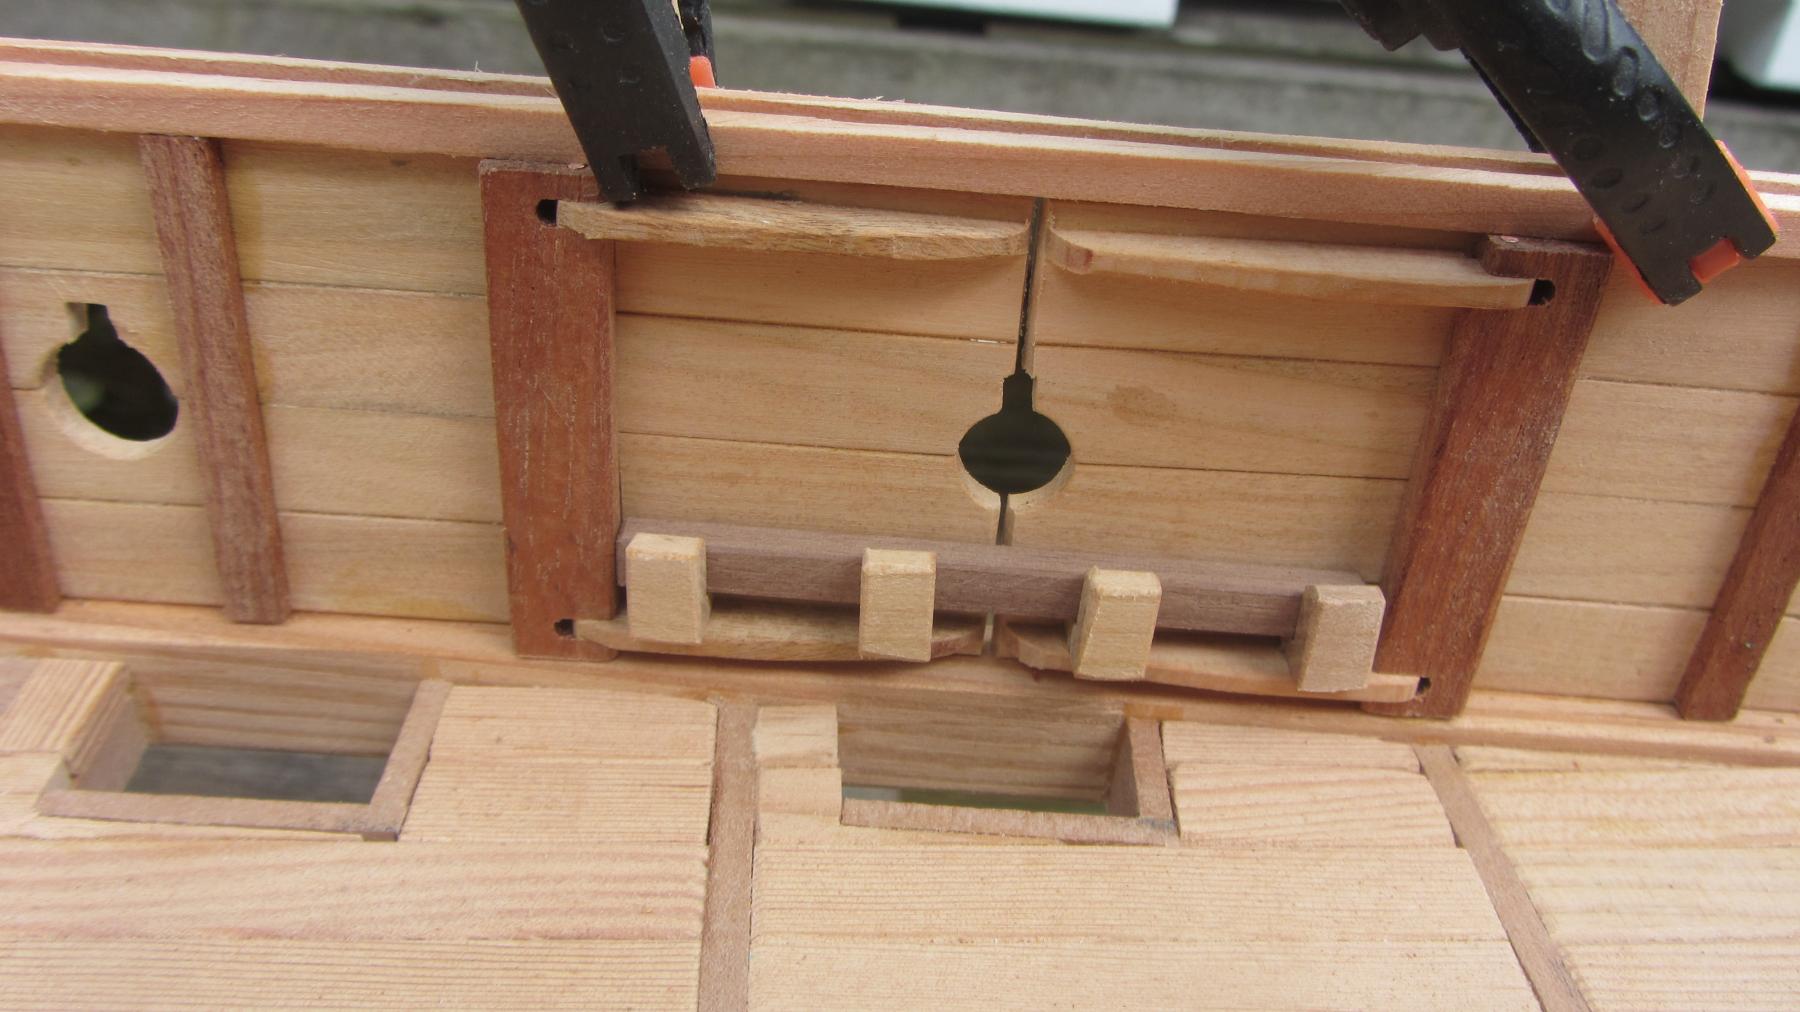
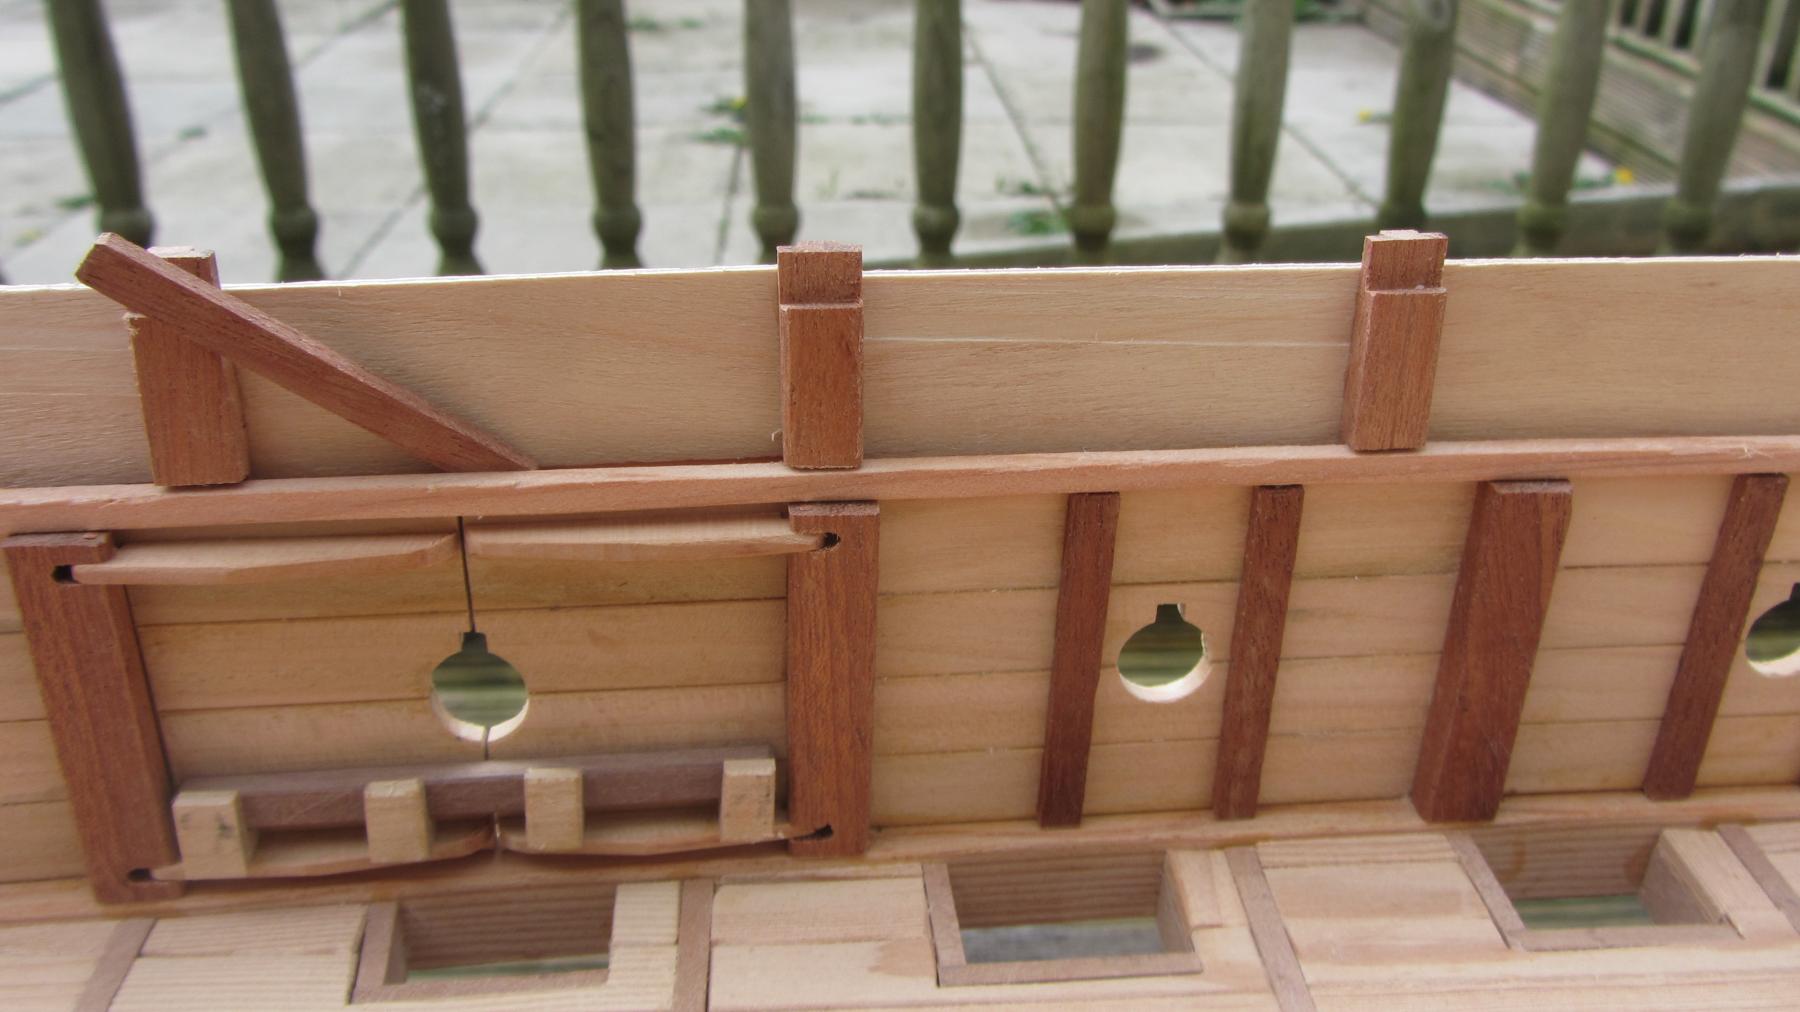
Hi. Lots of work done and only a few photos.. Opps. Ladders in place. working Side doors with bar. Trial fit... Looks good. Bow and Stern doors with working bolt. Mast securing timbers. Temporary mast inserted while work in progress. Funny block on the rudder. Allows the rudder to turn with ease. Walls dry fitted. View from the Stern of the ship. Side walls from the outside. Views from the Bow's Time to clean up and start the fixing and cleaning up. Next job after glueing the side walls in place will be fitting the second deck in place. Regards Antony.


- 99 replies
-
- 25
-
-
- turtle ship
- korean
- (and 1 more)
-
Hi. Thanks for the likes. It's a long way to travel to touch a piece of timber. But I know what you are saying. Have made good progress yesterday with the pillars for the second deck. The second deck lines up perfect with the first deck. Also made the ladders for the hold. Will fit the rudder in position temporarily just to get the angle and fit right. Photos later on in the day or tomorrow. Regards Antony.
- 99 replies
-
- 4
-
-
- turtle ship
- korean
- (and 1 more)
-
Hi. Making a First class job on the planking. Brian has said what I was going to say. I use a piece of softwood timber the same length as the max plank with a shallow saw cut that the plank will sit in on edge. Half a plank width deep. This allows to you to get the correct tapper and the bevelling at the same time. Keep up the excellent work. Regards Antony.
- 79 replies
-
- 2
-
-
- lady nelson
- amati
- (and 2 more)
-
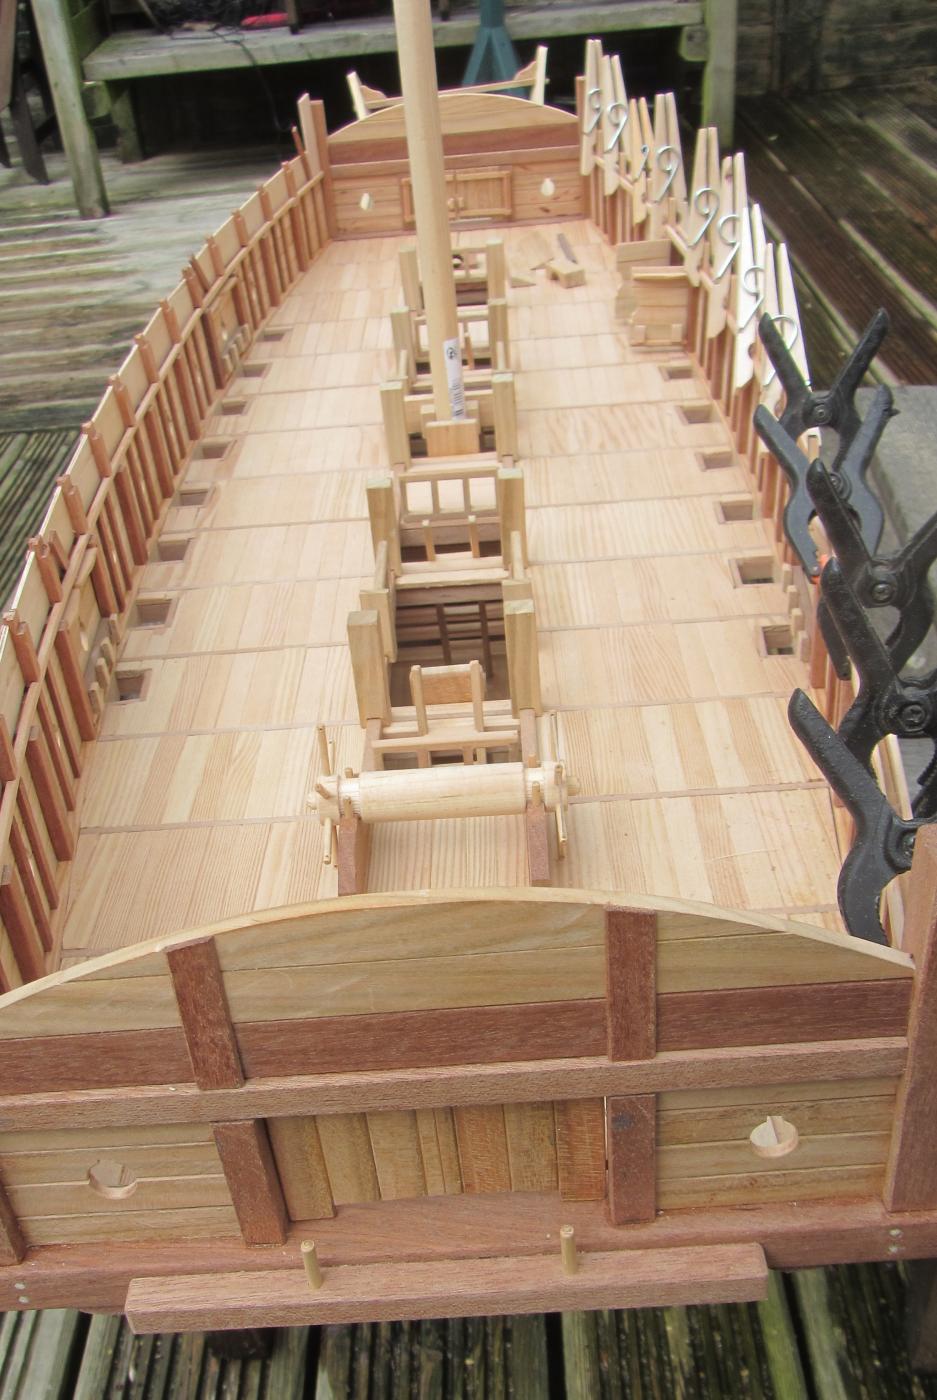
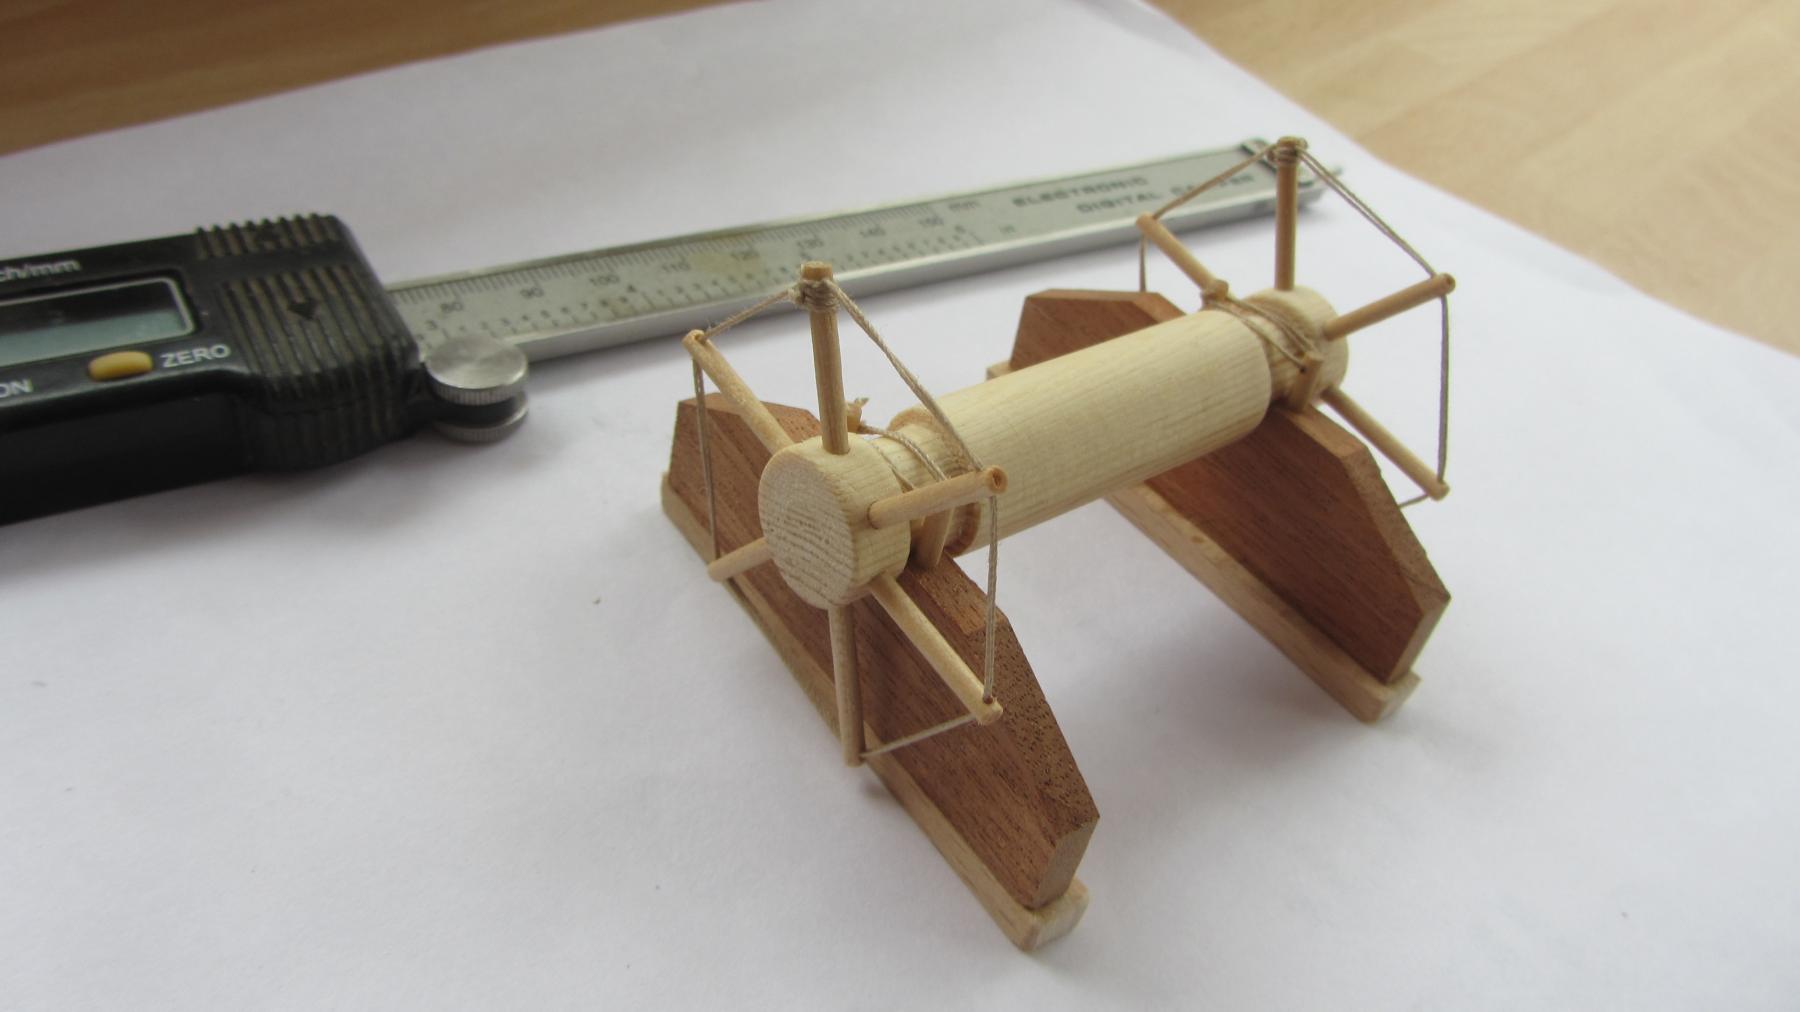
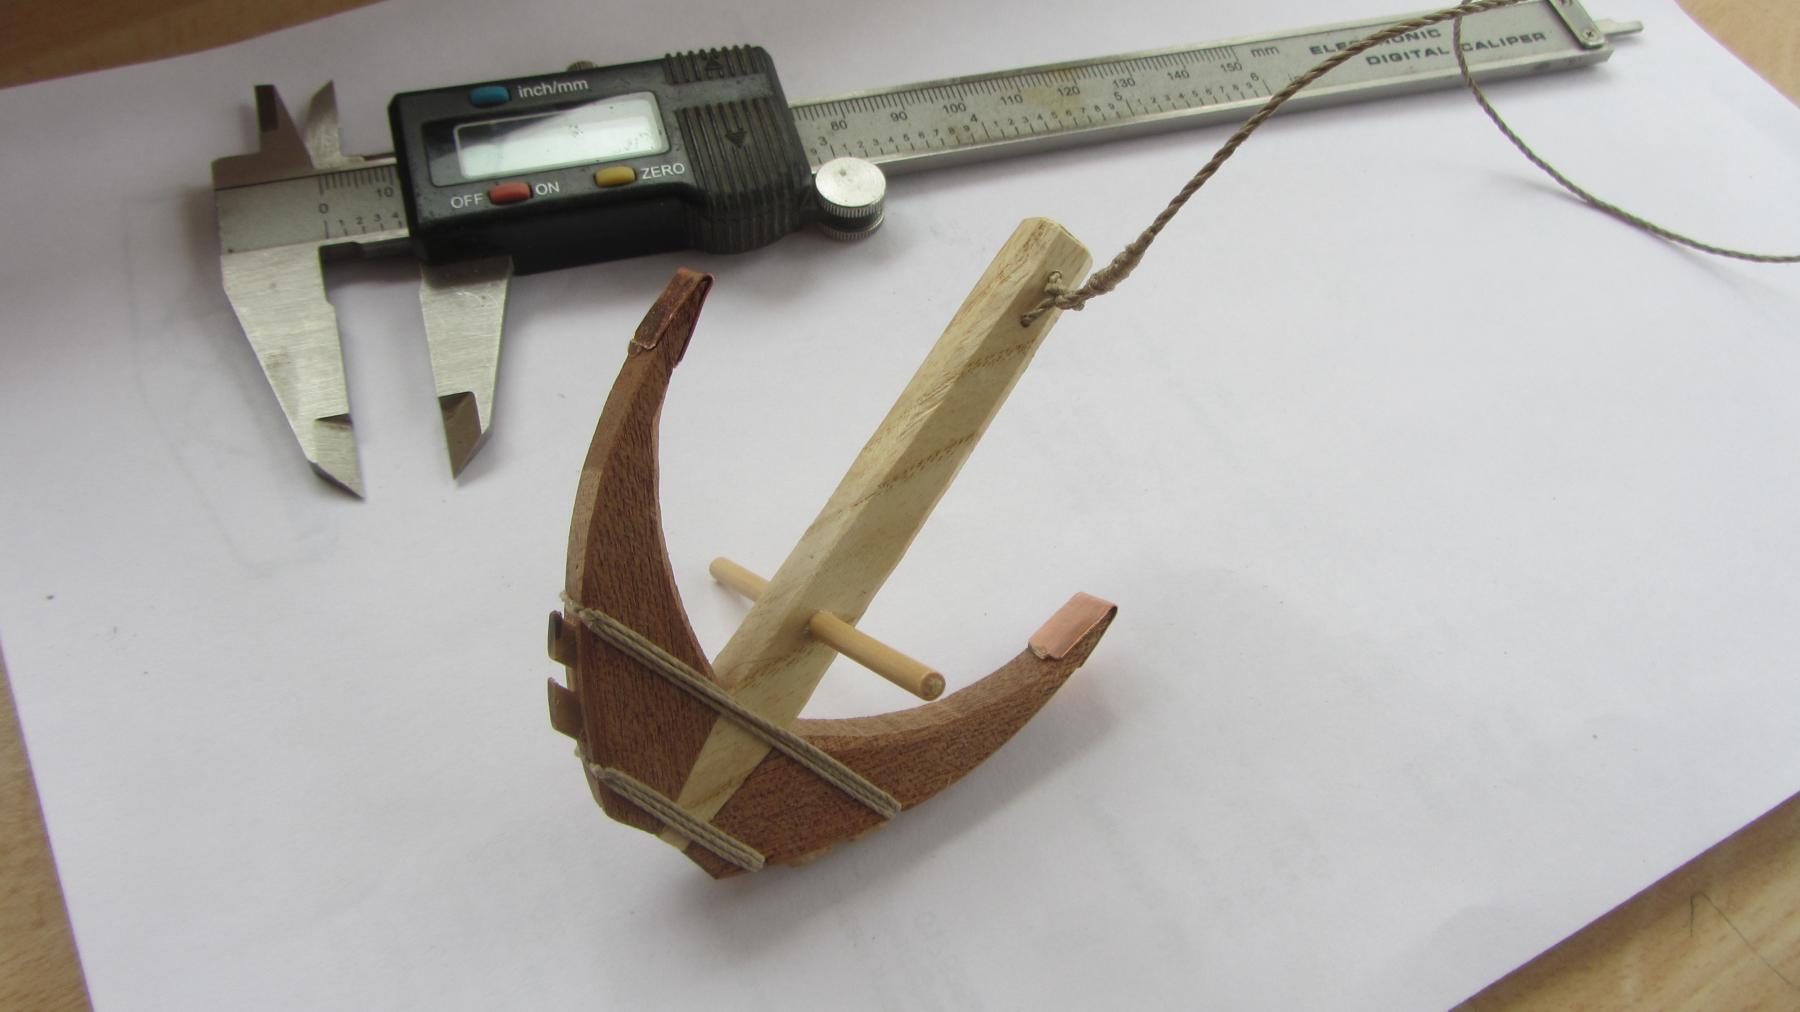
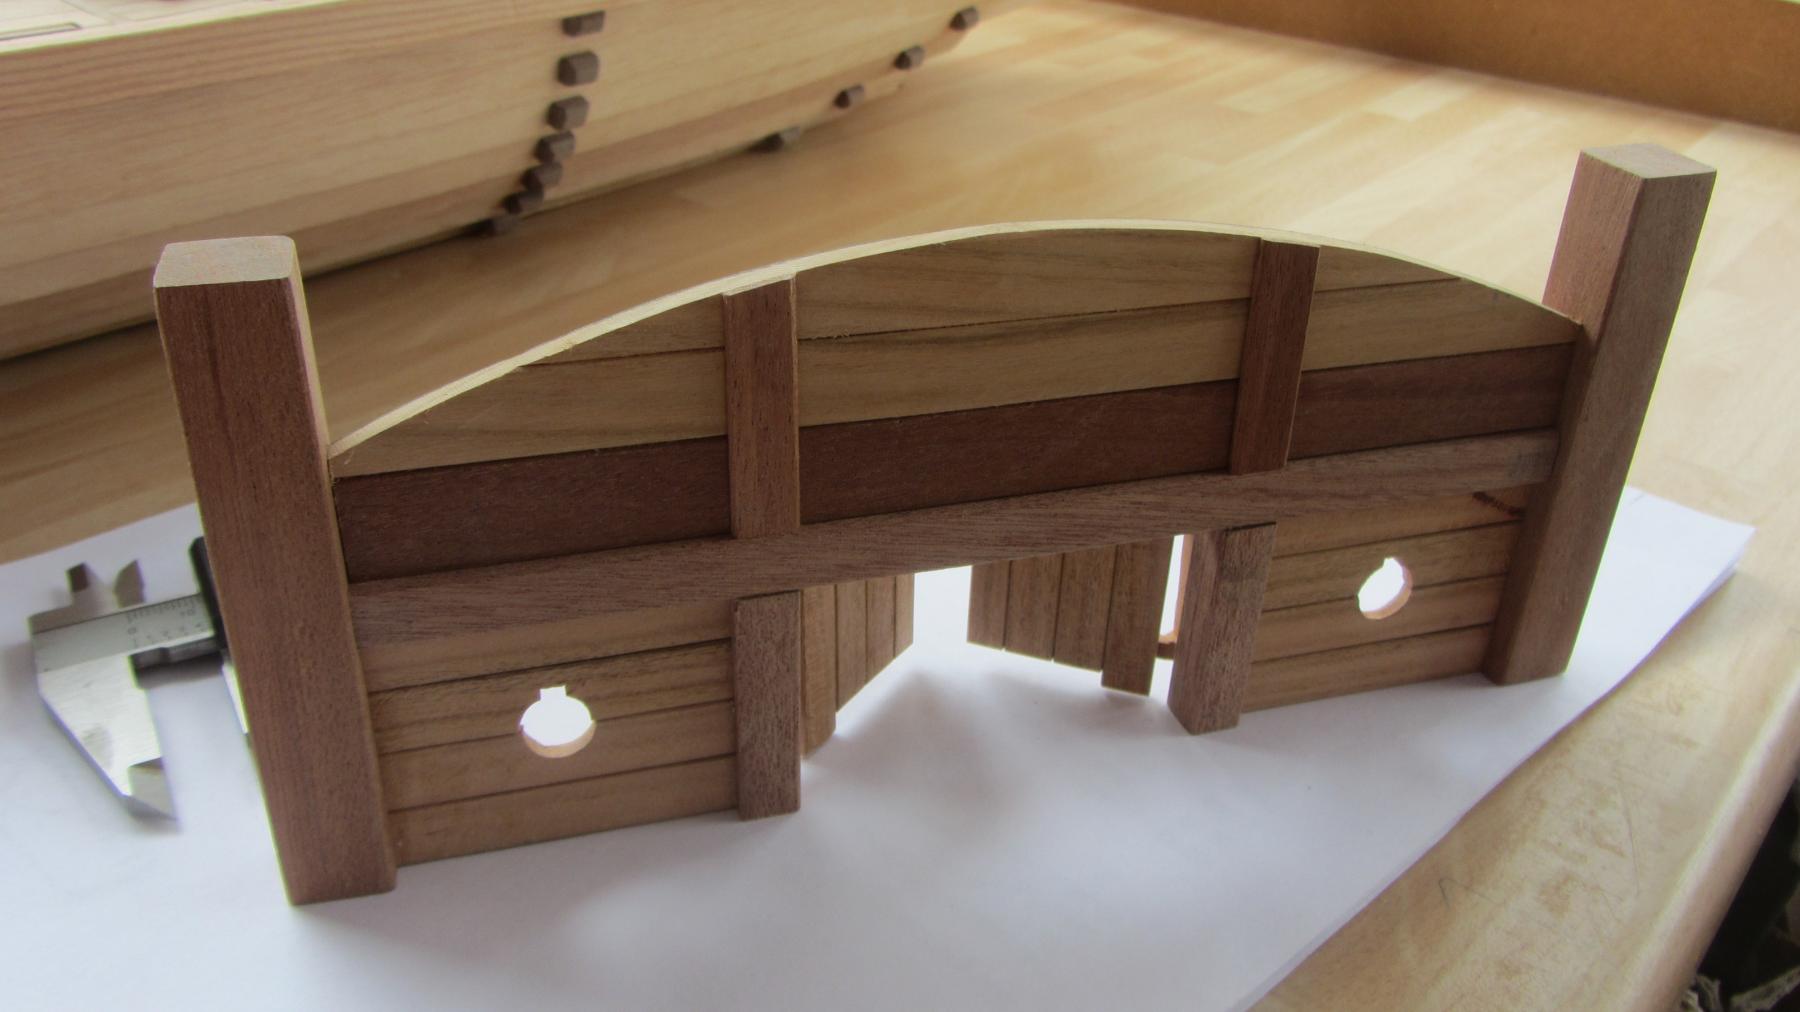
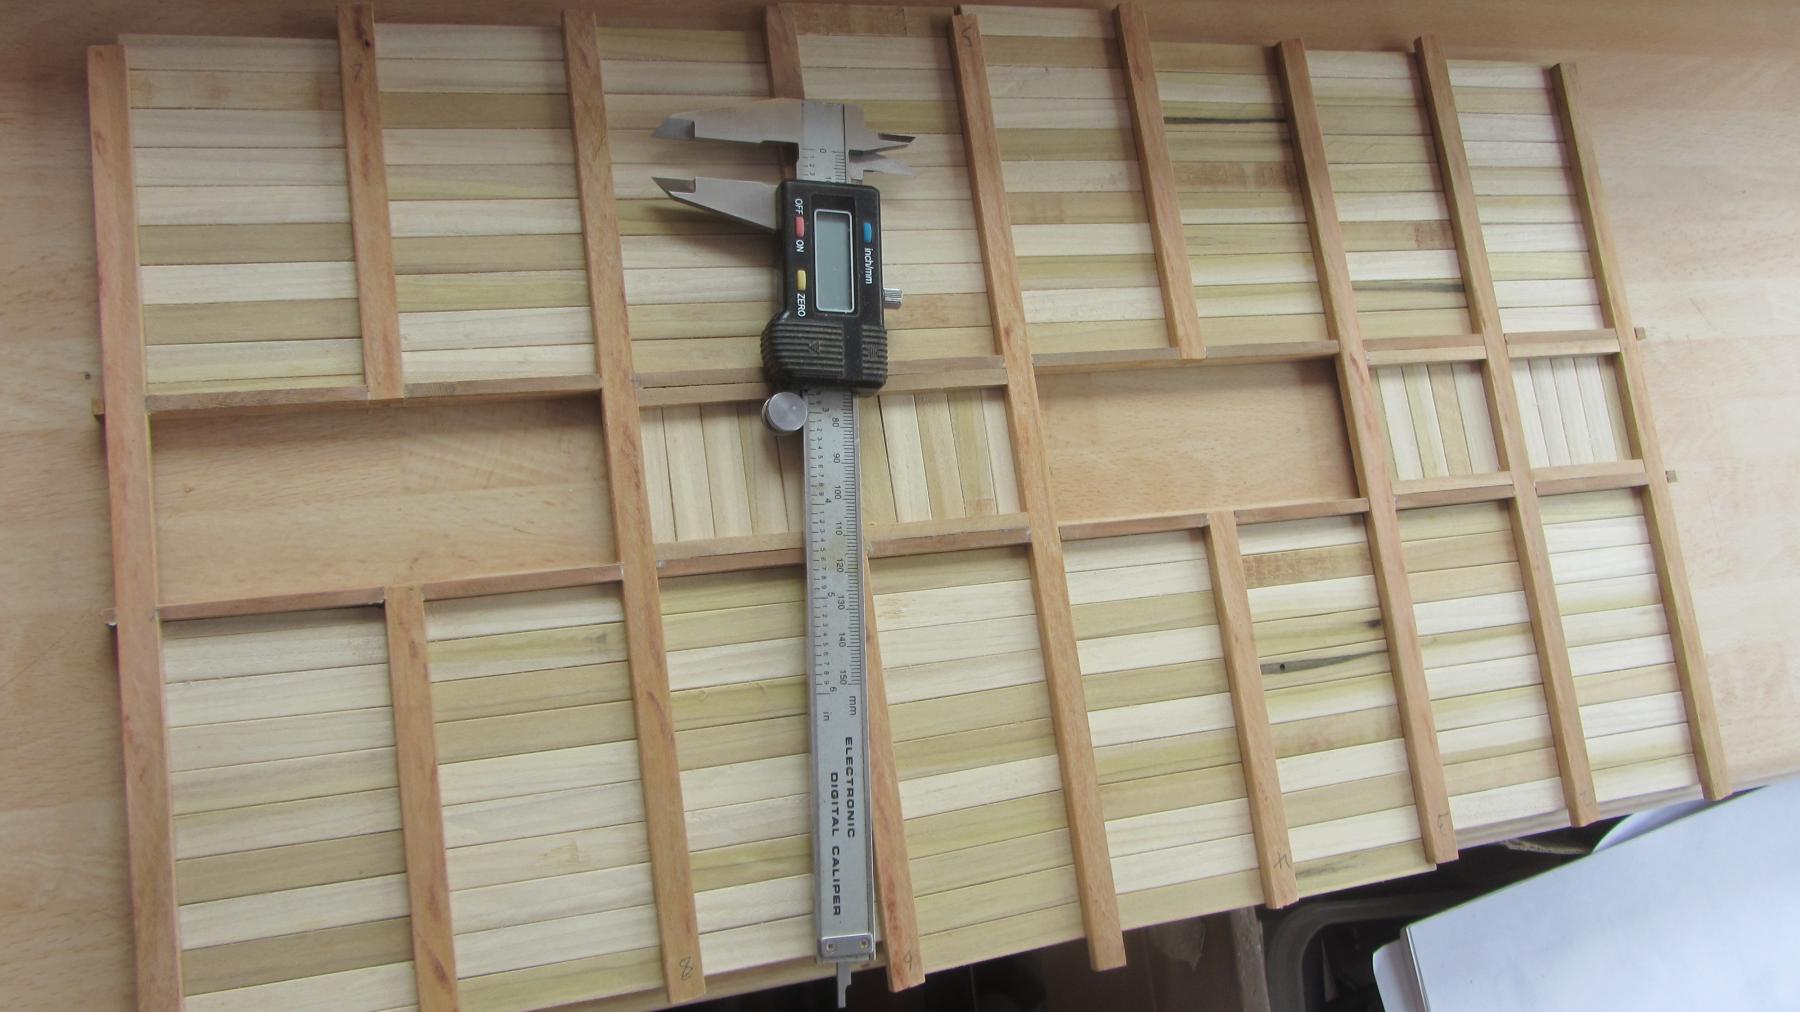
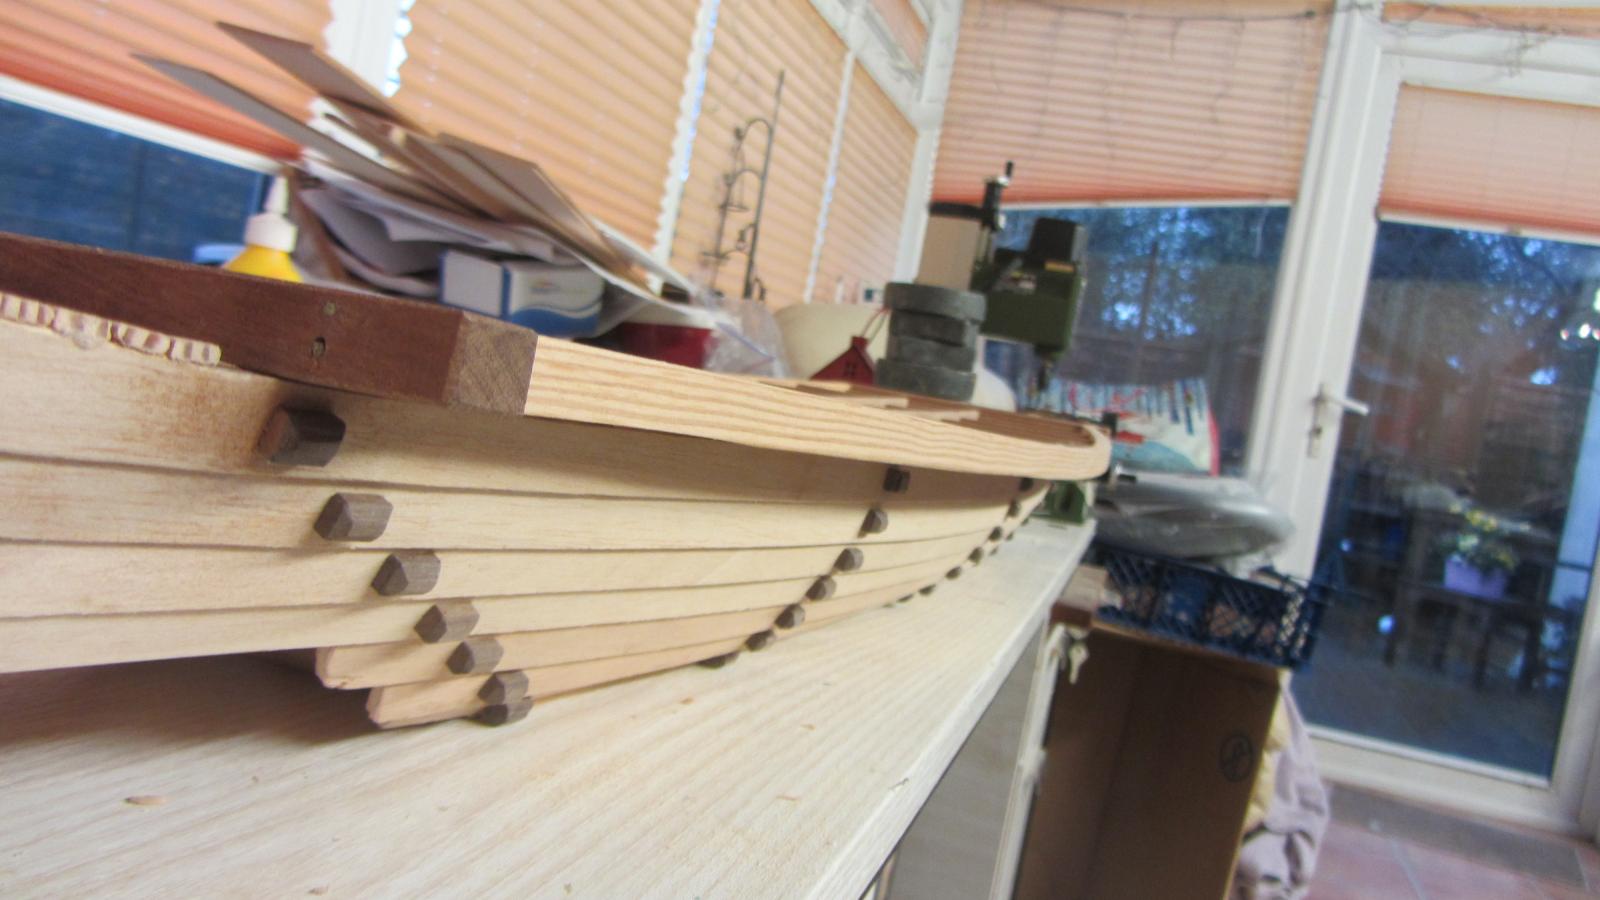
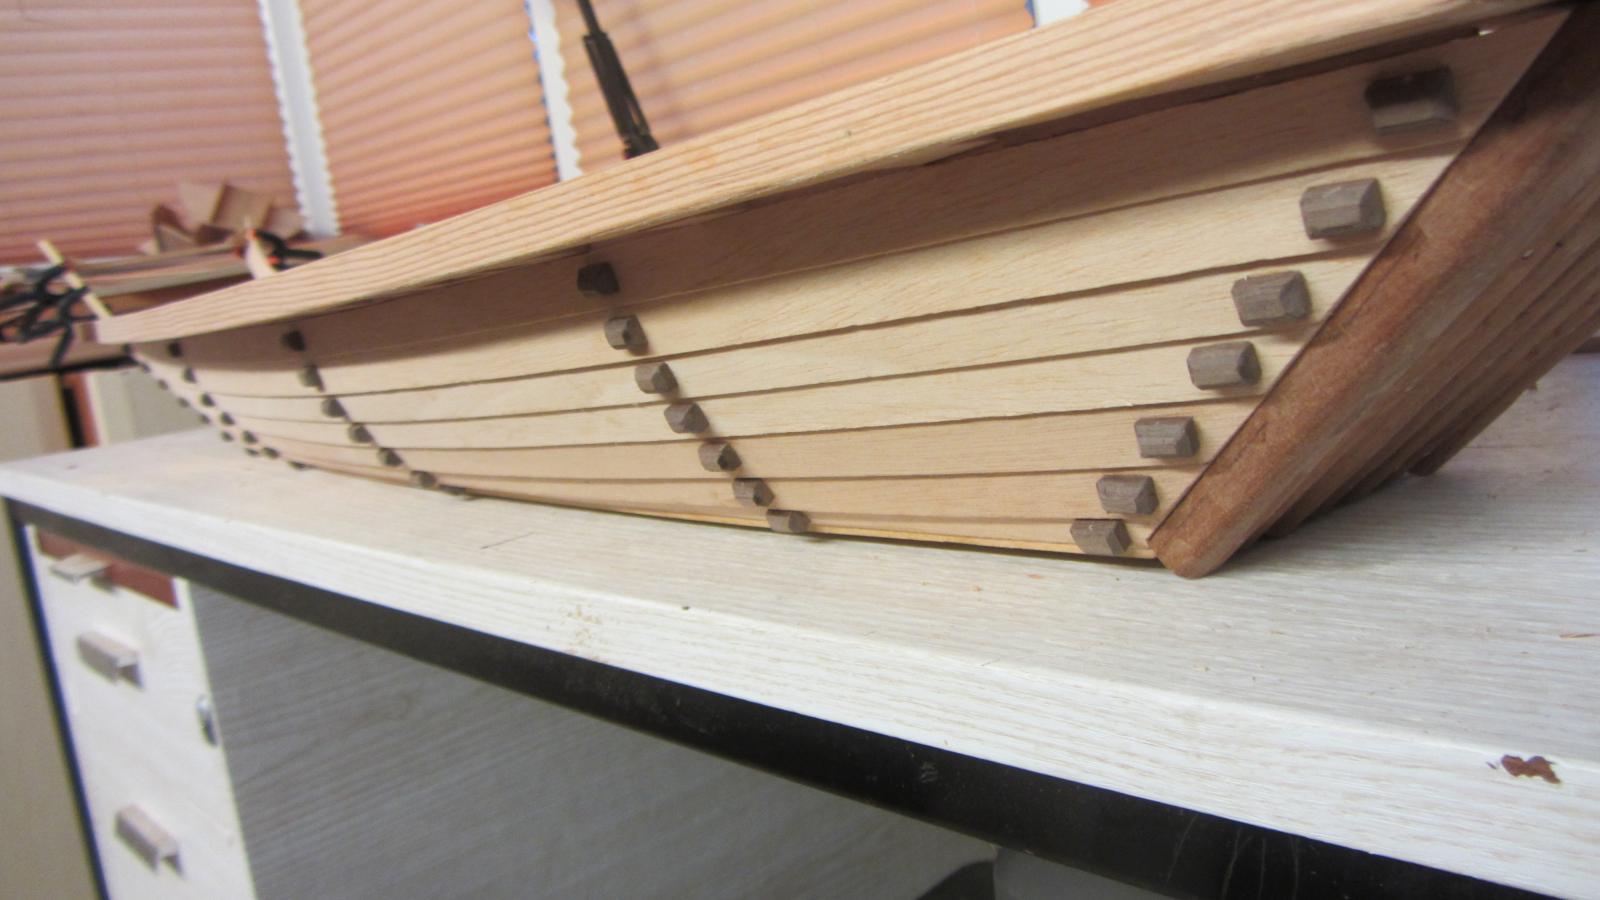
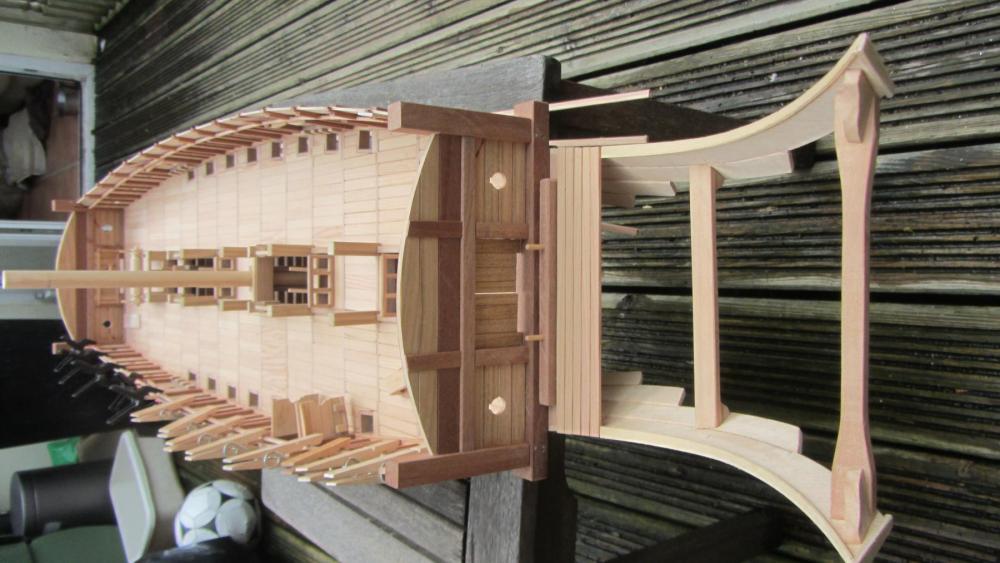
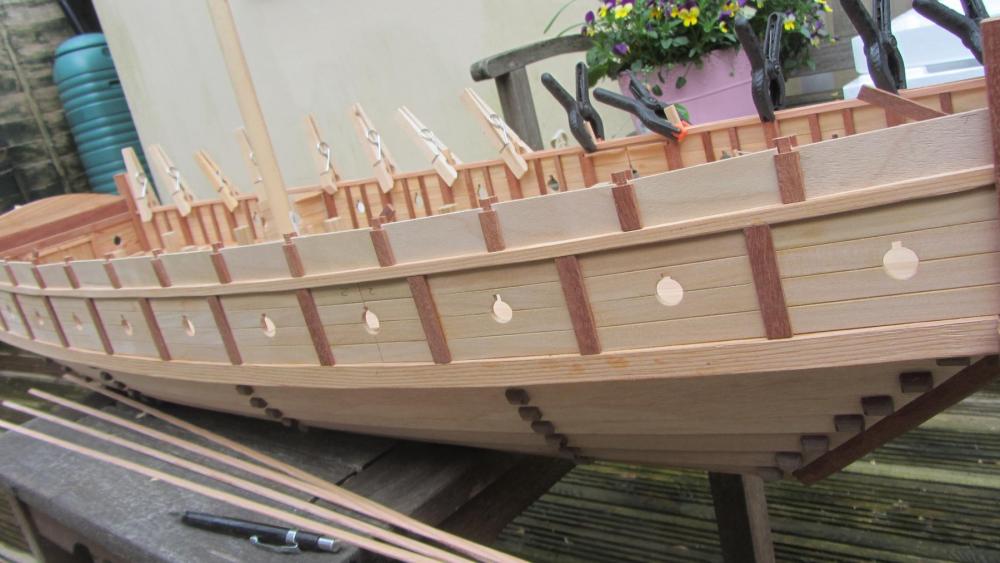
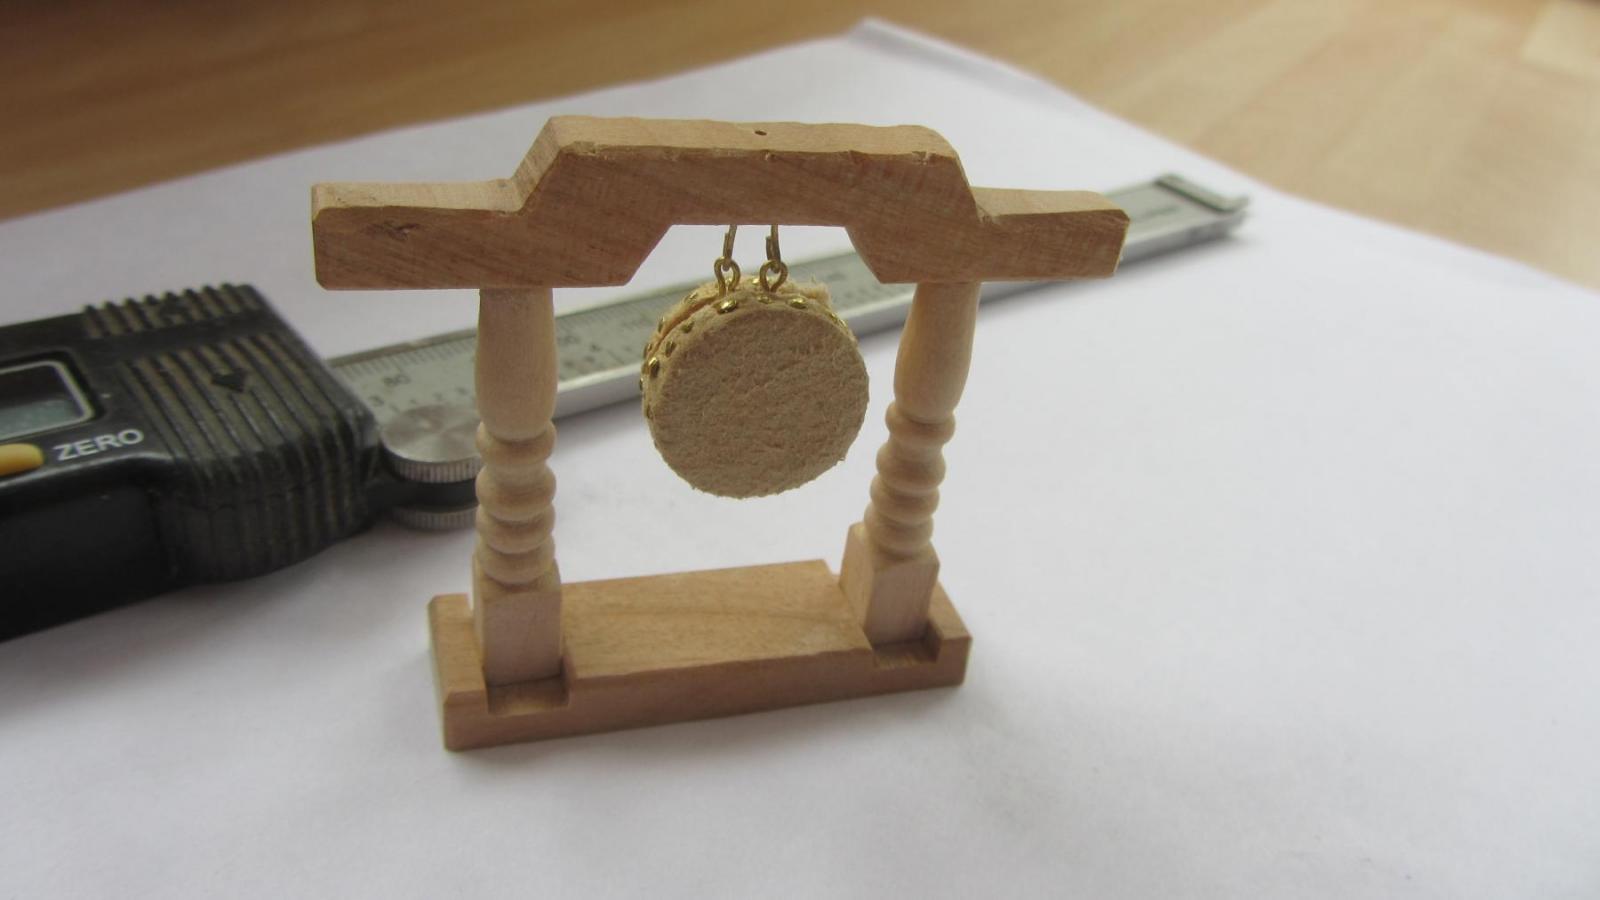
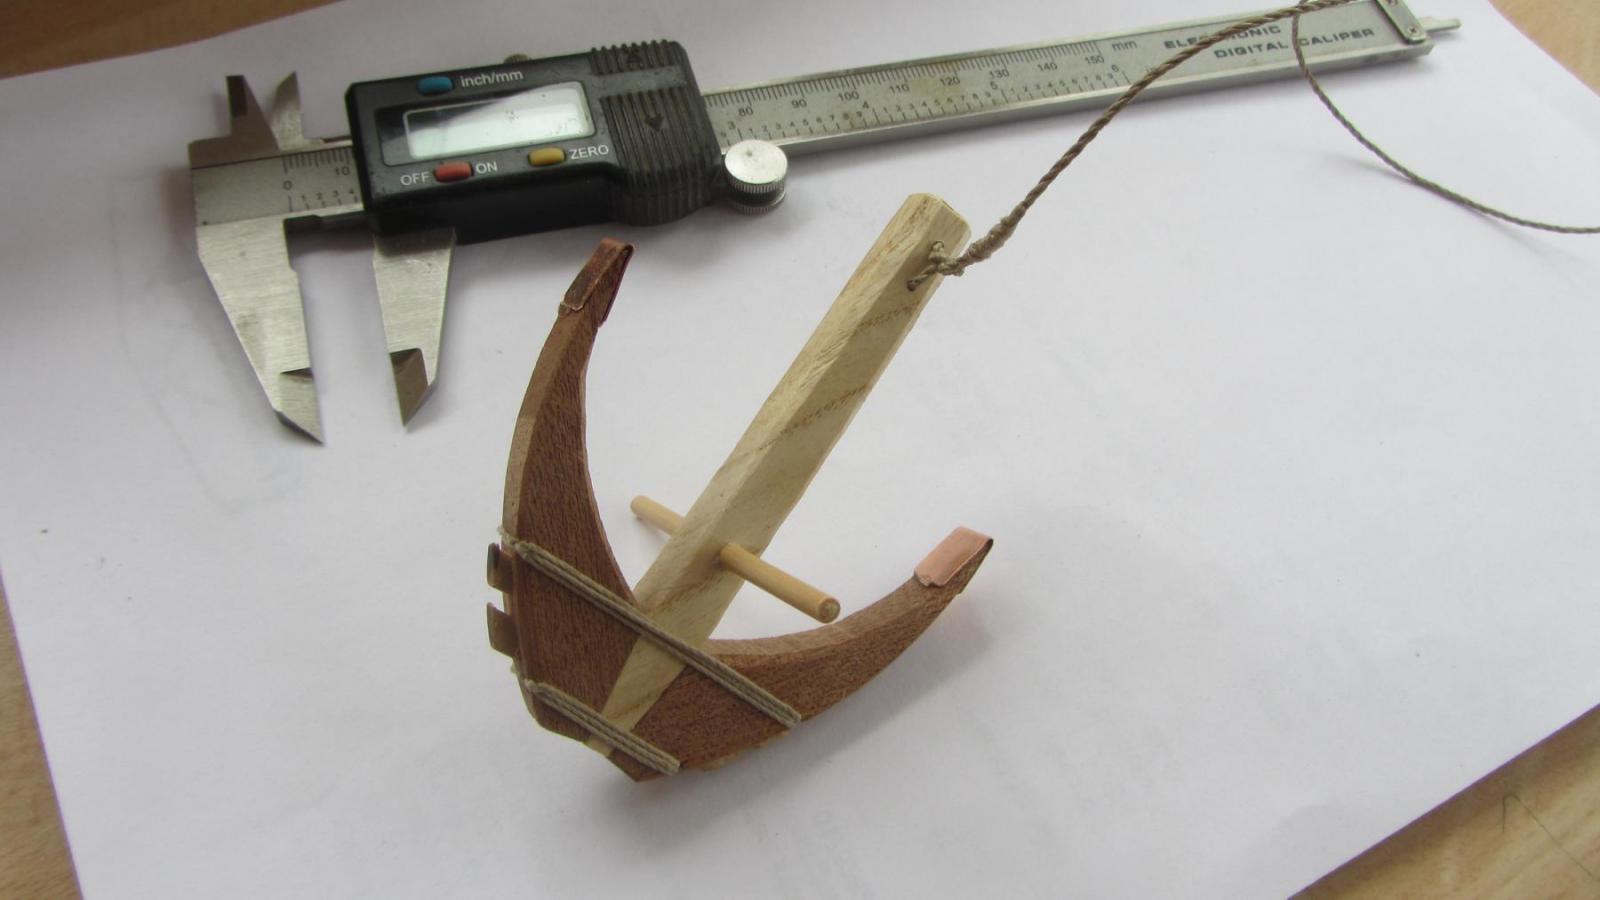
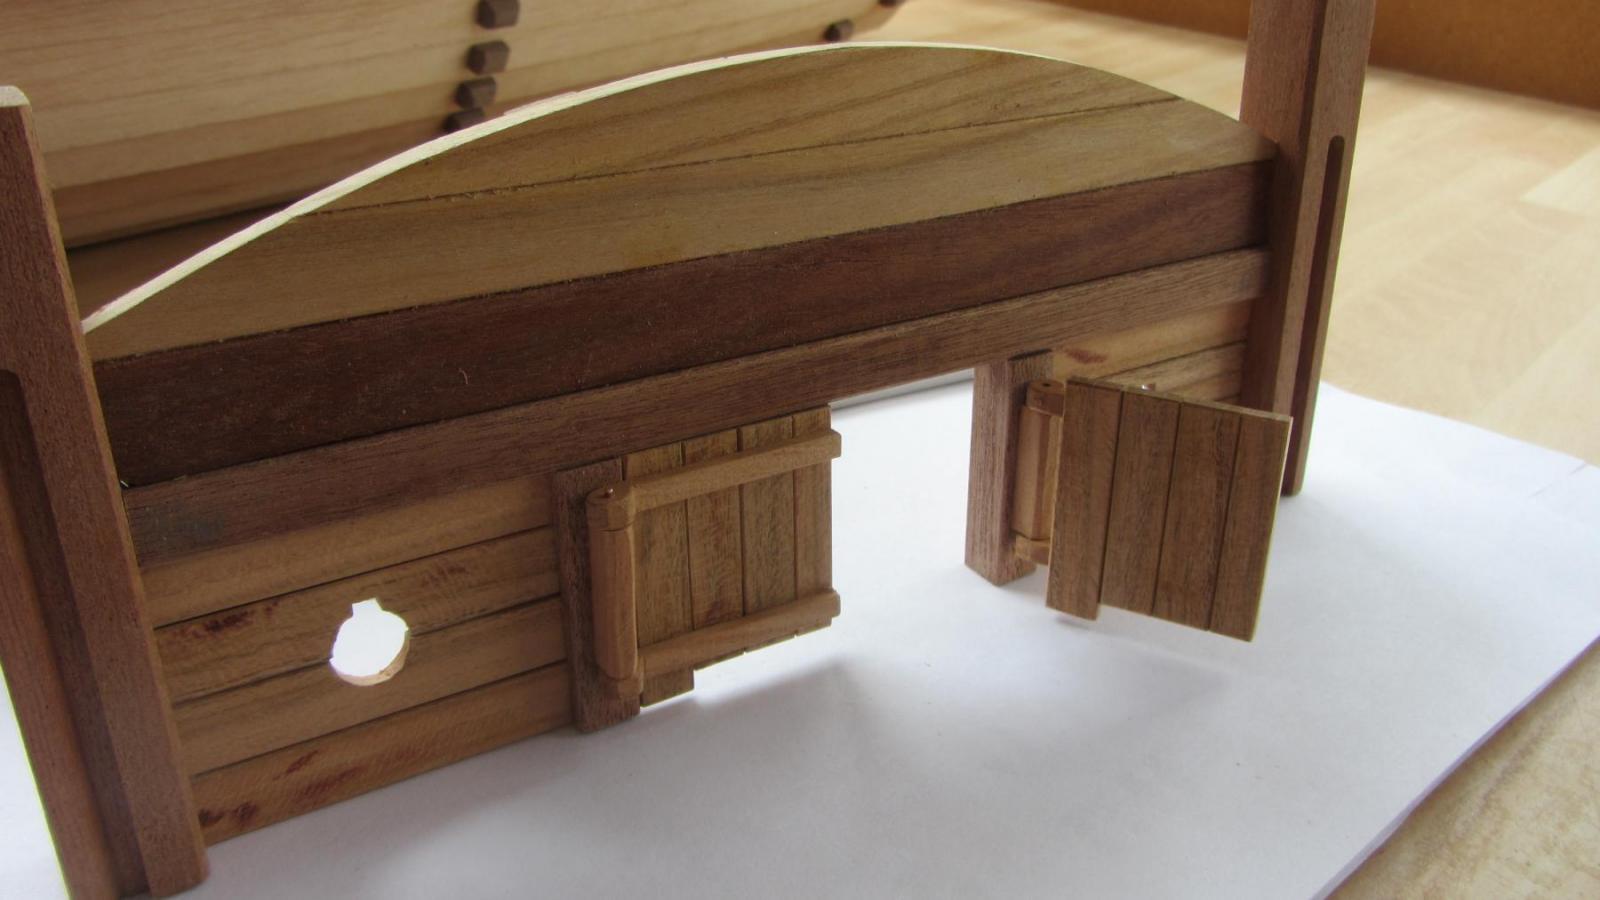
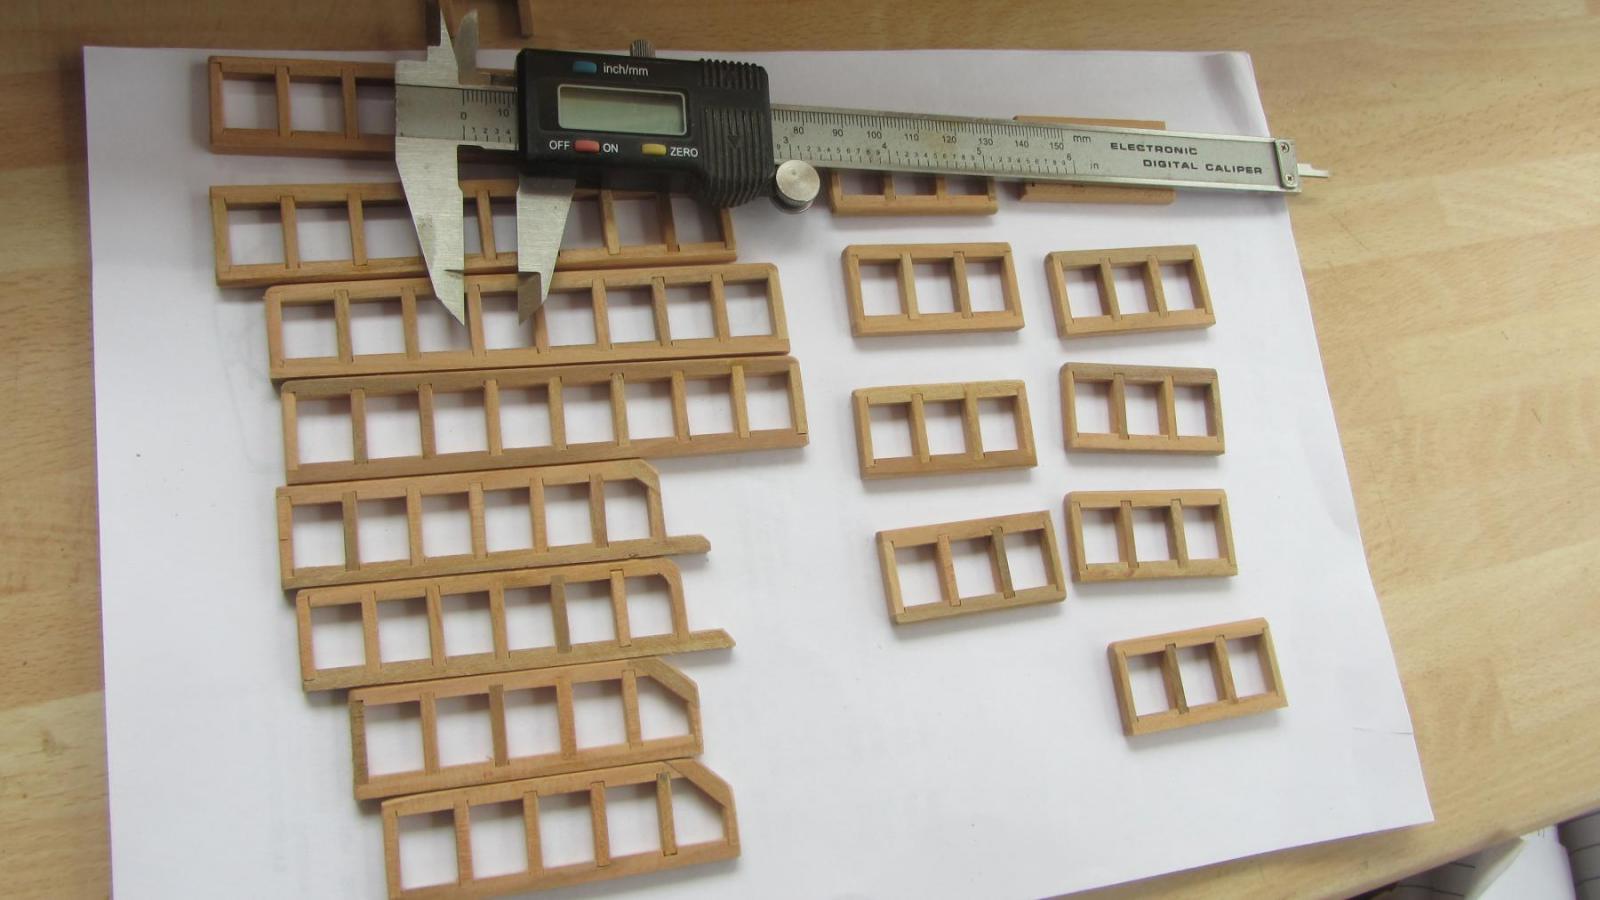
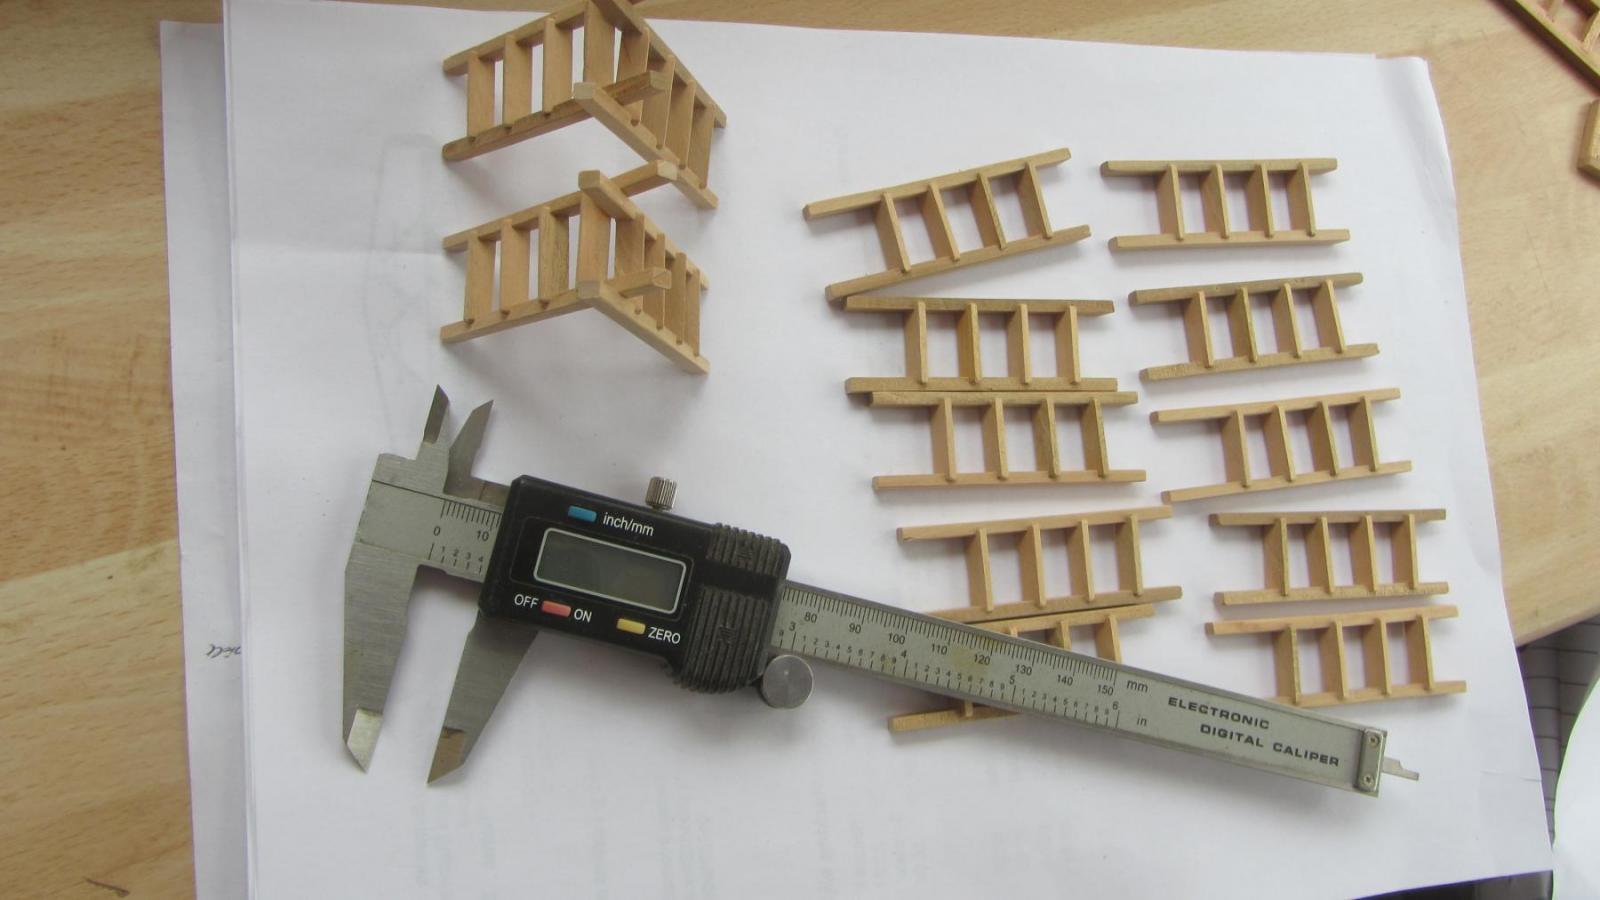
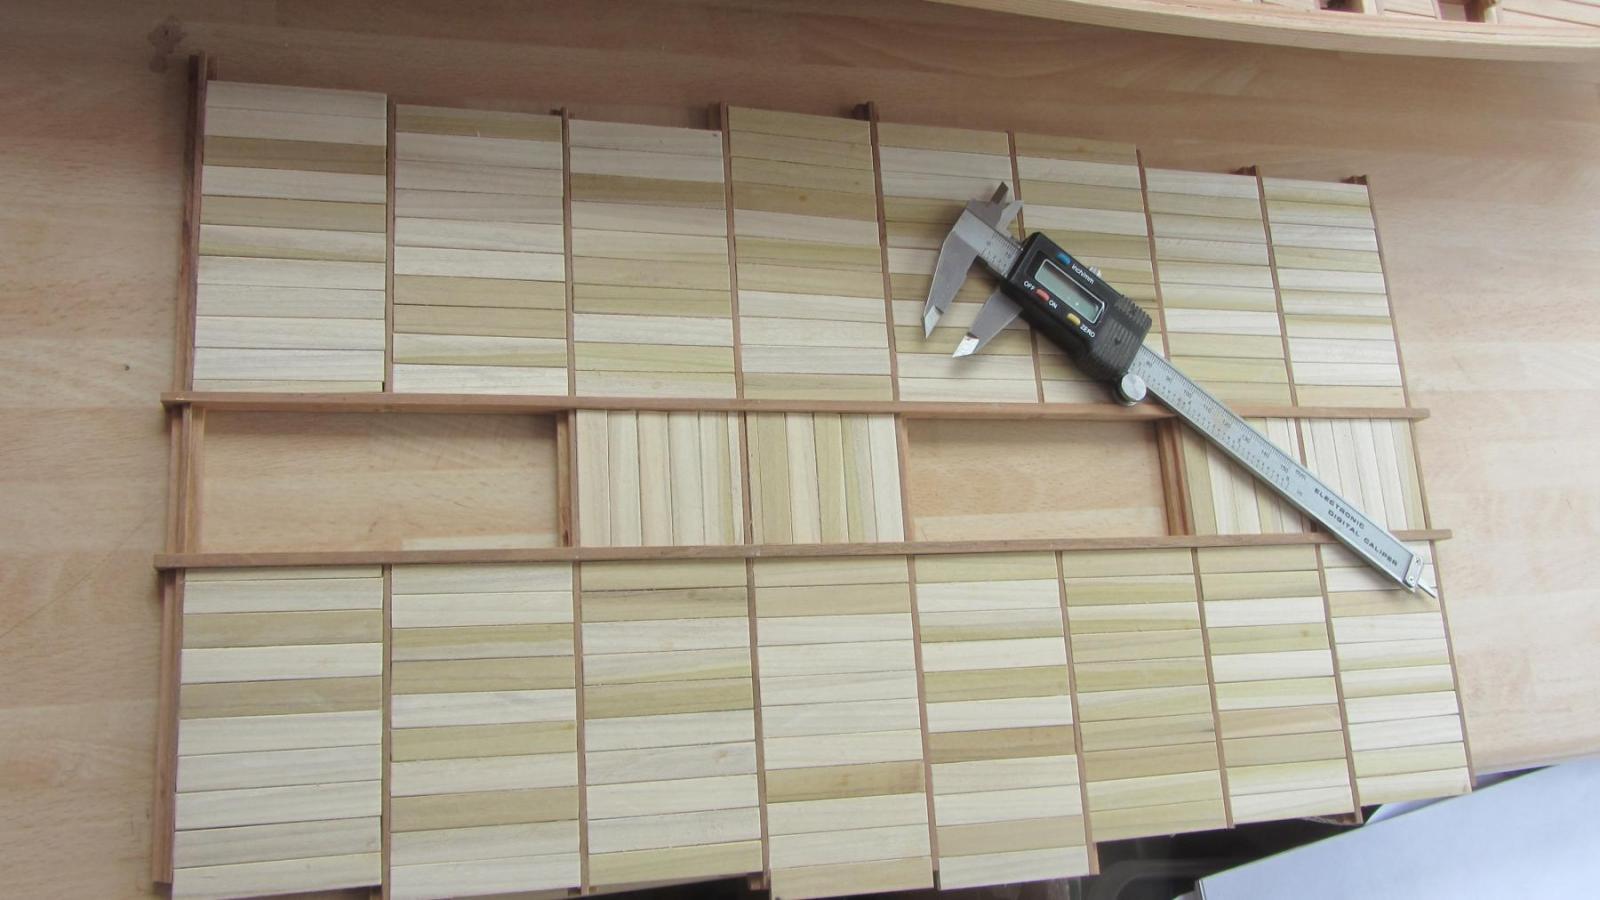
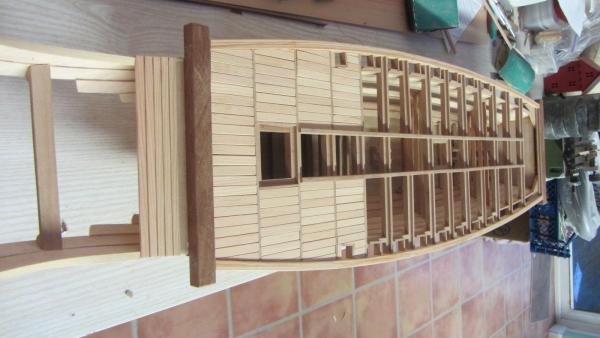
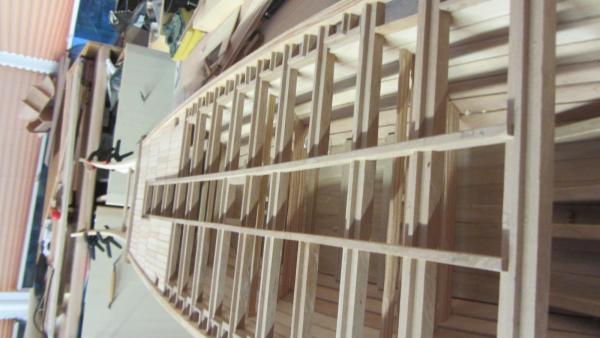
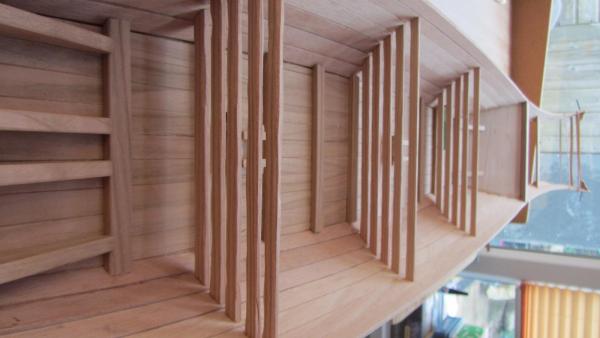
Hi. Thanks for all the likes. Sorry for the brief descriptions on the photos. The main deck is planked with spruce. At this scale the grain looks just right for Pine that would have been used on the real ship. The rudder is not going to be fixed until the model is complete as it protrudes way below the bottom of the ship. I might remake the Anchor winch as the drum does not look right. Needs to be from a core of the tree. The Drum stand was mad then chips cut to give it a bit of texture. The drum skin is shamny leather. The Anchor was a interesting as it has tendons through the shank and the arms. The Bow and Stern ends have working doors. The hole for the gunpoint was milled out on a jig on my proxxon mill. The handrails are made from cherry and need to be put through the sander to finish them. All the ladders have been made. Lots of ladders on this ship. And only 2 decks. The Top deck planking is Tulip wood. Have made this 10 mm wider than nessary as I'm not sure on how it's going to fit. And finally the ship as of yesterday. Turning out to be a large ship model. Have found some Korean soldiers from that time period and at the same scale. I will do the cutaway after the roof is in place. This will leave a 300mm hole in its side. And the edges that have been cut will be painted dull red. The side pillars and the planking are under construction ATM and will take a few more photos as work progresses. Will also take a photo of the jig for making perfect holes in the planks that cannot be drilled without splitting. I have 24 holes to make so time making the jig is well spent. Thanks for looking in. Regards Antony
- 99 replies
-
- 8
-
-
- turtle ship
- korean
- (and 1 more)
-
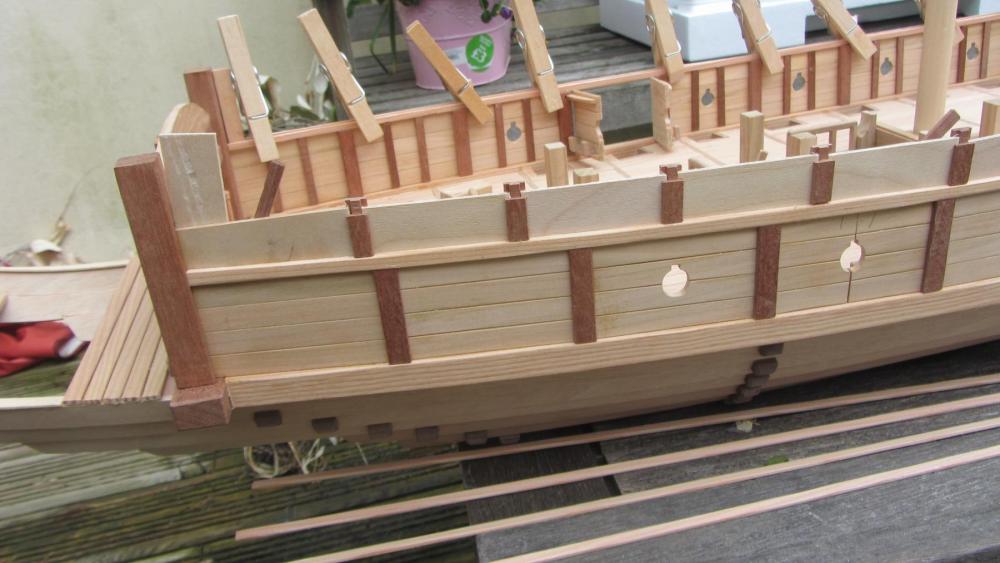
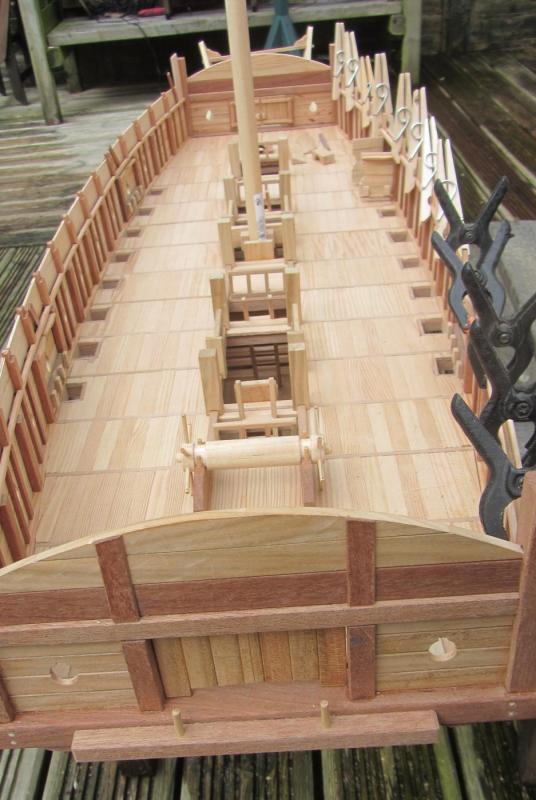
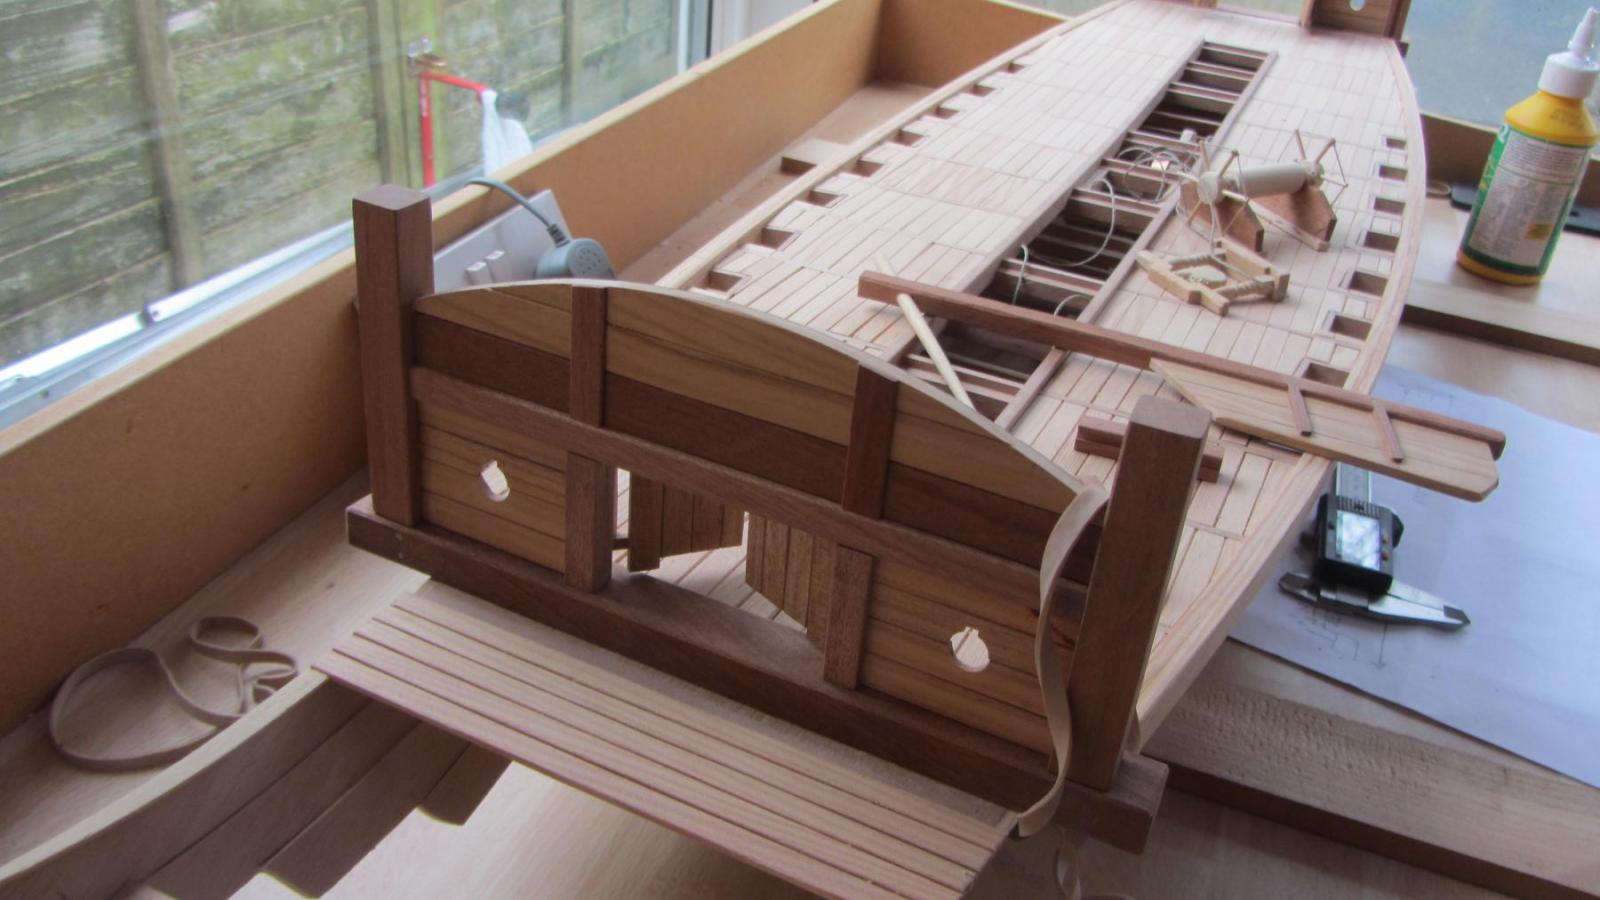
Hi. Updates as per previous post. Main Deck is now planked and needs a fine sanding. Main deck from above. Rudder and tiller. Winch for anchor. Drum Anchor The Bow front panel. Doors are working and I need to add a beam lock to the both ends of the ship. All the hand rails made up . Need finishing before adding to decks. Various ladders made up. also needs finishing. second Deck from above. Second deck from below. Bow and stern ends added to model. That's it for today. Regards Antony.


- 99 replies
-
- 20
-
-
- turtle ship
- korean
- (and 1 more)
-
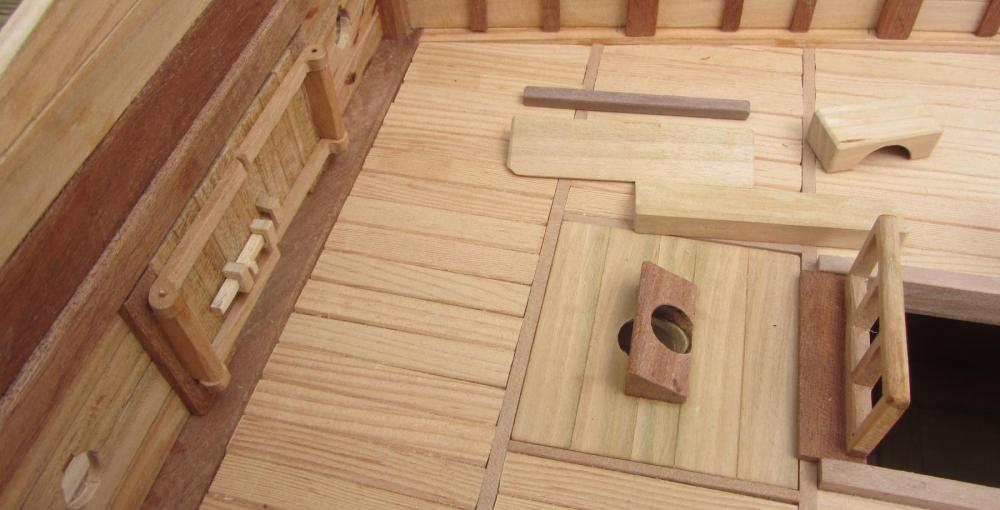
Hi. Well the kitchen is delayed for a few weeks. Ship back on the work area. Have made a few of the deck fittings. Will take a few photos tomorrow and post them. Regards Antony.
- 99 replies
-
- 5
-
-
- turtle ship
- korean
- (and 1 more)
-
Futtocks and riders
AntonyUK replied to toms10's topic in Building, Framing, Planking and plating a ships hull and deck
Yet more reading from the 74 gun ship. In the section of fixings. "Riders- these are fastened in exactly the same way as the bends. Bolts driven through from the hull- planking are forelocked to the upper face of the riders, one through each strake of planking, facetted alternately to the forward and after "Slice" of each rider. It should be noted however that the two lowest strikes (the garboard strake and the first bottom-strake), are merely blind-fastend into the floor-riders, since otherwise through-fastenings would interfere with the bolts of the keelson." Regards Antony -
Futtocks and riders
AntonyUK replied to toms10's topic in Building, Framing, Planking and plating a ships hull and deck
Hi Tom. Reading from the Seventy four gun ship volume 1. "The riders look very much like frames, Since they are shaped, worked and assembled in the same way. There are none at all in the after part of the hold; the width and thickness of the riders is the same as for the frames. They are cut away over the keelson and the thick-stuff at the floor-heads, but while they are being worked as much timber as possible is left in the middle to compensate for the amount cut away to accommodate the keelson. Filling-pieces are placed in the air-strakes of the ceiling at the point where the riders run. The riders are assembled in the opposite manner to the frames, in the sense that the floor timbers,which is the after"slice" of the floor-riders. The role of the riders is to counteract the tendency of the frames to sag outwards. In out 74 the futtock-riders finish under the planking of the gundeck." I hope this helps. Regards Antony. -
Hi Dave. One of the game designers was asking questions on this forum regarding ship design if I an not mistaken. Do you have a in game name?. I already play Archeage. RPG game. Regards Antony.
- 79 replies
-
- 3
-
-
- lady nelson
- amati
- (and 2 more)
-
Hi Dave. That says it all. And that a real drive to Acheave a better standard. Which explains your excellent work and results. Now back to the model in hand.. That's one excellent method of learning the planking method. The wood shows a much better curve than the tape you were using. And the infill blocks will help no end. Nice photo's by the way. Regards Antony.
- 79 replies
-
- 6
-
-
- lady nelson
- amati
- (and 2 more)
-
Hi. Thanks for all the likes. The model is now packed away until the kitchen is finished. With the builders and kitchen fitters everywhere I would not garnatee it's safety. Will start again @ the end of June. But that will not stop me making the ladders and the roof hexagonal plates. Not sure yet what I will use to make them. Copper sheet or plasticard. I have a punch to make the shapes. The bits I have been reading suggest that they used blades rather than spikes. Not sure which I will go with. Thanks for looking in. Regards Antony.
- 99 replies
-
- 4
-
-
- turtle ship
- korean
- (and 1 more)
-
Hi Dave. You are making a excellent job of this ship. I thought it was your first wooden ship... Your skill's are so very good for your first wooden build. I wish there was a Crown Timberyard need me. Hint... Jason sends it in bags so it can be sealed from moisture. Keep it in the bags until needed. Regards Antony.
- 79 replies
-
- 5
-
-
- lady nelson
- amati
- (and 2 more)
-
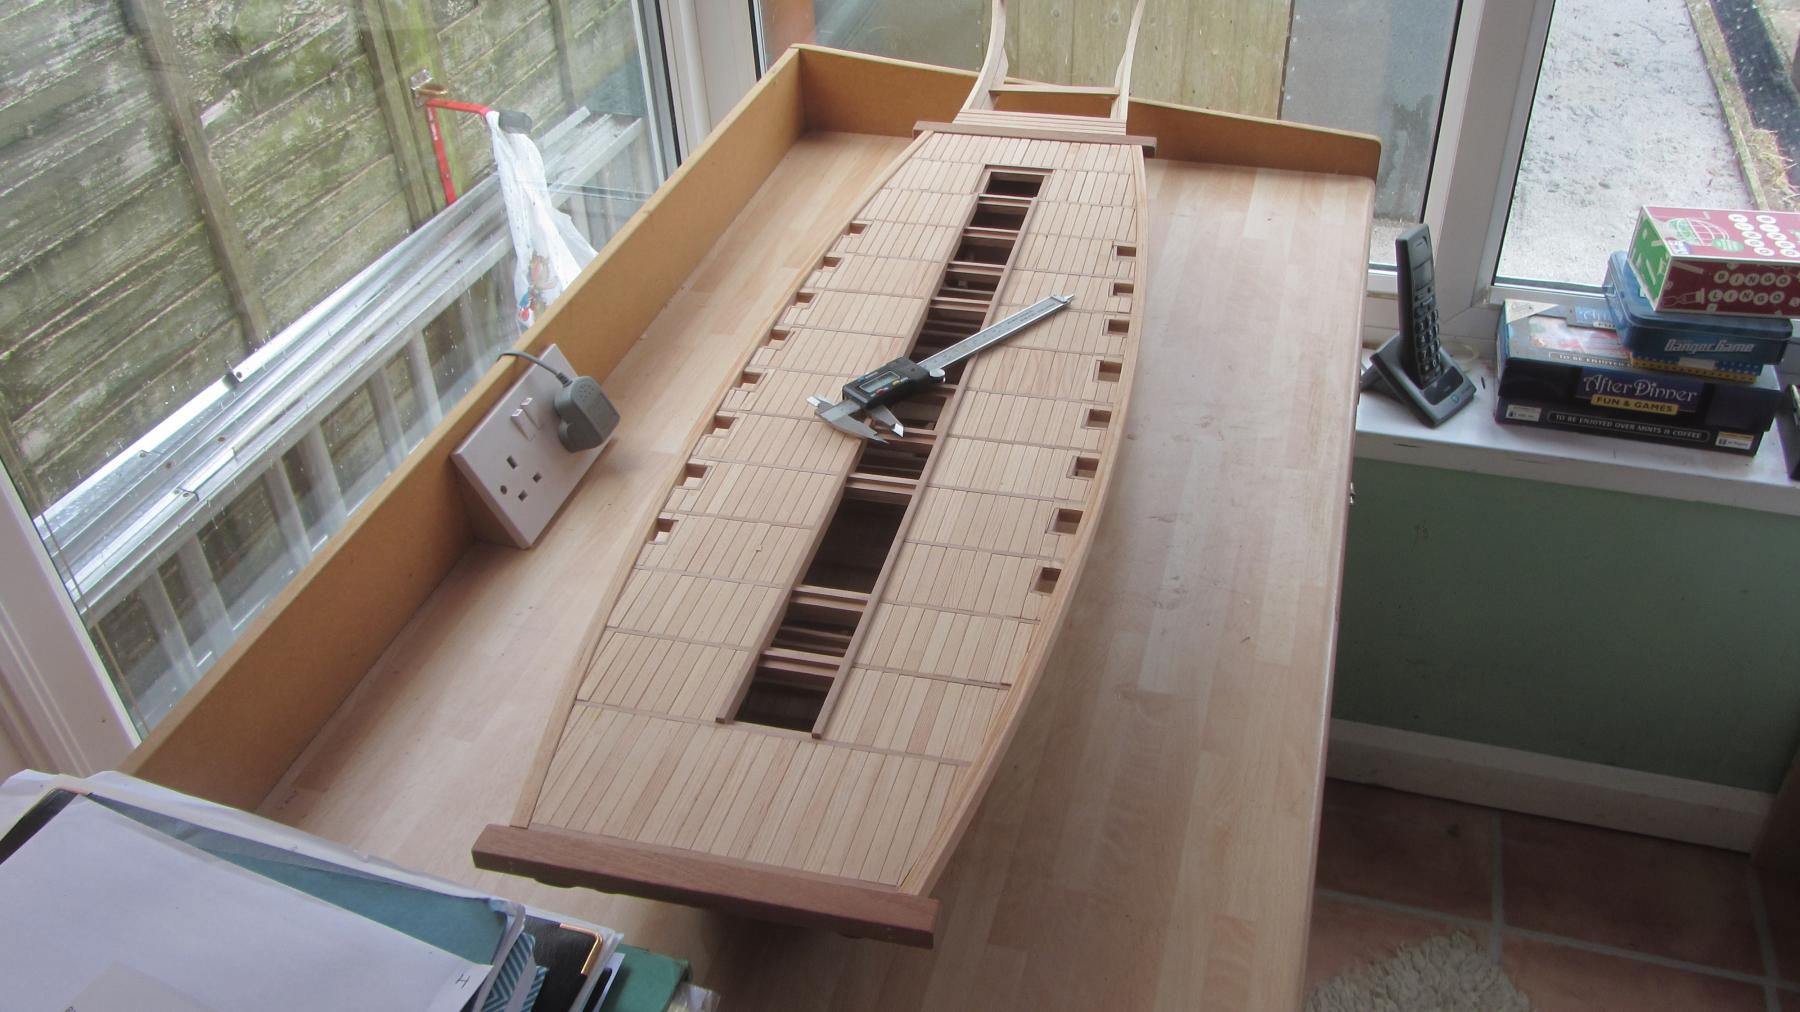
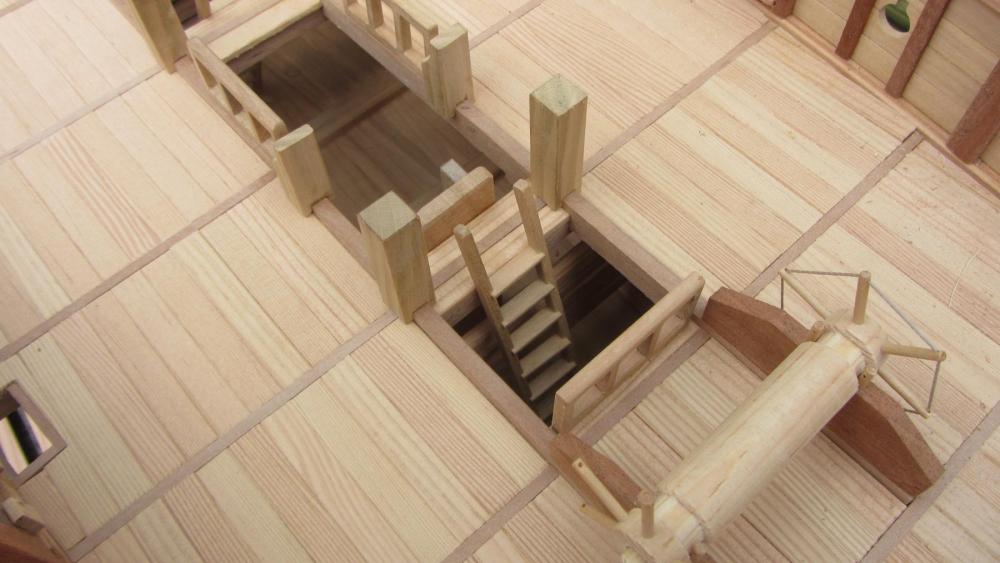
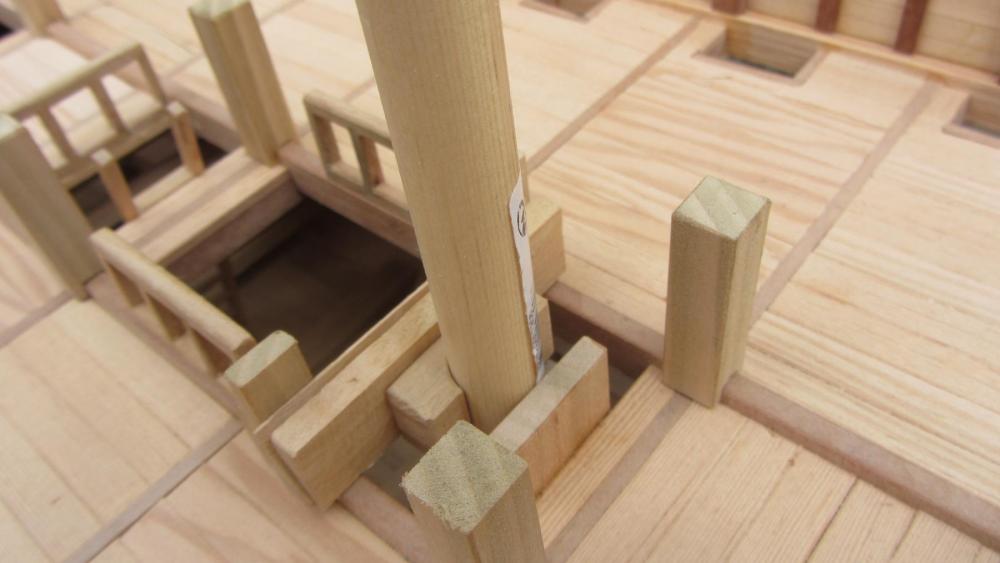
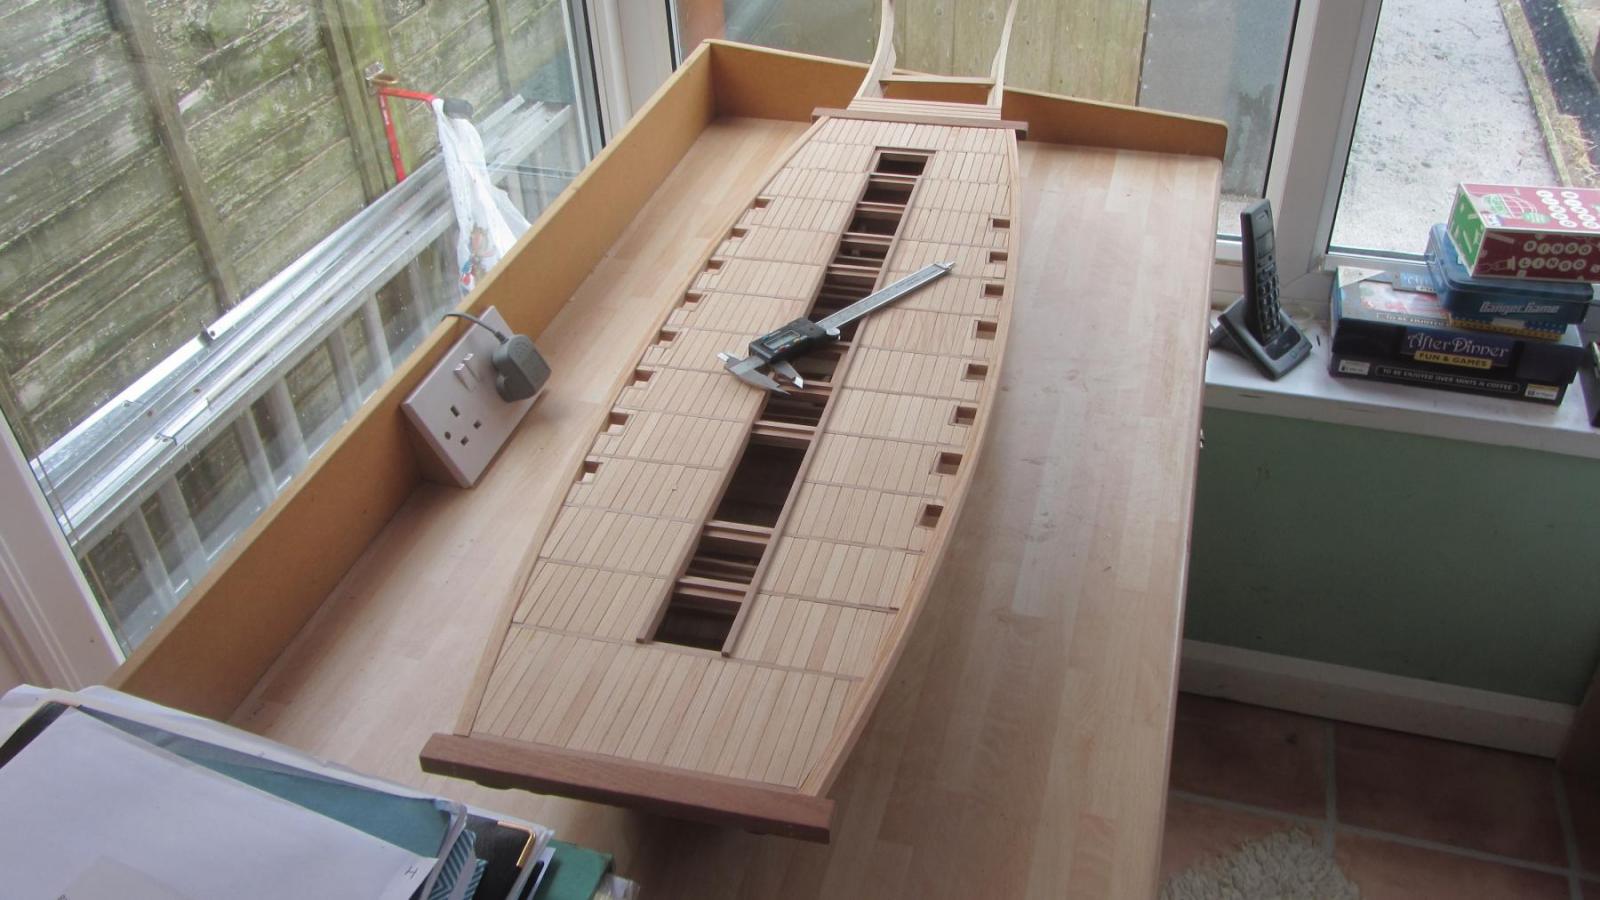
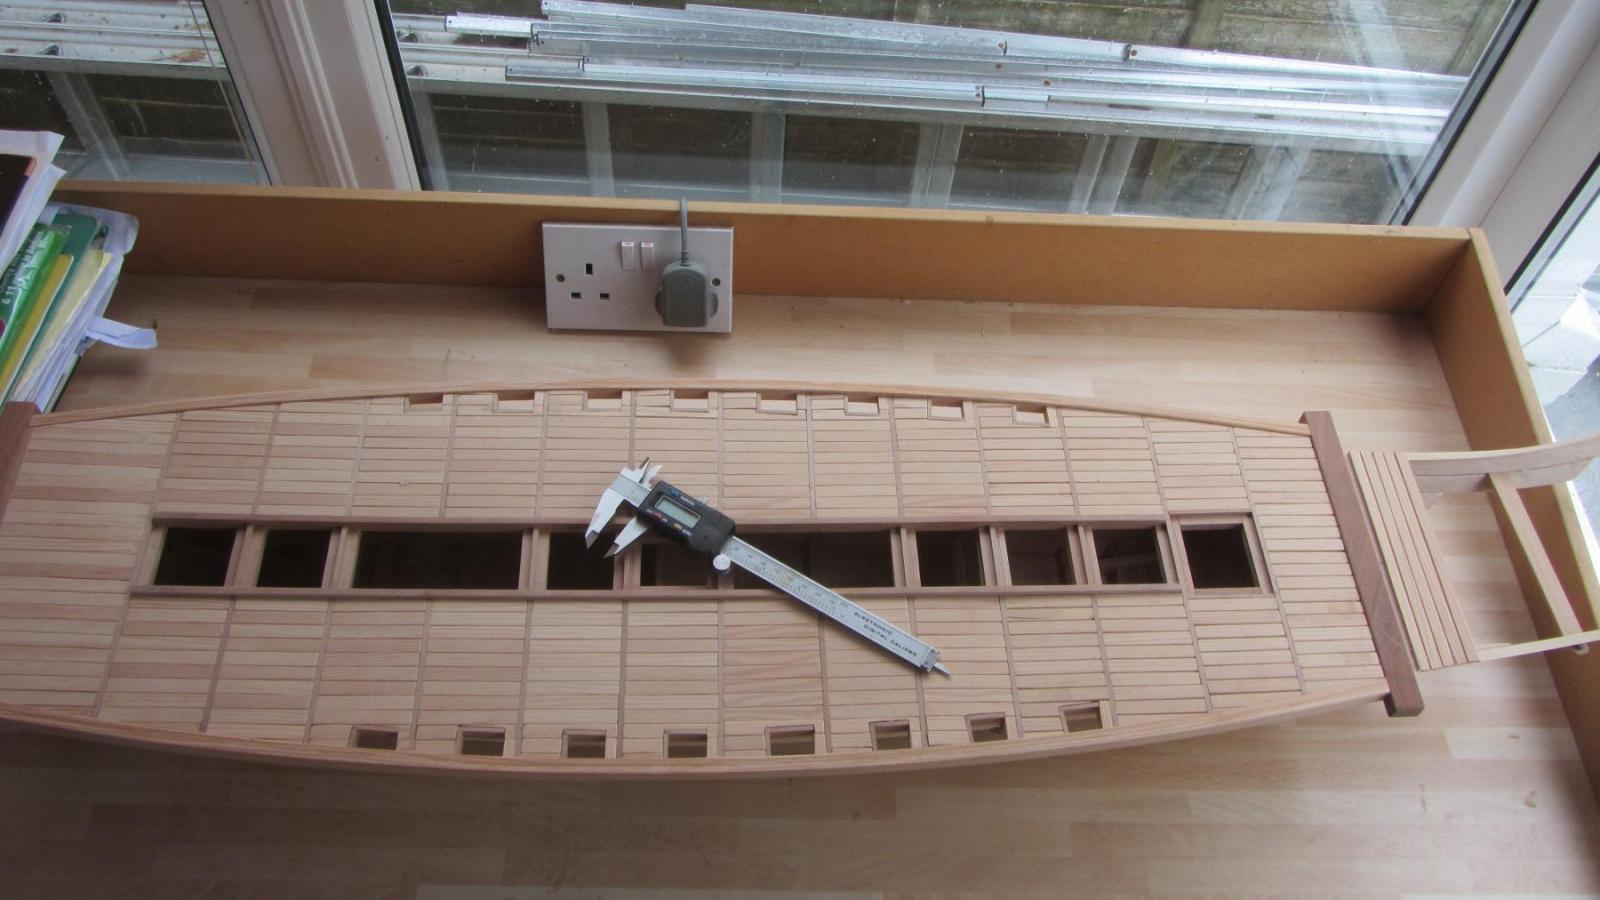
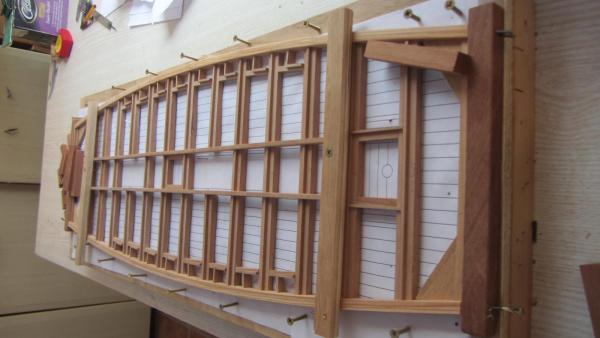
Hi. Happy today...The deck fitted the hull and is now in place. Picture one is the Hull side securing details. I used elastic bands to mark there position as you can see. The Deck being planked. Not sure if these would have been fixed in place or just laid into the recess. another close up of the side fixings. Bow area fixings. Looking from the Bow towards the stern of the ship. Next job will to be finish the deck planking and add the deck beams fixing pins and wedges. Also need to make the ladders that lead from the deck into the hold. Thanks for looking in. Regards Antony.

- 99 replies
-
- 19
-
-
- turtle ship
- korean
- (and 1 more)
-
Hi Navymast. Your ship is coming along very nicely. It's a very unique method of building a model ship. And No I do not know of Grant. Post the Question asking about Grant in another section of the forum as some people have not read your post's. Regards Antony.
-
Hi Bob. Time to start scratch building. Just do the bow section.. or Stern section with what's left over. It's a shame to bin the work that you have put into it. Well it's more time to spend on your Gun Station. Regards Antony?
-
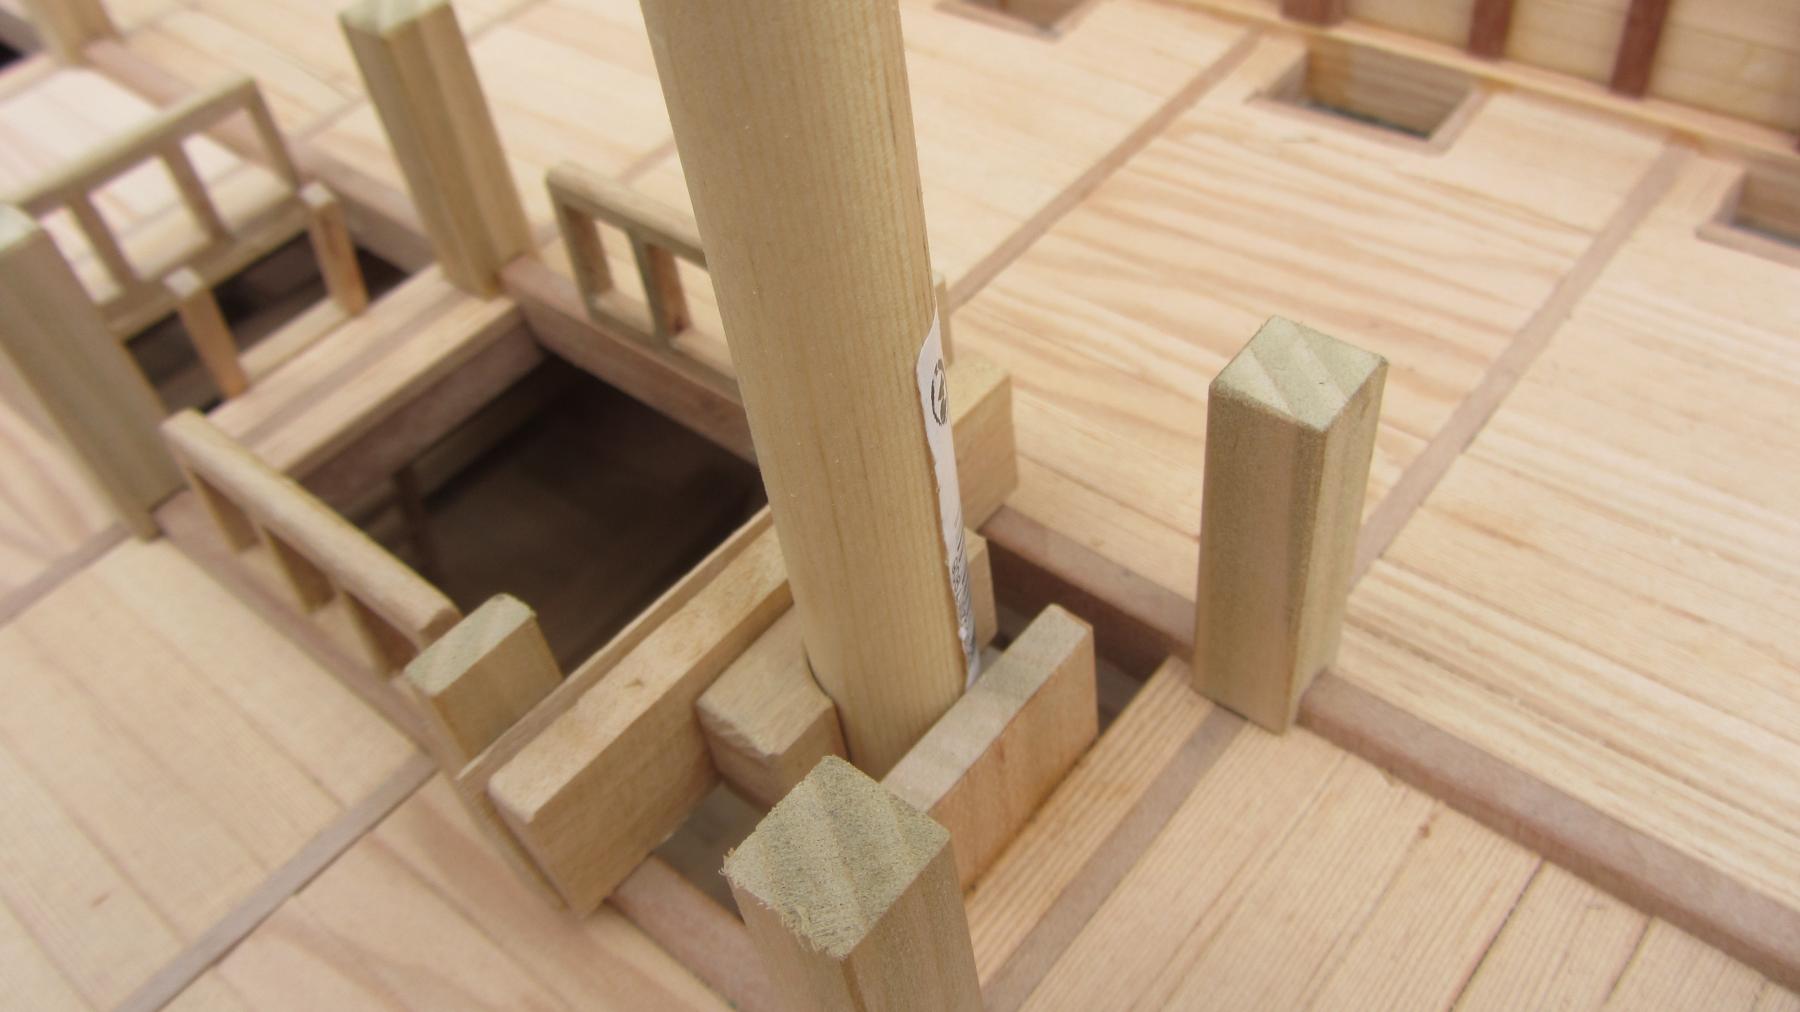
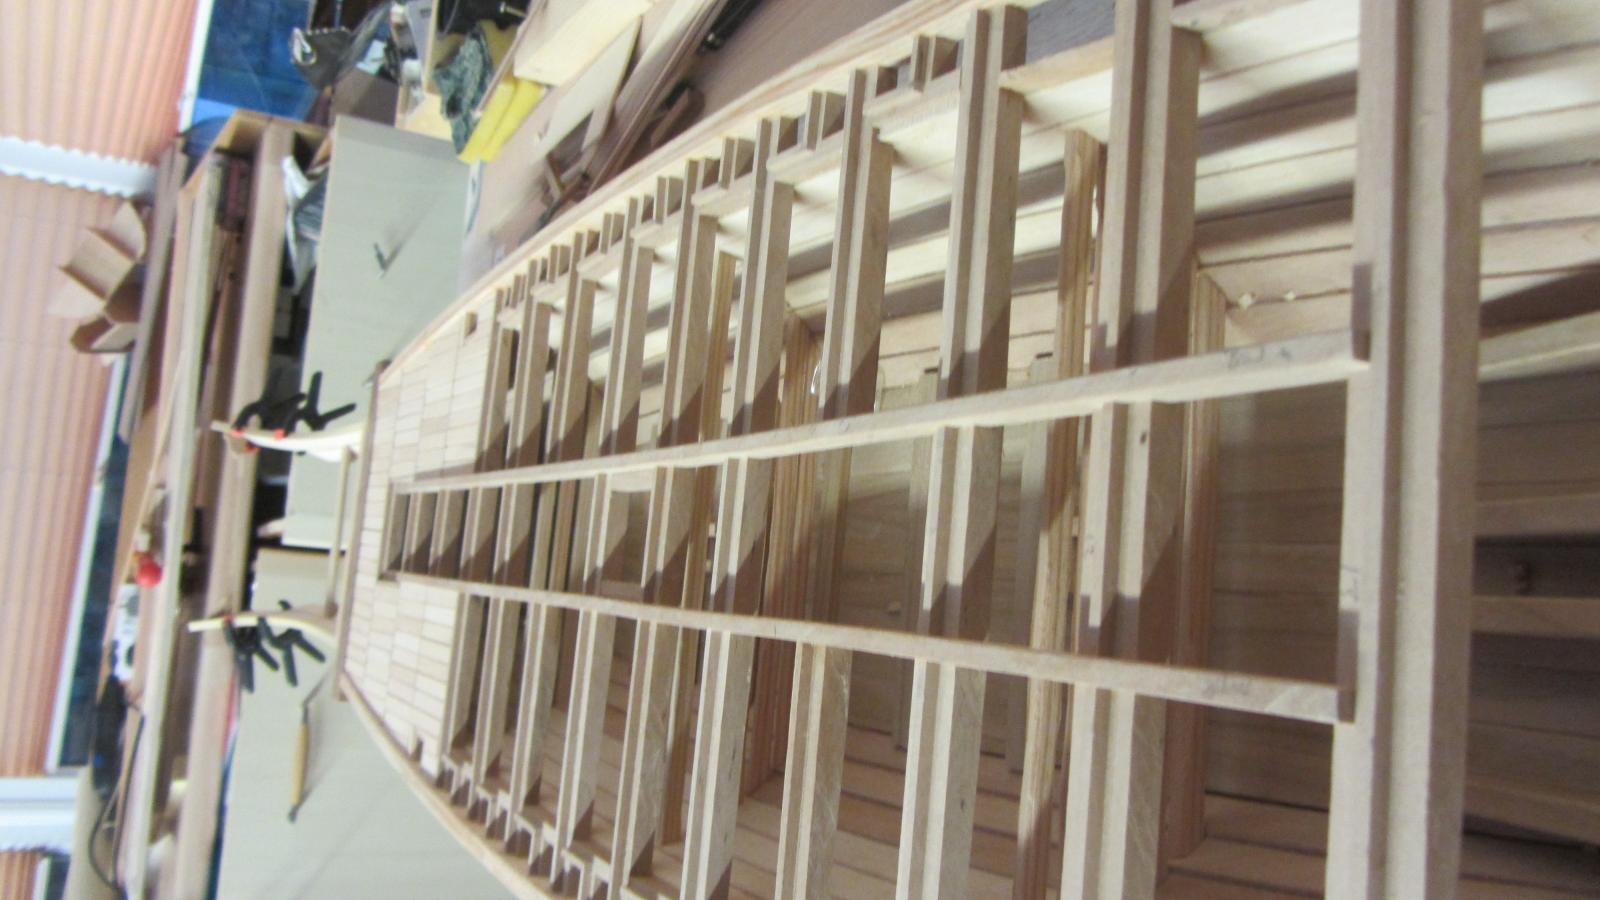
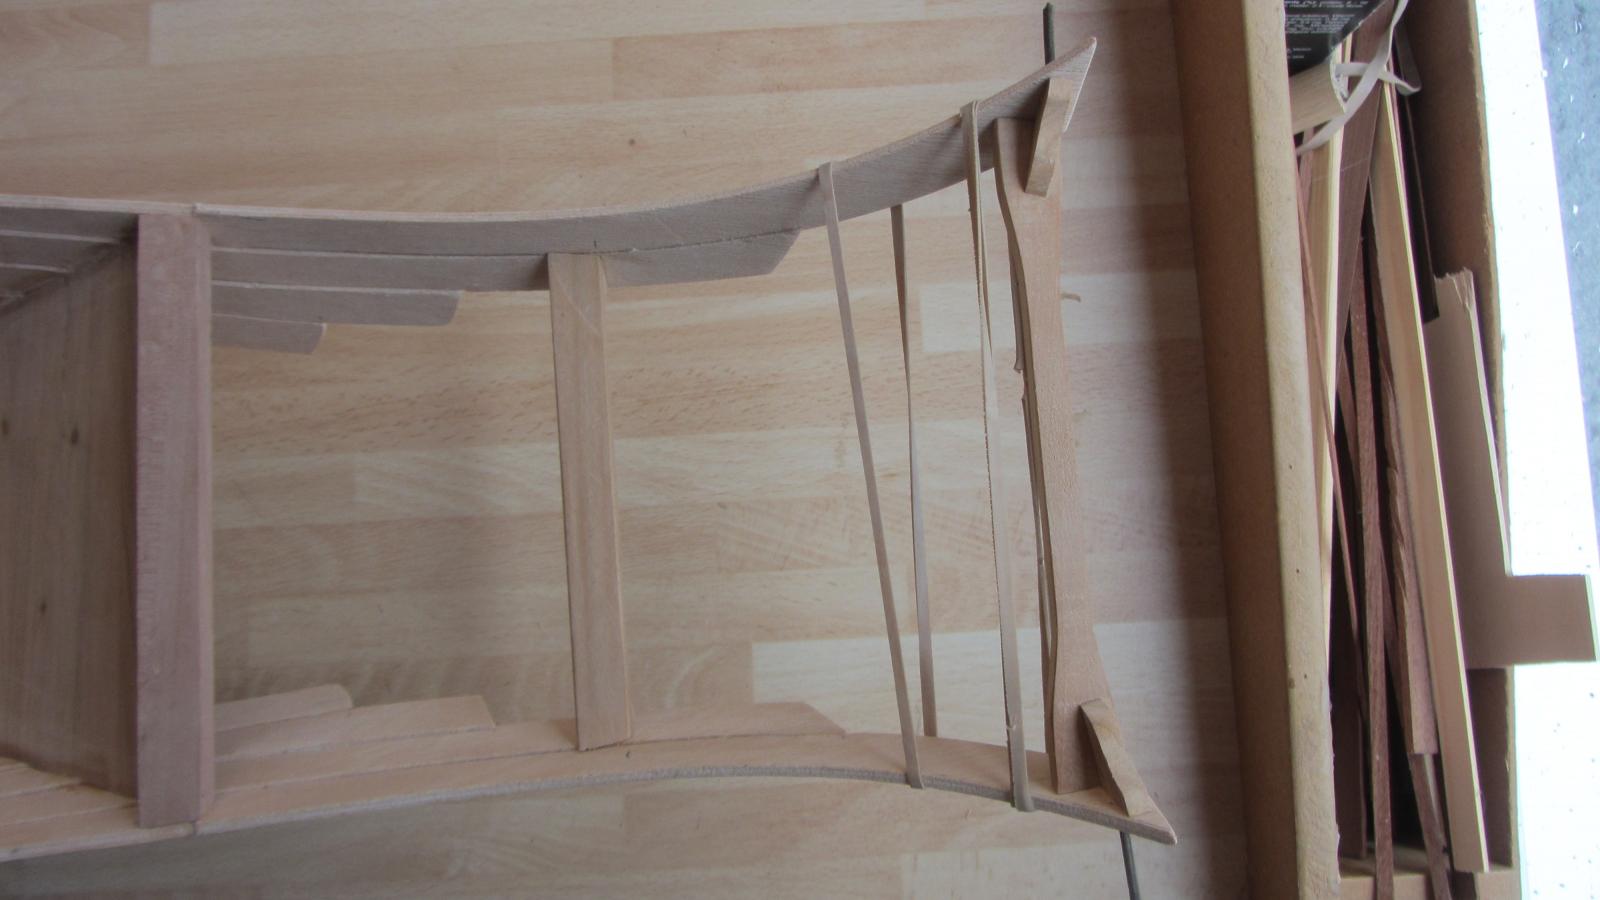
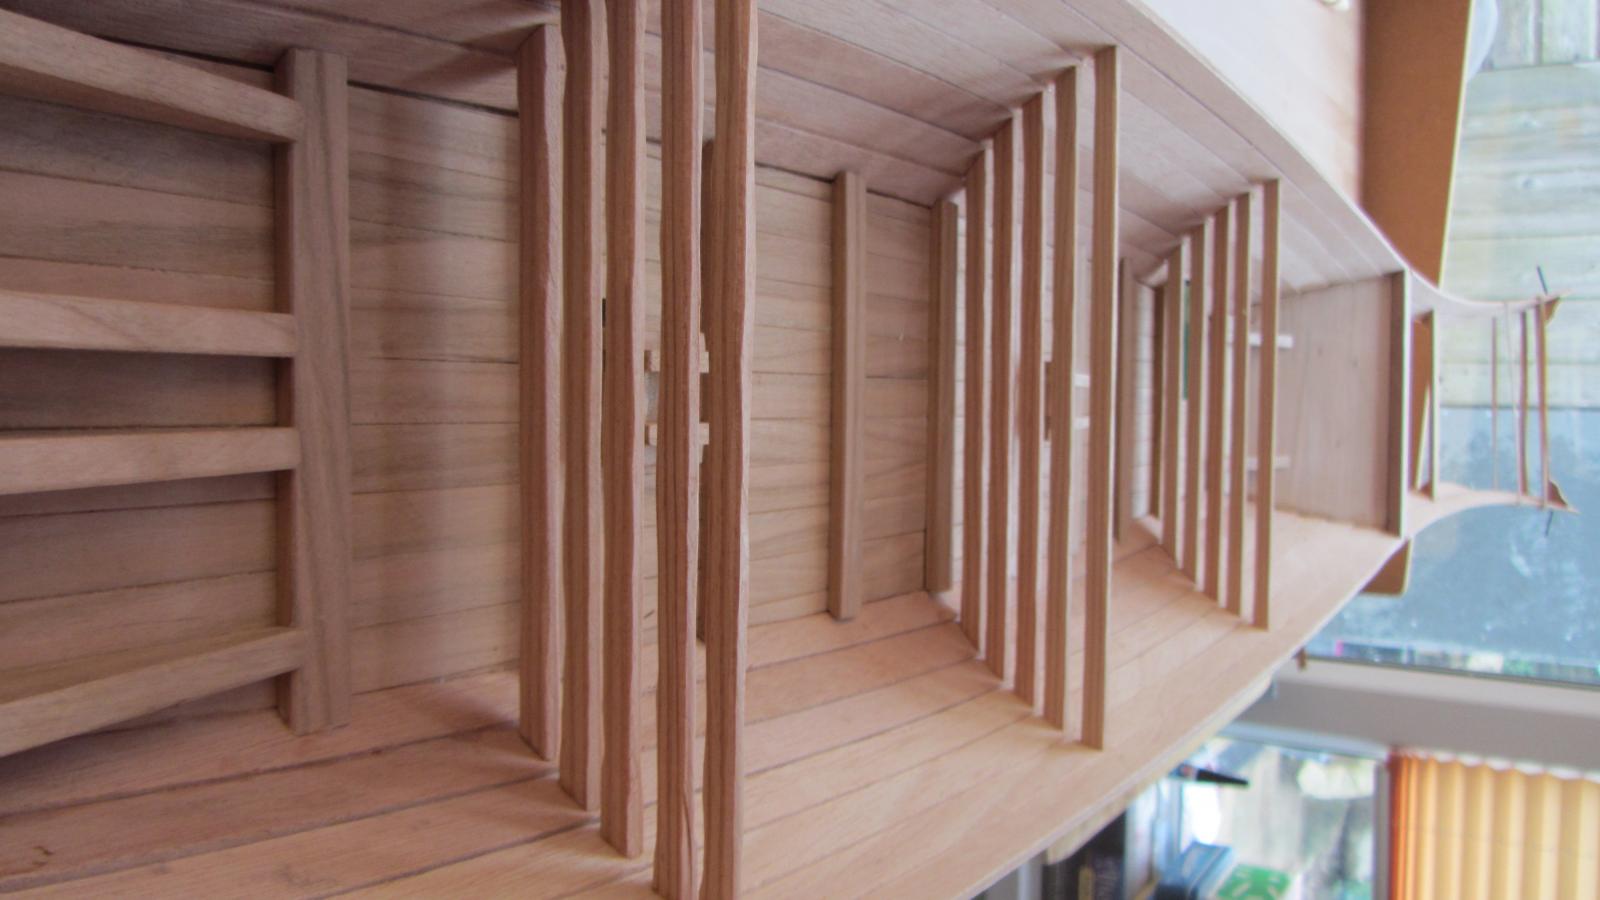
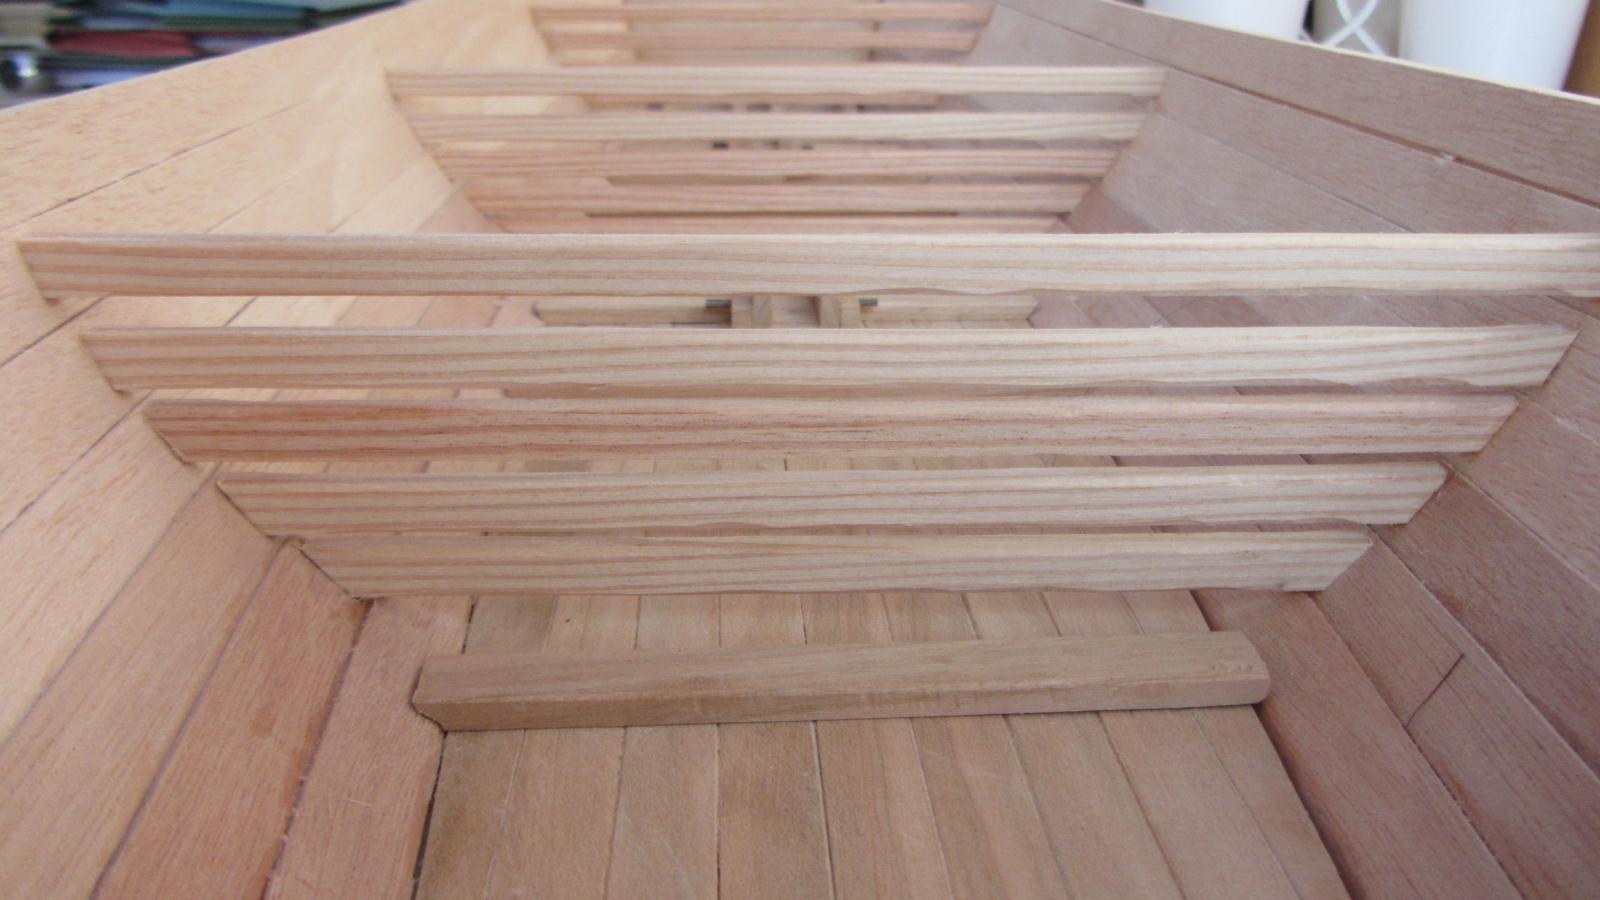
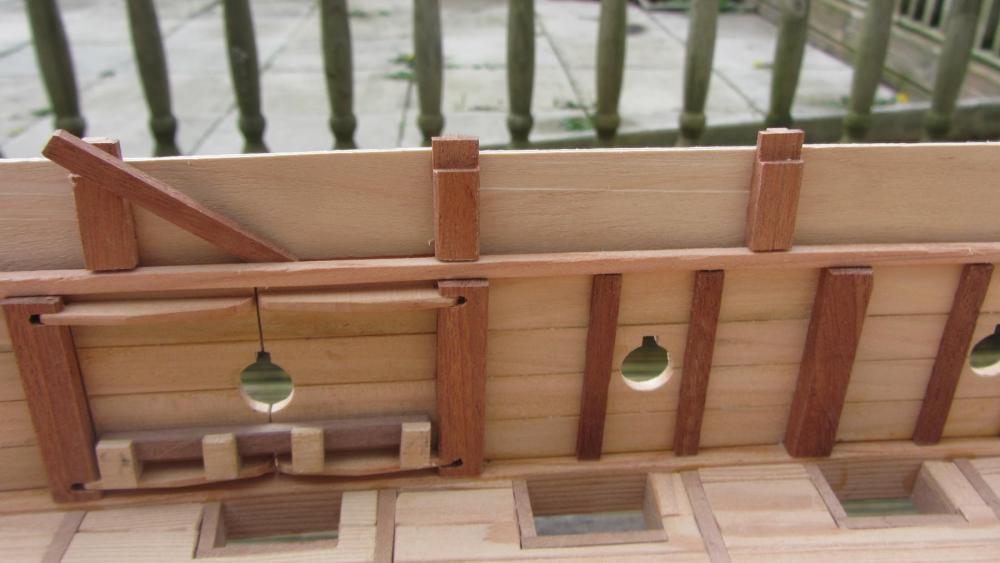
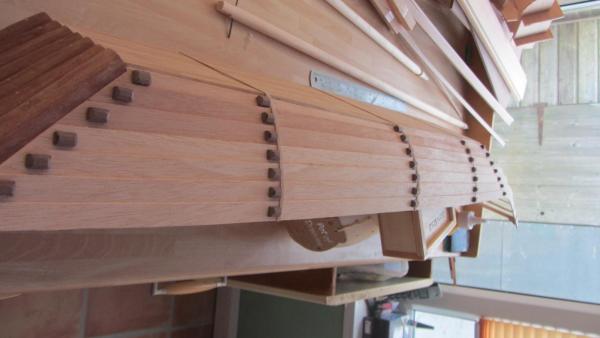
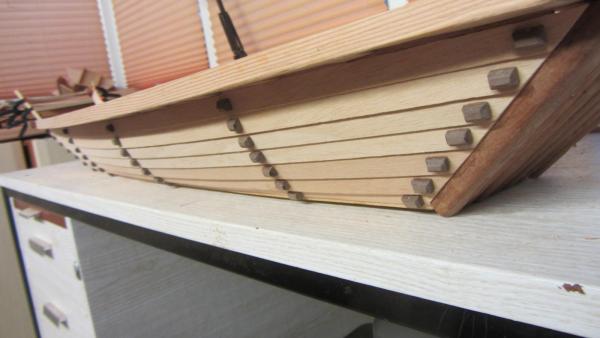
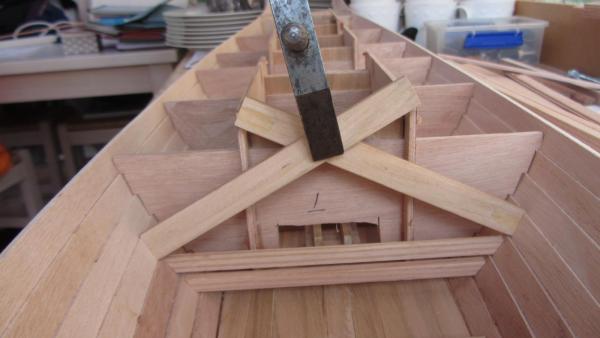
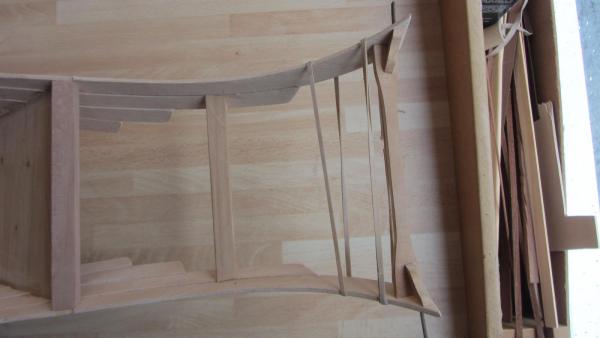
Hi. A little update.. First photo is showing the Deck assembly with the bulwark/Strake being added to the deck beams. Using a board with the correct camber the deck is held in place and the bulwarks are driven tight with wedges. This is a method of getting the correct angles for the support braces. Just 2 pieces of timber held flat against the planks and clamped. Gets the angles right and measures the length at the same time. Photo showing the deck assembly with the oar holes supports in place. Close up of the oar holes. Timber not yet finished. The Stern spacers are now fixed in place. Have Got to add the rear platform yet.. Will do this when main deck is in place. Photo of the hull support braces in place. I've rough cut these with a knife as they looked to clean having been cut on a saw. And another one close up. Will add the deck to the hull next week and make the deck support post's. She is turning out to be one big ship. Thanks for looking. Regards Antony.


- 99 replies
-
- 16
-
-
- turtle ship
- korean
- (and 1 more)
-
Hi. Thanks for the likes and reply's. Yesterday I had a model kit of a Turtle ship given to me as a belated Christmas present. It's the one from Young modeler manufacturer in Korea. I tried some time ago to purchase one but the seller would not ship it to the UK. The kit looks nice and the Quality is spot on. And no I will NOT be starting this until I have finished this build. But the instructions and drawing will be very useful to get the little details right. Will post more updates on this build later on today. Regards Antony. .
- 99 replies
-
- 4
-
-
- turtle ship
- korean
- (and 1 more)
-
Hi Danny. Just catching up of your fabulous cross section. Very Very nice. Your attention to detail is spot on. Regards Antony.
-
Hi Dave. Im'e glade to see you forward planning. It always pays off. You have been studying the planking tutorials. Good. Your build is looking good. Still following with interest. Regards Antony.
- 79 replies
-
- 5
-
-
- lady nelson
- amati
- (and 2 more)
-
Hi Dave. Well done. That turned out very well. And it looks perfect. What delights have you got in store for us next ?? Regards Antony.
- 79 replies
-
- 3
-
-
- lady nelson
- amati
- (and 2 more)