AntonyUK
-
Posts
1,190 -
Joined
-
Last visited
Content Type
Profiles
Forums
Gallery
Events
Everything posted by AntonyUK
-
 Hi Jeff Welcome to MSW. My advice.. for what's it's worth.. buy a smaller kit with a single mast and some rigging. Get your skill's up to scratch with the small kit and then start the Victory. Yeah try and straightening the Keel buy slightly over bending it with weights in the centre. And check it after a few days for straightness. Then redo if nessary. Keel clamps are OK for some models. I have never used them. I make my own business cutting a slot in some spare timber. Not sure you can use a keel clamps on this kit in the early stages of construction. Keel is added after planking ?. Not sure. There are a few build logs for the Constructo victory. Suggest you find one and have a read through. https://modelshipworld.com/index.php?/topic/6684-hms-victory-by-paul0367-constructo-scale-1-94-first-wooden-ship-build/& Is a nice build. Will follow you along with this one. Antony
 -
Using highly toxic substances.
AntonyUK replied to bluenose2's topic in Metal Work, Soldering and Metal Fittings
Hi. Please don't forget about the types of wood dust that can be toxic. And also include it's uses and storage. Regards Antony. -
Hi Eddie. You got my interest. Looking good so far. Regards Antony
-
Hi Tom. Nice to have you aboard. You might be interested in the next build.. same ship but Much larger. She will be a scratch built from these panart plans using the hull shape and outlines. Keel is already cut front Cherry. Drawing will be done as I progress with the build. Regards Antony.
-
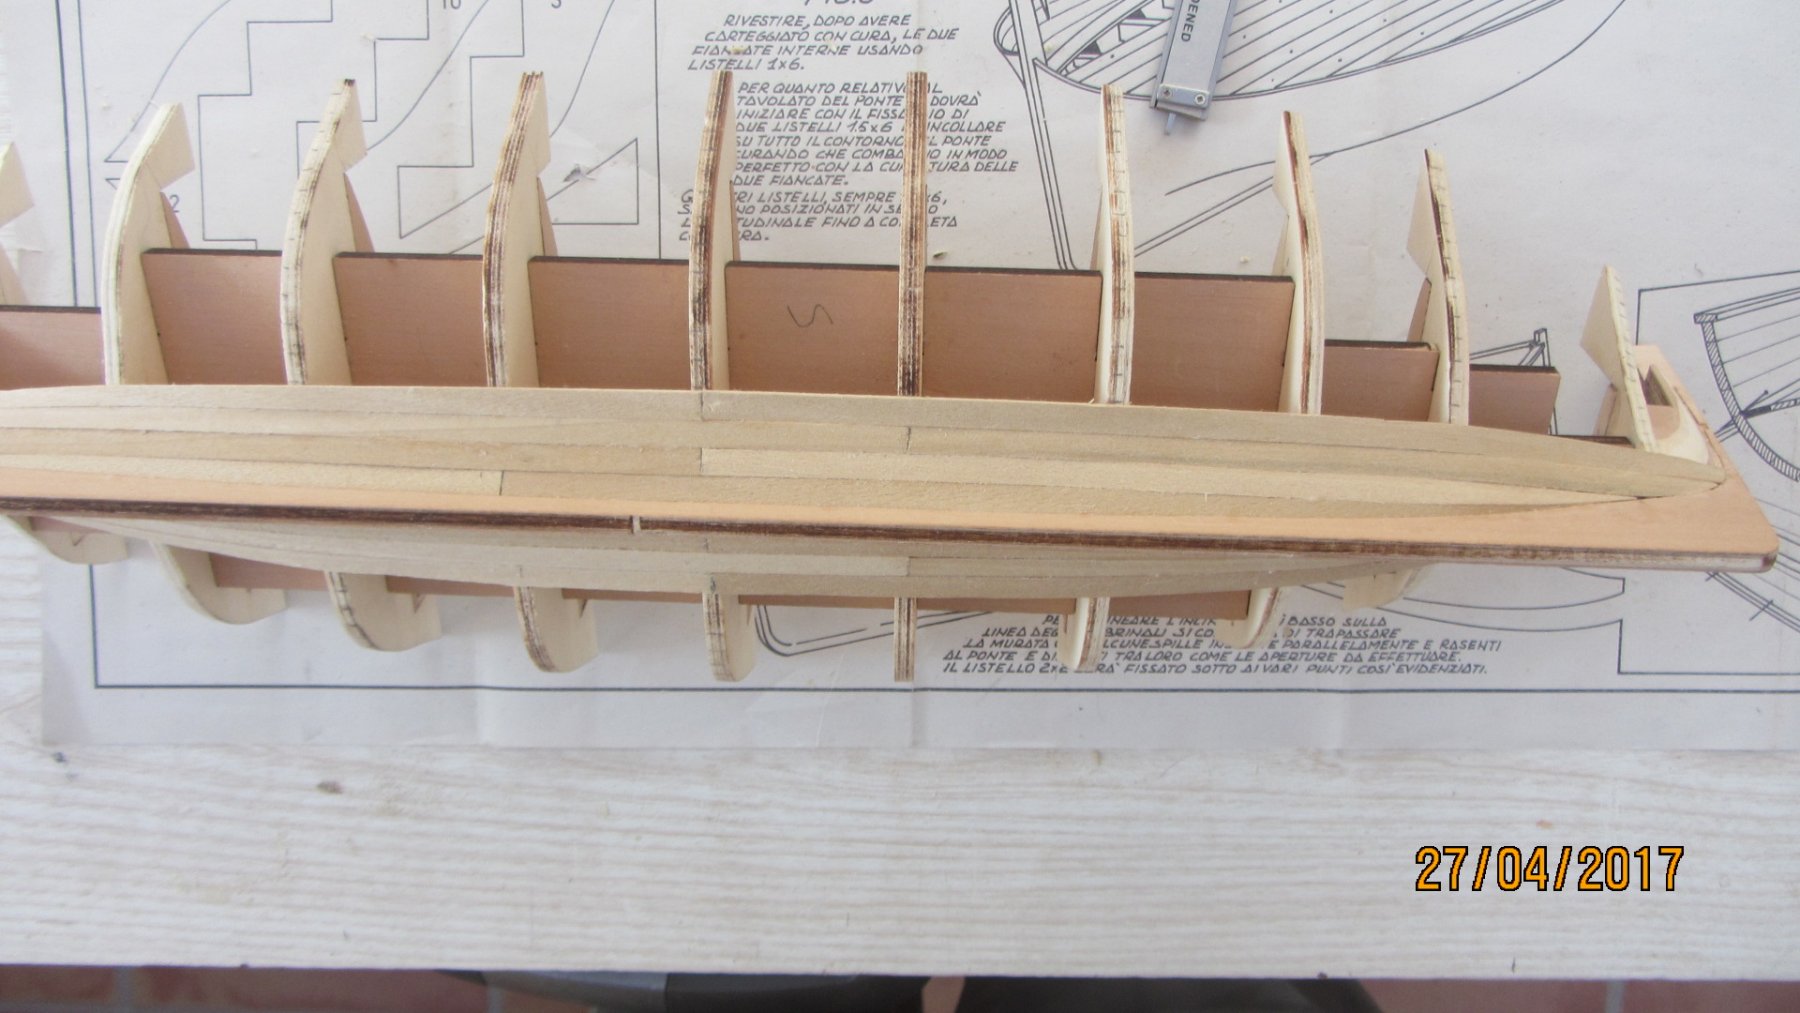
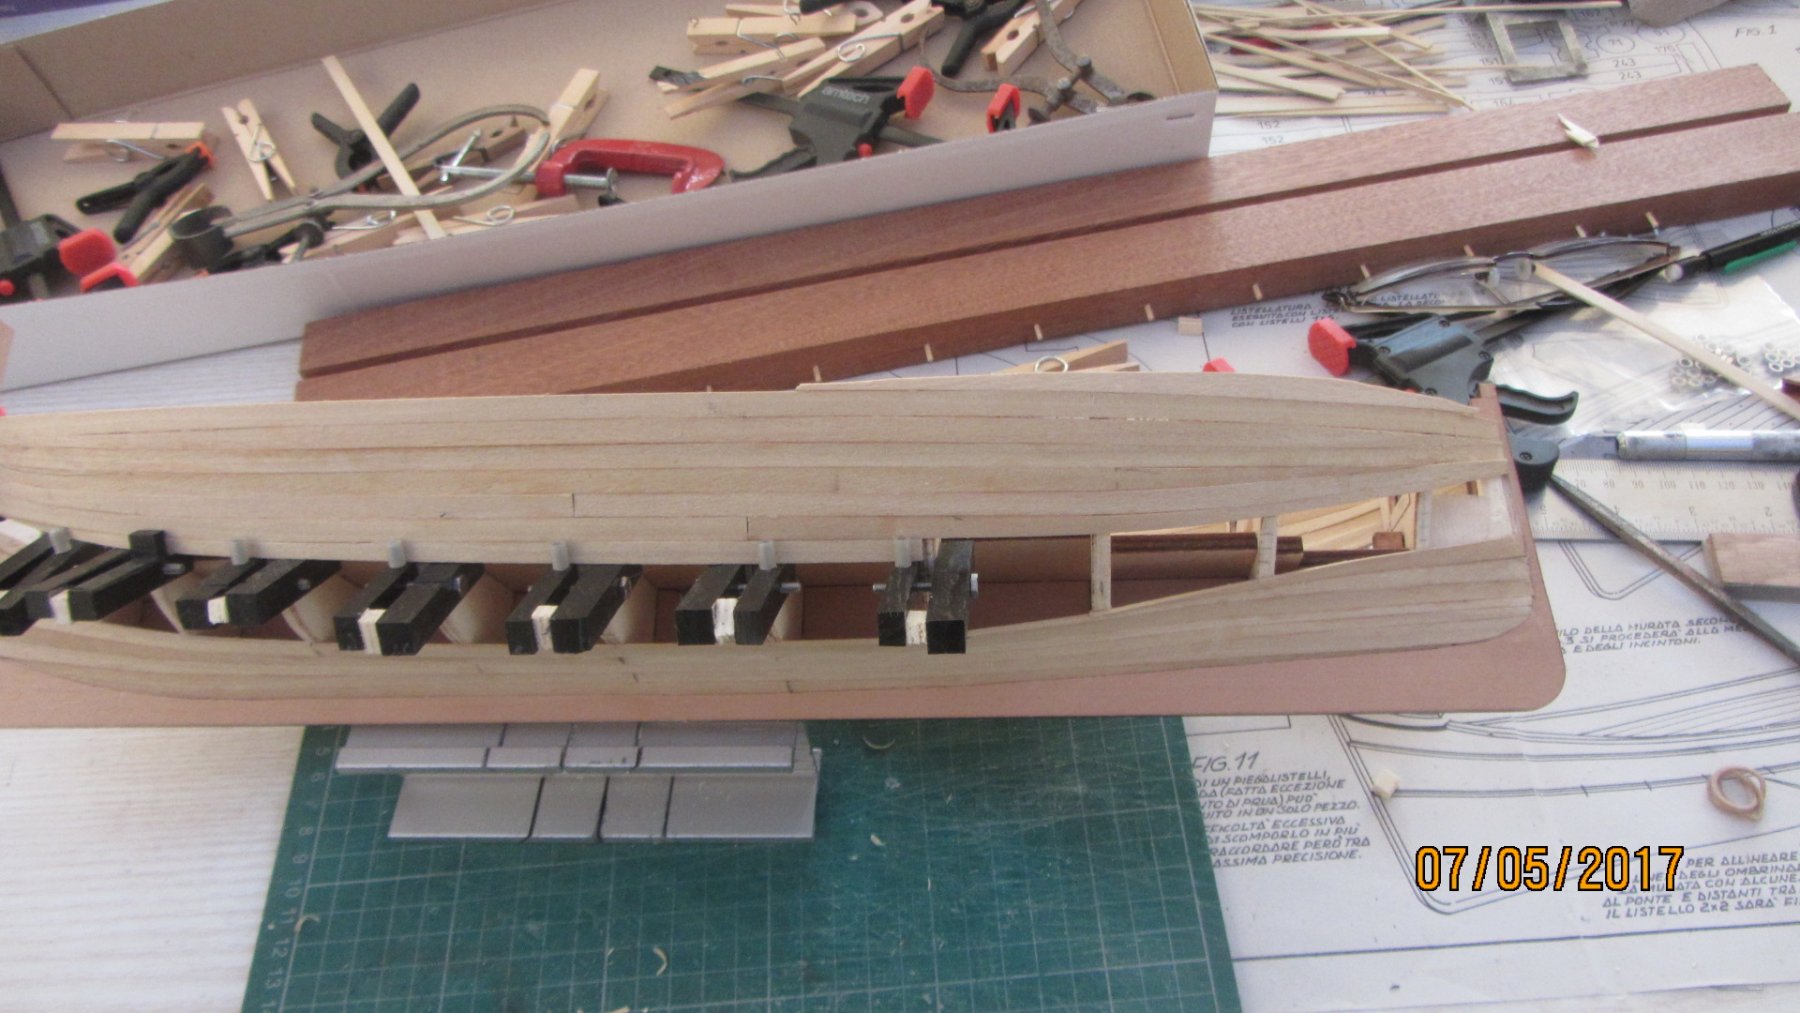
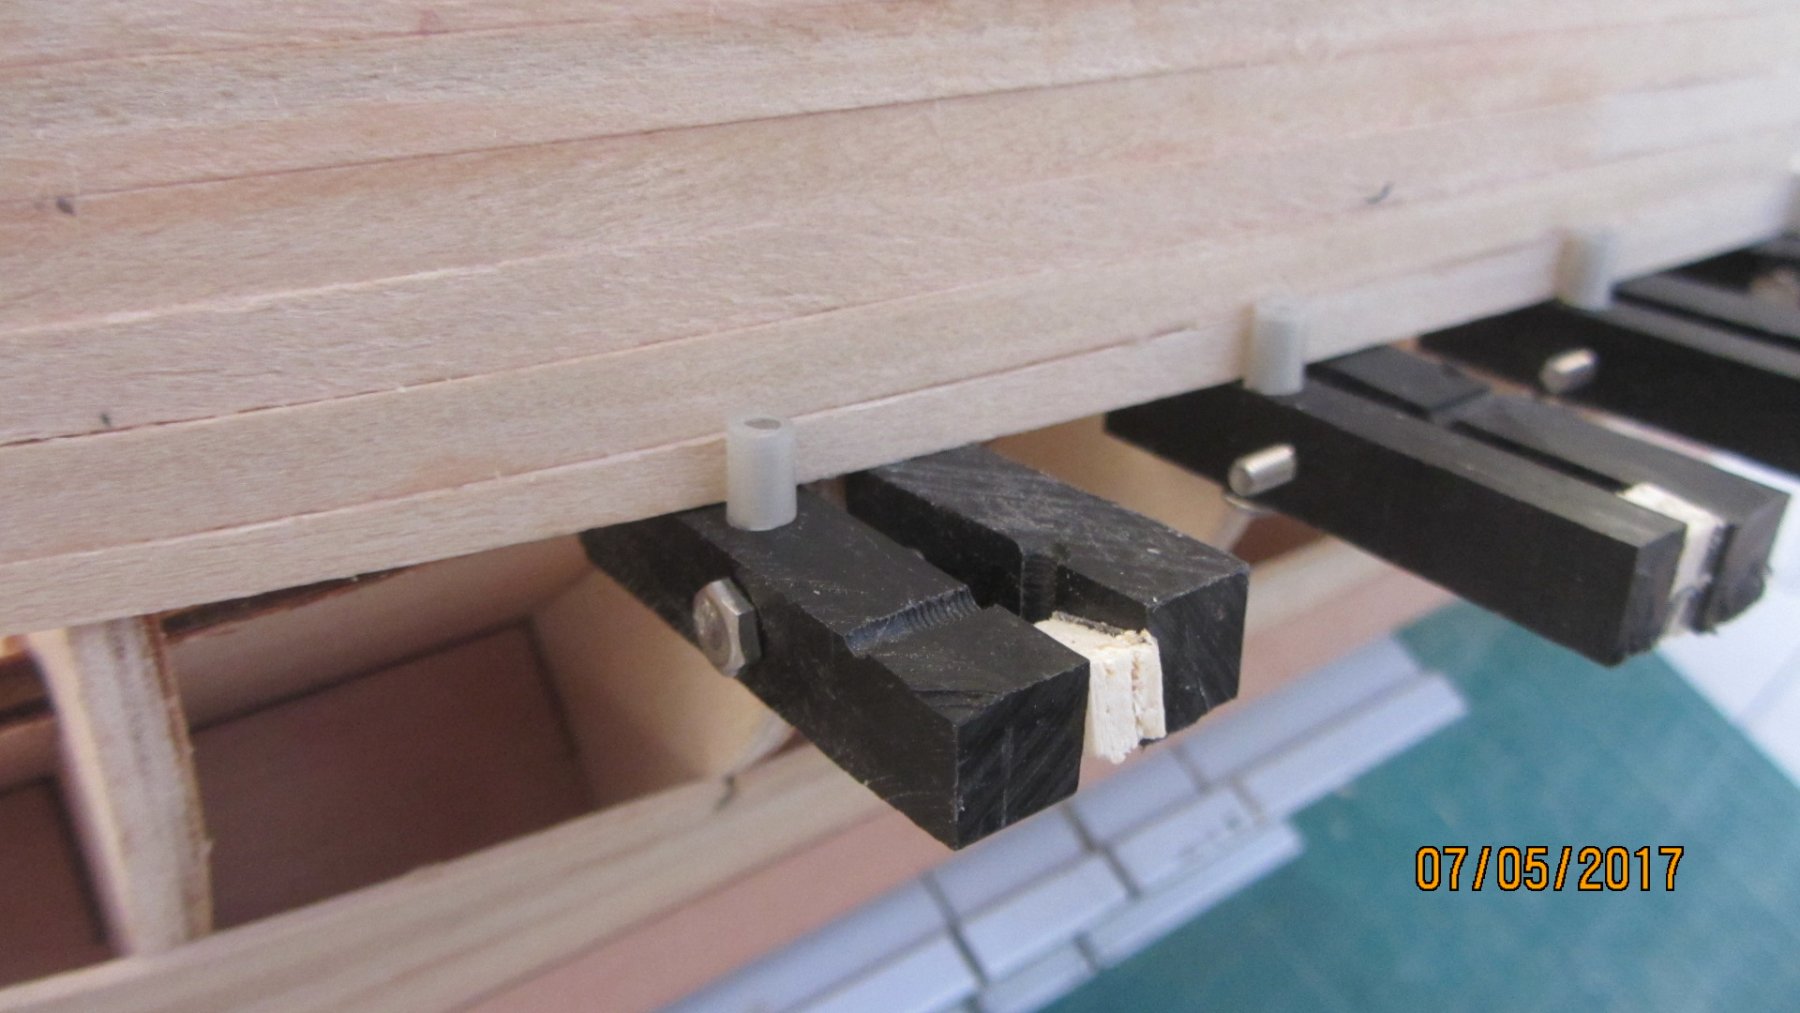
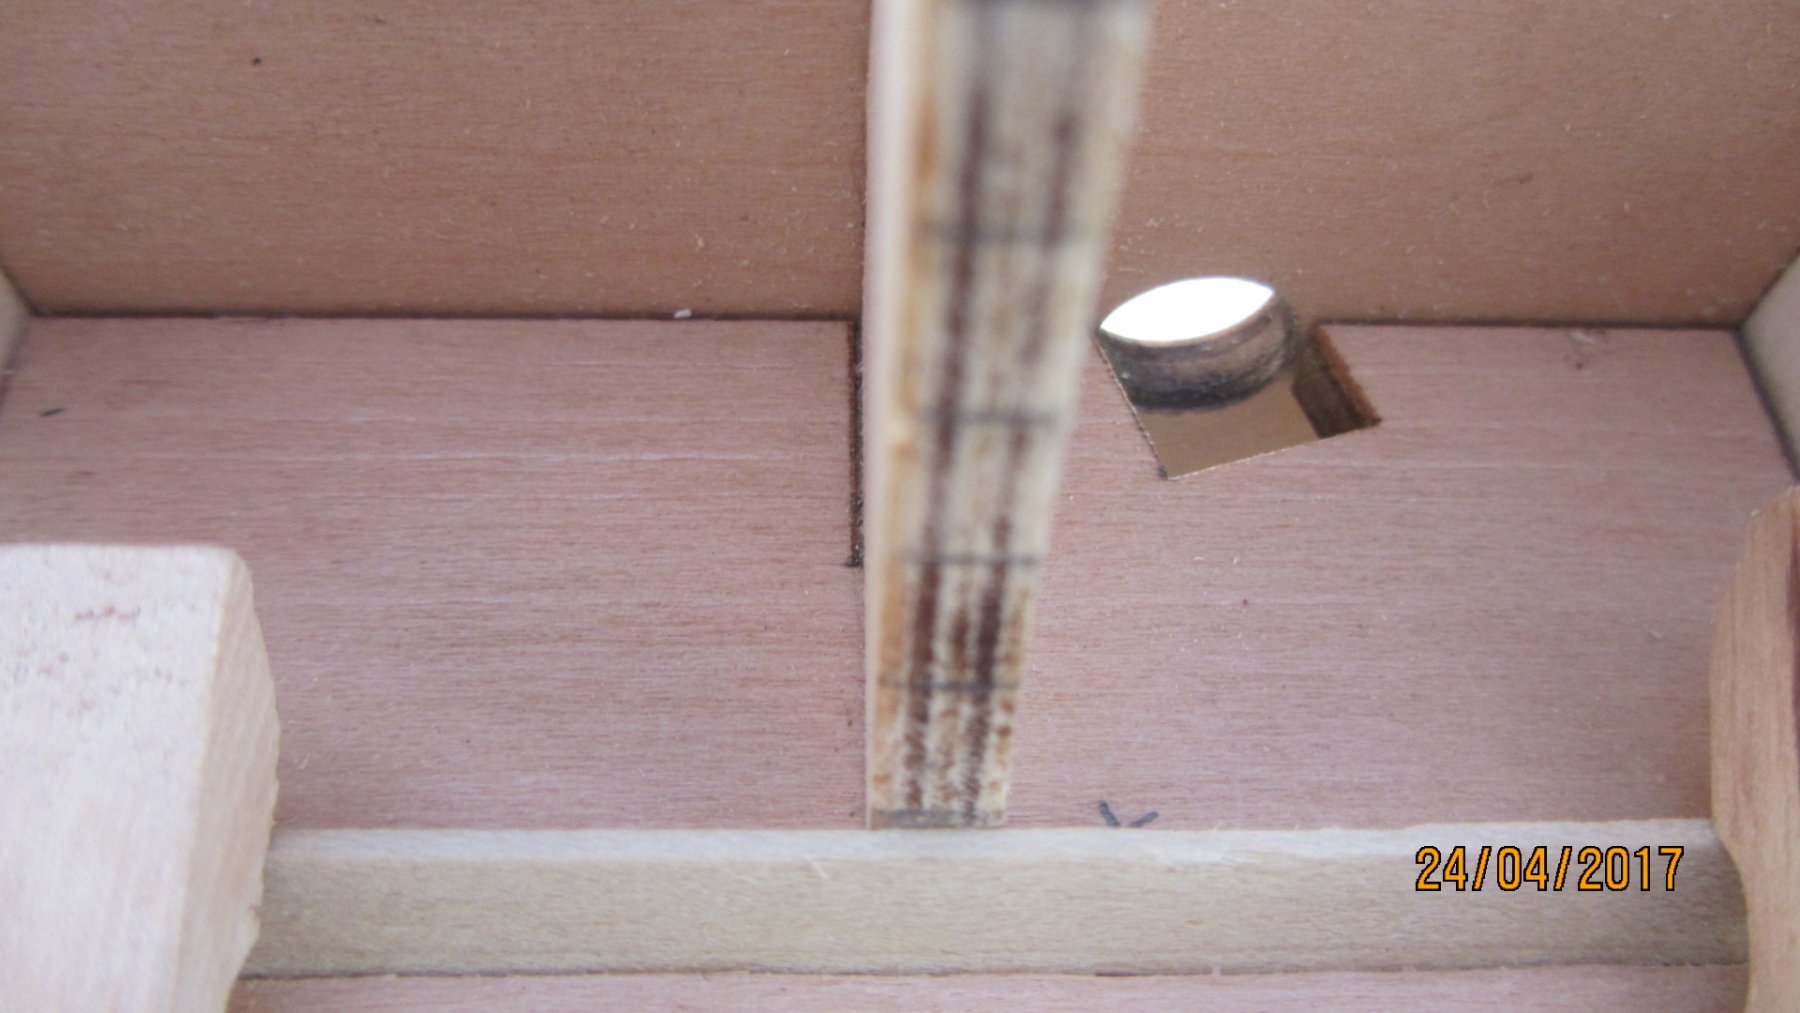
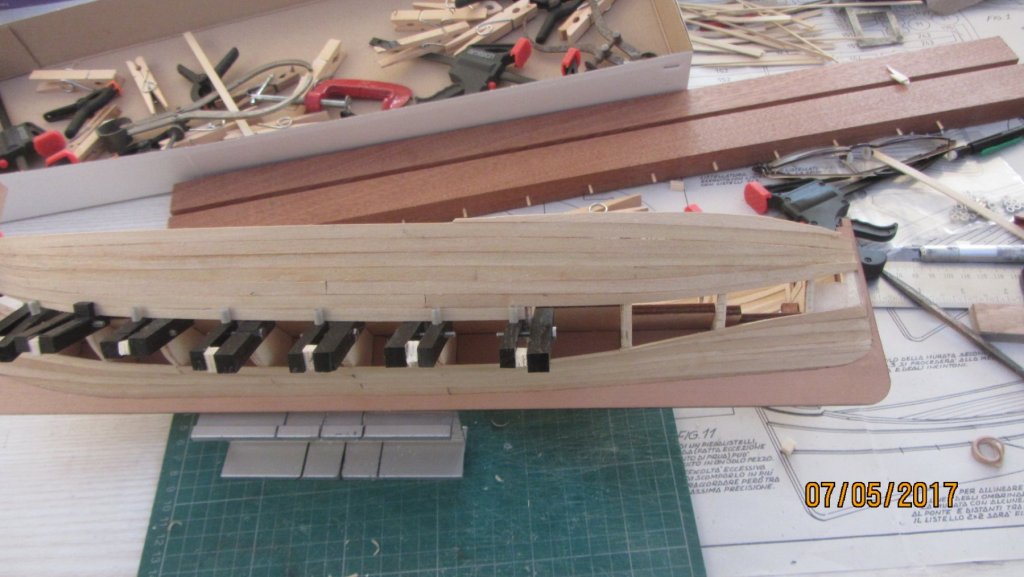
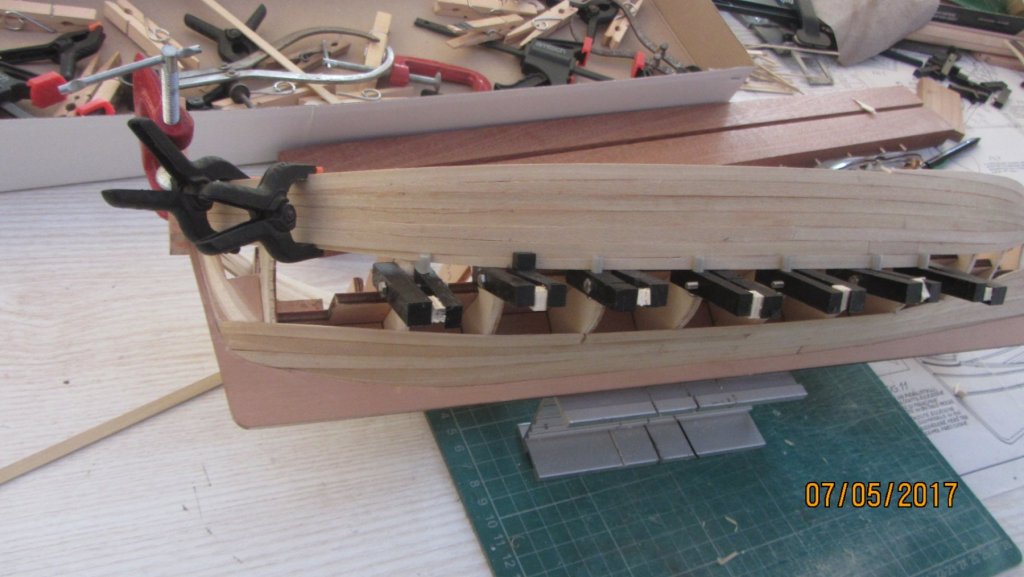
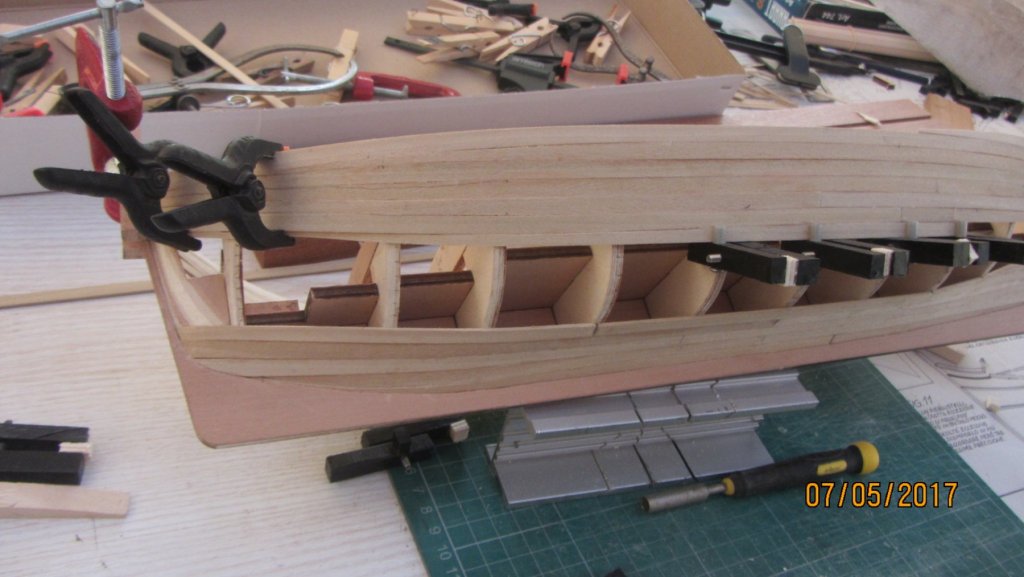
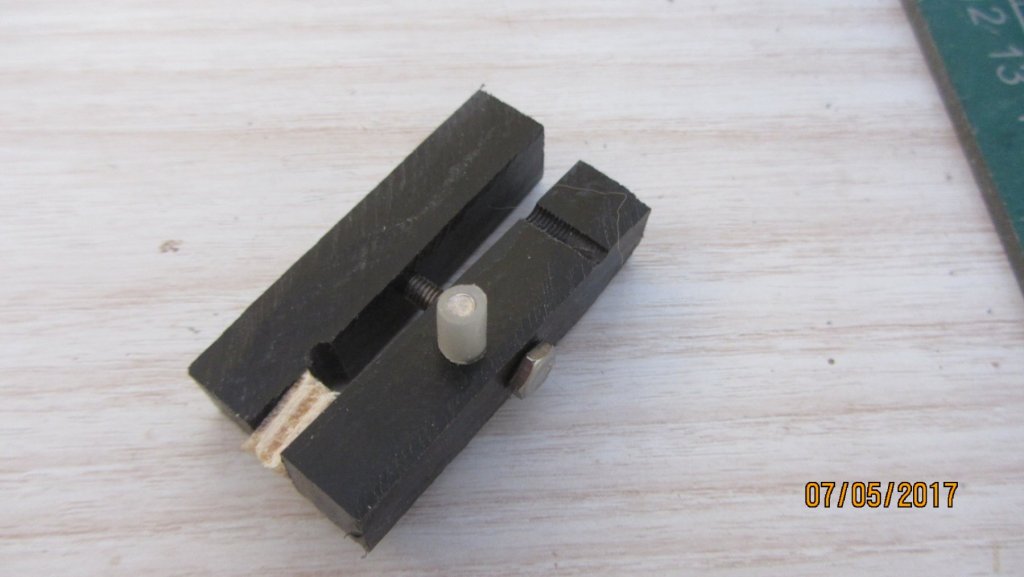
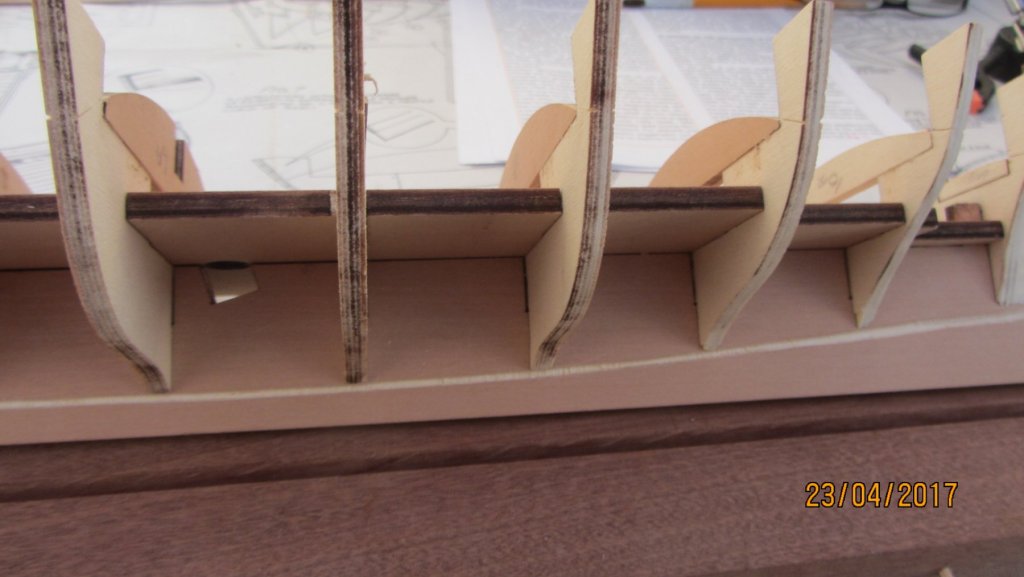
Hi. A little update. Its been a while since my last post here. With lots of Good reasons.. First i'me a granddad now A baby boy called Maverick. Mum and maverick are very well . Lots of time spent in that direction at the moment.. Have done bits like a plank a side a day. Its slow but it getting there. This is the easy bit.. Much more done here. if I was single planking this model I could not do it without spilling the planks. The little small black clamps are something I knocked up to hold the planking in place. Close up of the clamps in action. They are made from Acetal/Delrin that I have in my workshop. they work very well without slipping. The pin that holds the plank can be made off anything. I used a 3mm bolt with a piece of nylon tube to protect the Planks. The little square of plywood in the bulkhead thickness. Will make a drawing if wanted. Thanks for looking in. Regards Antony (Gramps)

- 32 replies
-
- 4
-

-
- santa lucia
- panart
- (and 1 more)
-
Hi. Now that what I call co-operation. Looks as if you are great bunch. And down to the taven for a pint afterwards. Well done to all of you. Regards Antony.
-
Hi. What a wonderfully project. So much information missing but I think you people have got your work cut out. At that scale you will get a real good idea on how the original ship was constructed. Will you be making a set of drawings on your findings and publish it ?. Gonna follow this build with great interest. Regards Antony.
-
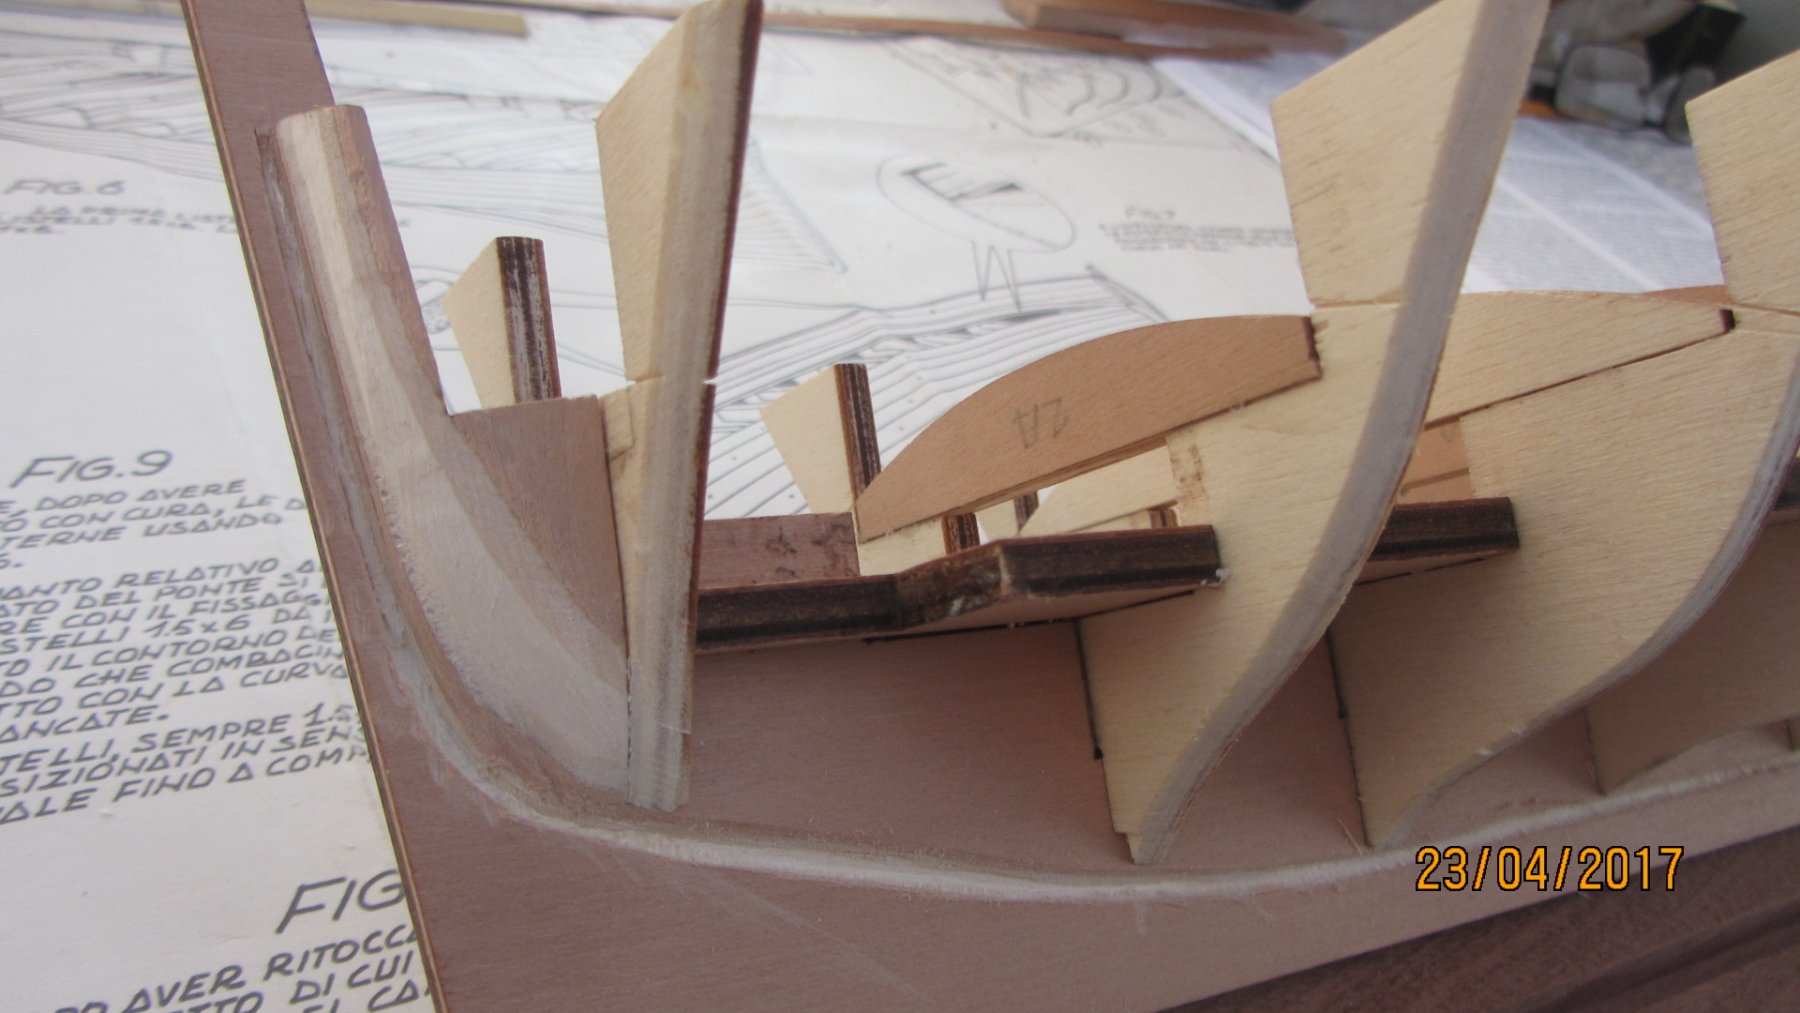
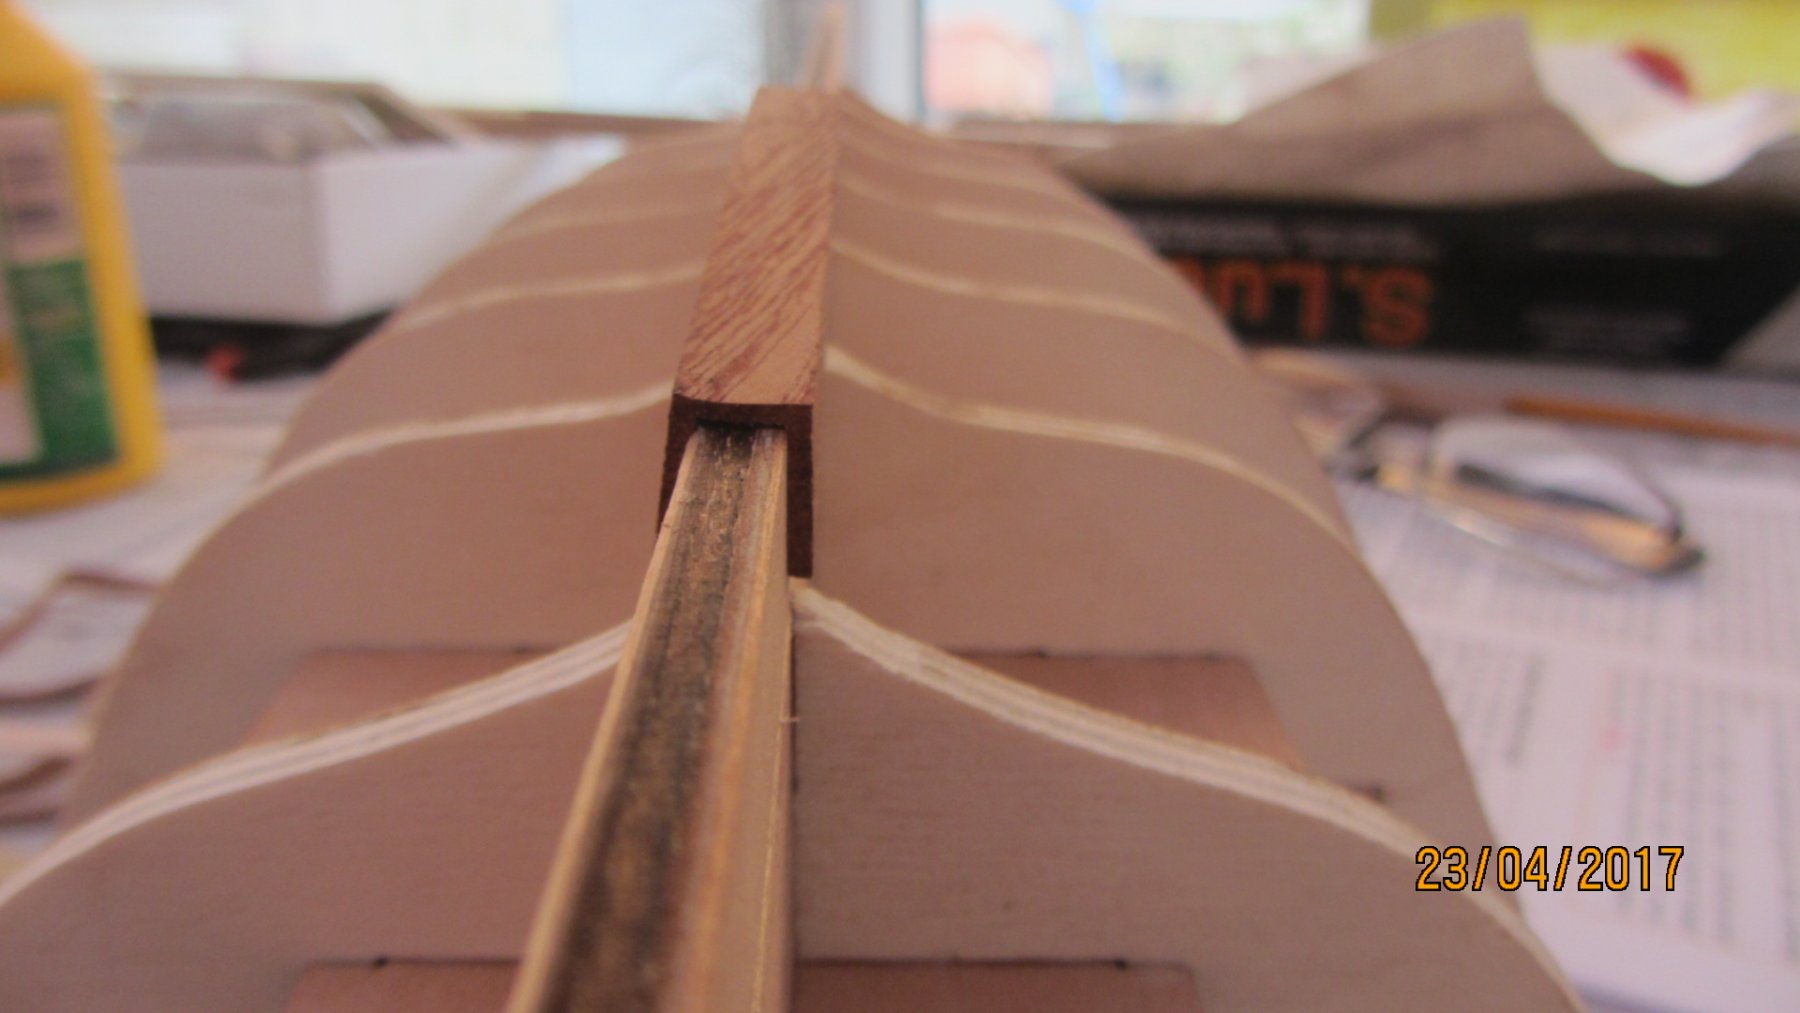
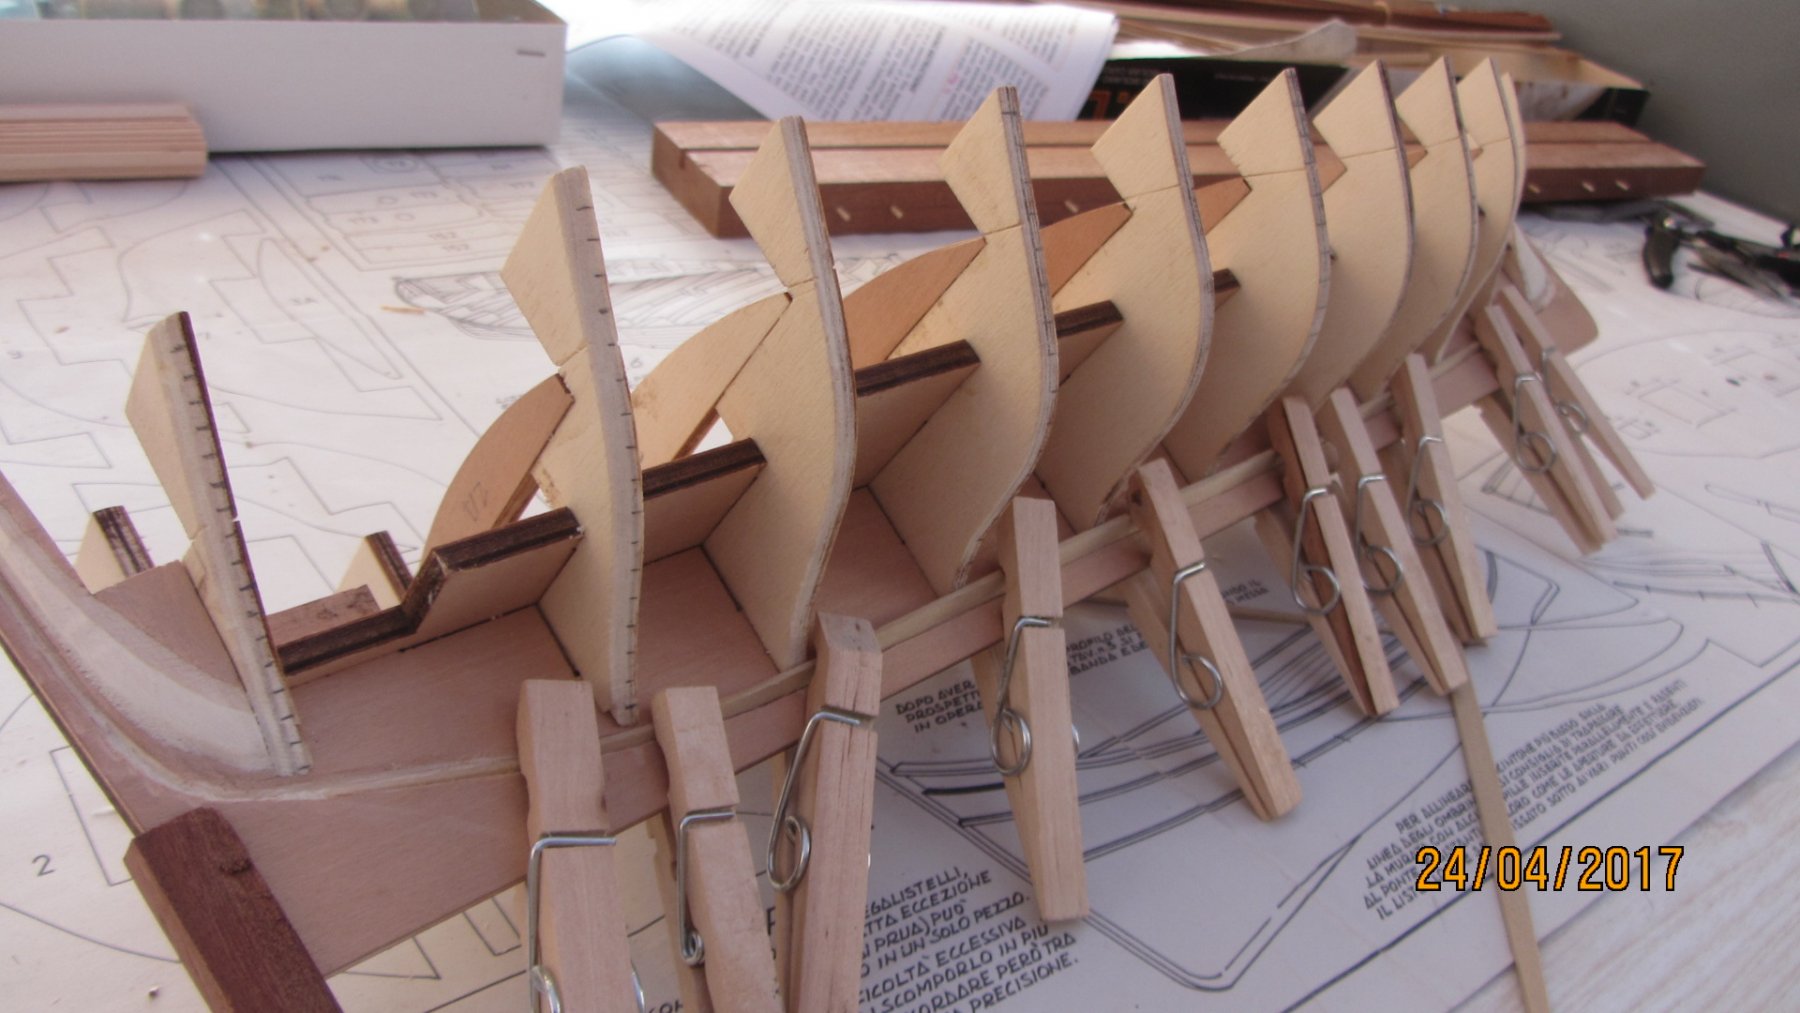
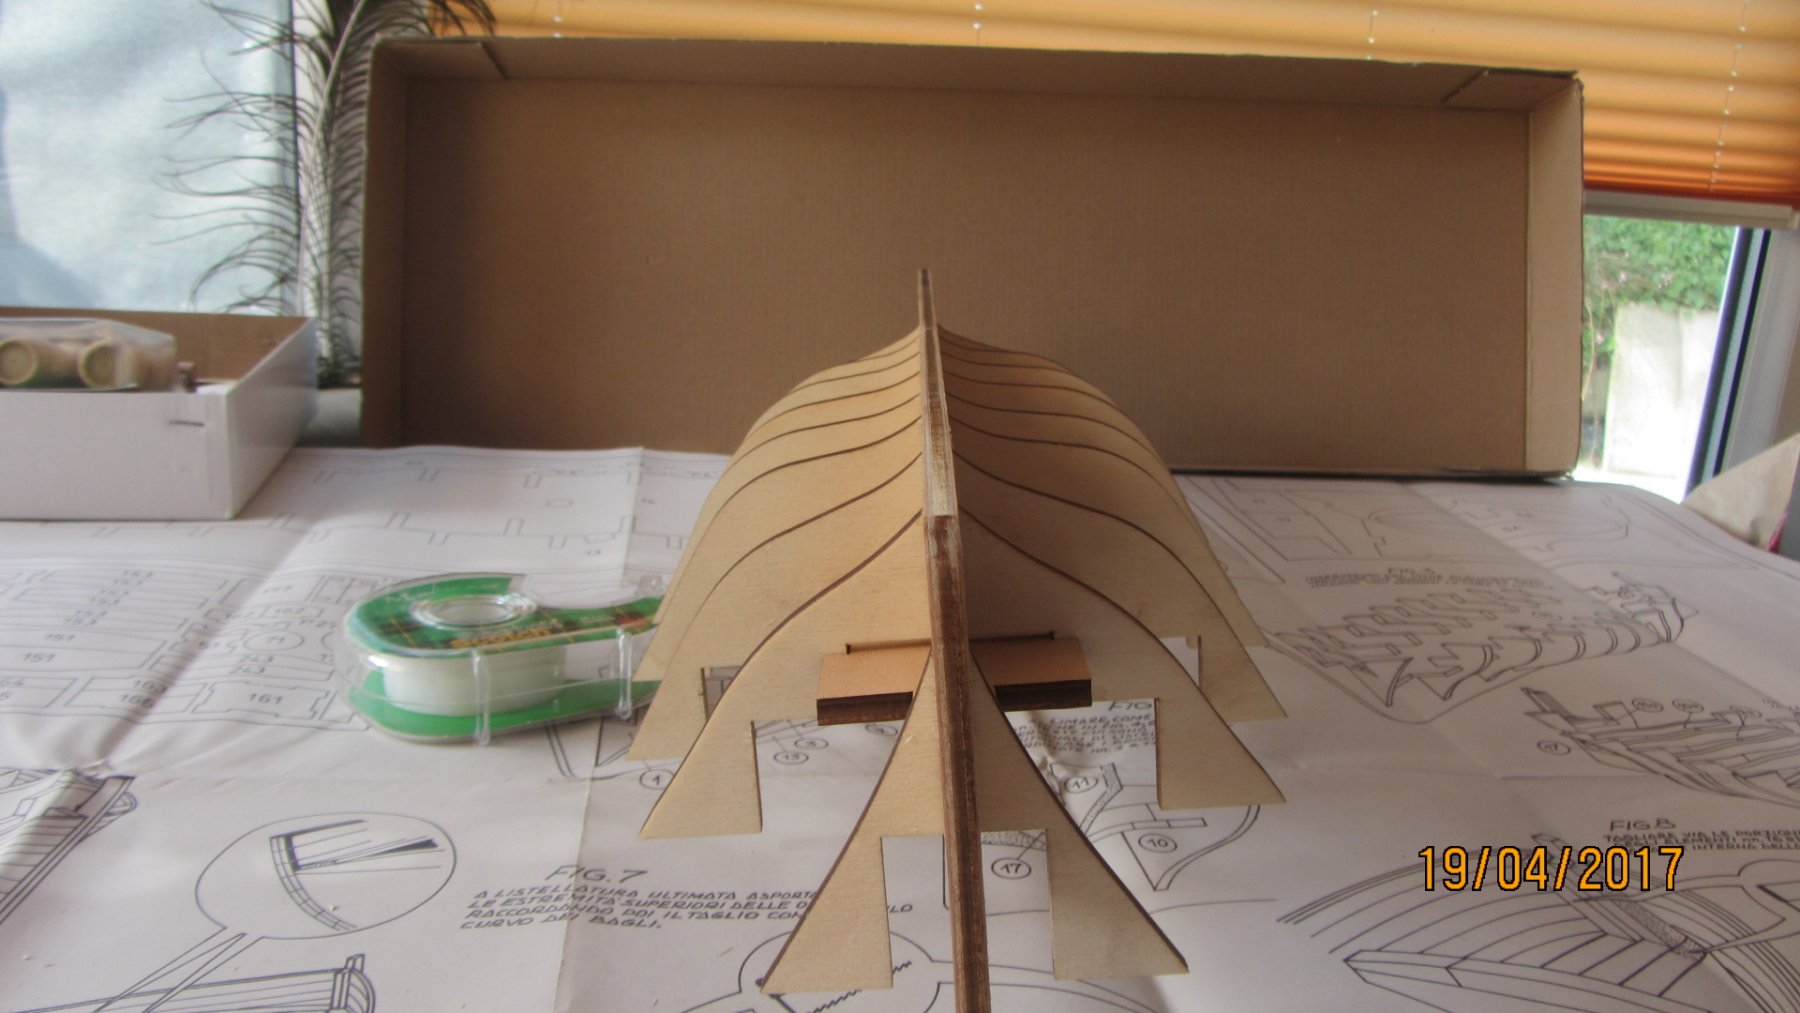
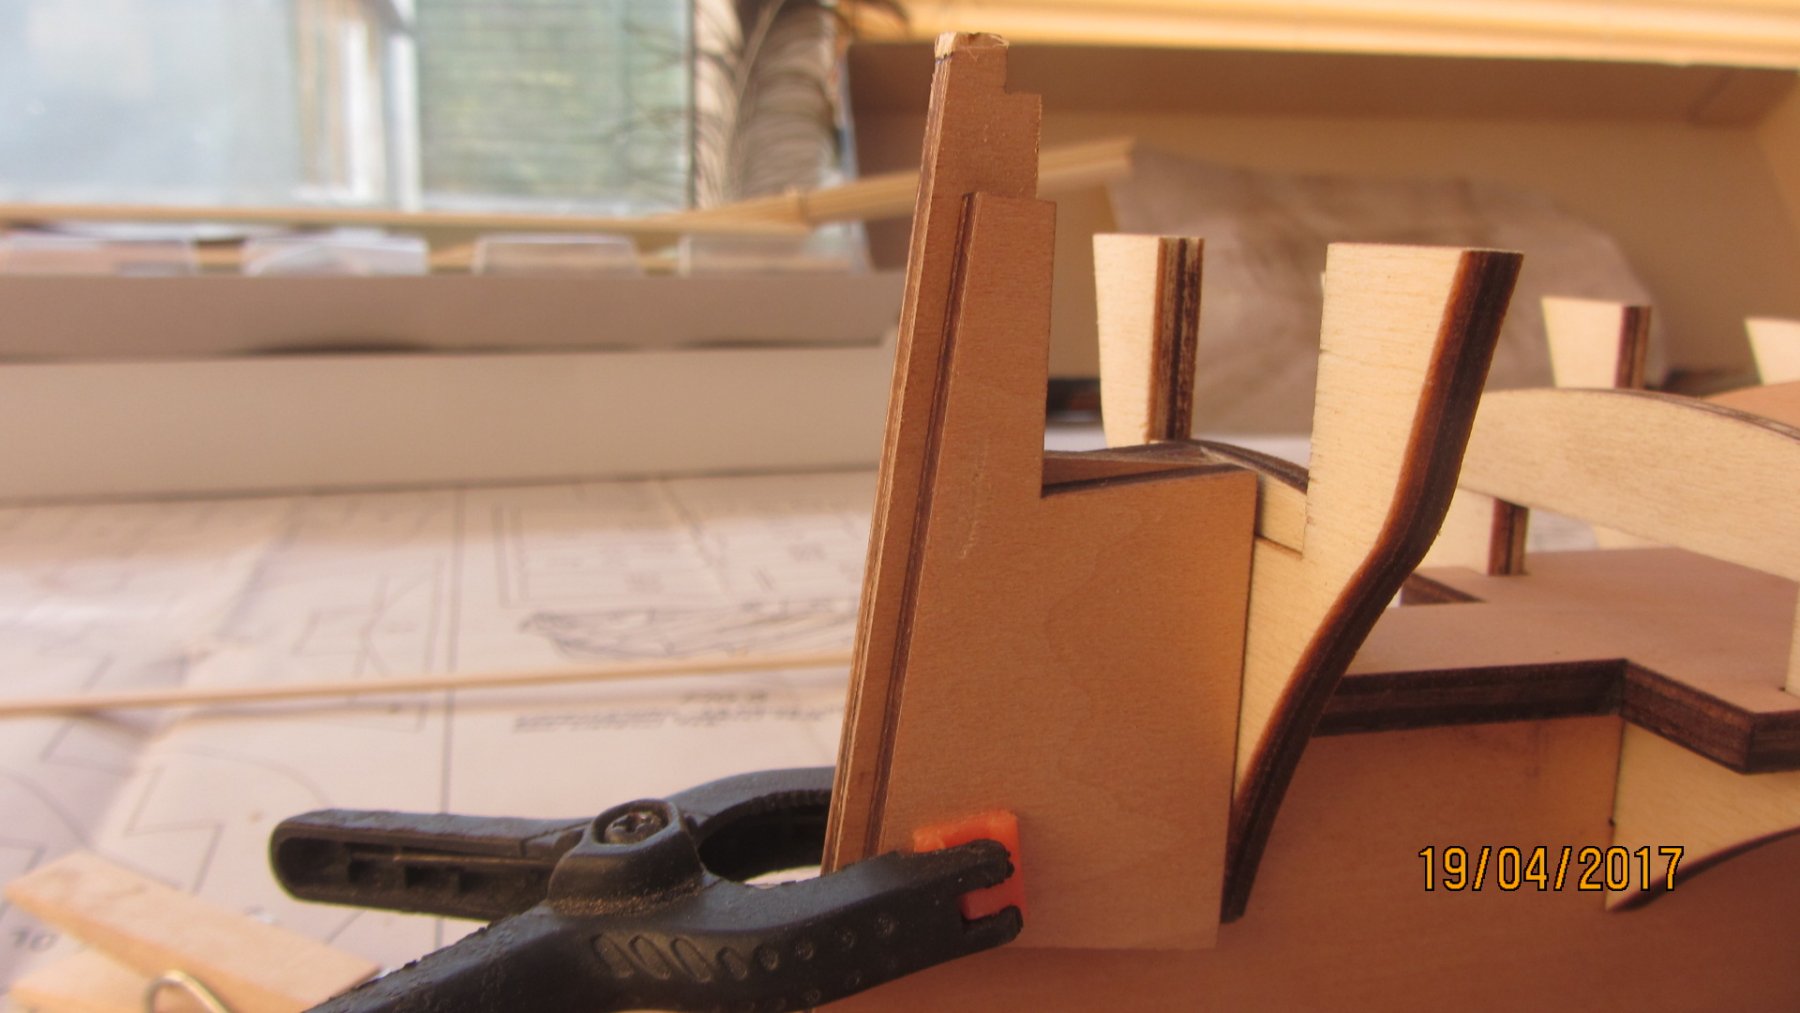
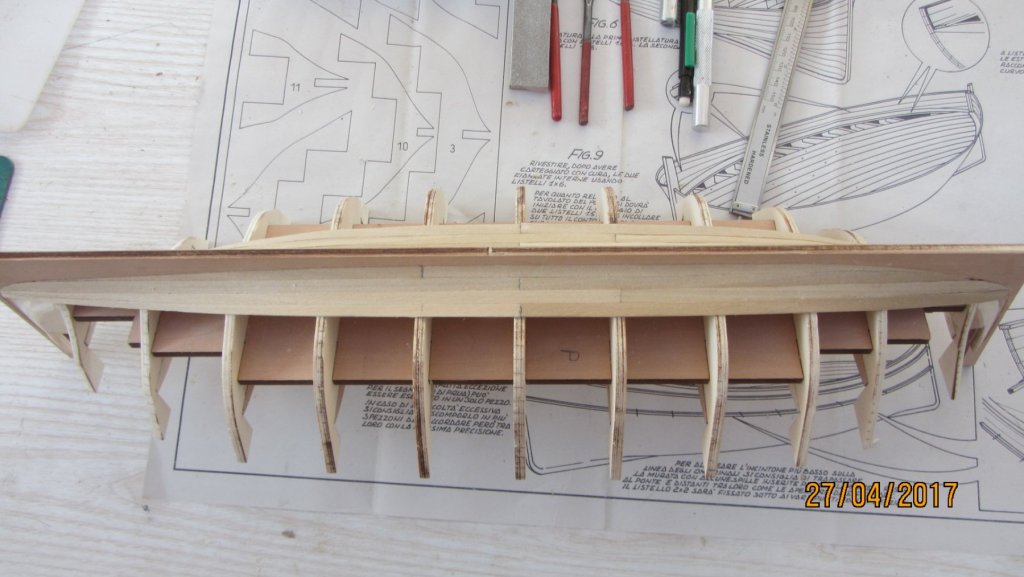
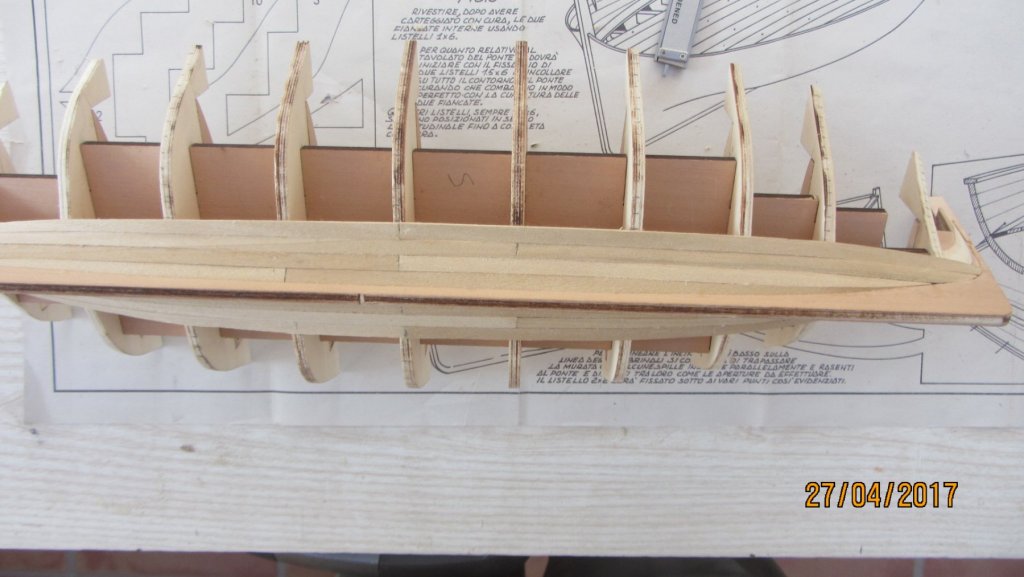
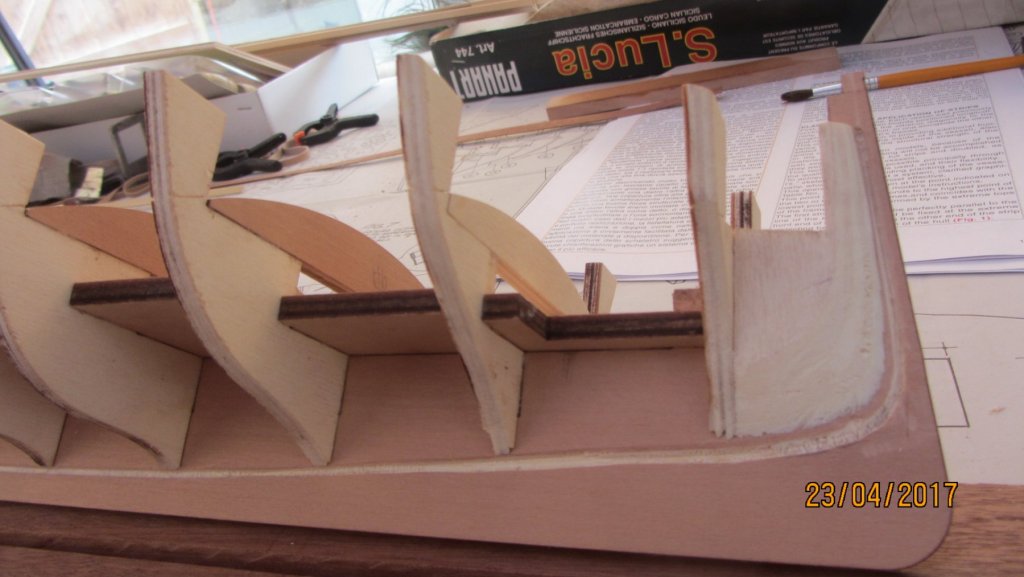
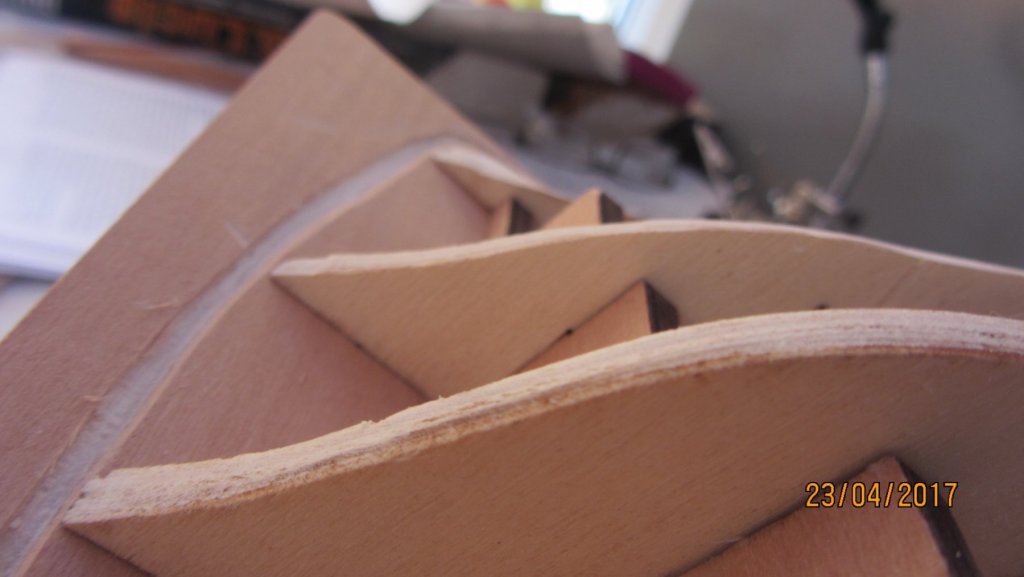
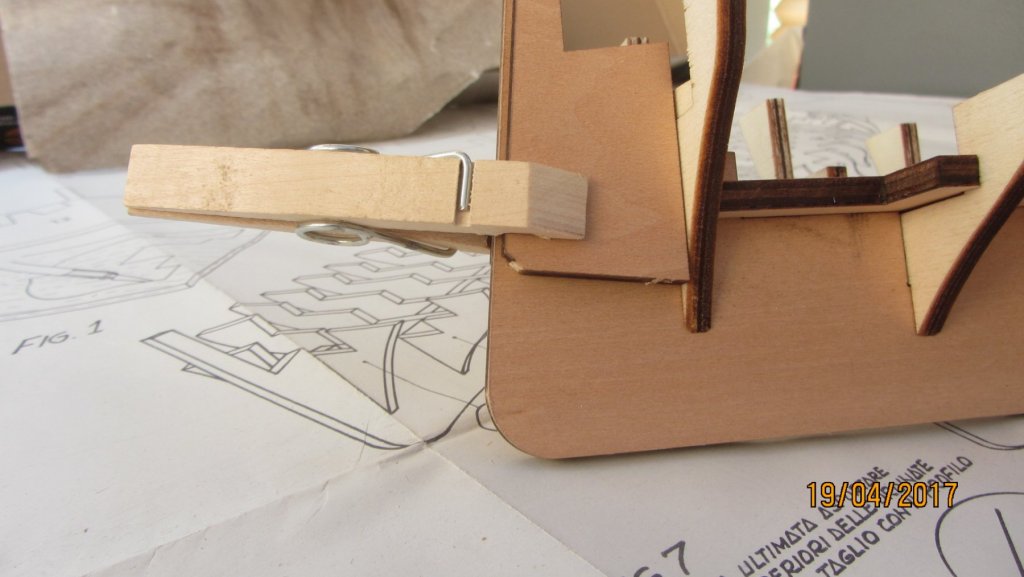
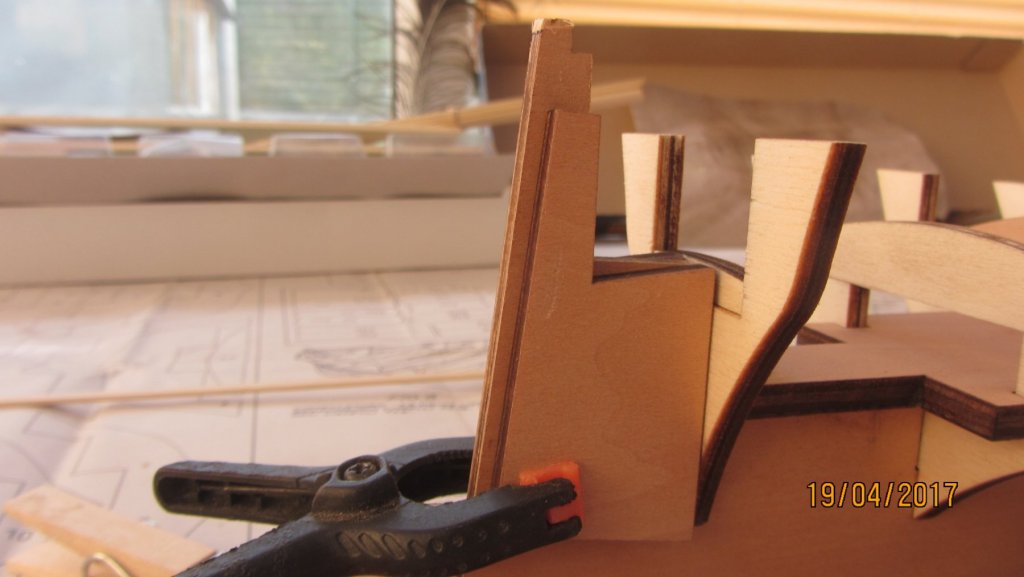
Hi. The frames are now faired and checked with planks for correct angles. The rebate has been cut into the keel. There is no mention of doing this on any of the plans or drawings.. This will be trimmed when adding planks. The garboard strake is in place on one side at the moment and the other is cut but not yet in place. fairing done on both sides with planks fitting well. Rebate cut and will need adjusting as I fit the garboard strake. The stern area. Found the plywood to be very soft and care was needed when fairing the frames. I will be removing the 2 layers each side from the keel and fitting a cap as in the photo above. This is just a test to see if it works. The rebate is 2 layers deep so the removal will be easy. garboard strake in place. Strange shape But it fits well. Garboard in place.. close up. The assembly up to now has been easy. With the use of clothes pegs to hold the parts while the glue sets. Will post as the planking continues. Regards Antony.


- 32 replies
-
- 4
-
-
- santa lucia
- panart
- (and 1 more)
-
Hi. pictures of completed assembly. view from the Bow. View of the stern area. Part 17 was fixed in the lower position as you can see. I hope that Don is incorrect Top/Plan view. That will be it for now as will have no time to sit at my work table. Maybe do a little more on Friday... fairing the frames for the planking. Thanks for looking in. Regards Antony.


- 32 replies
-
- 4
-
-
- santa lucia
- panart
- (and 1 more)
-
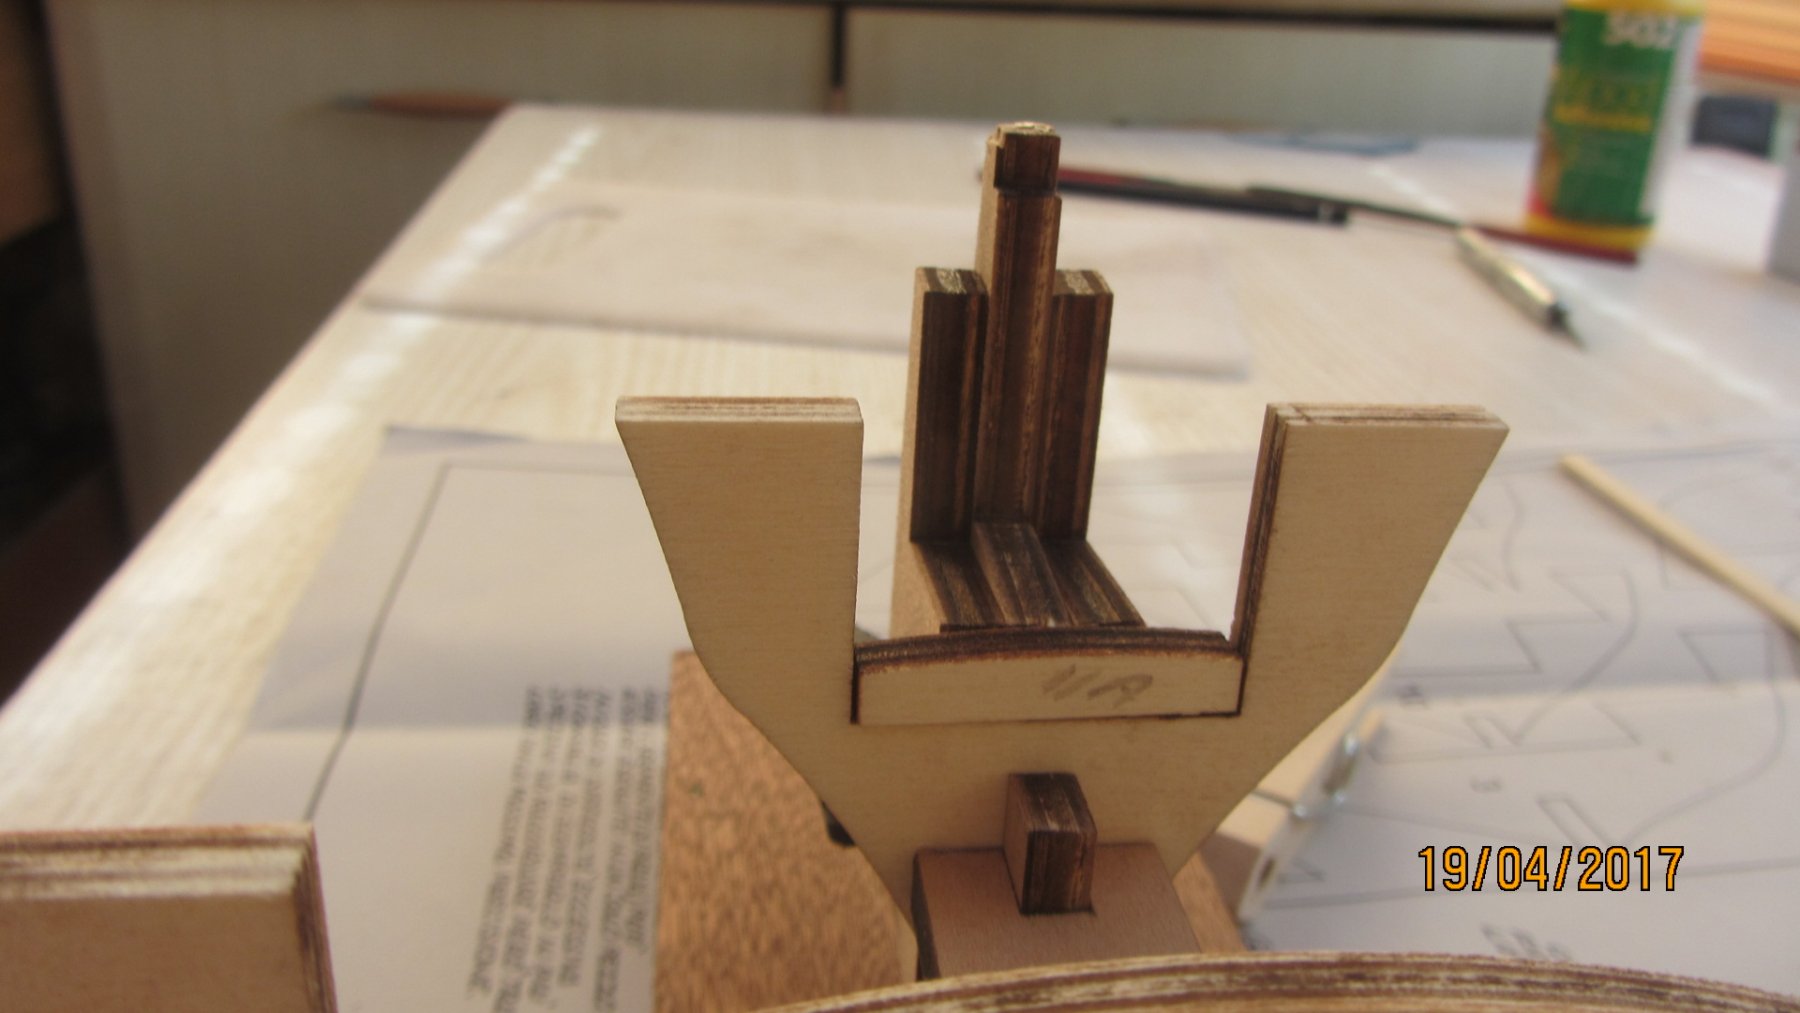
Hi. Thanks for the likes. Don. I found a picture of the Stern in a post. https://modelshipworld.com/index.php?/topic/15152-anyone-familiar-with-mantuas-santa-lucia-sicilian-cargo-boat/ Post 10 :- It shows the part in the lower position. I have done the fairing on the part and it looks good. And yes the strikes are to support the planking and then all the strikes get removed. The parts have just been assembled and checked to ensure square and true frame. Will post pictures later on tonight. Regards Antony.
- 32 replies
-
- 1
-
-
- santa lucia
- panart
- (and 1 more)
-
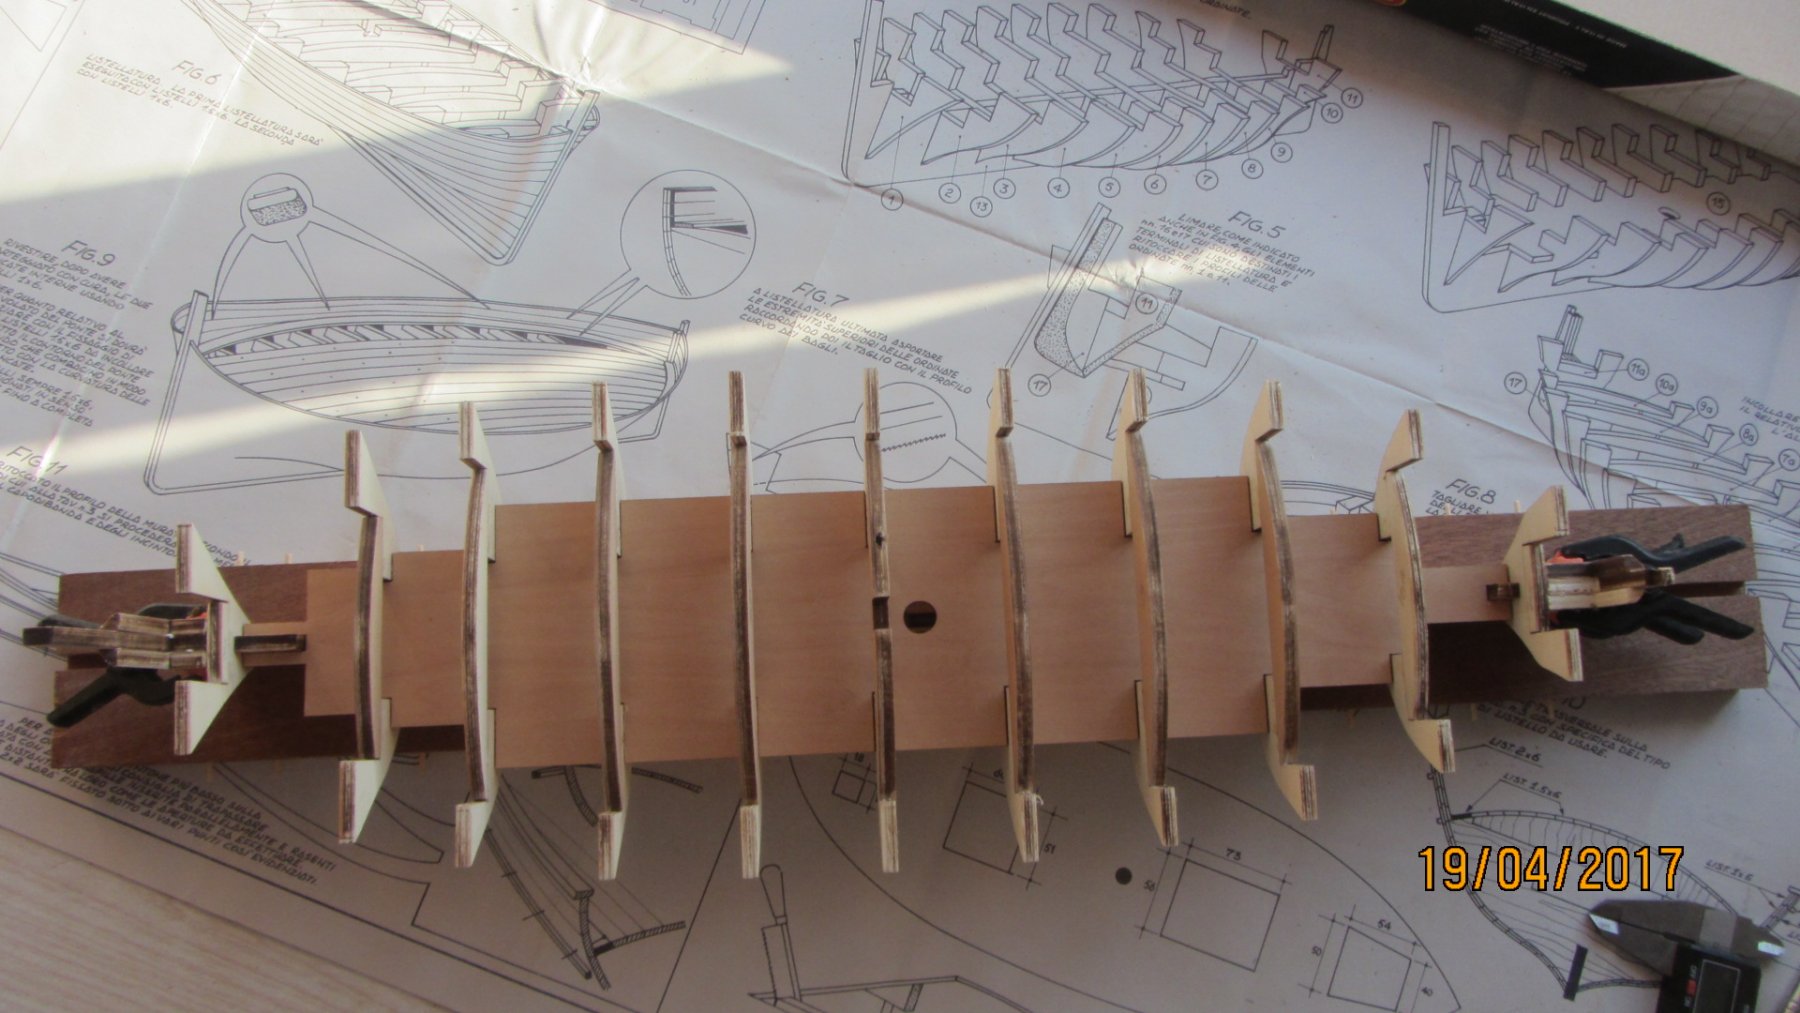
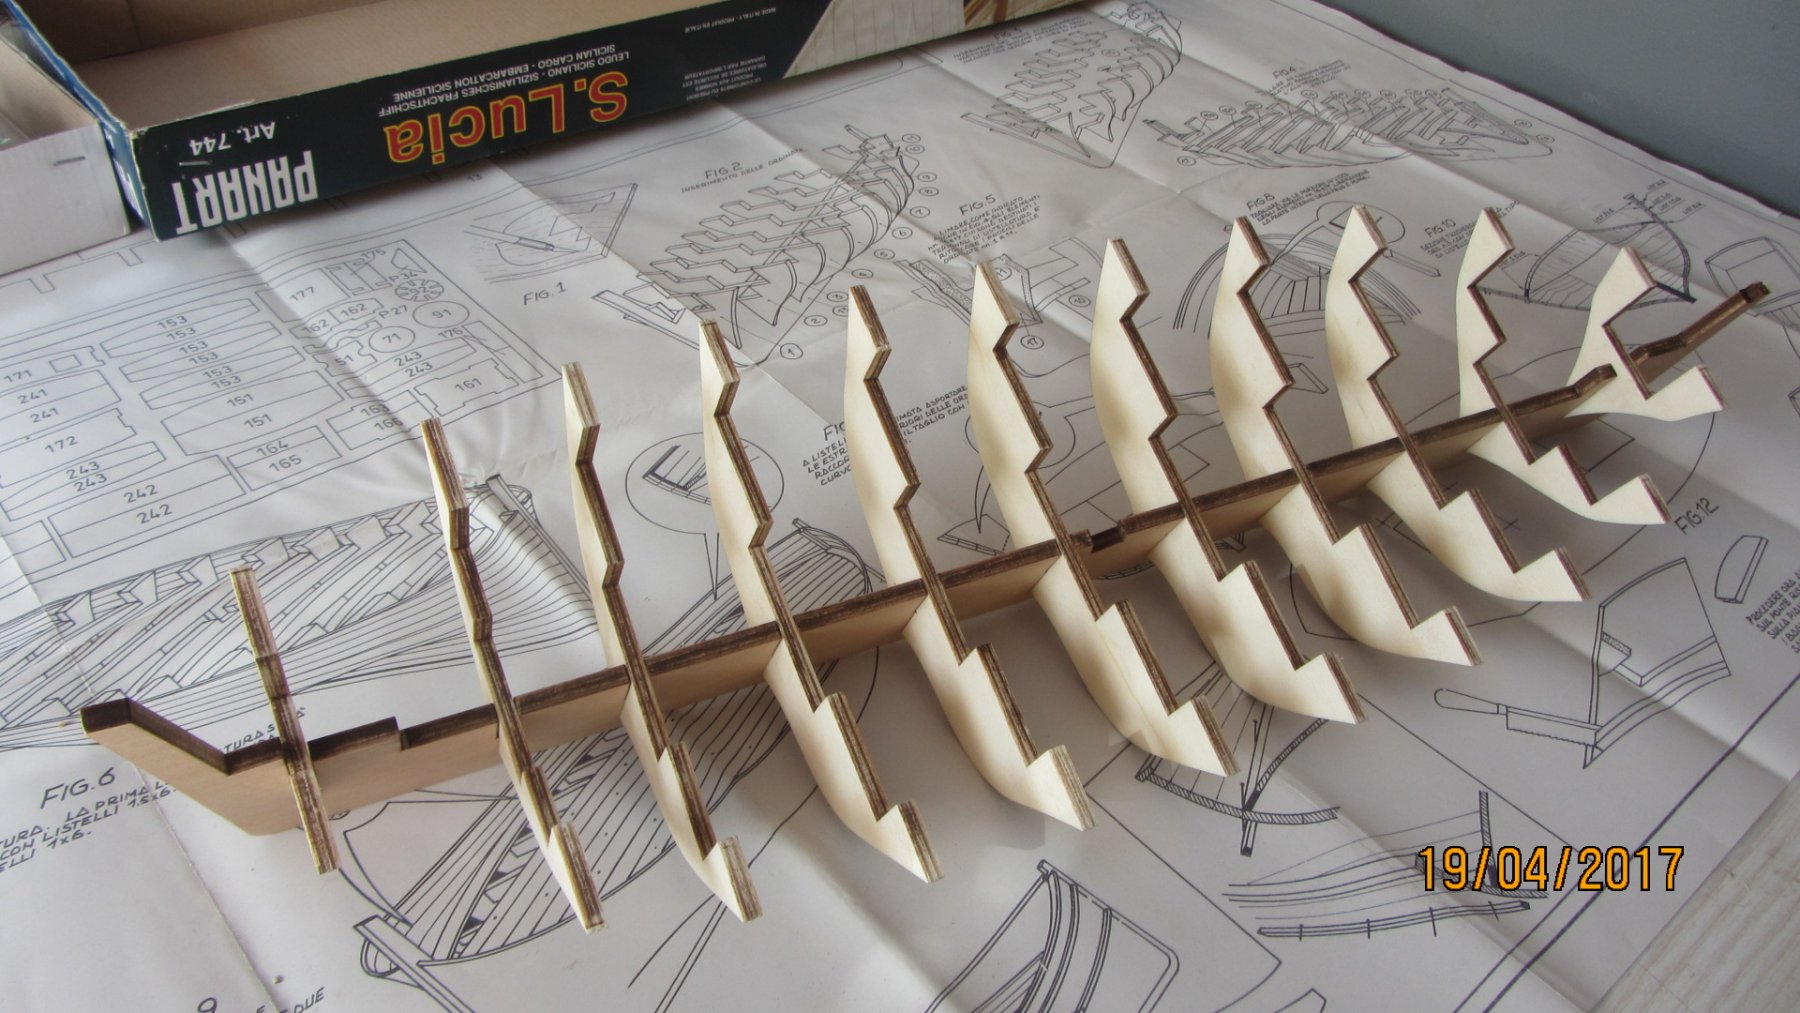
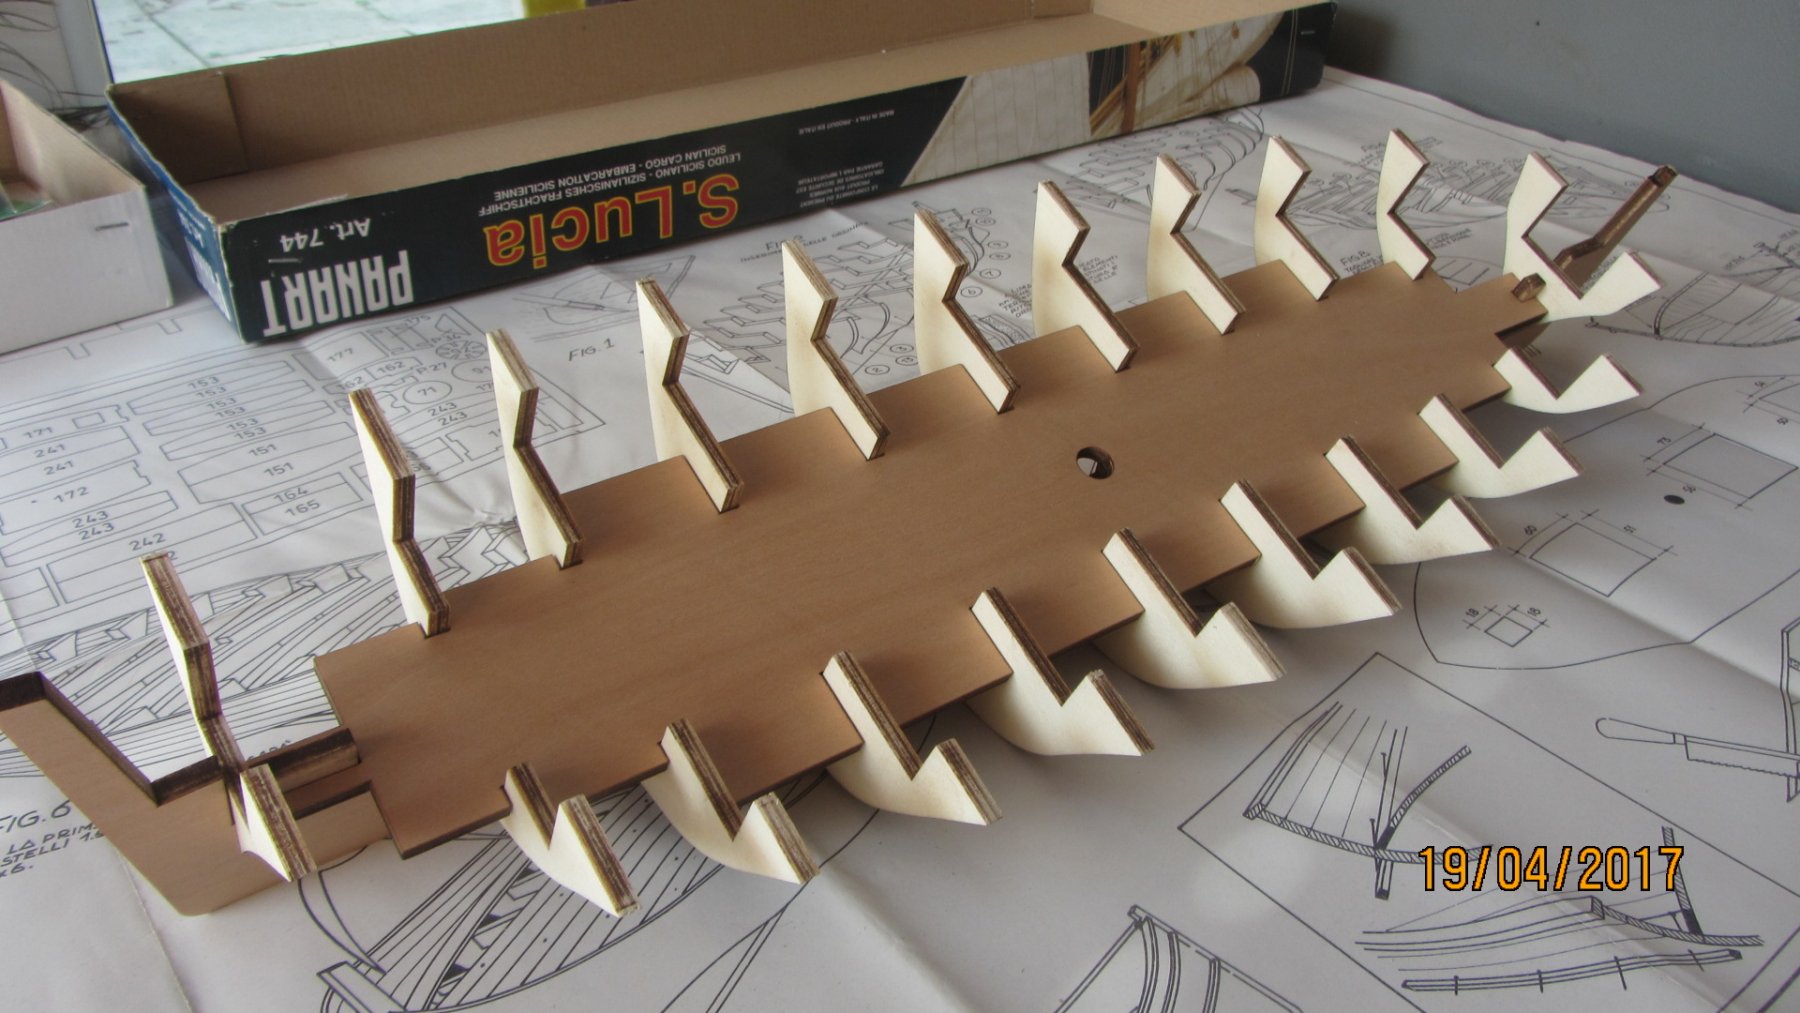
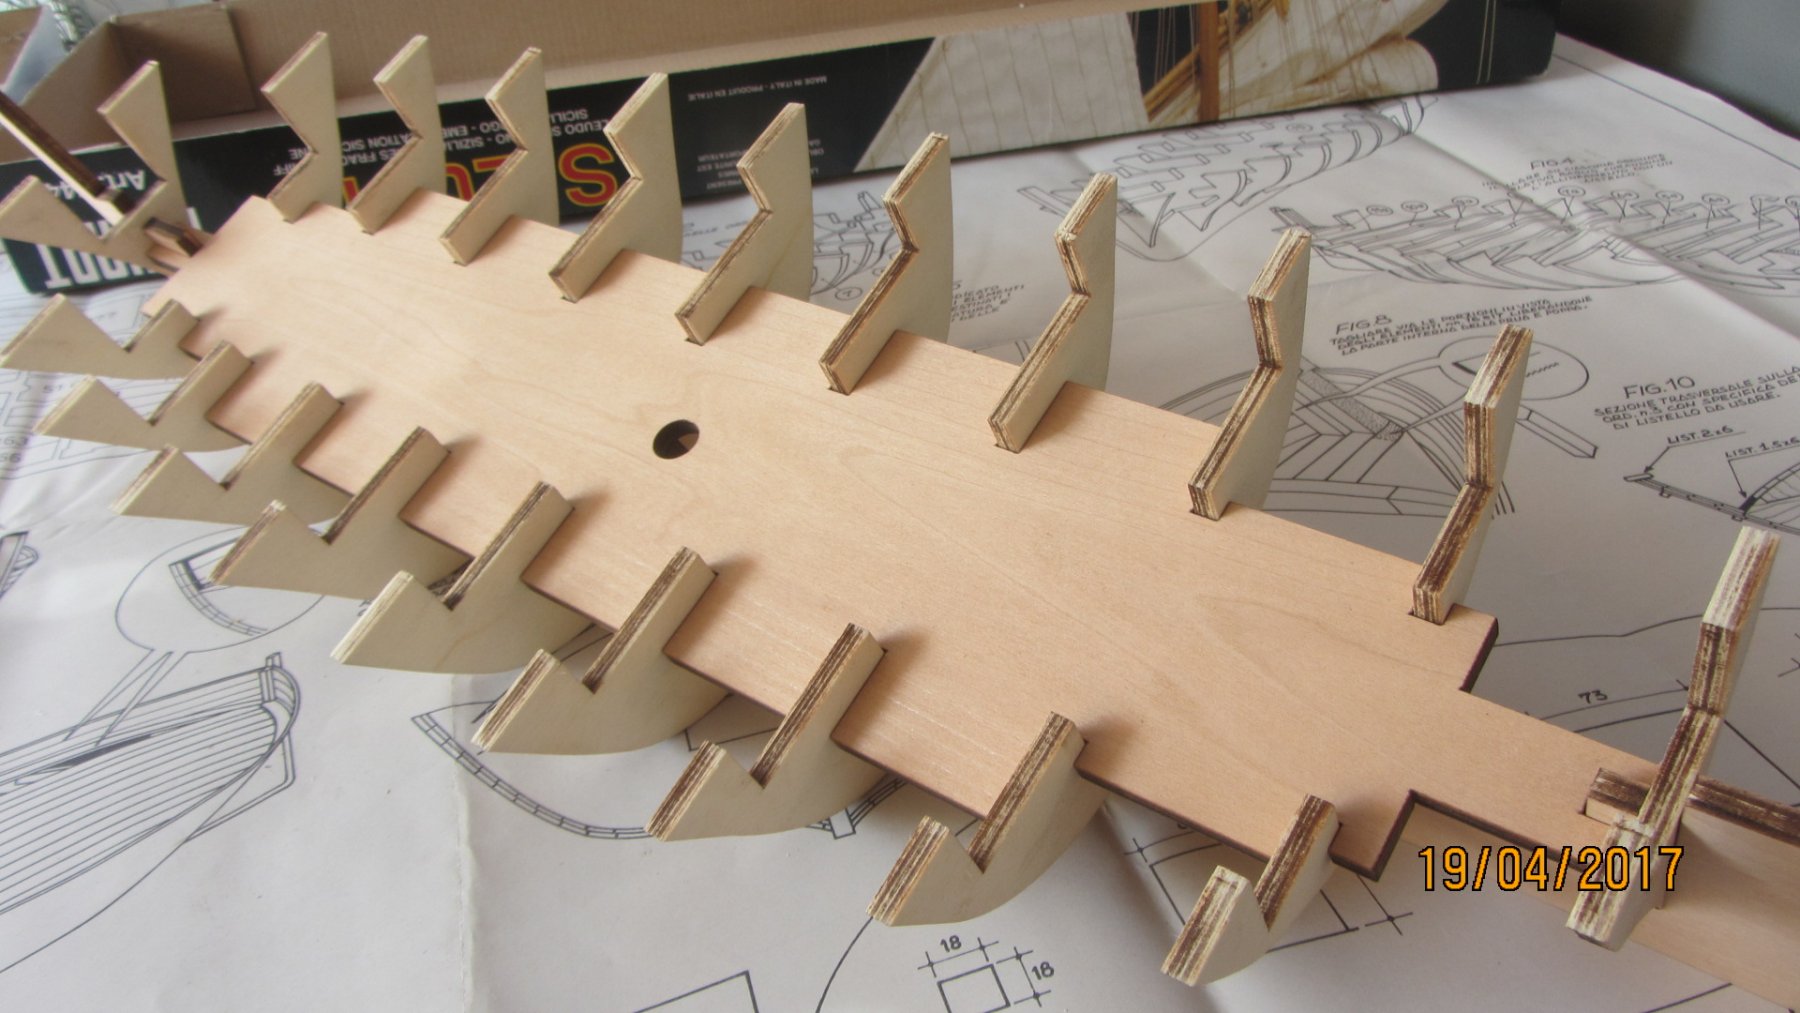
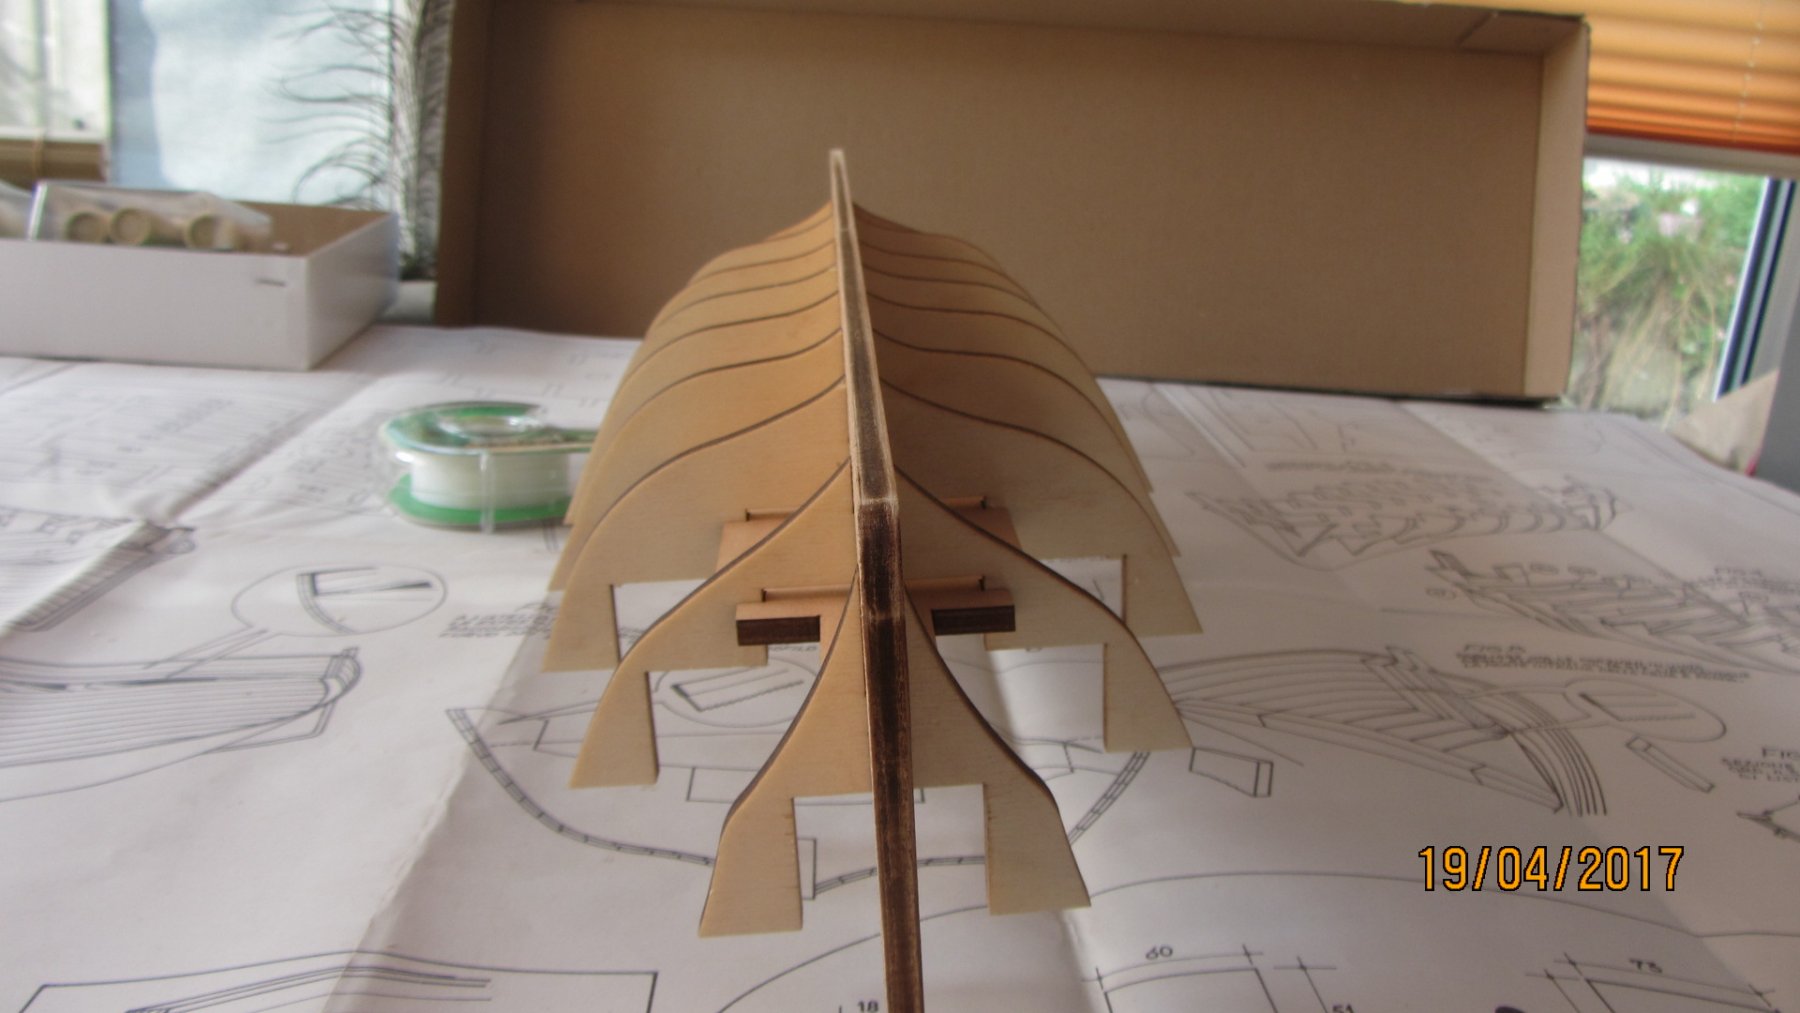
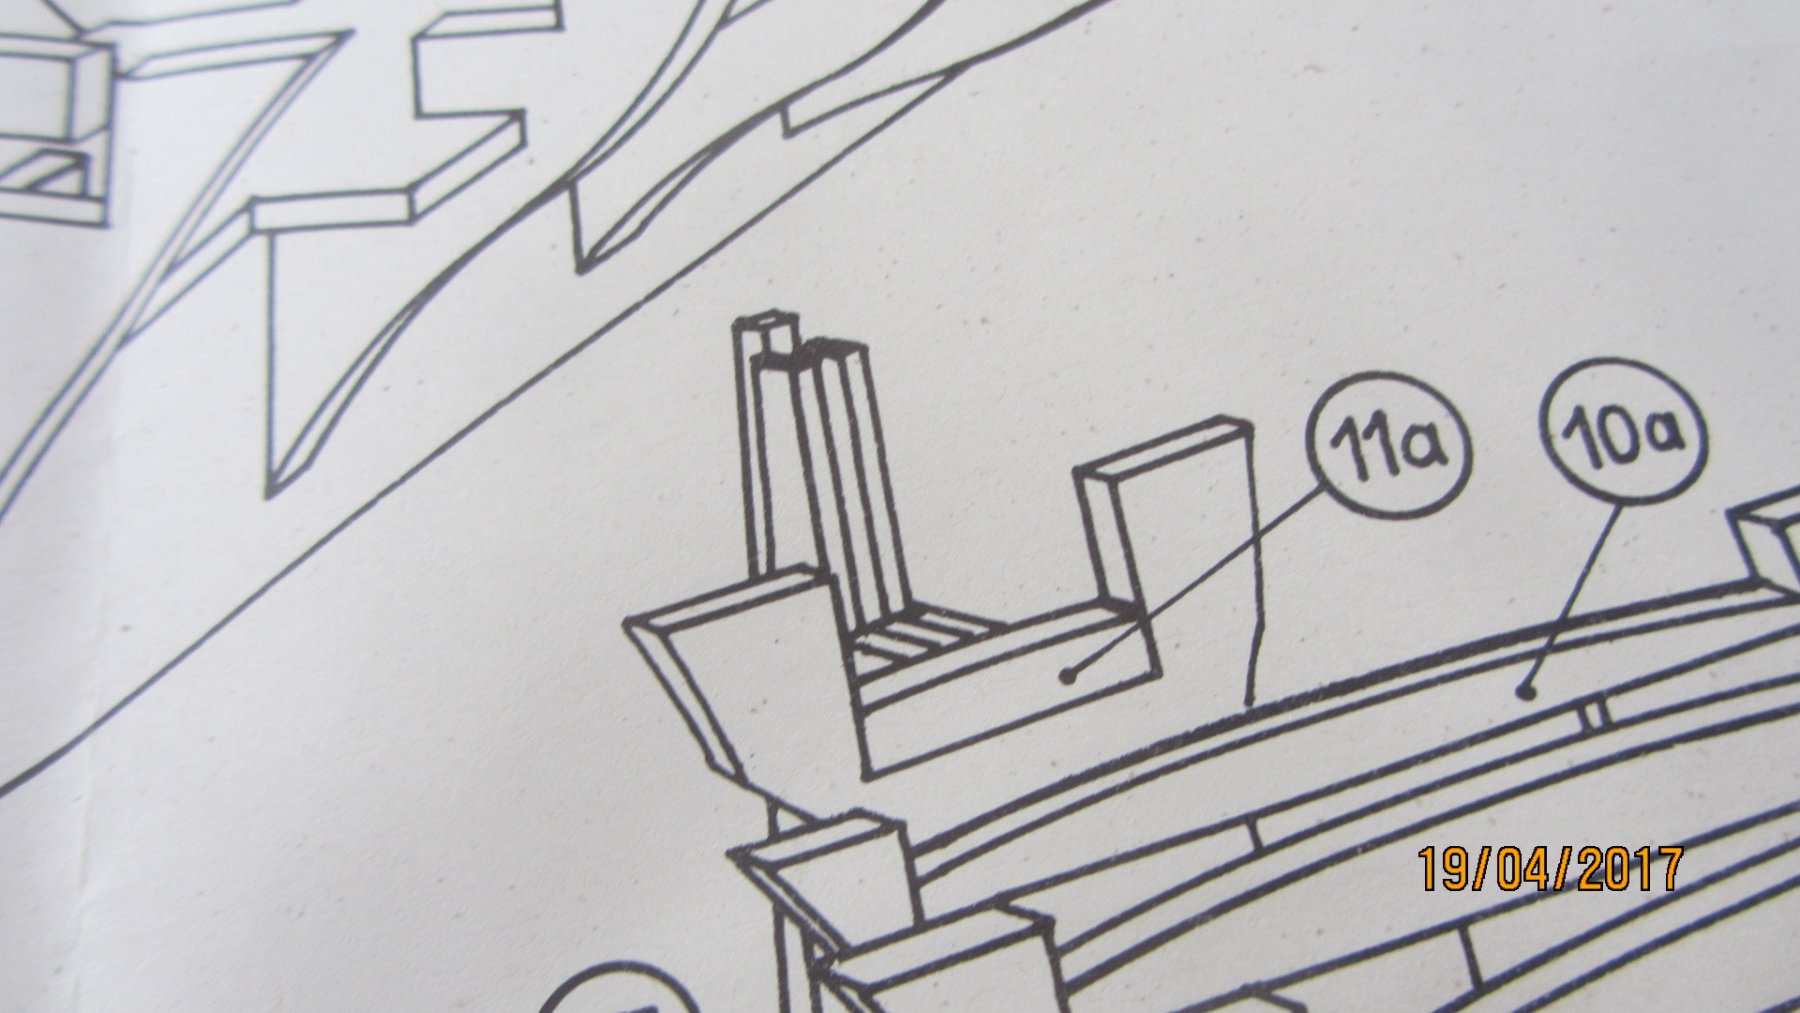
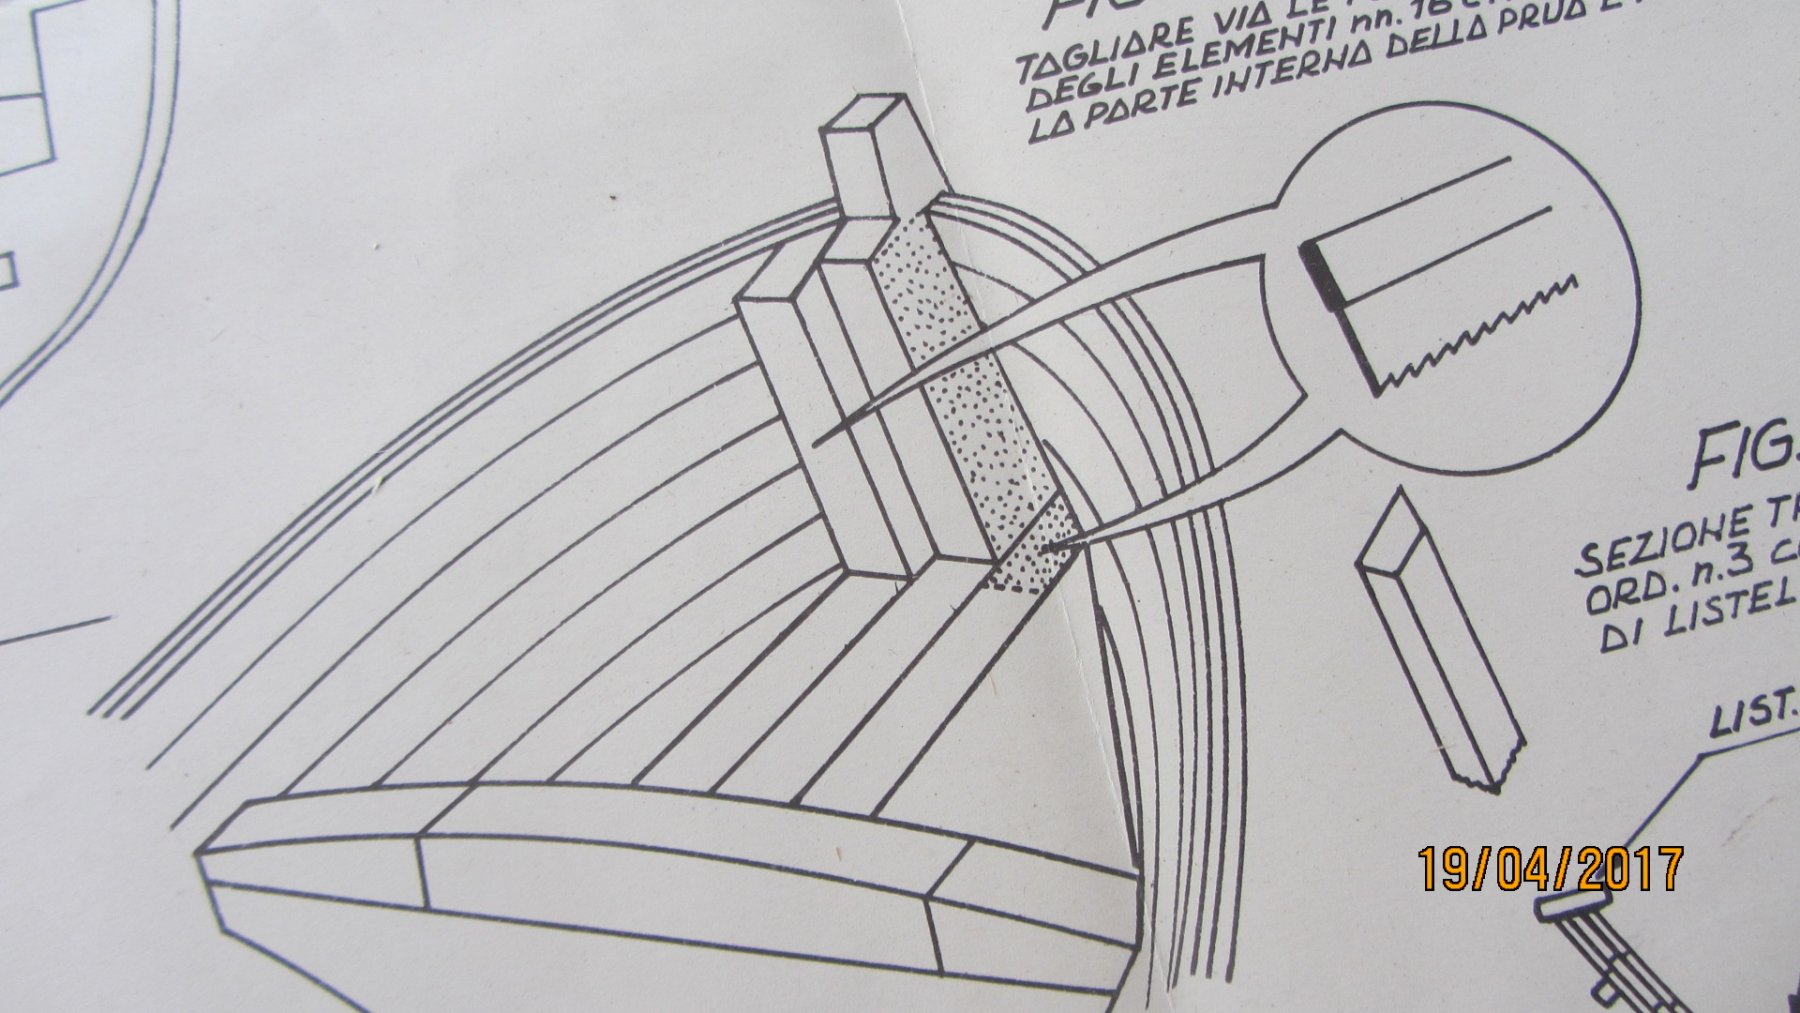
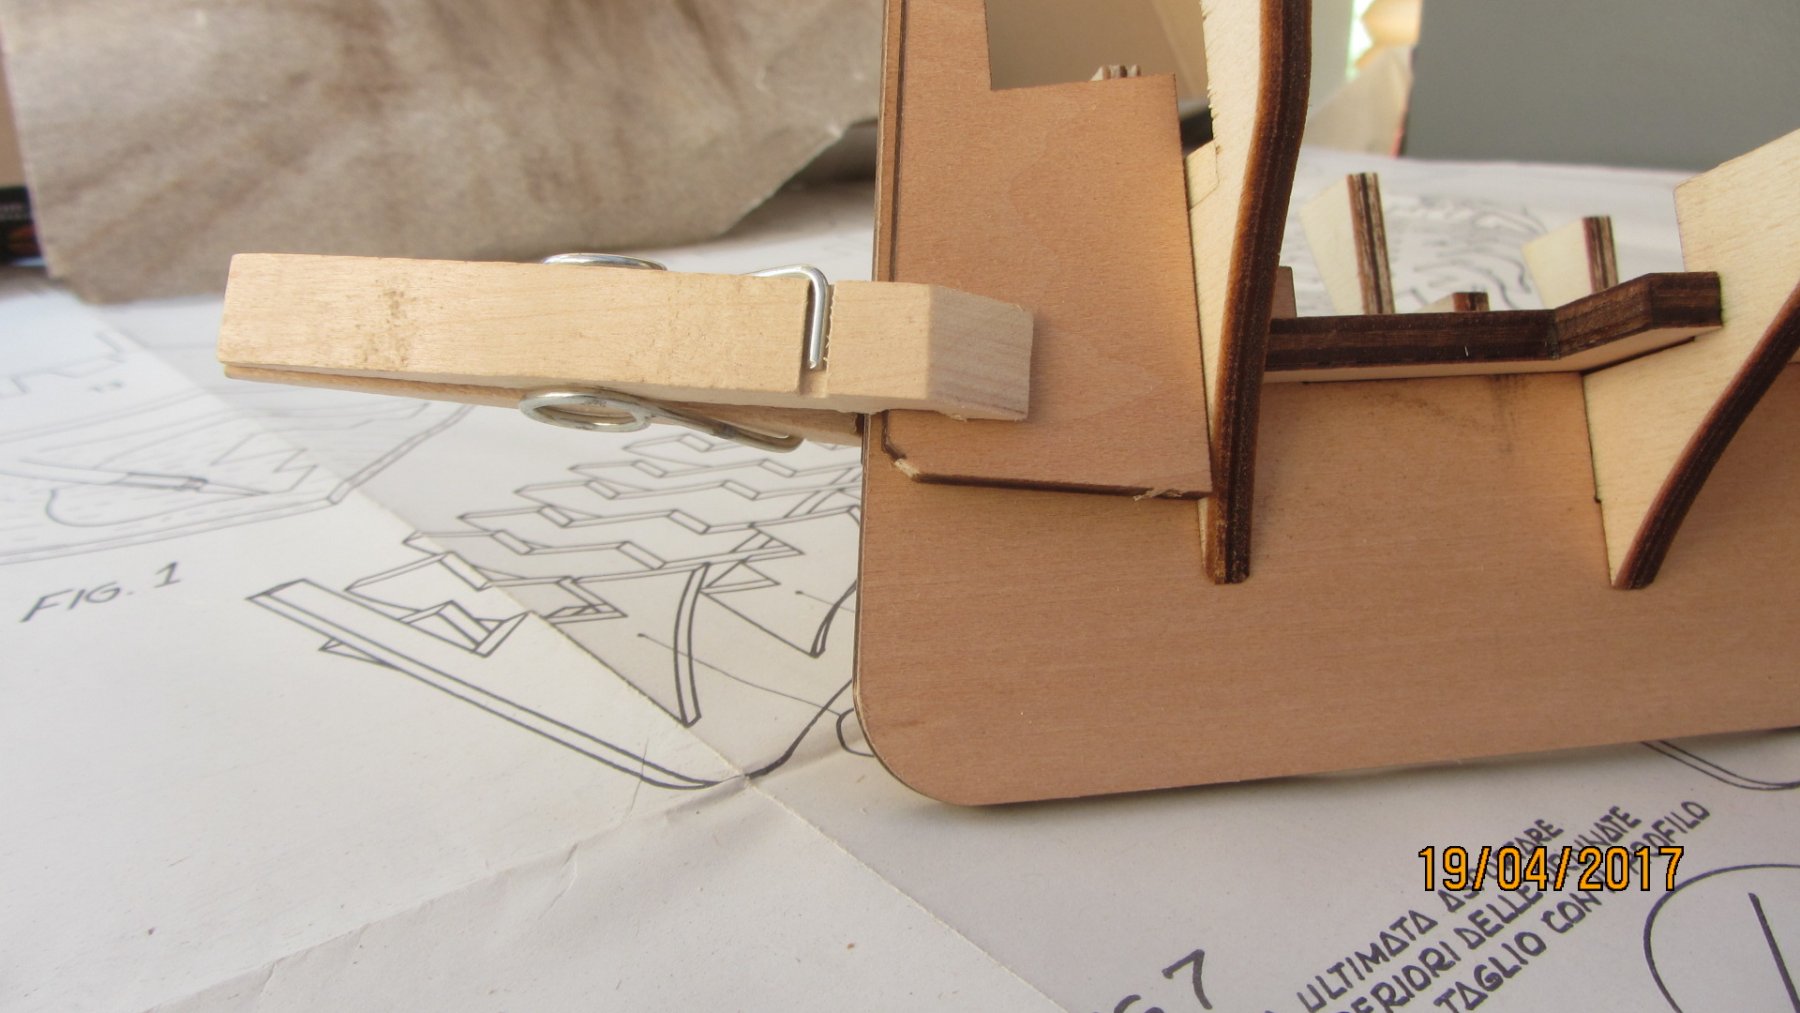
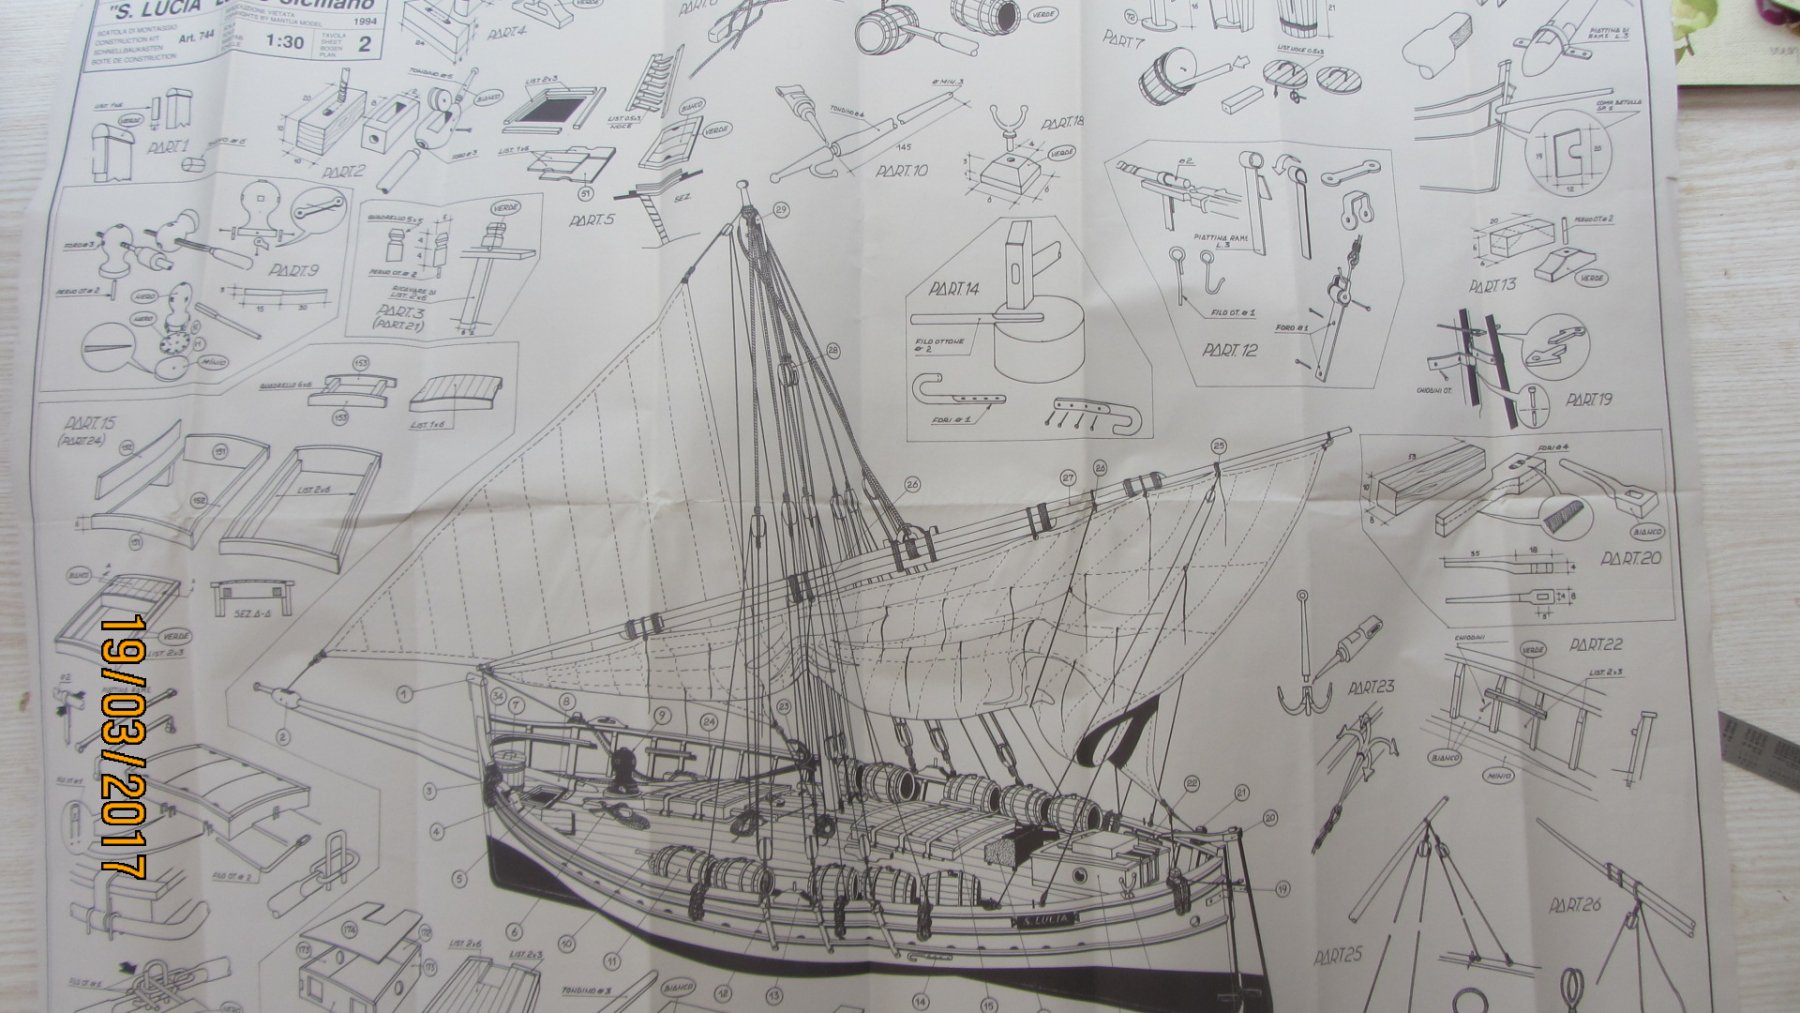
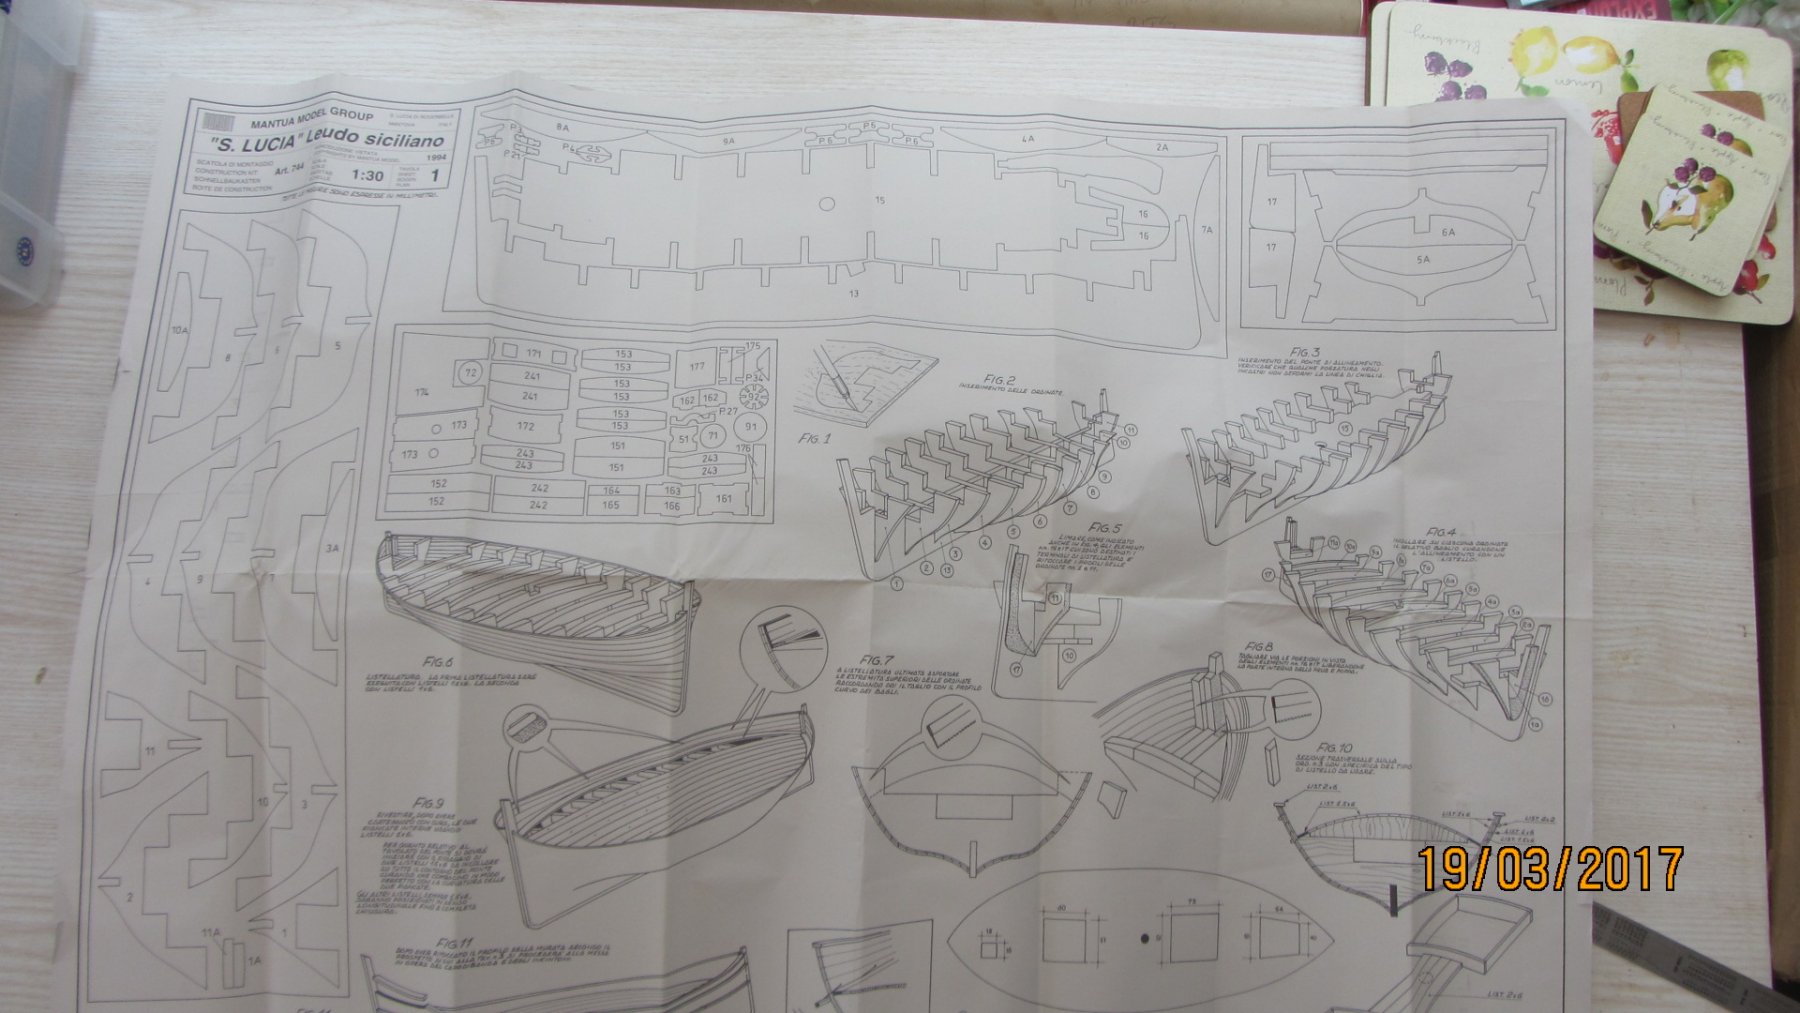
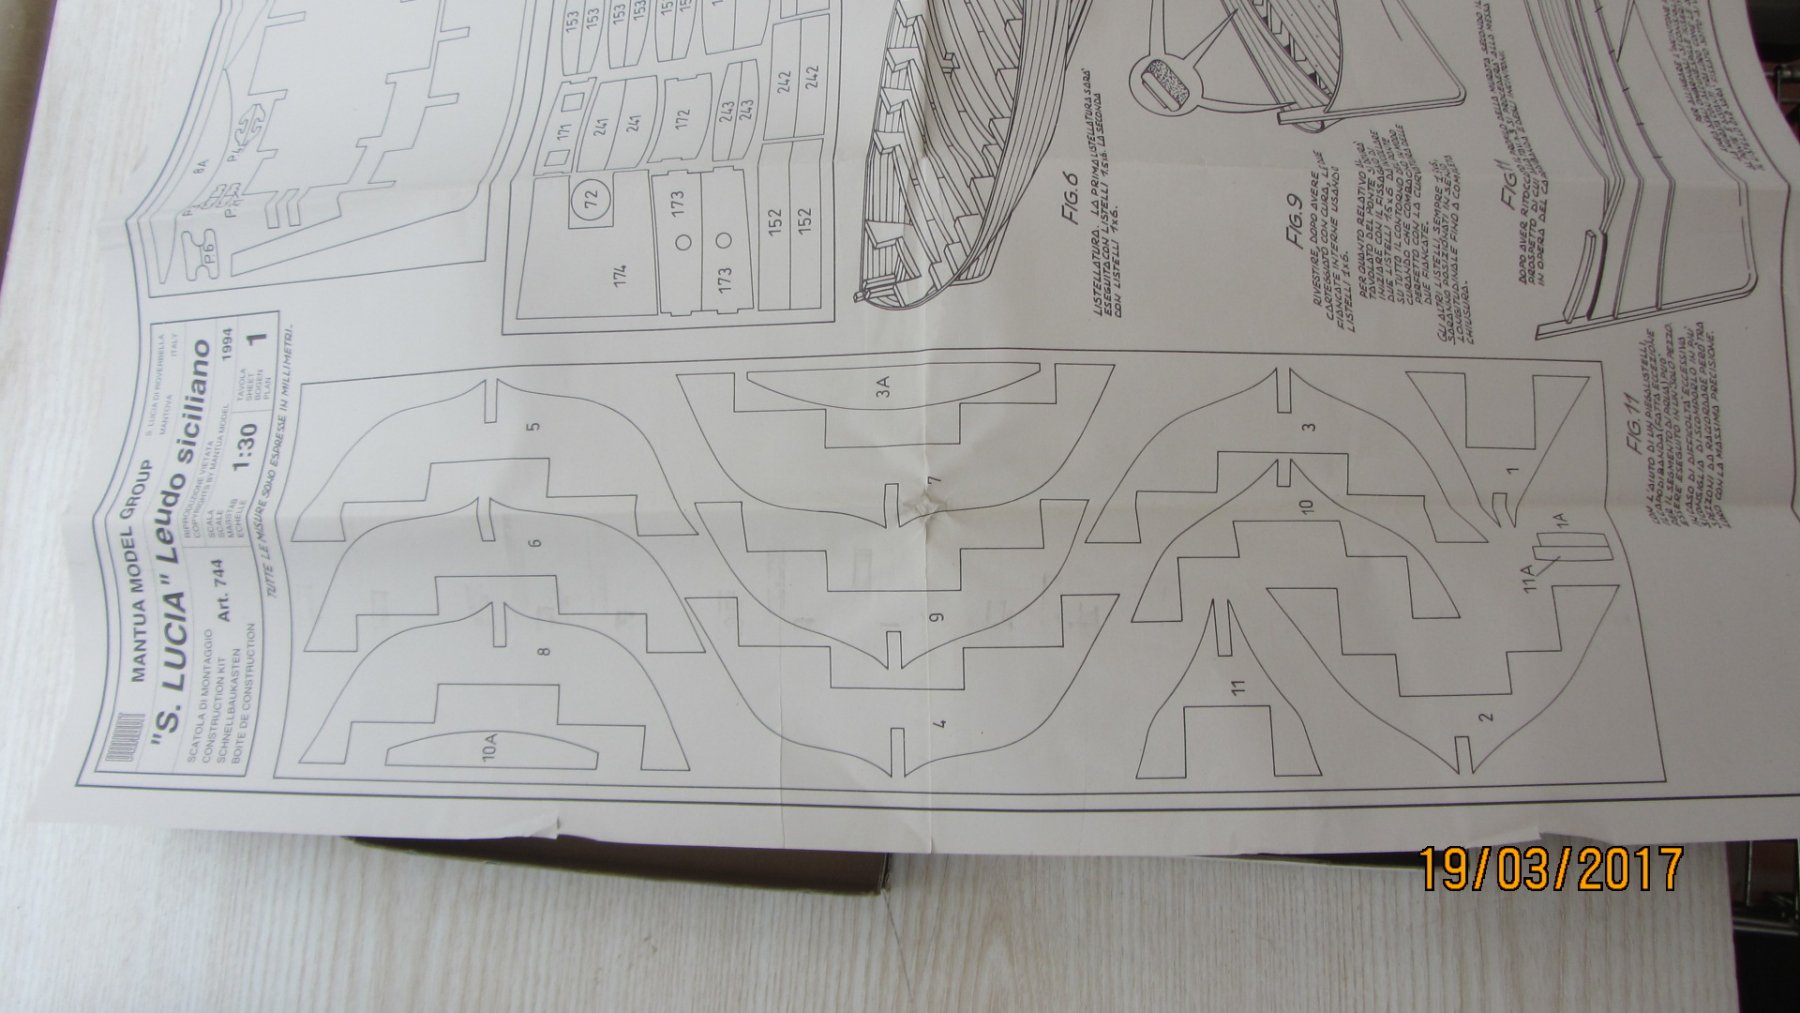
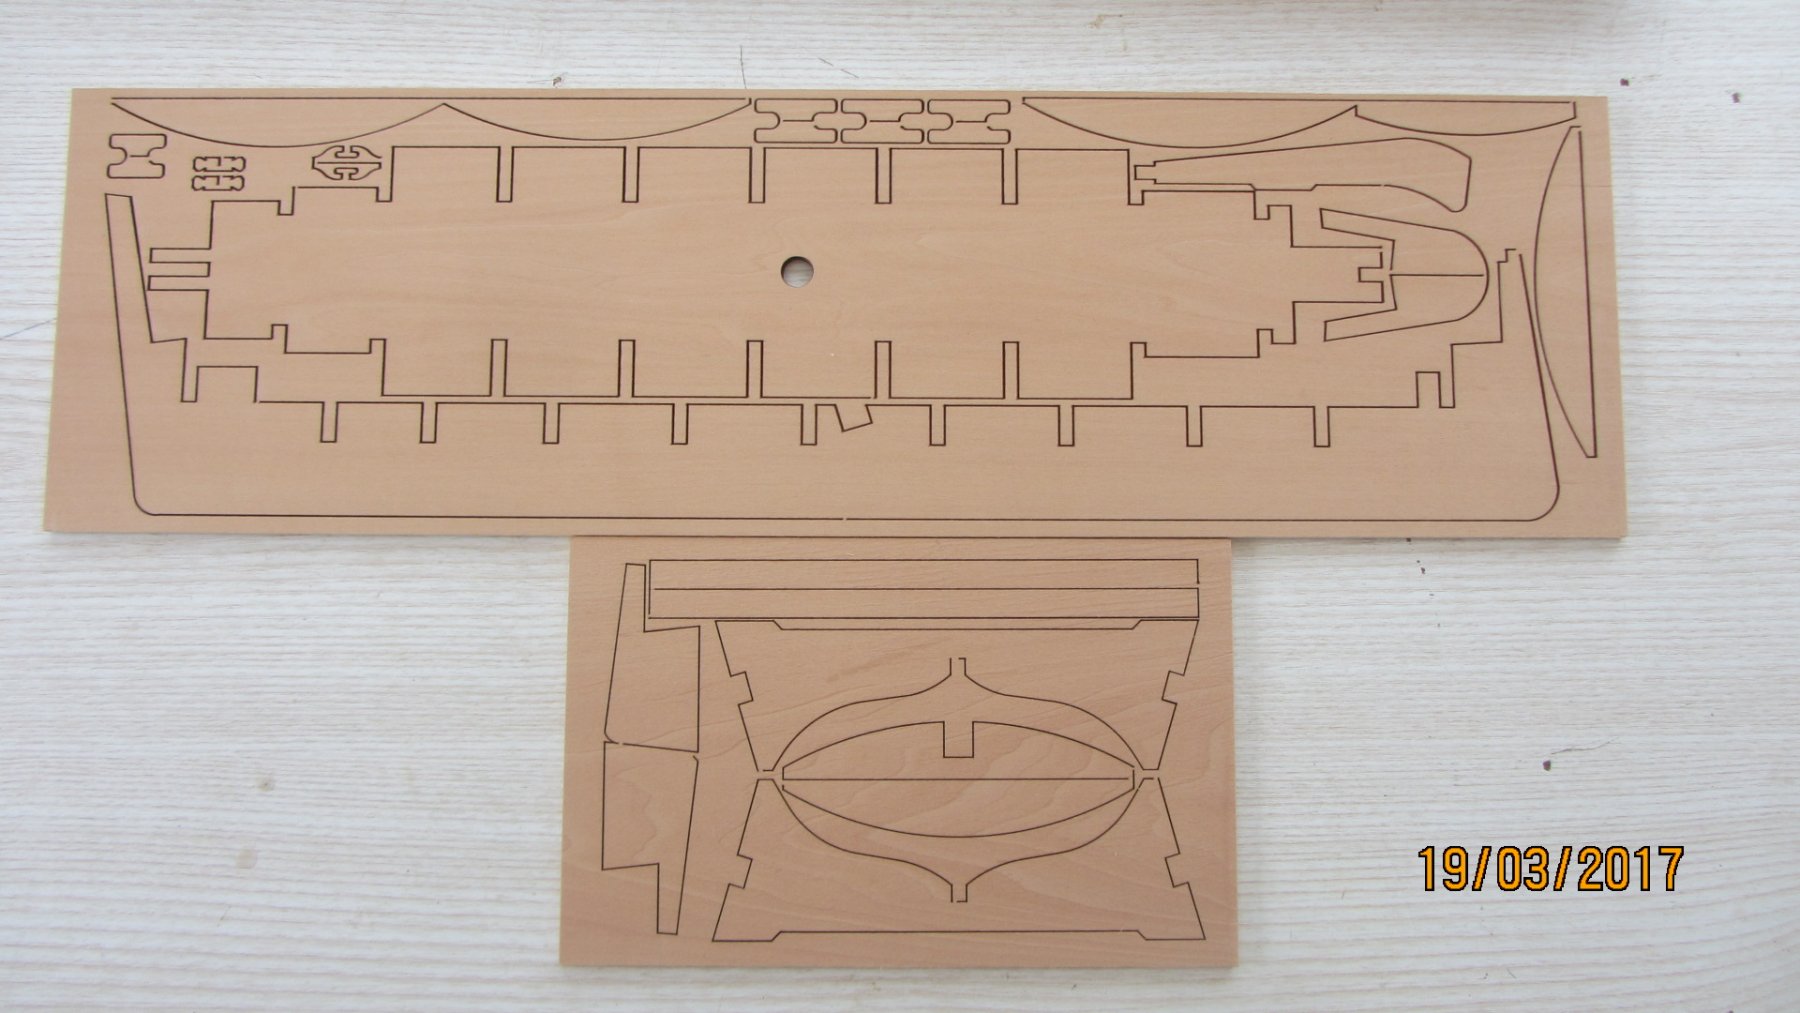
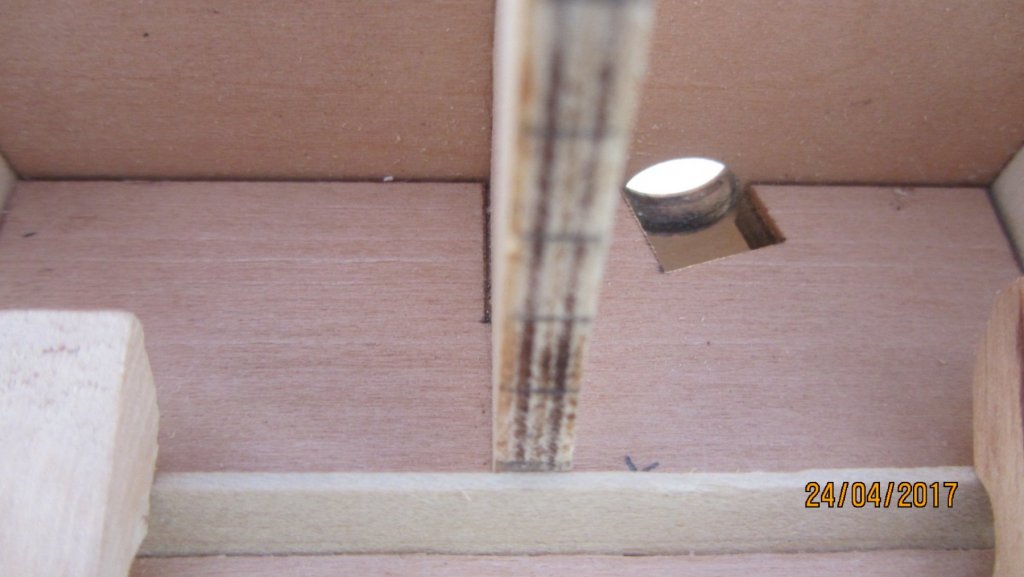
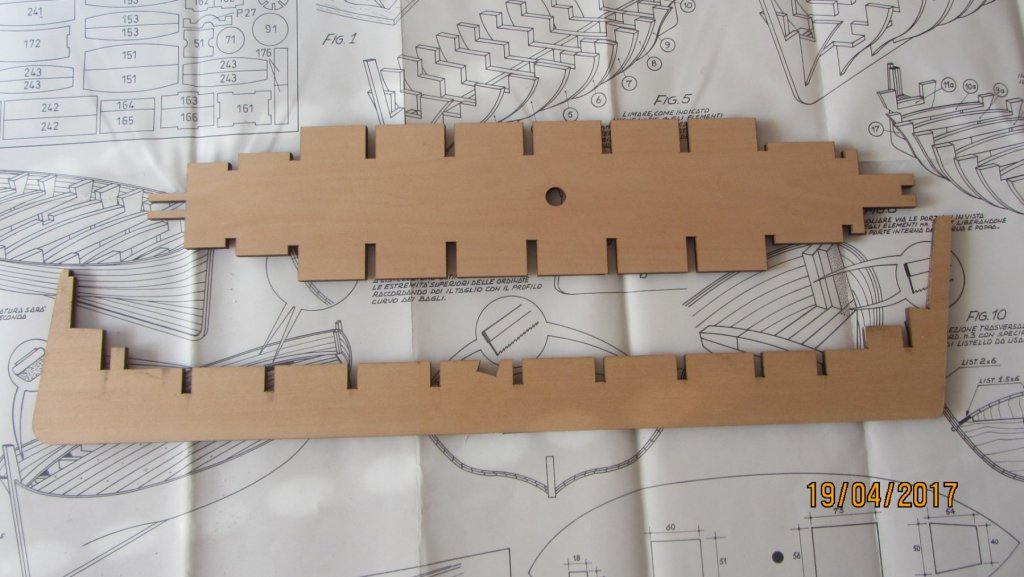
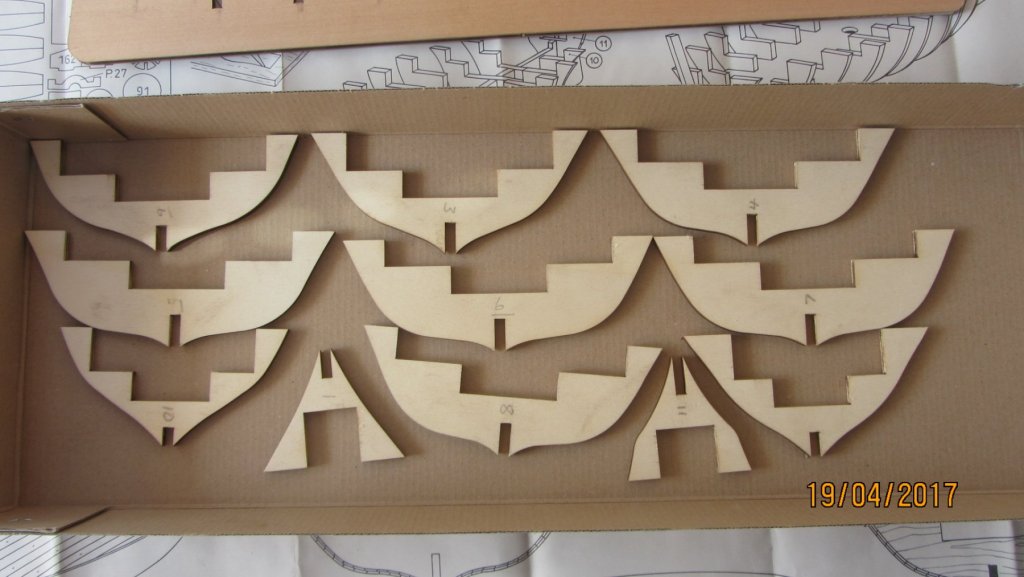
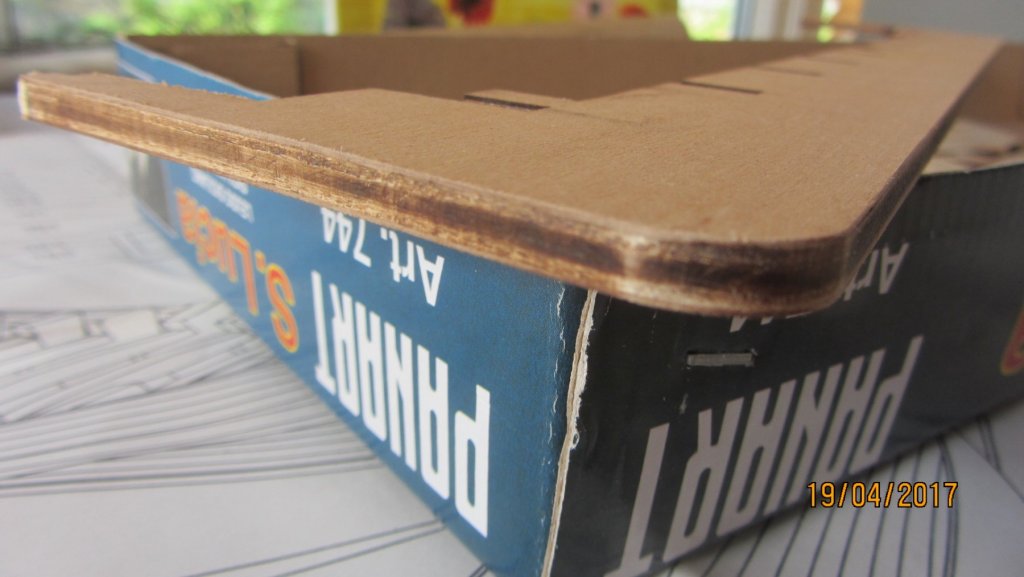
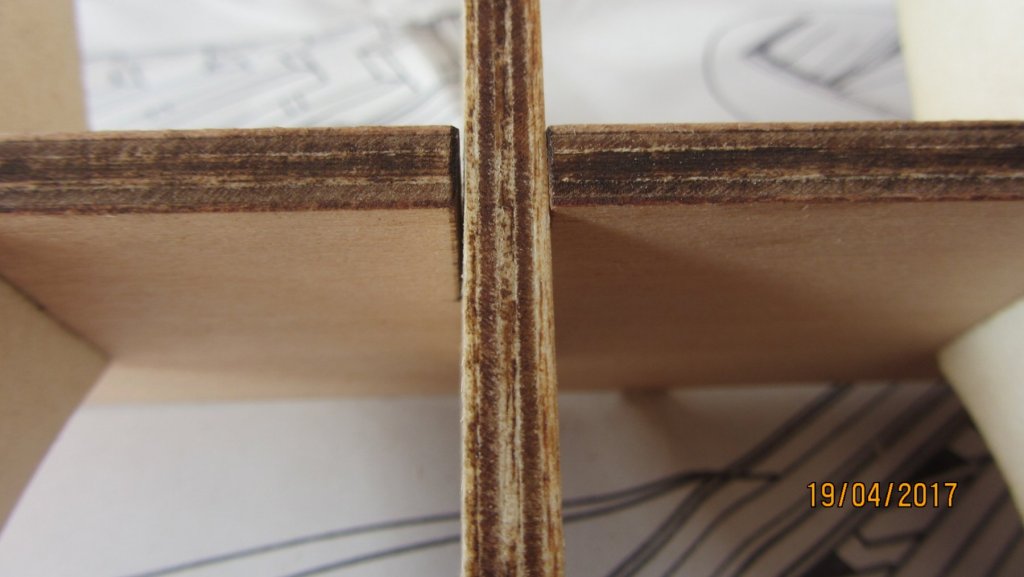
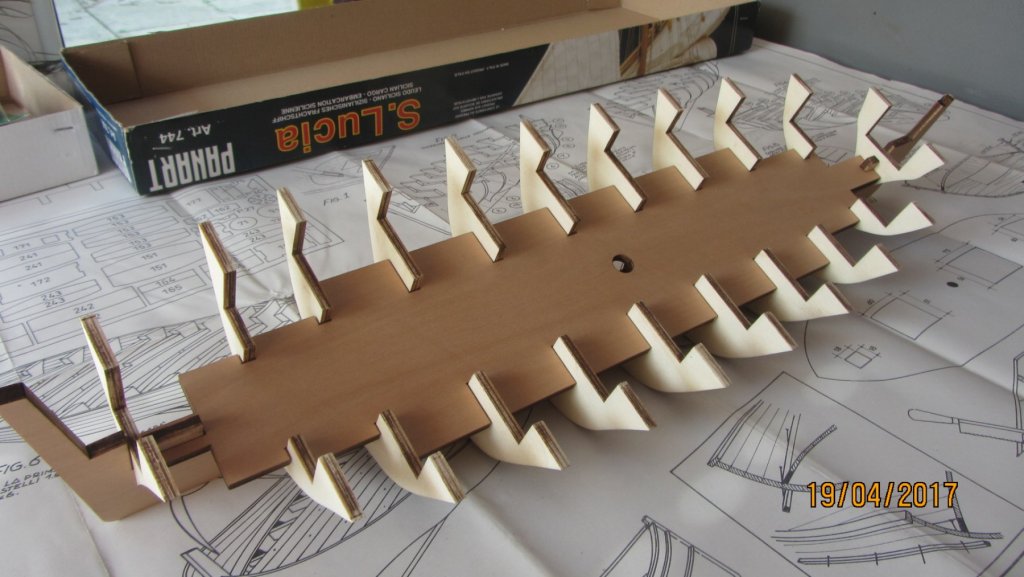
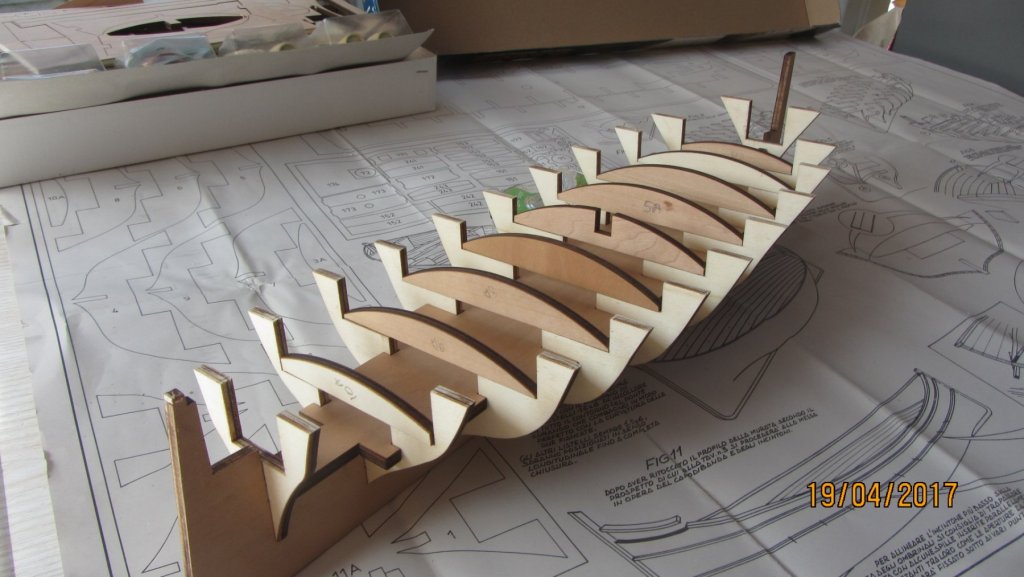
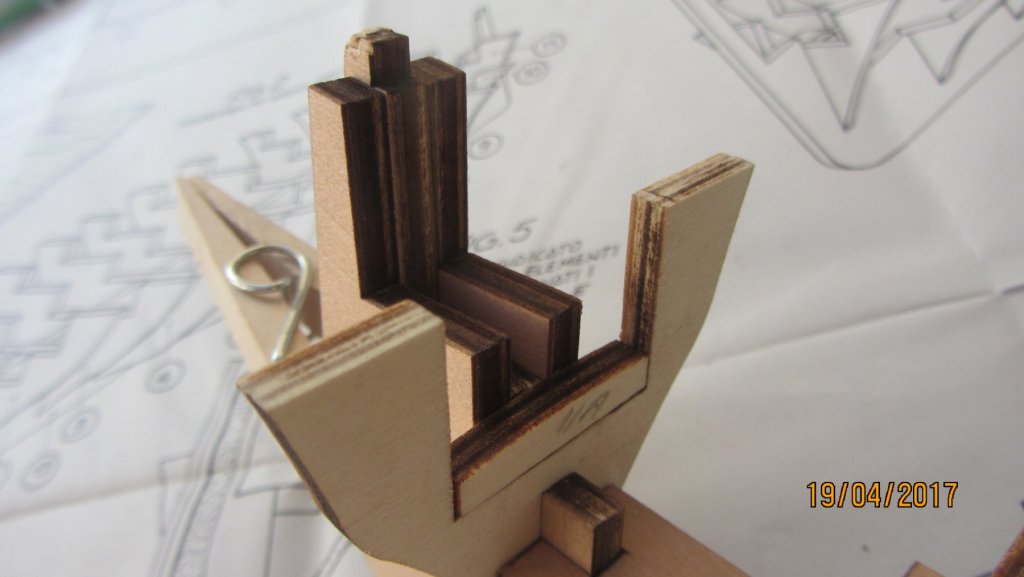
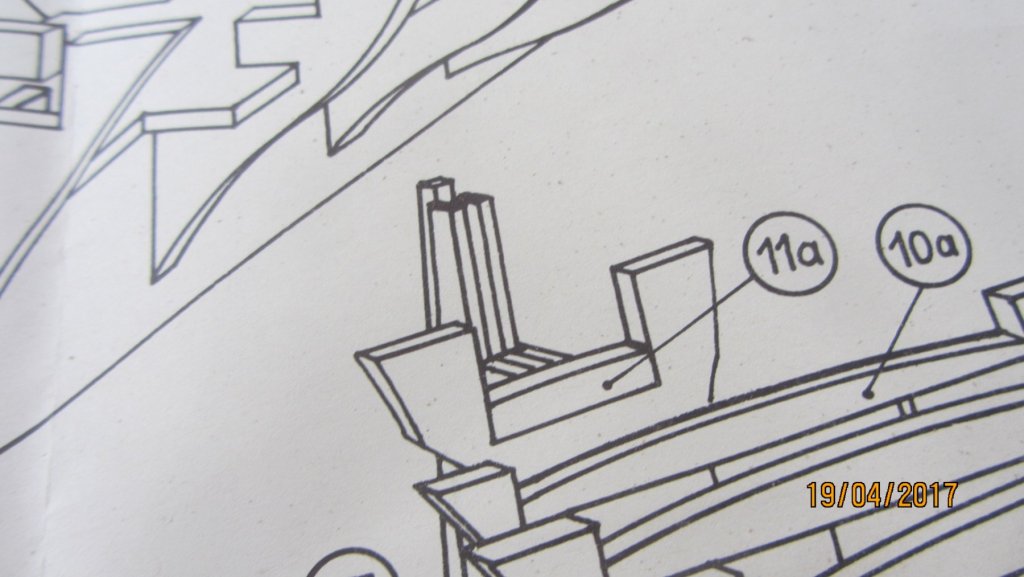
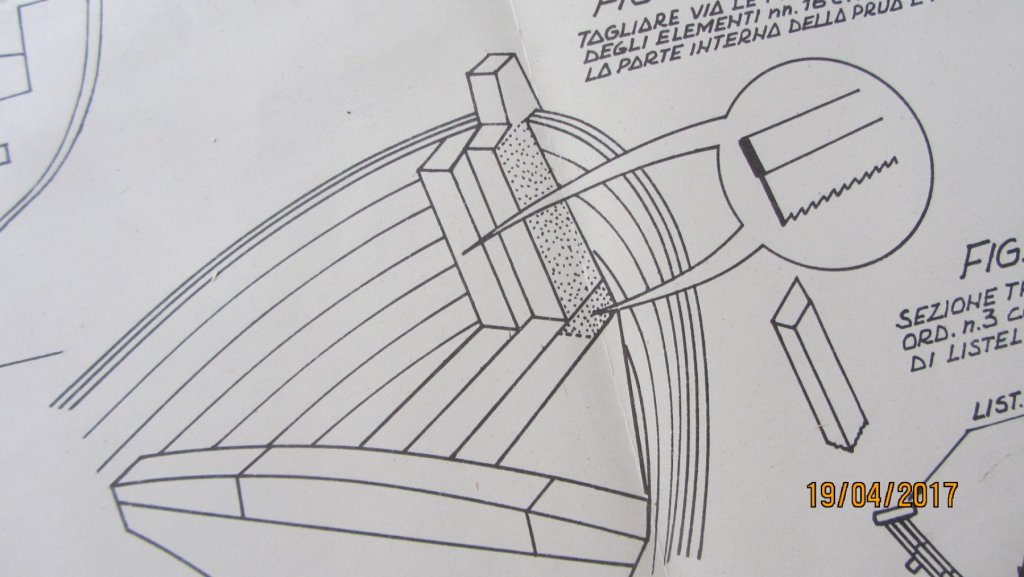
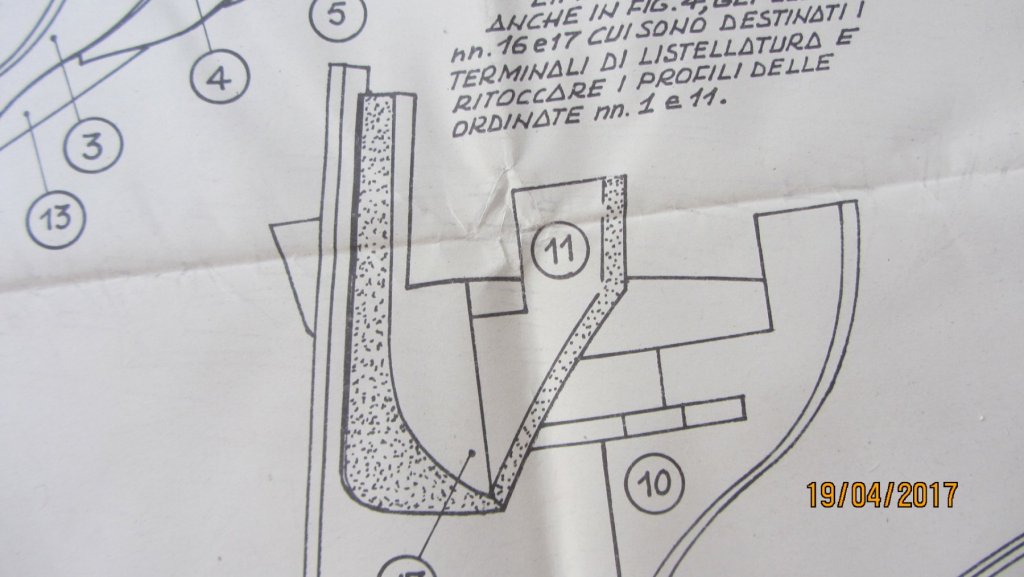
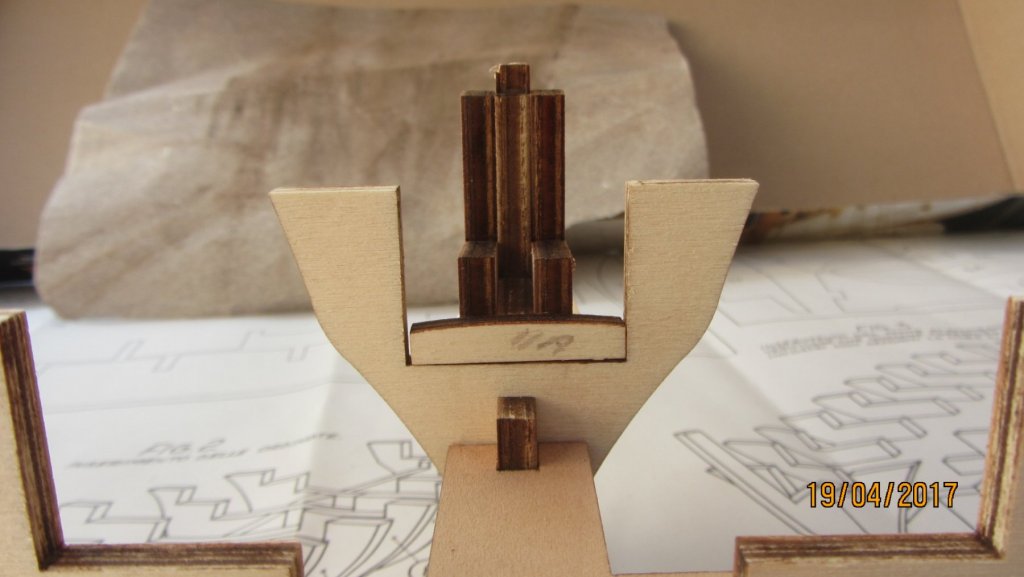
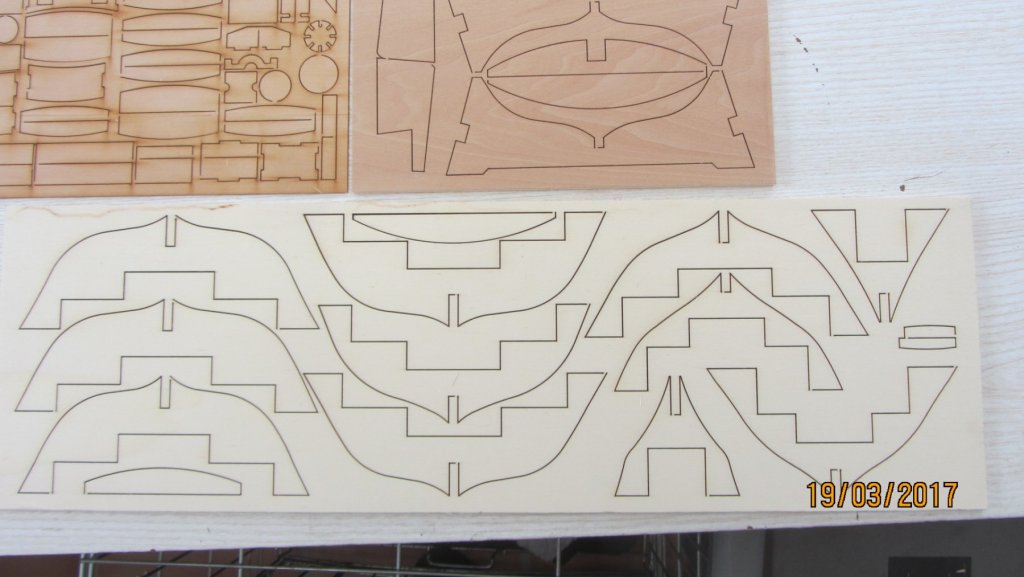
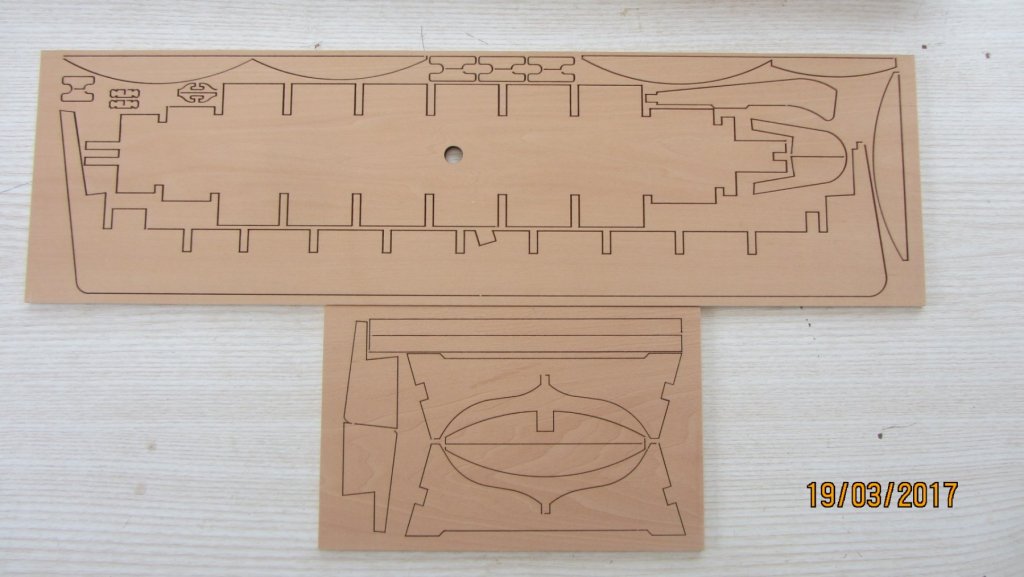
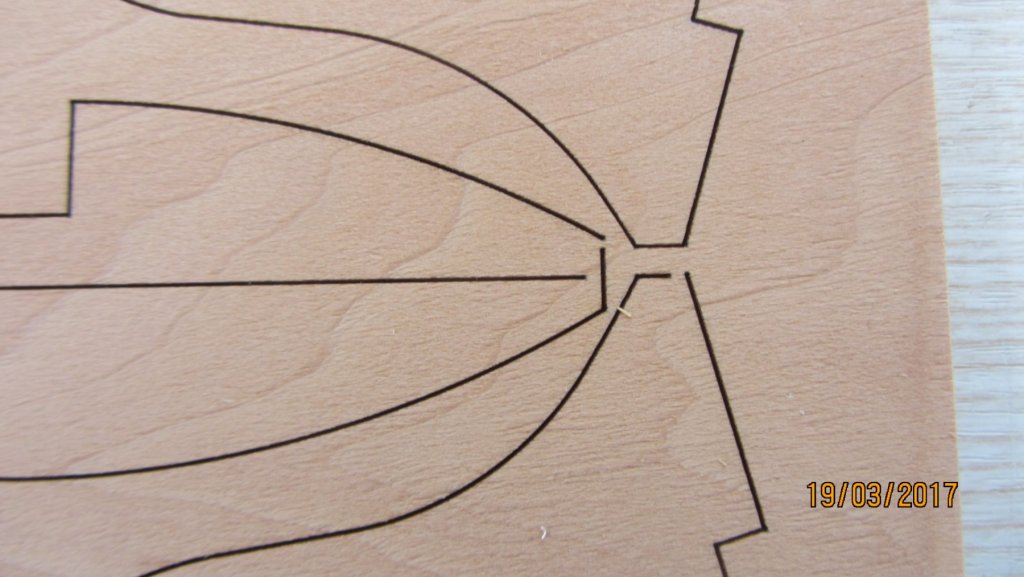
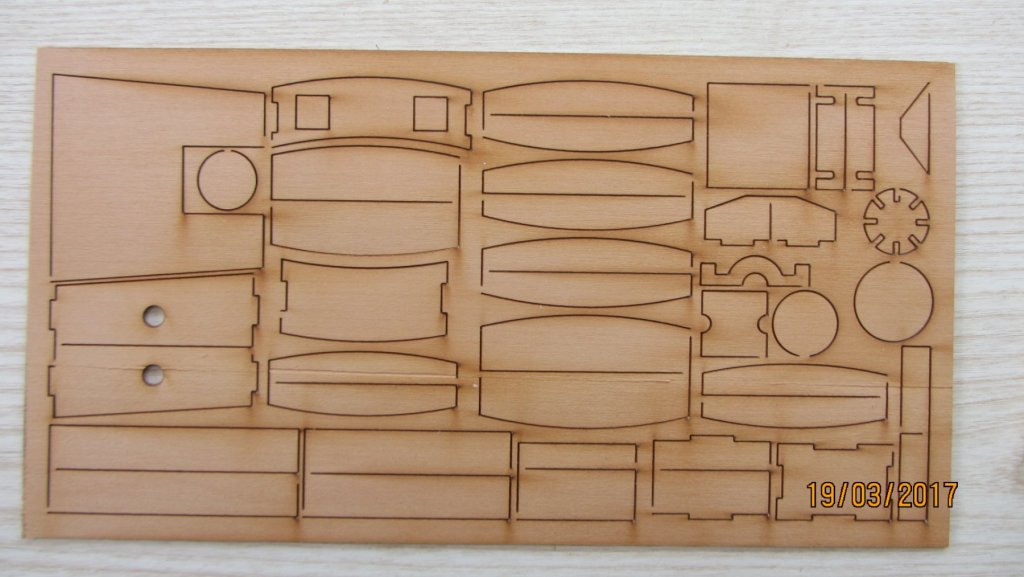
Hi. Started on the construction today. Started by cutting the Parts from the Laser cut sheets. Found that the veneer on the sheets was not quite bonded as it should be.. But not a issue. Easy glued. The Tabs for holding the parts to the sheet could be better placed and not were the bulkhead meets the keel. The Keel I will need to cover the Edges with Veneer as I will not be painting this boat. The dry fitting in process. Slight gaps in the bulkheads as the bulkhead sheet might be thinner than standard.. The Gap is 1mm .. But the Keel if of the correct thickness and bulkheads slot needed sanding to fit. This part really stiffens the structure and if of a very good fit. Just another angle of the stiffener. Slight warp to the keel. Will make a stand that will hold the keel straight and provide support while building. Added the Deck supports. Found that the 10A if to high. Will check this later on when I can put a few planks across the deck and check its height again. Part 11a can be glued into place .. why did they cut it out to start with ?? Also Part 17 according to the drawings below show that the top is level with the notch in the keel. Here it also shows that part 17 is level with the notch in the keel. Again it also shows that part 17 is level with the notch in the keel. No way is this correct. Much to high. This is the position I will use to fit part 17. Another angle. After cutting 1mm from the bottom of part 10a the planks lie on a natural curve and look good. Next step will Glue the bulkheads to the keel and add the stiffener at the same time. Will post more as I progress with the build. Regards Antony.


- 32 replies
-
- 6
-
-
- santa lucia
- panart
- (and 1 more)
-
Hi. Have you looked at cornwall model boats. They have a brand called Quarycraft. http://www.cornwallmodelboats.co.uk/acatalog/quaycraft-boats-rn96.html http://www.cornwallmodelboats.co.uk/acatalog/quaycraft-boats-196.html they are ready made but they do have a fare about of detail. Most are resin cast. Regards Antony.
- 6 replies
-
- 3
-
-
- mamoli
- constitution
- (and 1 more)
-
Hi Michael. Nice to see you back in your shipyard with the Halifax. The wait for updates was worth it 😀 All the best. Antony.
-
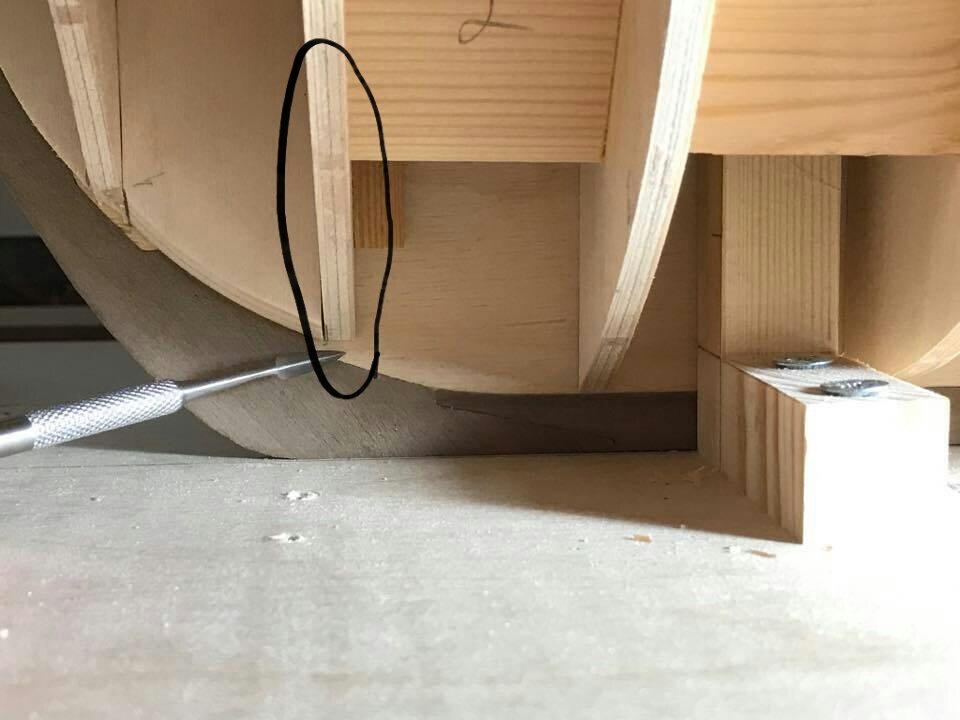
Hi Micheal. Having not seen the plans or drawings ...it's not easy to advise you. Check and double check if you are not sure. The bulkhead that your punch is pointing to looks as if it needs building up to the correct level. Then fair it down... check that the bulkhead is at the correct height at the top first. I cannot tell by looking at any of your photos. Also check if you need any build up on the sides. All the best. Antony.
-
Hi Jack. Just stunning work. A pleasure to watch. Regards Antony.
- 174 replies
-
- 1
-
-
- gaeta falcata
- marisstella
- (and 1 more)
-
Hi Paul. You are making a excellent progress with your build. It's nice to read what others have encountered and done makes it a much smother build. Your build is very clean and tidy. Will follow along on this one. All the best. Antony.
-
UK Supplies of good blocks and rigging line
AntonyUK replied to JRB9019's topic in Masting, rigging and sails
Hi As anyone used this company before ?? The quality looks OK. If so ..Do they accept PayPal ?. Many thanks. Antony. -
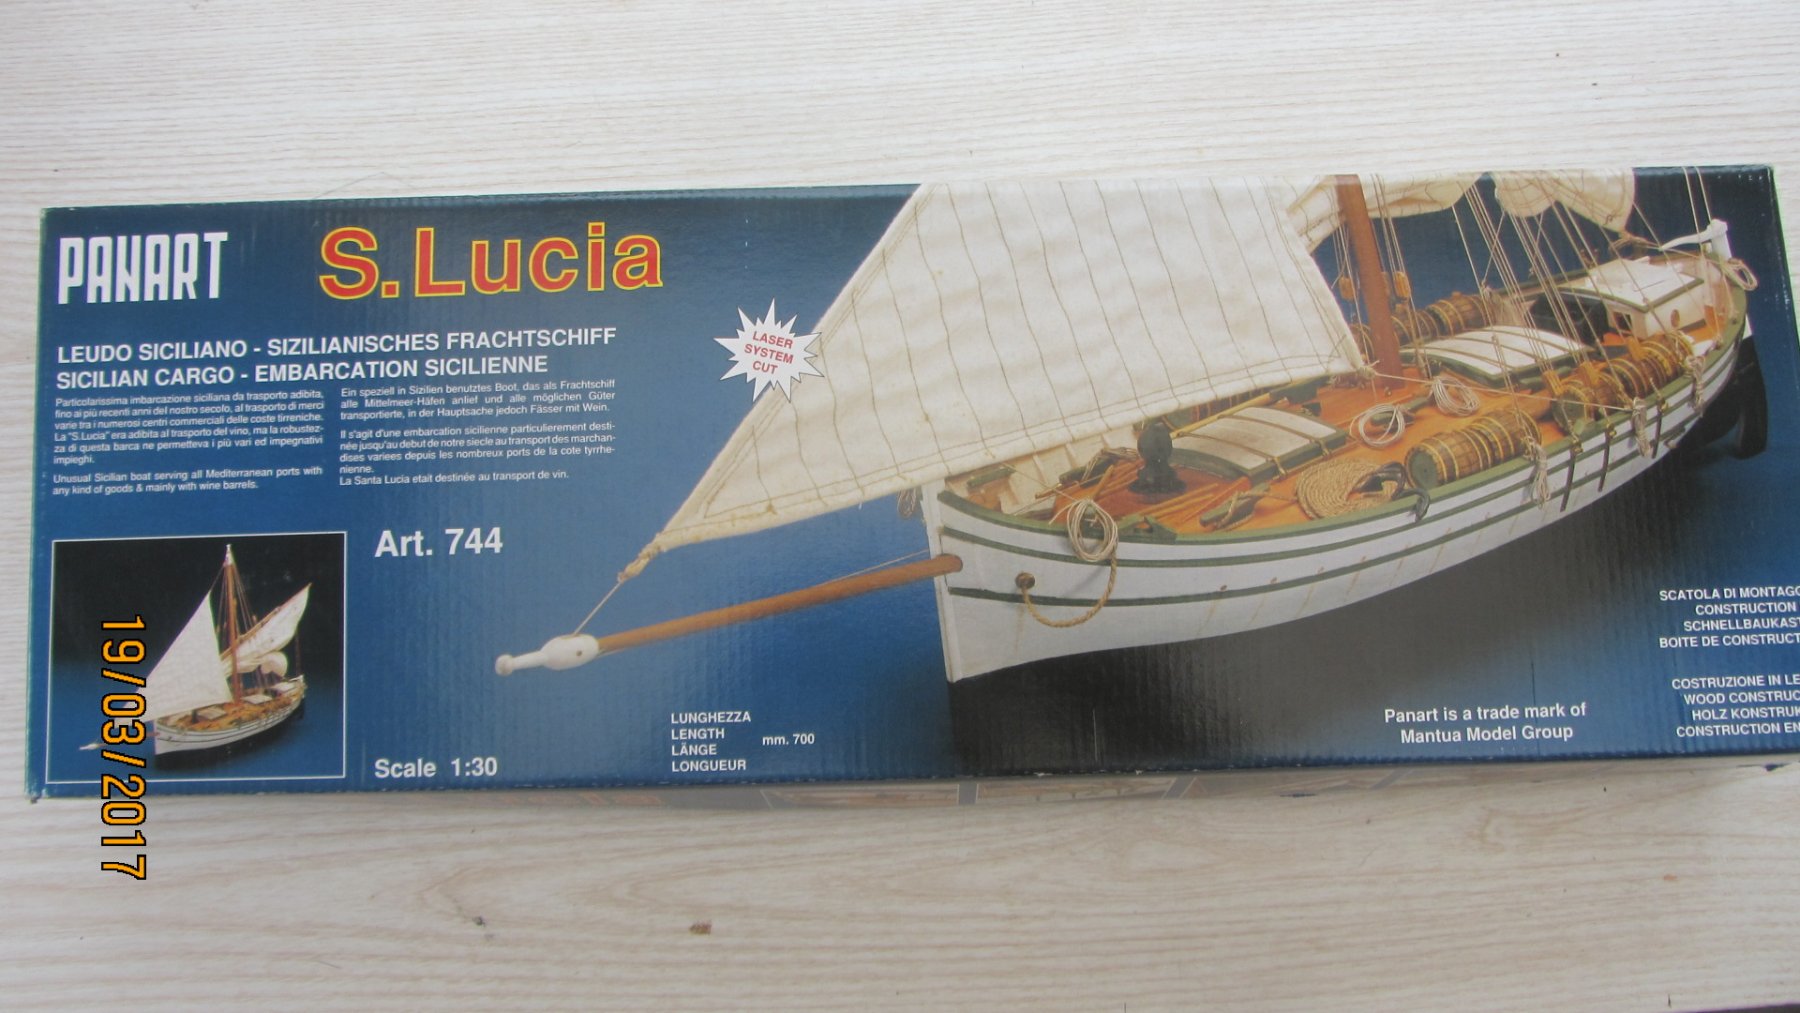
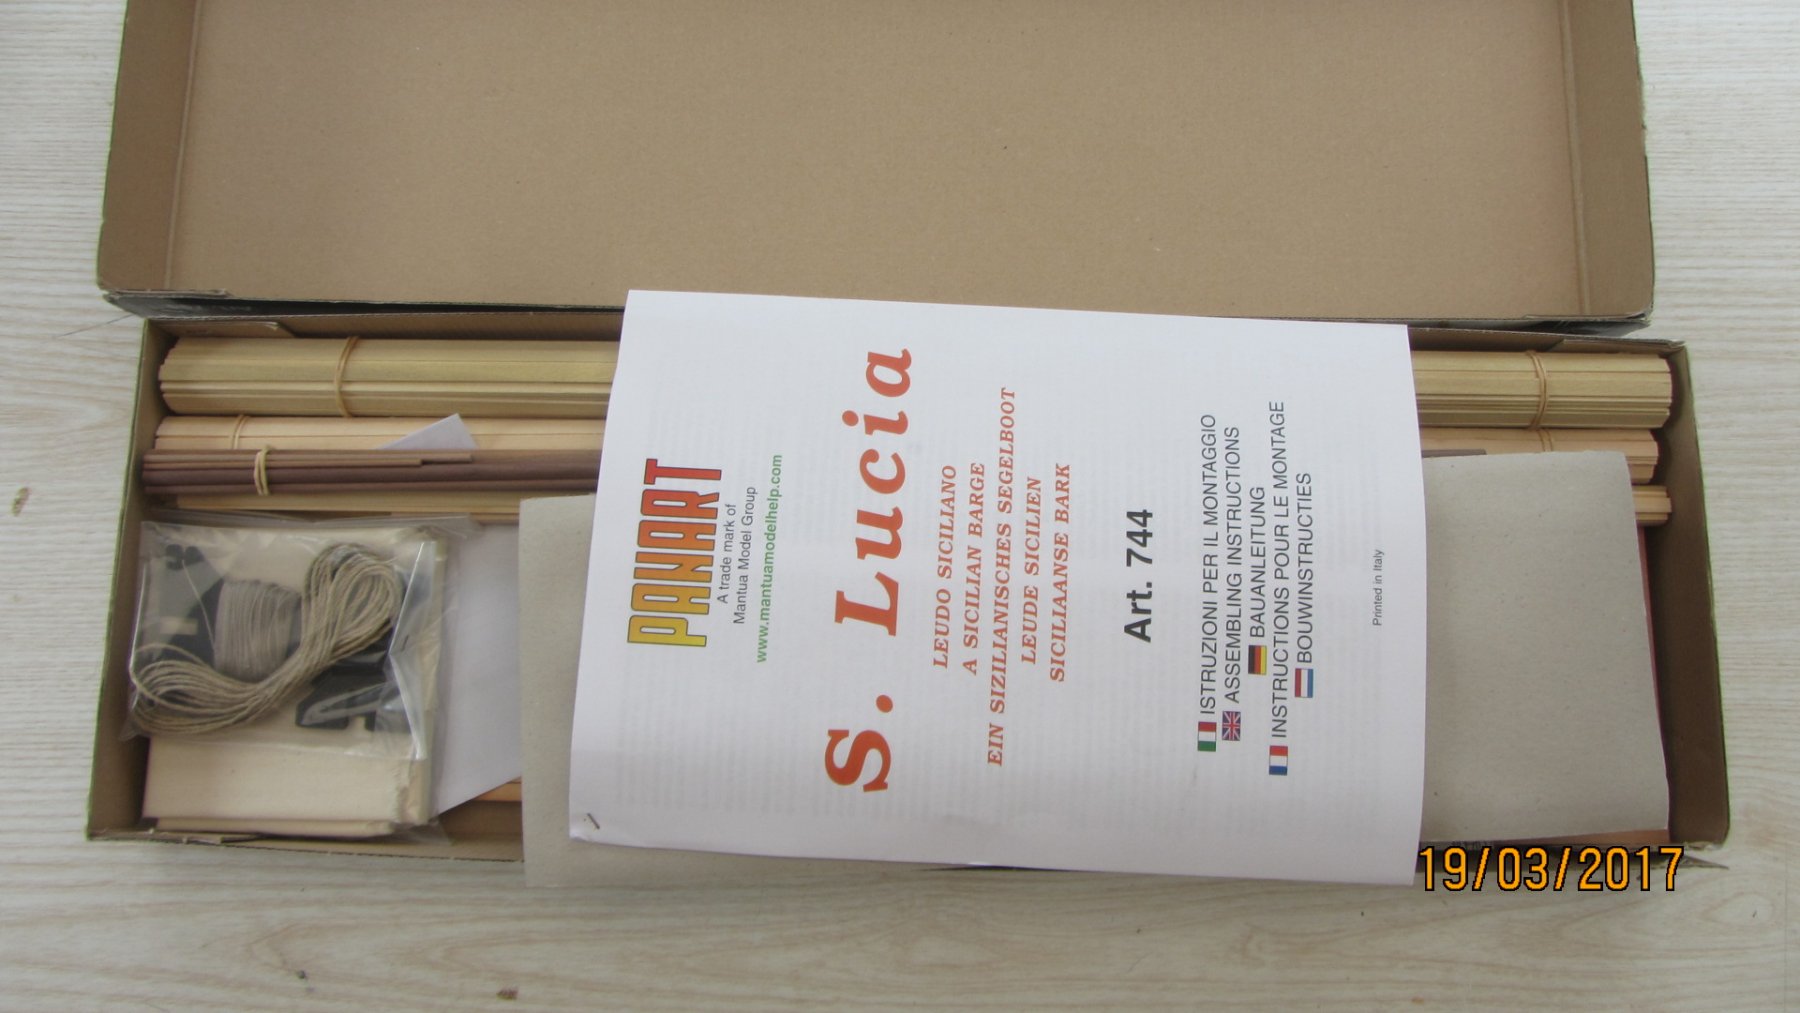
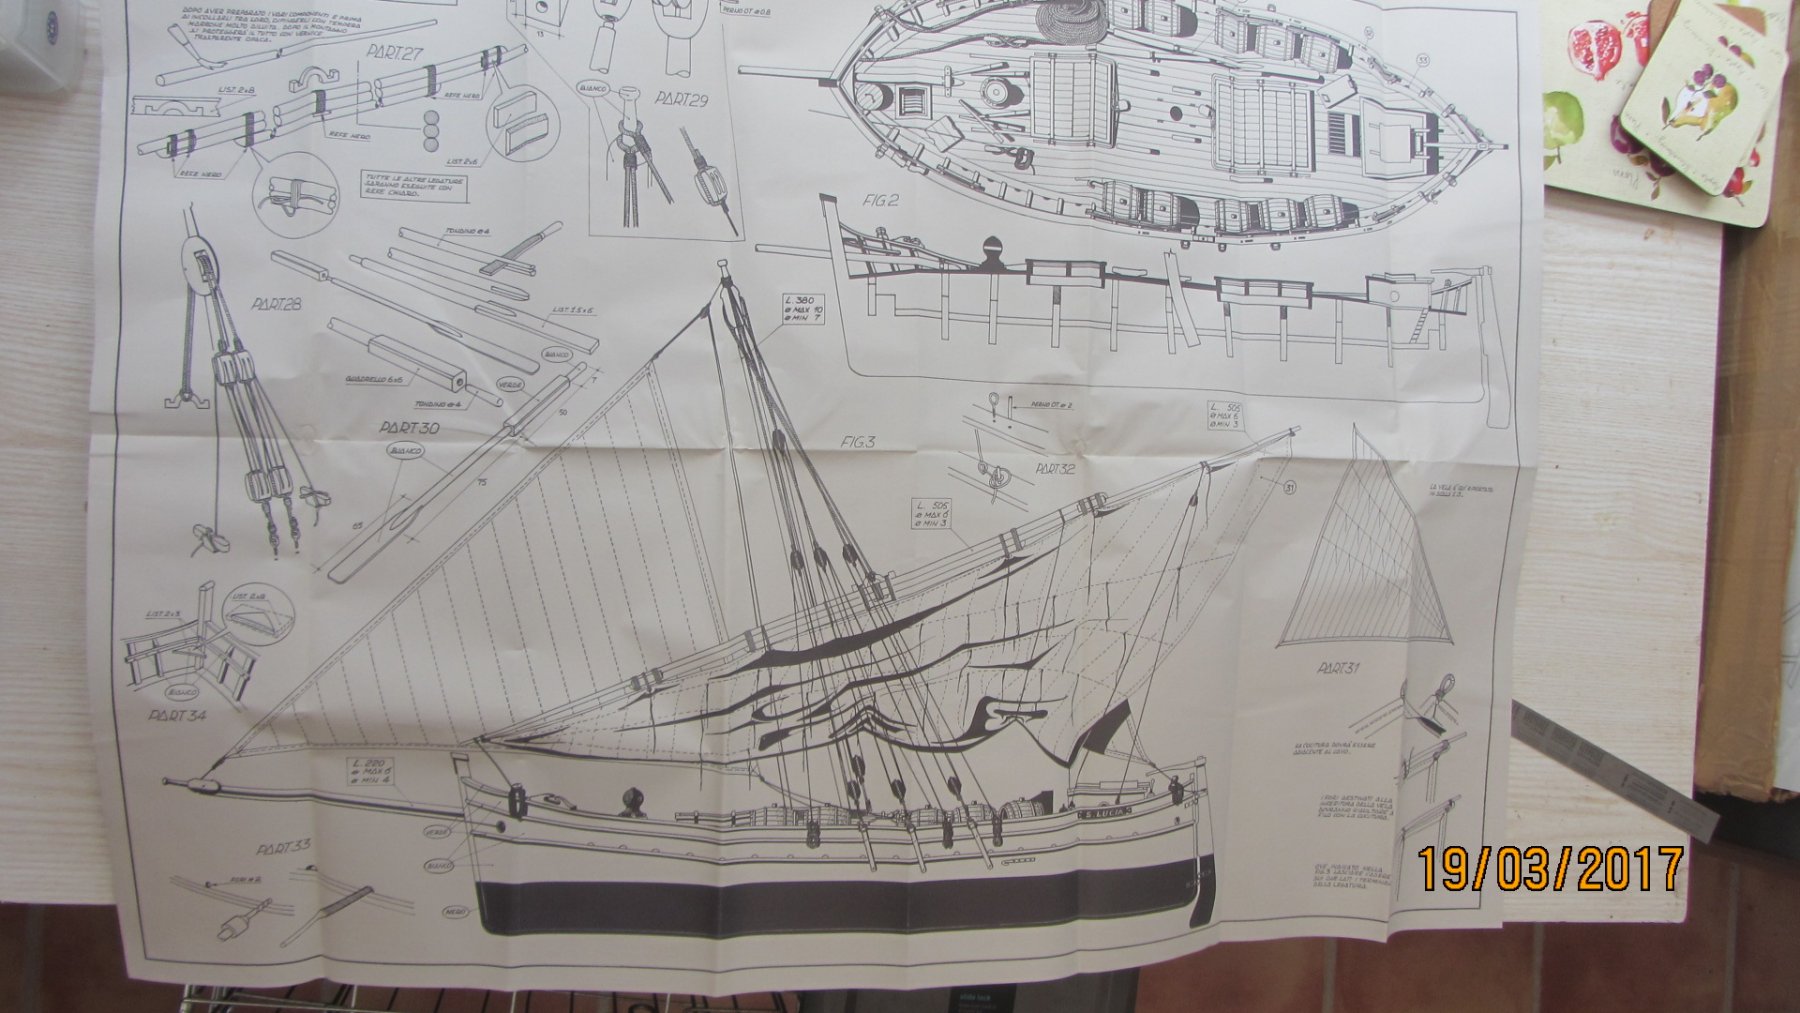
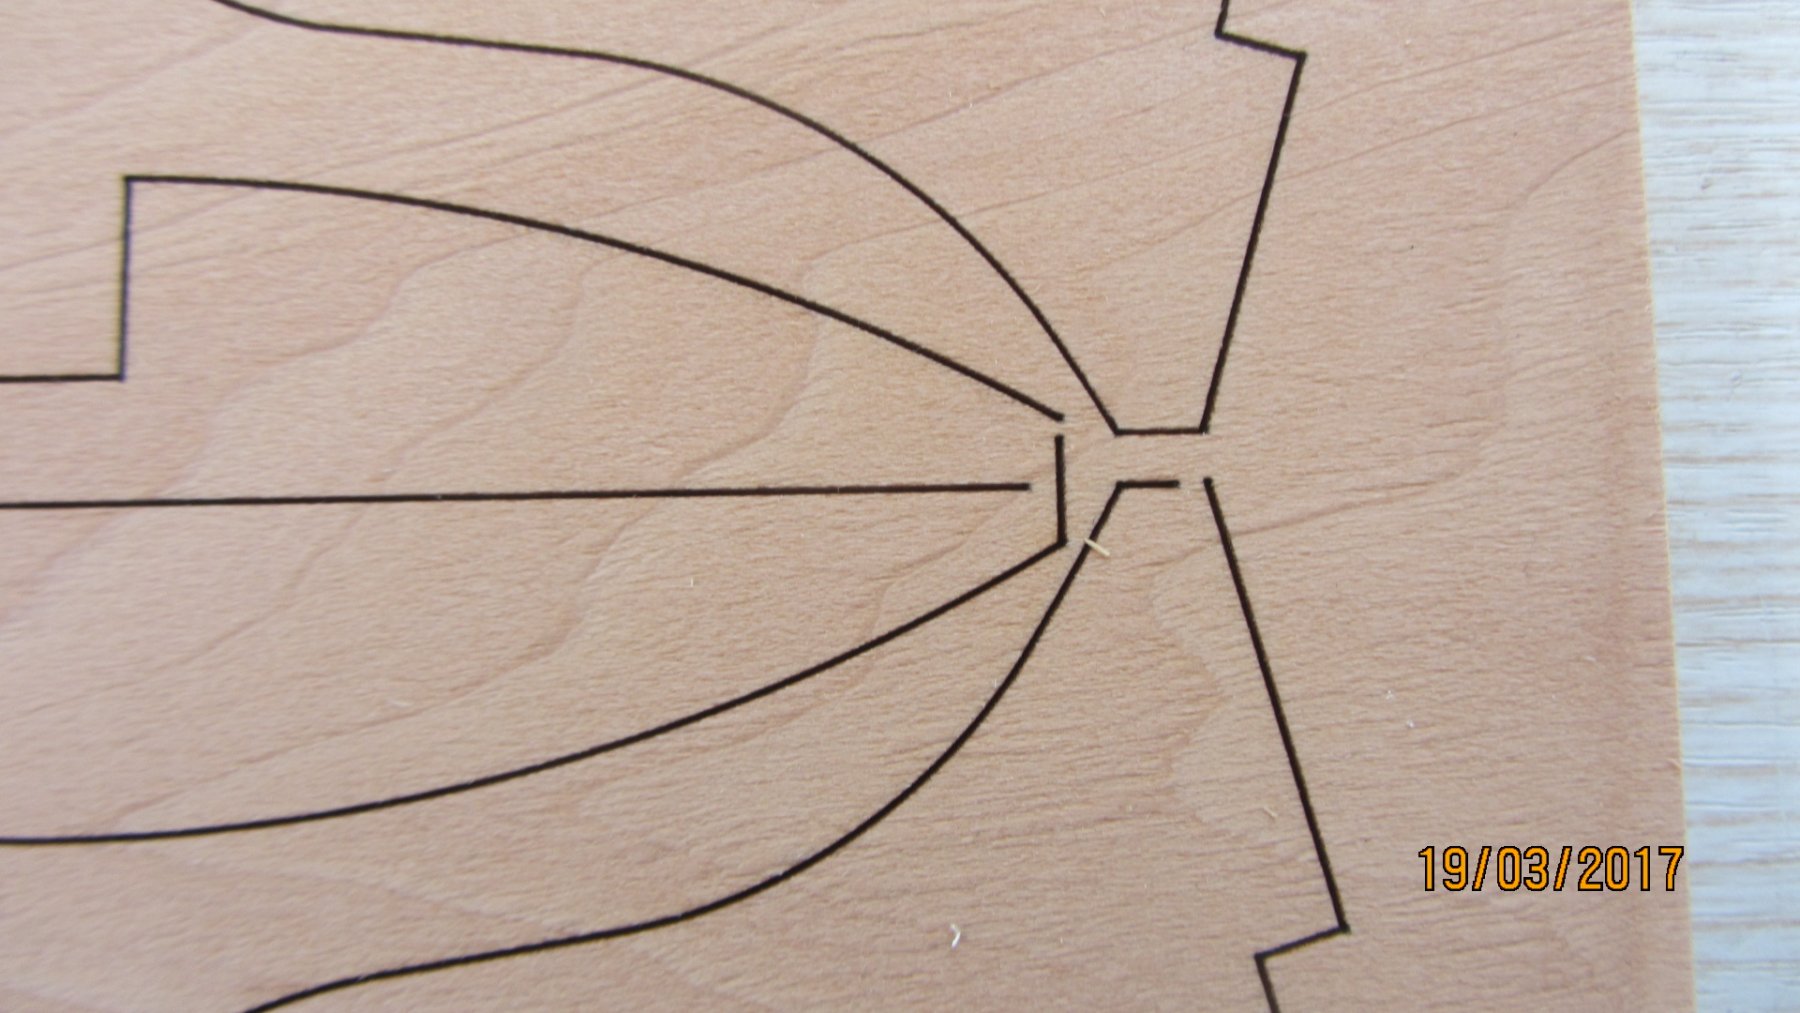
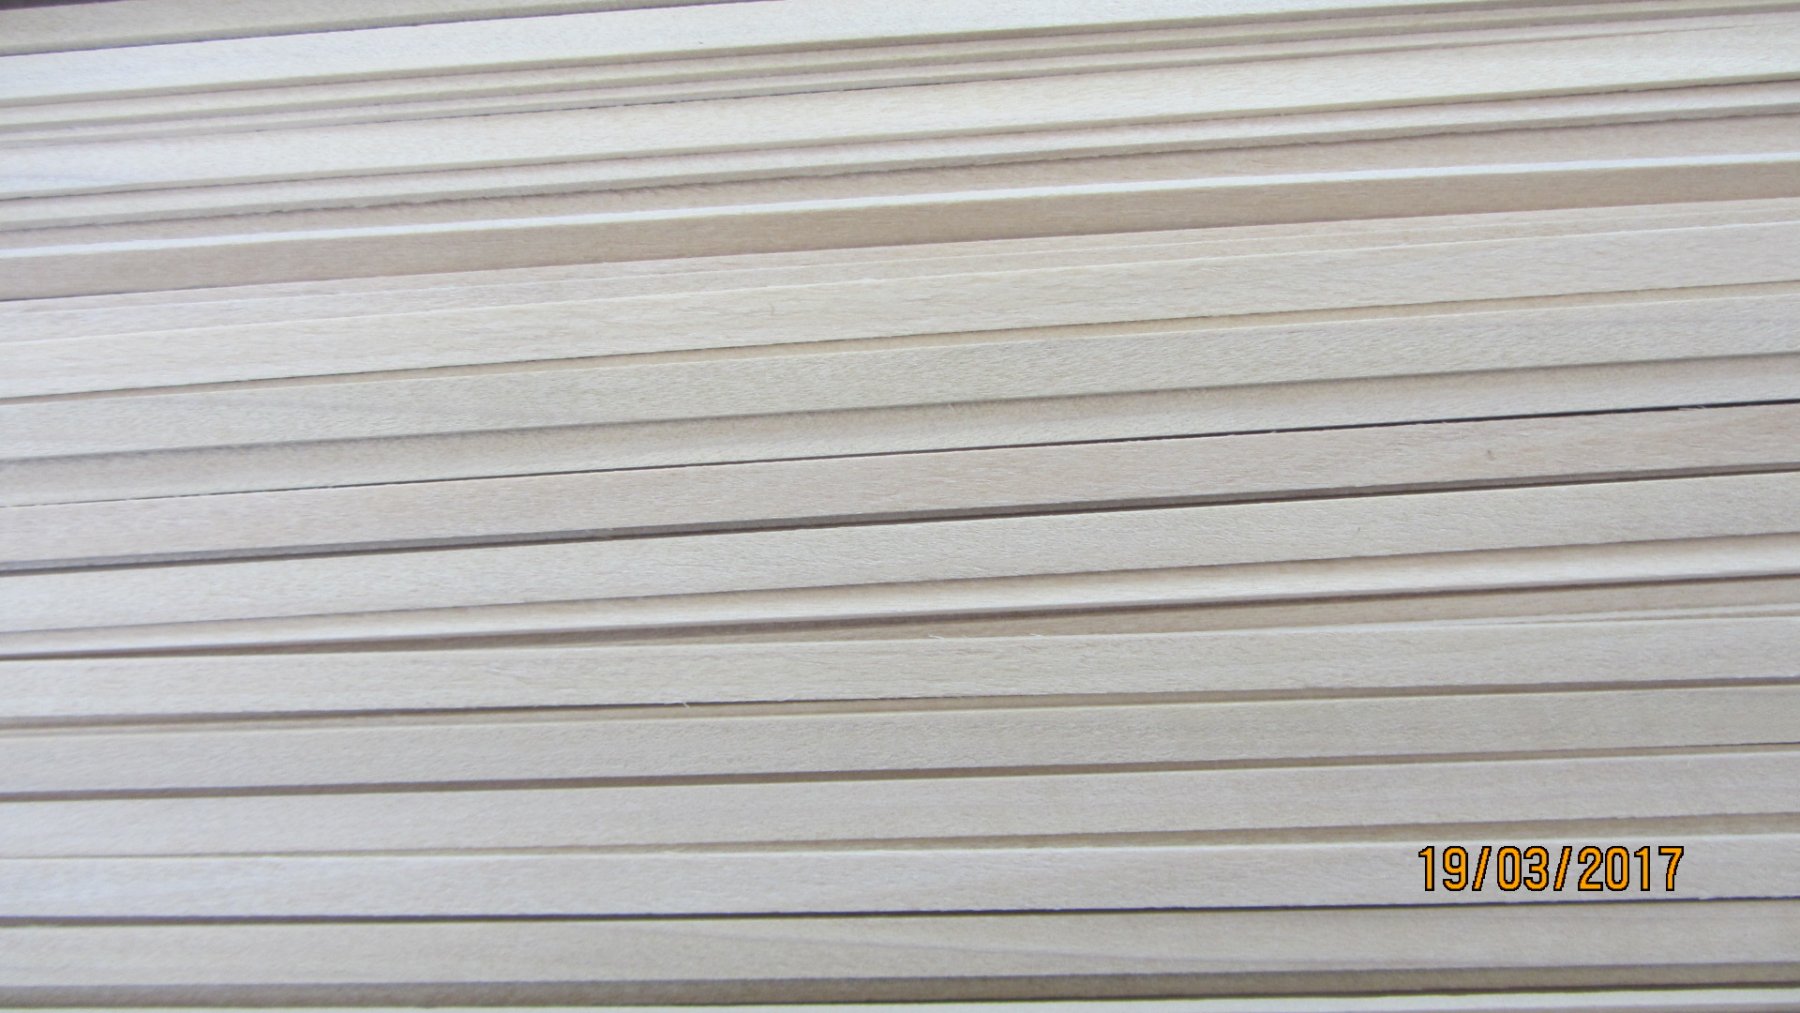
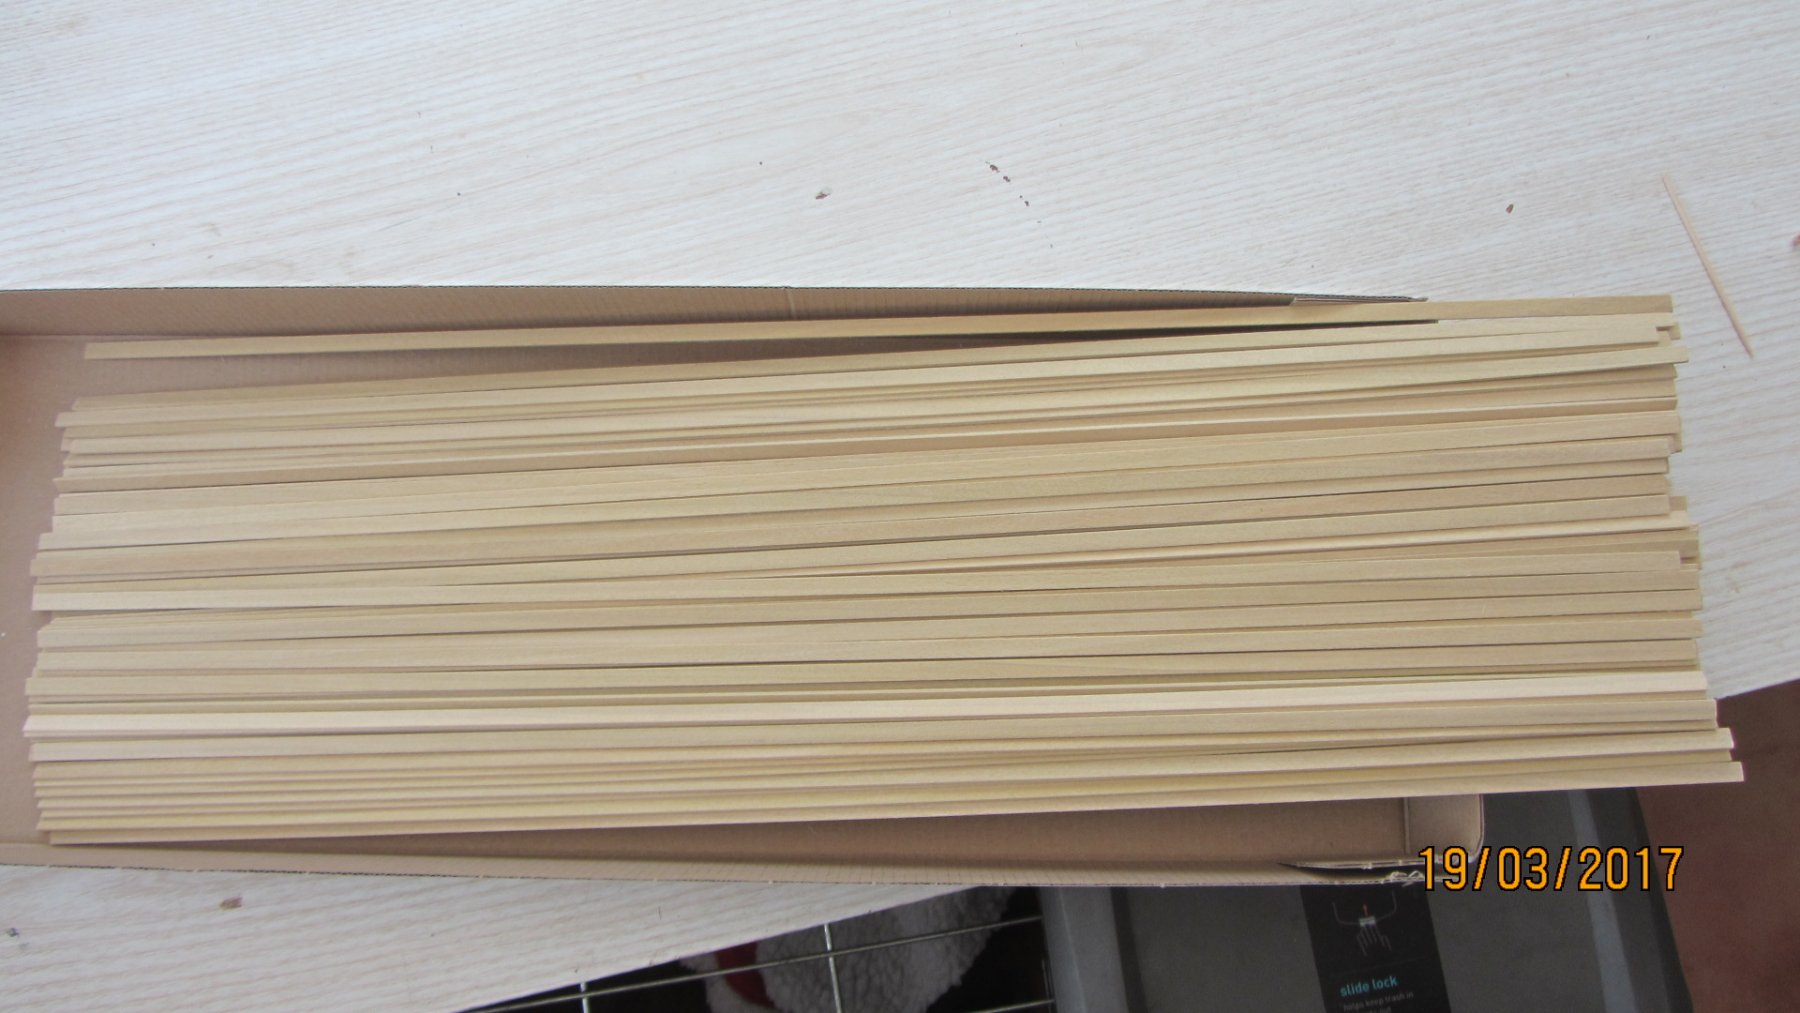
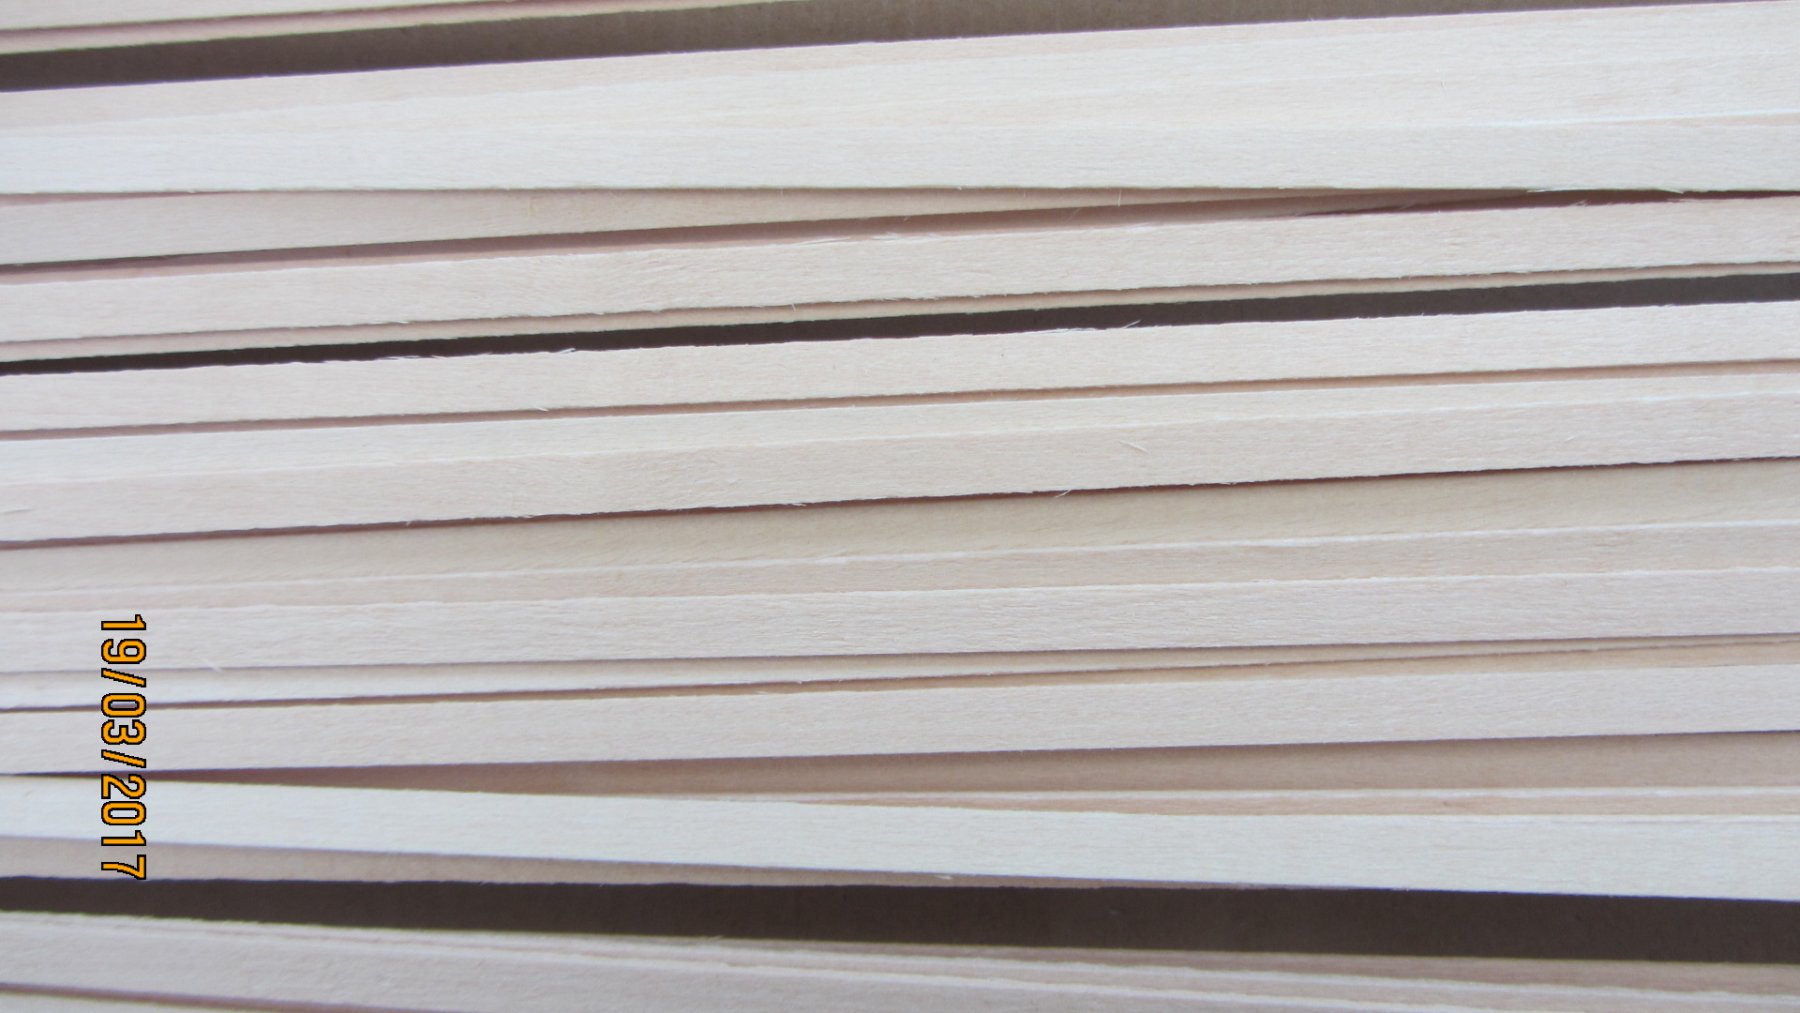
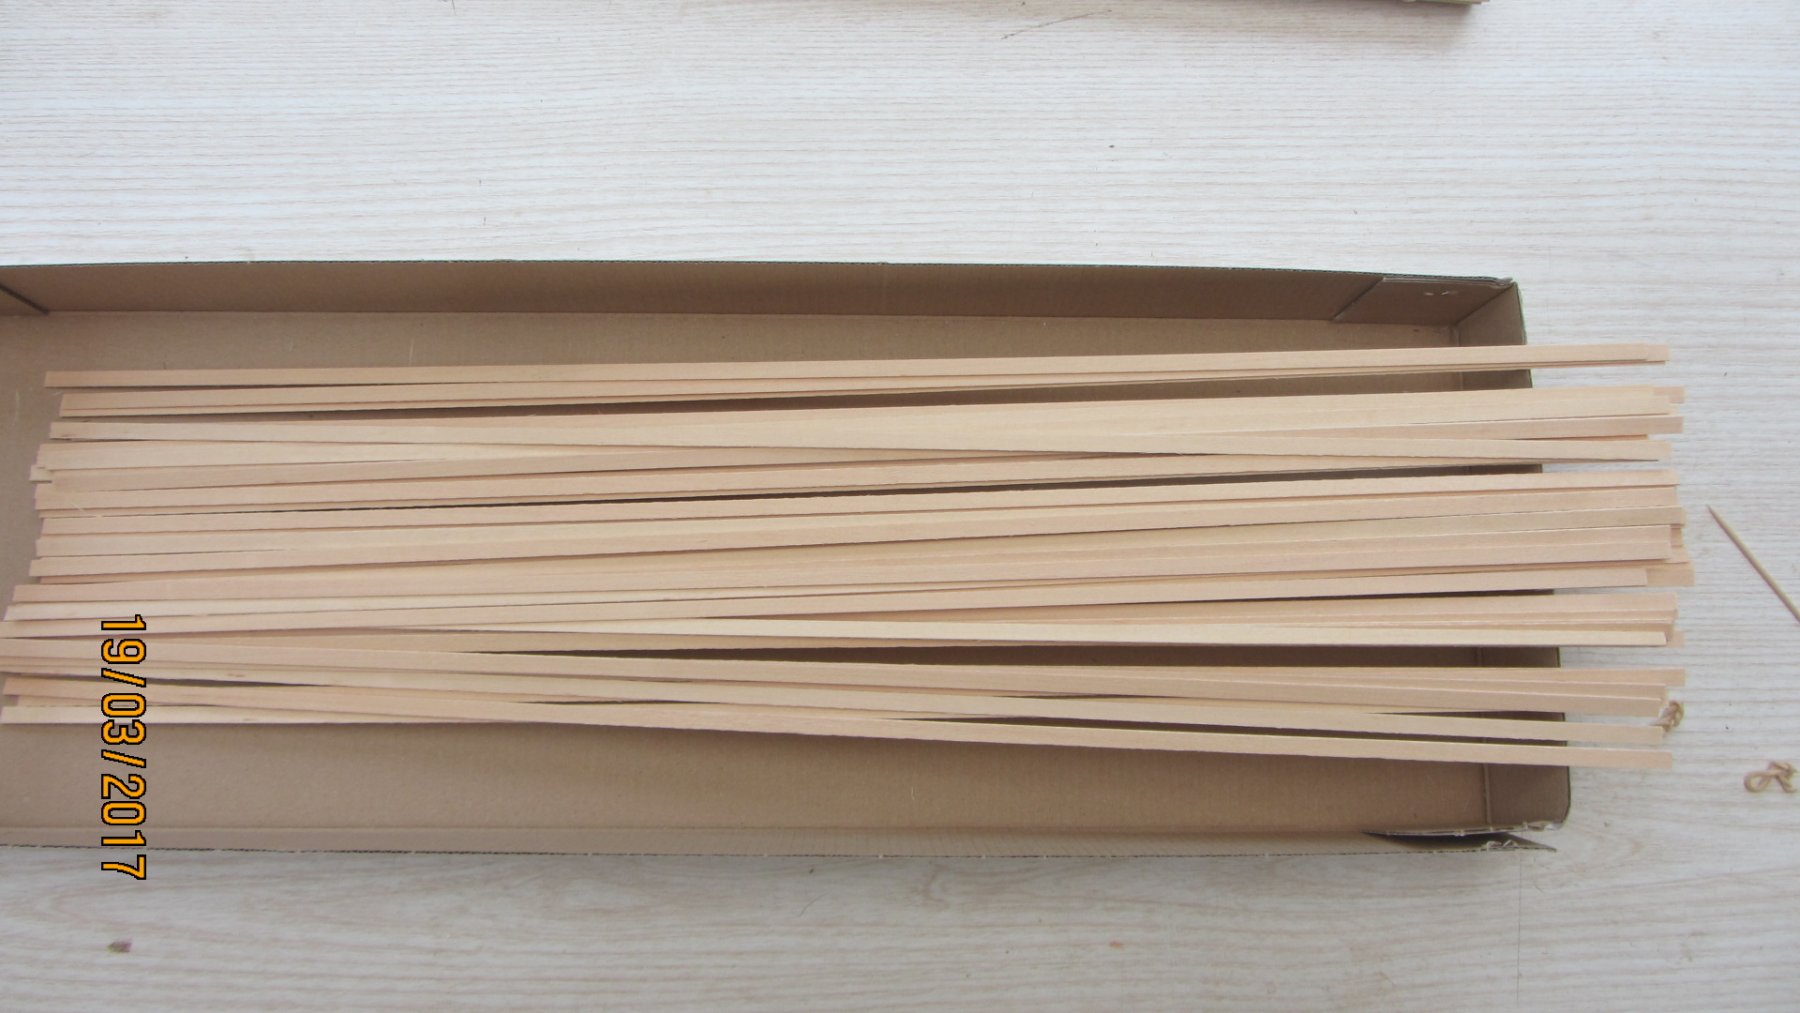
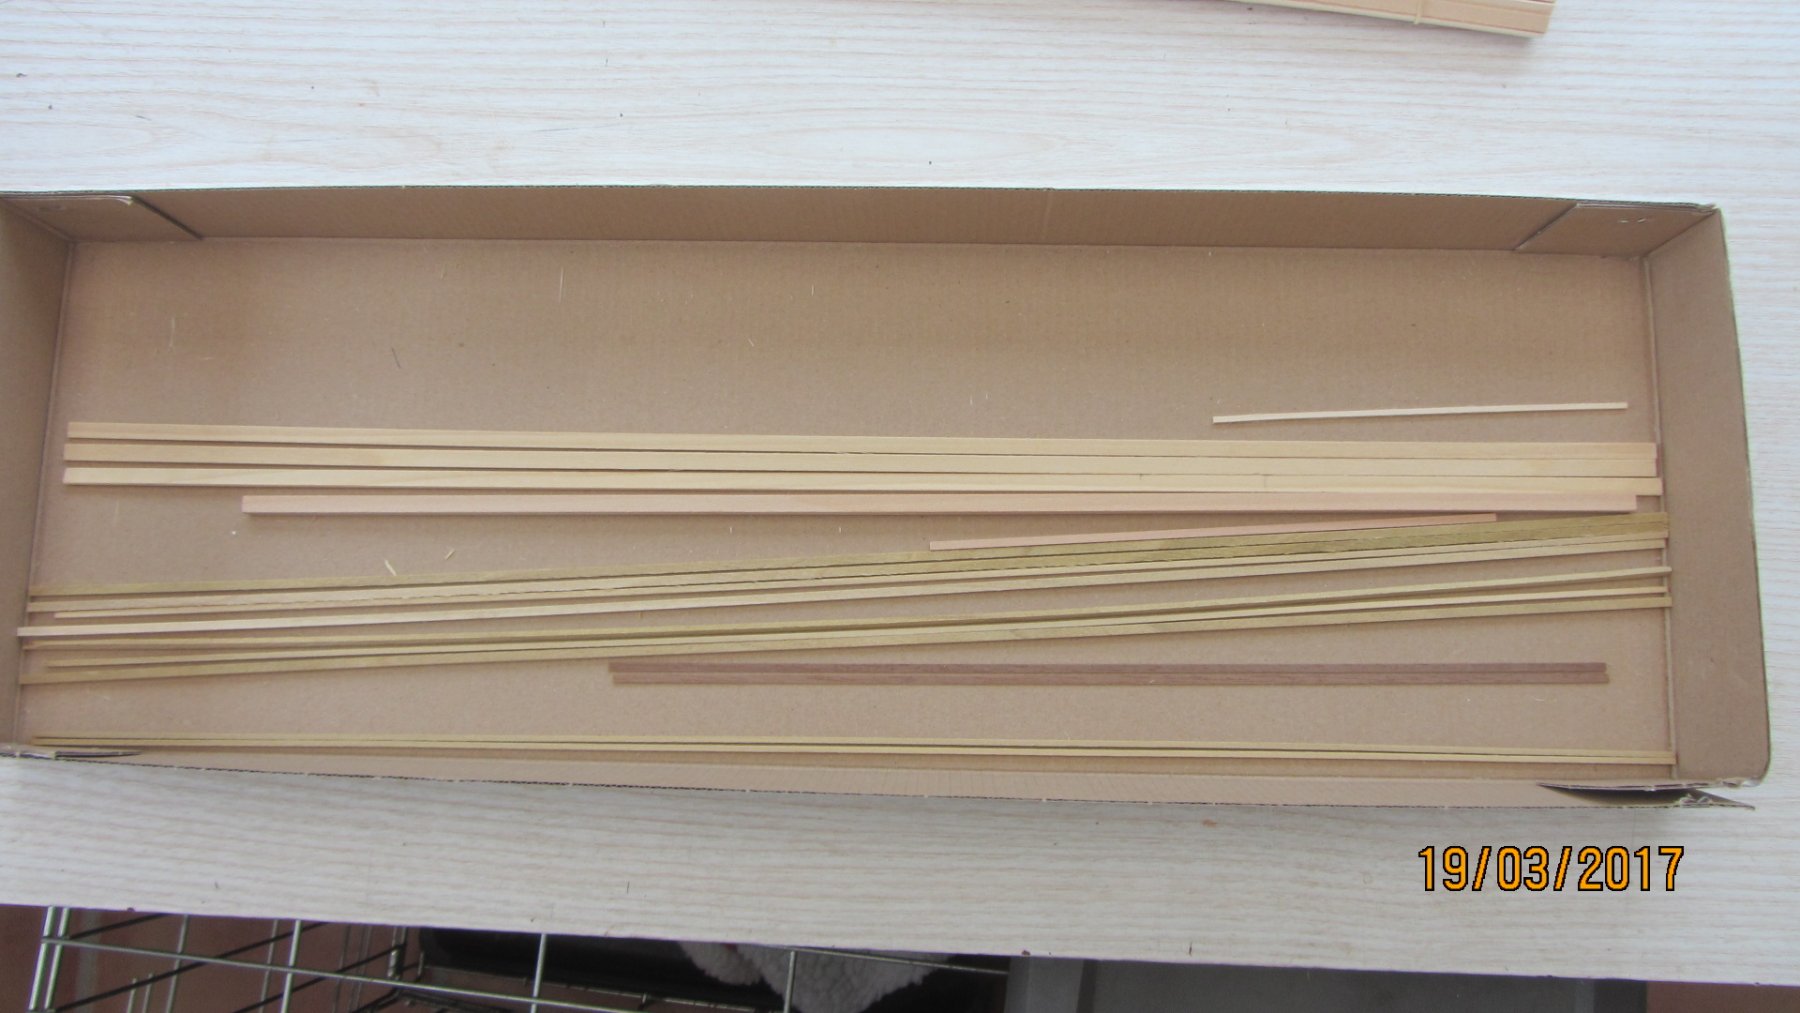
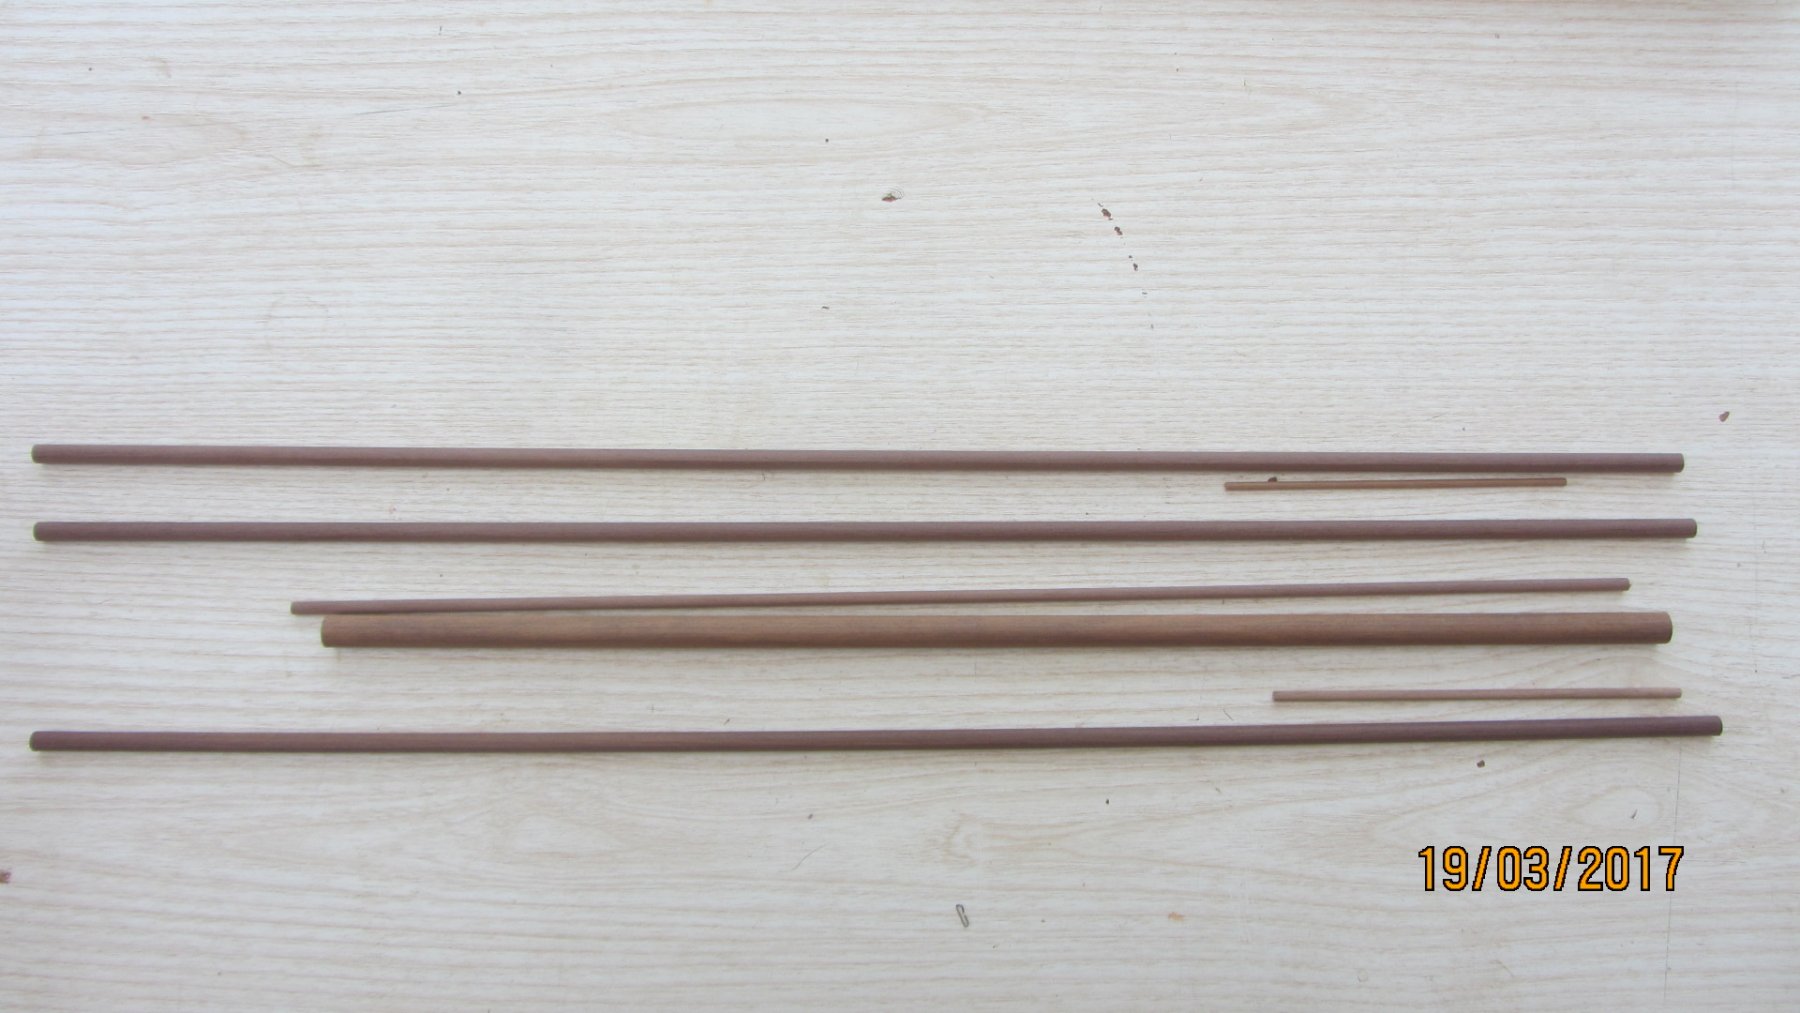
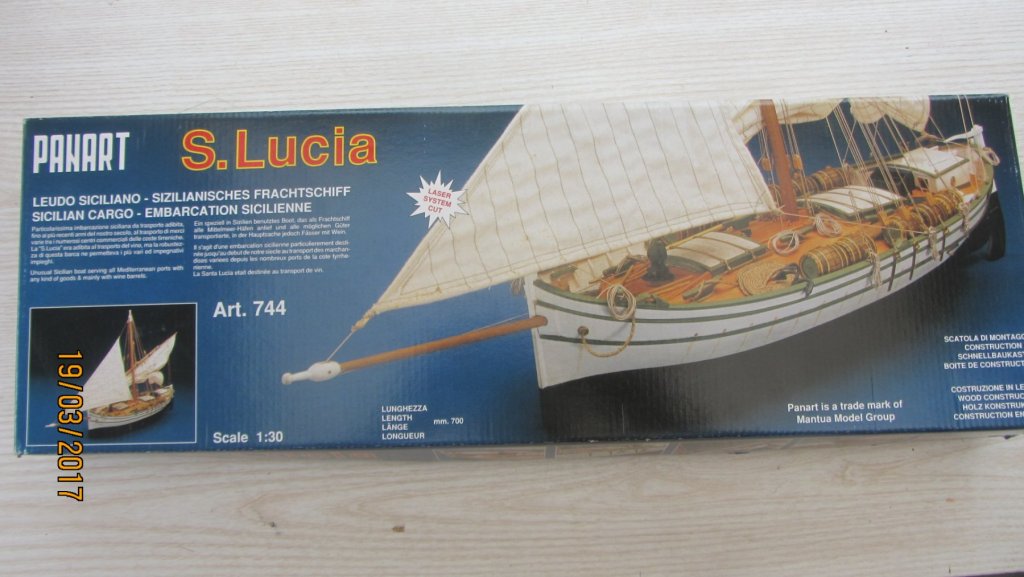
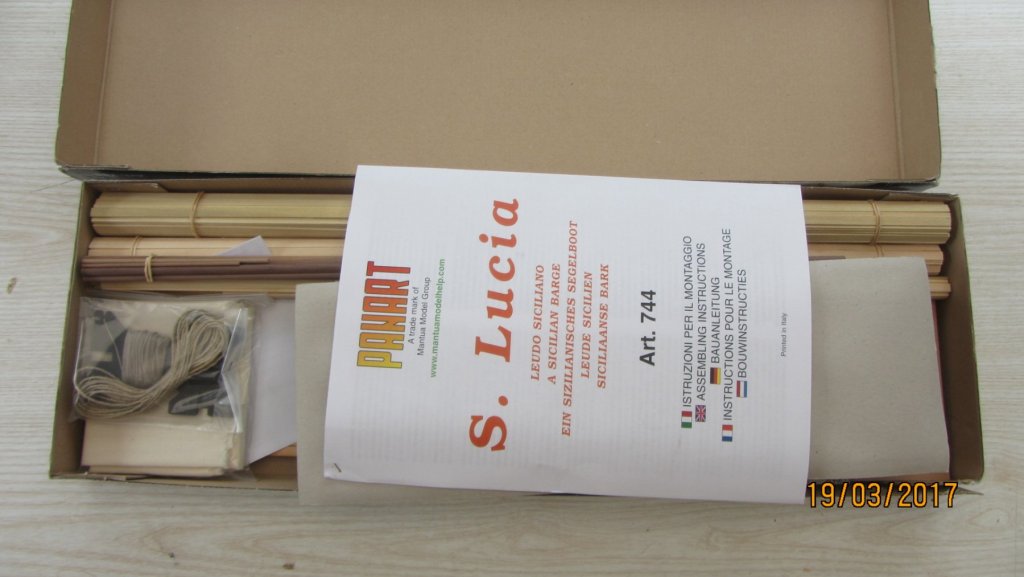
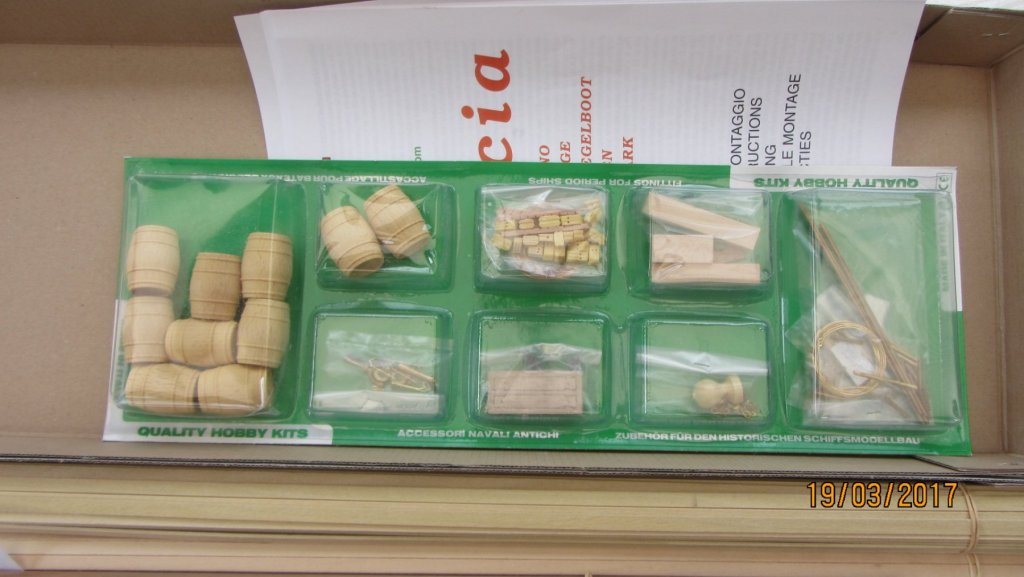
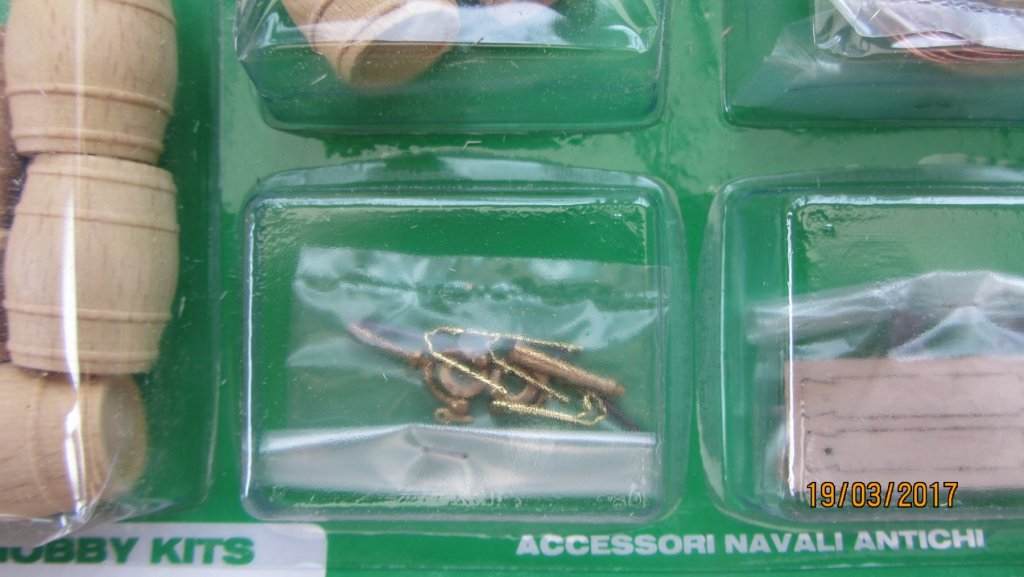
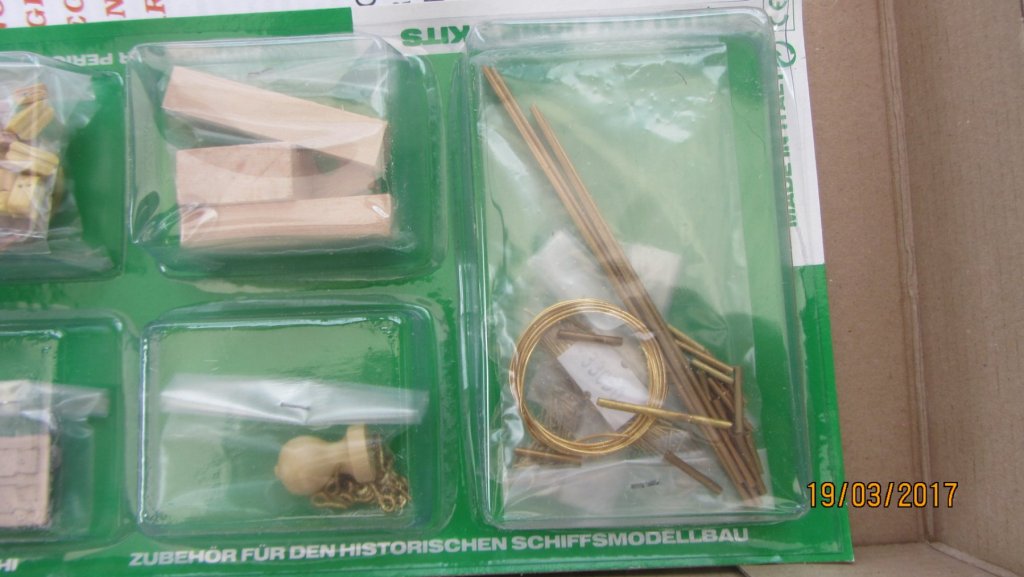
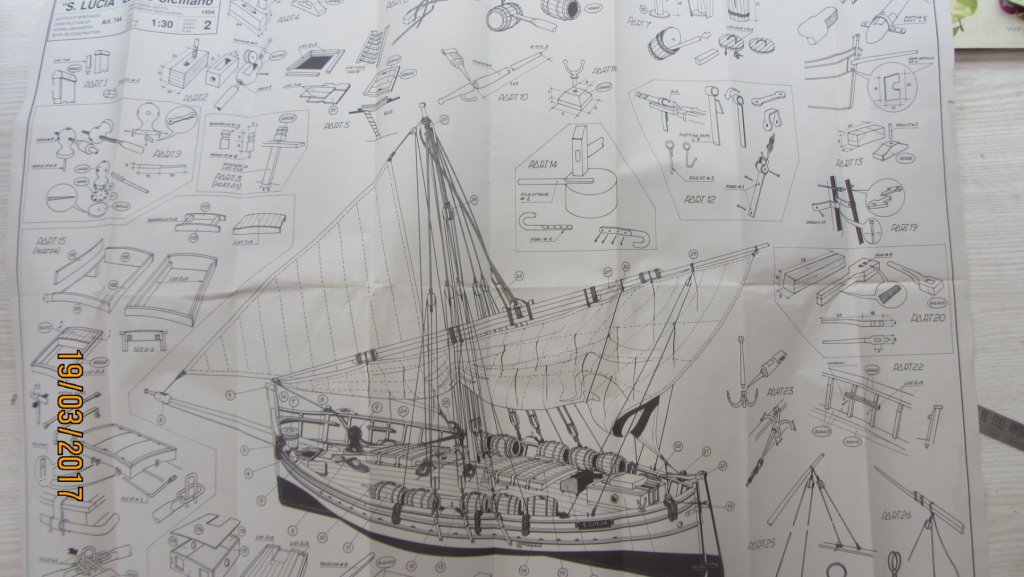
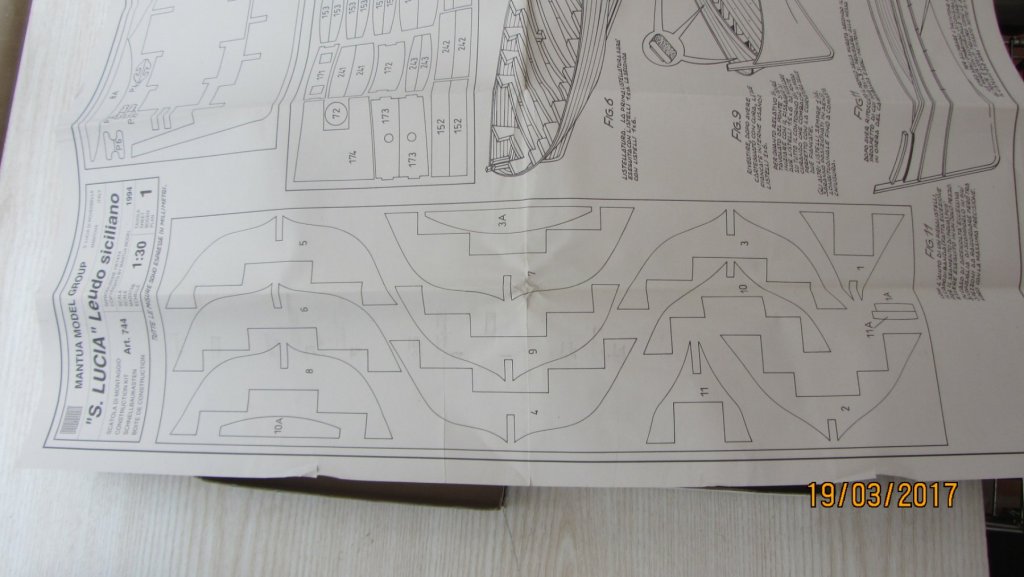
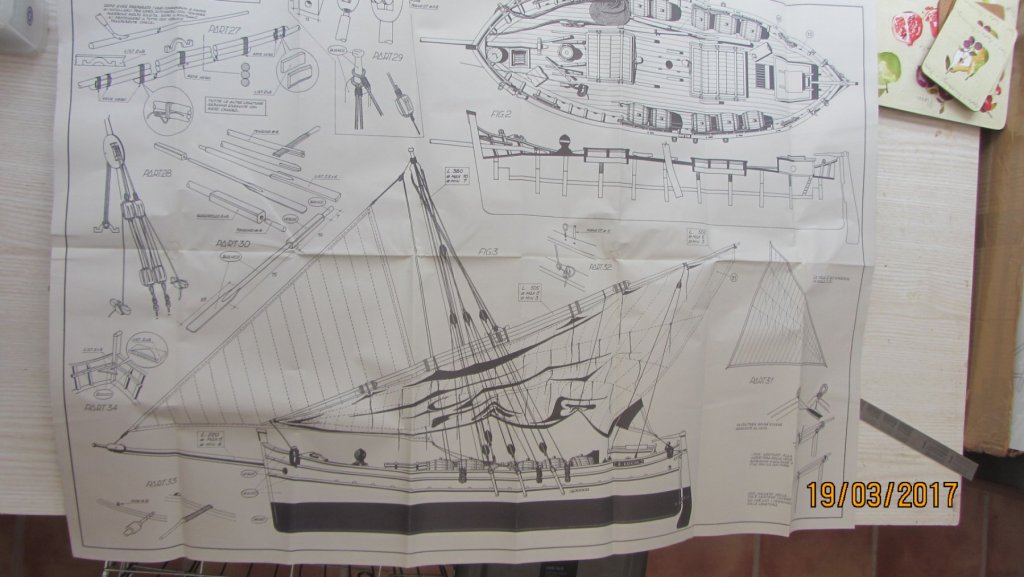
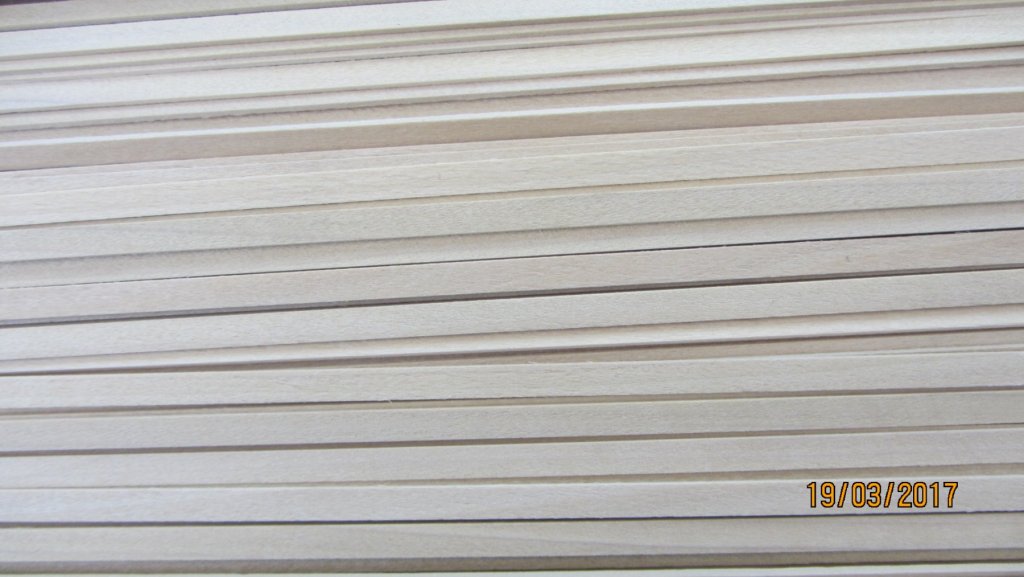
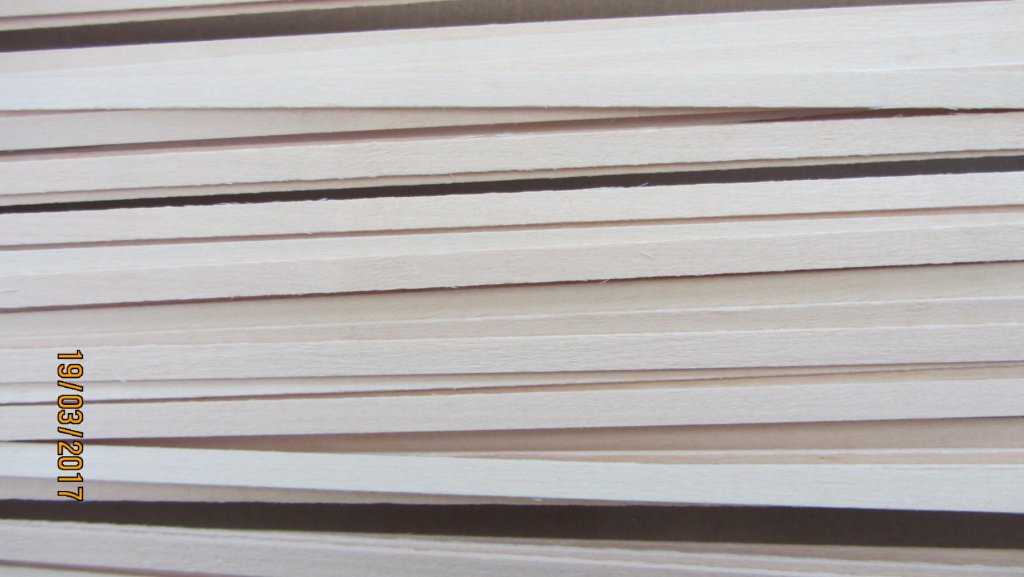
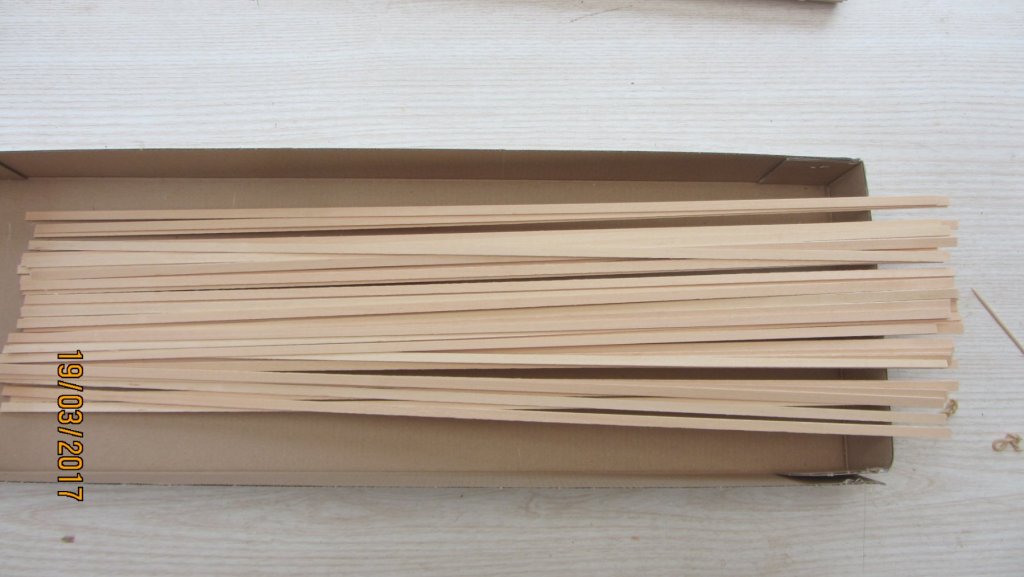
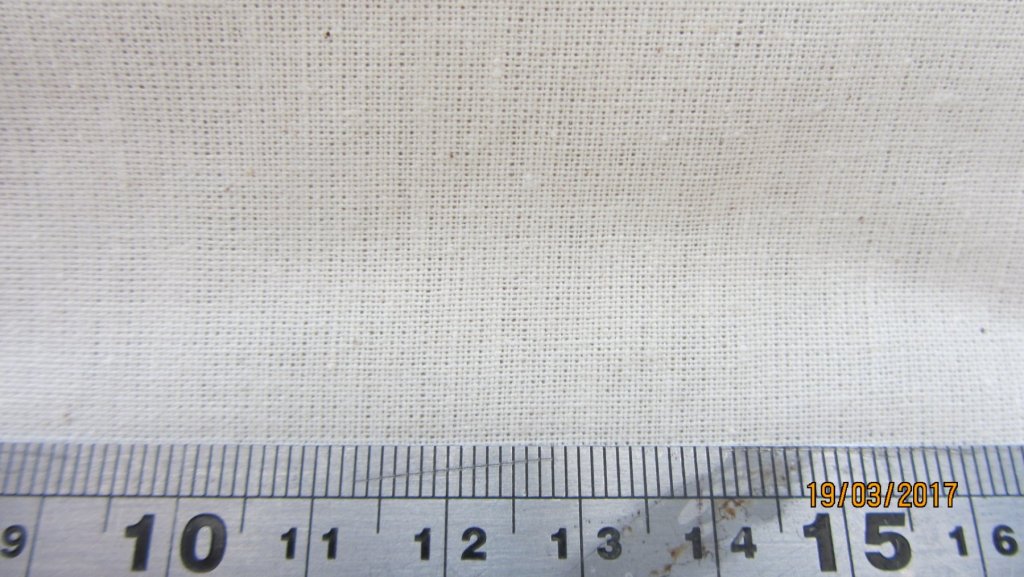
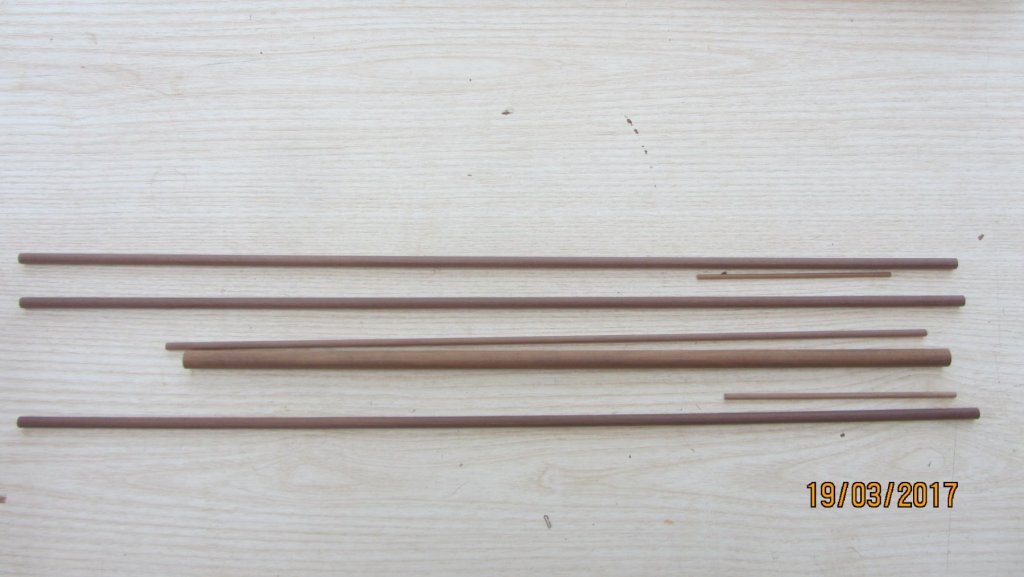
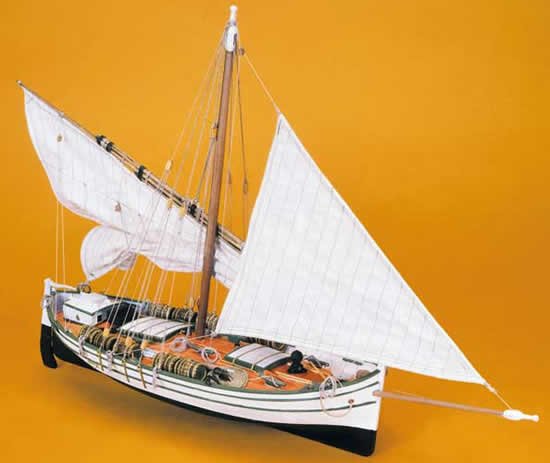
I. Having opened the kit I am very pleased with my choice and the contents of the box. The instructions are in many languages and are easy to read. English is enclosed in a Grey box. As below. The Barrels are OK BUT I will make my own. Blocks look Ok as do all the other bits. Will take more photos when I've opened the packets. Two sheets of drawings and assembles. One being Double sided. Nice to have the Parts drawn full size. The plywood is Pear faced and the laser work is Excellent. The first sheet is very thin with no cracks But with some laser burning. Again faced Plywood.. A close up of the laser cutting... Very clean. The wood is of good quality and I will be using this.. Also this wood is of very good quality. A real close up of the planking strips. Odd bits of timber. Sail cloth. Needless to say I will replace this. Dowel. Found a few interesting links on the style of boat. http://www.leudoleonidas.com/leonidas_EN/lastoria/la_storia.htm Have checked the kit contents against the Parts list in the back on the instruction booklet. All there plus a few planking strips extra. Will start on construction very soon. Thanks for looking in. Regards Antony.


- 32 replies
-
- 5
-
-
- santa lucia
- panart
- (and 1 more)
-
Hi. This will be my next build. I purchased the kit from https://www.rocrimodellismo.com/en/static-display-wooden-model-kits/1151-santa-lucia-sicilian-cargo-boat-wooden-assembly-kits-model-boats-and-sailing-vessel-mantua-model-panart-sergal.html The reasons for this kit are the pleasing lines and simple construction. Found some good information on the ship. https://www.shipmodeling.ru/books/leudo Language selection is in the top right corner. Will post some pictures of the kit's contents tomorrow. At first glance the quality looks very good. Regards Antony.
- 32 replies
-
- 8
-
-
- santa lucia
- panart
- (and 1 more)
-
HI George. Welcome to MSW. All the Enterprises that one large collection. A bunch good tips... Keep your blades very sharp. Read other members builds . Dry fit first. Ask for advice. Take your time. Enjoy. All the best from Devon. Regards Antony.
-
Hi Richard. Nice to have you aboard. Everyone who joins brings new methods and skill's into this forum 😊 Enjoy your voyage. Regards Antony.
-
Hi Chuck. Very nice toutorl on component casting. I've been casting parts for some time now and this toutorl is brilliant because it deals with very small and thin parts. Can you please add the relevant parts to the Articles Database to make it easer for people to find. The only thing I would add is to use the same box to support the mould while making your castings. Lego in your case. Thumbs-up on this one from me. Regards Antony.
-
Hi E&T. A long awaited update. And it was worth the wait. Wonderful work and skill's throughout. Regards Antony.
- 346 replies
-
- 2
-
-
- terror
- polar exploration
- (and 2 more)
-
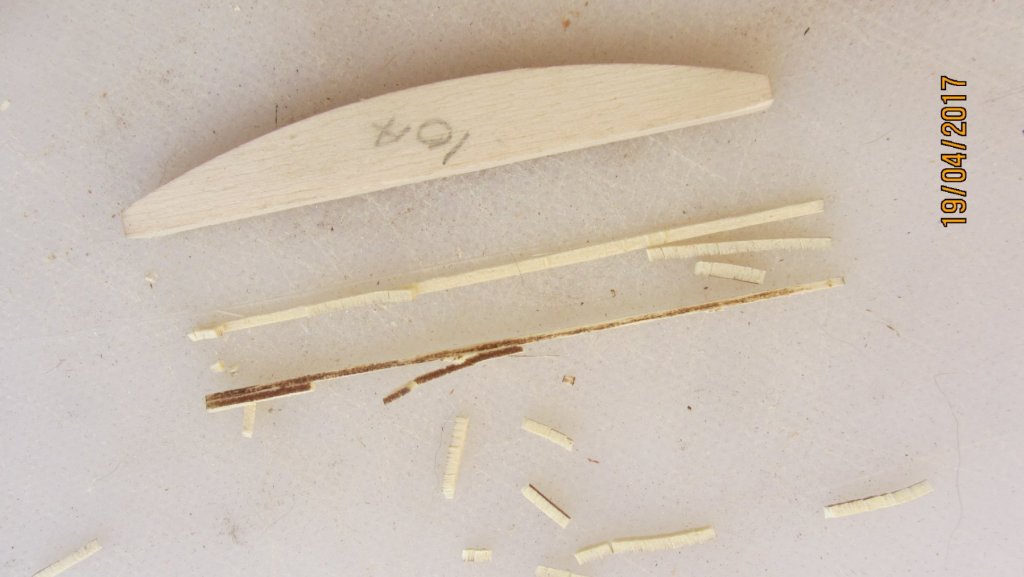
Hi The answer to the question is yes. 3 kits I have built so far and All had bamboo strip wood. If you look closely you can see the dark area of the knuckles.I replaced mine with good quality wood I milled myself. If you use it...make sure all the tools for cutting are very sharp. I like the look of bamboo as a finish but it's not easy to work with. BTW nice build. Regards Antony.
- 305 replies
-
- 4
-
-
- deagostini
- vasa
- (and 1 more)
-
Hi. Welcome to MSW. Nice intro.. Regards Antony.