Trussben
-
Posts
2,008 -
Joined
-
Last visited
Content Type
Profiles
Forums
Gallery
Events
Everything posted by Trussben
-
Welcome Melissa, There are a few of us model builders in the capital region, enjoy your new hobby. Ben
-
 I look forward to watching your progress on the Echo, I started my dark side career out on exactly the same subject and it stood me in great stead. Ben
 -
That’s a very nice way to do the rails.
- 1,784 replies
-
- 2
-

-
- winchelsea
- Syren Ship Model Company
- (and 1 more)
-
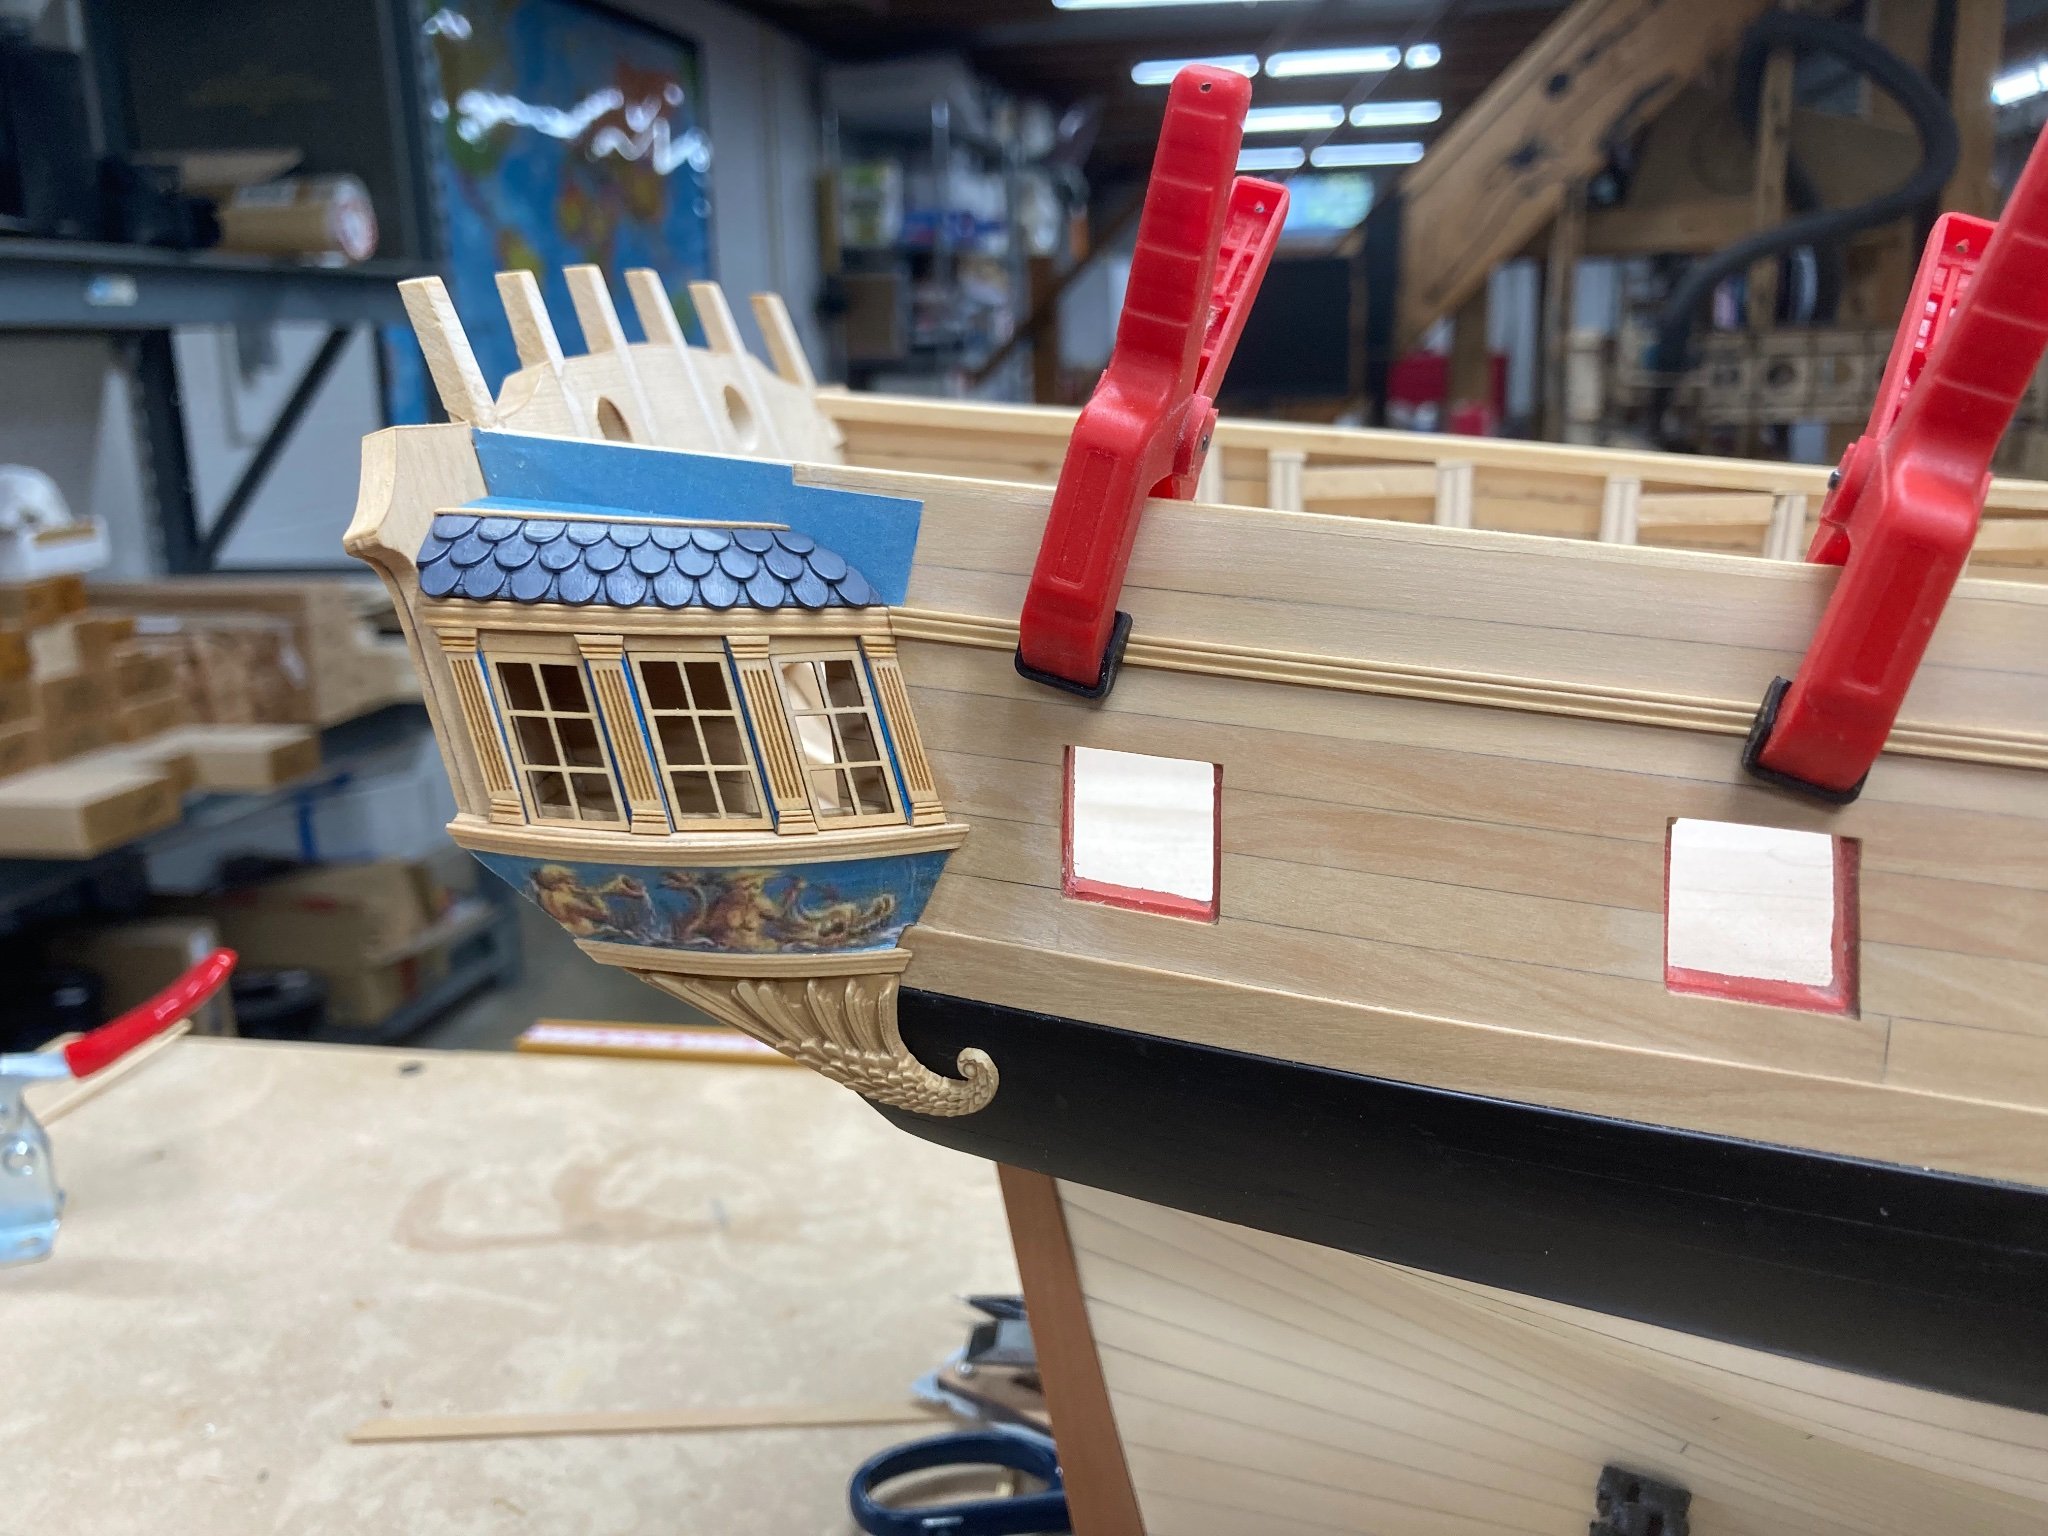
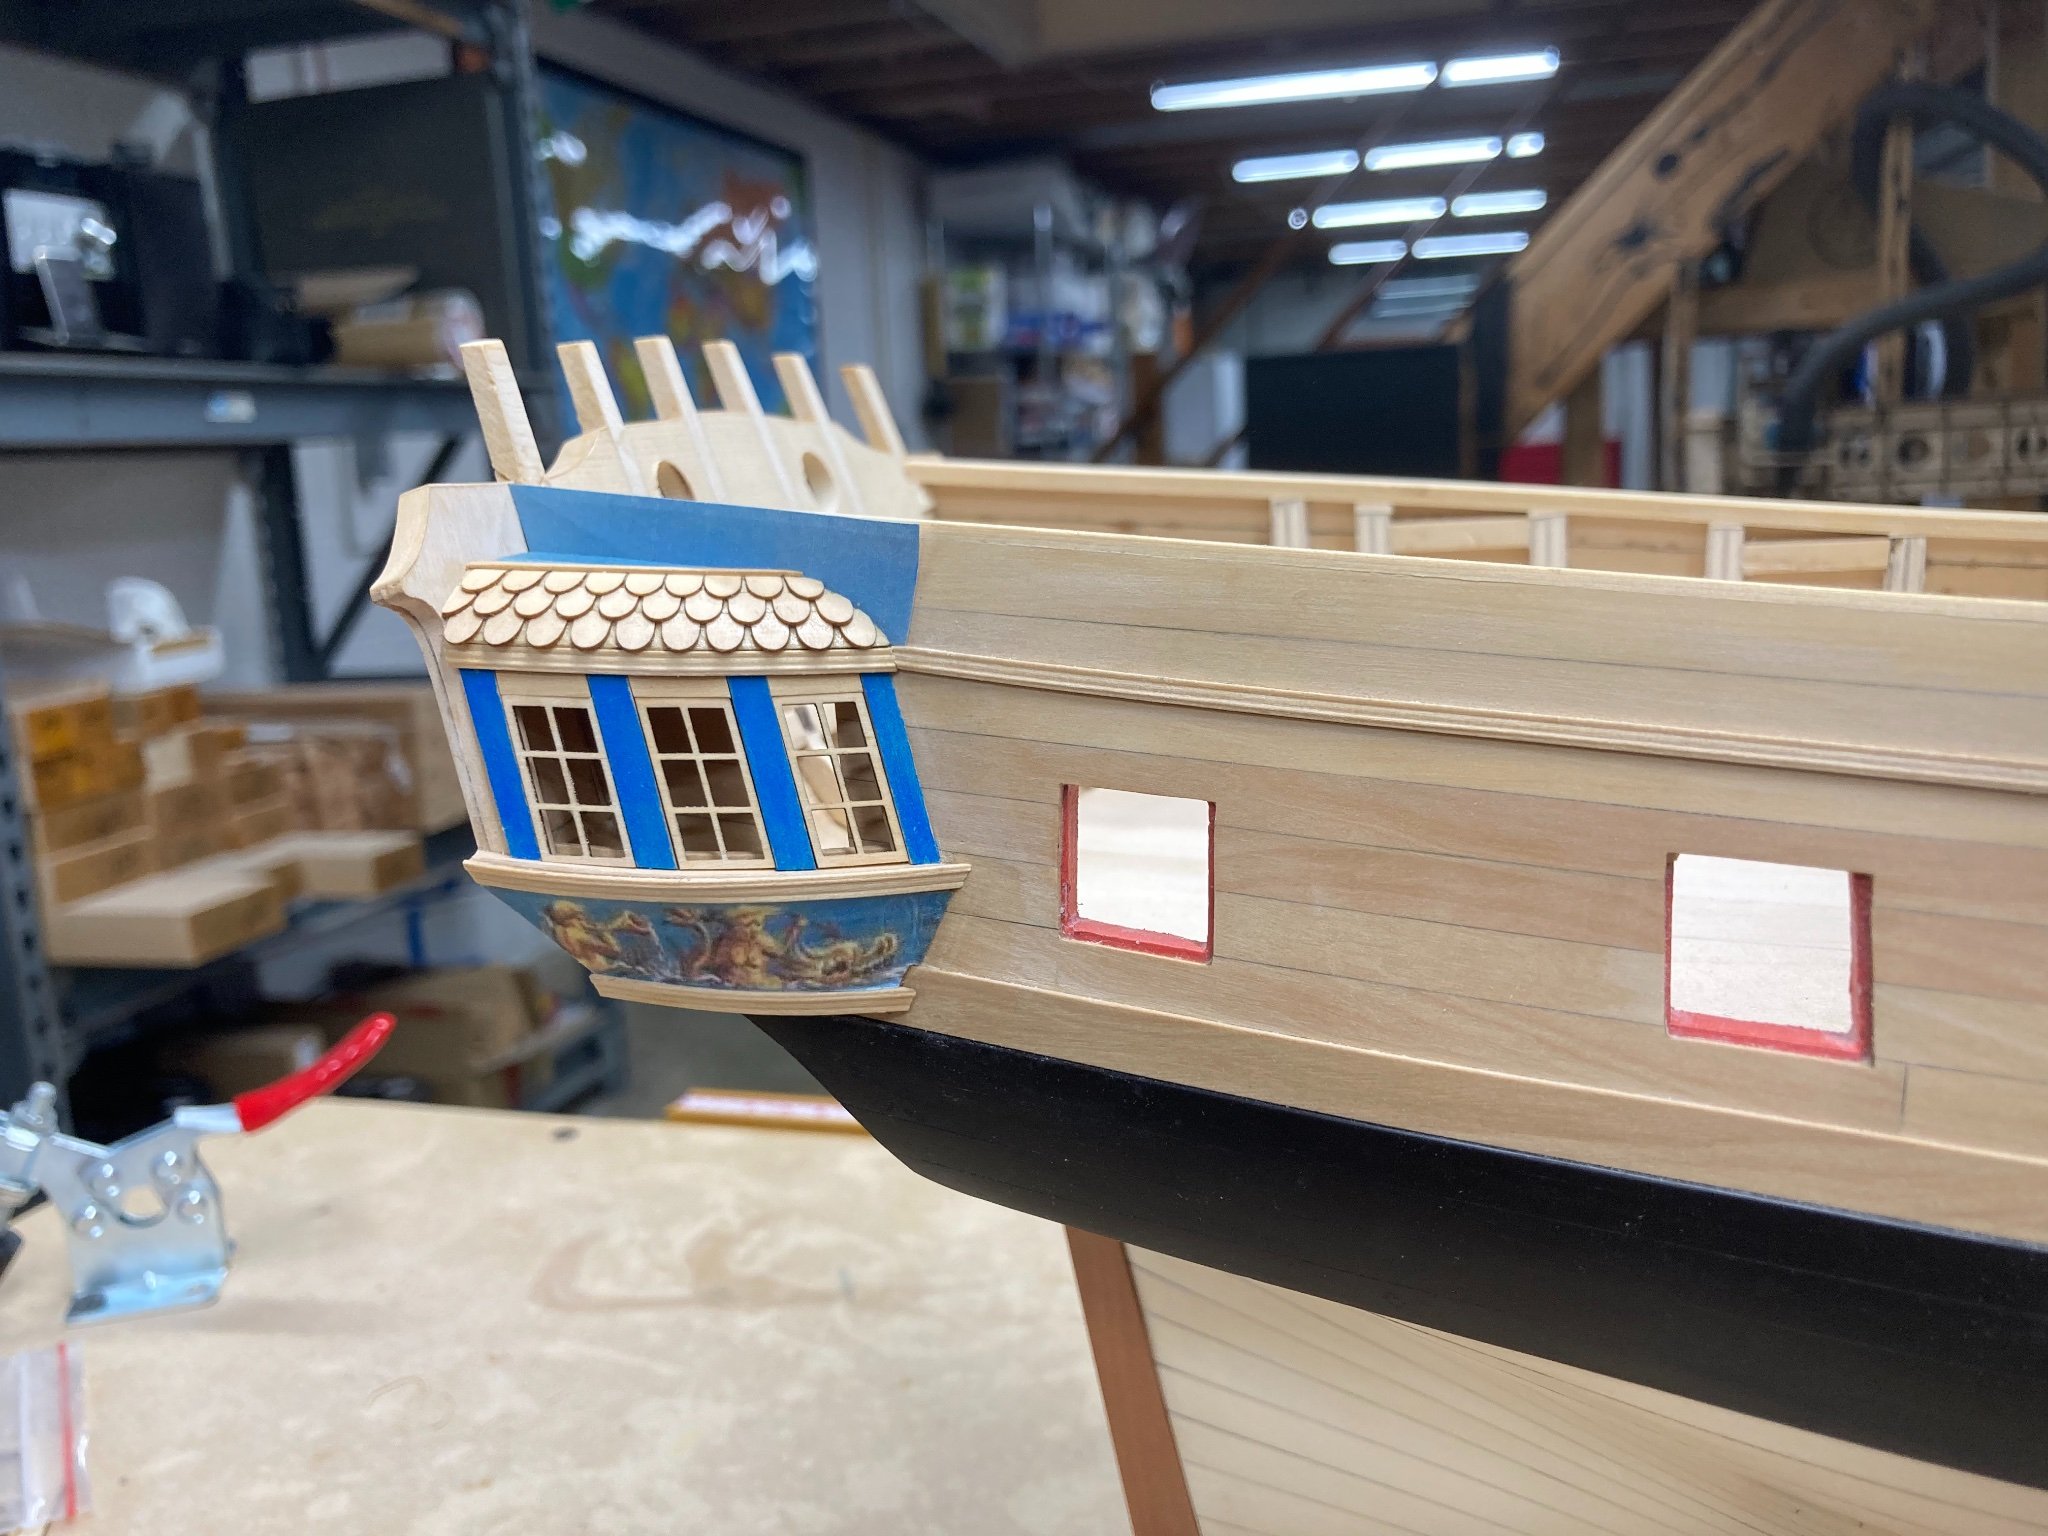
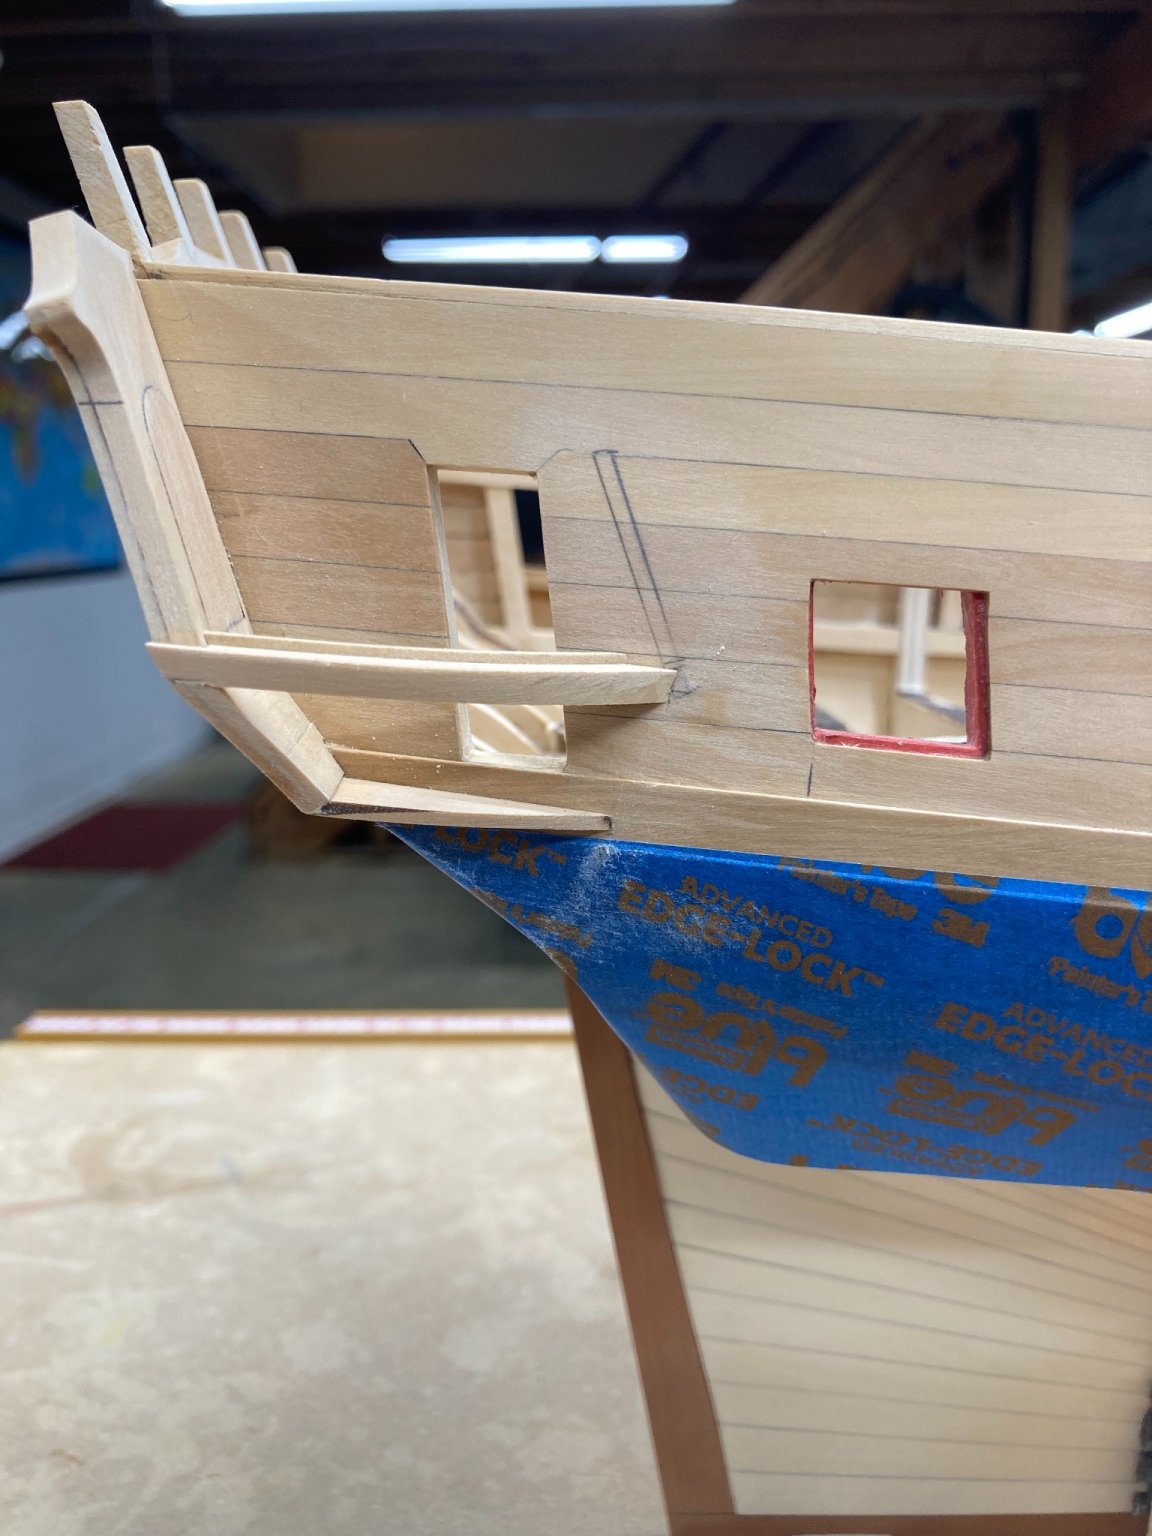
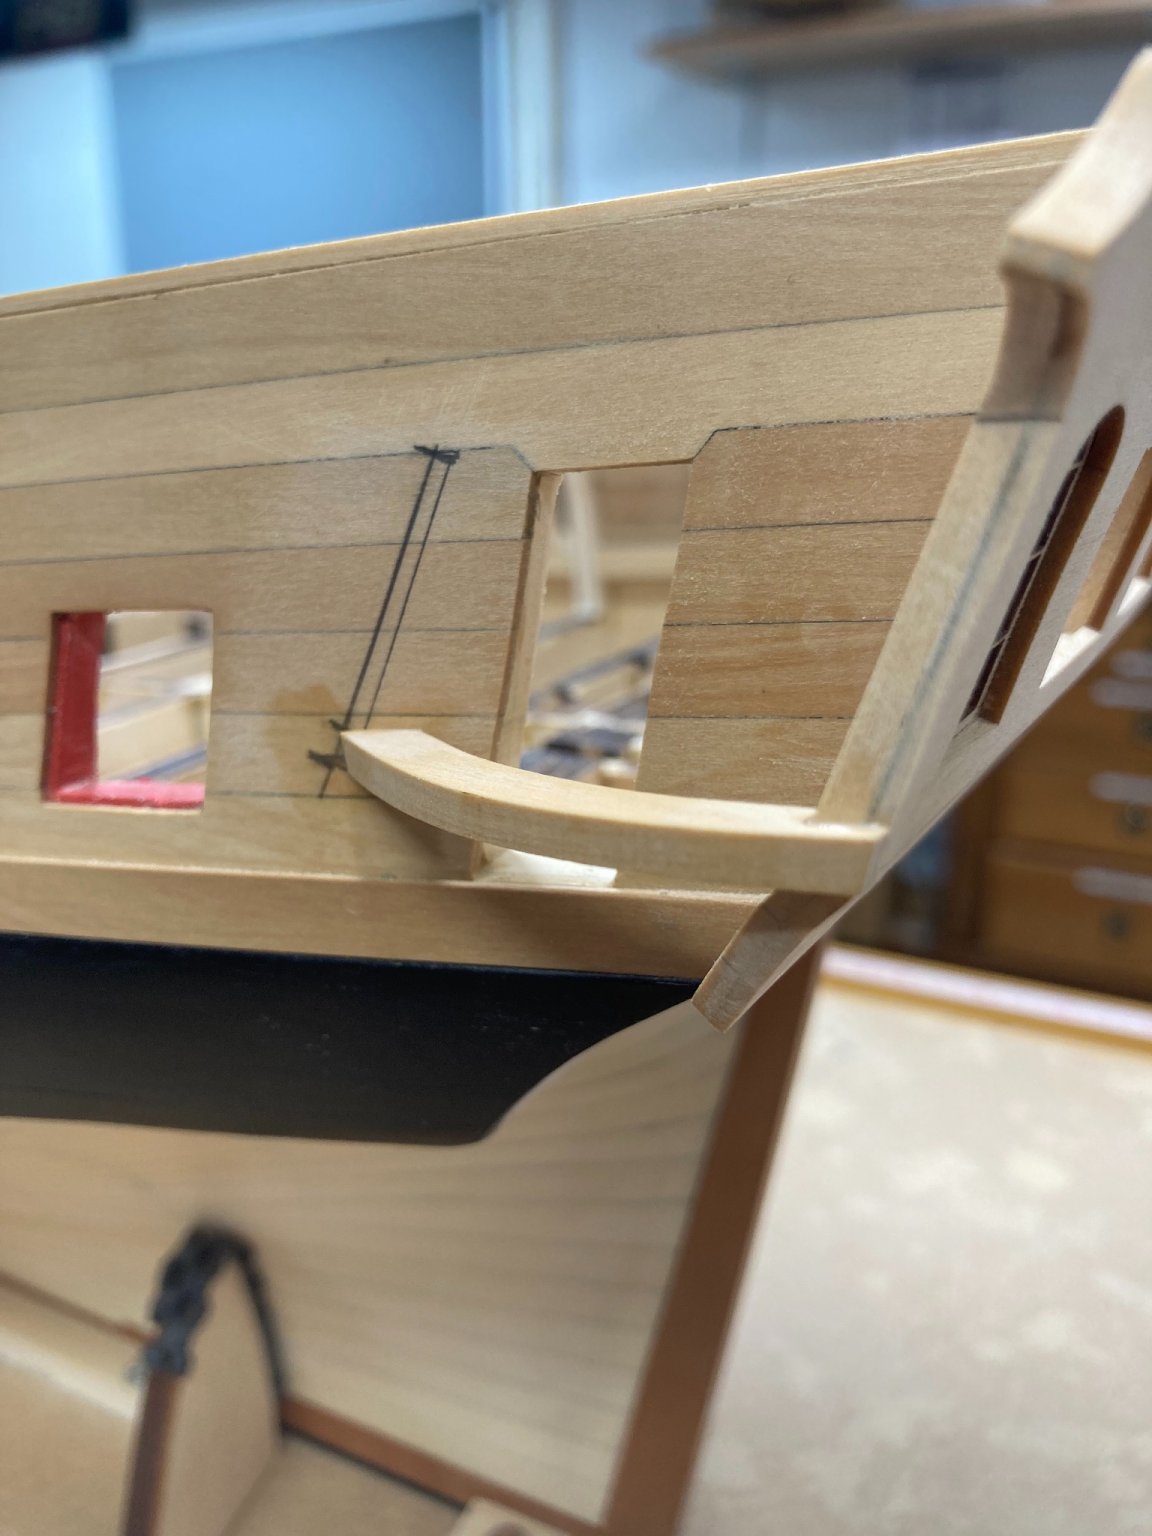
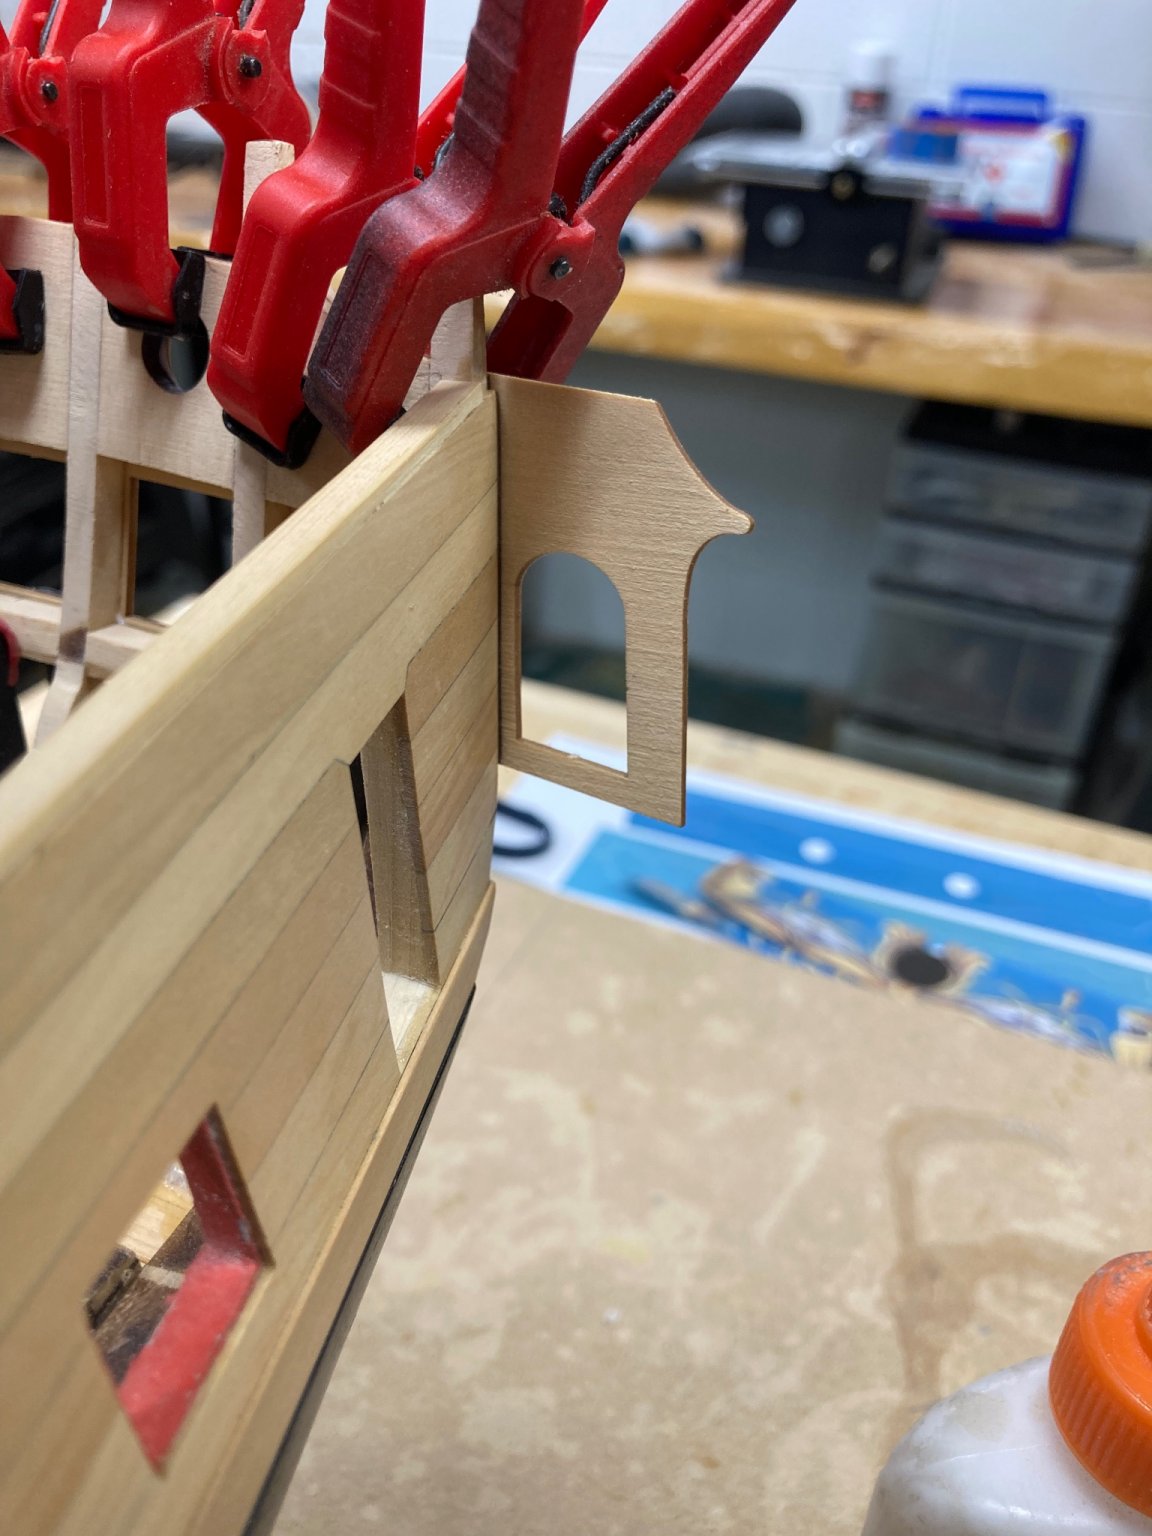
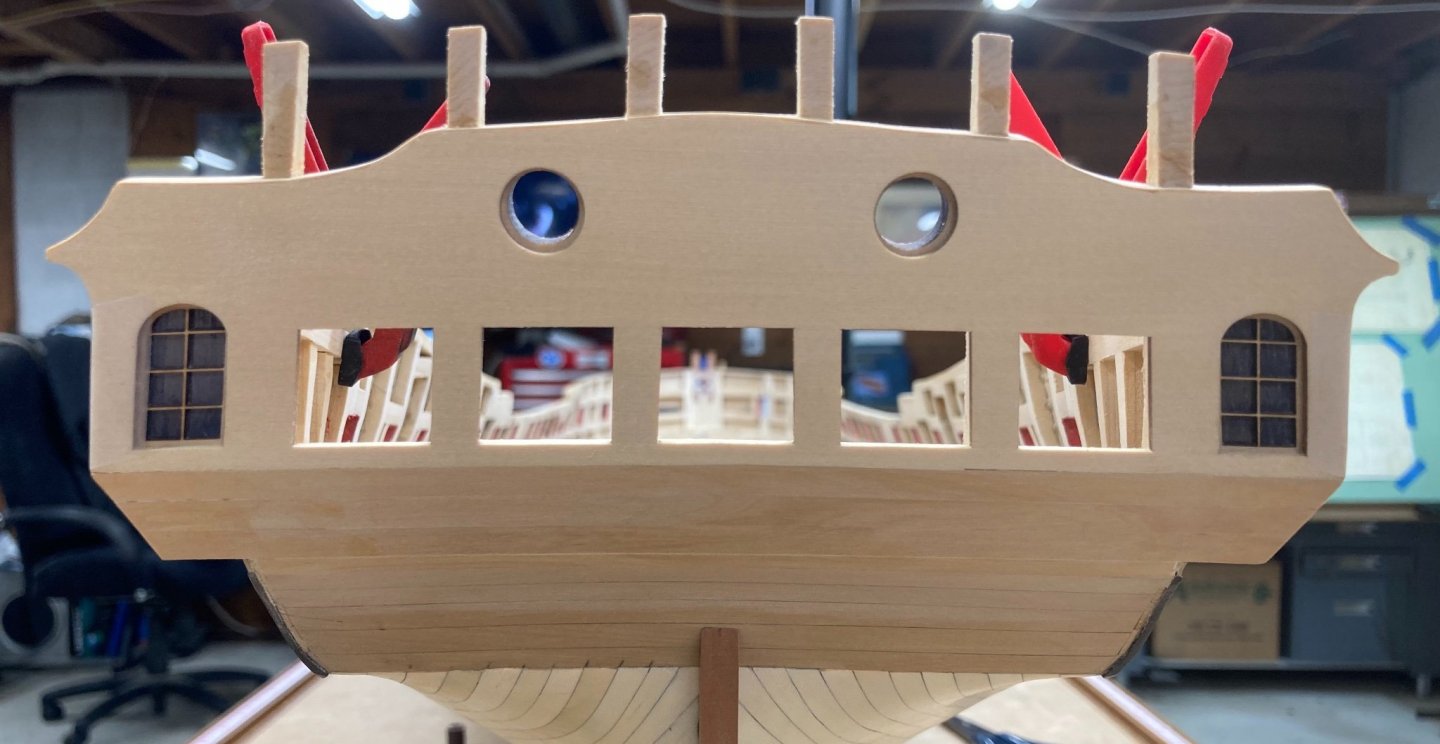
Starboard QG all but completed, need to decide if I want the top of the roof color to match the frieze or the tiles. I decided to rip off the first set of upper moldings and make a slightly wider one with a different profile, it matches better than my first attempt I think. You may notice that my tiles slightly overhang that molding, not strictly like the contemporary model but I like how it looks. The drop was installed and fitted really well with only a little finessing. Now to finish up the Port side and then move onto installing the rest of the friezes and moldings. Ben

- 399 replies
-
- 17
-
-

-
- winchelsea
- Syren Ship Model Company
- (and 1 more)
-
I agree, PLEASE do not simplify this - it just takes a bit more care than a lot of people are used to taking - but that doesn't mean that a lot of us will not take that time to do it justice. Just for example - I spent a couple of months LEARNING how to properly line off my hull planking and I'm VERY happy that I did so as I know the result was better and I learned how to do something with more skill. Keep up the great work and keep the challenges coming! Ben
- 1,784 replies
-
- 7
-
-
- winchelsea
- Syren Ship Model Company
- (and 1 more)
-
Work ongoing on the QG’s when time permits.


- 399 replies
-
- 16
-
-
-
- winchelsea
- Syren Ship Model Company
- (and 1 more)
-
Are you taking the pictures with an IPhone and posting them directly to the site? If so I had same issue - depends which way you hold phone to take picture, i had to edit the picture on my phone and flip it around and then save it again - it would then upload to MSW the way it was supposed to.
- 105 replies
-
- 2
-
-
- winchelsea
- Syren Ship Model Company
- (and 1 more)
-
Sorry Chuck, I'm back on the road working for a few week's now so very little progress will be happening.
- 399 replies
-
- 3
-
-
- winchelsea
- Syren Ship Model Company
- (and 1 more)
-
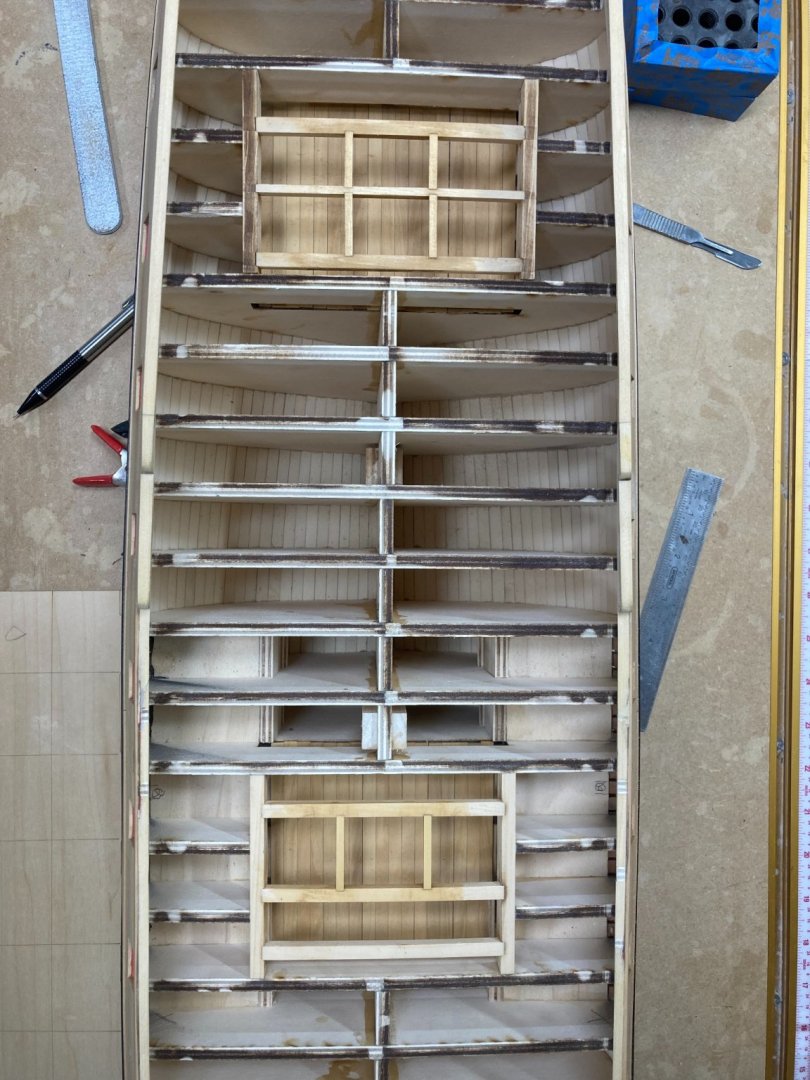
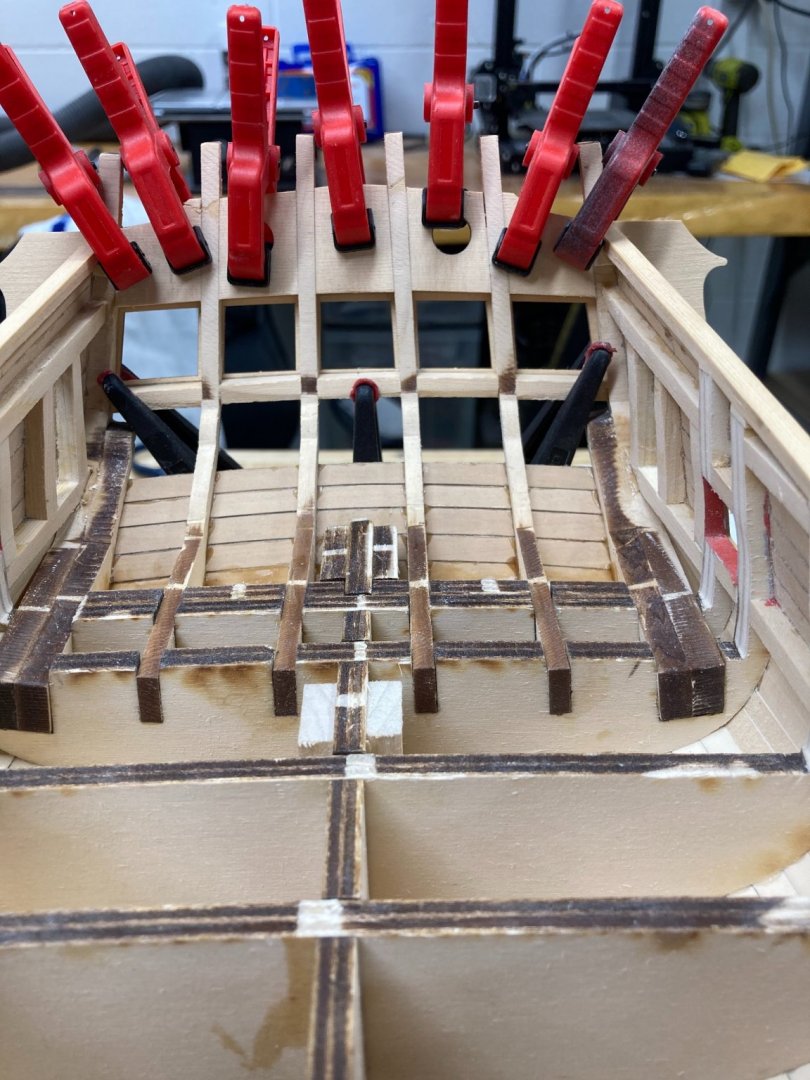
Planked the sub decks, I had thought about making the false main deck beams from my own Swiss pear to match the other structural parts, but when I saw how beautifully that Chucks laser cut parts fitted I decided to use them and stain to match the boxwood seeing as how those beams will almost be invisible.
- 399 replies
-
- 13
-
-
- winchelsea
- Syren Ship Model Company
- (and 1 more)
-
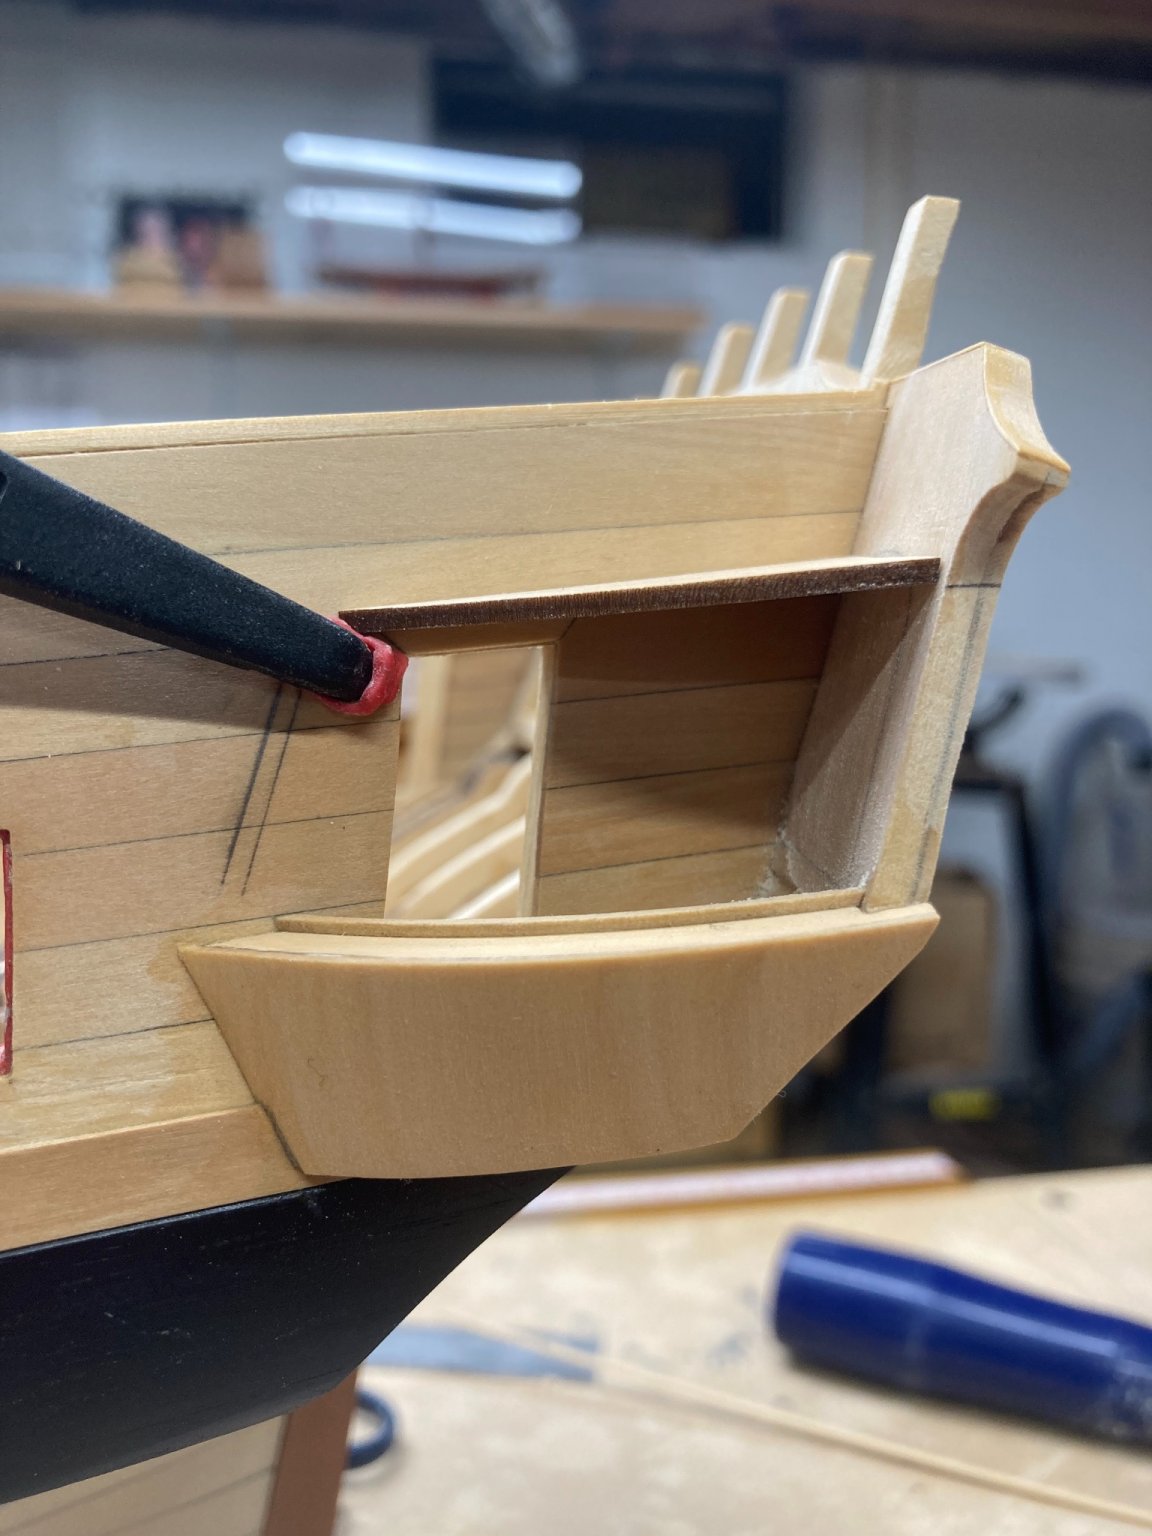
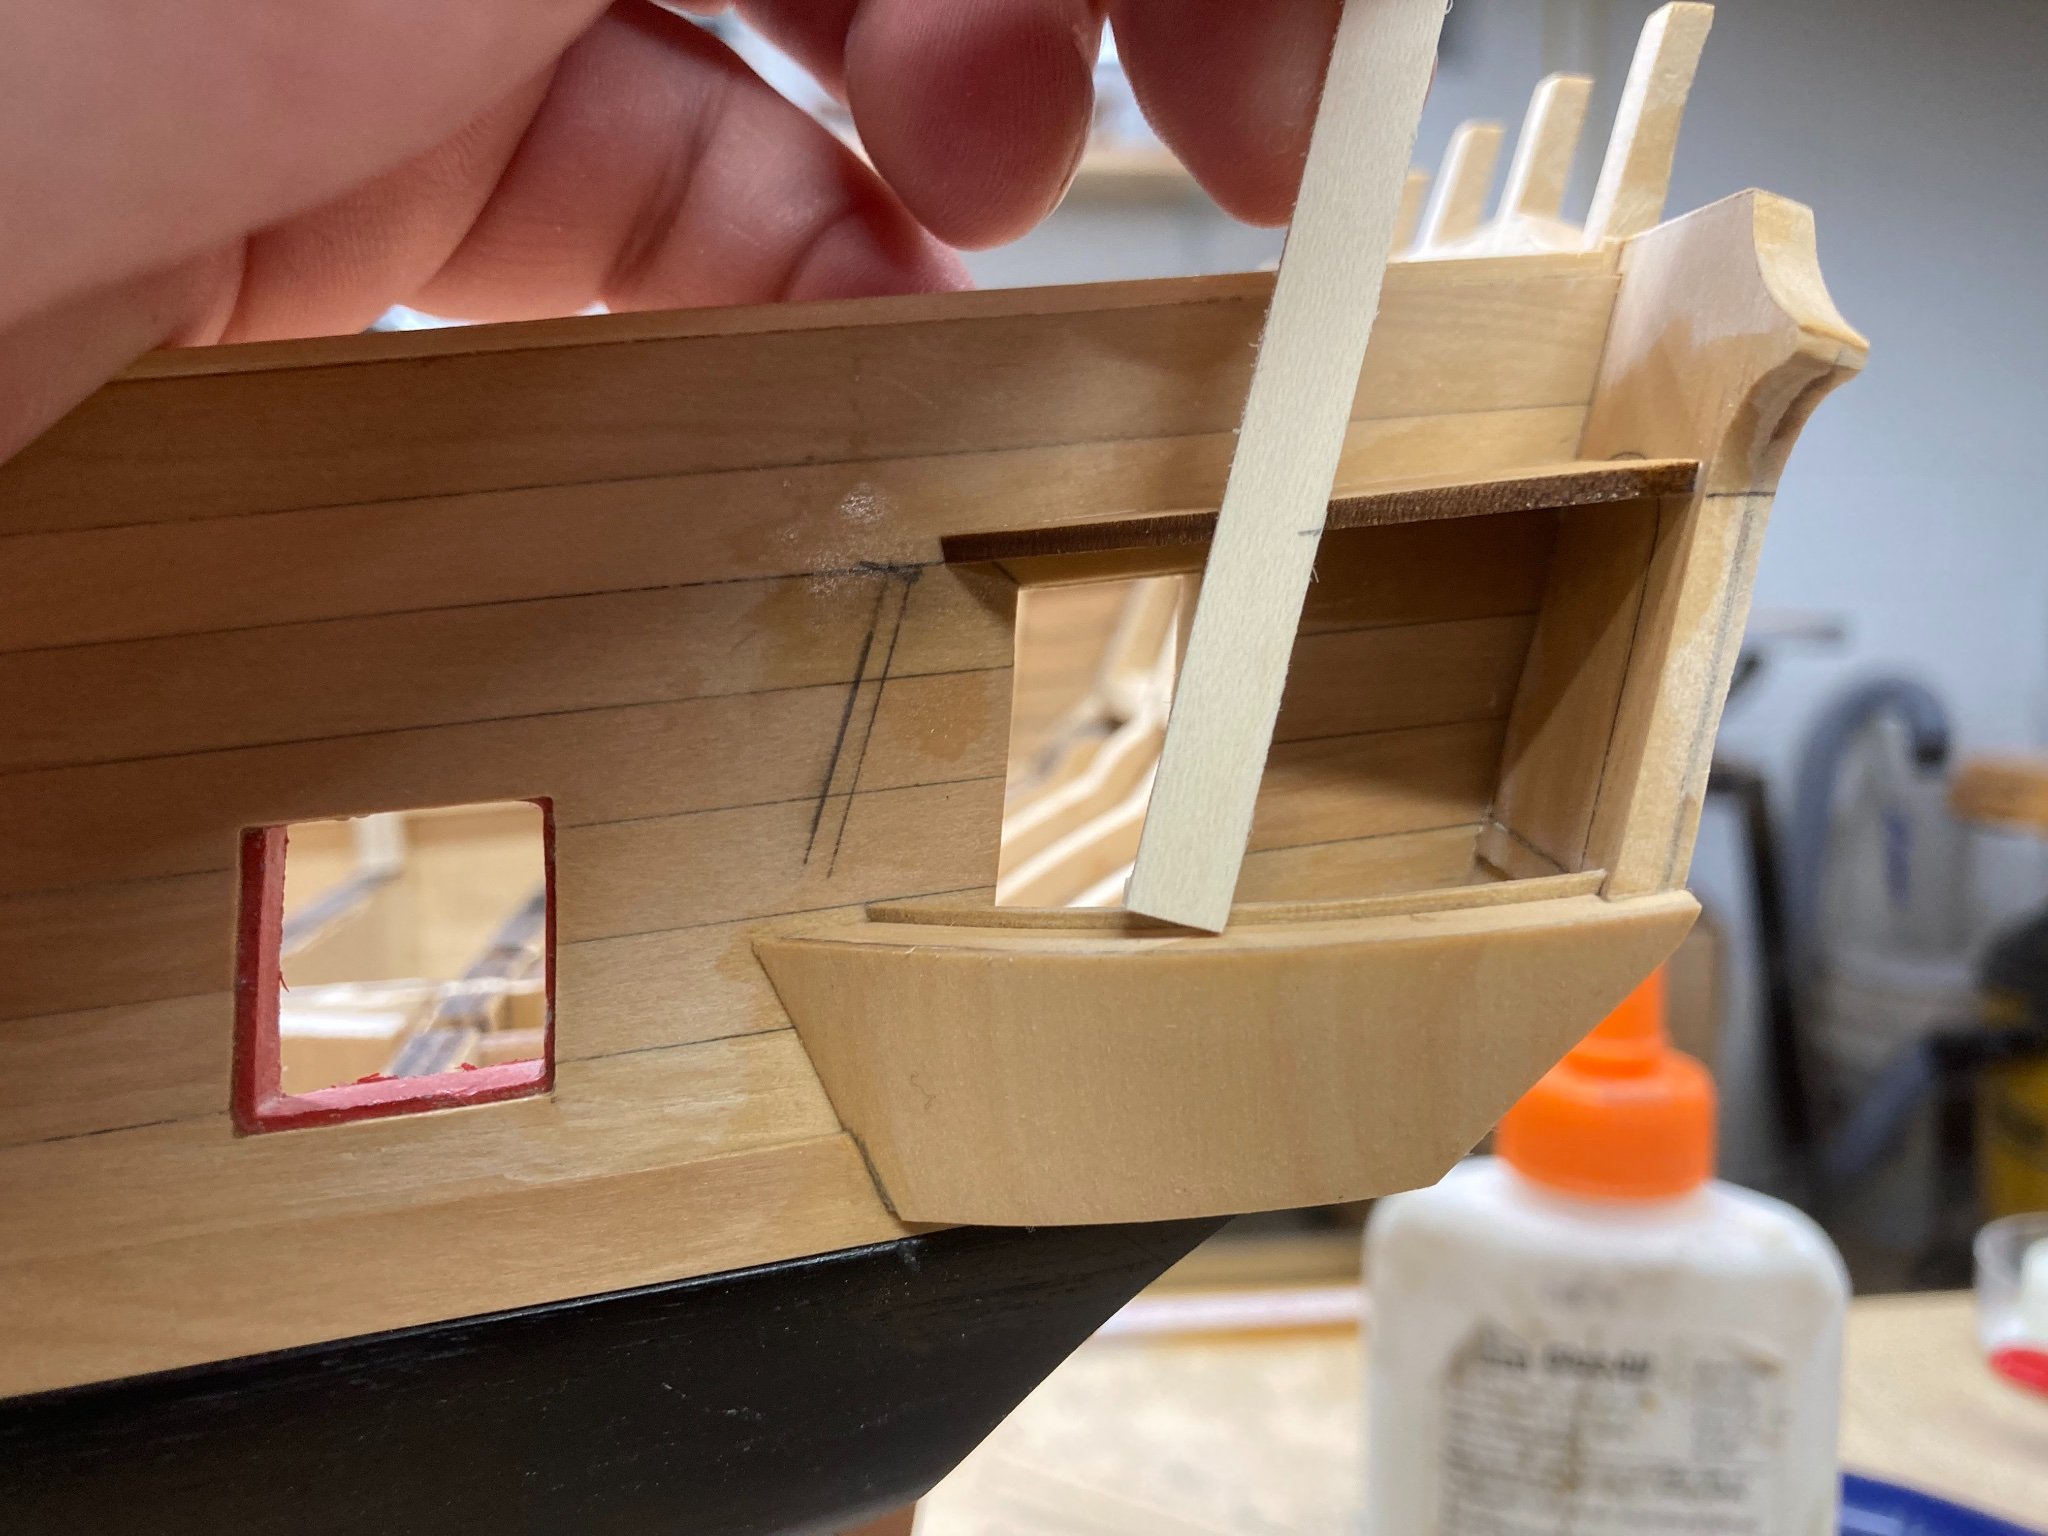
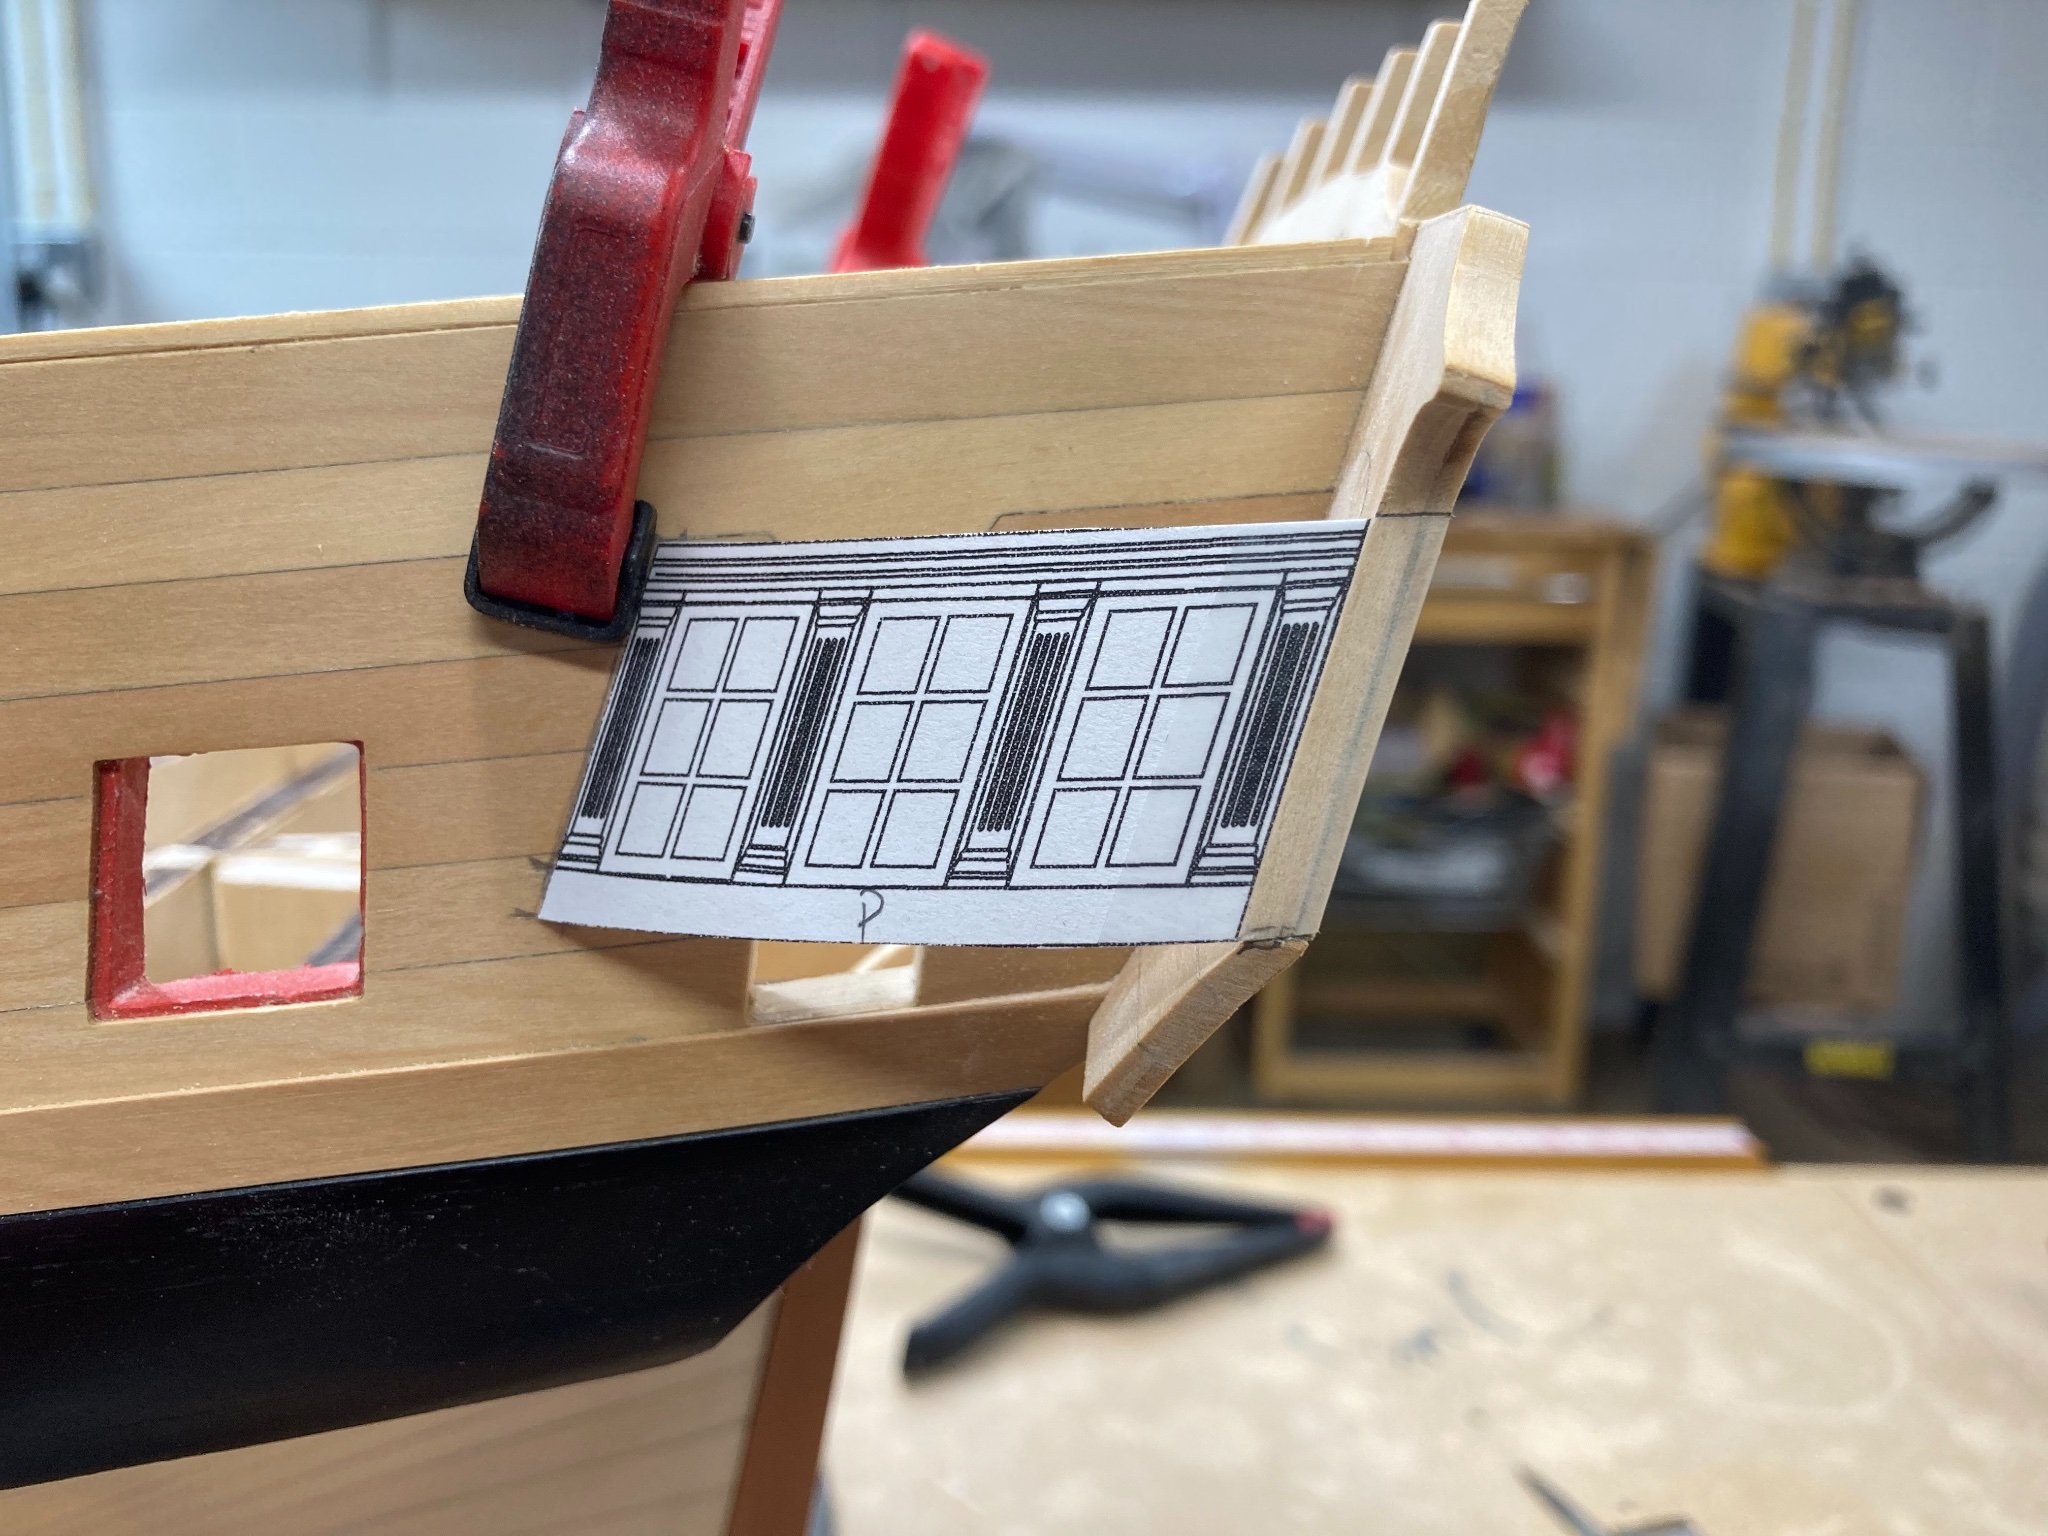
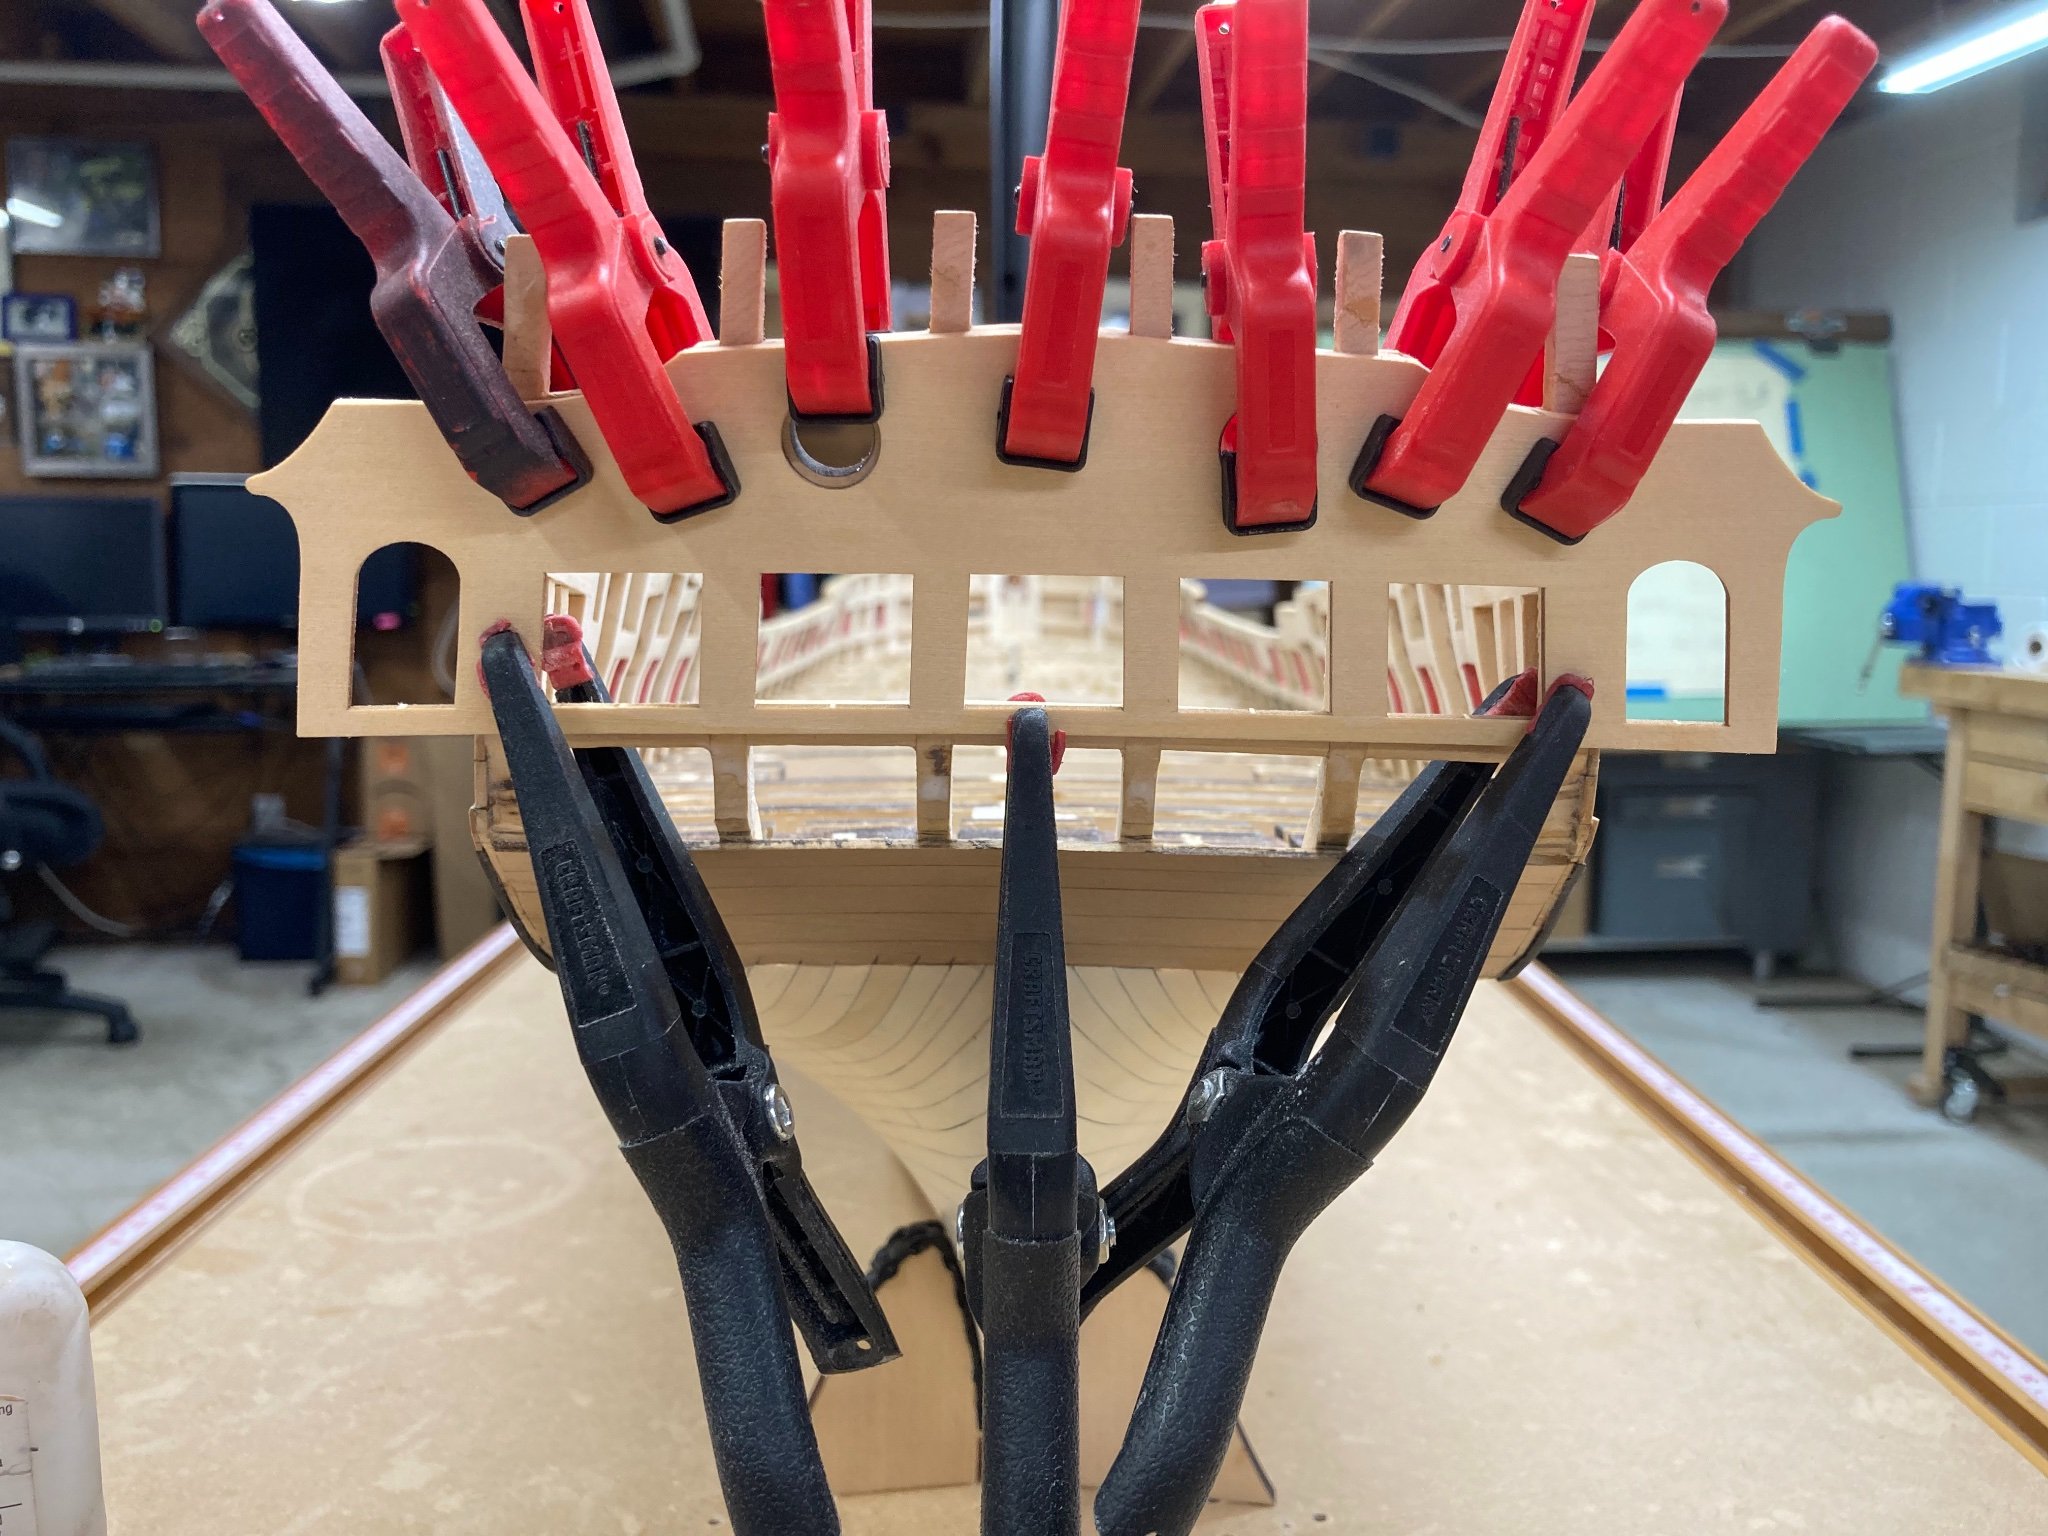
Thanks Dave, I decided to start the mockup of the QG window spacers and everything is looking pretty good so far.

- 399 replies
-
- 18
-
-
- winchelsea
- Syren Ship Model Company
- (and 1 more)
-
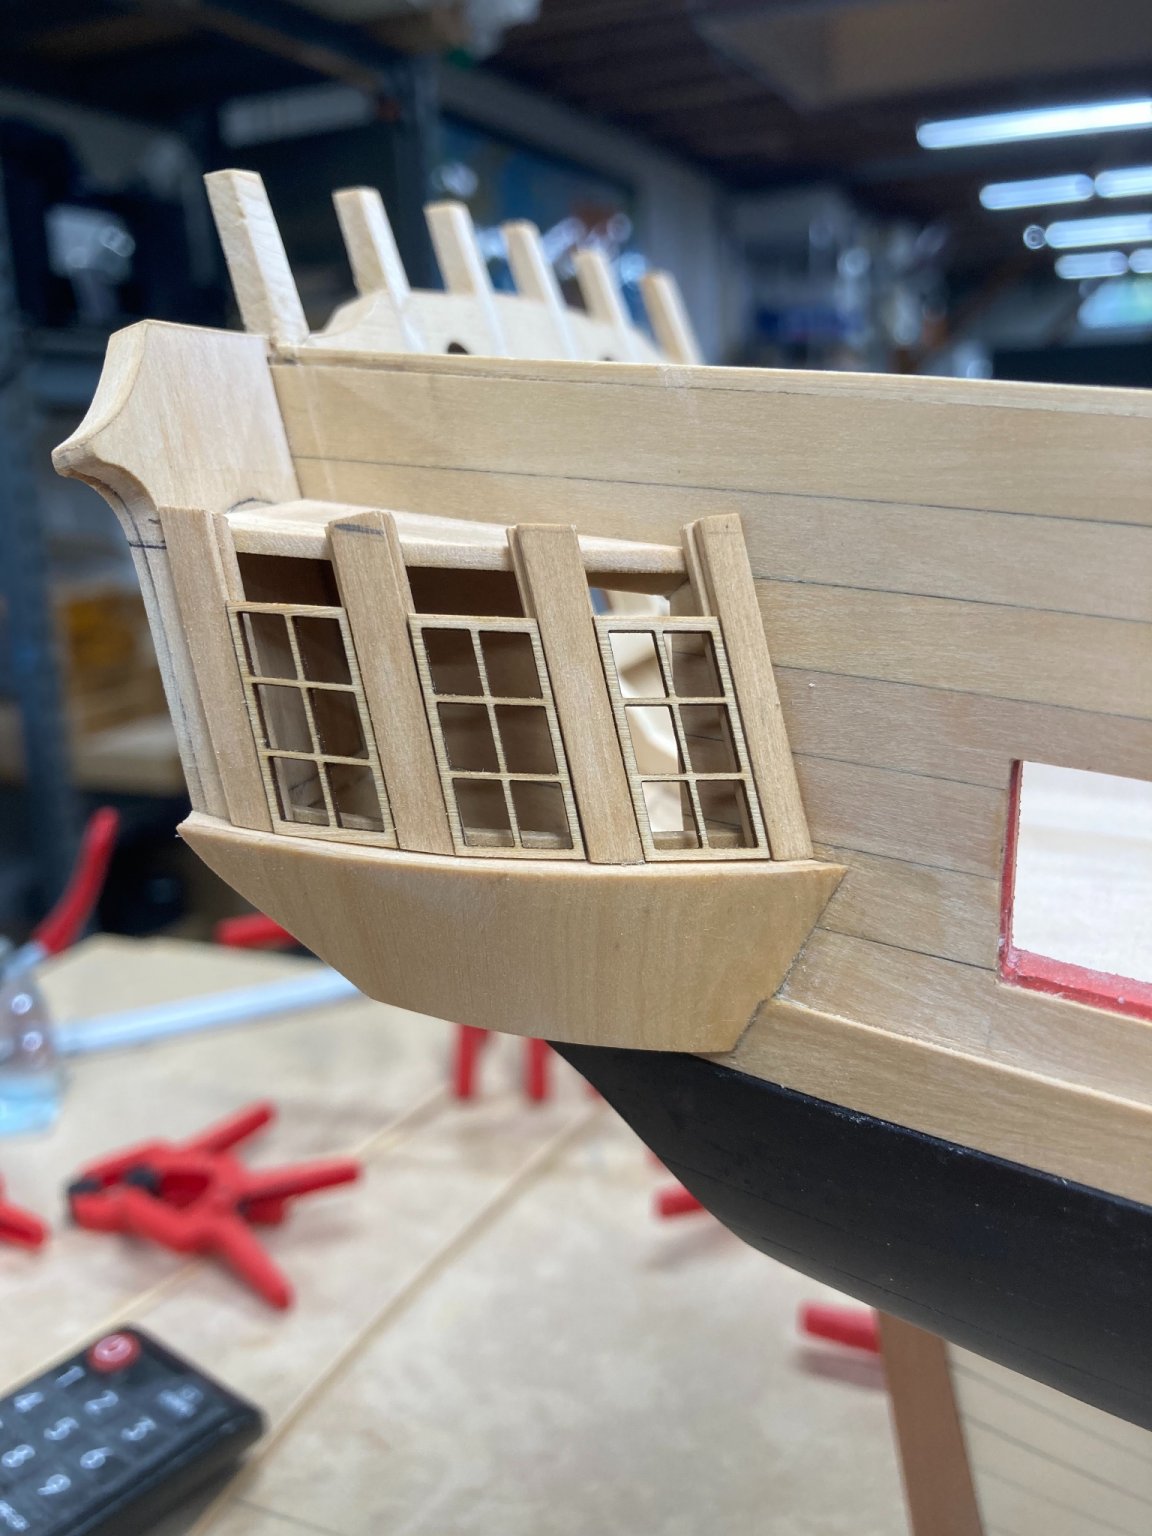
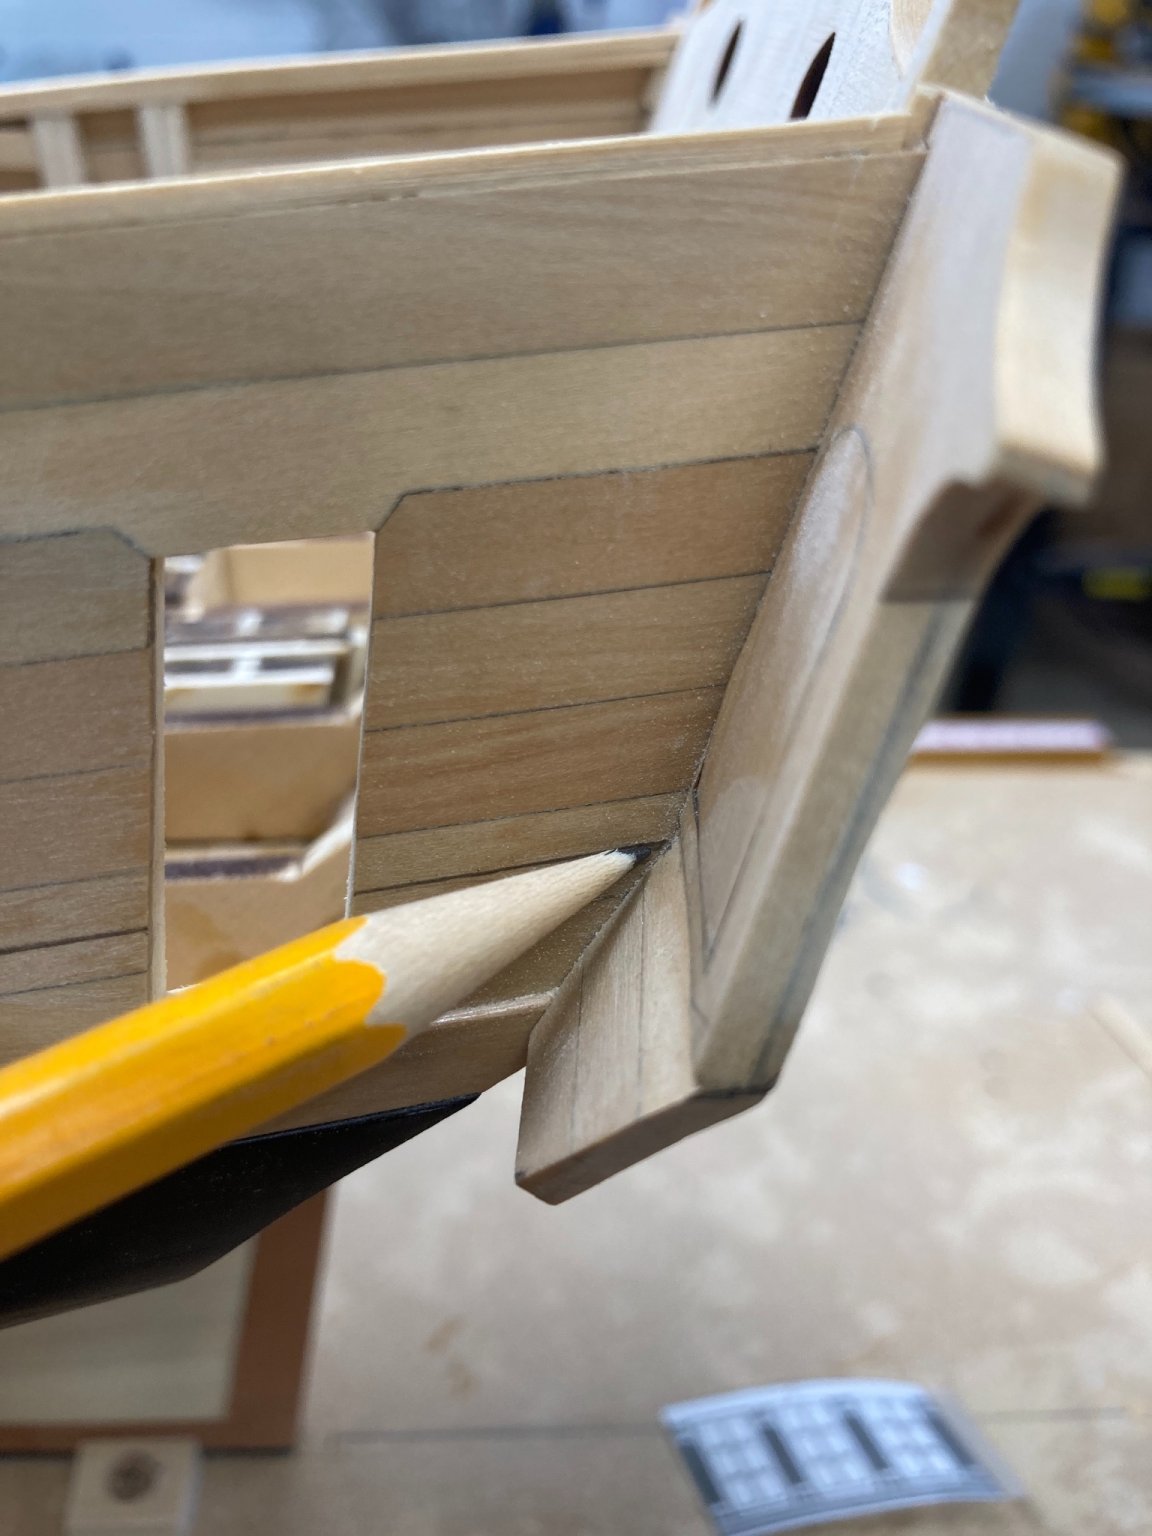
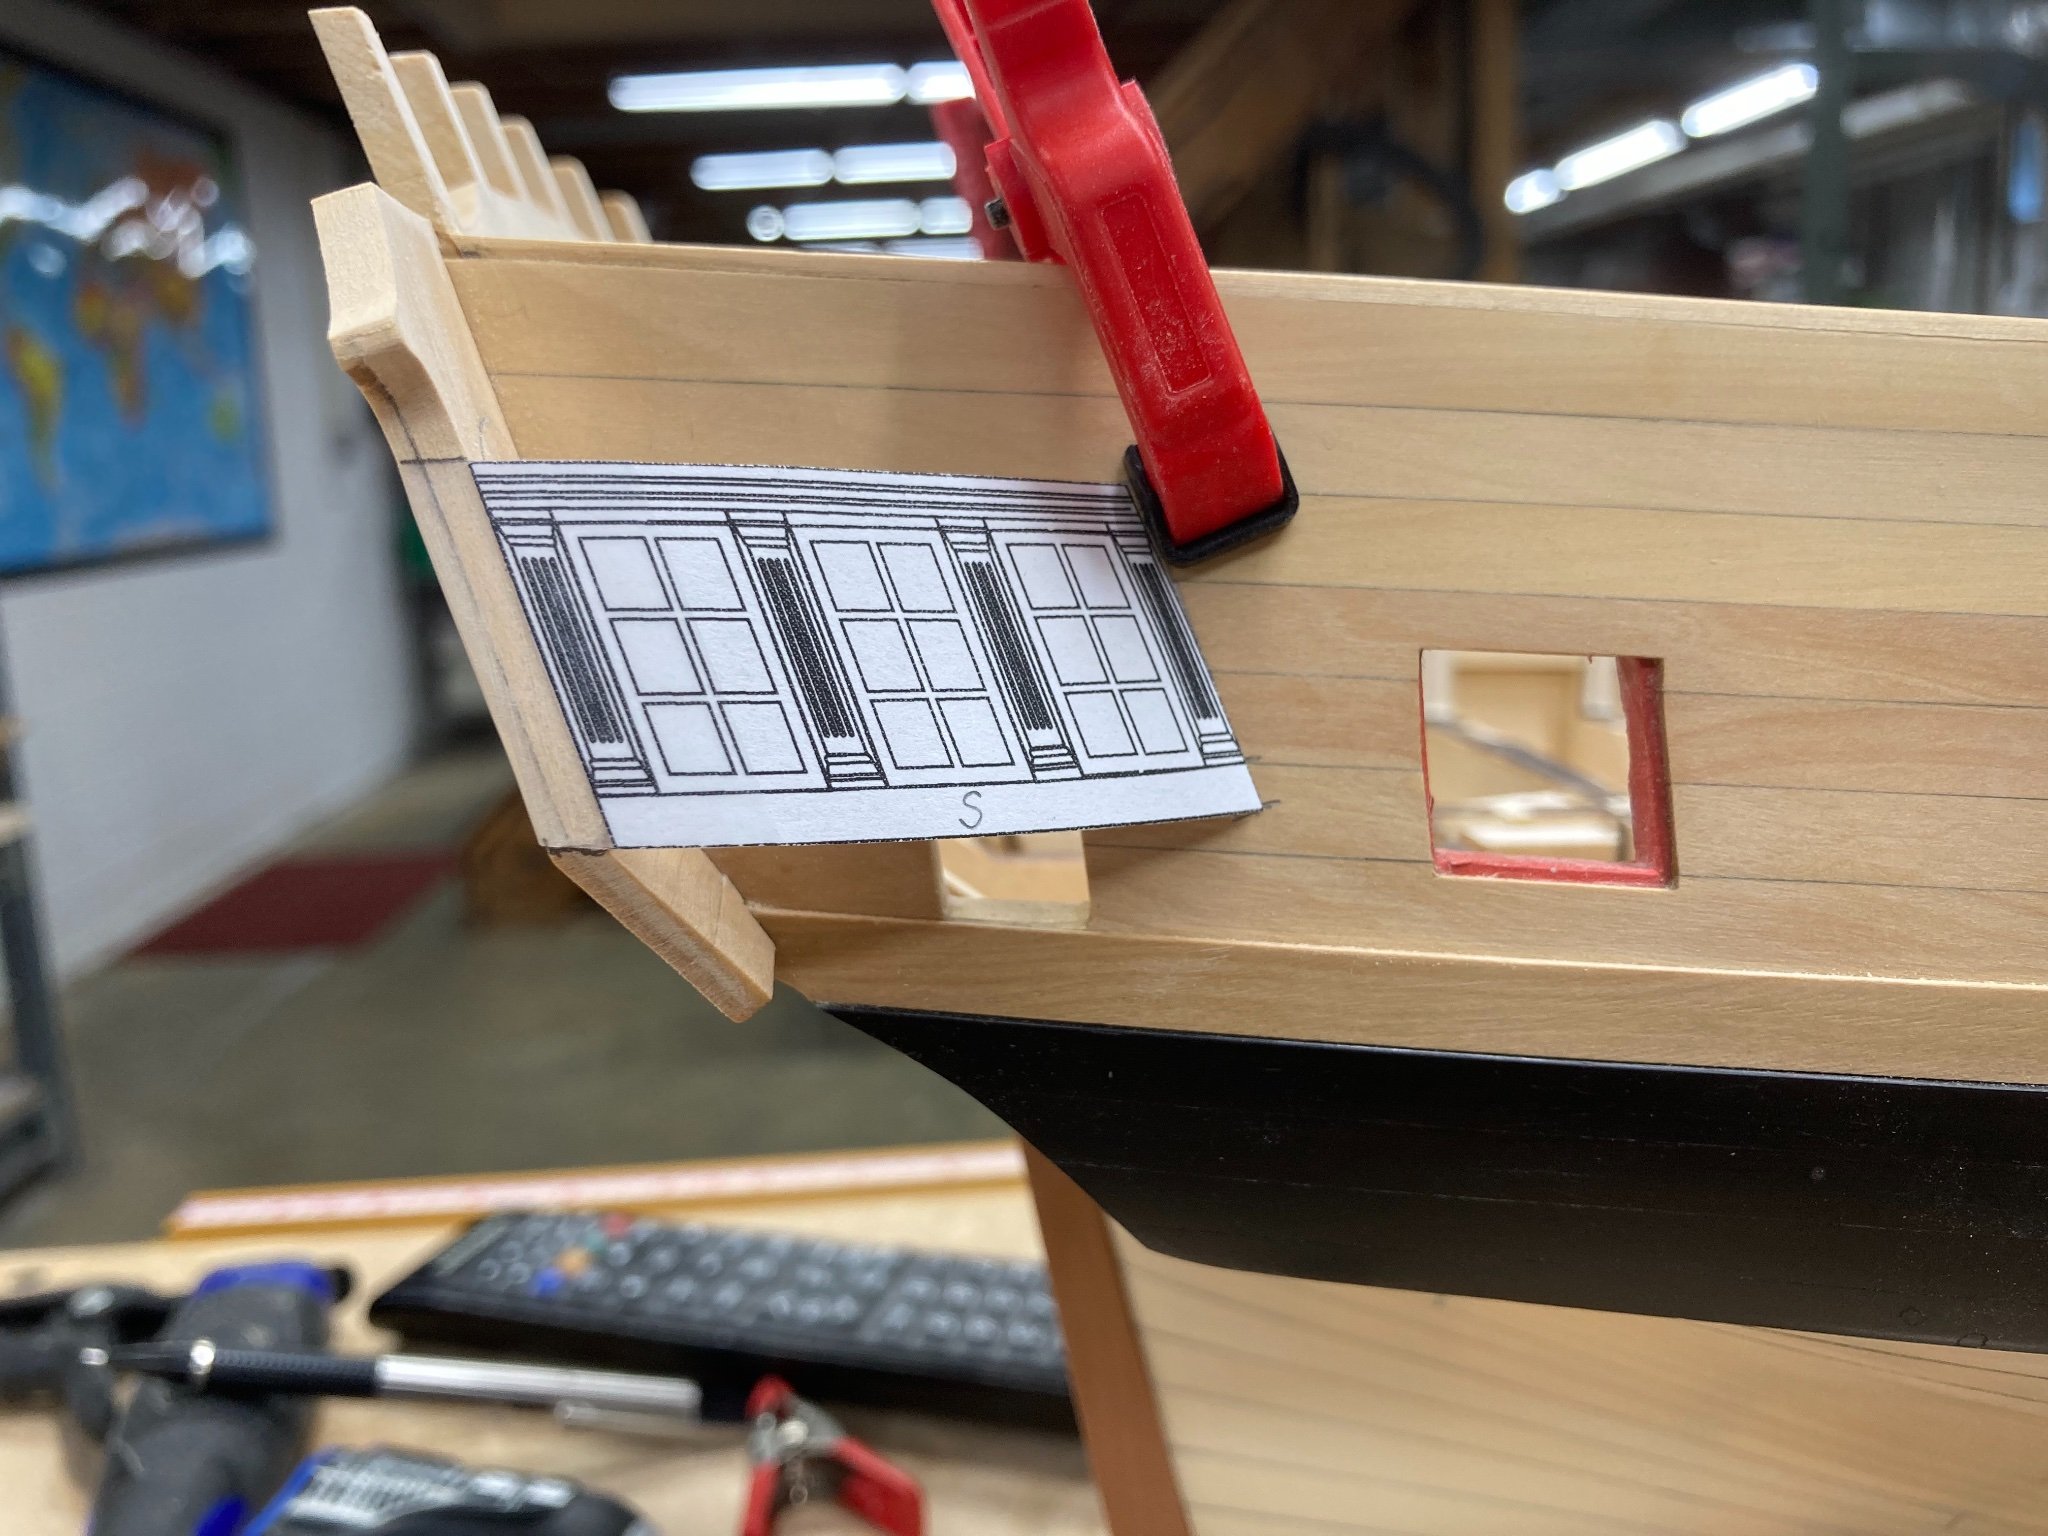
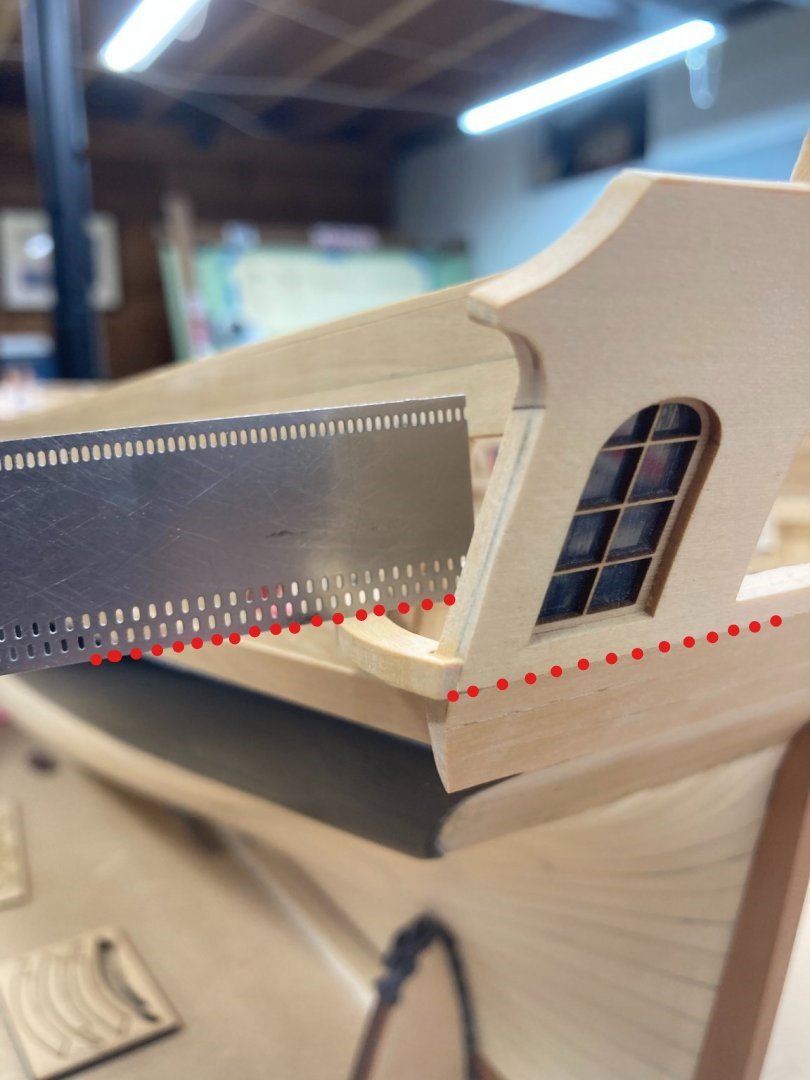
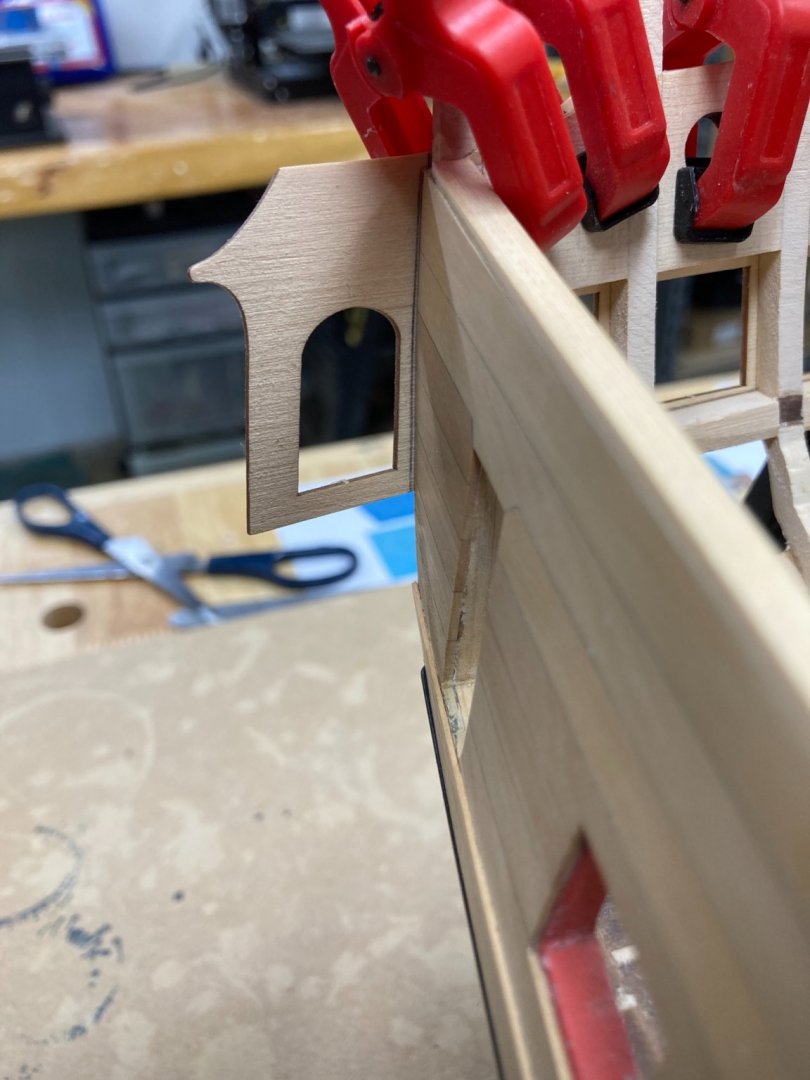
Installation of the QG top parts, again following the roundup of the transom athwartships AND the sheer angle the same as the lower pieces, I used a simple marked strip to check that the window space was the same fore/aft and in the middle.

- 399 replies
-
- 23
-
-
- winchelsea
- Syren Ship Model Company
- (and 1 more)
-
Nice to see you back at the Winnie Rusty.
- 642 replies
-
- 1
-
-
- winchelsea
- Syren Ship Model Company
- (and 1 more)
-
Work on the Quarter Galleries is progressing nicely I think.

- 399 replies
-
- 18
-
-
- winchelsea
- Syren Ship Model Company
- (and 1 more)
-
Thanks for the Help Chuck, I know if this is not done right then the entire QG wont look right at all.
- 399 replies
-
- 2
-
-
- winchelsea
- Syren Ship Model Company
- (and 1 more)
-
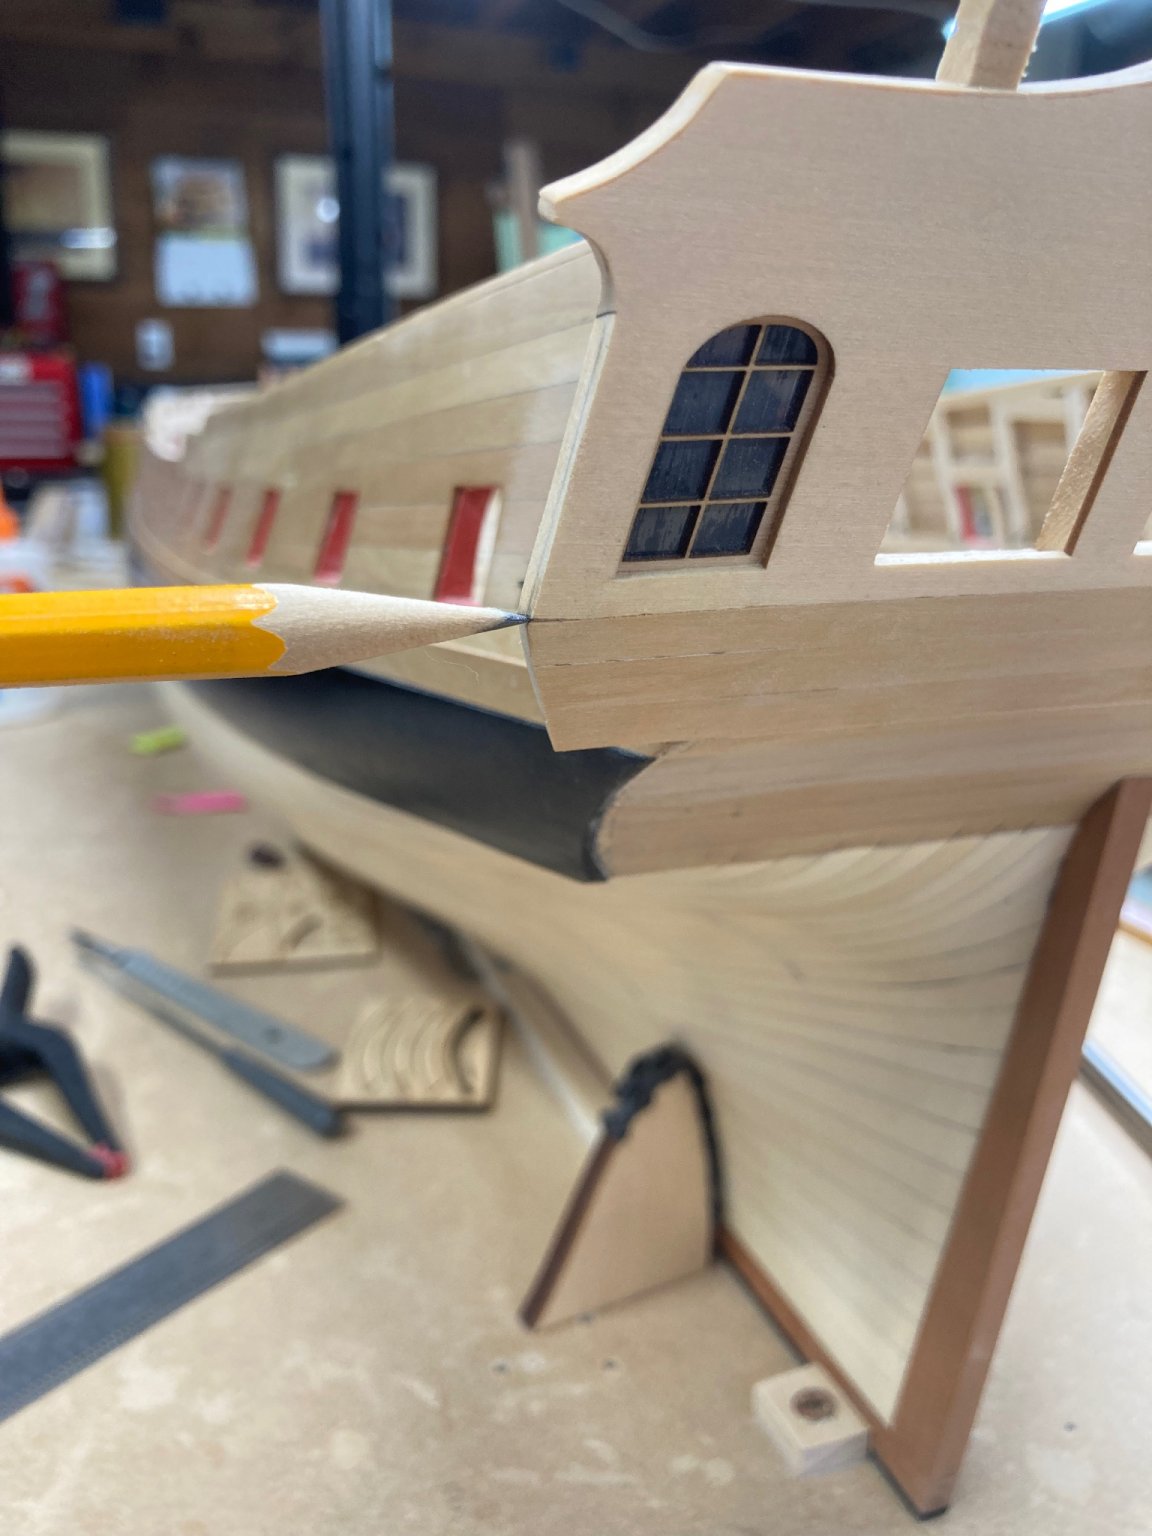
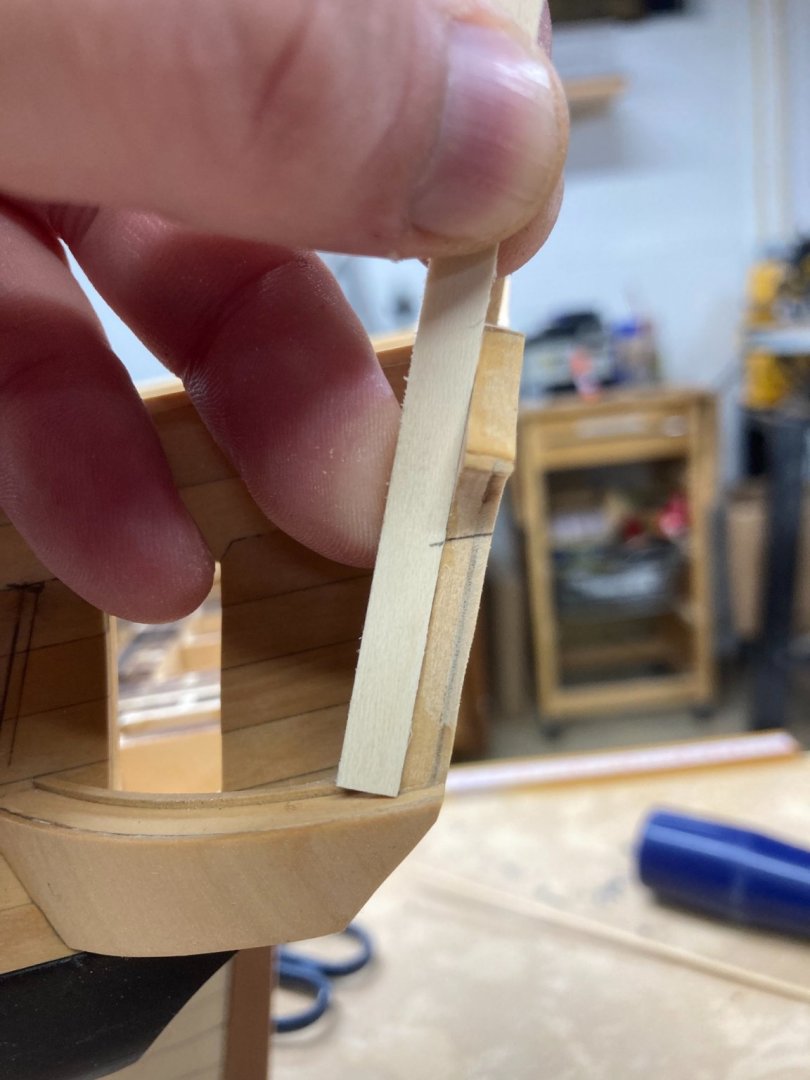
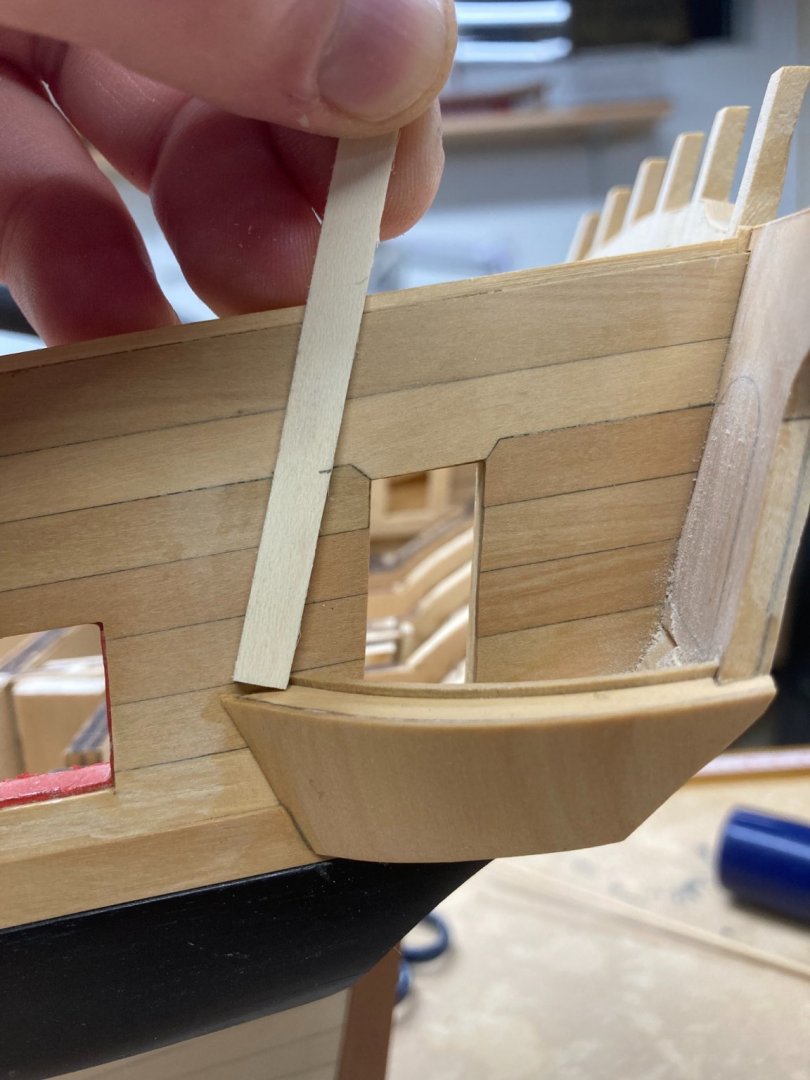
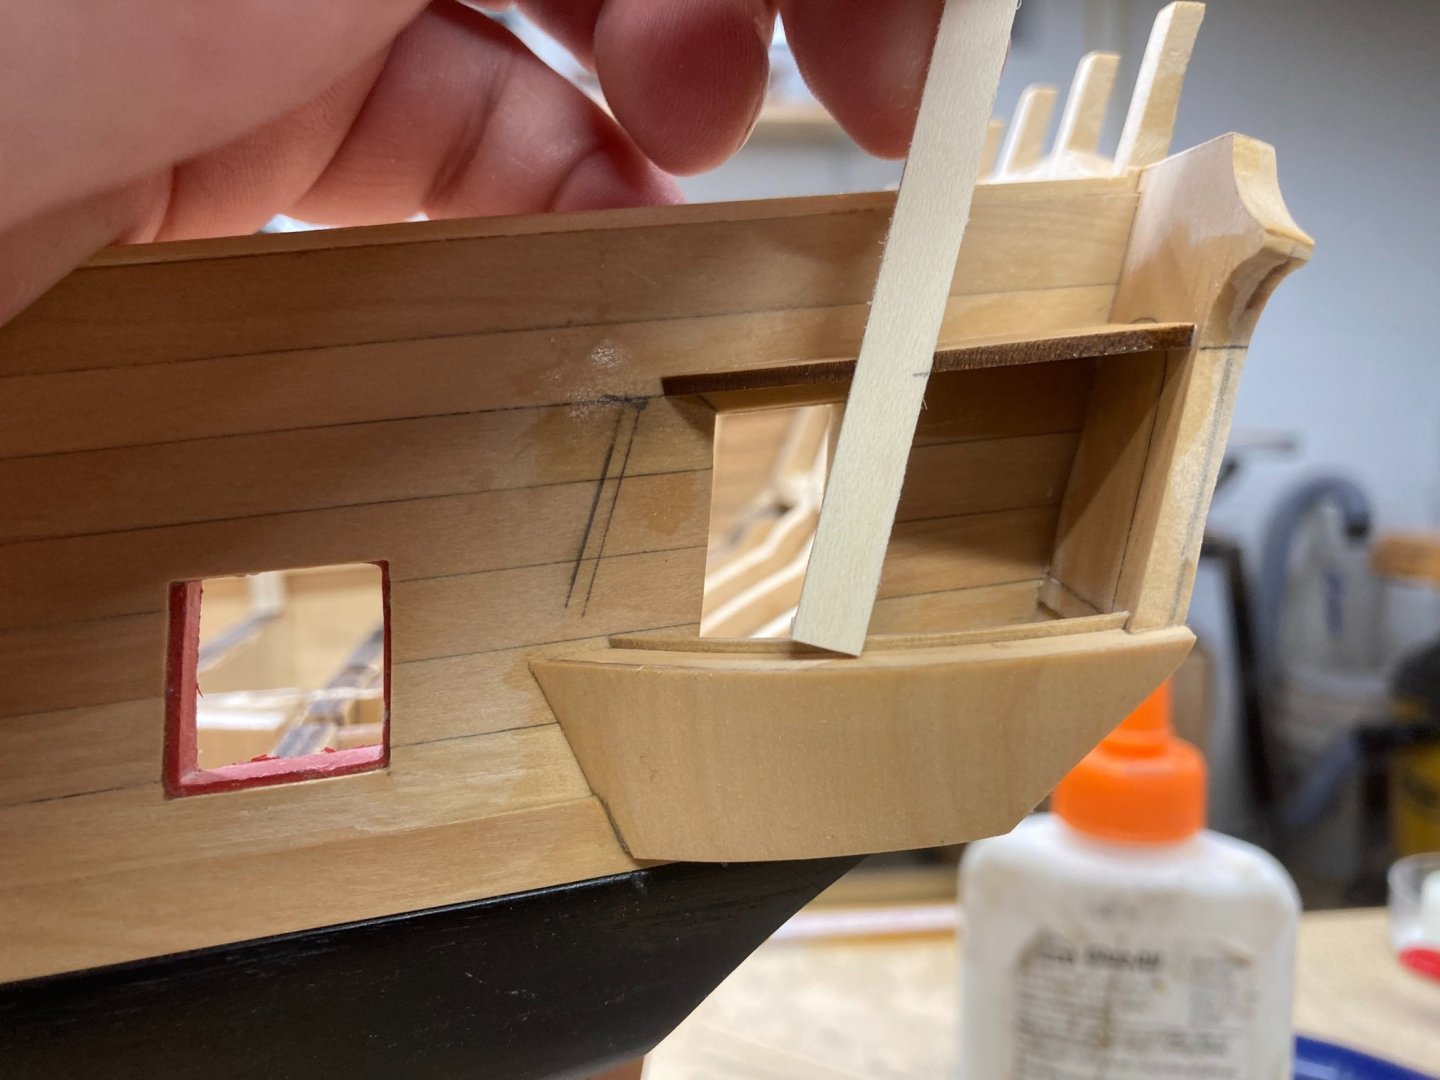
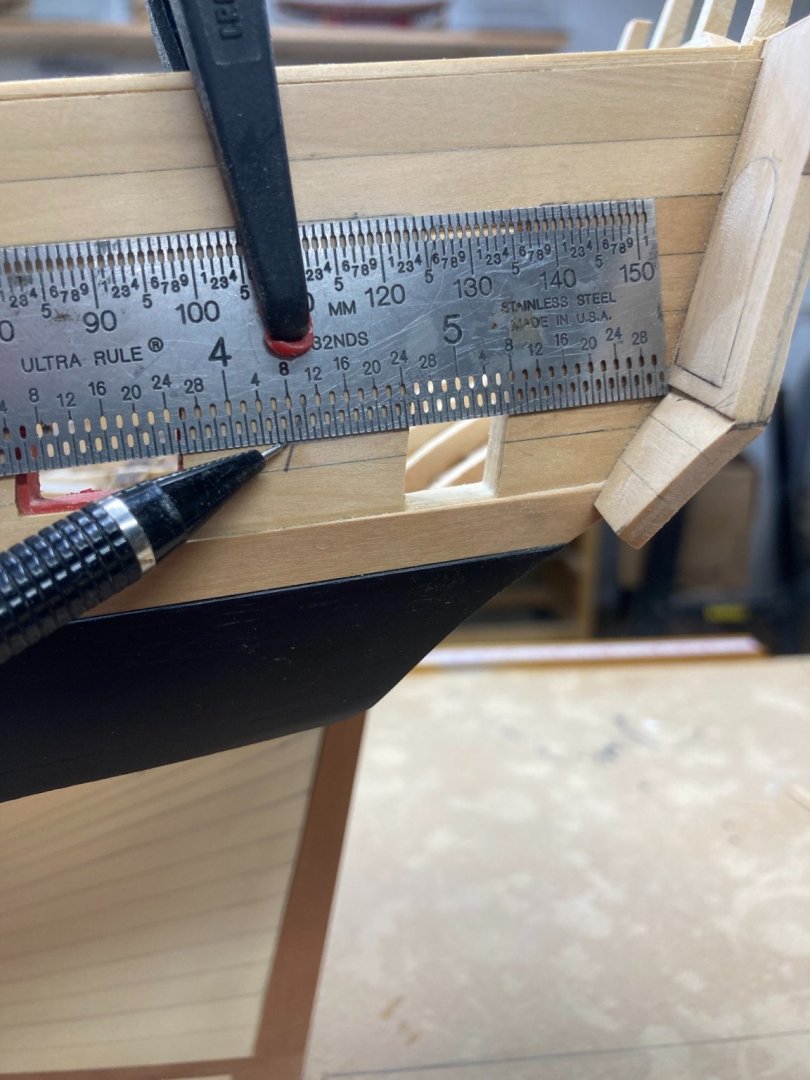
So I want to show you how I eventually figured out the correct height and position of the stool piece. After advice from Chuck I read and reread page 112 of David Antscherl’s Comet book where he discusses this exact thing although he calls it the berthing piece. 1st - I took the height of the upper counter where it meets the lower corner of the transom. 2nd - I transferred that height to the hull side, you can see the mark is LOWER than the transom which is correct. 3rd - I used a straight edge to follow the sheer of the hull and marked a line that shows where this bottom edge will be. 4th - I used the paper templates to mark the angle and heights of the other needed reference points inc it’s upper face level and the top of the QG ( or bottom of roof ) 5th - Sanding and fitting the piece being mindful that it’s upper face should follow the roundup of the transom. If anybody sees where I made a mistake here please let me know before I go any further.


- 399 replies
-
- 14
-
-
- winchelsea
- Syren Ship Model Company
- (and 1 more)
-
Thanks Chuck, Do those templates look in right position to your eye?
- 399 replies
-
- 1
-
-
- winchelsea
- Syren Ship Model Company
- (and 1 more)
-
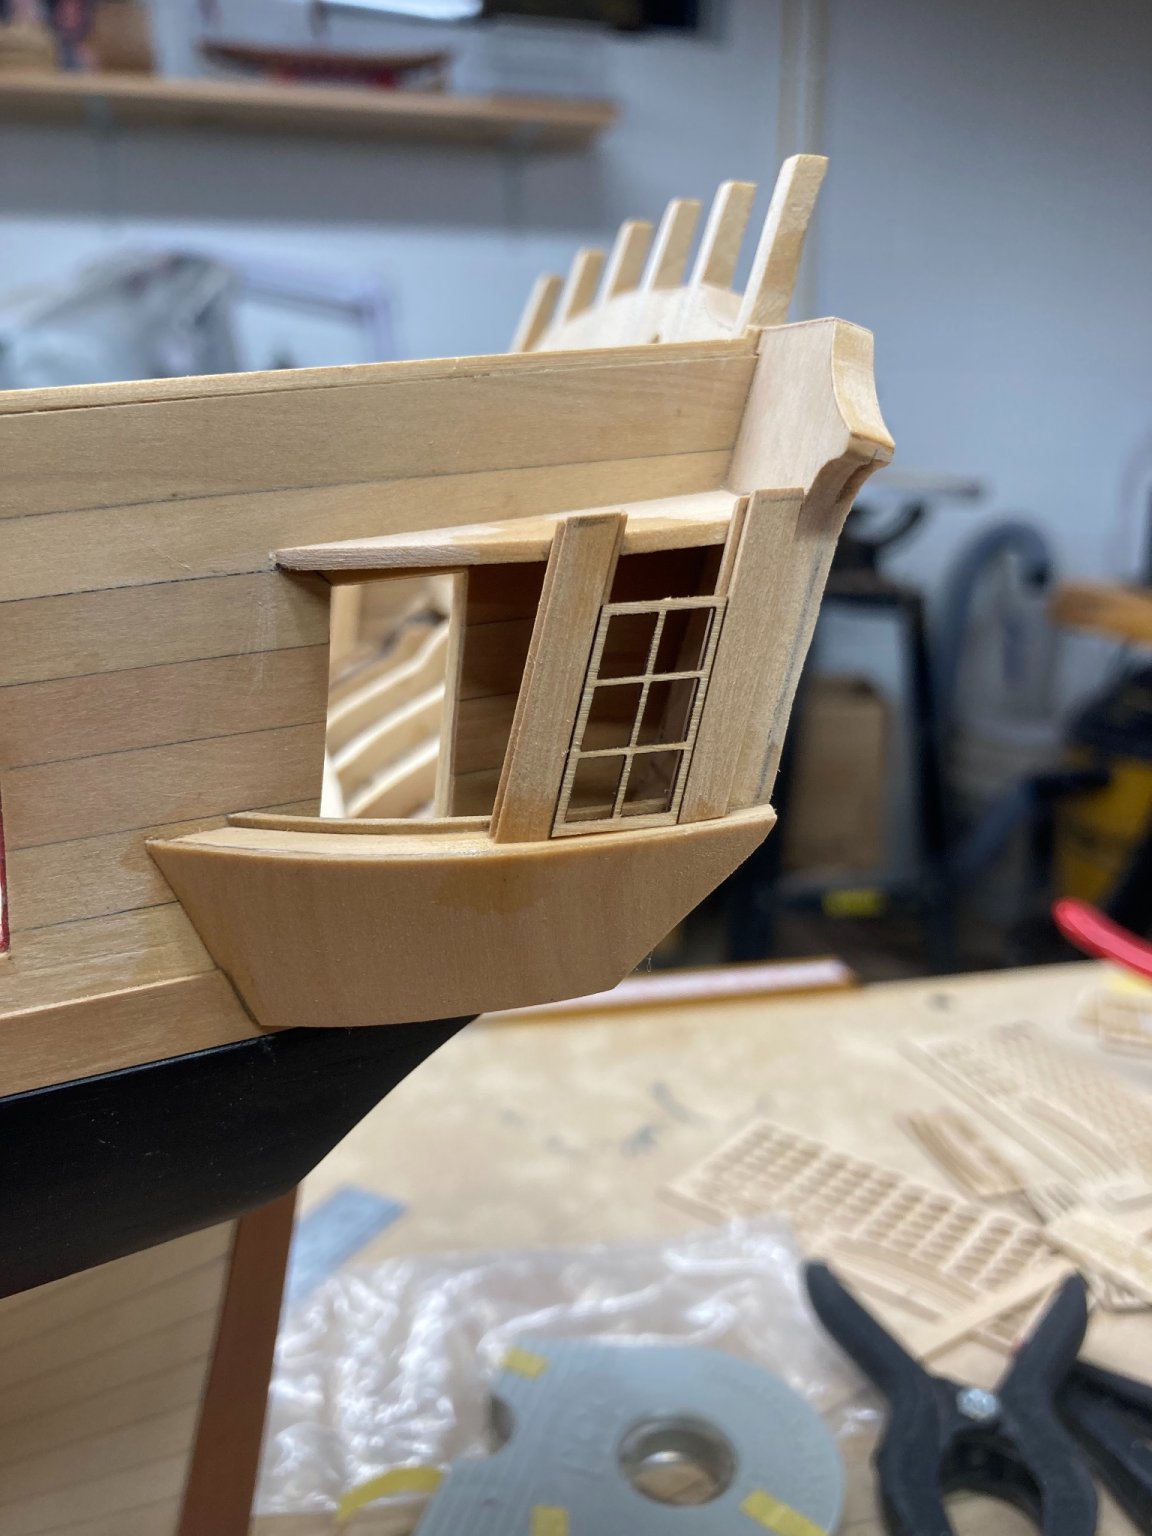
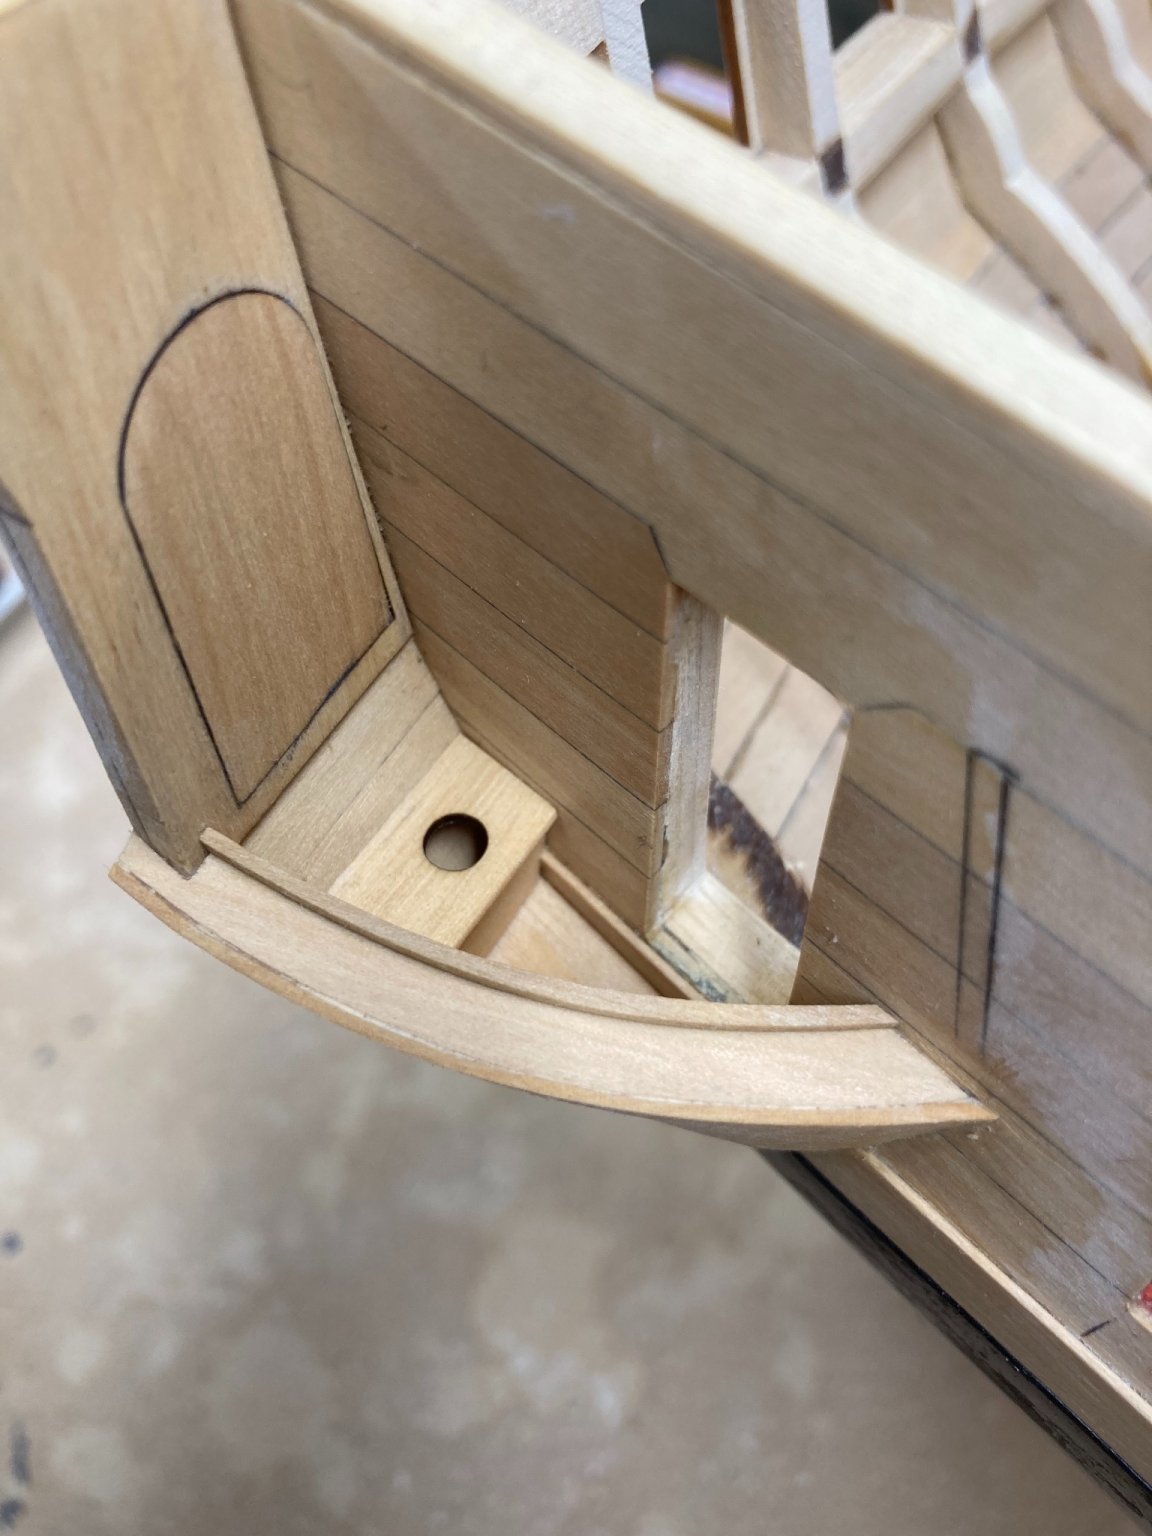
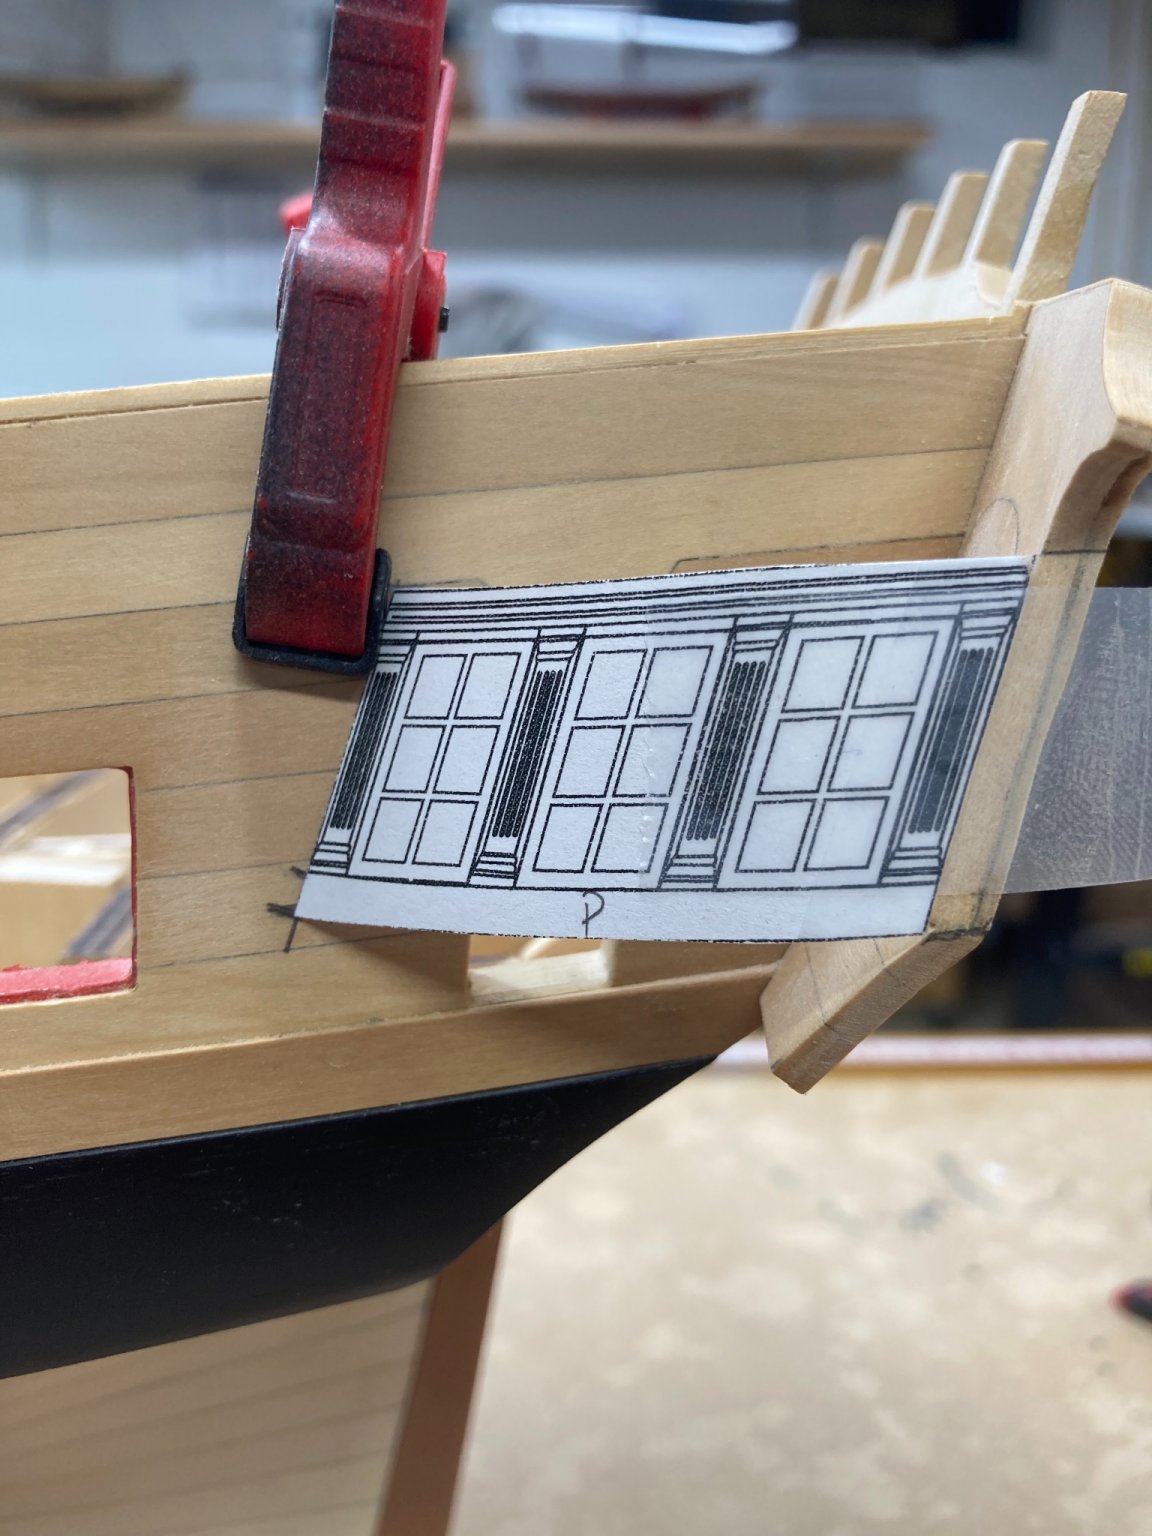
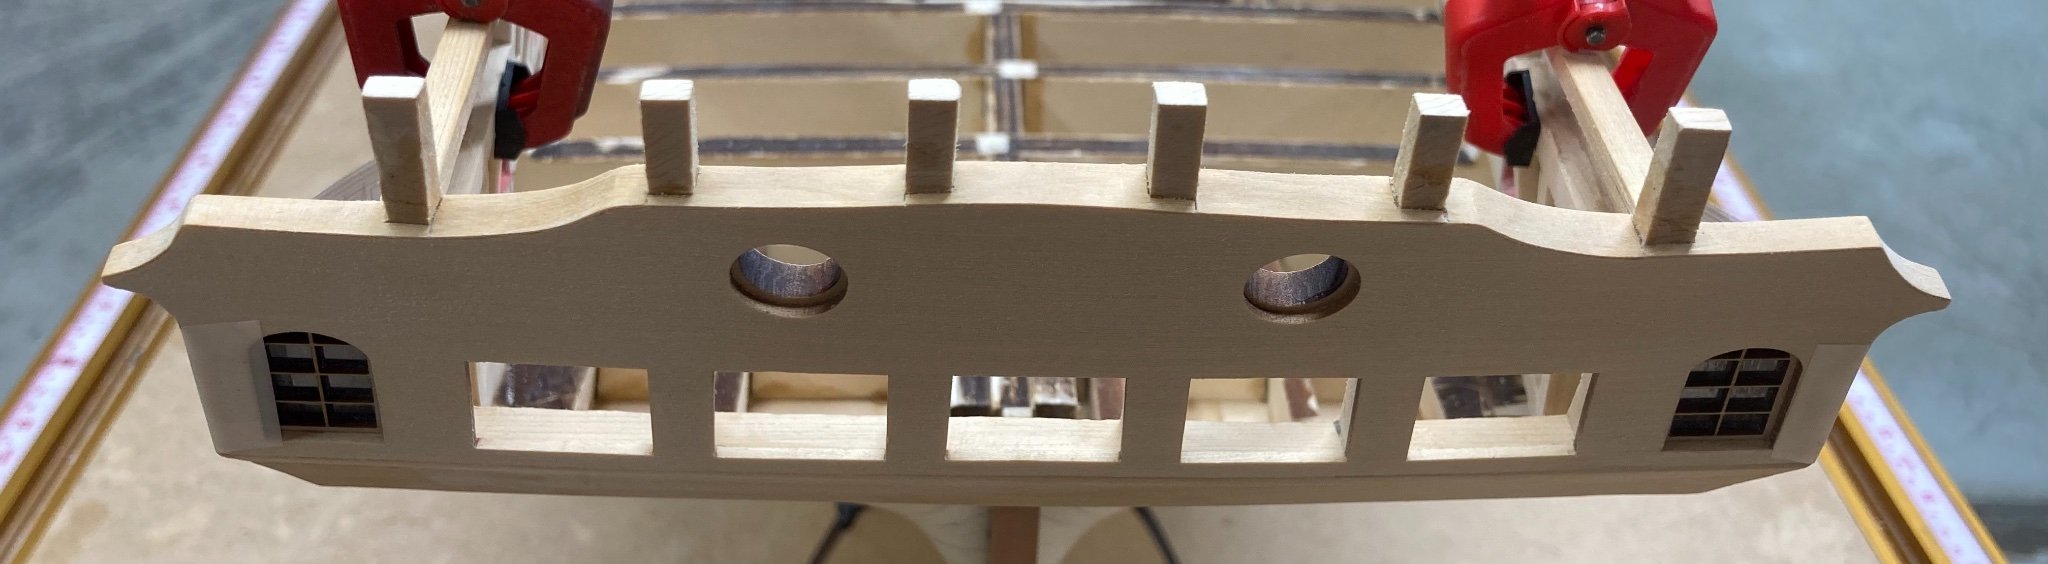
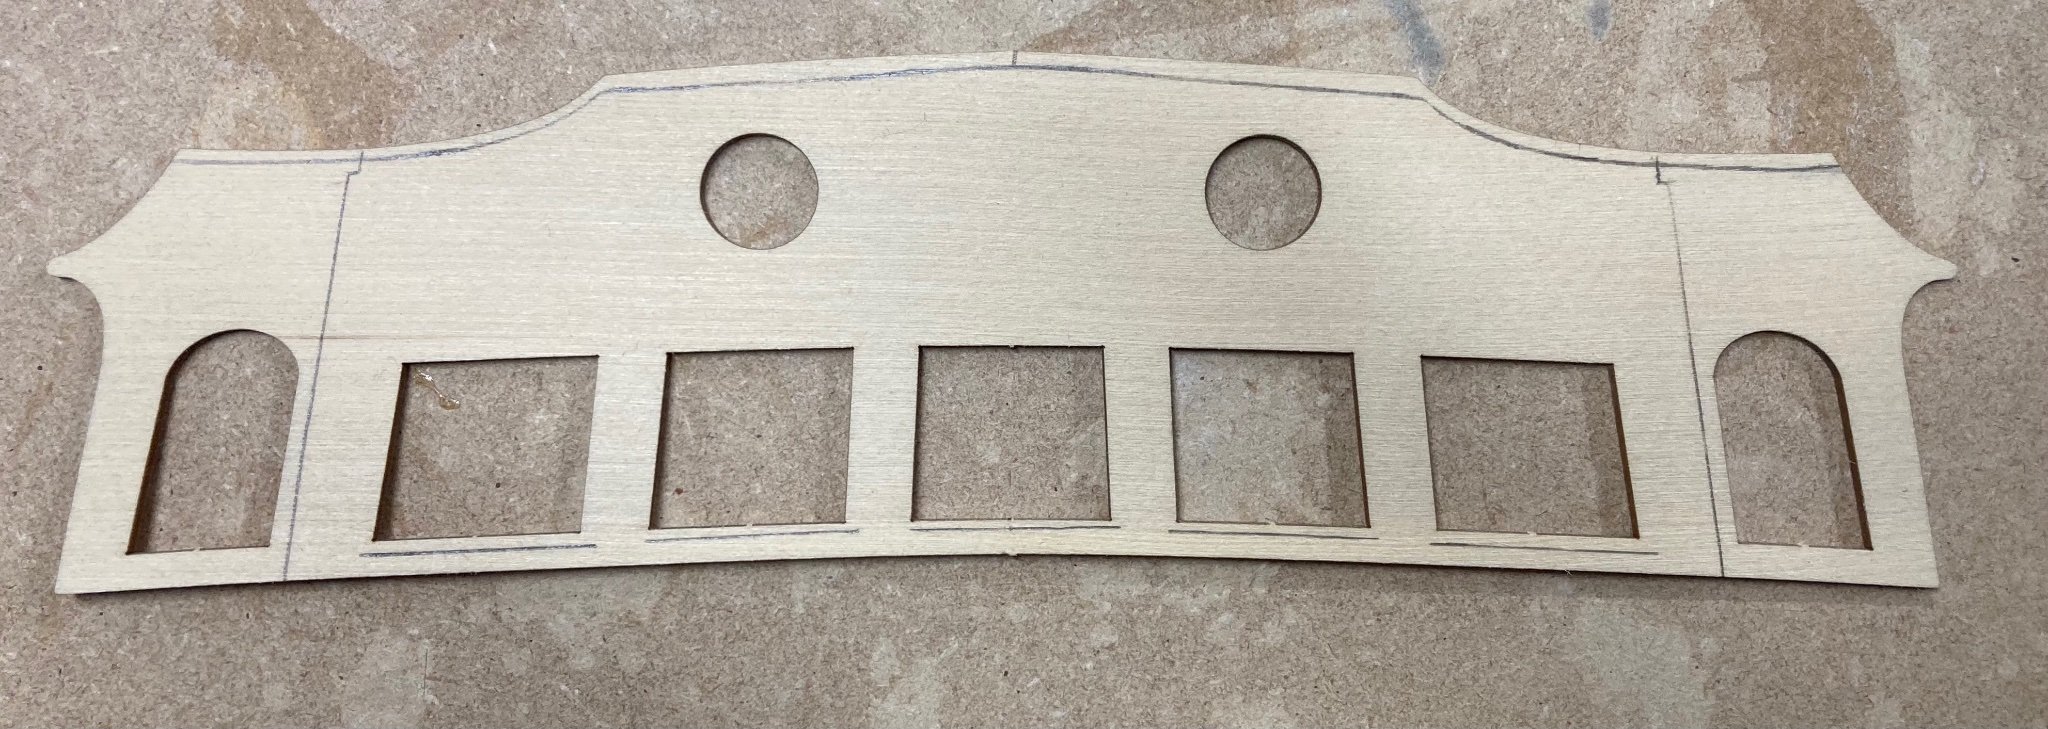
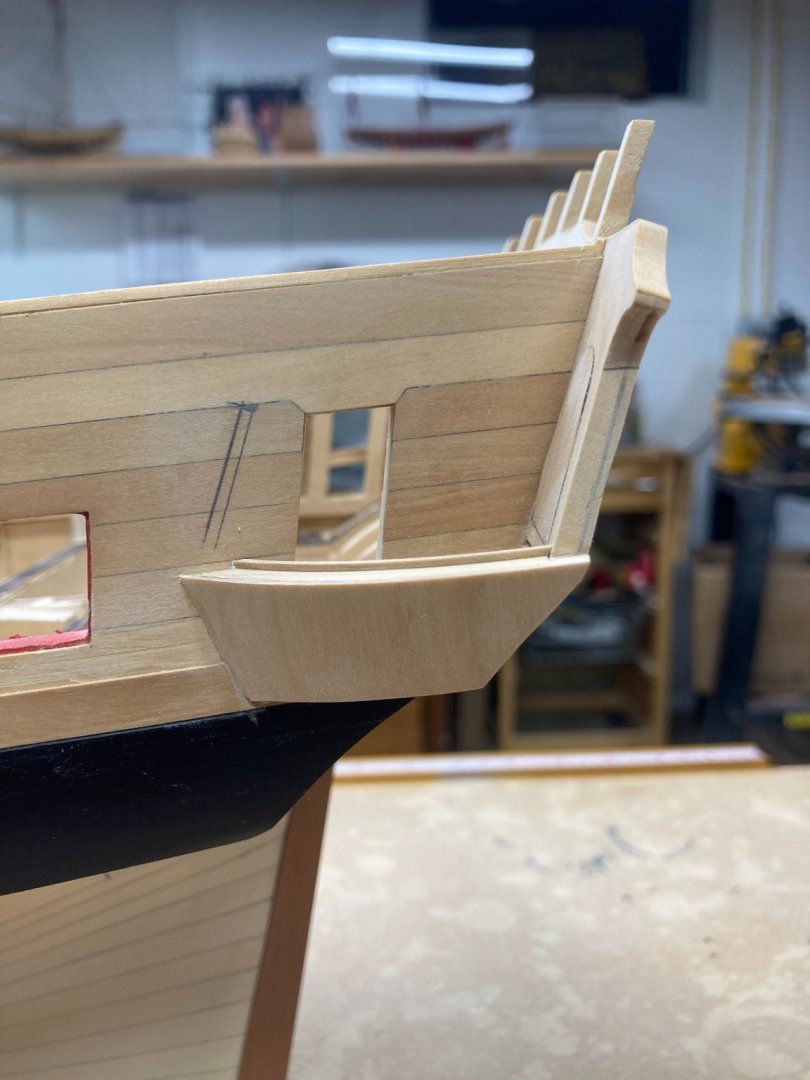
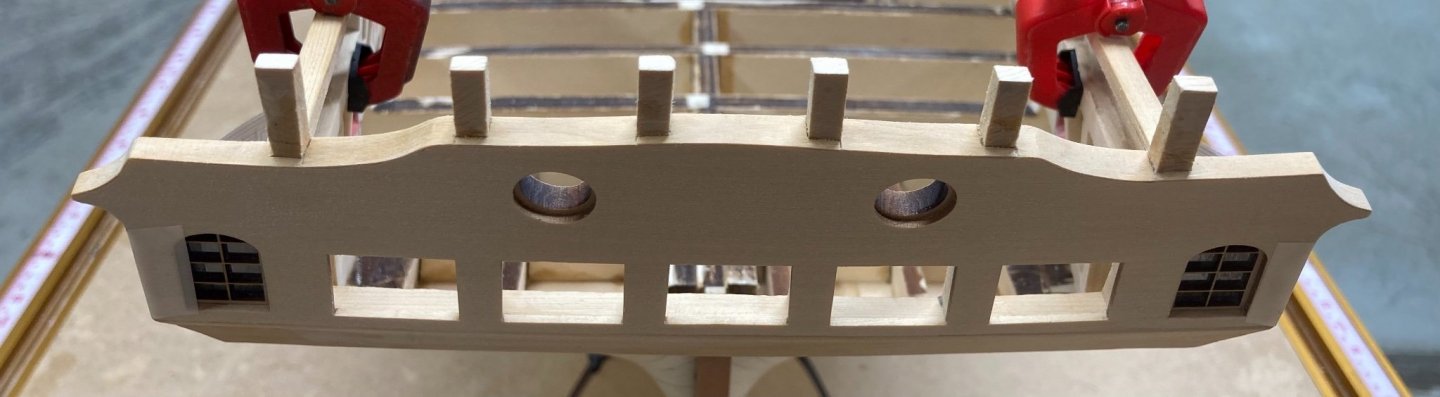
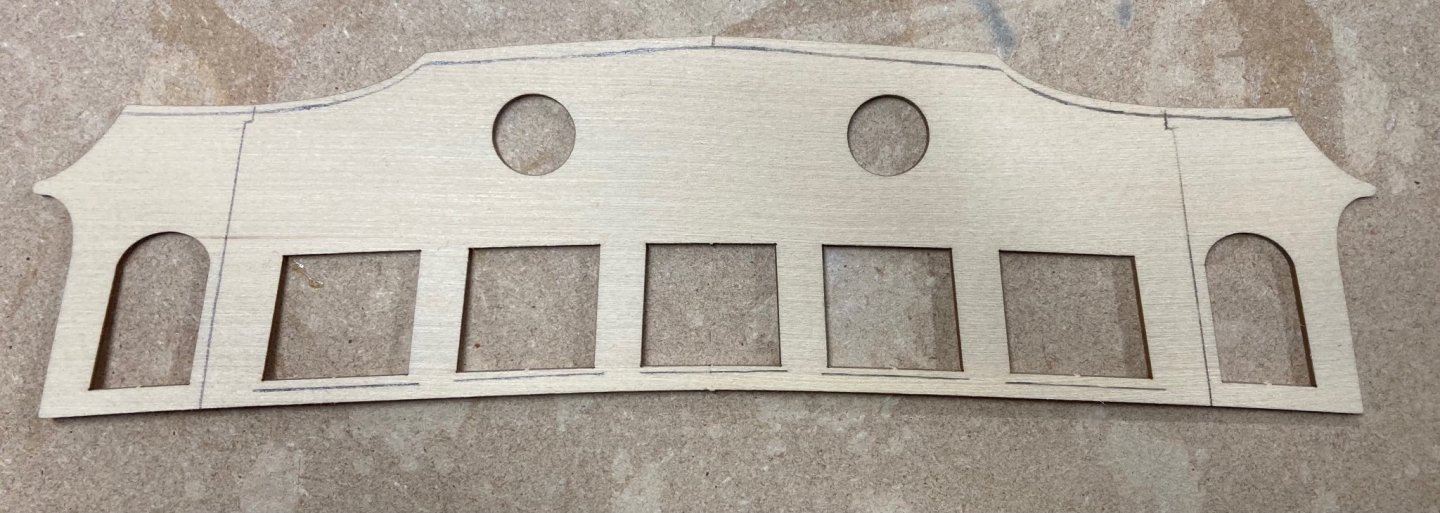
QG dummy windows installed and boxwood transom cap pieces installed.
- 399 replies
-
- 8
-
-
- winchelsea
- Syren Ship Model Company
- (and 1 more)
-
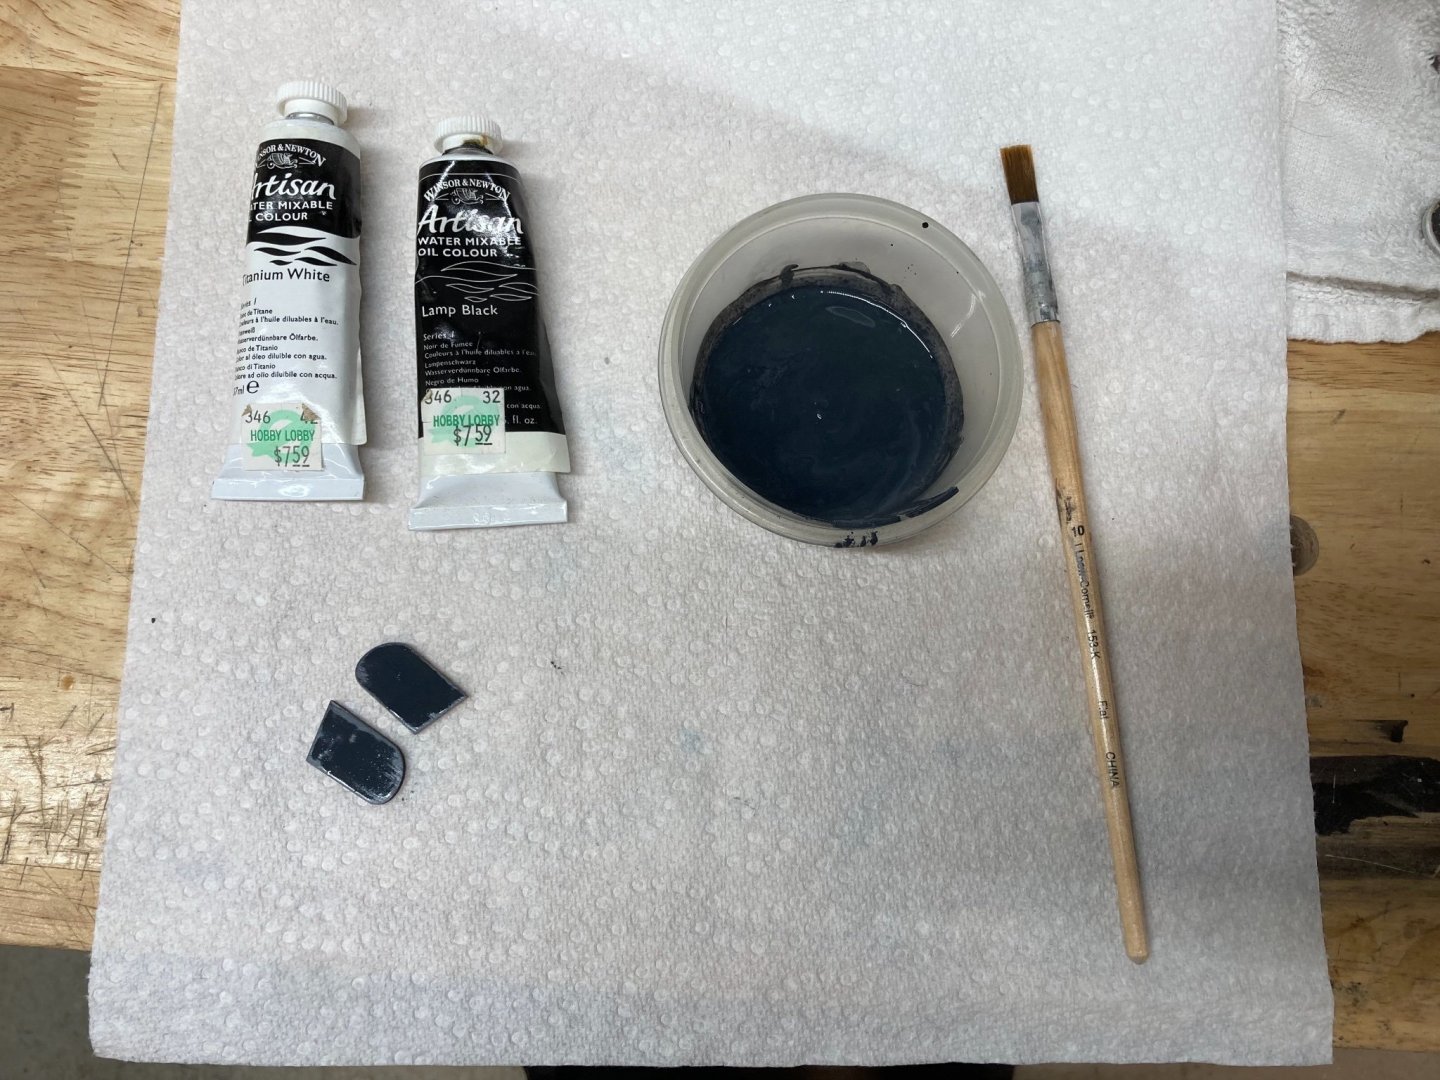
Painting the QG stern dummy window backings a nice charcoal dark grey.
- 399 replies
-
- 7
-
-
- winchelsea
- Syren Ship Model Company
- (and 1 more)
-
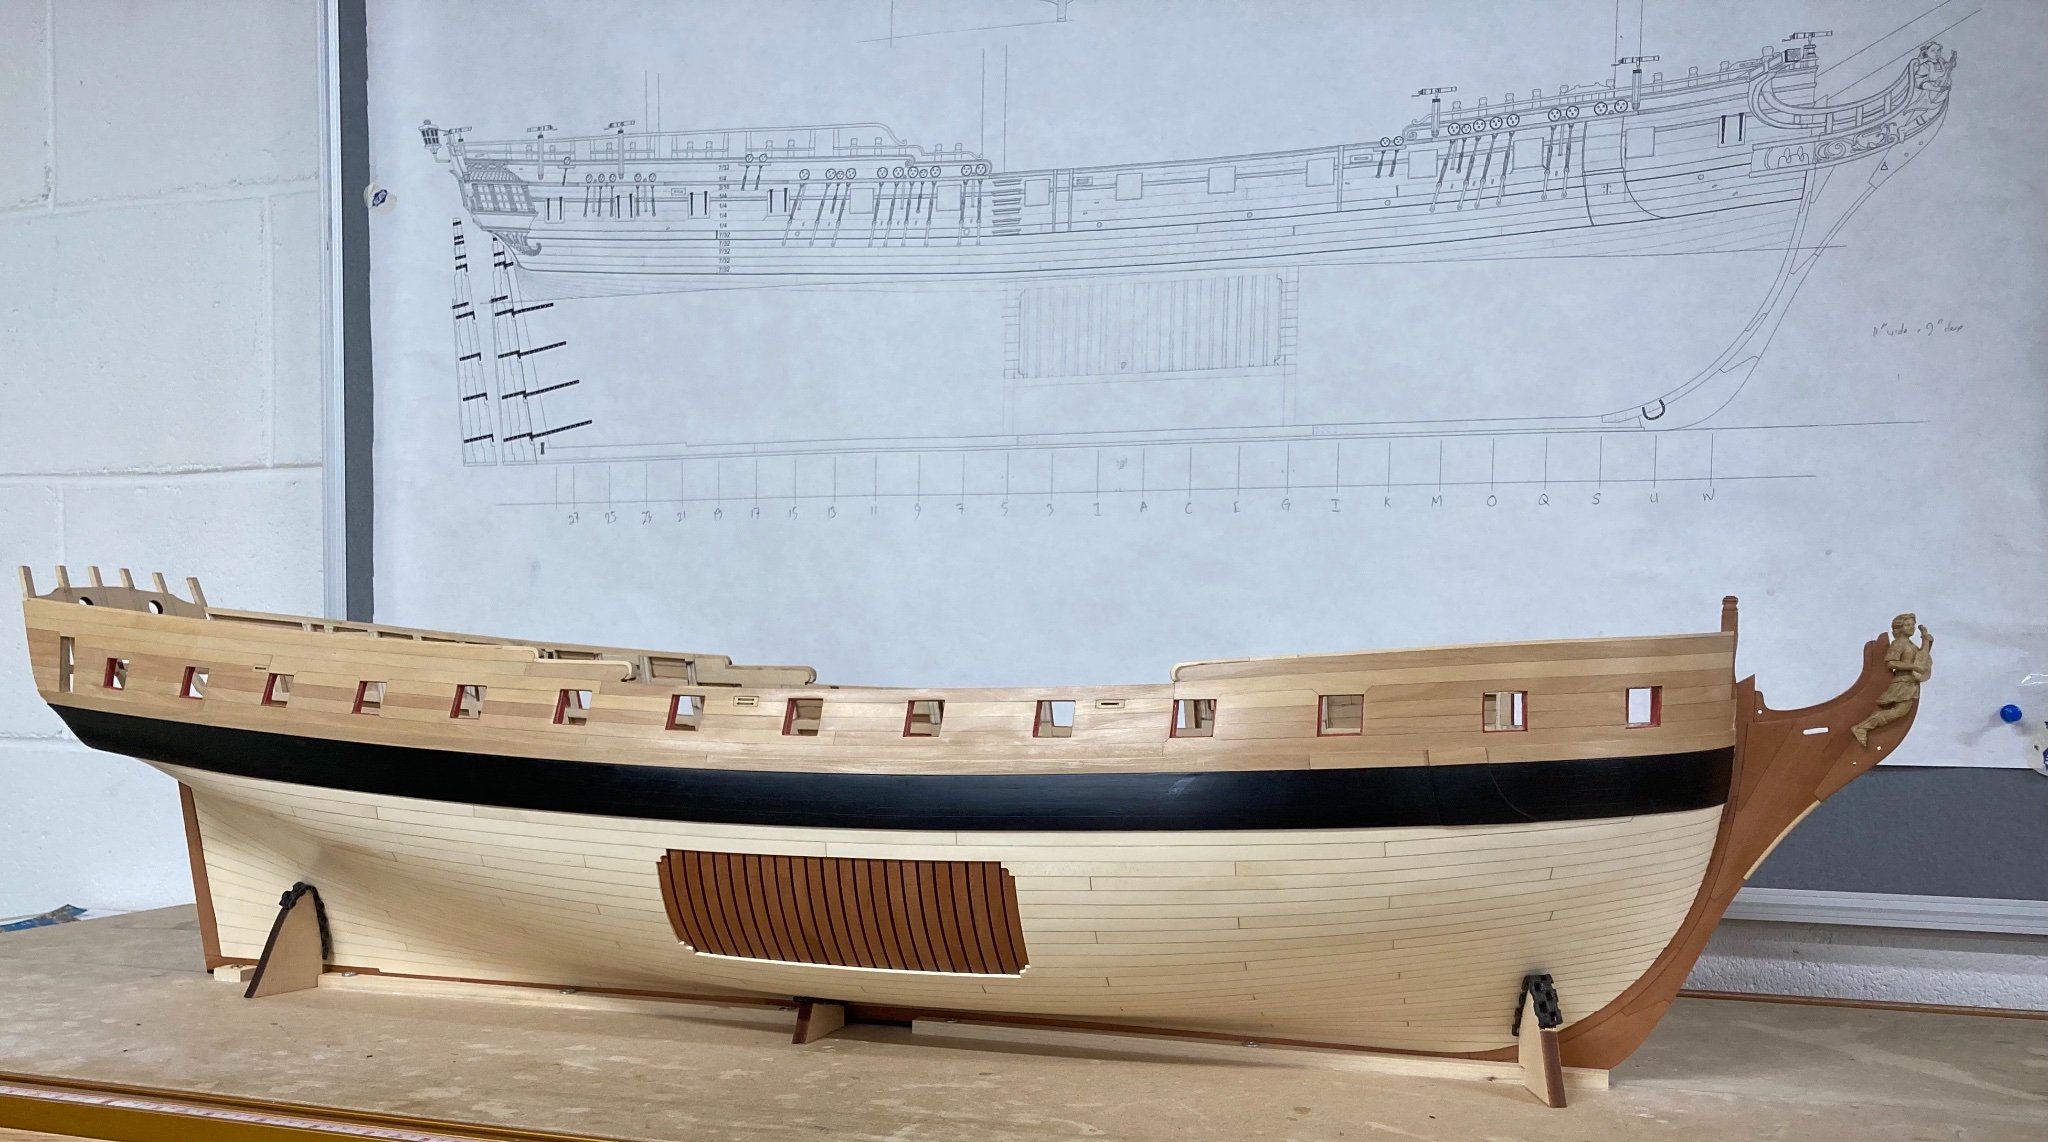
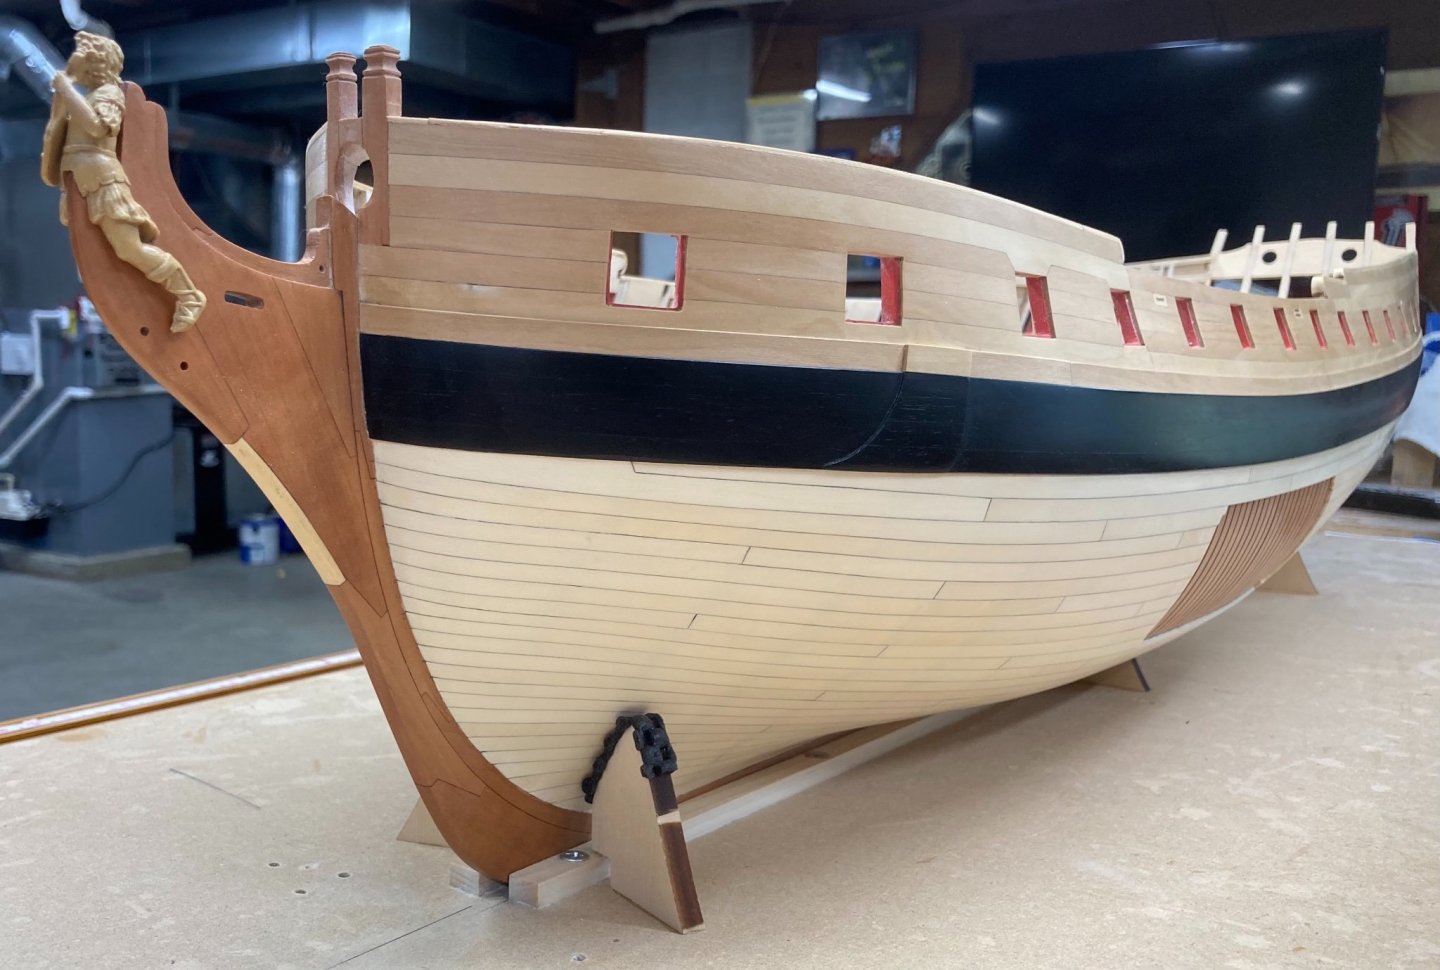
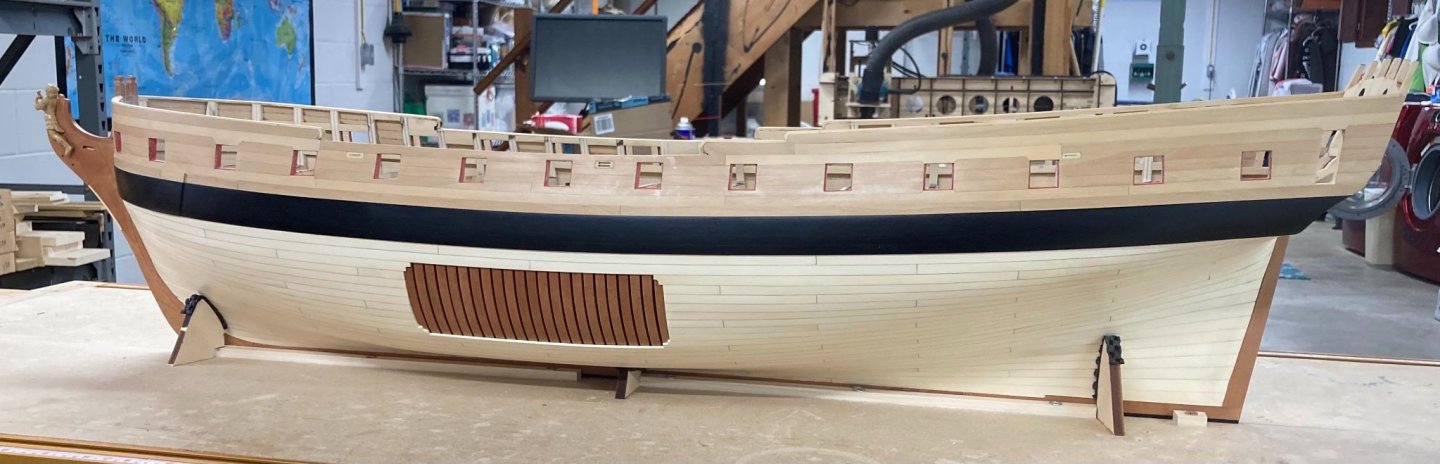
Thanks for all the comments and the “likes”. I now have the transom installed, the 3 x 7/16” wide upper counter planks went in perfectly and their bottom aligned exactly where they should, and then I made the final lower counter top plank to fit between them with a really good transition, so I’m pretty confident that the angle and height of all these parts are correct. ben


- 399 replies
-
- 20
-
-
- winchelsea
- Syren Ship Model Company
- (and 1 more)
-
Hey Bob, Correct, I used a little dab of white glue to secure the string. The tape was ok but it had a tendency to lift off so I ended up using a dab on that too.
- 399 replies
-
- 2
-
-
- winchelsea
- Syren Ship Model Company
- (and 1 more)
-
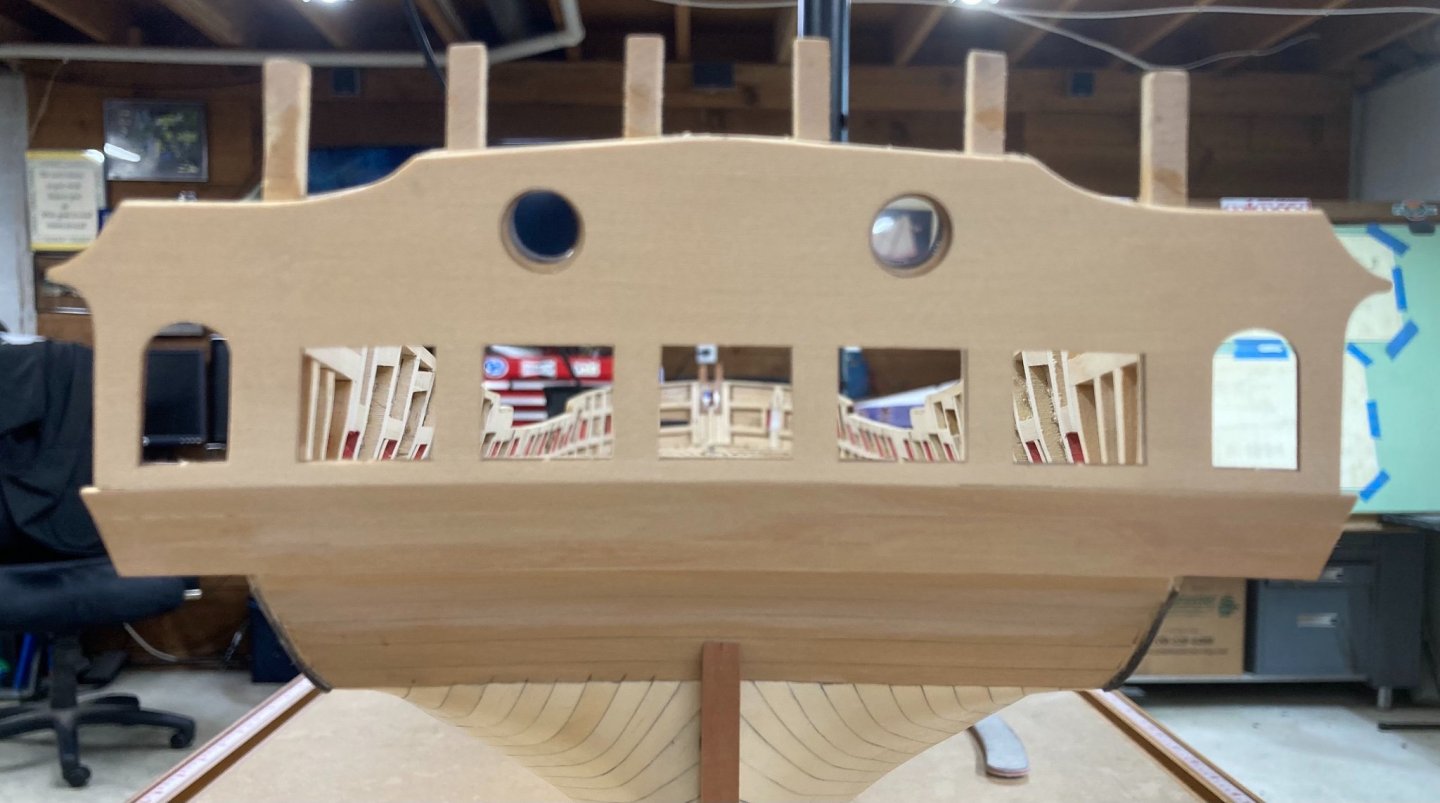
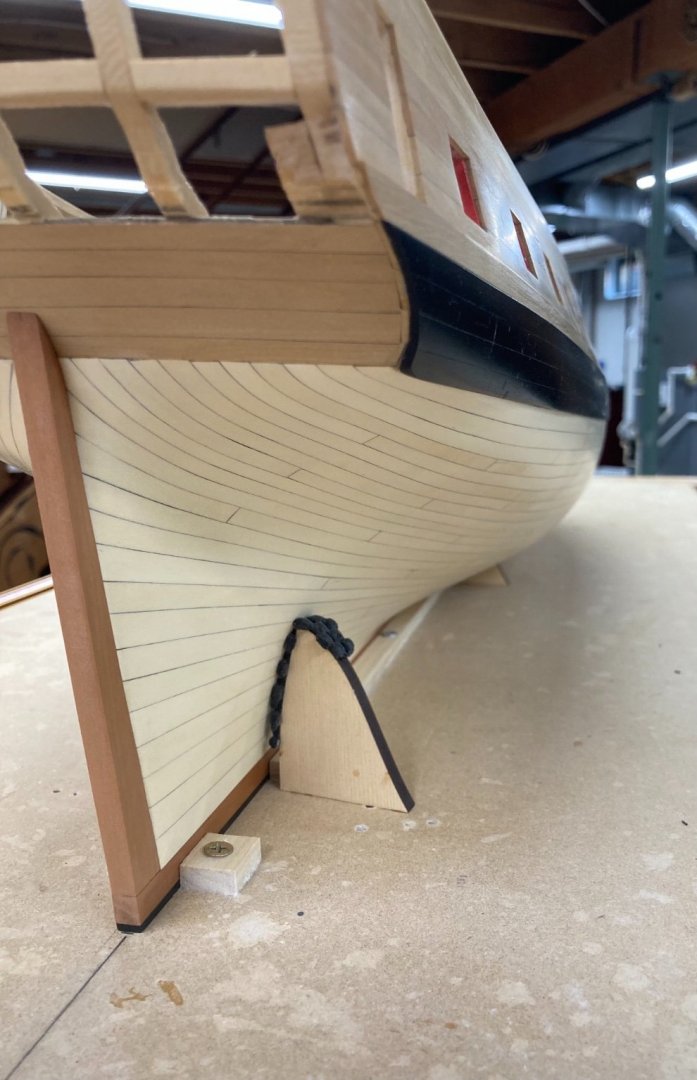
Lower Planking has finally been completed and 1st sanding to 220grit, I just added the stern post and will now sand everything to 400grit and apply some WOP. I'm Pretty happy overall with how it came out, there were a few issues around the tuck of the counter, the flow up the bow came out Ok and the Frame reveal is as I had planned it. I don't know if I would use Holly again for an entire hull as its damn expensive these days ( more than boxwood $$$$ ) but I like the color and it looks even better in natural light with a good contrast to the wales. That's the end of Chapter 2. Ben


- 399 replies
-
- 22
-
-
-
- winchelsea
- Syren Ship Model Company
- (and 1 more)