Trussben
-
Posts
2,005 -
Joined
-
Last visited
Content Type
Profiles
Forums
Gallery
Events
Everything posted by Trussben
-
 Nice progress there, my planking took over a year to complete!
 -
I did use the fruitwood gel stain that Chuck recommended, i just used a paintbrush to apply it not too thick, left for 5 minutes, wiped off with a clean rag and then used a dry brush to get it out of all the nooks and crannies and allowed to fully dry. Then I held them up to my hull planking to see if it matched and reapplied it as needed to get the right tone.
- 399 replies
-
- 7
-

-
- winchelsea
- Syren Ship Model Company
- (and 1 more)
-
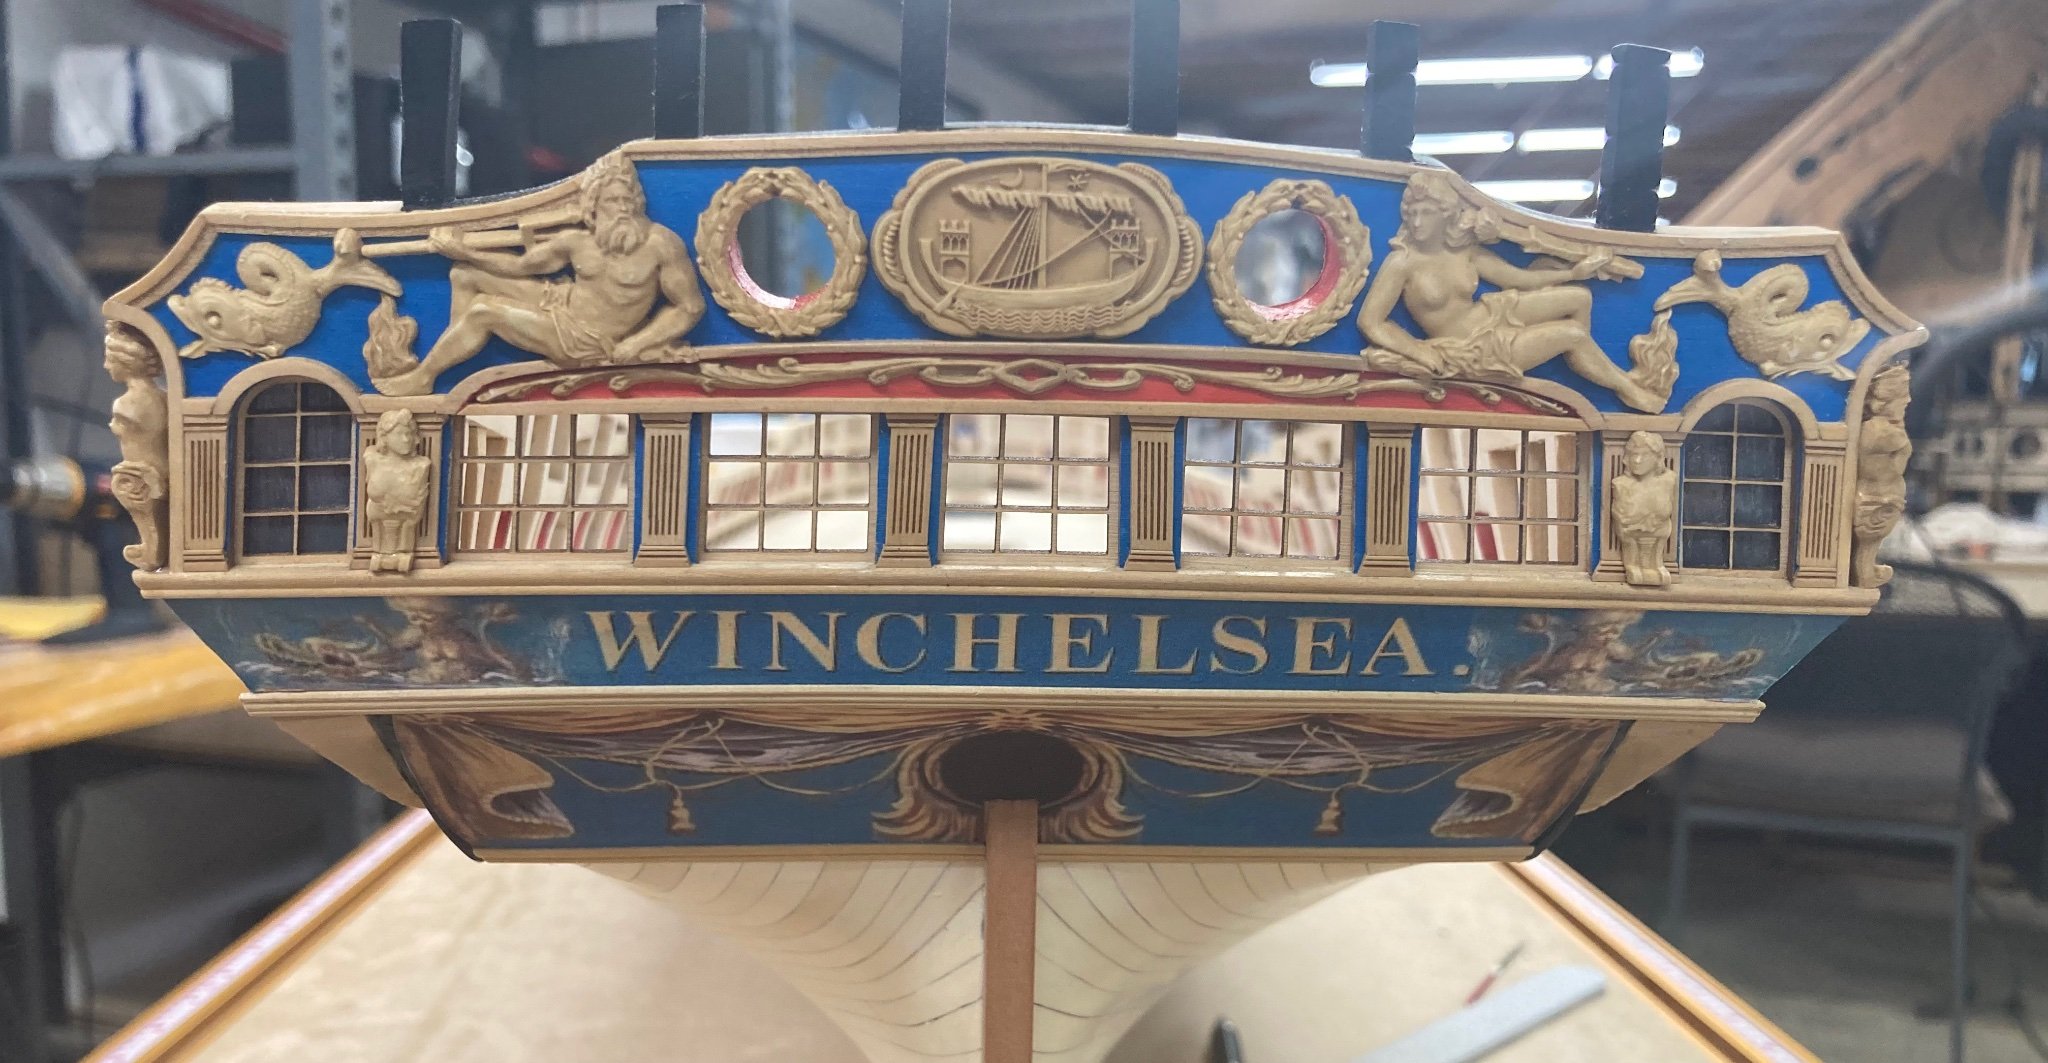
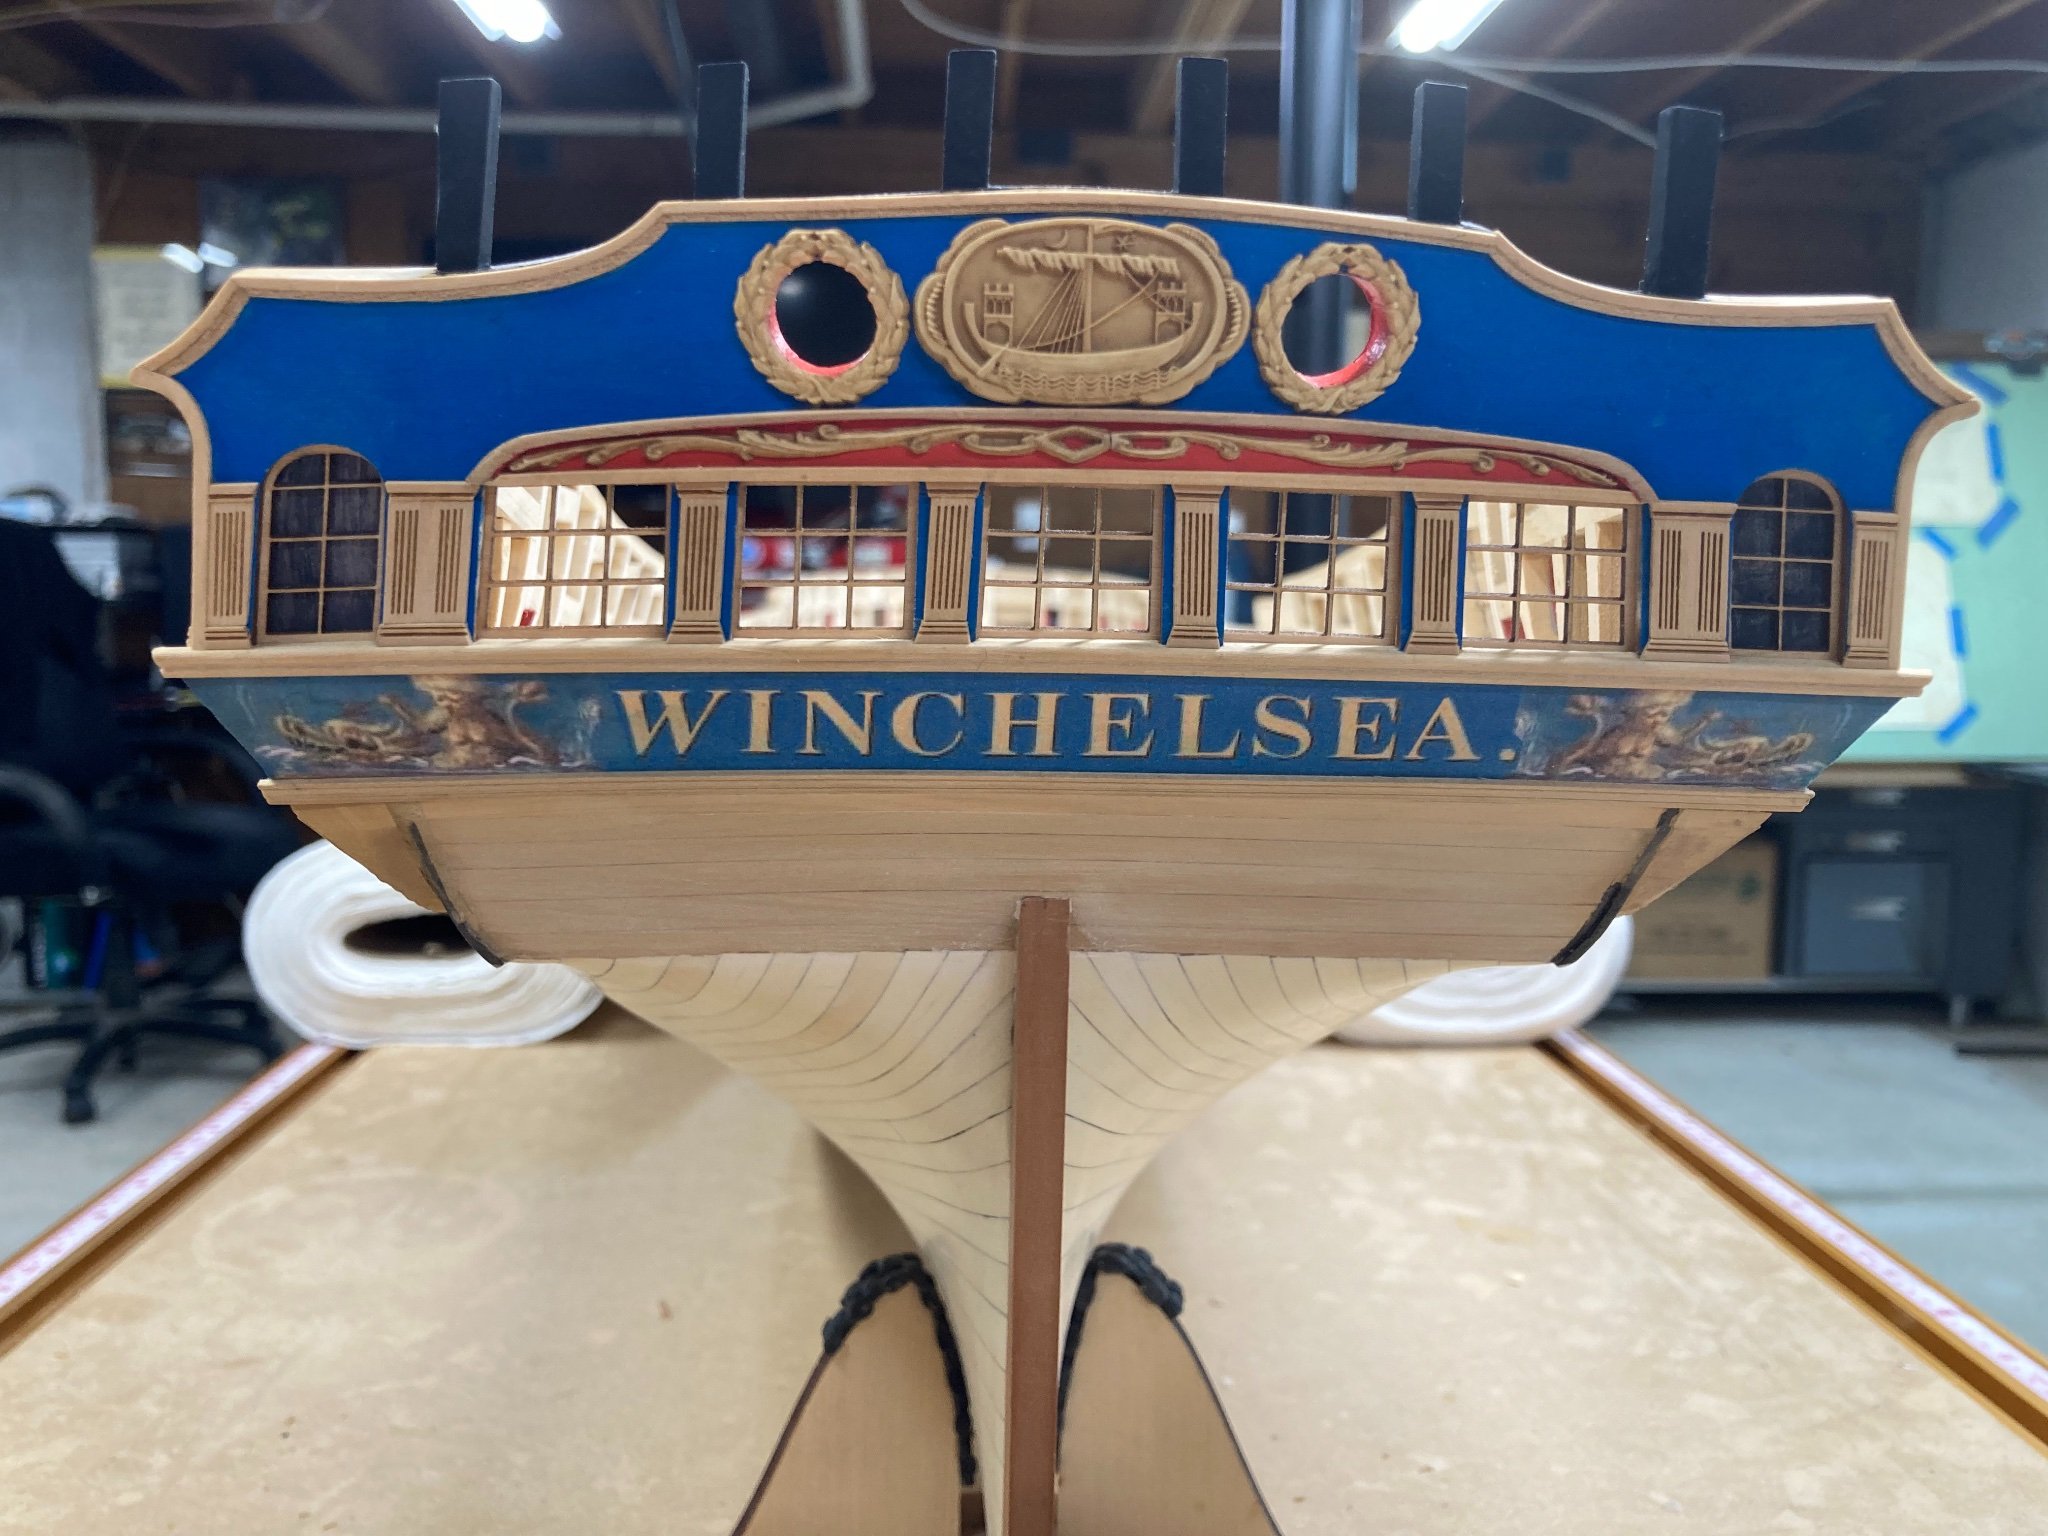
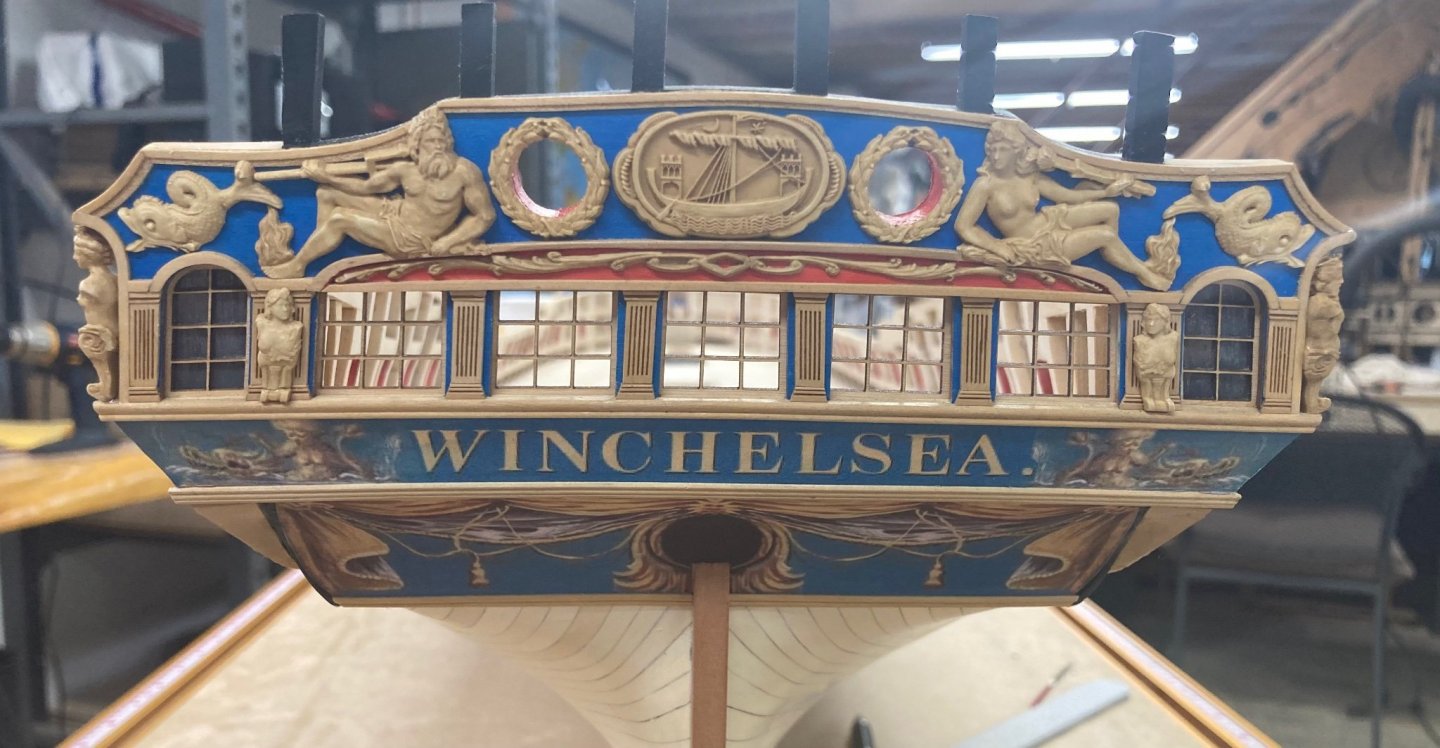
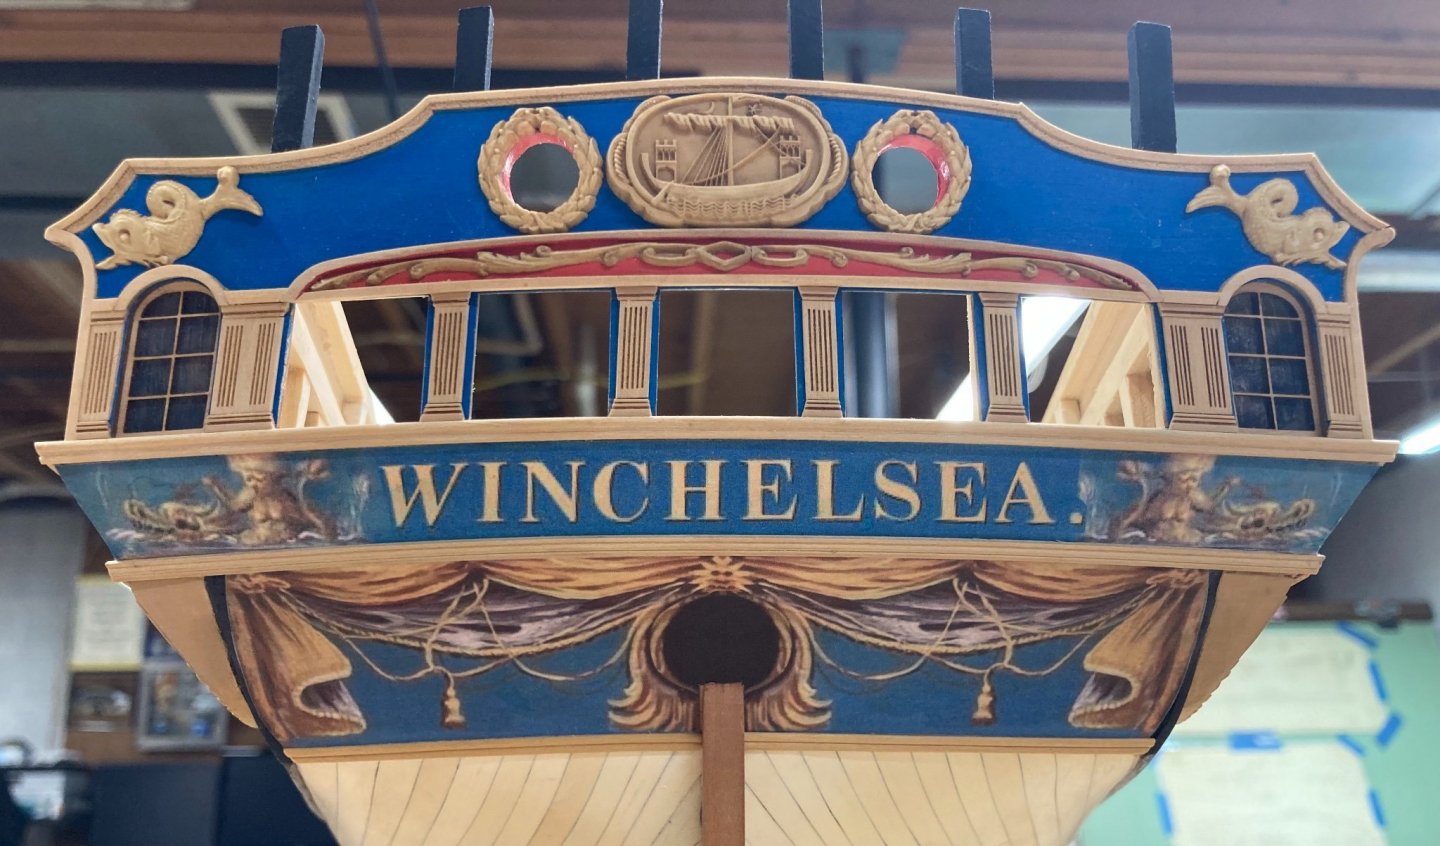
Stern decorations completed and the end to Chapter 3.
- 399 replies
-
- 17
-
-

-
- winchelsea
- Syren Ship Model Company
- (and 1 more)
-
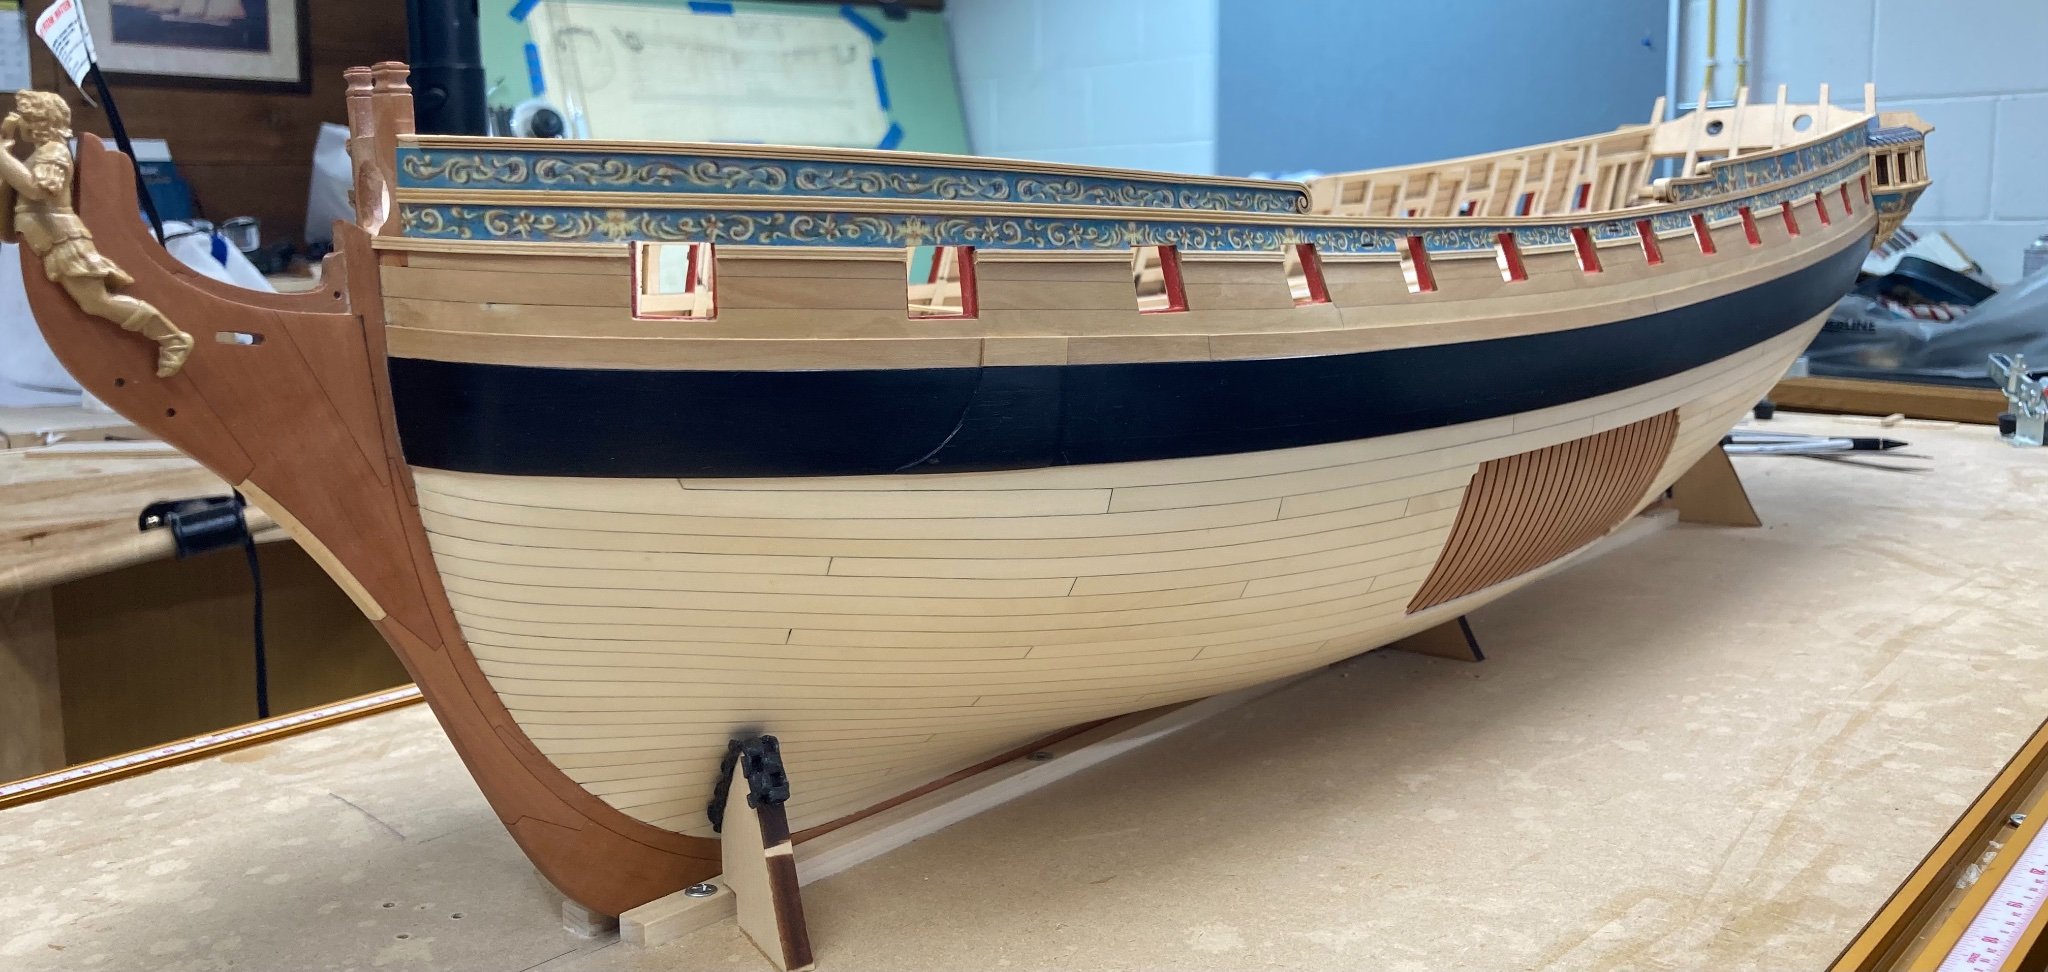
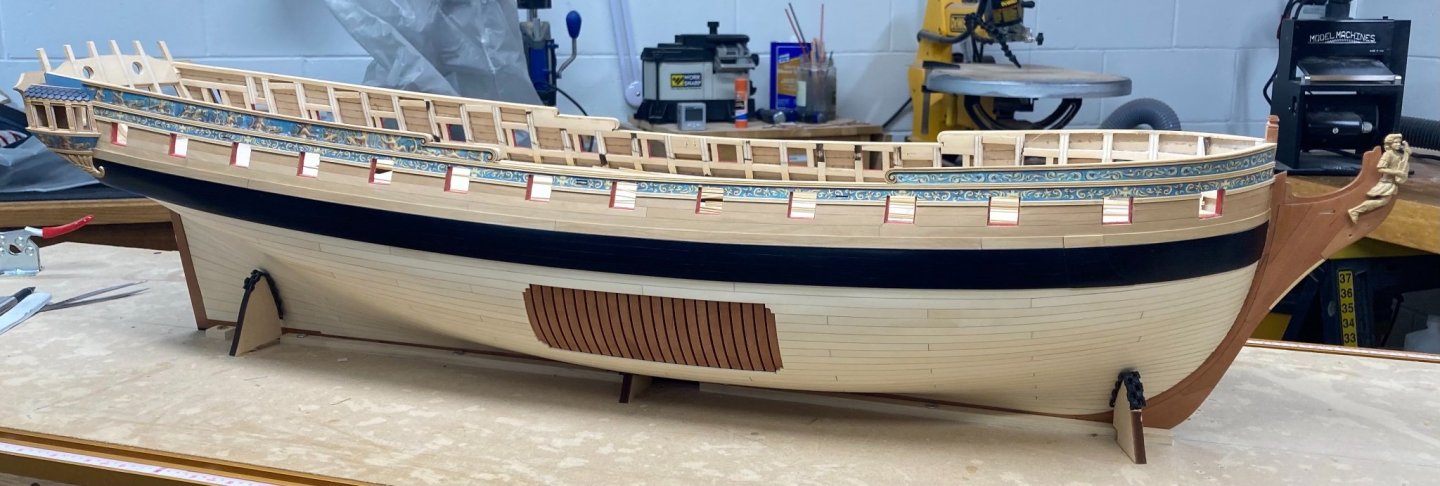
A little more work at the stern gets me closer to finishing it up. There was a little bit of clean up needed around the lower counter and then the frieze and moldings below it were added. Also the rest of the cove pieces were installed and outer fish/dolphin figures added.
- 399 replies
-
- 20
-
-
- winchelsea
- Syren Ship Model Company
- (and 1 more)
-
1:48 would definitely be my preference in scale and size as any bigger it will take up a lot of room when fully rigged, and I think it’s the perfect choice for a full rig. And obviously the matching scale with Winchelsea means you could display them next to each other.
- 1,784 replies
-
- 9
-
-
- winchelsea
- Syren Ship Model Company
- (and 1 more)
-
I’m certainly interested if you go ahead with this project in POF @ 1:48, with a full rig.
- 1,784 replies
-
- 3
-
-
- winchelsea
- Syren Ship Model Company
- (and 1 more)
-
I Like the sound of a “Passaro” designed full POF kit, that really would be awesome!
- 1,784 replies
-
- 4
-
-
- winchelsea
- Syren Ship Model Company
- (and 1 more)
-
Nice progress, I found that when I lined off my hull planking that I needed to do more fairing in certain areas, that’s the big “tell” of if it’s faired correctly. Ben
- 840 replies
-
- 4
-
-
- winchelsea
- Syren Ship Model Company
- (and 1 more)
-
HMS VICTORY 1765 by albert - 1/48
Trussben replied to albert's topic in - Build logs for subjects built 1751 - 1800
Beautiful -
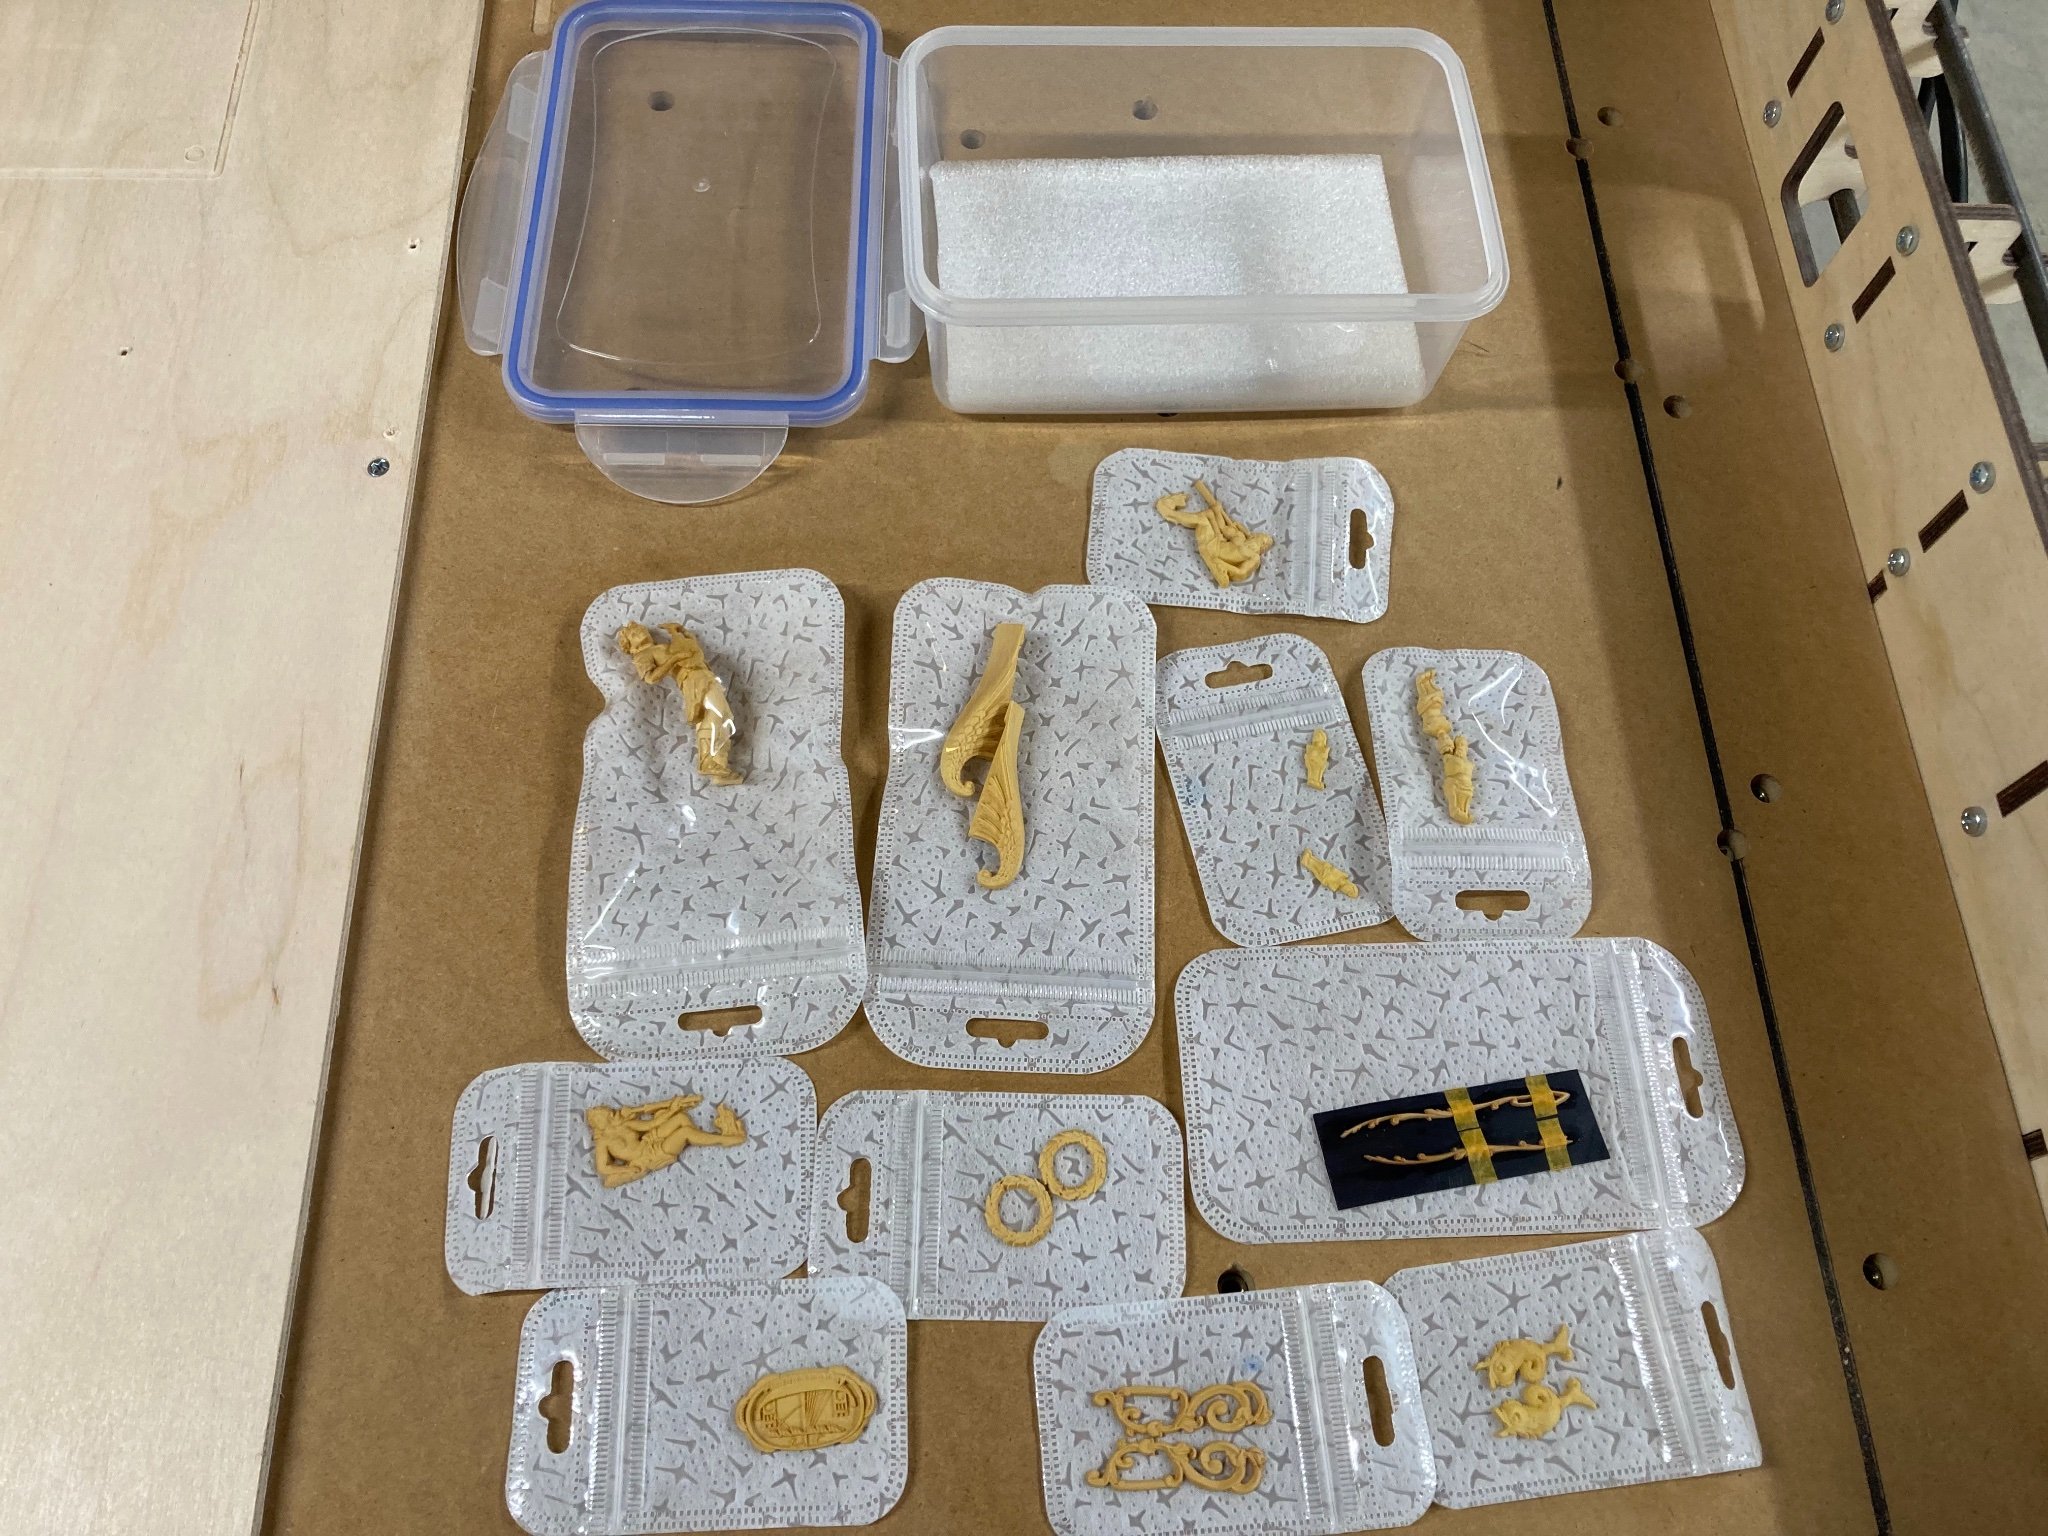
I am currently selling a set of Boxwood CNC carvings from Jack if anybody is interested.
- 399 replies
-
- 1
-
-
- winchelsea
- Syren Ship Model Company
- (and 1 more)
-
Hi I have a brand new in original packaging set of Boxwood CNC carvings as seen here for sale, I had totally forgotten that I had purchased them from Jack and found them in a drawer while searching for something else, and have already used the resin parts instead, So I offer them up for sale for the original price of $320 with free shipping inside of the USA. If worldwide shipping is needed myself and the purchaser can come to an agreement on what service and cost there would be for that.
- 1 reply
-
- 2
-
-
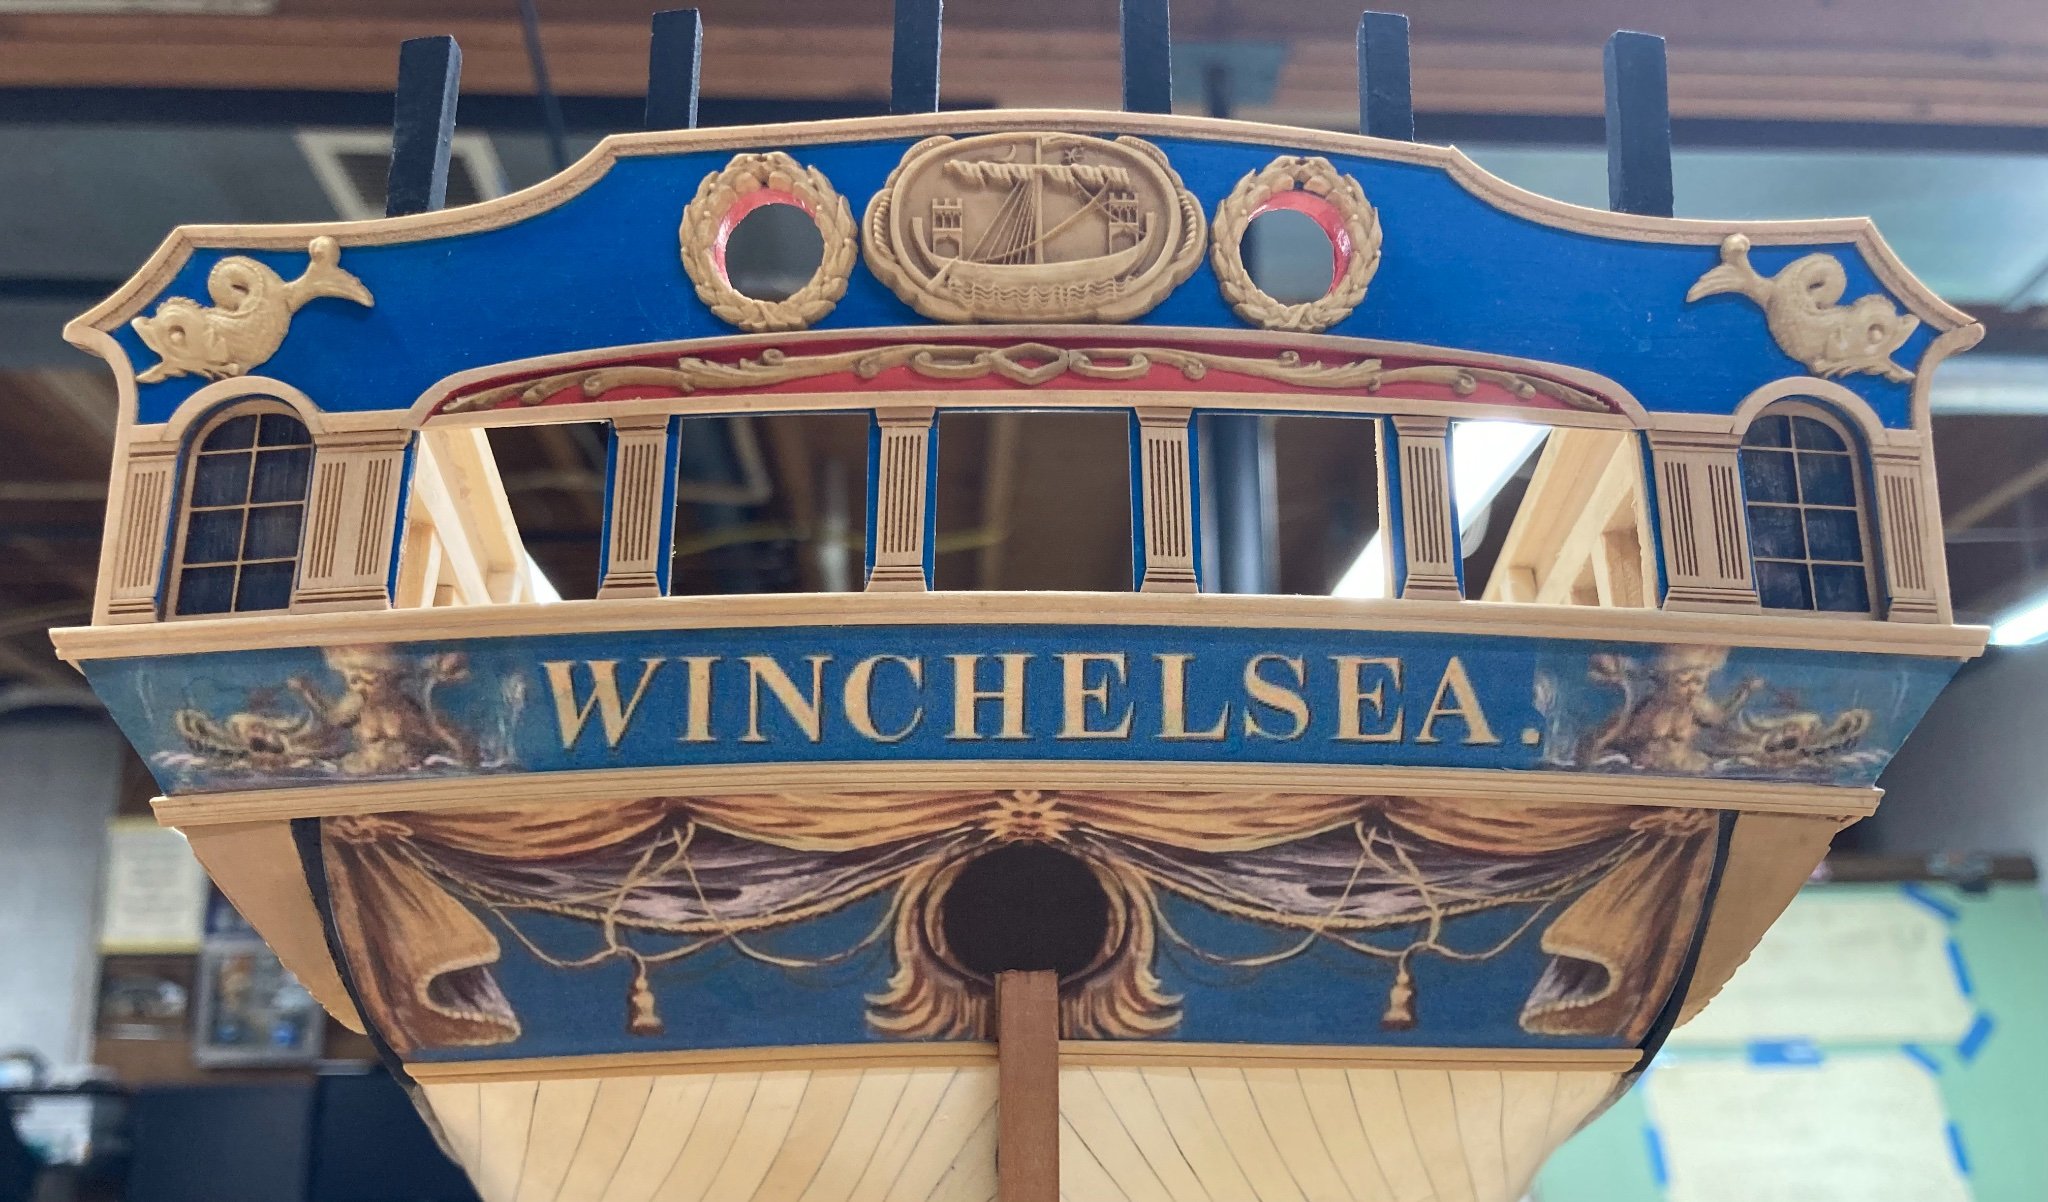
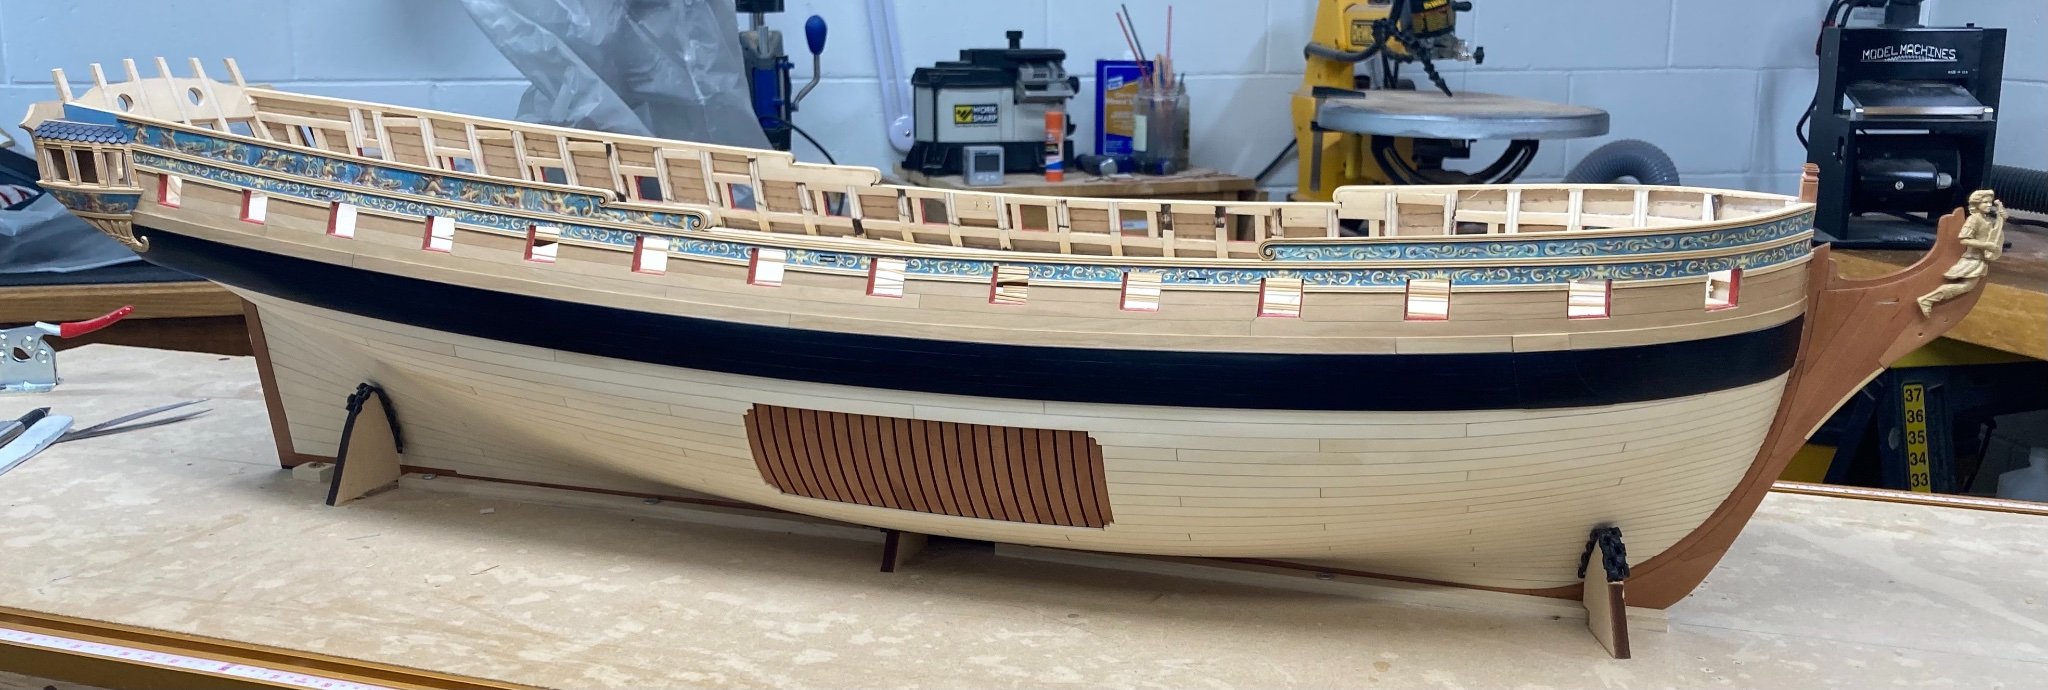
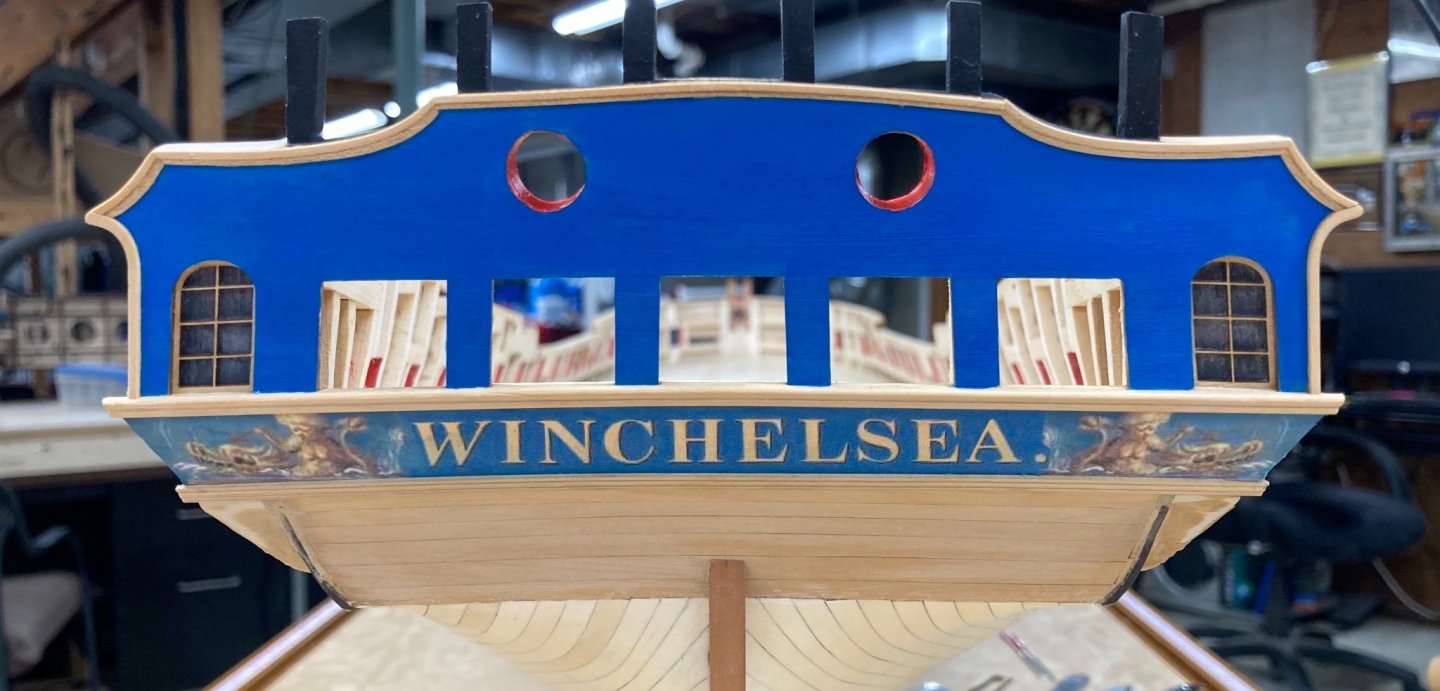
So working on the Transom details now, it was painted cerulean blue, the ports red and the timber heads flat black. The laser etched transom moldings were cleaned of char and installed and then I installed the Counter moldings and the Frieze between them and started getting the lower counter ready for its frieze.
- 399 replies
-
- 21
-
-
-
- winchelsea
- Syren Ship Model Company
- (and 1 more)
-
Both QGs were completed and the hull moldings and friezes were installed and now it’s time to pay attention to the stern details.

- 399 replies
-
- 20
-
-
-
- winchelsea
- Syren Ship Model Company
- (and 1 more)
-
I would definatly put the Main wales in place first as this sets up where Everything else goes.
-
Welcome Melissa, There are a few of us model builders in the capital region, enjoy your new hobby. Ben
-
I look forward to watching your progress on the Echo, I started my dark side career out on exactly the same subject and it stood me in great stead. Ben
-
That’s a very nice way to do the rails.
- 1,784 replies
-
- 2
-
-
- winchelsea
- Syren Ship Model Company
- (and 1 more)