HOLIDAY DONATION DRIVE - SUPPORT MSW - DO YOUR PART TO KEEP THIS GREAT FORUM GOING! (89 donations so far out of 49,000 members - C'mon guys!)
×


Trussben
-
Posts
2,005 -
Joined
-
Last visited
Content Type
Profiles
Forums
Gallery
Events
Everything posted by Trussben
-
 Wow Chuck, that looks amazing and just shows what a talented designer you are.
- 1,784 replies
-
- 4
-

-
- winchelsea
- Syren Ship Model Company
- (and 1 more)
-
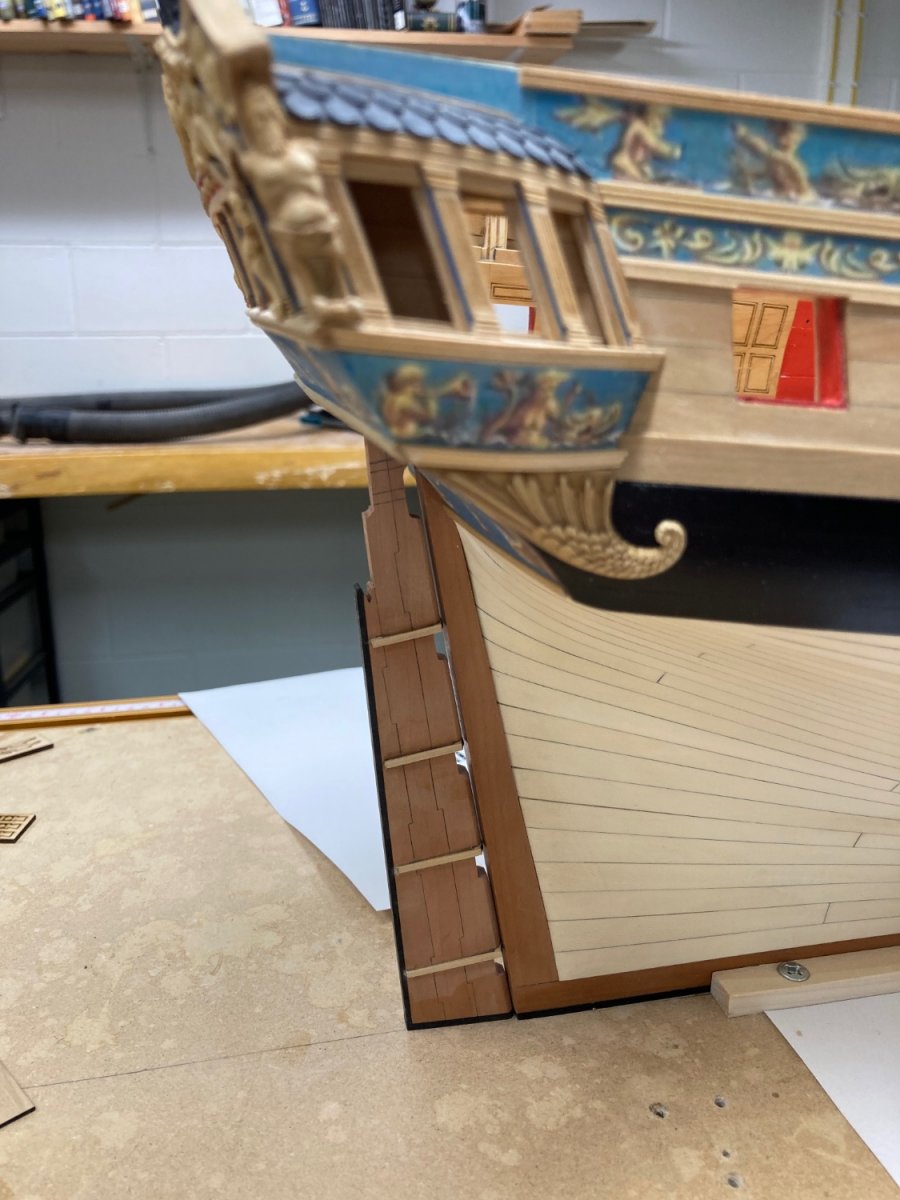
Work on the rudder is underway in Swiss Pear and Gabon Ebony to match my other frame accents.

- 399 replies
-
- 19
-
-
- winchelsea
- Syren Ship Model Company
- (and 1 more)
-
NAIAD 1797 by Bitao - 1:60
Trussben replied to Bitao's topic in - Build logs for subjects built 1751 - 1800
That’s some very fine deck framing there! -
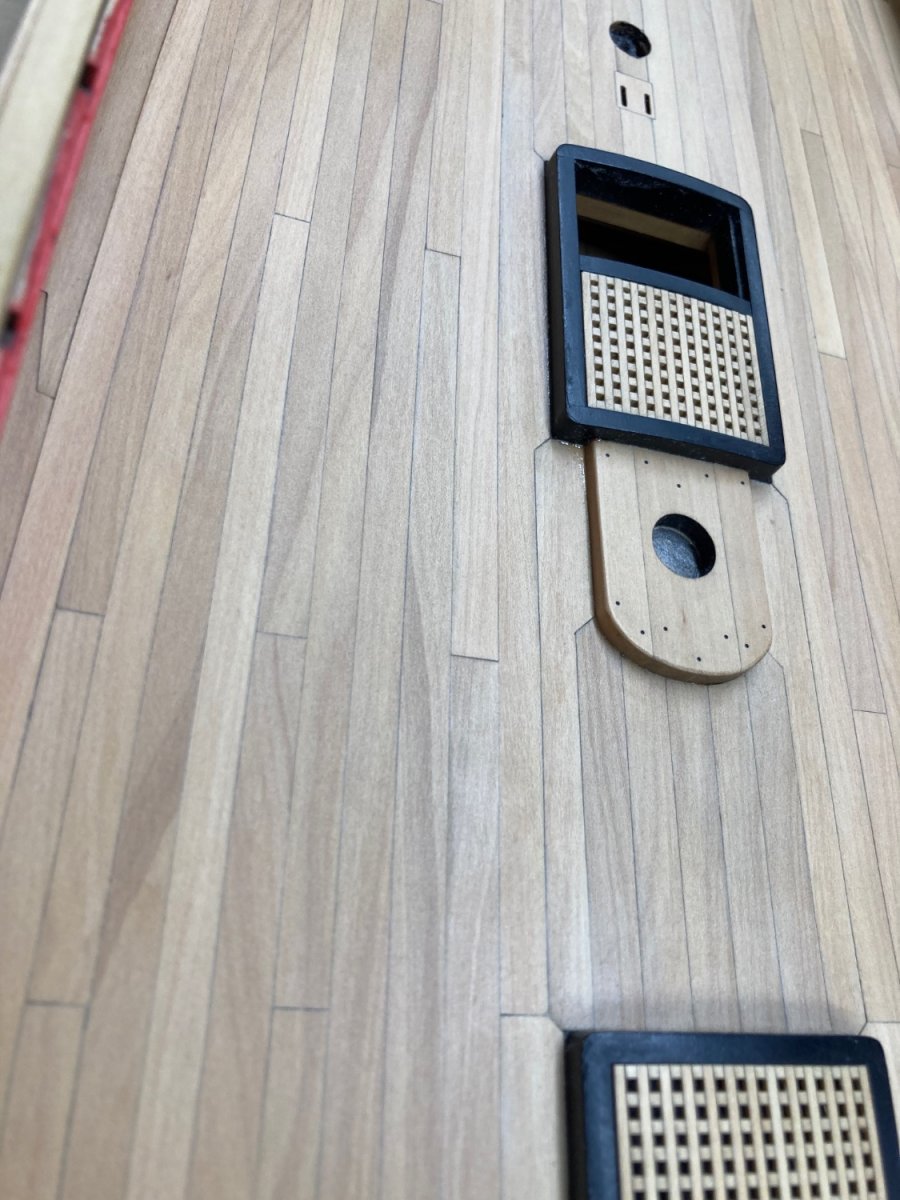
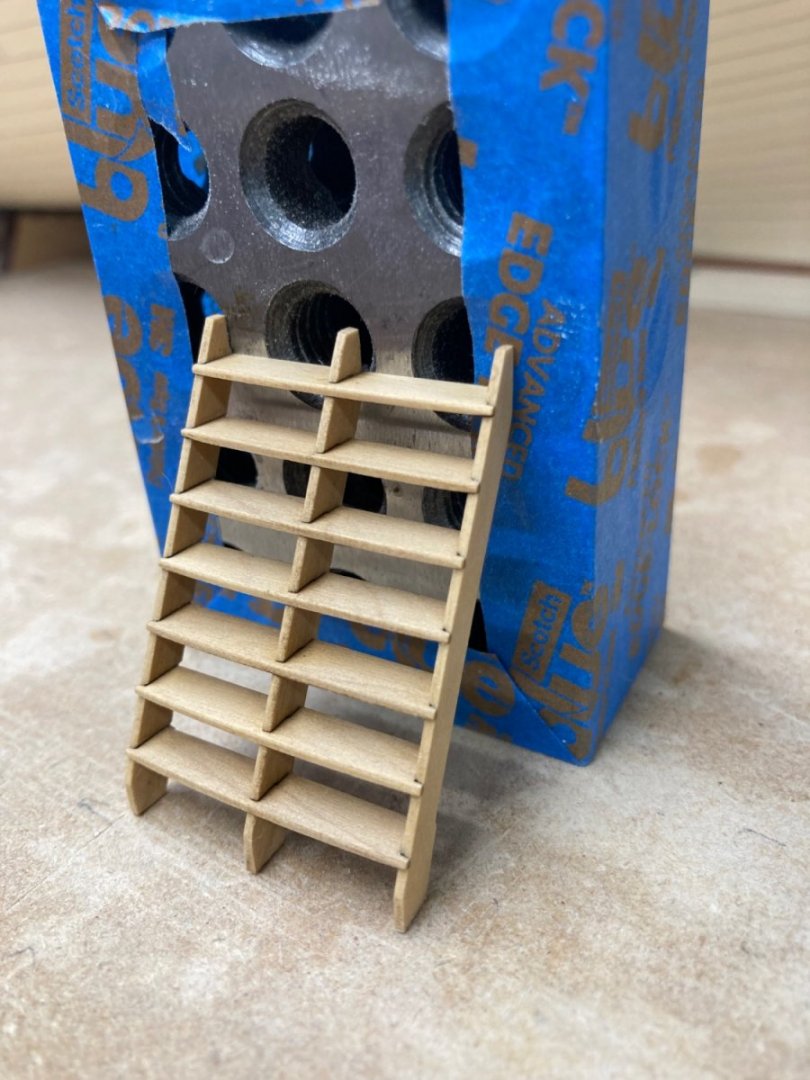
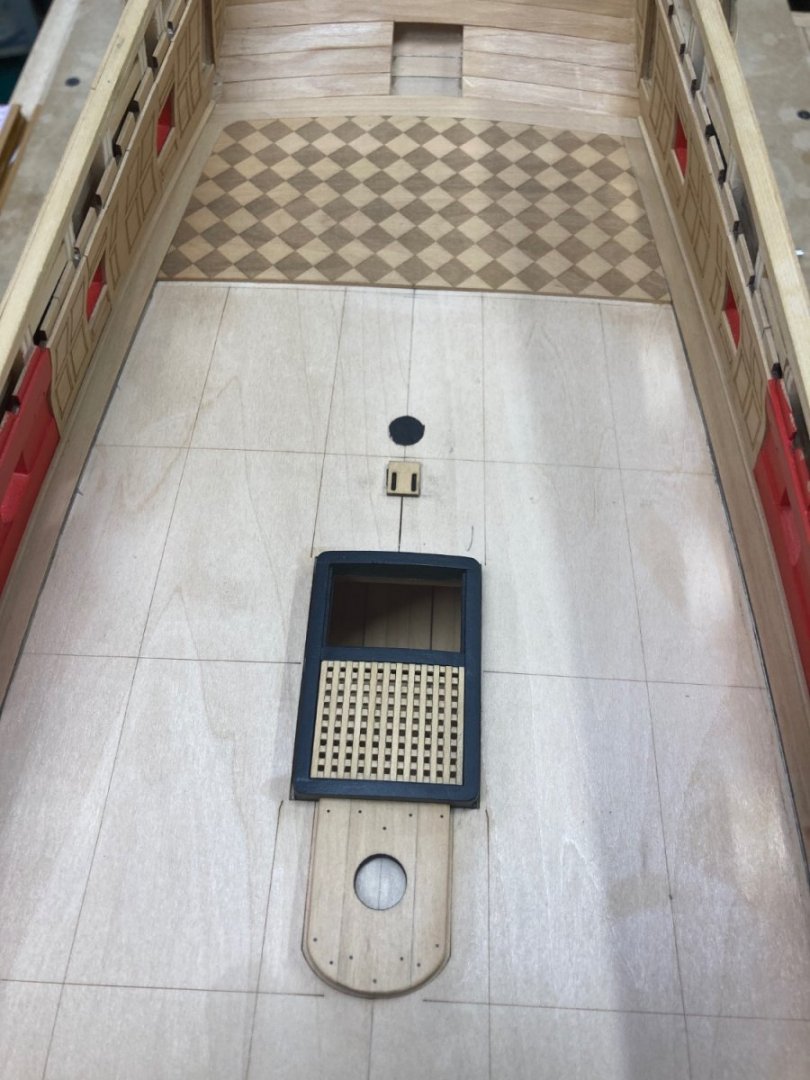
Thanks for the likes and kind comments. I decided to go ahead and make the rudder trunk and seats as well as the two ladderways. These are some really beautiful laser cut and etched parts that go together and look fantastic when finished.
- 399 replies
-
- 22
-
-
- winchelsea
- Syren Ship Model Company
- (and 1 more)
-
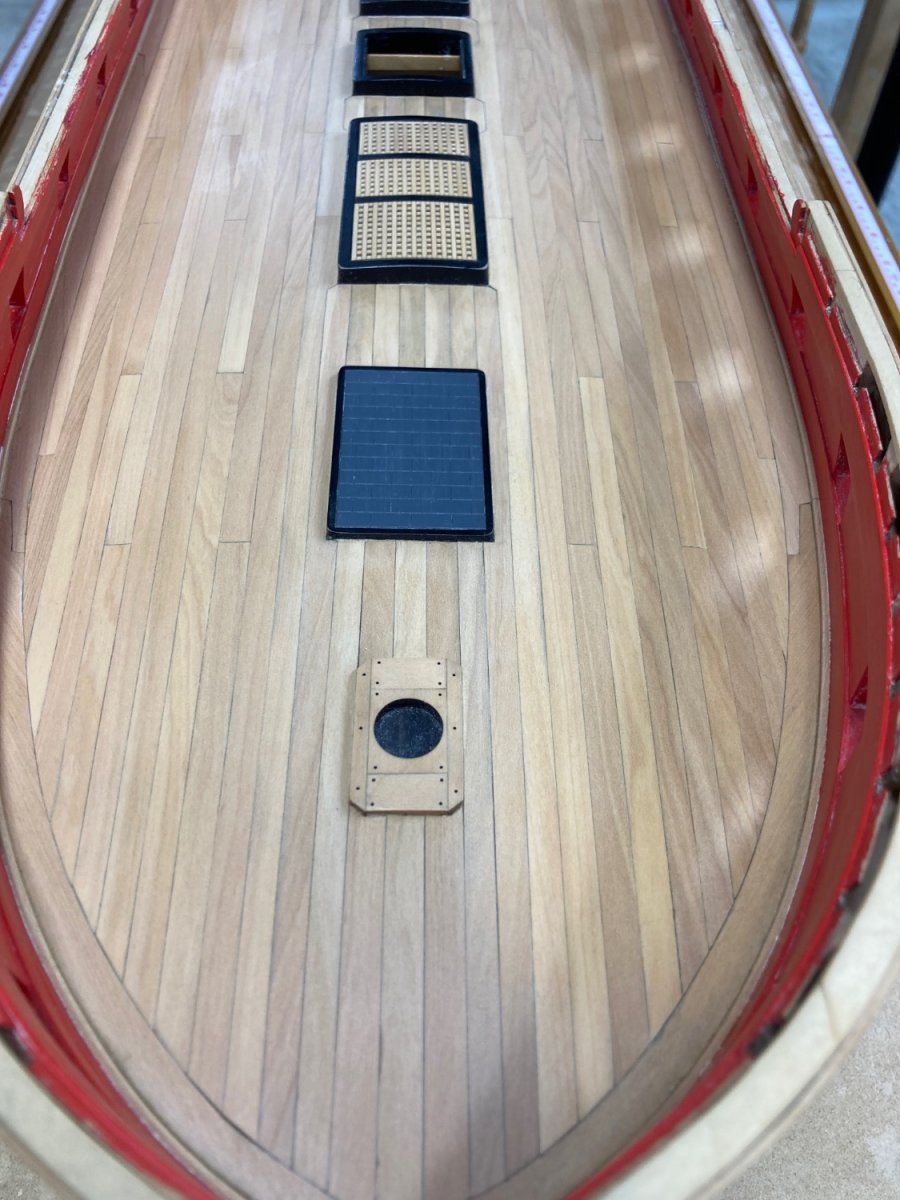
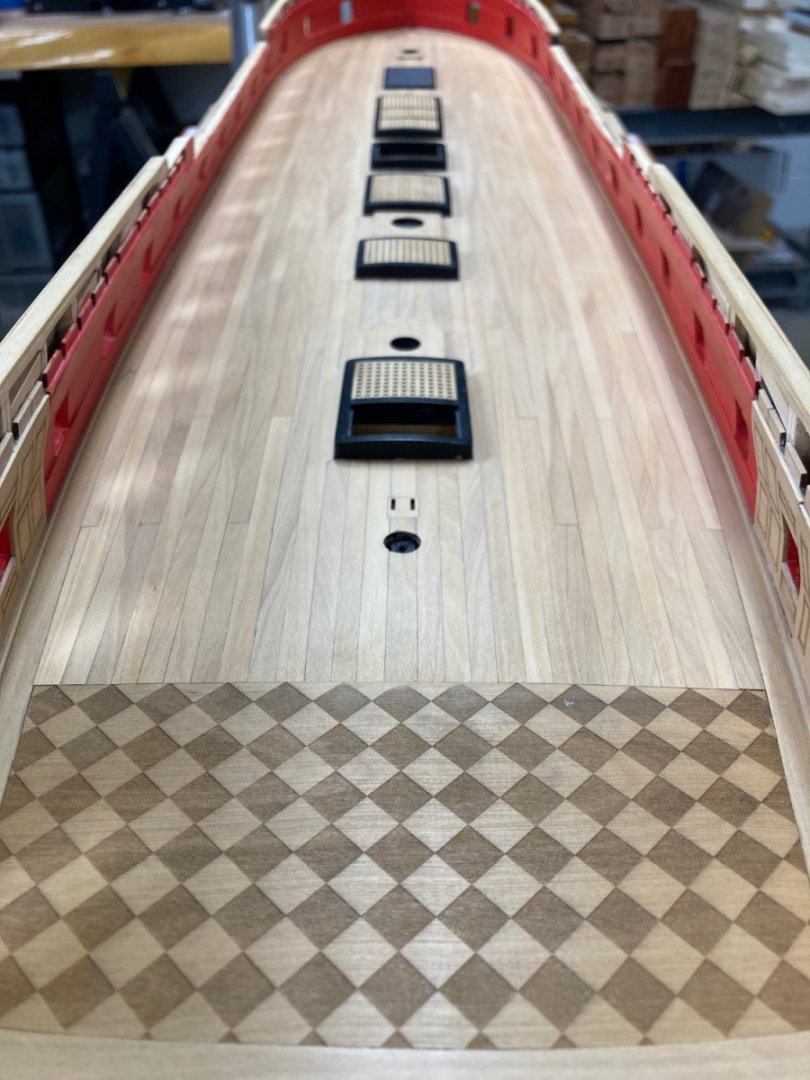
Completed chapter #4 with the deck planking done. I do have to touch up some paintwork that was damaged during the decking. Chapter #5 starts with the rudder and so I have to machine some pear wood and cut those pieces out to match the plans as I will not be using the laser cut parts.


- 399 replies
-
- 19
-

-
-
- winchelsea
- Syren Ship Model Company
- (and 1 more)
-
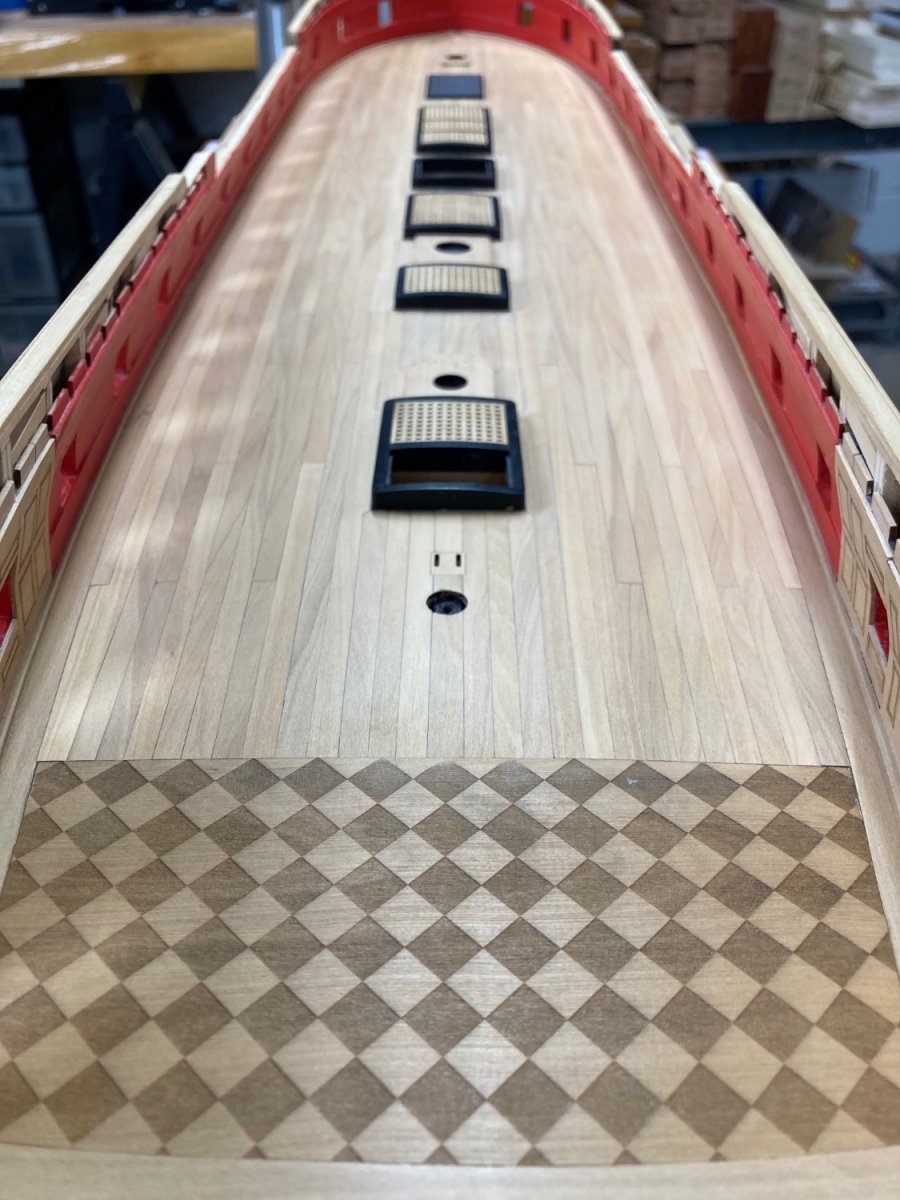
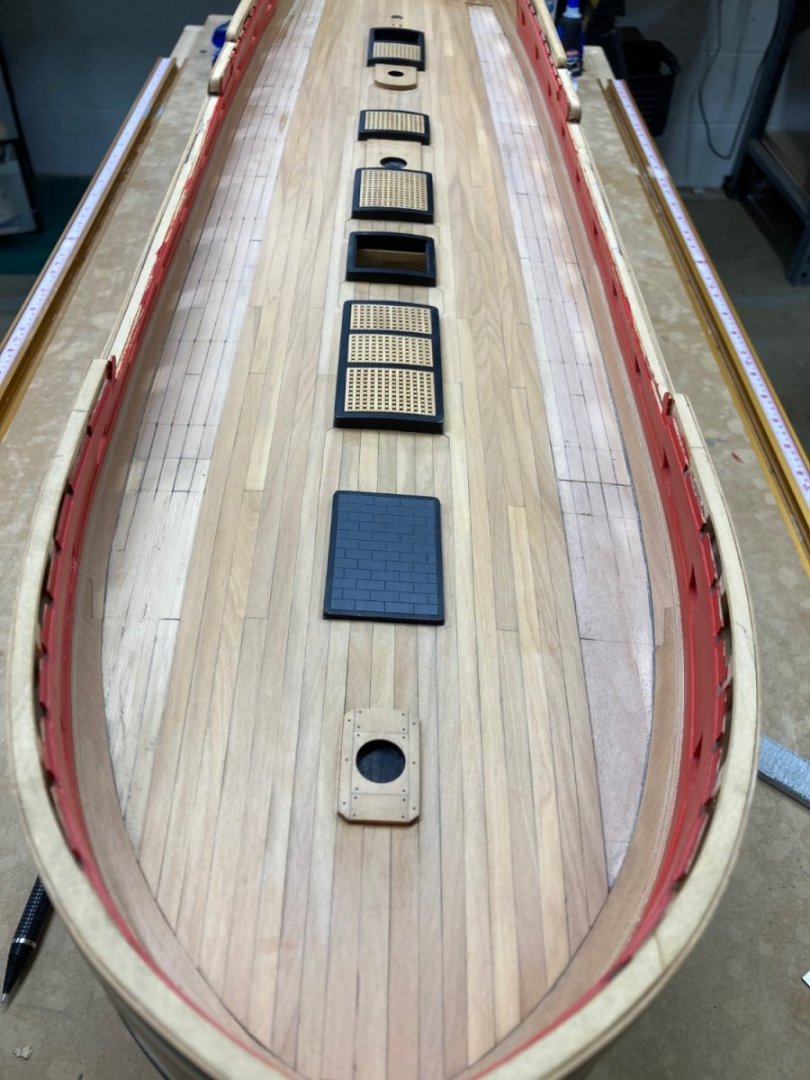
Next belts on each side of 5 planks completed, onto the final belts of 5.
- 399 replies
-
- 20
-
-
-
- winchelsea
- Syren Ship Model Company
- (and 1 more)
-
Thanks for all the comments and likes. Central belt of deck planking ( the difficult part ) has been completed, and now onto the outer belts.

- 399 replies
-
- 21
-
-
-
- winchelsea
- Syren Ship Model Company
- (and 1 more)
-
Best supplier of high quality Holly in USA but not cheap. https://www.domexhardwoods.com
-
Yep, got to agree - Very nice planking so far.
- 840 replies
-
- 2
-
-
- winchelsea
- Syren Ship Model Company
- (and 1 more)
-
Thats about right, maybe even a touch further back. See that C2.2 picture on bottom of last post, you can just make out the garboard where it ends at the boxing joint.
-
Your garboard is too far forward as you thought before, it needs to be more like 3/4" further aft, having it too far forward forces the other planking too far up the bow which causes plenty of headaches.
-
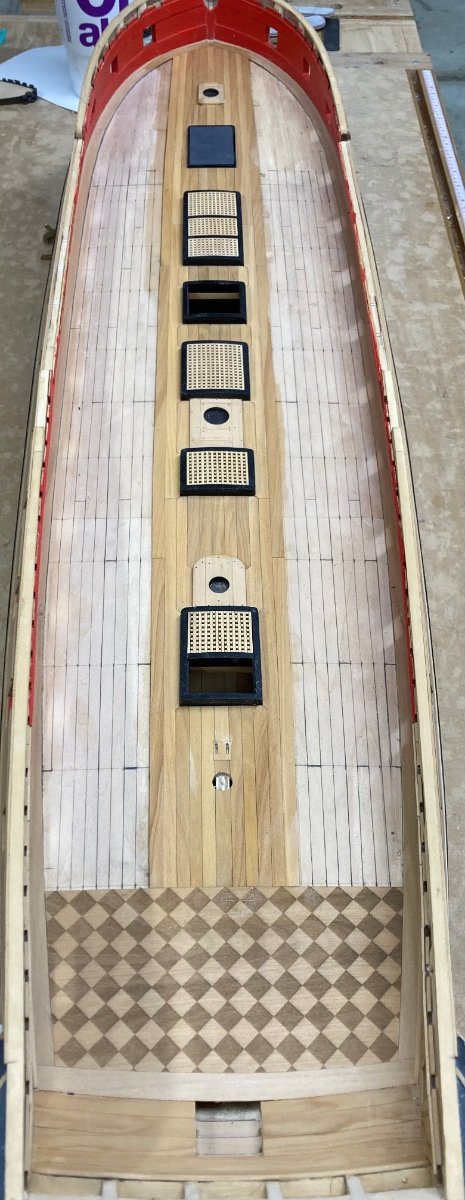
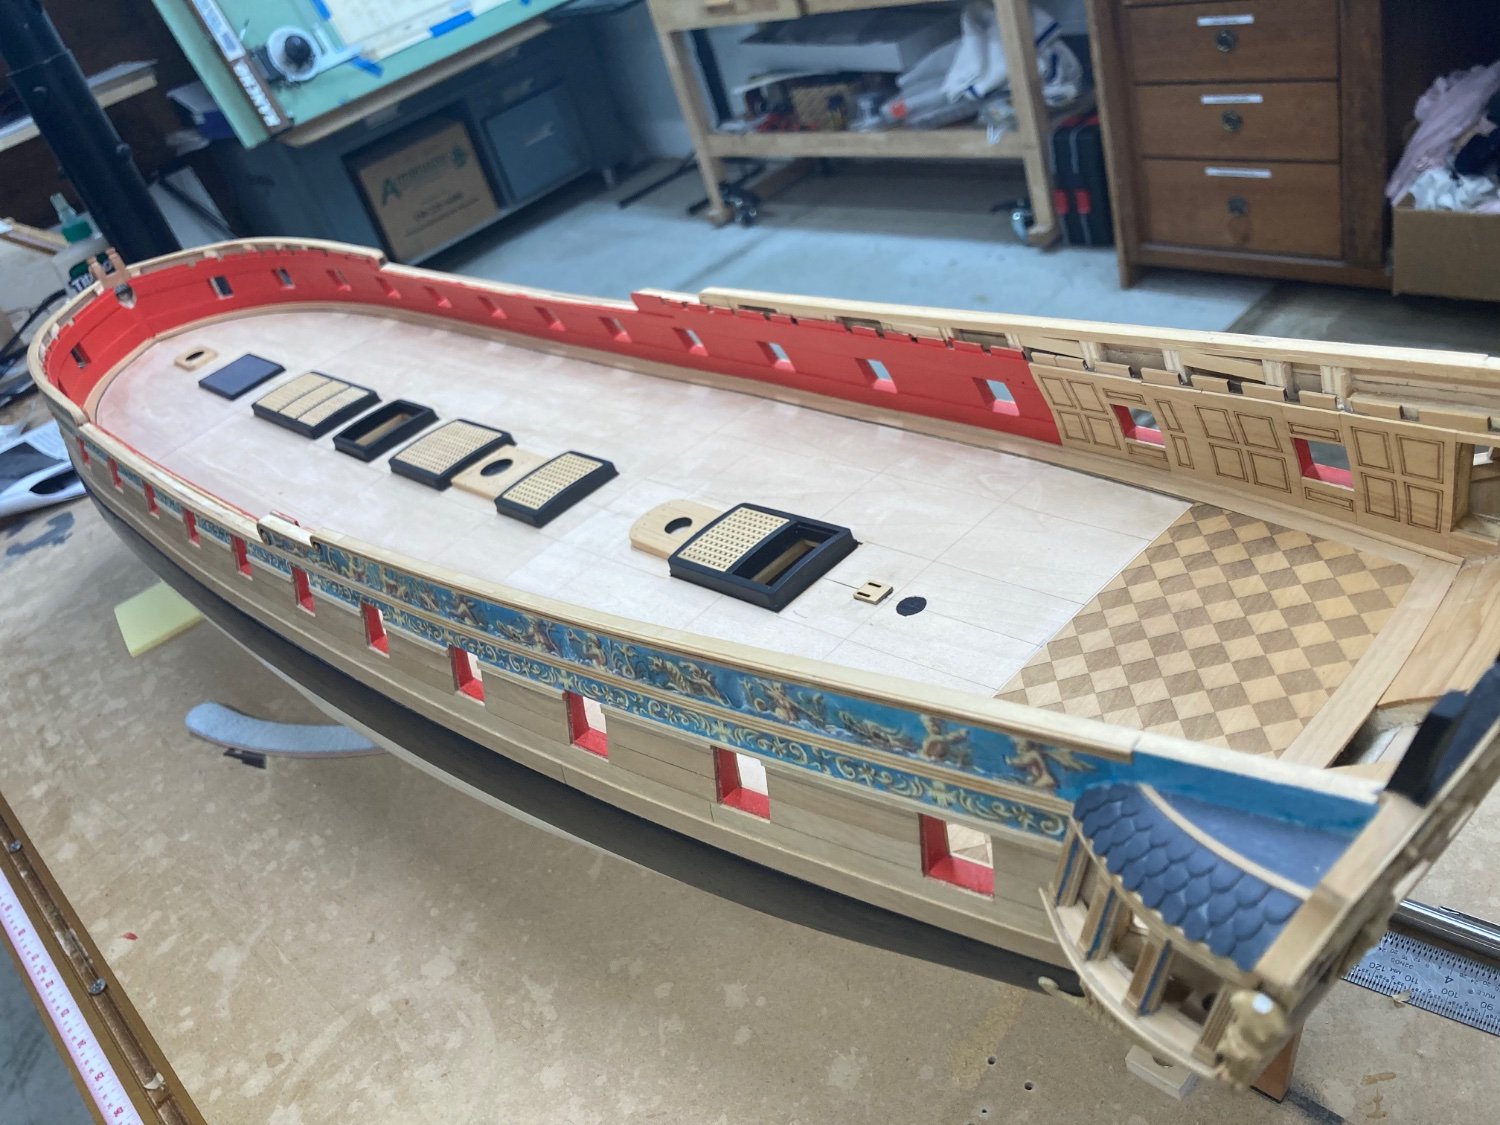
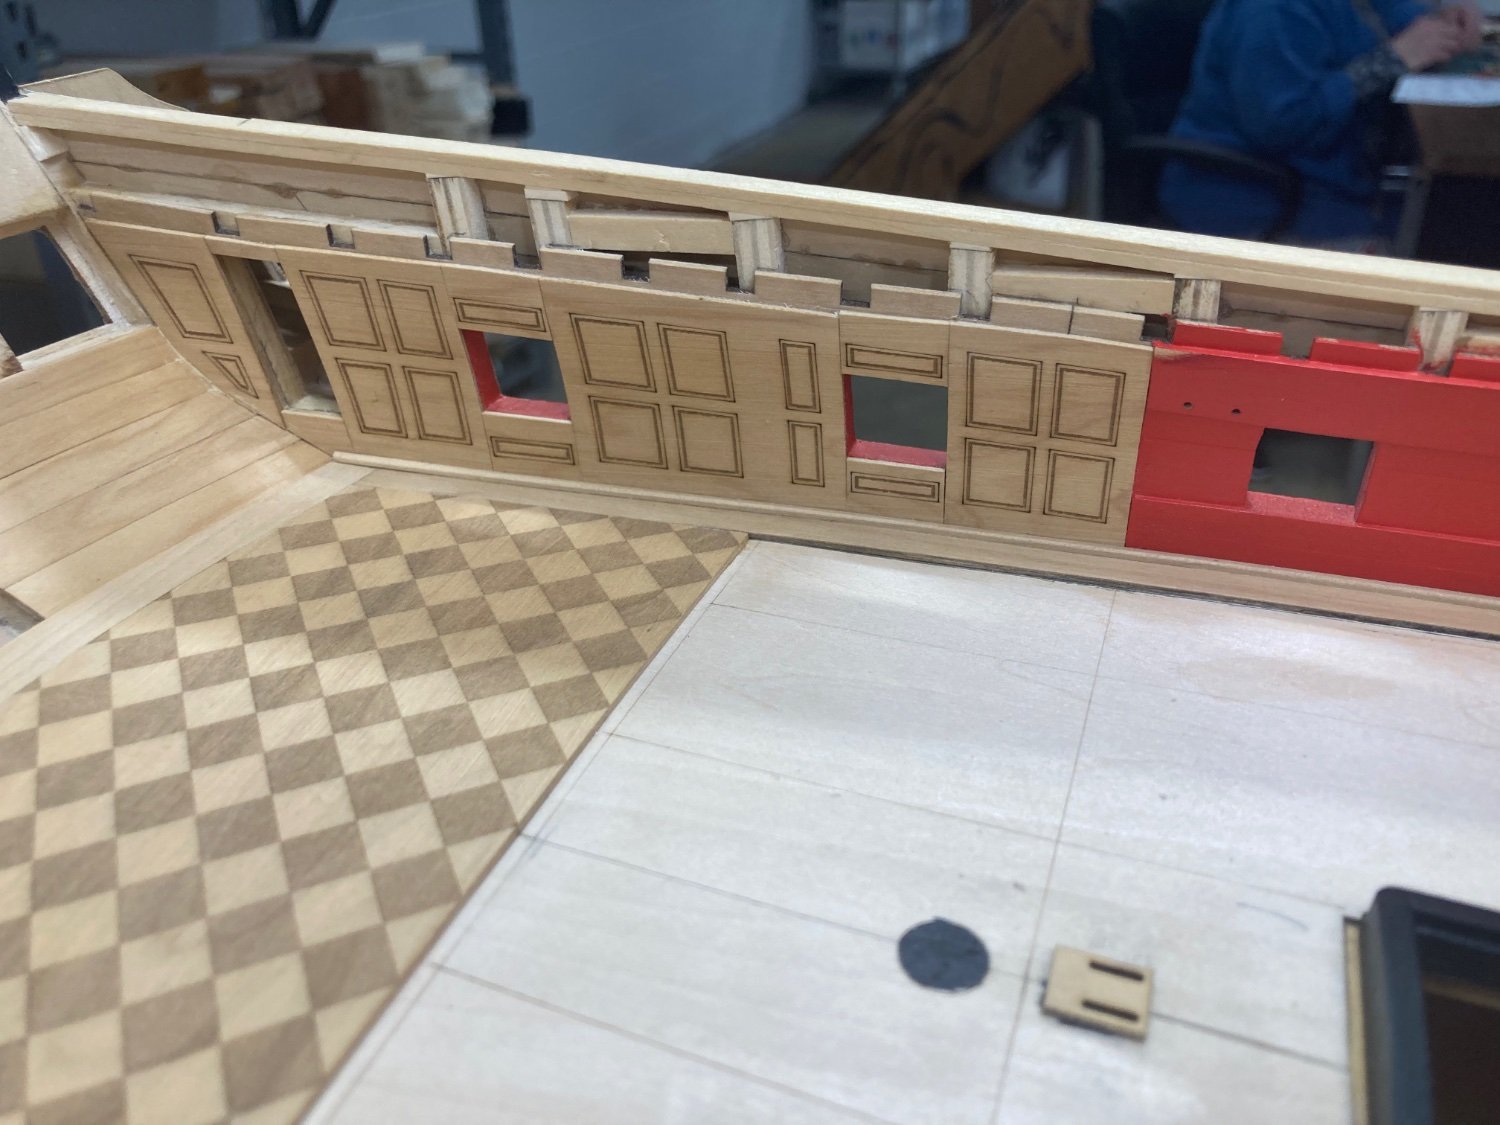
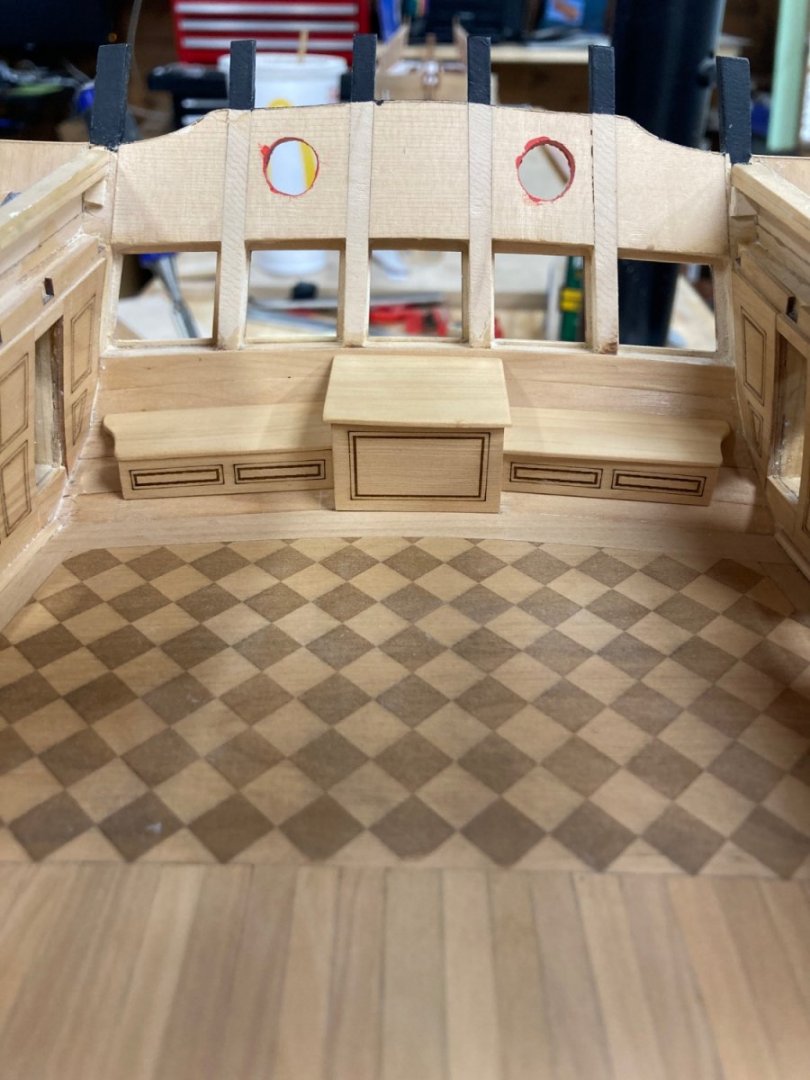
So now ready to start lining off for the deck planking, as you can see I decided to go the whole hog and paint the bulwarks and add the fancy cabin paneling and floor.


- 399 replies
-
- 11
-
-
-
- winchelsea
- Syren Ship Model Company
- (and 1 more)
-
Hey Greg It had better be as it evolved from the Deck framing plans that I created and you saw before while the deck was being built, with just a few tweaks needed.
-
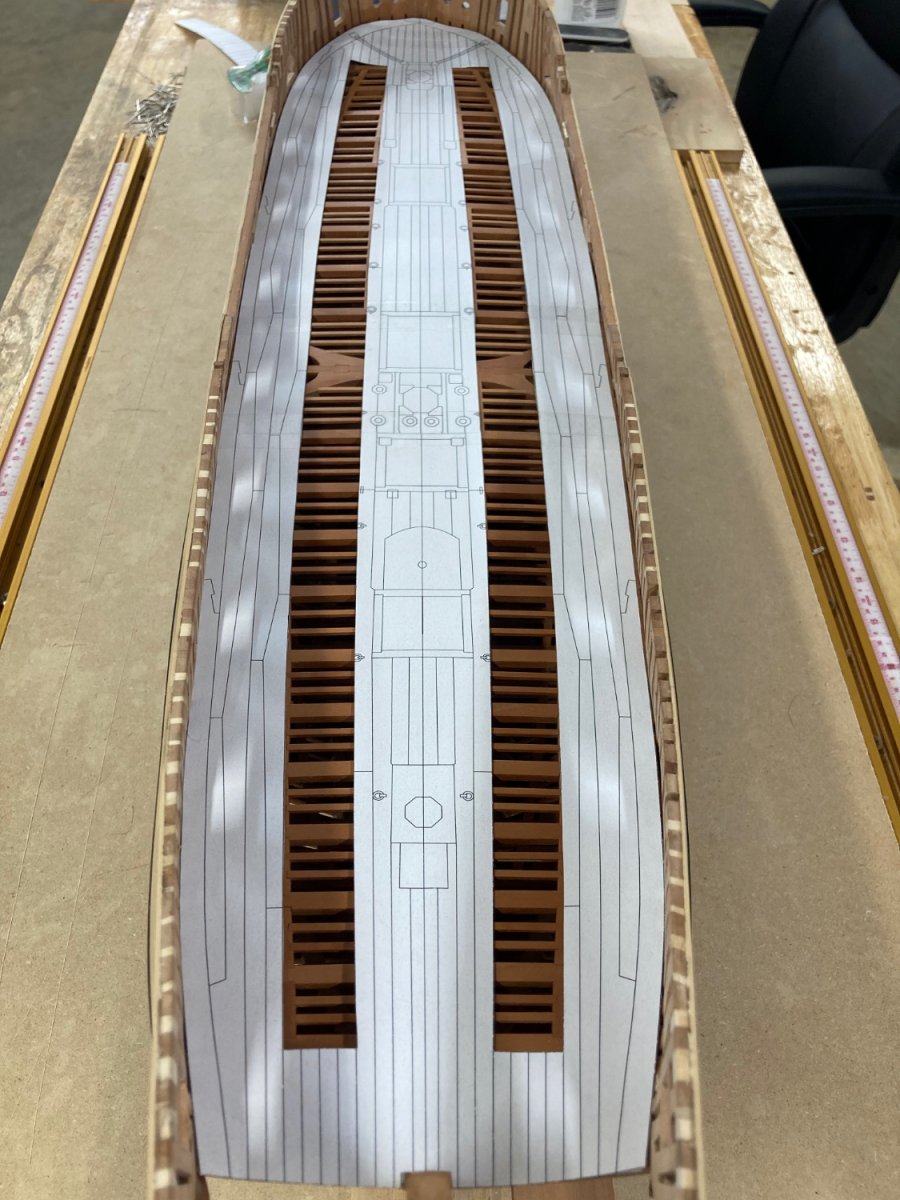
I’m going to make several templates to show planking with no guns, guns on one side, guns on both sides and a hybrid of all to try and figure out what I want to artistically show on my model. ACad makes this easier for me now that I have the general layout for my hull and deck shape/dimensions inputted to make several of these pretty easily.
-
Started to plan out how I intend to plank the main deck, this is one of the layouts I’m considering if I decide to add cannons.

- 889 replies
-
- 22
-