HOLIDAY DONATION DRIVE - SUPPORT MSW - DO YOUR PART TO KEEP THIS GREAT FORUM GOING! (Only 13 donations so far - C'mon guys!)
×


Fright
-
Posts
562 -
Joined
-
Last visited
Content Type
Profiles
Forums
Gallery
Events
Everything posted by Fright
-
 1st off - Congratulations on passing you exam and in starting you residency work! That makes up for the 'slower' pace with your nice looking ship. Cheers!
- 88 replies
-
- 1
-

-
- finished
- artesania latina
- (and 1 more)
-
Steve - many, many thanks! Your work on your Model Shipways kits are an inspiration for myself, and I'm sure for many others.
-
OC - LOL I would love to build the Pearl someday. I had planned to start work on the Model Shipways Bounty Launch but I have become interested in the Civil War while doing research on my great-great grandfather, who was a private in the 15th Michigan Volunteer Infantry and was captured in Resaca and sent to Andersonville Prison, where he was released in a prisoner exchange and returned to duty and marched to Savannah. I'm thinking of trying to build a version of the Sultana Steamboat from Lindberg's Robert E. Lee kit. I also have a Harriett Lane steamboat waiting on my shelf. Decisions, decisions! LOL
-
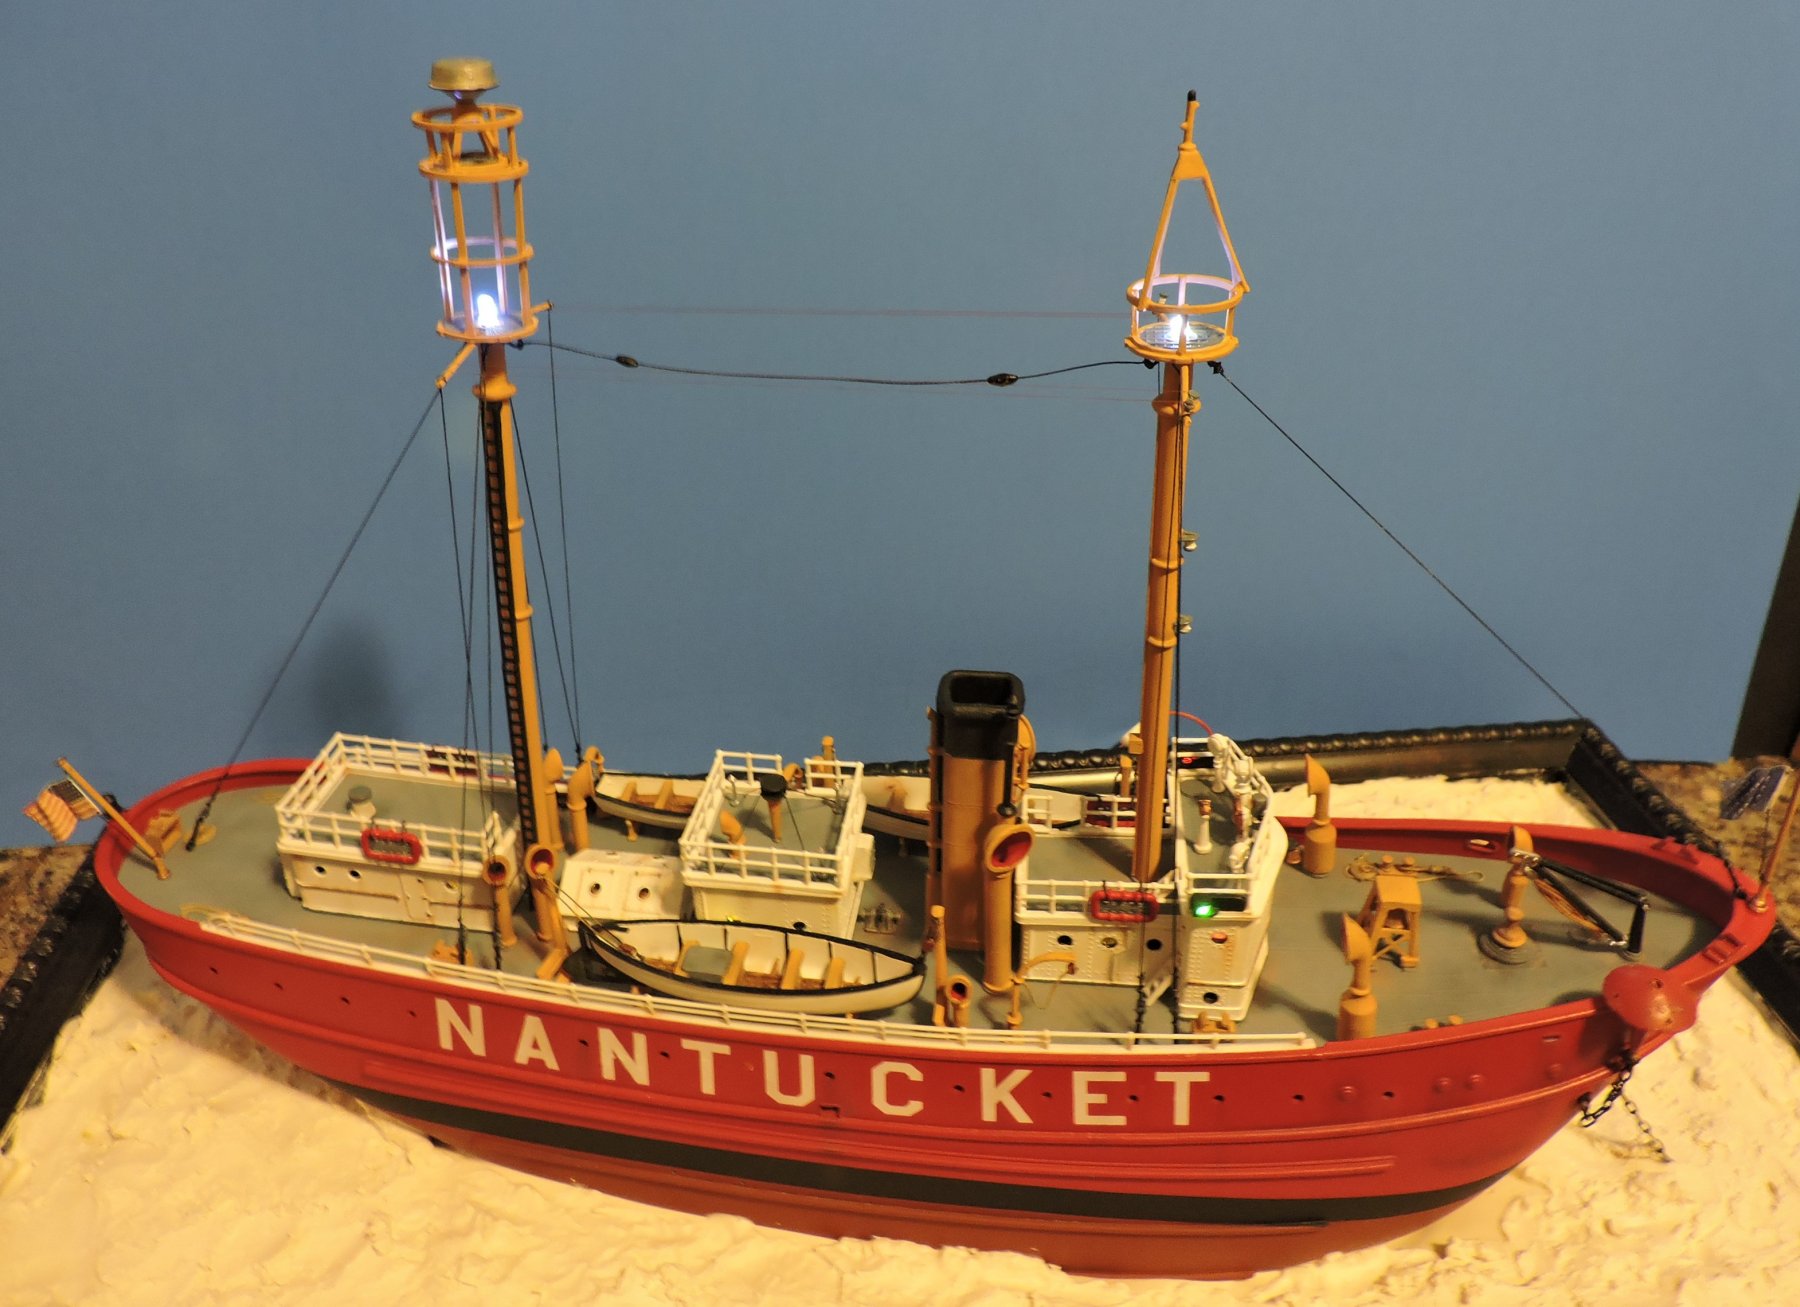
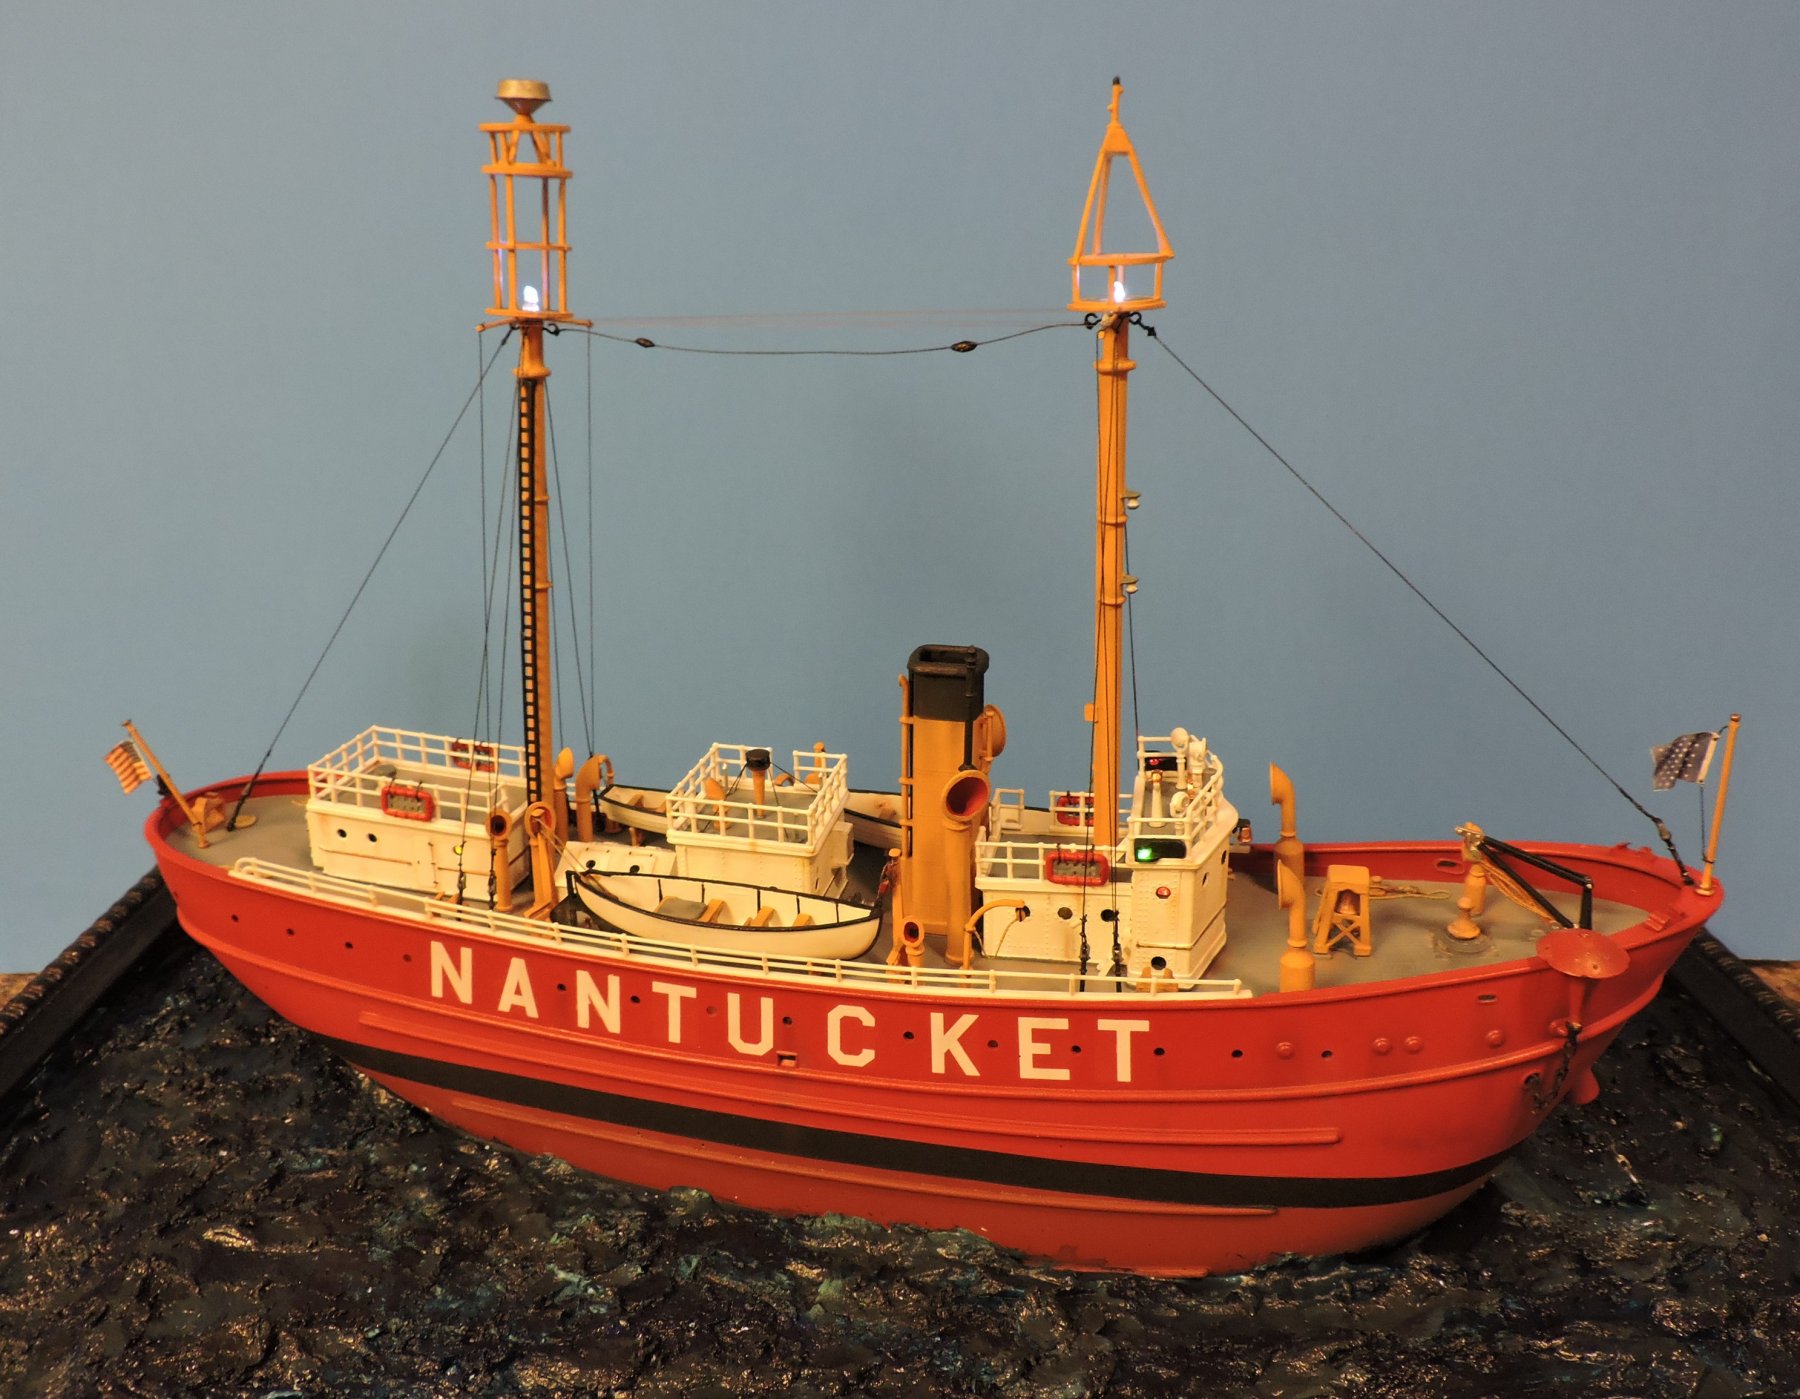
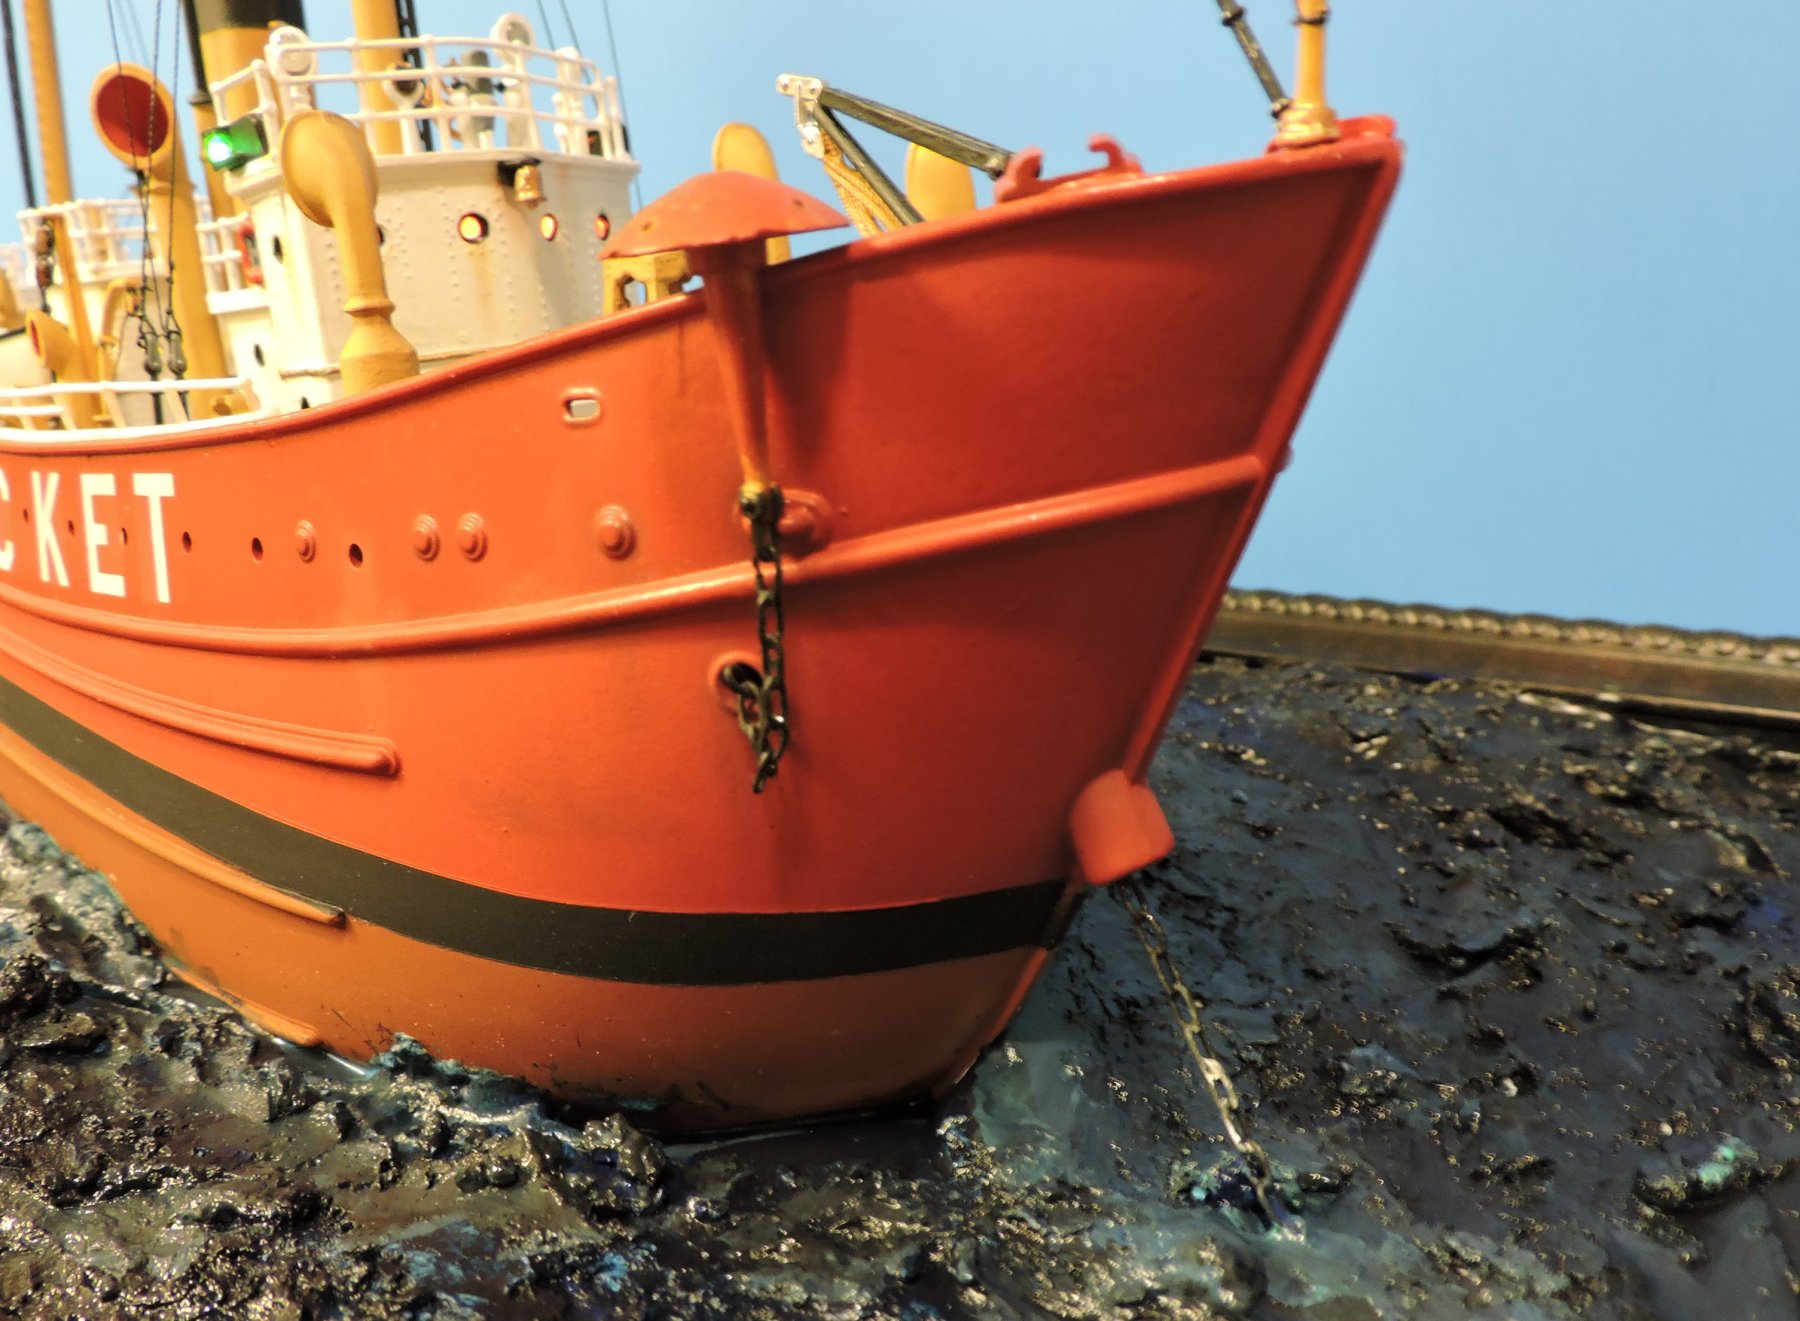
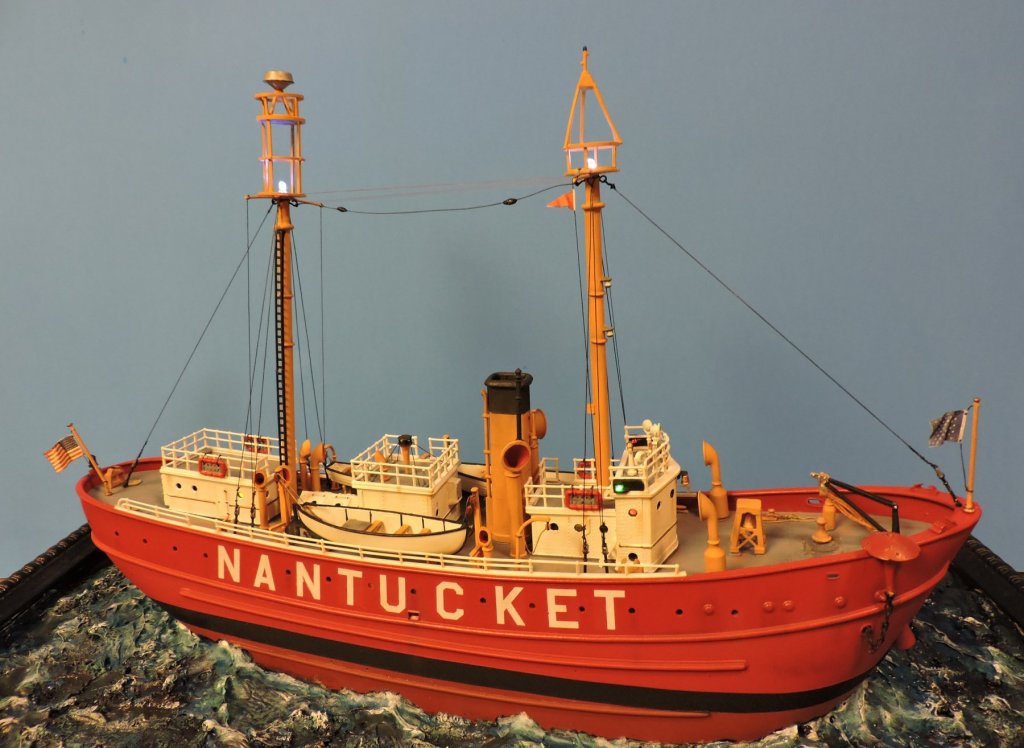
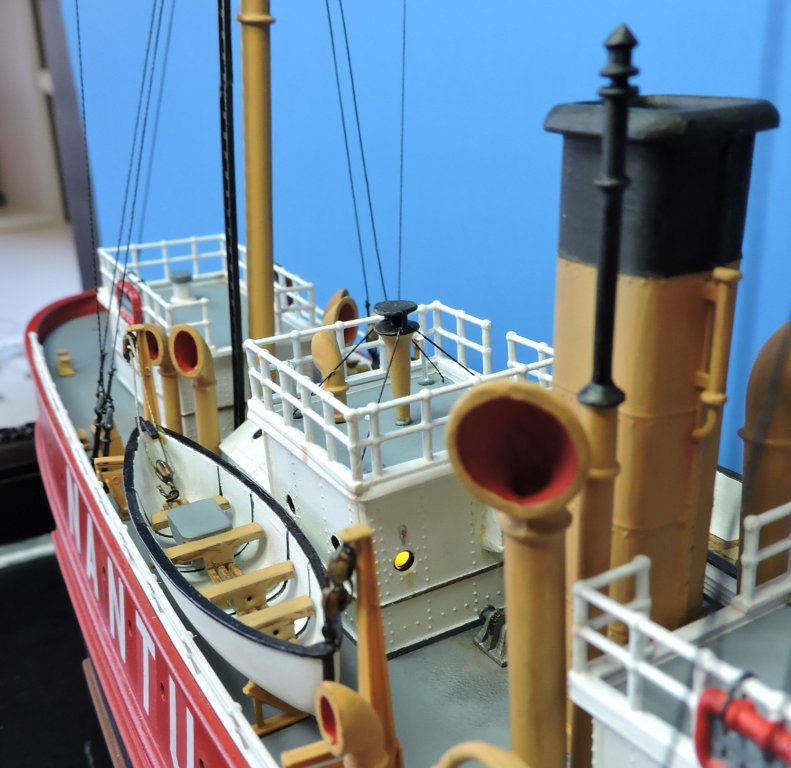
I have reached an end with my journey on working with this model. Total work time was about 6 months. I had my 1st lesson in using LED lighting and in creating my water effects for the base. I certainly wish to thank those for following along and providing some helpful advice along the way. On to my next ship!


- 97 replies
-
- 15
-
-

-
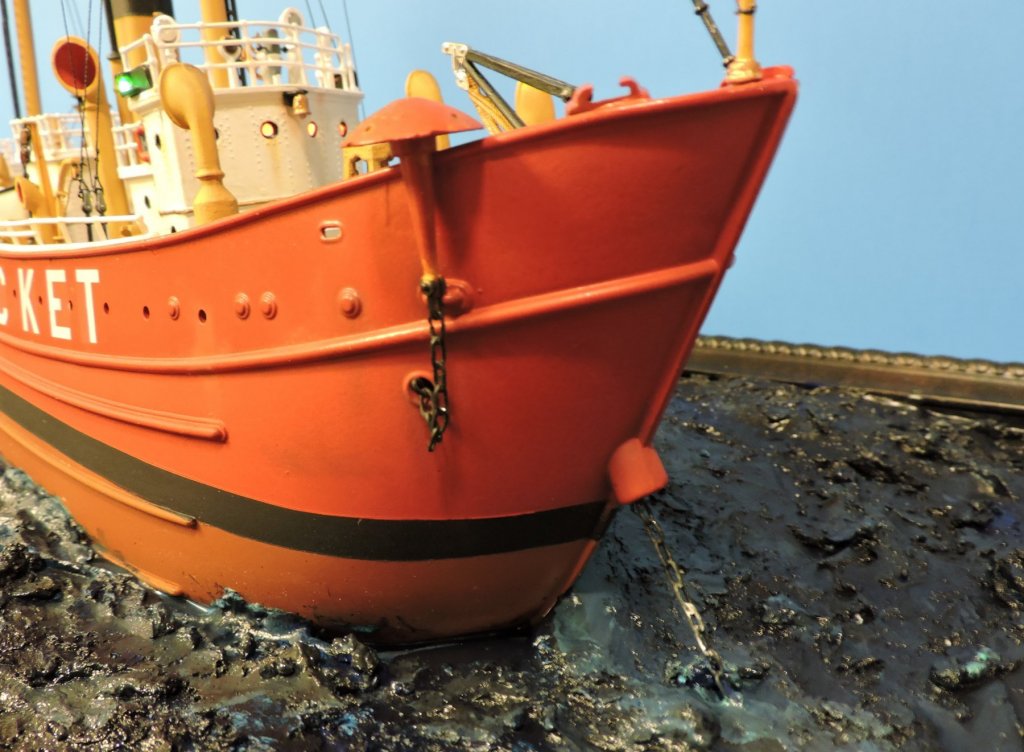
A really nice job on the weathering. I'll take you up on the offer of how you achieved this look.
-
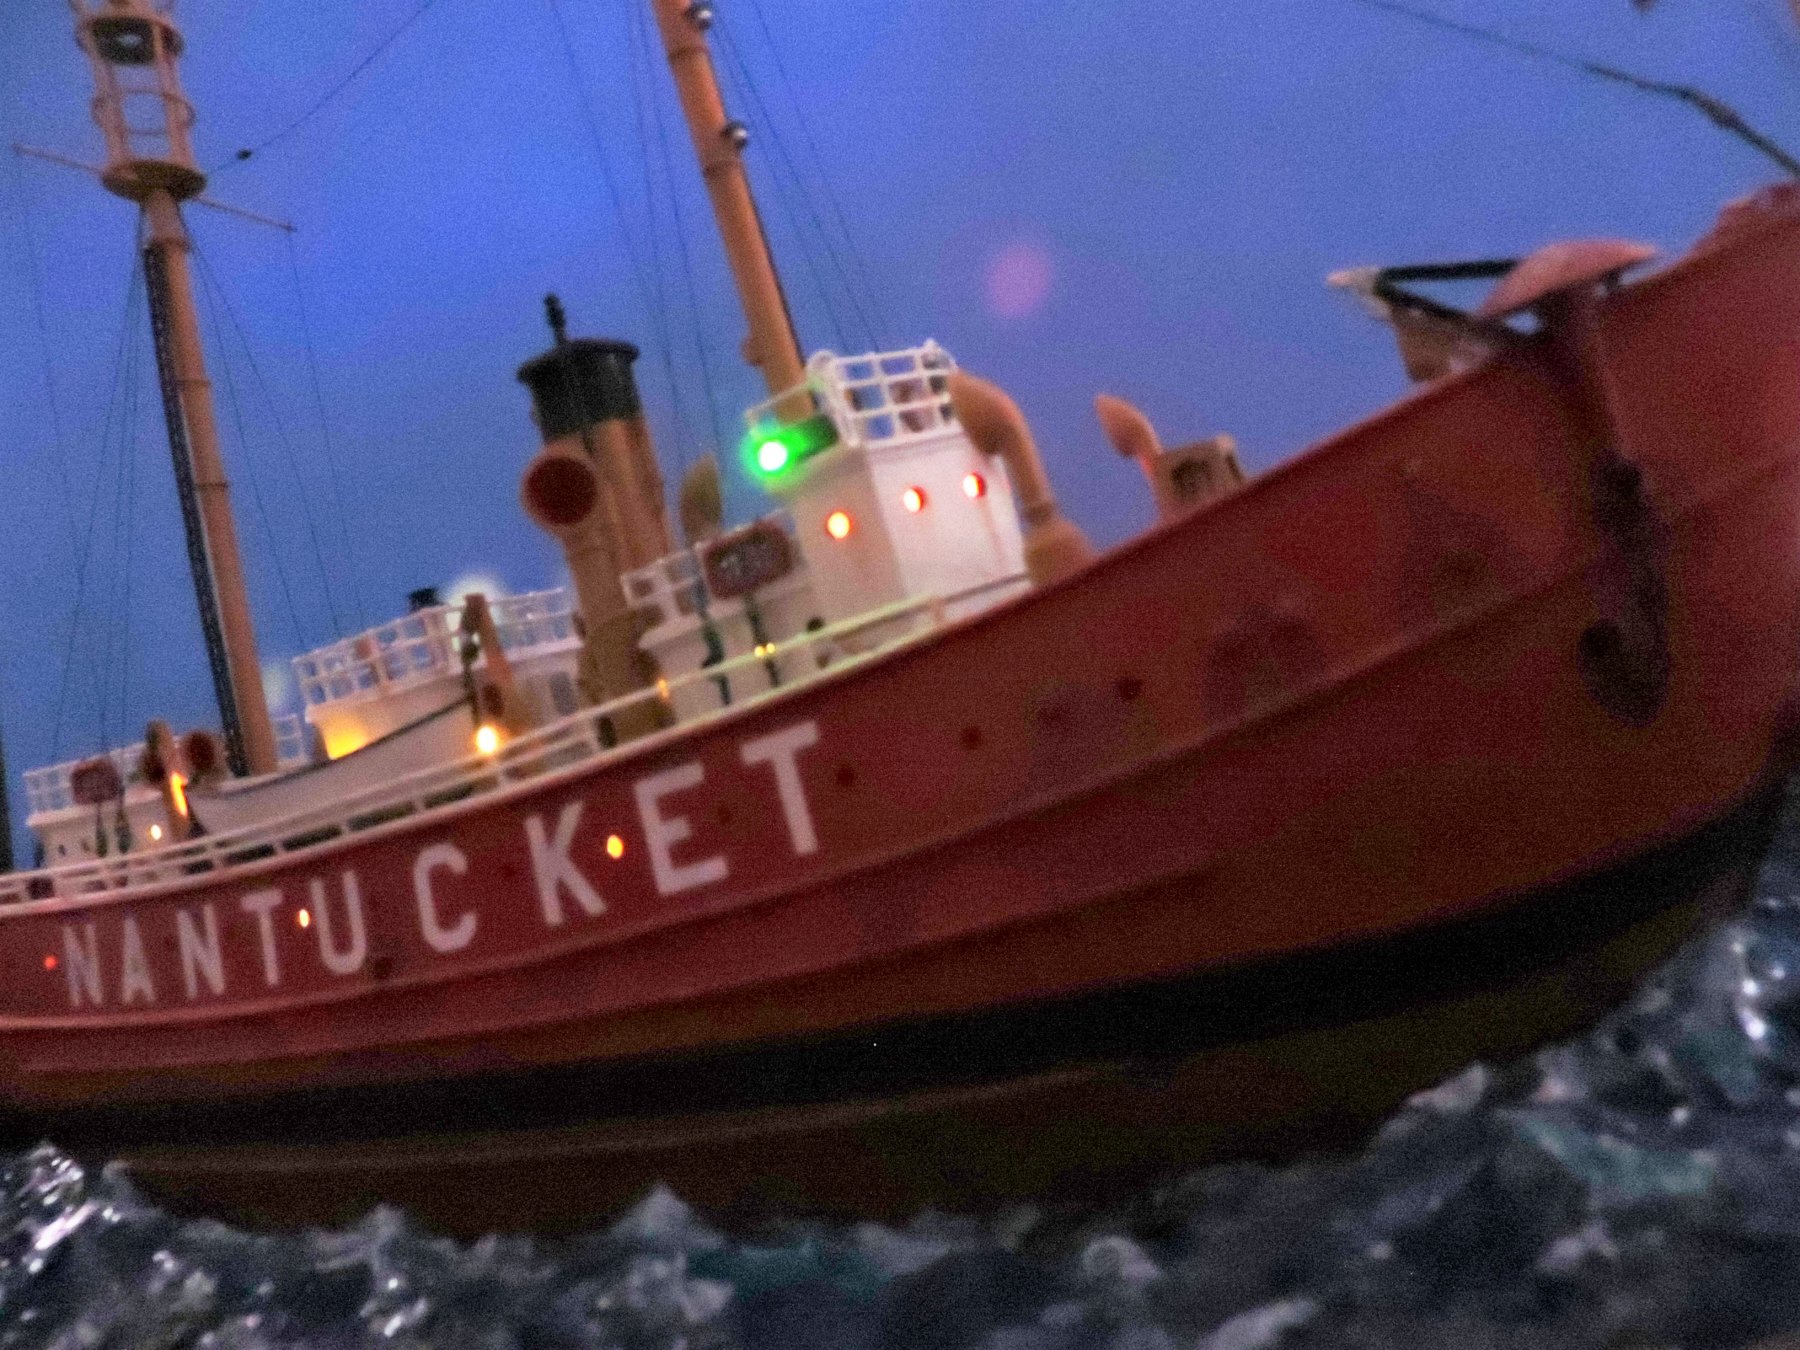
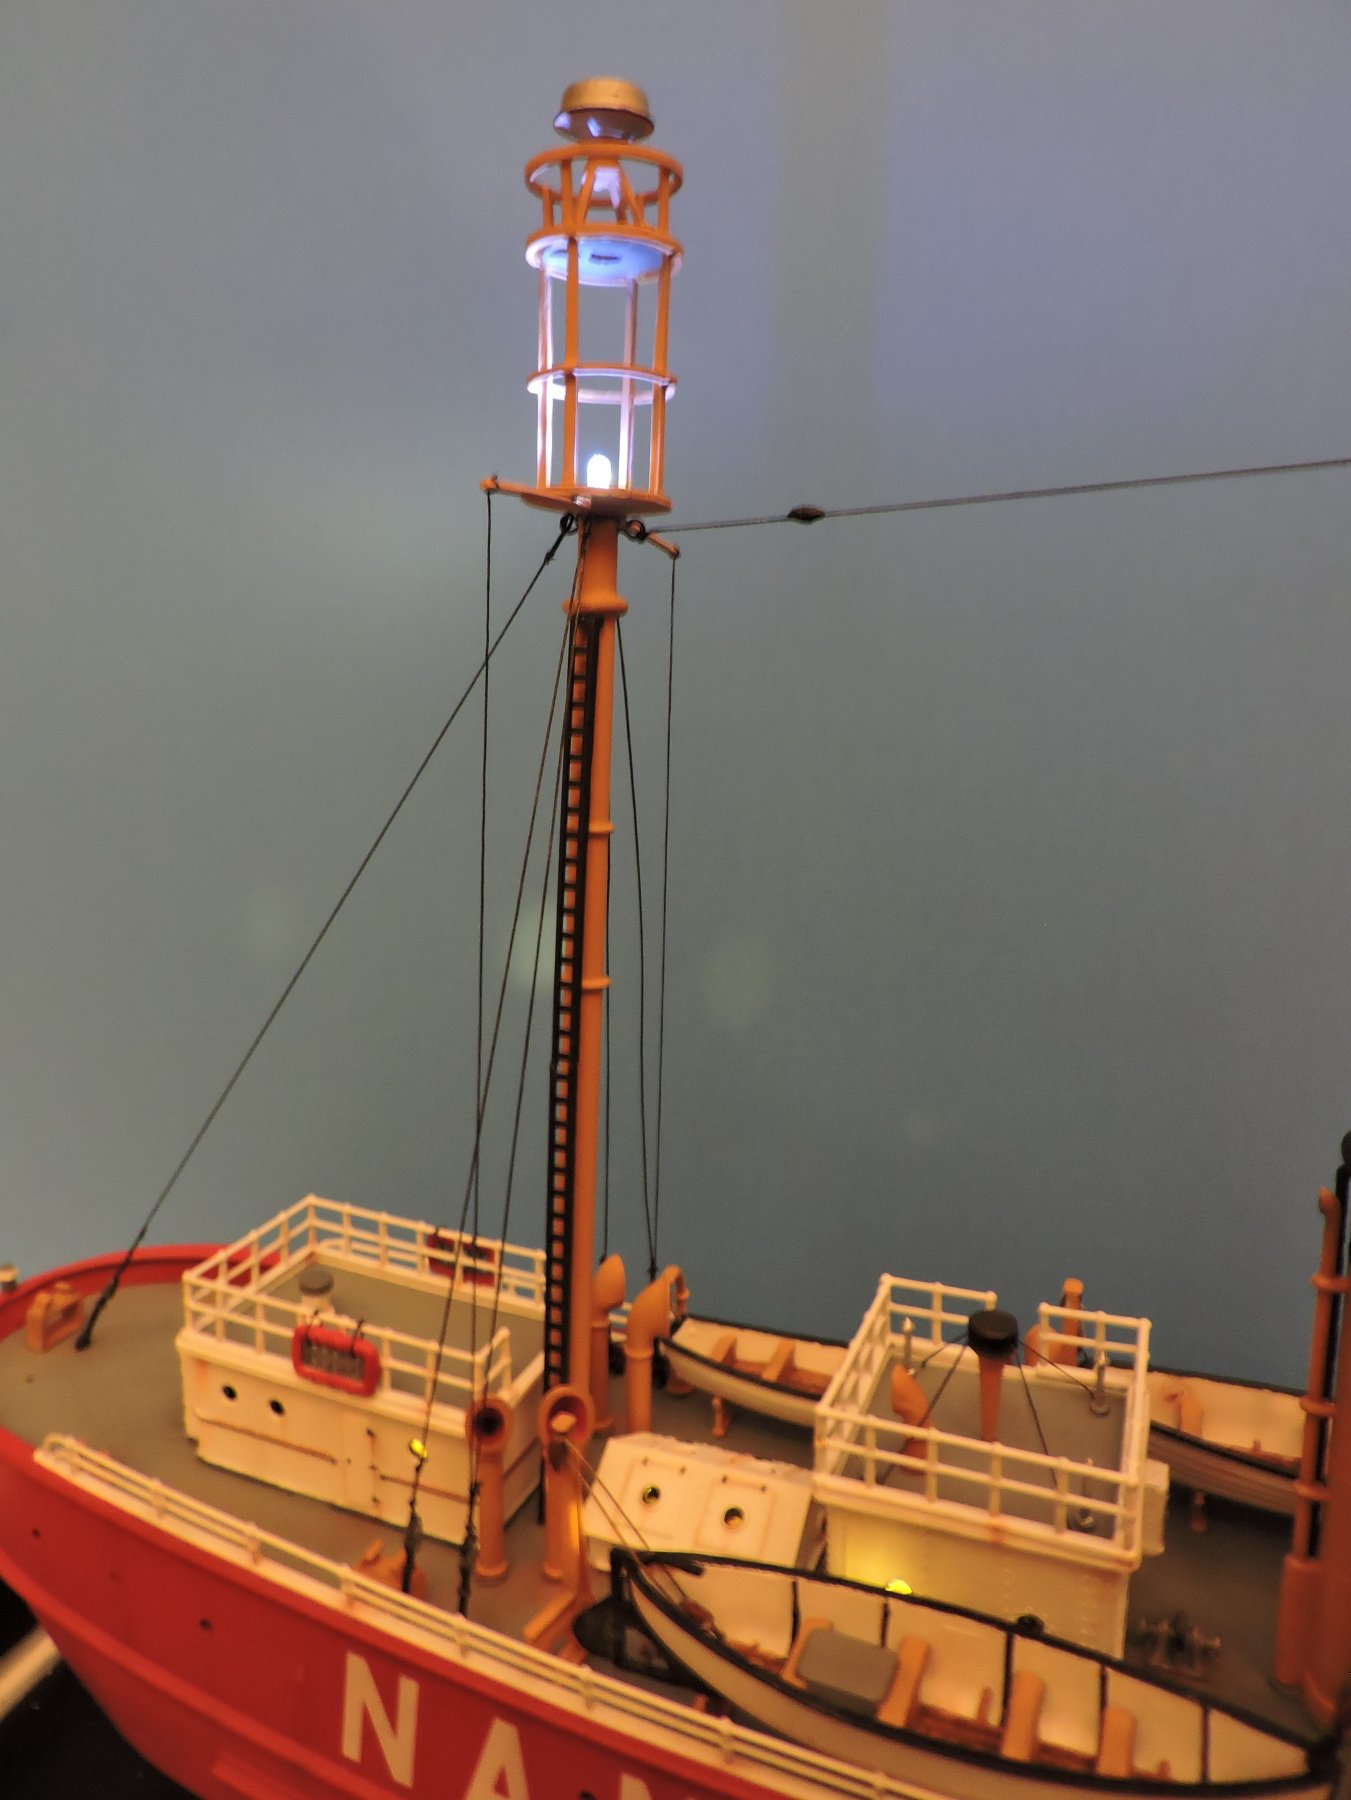
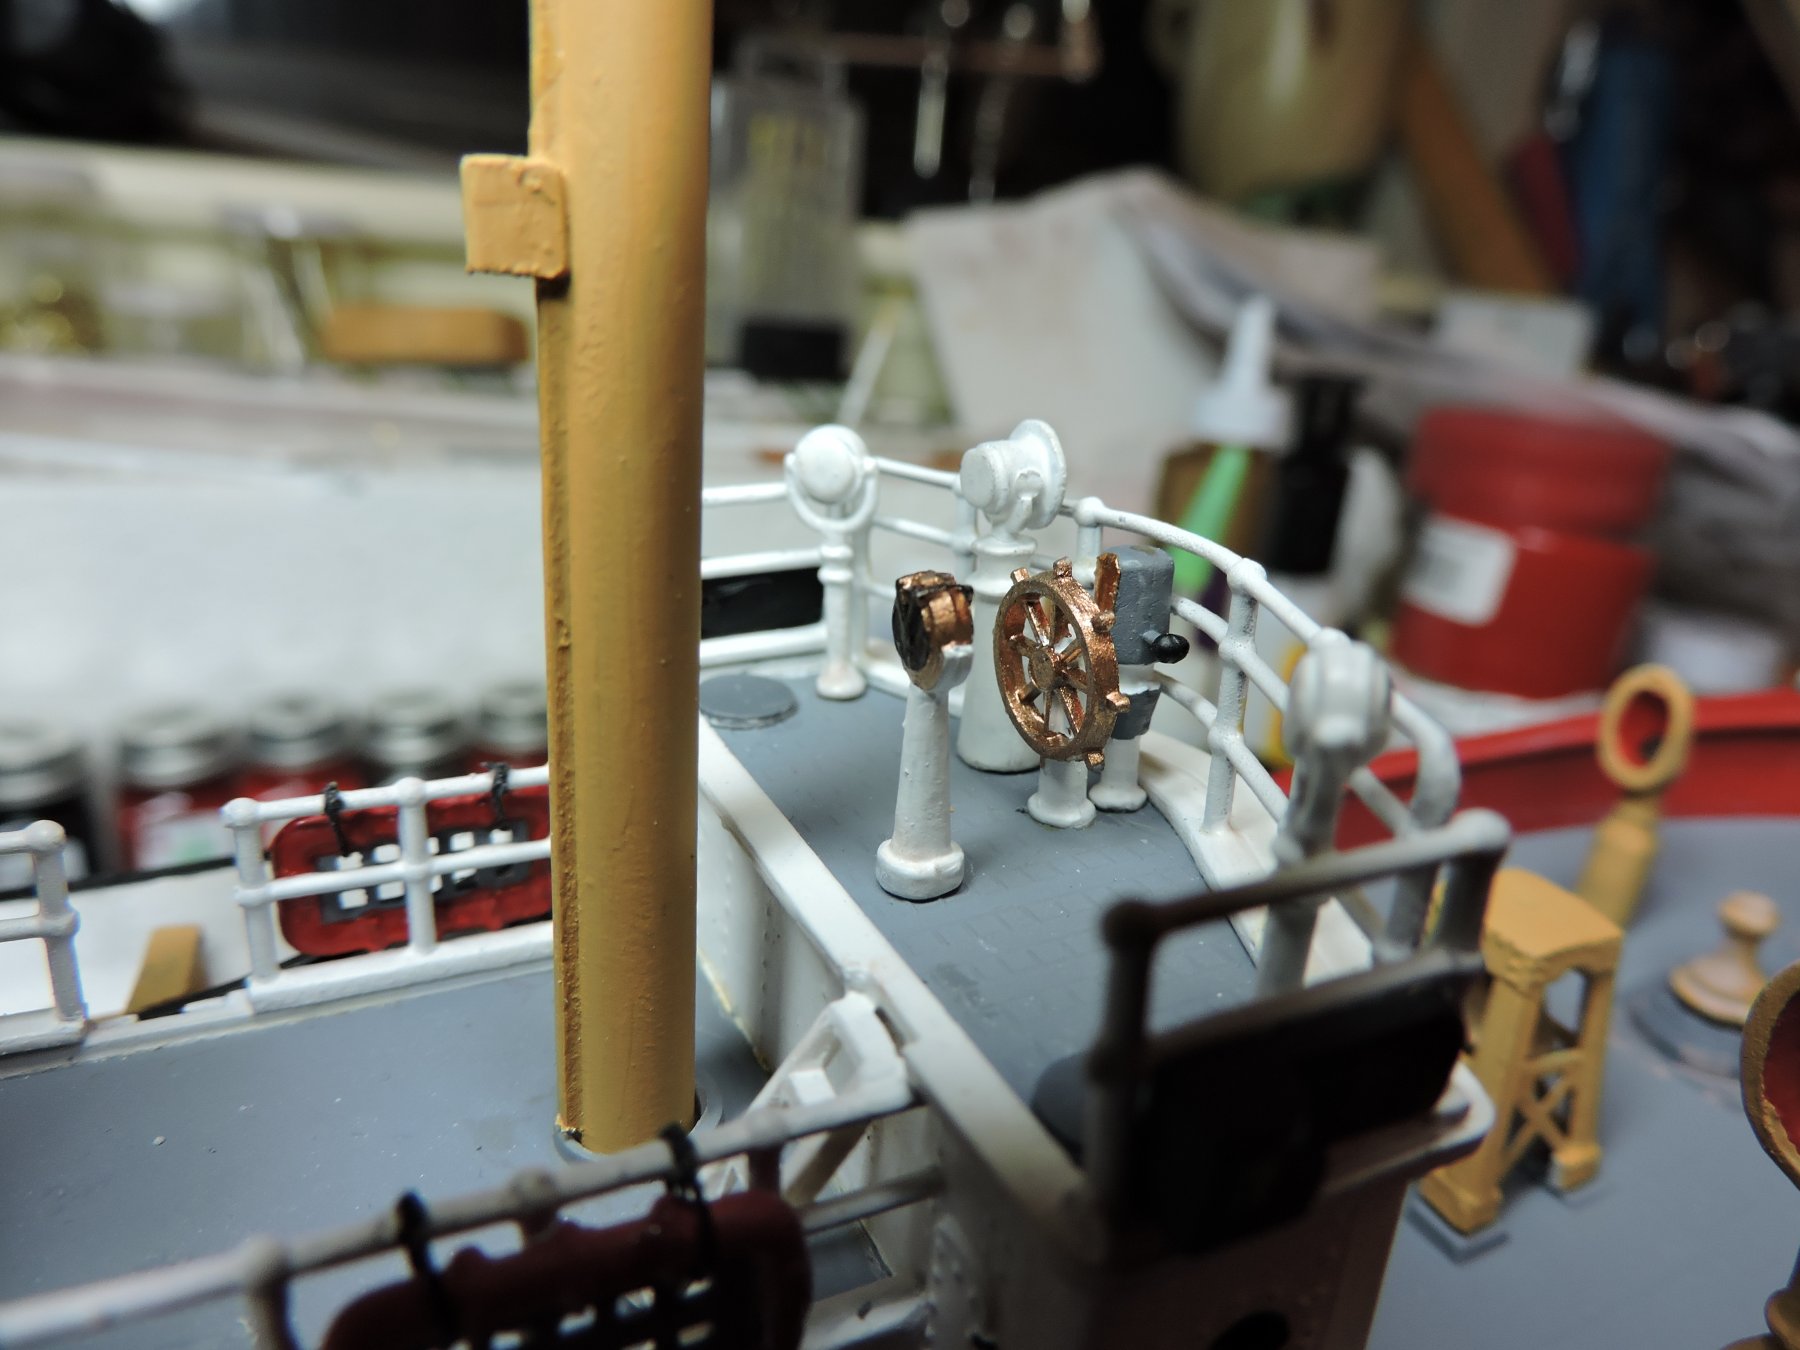
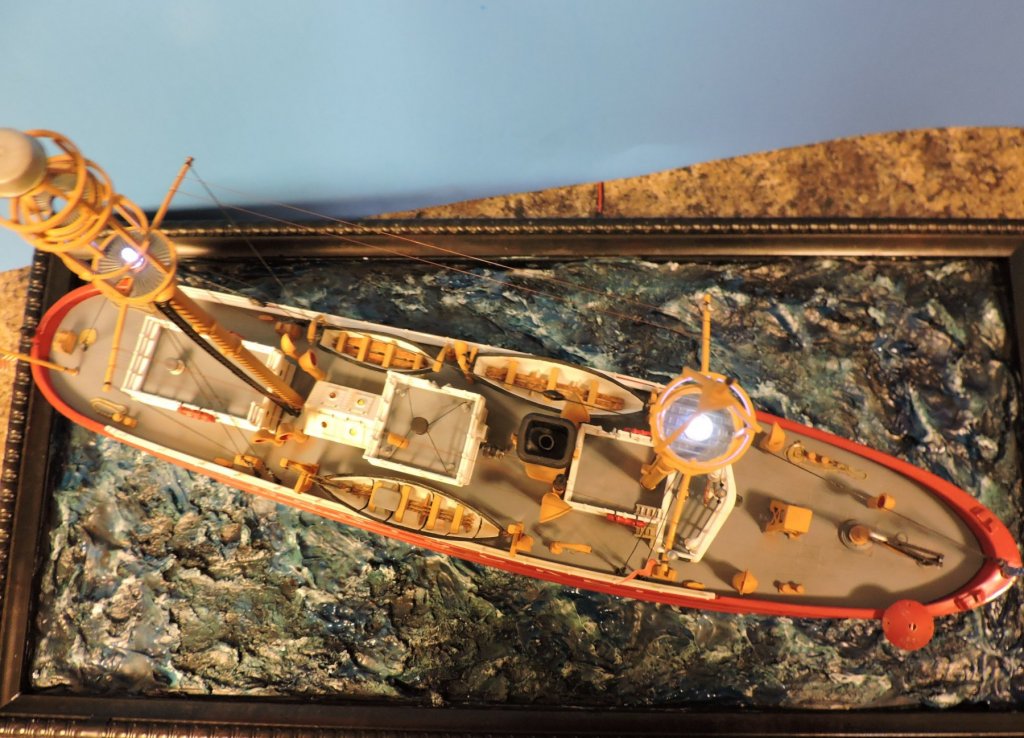
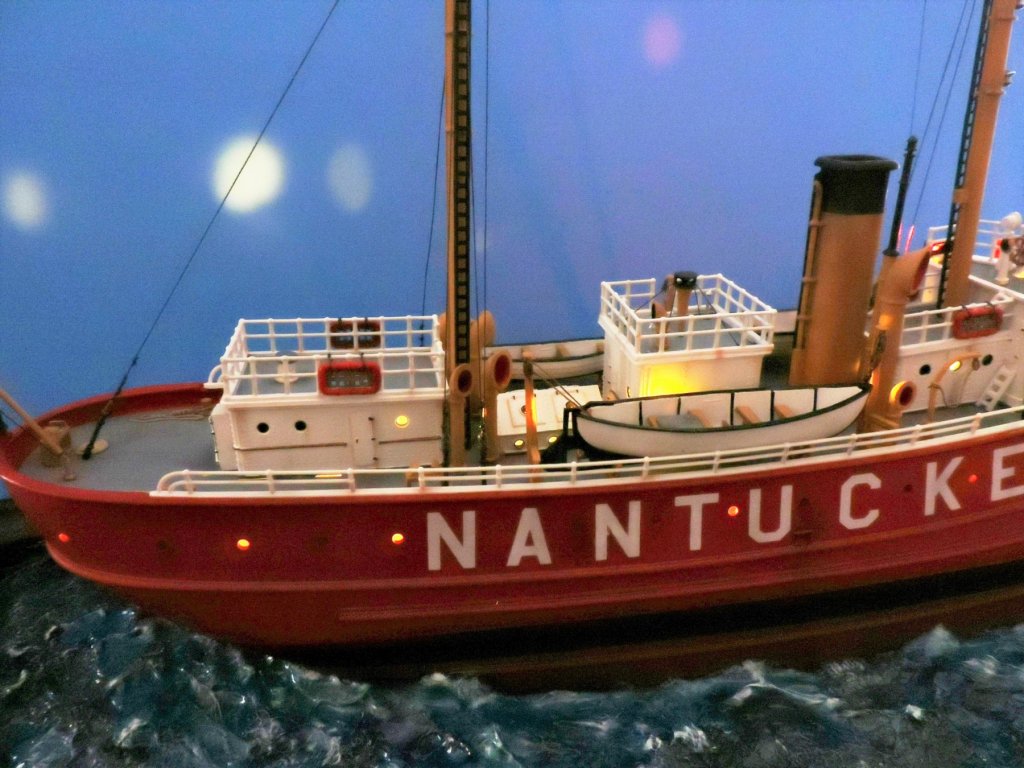
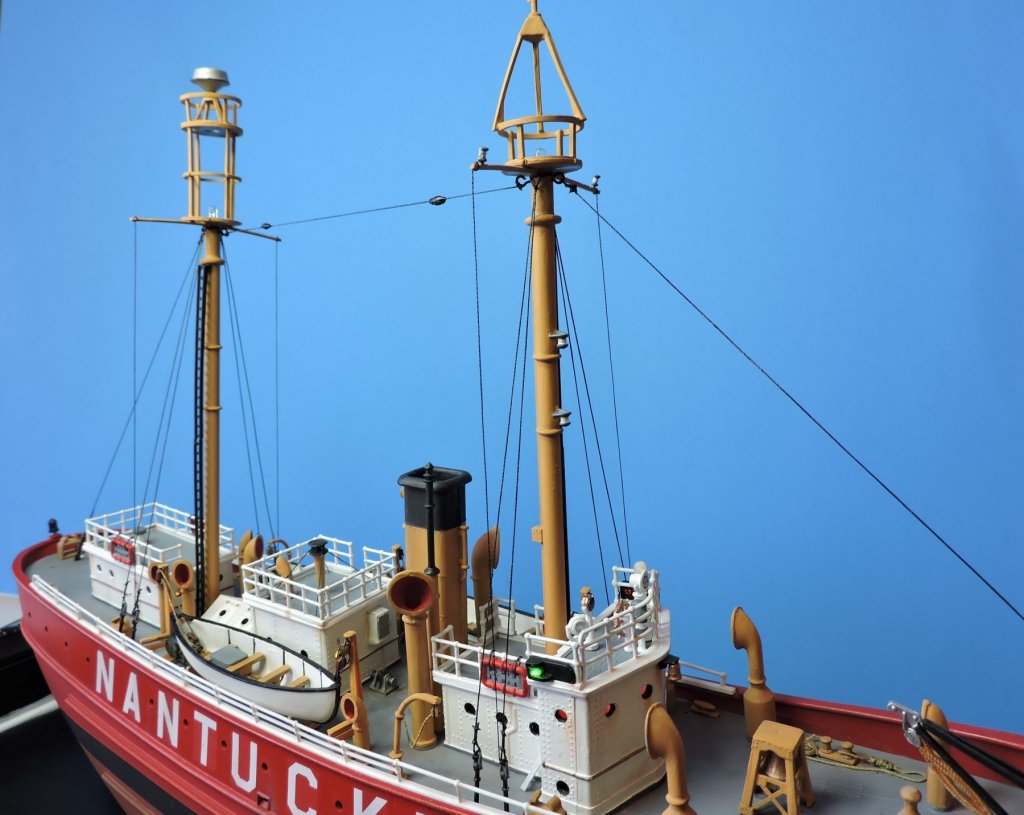
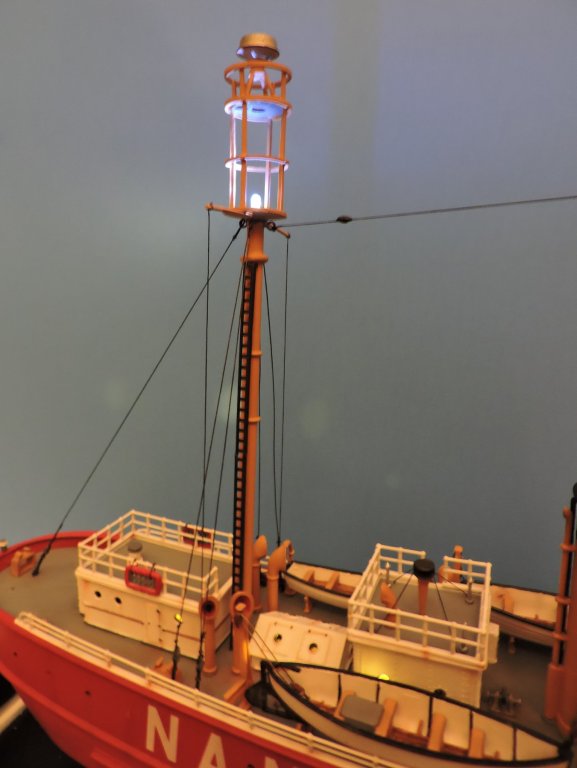
CDW - Thank you,kind sir, for dropping in. My log is not as detailed as are many on this site and I find I tell myself, 'I'll take more pictures' with every new kit that I have started. With the help of looking at a lot of pictures of lightships; purchasing and reading "The Lightships of Cape Cod" by Frederic L. Thompson; visiting several build logs from websites; I improved on my painting skills as well as learning basic lighting and diorama skills which are my 1st attempt. I'm pretty happy with how she has turned out. She's still not complete but getting close! In hindsight, I would have liked to improve on the beacon tower light structure. It seems too open and plain. I may try to create some kind of light covers that look like fresnel housing to cover the LED flashing lights, if I can fit them into the already assembled light cage. I wish Lindberg (and other companies) would improve on their directions instead of using a number system. My personal gripe. Another slight error is the direction of the anchored ship as opposed to the direction of the swells. I didn't realize it until I came back to start painting the base coat and all was dry. Oh well, I'll just tell people the wind has suddenly changed! Thanks to sites such as MSW for opening up a world of talent and information by so many who are kind enough to share their knowledge !!! On a side note, my wife and I are planning to visit Ocala and Tampa area possibly in June. We're trying to relocate to be with an hour drive to an ocean. Landlocked here in Atlanta and miss our seafood
-
Welcome !!! We all started off at one time or another on these crazy little things called models. I'm pretty new at this myself having completed my 1st wooden build. As for comments from members in this site, I have only come across support, helpful tips, information, suggestions and constructive critiques. I think you have joined a great group of talented and knowledgeable members. Congratulations on your 1st ship and here's to good adventures along your way.
-
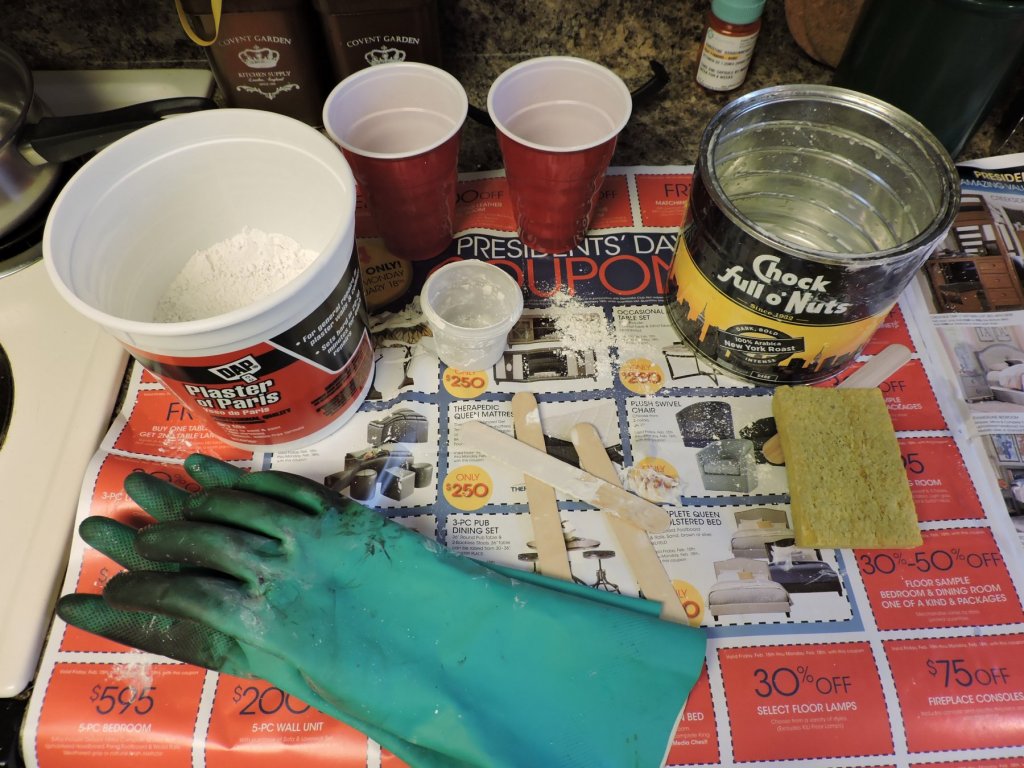
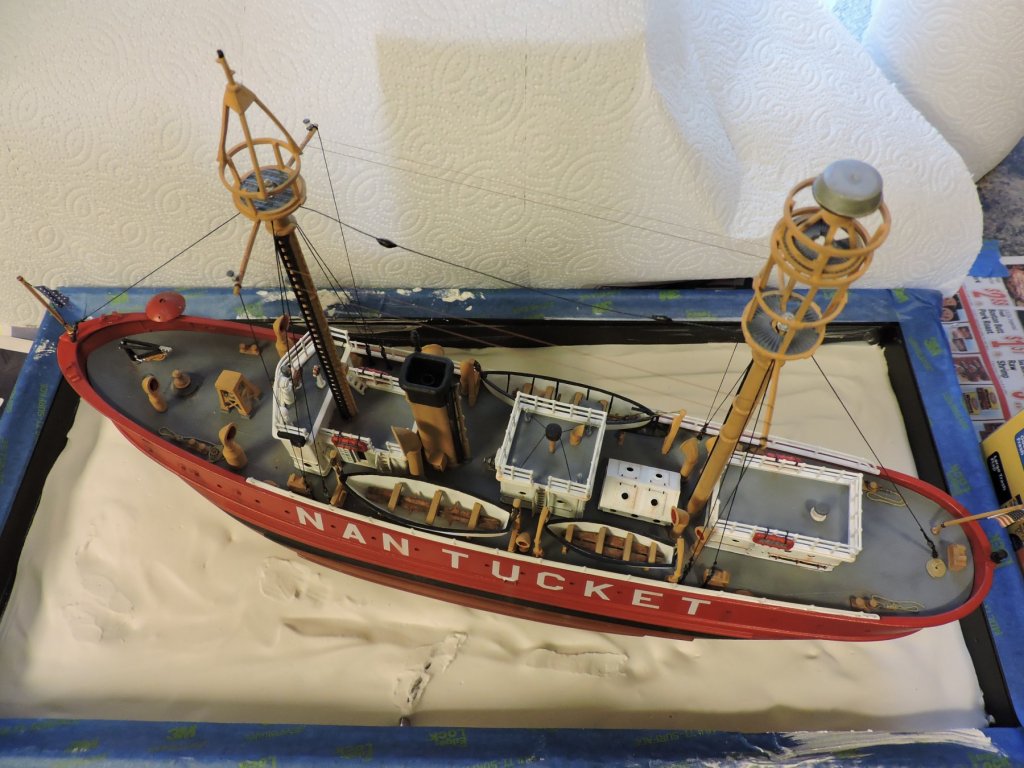
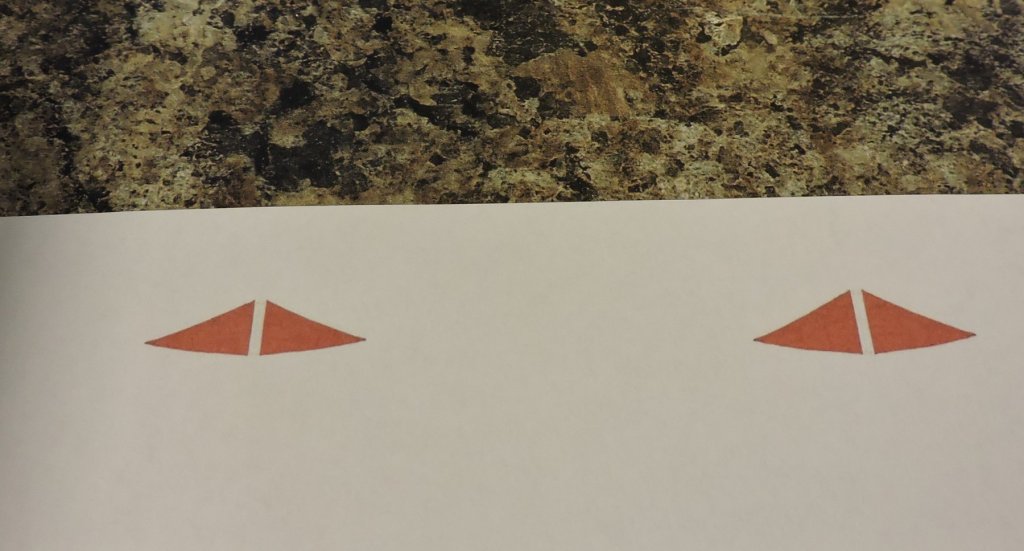
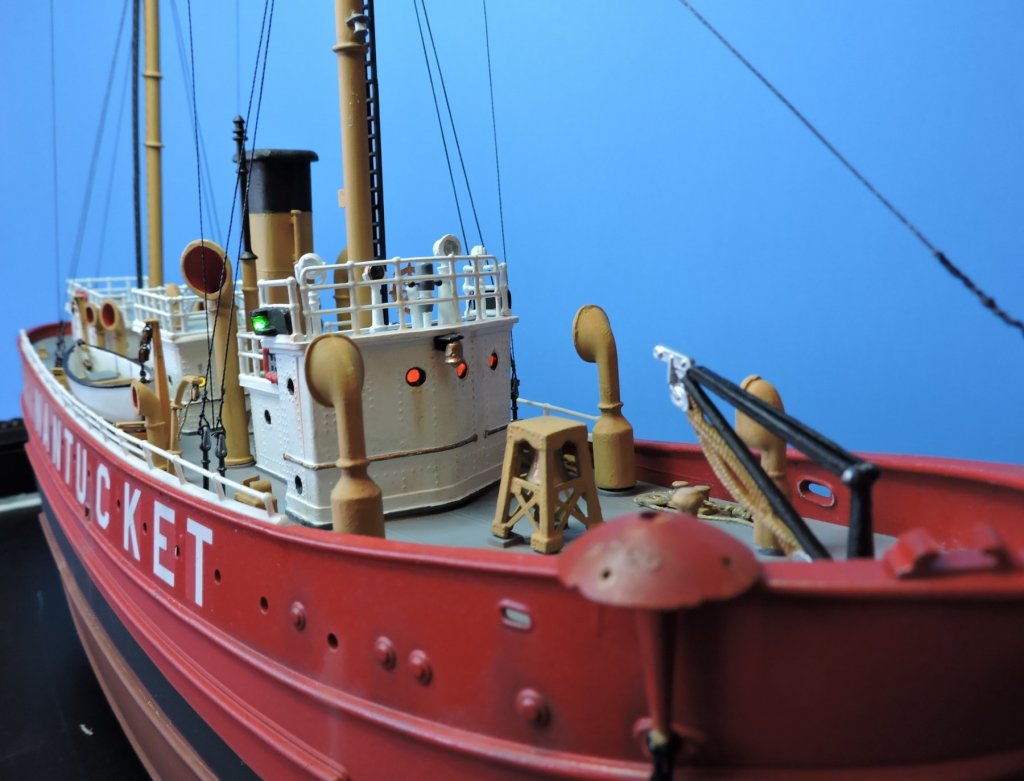
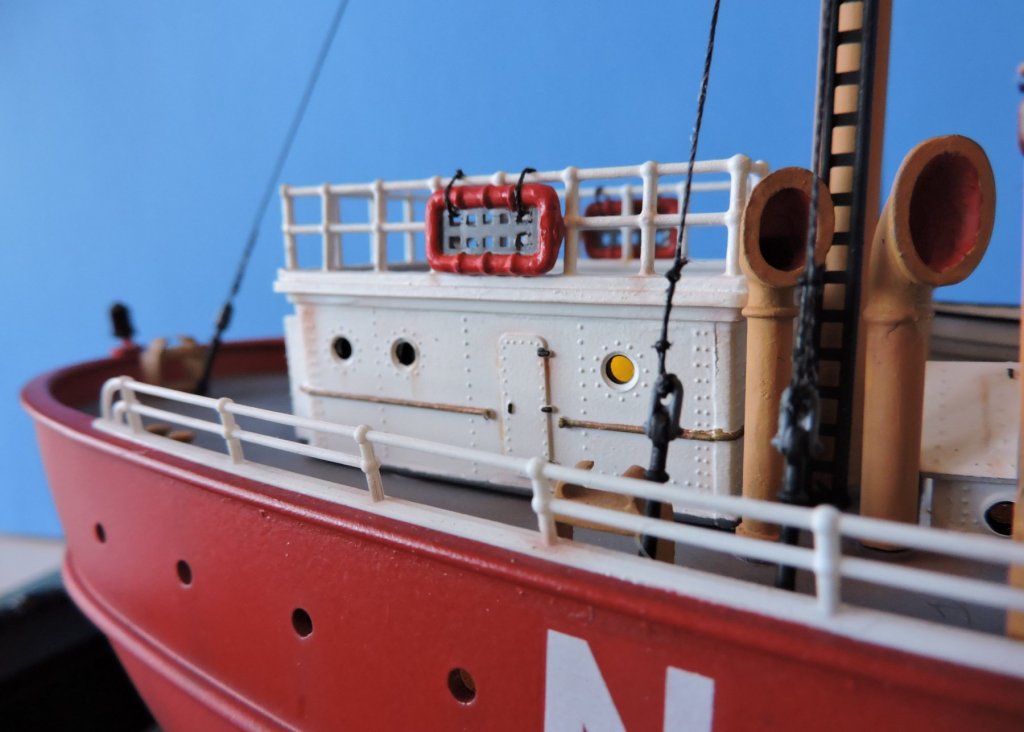
I was able to get quite a bit of work accomplished on my model over the weekend. I installed the four radio wires between the beacon towers using rust-colored EZ line (a little hard to see in the 1st picture). This is pretty amazing line. I then glued my ship to the base and set about creating my ocean effect using a tub of plaster of Paris that my wife had in her hobby stash. I poured three layers and allowed each one enough time to dry. Once dried, I broke out my acrylic paints to lay down a base coat. I used two different colors of blue, a bluish grey and a little green for my mix. My wife also reduced and printed out a red small craft advisory flag so I can have it flying from one of the forward beacon lines. All of this needs to thoroughly dry before I can use my Vallejo Atlantic Blue gel to create my swells. I will then add some white caps here and there and finish with a coat or two of Liquitex Gloss varnish. Getting close to the end now.


- 97 replies
-
- 11
-
-
Dave - you're off to a good start. Good adventures and smooth sailing with this kit!
-
ccoyle - these prisons were hell holes on both sides. Both sides expected to have a quick 'war' and therefor, both sides were not prepared for the overwhelming amount of prisoners. Cruelty on both sides 😓 Jonathan - there is some amazing history in all of our pasts! The flagshipmodels website has some great looking models. Thanks for the tip on this page
-
A job well done on this kit.
-
Jonathan - Welcome to MSW's site ! Since moving from Los Angeles to Atlanta, I have started to do research on Sherman's March and have visited Resacca, Kennesaw and Andersonville, where my great grandfather spent 1 month in Andersonville Prison until exchanged. He was 16 yrs of age. I look forward to seeing some of your ships from this period. Cheers
-
Greetings from sunny San Diego! (couldn't resist)
Fright replied to AlanZL1's topic in New member Introductions
Alan - Welcome to the site. The smooth finish on your hull looks fantastic! p.s. Please say hello to my Pacific Ocean for me I'm now land-locked in Atlanta GA. -
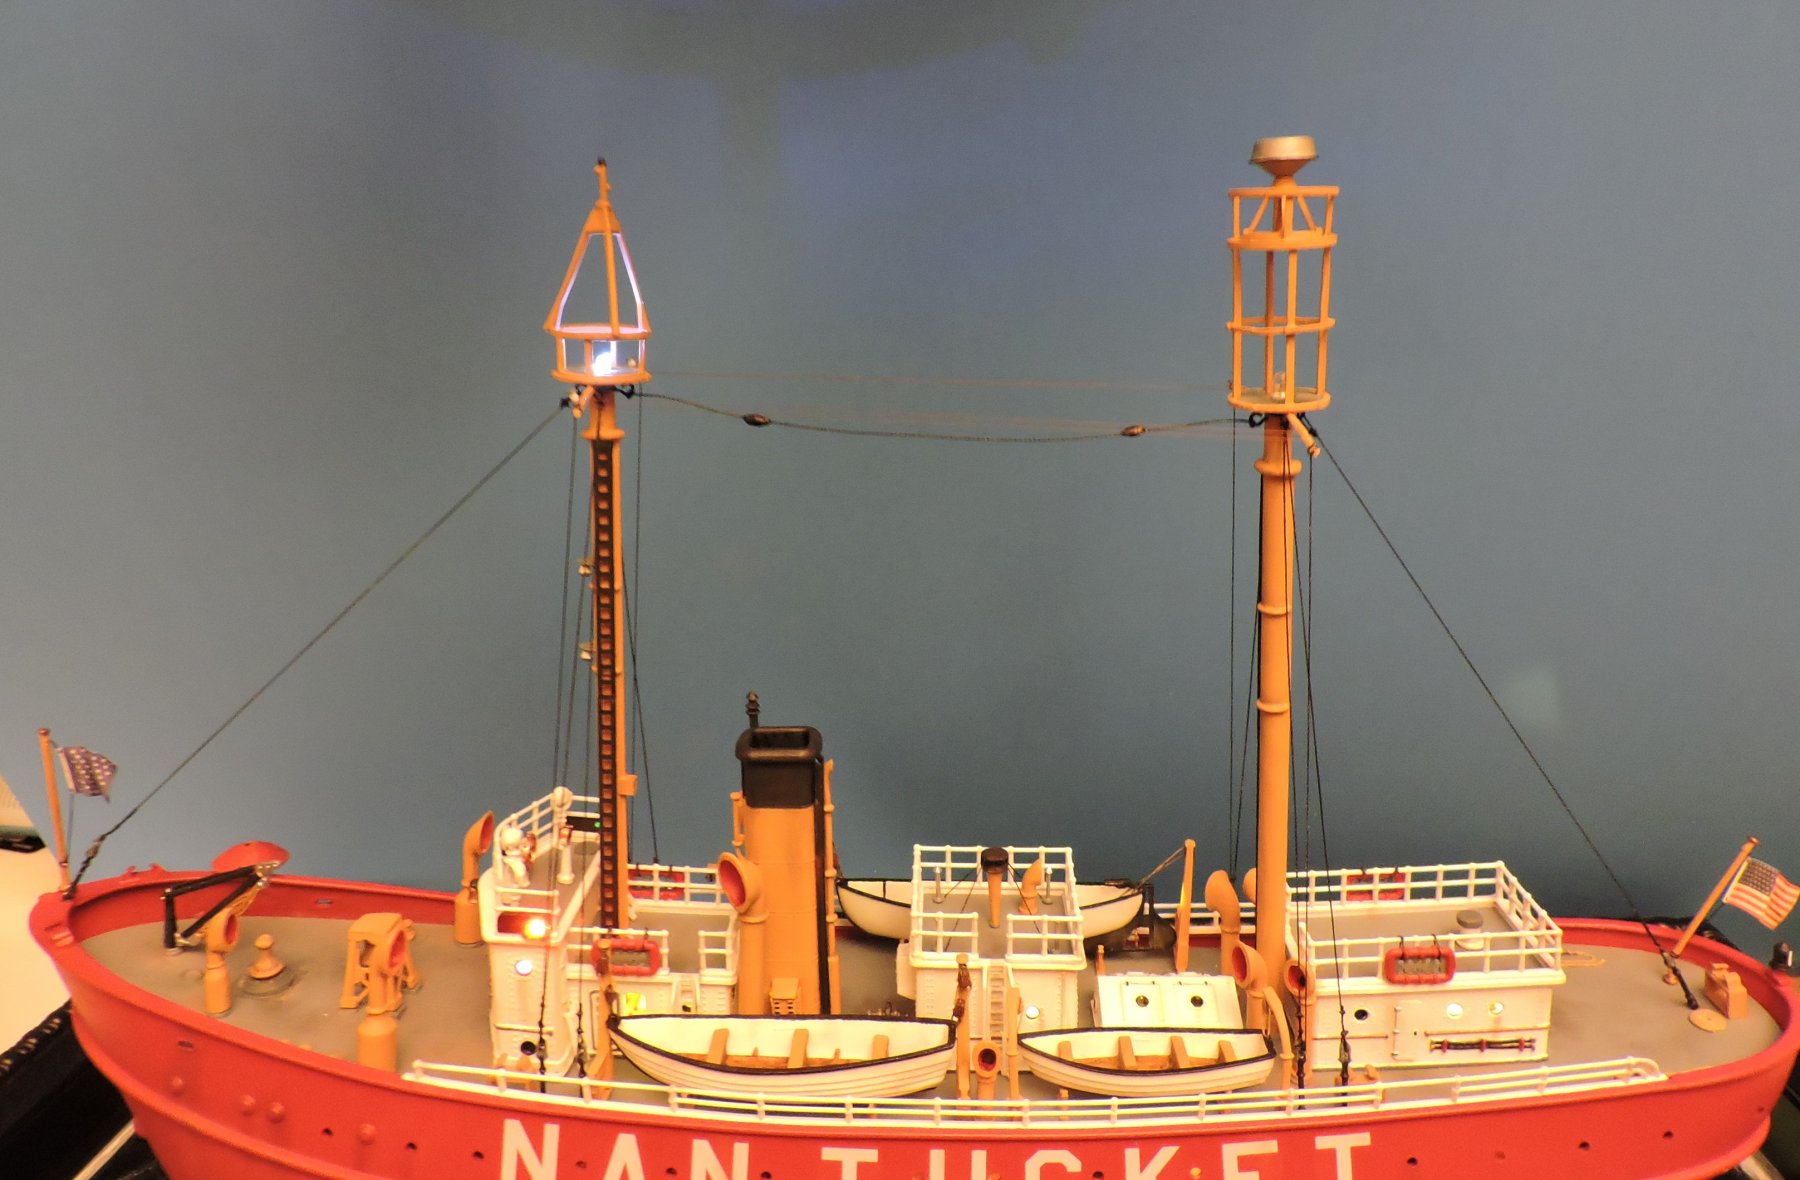
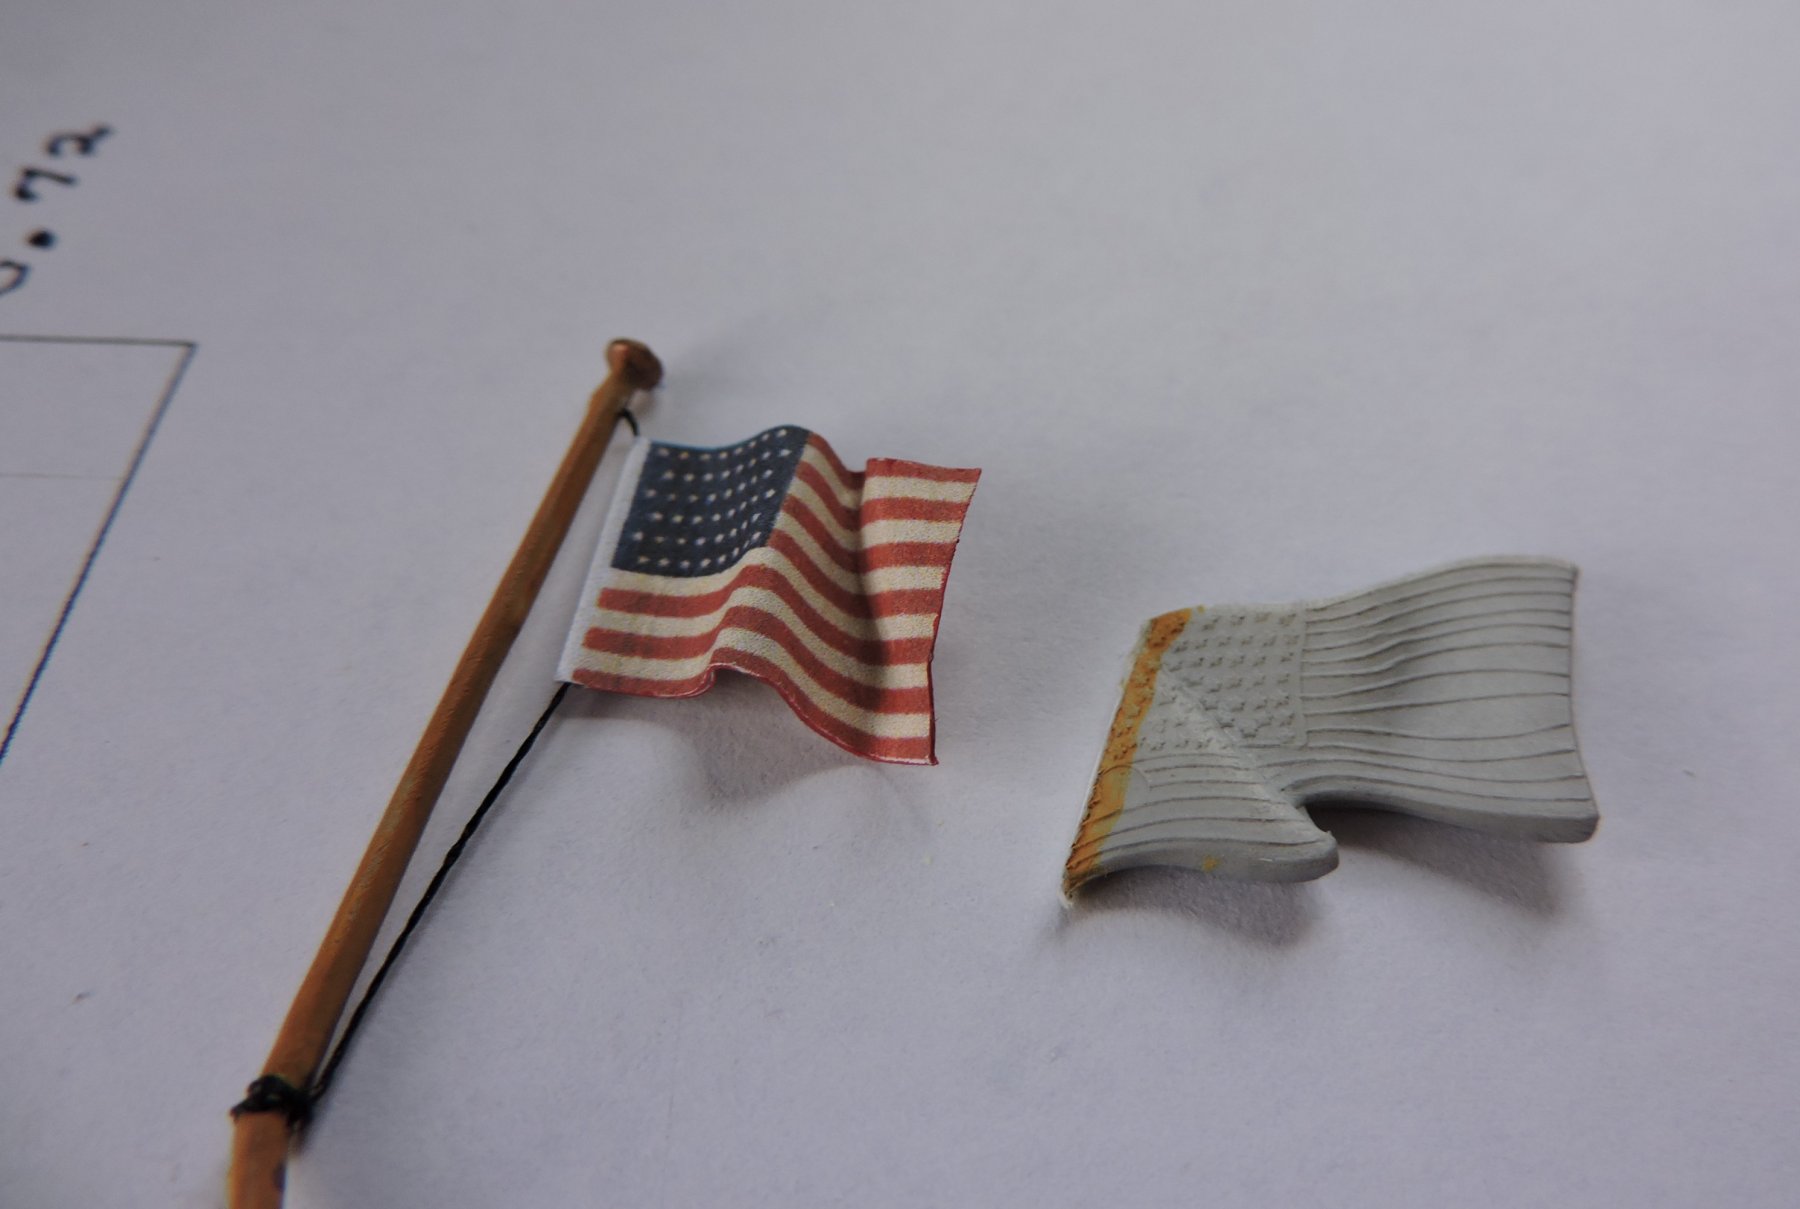
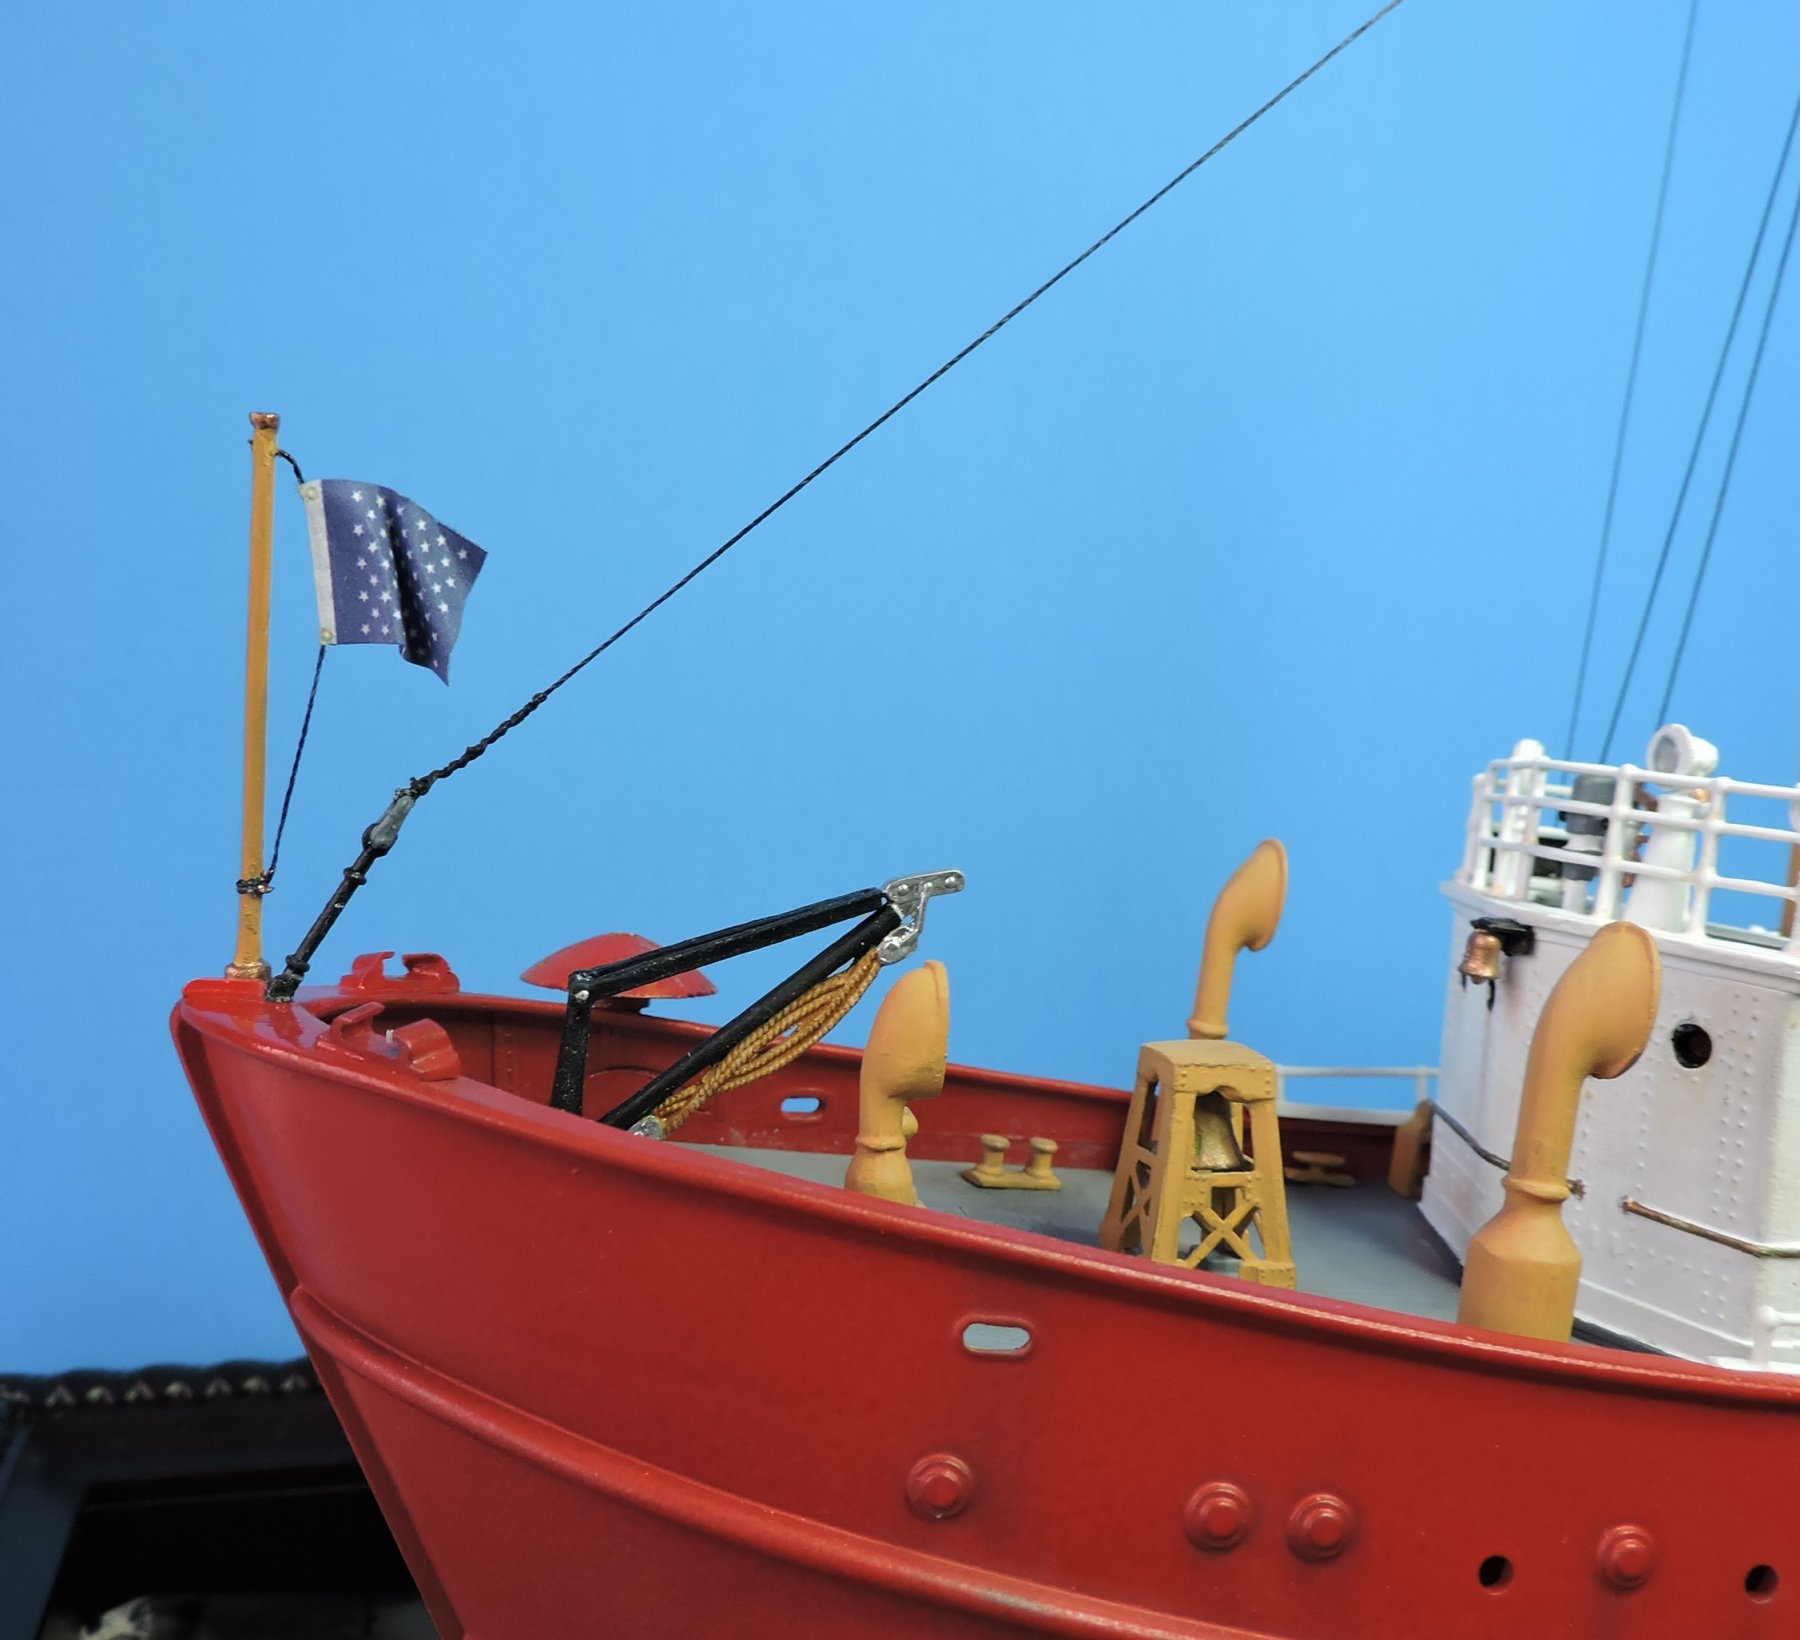
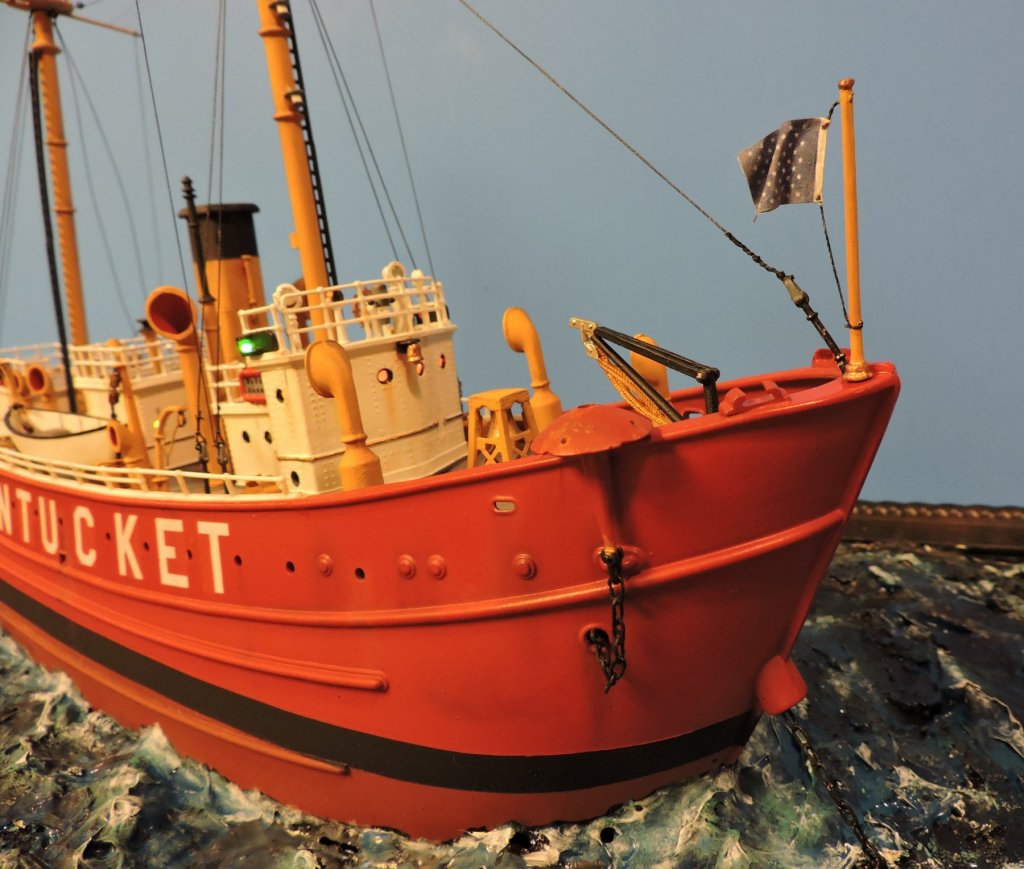
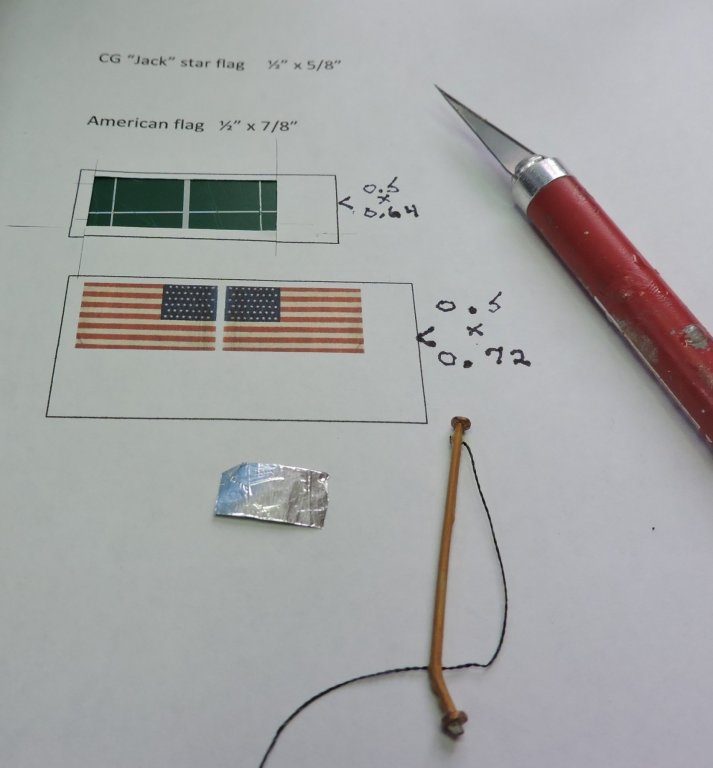
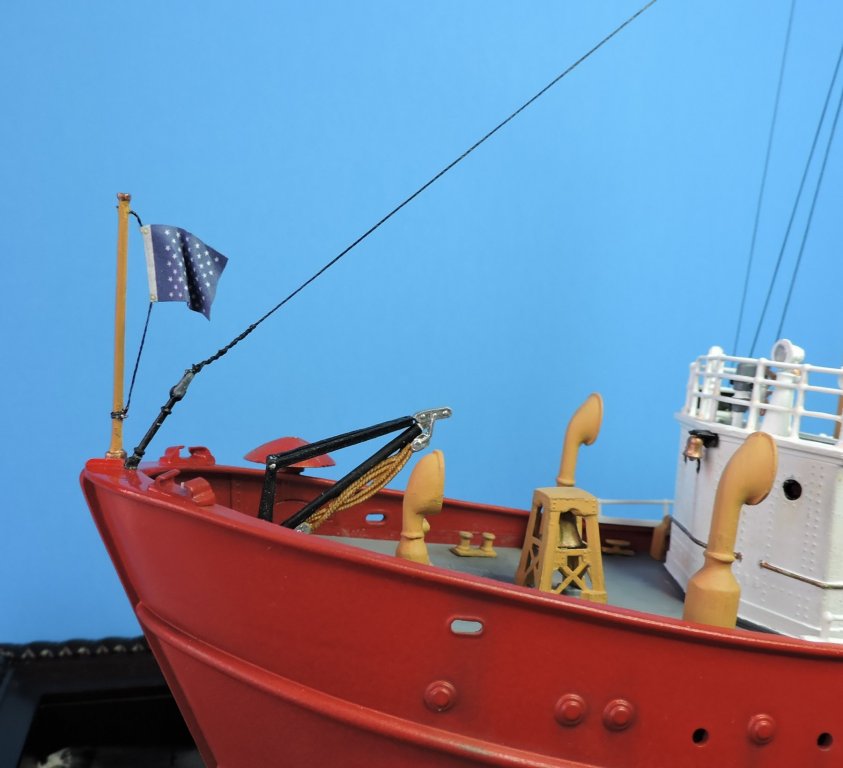
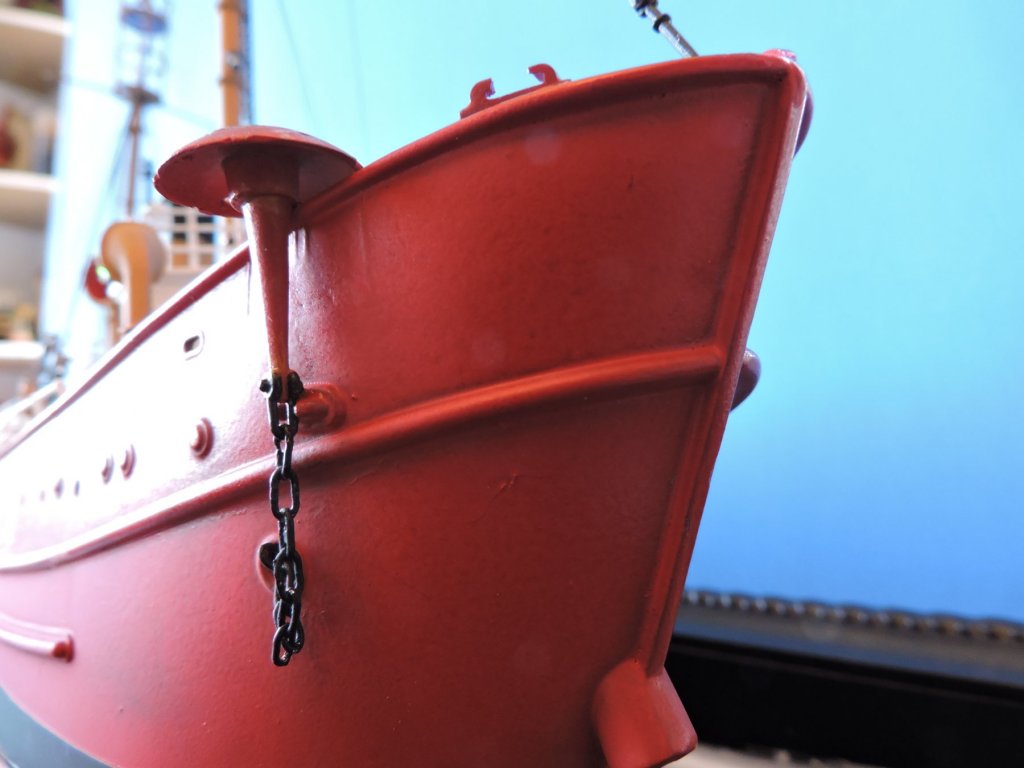
Huzzah! Flags are now mounted on the bow and stern. Many thanks to my wife, who works with miniatures, for reducing and printing my US Navy Jack and American flag. Note: the Jack flag's dimension are 0.5"x 0.625" - not 0.64" as written on my paper in one of the pictures.


-
Wow - incredible job on the hull's smoothness. I'll be 'borrowing' your idea on the paint box
-
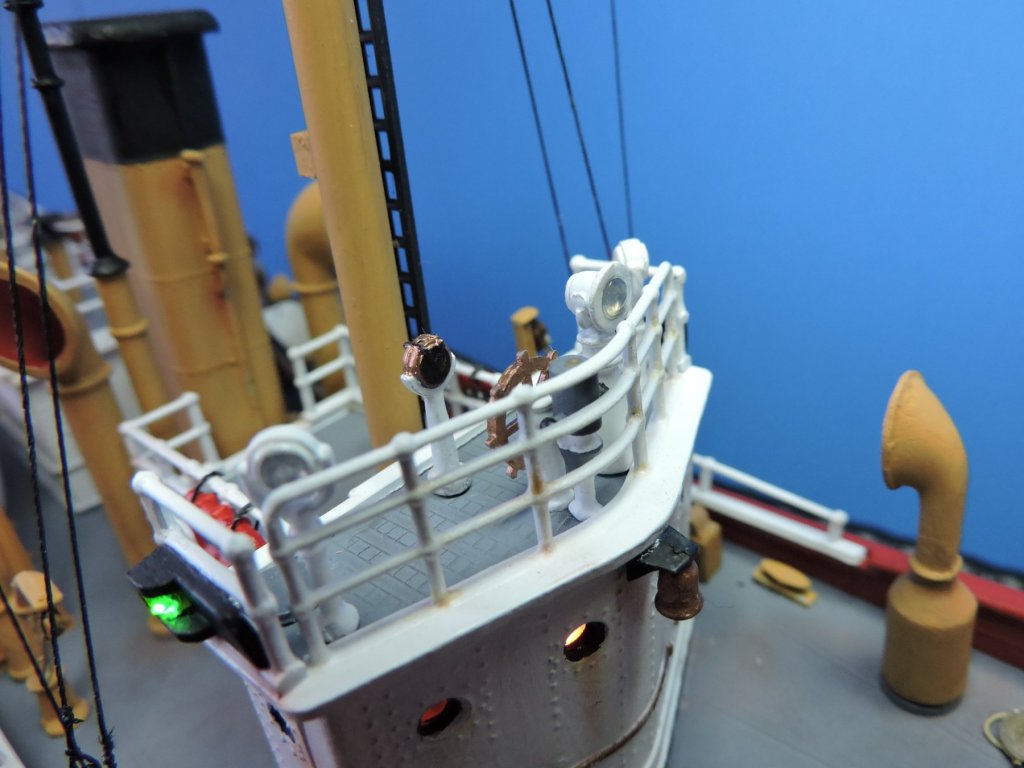
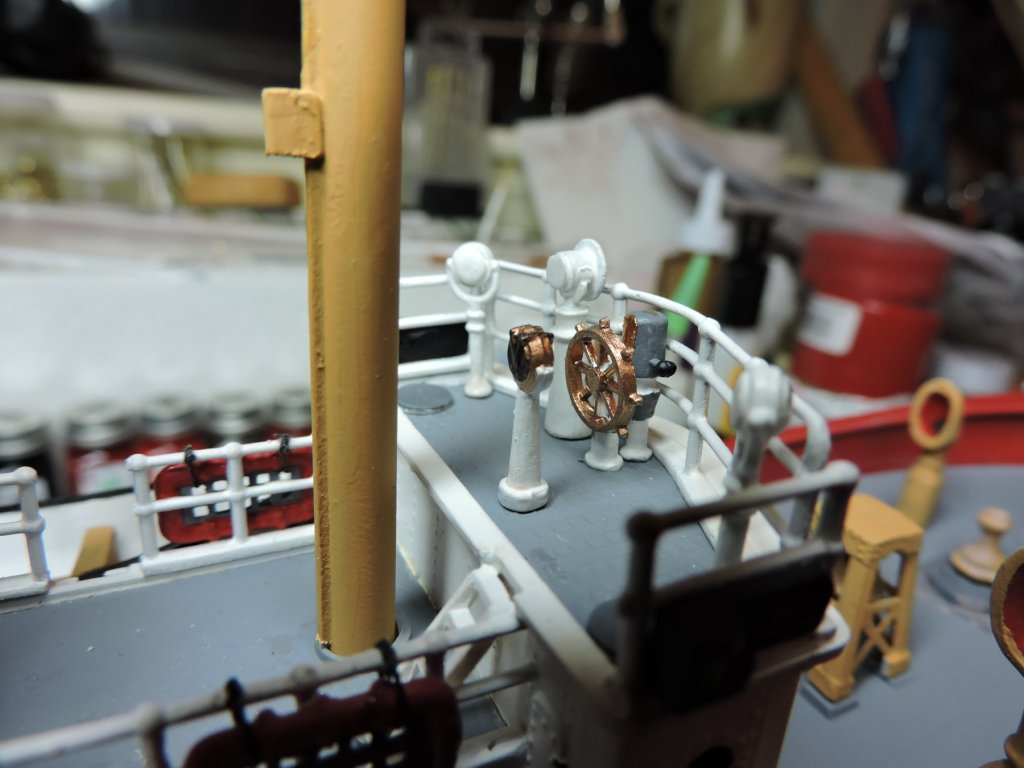
These are some pictures of current status. Rigging is on and once I receive my order of EZ Line, I will finish adding the radio wires to the beacon towers. Flags for the bow and stern are coming. My next step now is to start creating my ocean effect for the ship's base. This will be my 1st attempt at a diorama so I'm keeping my fingers crossed!
-
I remember the excitement of opening up my ship upon it's arrival. It's pretty overwhelming for a plastic model kit. Wow - your preformed sails took a beating from that support brace. I guess I was fortunate to only have one of my sails arrive with some damage done to it. Here's a well made video that was made on this man's build:
- 15 replies
-
- 1
-
-
- constitution
- model shipways
- (and 1 more)
-
This looks like a nice classic boat. I'll be tagging along on your build
- 49 replies
-
- 2
-
-
- dumas
- Chris-Craft
- (and 2 more)
-
I'm fairly new at modeling myself (since 2011) but I've read articles and posts from several modelers on material used in making sails. Kleenex, silkspan, and cloth material. I used rolled up Kleenex to create furled sails on mt Capt. Kidd kit that I used for practice. I used a nice canvas colored linen that I picked up at JoAnns for my wooden Bluenose. I tried laying material over my pre-formed plasic sails using a 50/50 mix of water and glue to try and get the detail work to transfer but I was unsuccessful with my attempt. Will you be doing full sails or furled sails on your Connie? There are a lot of articles on this subject but I found these two to be very helpful for me in making sails. Look up a gentleman by the name of Tom Lauria on Youtube or on ModelShipWorld.com. Another great article is by a modeler who goes by the name of Landlubber Mike on this site. Here's a link to his method of sail making: There is a good build of the Constitution by Force9. These are just my favorites that I've found along the way. The excitement builds as we await some of your pictures with your progress. Cheers and a good weekend!
- 15 replies
-
- 1
-
-
- constitution
- model shipways
- (and 1 more)
-
Steve has offered some good pointers and tips. I purchased my line from Syren Ship Model and Cottage Industry Models. I was not happy with the seam lines from the three-part deck so I purchased my deck from Scaledecks.com on Amazon at a special price. I also reinforced the underneath of the deck seams by gluing plastic styrene strips. Run a good thick bead of cement all along the inside of hull seam. This, along with the reinforced styrene will prevent hull separation when it comes time to install the decks. Once again, like Steve mentioned, how much detail and time do you wish to put into your build depends on you. I have spent two years working on and off and I have finally installed the gun deck. I added lights and made some modifications before I had to step away for a while. Oh yes, I have learned quite a bit in these eight years of modeling and I am so thankful for the help that has been given to me from fellow modelers in these sites. Big lesson is take your time. Completing this ship is a challenge and your goal. I wish you smooth sailing and good adventures with this ship!
-
Congratulations !!! A great kit with very good detail. Mine is on a holding pattern. I had to step away from her and try to learn some needed skills with some other models. I hope to get back to her in the near future. Here's a good book to pick up if you do not already own it. "The 44-Gun Frigate USS Constitution 'Old ironsides' (Anatomy of The Ship) " by Karl Heinz Marquardt. It has a lot of reference diagrams along with history of the ship.
-
Doug - I'm signing up for your adventure with this ship build.