Fright
-
Posts
562 -
Joined
-
Last visited
Content Type
Profiles
Forums
Gallery
Events
Everything posted by Fright
-
Hello James and welcome to this site!
-
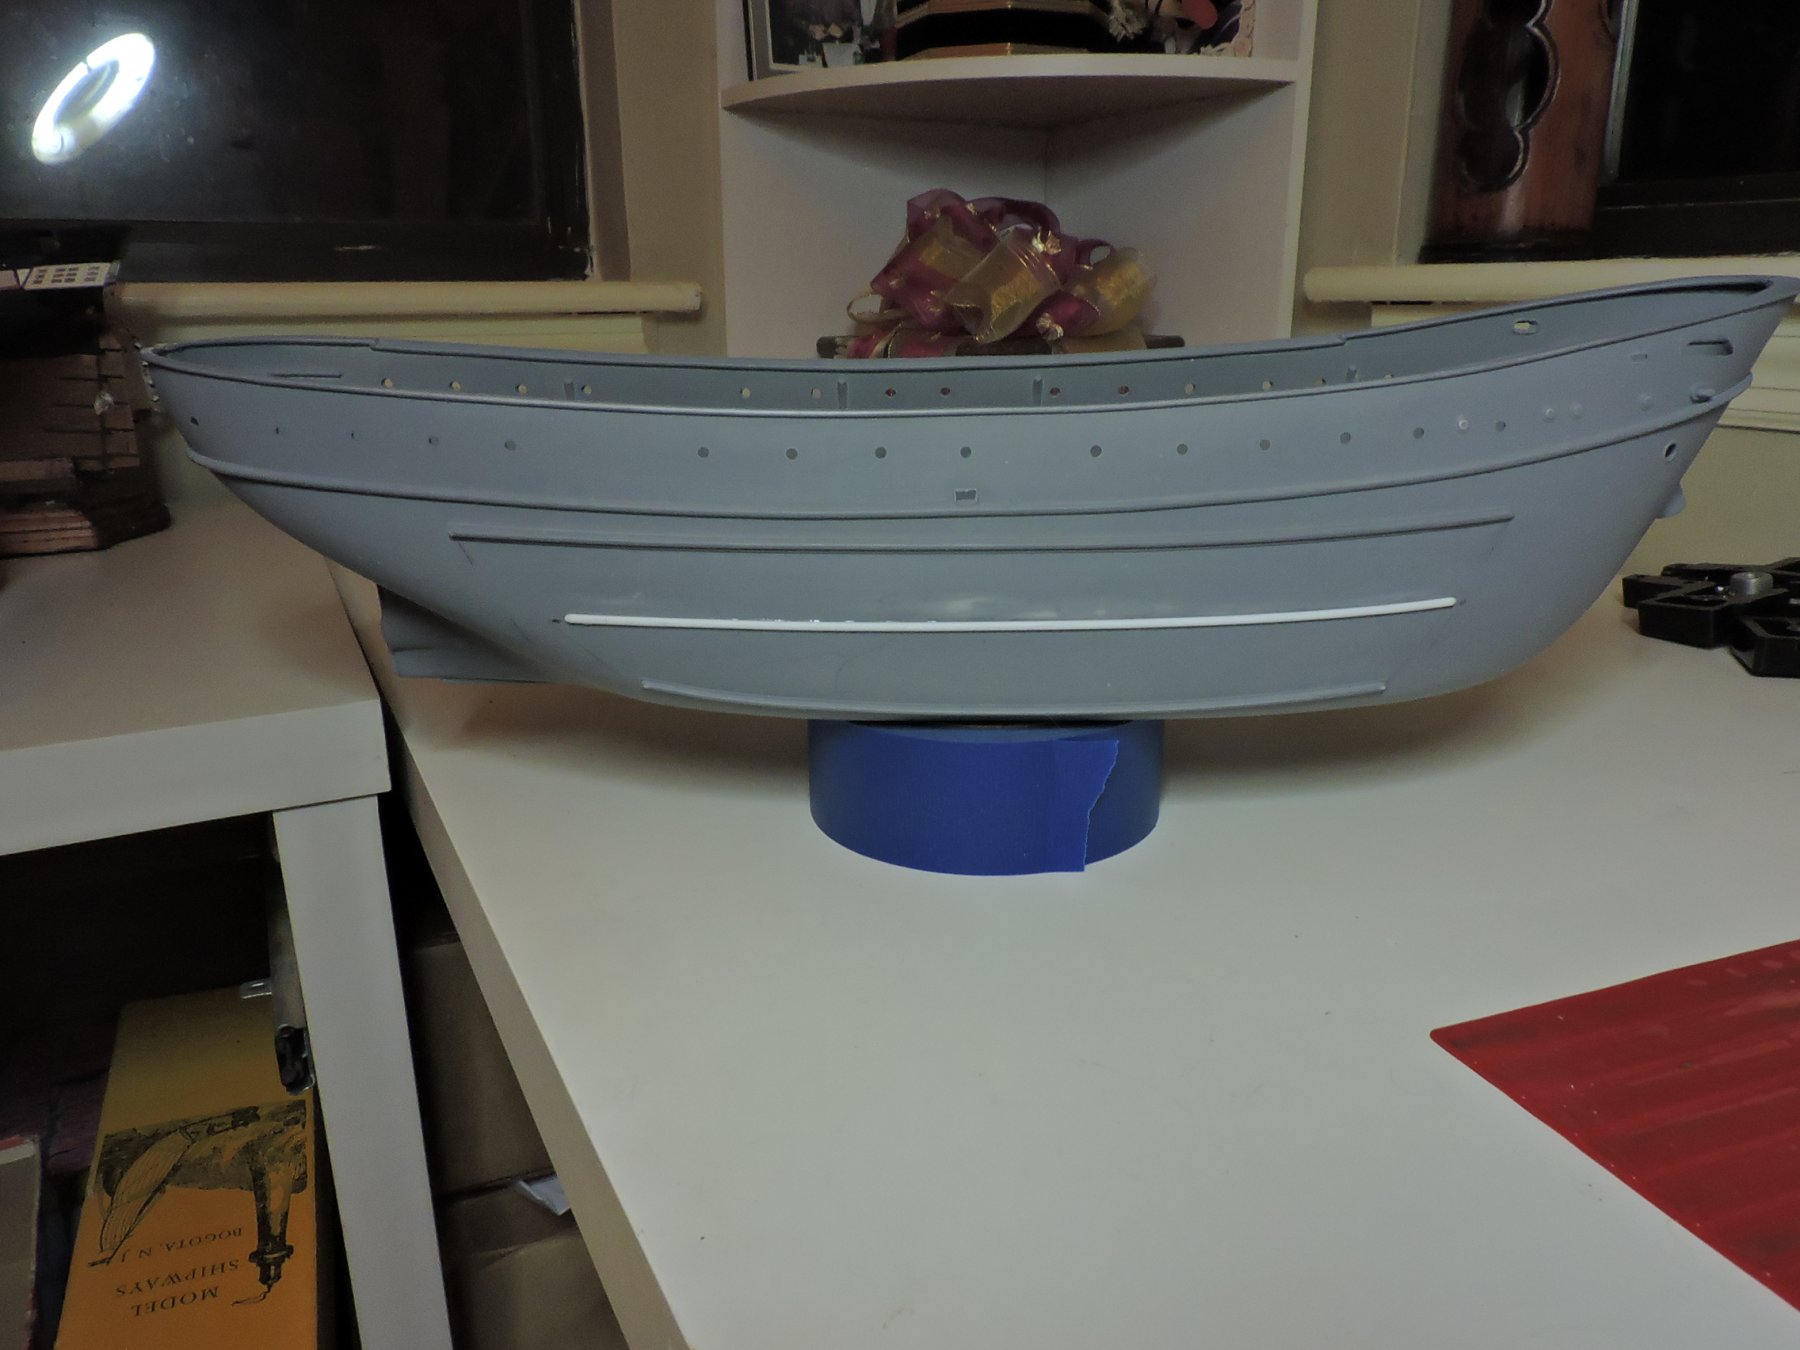
 Someone brought to my attention that I should make sure all superstructures were 'blacked out' to prevent any light leaks. I painted all interiors and bottoms of their ceilings with silver paint. Once everything had dried, I painted a coat of flat black over everything. Once this has dried I will repaint the interiors with white and light green. I put those aside to dry and marked two location about midway on the hull, just above the waterline, and drilled two small holes for the intake/discharge openings. I then marked and masked off the upper portion of hull and sprayed the lower hull with anti-fouling red. Here are two photos of the hull:
 -
Thanks to Popeye for suggesting to create possible interior furnishings in the main cabin. I just needed something to block the emptiness if interior and this is what I came up with. I made a little chart table by cutting the legs and table top from a styrene sheet. I used a small piece of styrene square to support the side legs. I made a little drawing on a post-it and cut it to shape and glued to the table. I cut a tiny 45 degree shape as my triangle and glued to table. I had a small piece of styrene that I used for my rub rail and I painted them black/blue and glued to interior cabin wall. Pretty simplistic, but I think this will help tone down the light emitting from the open hatch when all if finished. Still needs paint and detail work done to the outside.
-
HOF - thanks Hof. My electrical skill are not the greatest, but the led system by Evan Designs that I purchased from Modeltrainsofteware.com seem to be pretty simple. The led's already have resistors attached and everything looks fairly simple to connect up to a AA battery pack which I will try to hide inside the base.I ordered 5mm, 3mm and Pico size led's.
-
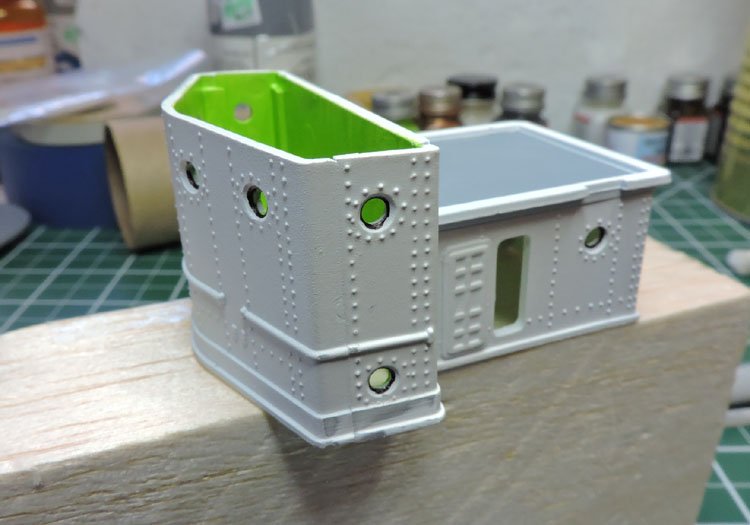
Back to work. My lights for the ship will be arriving Tuesday - yeah! I started to think about this main cabin and I suddenly noticed this open hatch. With a light inside, it would just show an empty compartment and that's not good. I"m thinking about creating a small wall (made from styrene) just behind the door to block looking all the way through. My wife suggested taking a photo that shows an inside picture of the cabin and then shrinking it down to paste on my 'fake' wall. I'm also toying with the idea to cut a small opening into the deck just inside the door and then adding adding stairs that would appear to be going down into the hull. So, here are two photos before any work begins. I also have to tone down the bright green to more of a pastel shade of green
-
I changed my game plan with my lighting and went with a different company for my lights. I went online this morning and purchased lighting gear from https://www.modeltrainsoftware.com/ I ordered AA battery pack w connector; shrink tube; a pair of wired connectors; 1.8mm led (red & green) for port and starboard lights; 2 3mm flashing bright white lights for masts; and 2 Pico warm white lights to illuminate the inside of cabins. Hopefully, I'll be able to figure out all of the connections correctly! LOL
-
LJP = Welcome and I look forward to seeing your build(s).
-
Did some work on the three small boats that will go on the main deck. I'm going with wood colored seats, white hull and black stripe on keel and rails. I will spray them with Dullcoat to flatten the glossy look and add some rope coils.
-
I made a correction to the hull after looking at photos taken of the ship's bow. On the actual ship, the auxiliary mushroom anchor was located on the starboard side next to the main anchor. On this kit, the hull has a half-circle opening where the auxiliary anchor is supposed to be housed. I took a post-it note and held it up to the inside of the opening and trace the shape with a pencil. I then transferred the shape onto a sheet of styrene and and used my x-acto blade to cut the pattern. I files it to fit the opening with a nail file and used liquid cement, both on the inside and outside, to bond it to the hull. I used a little gray putty to fill in seams and left overnight to dry. I sanded down the area until smooth and then sprayed the hull with some gray primer. Now I need to figure out my game plan on creating the 'new' opening to hold the anchor next to the bow.
-
I'm wondering if anyone can help me along with the three smaller boats on board the Nantucket lightship? I was told that this kit represents the lightship before she had a retrofit in 1960. So my question is: what color were the lifeboats, utility boats painted in the 50's? I'm assuming by this time period, they would have been metal and not wooden hulls. The USCG standardized a color scheme for these vessels around 1940 but I cannot find a reference for these boats. A few old photos show that the boats had a red hull and it looks like black rails and keel. Later photos (almost all after 1960 show the boats to be painted white). Also, would the seats and rails inside the hulls have been wood colored or metal gray? Any suggestions or help on this subject would be greatly appreciated.
-
Wow - an amazing boat and some amazing friends! Everything on this boat looks fantastic, including the wood pattern on the flooring.
-
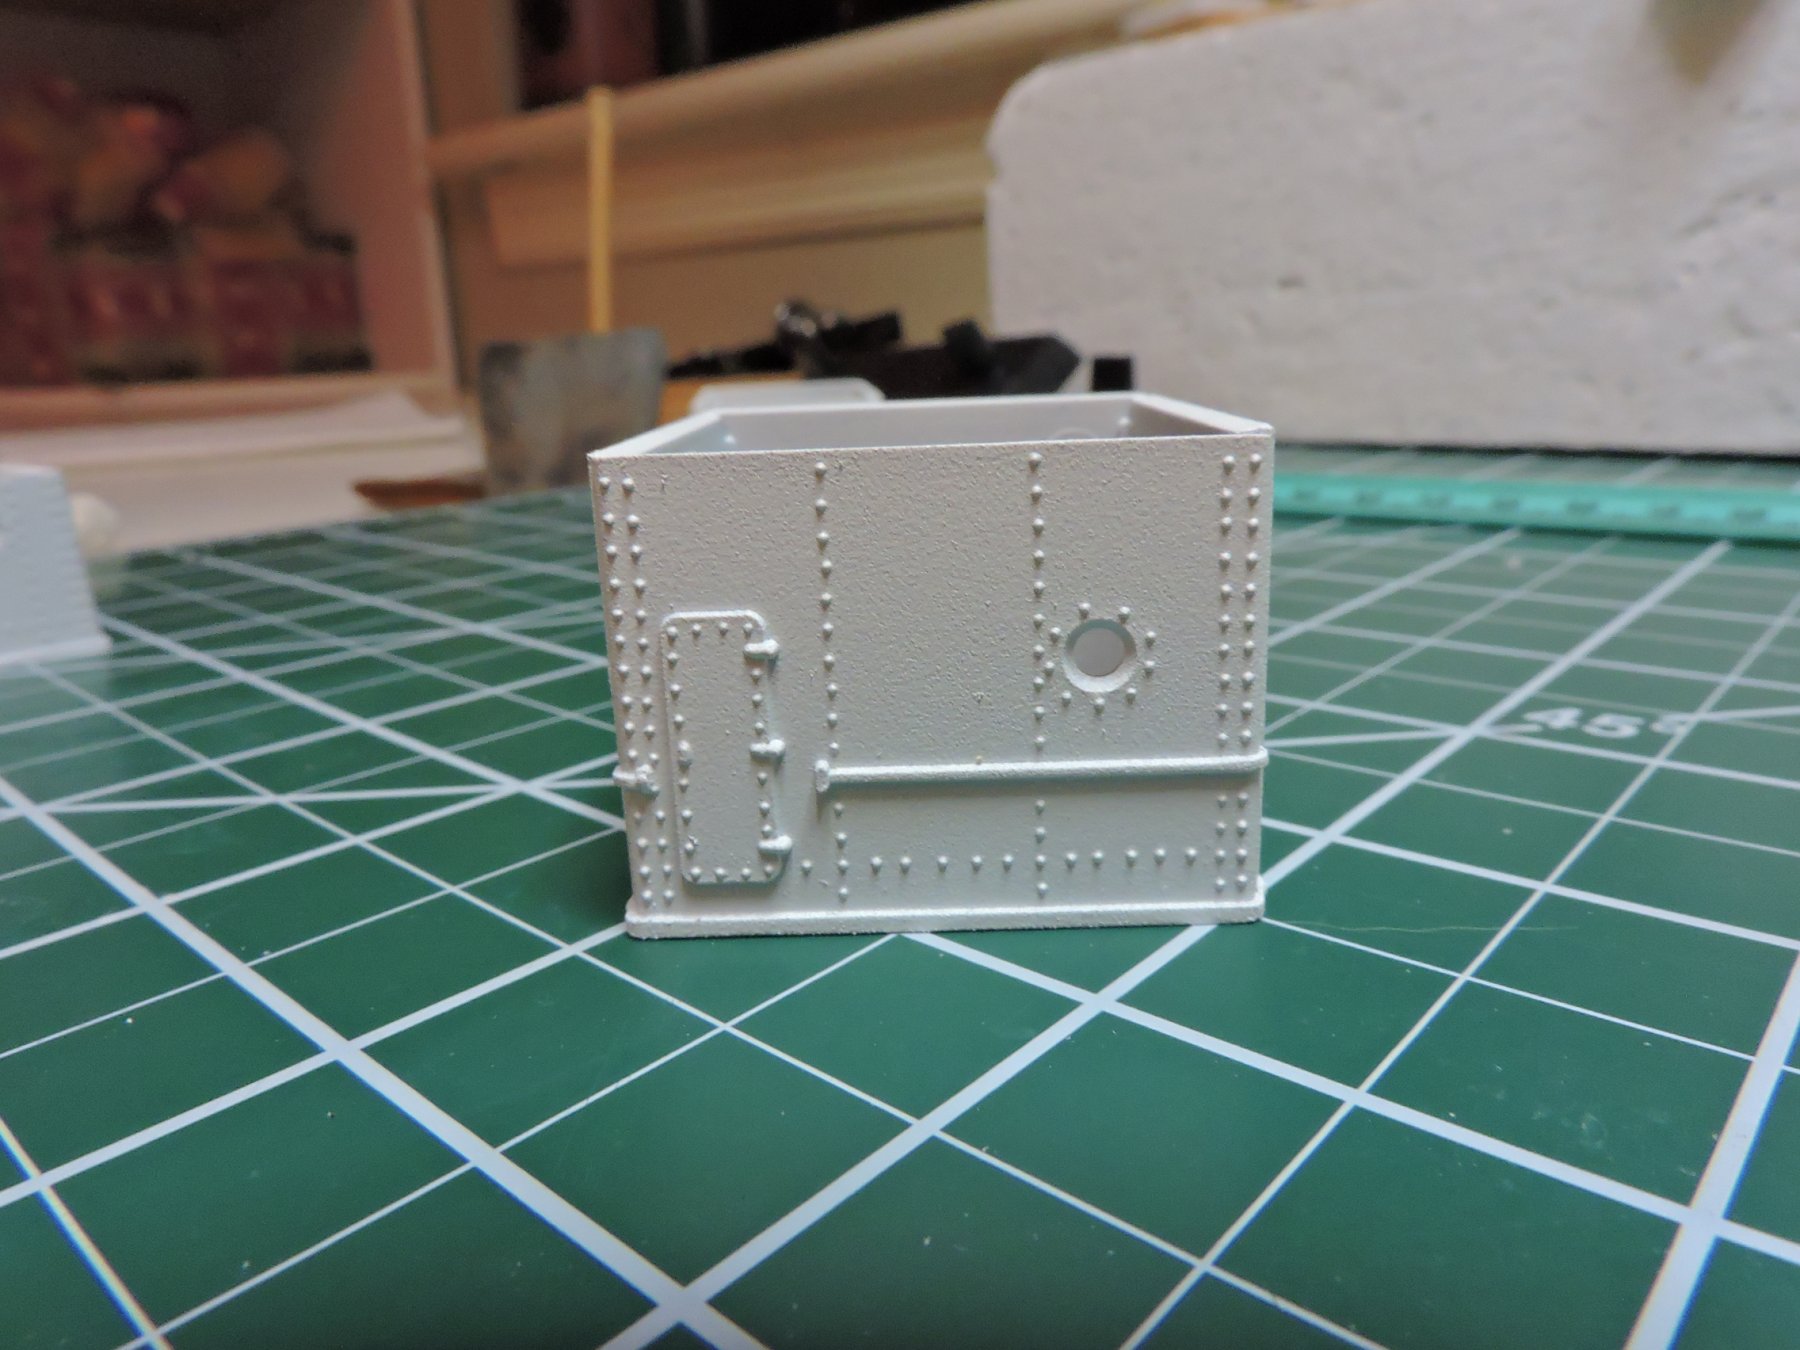
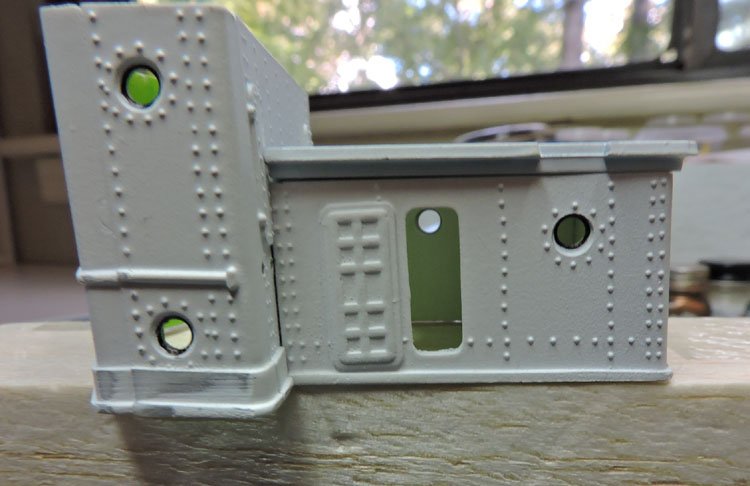
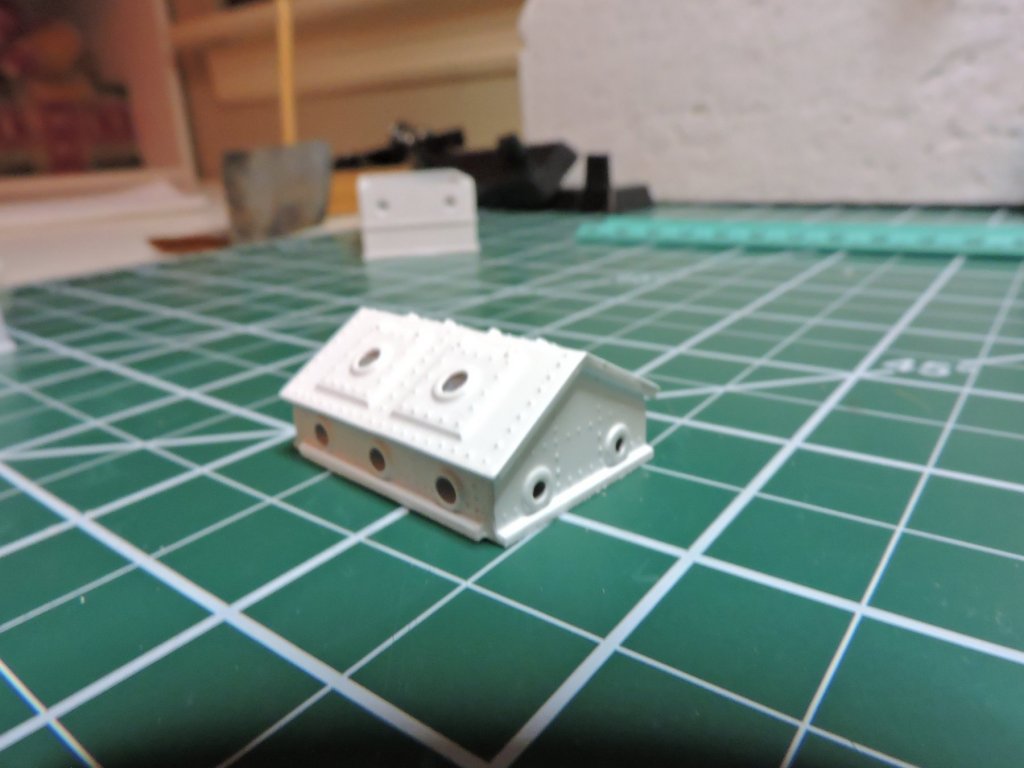
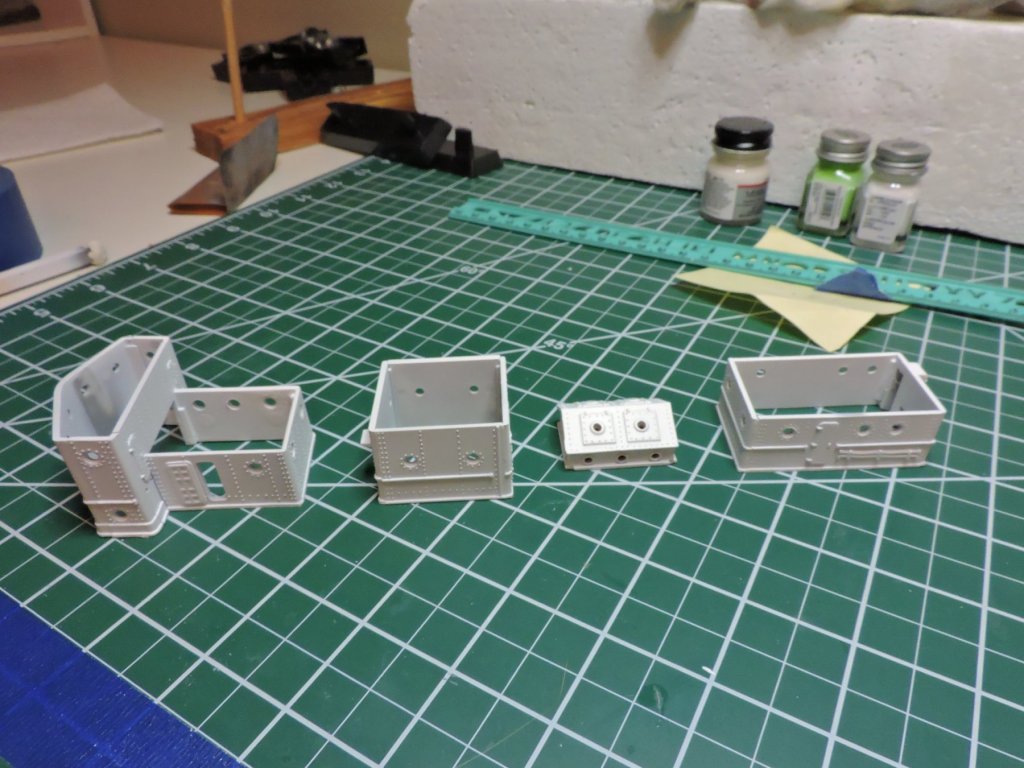
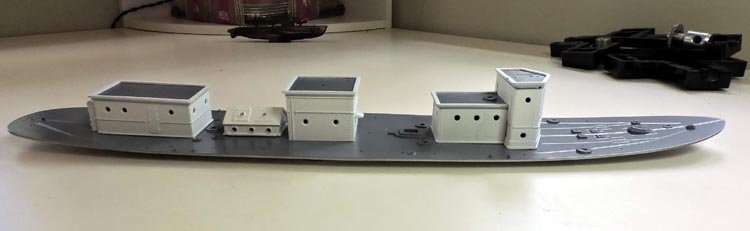
The past few days, I have been working on and off with putting together the pieces for the superstructures that go on deck. Almost every piece needed to be filed and sanded to remove flashing and seam lines. Many of the portholes needed to be filed out due to amount of flash that were closing up many of the holes. My inexpensive files that I purchased from Harbor Freight came thru for me on this one. After making sure a piece fit together, I used Tamiya liquid cement to bond the walls together. I also hit the inside of seams with a little CA glue to strengthen the bond. I used white glue to help fill any visible seams and, after sanding smooth, I sprayed all four deck structures with primer white. For the top decks of the structures, I sprayed them with Testors gray. After the three pieces dried, I taped off the deck portion of each piece and sprayed the edging and underside with white primer. The three pieces fit perfectly on top of their appropriate structure and all four pieces sit nicely on the deck. Nothing is glued yet as I need to do add detail pieces and do some detail painting. Note: the bottom edging on the corners for the engine room skylight (a-frame) need to still be filled to match up.


-
Attila - count me in on your build. I started Revell's 1:96 Connie about two years ago and I finally have her gun deck installed. Maybe this will inspire me to get back to work on her. I look forward to watching your progress on this ship. Good adventures!!!
- 82 replies
-
- 2
-

-
- revell
- cutty sark
- (and 3 more)
-
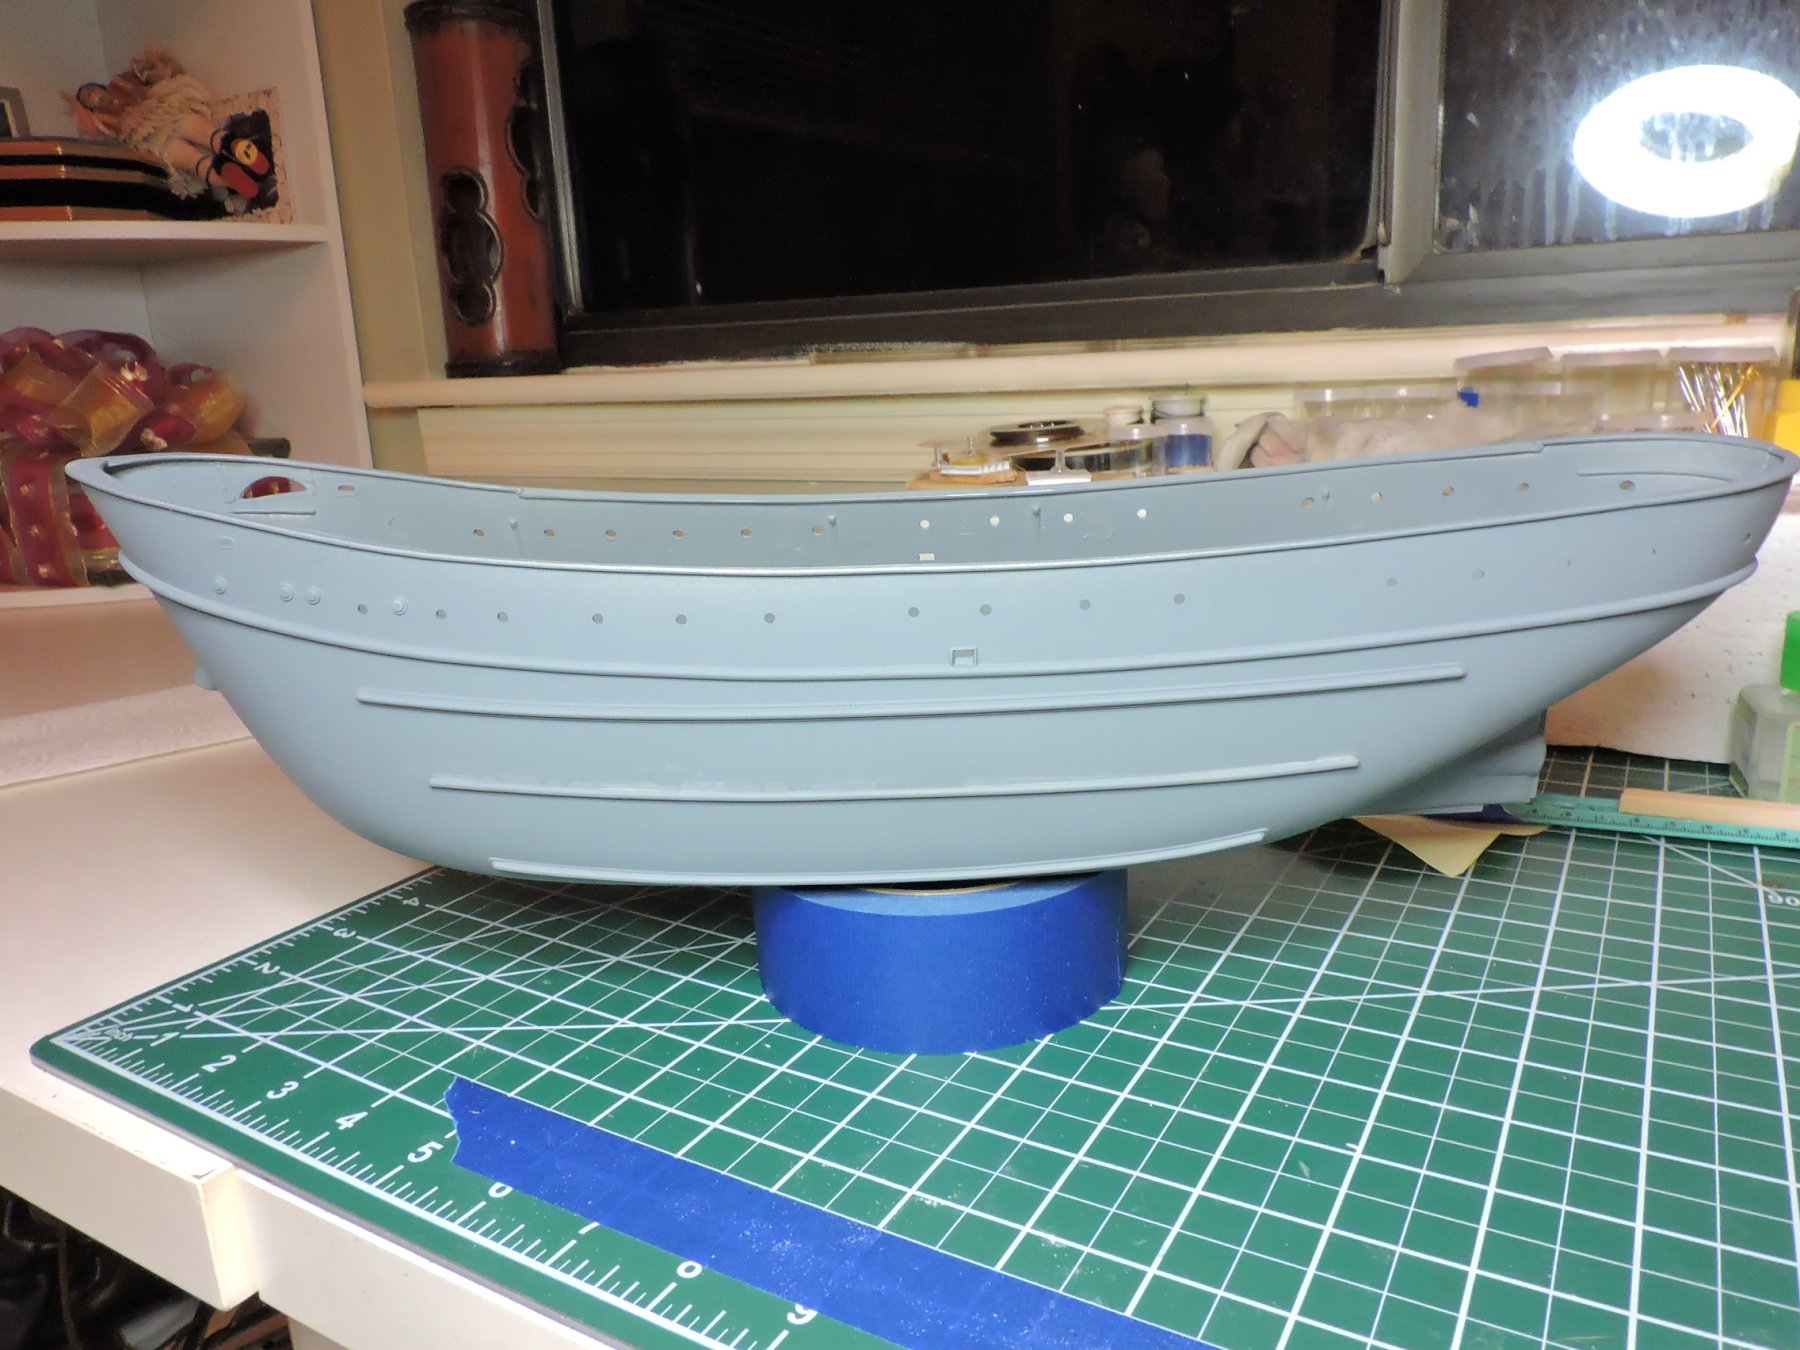
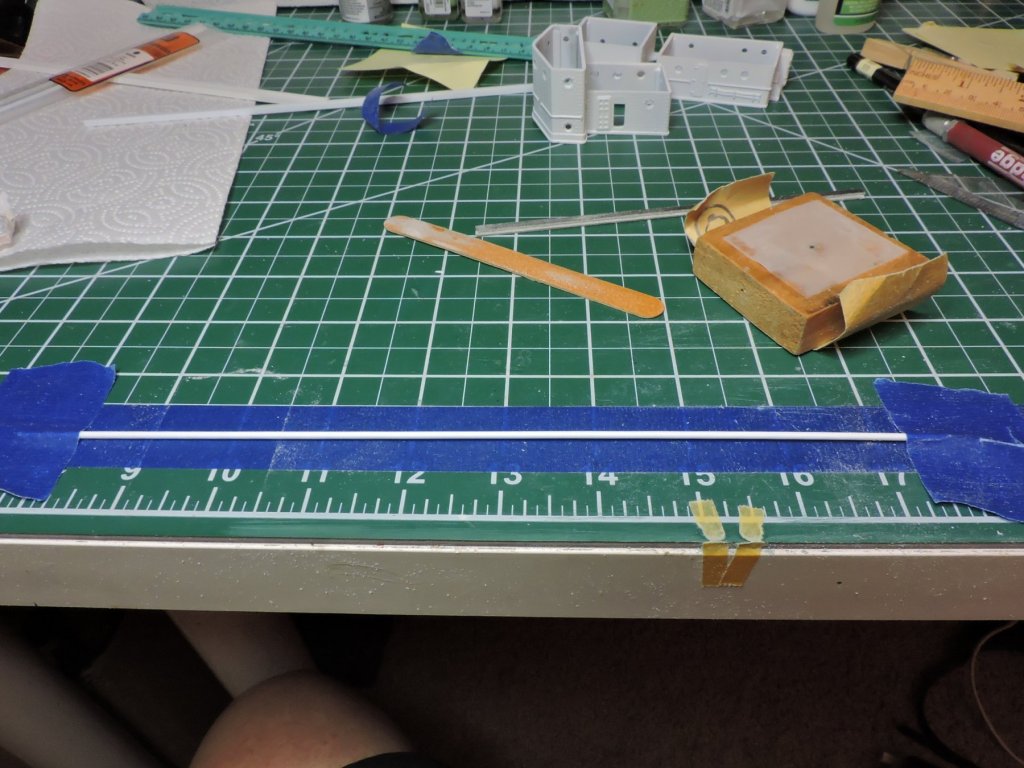
Members 349 posts Location Atlanta GA Report post #1 Posted just now I was able to sit down and set about creating the missing rub rail for the ship's hull. I took two Evergreen round strips and taped the ends to hold them in place on my workbench. I then used a sanding block to flatten down about 1/3 of the strips and the rounded off the ends with a file stick. I measure and marked some guidelines along the hull and then ran a strip of painters tape as a guideline for place of strip. I used CA glue to attach one on each side of hull. I then sanded off any glue marks and sprayed with primer gray.


-
MR. BlueJacket - she is really coming together. Thank you for mentioning this 'rule of thumb' about coppering a hull.
- 77 replies
-
- 3
-
-
- schooner
- solid hull
- (and 4 more)
-
A very clean and nicely detailed boat!
- 48 replies
-
- 1
-
-
- 18th century longboat
- model shipways
- (and 1 more)
-
Tjalle58 - opening up a box is always fun and I wish you smooth sailing with this build. This is a great place to post and ask questions - the people in here are very kind in helping someone along or giving positive feedback. Enjoy!!!
-
This will certainly be a nice compliment to go with your T78 Norten model build. Your detail work really gave that boat some life
- 171 replies
-
- 6
-
-
- krabbenkutter
- authentic models
- (and 1 more)
-
This wooden kit has really come a long way in your hands and she is looking pretty darn good. Compliments to your build!!!
- 171 replies
-
- 4
-
-
- krabbenkutter
- authentic models
- (and 1 more)
-
John Allen - thanks for taking a look and I'm going to go with what I am seeing from photos on the actual ship. I also have noticed that the two Mushroom anchors are almost side by side; main on bow: main anchor on bow, the secondary anchor slightly higher on the starboard side. There is no 'half moon' opening on the real hull that houses half of the secondary mushroom anchor. Thanks again!
-
el cid @ Keith - thank you for your input on types glues. I'll pick up a bottle of the Tamiya liquid glue on Monday. I'll look into the tube glaze at my local auto shop. Thanks again!