


Fright
-
Posts
562 -
Joined
-
Last visited
Content Type
Profiles
Forums
Gallery
Events
Everything posted by Fright
-
 Congratulations on finishing this wonderful build!
 -
Welcome LG to this world of talent and advice.
-
Bill - don't worry about being slow. I've got you beat on that one!!! Make room in the boat for me - I'll be following along!!!
- 41 replies
-
- 1
-

-
- muscongus bay lobster smack
- BlueJacket Shipcrafters
- (and 1 more)
-
popeye - I was aware of Evergreen but I've not heard of Plastuct. I will look up their products. On the solid masts, there are three locations that have 'rings' around the masts. I imagine these were some type of metal supports. I was thinking that it may be possible to cut off these three sections on the solid towers, drill a hole thru them for the wire, and join them with the hollow tube. There may be a possibility that they could slip inside of the hollow tubes to form the bonding. Thanks again for shedding some light on this problem. Cheers! My look for work until the end of October. Aye, 'tis a good life, but they don't supply us with any rum LOL
-
Jack12477 - My two 'beacon' lights that I will be using are 3v 3mm white Led with a slow flash that I ordered from Evans Design. On the site, he suggests that they be on their own power source to prevent flash leakage to any solids. He suggests using coin battery to power them. My solids will be hooked up to a AA battery pack. I tried to find the flash pattern for the Nantucket online but had no success. It's also very hard to find pictures of this ship that is pre-1960. Almost all are good quality pictures, but are taken after her retro-fit to diesel power in 1960. They do help in showing some of the deck equipment that were painted with spar. I downloaded the official USCG color regulations that say what colors are used on what equipment. With that, thanks for the feedback and have a wonderful weekend!
-
Ozark - I started out using a strip of cardboard for a cutting mat, but eventually, I agree with Eric that a cutting mat for any crafting or future modeling is a good investment. I looked at a lot of posts and made a decision to use better quality rope. Like Jim Rogers suggested, I too went with Syren rope and make sure you use some good wax. My 1st kit was in 2011 and I've learned a lot as time has gone by. And yes, one can sometimes get overwhelmed with information. I am not even close to working with the masts, but a lot of people do suggest using wood for better strength - especially when it comes time for rigging. Another tip that I read and am using is, I replaced my plastic eye bolts with metal ones for the very same reason about breakage. I'm looking forward to watching your progress and don't rush it!
- 49 replies
-
- 1
-
-
- constitution
- revell
- (and 1 more)
-
Jack12477 - that would be awesome but, to tell you the truth, I have zip-diddly knowledge about wiring. I have no clue how I would go about getting my 3mm LED's to flash in that pattern! I've looked at a couple of posts where they used circuit boards etc. that are truly amazing, but again, way over my head. This is why I chose battery over AC - I'd hate to electrocute myself when I power it up LOL As for the beacon lights on towers, I originally thought they were in two pieces and I would run the wire up the center. NOT! They are solid plastic towers. I'm thinking that I may be able to attach the thin wire along the tower and try to hide it underneath the ladder that is attached to the tower. ? Last, but not least, I want to thank you for taking a look and your suggestion. Greatly appreciated! Have a good weekend!!!
-
popeye - here's what I plan to use as my base. I picked up this 9"x20"x1.5" shadow box frame for $16.00 @ Micheal's. The AA battery pack and on/off switch will be attached on the backside of frame. Fits perfectly! I'm passing the electrical wiring thru a 1/4" clear tube (remnants from last year's surgeries) that will run from the ship's hull to the frame's edge. I will use a thin layer of Plaster of Paris (which I'm 'borrowing' from my wife's stash) to fill around the bottom of frame; paint and also use Vallejo's Water Effect Atlantic Blue gel to create an ocean effect. At least that's the game plan LOL This will be my 1st attempt at creating a water diorama.

-
I did a trial run with one of my Pico size led's in the wheelhouse and rear cabin to get an idea of what it would look like. *Neither top deck nor cabin is glued down. I'm pretty happy with the way it is going to look.
-
popeye - many thanks and she's coming along. I'm going to try a test run with one of the lights to see how it looks and I'll post a picture or two of them shortly. I keep finding 'little' things to touch up on the structures but I'm at the point where I need to think about building my display stand before I can go any further. I want to hide the battery pack at the back but have easy access in order to change batteries. I also want to install an on/off button for the power source. I was thinking about using a wood frame about an inch deep with a cover over it and then the ship mounted on top or, using the frame with a bottom, mounting the ship slightly at an angle and filling with 'liquid water gel' to give it a look at sea. Ah,,, decisions, decisions LOL I also invested in an airbrush but am terrified about using it for fear that I will ruin what I've done so far. Up until now, I've either used rattle cans or a brush. I need to do a lot of reading up on this method. Aye, and with that bein' said, today is Talk Like A Pirate Day !!! Ya know I'd like to take up bowling but I have a severe hook! Arrr-men
-
Hello Mike and welcome. Smooth sailing on your USS Constitution build and look forward to watching your progress.
- 209 replies
-
- 1
-
-
- constitution
- revell
- (and 1 more)
-
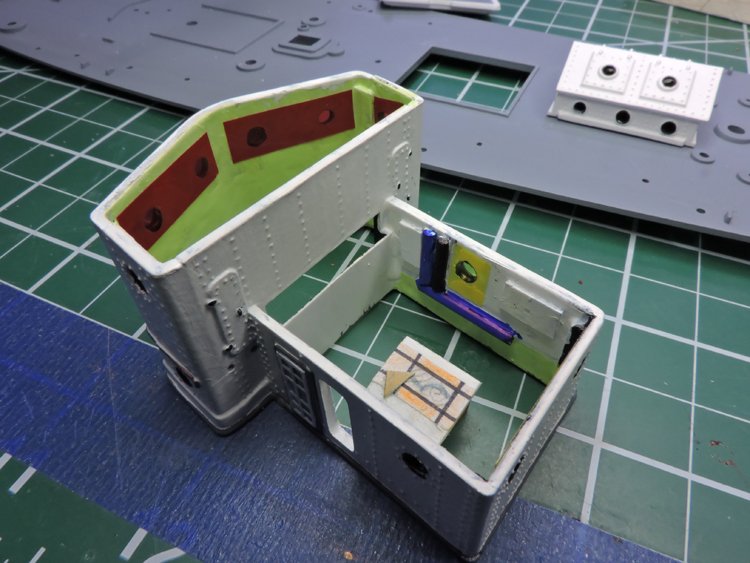
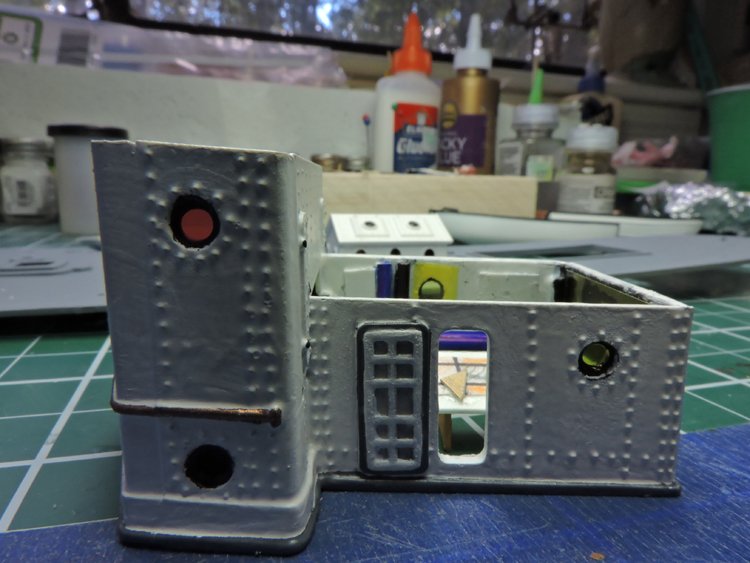
1st photo: I got the drill out again and opened up the 'vent' that is attached to the smokestack to give it a little more realism. I backed the vent up with a couple of pieces of styrene for support while I drilled so it would not snap off. I used two different bits. Here are some shots of my progress with the superstructures that will eventually have led lights inside. I have used a red transparency film in behind the portholes for the wheelhouse. On some of the others portholes, I painted pieces of styrene flat black and then glued them behind portholes to block any light from shining out. On the other two cabins, I either blocked portholes or used a yellow film to reduce the white led lights. For the beacons, I will be using two led flashing lights. The one thing about a camera is it sure brings out all of the imperfections that the eye passes over. I have some touching up to do!!!


- 97 replies
-
- 10
-
-
Ozark - don't feel too bad about that window, on my ship, a section of plastic was missing by a gun port. Like JimRogers mentioned, it can be fixed by using styrene plastic to mend. I recommend running a good strip of tube glue all along the inside seam of the hull to strengthen it. When it comes time to install your decks, you do not want to take the chance of having the hull open up. Depending on how you approach the three-piece gun deck , you may want to glue some styrene plastic sheeting underneath the seams of the deck to prevent them from opening up as well. Here is my hull and display stand. Note: the deformity on the 6th gun port from the stern. I thought this was the way it looked LOL I had to repair it and it was not easy at this point. Those subtle things that pop up as we go! I wish you smooth sailing on this adventure and I'm following along.
- 49 replies
-
- 4
-
-
- constitution
- revell
- (and 1 more)
-
Tjalle58 - I just finished the Bluenose schooner by Scientific, an old company that made wooden airplanes and ships back in the 60's. For me, working with wood gives one a feel that they are actually building a ship. A lot more creative and one certainly learns a lot of skills with these
-
Did some work on my mushroom anchors for the bow of ship. I found this picture of the anchors that shows four small triangular openings around the ring. I used one of my small drill bits to create the four openings on my two anchors. I will settle for round openings and not try to duplicate the triangle.
-
Do not get frustrated. Model building, I'm finding out, teaches one patience and problem solving like everyone has mentioned. I just finished my 1st wooden ship and, not only did I walk away with some new knowledge and skills, but I am very grateful for all of the support and advice that I received from members in this site. No worries and set your course!
-
Ozark - best to you and hope it will be smooth sailing for you with this build. Don't rush! Good advice from Tarbrush about using primer on everything before any painting starts. I'm two years in on mine (I get sidetracked with other projects) but Revell did a great job with this model. I'm signing aboard with this one. Cheers!
-
Congratulations on this build - she looks Beautiful!
-
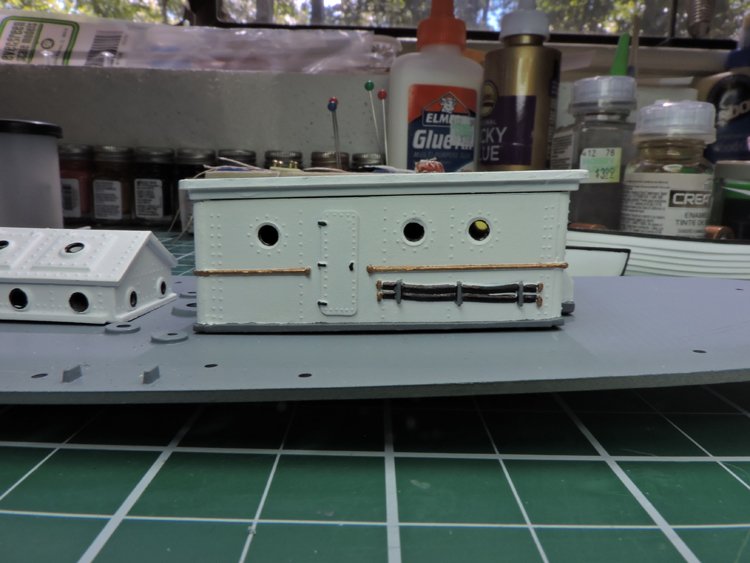
Update - sprayed hull with Dullcoat. Finished off painting all railing brass. Next will be to paint the fire hoses that are attached to the one cabin flat black. I went about trying to remove all of the flashing from the three searchlights that will sit atop of the wheelhouse. On the back of each of the two smaller lights, there was a mold indentation. I used a dab of Elmers to fill in the impression and drilled out all three of the lights. I'm thinking I will paint the inside with chrome and then use a drop or two of my wife's decoupage clear coating as the lenses.


-
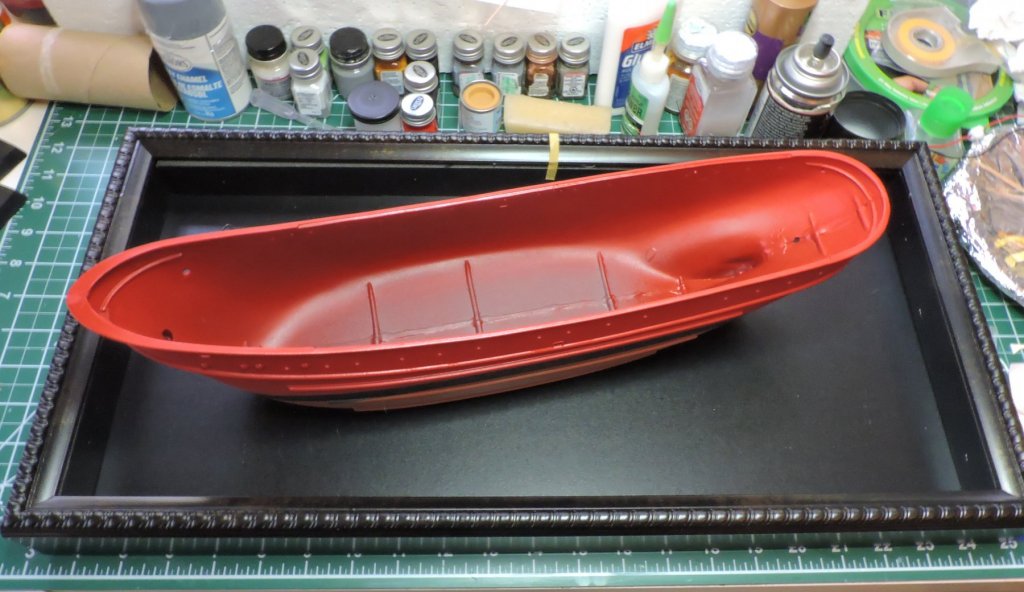
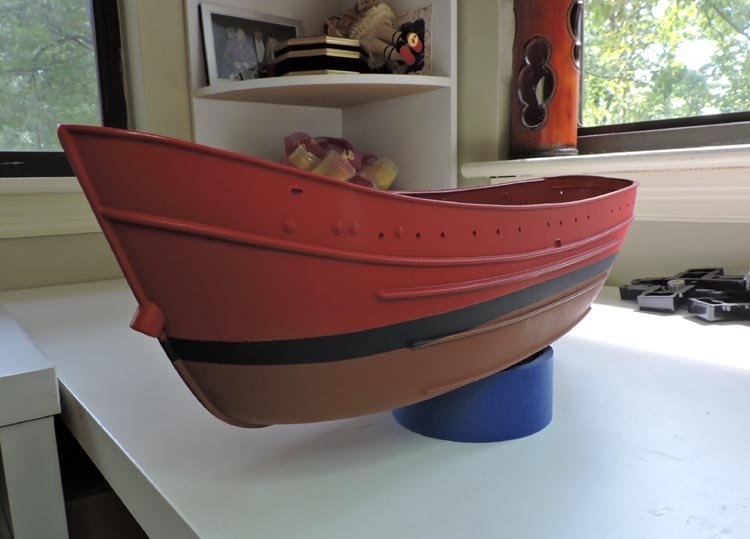
Today's work consisted of masking off the lower portion of hull and sprayed the upper hull with my red. Once this has completely dried, I will spray with Dullcoat to flatten out the gloss. I also taped off the superstructures so I could paint the handrails brass. I can see I'll need to do a little touch up here and there. Filed all of the flashing off of the ship's propeller and then painted it brass. I will try to give it a slight patina look with some weathering powder when dry.
-
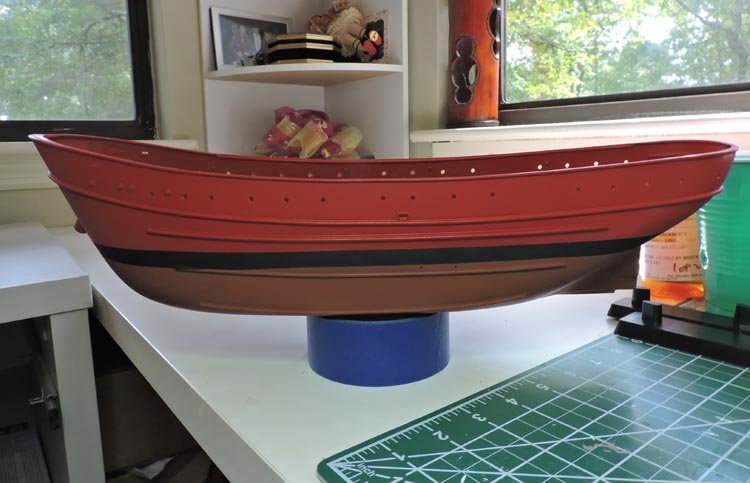
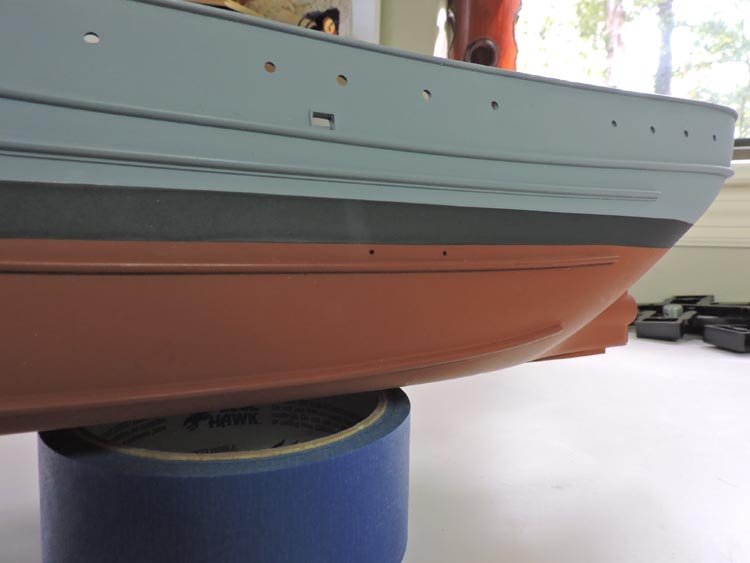
I masked off the upper and lower portions of hull and painted the boot stripe with flat black. I used Tamiya tape for curves for the edging and wider blue painters tape for the large ares. It came out pretty clean looking.

-
A very warm welcome !!!


