


Telp
-
Posts
124 -
Joined
-
Last visited
Content Type
Profiles
Forums
Gallery
Events
Posts posted by Telp
-
-
Looking superb indeed. I am going to do the revell 1:350 bismark kit after christmas (I am just finishing the rigging on my Supply) and want to do something different for a bit. I have some PE and am looking at components at the moment so I can put lights inside the ship. I must say, after looking at how tiny the PE is I am now wondering if my eye sight will finally fall apart. I noticed you are painting your PE, I have seen other ships where it is left in brass but I think id prefer to paint it as well.
- mtaylor, Canute and Old Collingwood
-
 3
3
-
-
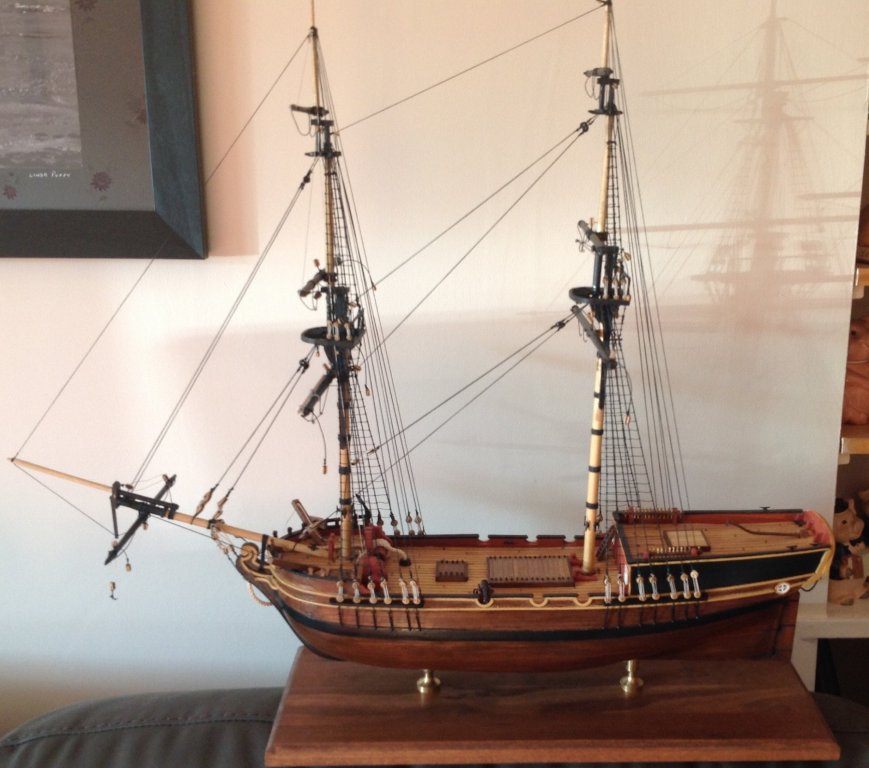
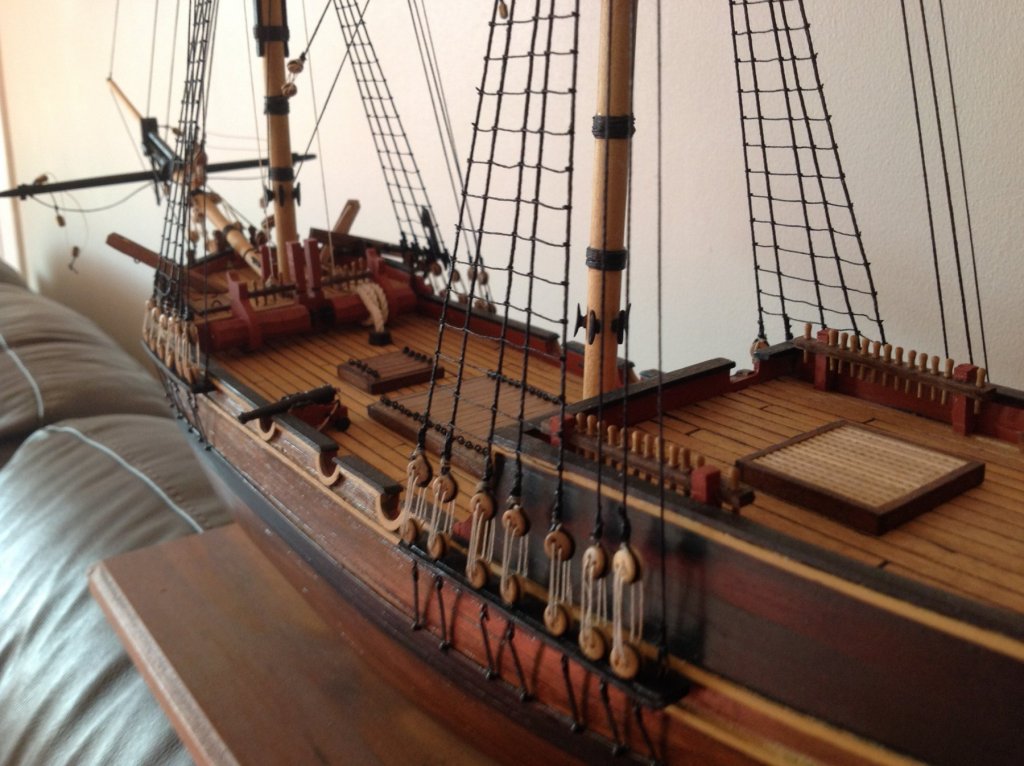
Well the brig is now hitting the rigging stage and I have now placed the standing rigging as per the plans, I have been looking at other builds to see any additions others may have worked out for extra rigging and am adding where I can.
Im now planning the running rigging and have had to place blocks in new positions due to me not thinking ahead. But I'm pleased so far and it's just nice seeing a box of wood become something in the end. Cheers all
terry

- Jobbie, GrandpaPhil and robdurant
-
3
-
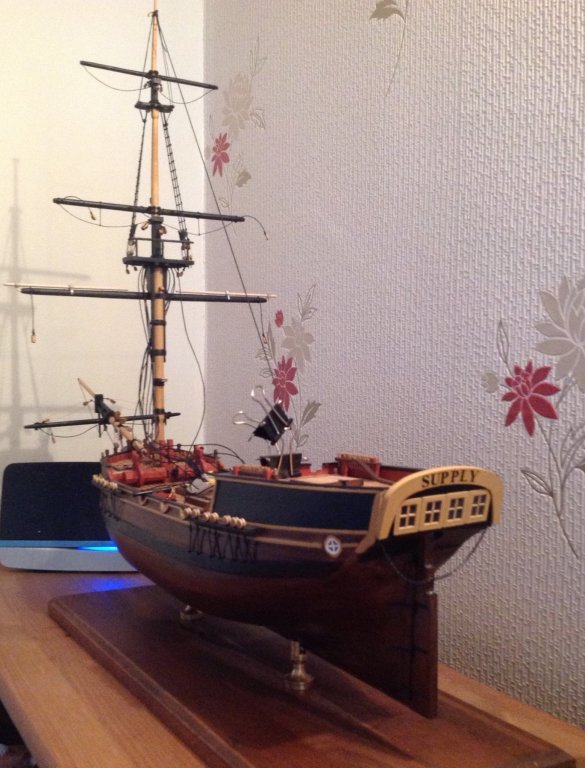
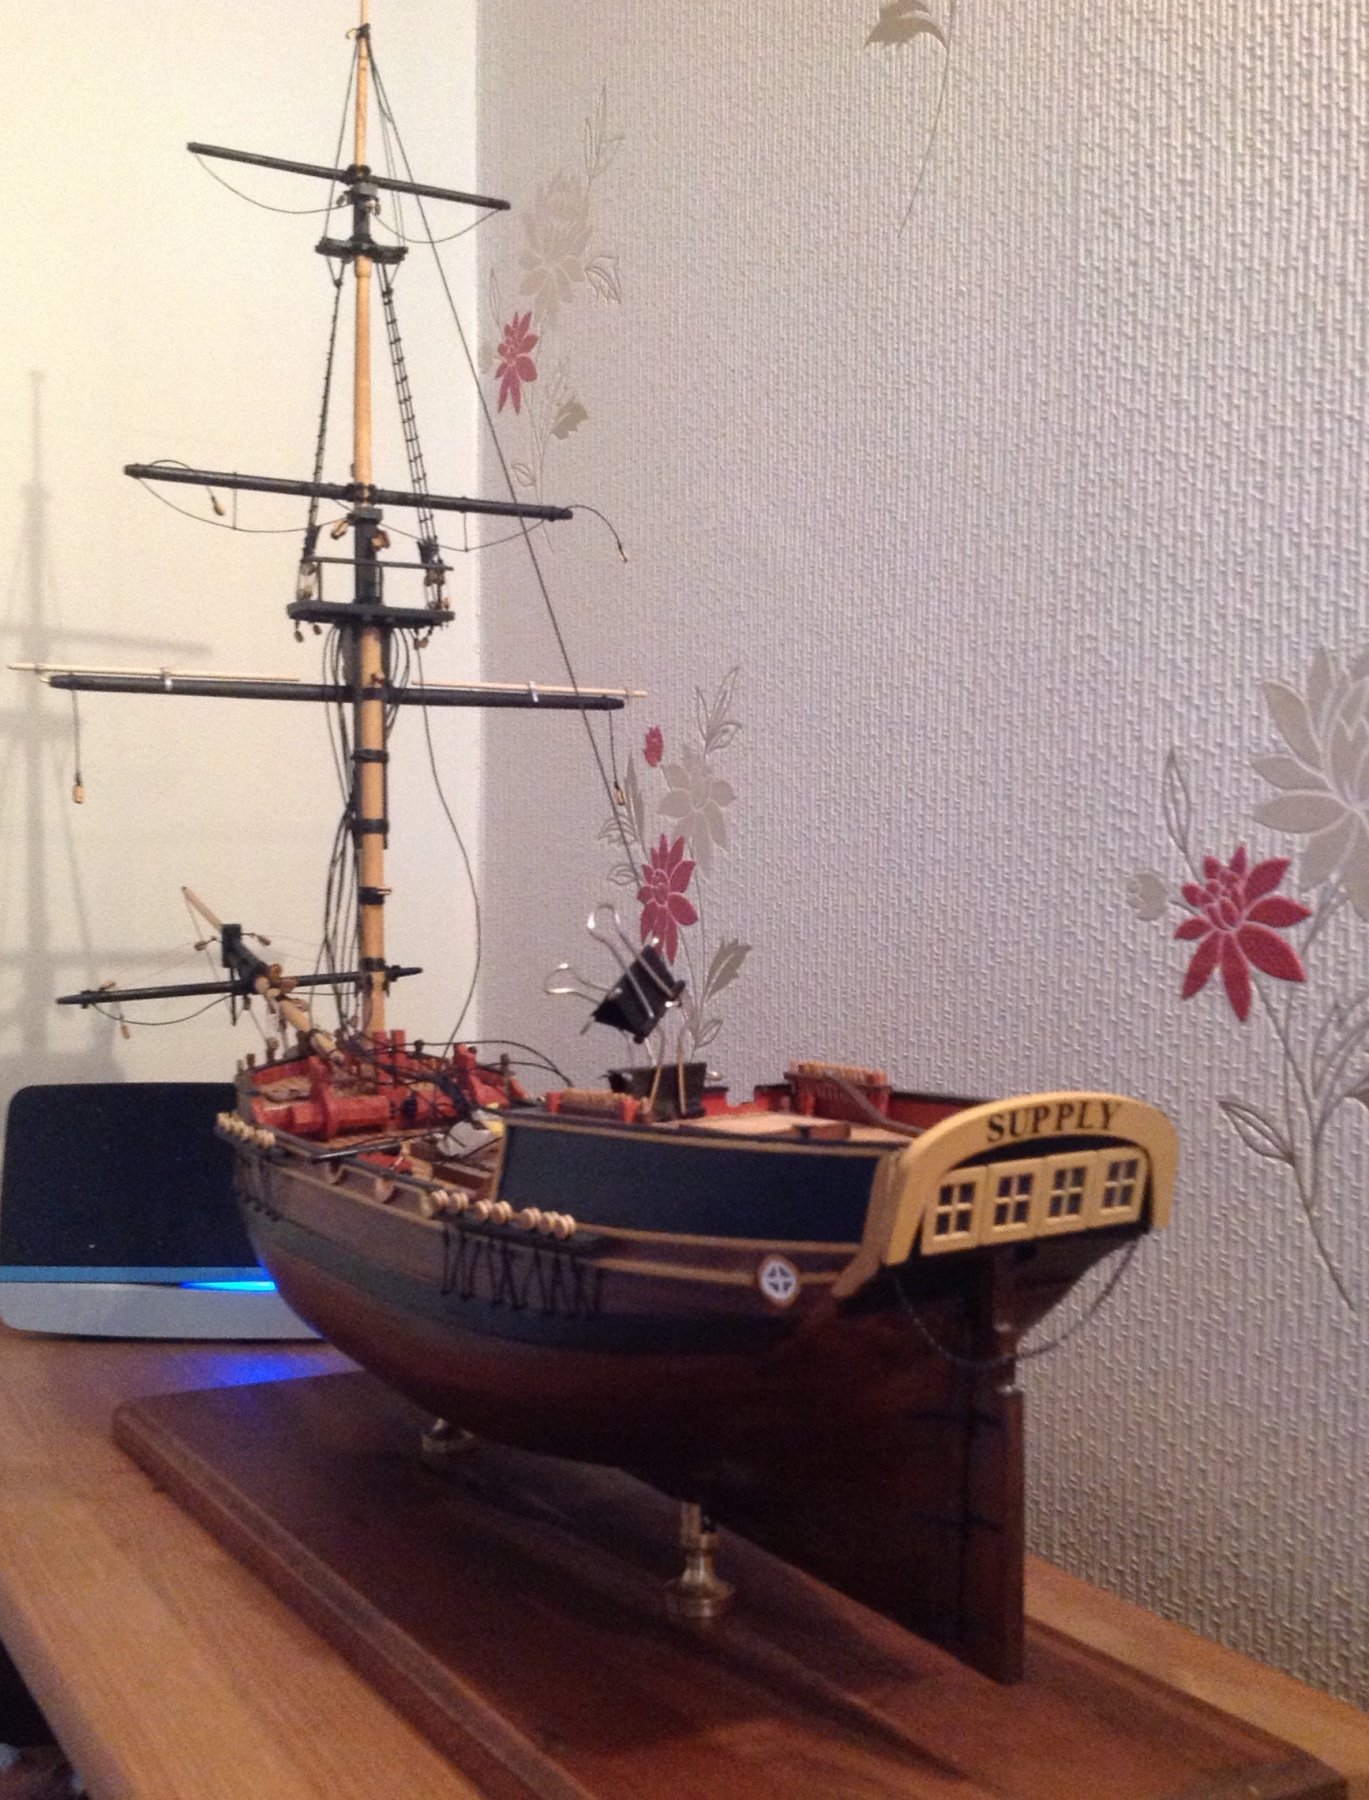
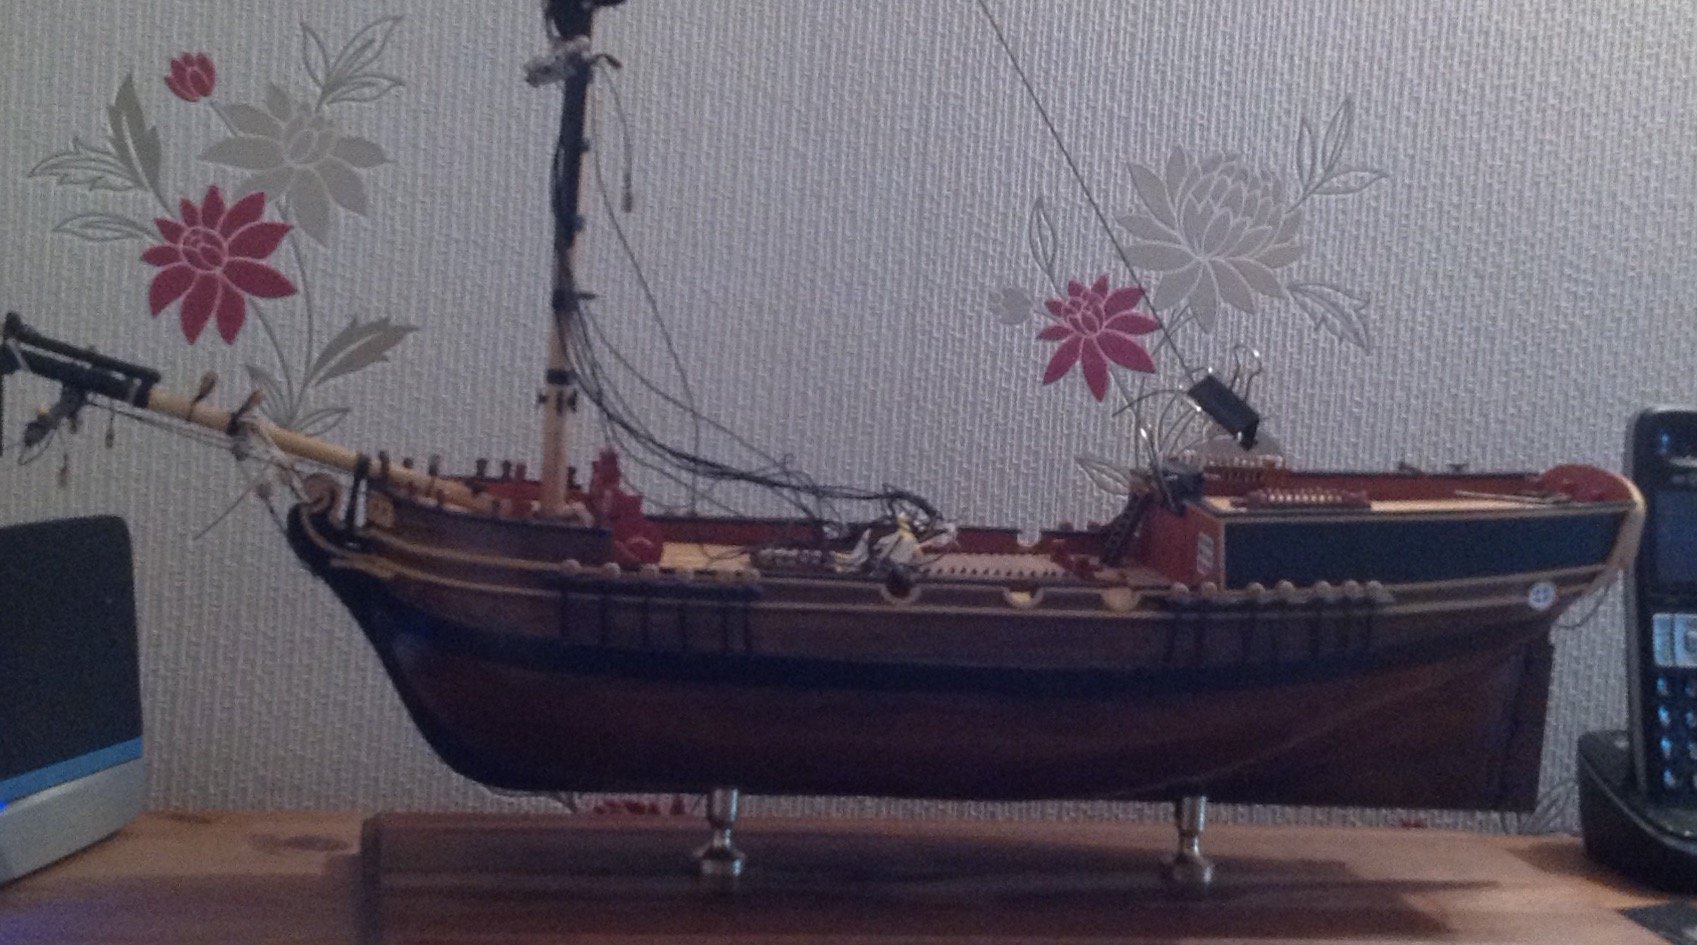
Nice one Andrew, she is a lovely ship for sure. I read the notes for some of the completed builds on here and they helped big time. I have just finished the standing rigging on my own supply and now planning and working out the running rigging. I went for windows at the rear of the ship which I sourced from dolls house shops and decided I didnt like the white finish on the hull and went for a varnish finish. Been on it for 14 months now and it has been a great learning kerb. So ill pull up a plank and follow along.
Terry
-
52 minutes ago, Paul0367 said:
I thought I replied to the above question. I got copper reel from USA, just could not find any in the UK. I used a dress makers wheel for the detailing and cut to manageable strips. Caution pull off the backing slowly and at a very slight angle to prevent it rippling up. Oh it will get unsightly due to finger grease as you handle the model, mine was terrible until I used Silvo on her and its like new, now it's waiting to age gracefully with time.
Many thanks. Good tip for ageing.... Rub some yoghurt into the copper, the bacteria will start the ageing process 👍👍
-
Hi all,
As many will know, they are now using the pink scheme on HMS Victory which made me wonder if all the ships connected to Nelson or the fleet at Trafalger were of the same scheme.
I decided to write to the restoration boss at Victory to pose the question and below is his reply which makes for interesting reading, especially if anyone has it in their mind to do a repaint of any model they have. I am hoping to try HMS Agamemnon at some point and am looking into the pink scheme for her, even though as you caan see from the mail, they have no information as such.
Regards
Terry
Terry,
Thanks for the email.
Unfortunately, there appears to have been fairly wide discrepancy across the fleet for how colours were mixed. Below is a table that gives details of the data I have for ships, aside from Victory, in the run up to Trafalgar.
Ship
Date
Purpose
Stores Consumed
Ratio Yellow:White
Temeraire
20/11/1805
Sundry work of the ship and boats
Paint, yellow, 80lbs
1:0
Thunderer
28/09/1805
Painting new work and mending ship’s sides and sundry parts
Yellow, 70lbs, white, 50lbs
7:5
Thunderer
01/10/1805
Painting the ship’s head and stern, quarter deck, poop and freshening the sides, painting the launch, fire buckets &c.
Paint, white, 80lbs, yellow 96lbs
5:4
Ajax
26/12/1805
Painting the boats and freshening the paint on the stern
Paint, white, 50lbs; yellow, 100lbs
2:1
Revenge
17/10/1805
To painting the ship’s topsides
Paint, white, 44lbs; yellow, 130lbs.
3:1
Revenge
01/06/1806
Repairing the paint on the ship’s sides
Paint, white 88lbs, yellow, 92lbs
1:1
Prince
28/09/1805
Painting the ship’s sides and weatherworks, and refreshing the paint in other places
Yellow, 200lbs
1:0
From the above table, it can be seen that the British ships at Trafalgar had sides painted with paint that was either pure yellow (Prince, Temeraire), used a mix of two or three parts yellow to one part white (Ajax and Revenge prior to the battle) or used a mixture that was (or was close to) equal parts yellow:white (Mars, Thunderer)
Unfortunately, I have not come acrioss any evidence for the specific manner in which HMS Agamemnon was painted.
I hope the above is of some interest, and apologise for being unable to offer greater assistance.
Kind regards,
Andrew
-
-
I was wondering the same Jorgen, if Victory's colours were specialist to Victory herslf or the colour scheme was associated with the other 33 ships at Trafalger.
I want to have a go at HMS Agmemnon one day so I would be interested to know, I might send an email to the victory restoration team.
Just to say also... if anyone has the caldercraft HM Brig Supply model, have a look at the colour of the box around the edges, it is actually very much like the colour they are now repainting victory with.
-
Red lead itself was not as brilliant as the final finish, it was used as a part of the original finish as normally it is a dull colour mainly used in its own right as a primer of metal. Of course lead in paints is now as such banned in the UK so i'd be interested to know what they have used as a substitute. The linseed oil gave the gloss sheen but that is a great red for sure. Nice video, and when I get round to building my Victory I will certainly use the new colours.
-
Hi all
Wondering if anyone may have a copy of " BUILDING THE SWAN CLASS SLOOP PEGASUS 1777. Volume III by Greg Herbert" at a reasonable price. I am after working on the HMS Pegasus model and want to use the book as a means to get information and ideas. The book is available but at a rather hefty peice so I thought i'd see here first.
Many thanks
Terry
-
Thanks Micheal,
I read the chapter 1 practium a few times and there seems to be some pretty drastic cutting going on, but I am looking for a project that will make me work so to speak. I think your views on the ebony I may grab as I suffer from respitory issues so I dont fancy the dust issues on that. Will be good to see you move on with this project, it will be a couple of months before I gather everything together to make a start due to funding, but I intend taking this on once I have finished my brig supply.
Regards
Terry
-
Does the change in the bulkheads mean you no longer follow Bobs practicum? I had a look at doing this build and read bobs free chapter 1, but I don't know how harder it may get, so would welcome any feedback as to ease or non ease as such.
Many thanks
Terry
-
-
Hi Paul, fantastic job mate, shows what can be achieved if you put the hours in to the detail. Can I ask, with the build being a 1:94 scale, where did you ounce the copper for the hull? Was looking at doing the CC build sometime but the cost is unreal, so may look at this build myself hence the plating.
many thanks
terry
-
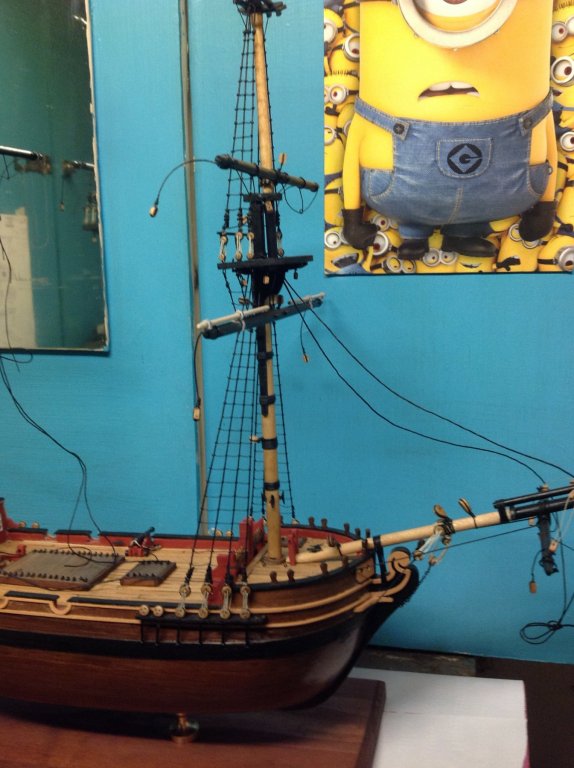
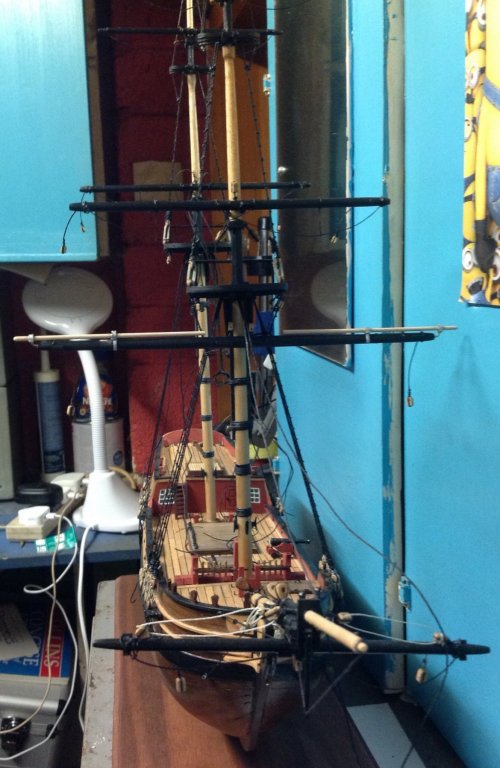
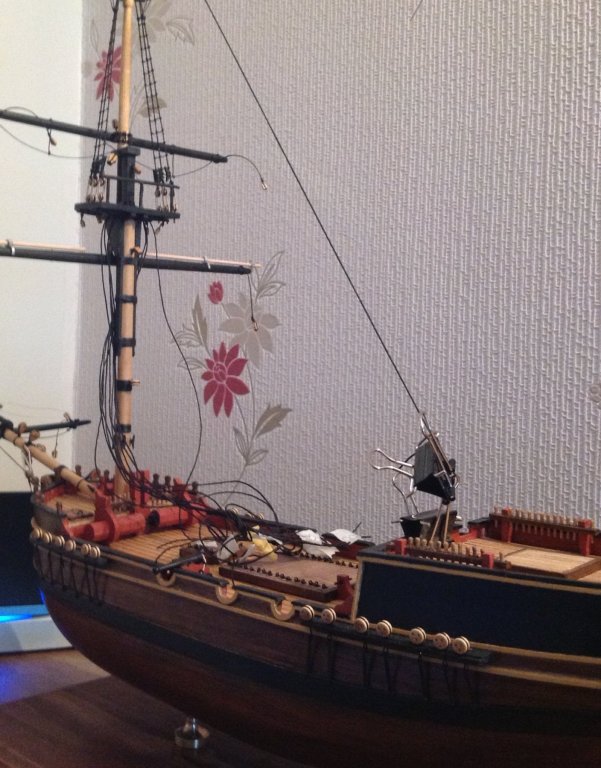
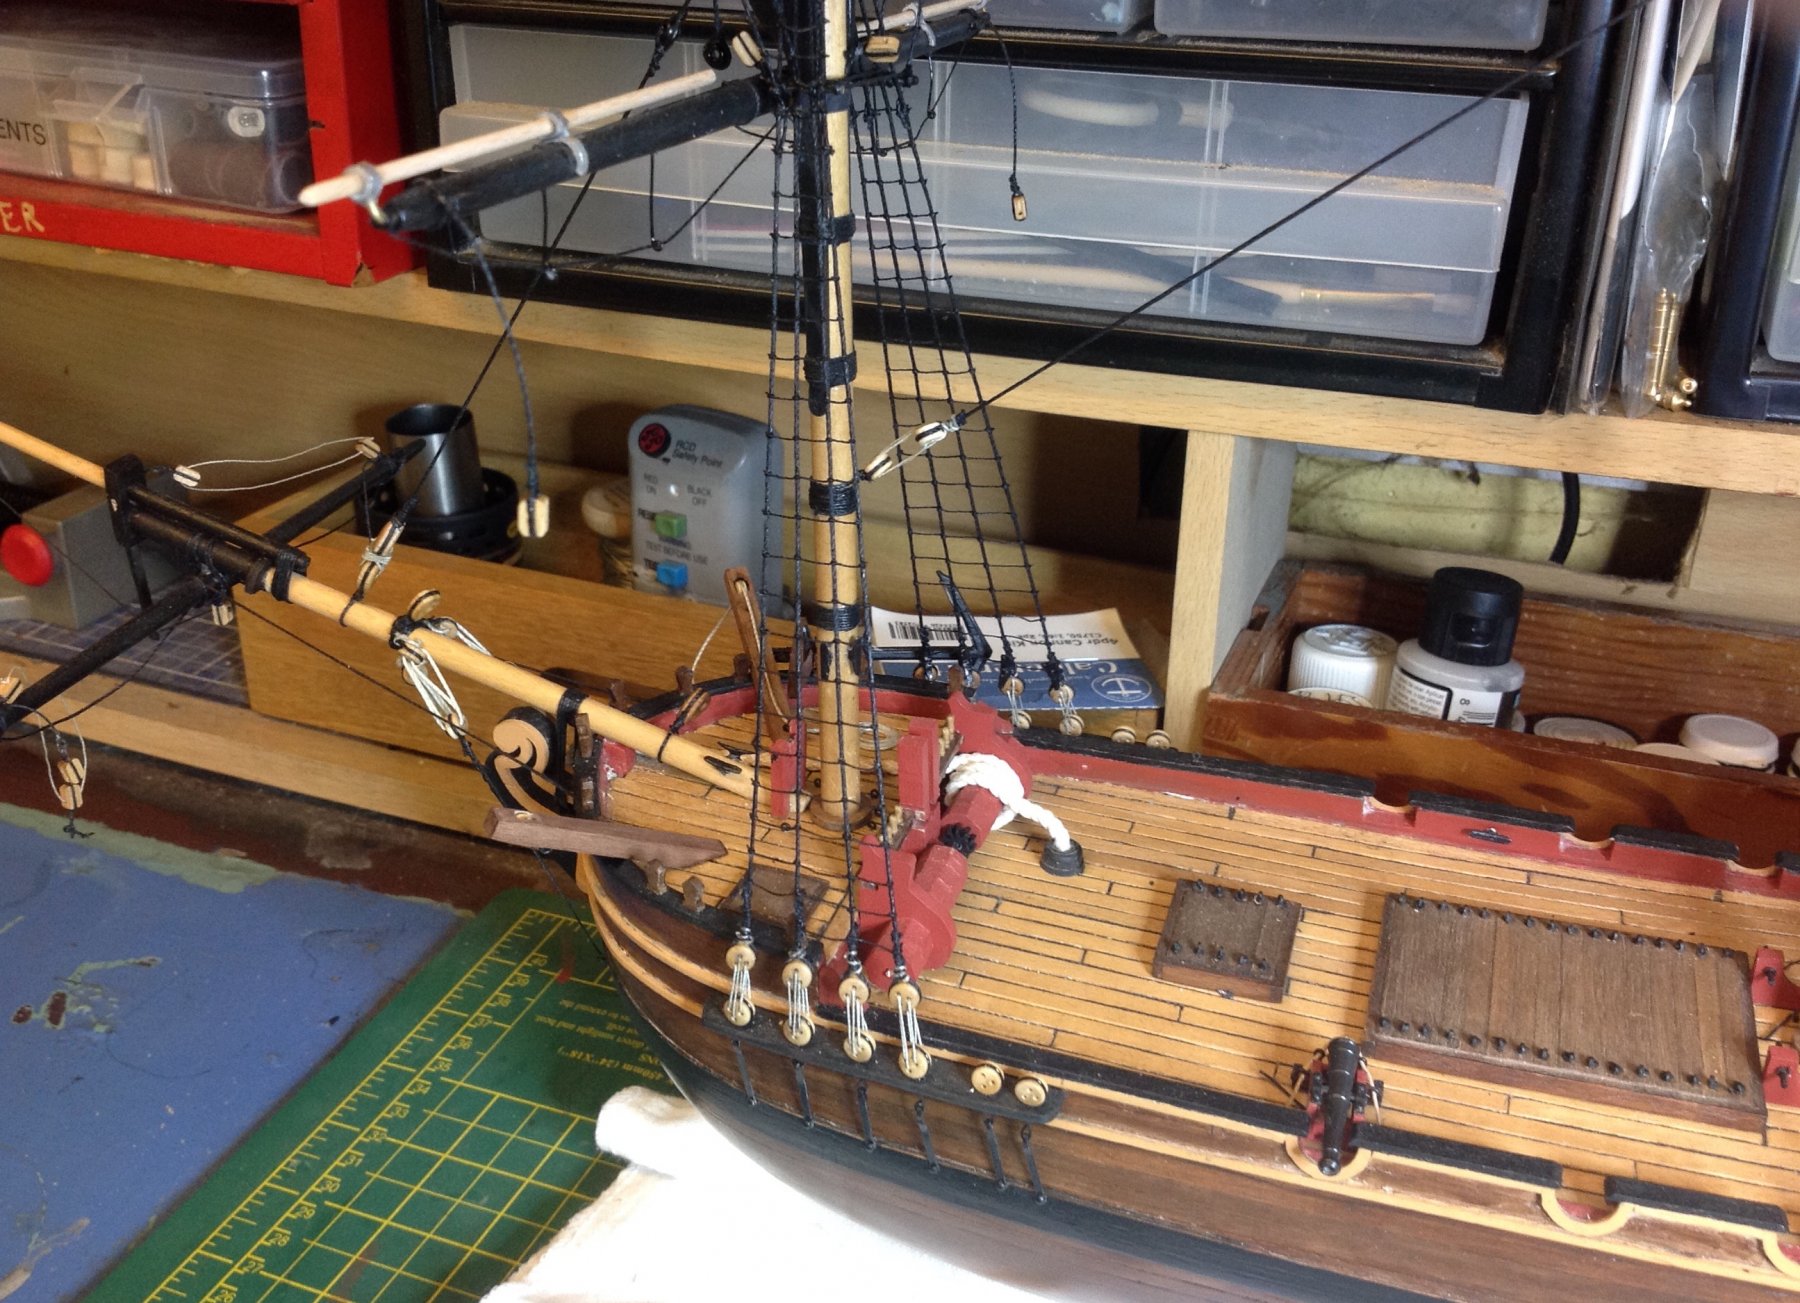
The brig is now moving along nicely, a few mishaps that need sorting will be sorted and I am now adding some rigging to the foremast, the stays and backstays. I have rigged the heart blocks as best as I could make out from reading about seizing ect, so hopefully this is reasonably ok. Am loving this build, the ship masters will see issues I'm sure but the learning kerb is wonderful. Pictures added up to now as to where I am. Cheers all.
terry

- Dfell and Beef Wellington
-
2
-
Hi Andrew, the supply is going ok at the moment, I am now on the rigging stage which is the bit I like, although I've made a few mistakes on the actual build I have gathered as much as possible on ways to rectify.
my plan is to do a big ship at some point preferably HMS Aganemon, so what I am doing is building up as I go, so from one to two masts, then two to three, with a copper hull and more intricate bits as I go so that by the time I get to the large ship I would hopefully have gained enough skill sets to not worry on what's coming.
the supply is a nice moderate build, there is plenty of space to rig things like the shrouds and dead eyes etc, but enough scope to up the understandings of things. If you don't fancy a two masted build how about something like HMS Pickle?
-
Hi Andrew, the longboat is a great little project that does get you hitting the ground running, although small, she offers a bit of everything for sure.
The cantering of the bottom gaff as mentioned is positioned as such by being secured to a block along the centre of the deck just below the gaff and is then rigged.
the upper gaff issue is a pain, I worked around it by raising the gaff to it upper position on the mast, I held it in place with a small clamp and then tightened the rigging, I also placed a few drops of glue where the parell beads are, this did help keep it in place.
as said, she is a tiny little lady but I felt it made working on her harder as everything is so small against man fingers. I did add some pics to my build log but if you need any of a particular area let me know. Atb
-
She is an utter beauty and for me a real gem as Pegasus is going to be my next project so thank you indeed for a brilliant set of pictures and a wonderful set of tips.
Terry
- mtaylor, Martin W and Blue Ensign
-
3
-
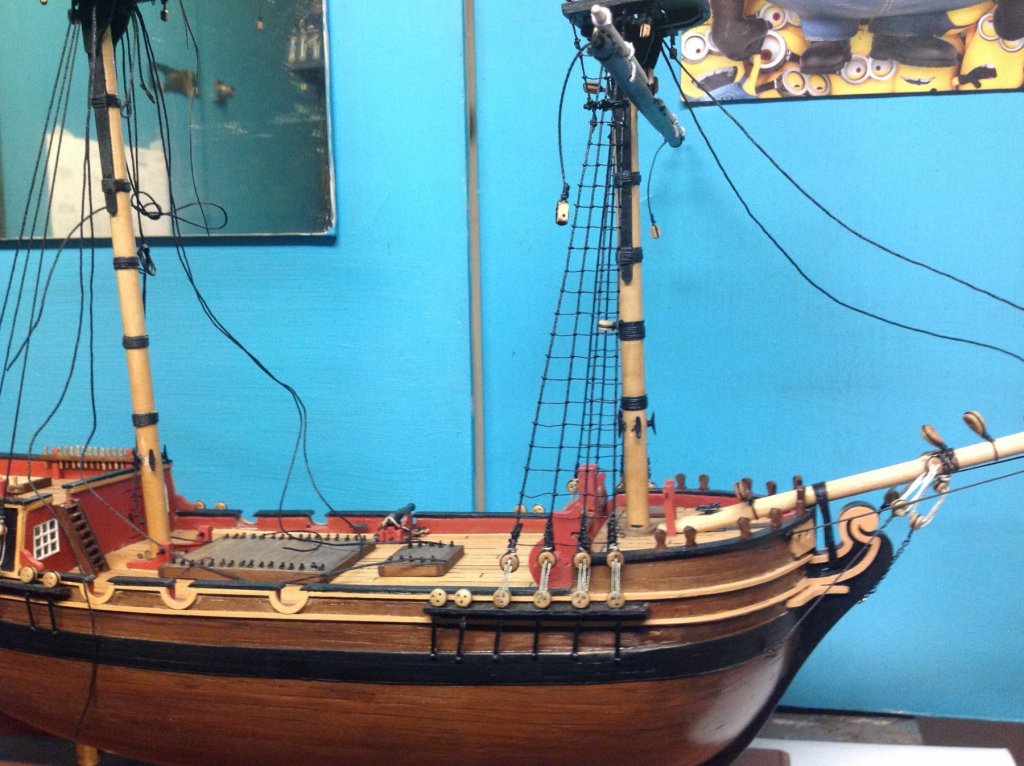
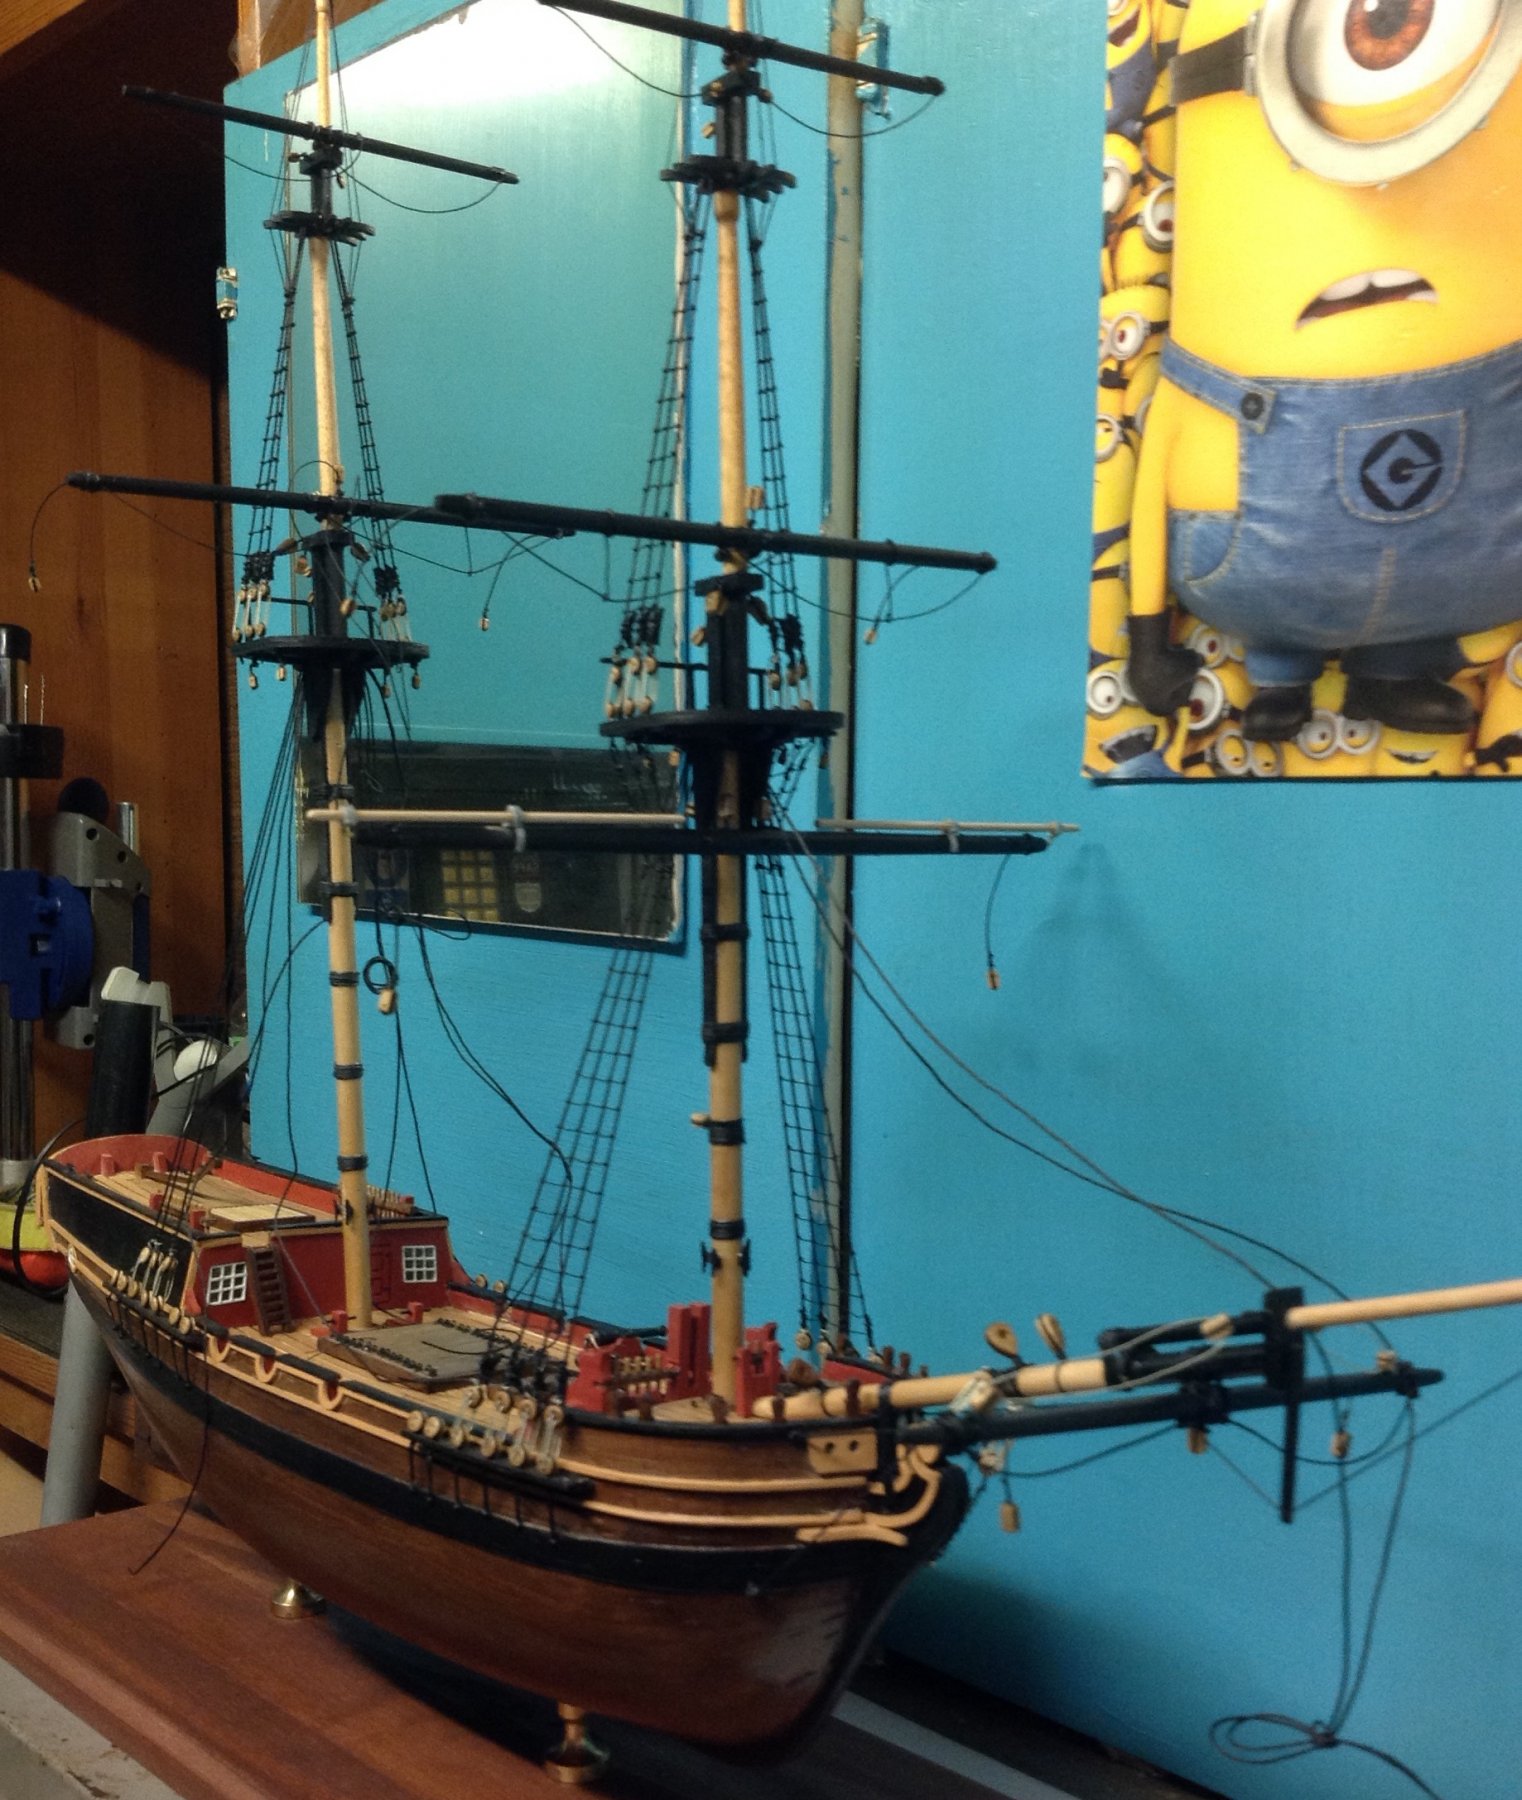
Progress continues and I have just finished the forwards shrouds and rat lines, thankfully I left the yards off as it would have been nothing short of a nightmare seeing as these were the first time I'd had a go. Now starting on the main mast rats so more fun to come. So onwards and upwards as they say.
terry

- Beef Wellington and Dfell
-
2
-
Another good way is to do a mix of 50/50 white glue and water, give it a good stir and then brush a light coat over the part. Once dry use one of those washing up pads, the green ones are ok to gently rub down the part, then paint. No odurs, no mess. Just for info.... Most if not all paints now sold in the UK come under European safety rules, so there should be no nasties in any paint unless it is licensed for specialist use and then the operator would be trained as such.
- Canute, thibaultron and mtaylor
-
3
-
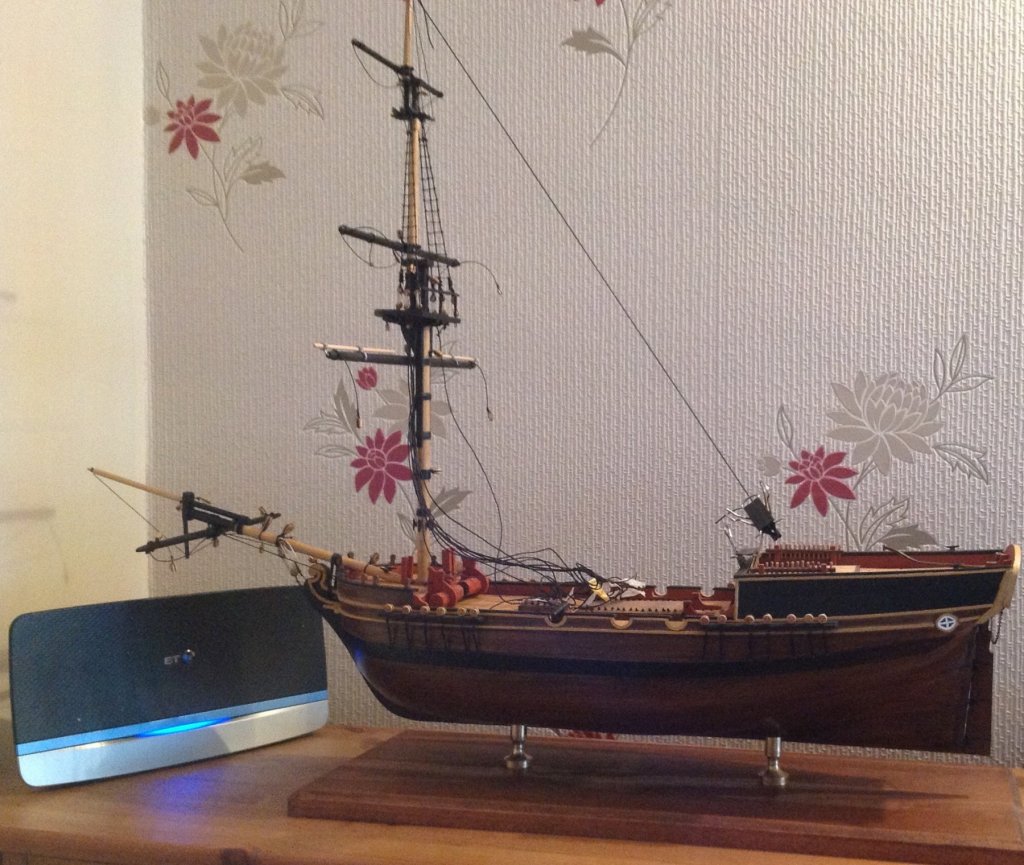
It's a satin walnut varnish big, put on quite quickly with a French polishing cloth, the gently rubbed down with wire wall before a second coat. Once dry I used a cloth again using Norwegian clear oil, and gently working it in for a few minutes to bring back the satin finish.
the mount base was done in Indian rosewood dye so that it gave a Matt finish as I did not want the hull being visible in the mount.
-
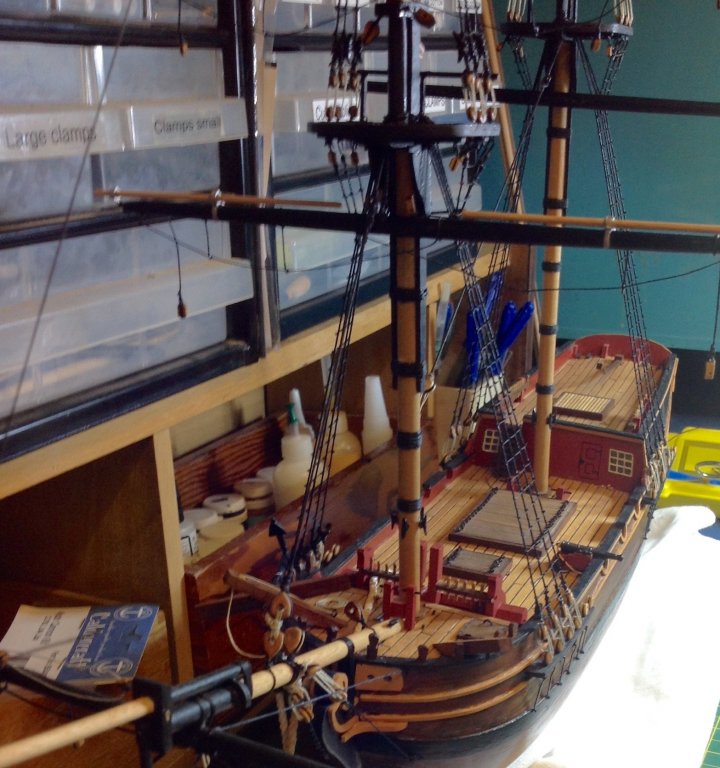
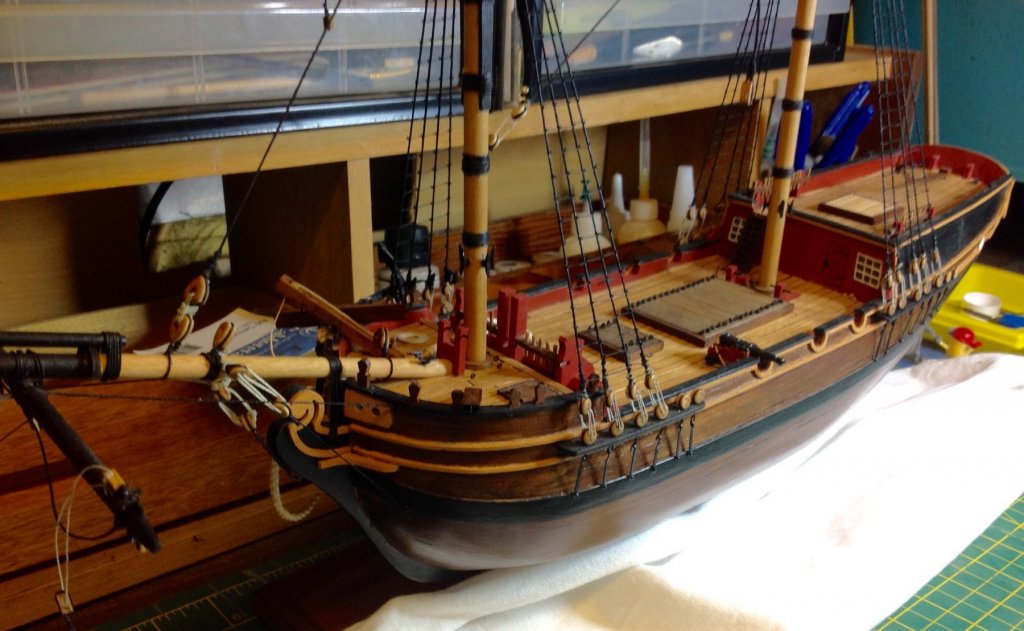
Well work has been on going, have finished the foremast and have used the plans and looked at the great supply blogs in here to get some ideas. I did the mast work off the ship and it was much easier so thanks for the advice. The main yard on the foremast is only pinned for now to allow me to do the shrouds so I can remove it, just placed it there to give me something to use when setting up the mount. Now have the main mast yards to do so hopefully it's all moving along.
terry

-
Robert, what is the overall voltage that you are going to use for your lights, can this sort of system run say from a single 9v battery or is this done using something like a 12v system. I am reasonable with electrics and was looking at this sort of idea on a later model.
Many thanks
Terry
-
Woah, she is an utter beauty, I am toying with looking at a Pegasus build after I have finished my supply and you have done a beautiful job indeed. The log is superb to say the least and what a log to follow for the future. Many thanks for making my mind up for me. ;-)
Terry
- Blue Ensign and mtaylor
-
2


Bismarck by Semorebutts - FINISHED - Trumpeter - 1/200 scale - PLASTIC - with MK1 detail set
in - Kit build logs for subjects built from 1901 - Present Day
Posted
If the worst comes to the worst drop the ladder into some nail varnish remover for a little while, it will take away the ca glue. May mean putting it together again. If you use a cotton bud and apply the nail varnish remover youd be able to thin it enough to wipe it clean.