RGL
-
Posts
5,549 -
Joined
-
Last visited
Content Type
Profiles
Forums
Gallery
Events
Everything posted by RGL
-
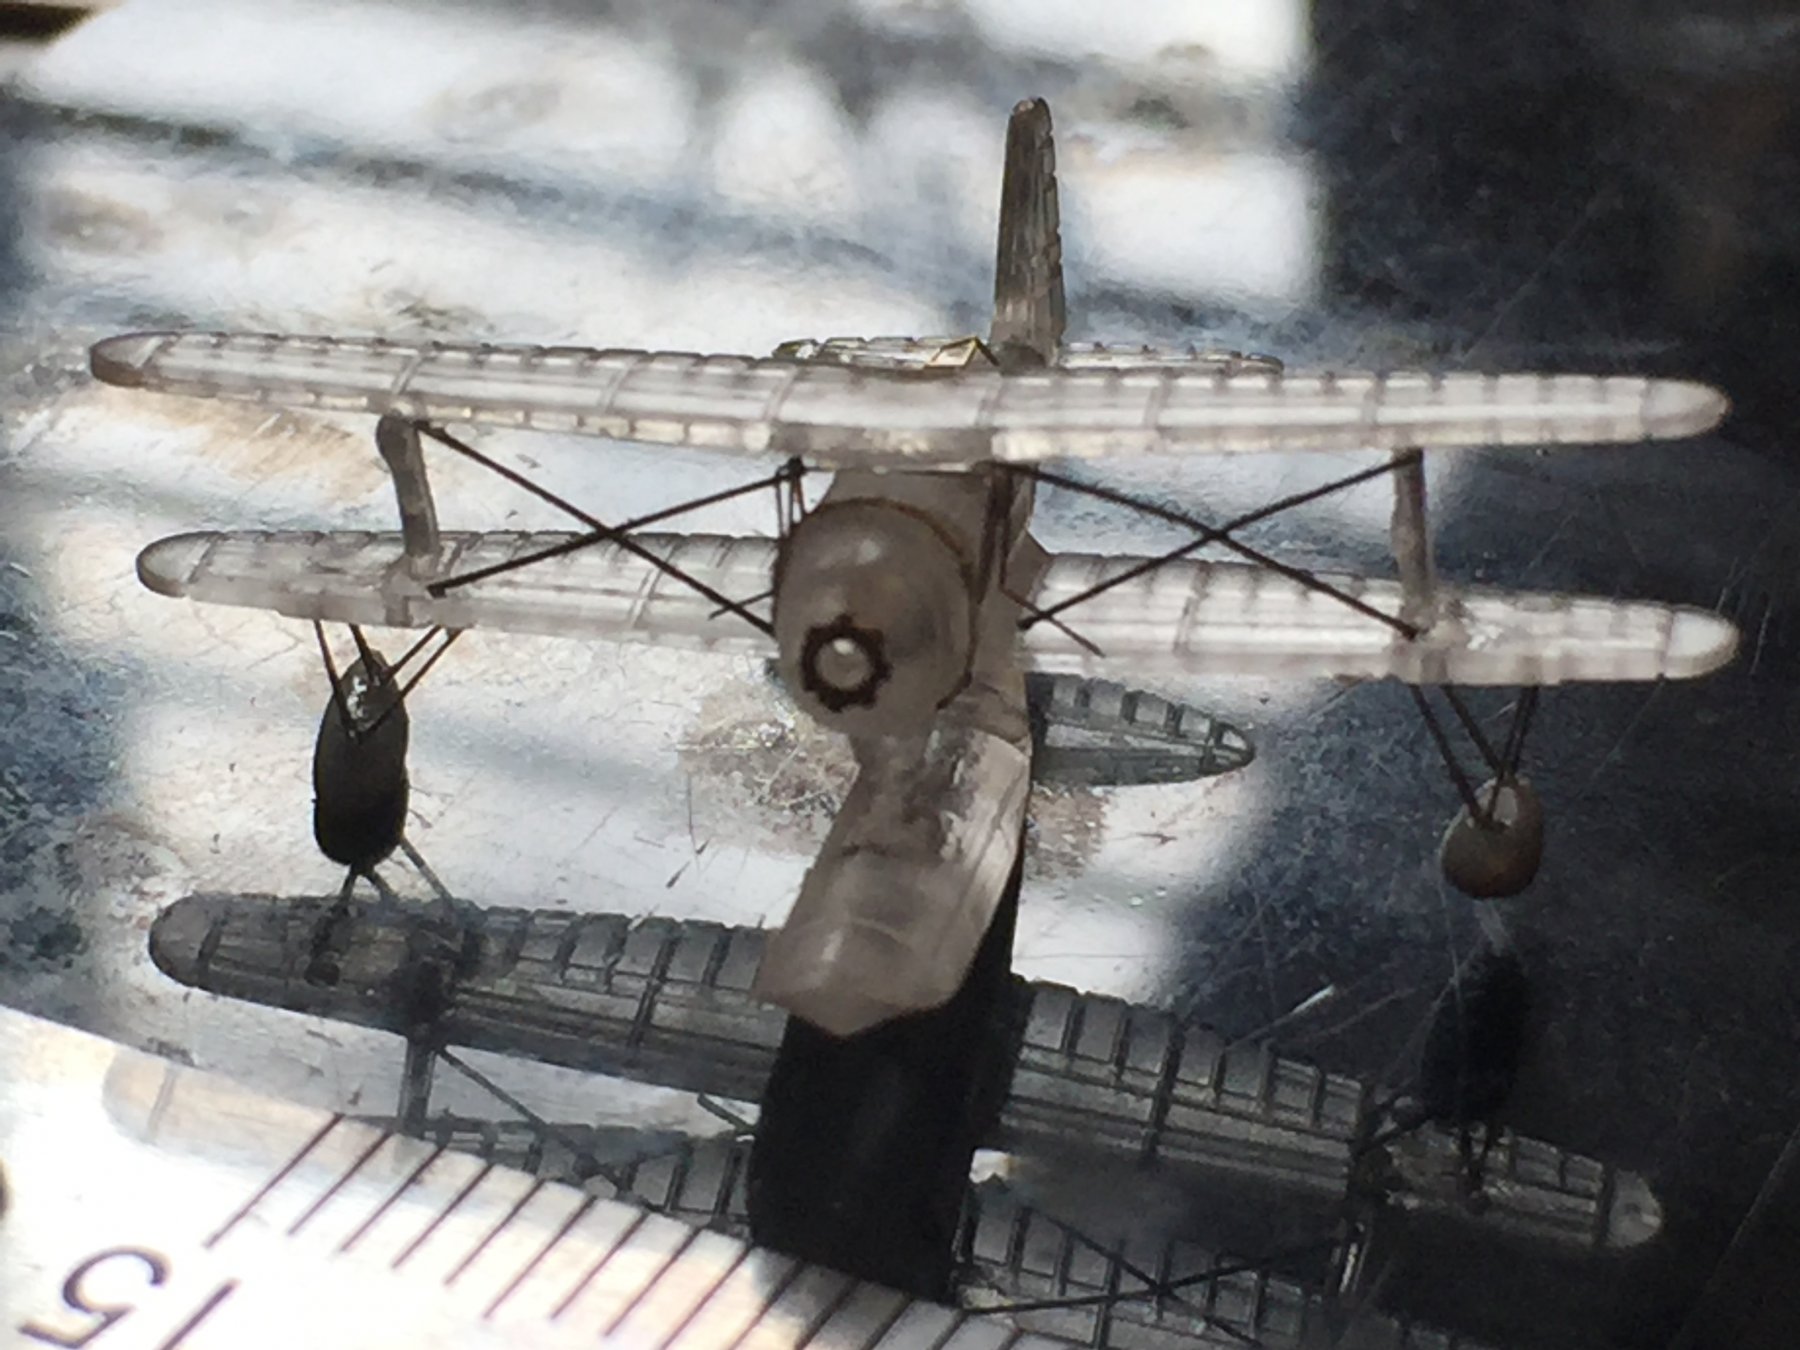
 I can see why this was discontinued as it is really horrible to use. Just tiny. Also, I bashed up one with folded wings from the Tamiya kit, this will sit in the hanger bay so the errors won't be so visible.
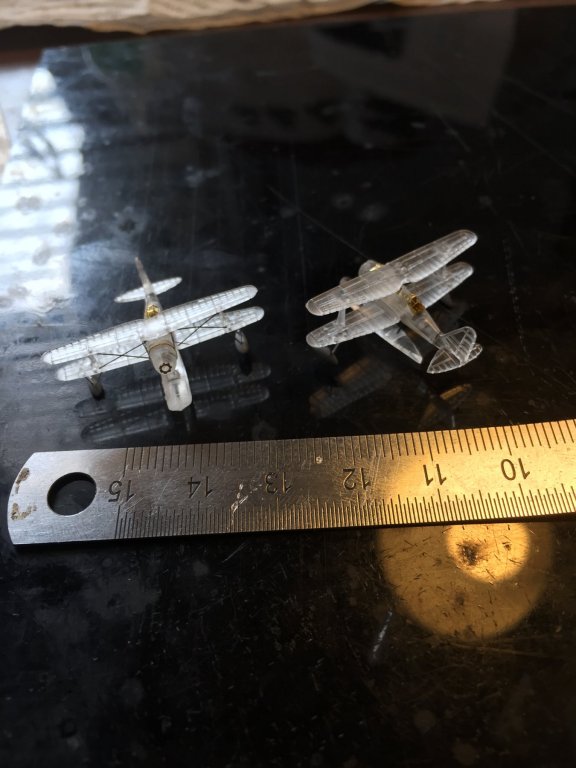

- 743 replies
-
- 16
-

-
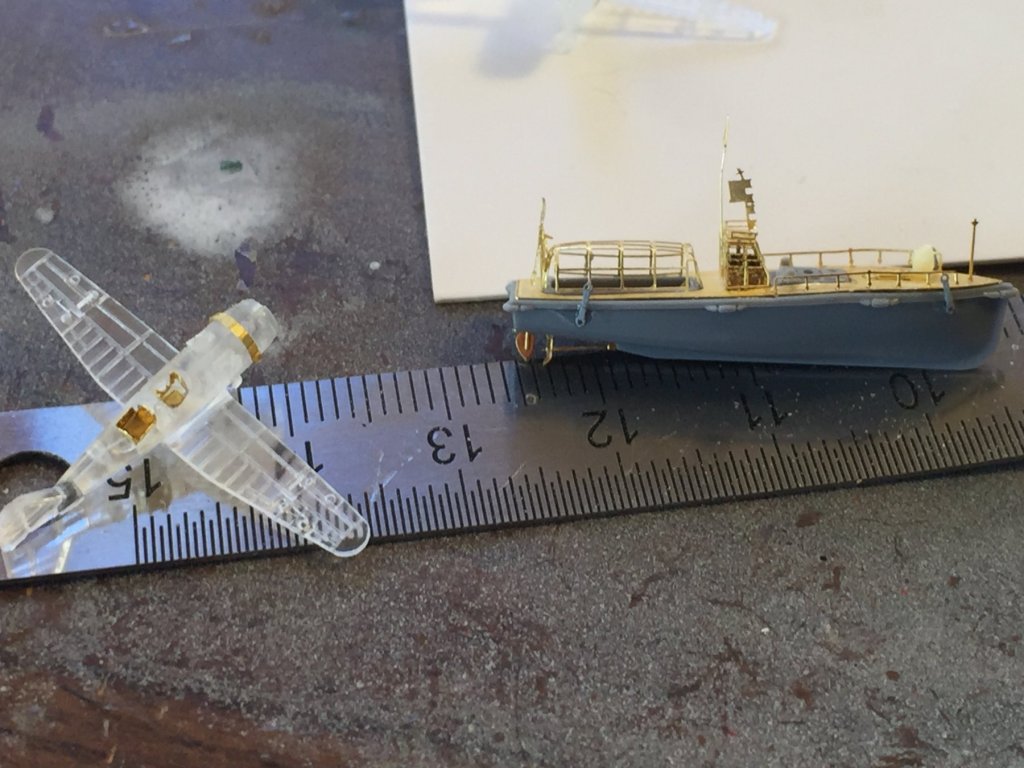
It's from a discontinued Fujimi seaplane set which is hard(ish) to find. As they are hard clear plastic they are very brittle and horrible to work with and the only set that you can add the rainbow models cockpit sets without major surgery. Tamiya give you 2 sets of each aircraft as well which are quite nice as well as the two sets from the practice kit which are fairly basic. The new AOTS says Yamato only carried the Mitsubishi Pete and not the monoplane but I may yet cheat and do one up. I should have enough to do up 2 with their wings folded (Dr Google has very little information on this) and have them in the hangar well and a couple on the catapults. I know now that they got rid of them all for the last mission but.... painting and weathering them them will be a challenge and I have to do some research on this stuff people use to stick decals down. Pontos have nothing in reference or addition addition to the ships launches.
-
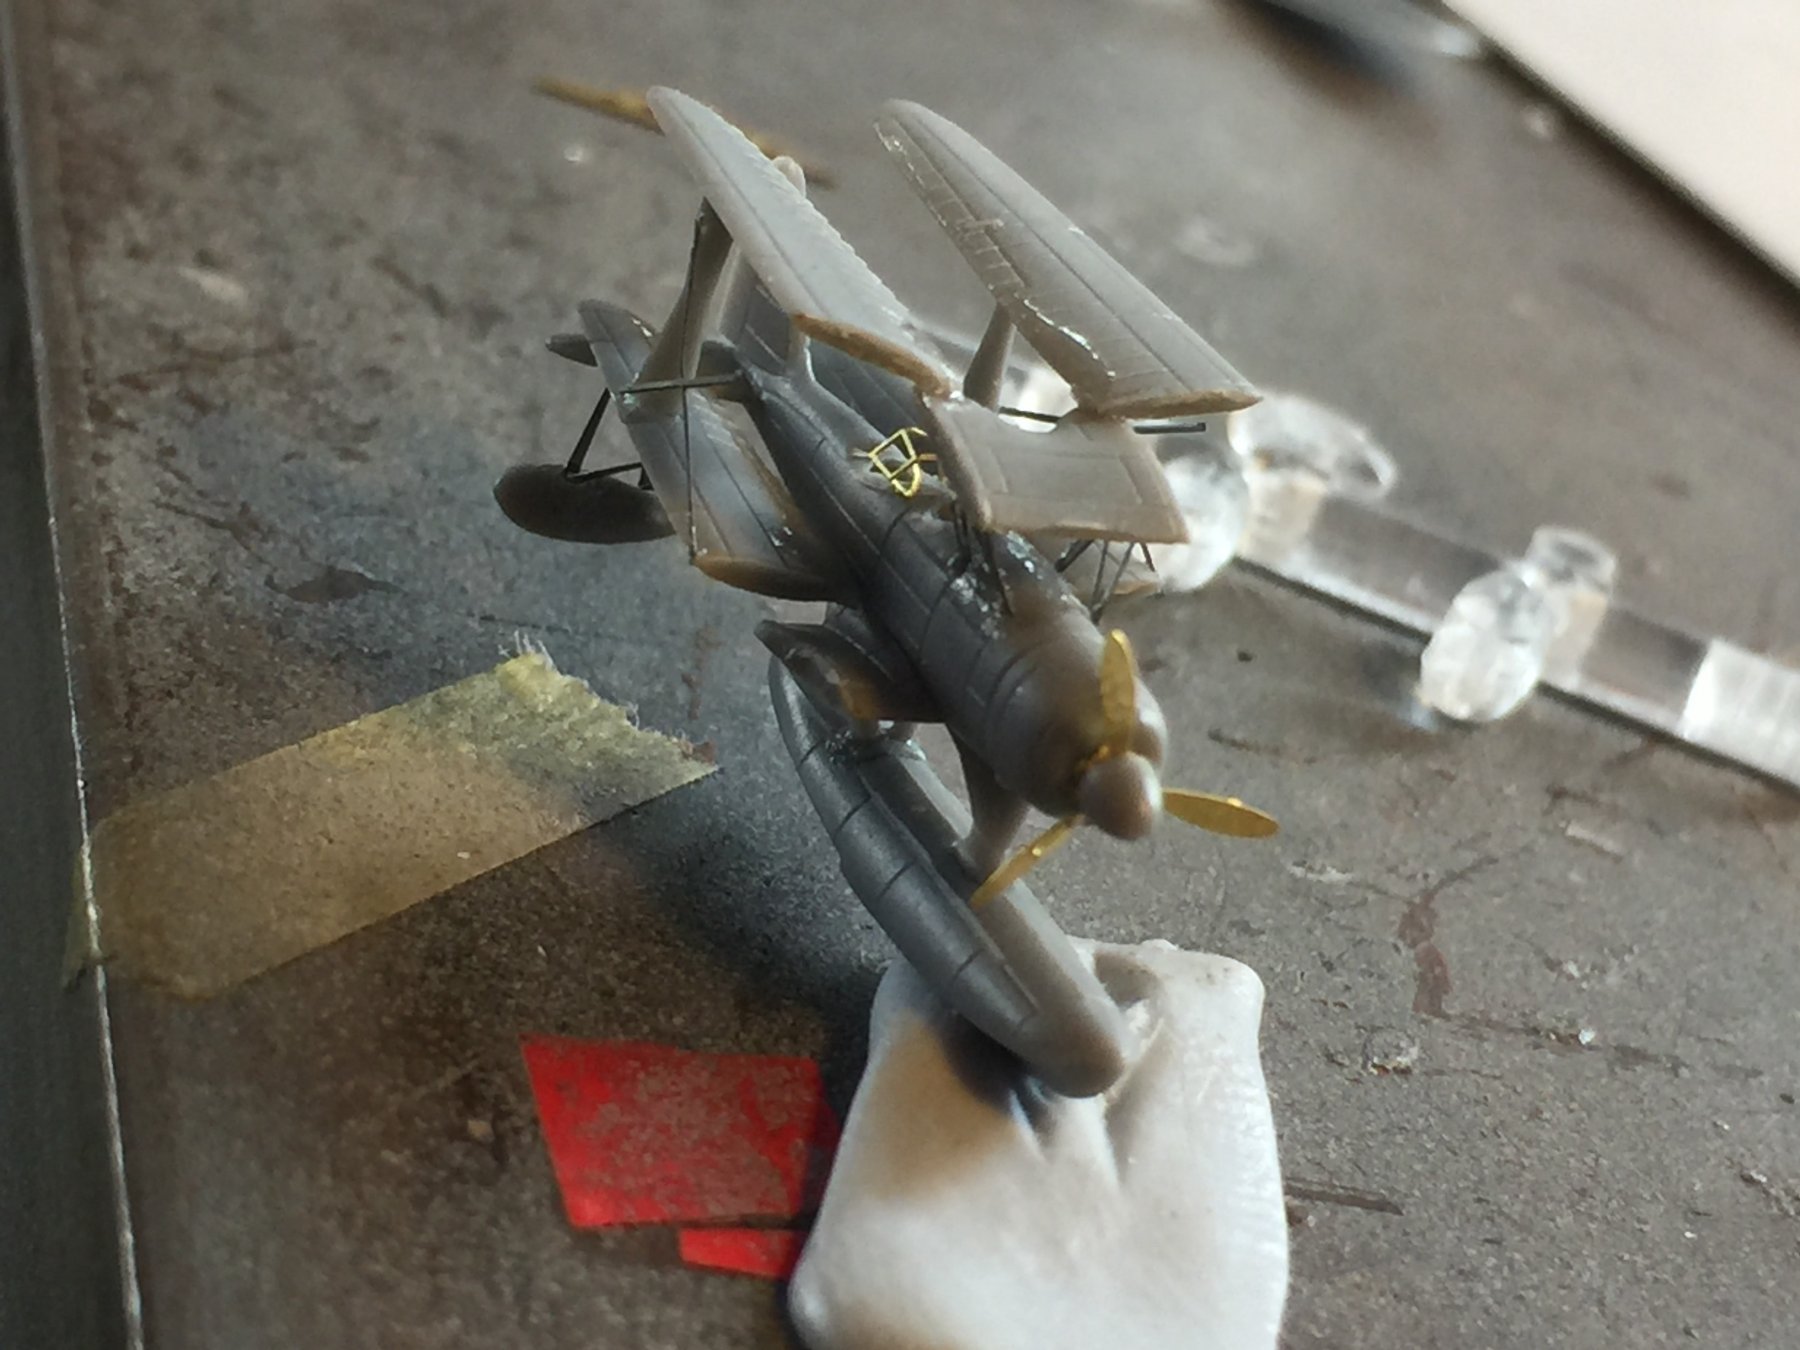
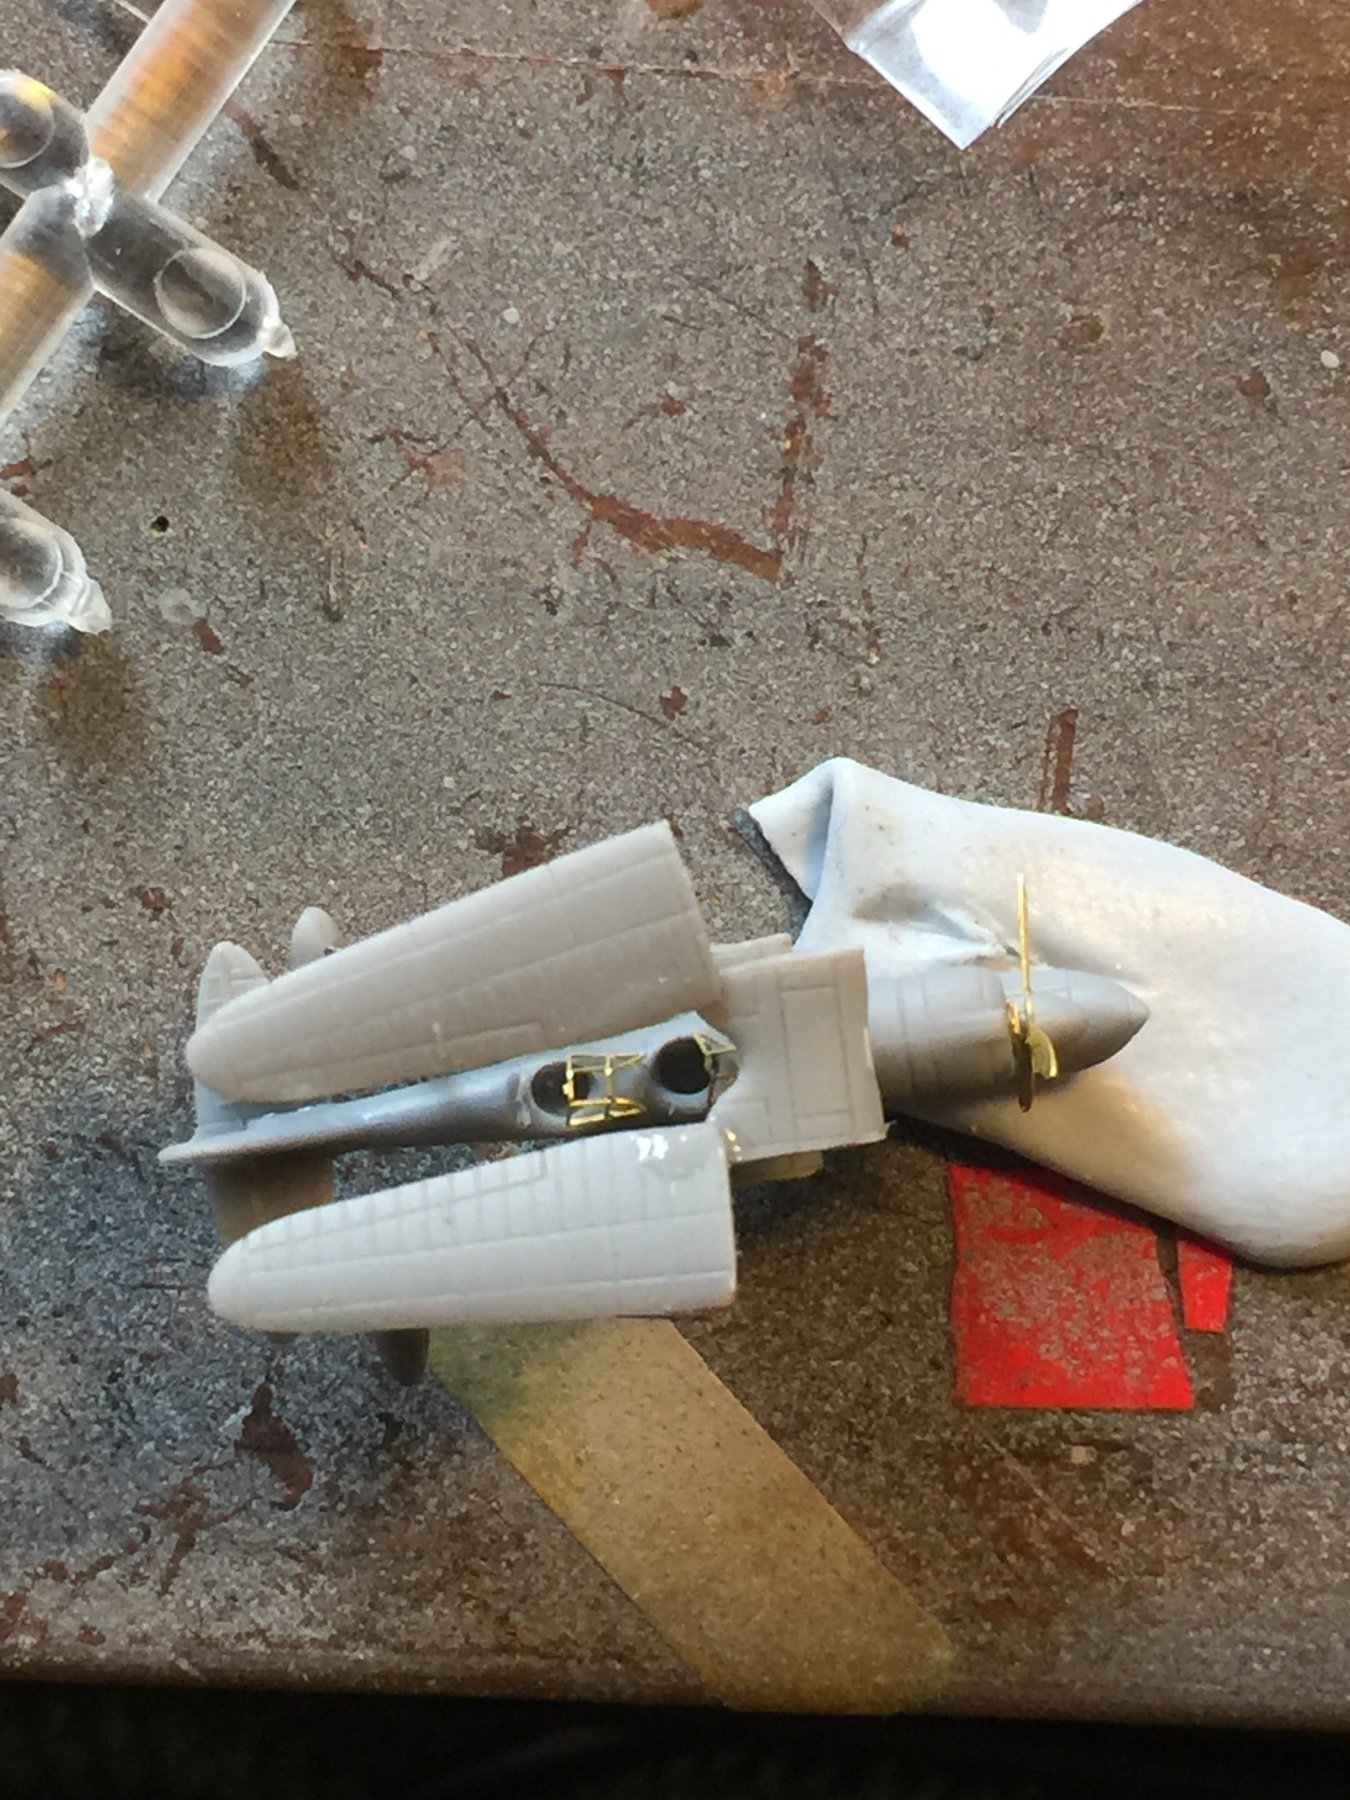
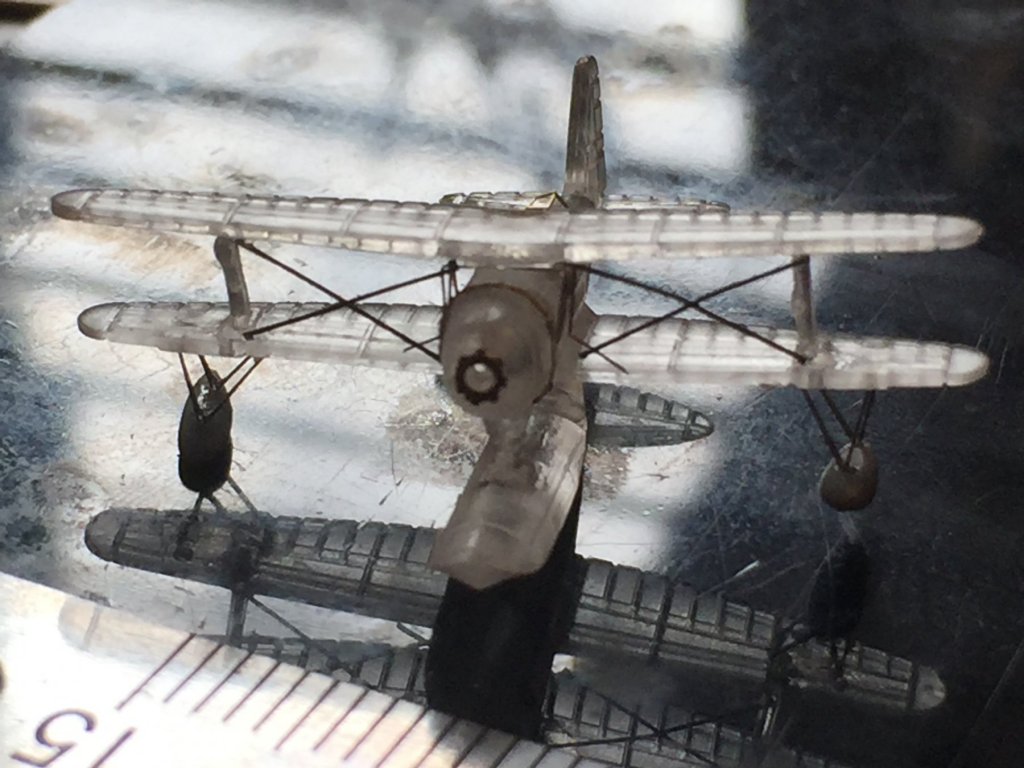
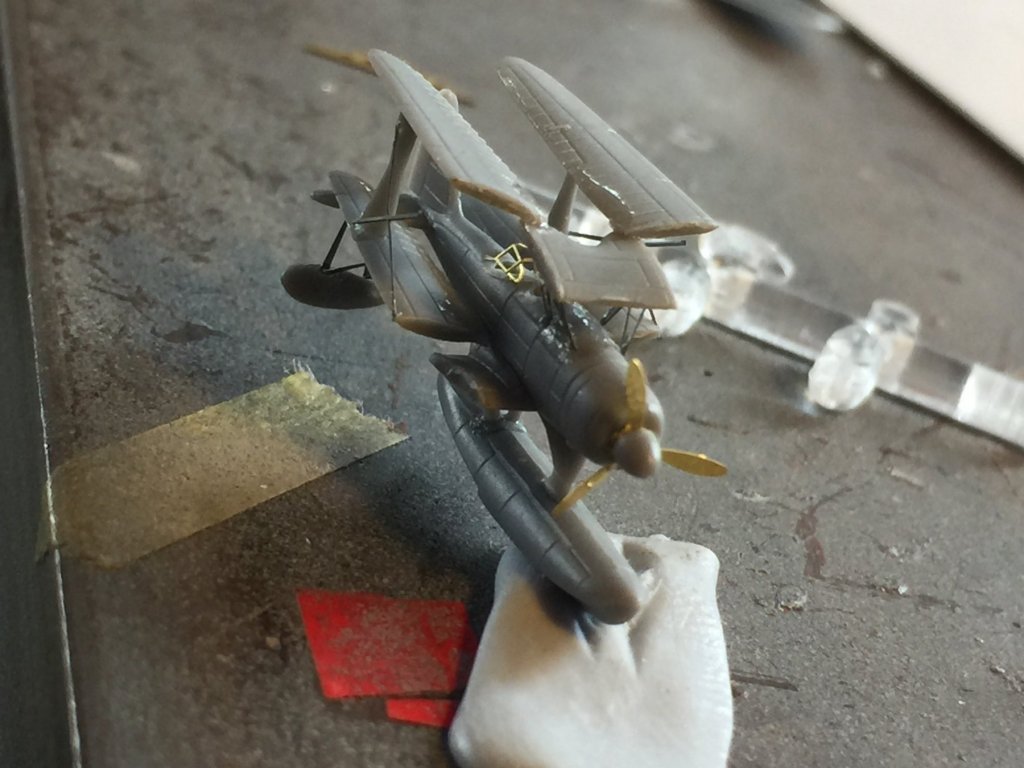
How's this? You can see I'm trying to put cockpits into floatplanes at the moment. Time for a break and a beer.
- 743 replies
-
- 11
-
-
I had seen this but it is waaaaaay too big for this scale. North Star make it to scale which I used on my Dreadnought but it's a pain to make and still looks 2D to my eye. All the manufacturers are seeming to make 1/200 these days so it may work for that but I would quickly run out of room parking them in my study.
-
So true, at this scale you can get them as Etch but they don't look quite right so I had to make do.
-
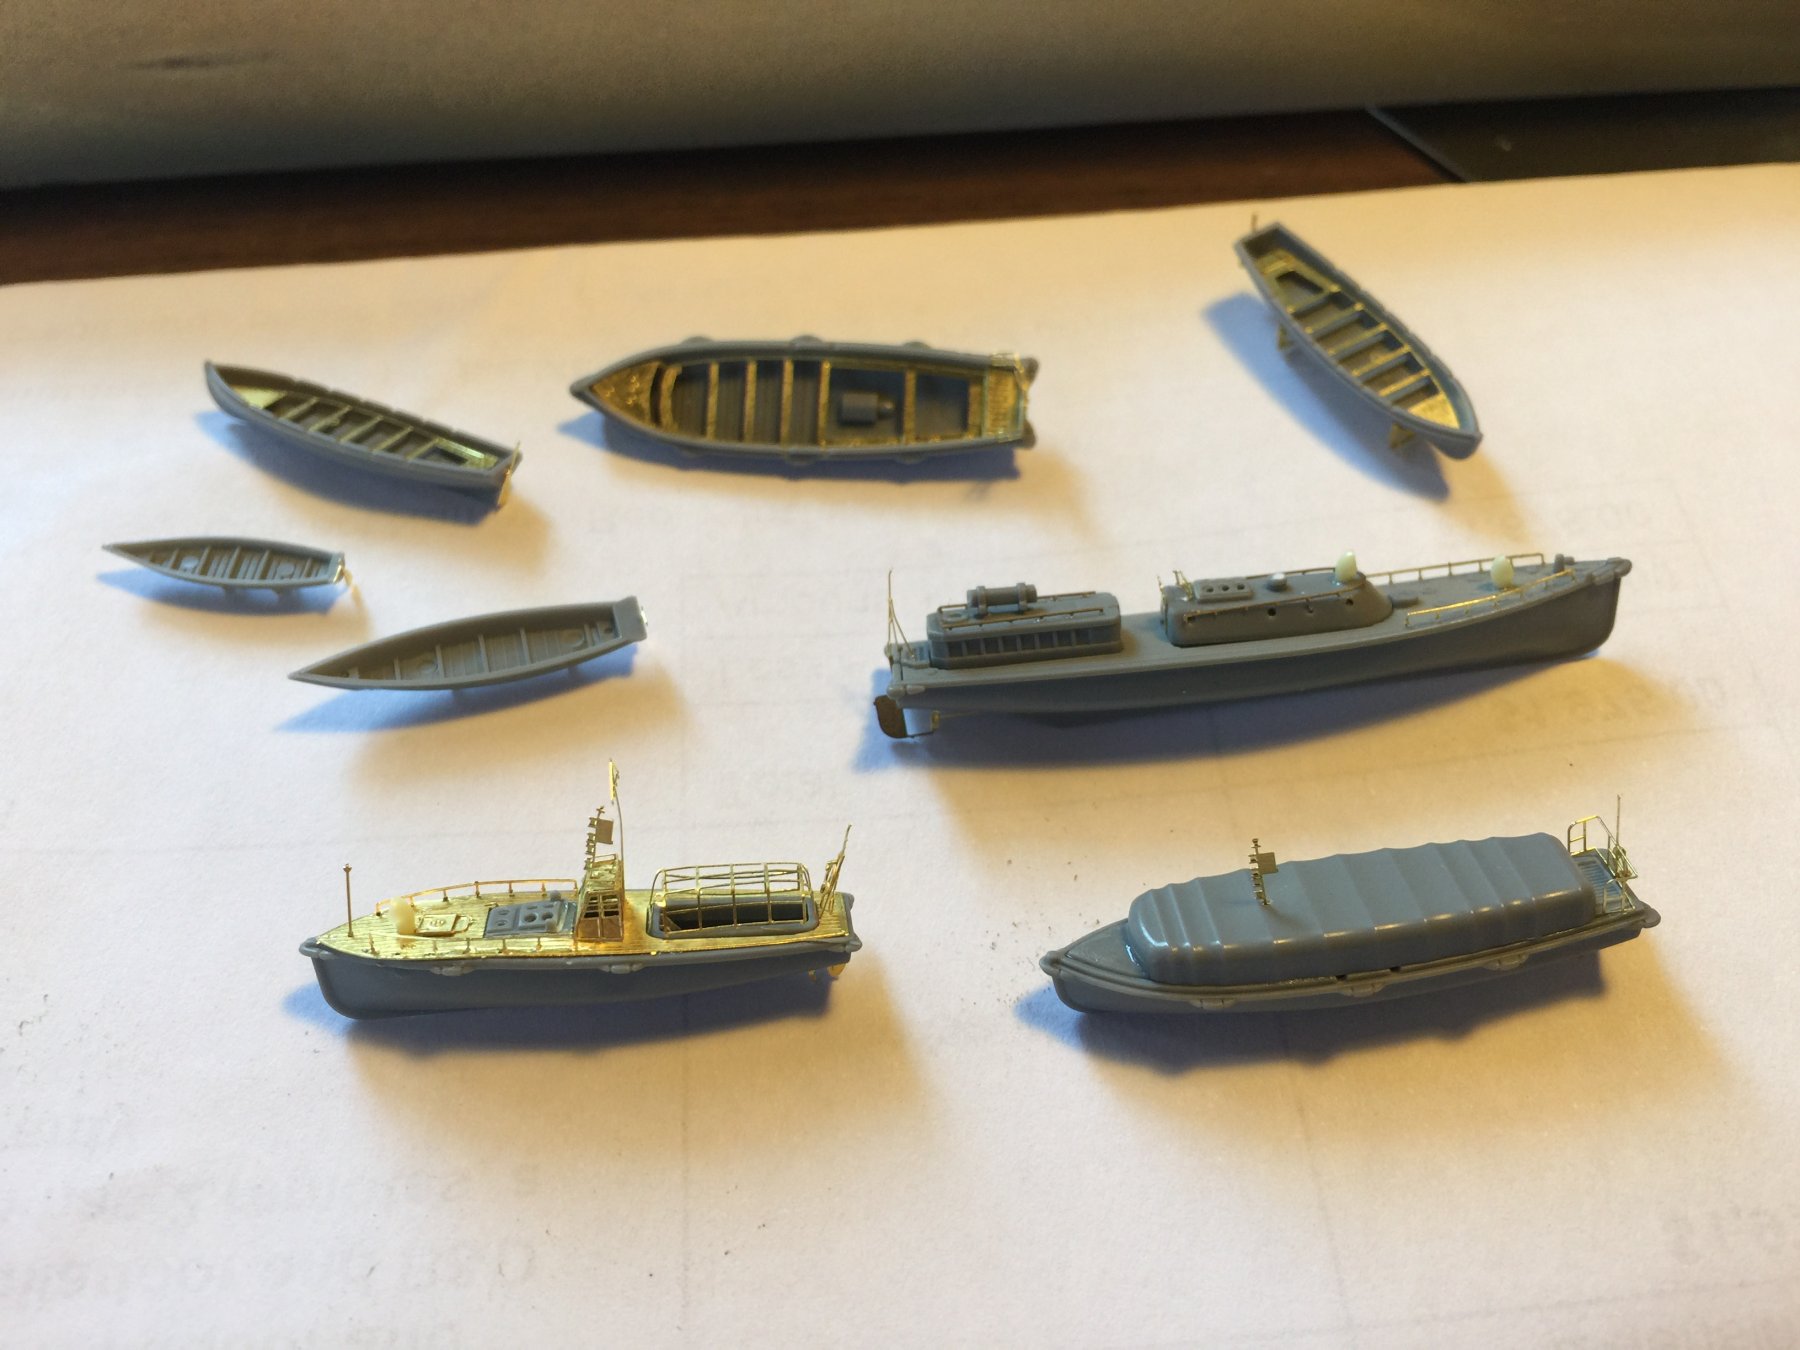
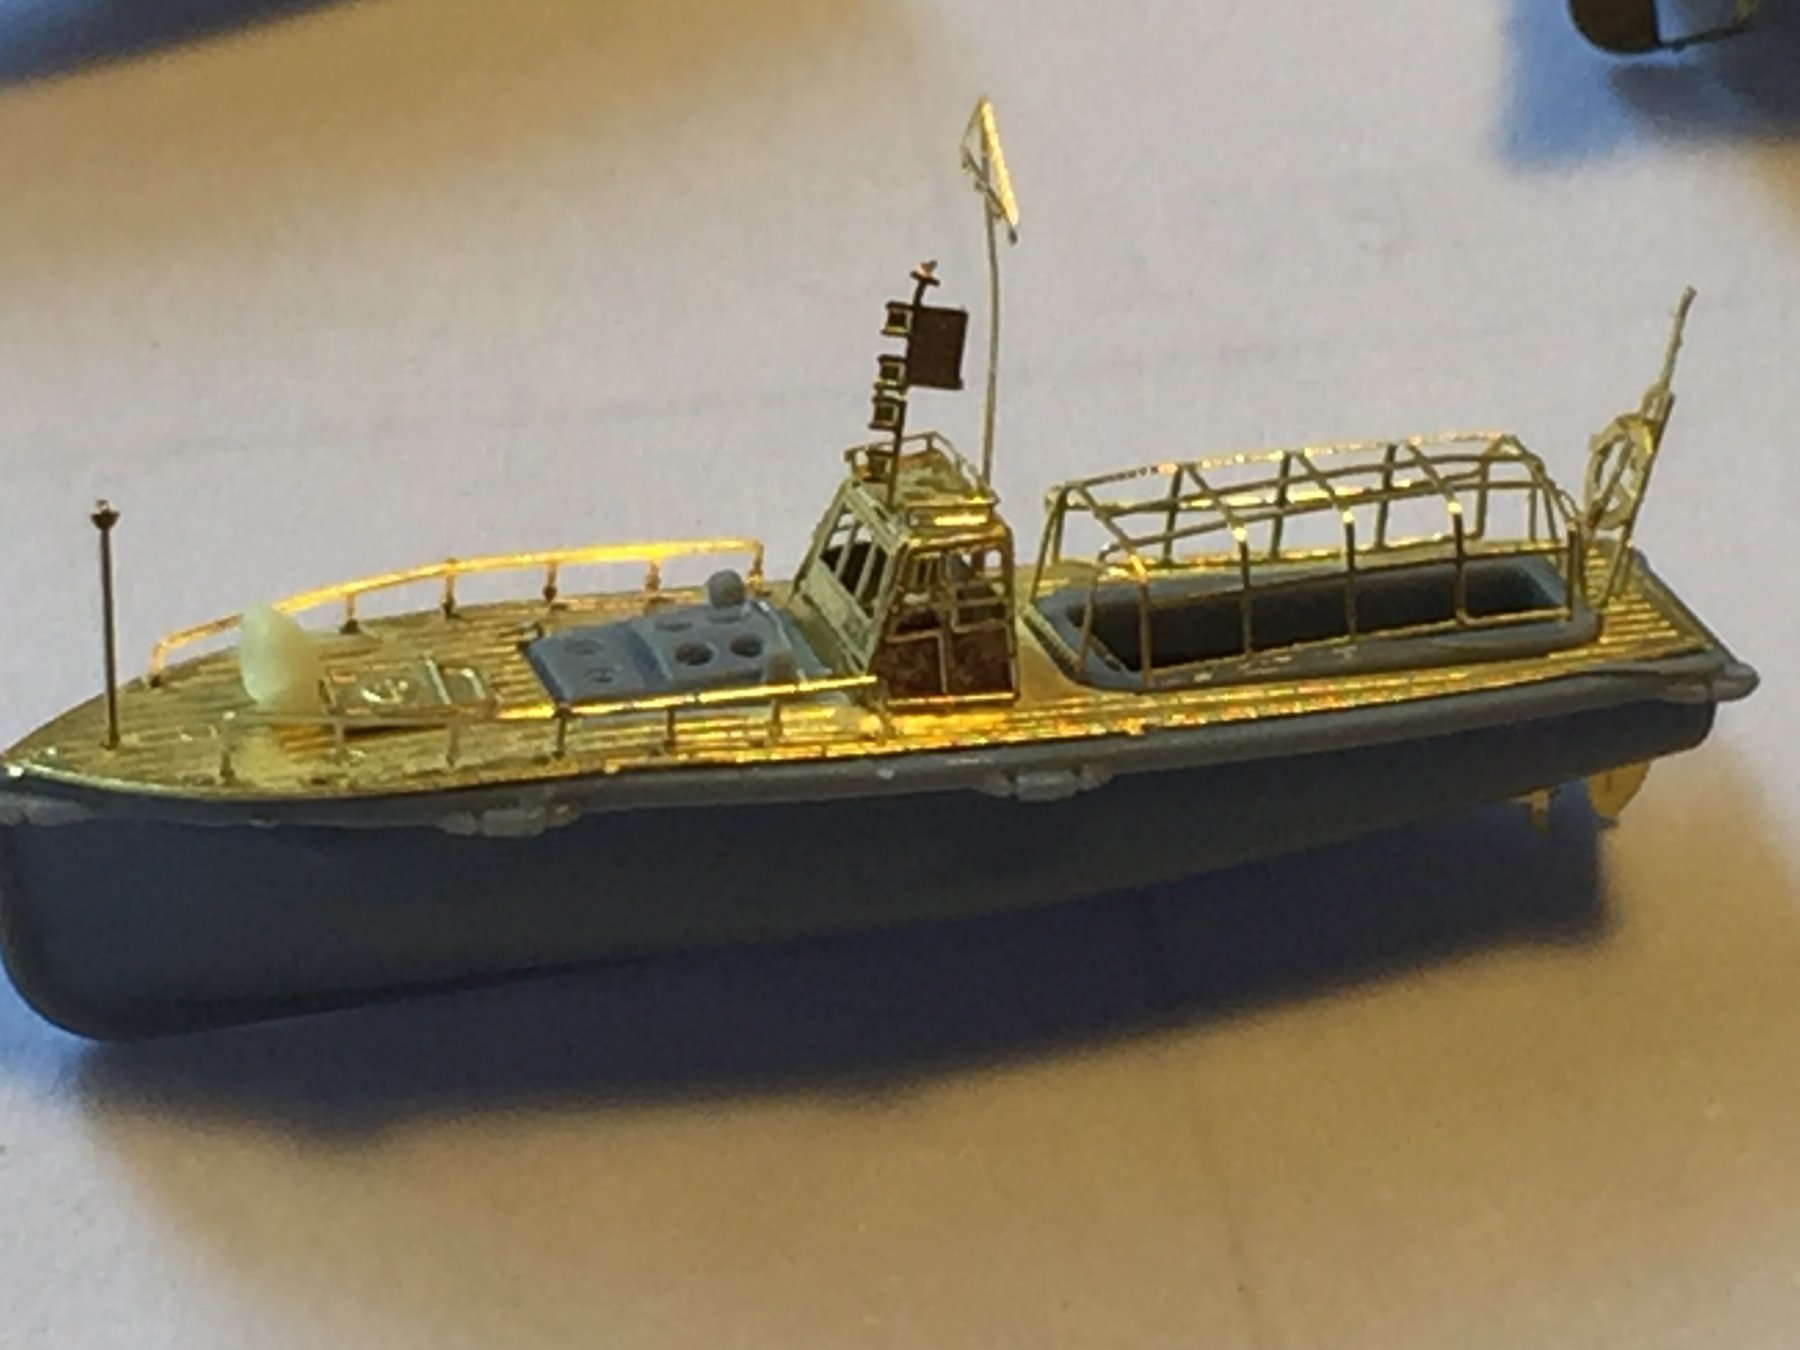
Thanks mate, I'm thinking of how to make improvements for my next build. The plan is to beat the hell out of the next build. Working on the ships boats now, the scales seem to be all wrong.
-
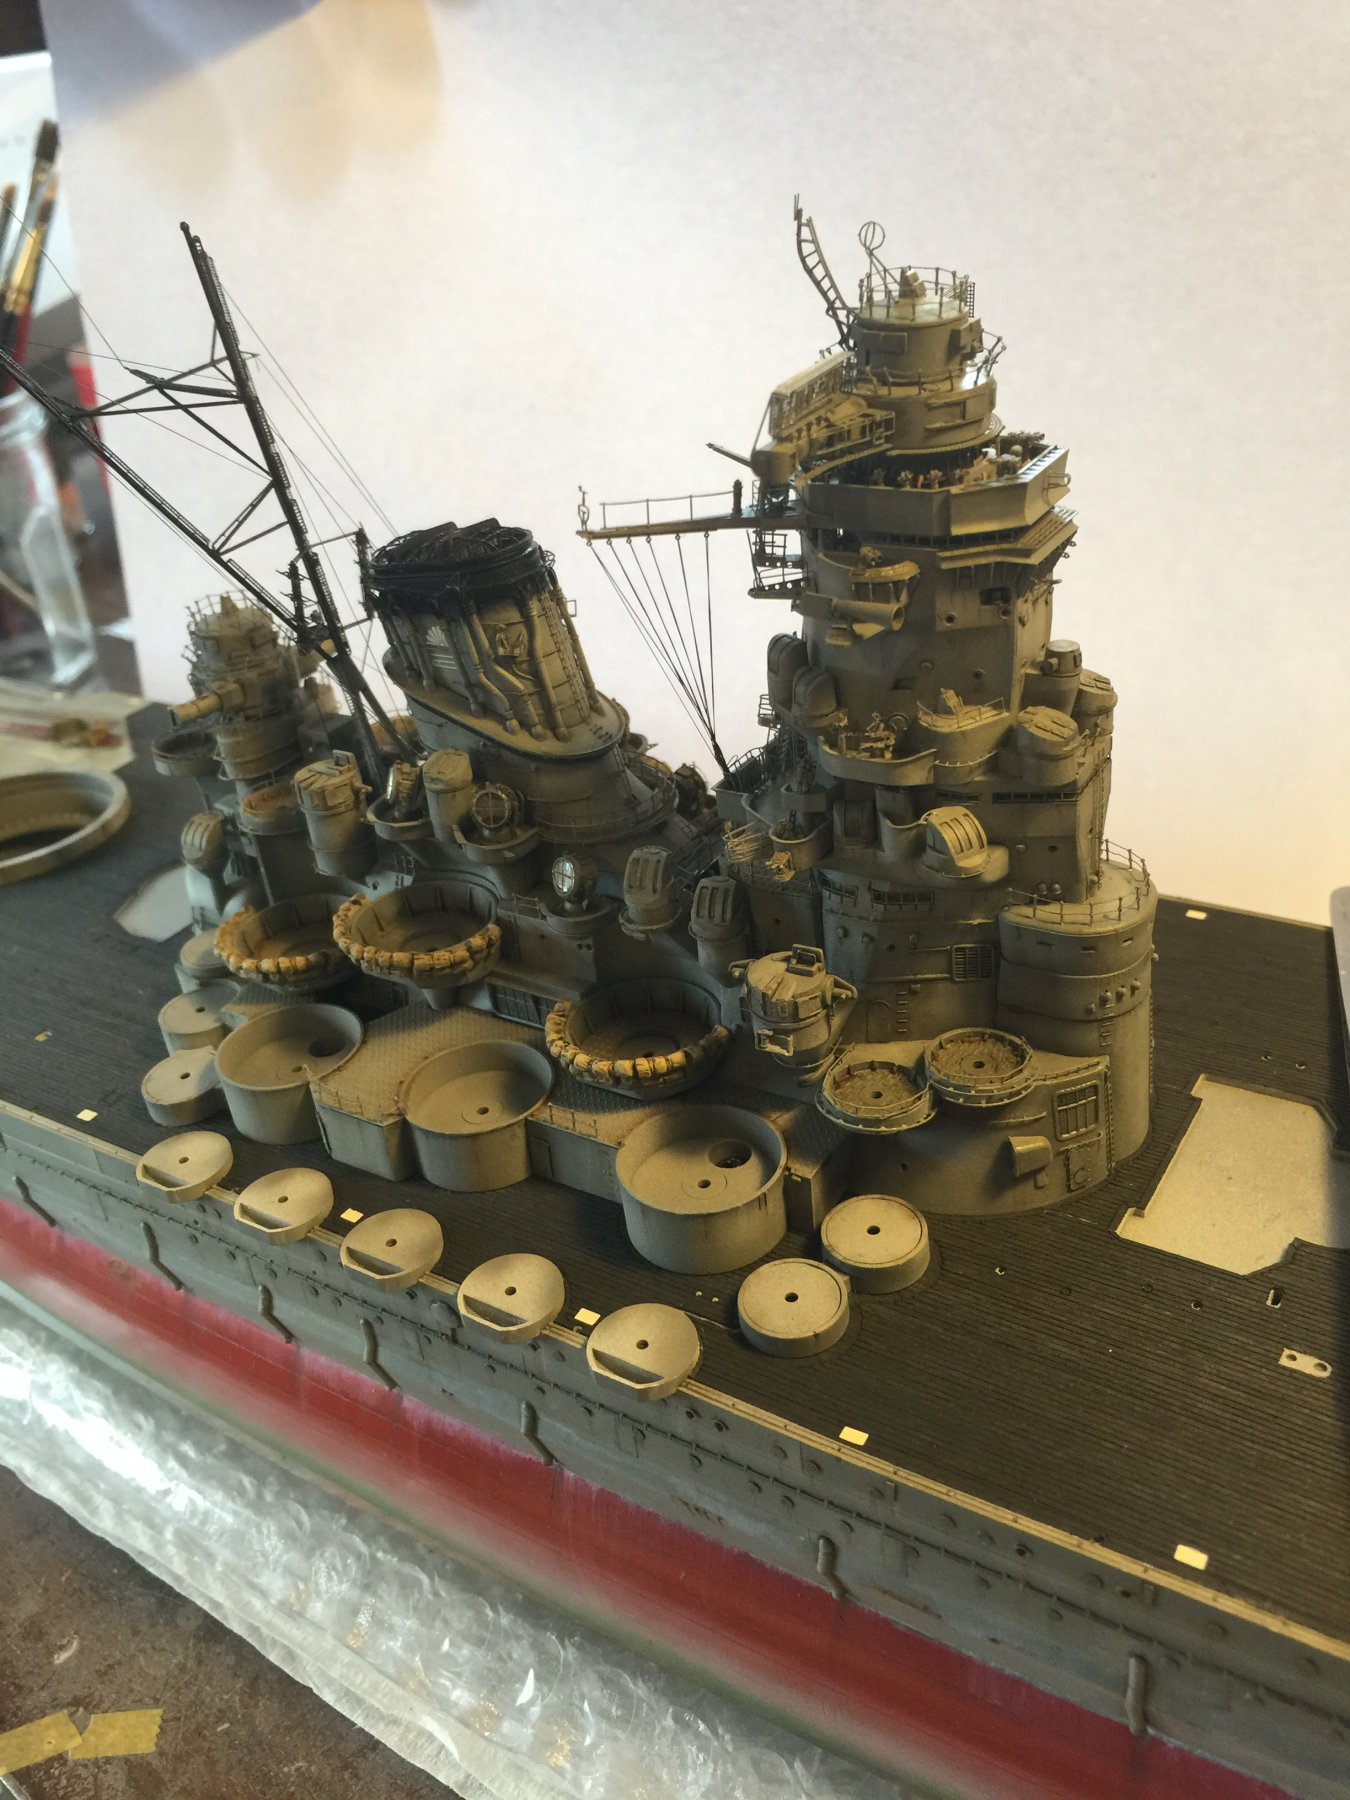
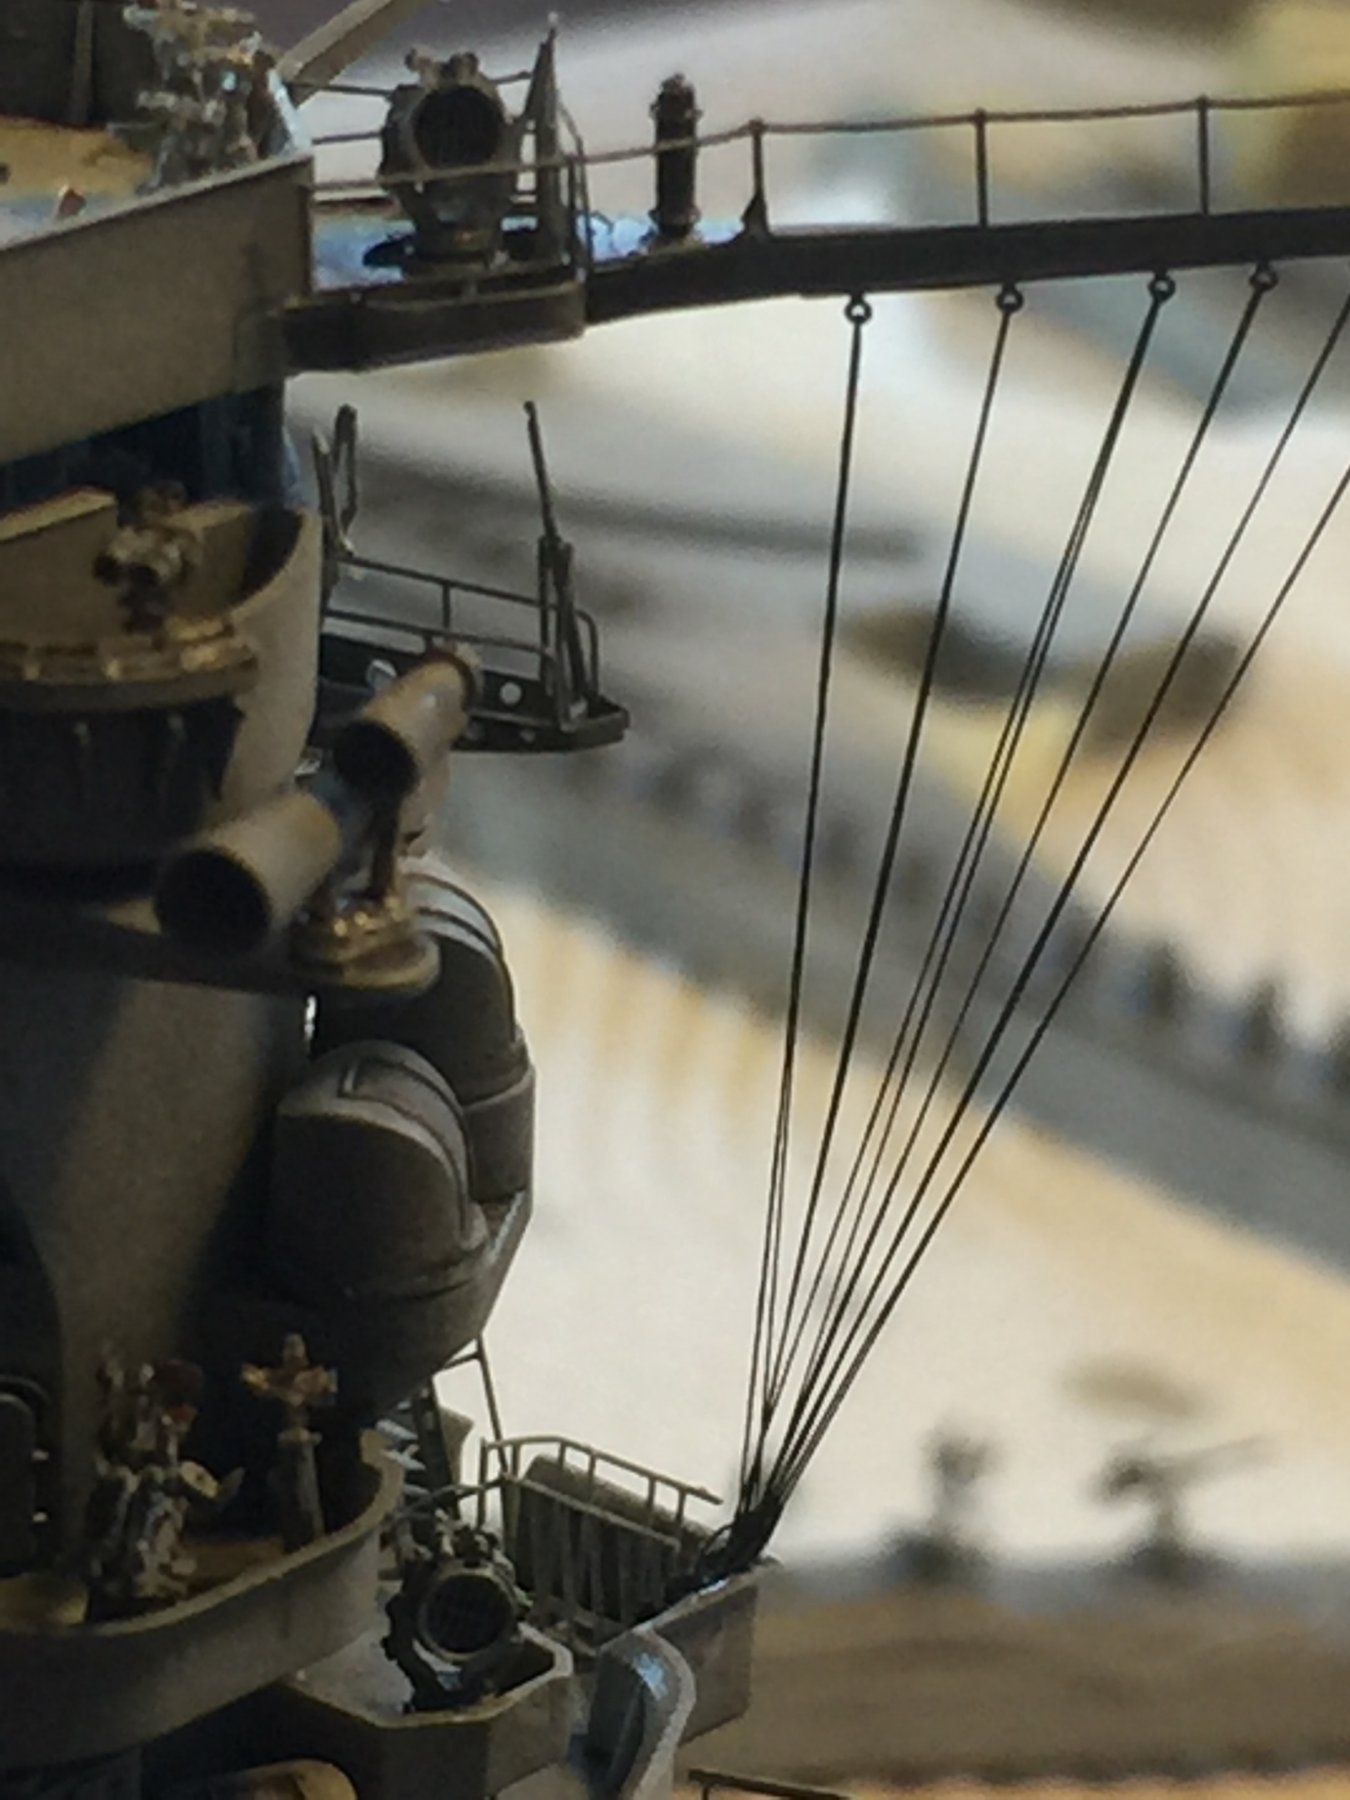
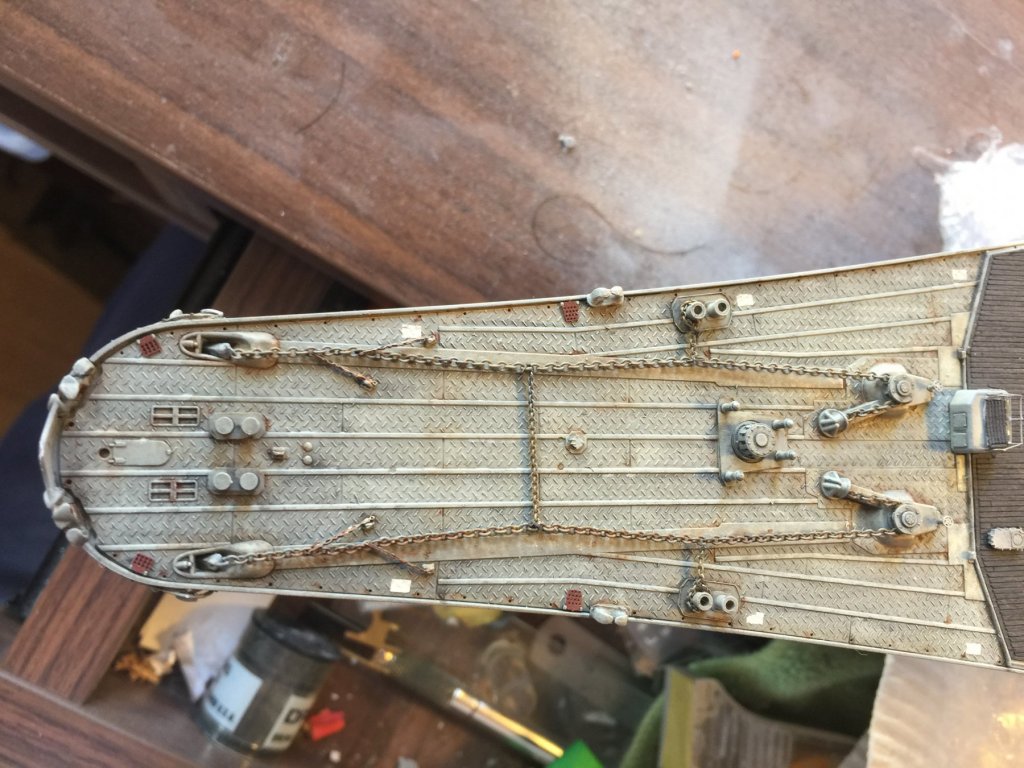
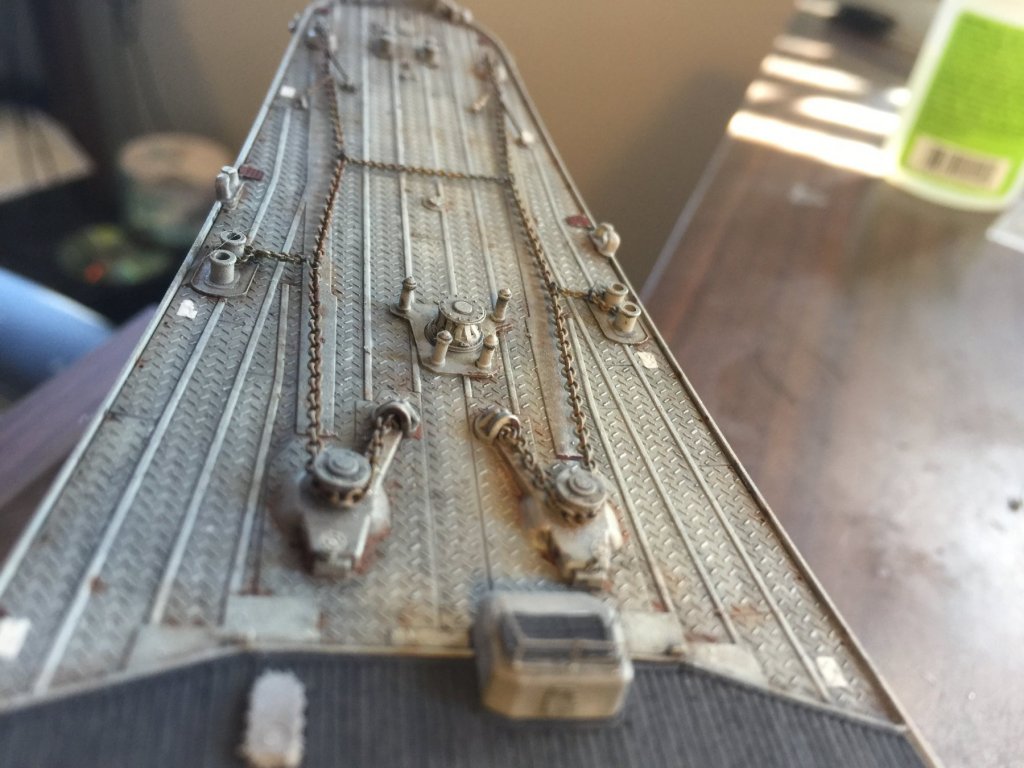
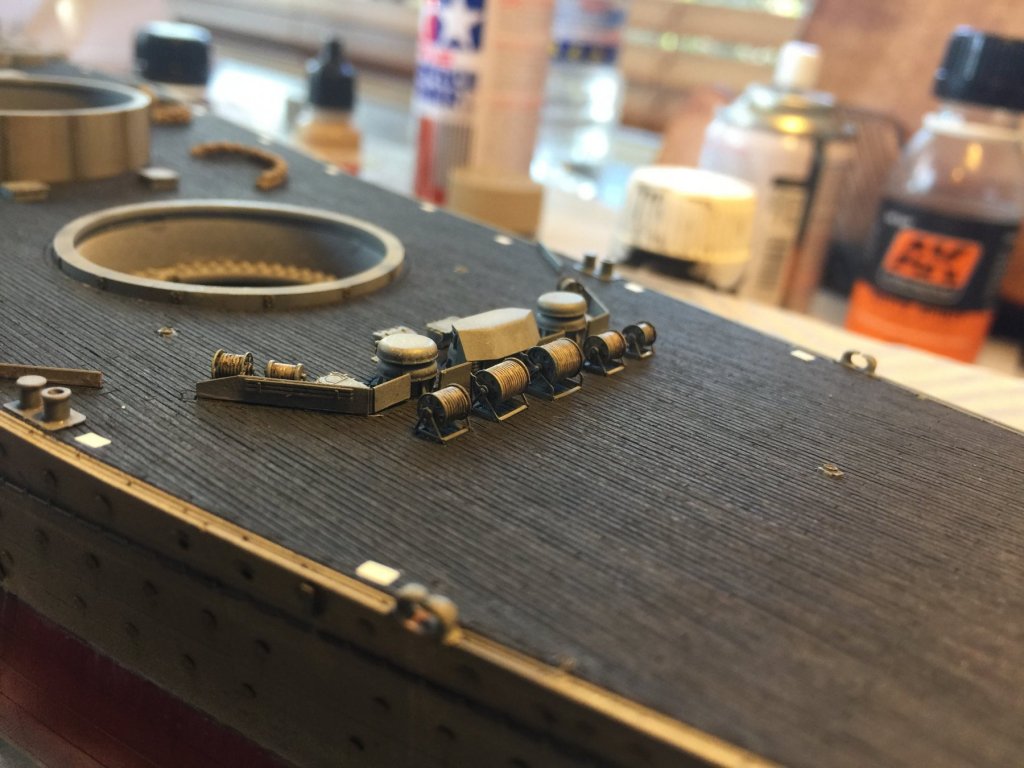
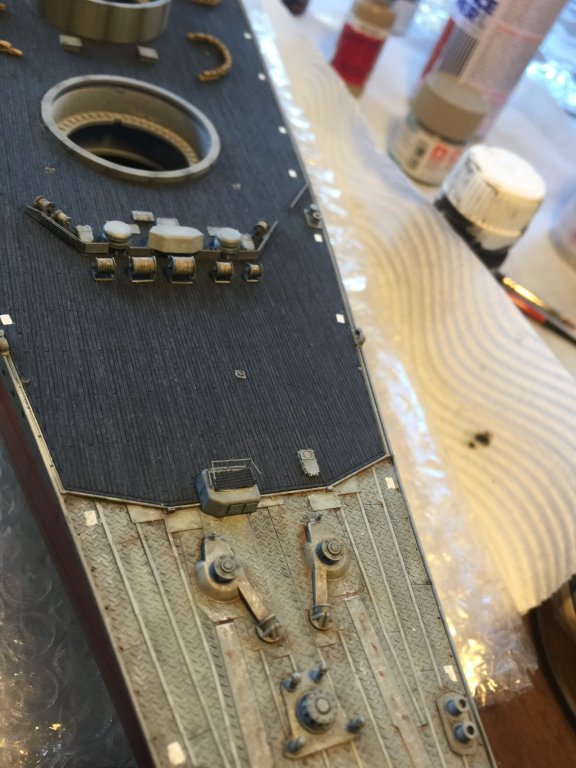
And back to the front of the bus; the ships chains and anchors. I painted the chains grey (from the shiny cheap looking black metal), then ran 2 different rust washes over them, and using two different chain sizes secured them with ezline. The Pontos kit provides 4 chain stoppers and brake handles as well. I think they came out OK.

- 743 replies
-
- 20
-
-
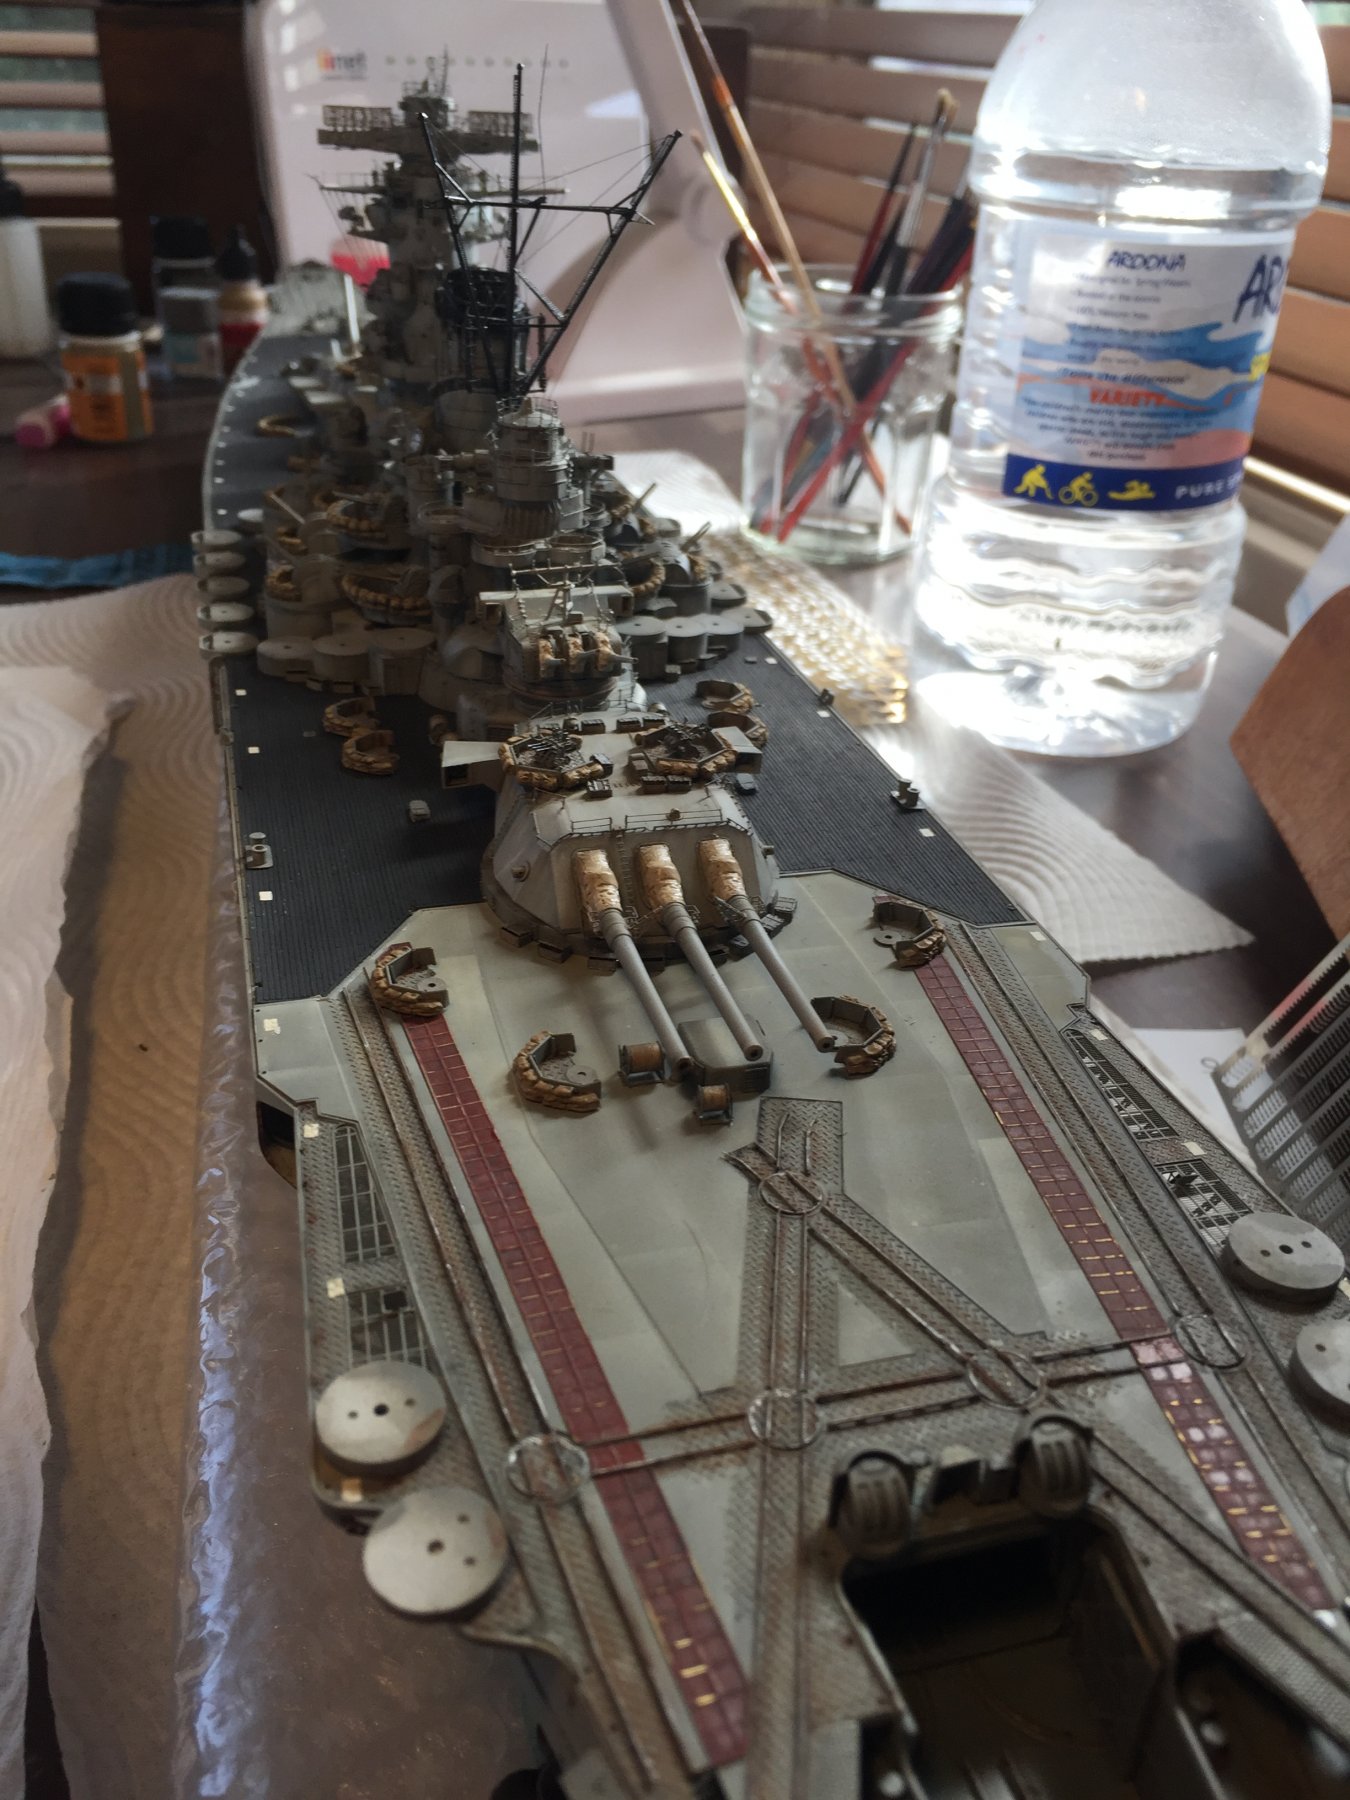
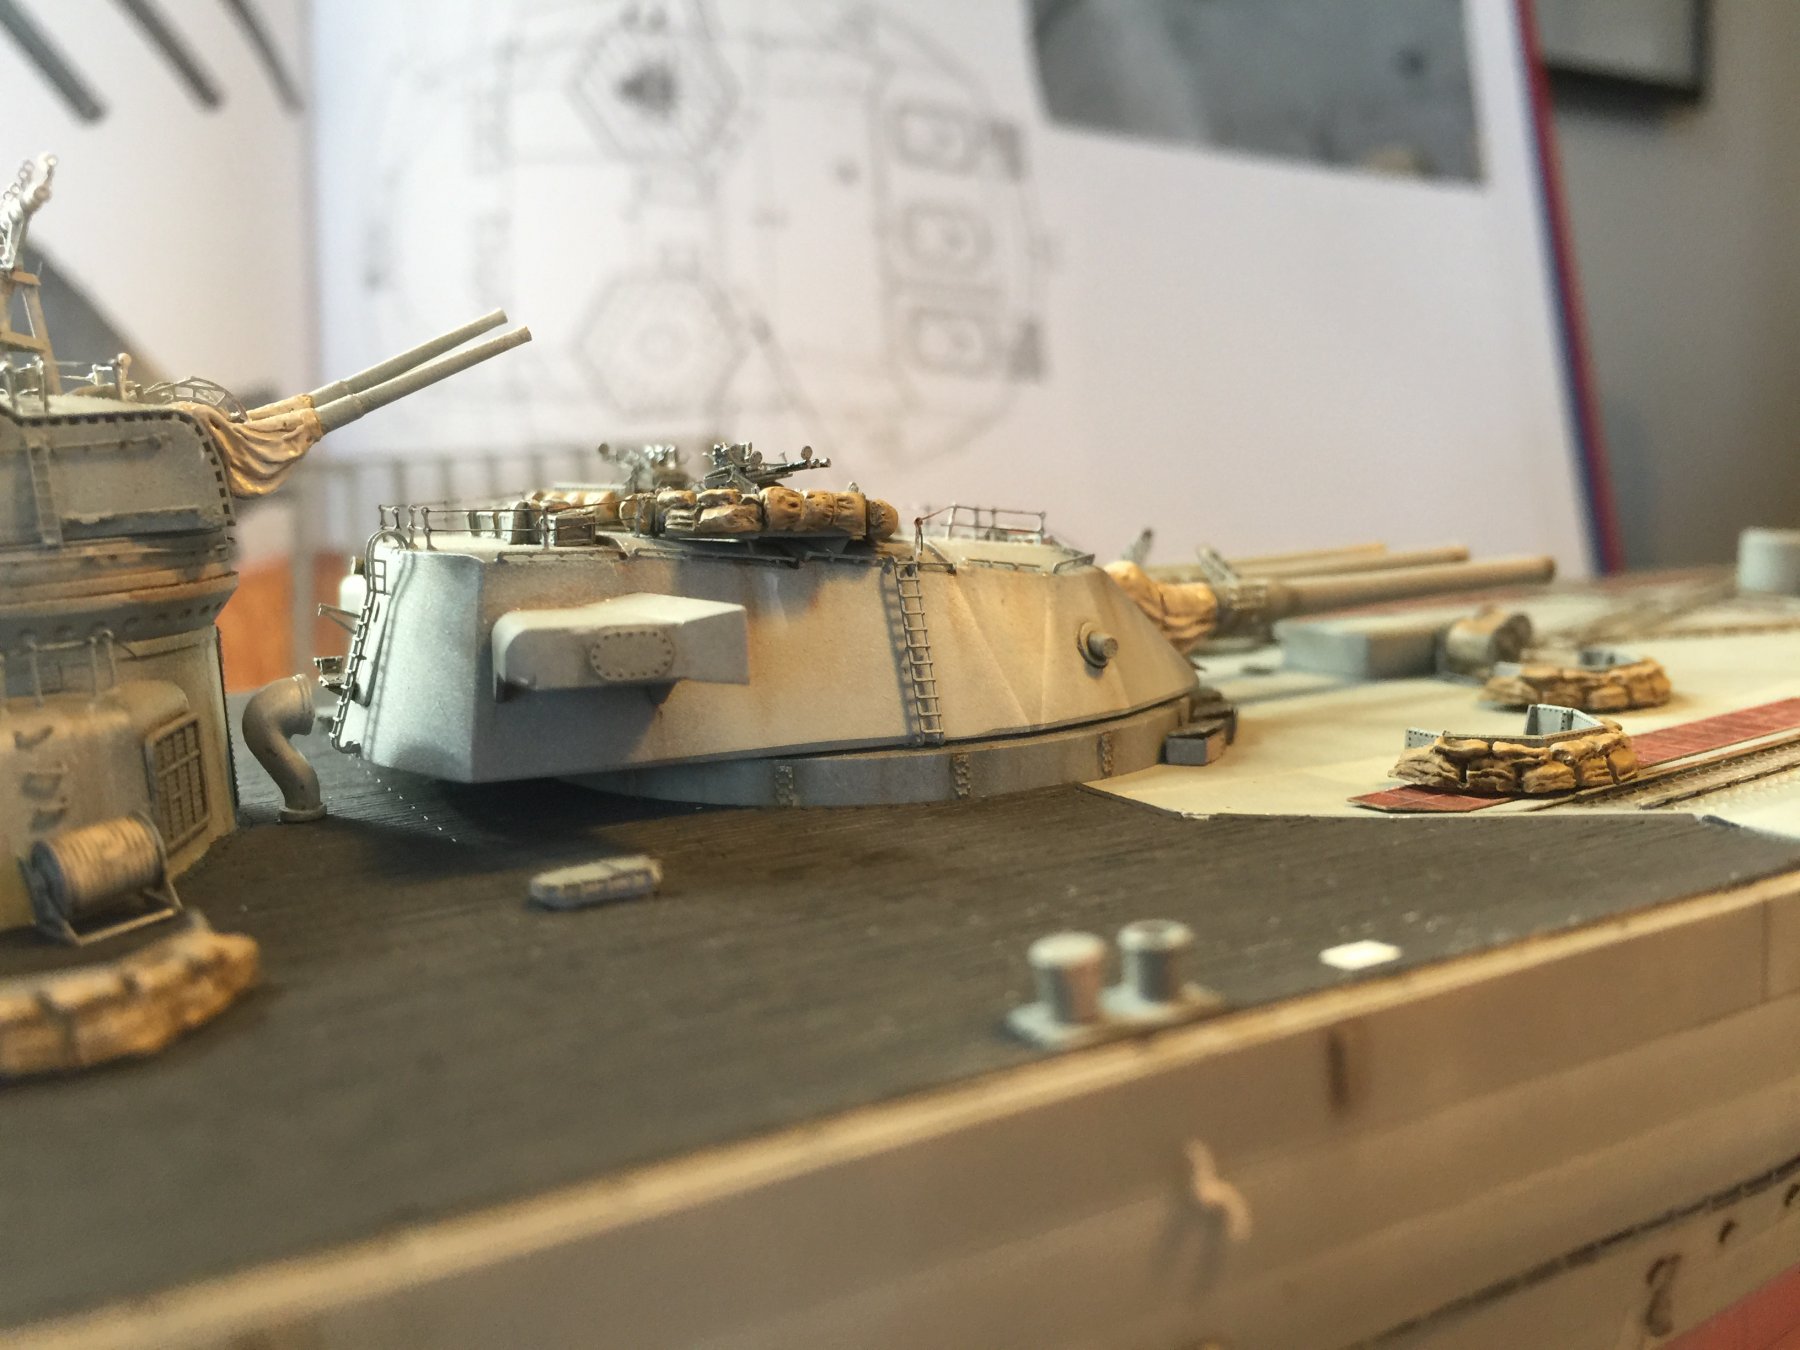
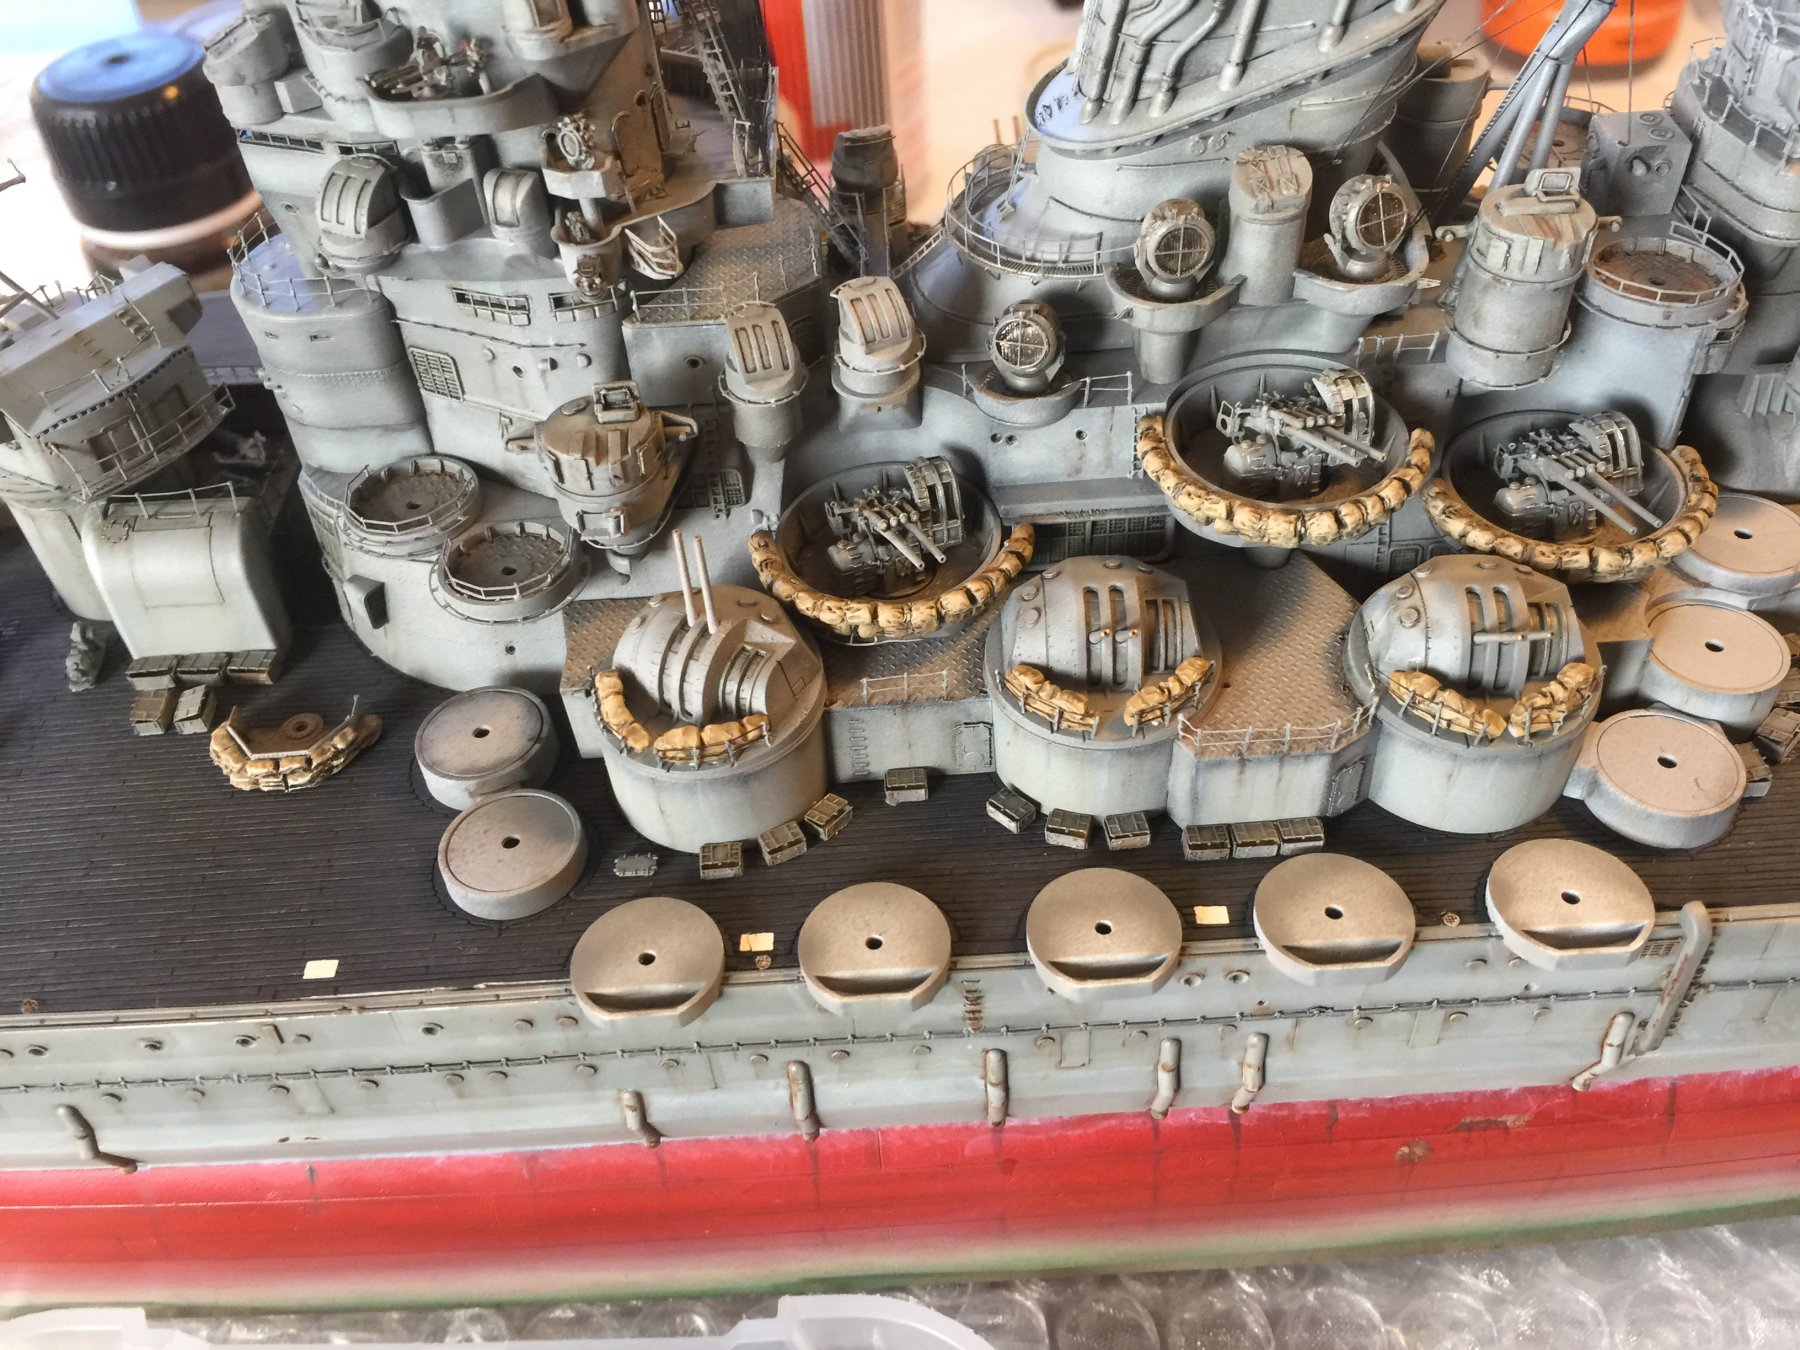
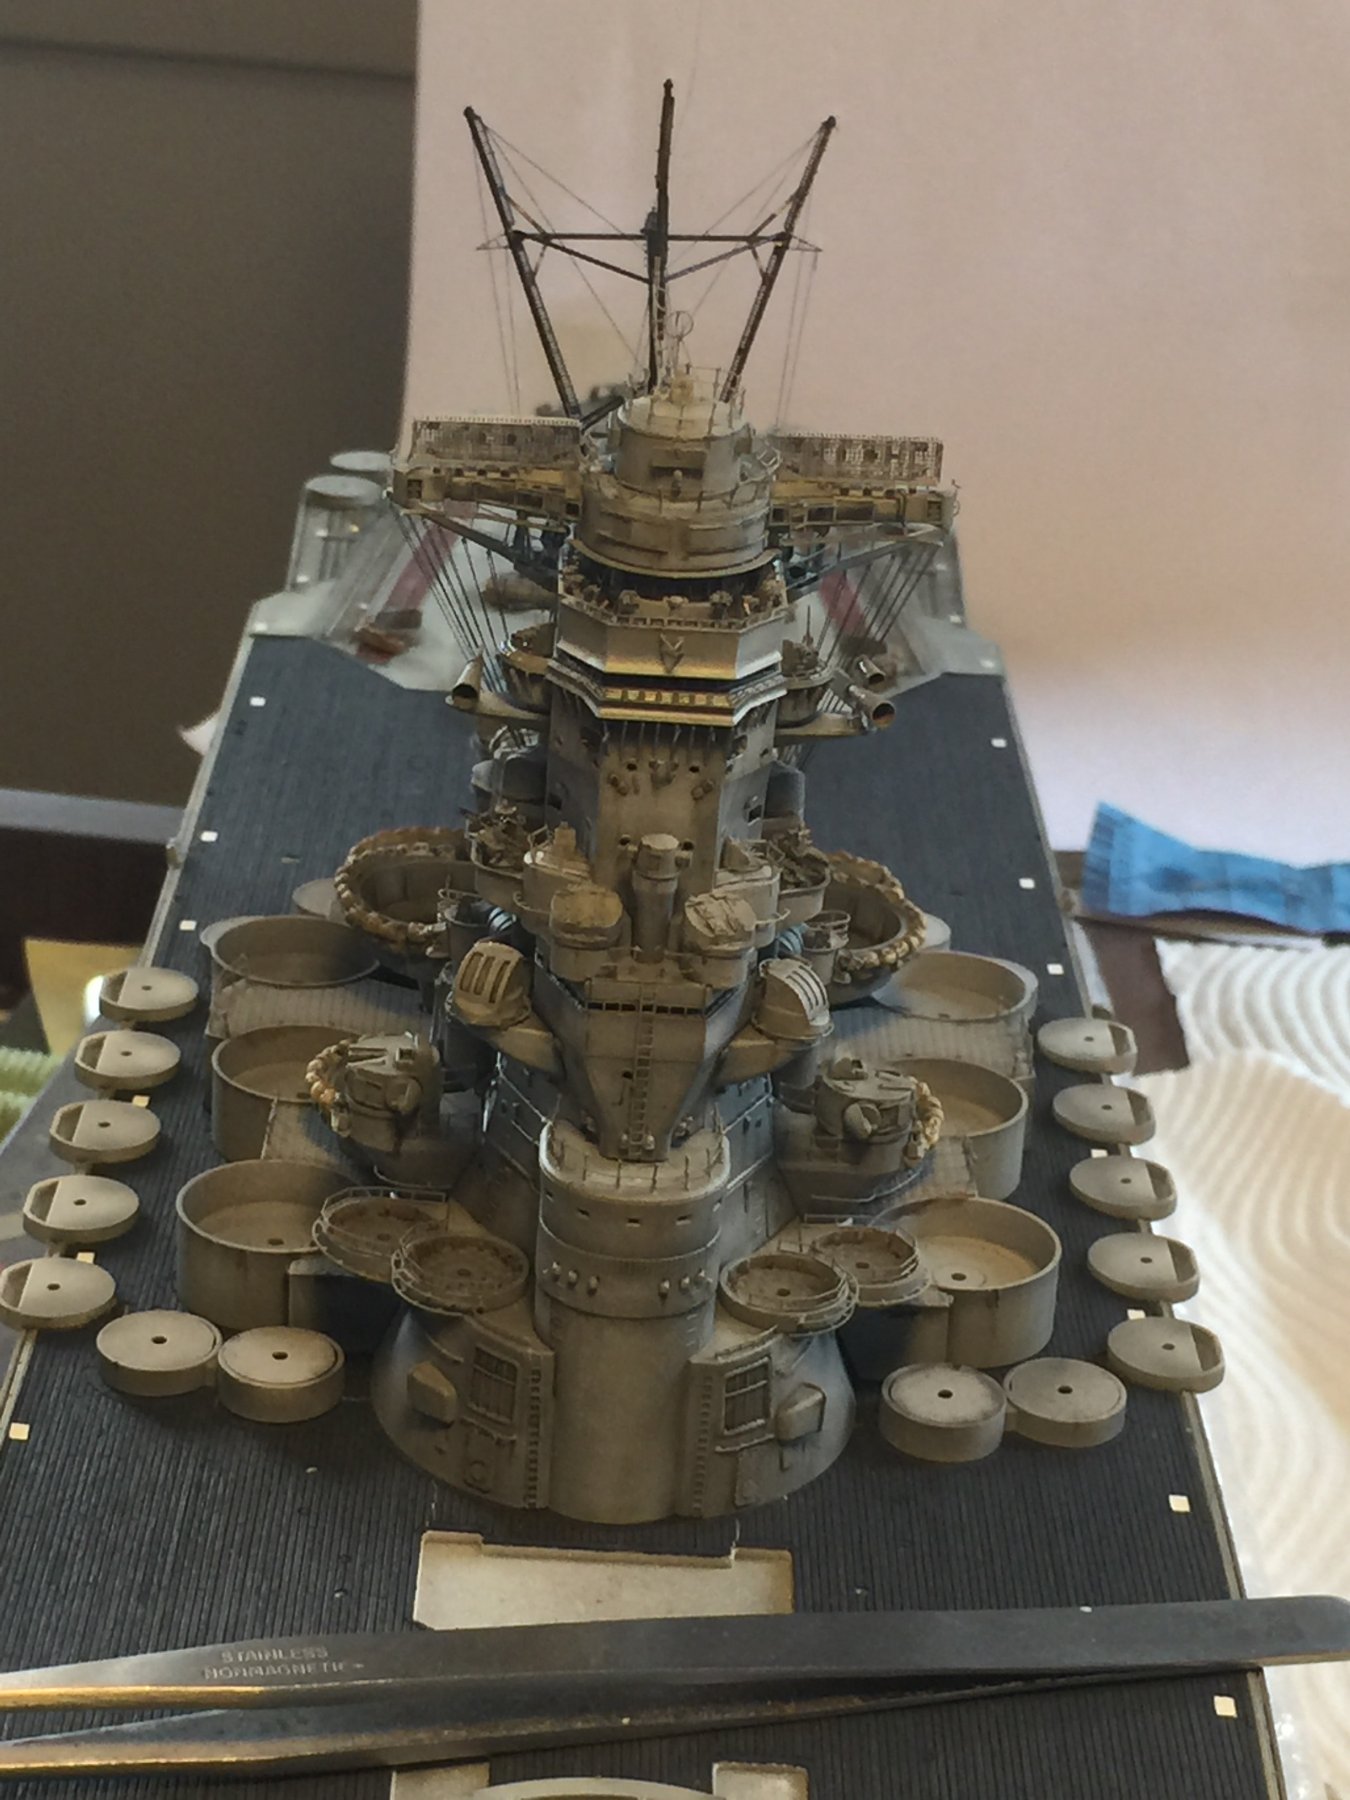
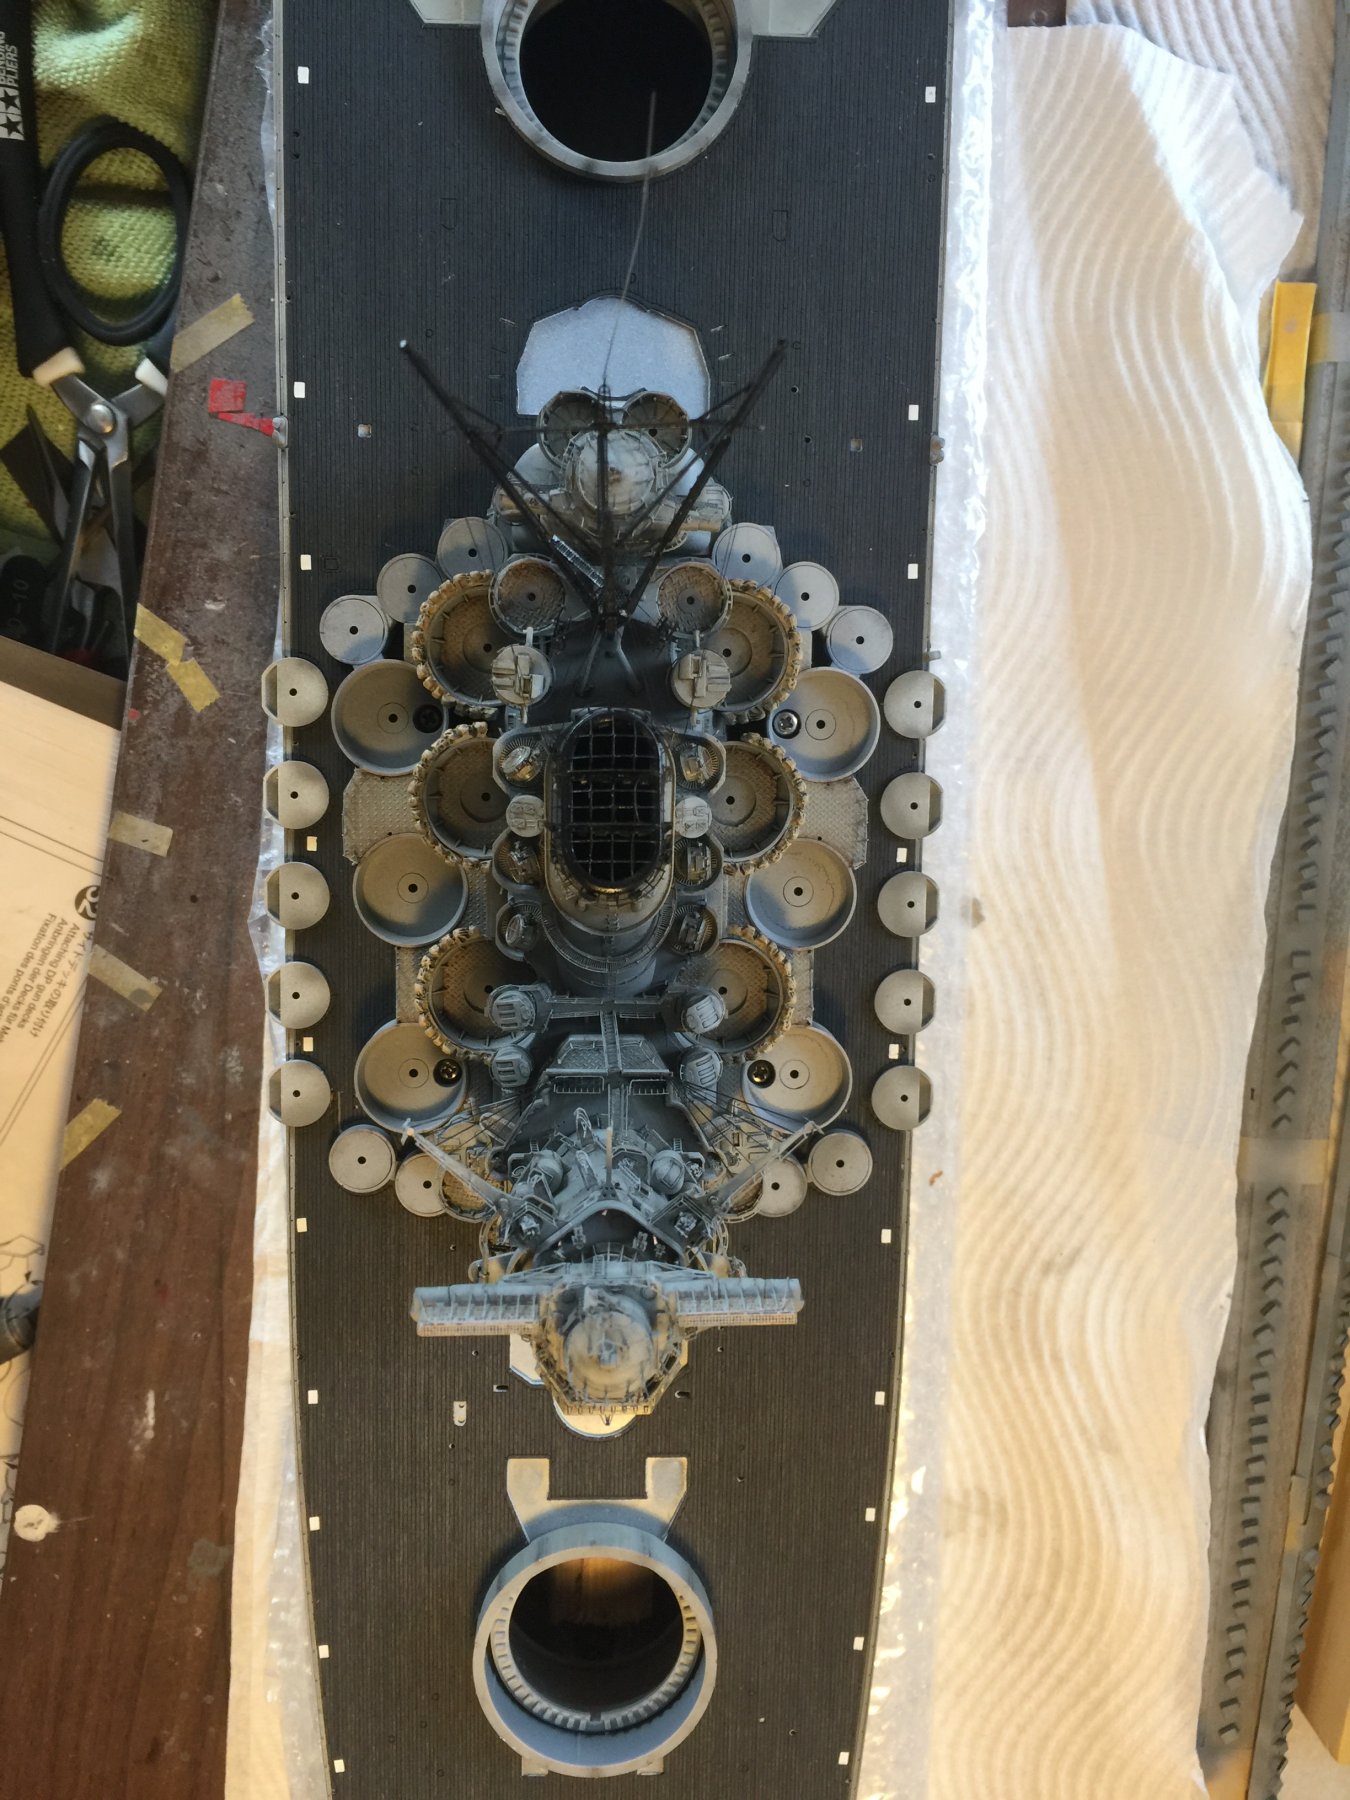
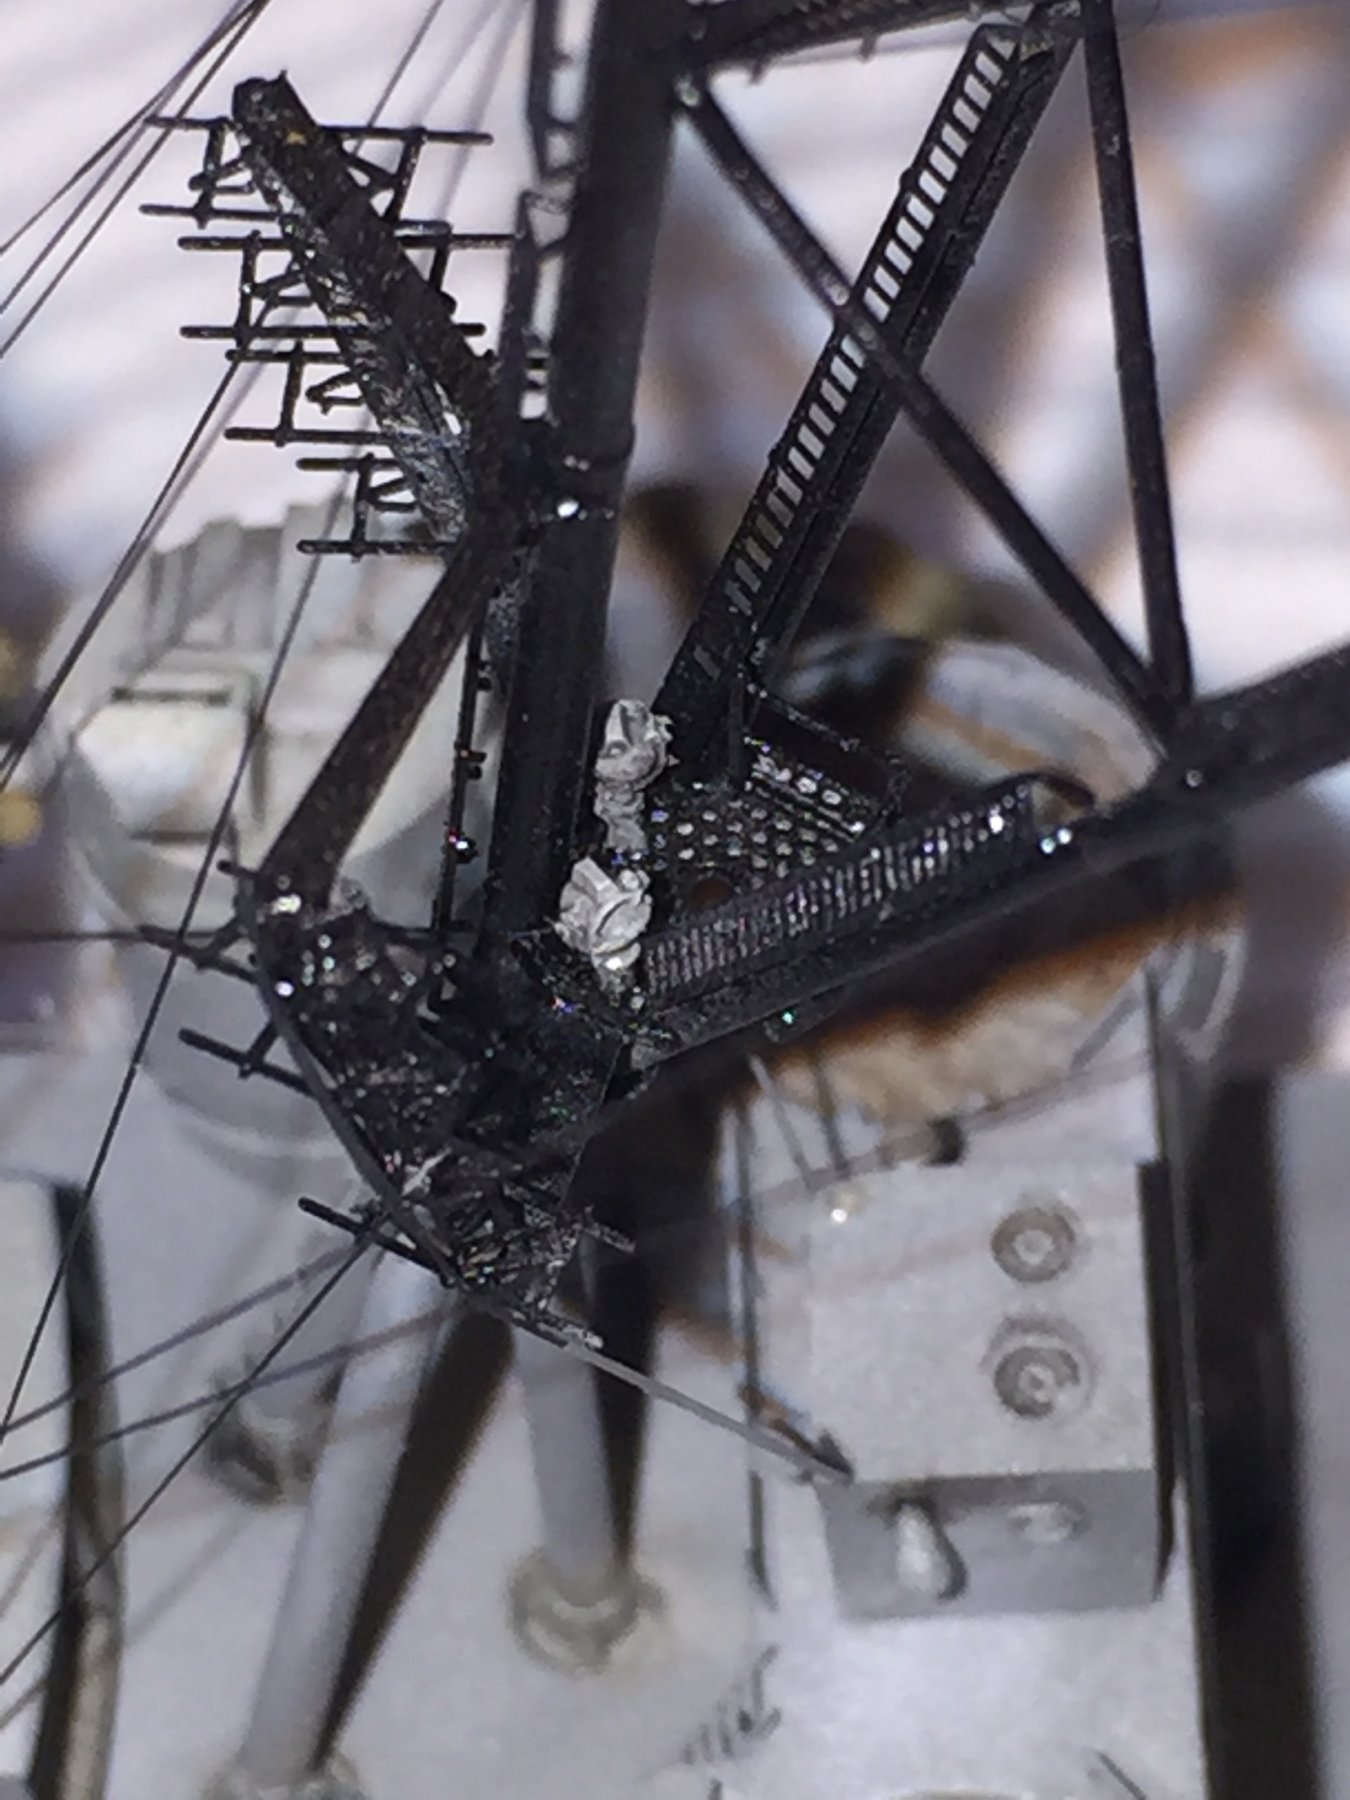
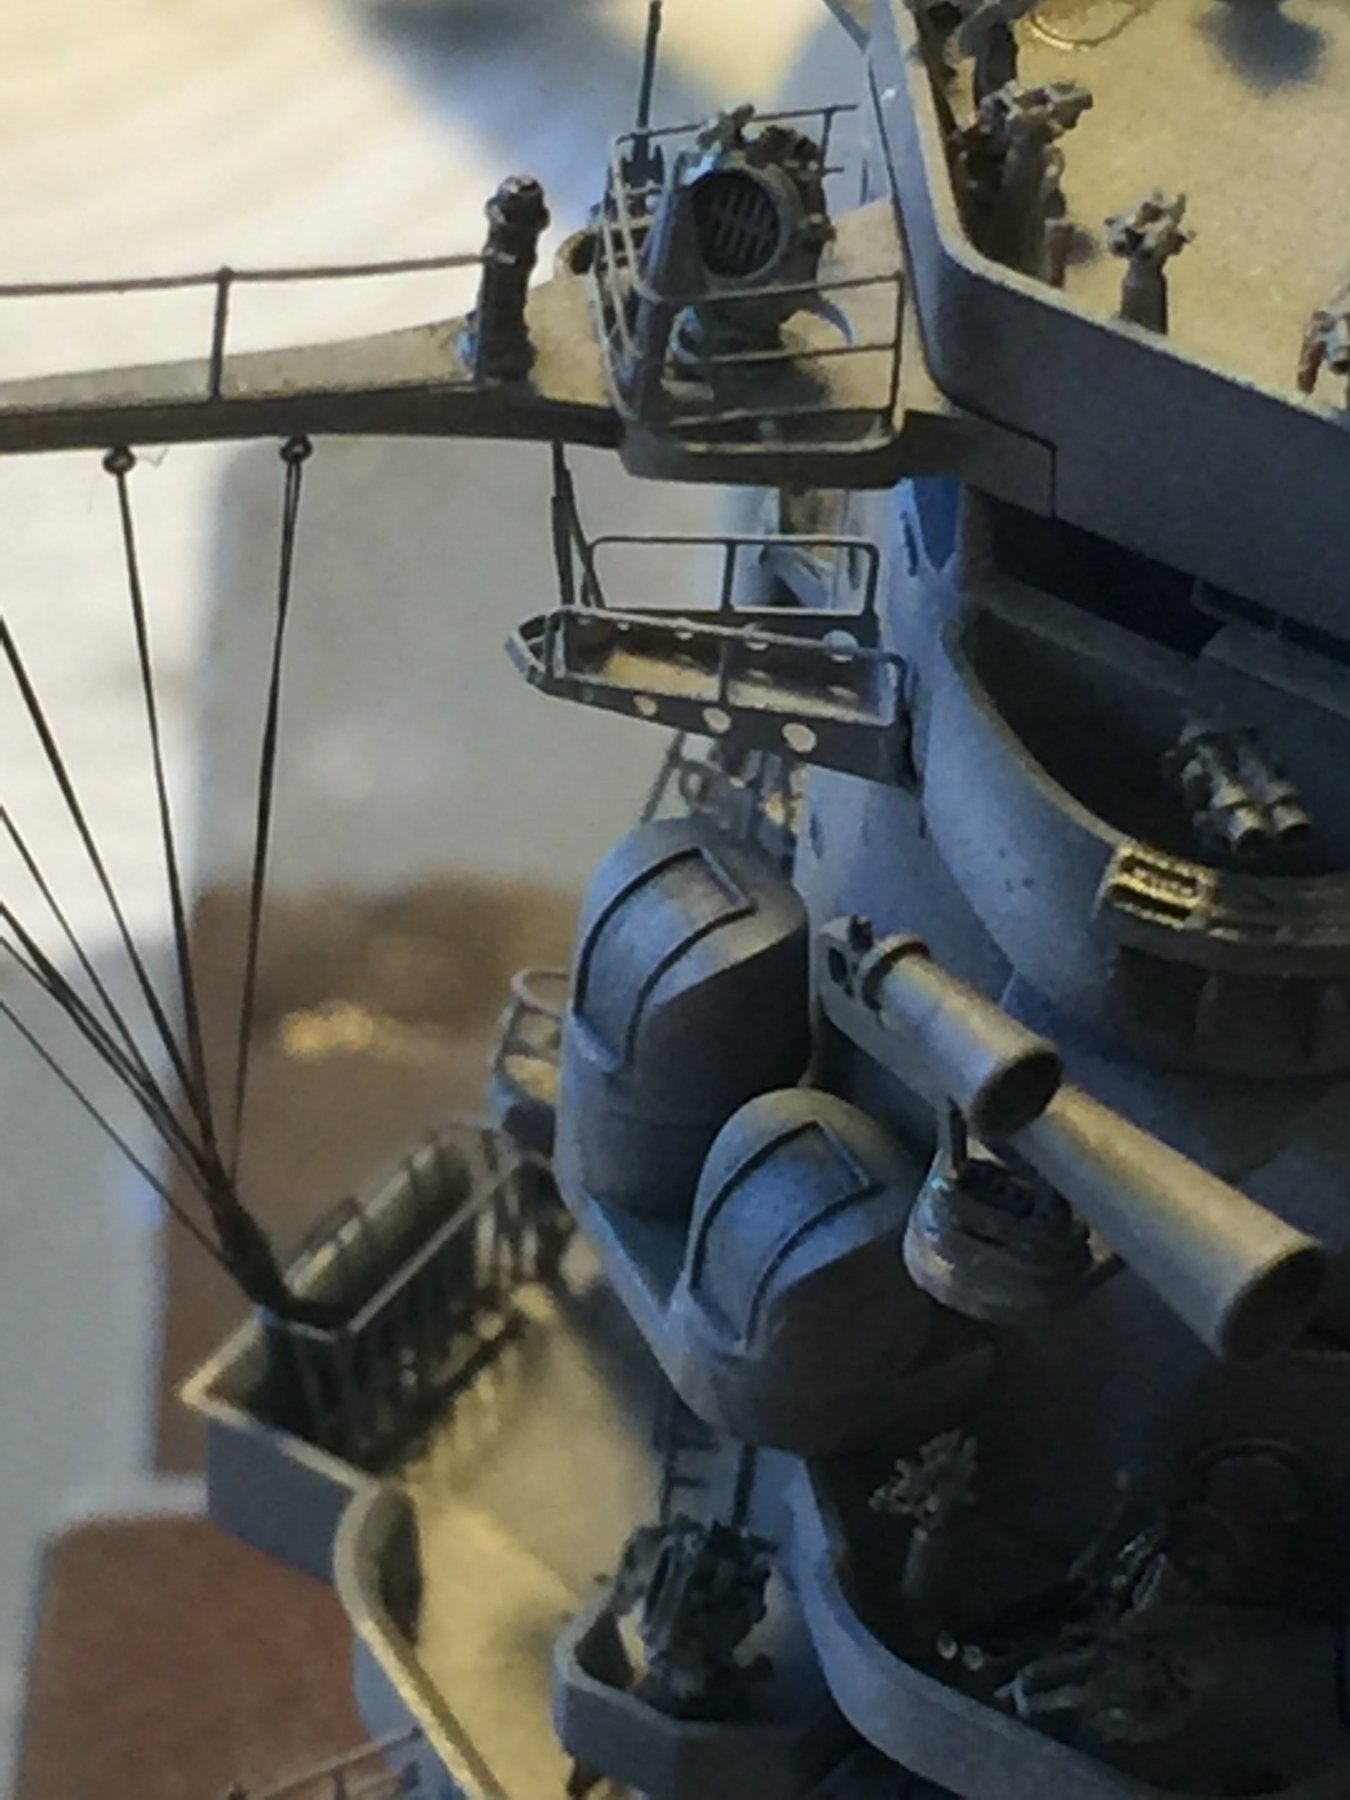
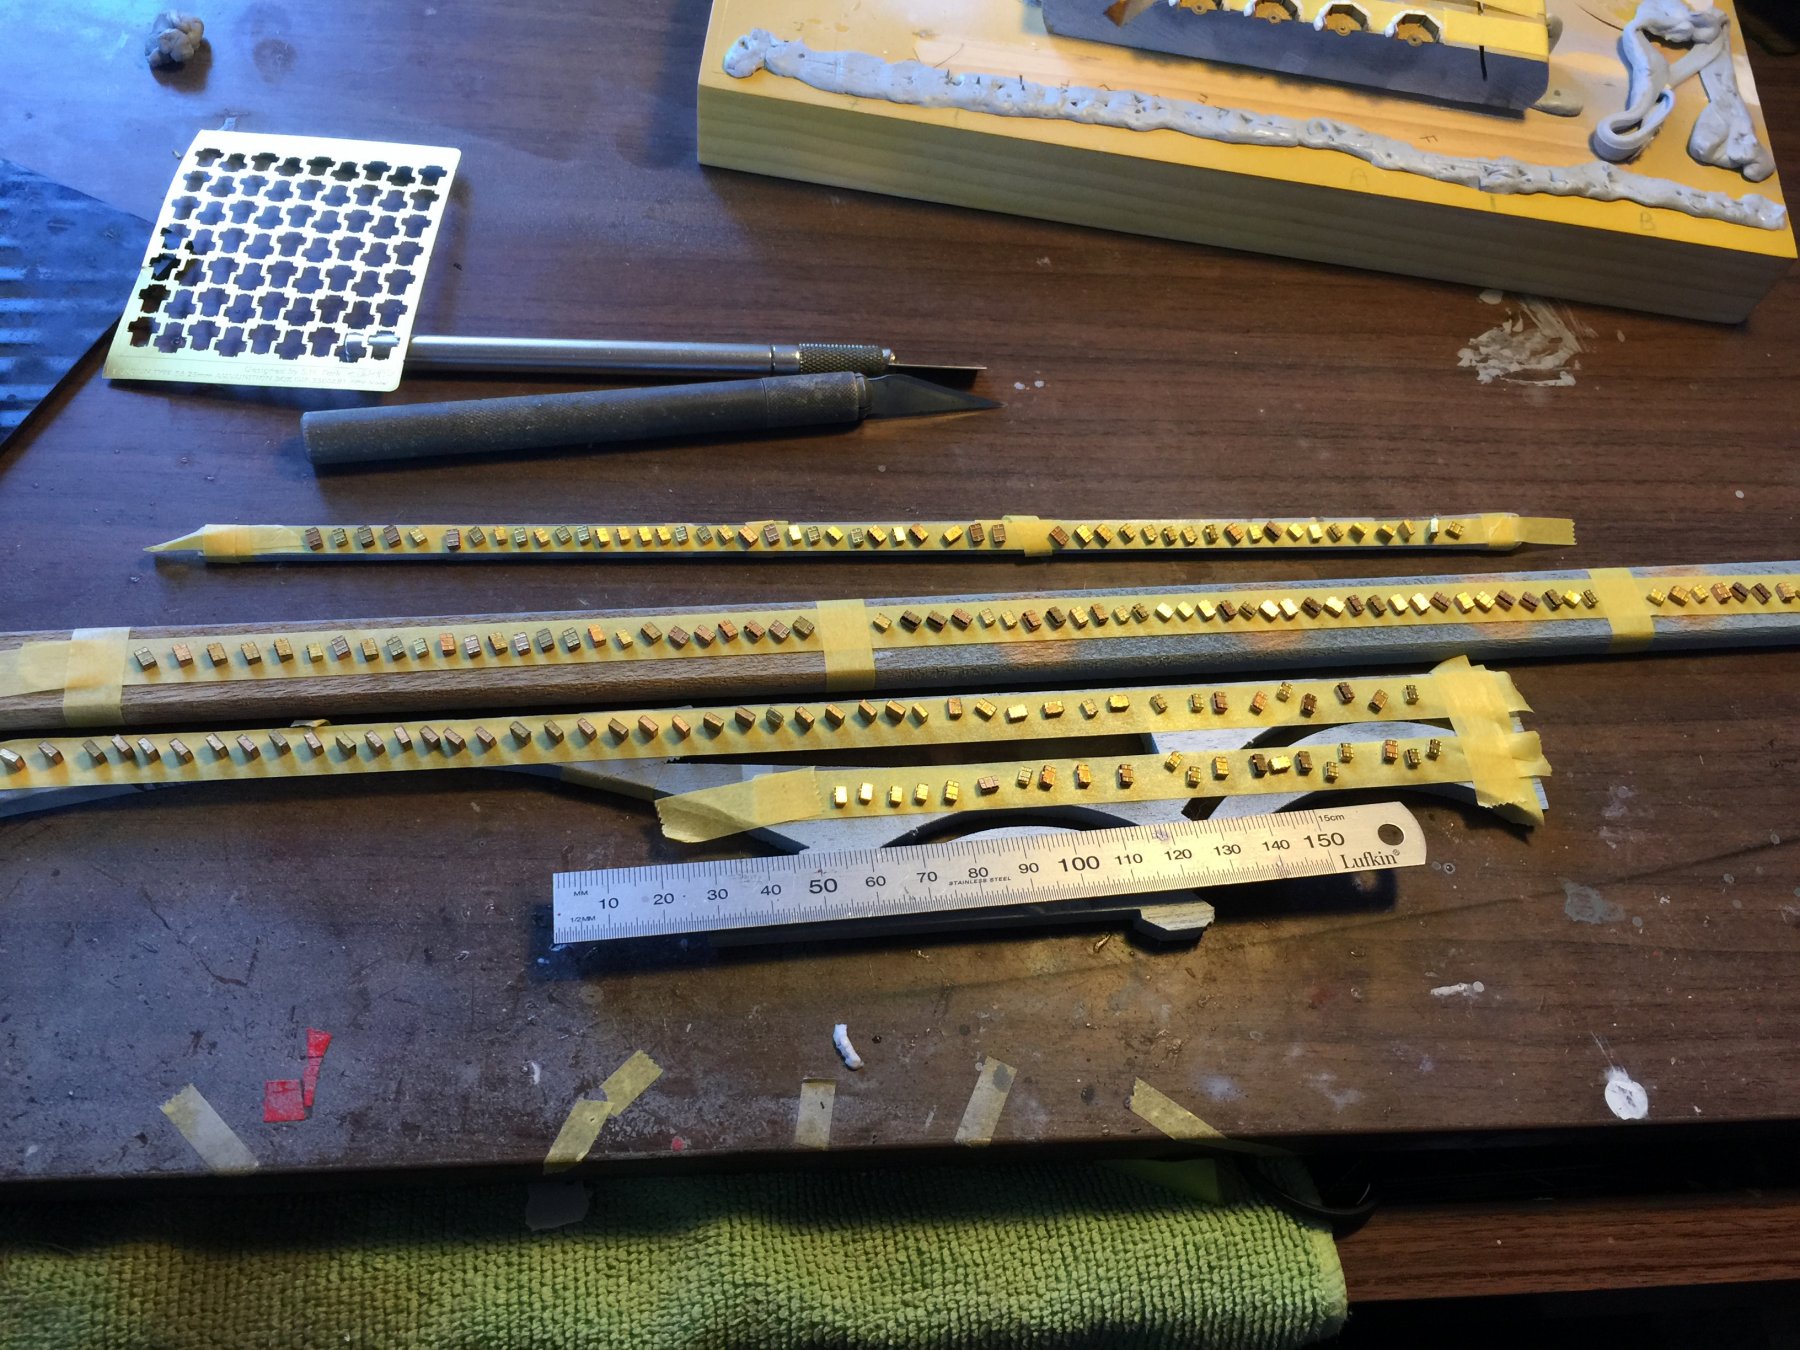
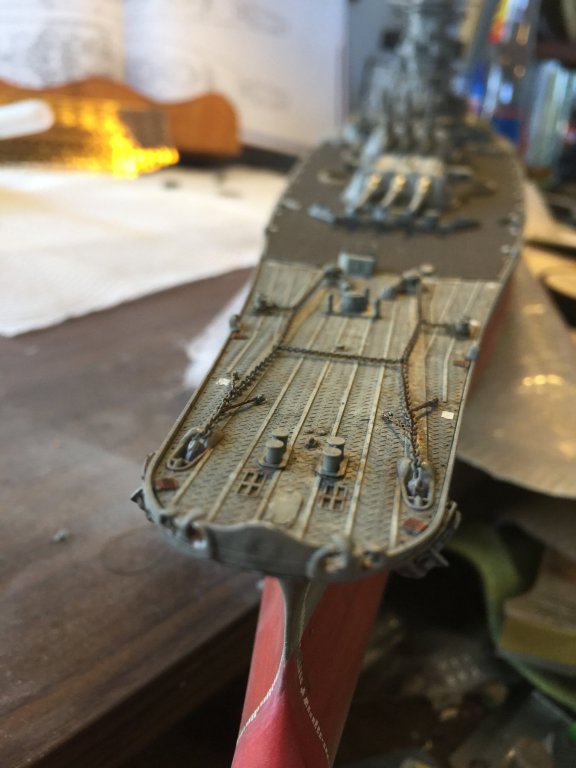
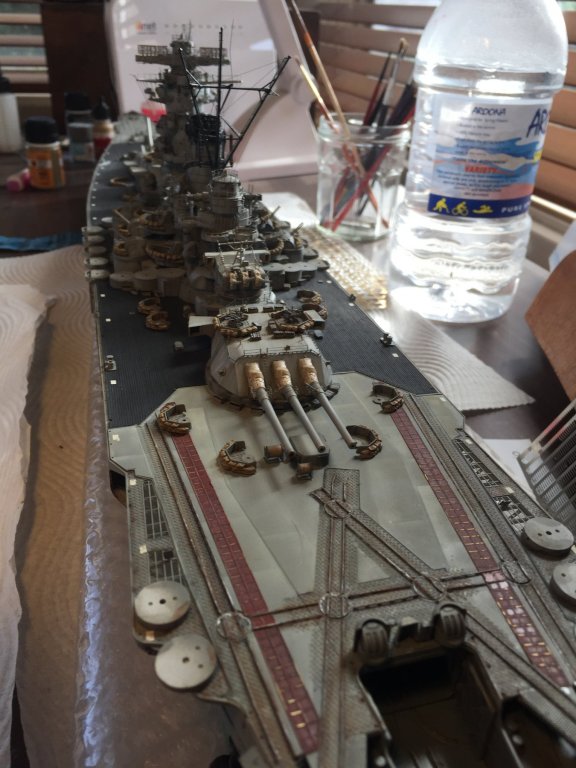
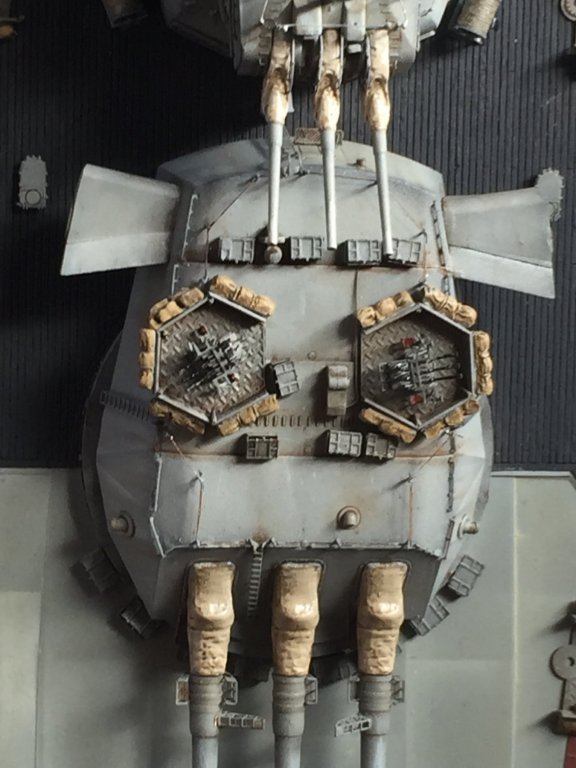
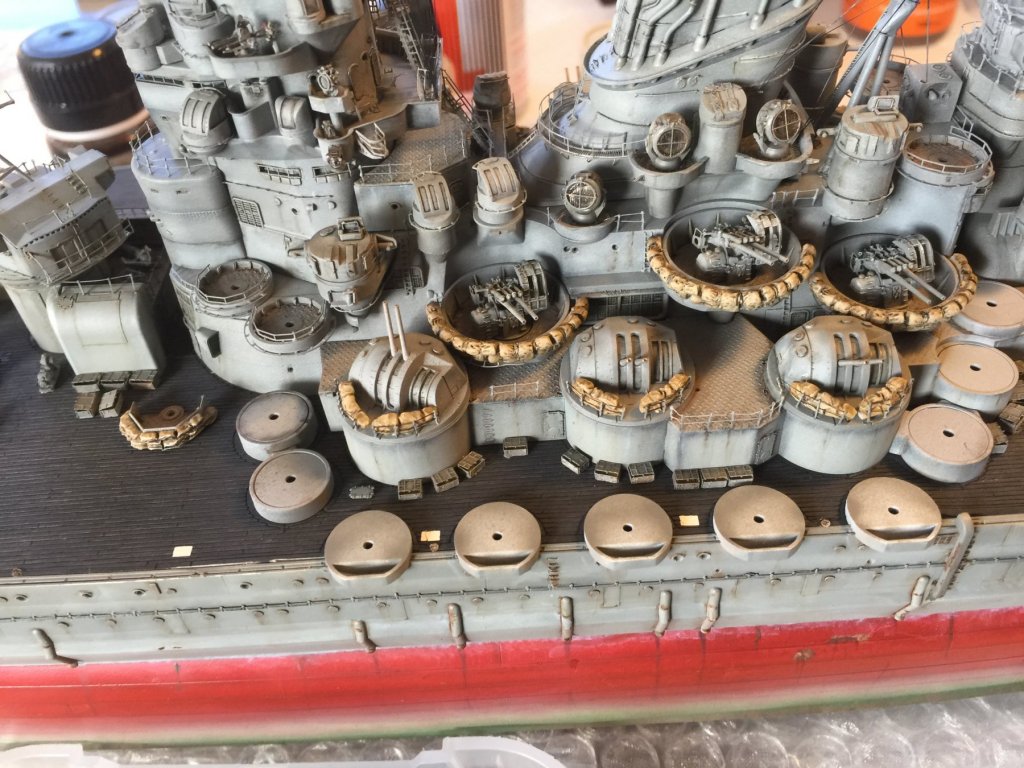
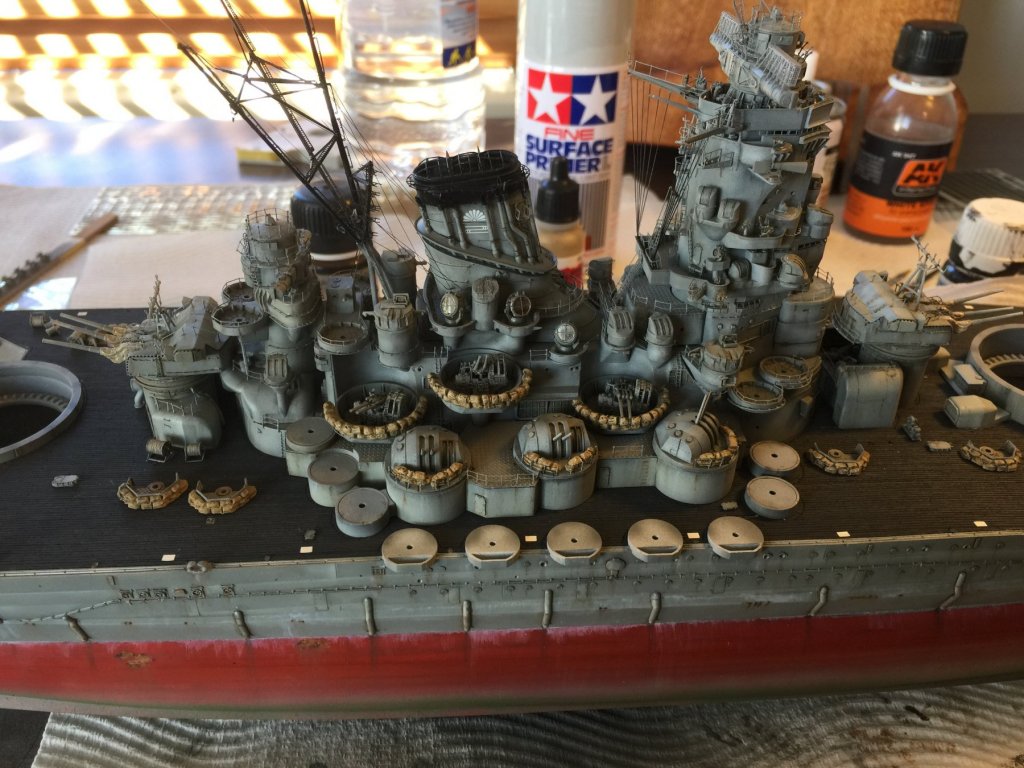
After 3 hours of repairs, the big guns are done. Ammo boxes added and the AA guns, finally looks like a battle ship. As the 25mm's are so fragile I will leave the rest of them to last, but I really don't want to tempt fate by removing the big guns again.

- 743 replies
-
- 24
-
-
They come as a set with the upgrade. The ammo boxes have now been added and the big guns would have been added if I didn't drop the box and break them all. That's tomorrow's job, the plan is to have the big guns done and on. There are also support struts which will have to go on the high angle guns and this part of the build will be complete. I can then then do the anchors and chains, then make a start on the ships boats and aircraft. I am aware that the Yamato got rid of them at the end but why would I go to all this pain and not do them? Once that it done one I can do the flagstaffs and rigging and then the stanchions. Id like to see a few more of you tackle some photo etch! The metalwork on many of the wooden builds is just outstanding.
- 743 replies
-
- 17
-
-
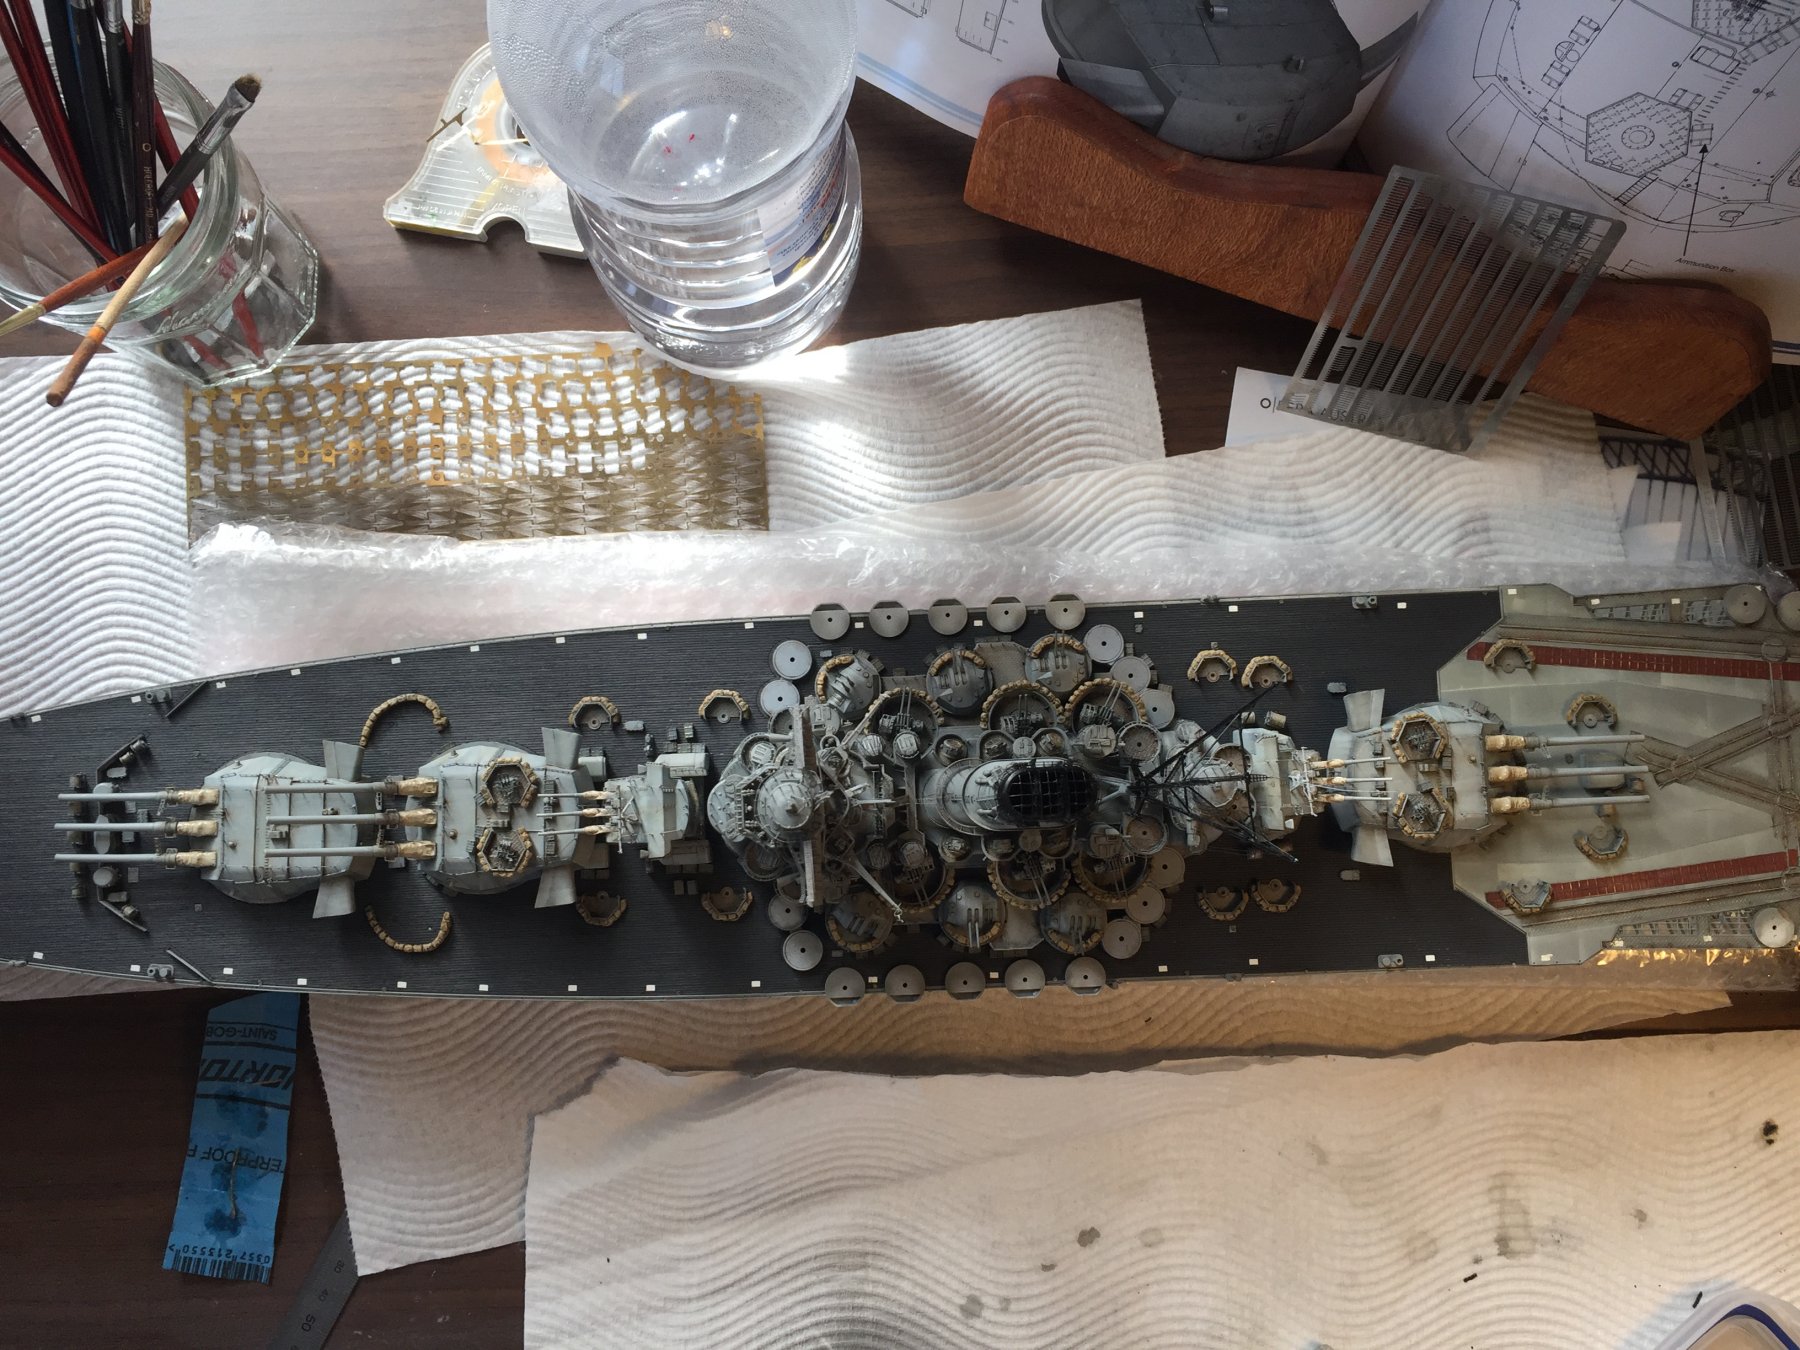
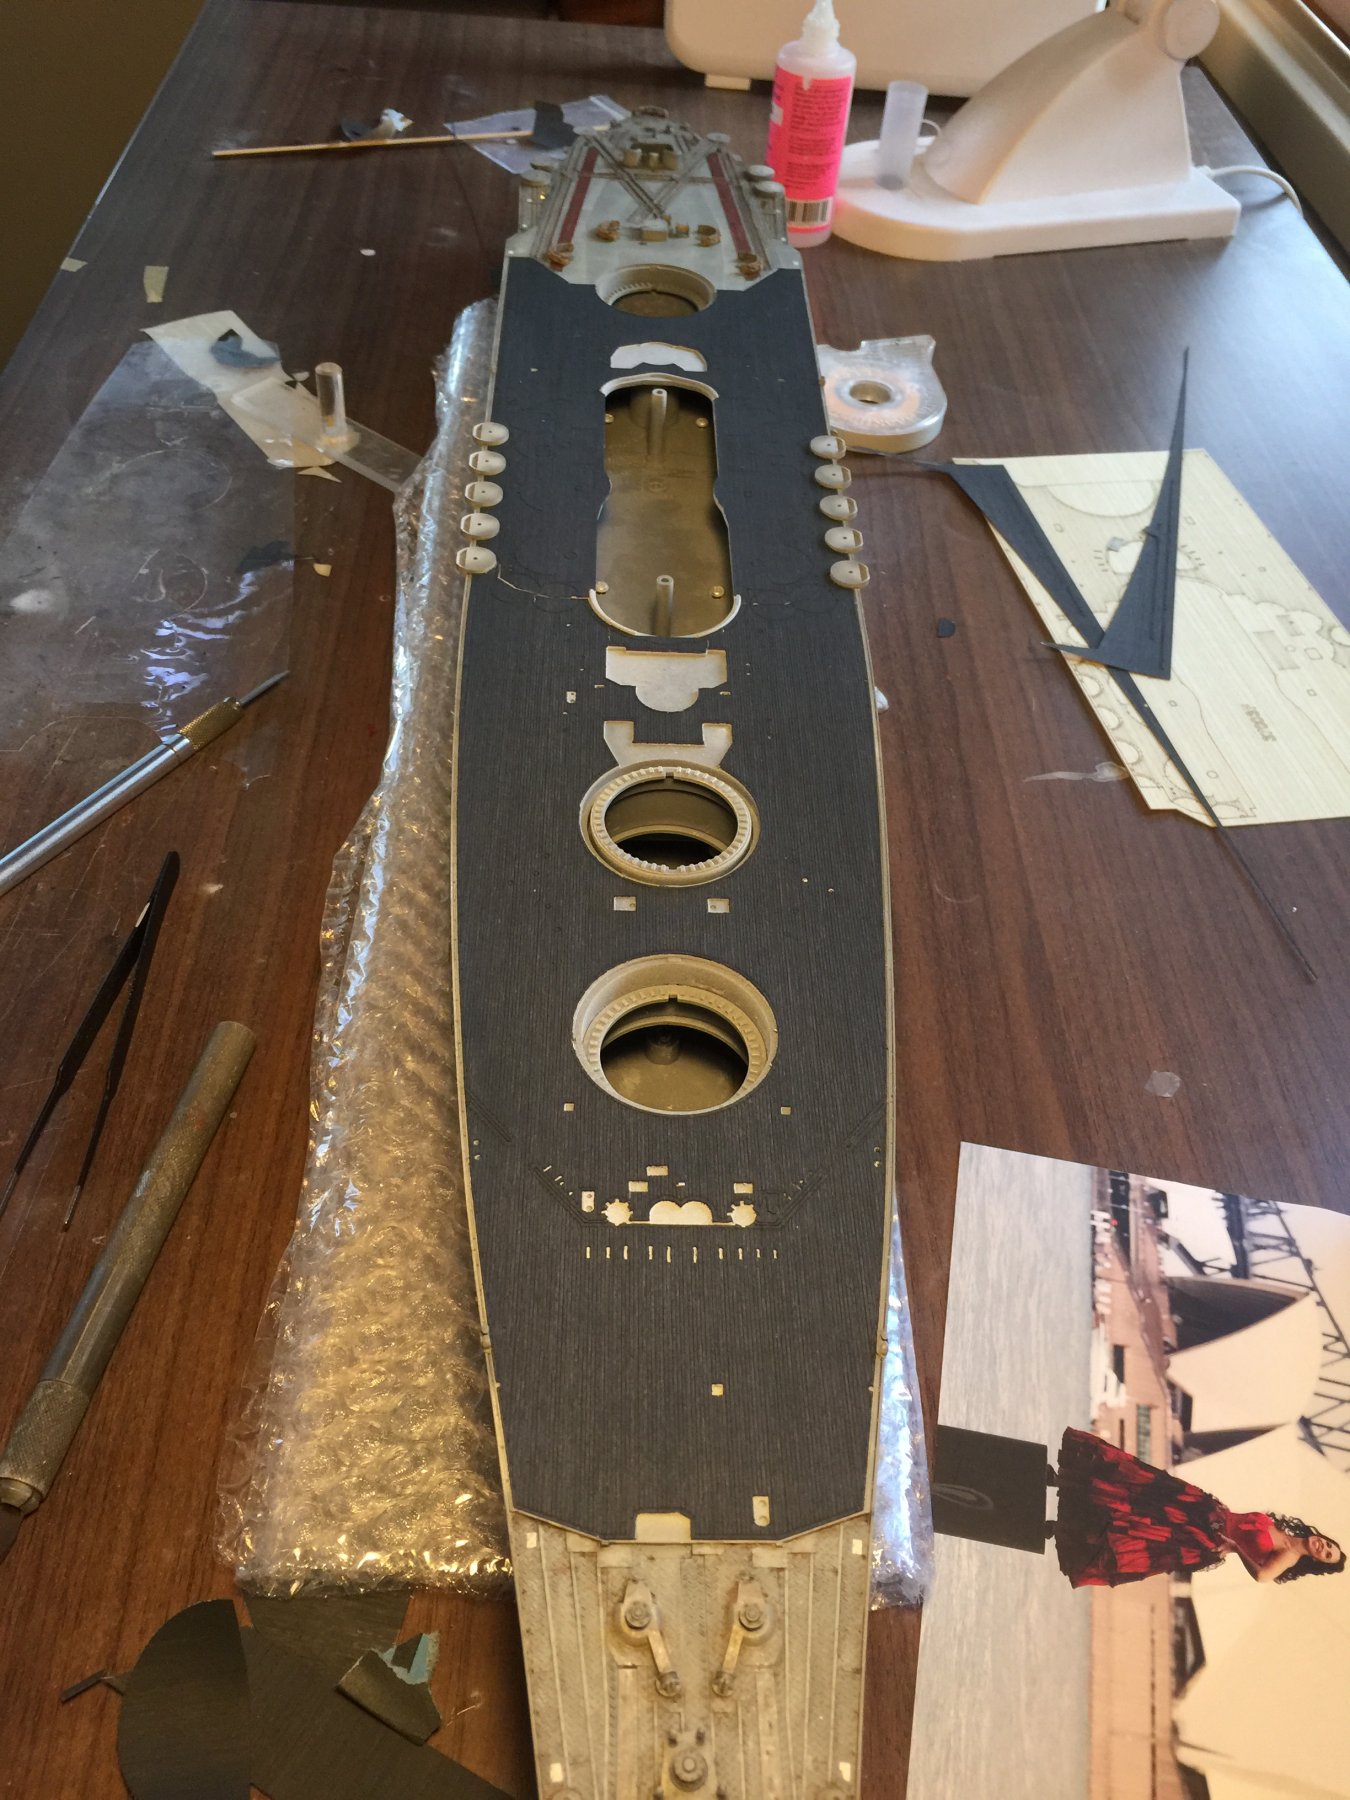
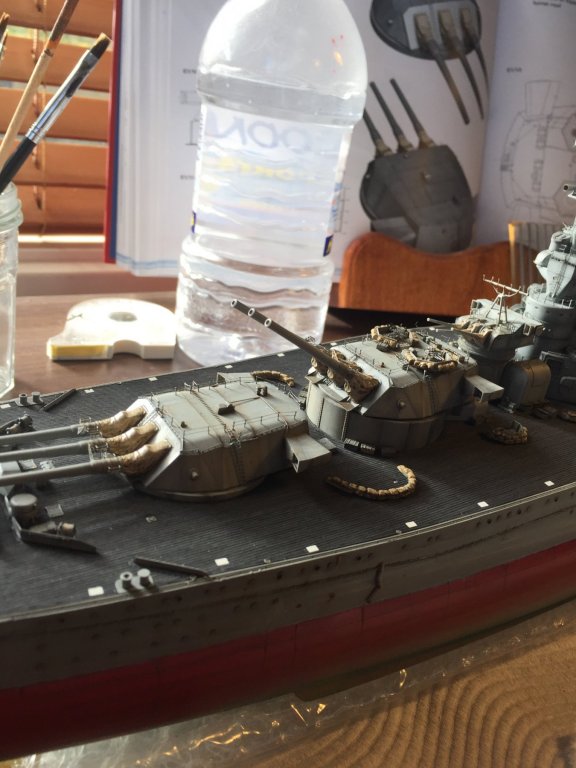
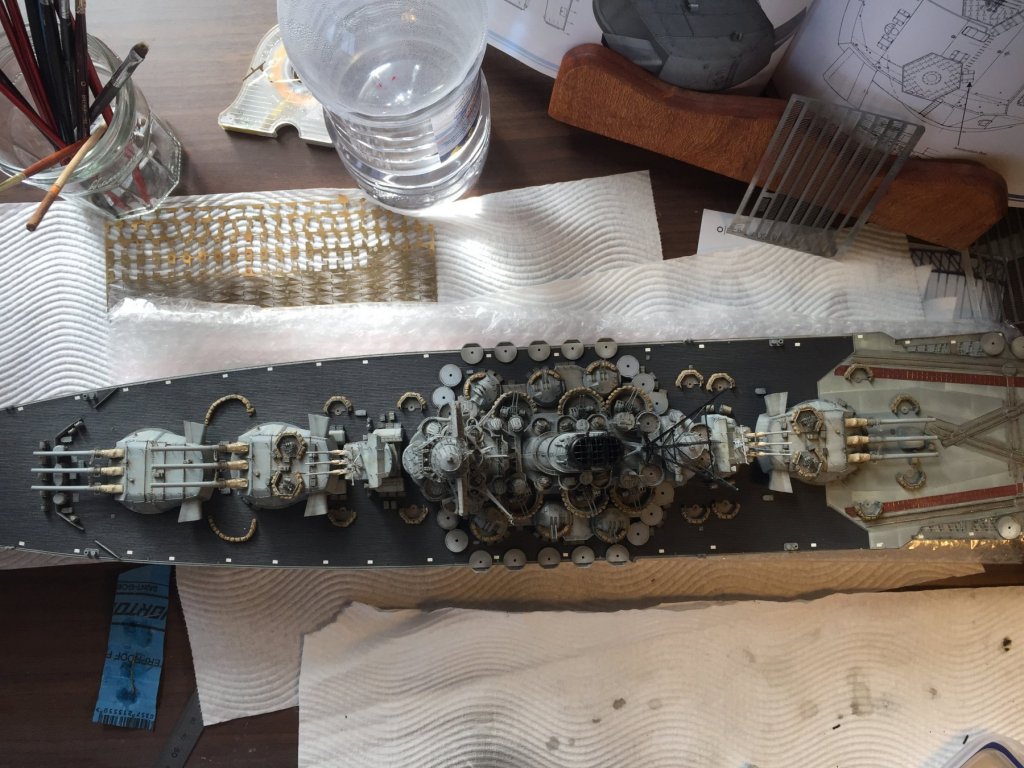
Today's update, the breakwater and secondary guns added as well as a lot of deck fittings. Lots of ammo boxes to add yet too.
- 743 replies
-
- 17
-
-
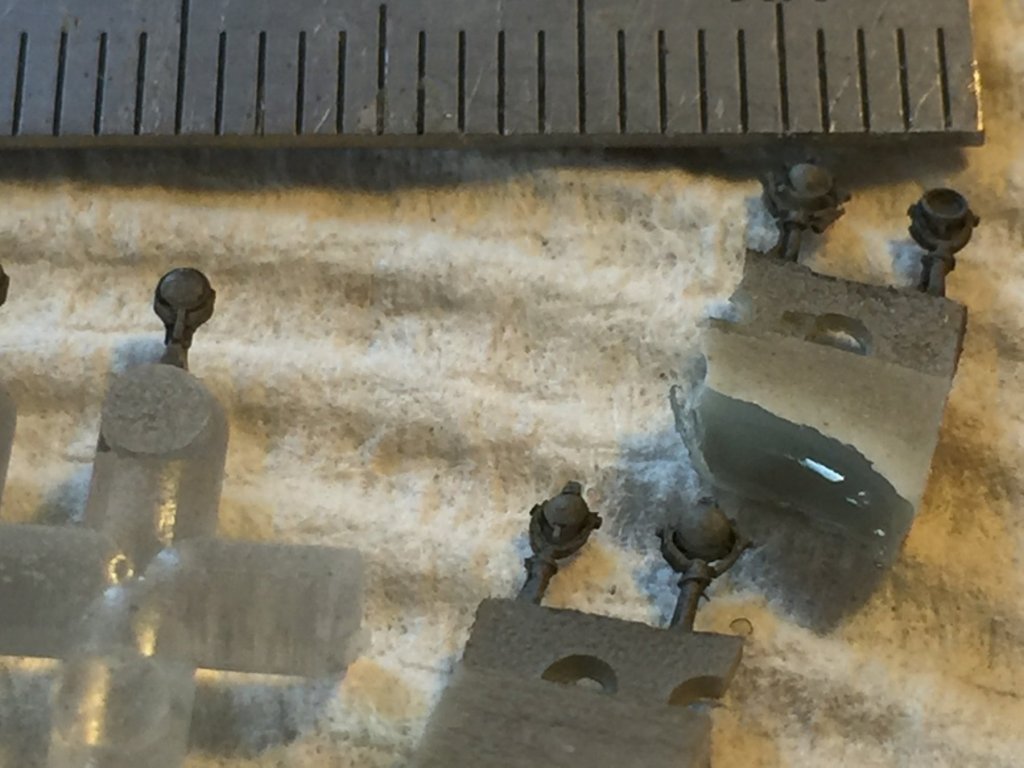
It's amazing how quickly a small piece of PE can fly, hit warp speed and disappear forever
-
Cog, we'll both keep finding PE forever. There are a quarter of a million things to go.
-
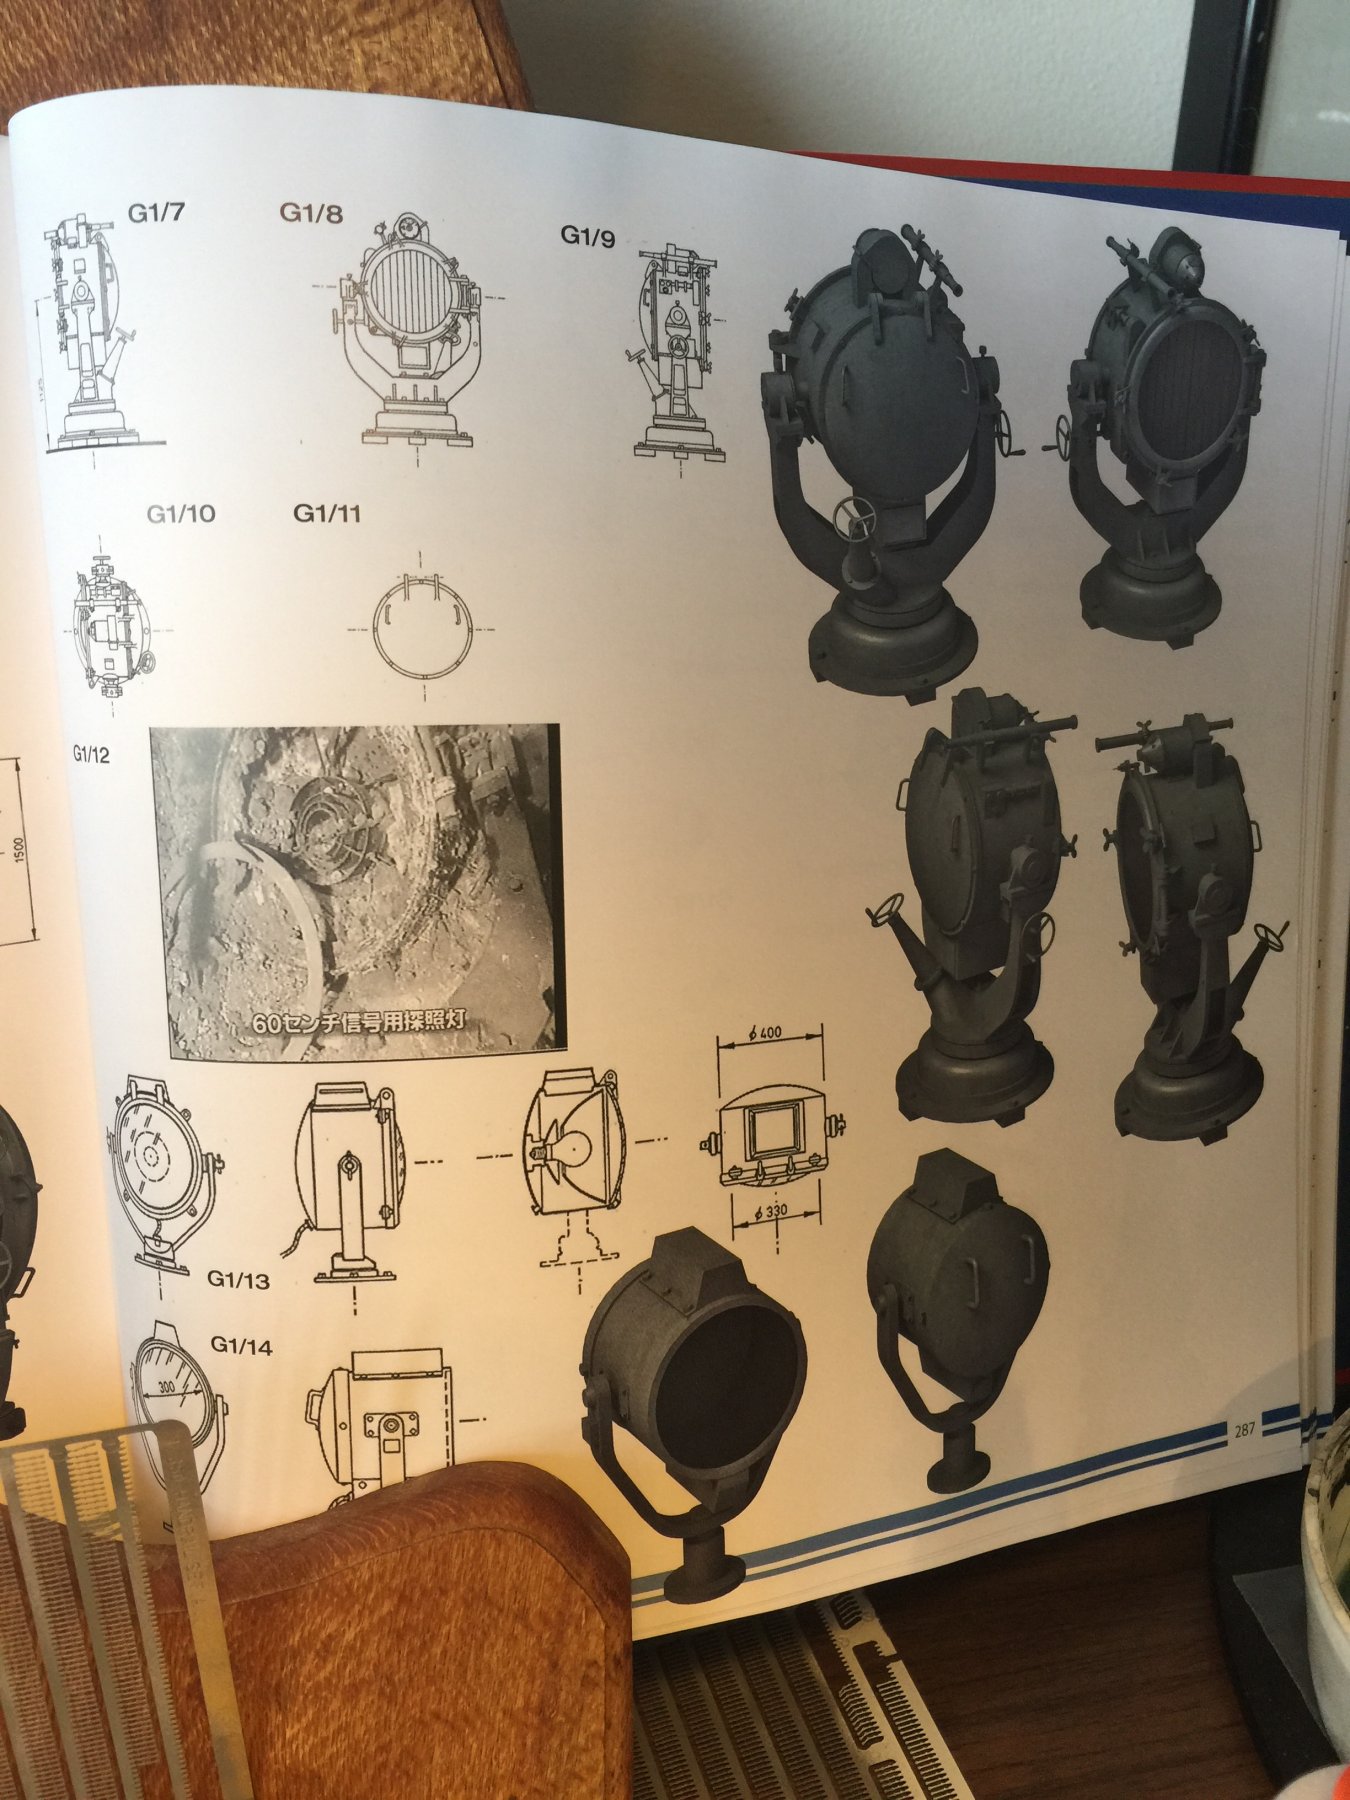
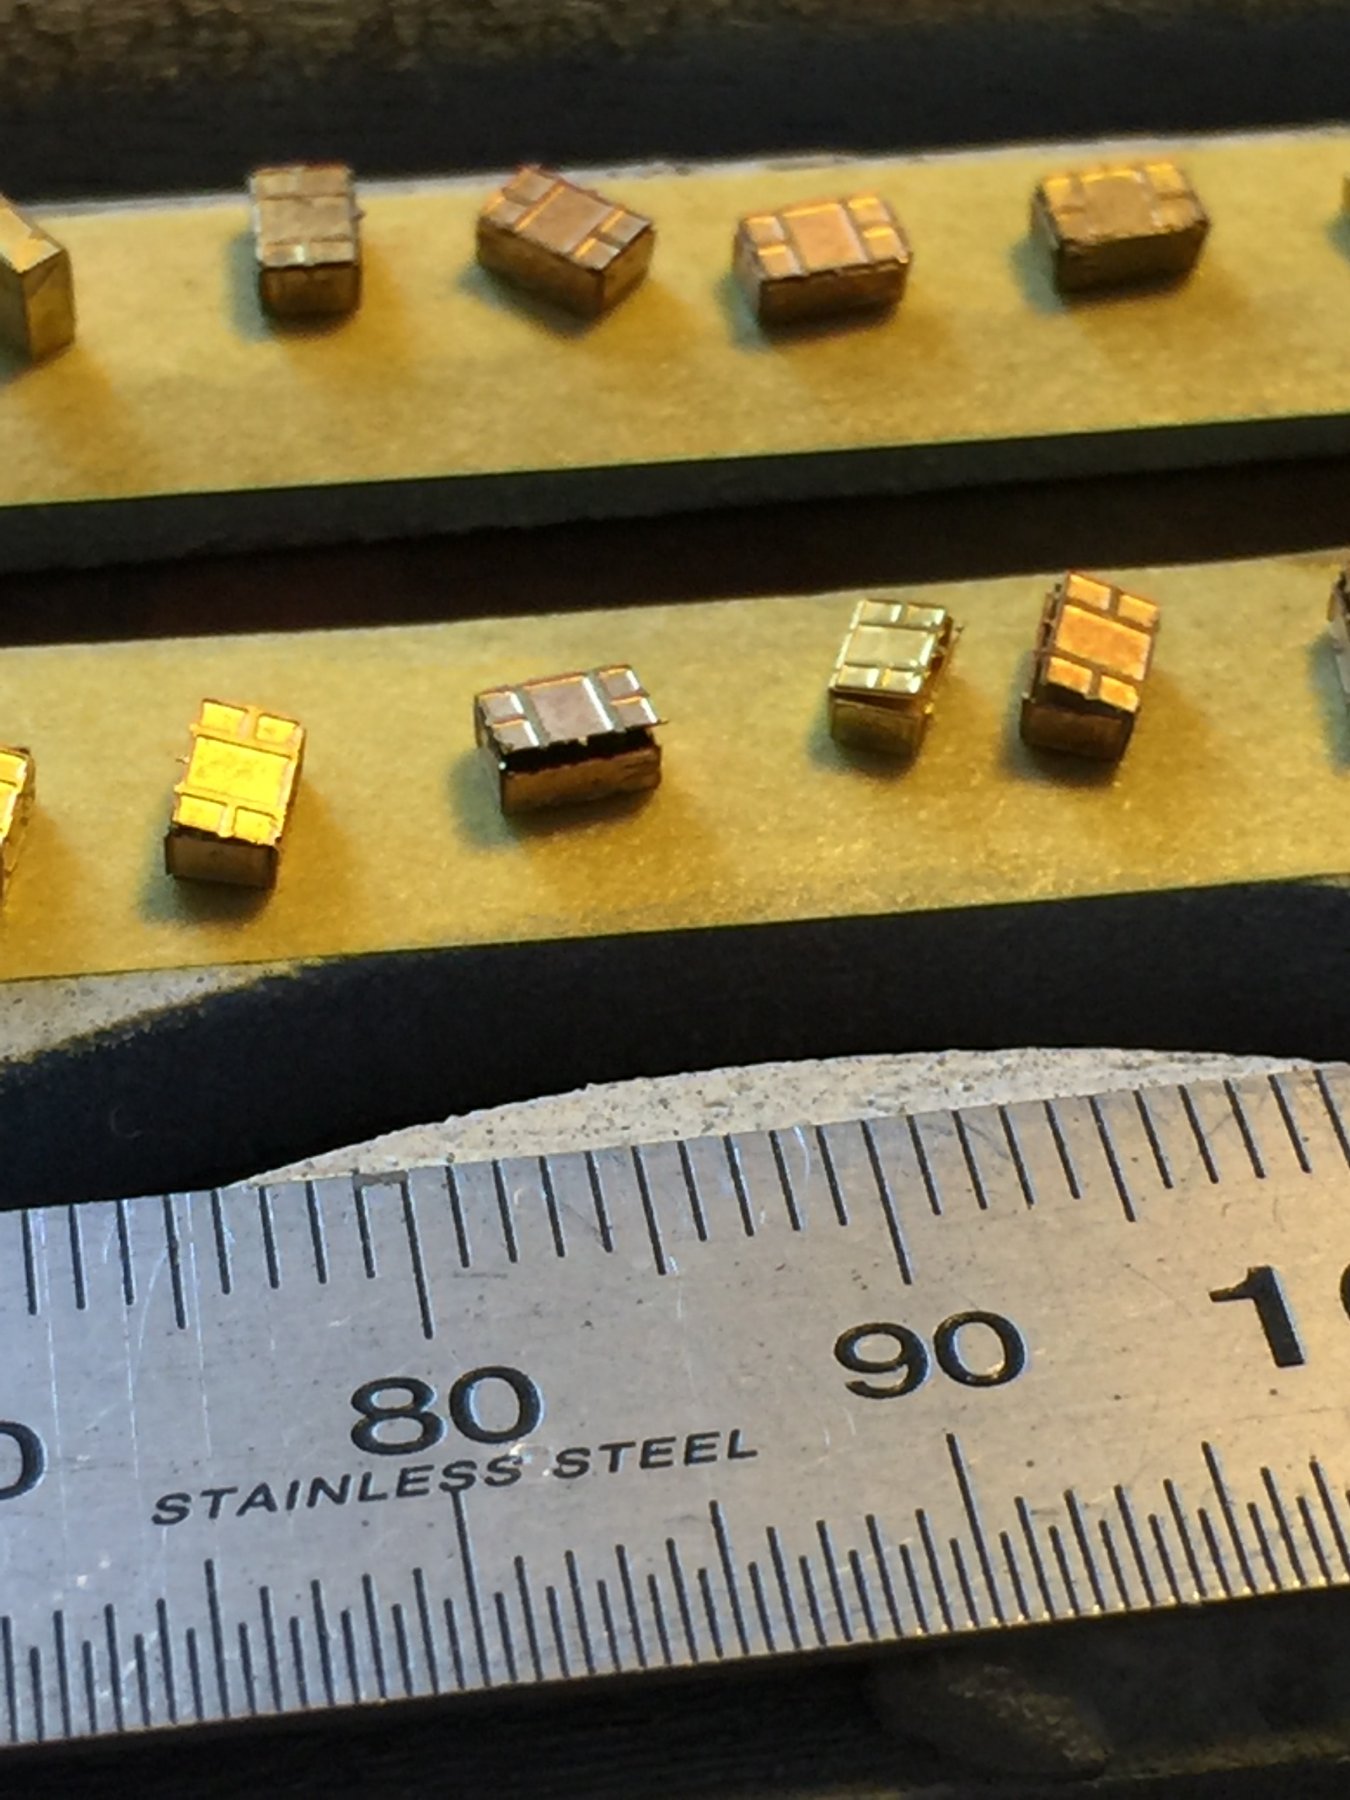
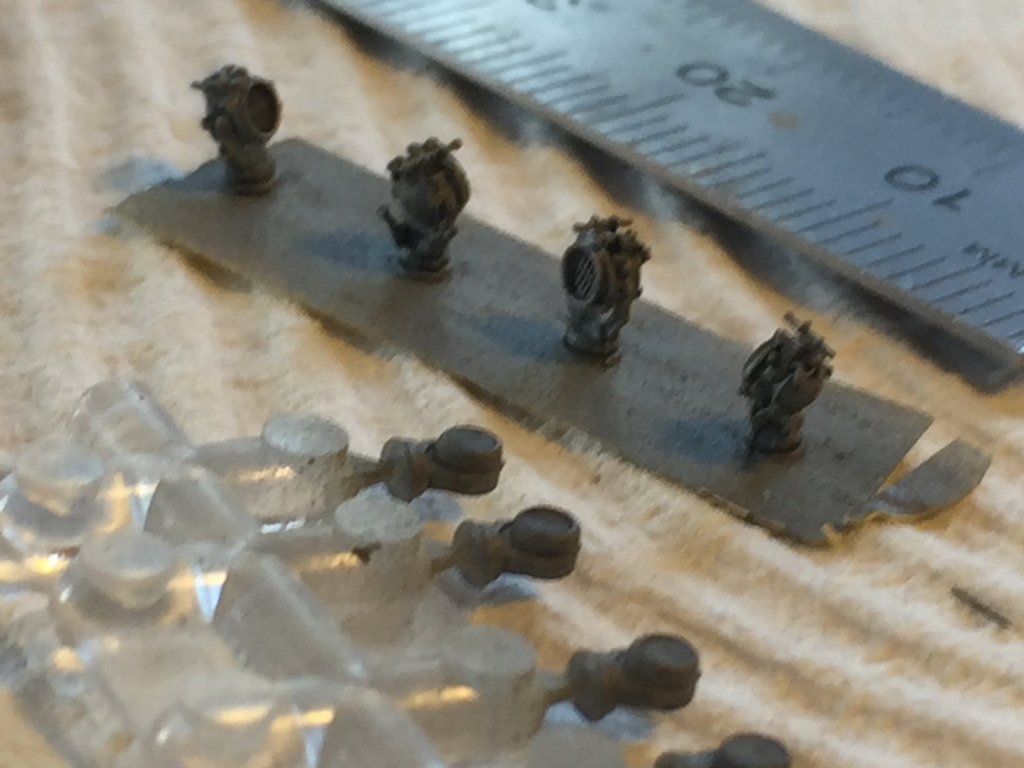
Smaller spotlights, Tamiya make some nice featureless little blobs in Clark glass. This is why I like aftermarket as it is so detailed. When you compare the two you can't go back.

- 743 replies
-
- 11
-
-
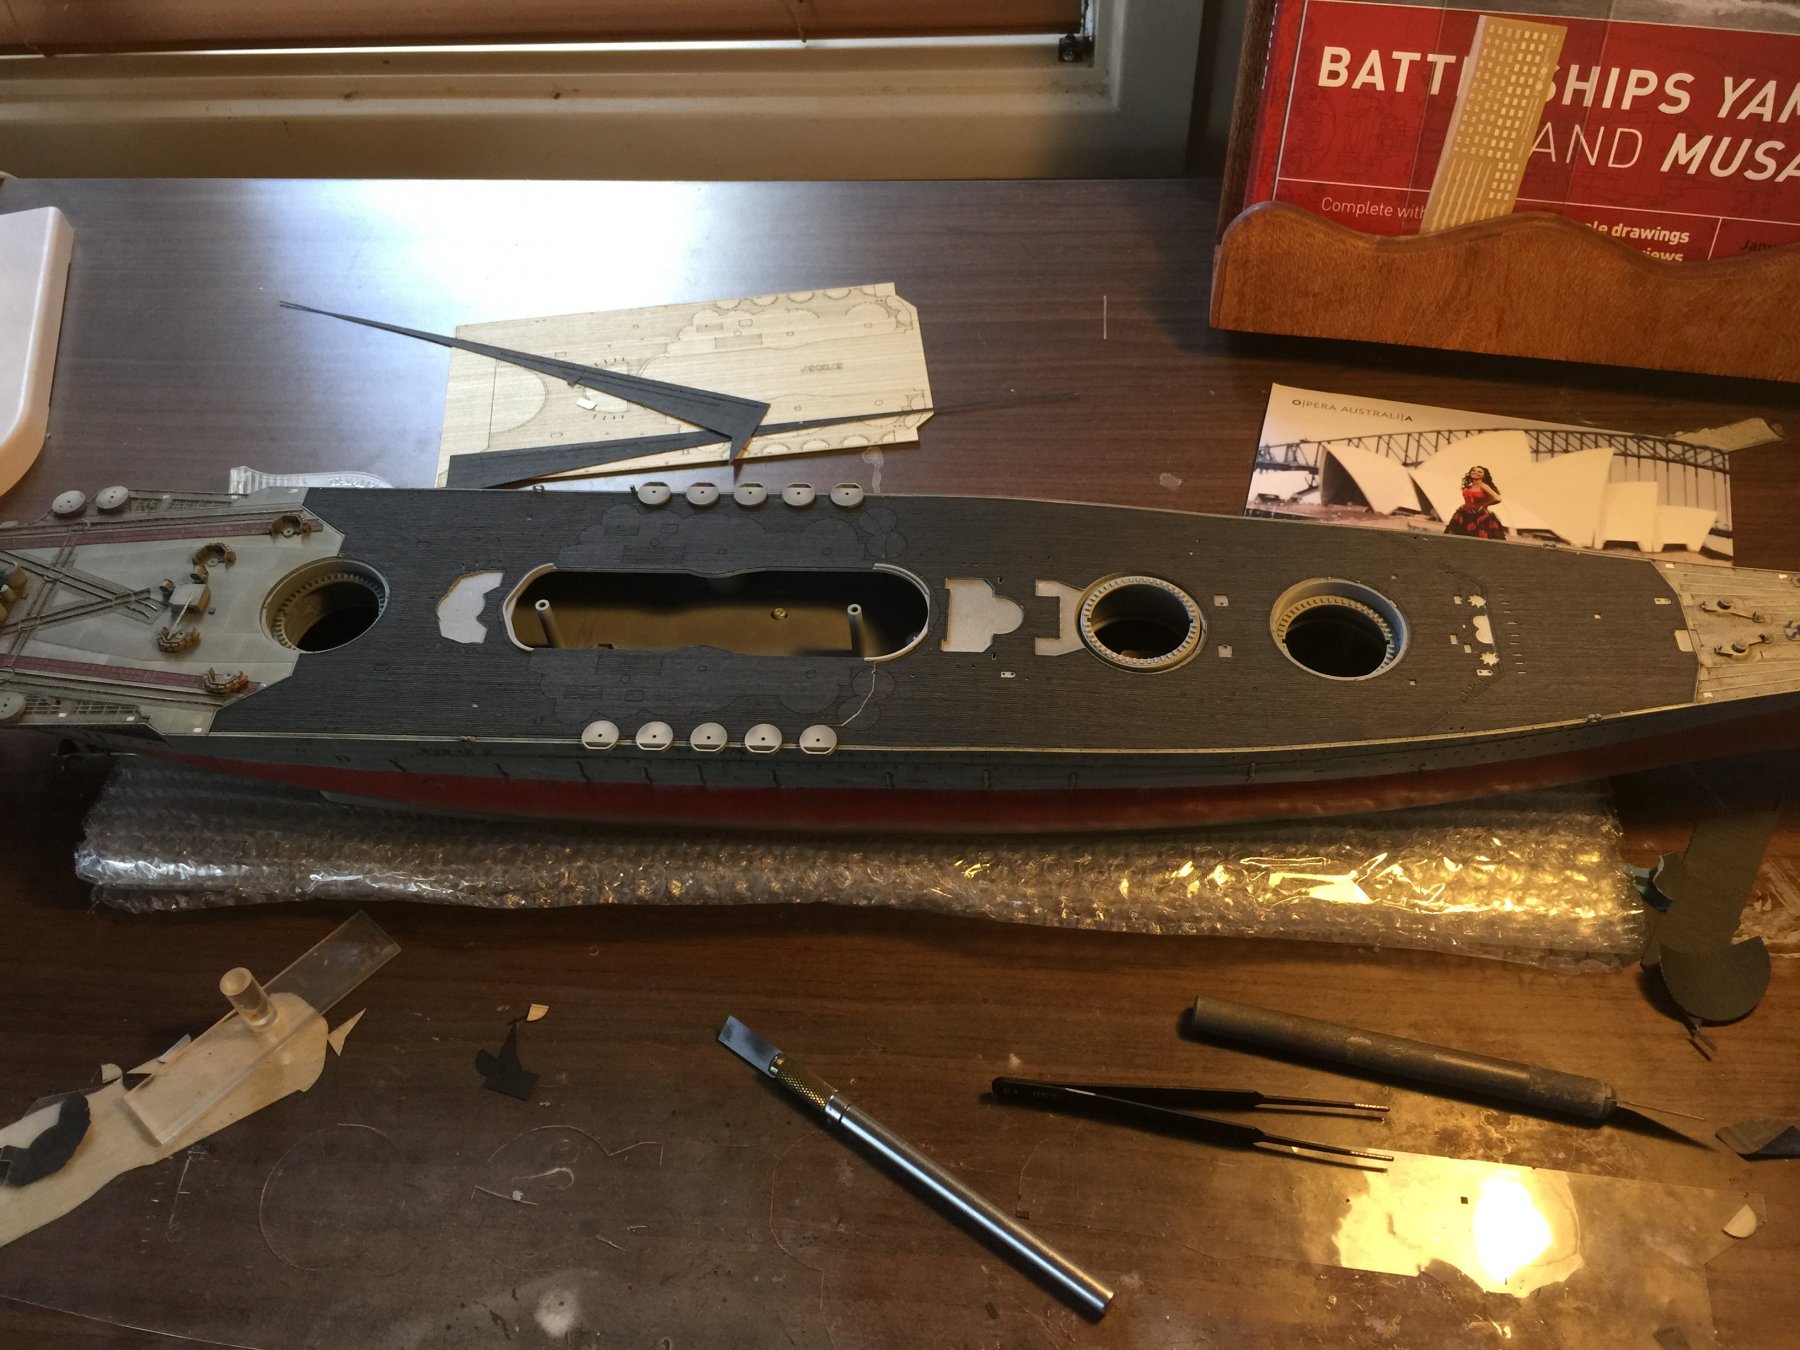
When I recieved the Pontos upgrade it has a natural colour deck but for its final mission it was painted black. I tried on an offcut to stain it black but as it is so waxy the stain did not take, so I ordered the after-after market black deck (from Japan no less at the same price as Oz). Yesterday I get this large box full of bubble wrap and the black deck on the date they promised it. Now, nerve wrackingly later, here it is. I can now progress with the build. And try and figure out how to weather it. I'm thinking some pastels in powder form perhaps. Suggestions anyone?


- 743 replies
-
- 13
-
-
Paul, I have been using this set during the build (and on previous builds too). Cog, I think a jigsaw would take less back strain, 5 folds each after cutting them off the fret. They're going to each need a few tiny drops of glue.
-
Yes, I have been looking at that as Infini models has a nice upgrade, the bloke was the primary engineer for Pontos and left, but I'm very tempted by an Isuzu was well as there are a lot of improvements to make on it. How's the back?
-
Well, I tried the run on decals, too hard so went with the Tamiya ones. I did drop the container will all the big guns in it today, took me an hour to find NEARLY all the bits that fell off, can't find 2 of the sandbags which I'll make from spares. Annoying but not the end of the world to fix. A few hours work. Im currently working on the deck fittings and dreading making up about 170 ammo boxes and placing individual stanchions for the entire ship, plus boats and aircraft. As to the weathering, Utube is your friend, and the excellent airbrush recommend by banyan. You just can't do this without one. I reckon 3 months to go. I really want to build something smaller next (in this scale) so I'm open to suggestions. I now have an inside job for at least 6 months and no coaching duties until October.
- 743 replies
-
- 10
-