RGL
-
Posts
5,554 -
Joined
-
Last visited
Content Type
Profiles
Forums
Gallery
Events
Everything posted by RGL
-
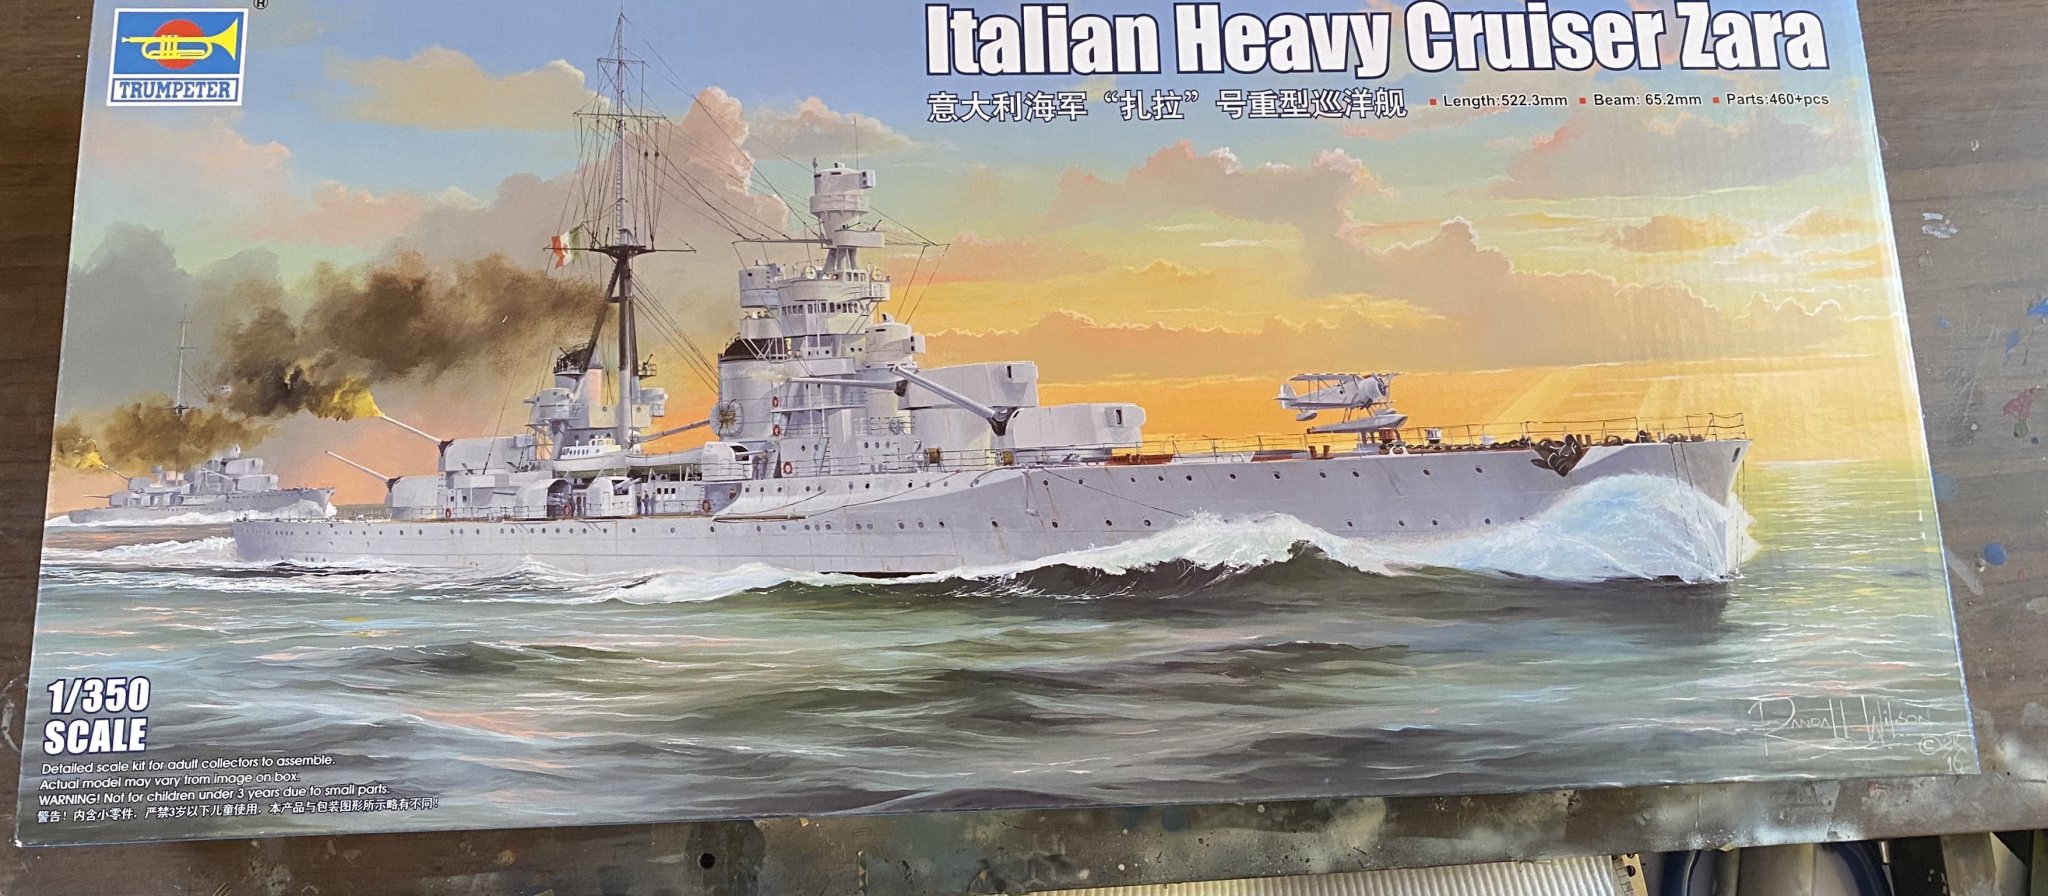
 I’m awaiting upgrades from Russia for my next major build, but for the next few months it will be Zara
- 45 replies
-
- 6
-

-
- orp ślązak
- mirage hobby
- (and 2 more)
-
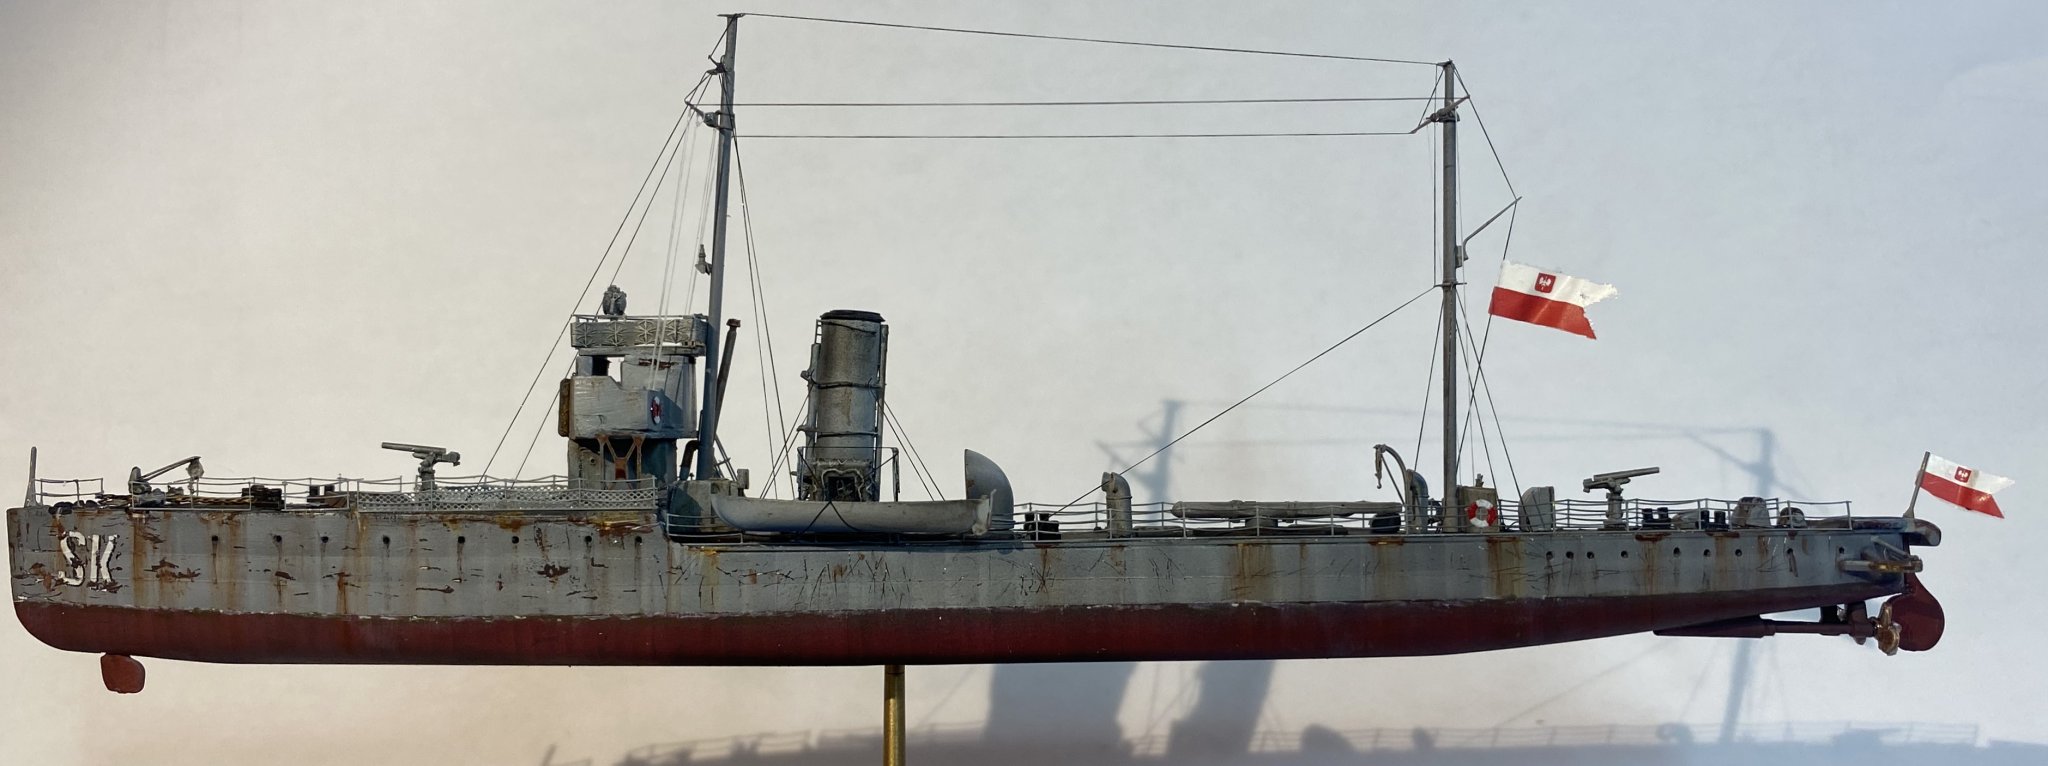
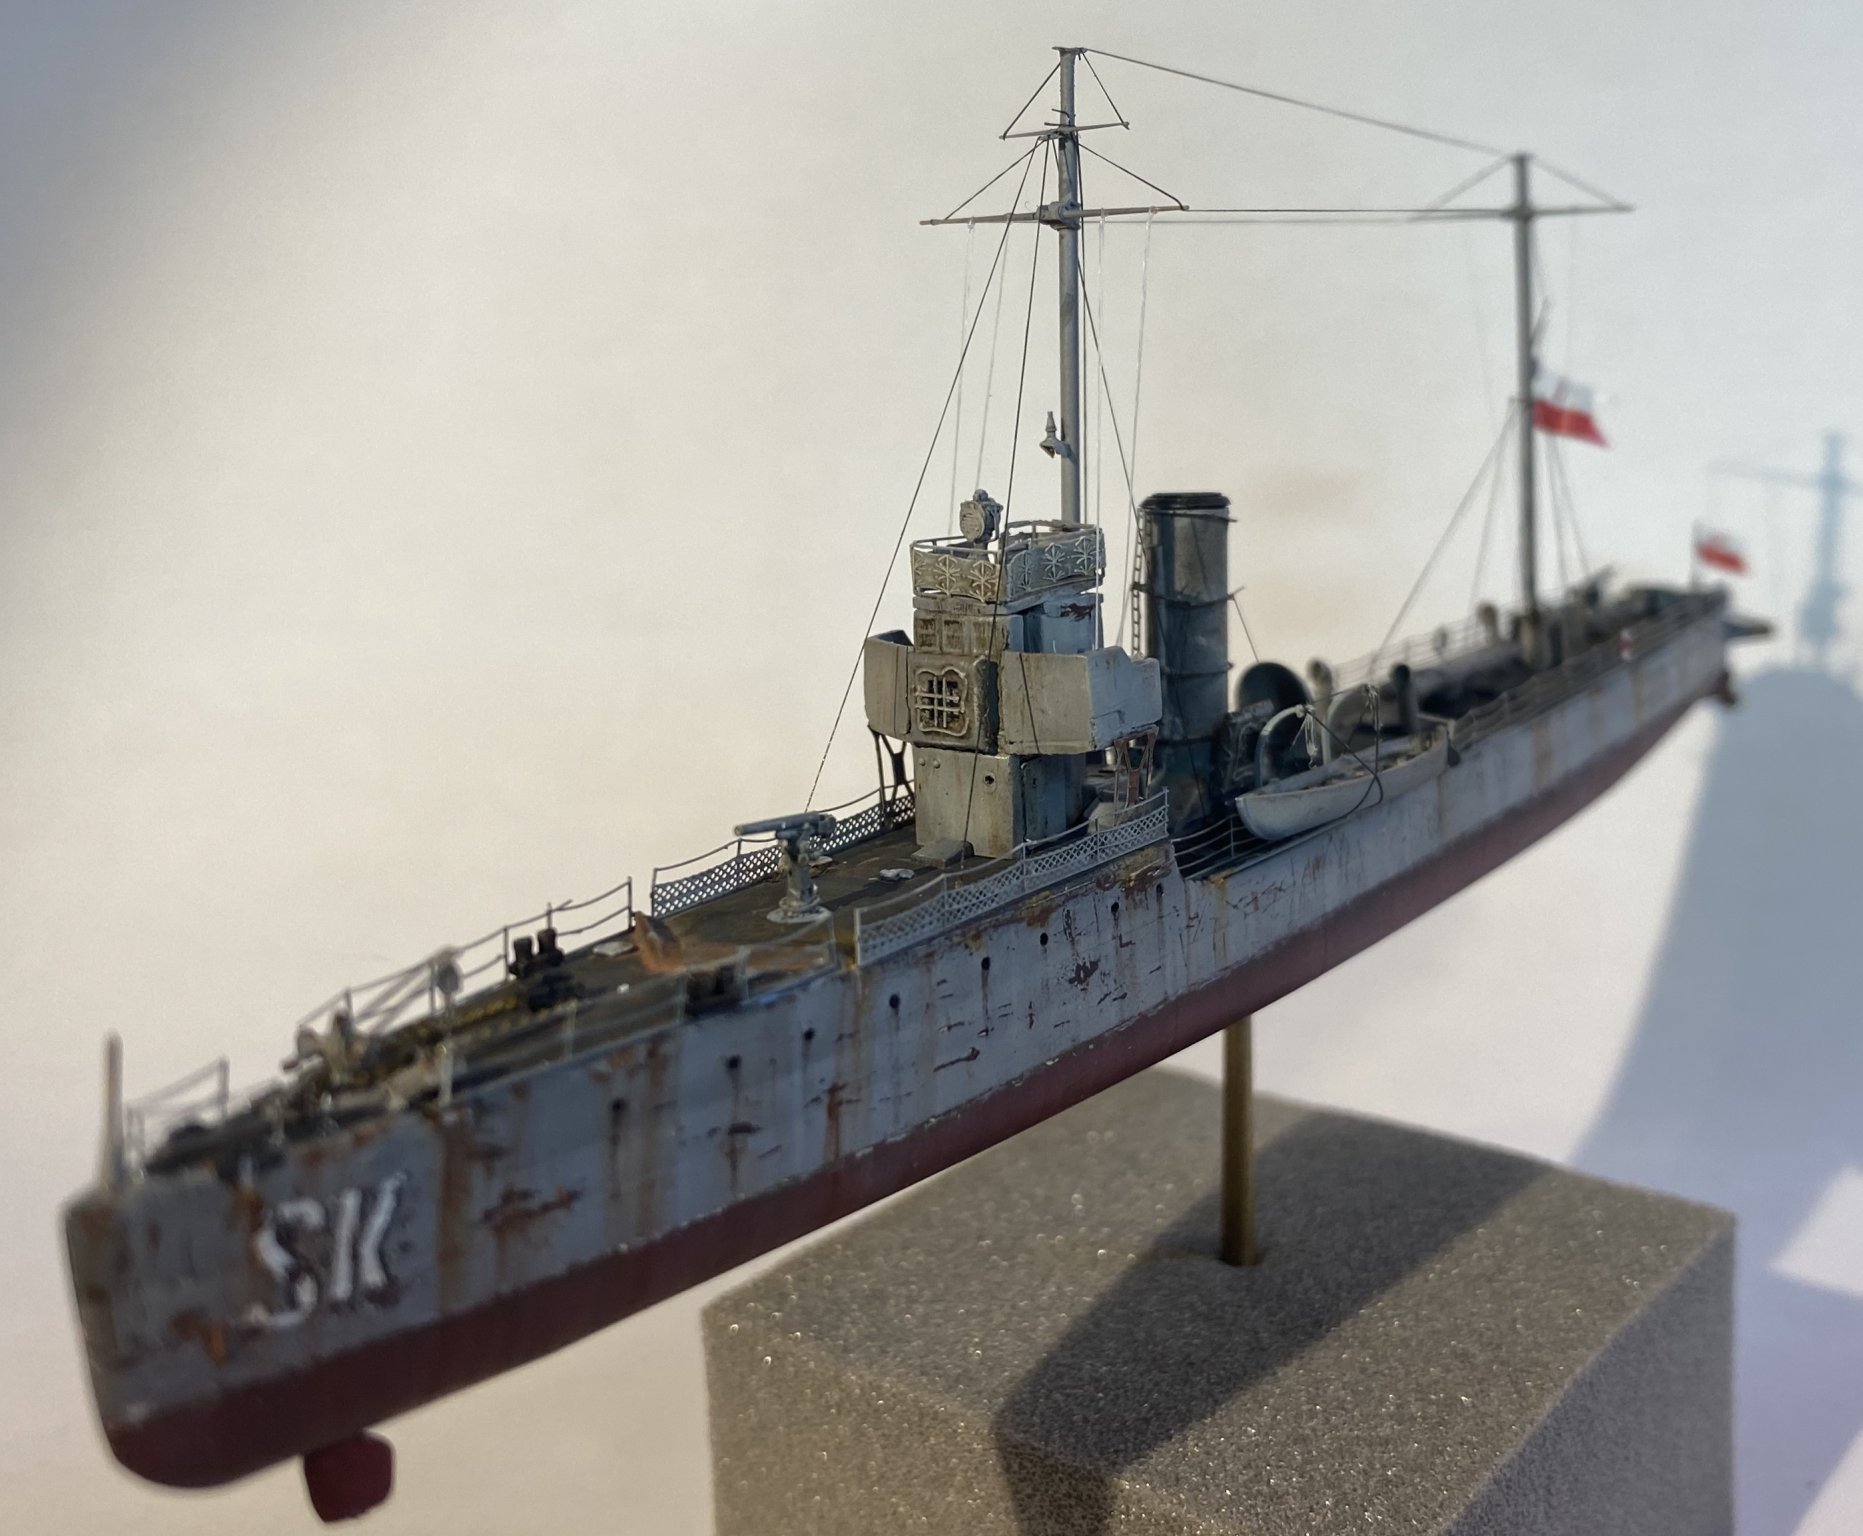
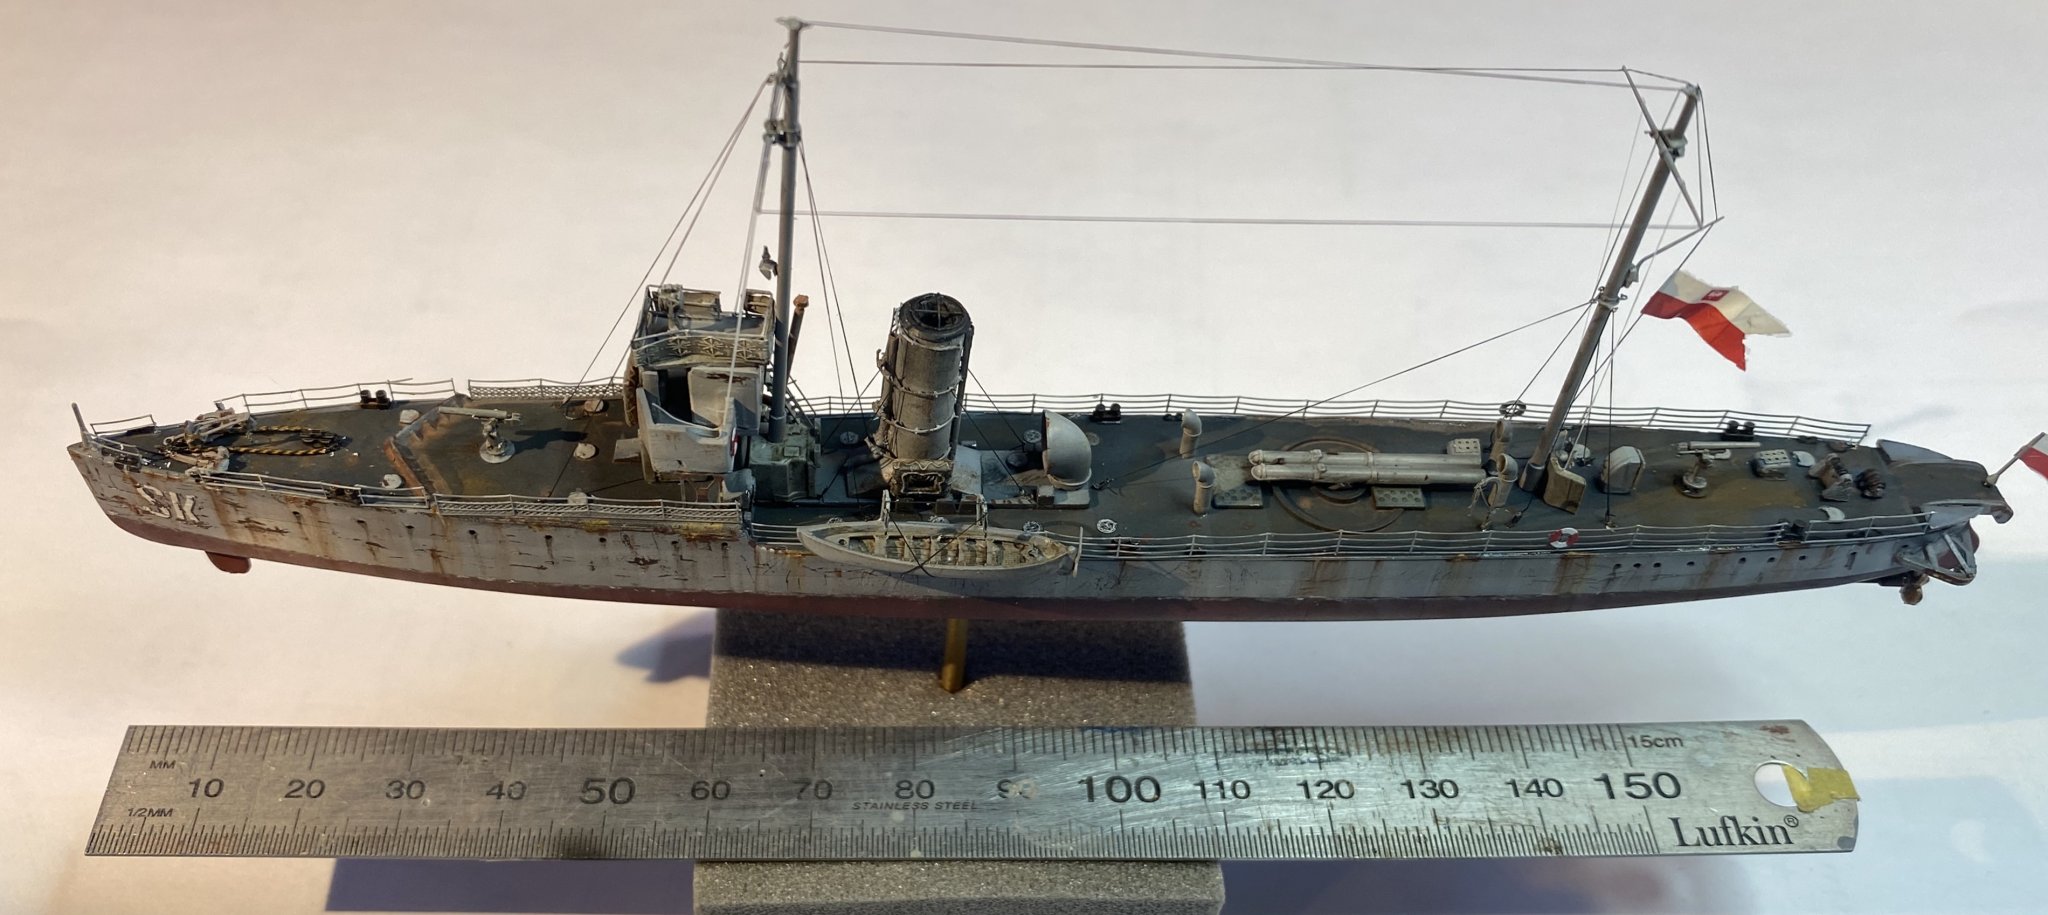
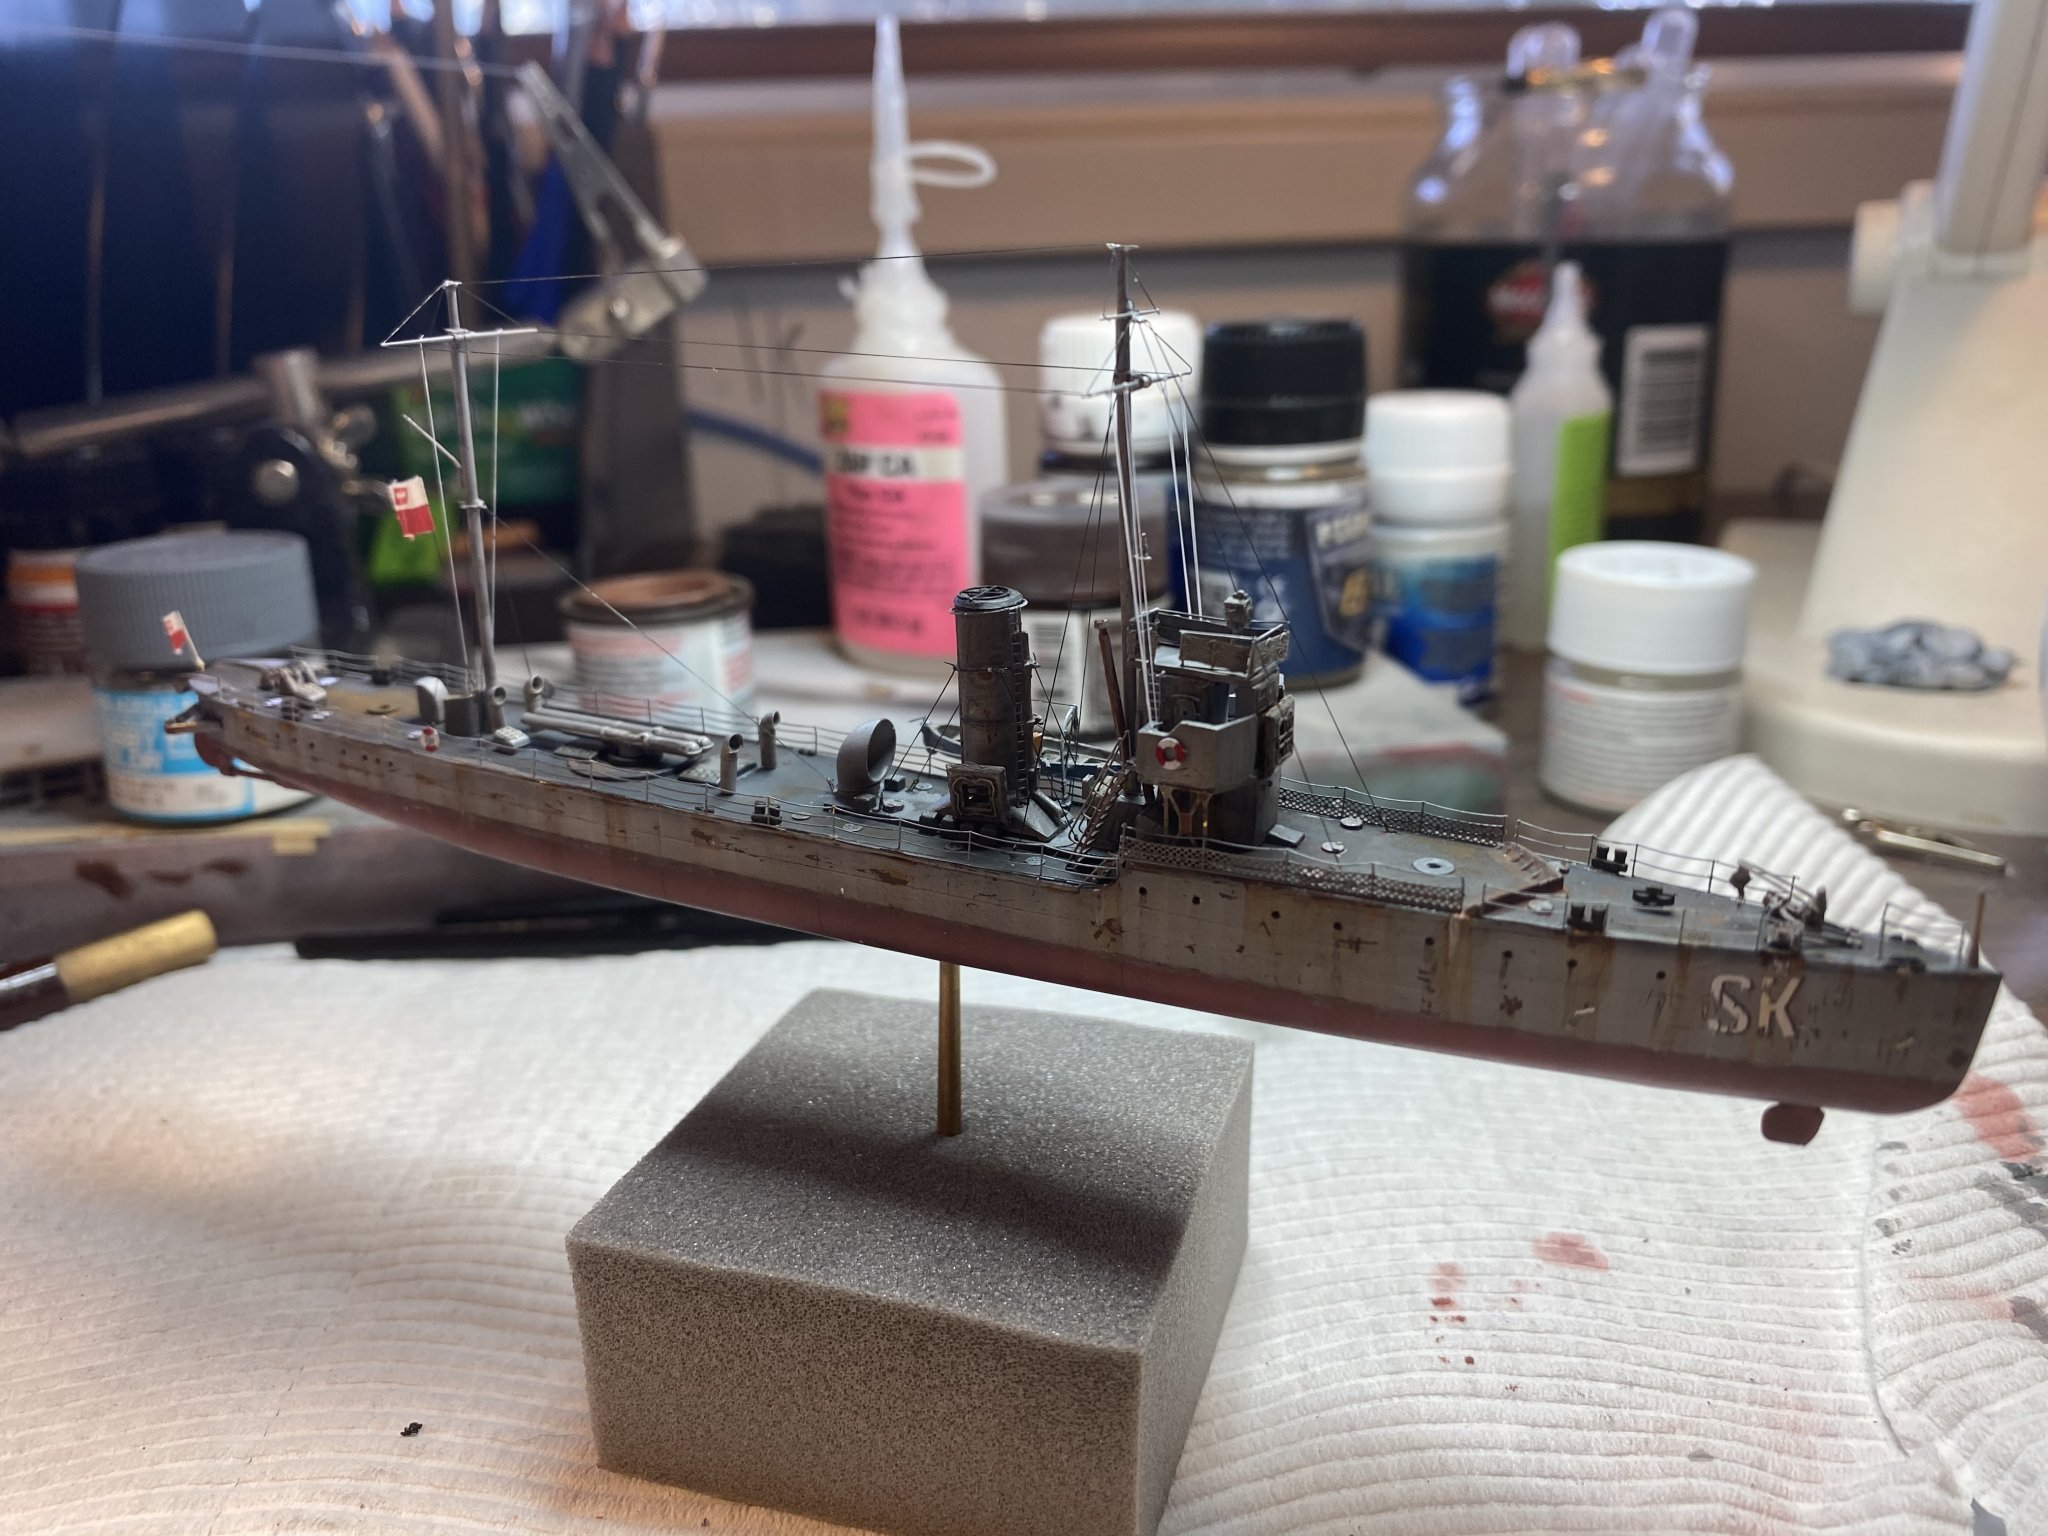
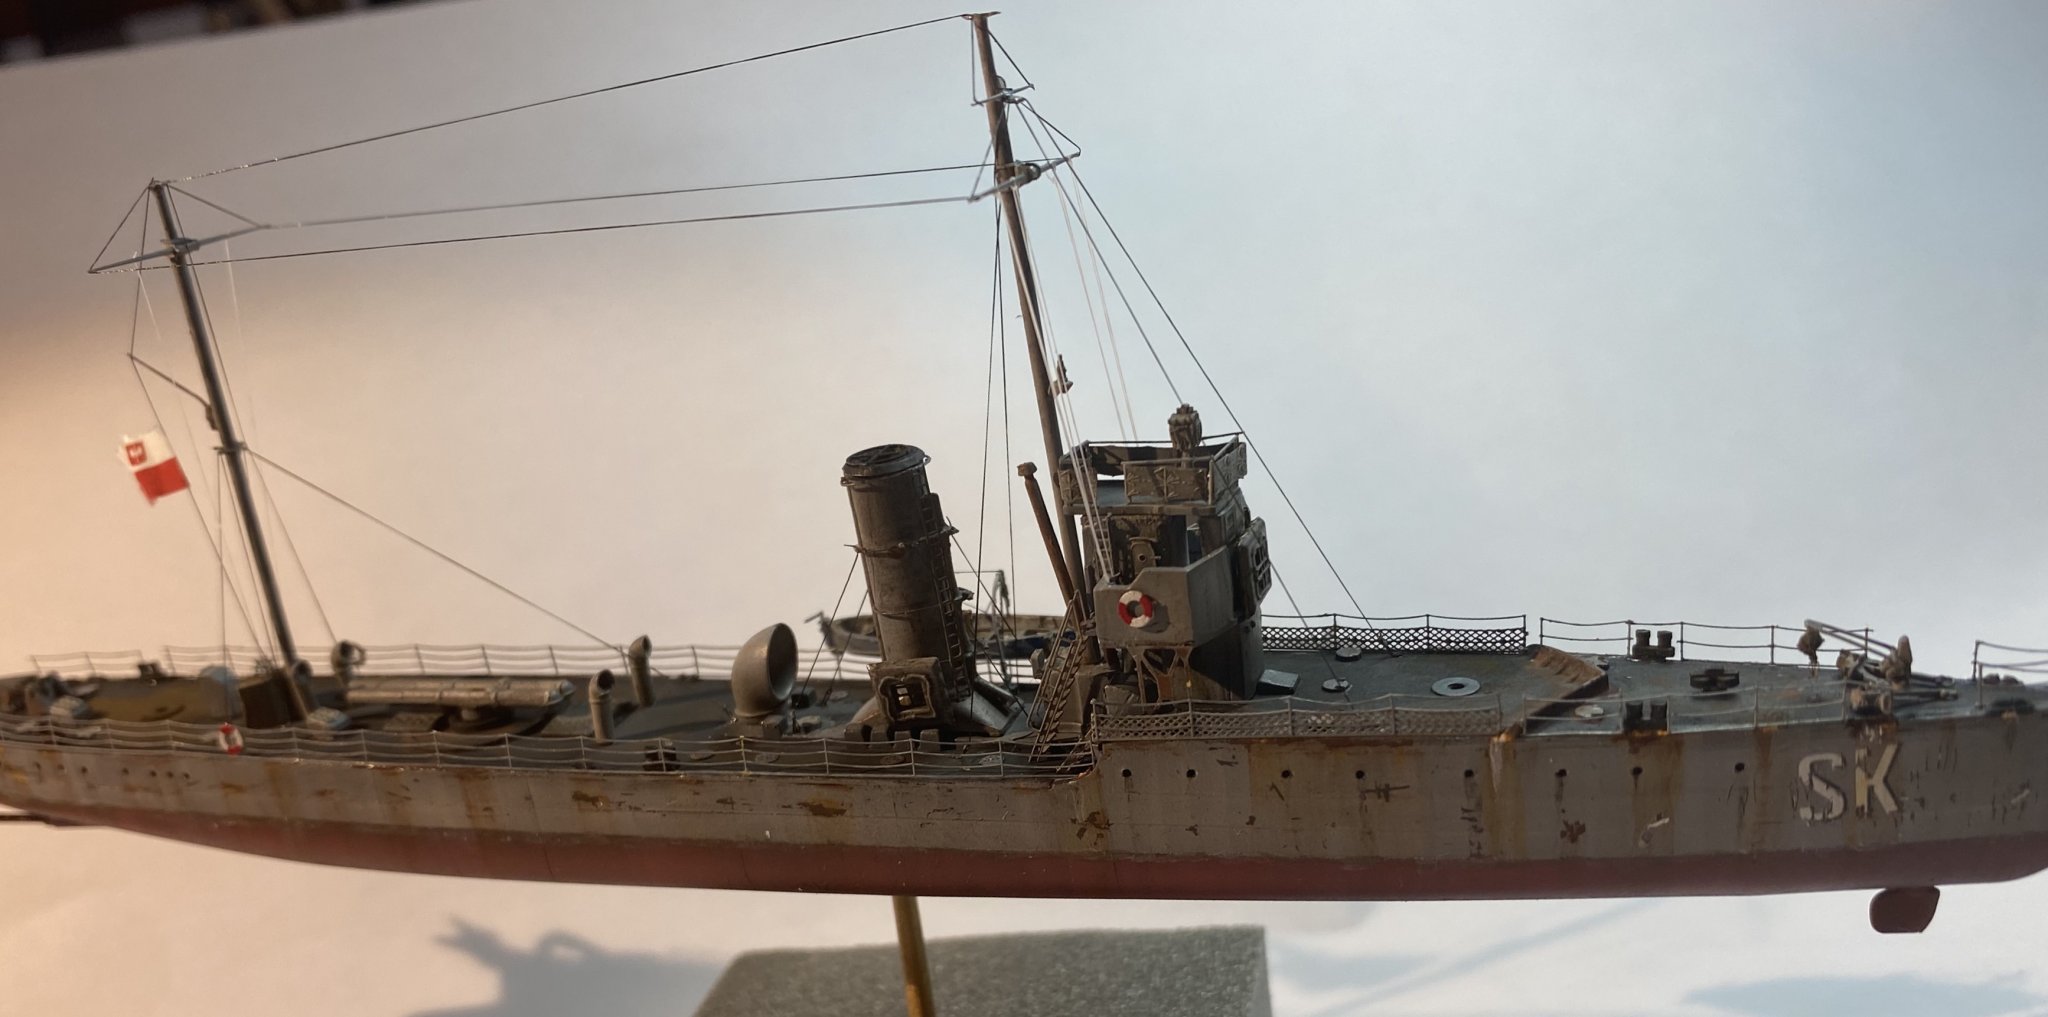
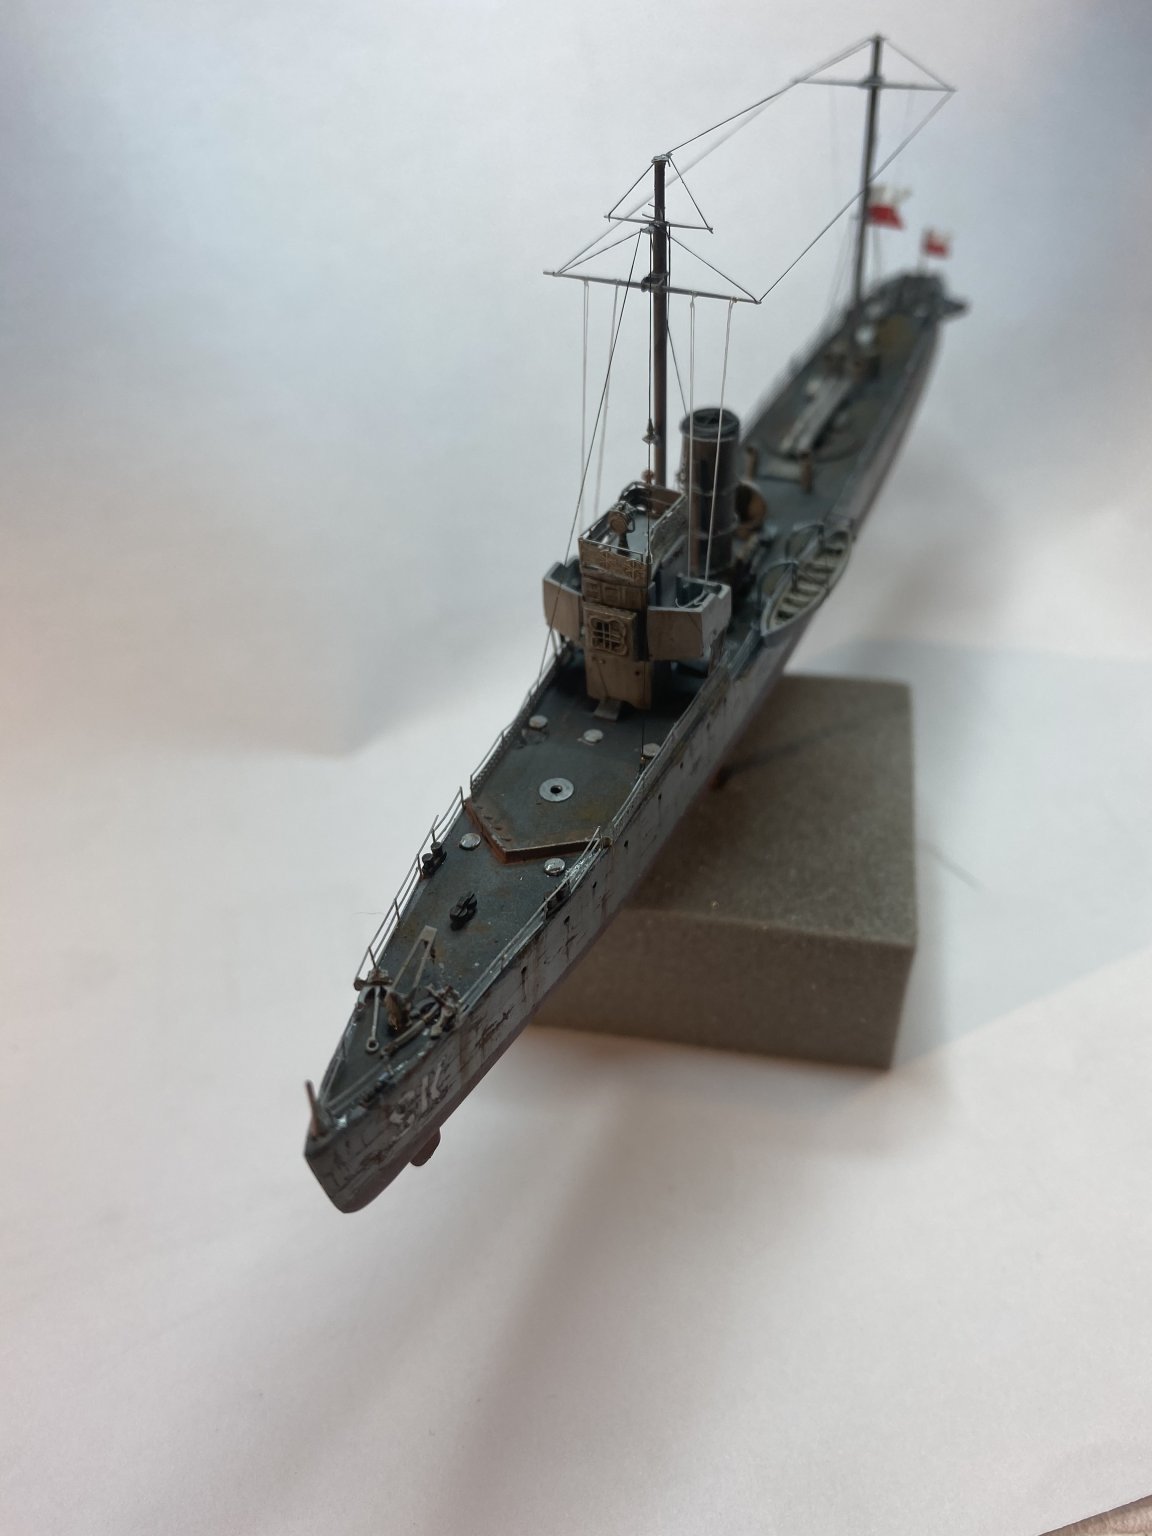
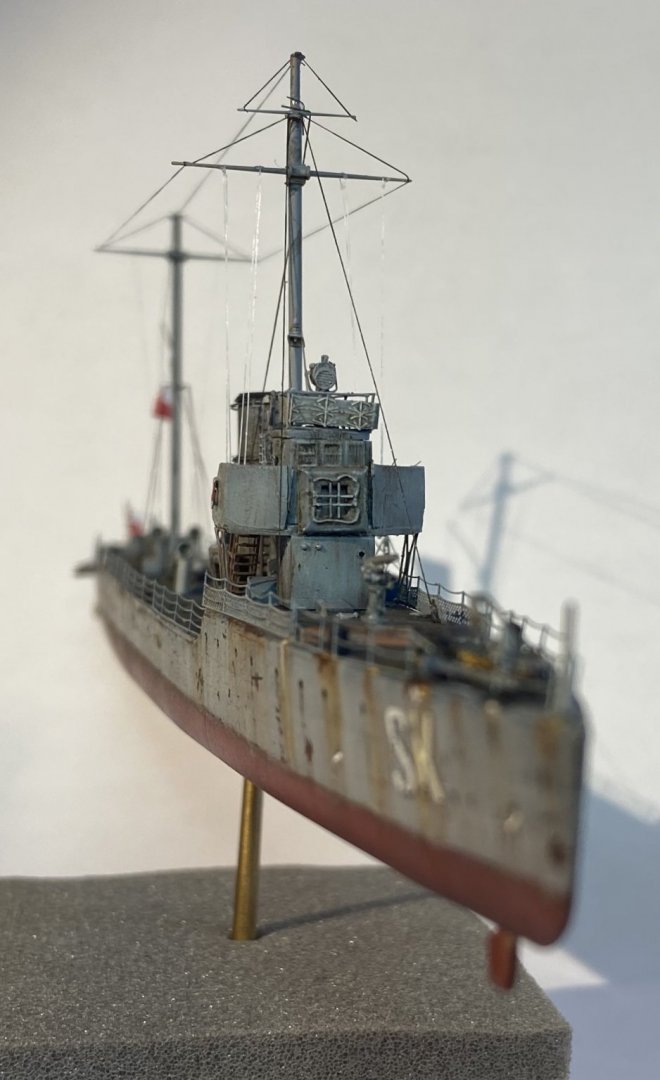
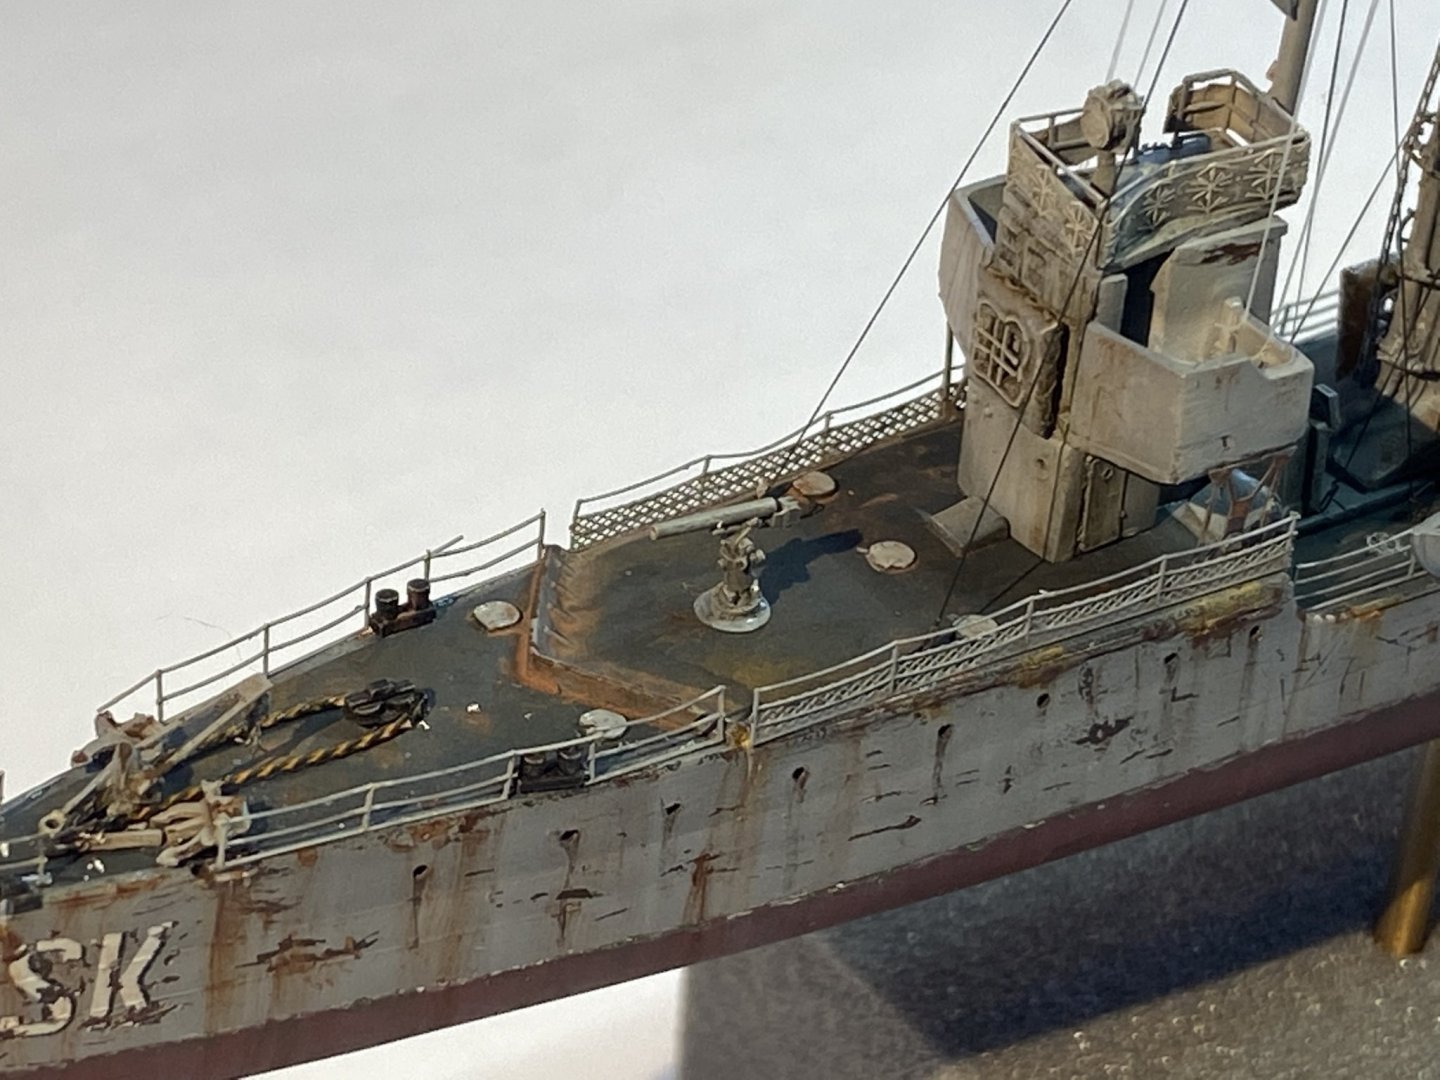
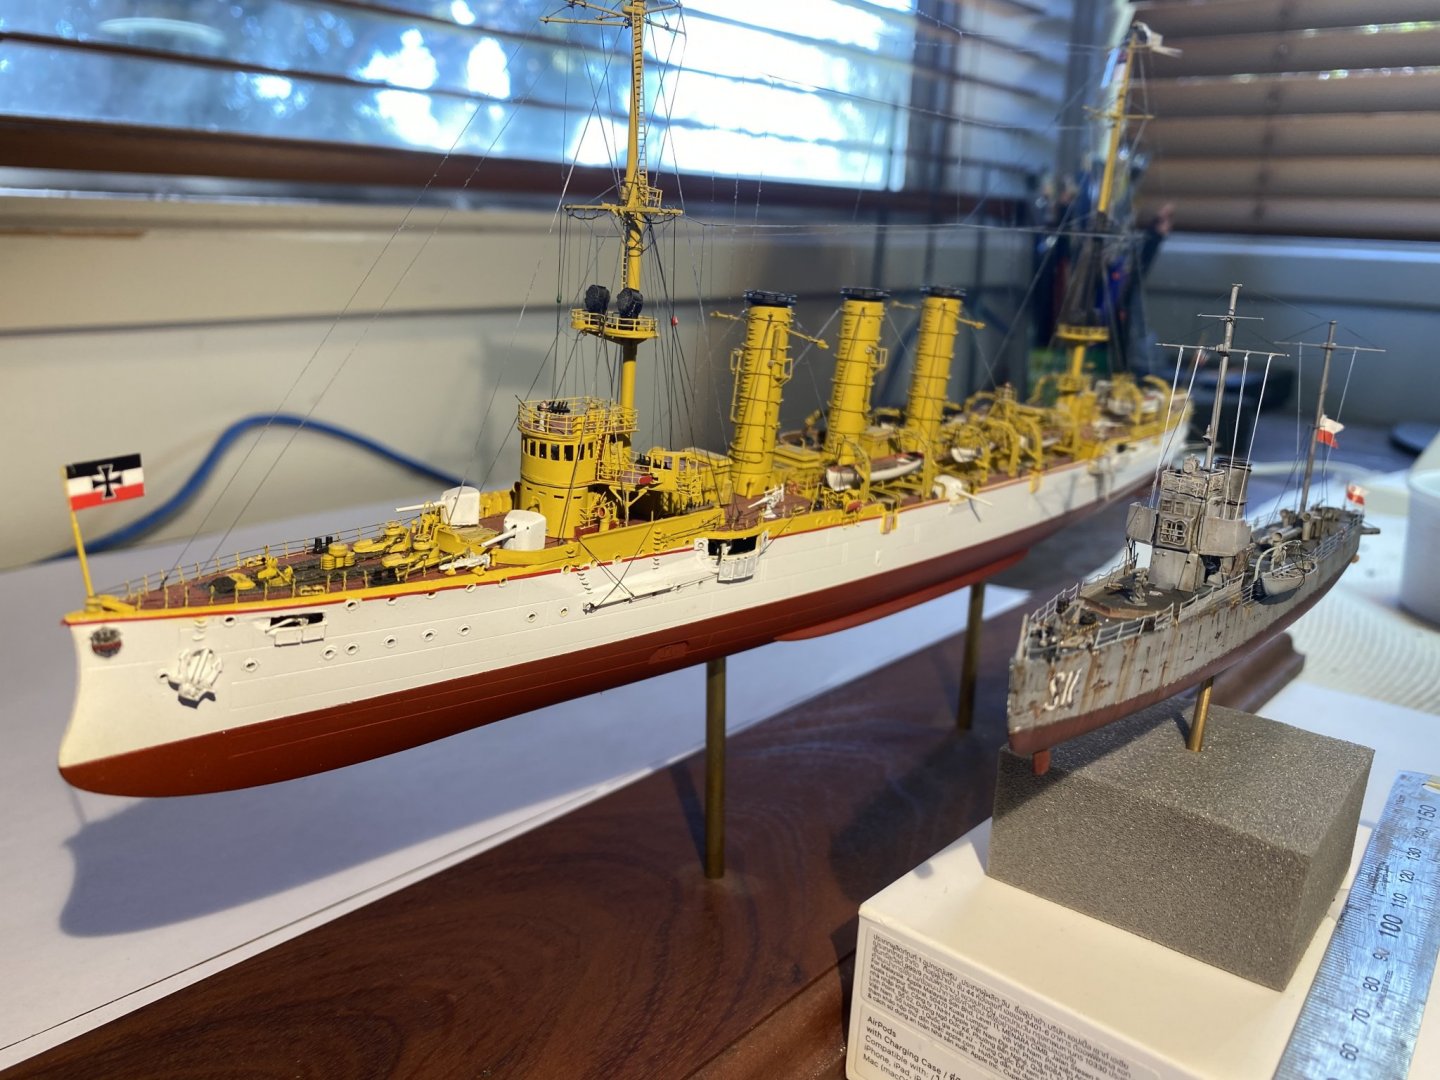
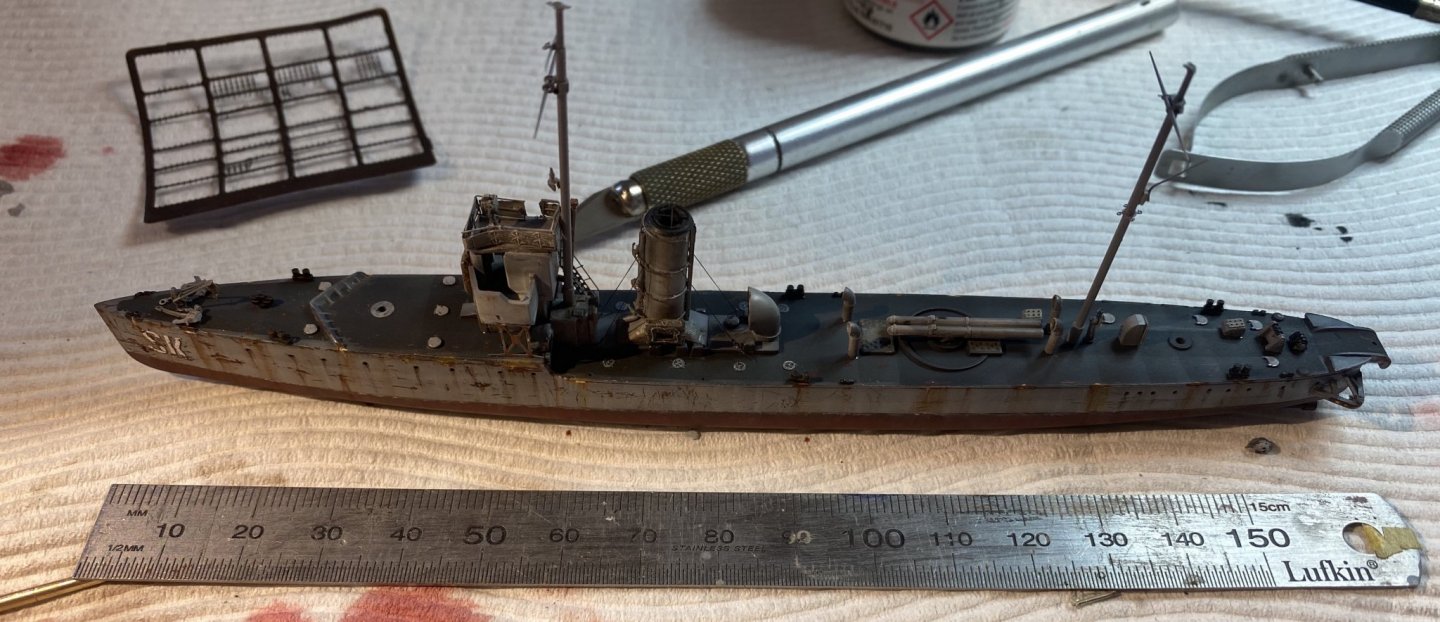
And finished. I’ve added some images of the ex A-59 alongside Emden for scale


- 45 replies
-
- 14
-
-
- orp ślązak
- mirage hobby
- (and 2 more)
-
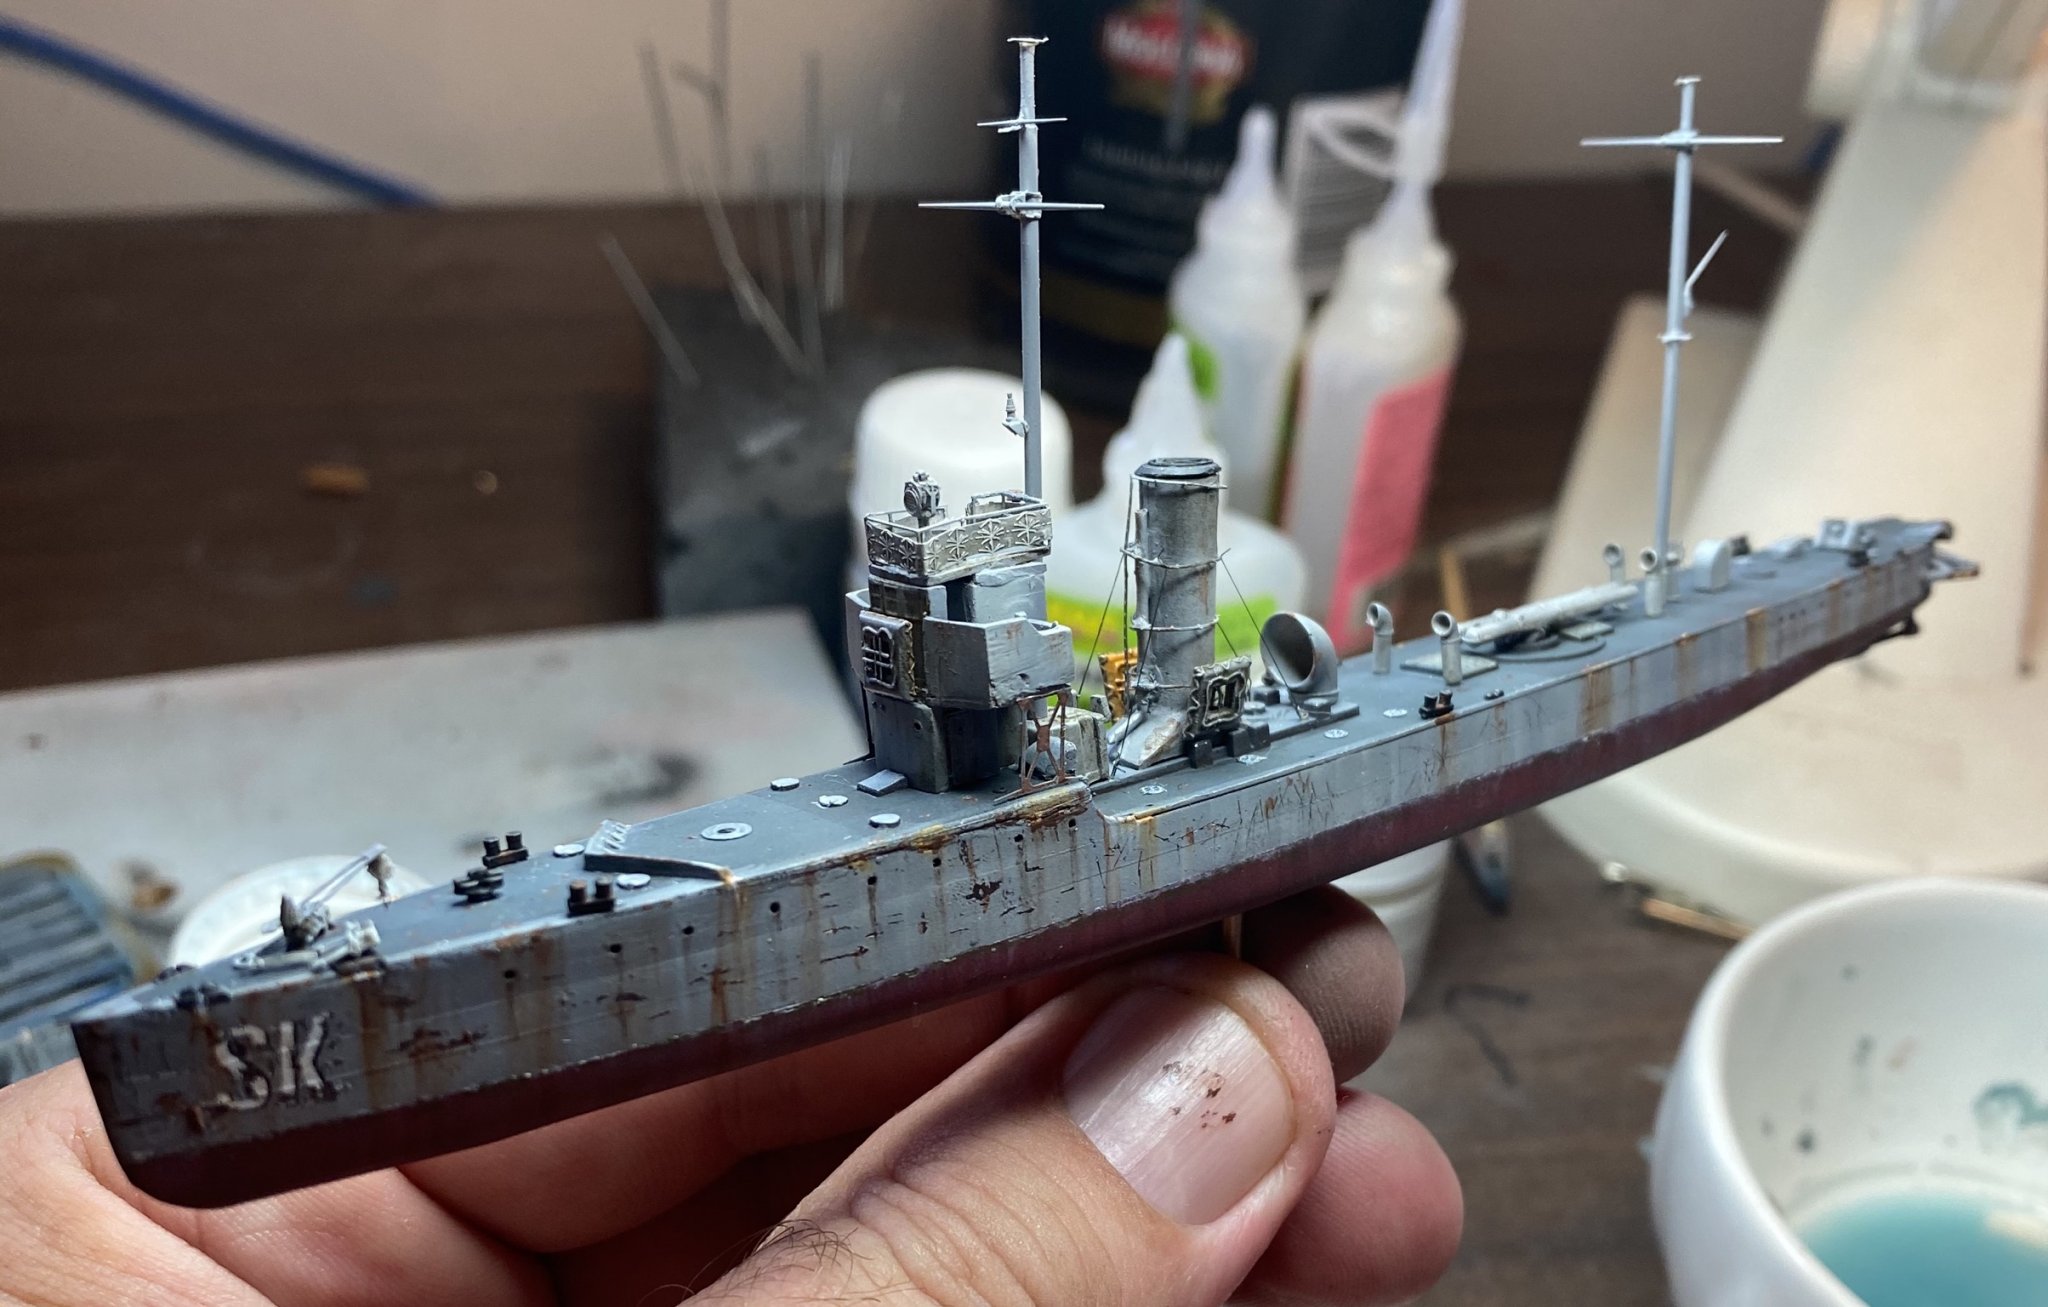
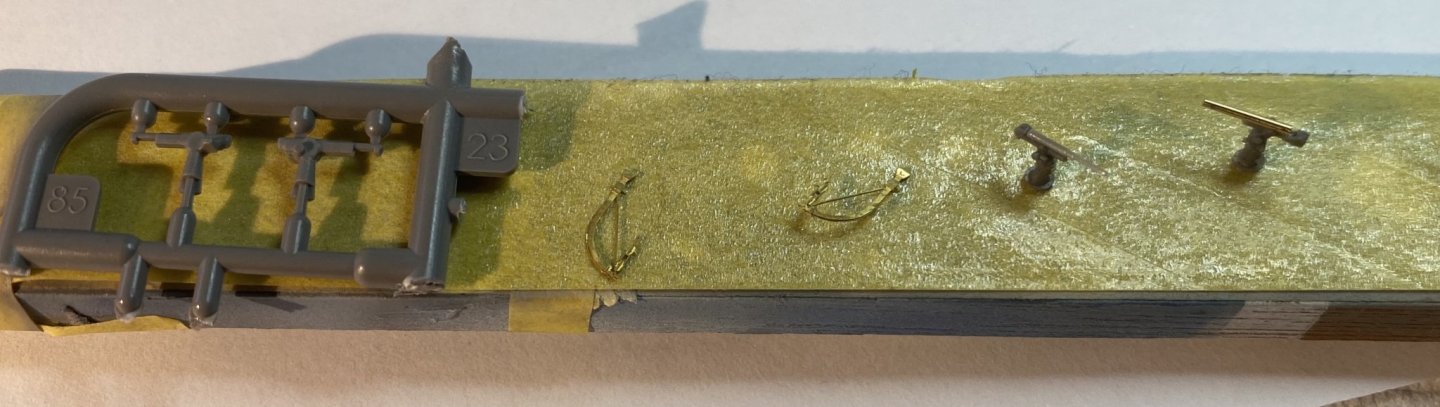
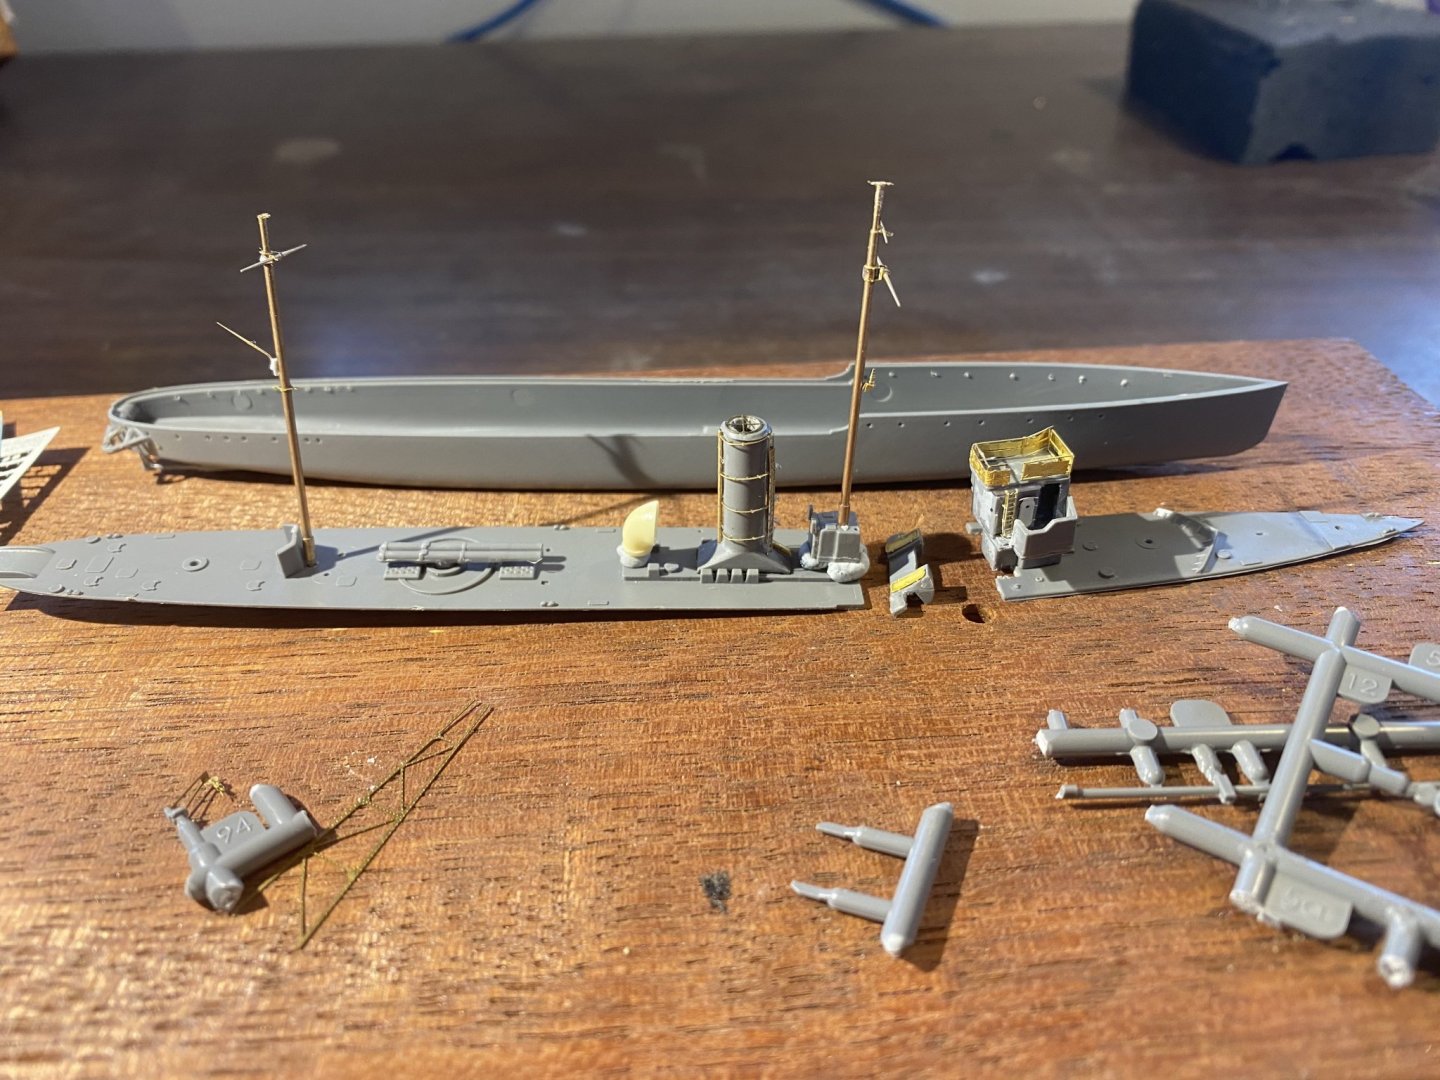
Final bit is actually the only aftermarket I bought specific for this kit, Resin guns, you can see the kit provided ones

- 45 replies
-
- 12
-
-
- orp ślązak
- mirage hobby
- (and 2 more)
-
I built this here several years ago! Welcome to the dark side!
-
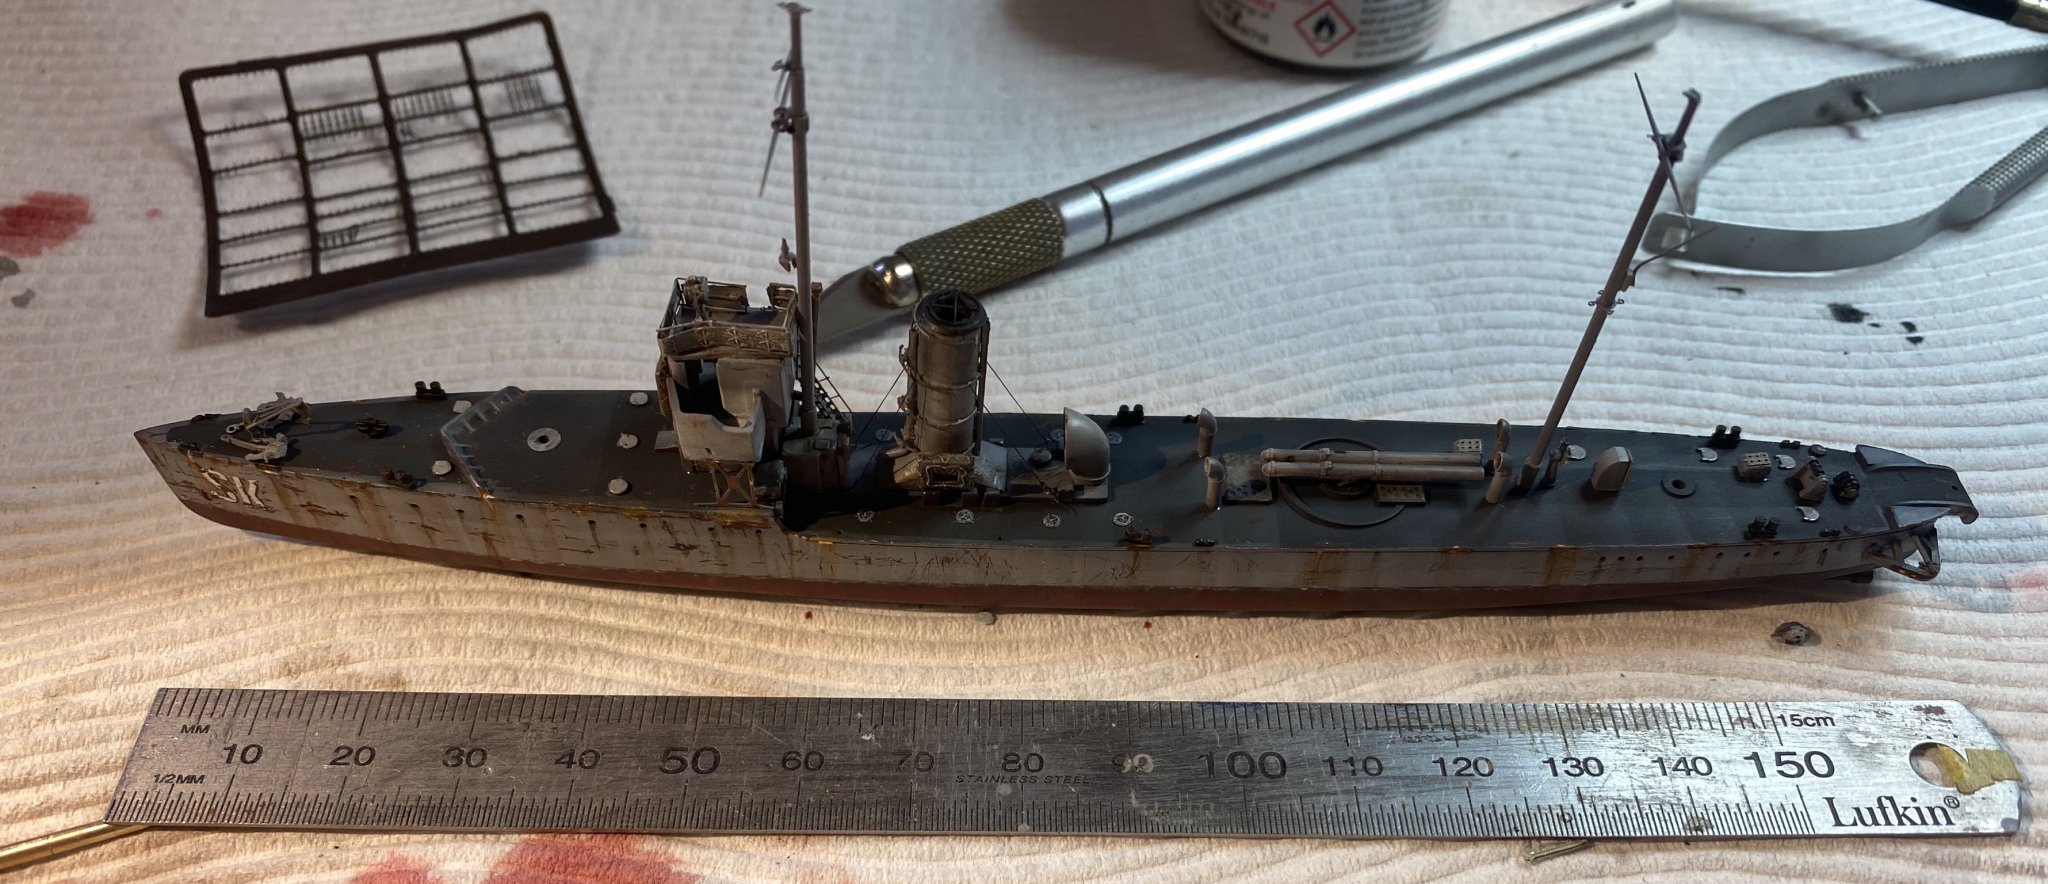
Deck stuff thrown on, needs touch ups and rigging, railings, ships boat plus guns.


- 45 replies
-
- 9
-
-
- orp ślązak
- mirage hobby
- (and 2 more)
-
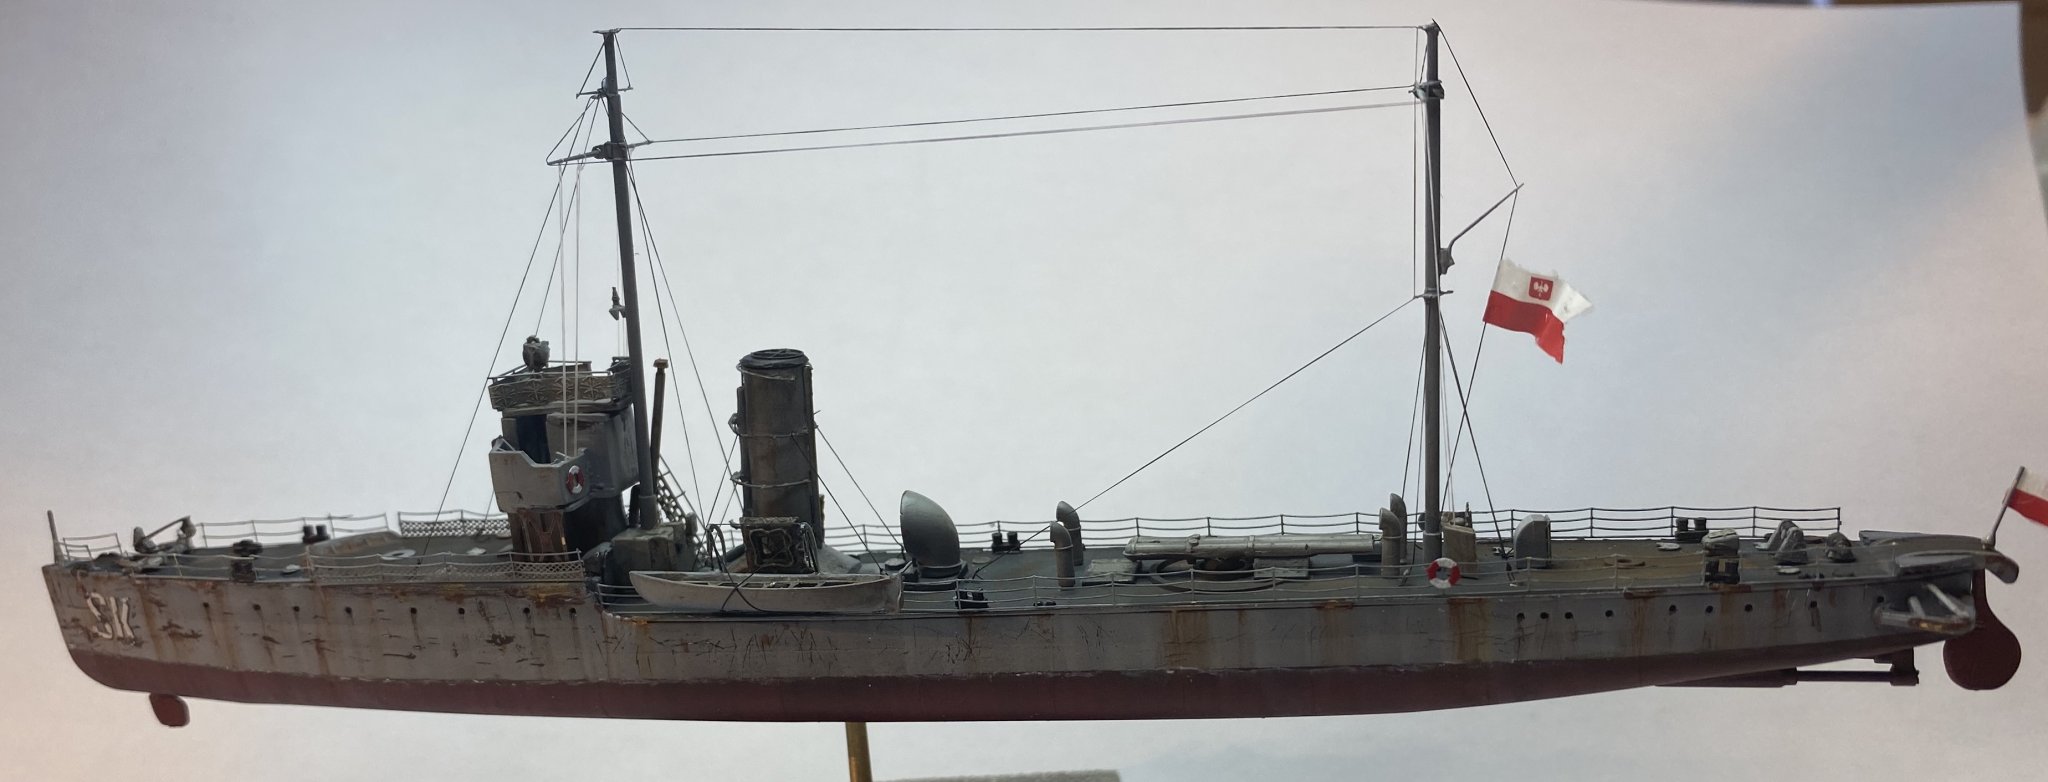
now a bit of chipping, weathering next. The decal went on and would not for the life of me allow me to re adjust it, as such it got a bit roughed up.


- 45 replies
-
- 5
-
-
- orp ślązak
- mirage hobby
- (and 2 more)
-
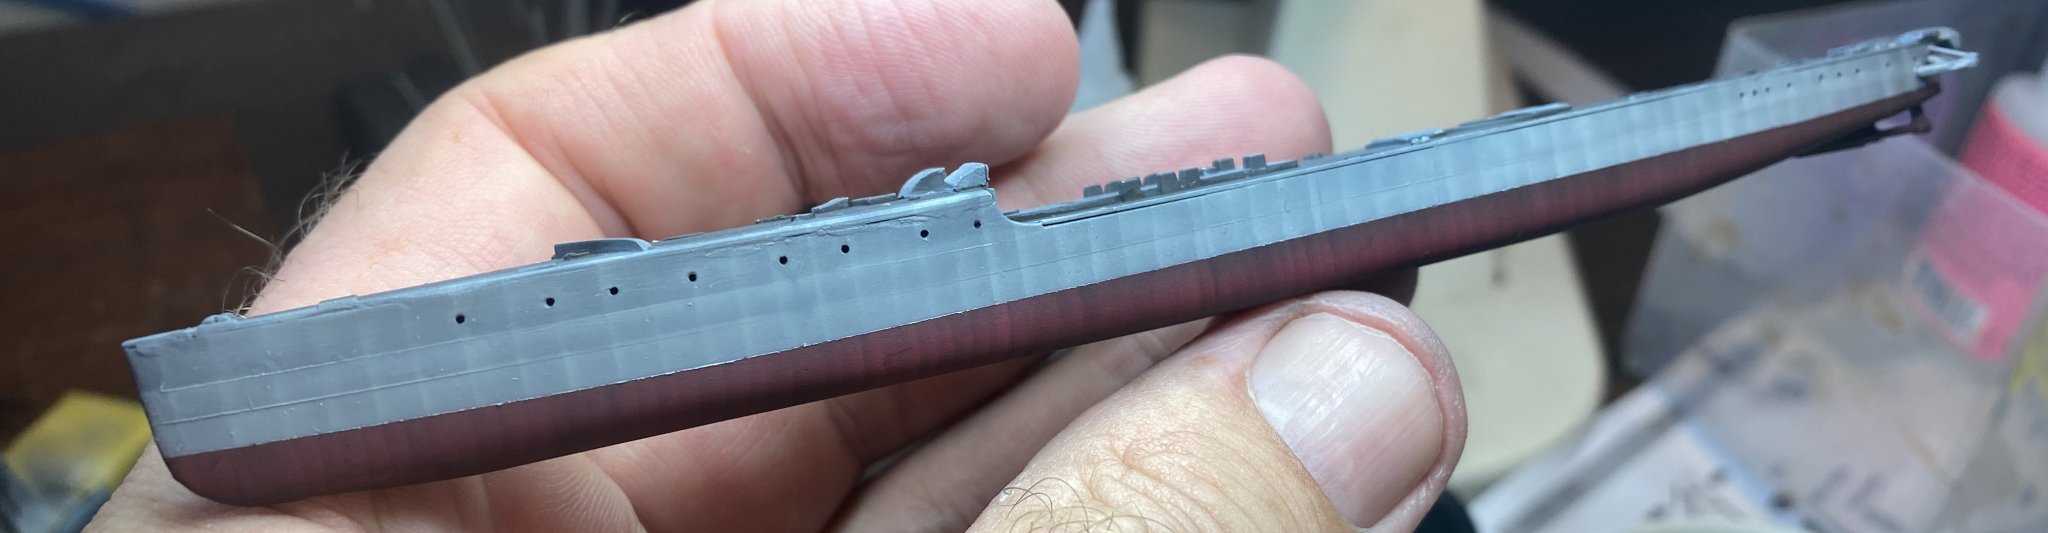
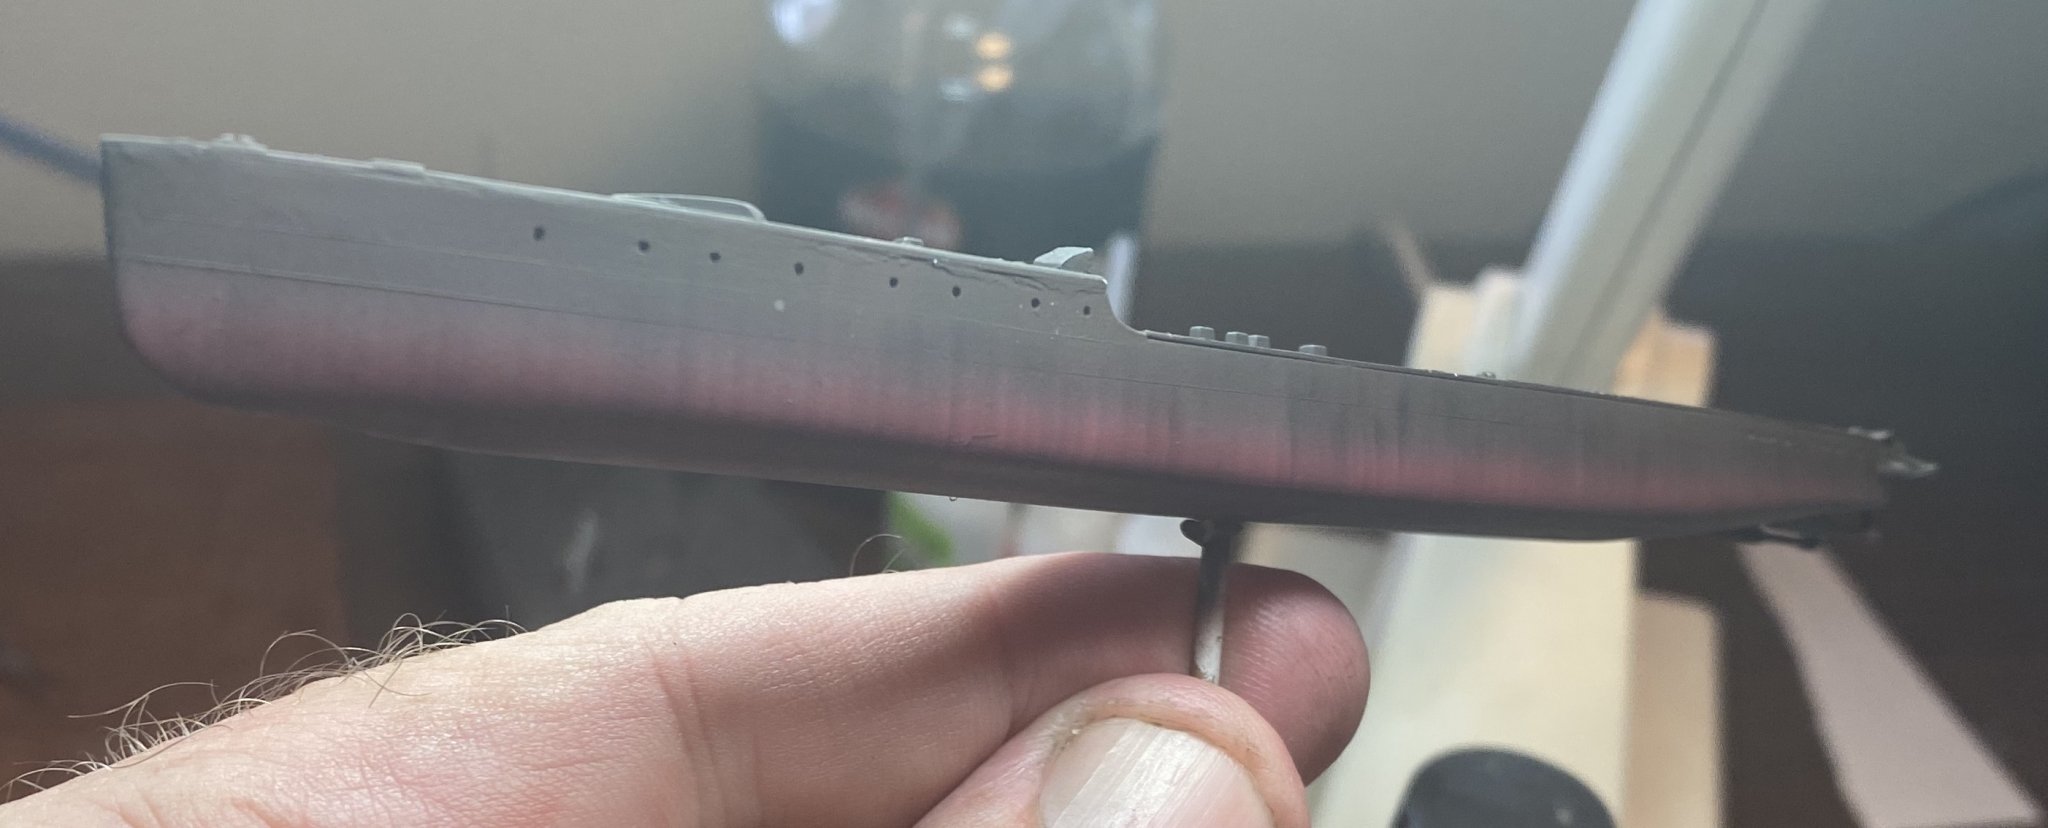
Now a little bit of oil canning below the water line, when I grunge this up with won’t be so stark


- 45 replies
-
- 8
-
-
- orp ślązak
- mirage hobby
- (and 2 more)
-
Oh absolutely, an under coat with oil canning in black and dark red, seal it, Chipping fluid then grey oil canned overcoat and then chipping. once that bit is done the rest will come together very quickly
- 45 replies
-
- 5
-
-
- orp ślązak
- mirage hobby
- (and 2 more)
-
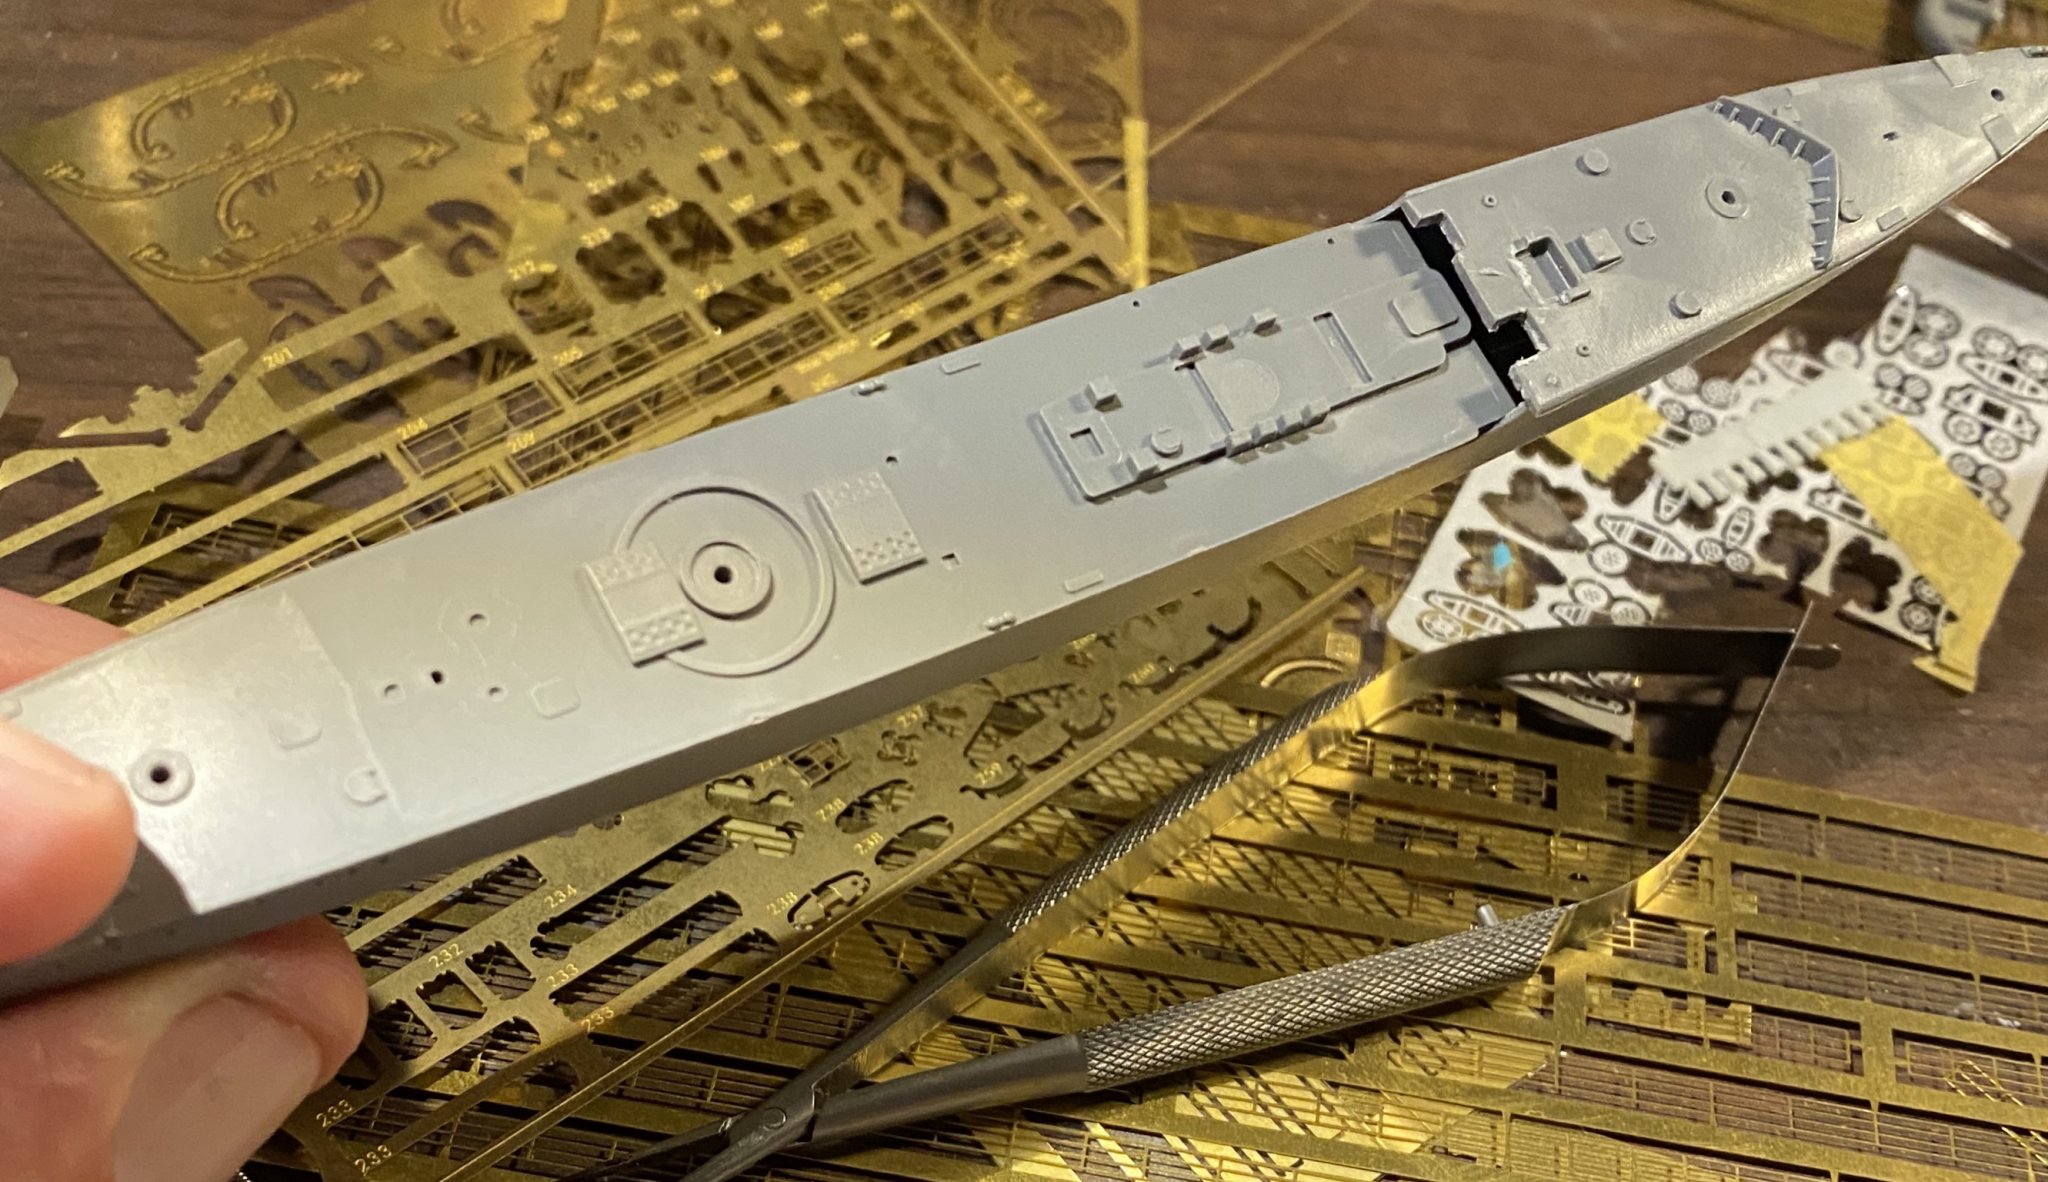
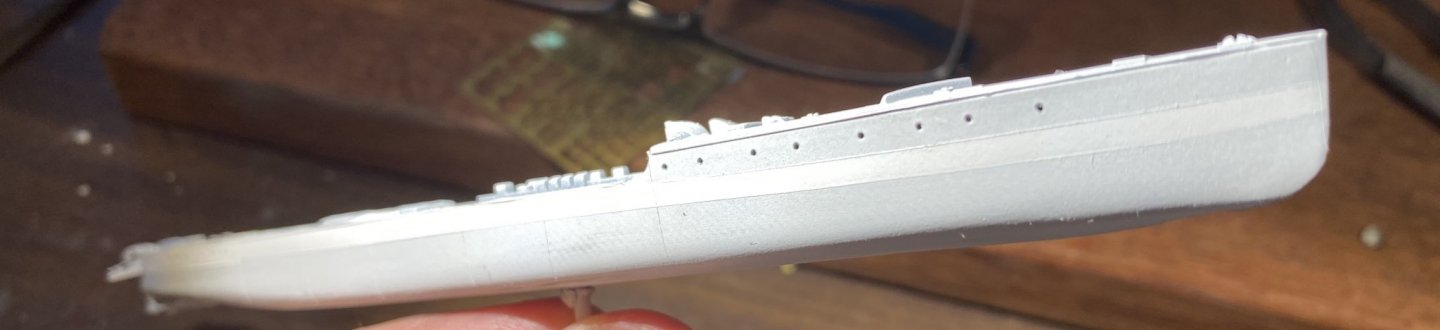
Not getting a great deal done with other things on, but masked and over sprayed a hull plate belt, shows up a fair gap on the bow.
- 45 replies
-
- 8
-
-
- orp ślązak
- mirage hobby
- (and 2 more)
-
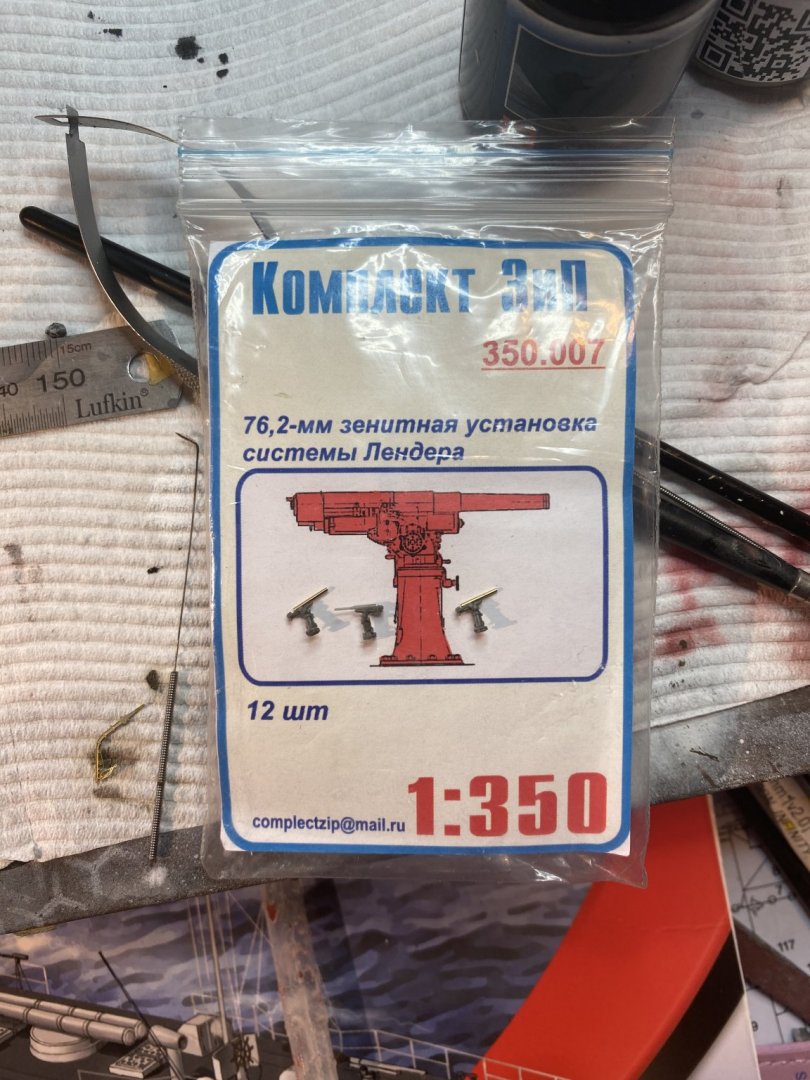
I've decided on the Borodino because unlike the french ships, there are a lot of upgrades for it. These kits are pretty clunky without them. Mind you, the Zvezda kit is very cheap but I've ordered some upgrades from Russia as you can't get them anywhere else in the world, I'll get the GMM PE and a wooden deck, new barrels. It closes off my 3 Russian ships that way. By the time it all arrives I will have finished the little torpedo boat and the next in the cue....
-
So, whilst I’m doing a distraction piece, What would you like to see, a big Sov battlecruiser like Kirov, their plagued aircraft carrier, a old French pre Dreadnought, but I can’t do German, USA or IJN, but something big and iconic
-
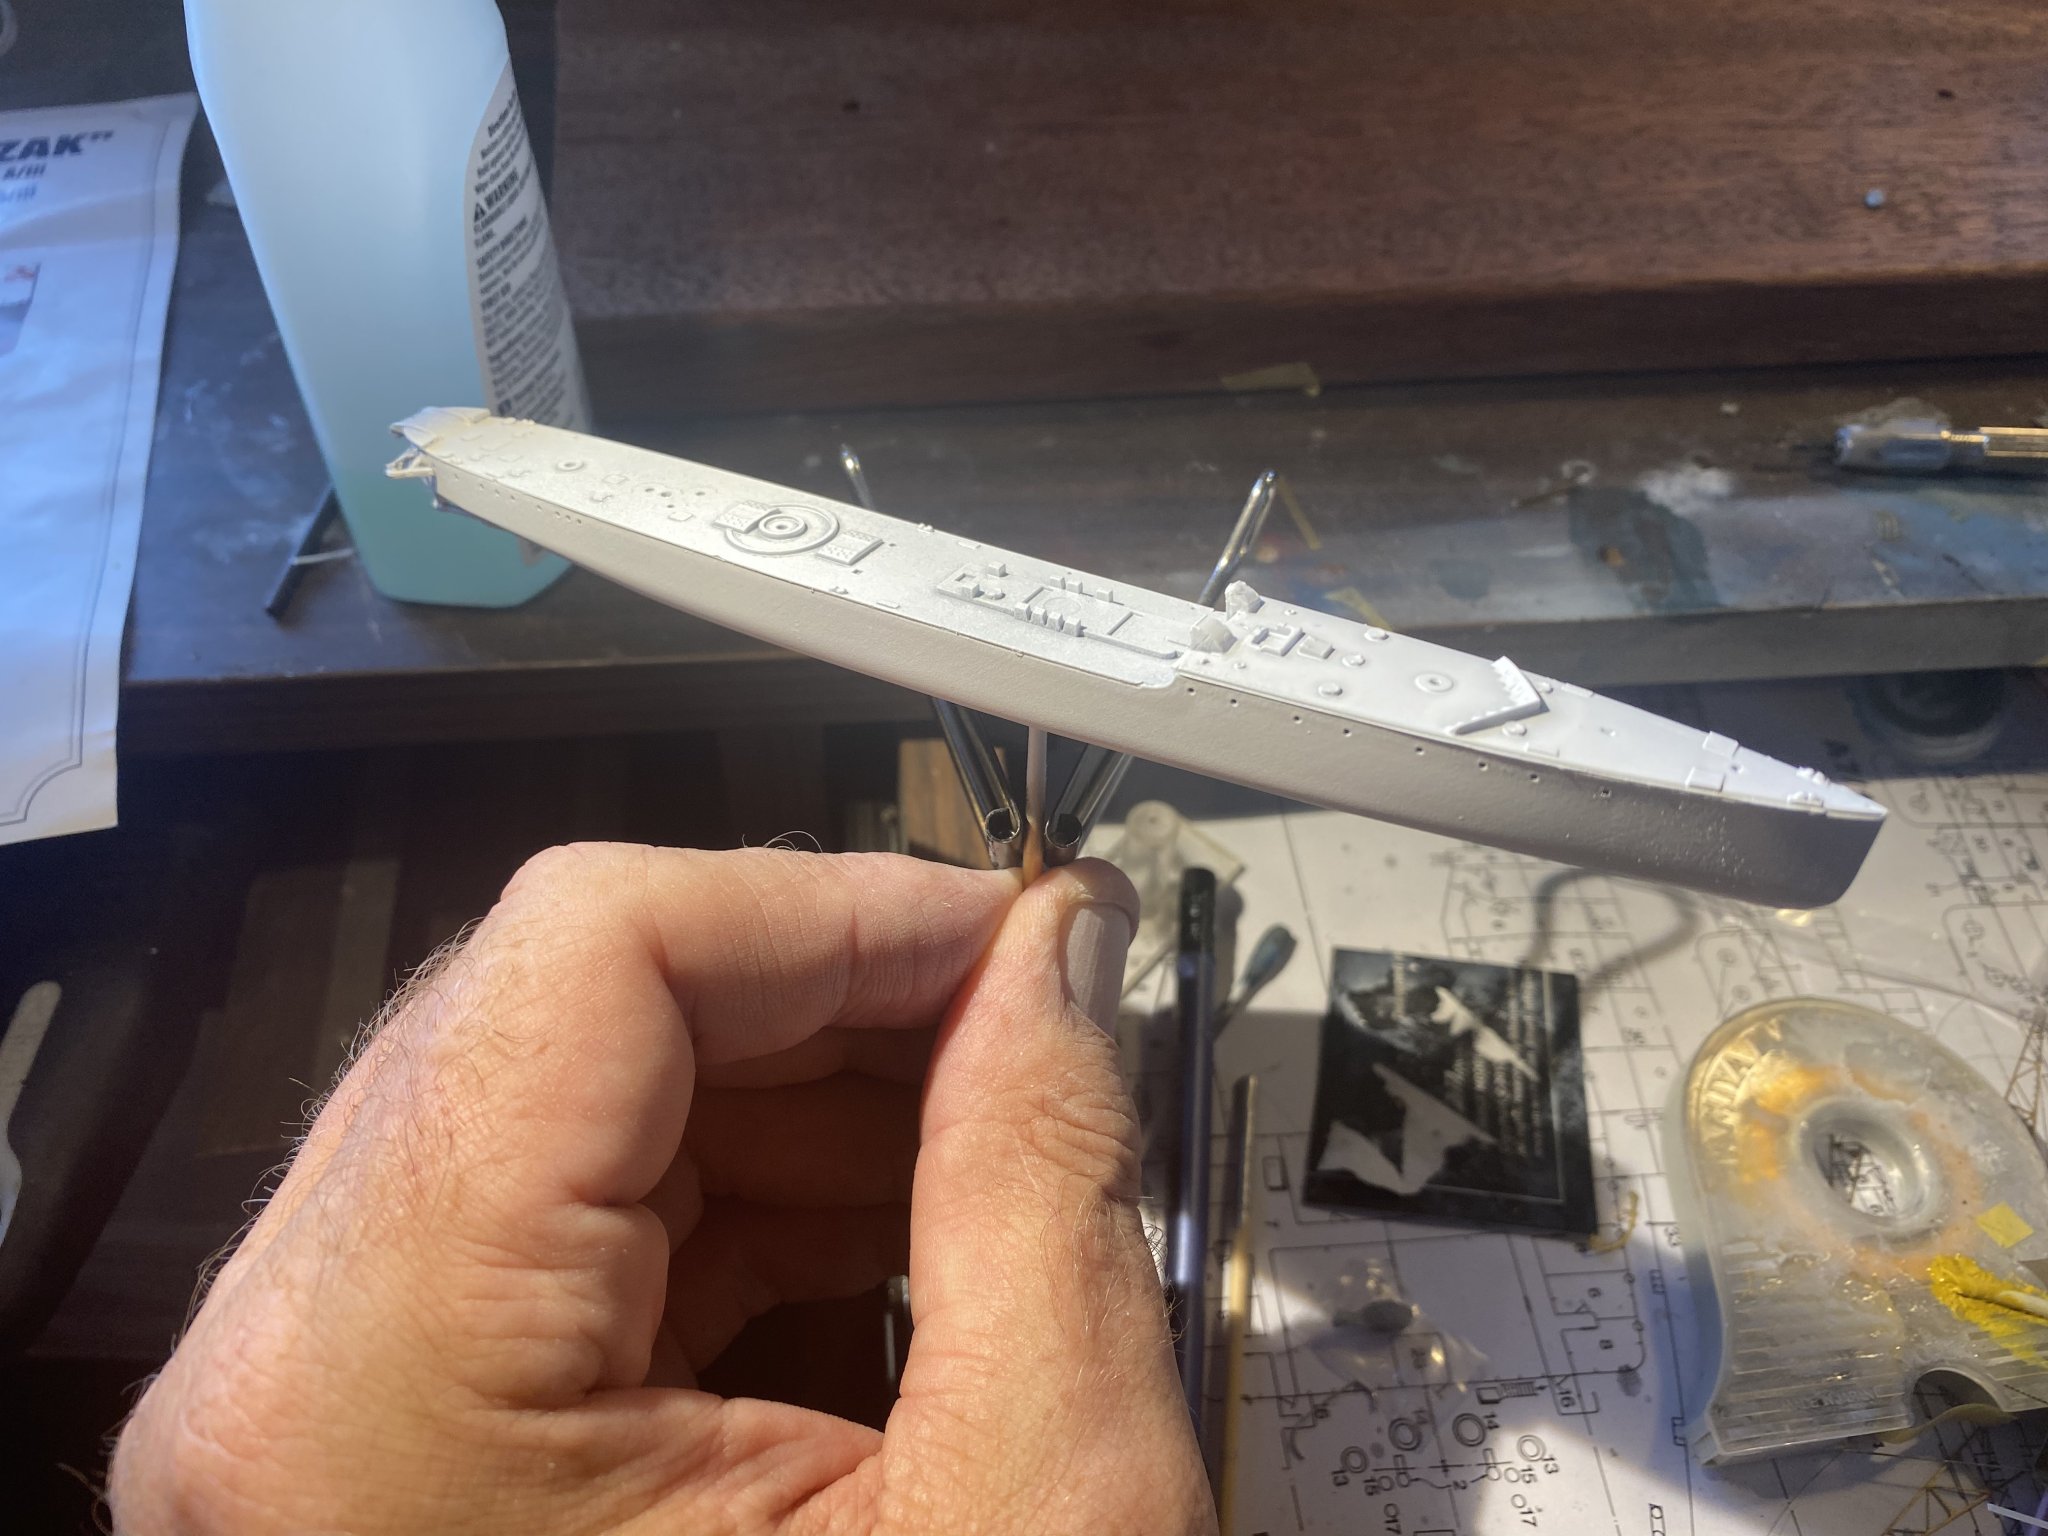
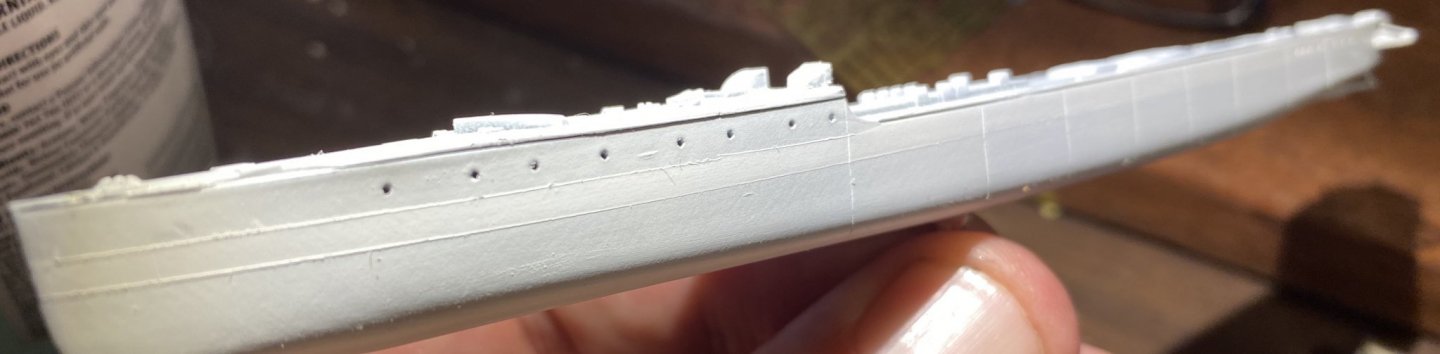
Hull joined up, base coat of primer on. Now I can start masking in the hull panels.

- 45 replies
-
- 9
-
-
- orp ślązak
- mirage hobby
- (and 2 more)
-
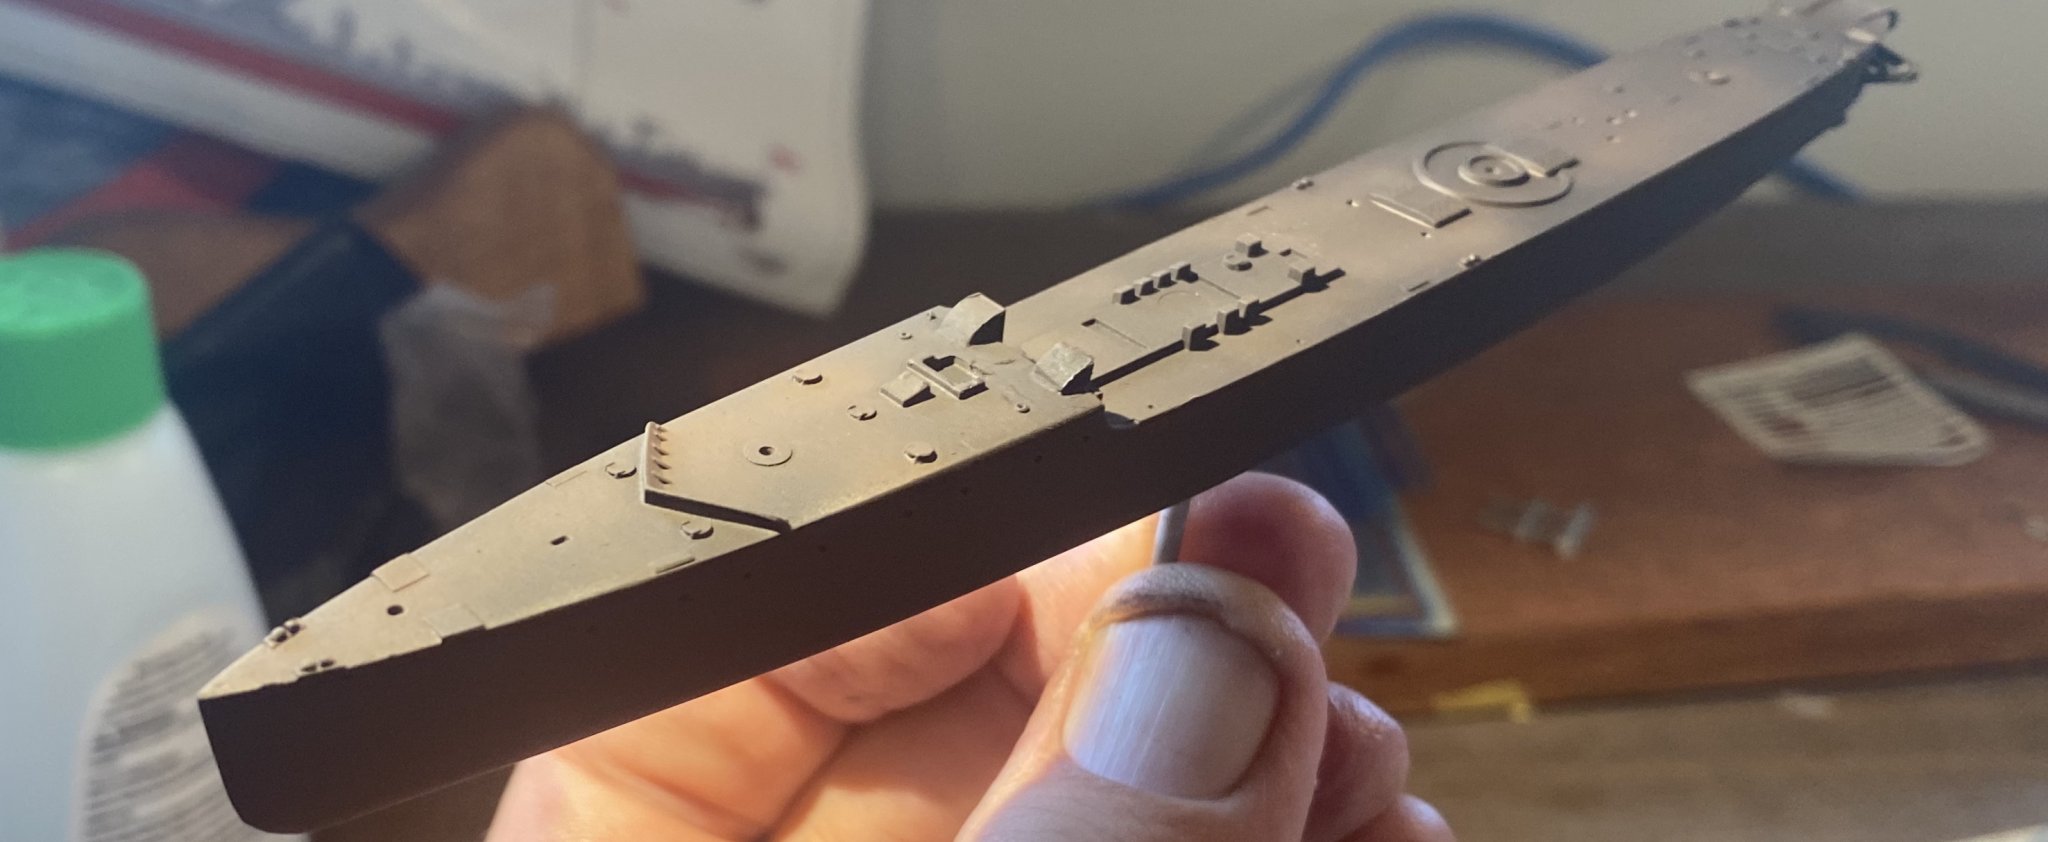
Masts made up from spares, it’s a pretty rough kit really , lots of sins to be covered up
- 45 replies
-
- 8
-
-
- orp ślązak
- mirage hobby
- (and 2 more)
-
As you can see, this is tiny after an aircraft carrier.


- 45 replies
-
- 11
-
-
- orp ślązak
- mirage hobby
- (and 2 more)
-
Ah, I have to go Polish as I’ve already built 3 German ships, Emden, Graf Zeppelin and Seydlitz!
- 45 replies
-
- 4
-
-
- orp ślązak
- mirage hobby
- (and 2 more)
-
I’m awaiting an upgrade set from EBay for my next build so this is the sorbet. I’ve wanted to build it for years but the North Star upgrade has been sold out for ages. I’ve got enough in spares to replace a lot above deck.
- 45 replies
-
- 5
-
-
- orp ślązak
- mirage hobby
- (and 2 more)
-
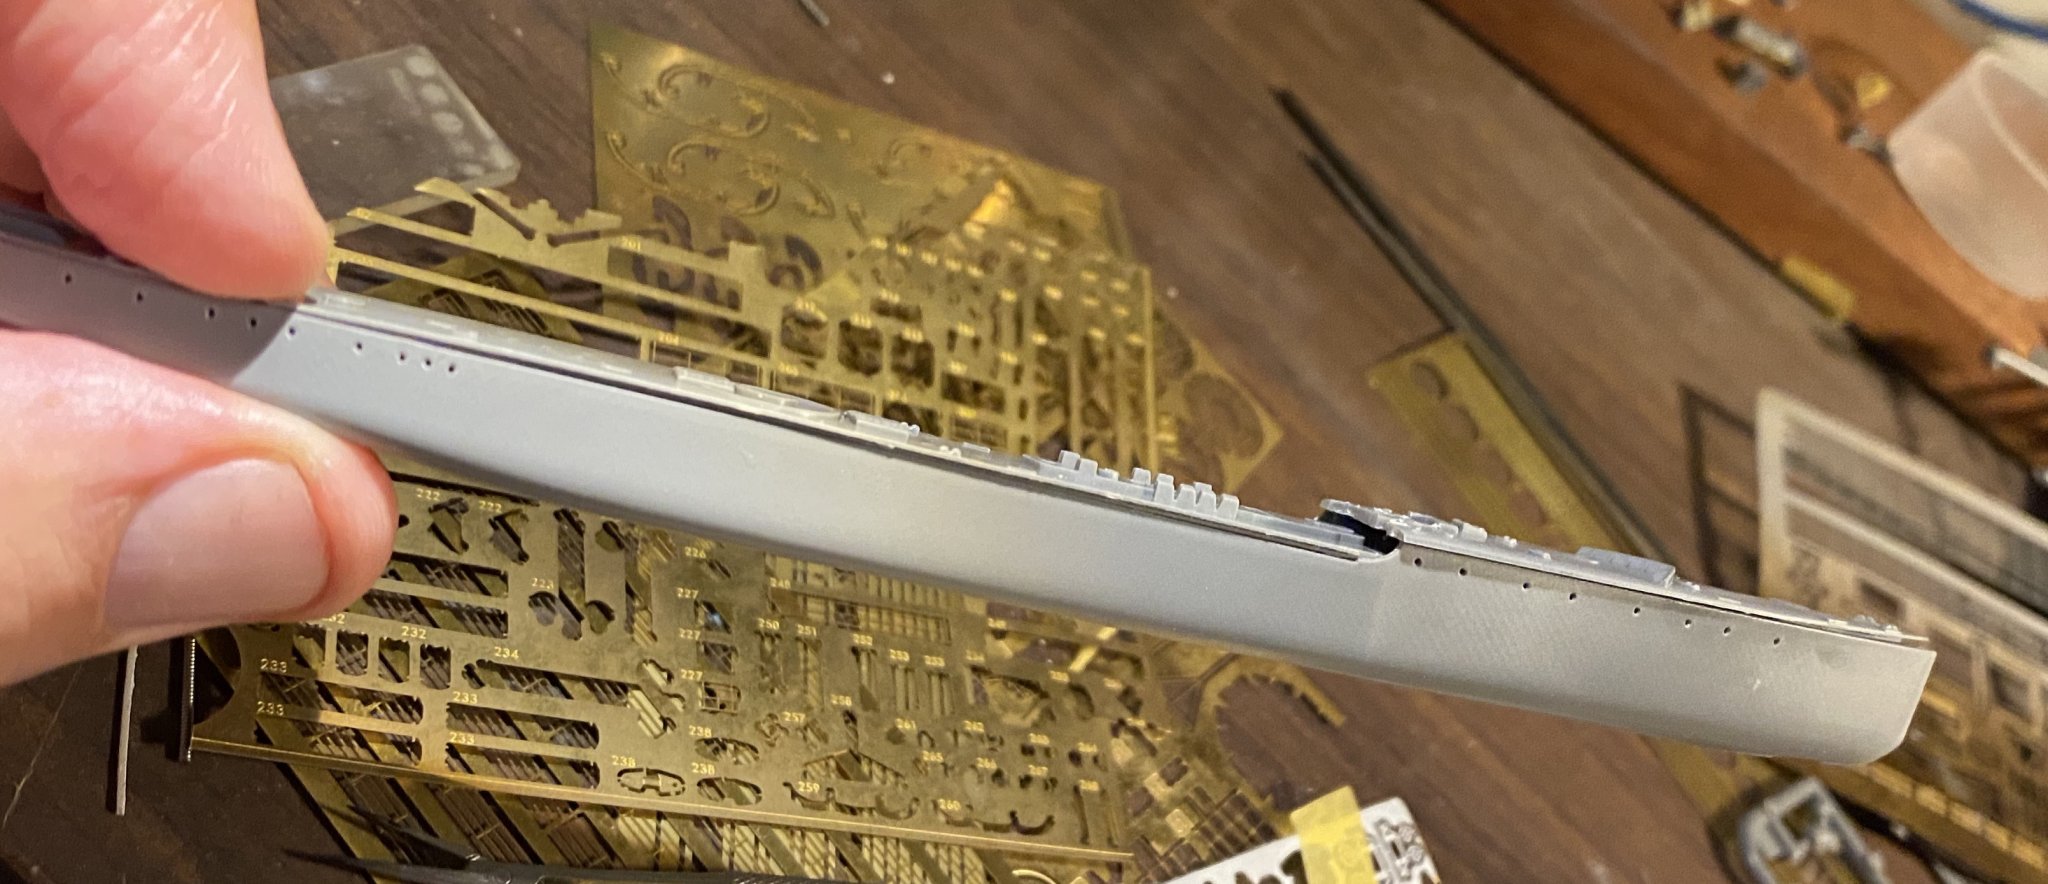
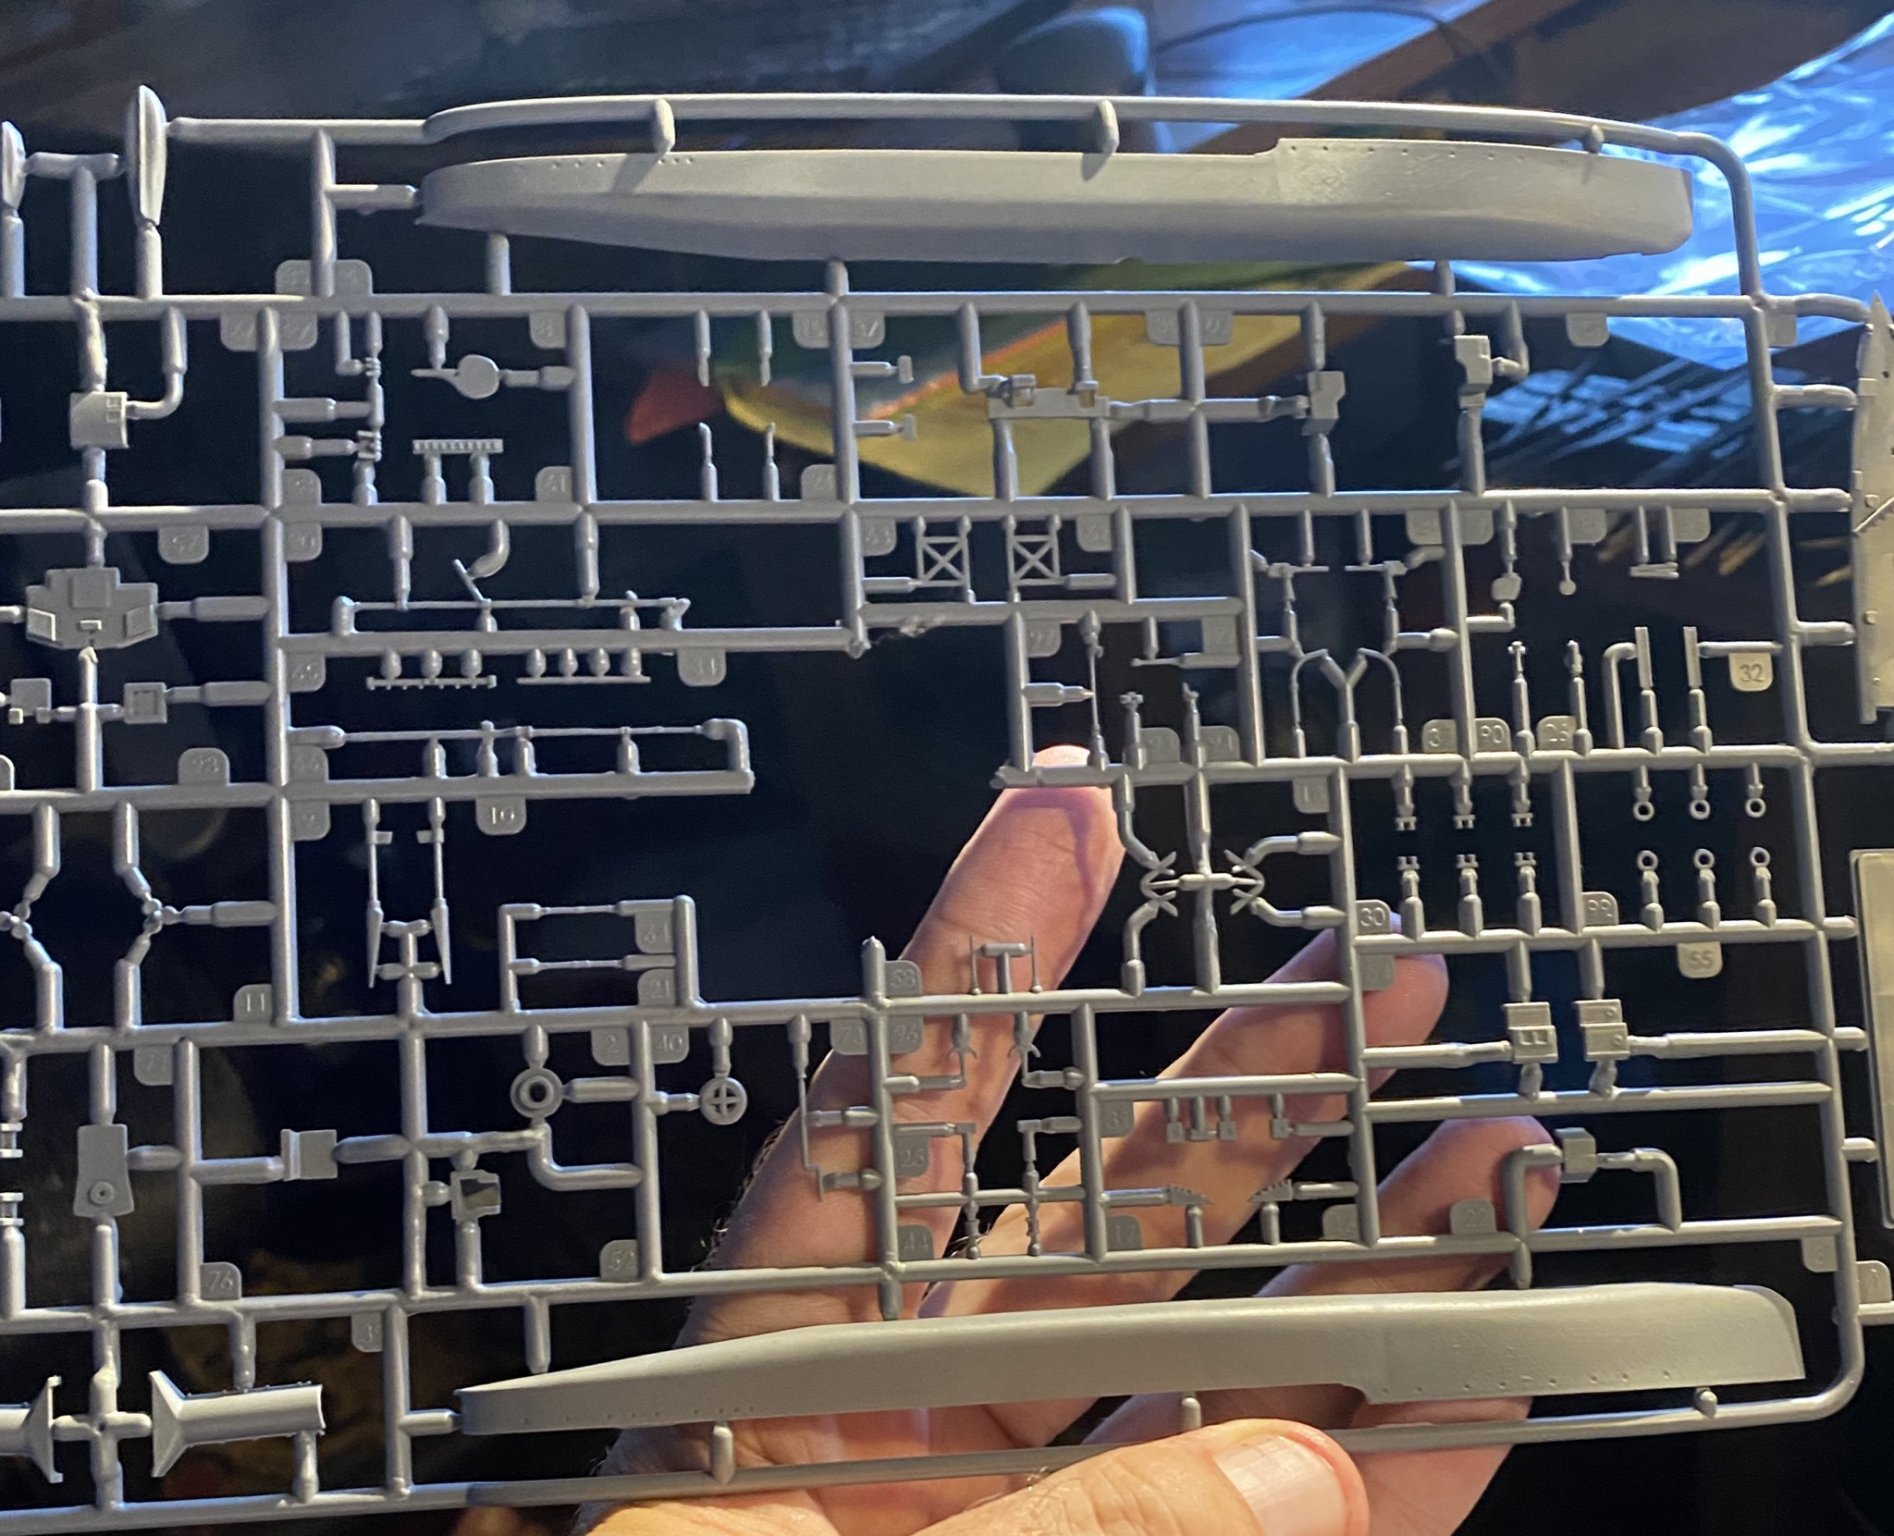
This thing is tiny. And very simple. A lot will need replacing from spares, but offers some significant weathering challenges for oil canning, rust, chipping


- 45 replies
-
- 11
-
-
- orp ślązak
- mirage hobby
- (and 2 more)
-
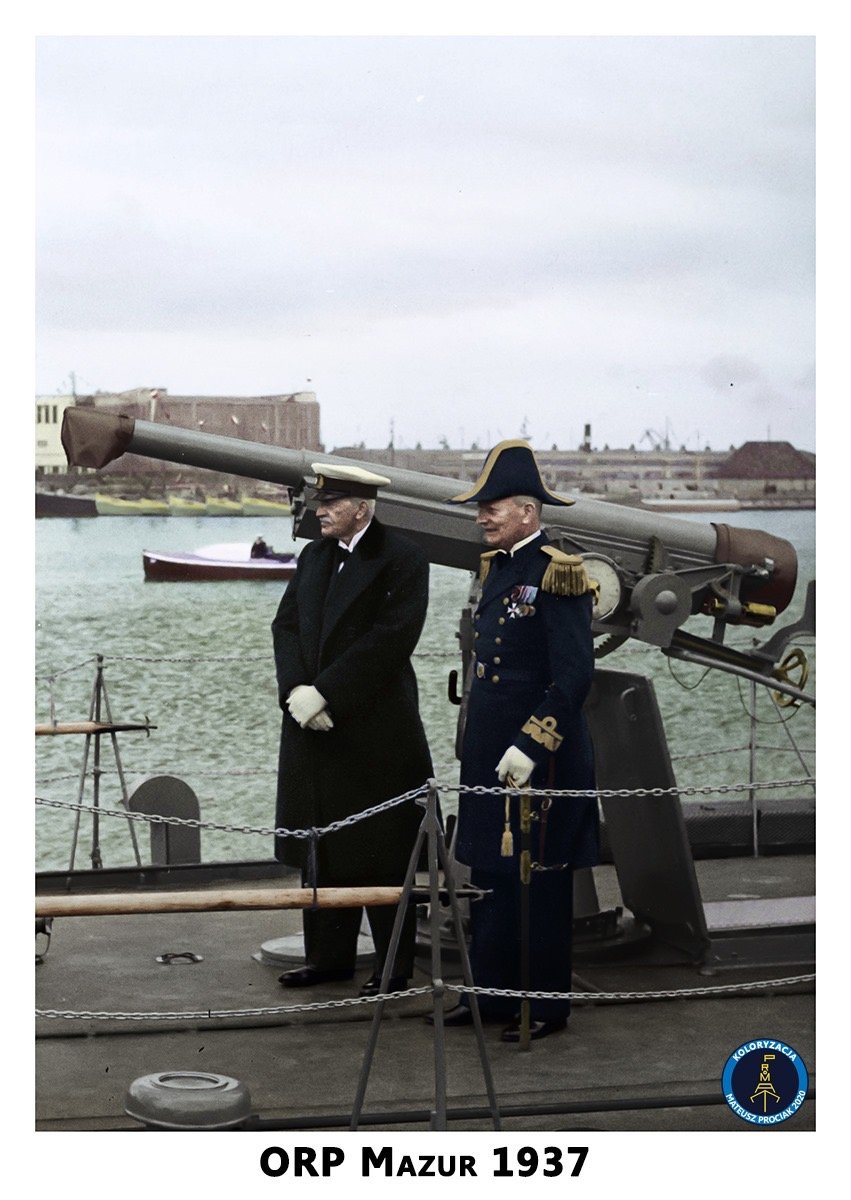
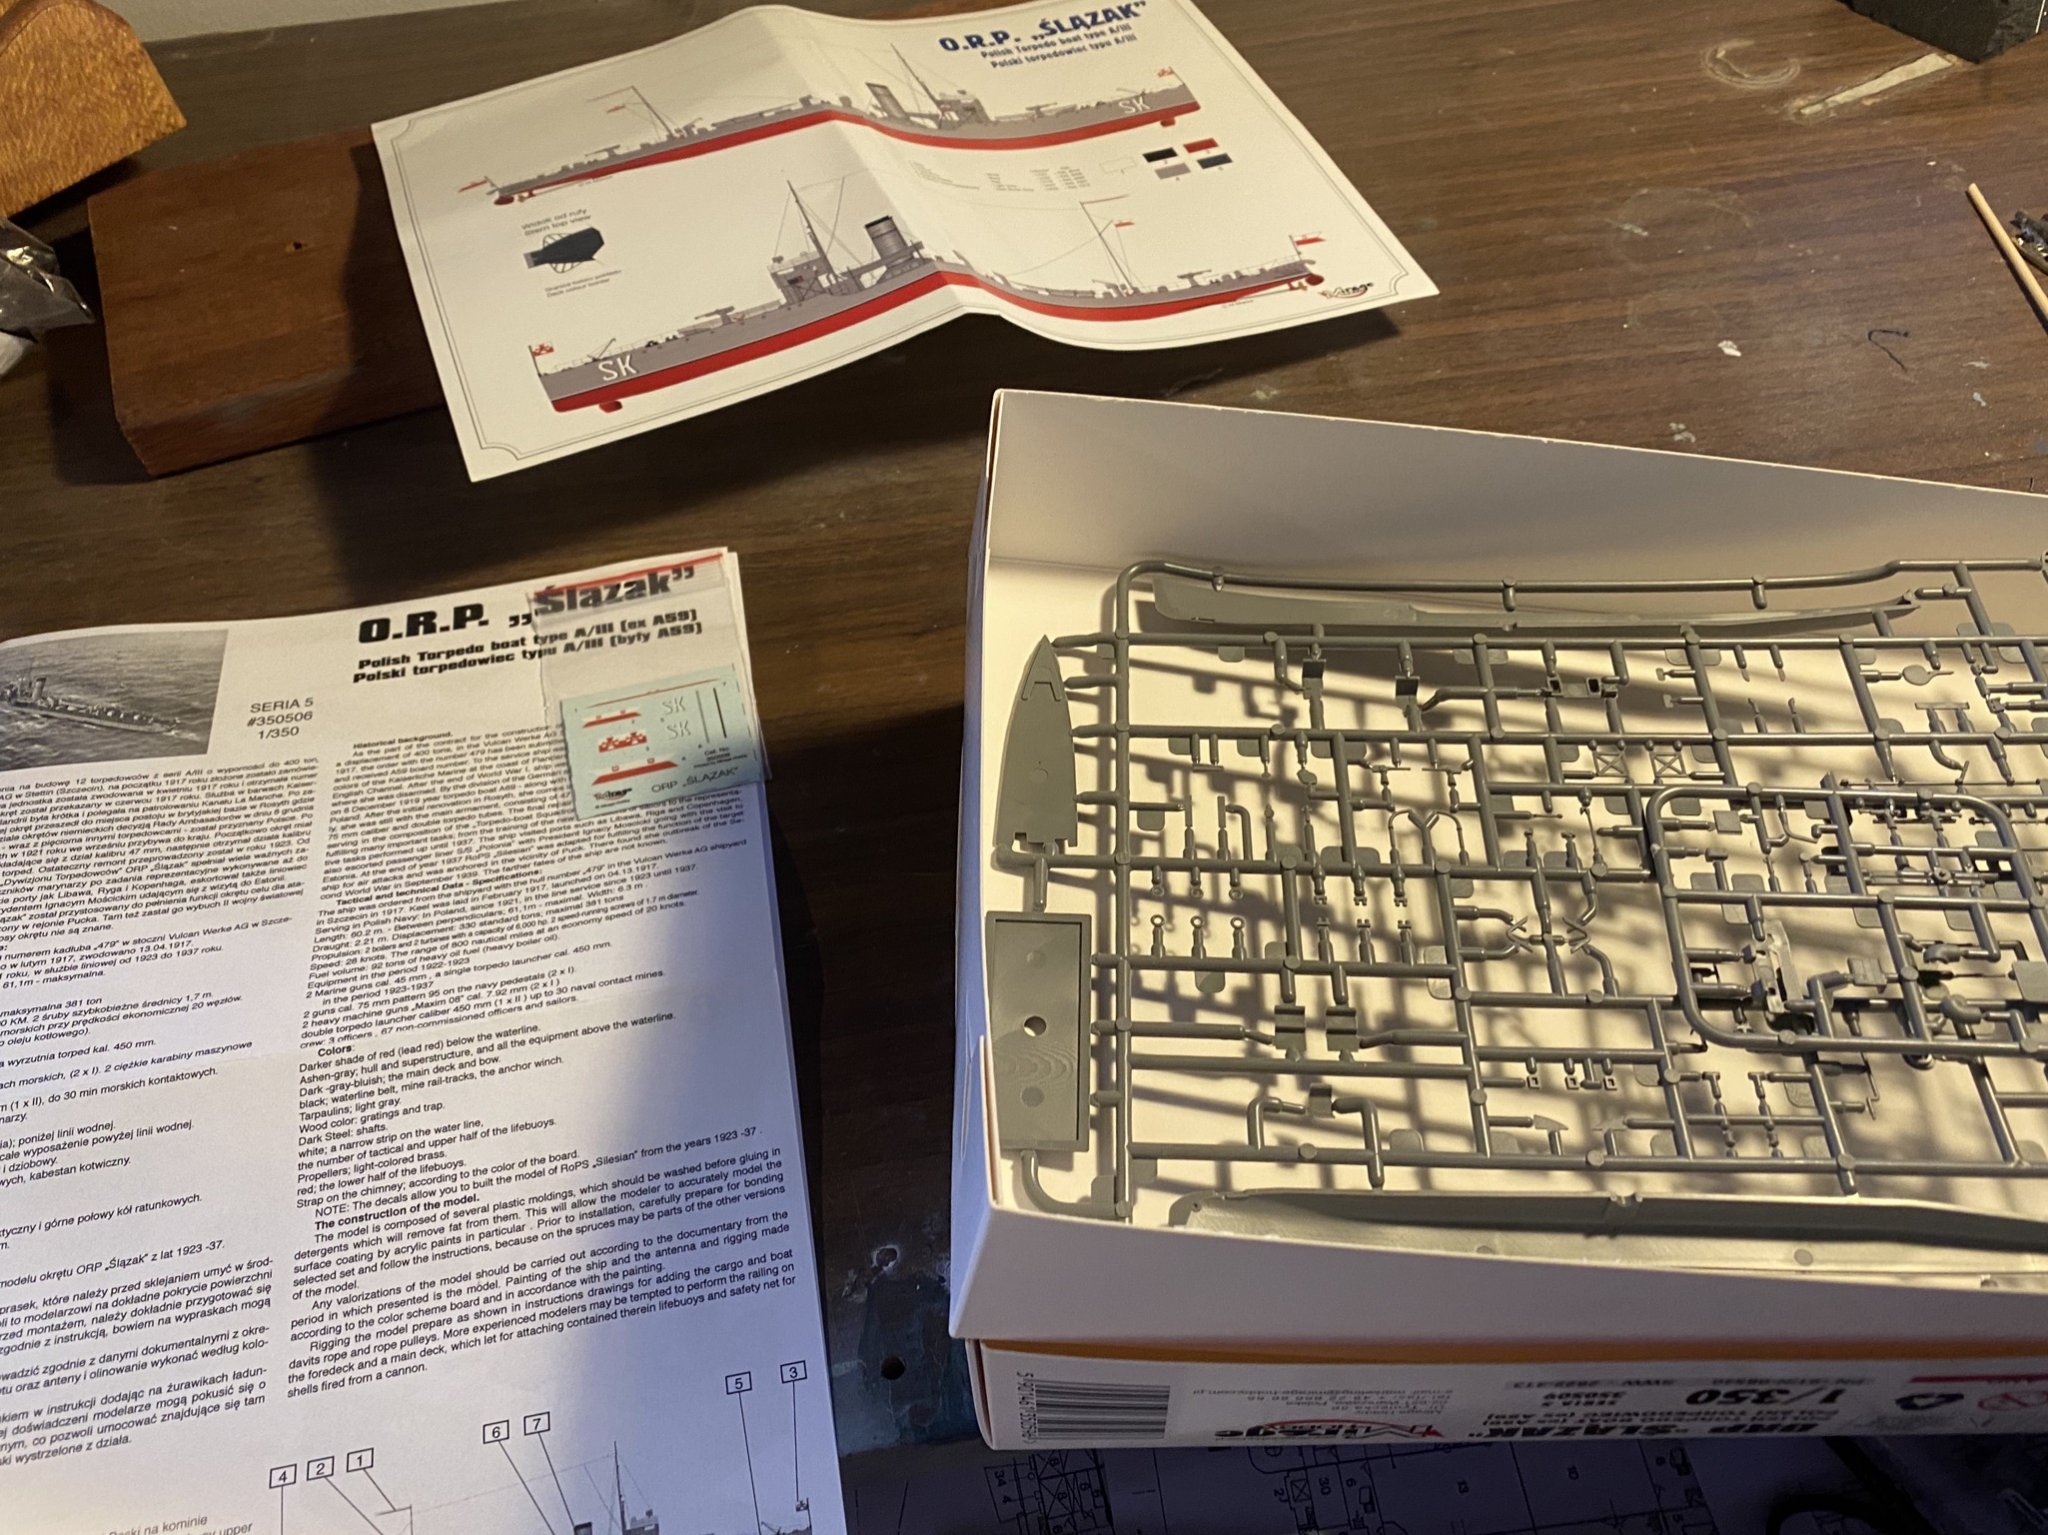
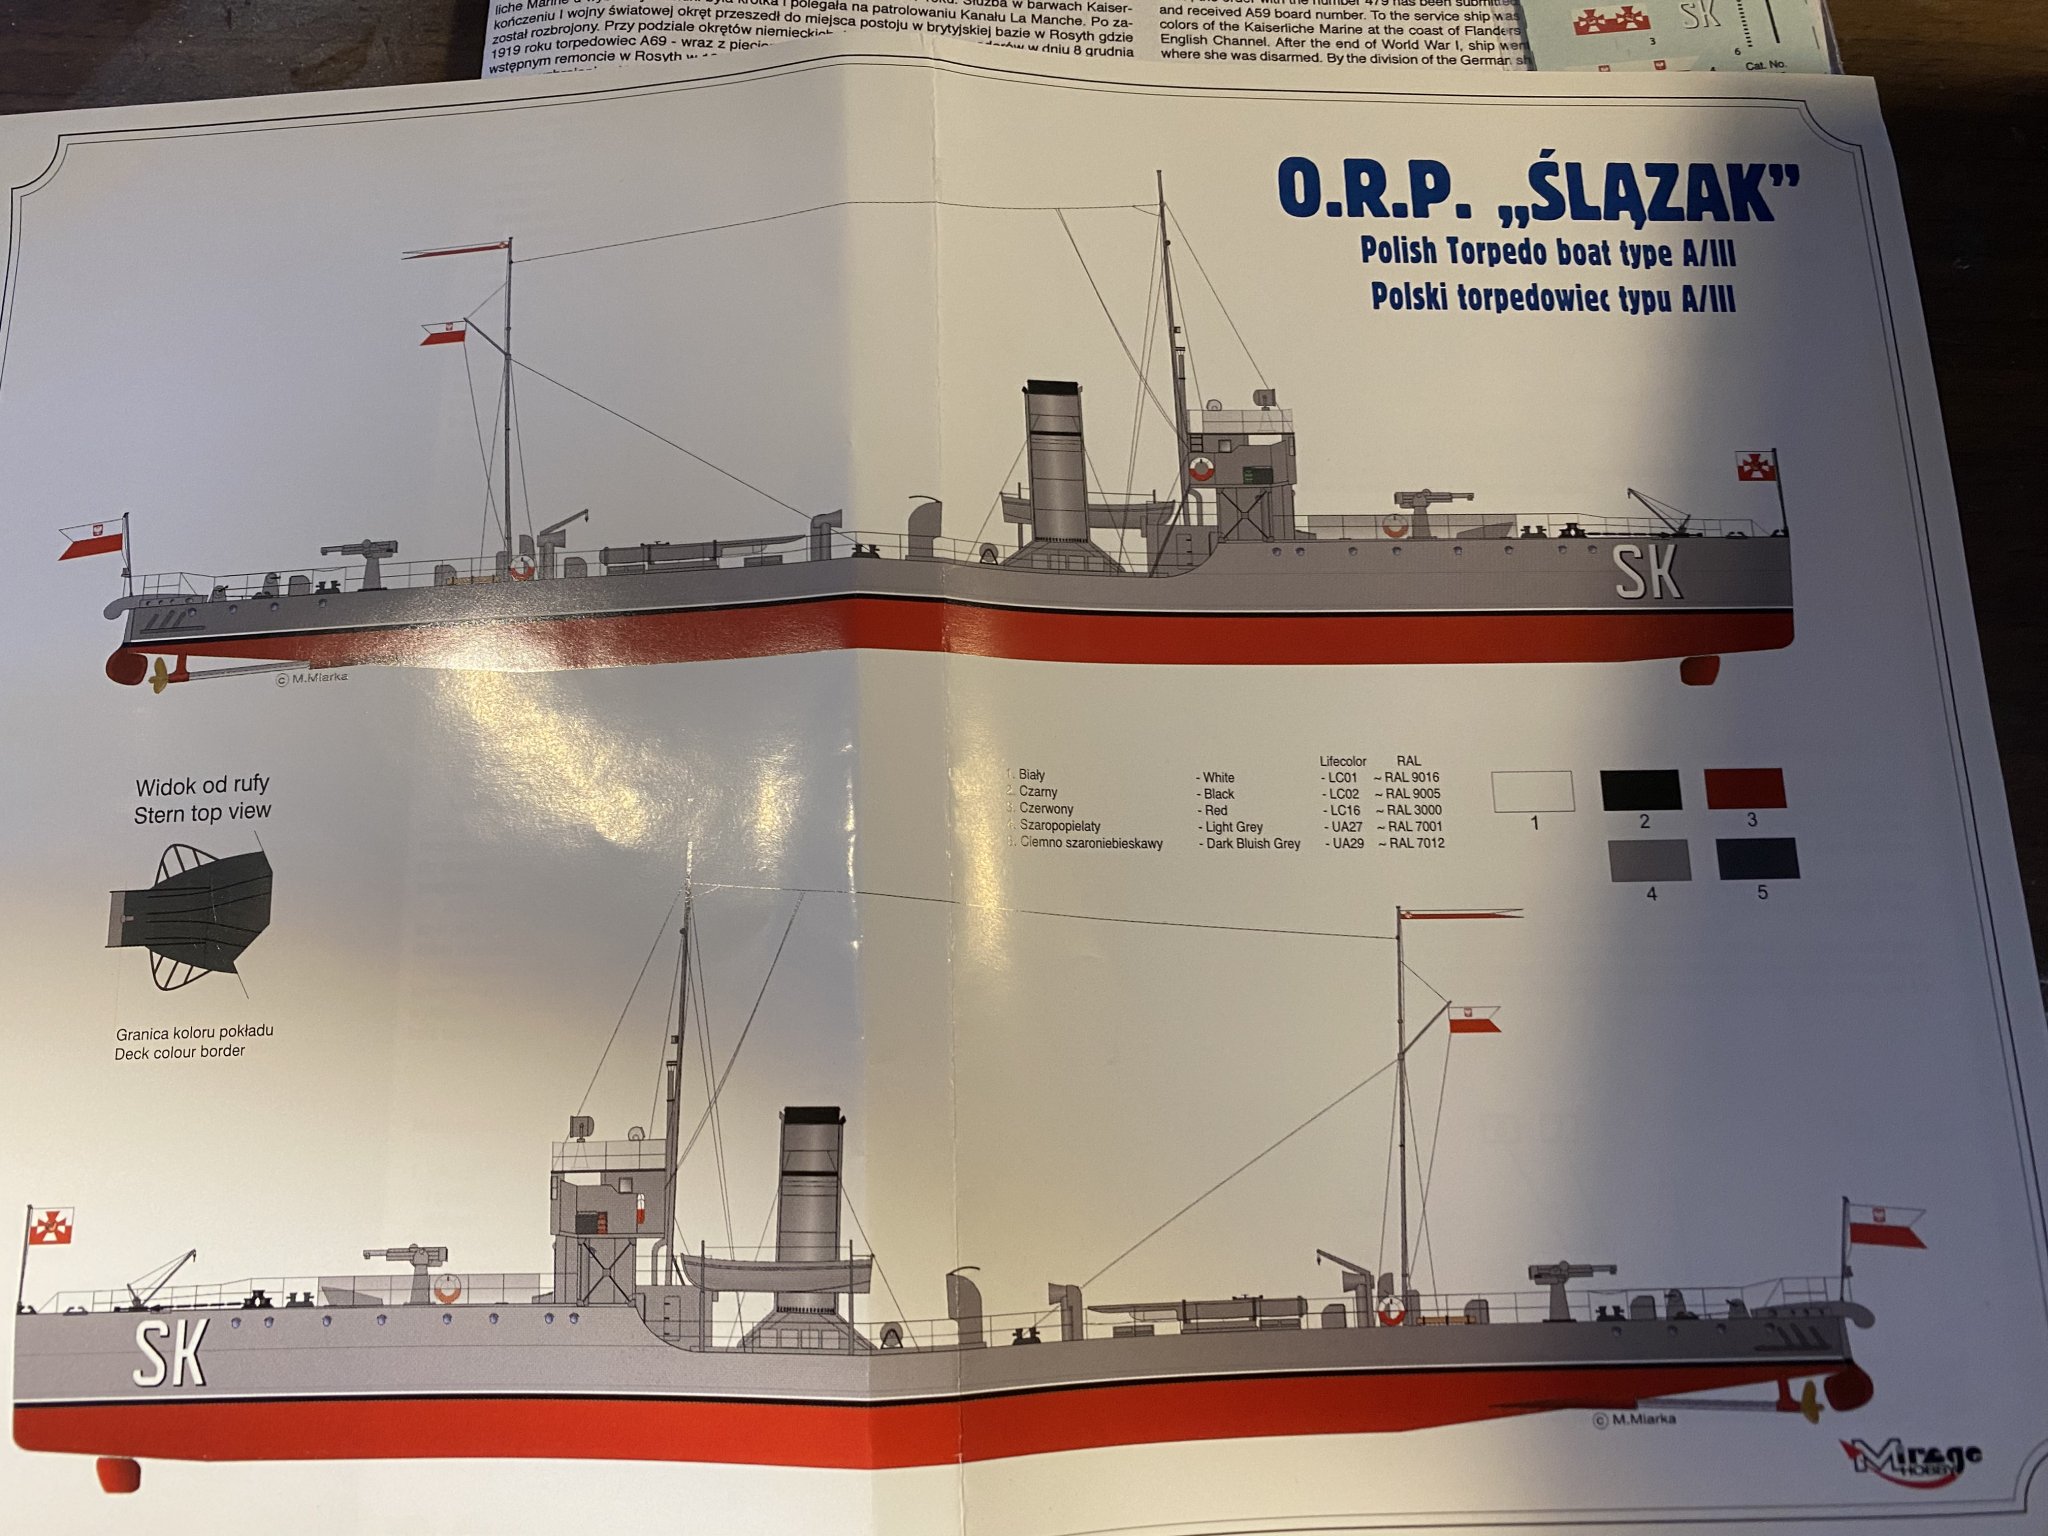
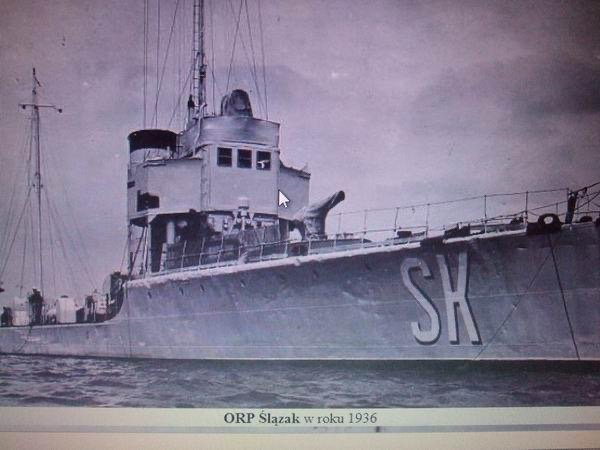
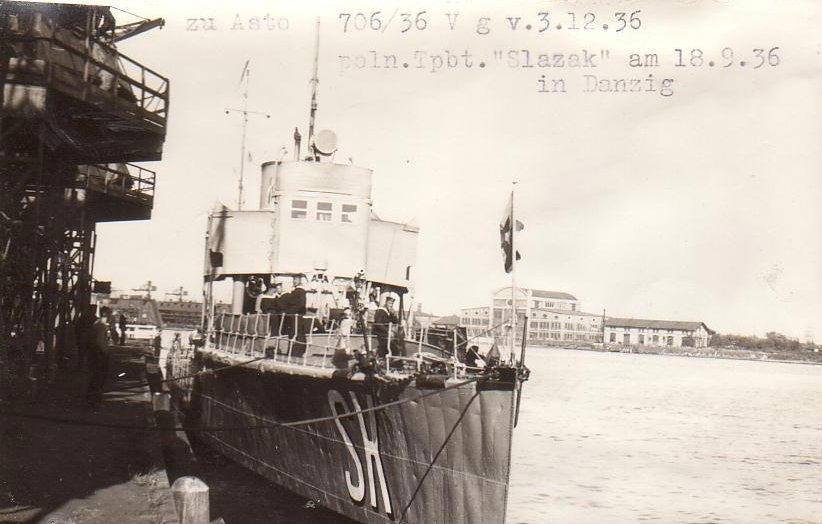
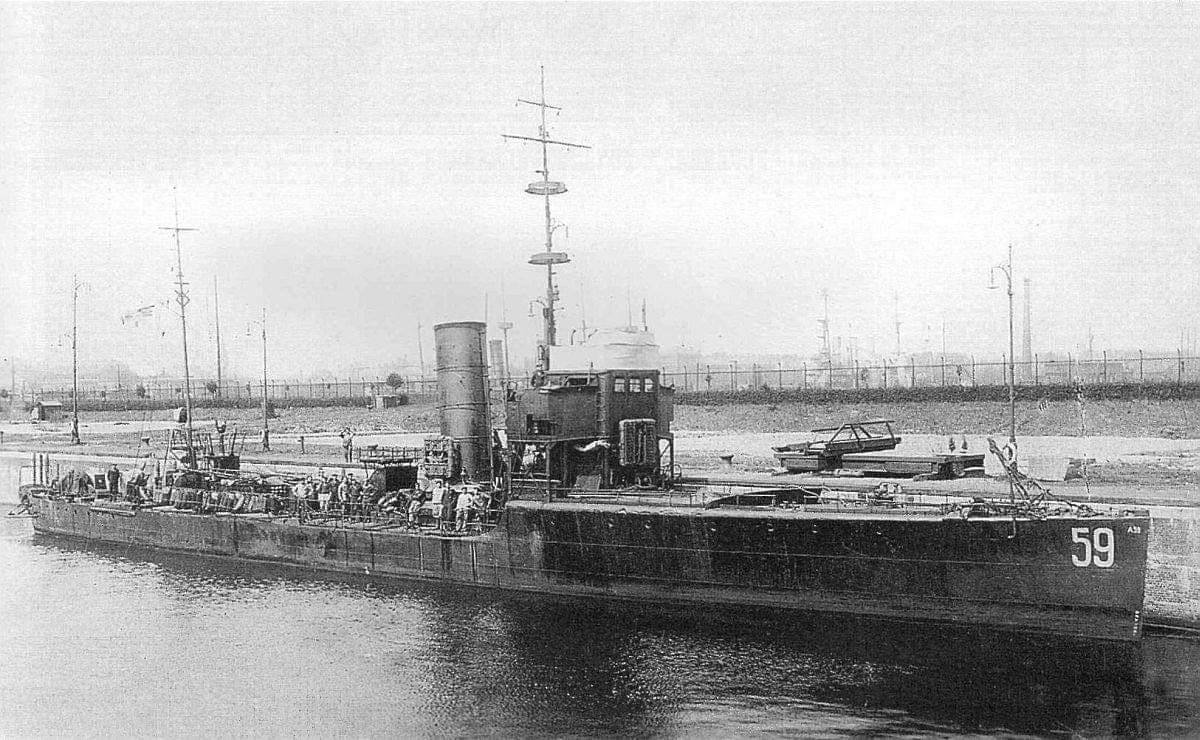
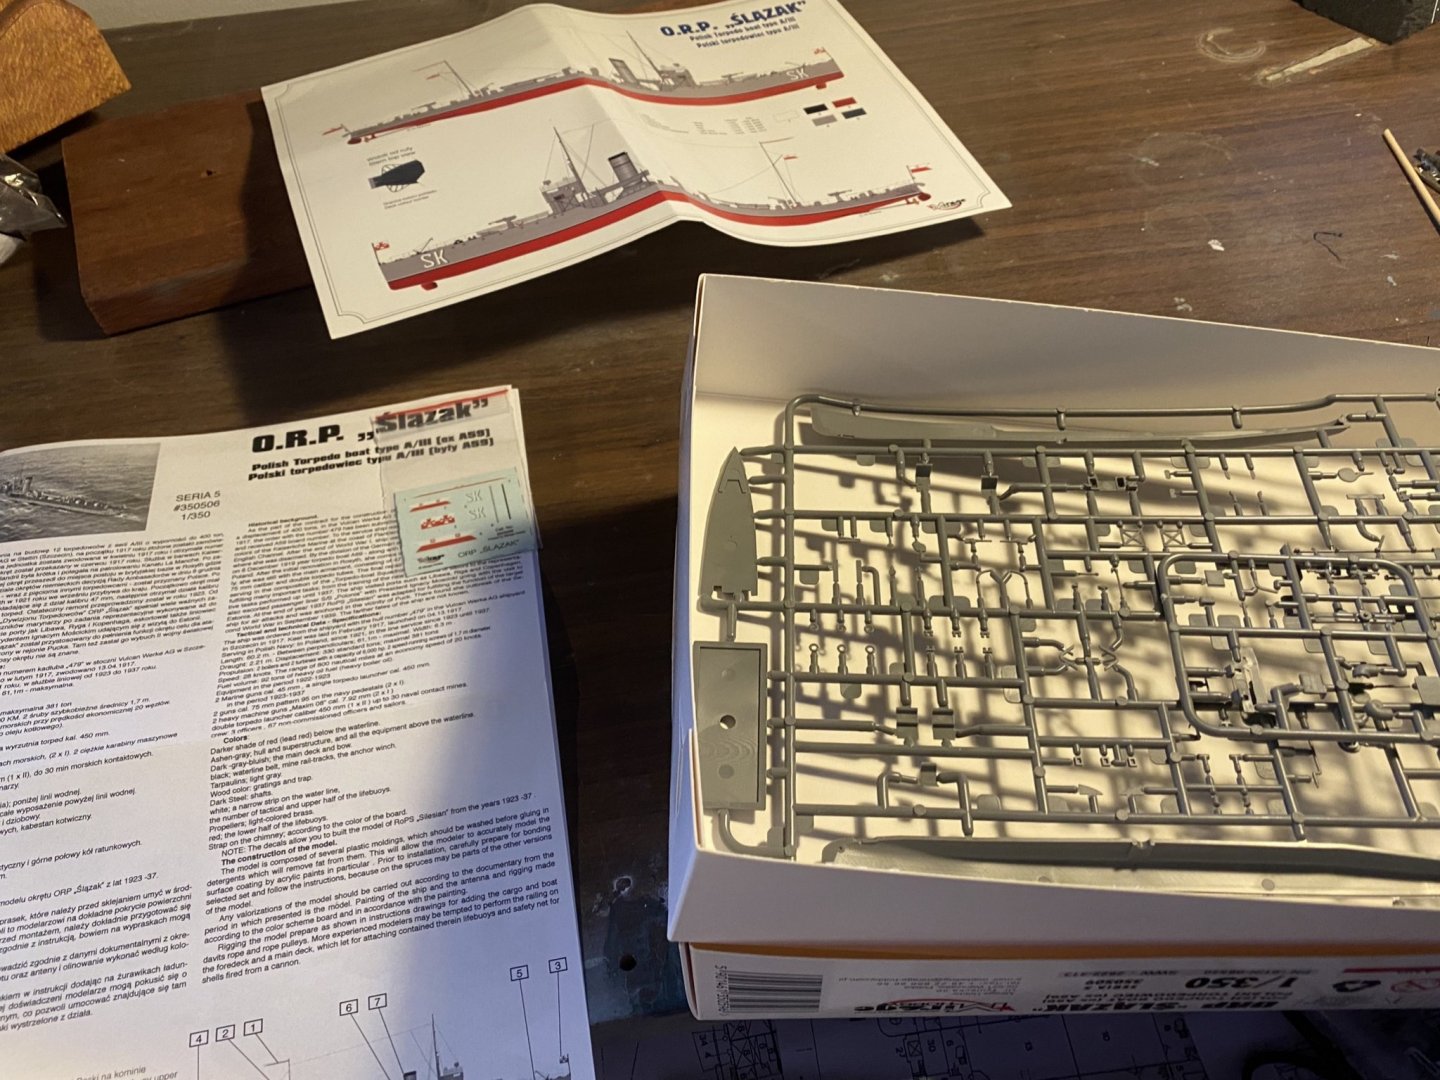
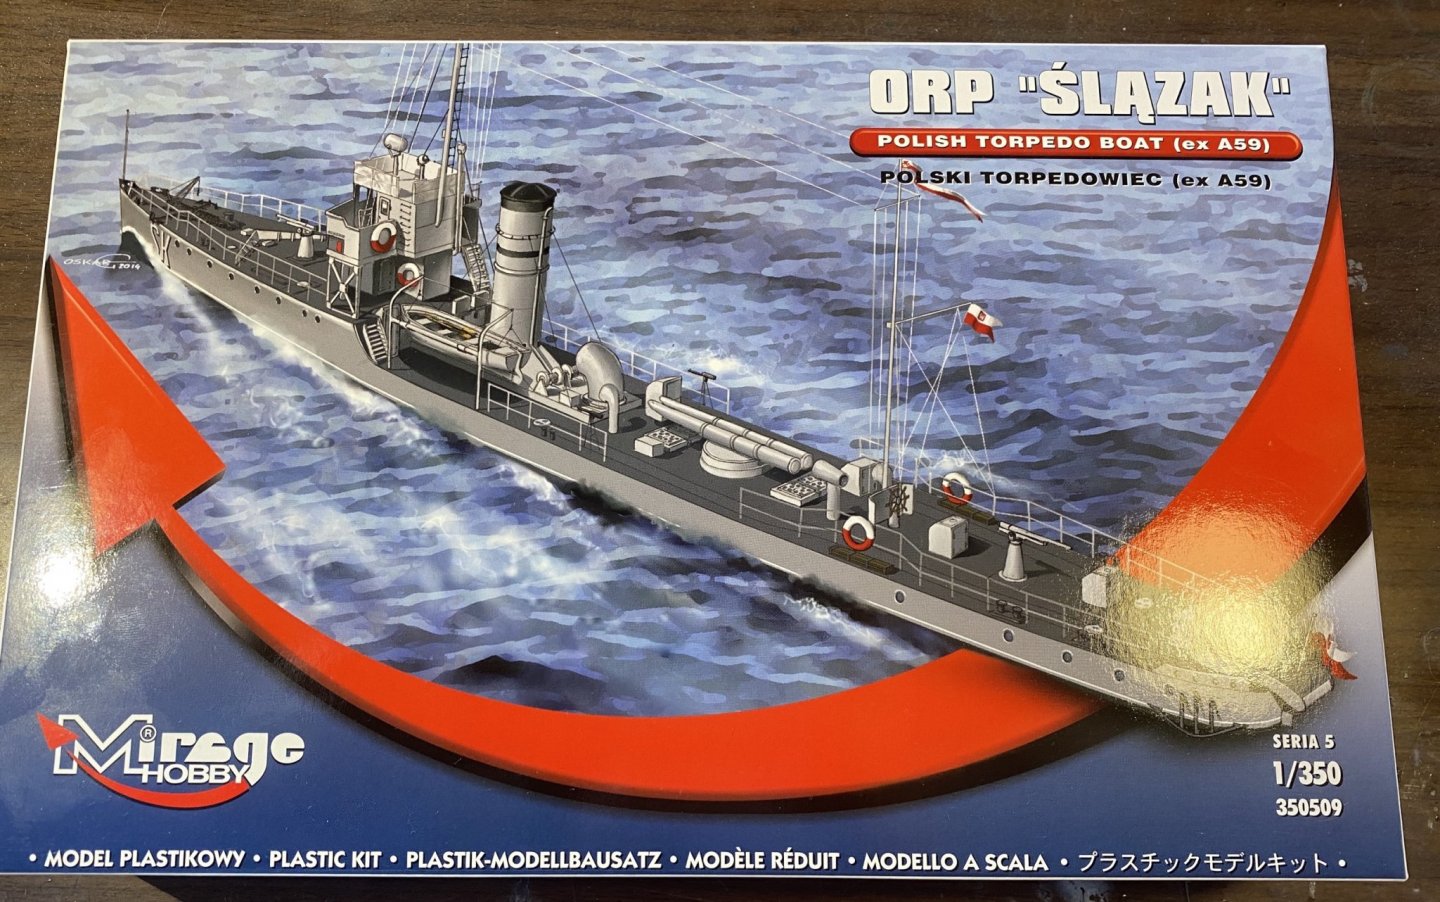
The A-class torpedo boats were a class of German single-funnelled torpedo boat/light destroyer designed by the Reichsmarineamt for operations off the coast of occupied Flanders in the First World War. The A designation was to avoid confusion with older classes and designs. They were known as "coastal torpedo boats" (German: Küstentorpedoboote) to differentiate from larger, ocean-going torpedo boats. Post WW1 it was awarded to Poland. From 1937 served in the Polish Navy as a target ship for aviation exercises and as it was unarmed. The outbreak of World War II found it in Puck (no idea where this is, sorry). During the September campaign it was persistent but ineffectively bombed by German planes. After taking Puck, it became a German prey. It’s fate is unknown, probably cut into scrap metal. There is very little history of this ship, but it cost $20 and I love this type. It’s cheap, nasty, needs work and the only aftermarket no longer is produced. Thus it’s a kits bash. Should be fun.
- 45 replies
-
- 9
-
-
- orp ślązak
- mirage hobby
- (and 2 more)