HOLIDAY DONATION DRIVE - SUPPORT MSW - DO YOUR PART TO KEEP THIS GREAT FORUM GOING! (Only 66 donations so far out of 49,000 members - Can we at least get100? C'mon guys!)
×


RGL
-
Posts
5,531 -
Joined
-
Last visited
Content Type
Profiles
Forums
Gallery
Events
Everything posted by RGL
-
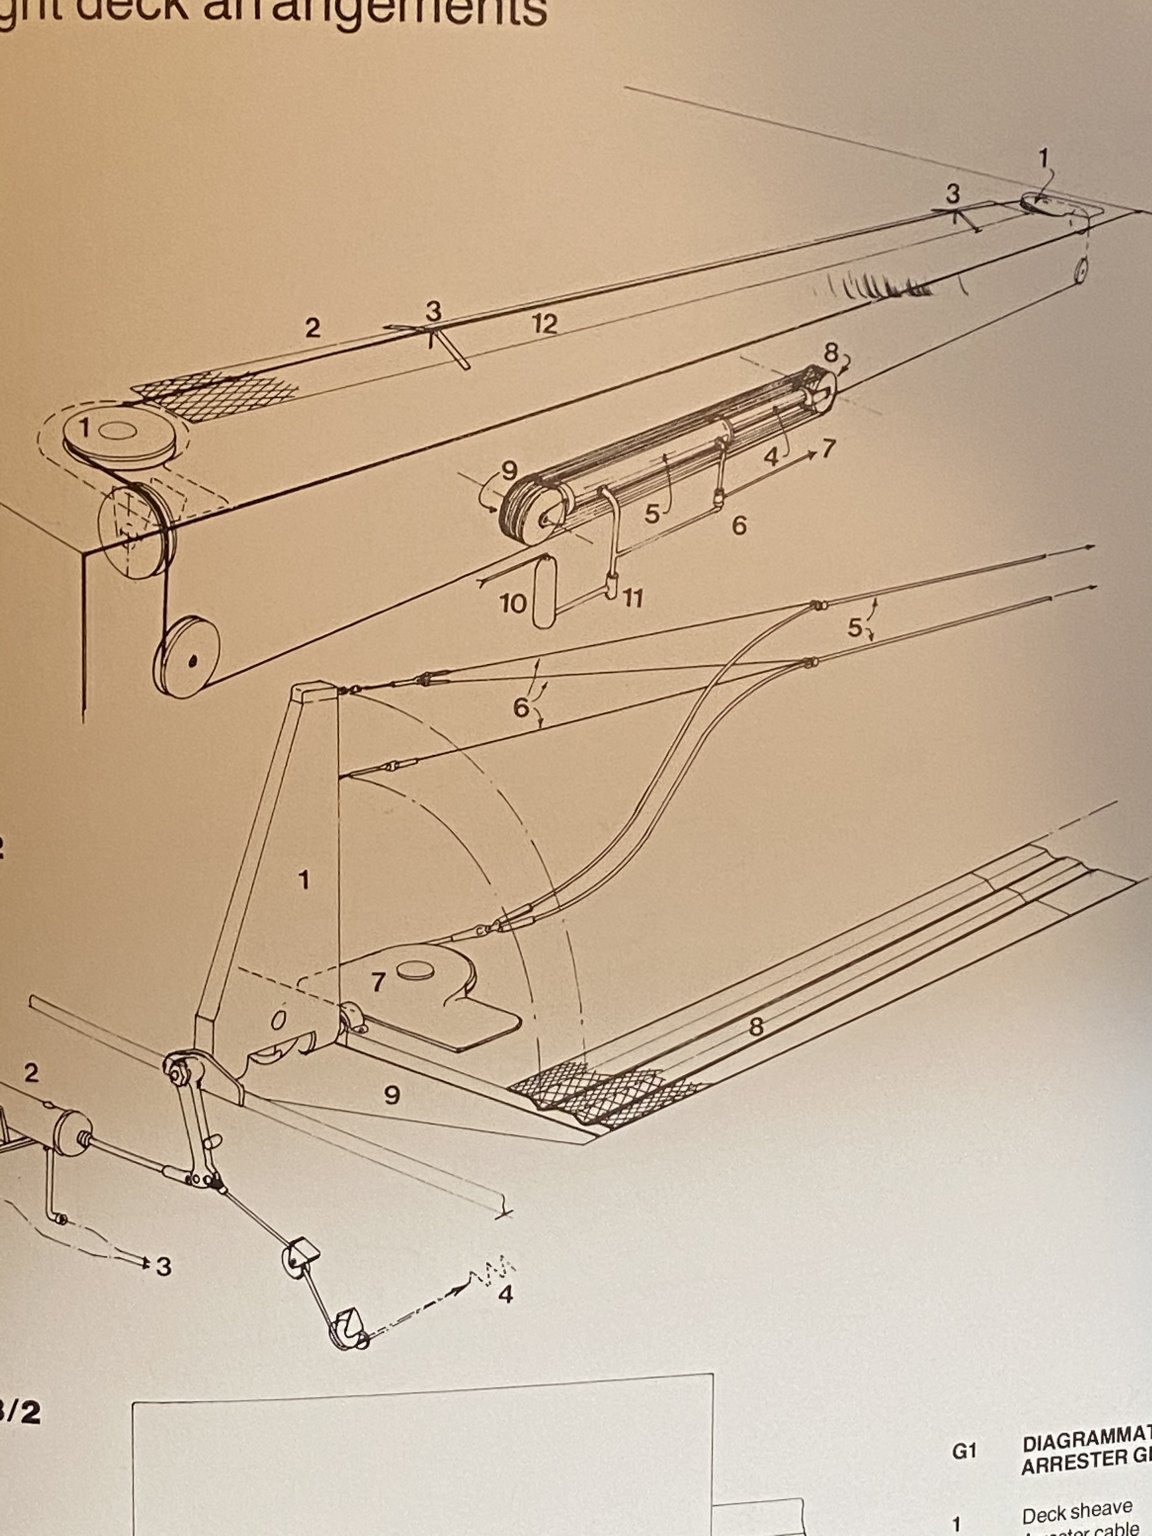
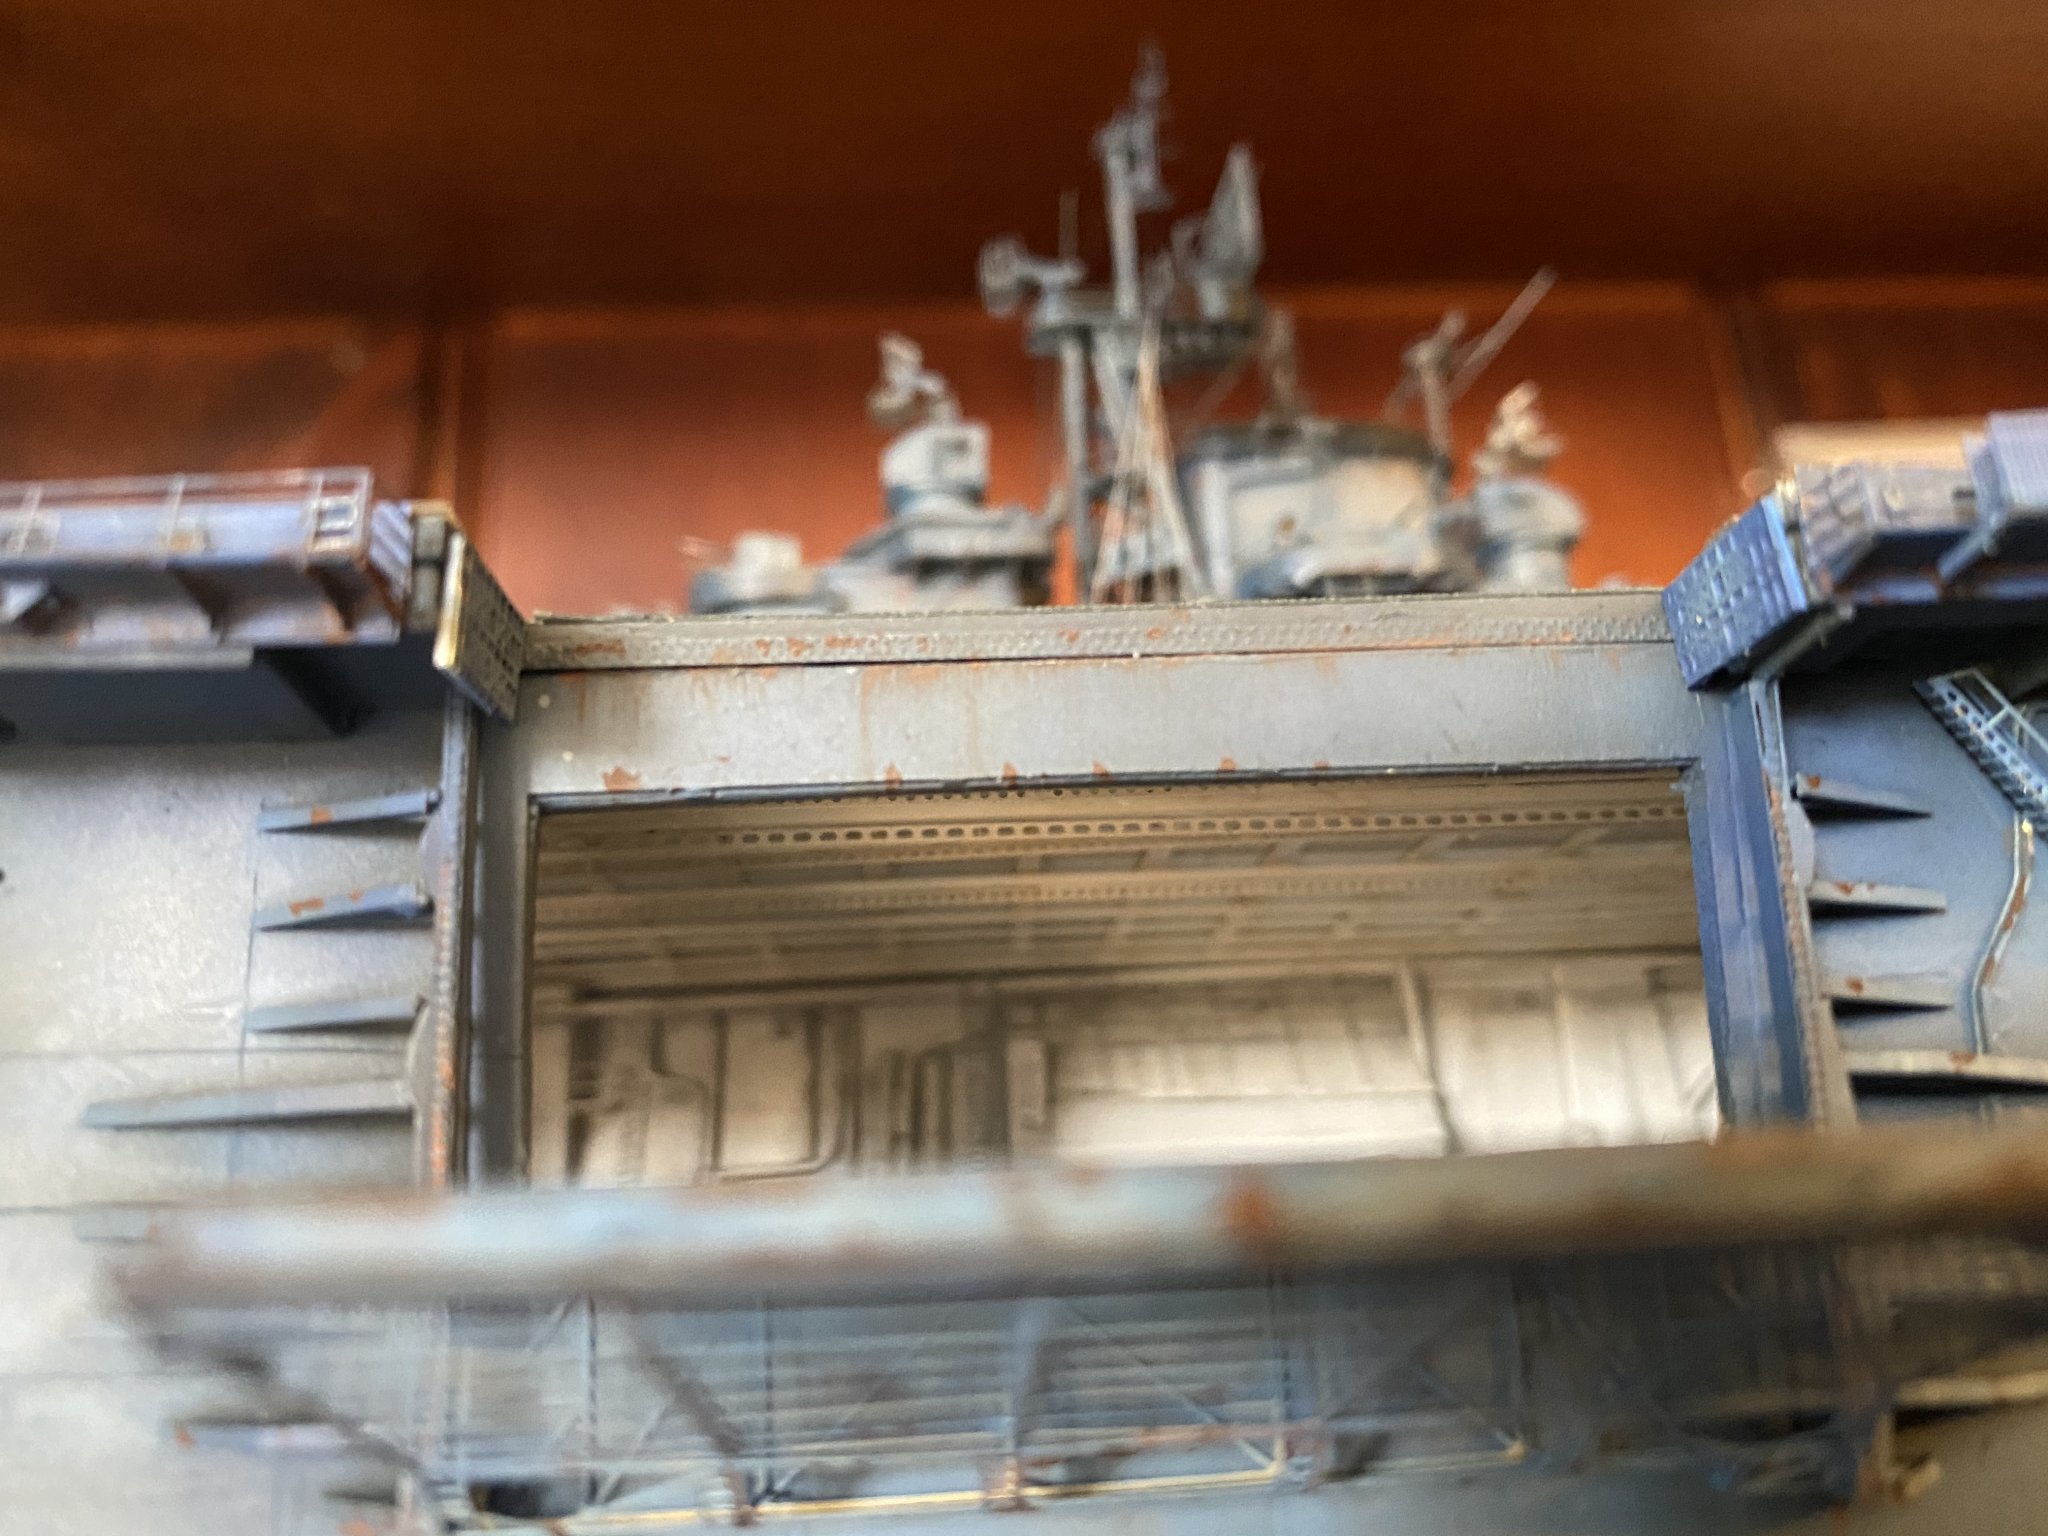
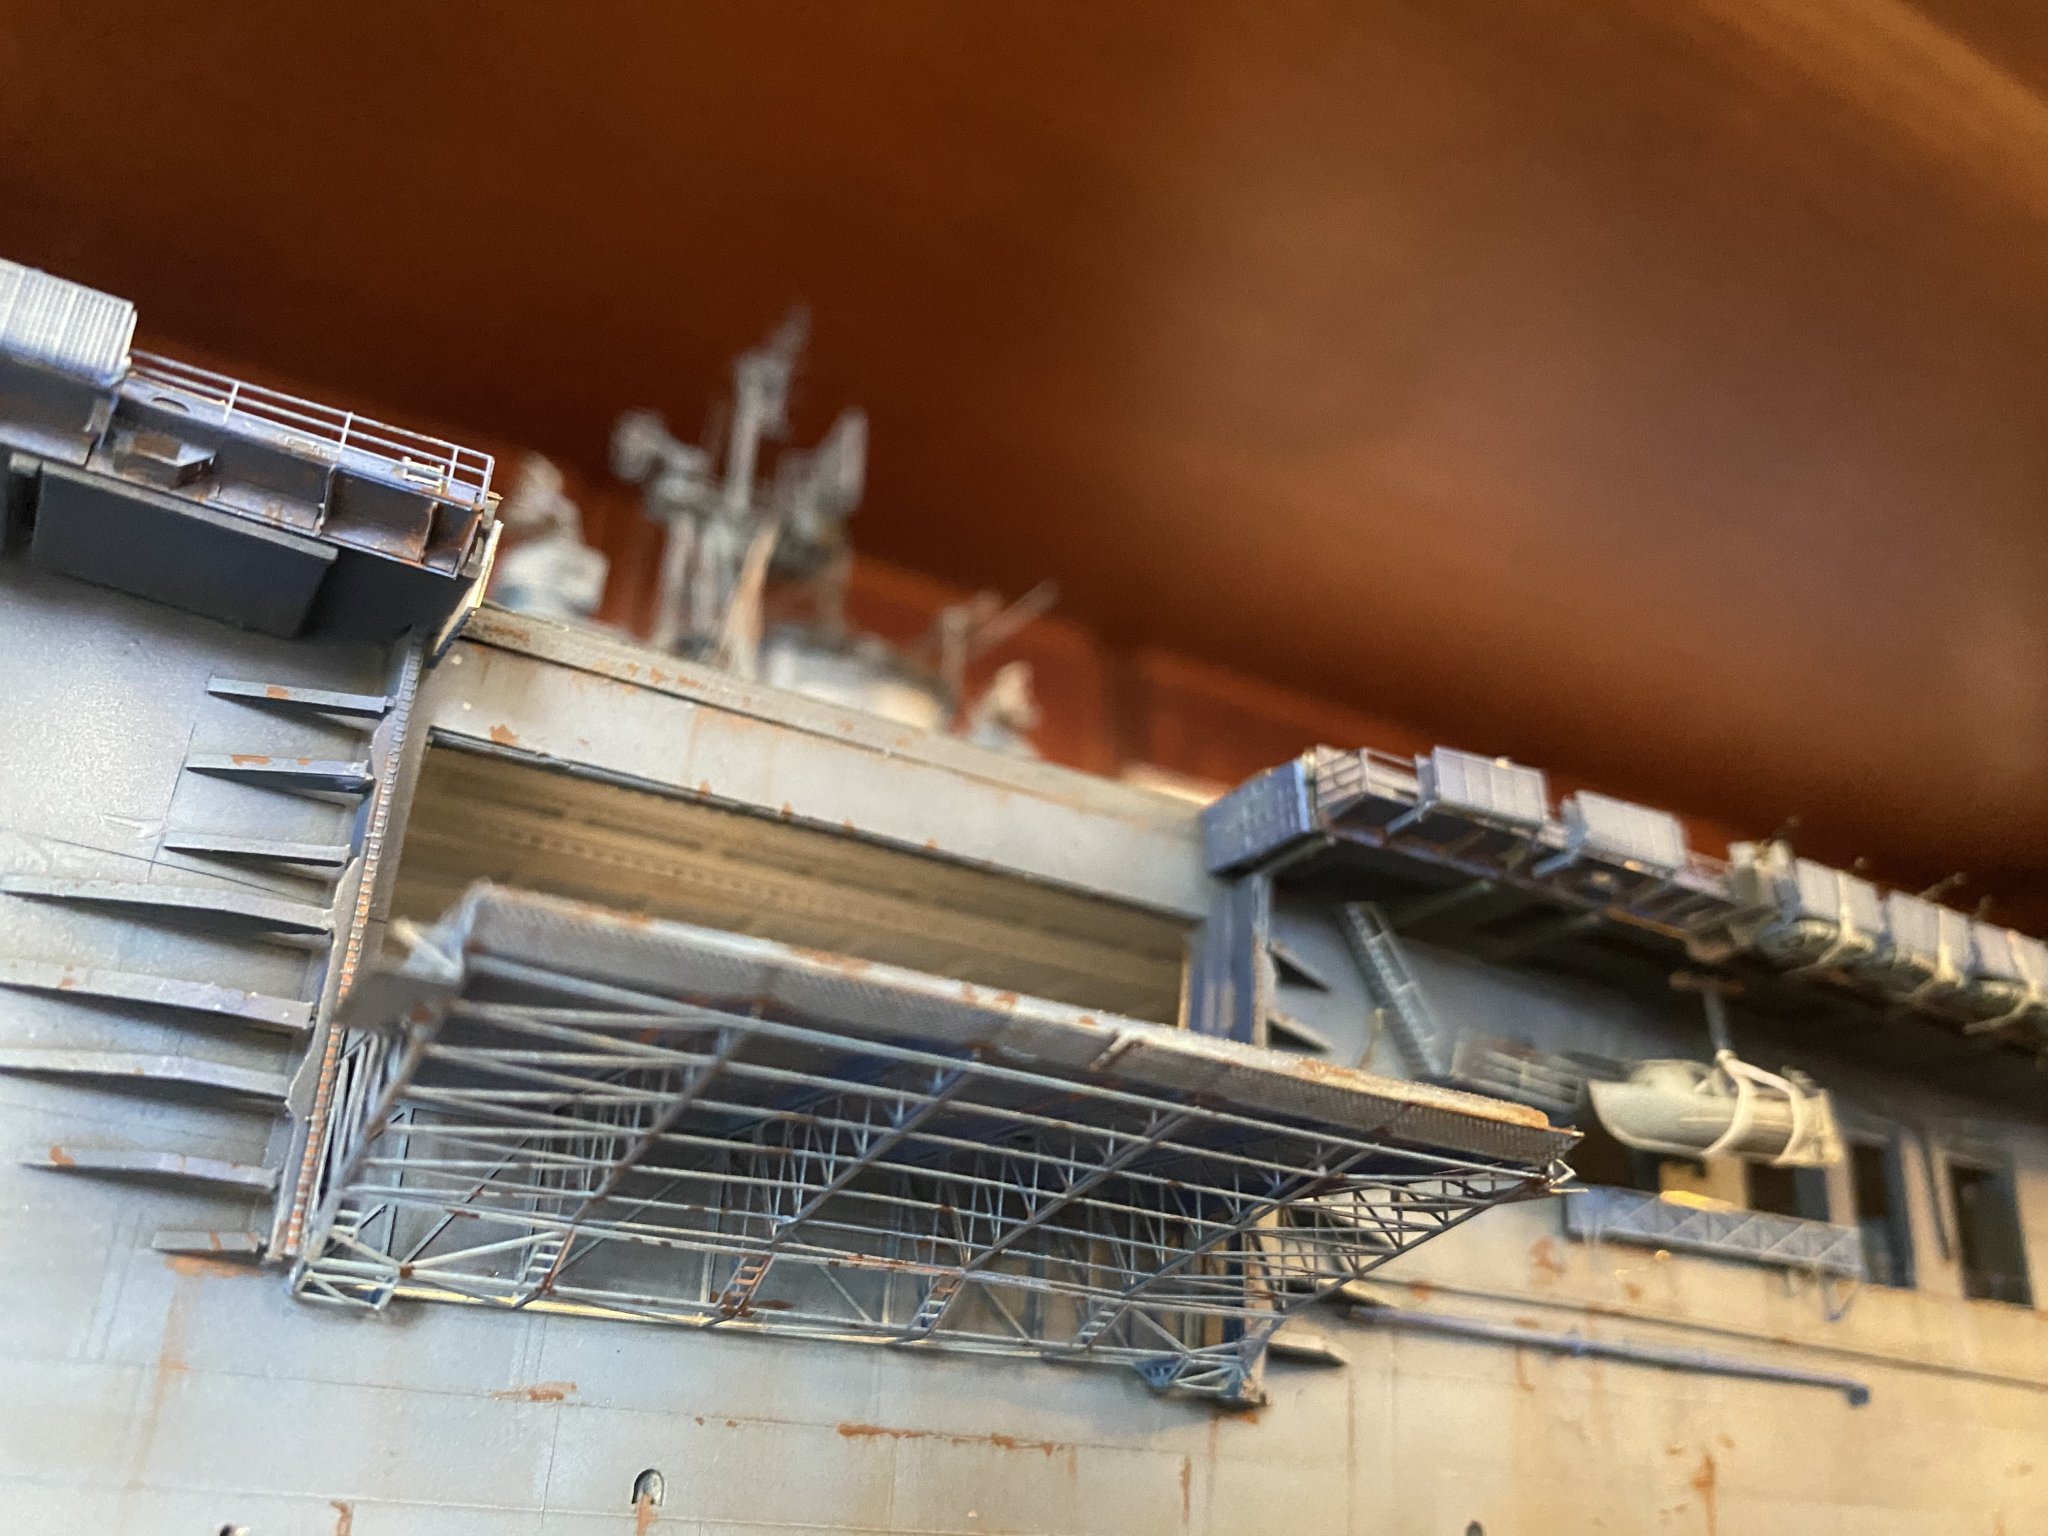
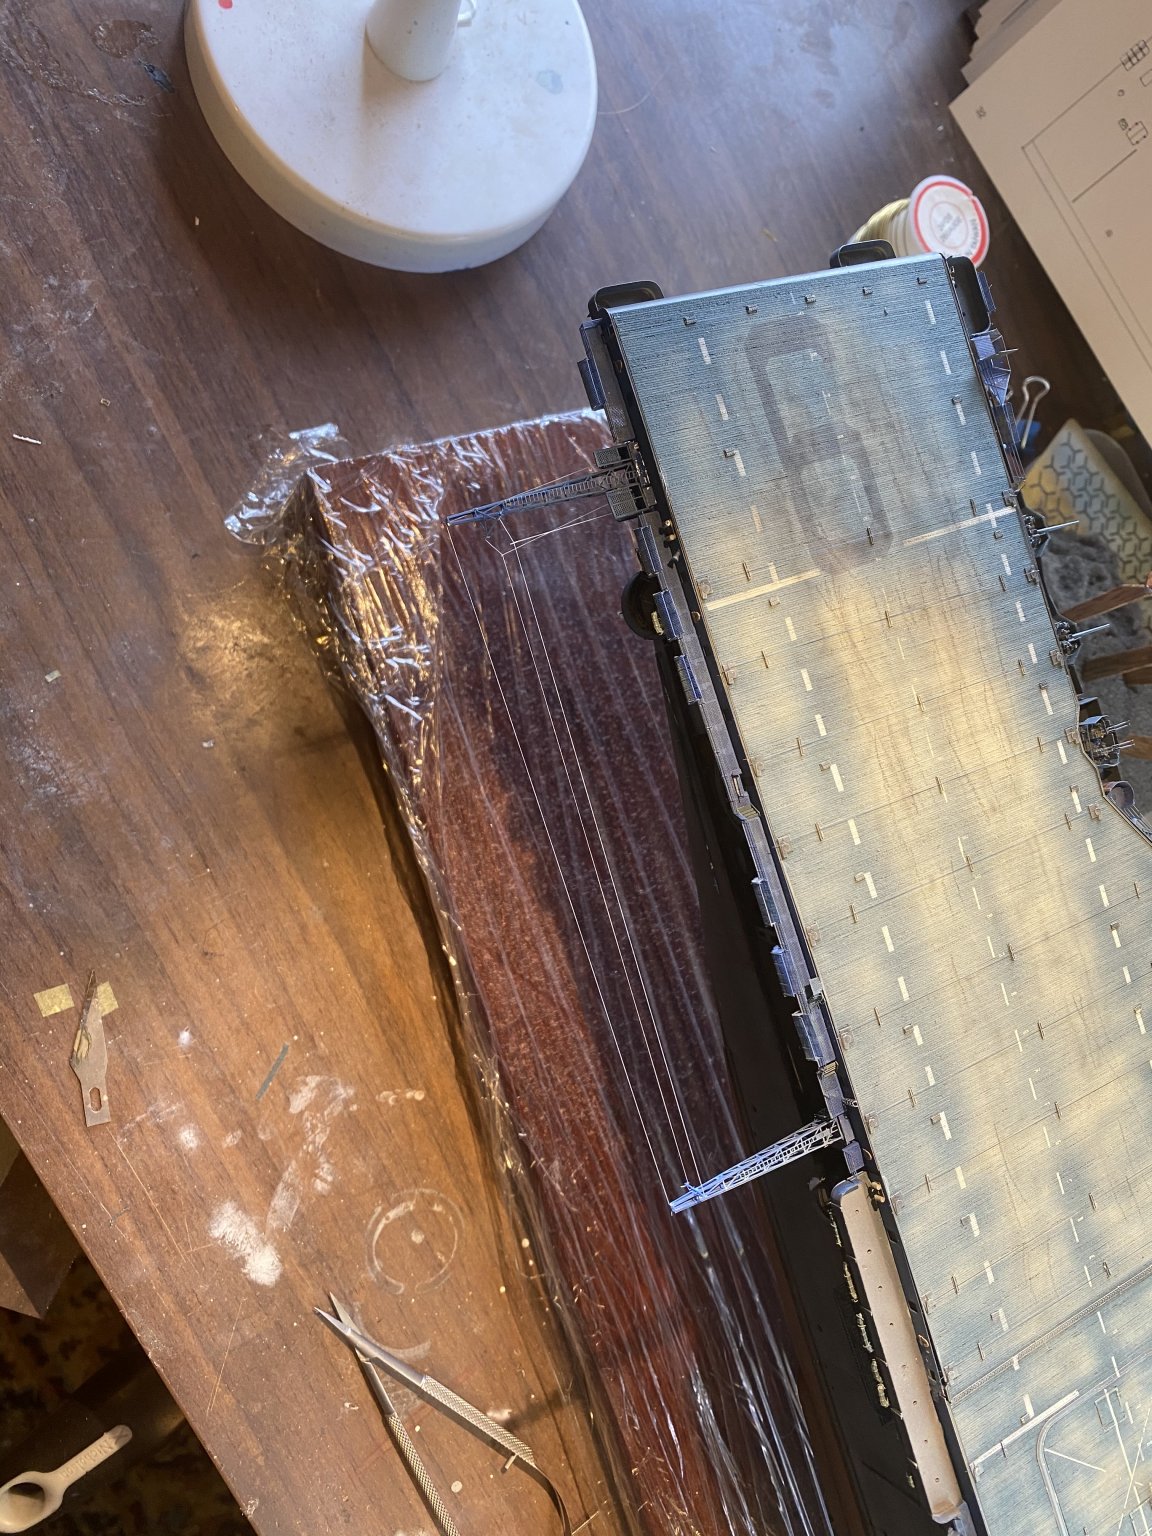
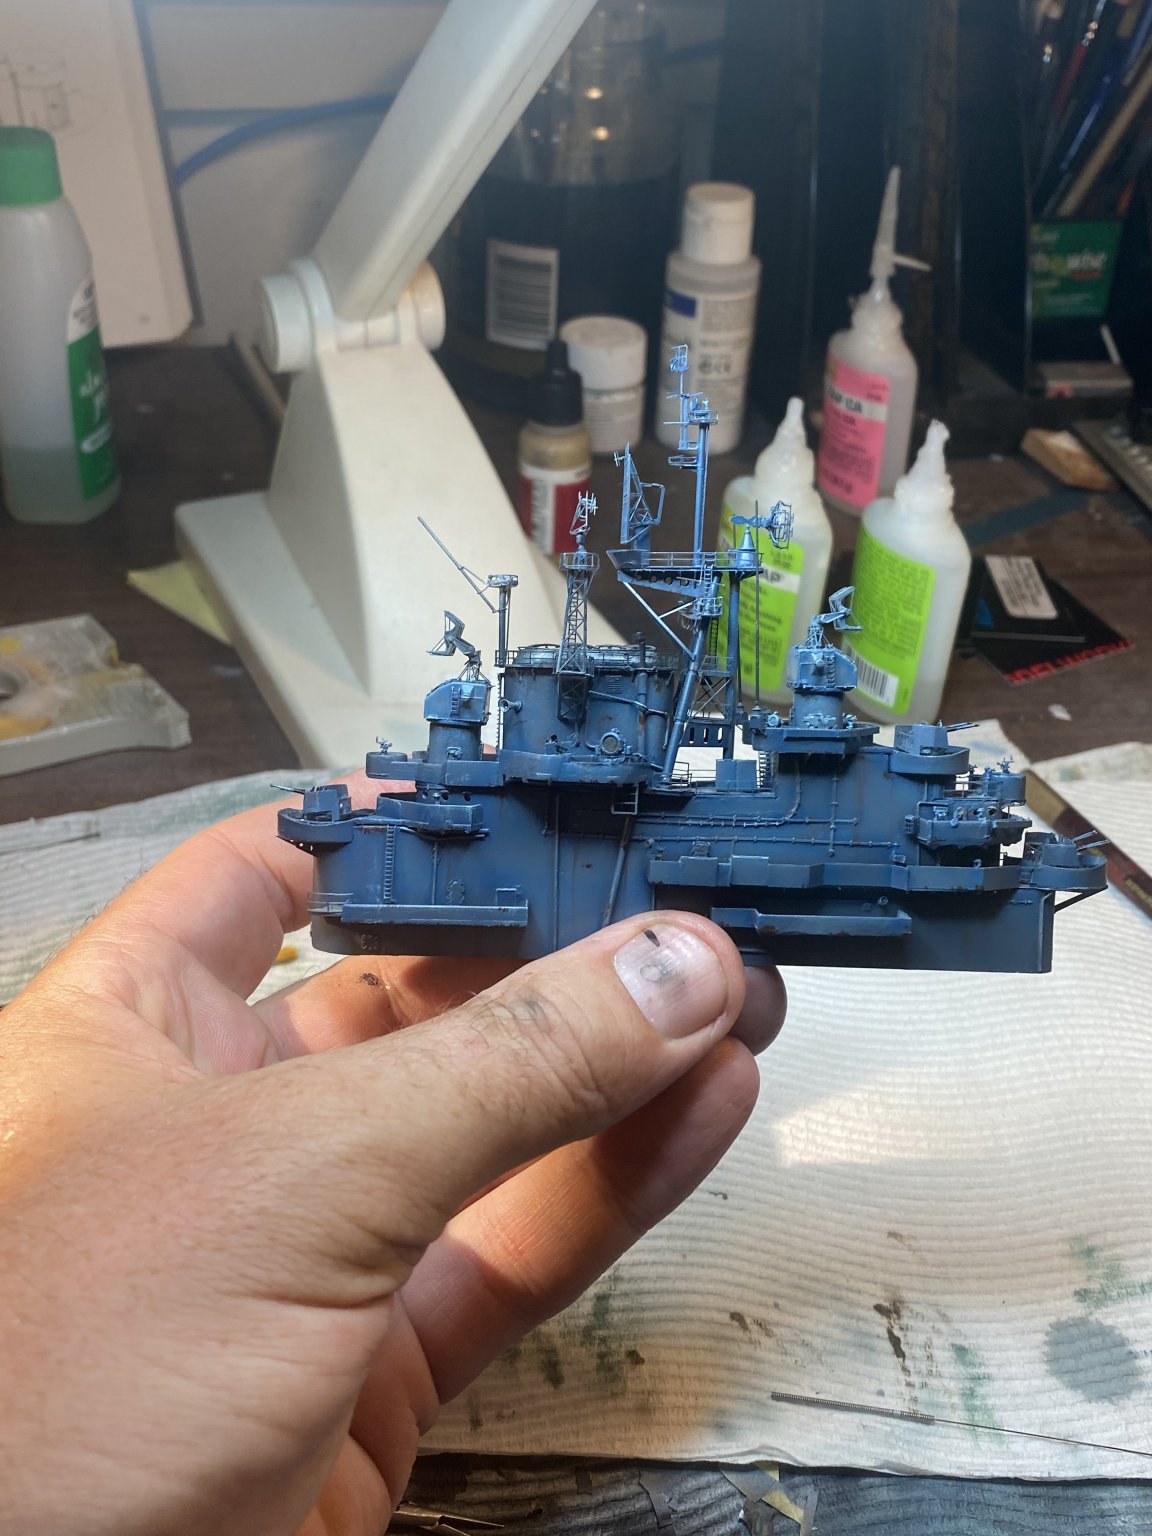
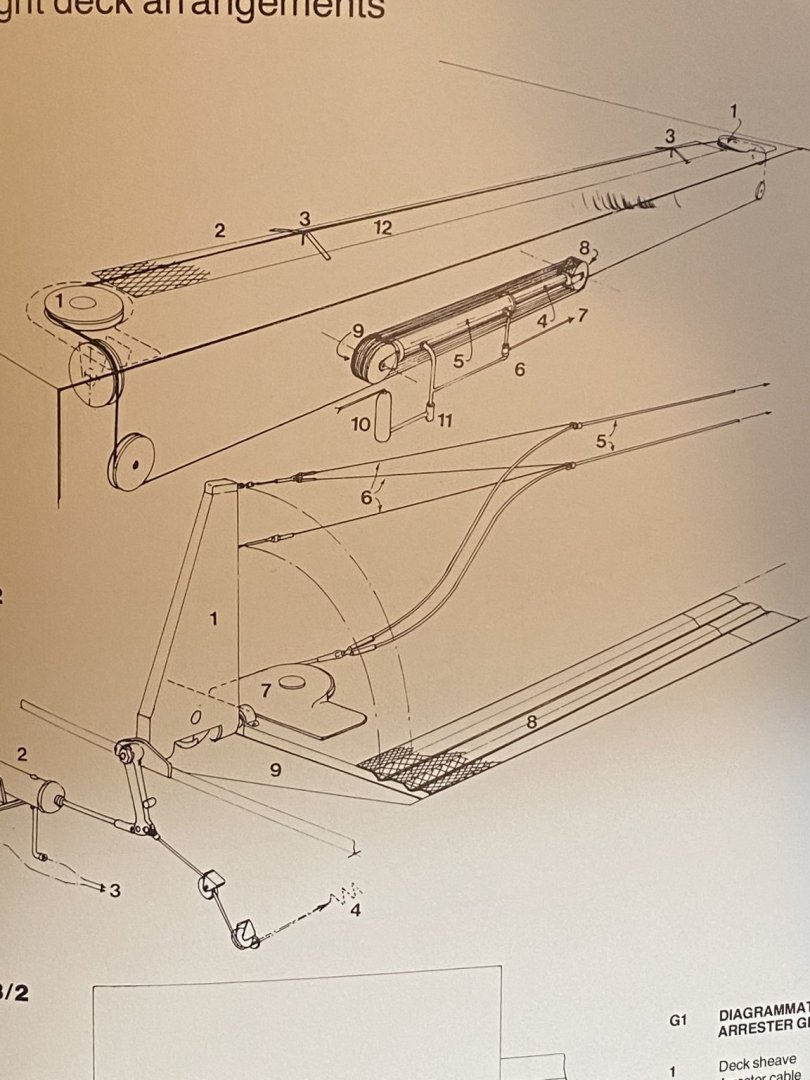
 You can hardly see this, but when the carriers did recovery operations, they put up wire barriers to stop planes that missed the arrestor cable, so the upgrade provided the 8 required stays which I have rigged with two wires each, just near impossible to see.
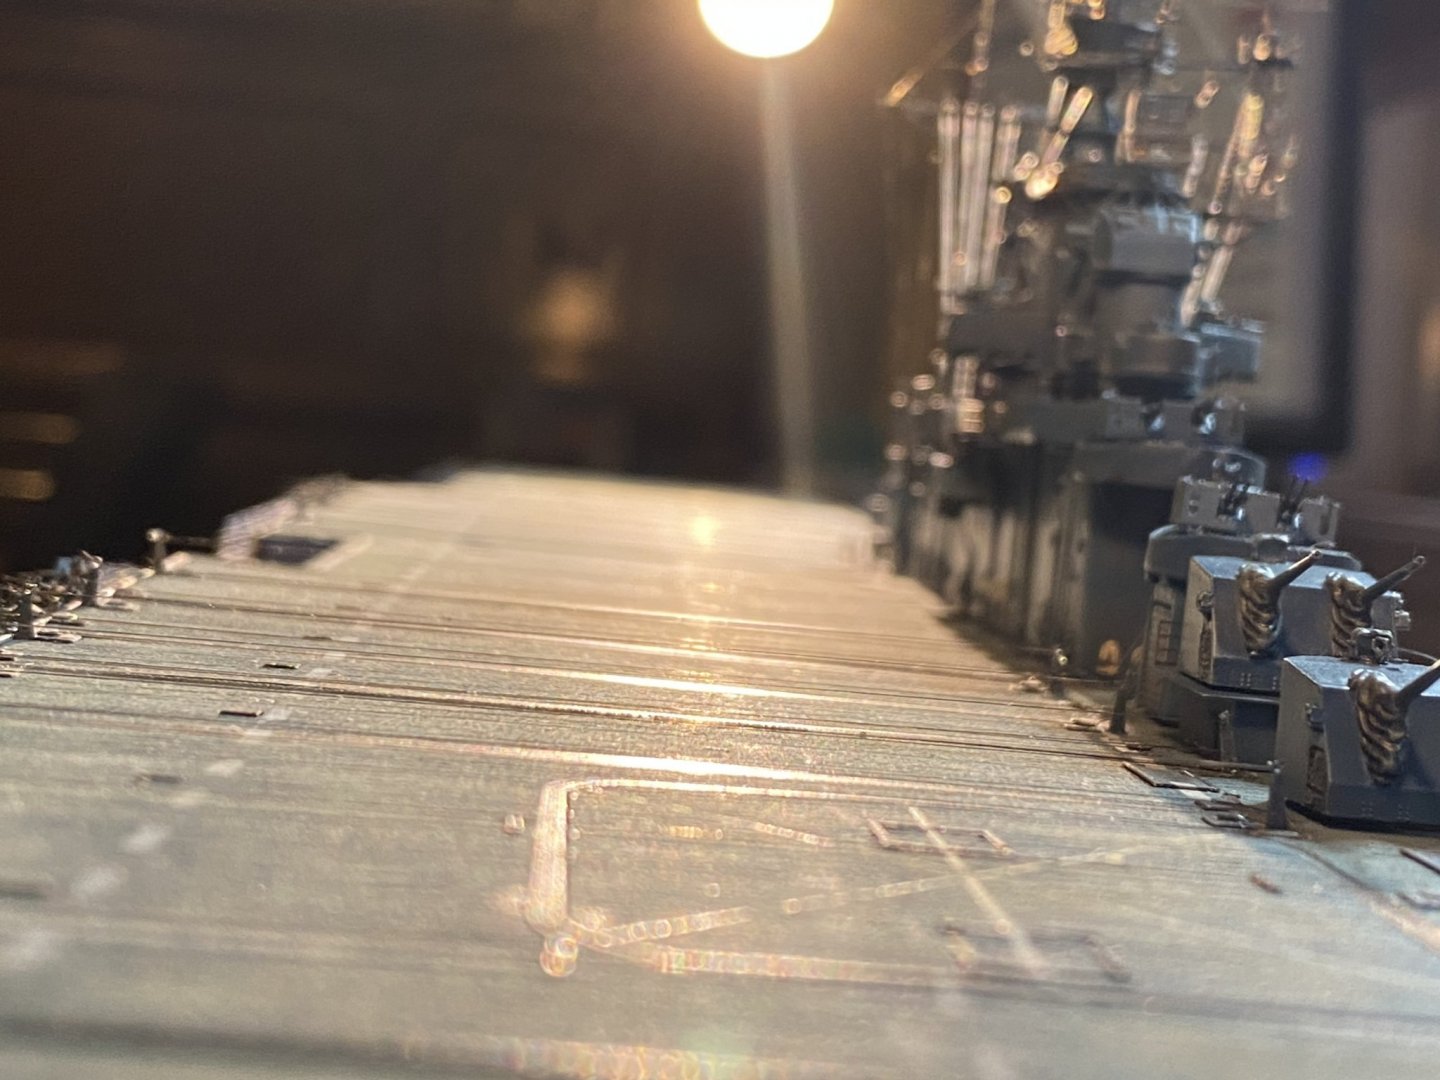
- 308 replies
-
- 21
-

-
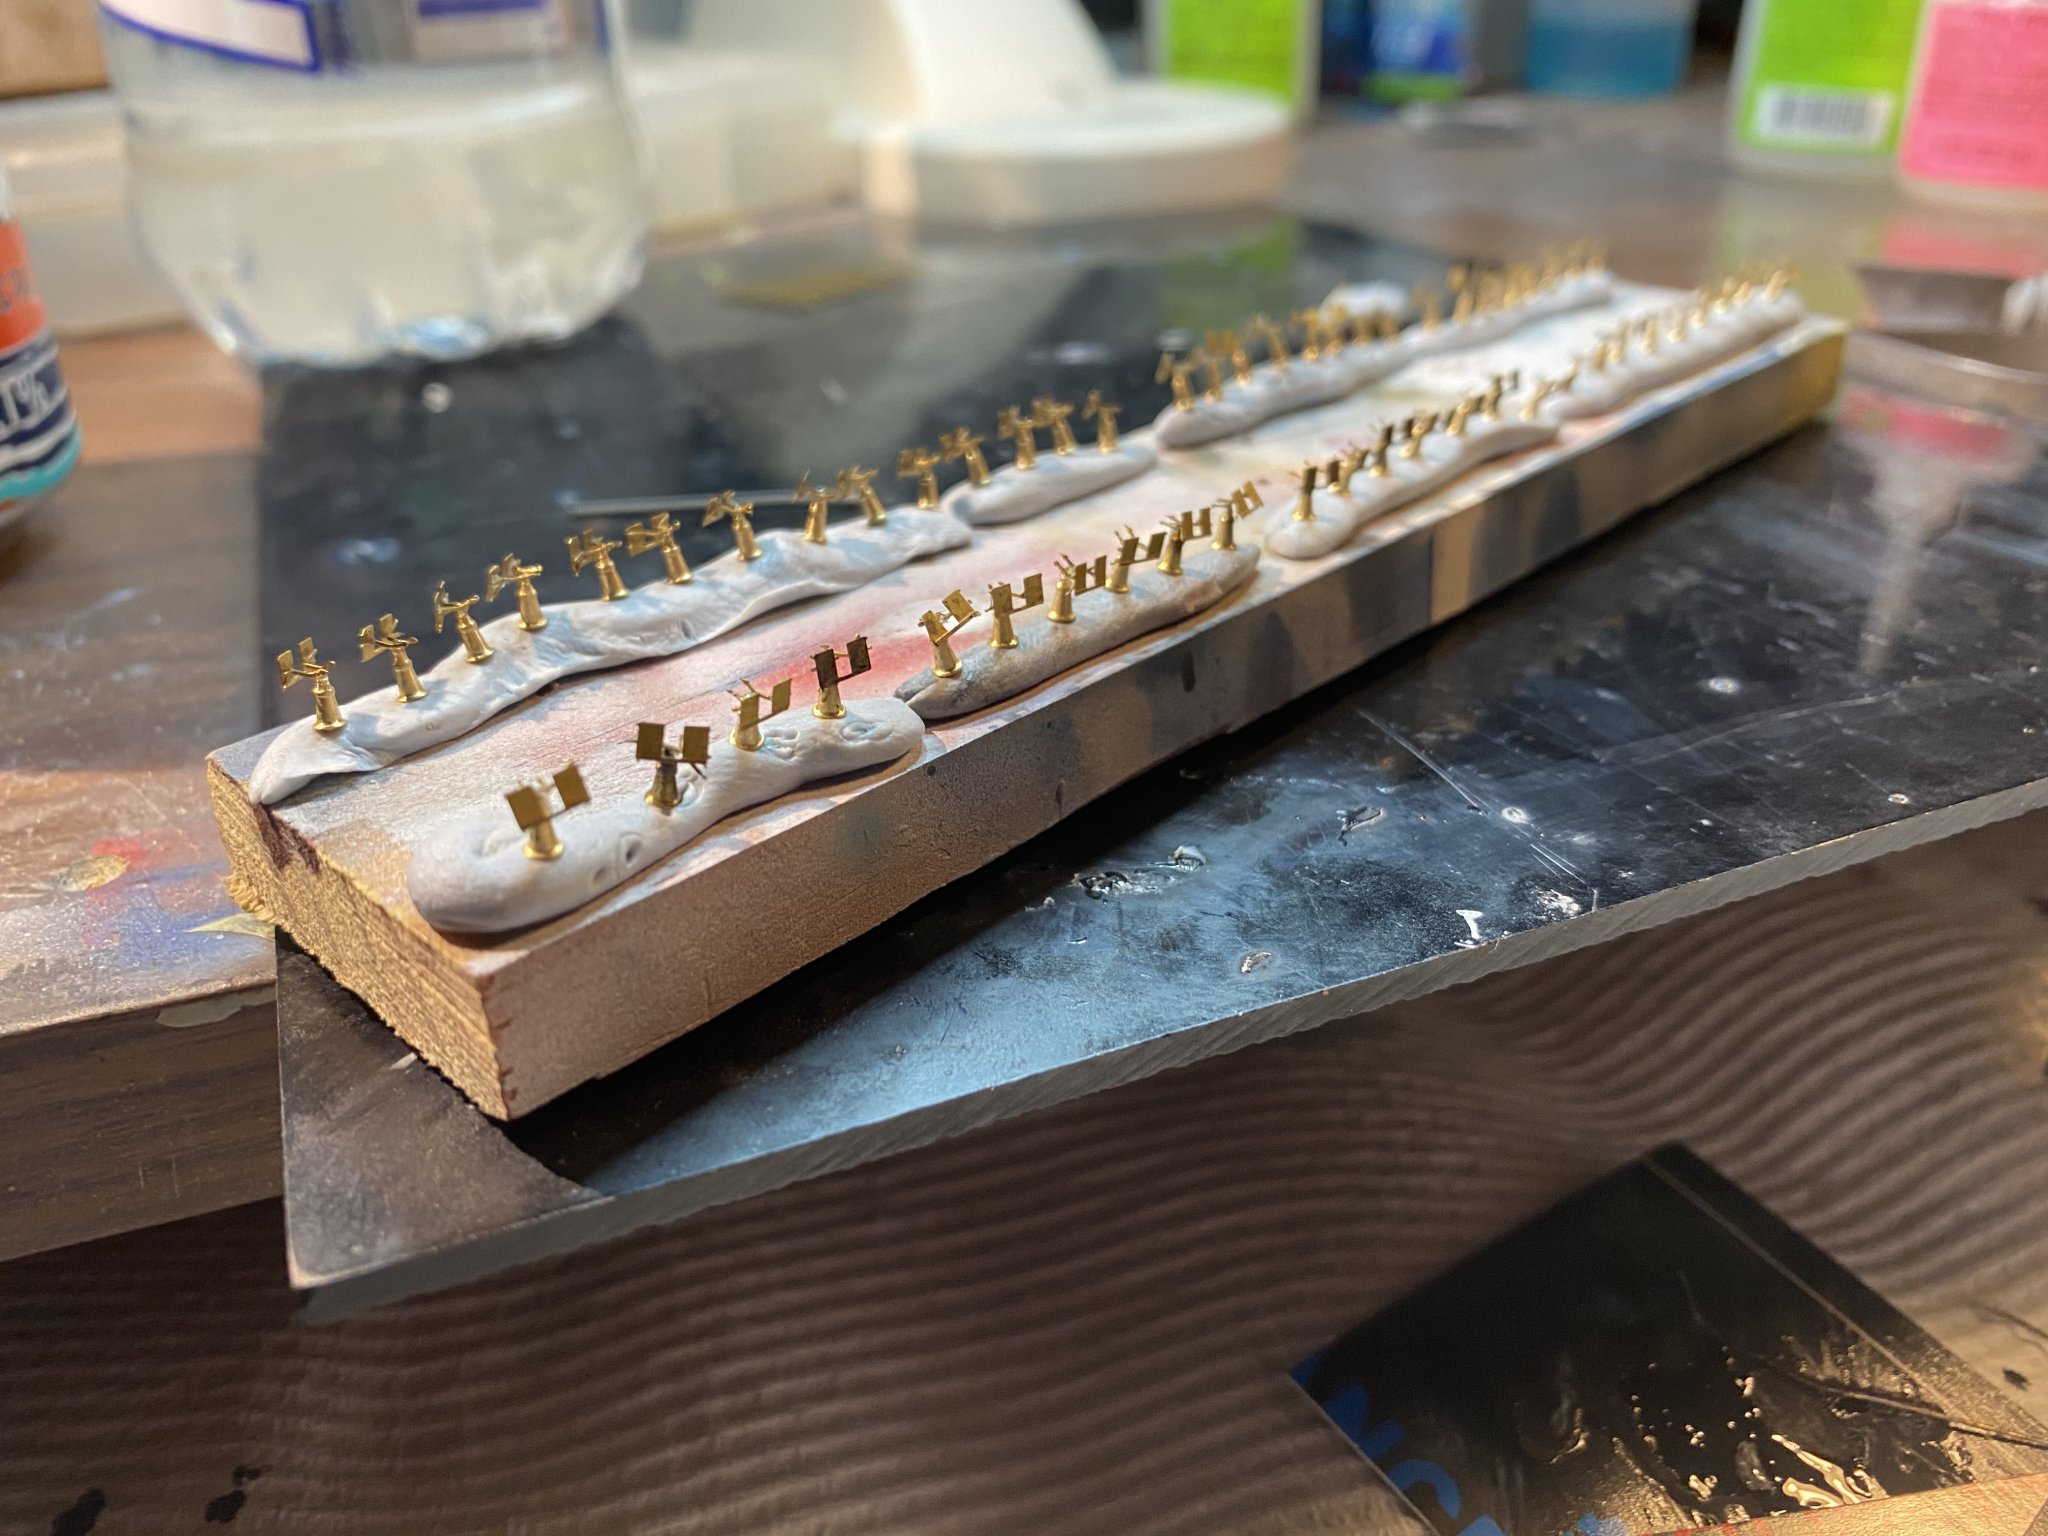
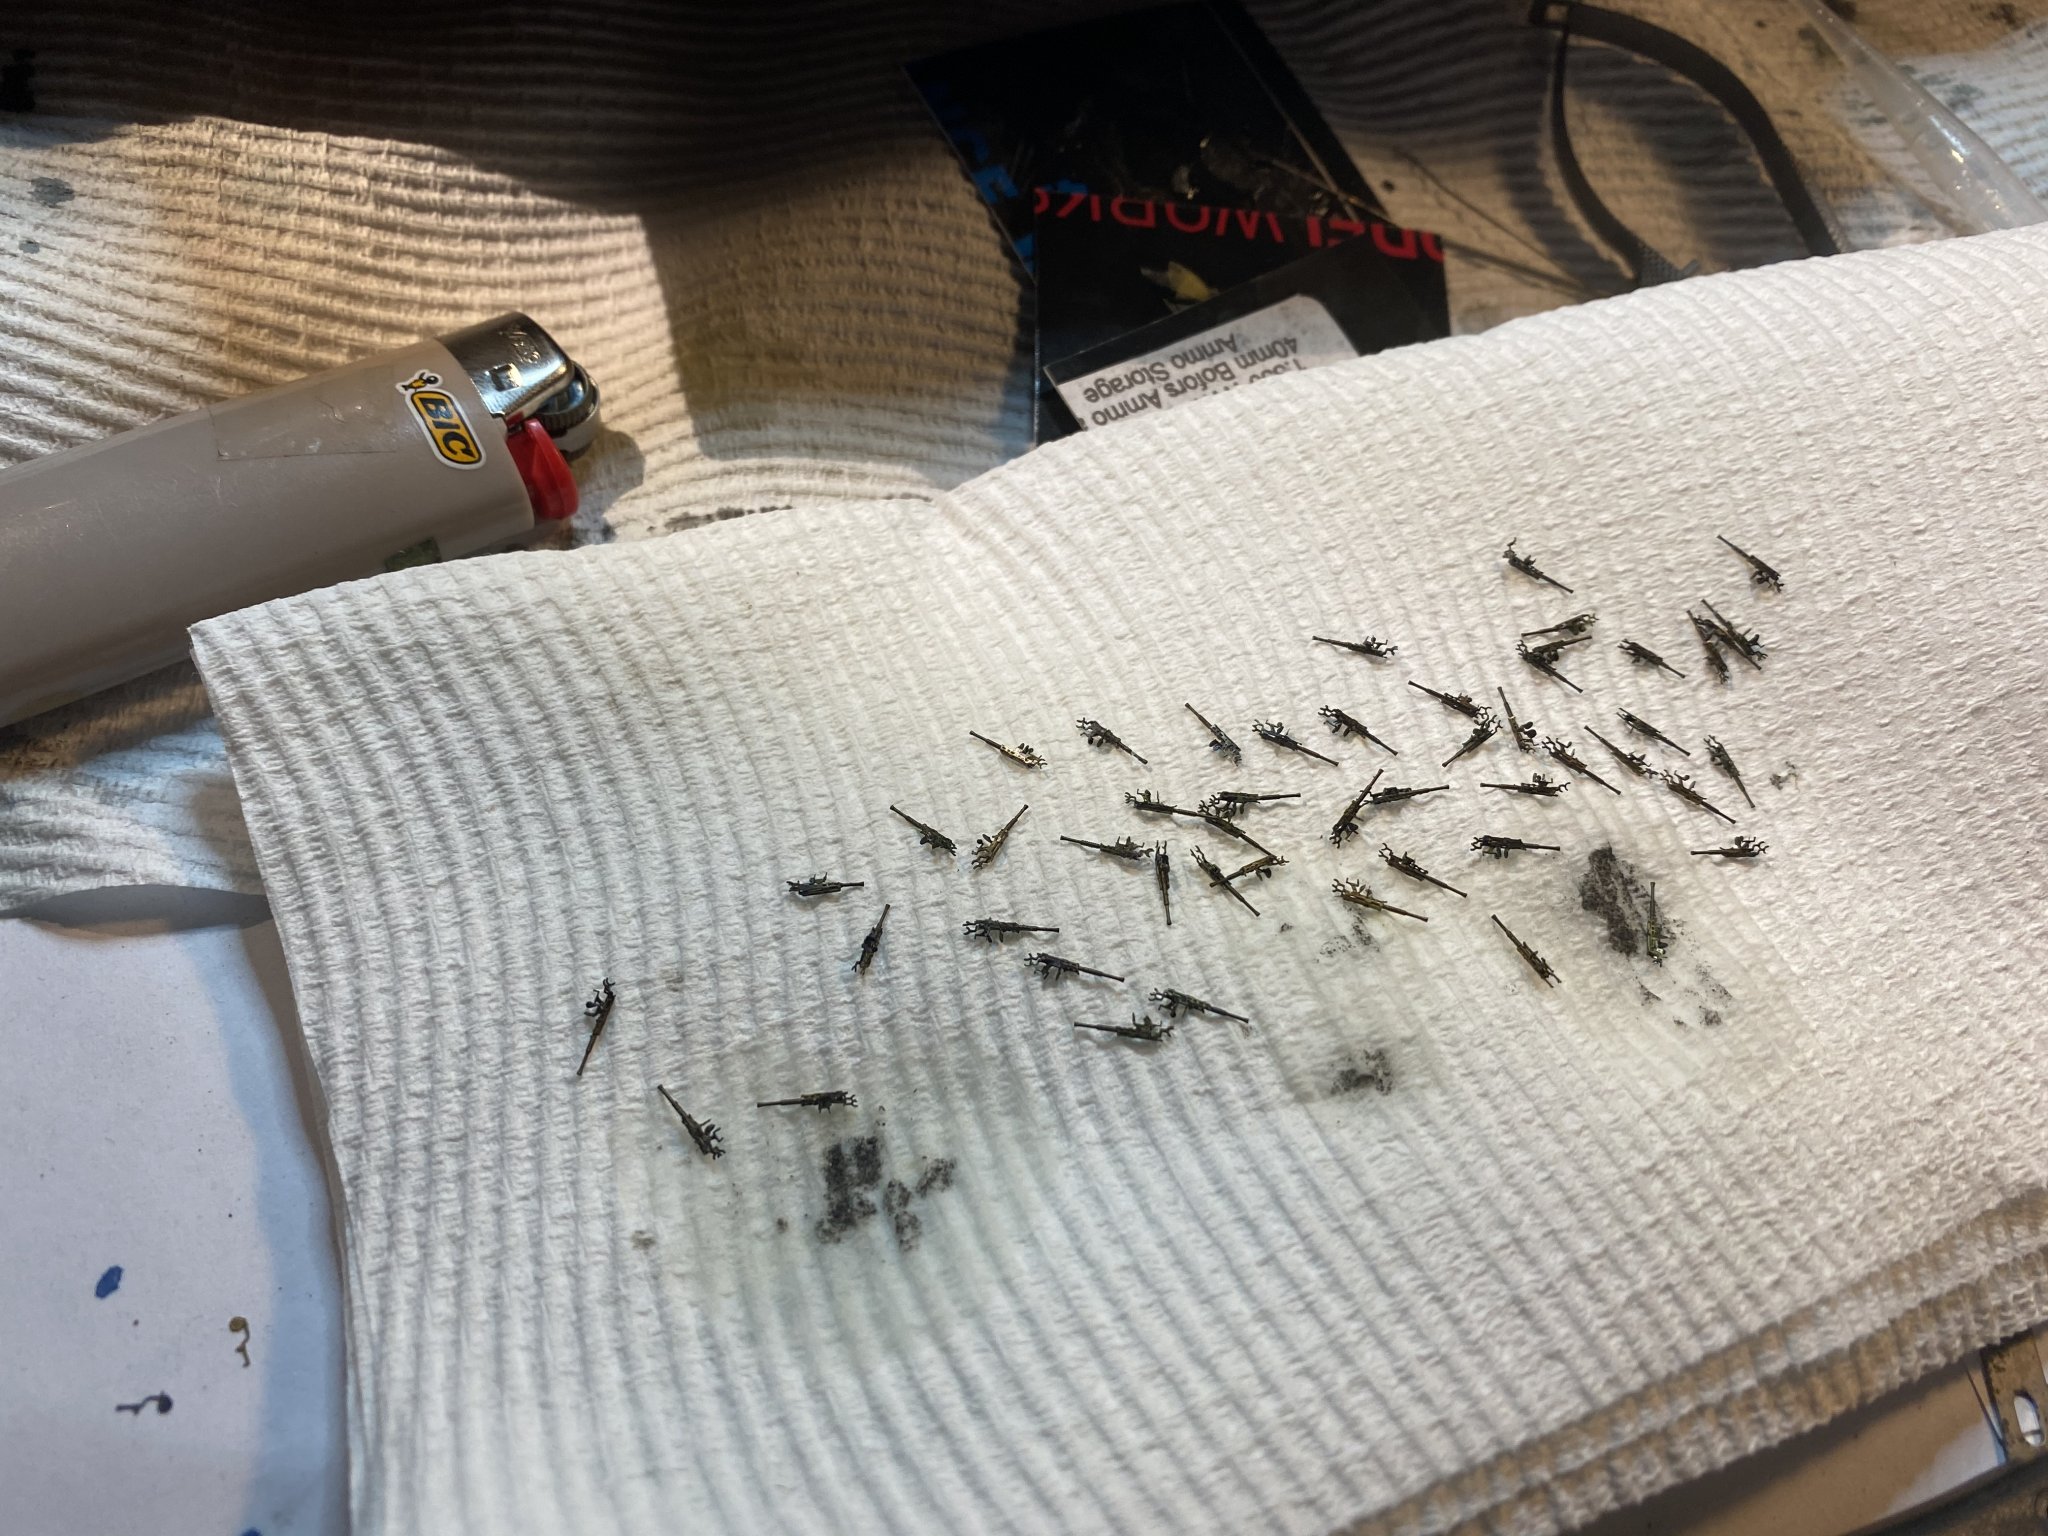
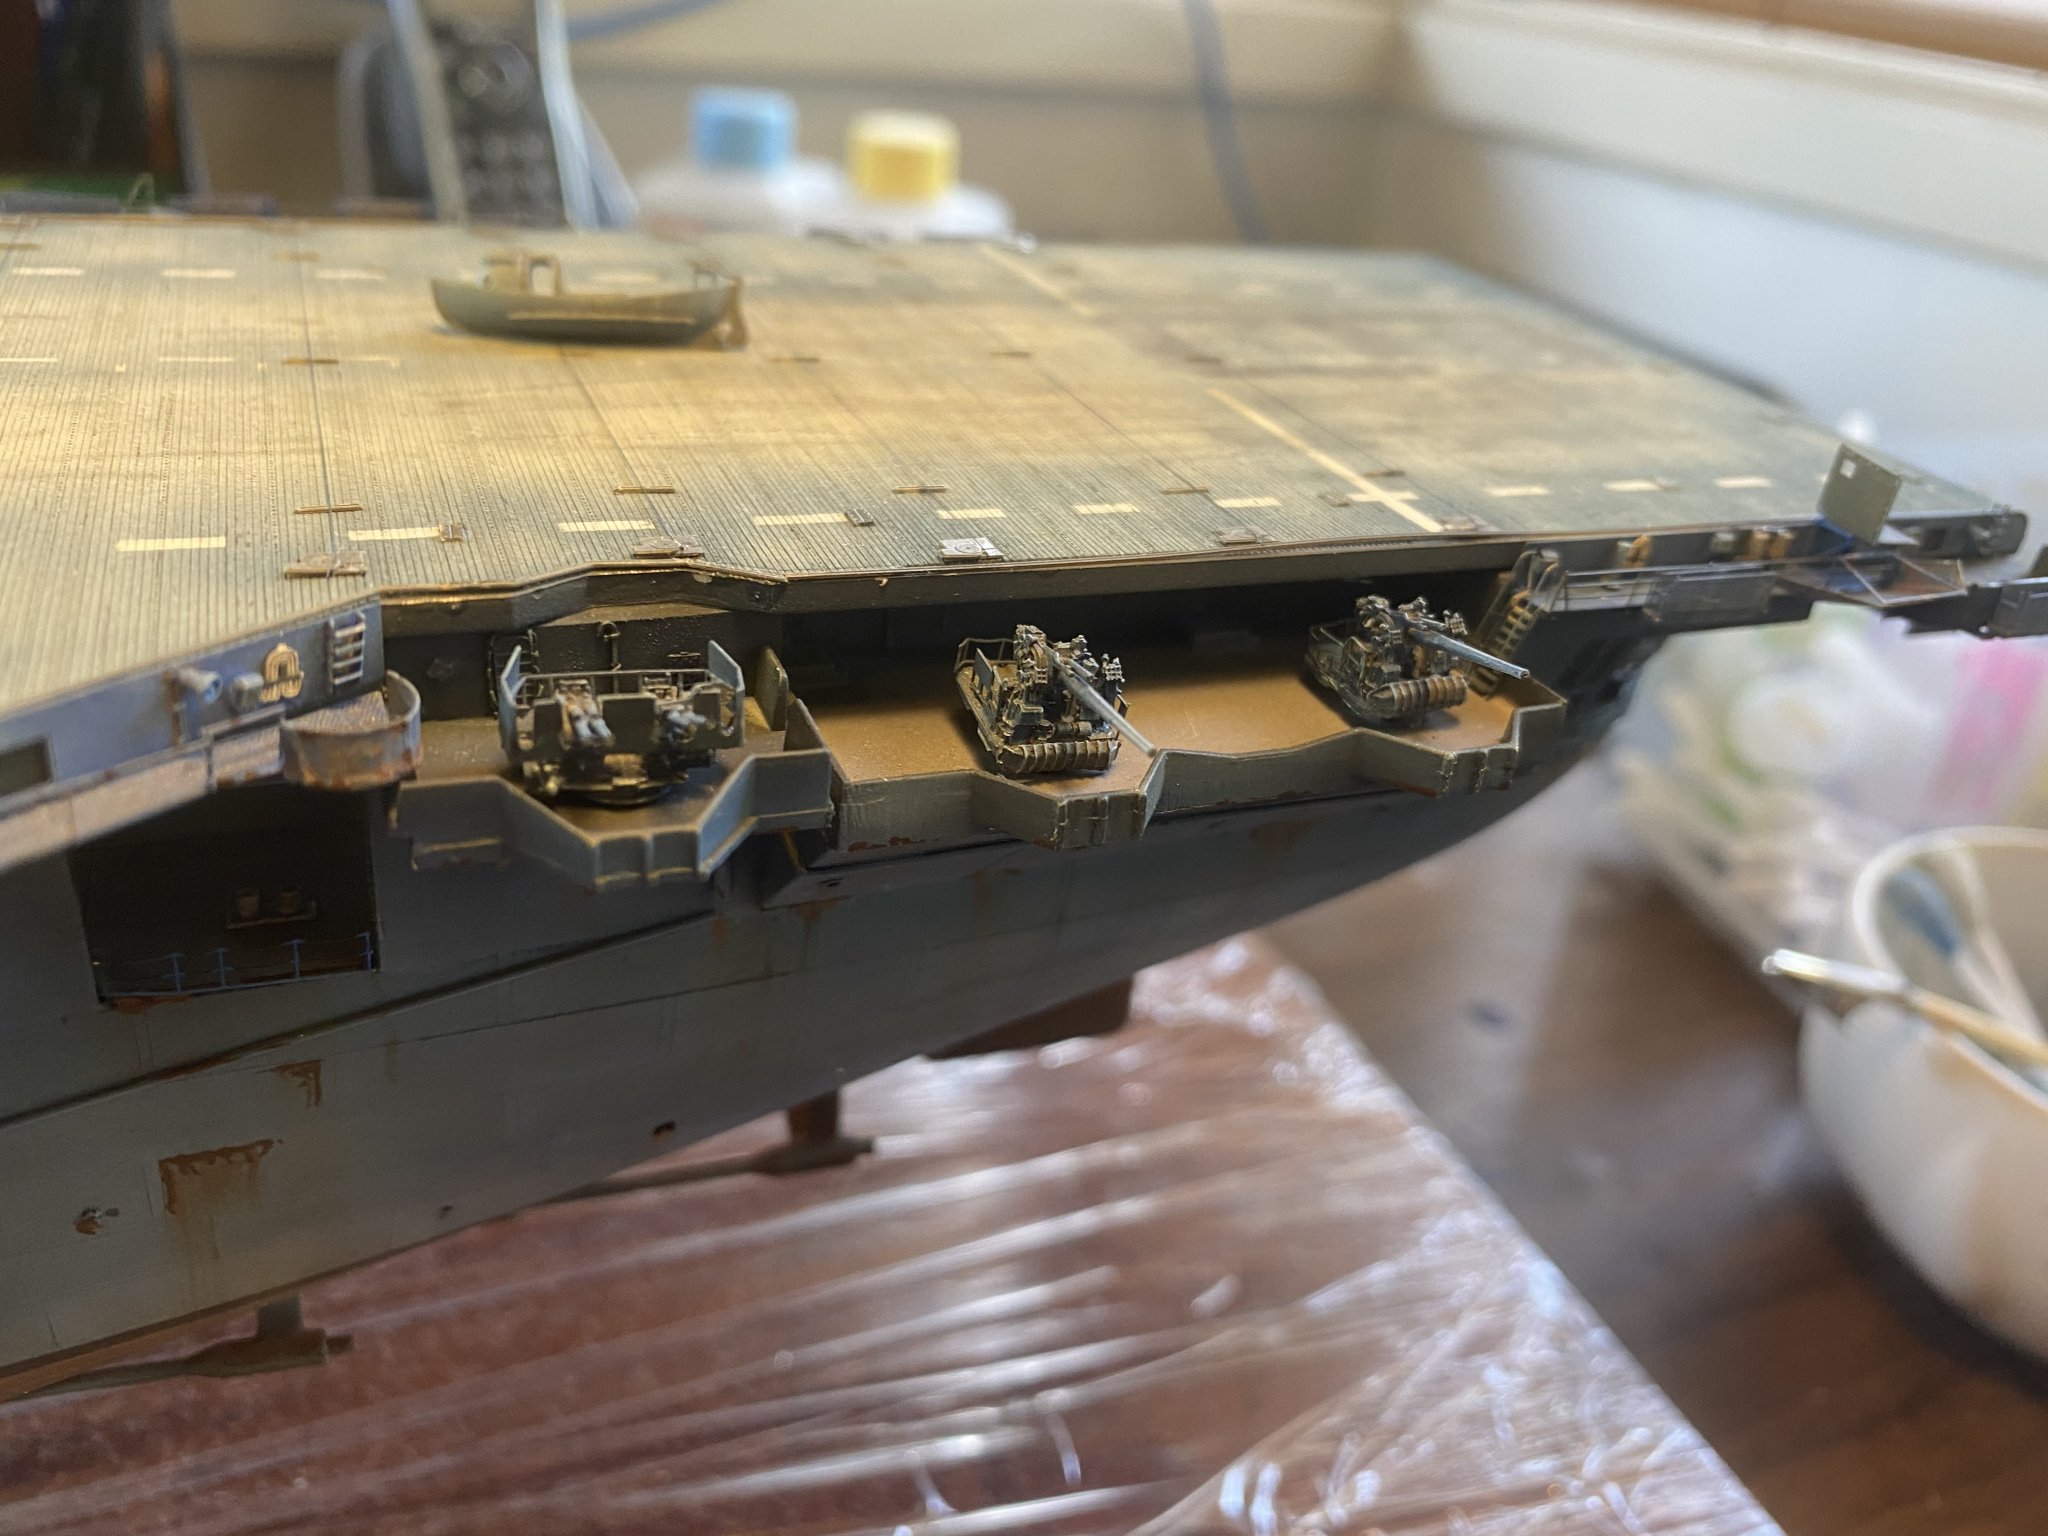
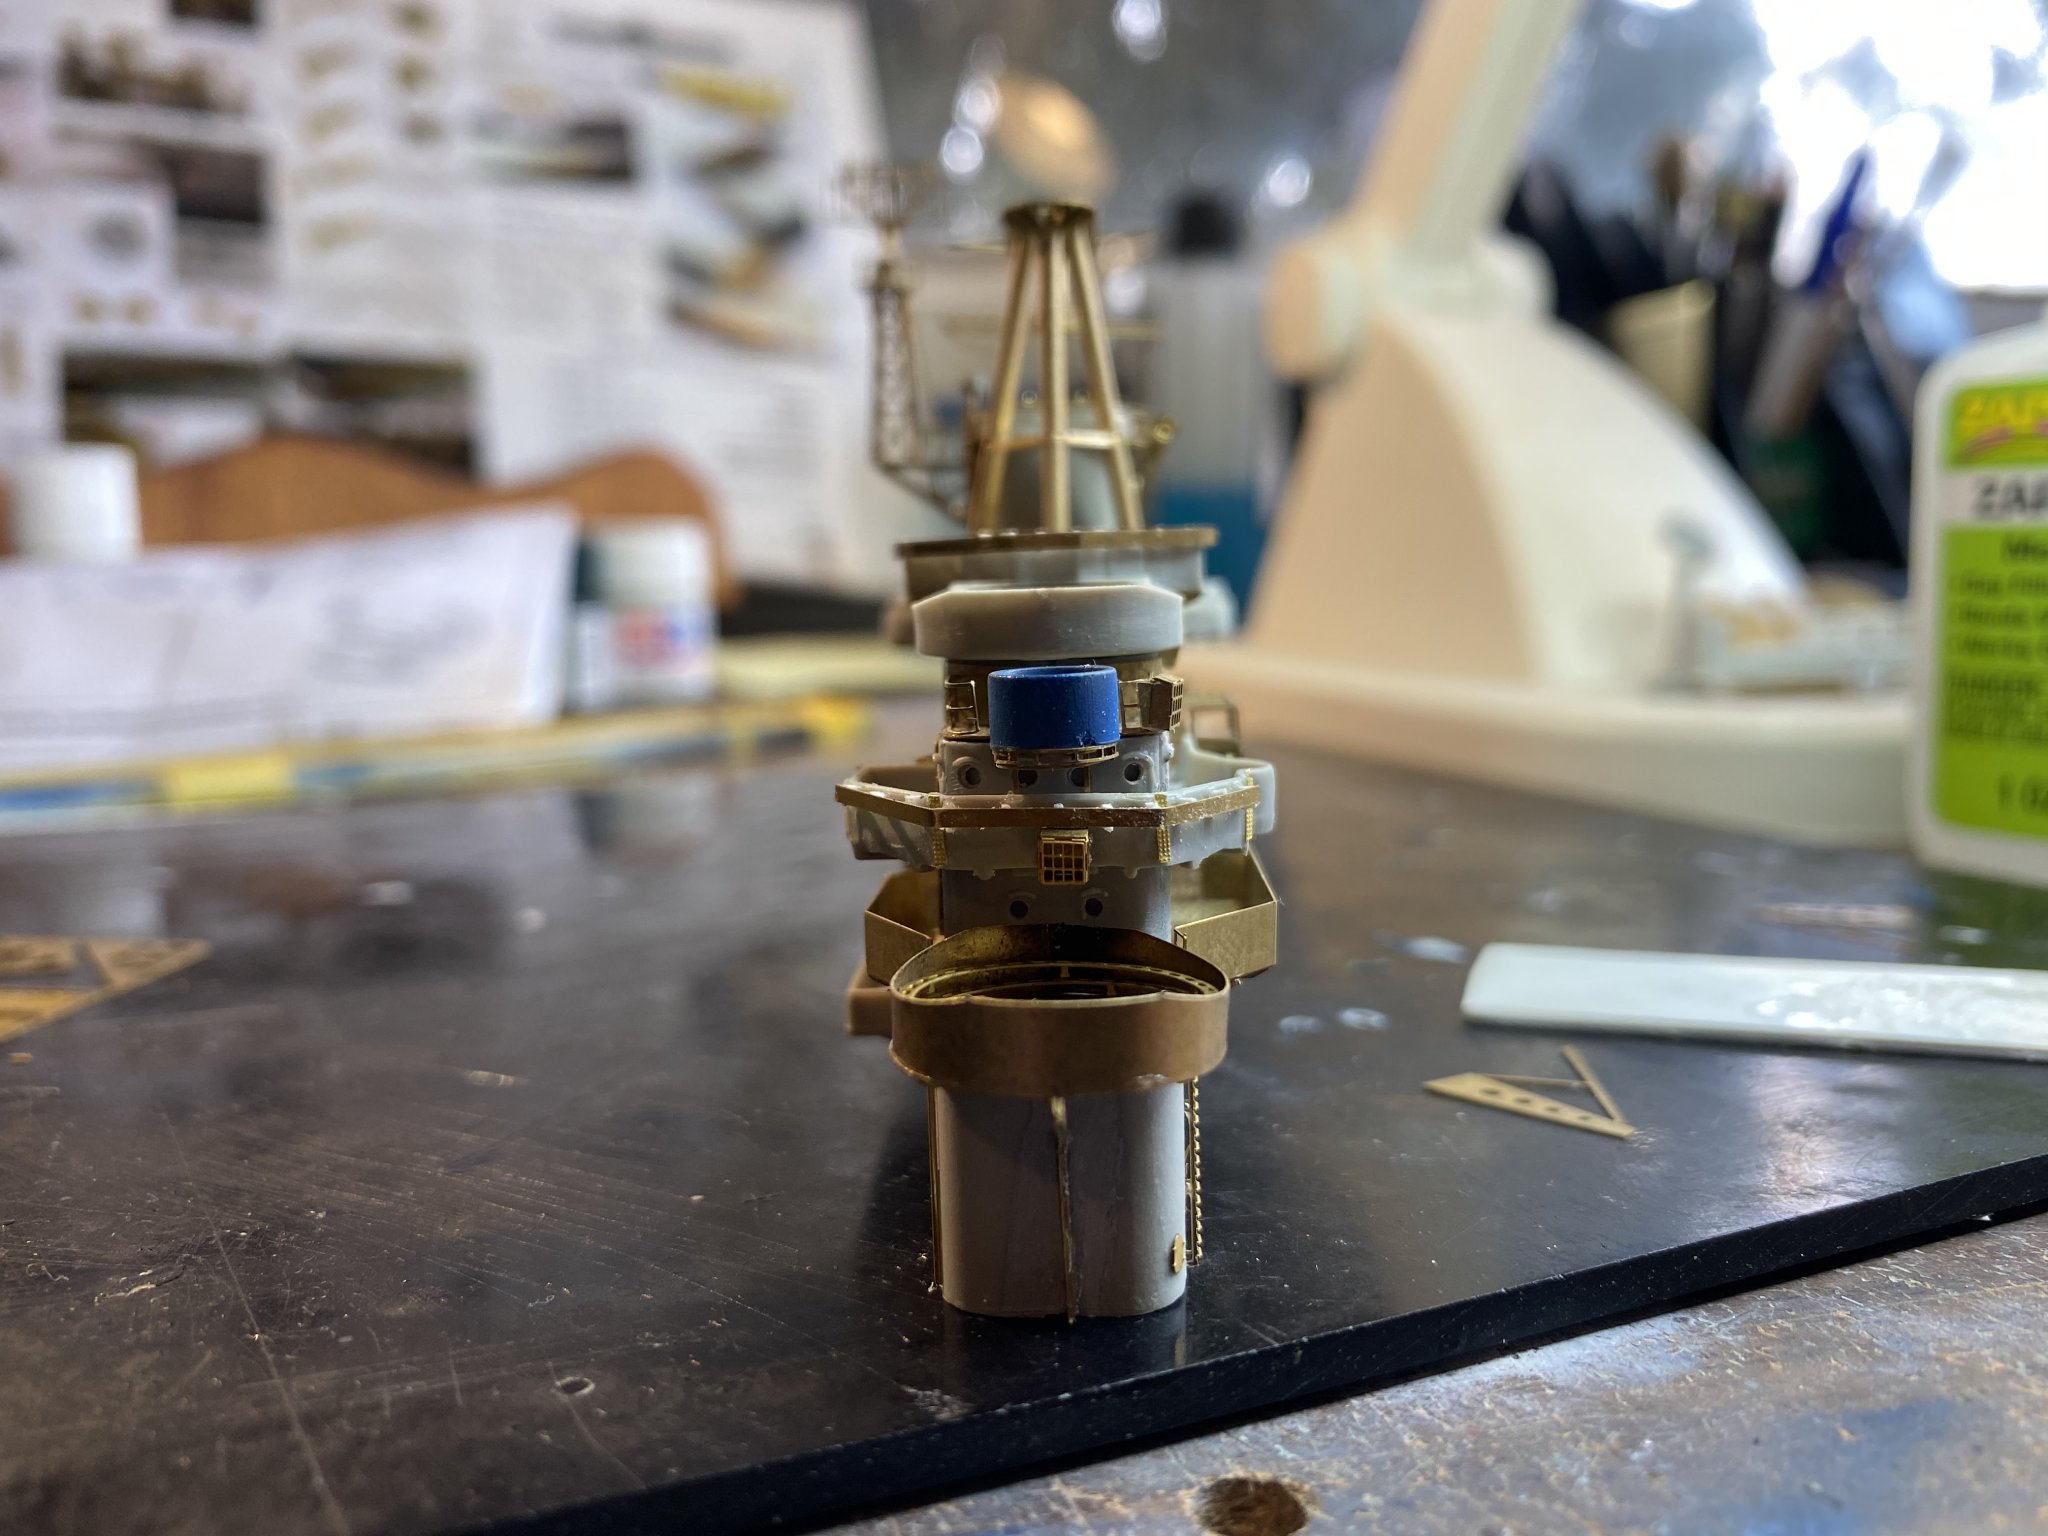
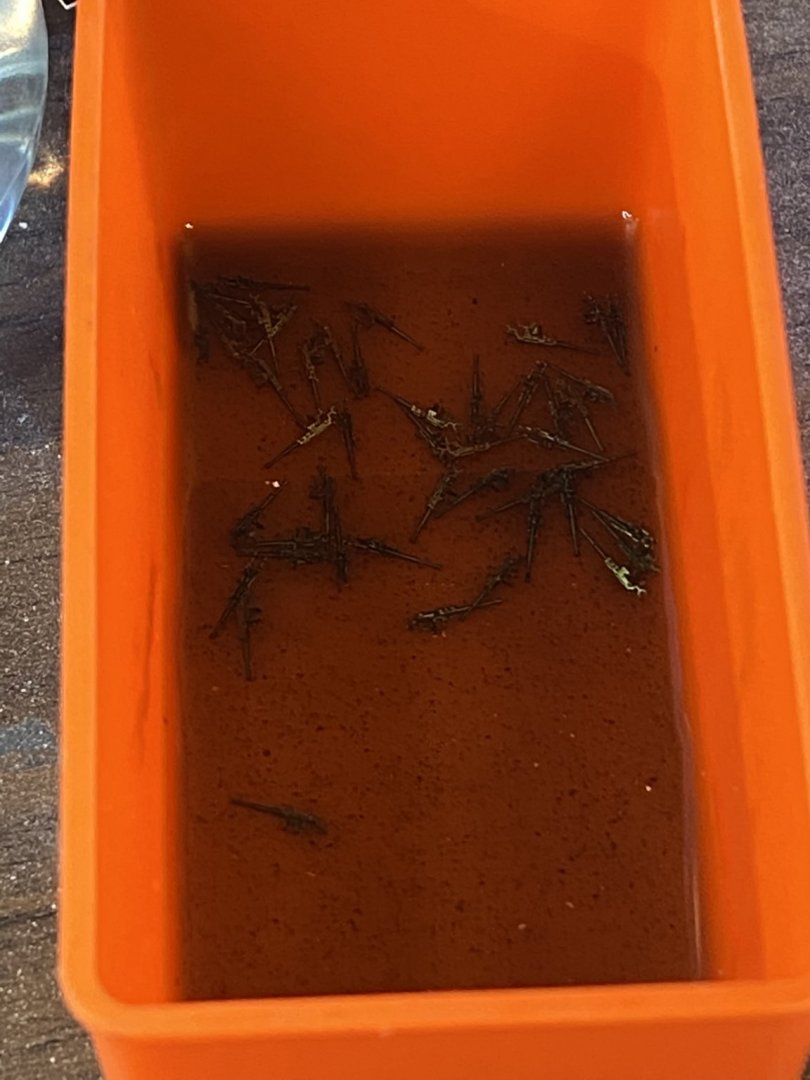
A week away, back to 50 single 20mm guns. A full session to cut off the PE, then glueing and aligning. the orange bucket is full of blackener which will do the barrels and will no doubt need some paint on the brackets. unfortunately the early work of Pontos does not quite align anywhere.


- 308 replies
-
- 12
-
-
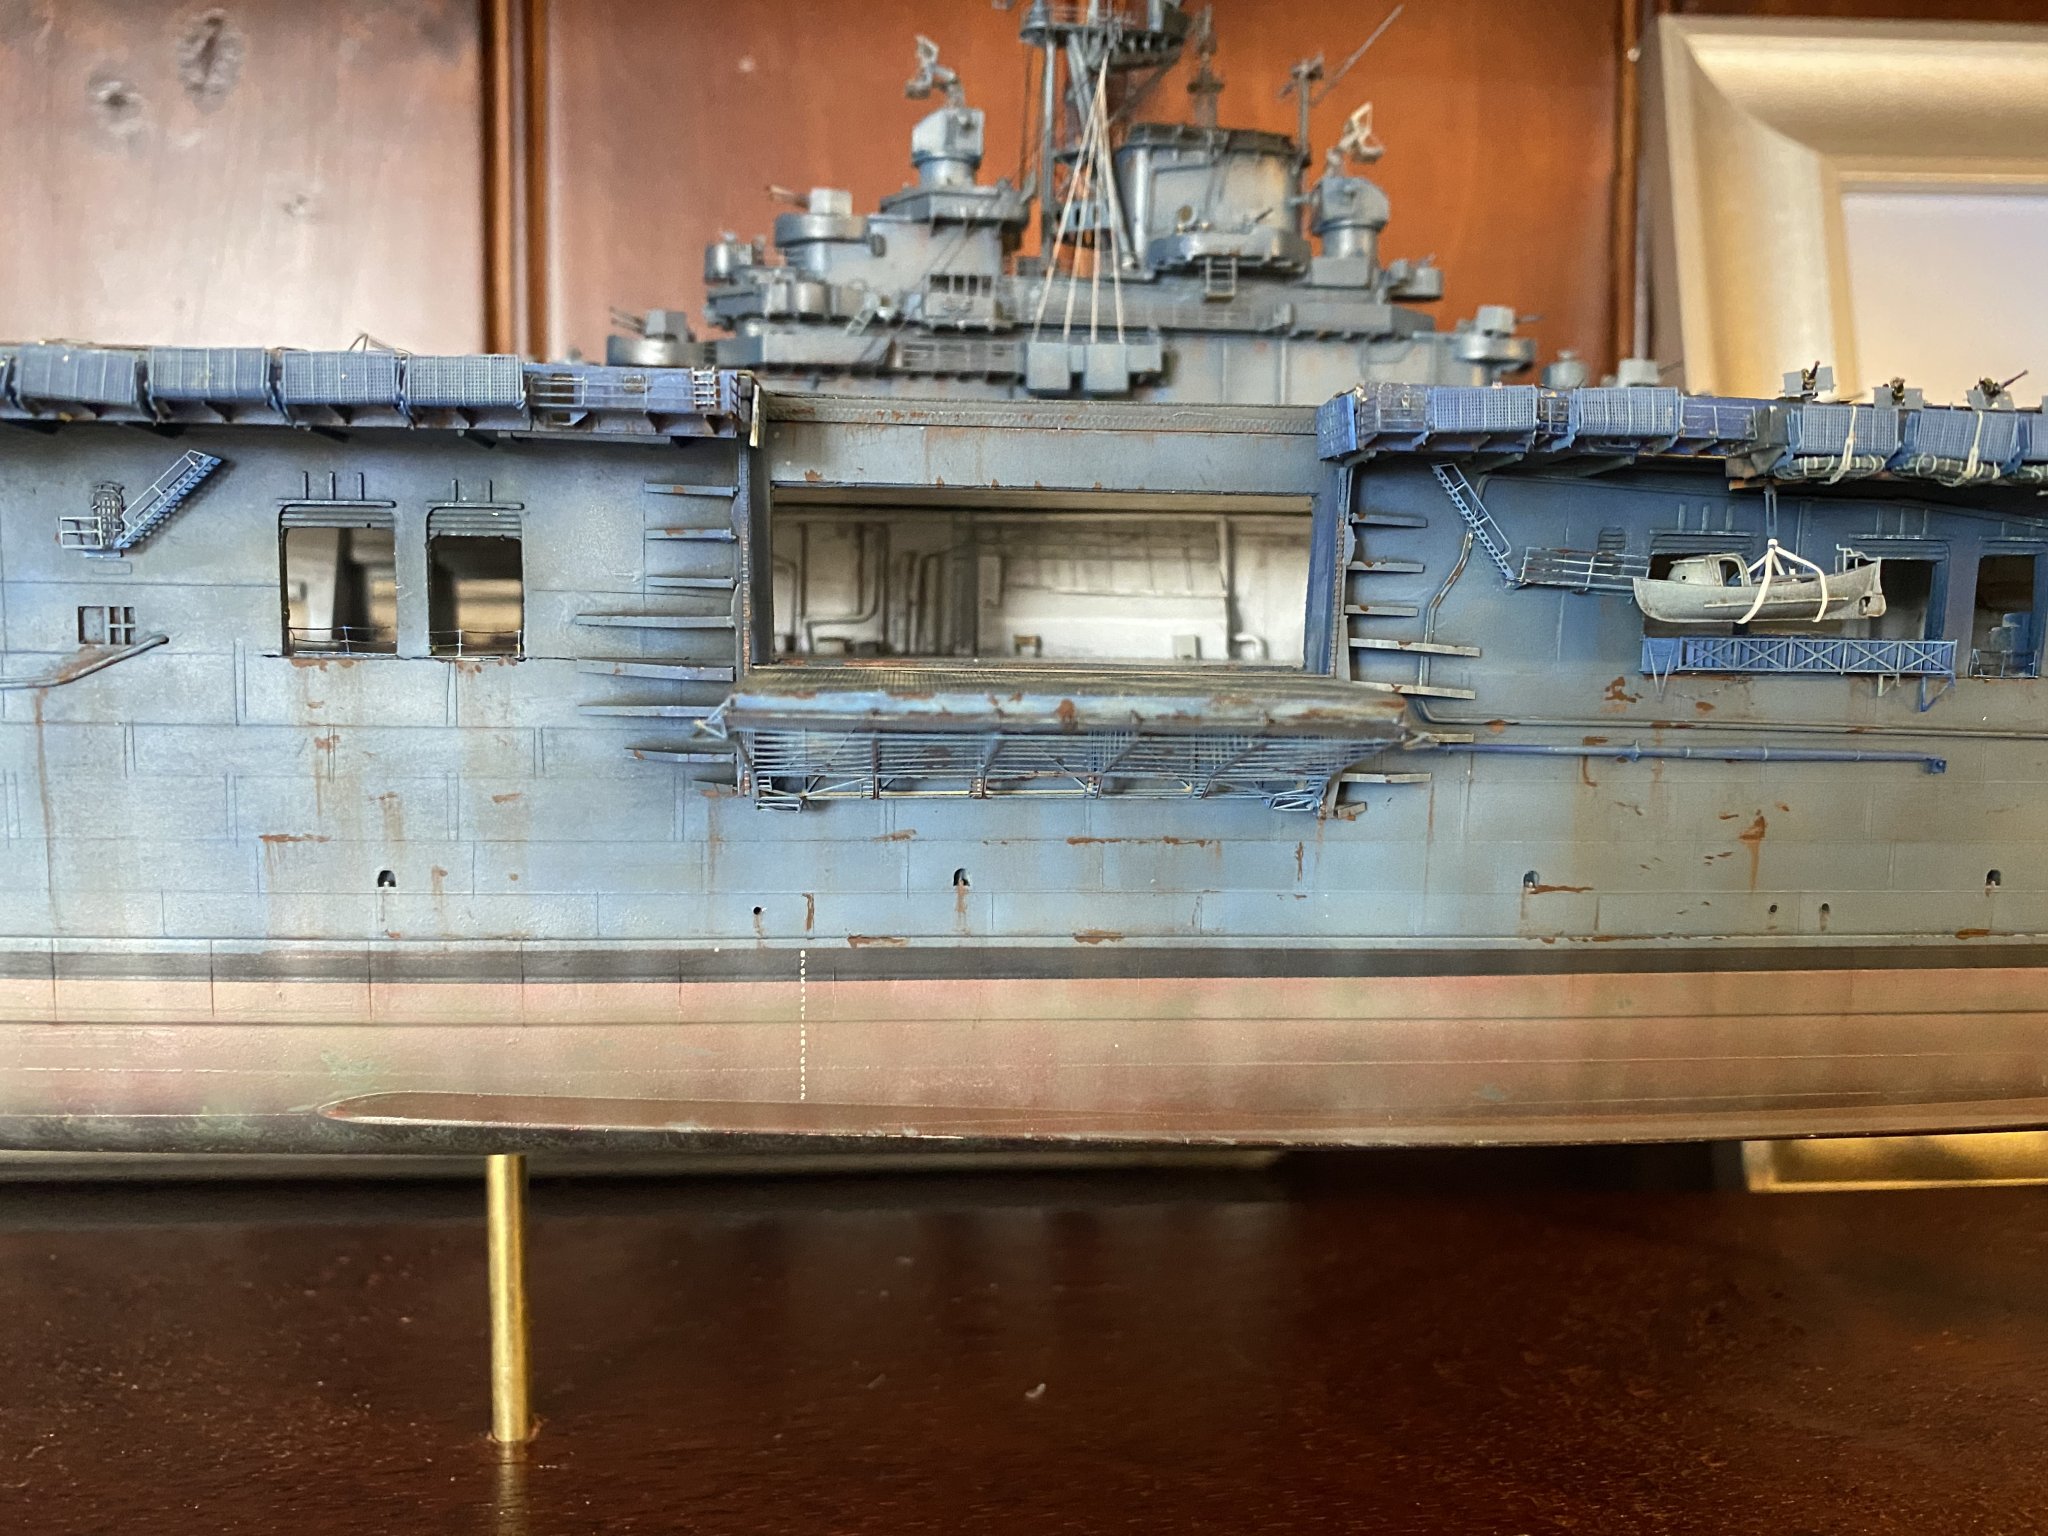
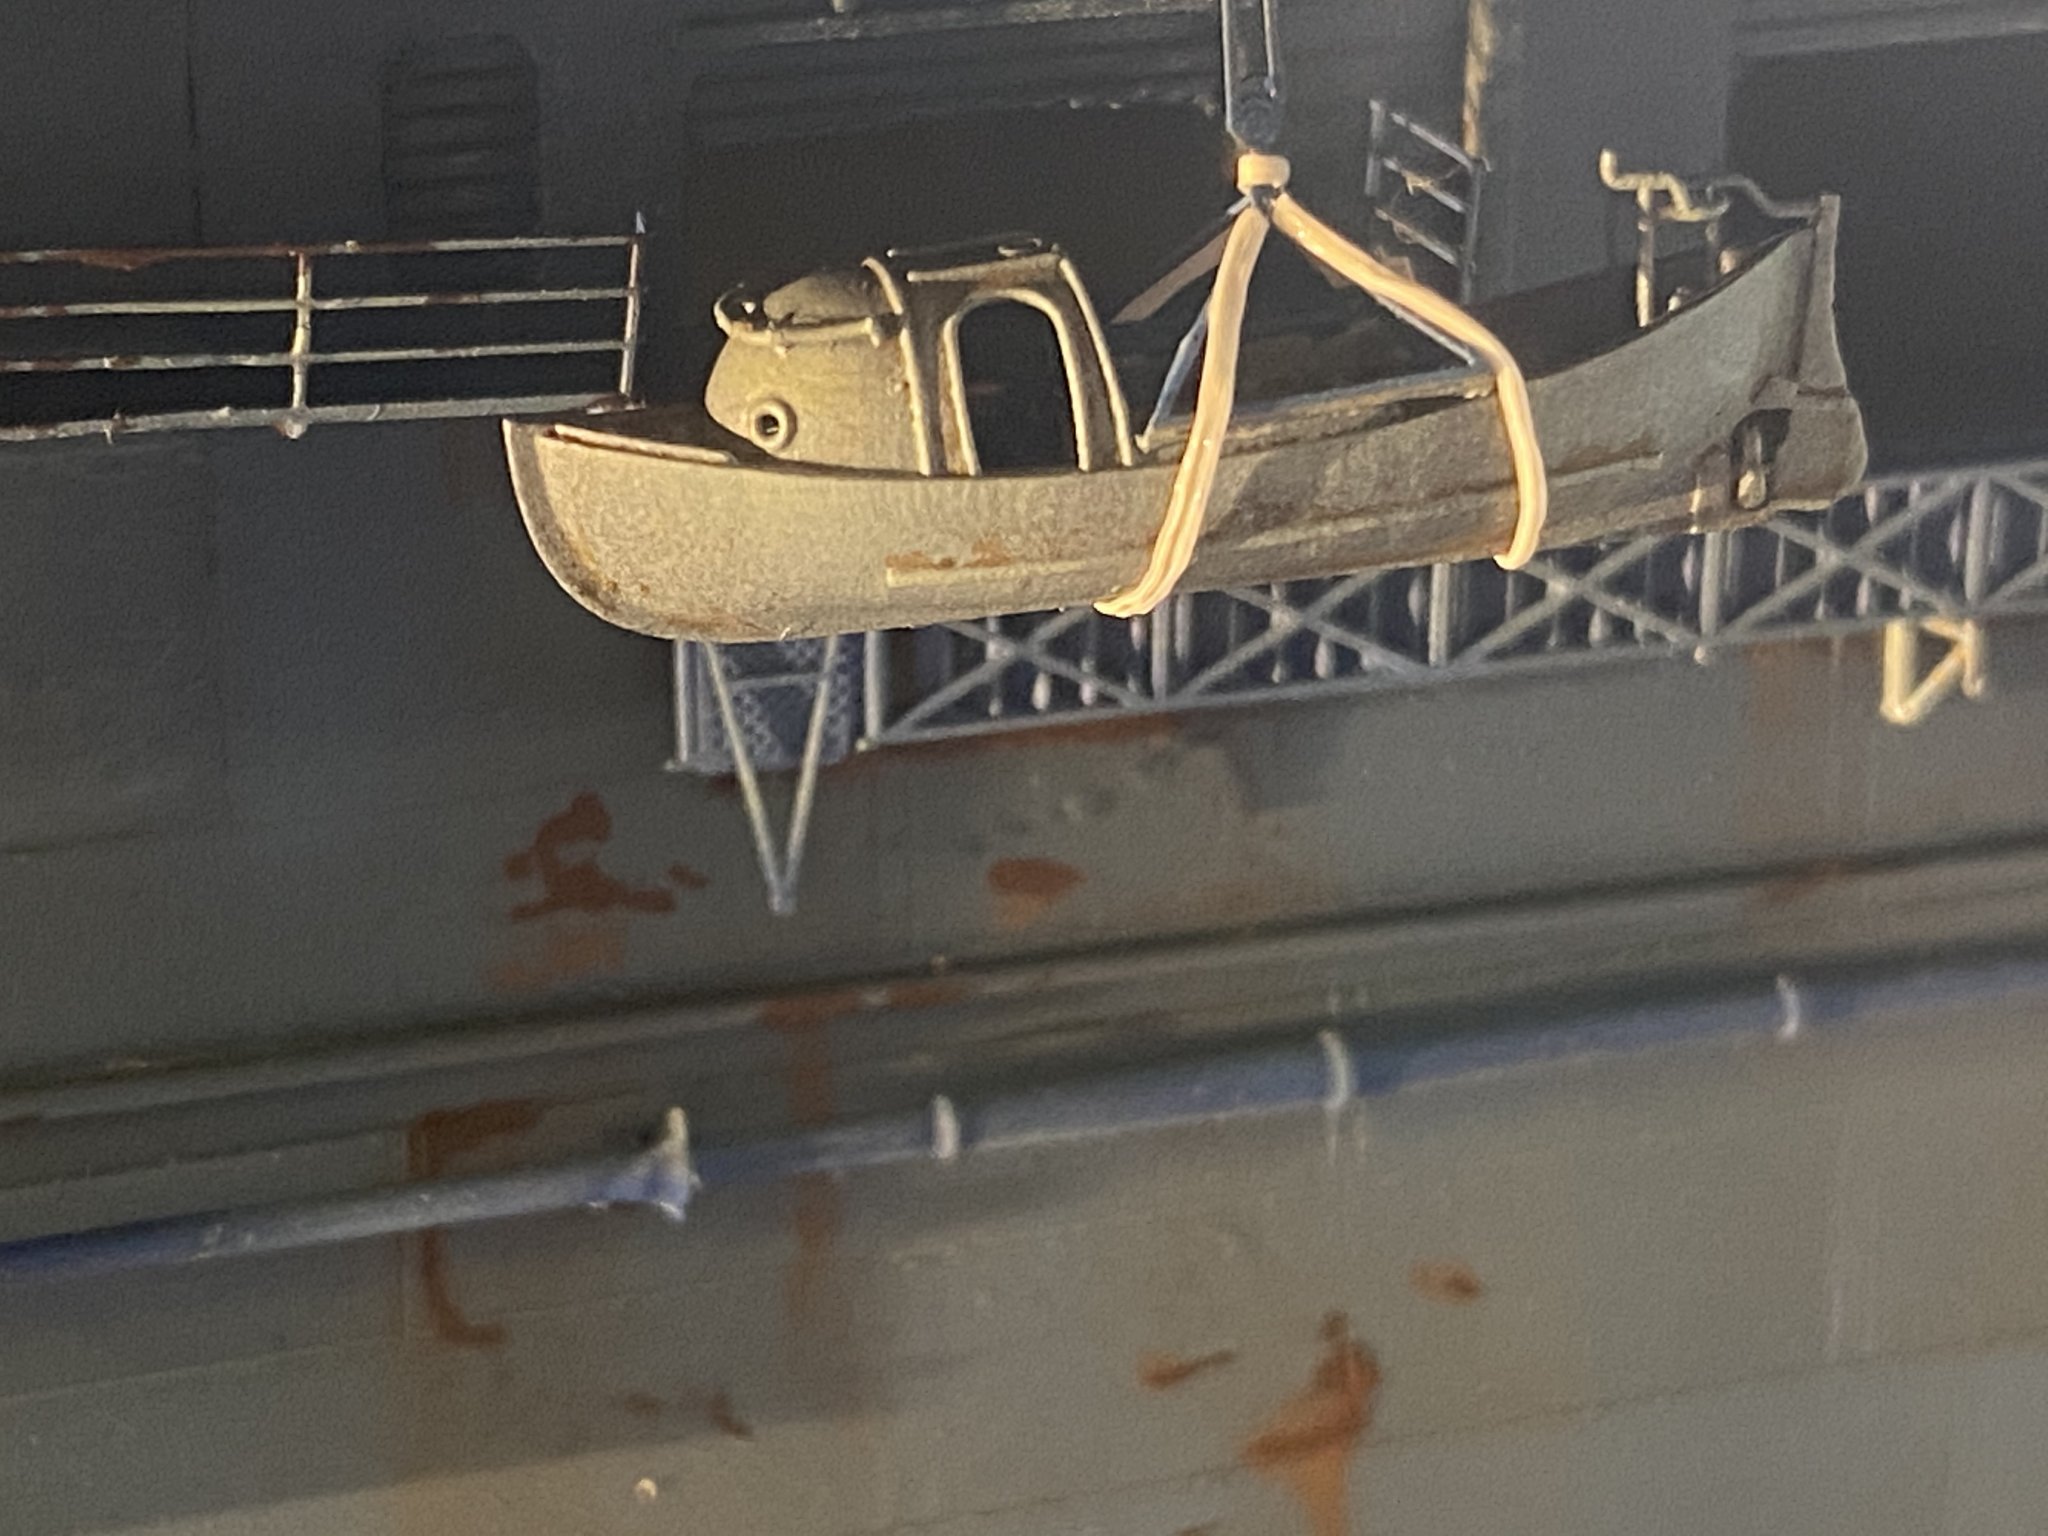
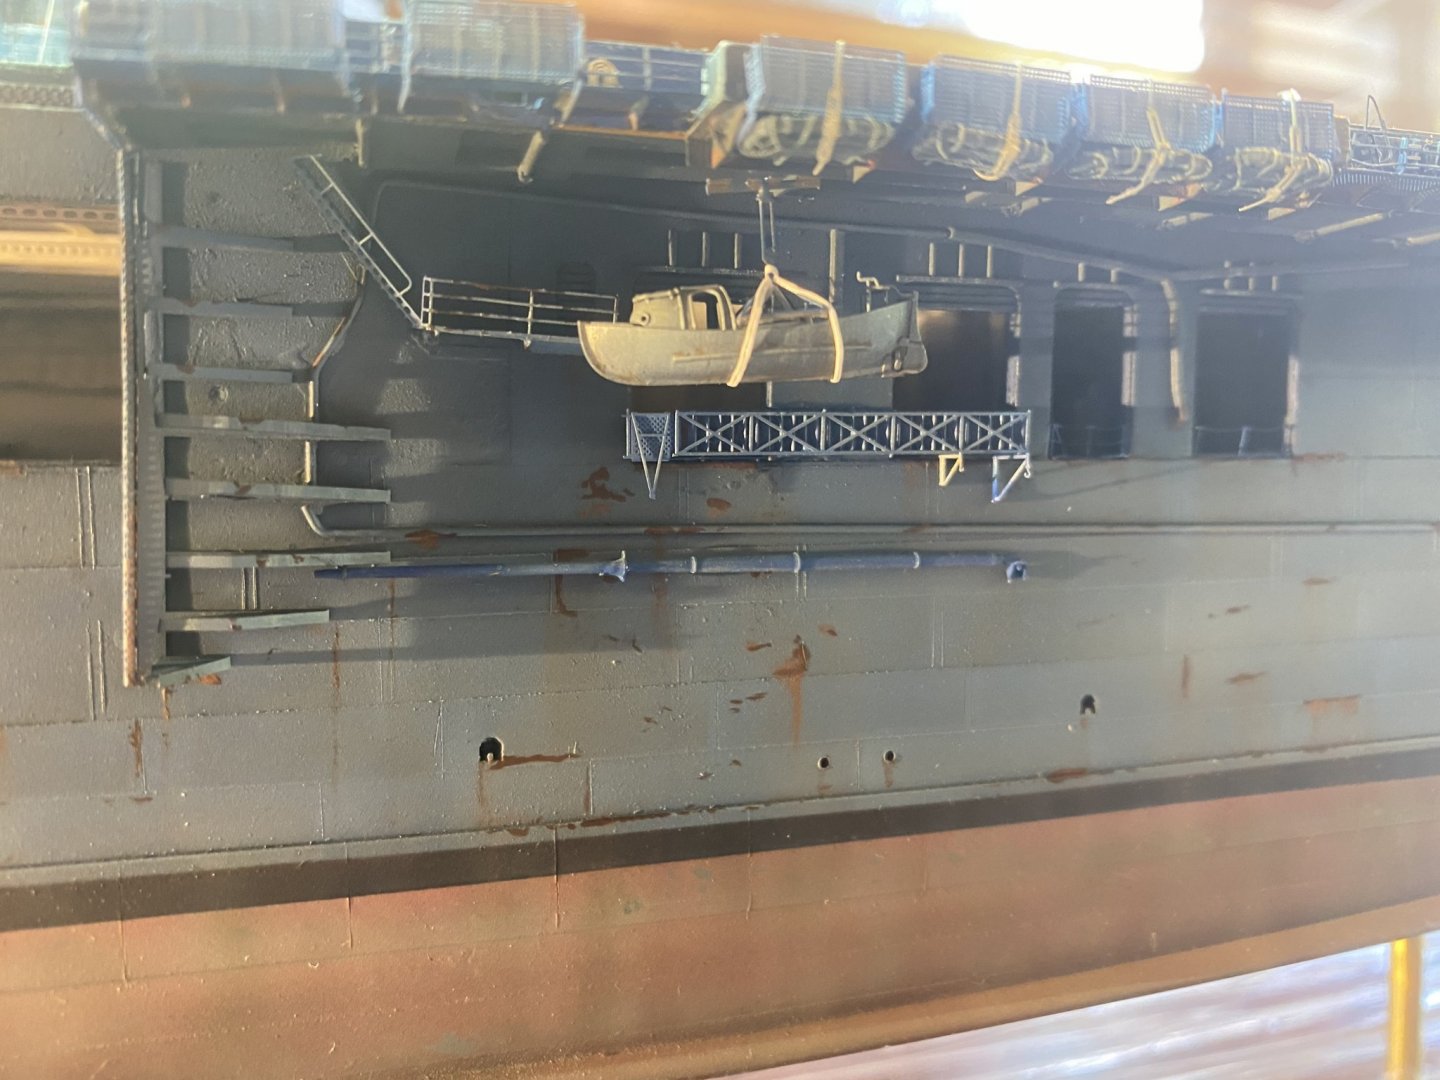
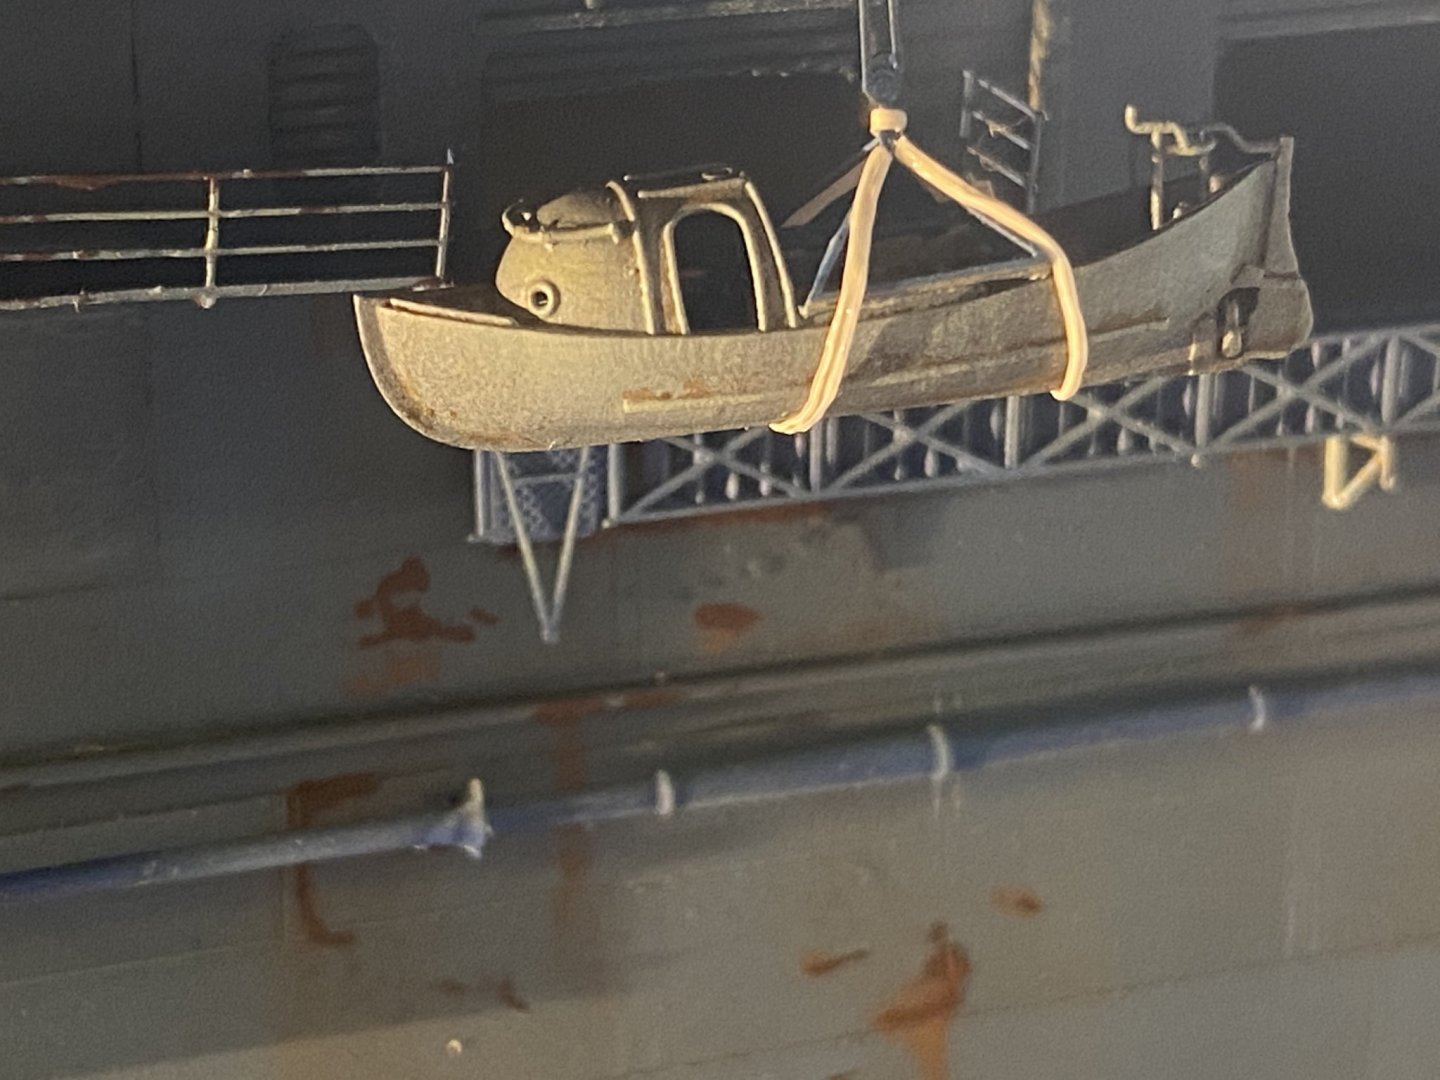
The ships launches. Not that the kit ones are bad but I got two from Black Cat models which are 3D printed and they are just amazing.
- 308 replies
-
- 14
-
-
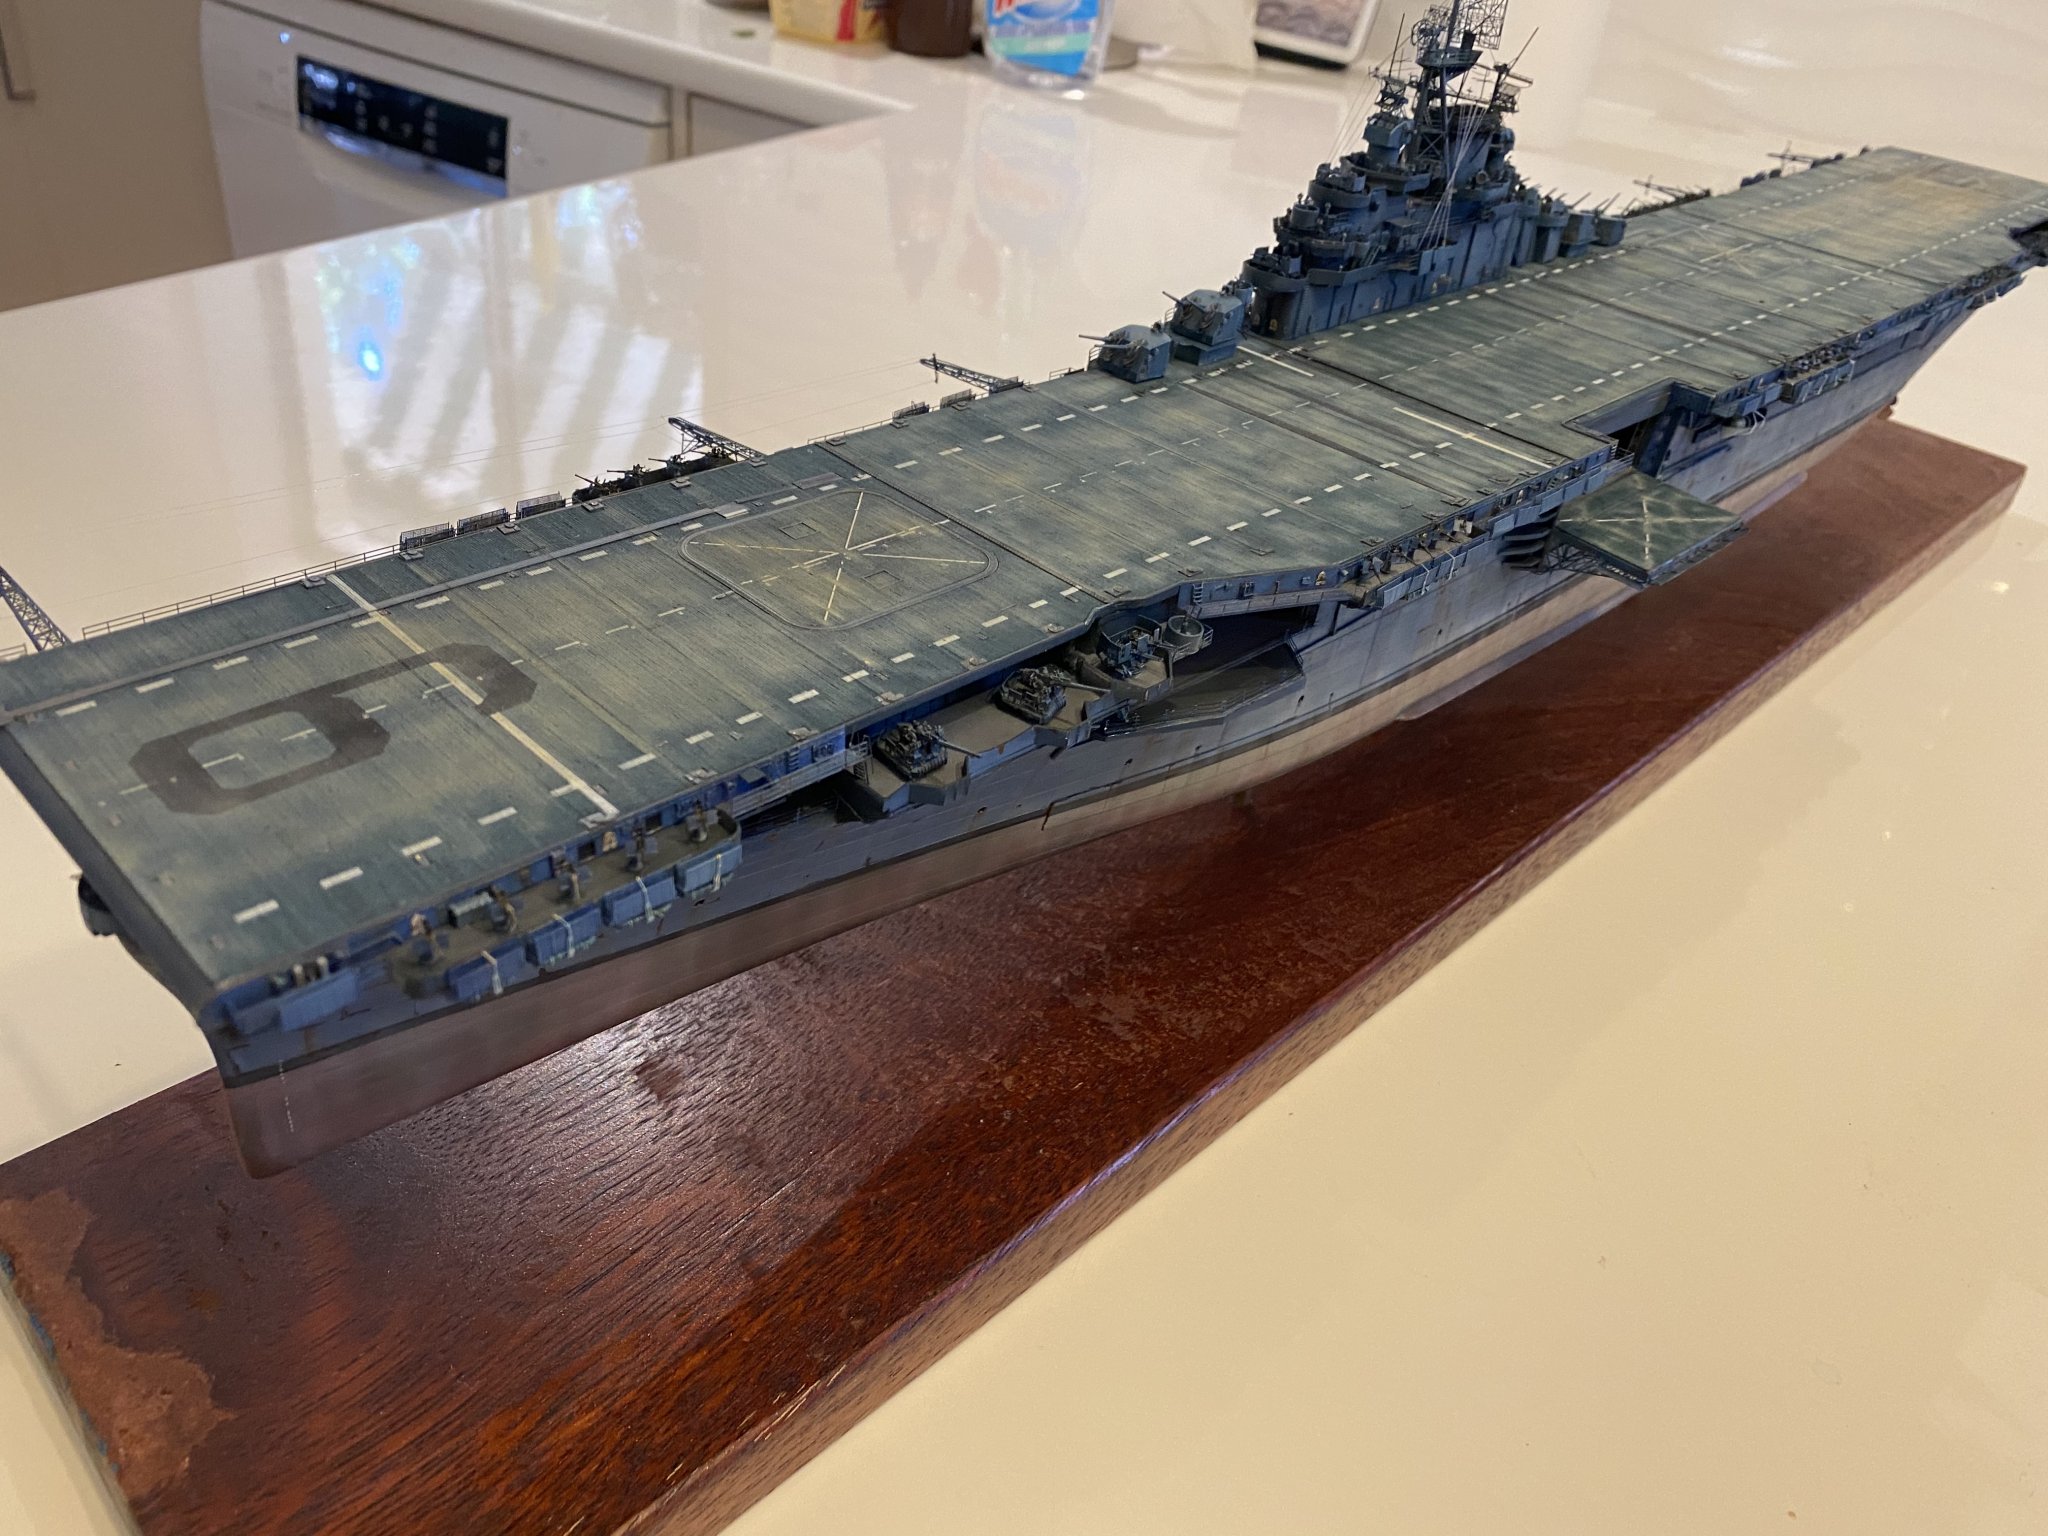
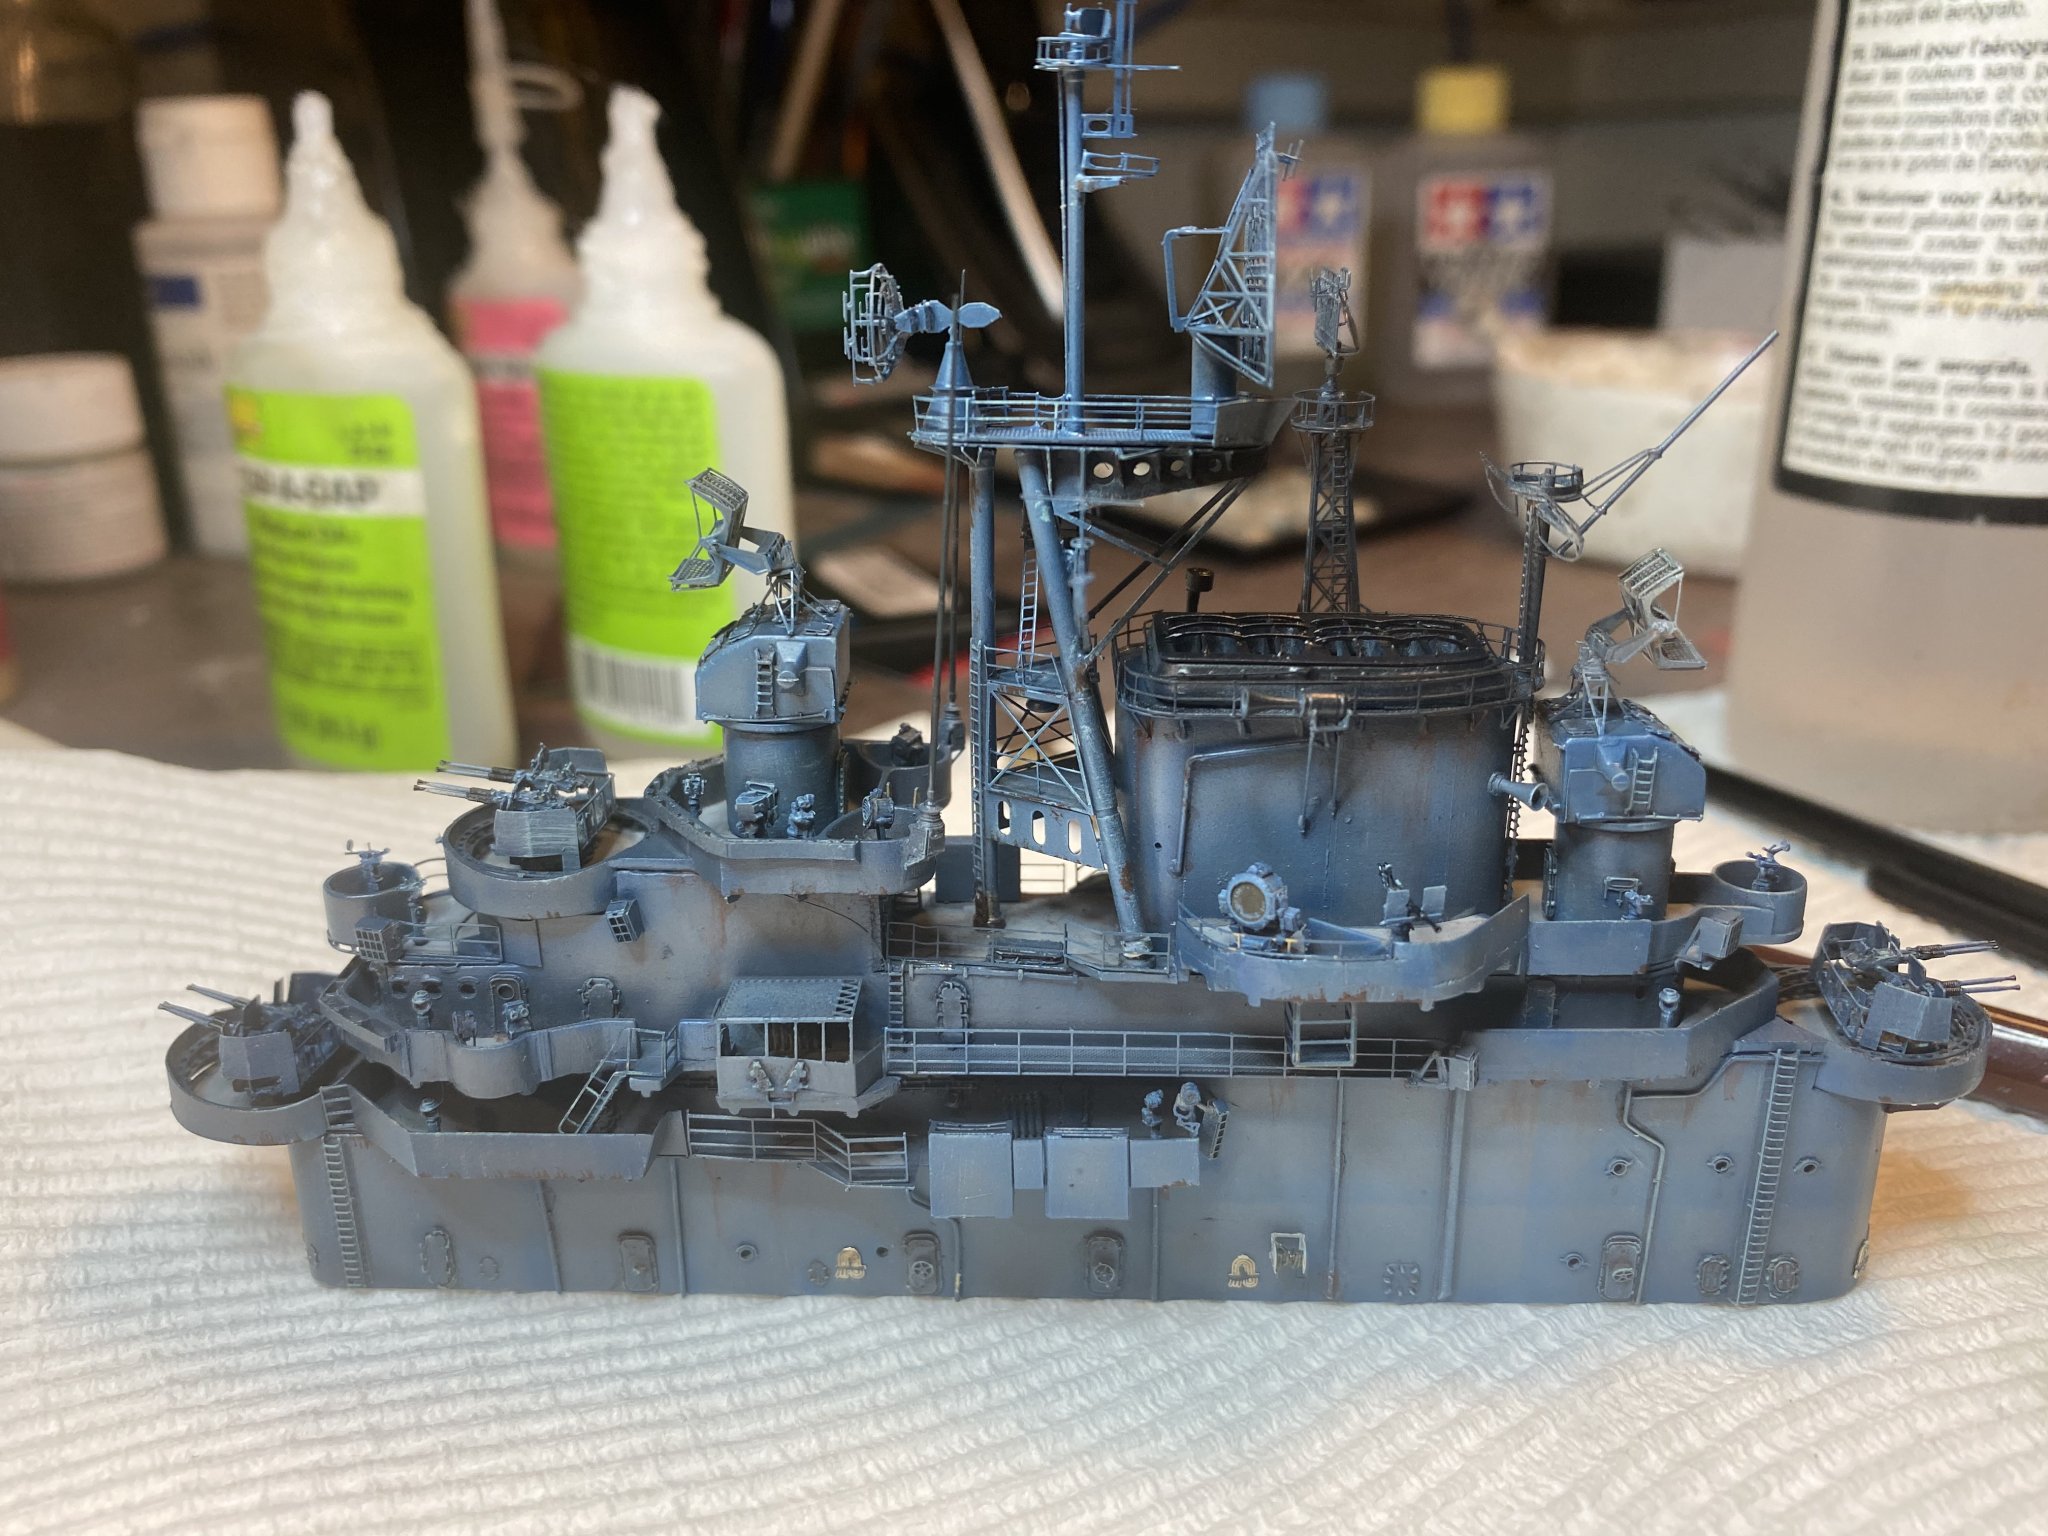
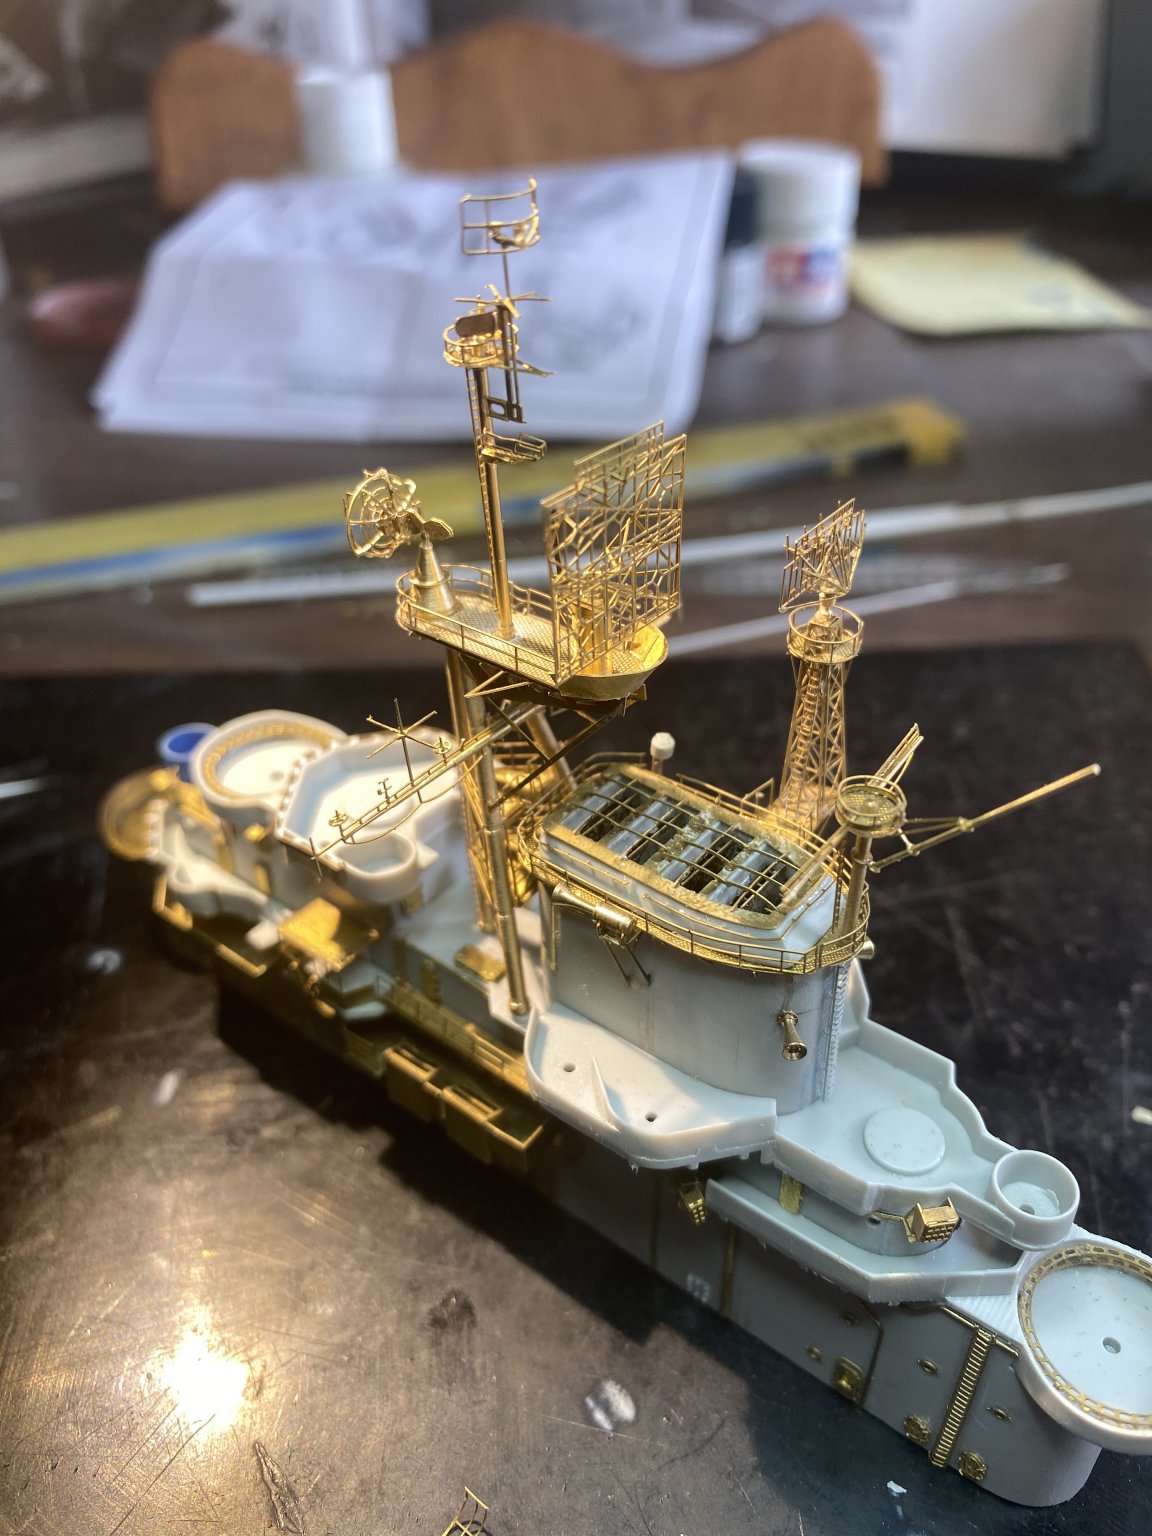
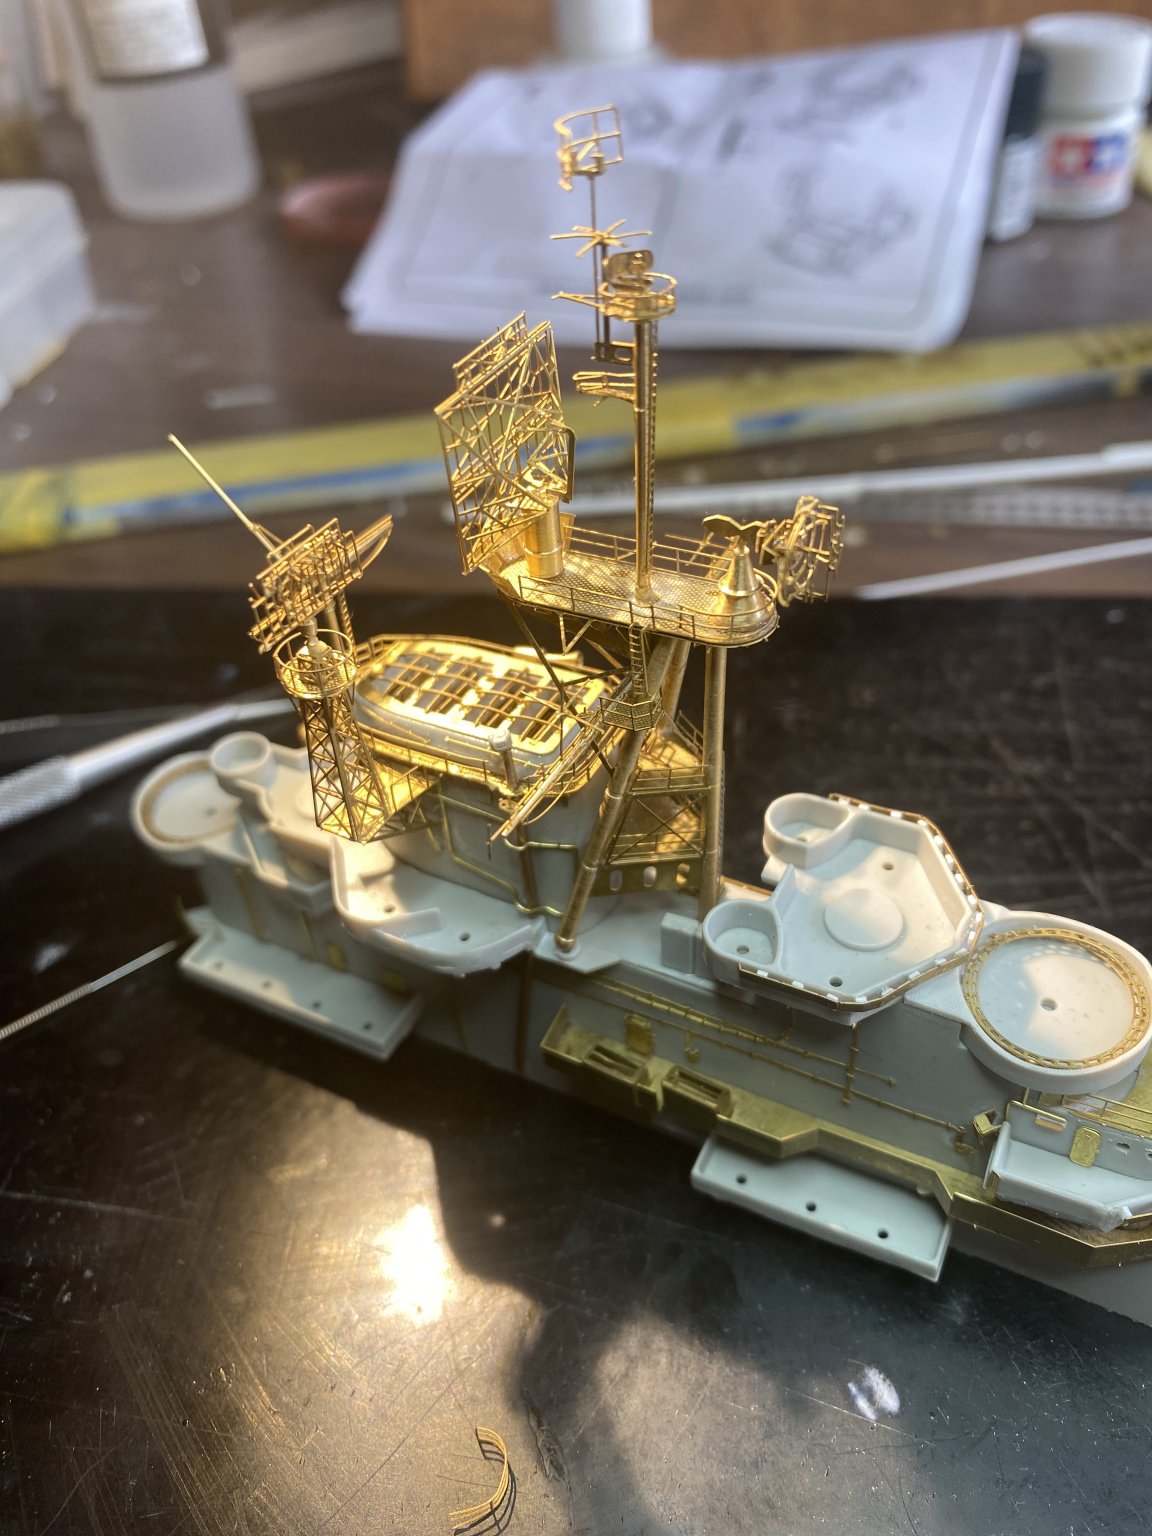
The search lights are replaced and actually have little glass lenses which just look like toys to me, so I rather have them with a dark wash. the three shades of blue is quite growing on me, it’s very dark but looks quite real.
-
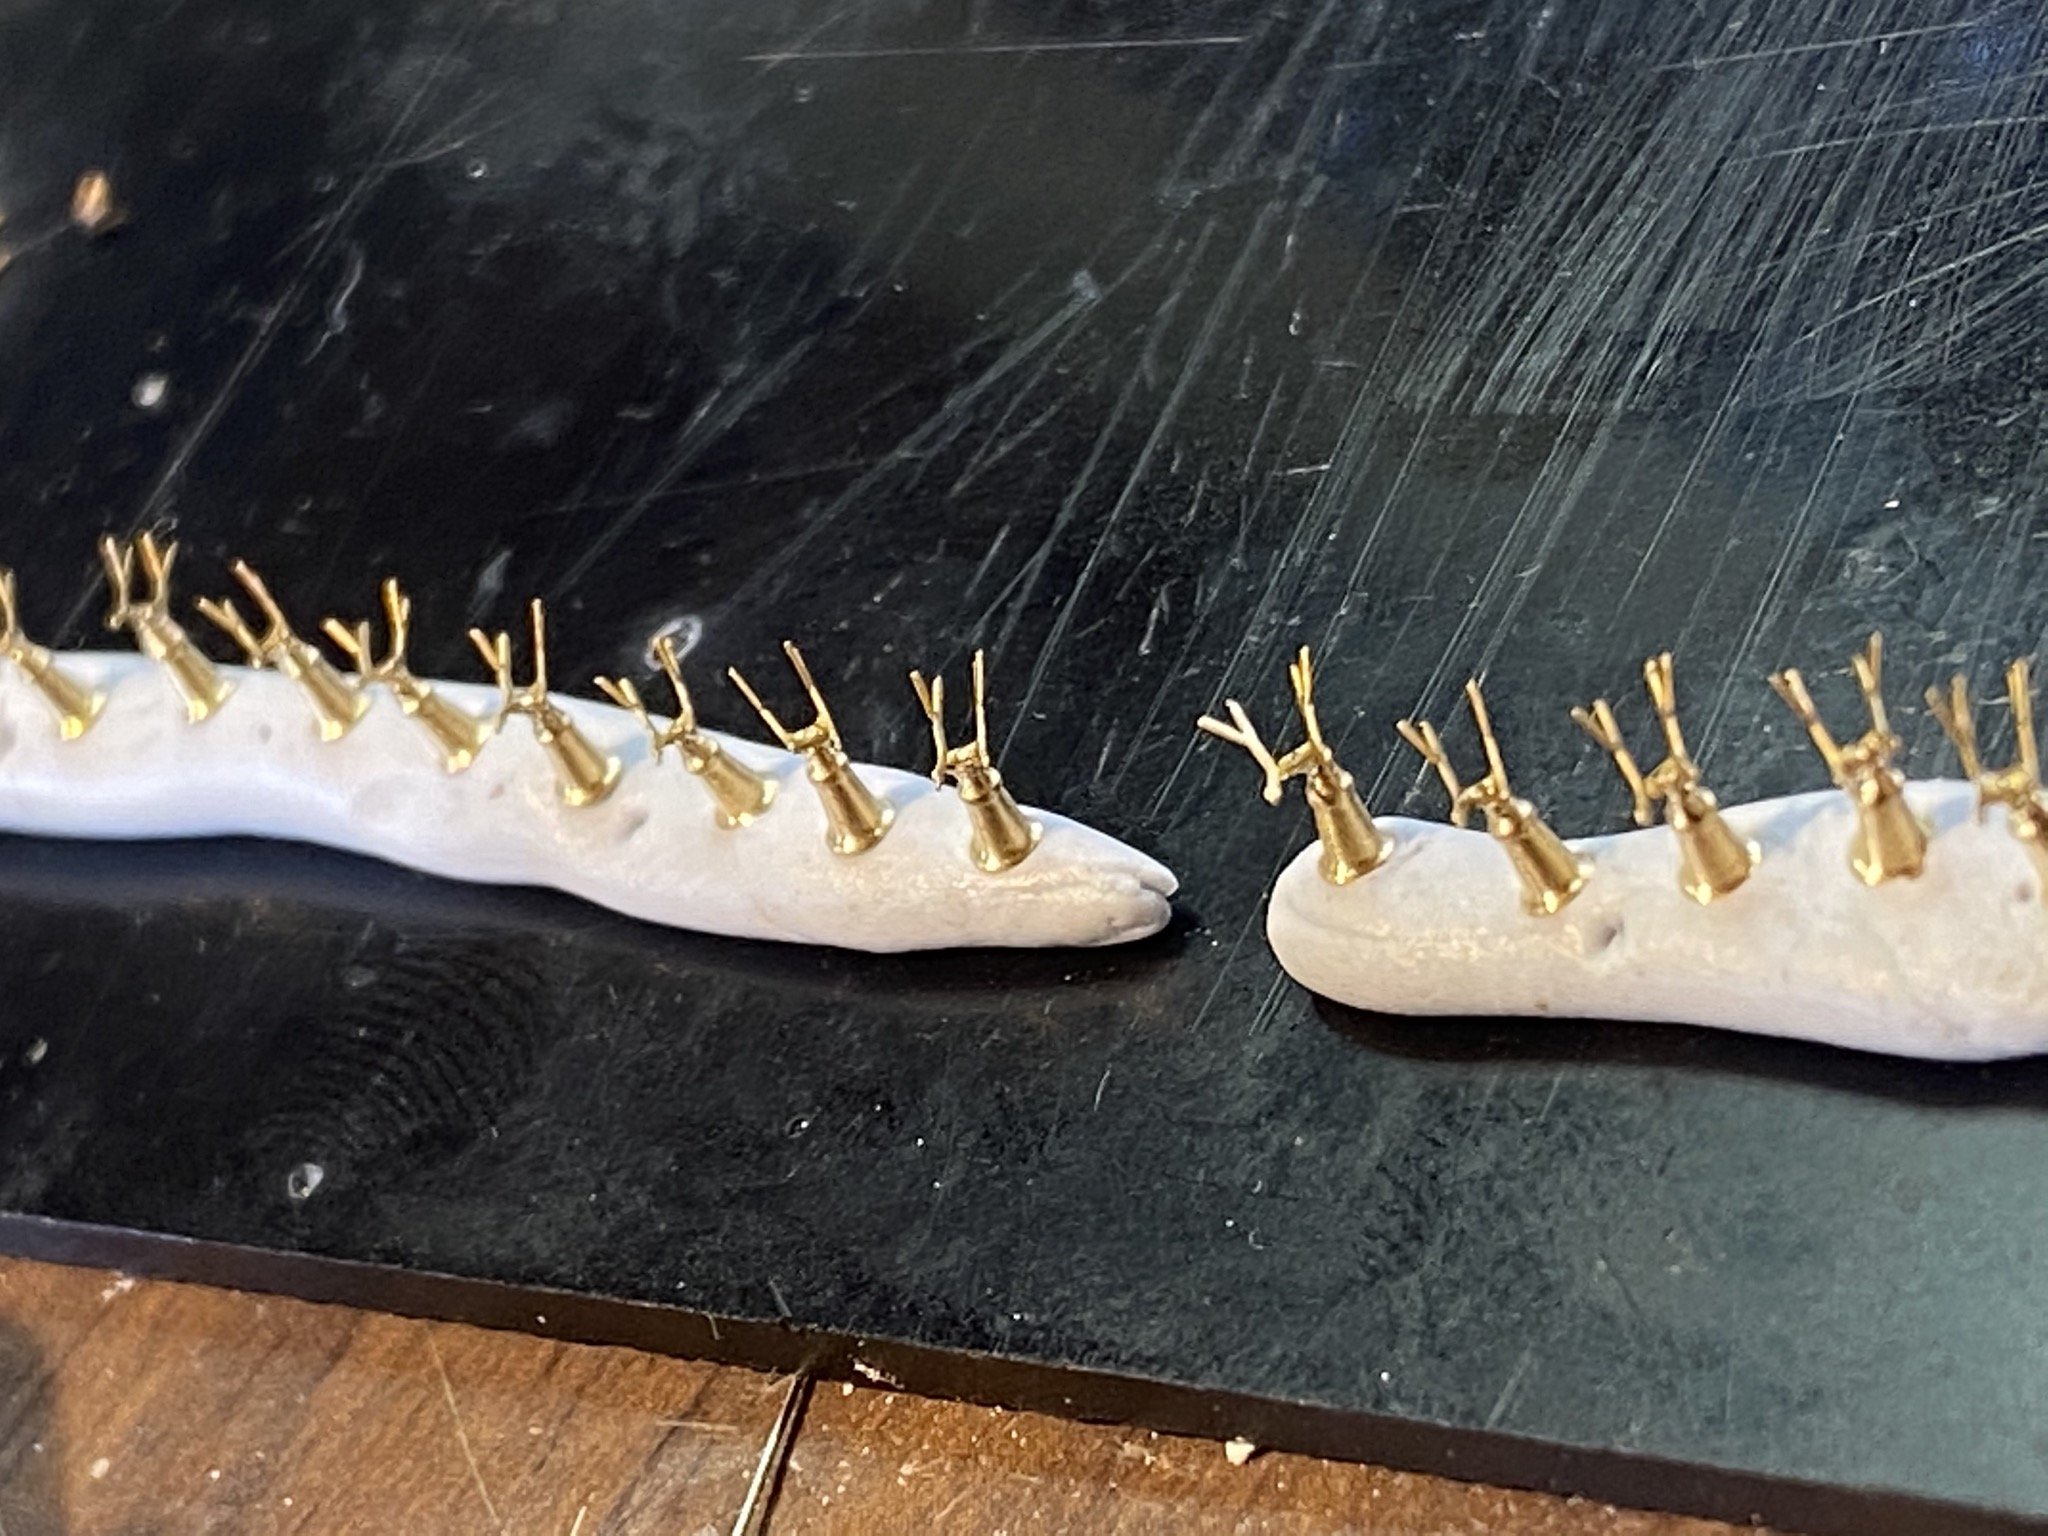
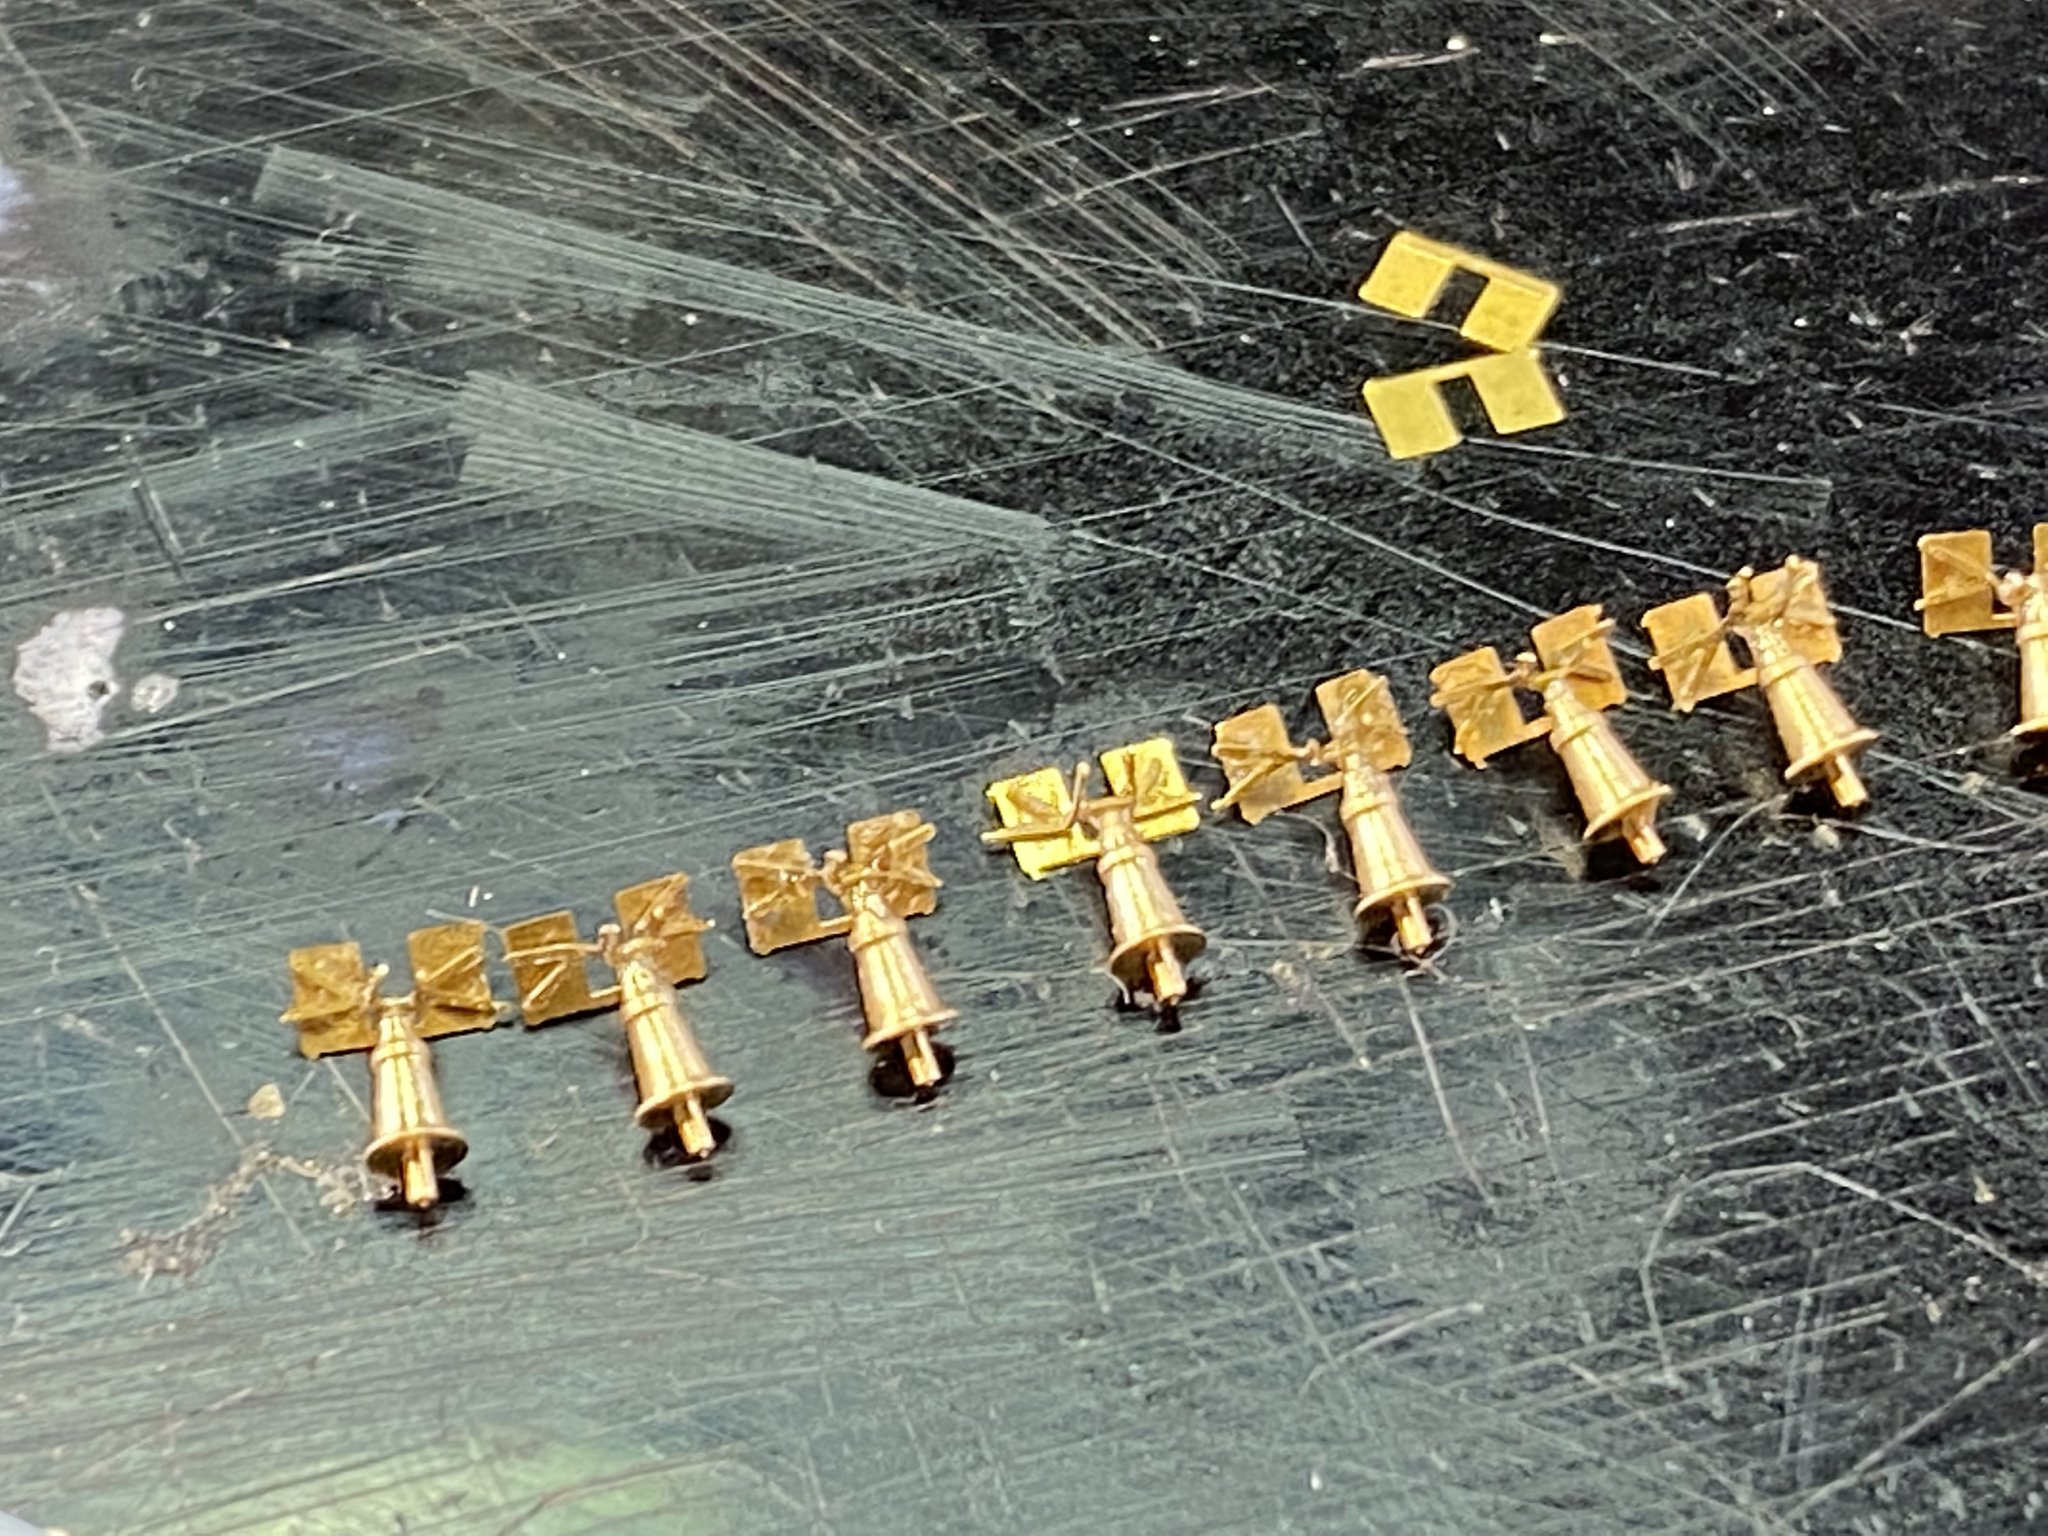
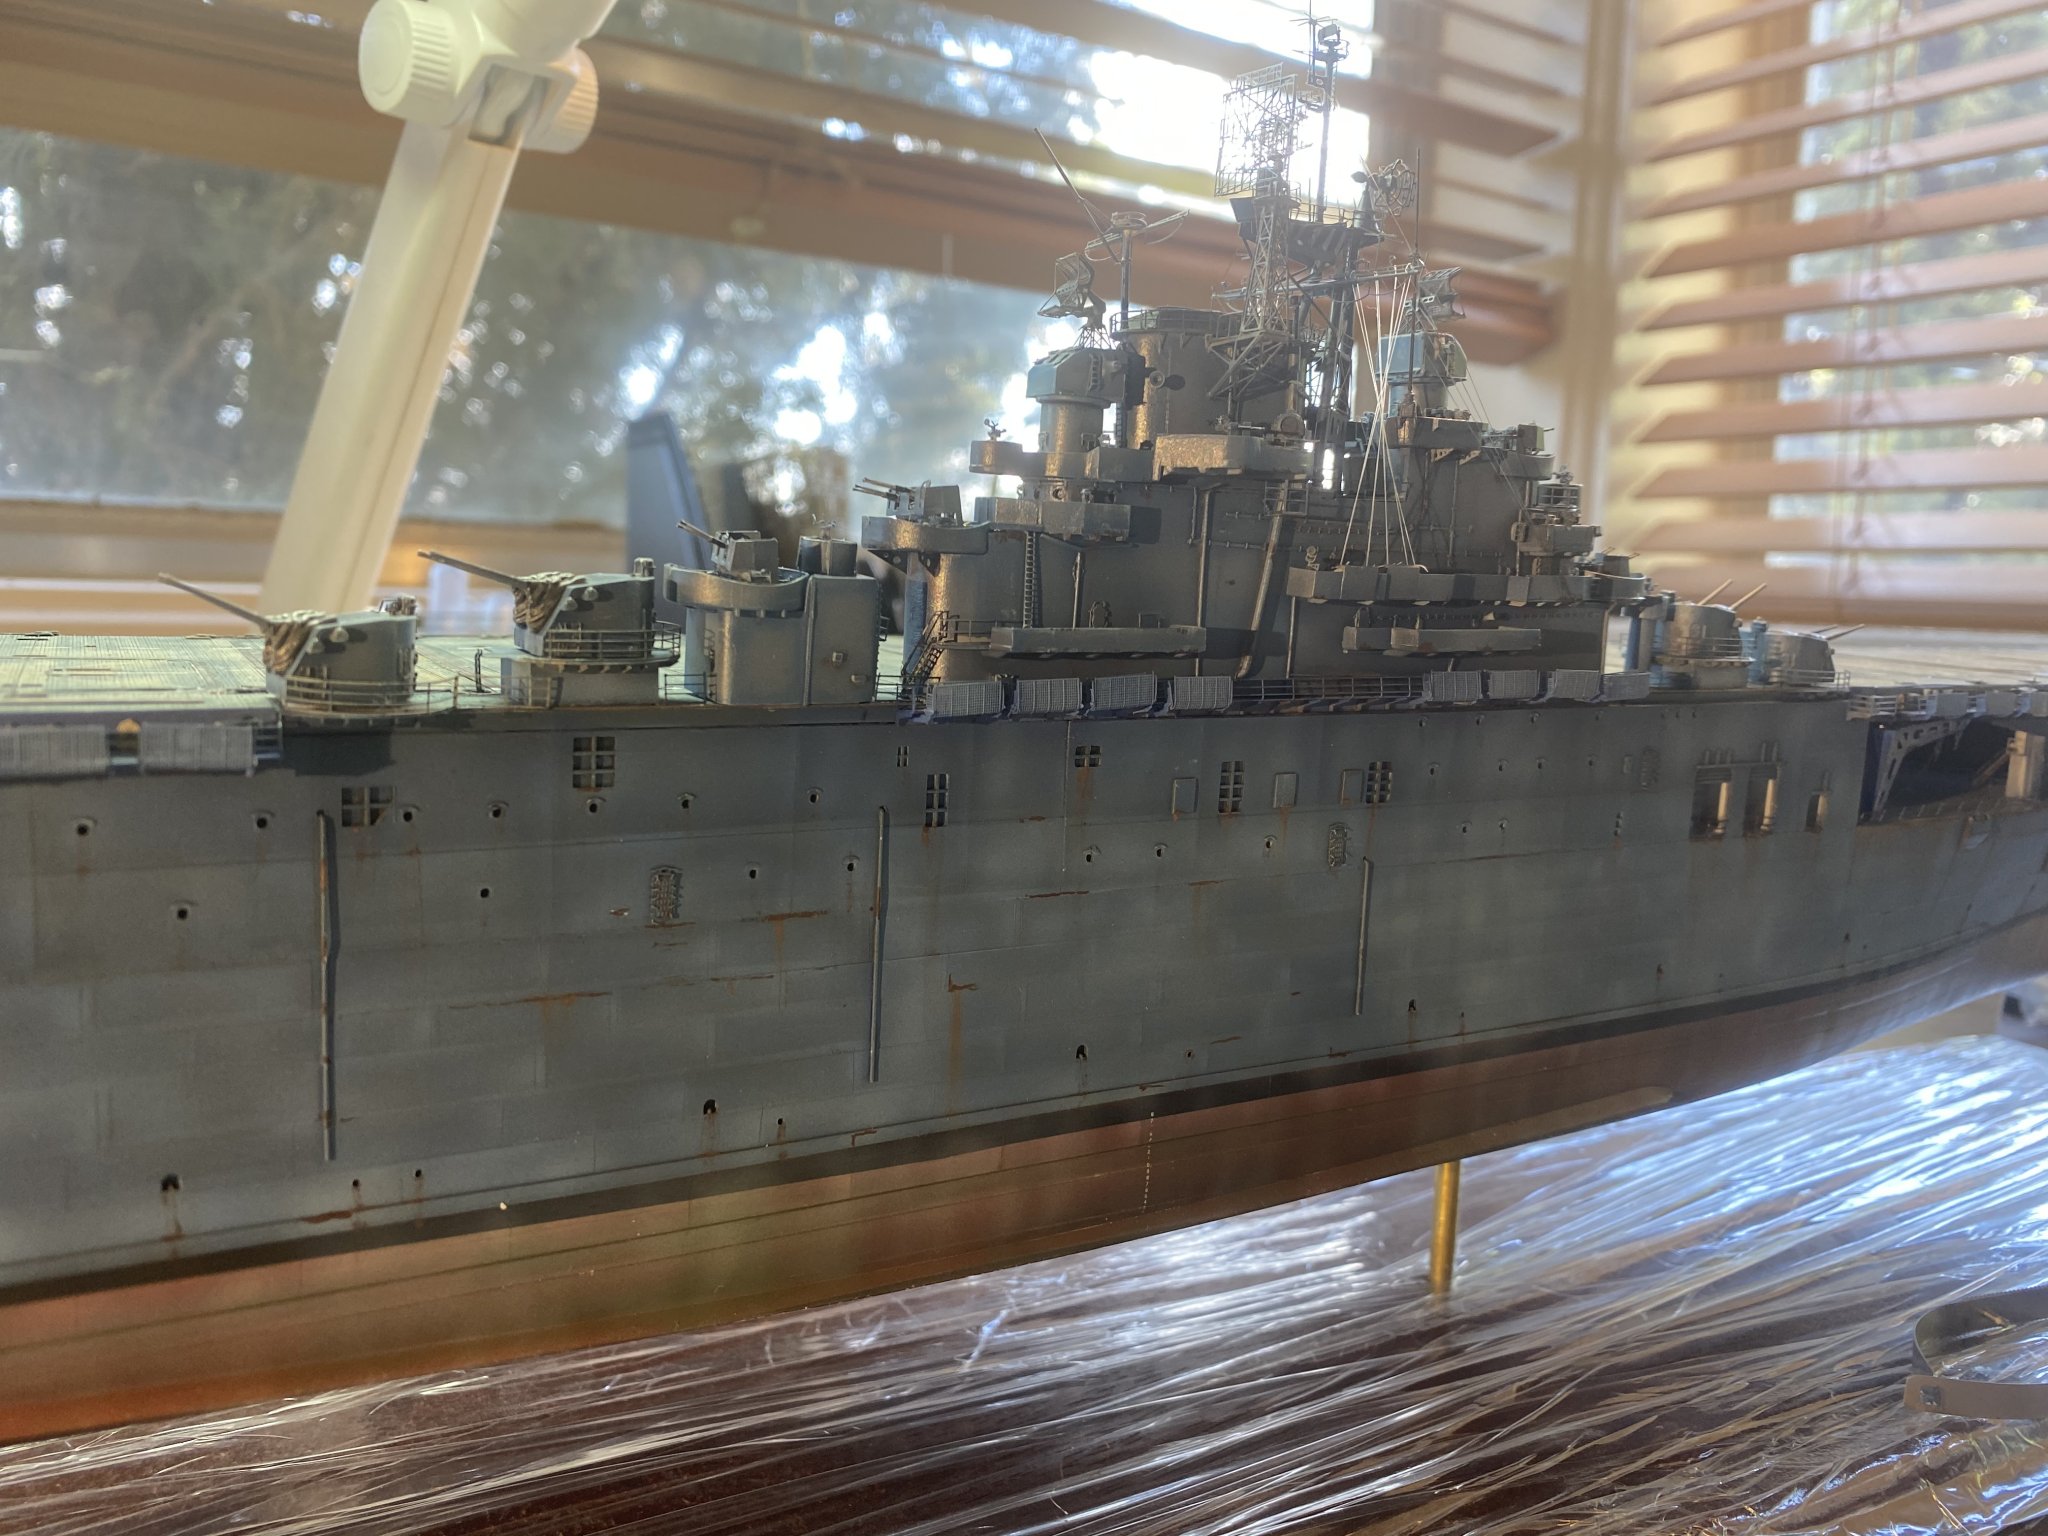
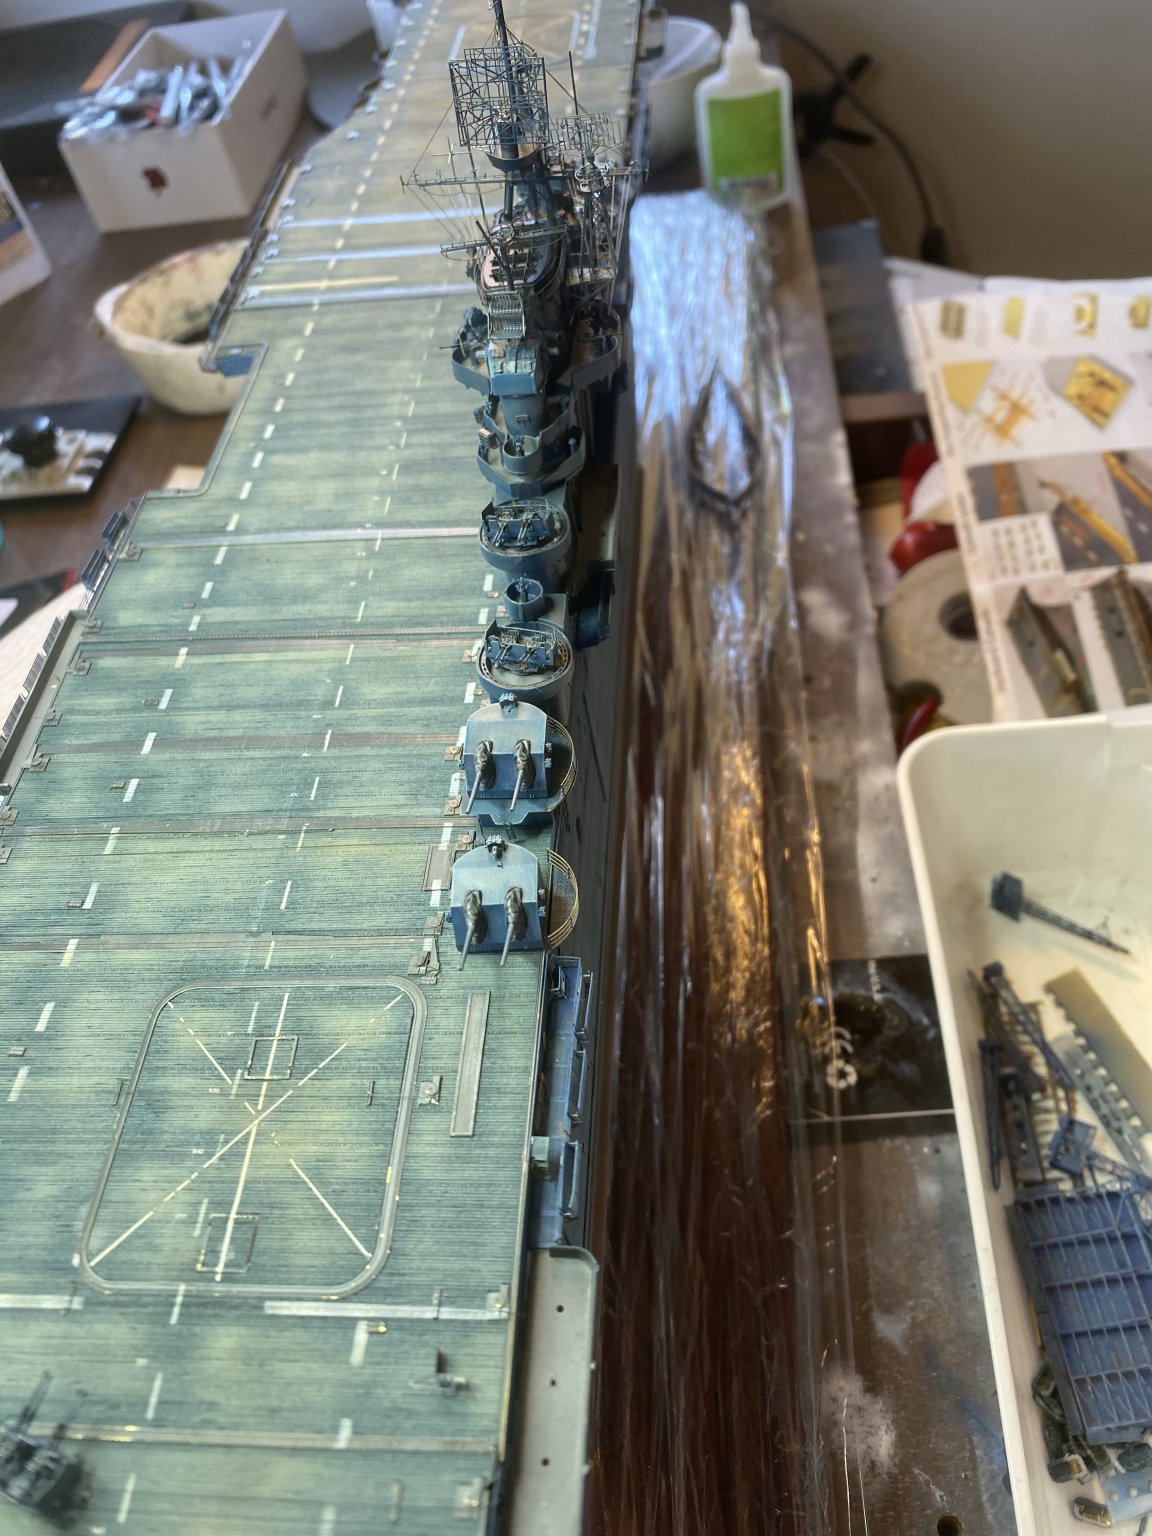
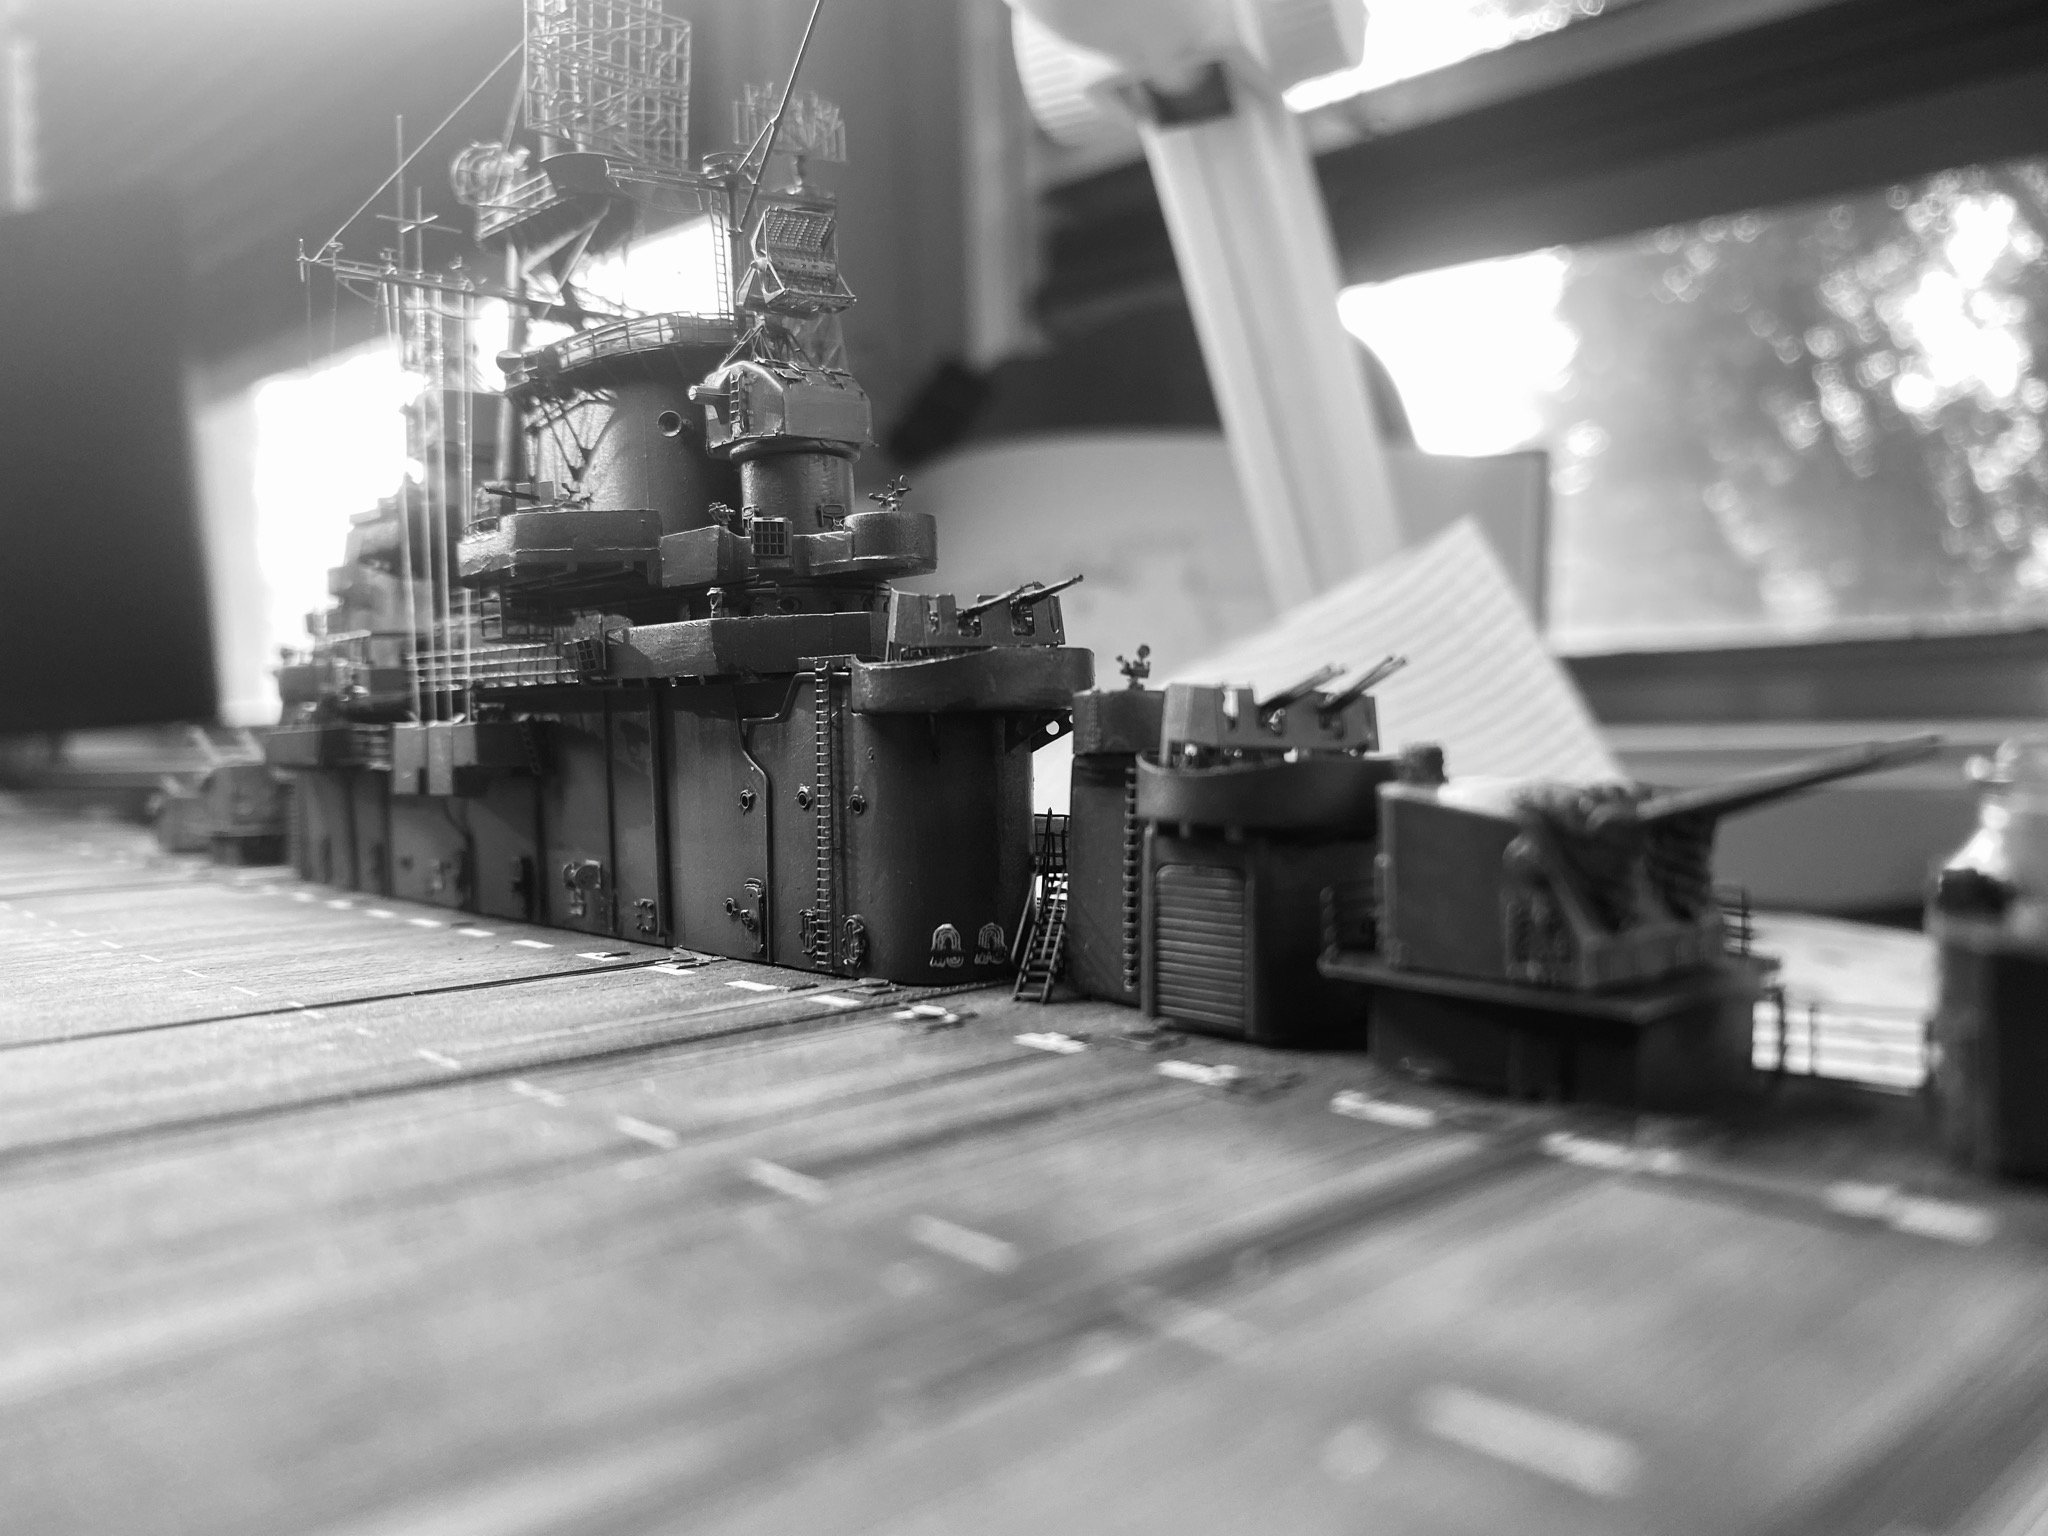
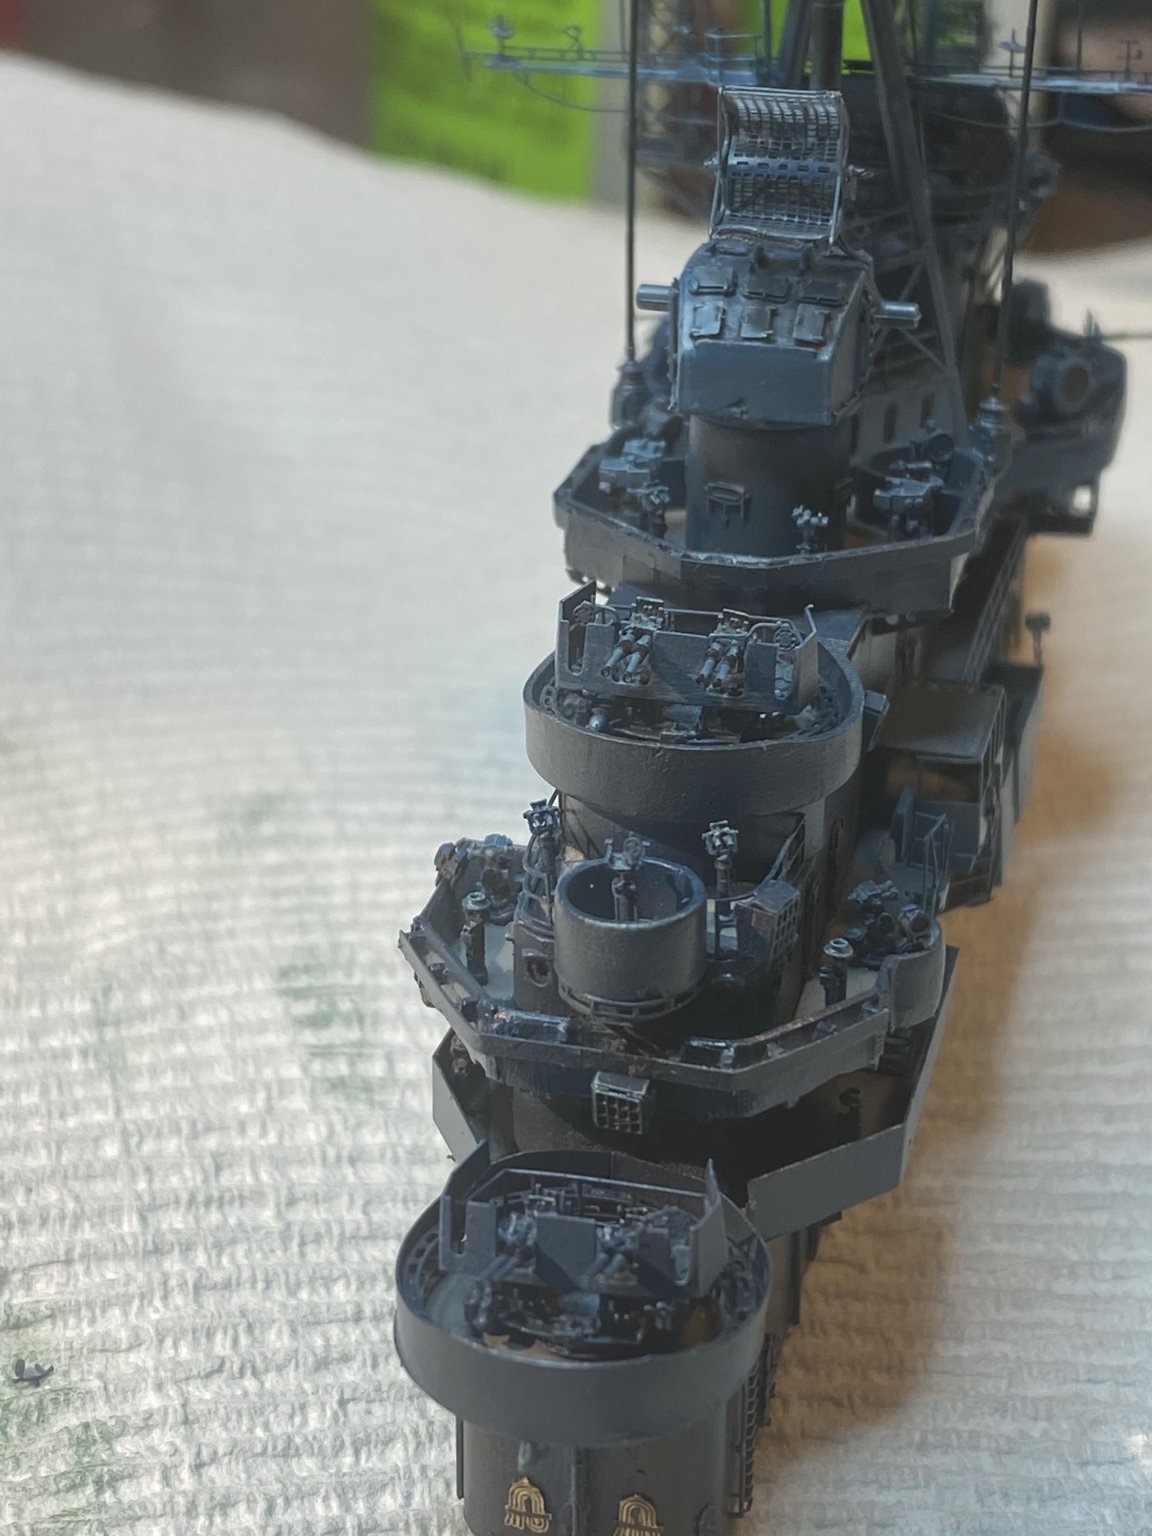
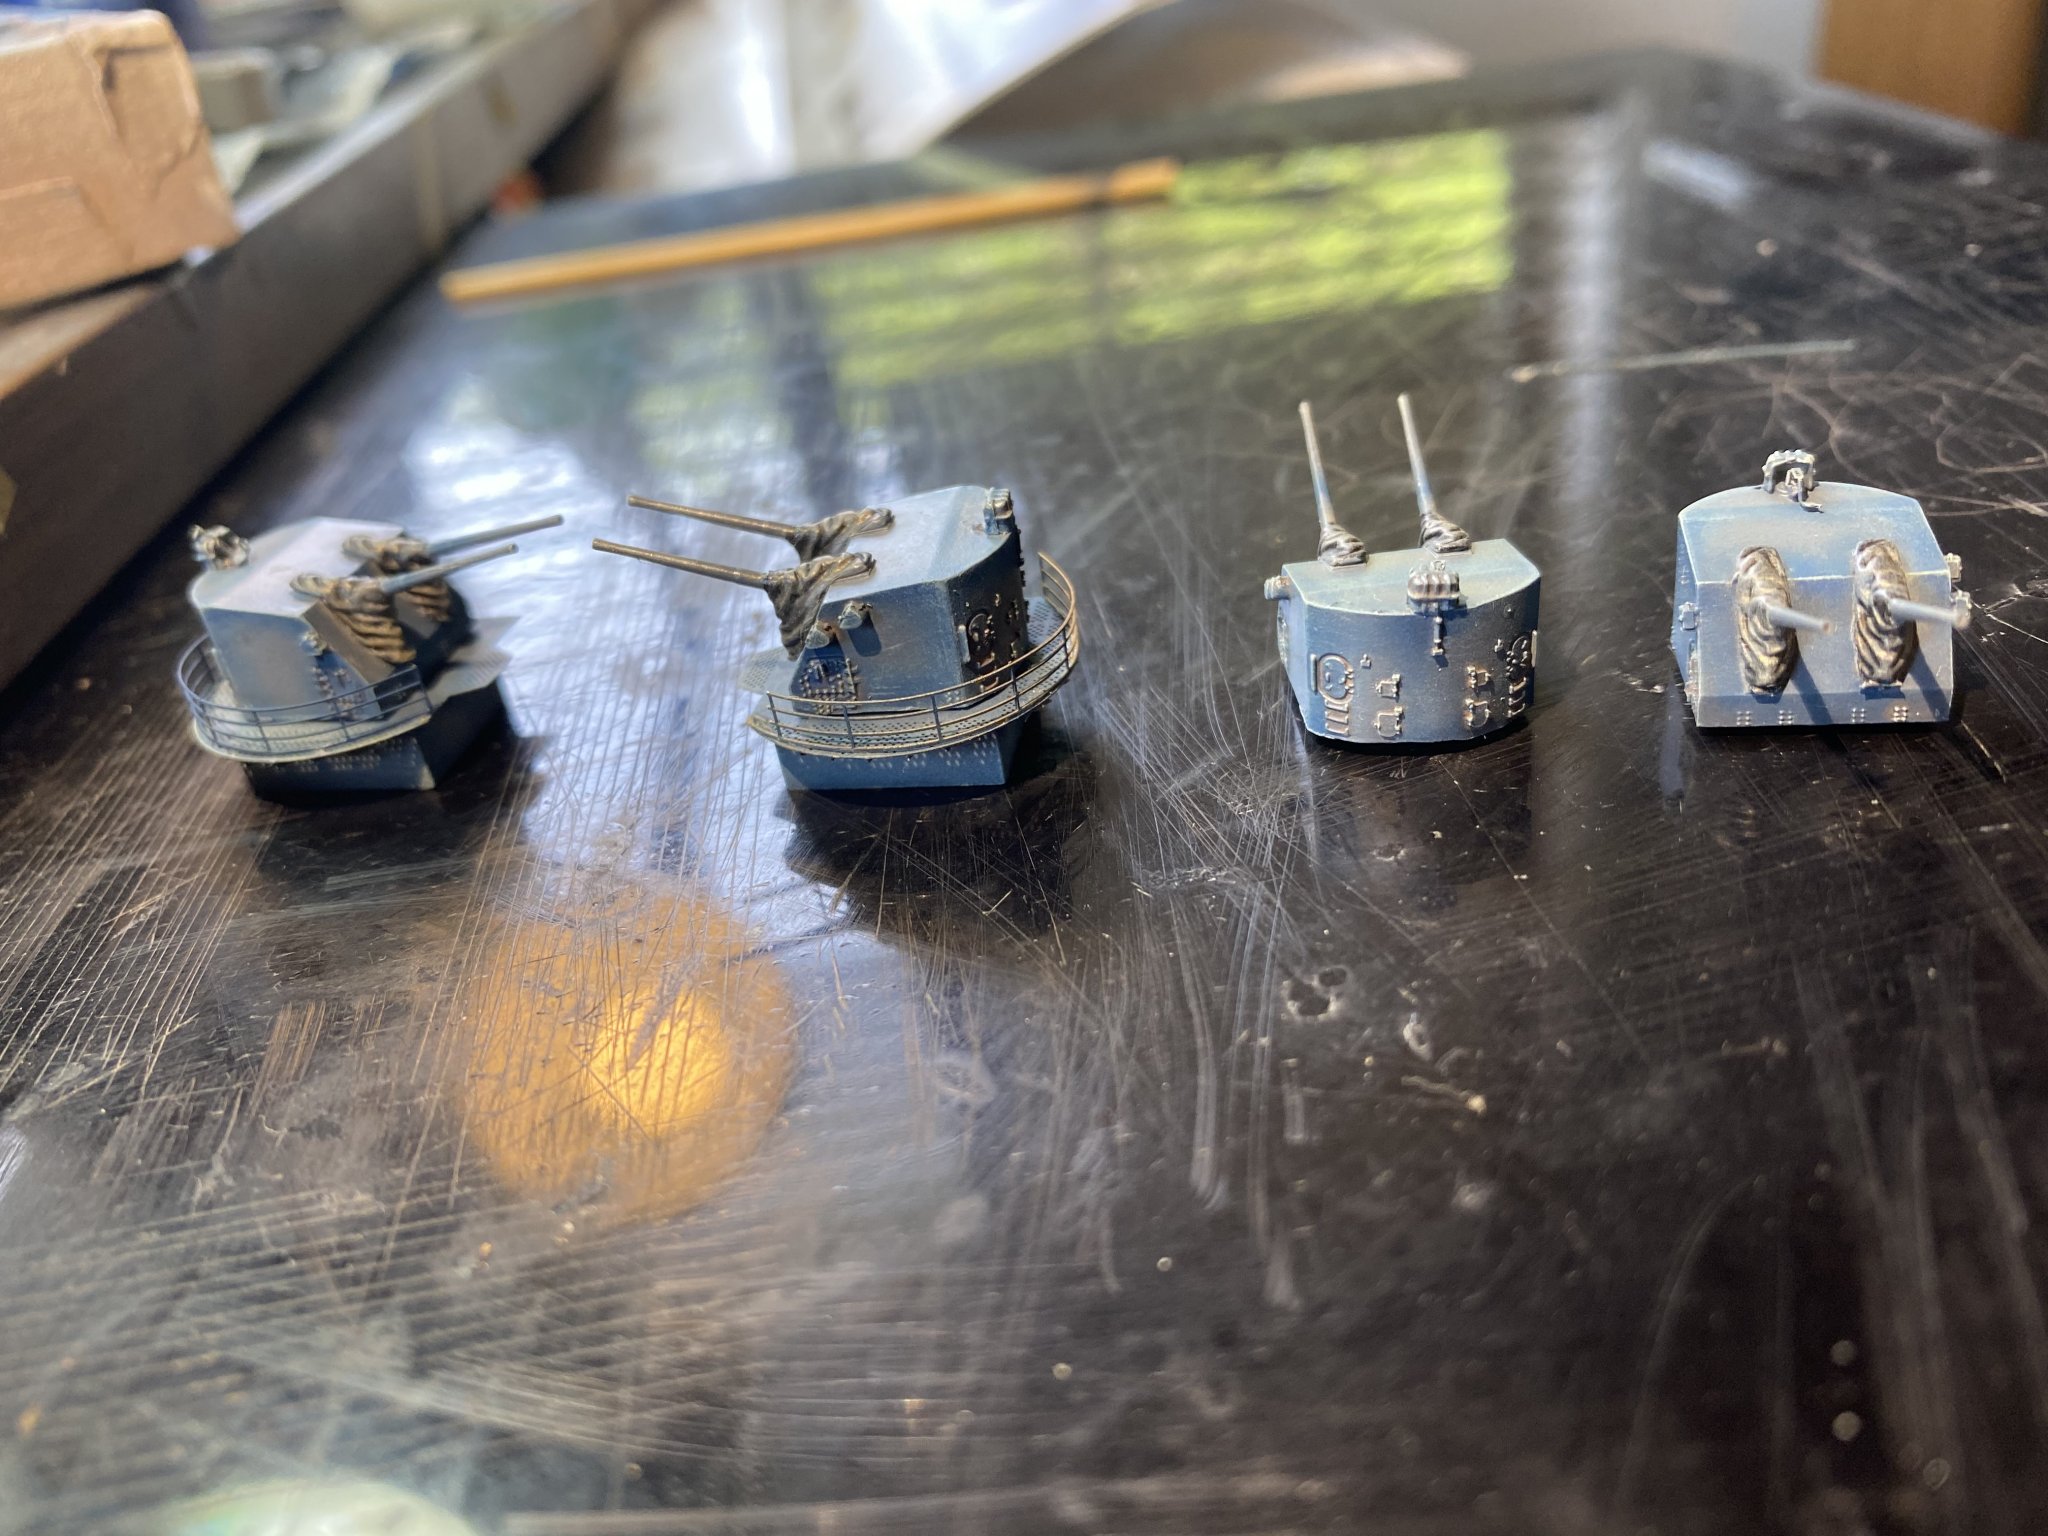
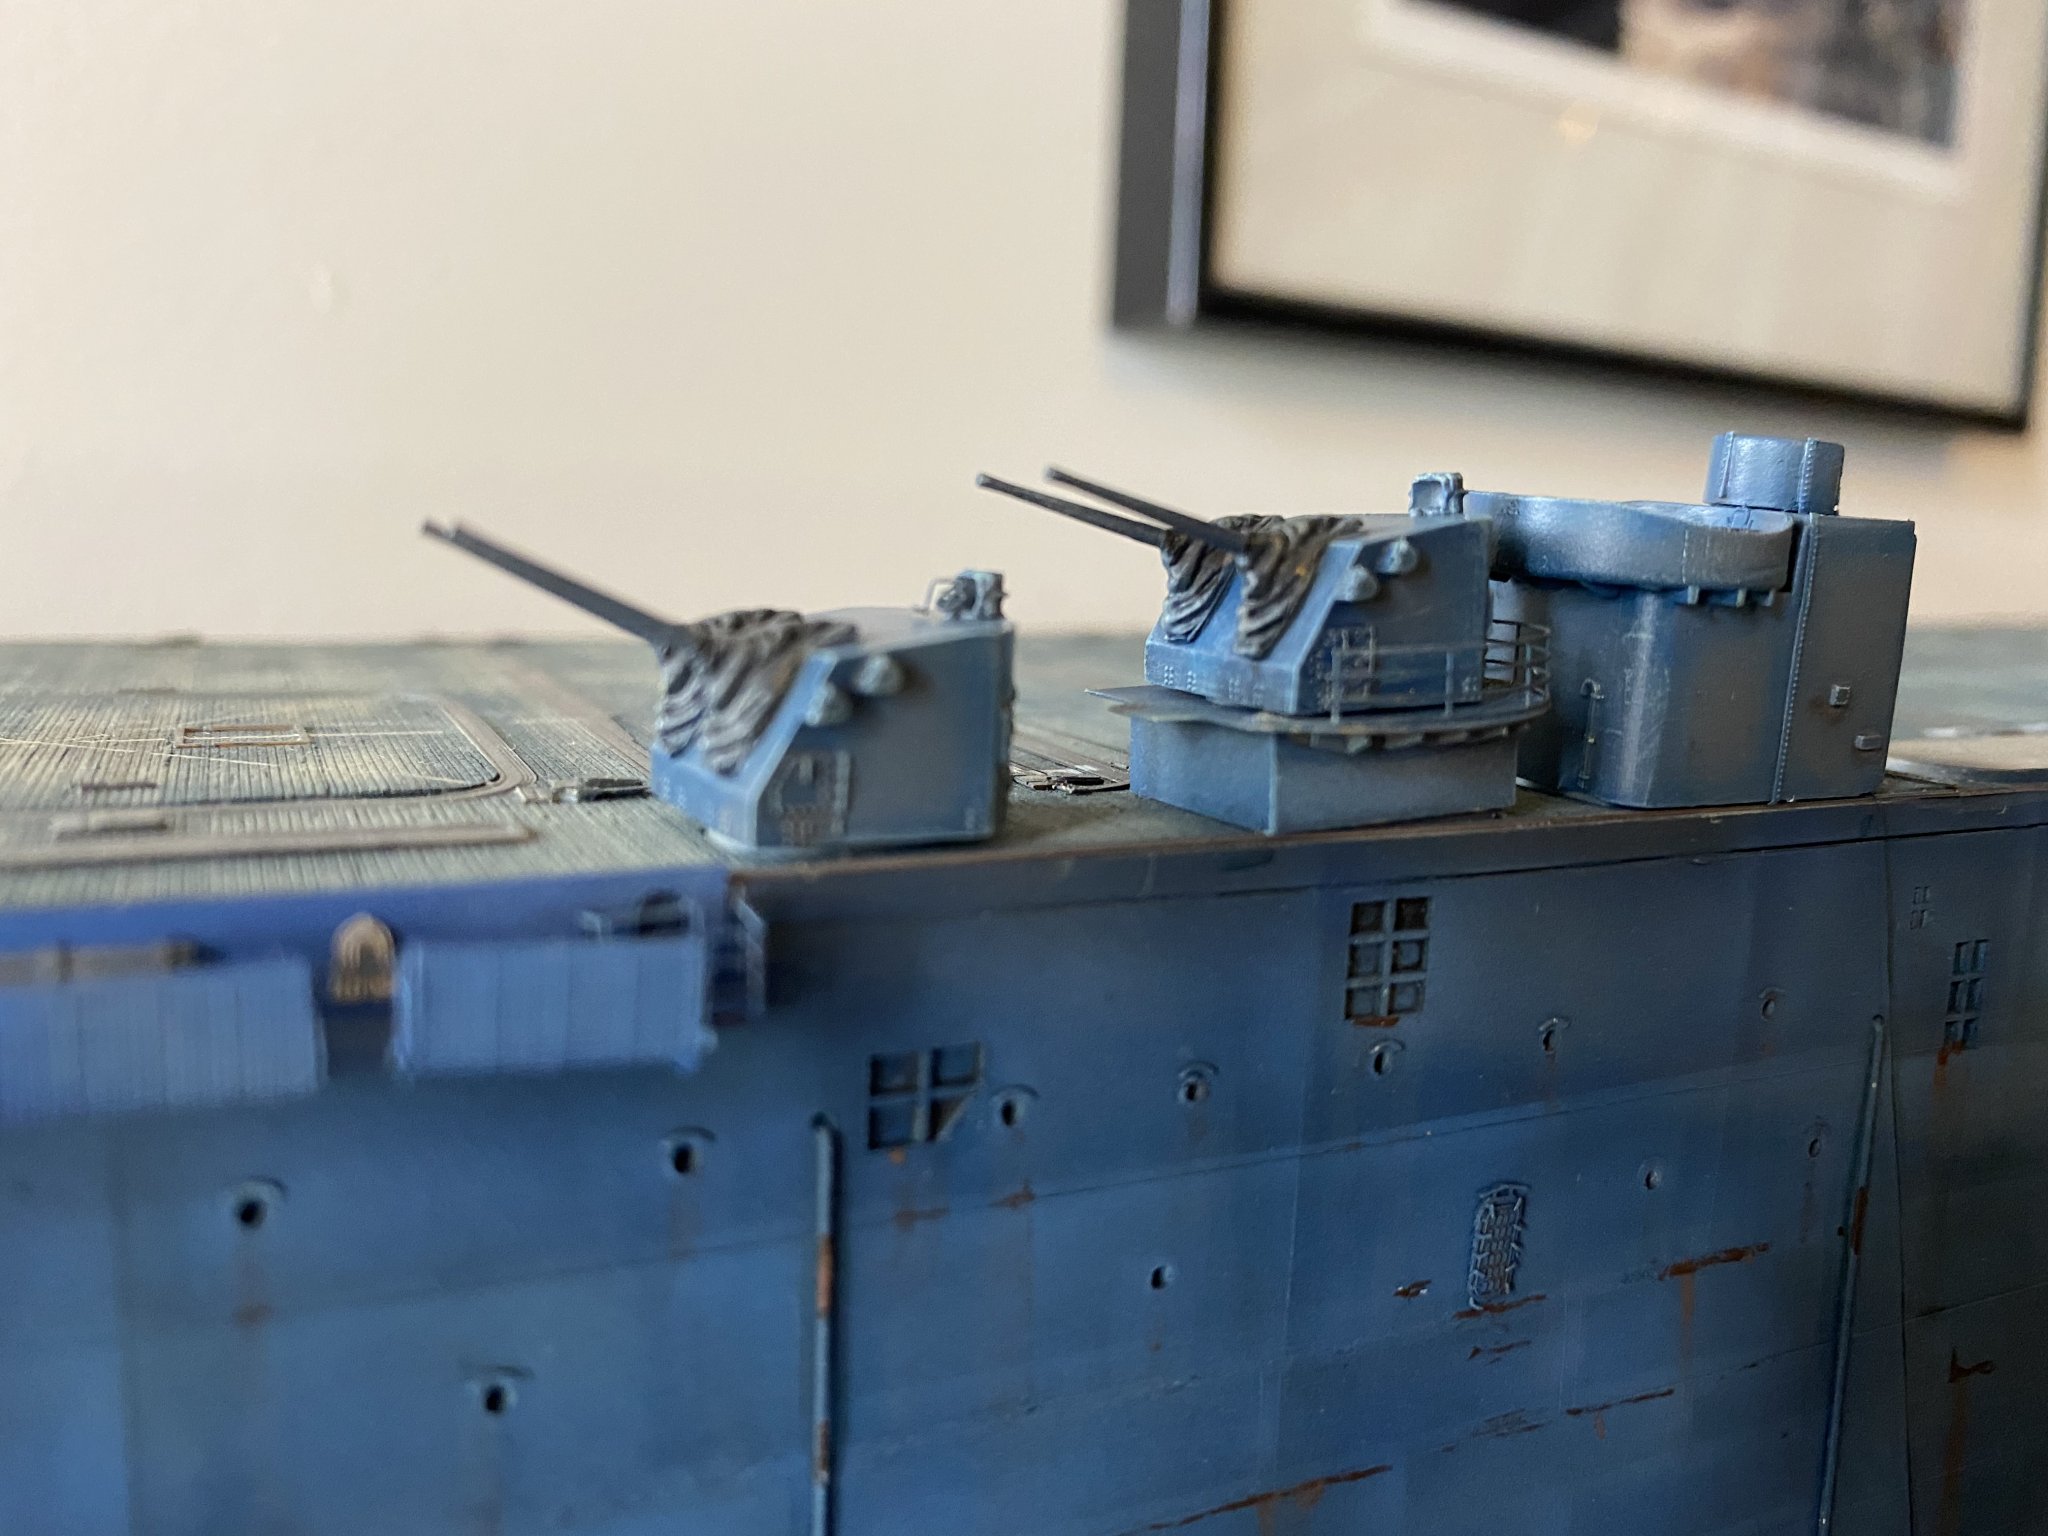
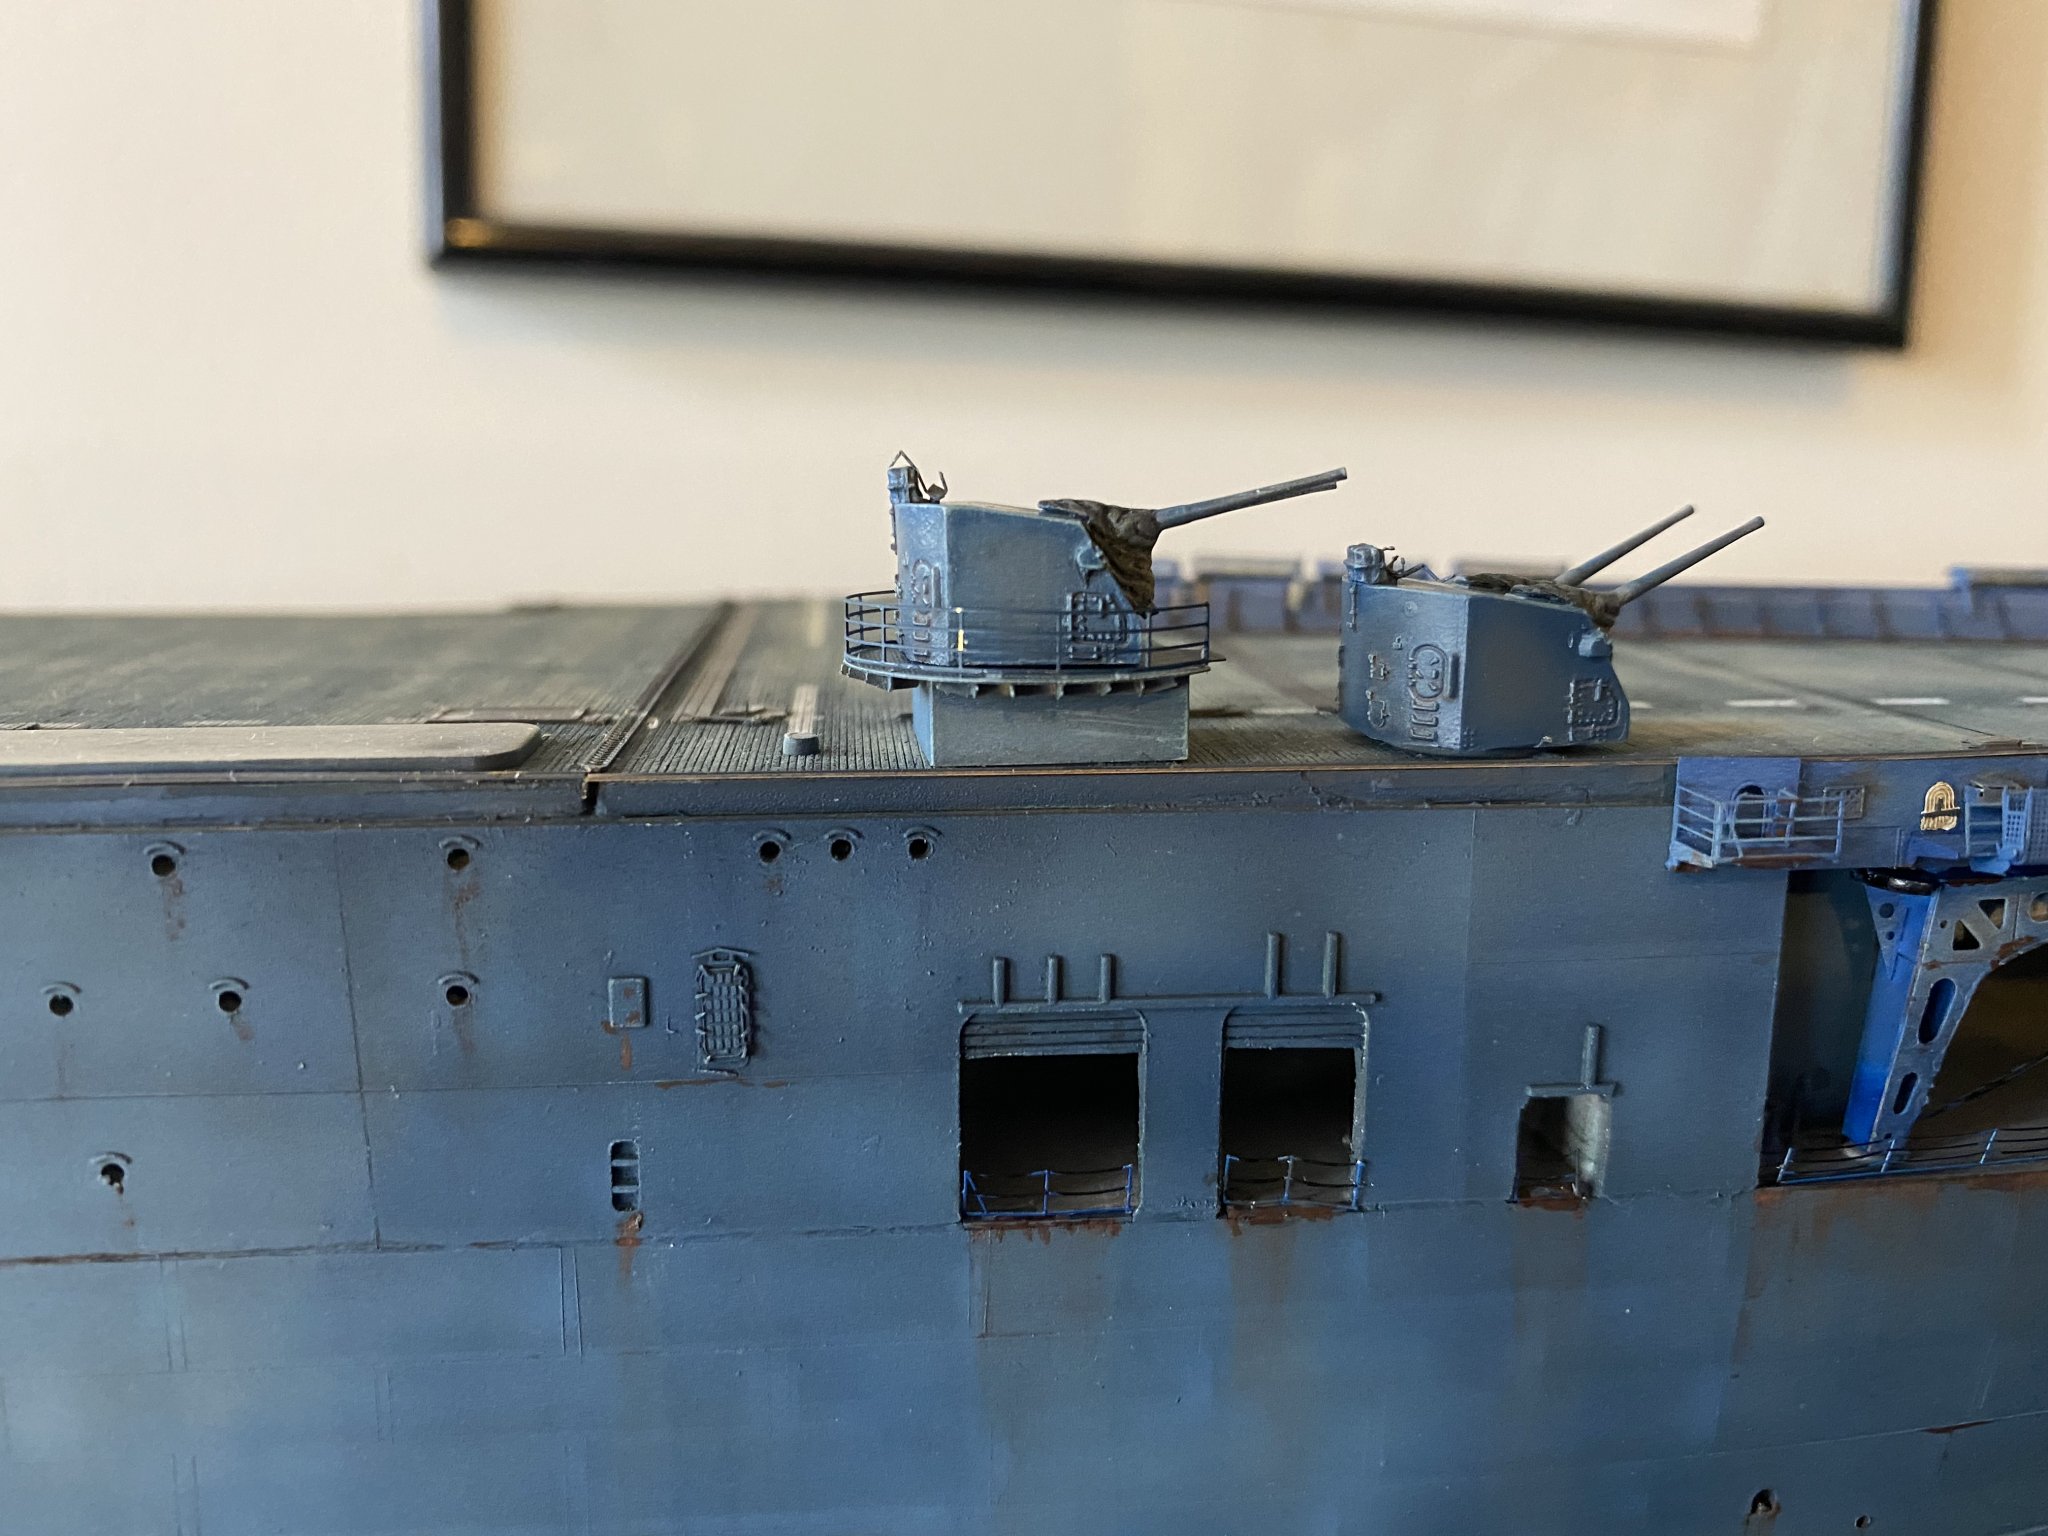
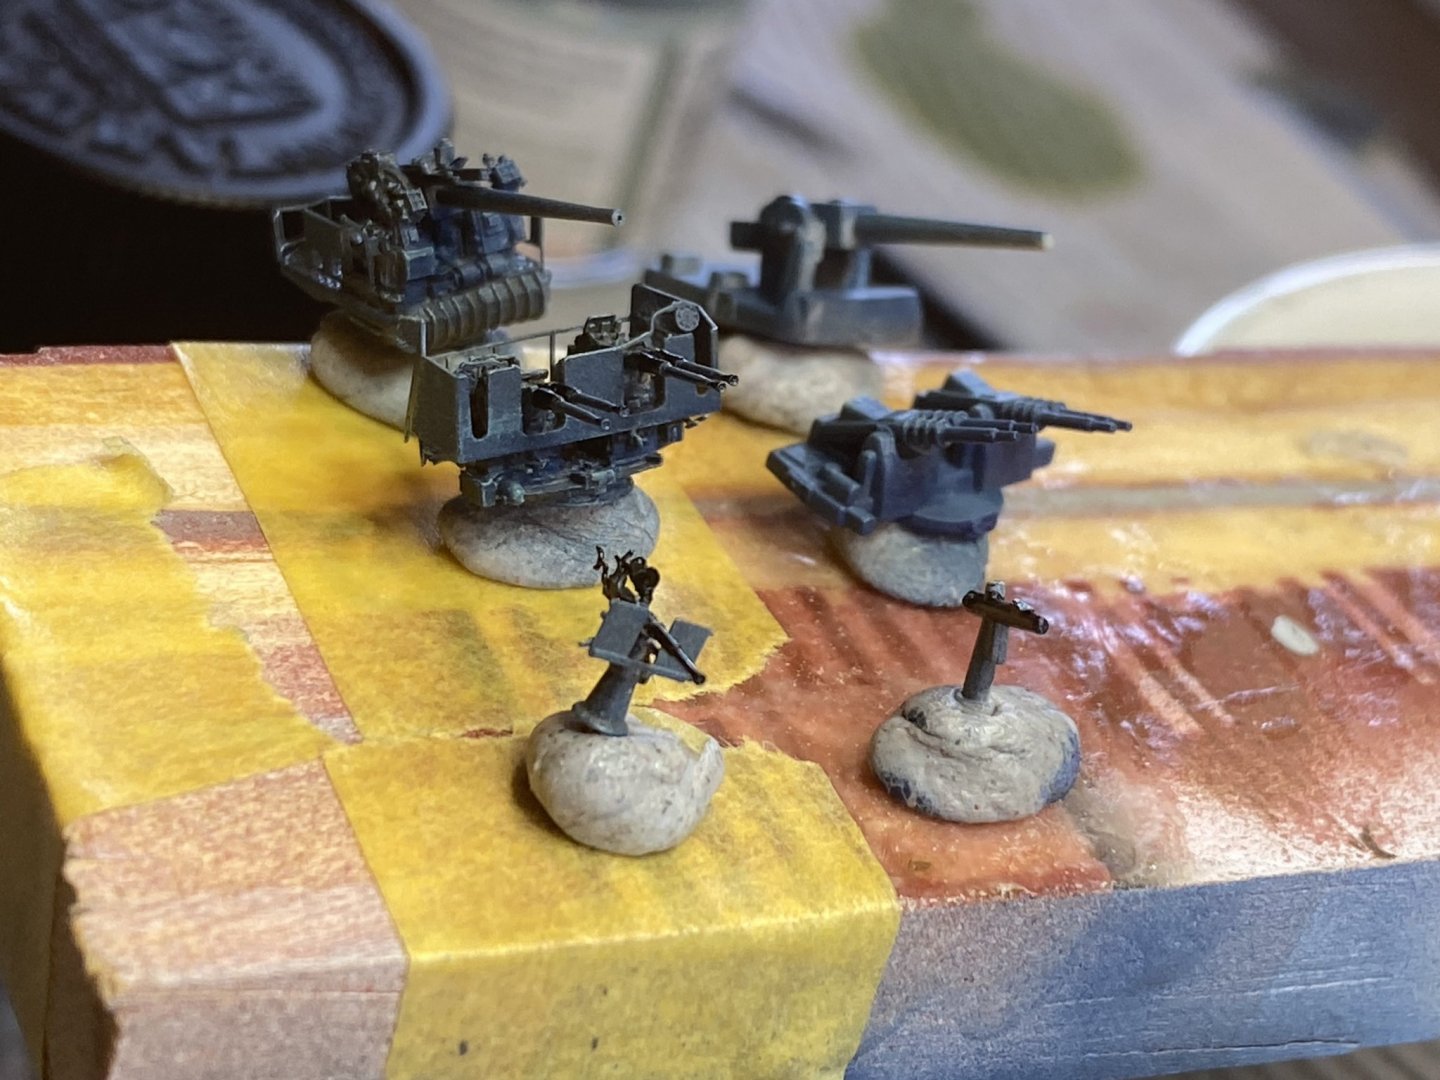
The remaining guns, the 20mm’s are now pretty standard replacements, the 20mm quad borfors were just horrible to build as the barrels are mismatched, but the 5 inch singles are very easy and nice. The kit plastic blobs are painfully inadequate

- 308 replies
-
- 18
-
-
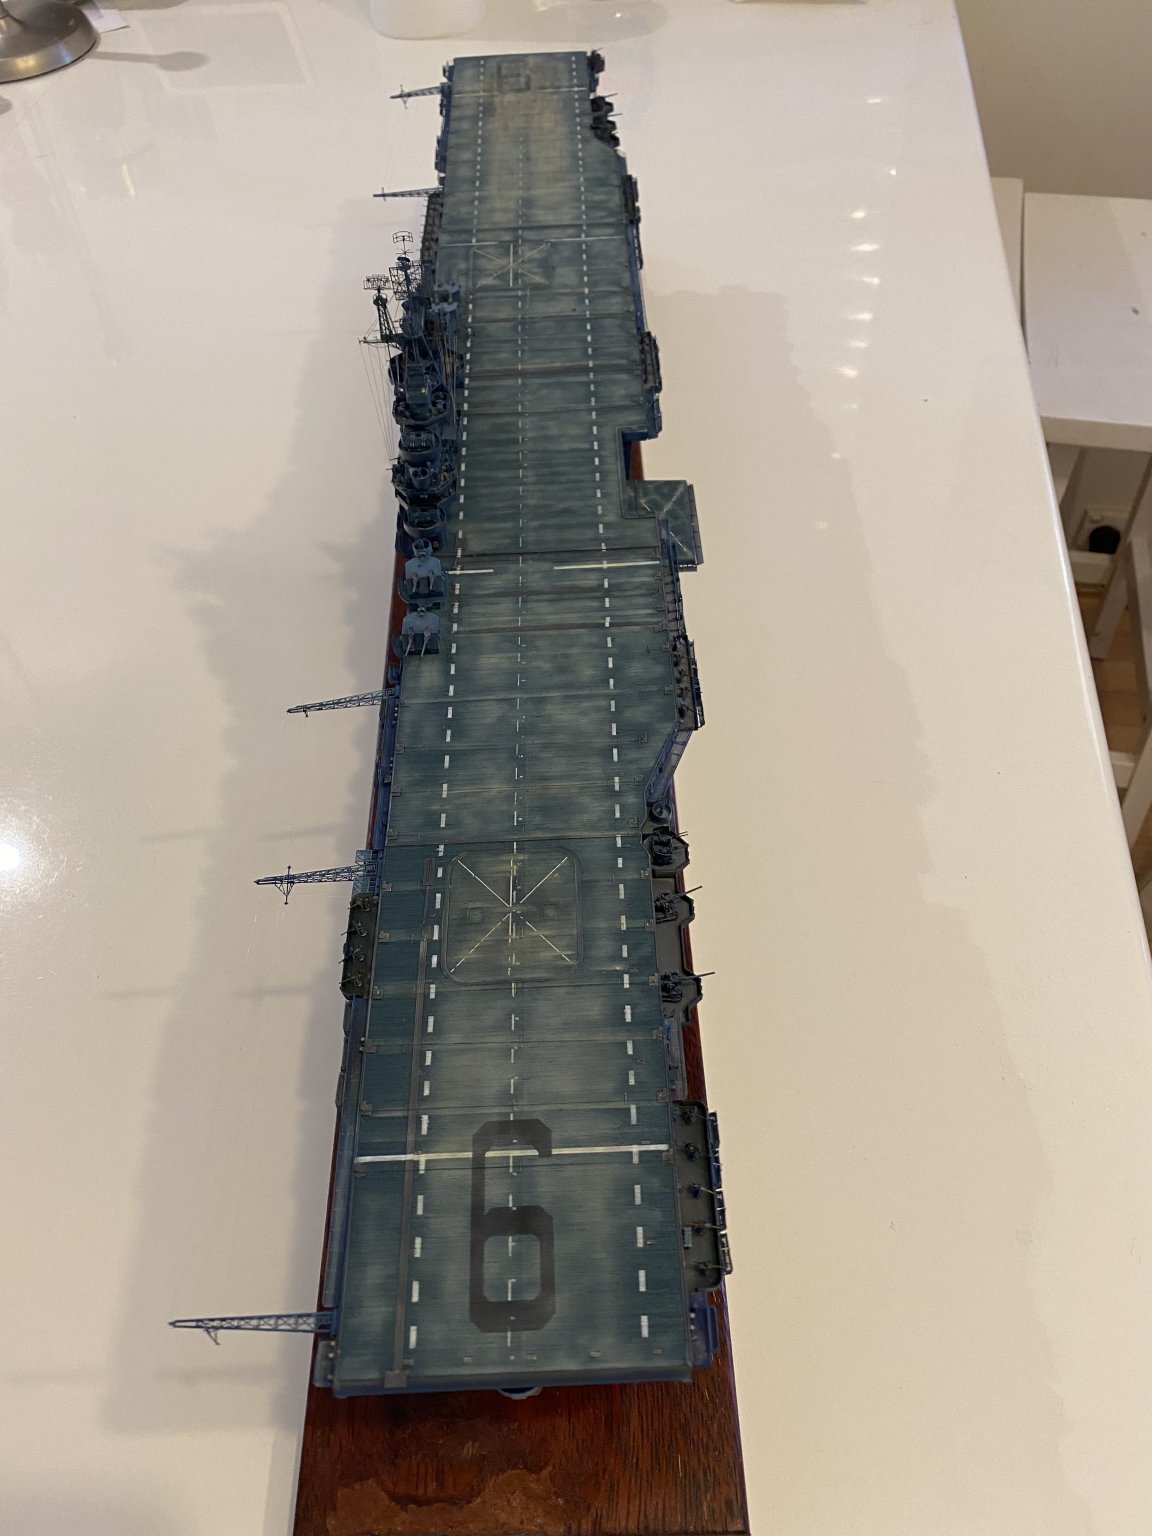
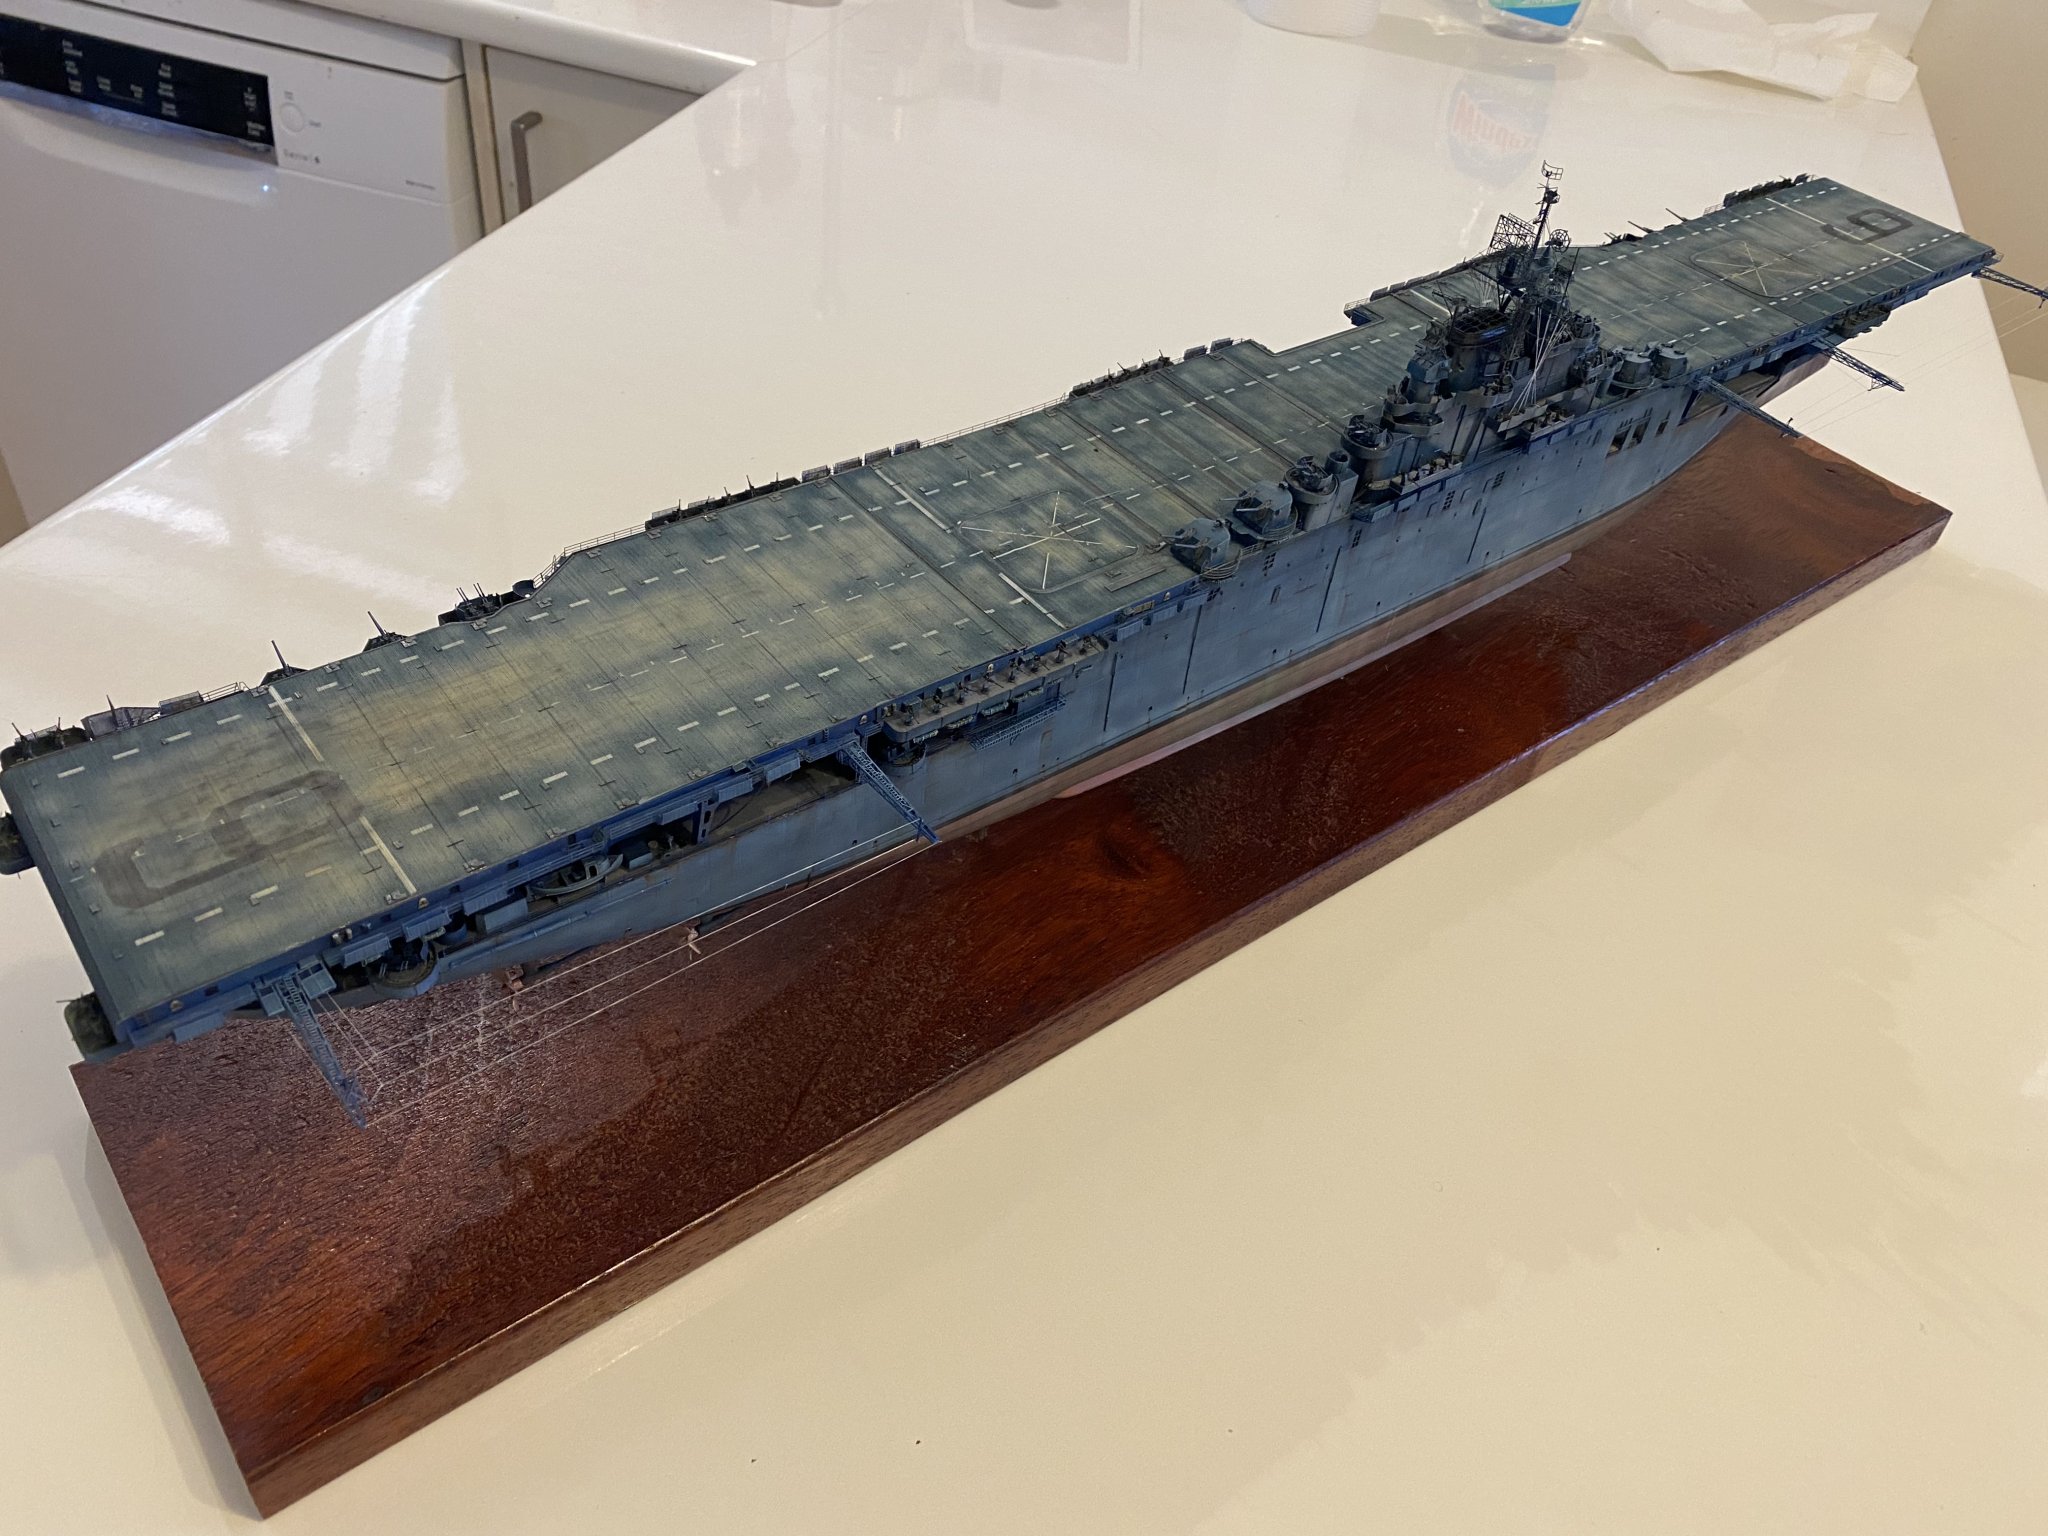
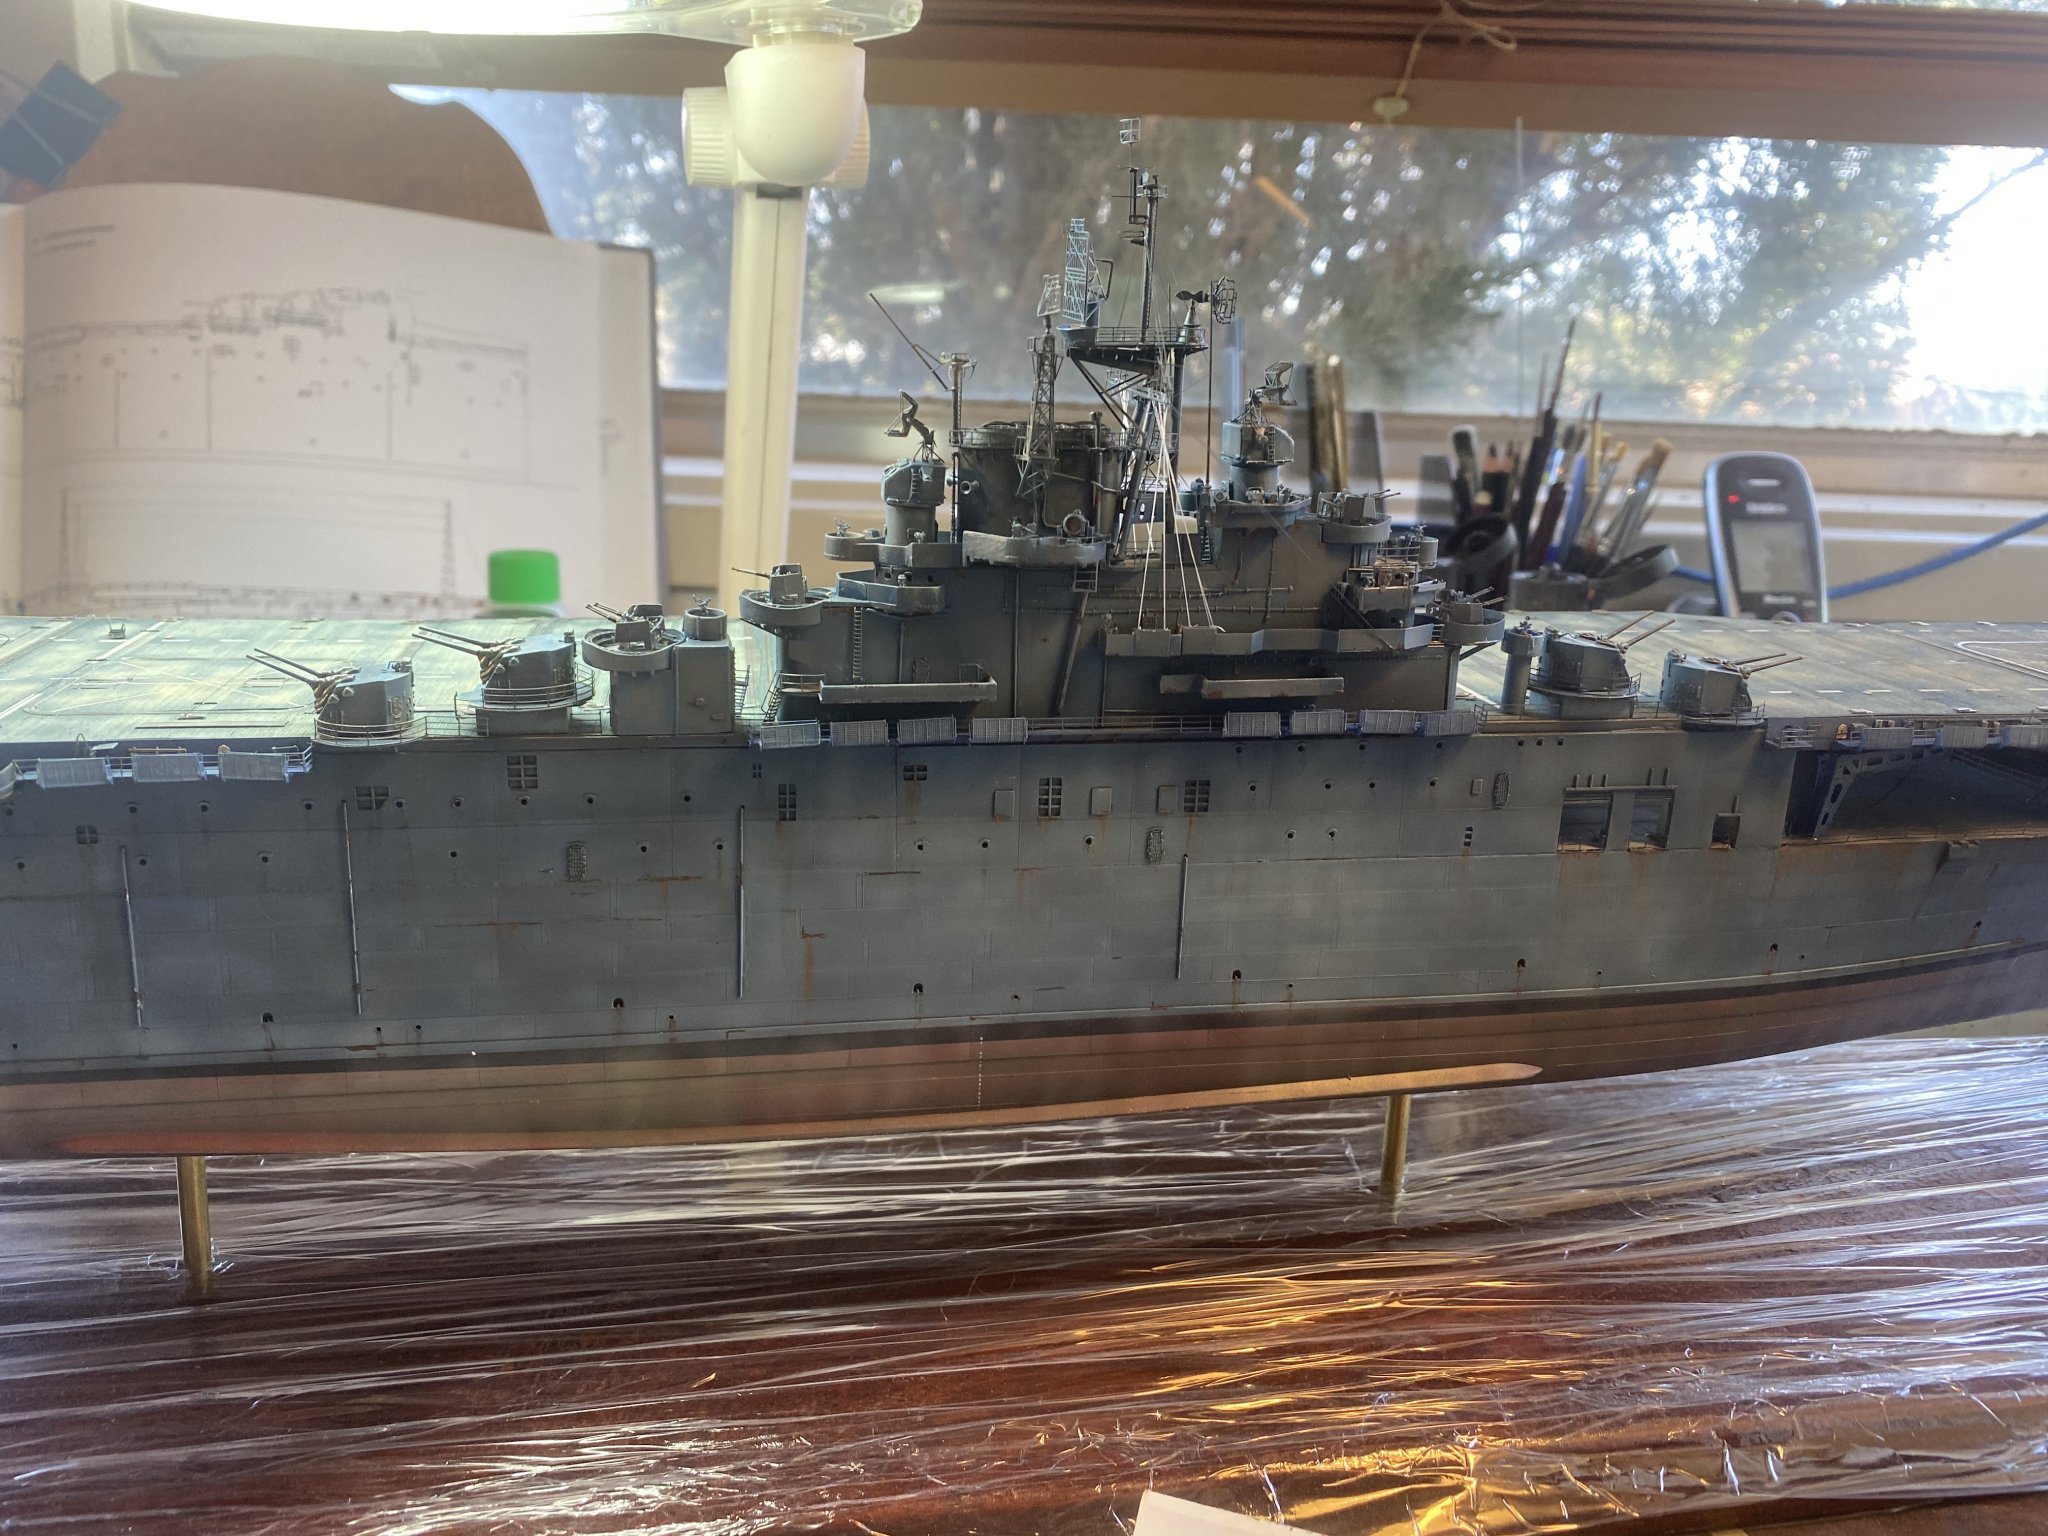
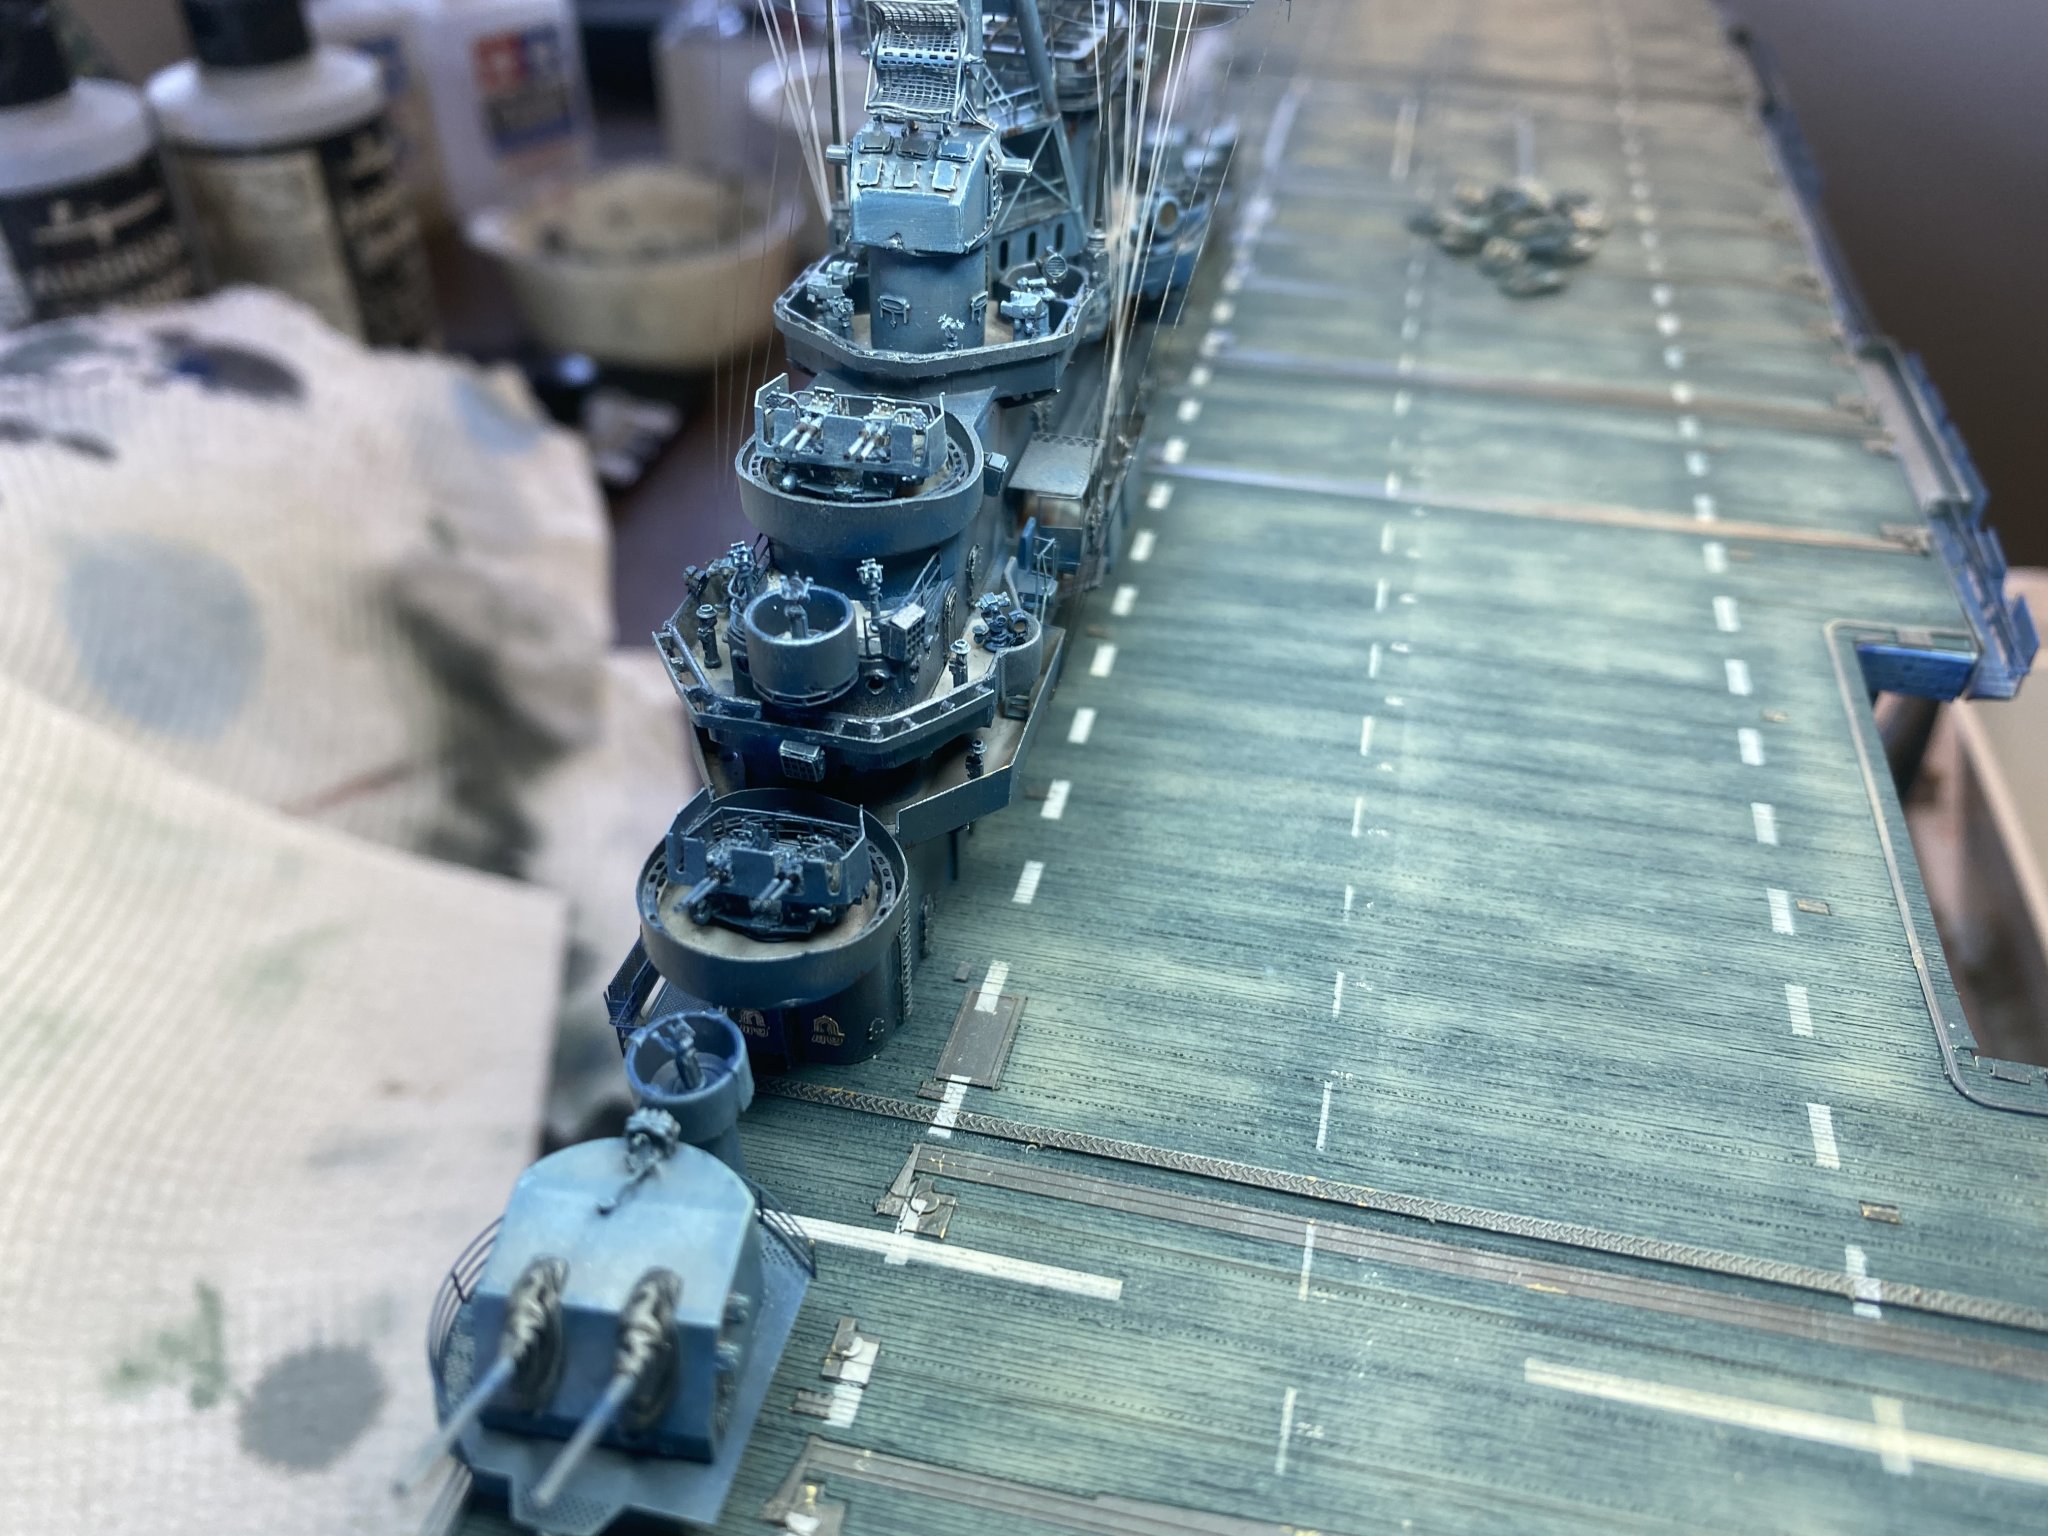
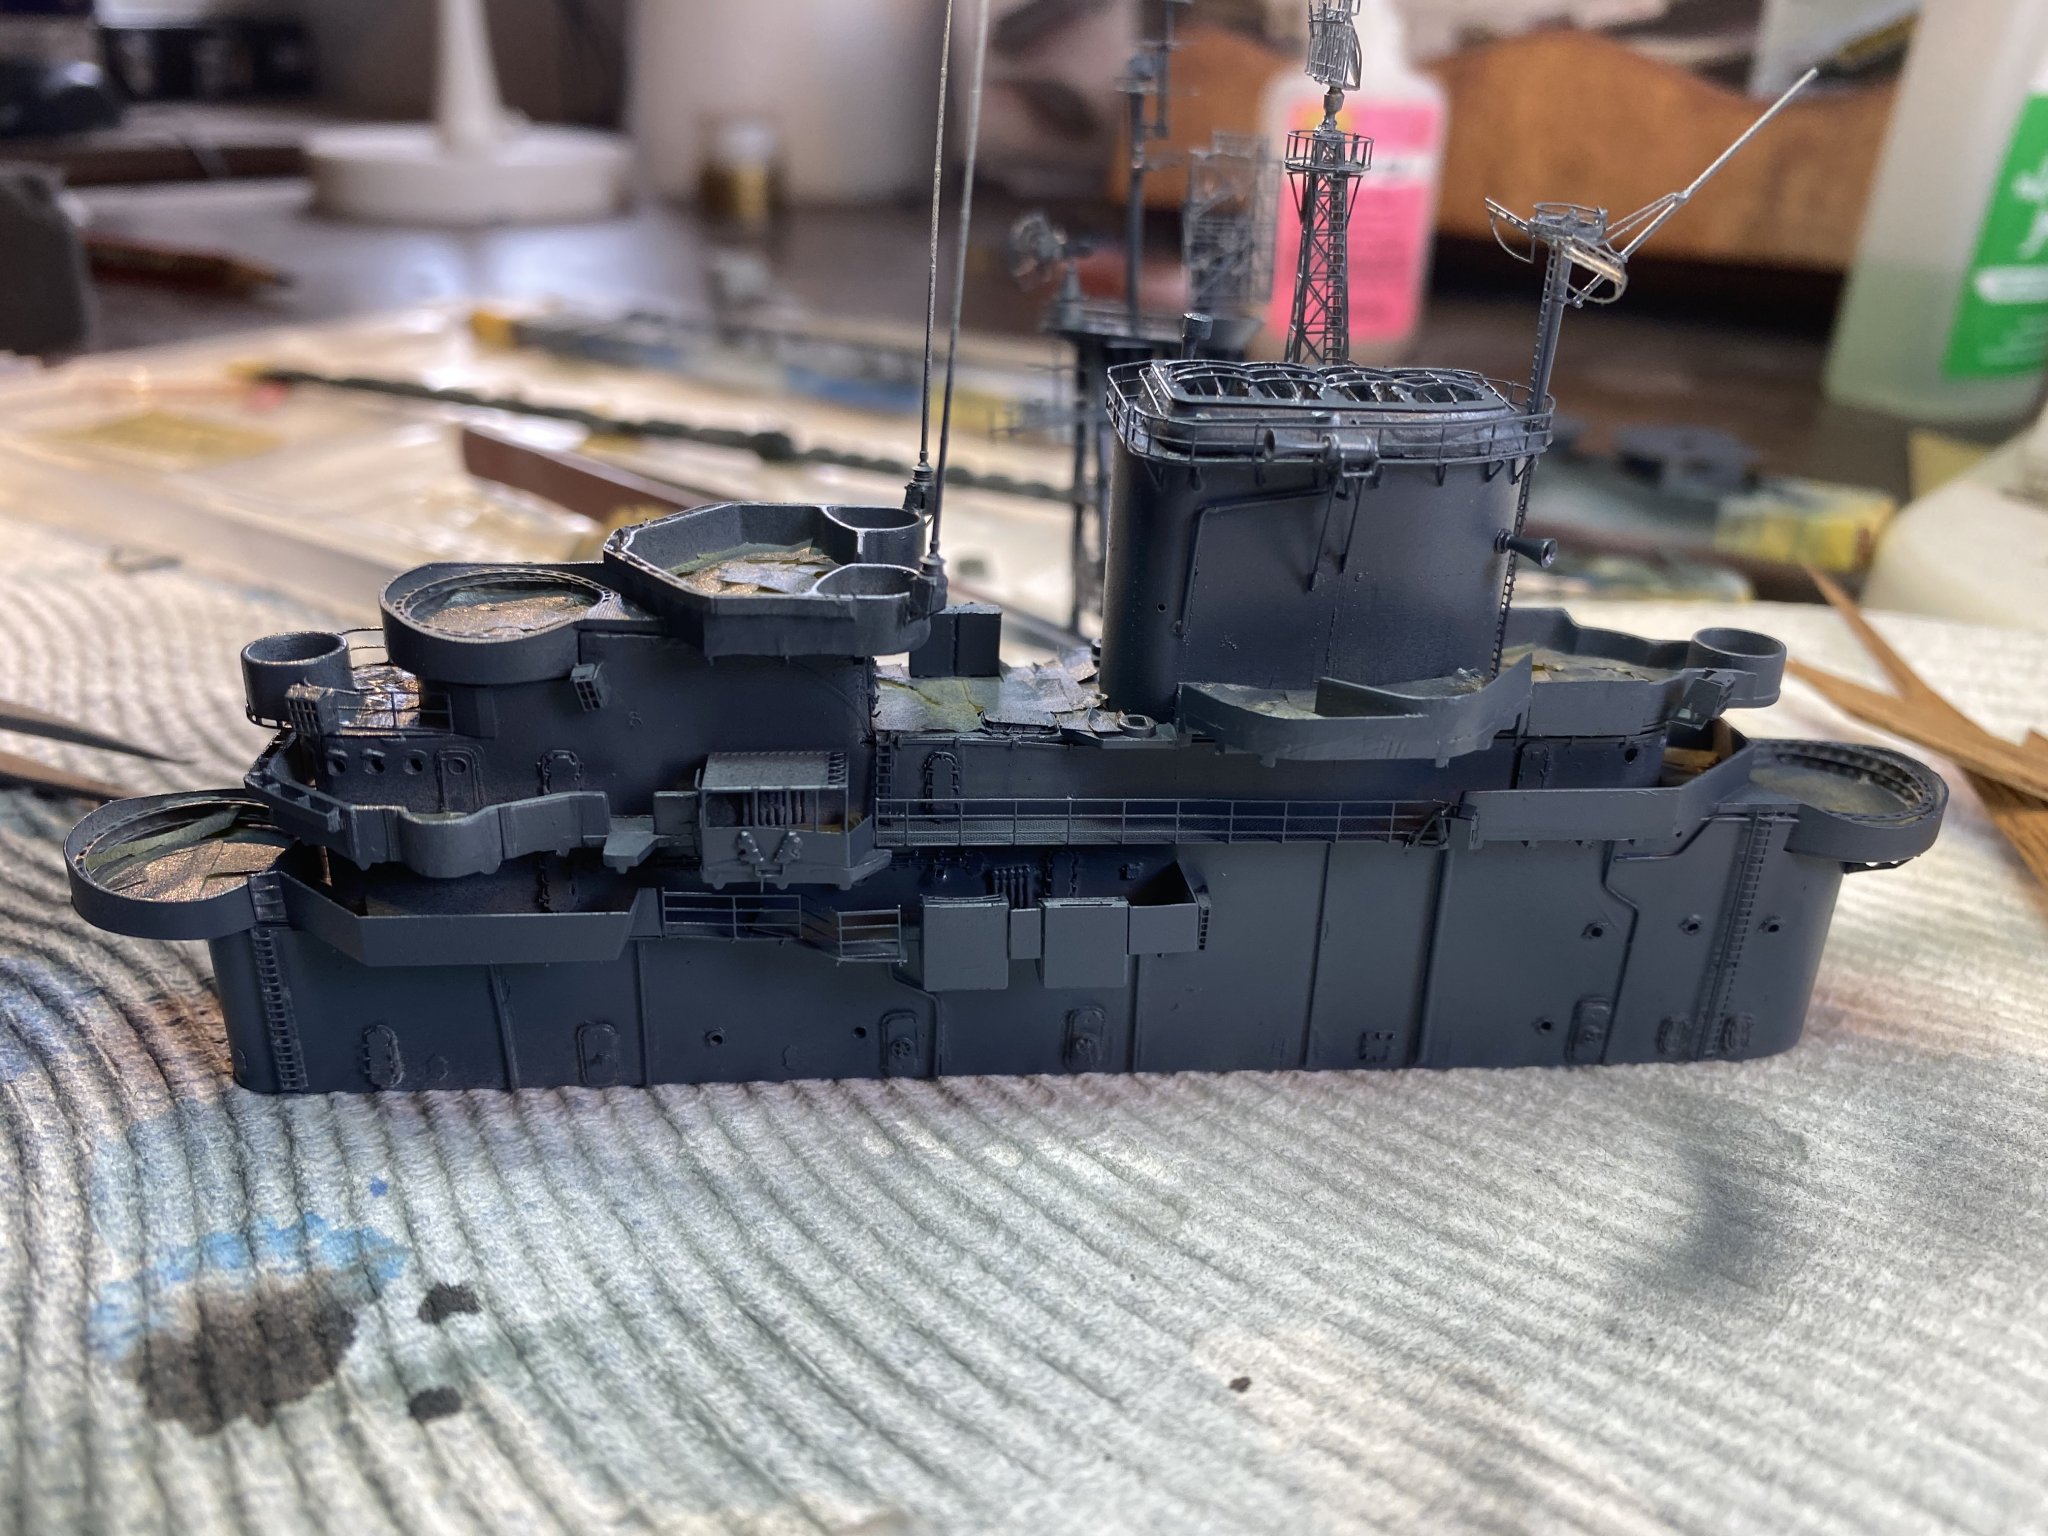
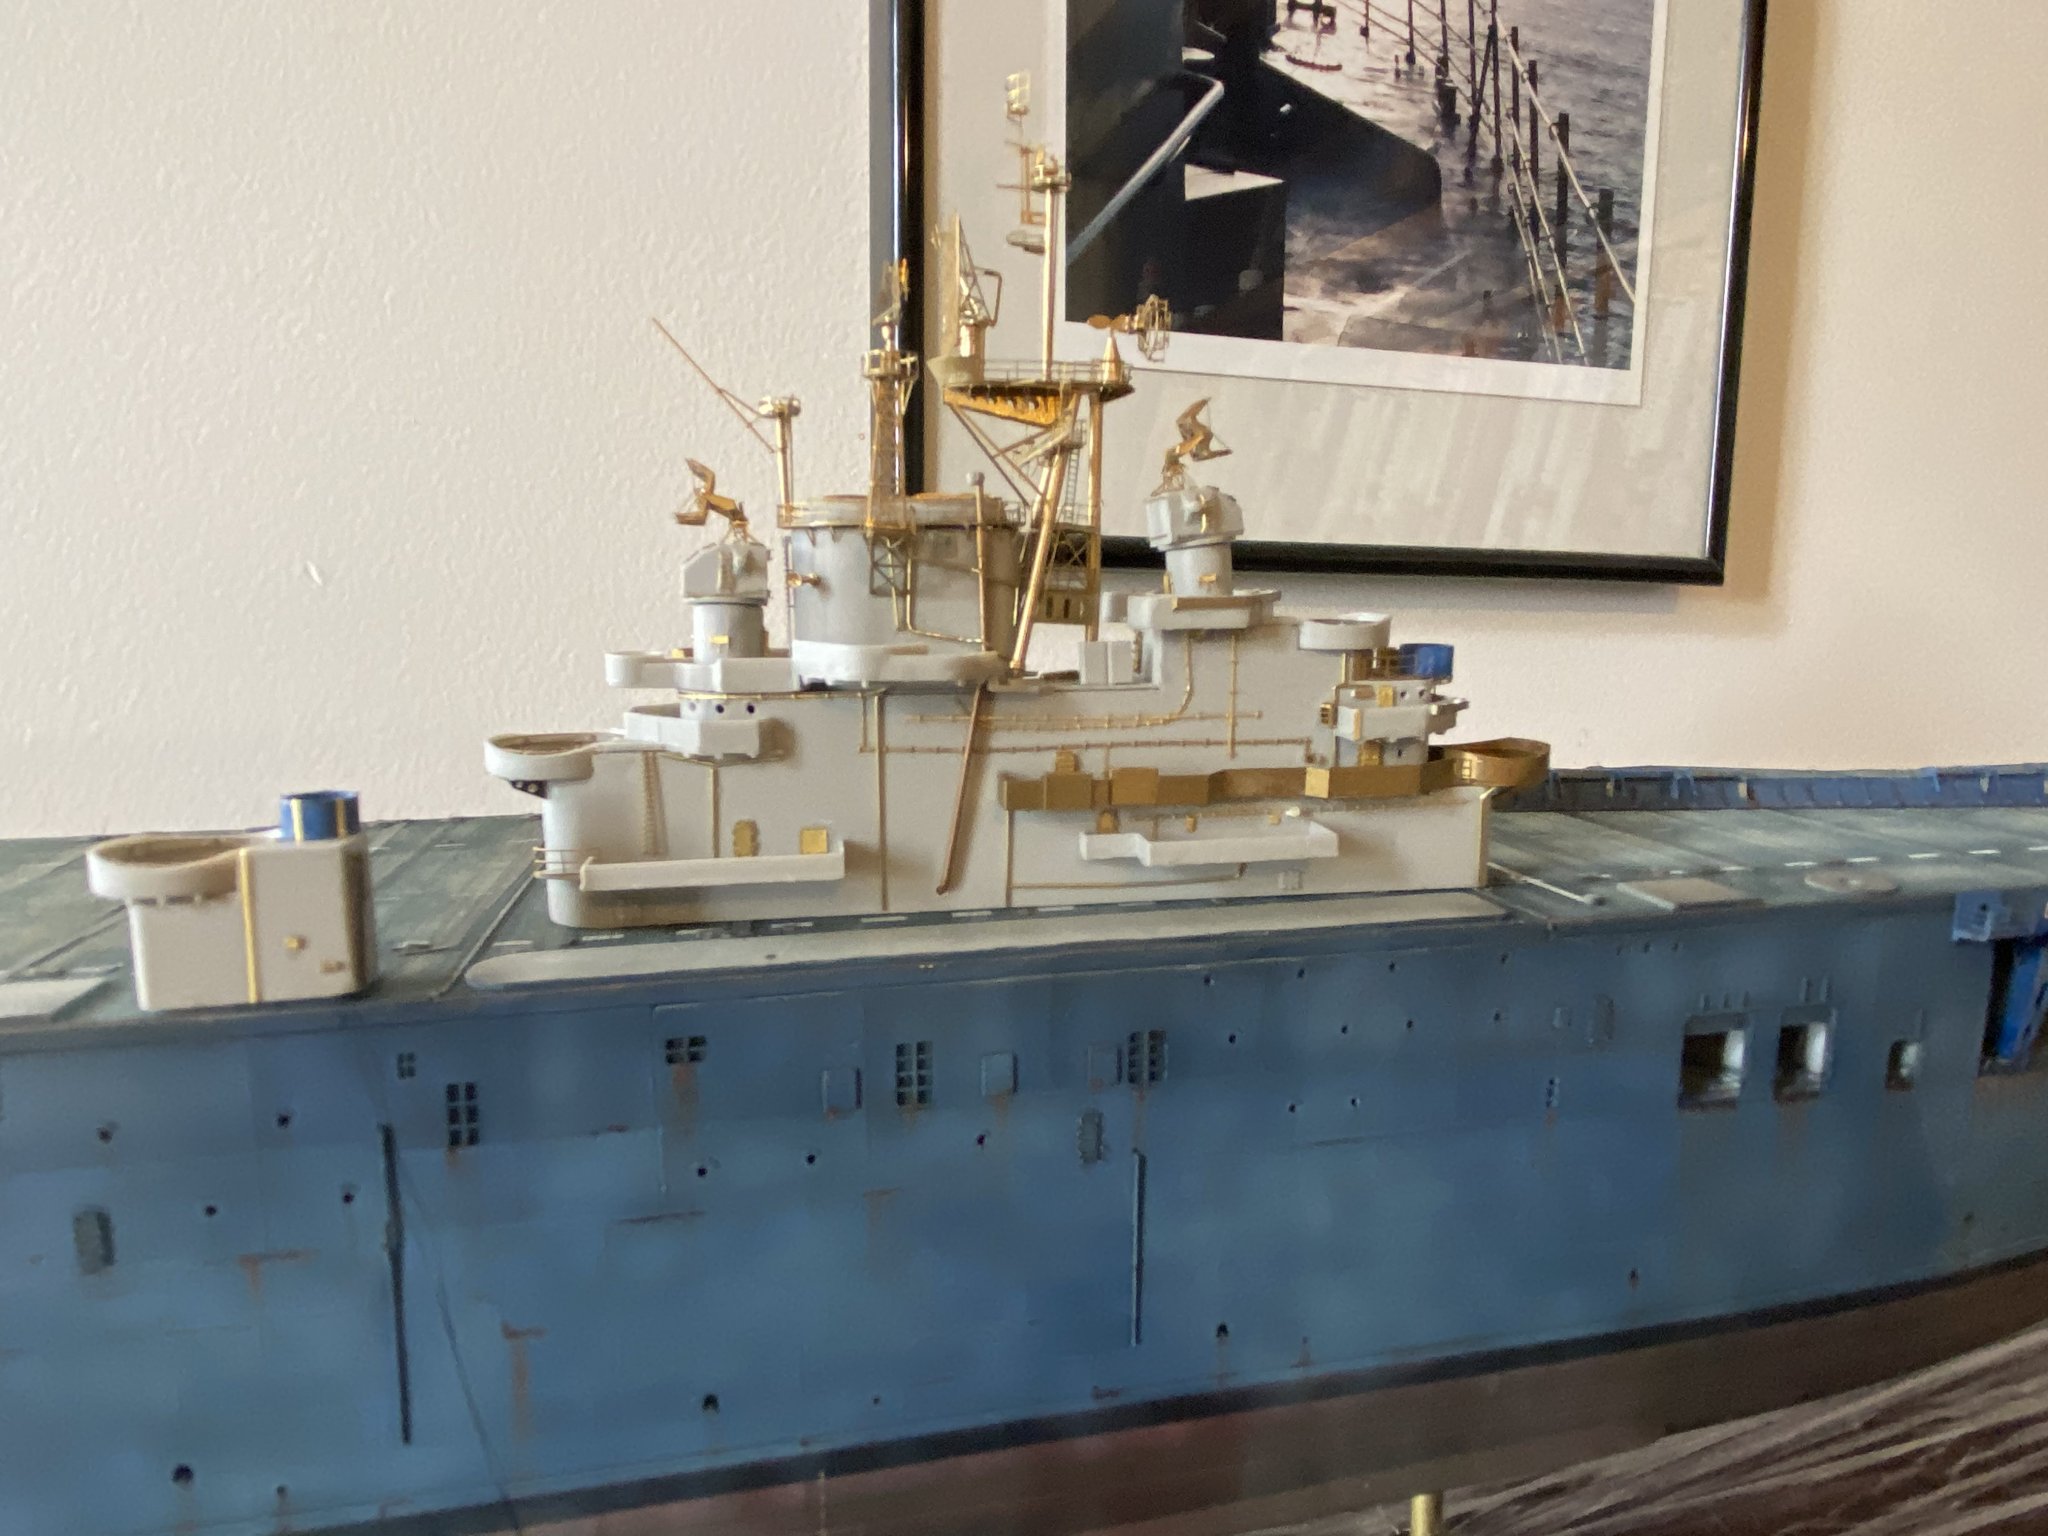
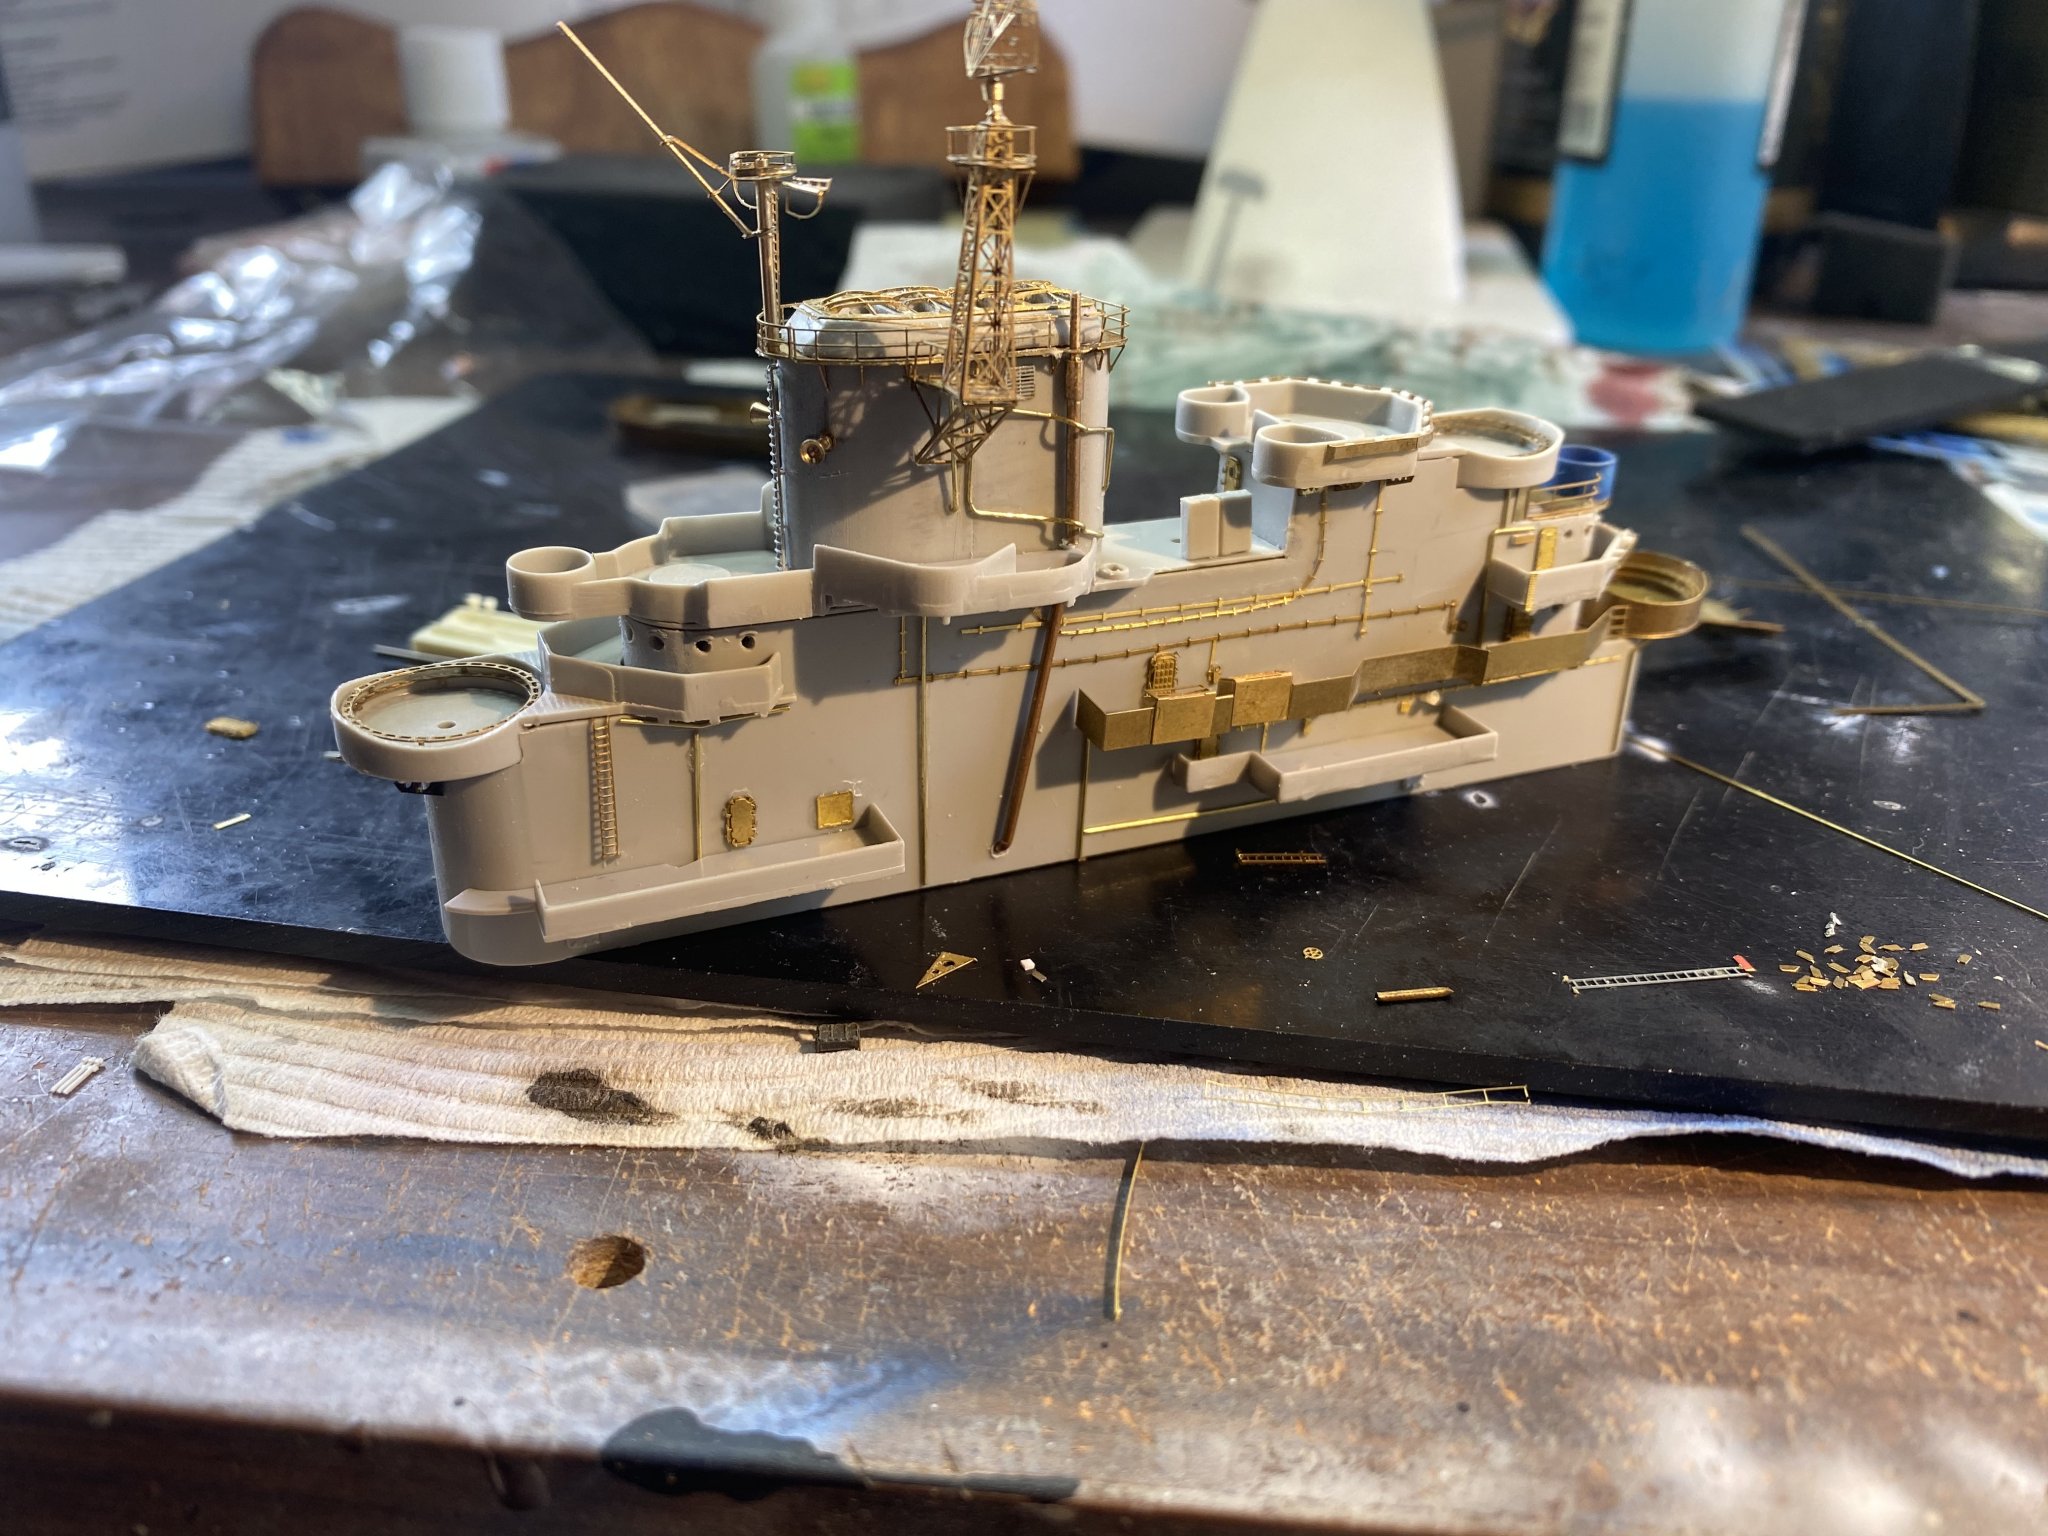
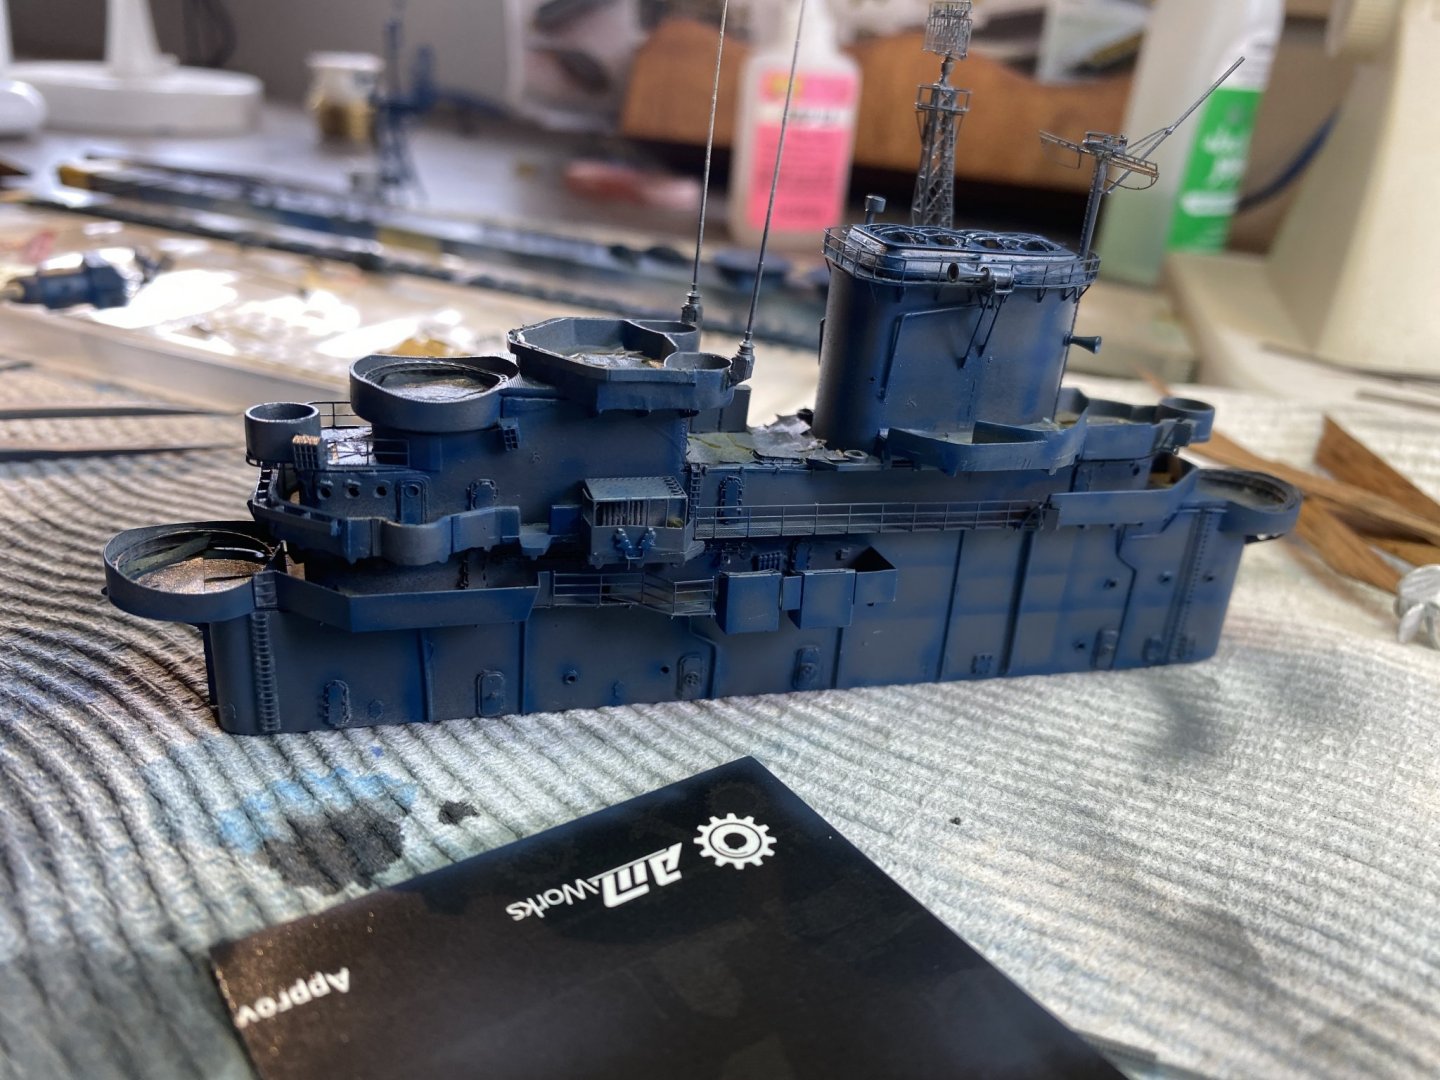
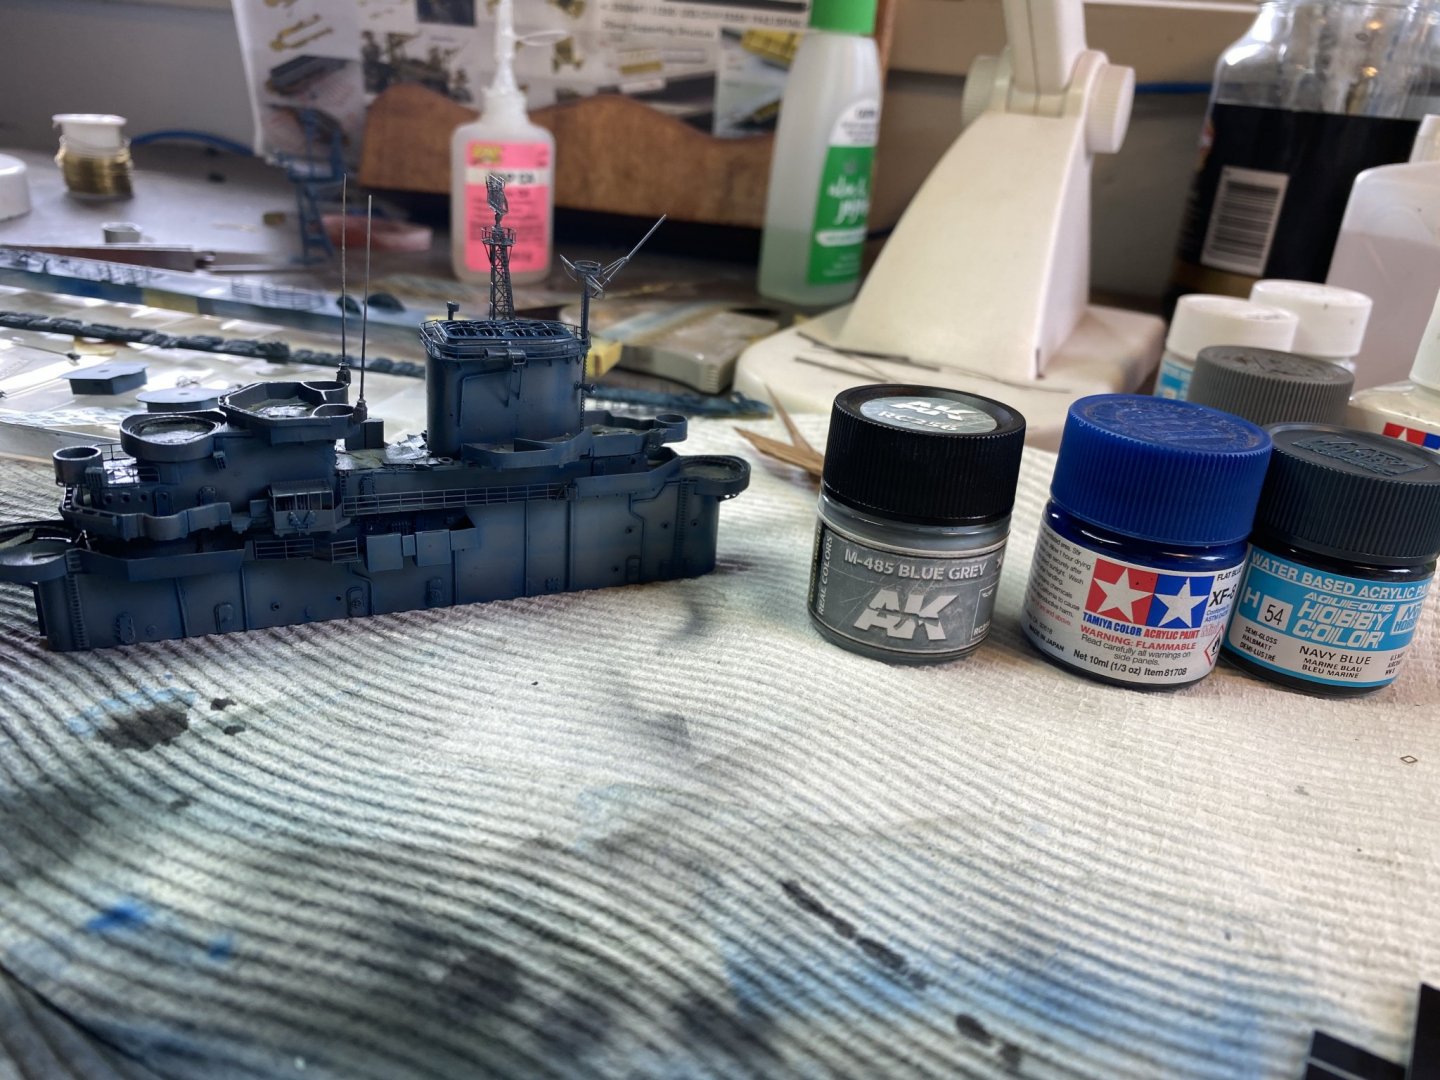
Island painted, Navy Blue flat blue highlights blue grey overspray. next filters then weathering.

- 308 replies
-
- 16
-
-
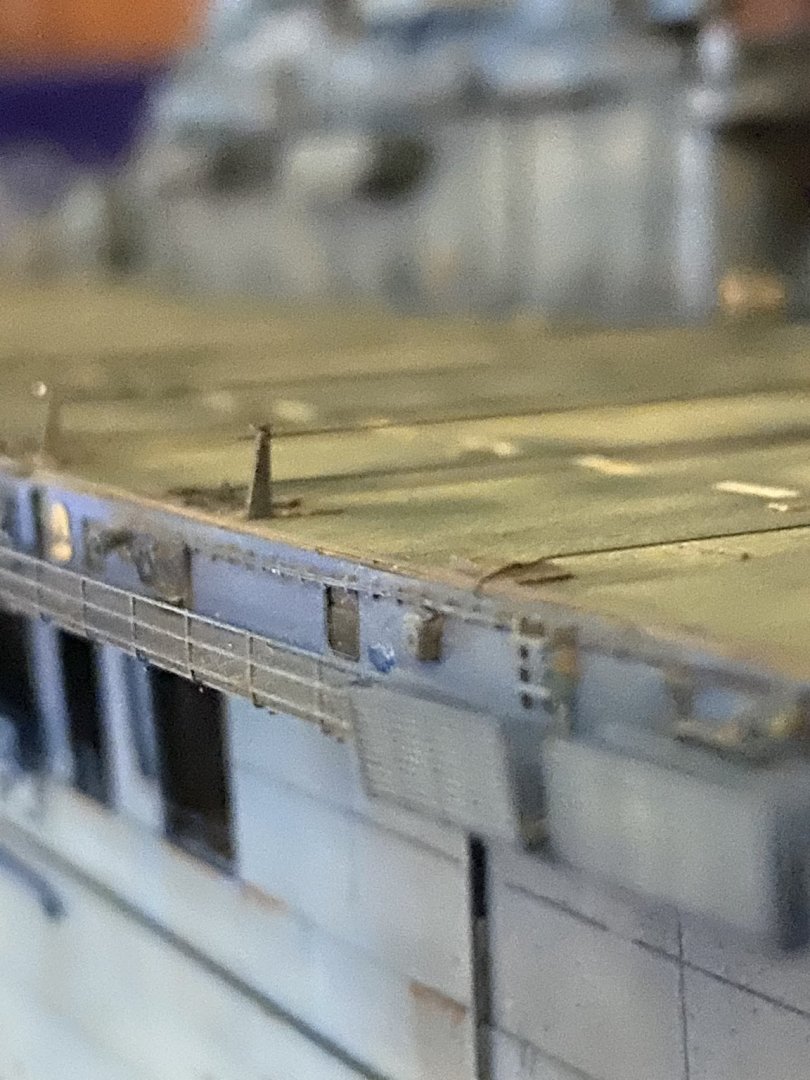
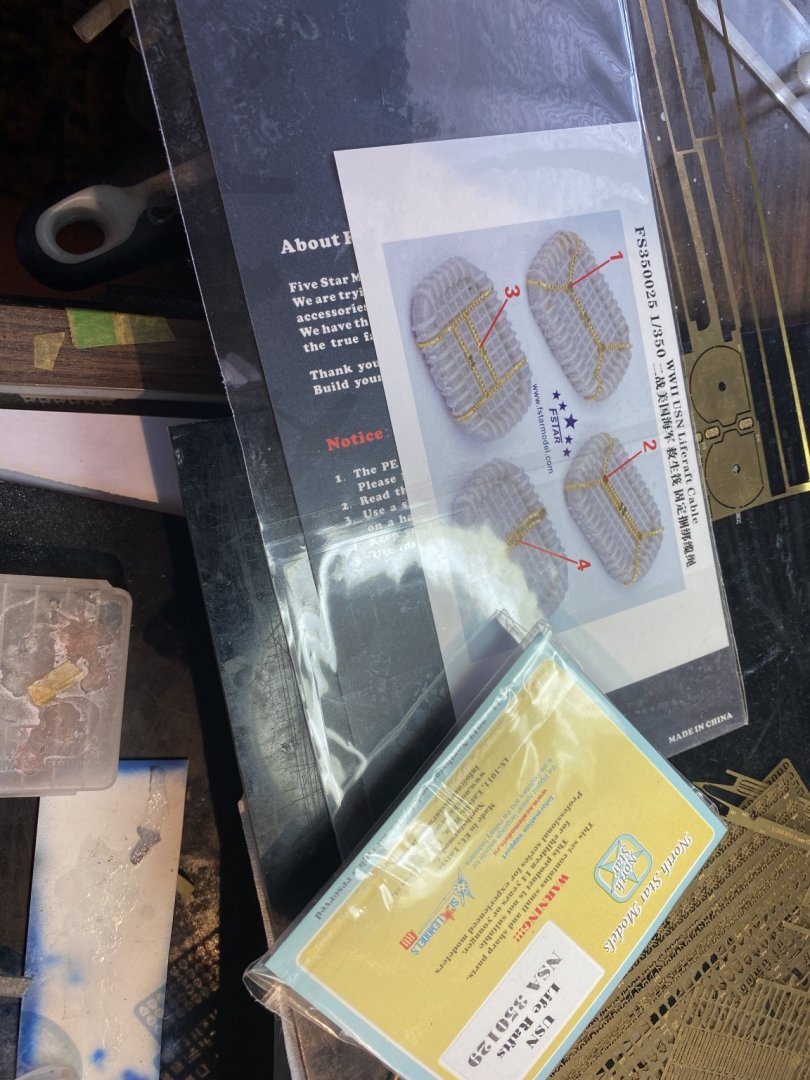
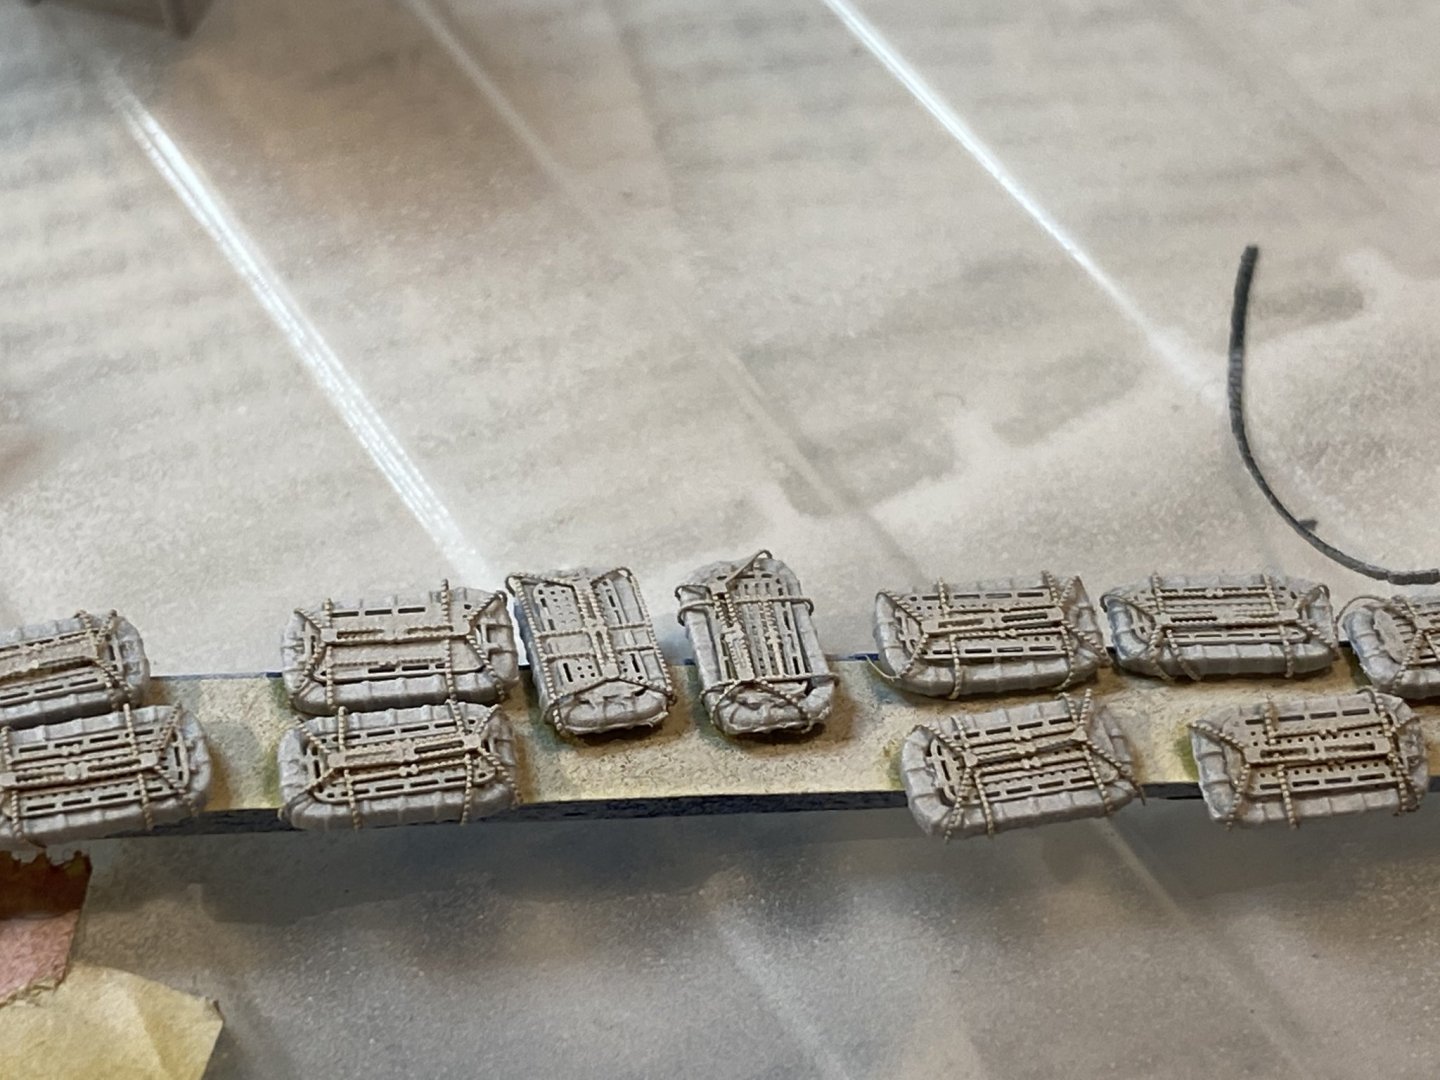
Paint cue, Primer added to 30 life rafts with extra strapping for the undersides of the catwalks. The kit provided ones are rubbish so I got North Star ones, and 5 star have the tie down straps.
- 308 replies
-
- 17
-
-
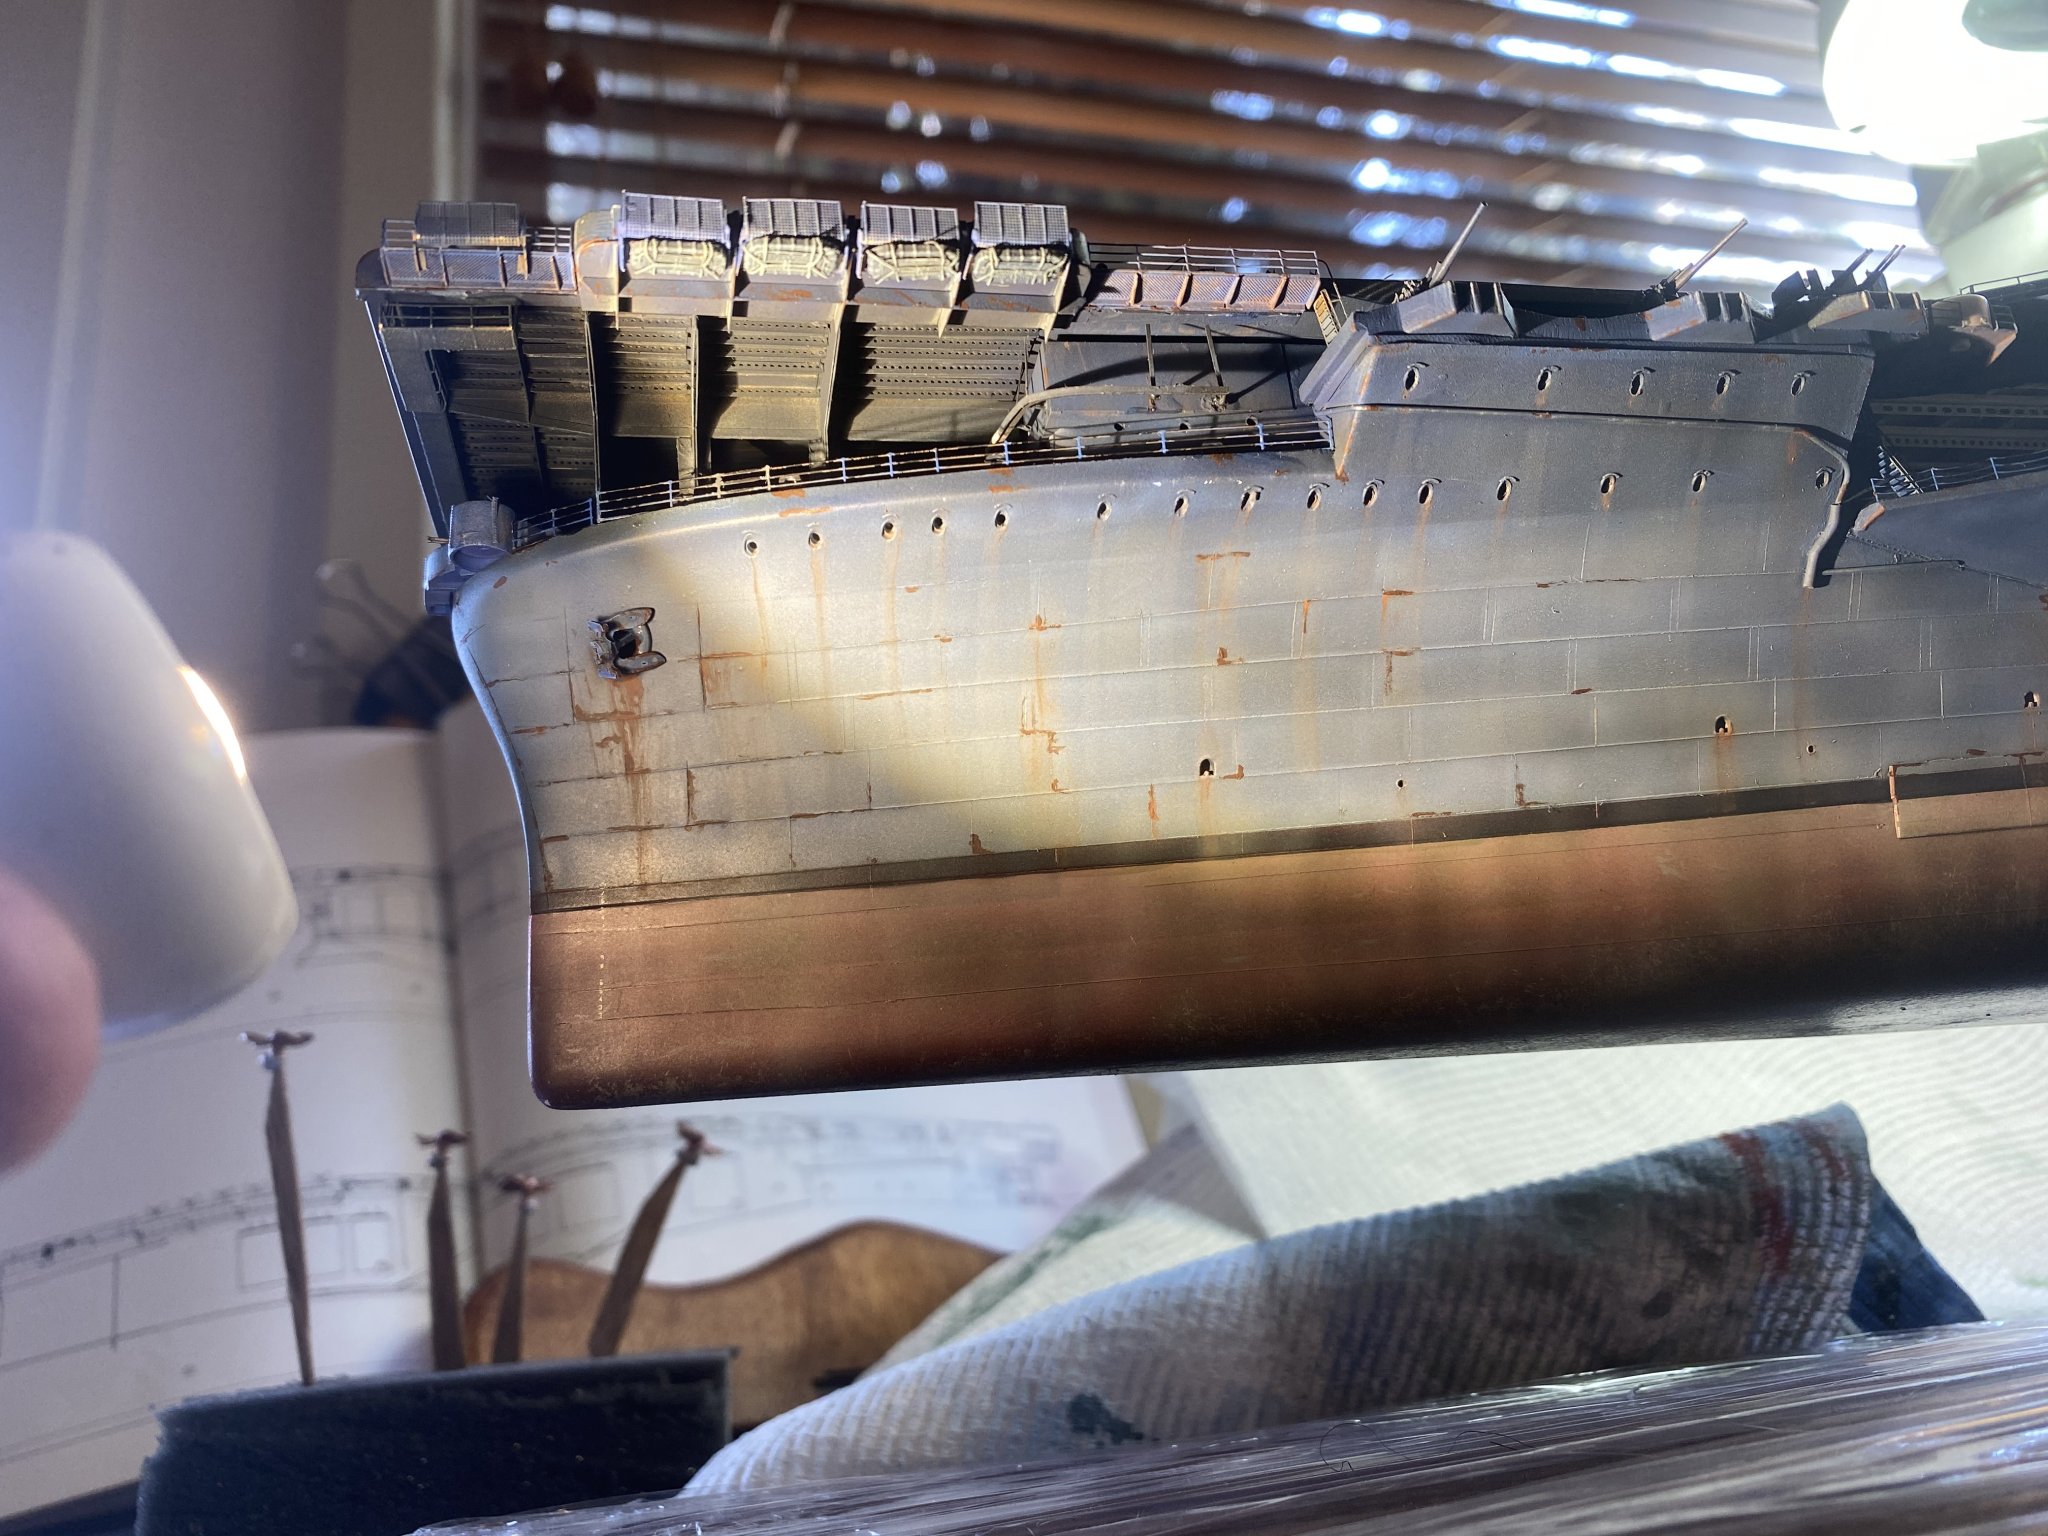
Base coat of primer, then mask along the hull where the plates go. Then several coats of rattle can primer to give it some depth of about .1mm, remove the mask then cut the individual panels in with a scalpel vertically.
-
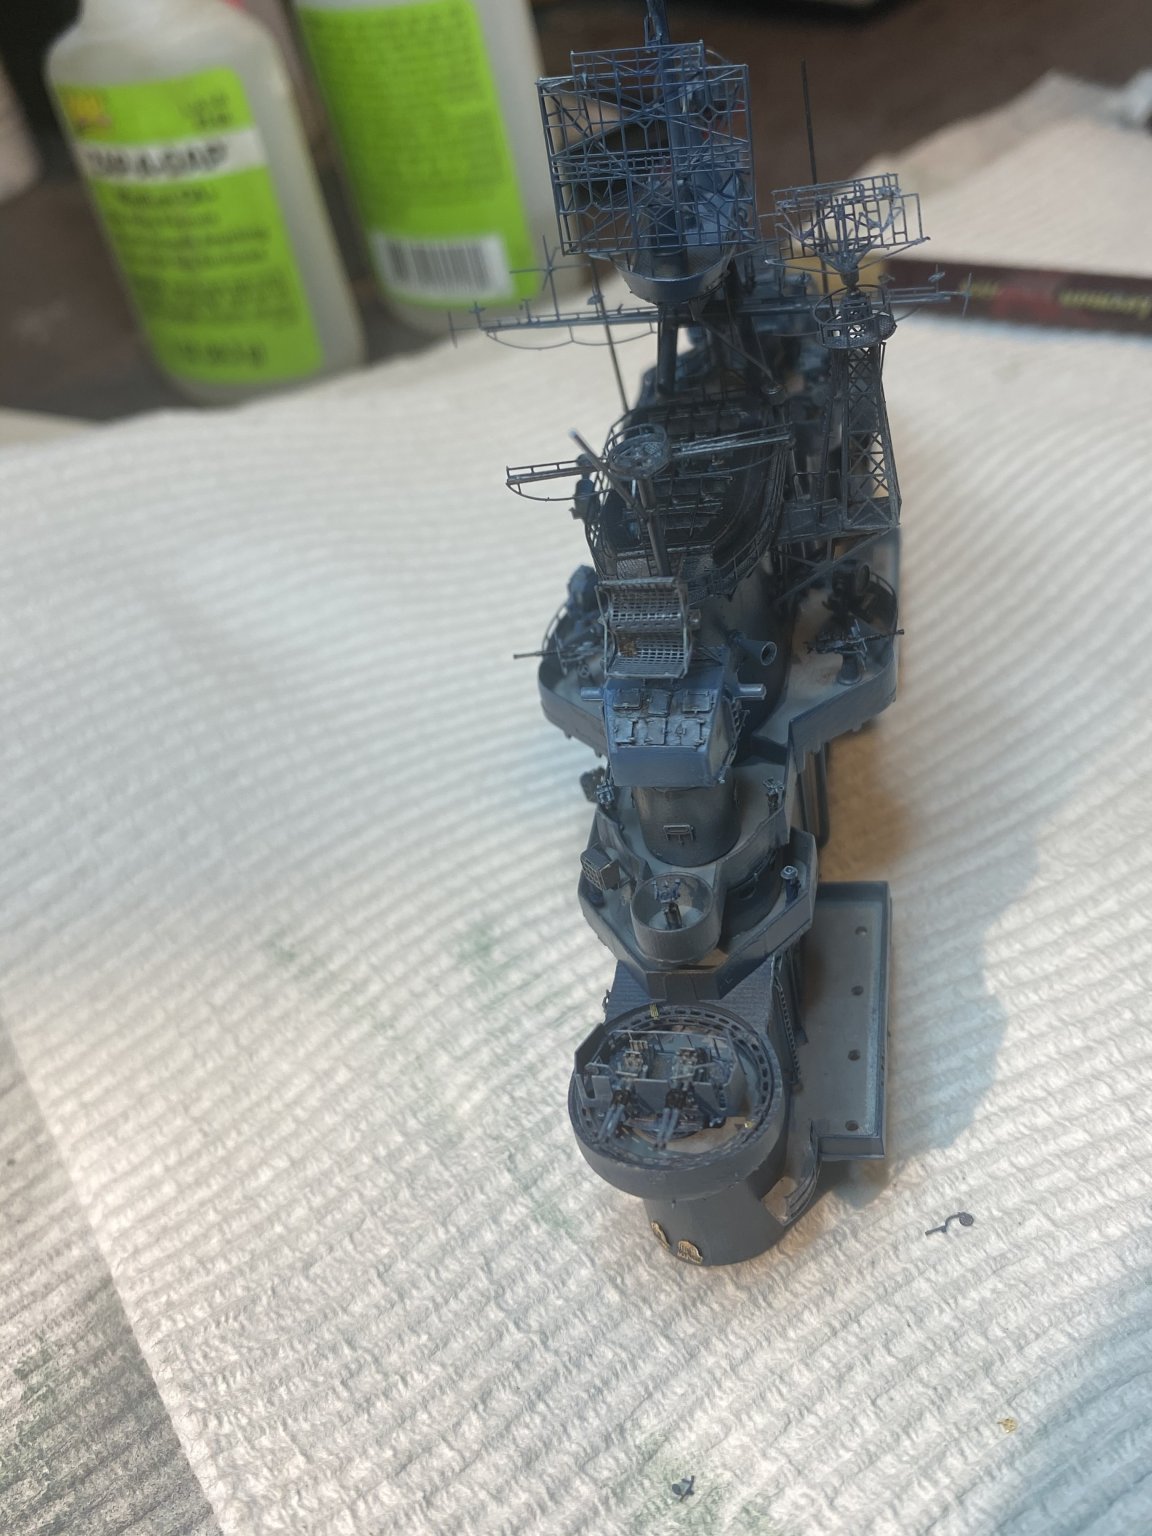
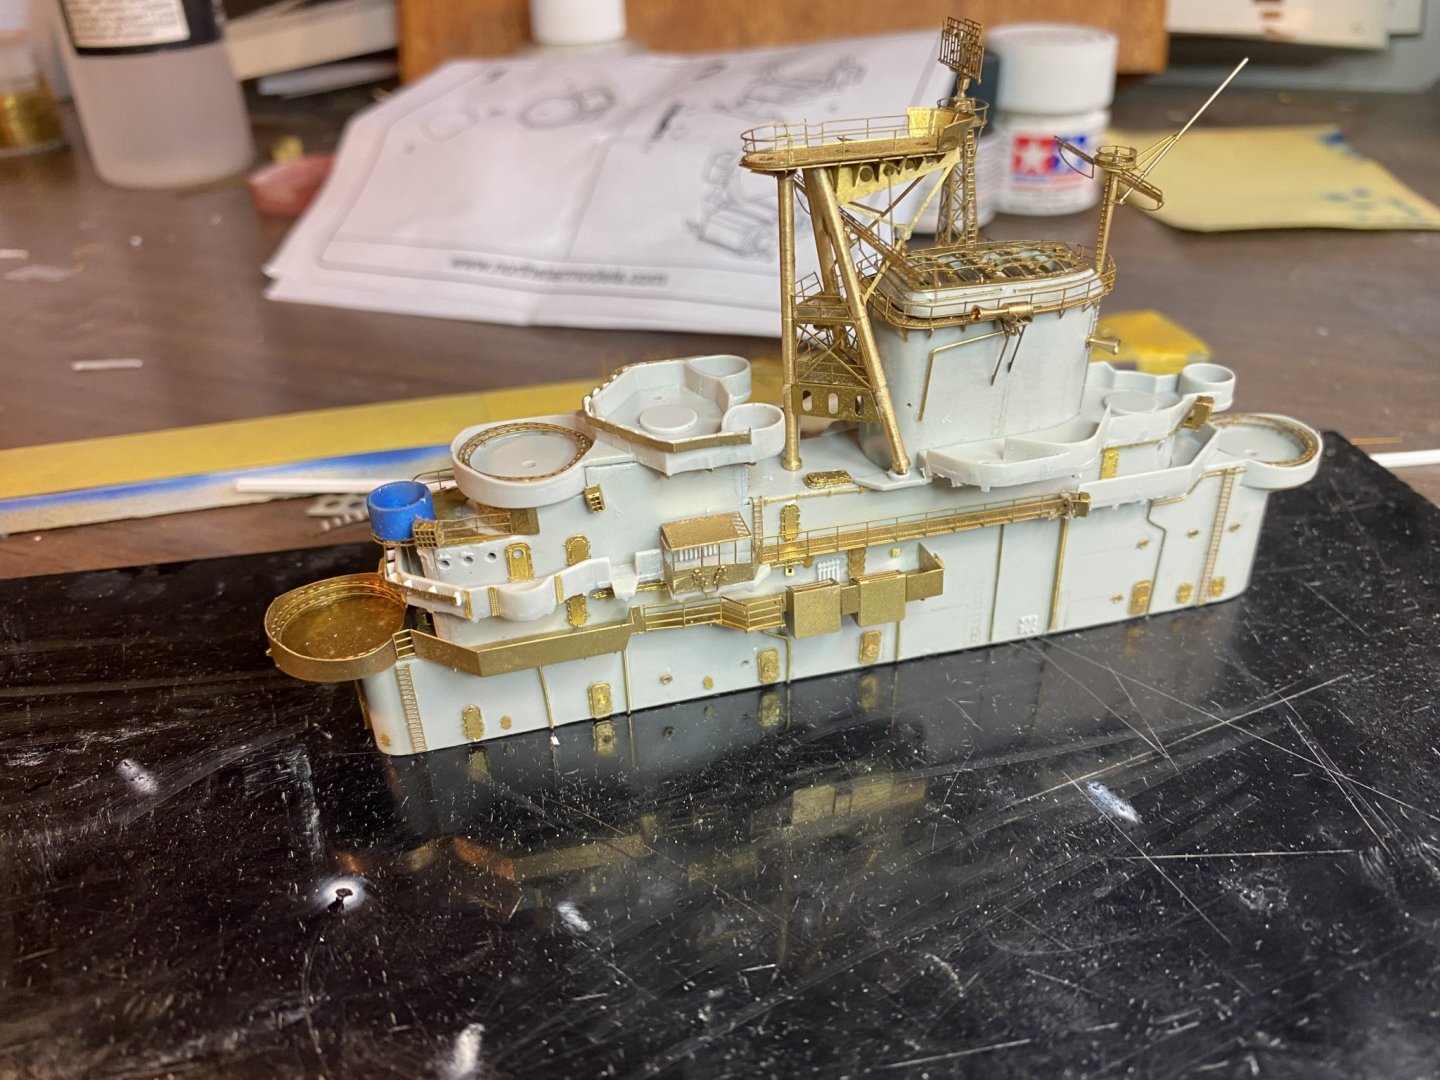
So today, added the loud speakers and started the tripod mast which takes forever as you have to get it square. The Pontos set offers a pre and post 44 refit mast and island (but the instructions are not clear about this), but the main yard is behind the tripod in pre 44 and they have gotten it in front so a bit of cut and past required.

- 308 replies
-
- 19
-