Supplies of the Ship Modeler's Handbook are running out. Get your copy NOW before they are gone! Click on photo to order.
×


FriedClams
-
Posts
1,357 -
Joined
-
Last visited
Content Type
Profiles
Forums
Gallery
Events
Everything posted by FriedClams
-
 Beautiful work, Andy! Perhaps the white balance isn’t set to automatic? Gary
- 174 replies
-
- 3
-

-
- Vigilance
- Sailing Trawler
- (and 1 more)
-
Just like all your work, Paul - neat, clean and everything fits together perfectly. Extremely fine modeling! Gary
- 201 replies
-
- 4
-

-
-
- Oyster Sharpie
- first scratch build
- (and 1 more)
-
I've been reading your log over time and have enjoyed watching your progress on this very complex model. I've especially enjoyed your modeling of the tanker's piping arrangement. I spent most of my working years in manufacturing as an industrial automation electrician and there was always chemical processing and treatment support systems associated with that manufacturing. Your pipe modeling on this tanker reminds me of those systems although the operations and purposes are completely different. Most of the individual process systems I worked on were quite simple when broken into segments and understood separately. But when these systems were all crammed, stacked and constructed closely together in an area or even a separate building, they look intimidatingly complex. A tangle of cable trays, racks of pipes, tubing, pump stations, valves, vessels, pits and tanks of all sizes. Almost steampunk. This modeling of yours has tremendous visual interest, authenticity and to me, great appeal. Wonderful work, Roel! Excellent craftsmanship and a level of detail seldom seen on a model. Gary
-
A very interesting restoration project, John. I'll be following your progress which so far looks great! Gary
-
Been reading through your log, Mike, and you're doing some fantastic work here! I agree with the comments above - the scratch gear looks great and certainly a worthwhile effort. An interesting subject and build. Gary
-
Beautiful finish, Glen - the smoke coming out of the stacks is nothing short of wizardry! My favorite build of yours yet. Fantastic! Gary
- 235 replies
-
- 3
-
-
- Banshee II
- Bottle
- (and 1 more)
-
You’re probably right, Keith. Actually, I was thinking more of the barge itself and not so much the driver. The driver timbers were probably treated with creosote or some other nasty brew of toxins and heavy metals to preserve the wood from rot. So you’re brownish/black could very well be spot on. Gary
-
Nice progress on the model, Keith - I like it very much. I do agree with the other members that mentioned adding white and grey to the barge. I think we instinctively see wood as brown, but once the sun and water get at it - the surface is bleached of pigment and turns grey. Only unexposed wood retains its coloring, unless of course it's constantly cared for, and I'm guessing these pile drivers were not. I don't believe that pastels/chalk will stick now that poly has been applied but thinned acrylic or even oil paint might. Just my two cents. Great and fun project! Gary
-
Been reading through your log and have just caught up. Wonderful work on this interesting vessel, Ras! I admire your resourcefulness in both materials and construction technique. Will be following along on your final steps. Gary
- 128 replies
-
- 4
-
-
- zulu
- sternwheeler
- (and 1 more)
-
Gunboat Philadelphia 1776 by tmj
FriedClams replied to tmj's topic in - Build logs for subjects built 1751 - 1800
Yes, end grain is super absorbent. But because it is, would it be possible to seal the ends of the basswood clear before applying the Tung-Oil? Excellent work on this model by the way! Gary -
Nice looking planking, Glen! Oh, the many uses of 1-2-3 blocks. Gary
- 235 replies
-
- 4
-
-
- Banshee II
- Bottle
- (and 1 more)
-
I've been reading your log over a couple of sessions and what a beautiful model you're building! Such nice work, Andrew. I found your hull color-banding technique for tone variation to be unique and effective. Had not seen that done before. Will be watching for future updates. Gary
-
Yes and 28 times no less! Keith, when you chose a pan to soak the wood in, did you intentionally go looking for the most expensive one you could find? My wife bought a Dutch oven from Le Creuset a few years ago that made me literally gasp when she informed me of the price. If she had caught me using it to stew wood - well, I shudder to think. Gary
-
That's a great water effect, Glen, and I think that added white really brought it to life. Just the right amount of surface agitation. Gary
- 235 replies
-
- 5
-
-
-
- Banshee II
- Bottle
- (and 1 more)
-
Thanks for the info, Paul. I'm going to give it try soon. Gary
- 201 replies
-
- 4
-
-
- Oyster Sharpie
- first scratch build
- (and 1 more)
-
Nice work on the cabin, Paul. I was wondering how you like working with the Alaskan cedar? Never tried it myself, but something a little harder than basswood would be nice. Gary
- 201 replies
-
- 4
-
-
- Oyster Sharpie
- first scratch build
- (and 1 more)
-
Wonderful work, Keith! Gary
-
Keith, I must be experiencing the first stages of dementia. Back on page three, post #61, I explained how I repaired two recessed planks by adding on additional wood to the surface and then sanding it back to flush. I did this to a number of areas on the hull, but the planks I was using to demonstrate this process were these two very same planks. They are indeed repaired, and it was that repair that saturated the wood with CA. Good grief - this getting old business is not easy and at times downright troubling. Thank you, Mike, for the kind comment Gary
-
Thank you, Tom, Paul, Keith B, Keith A, Andy and Rick for the nice words! And thanks to all for the visits and the "thumbs up". Thanks! I have a Sony RX 100 that a bought about eleven years ago and use for all the posted photos. It's a fixed lens pocket camera that has features you would only expect to find on a DSLR, like RAW capture. It takes great images even in bad lighting and can focus inches away from the subject. It makes taking a decent photo easy. If you mean the third and fifth hull plank down where it is attached to the stem - no, that's a spot where I got CA smeared onto the surface when I was forcing those planks to submit to my will. After the hull was fully planked, I washed it with india ink/alcohol to give it little age, but the solution couldn't absorb into the wood where CA had penetrated. In fact, all the lighter colored splotched or streaked areas are due to this. In the end, the hull will be painted, weathered and I wouldn't be surprised if there is chipped and flaking paint here and there exposing some of that aged wood underneath. Not sure yet. Thanks for observing that, Keith, because if it had been recessed - now would be the time to fix it. I agree, Andy. A utilitarian design for sure, but I think the designer had an aesthetic eye just the same. Gary


-
Congratulations, Gary - beautiful model. Gary
-
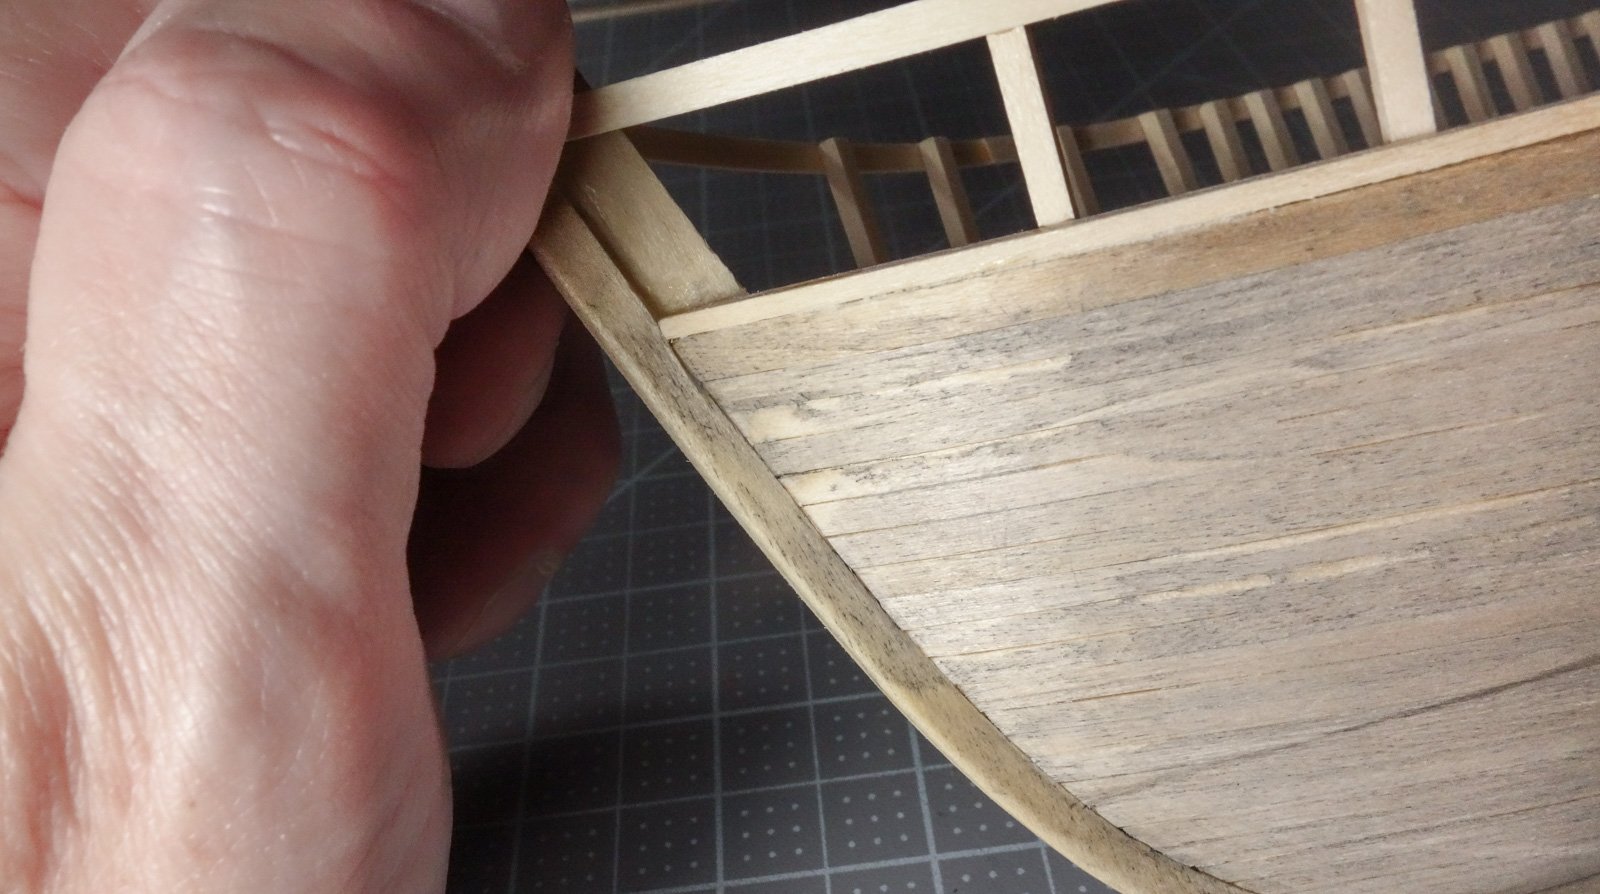
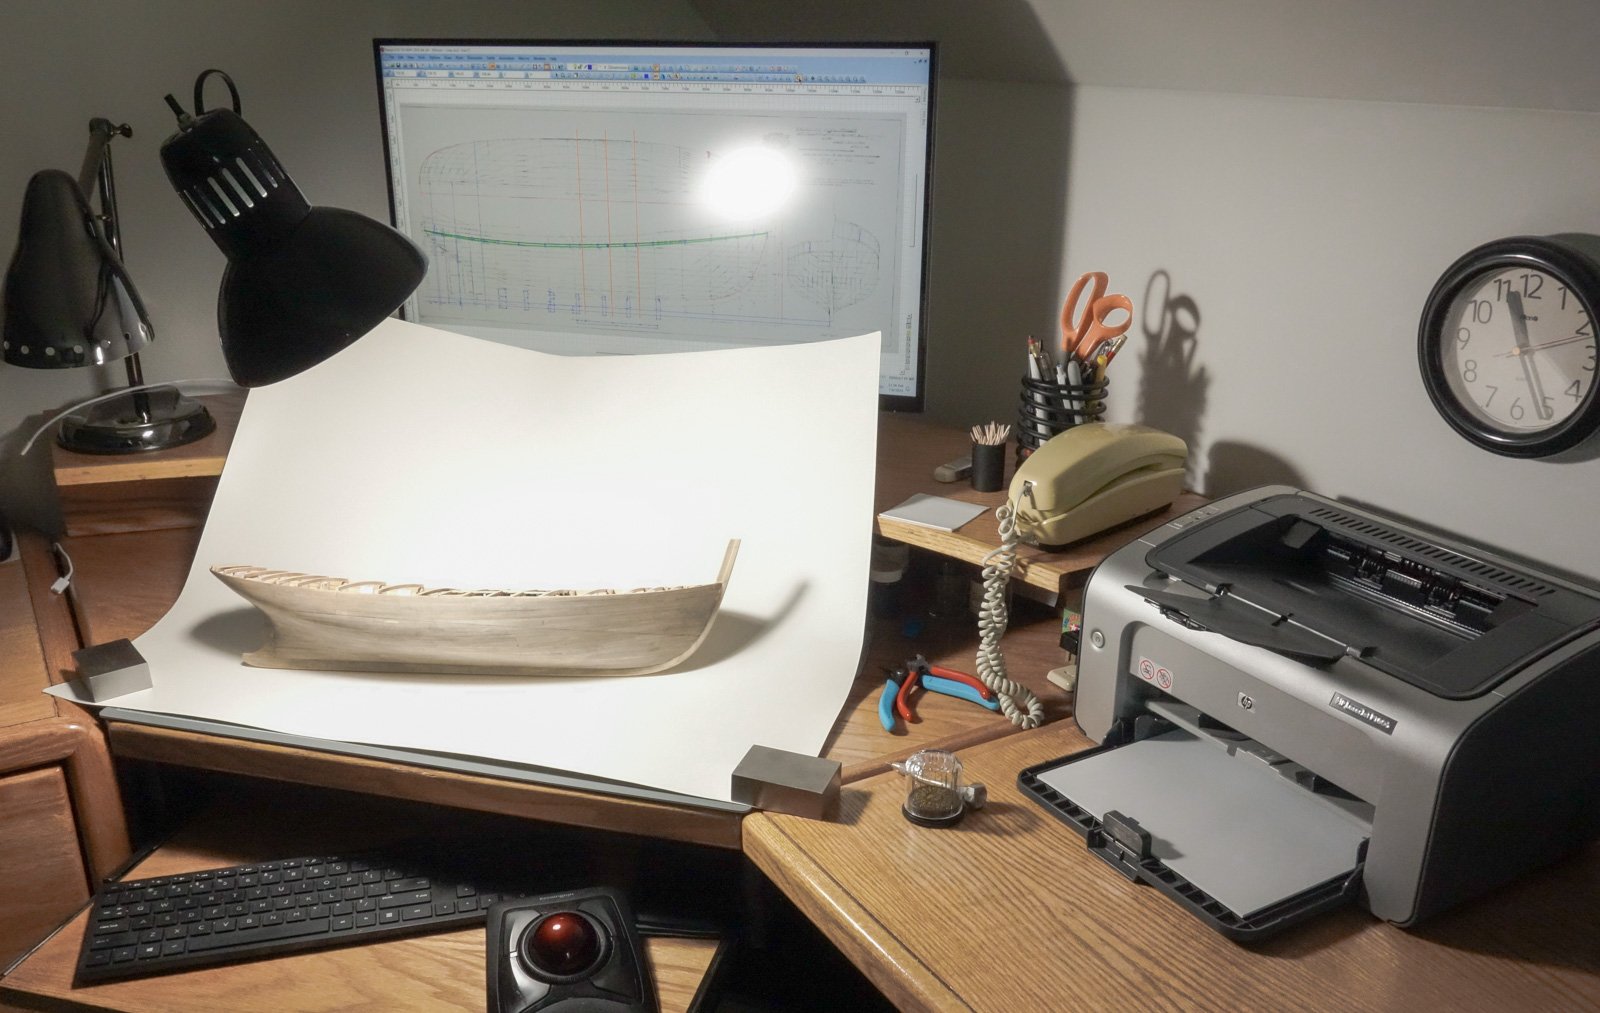
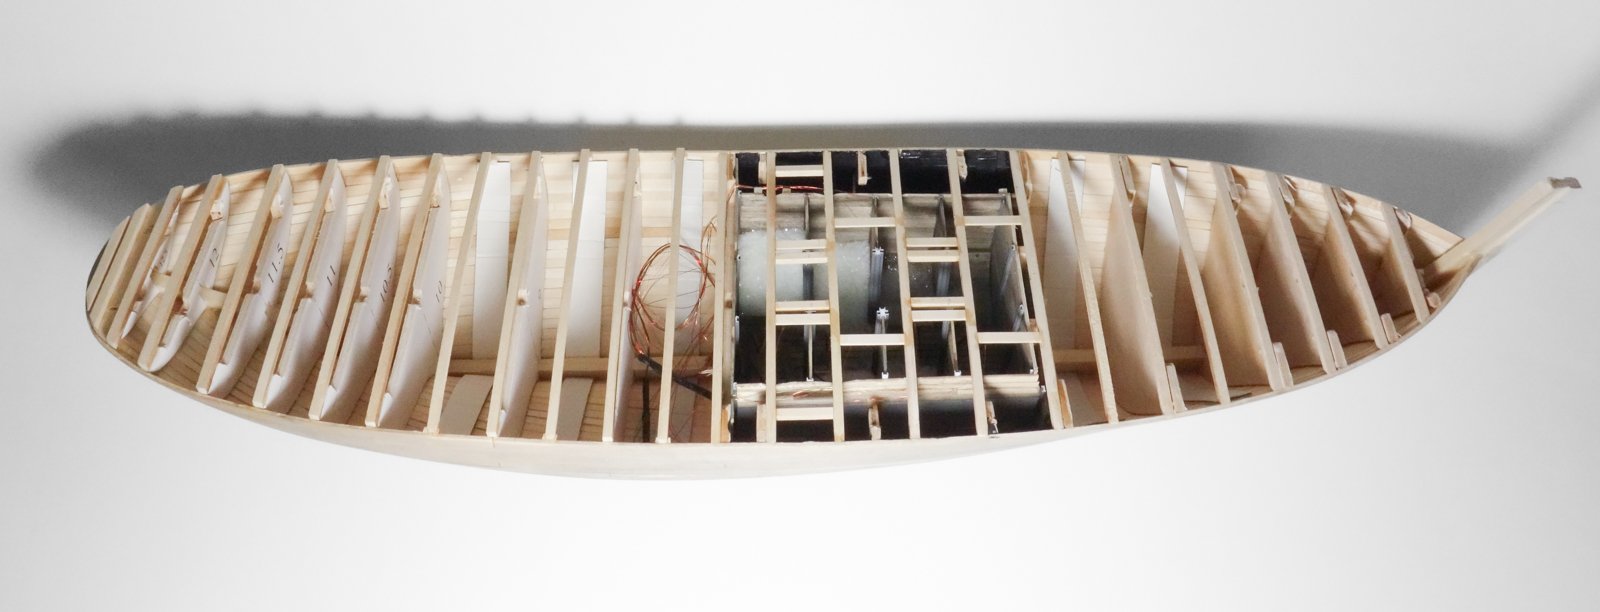
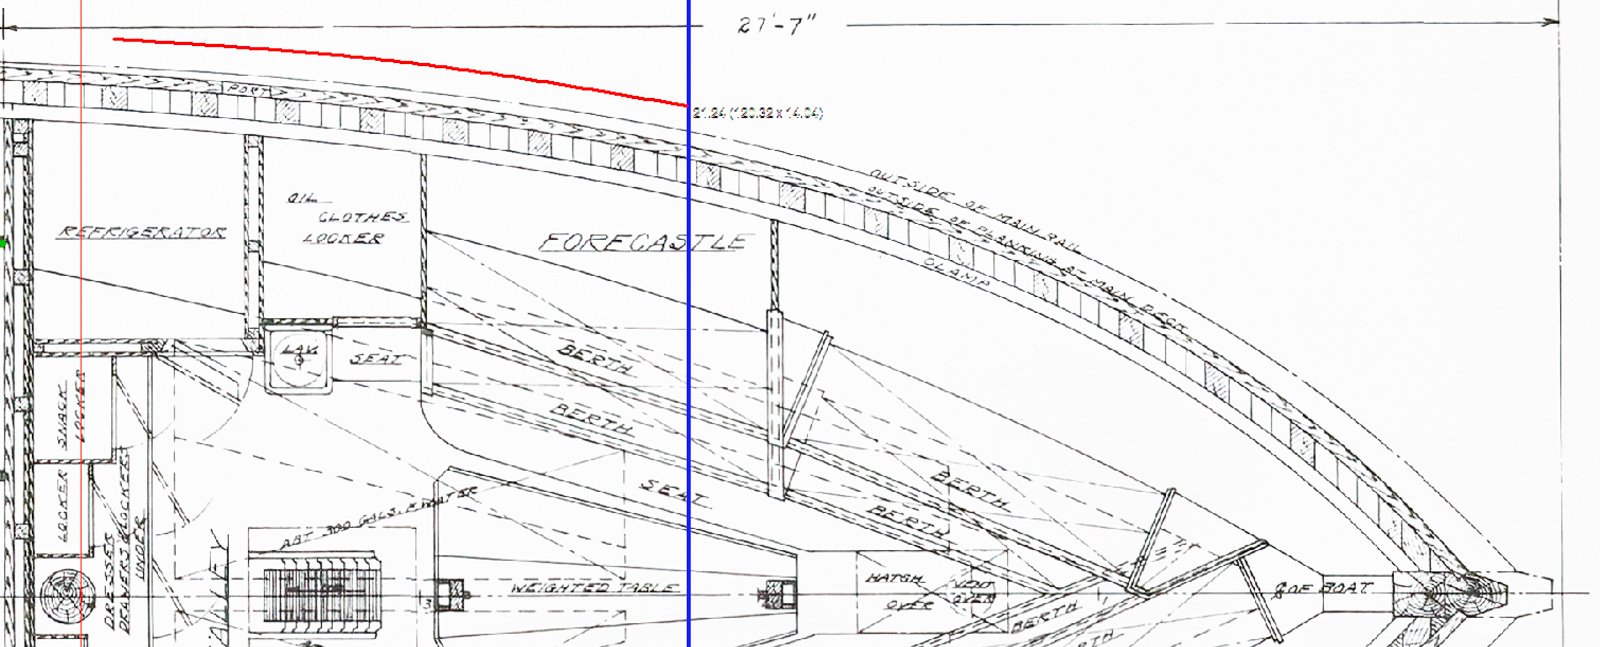
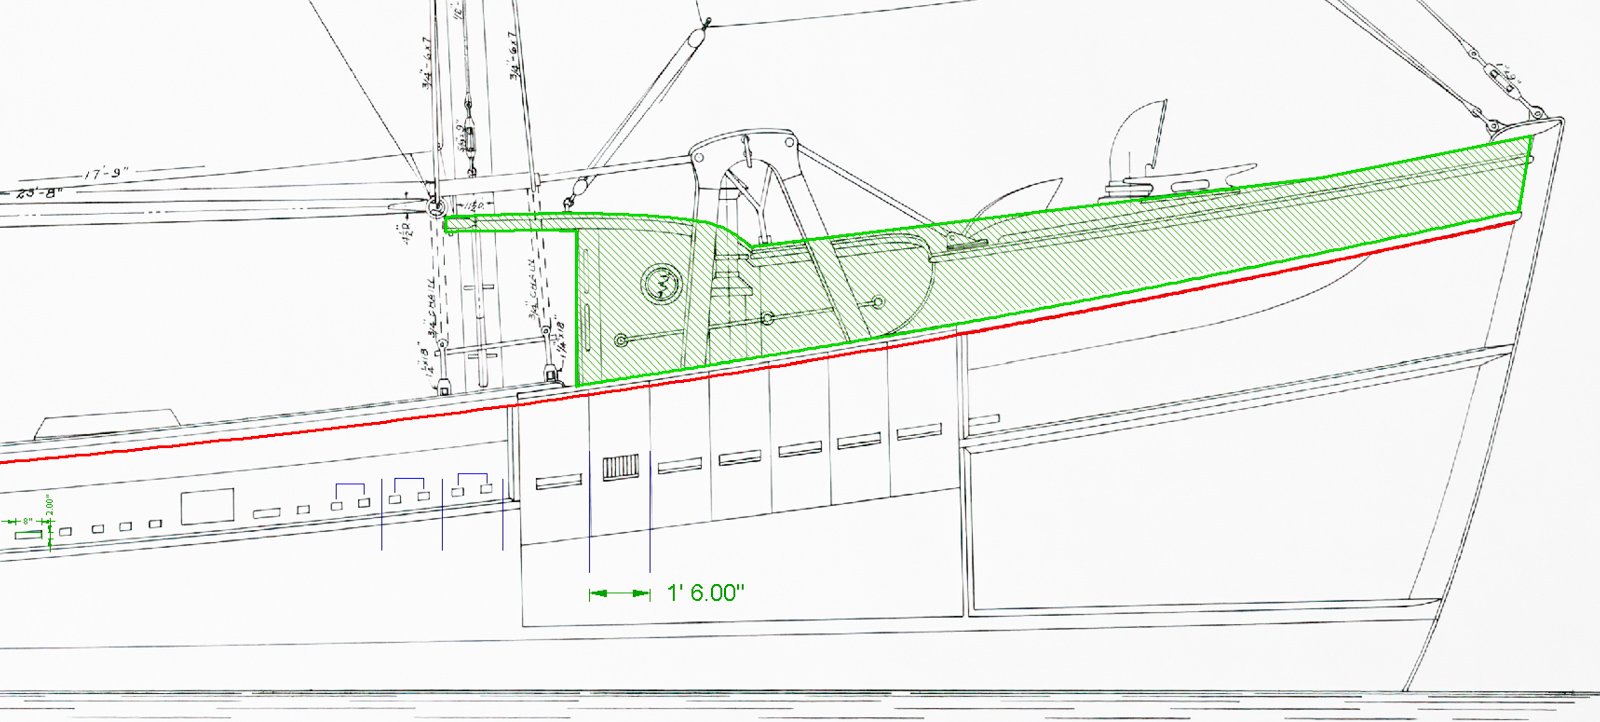
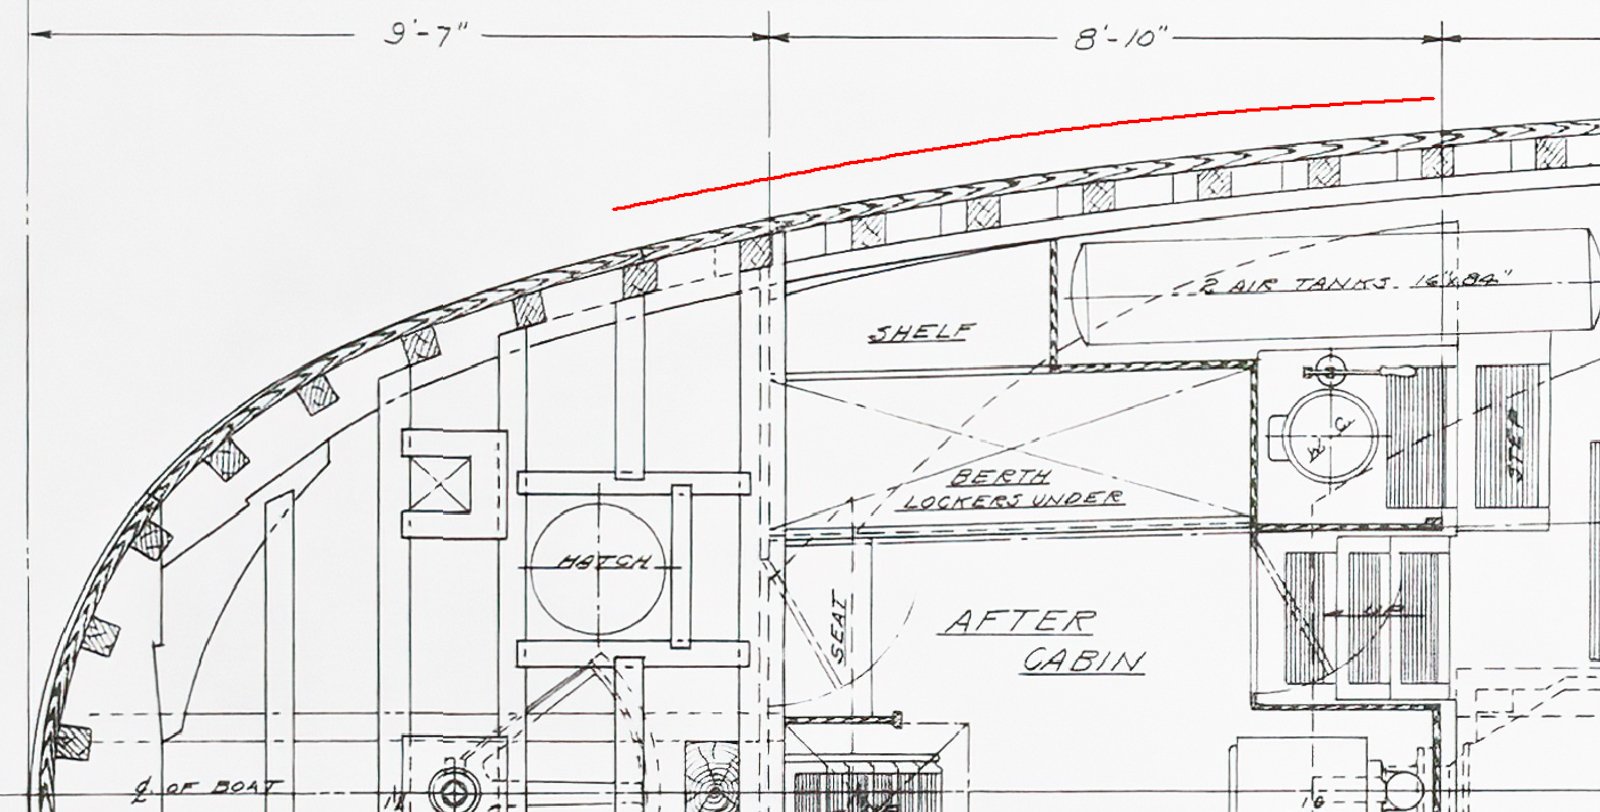
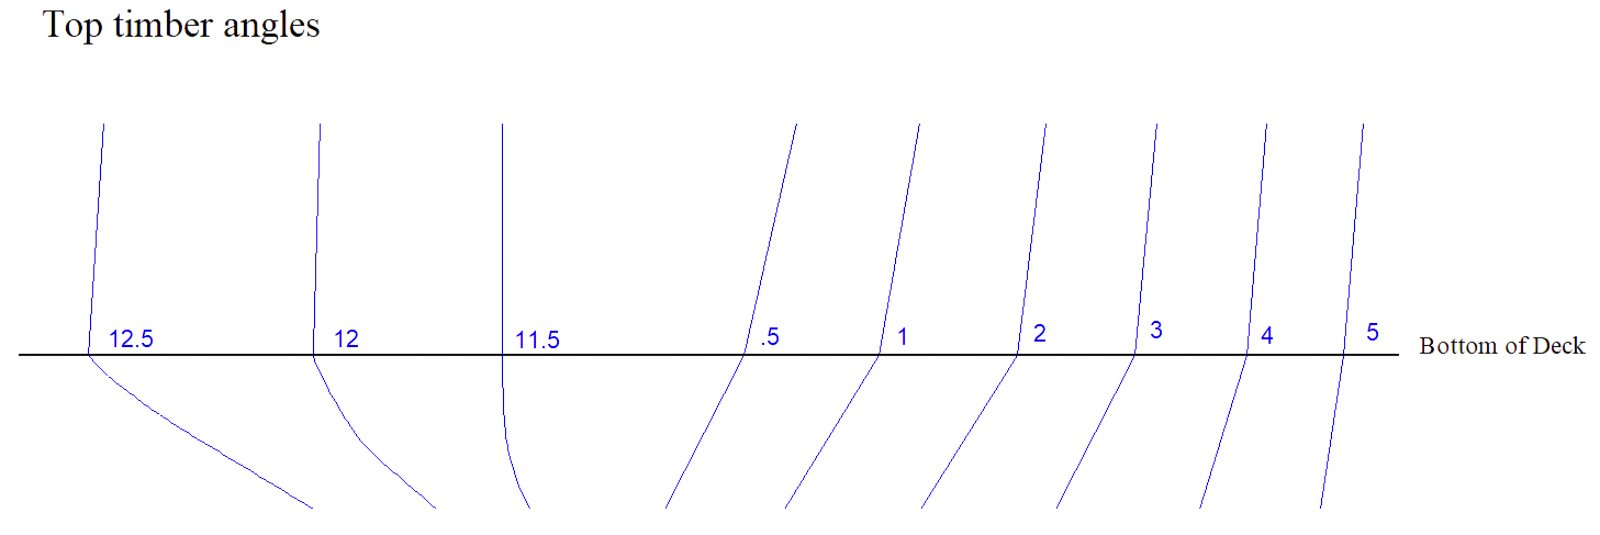
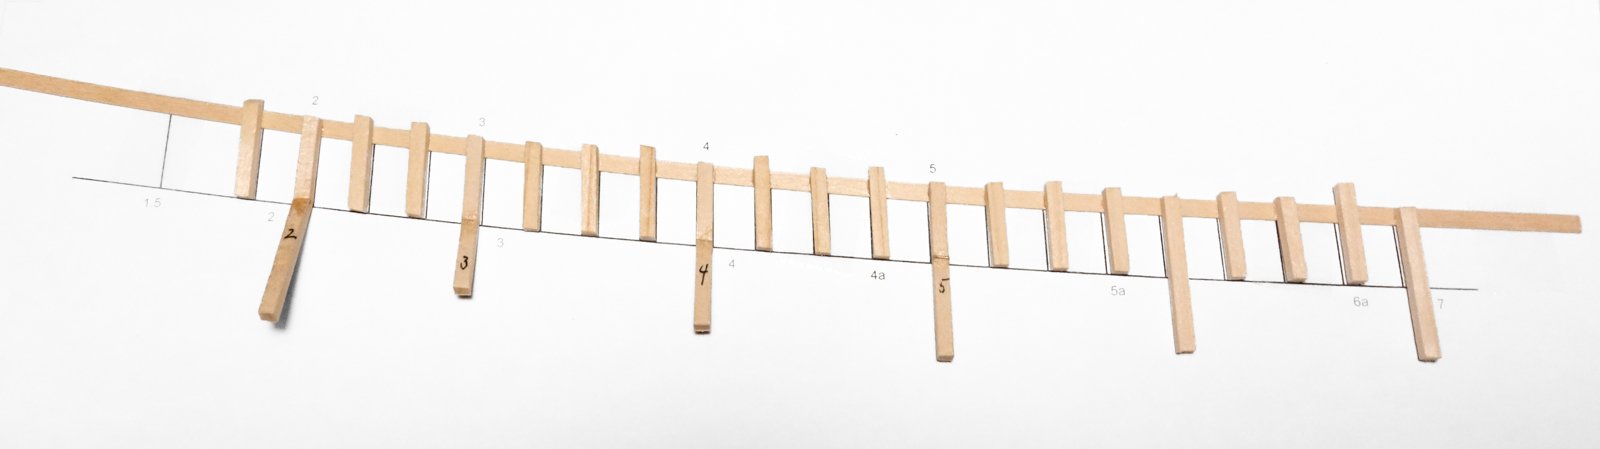
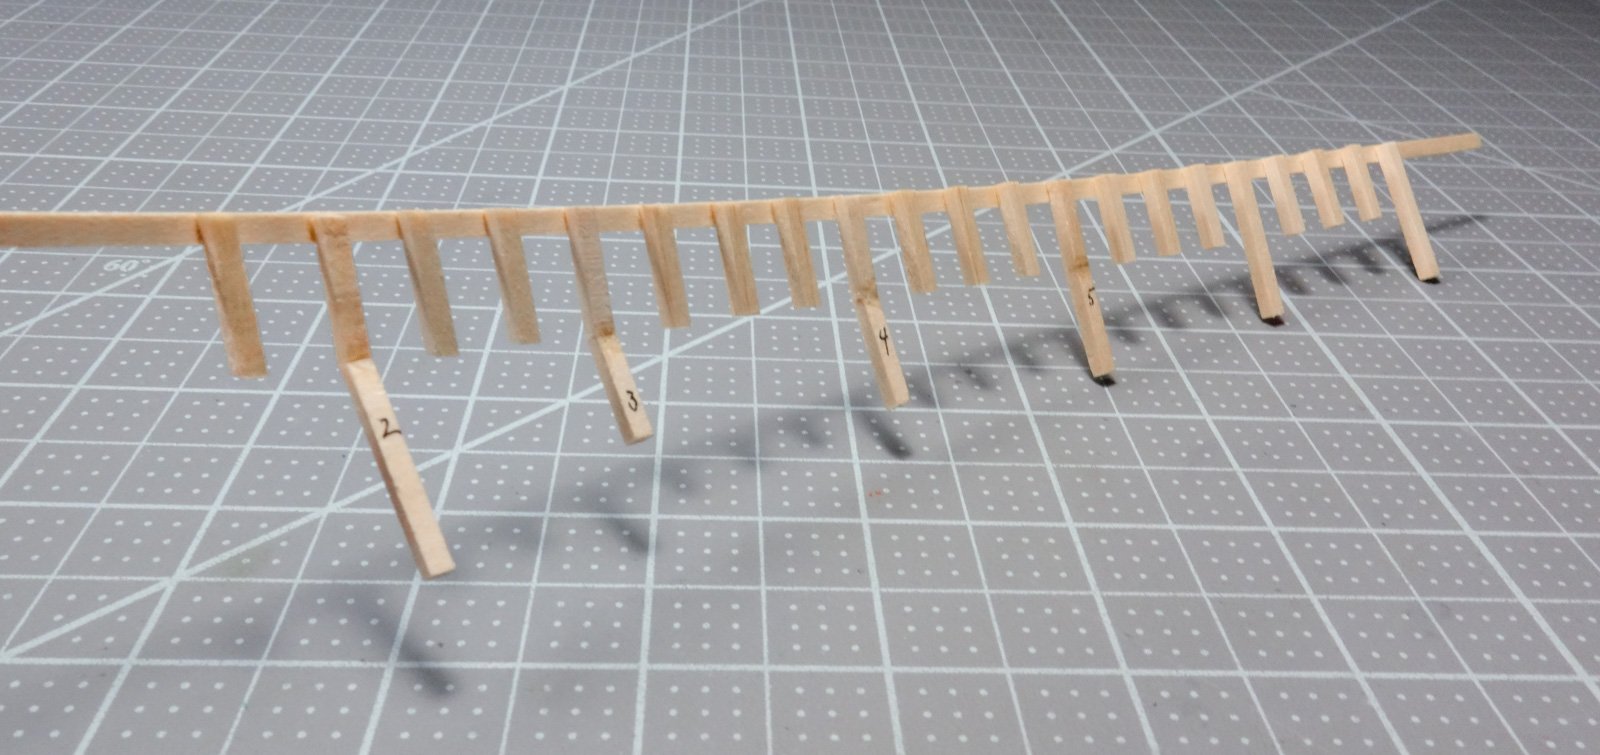
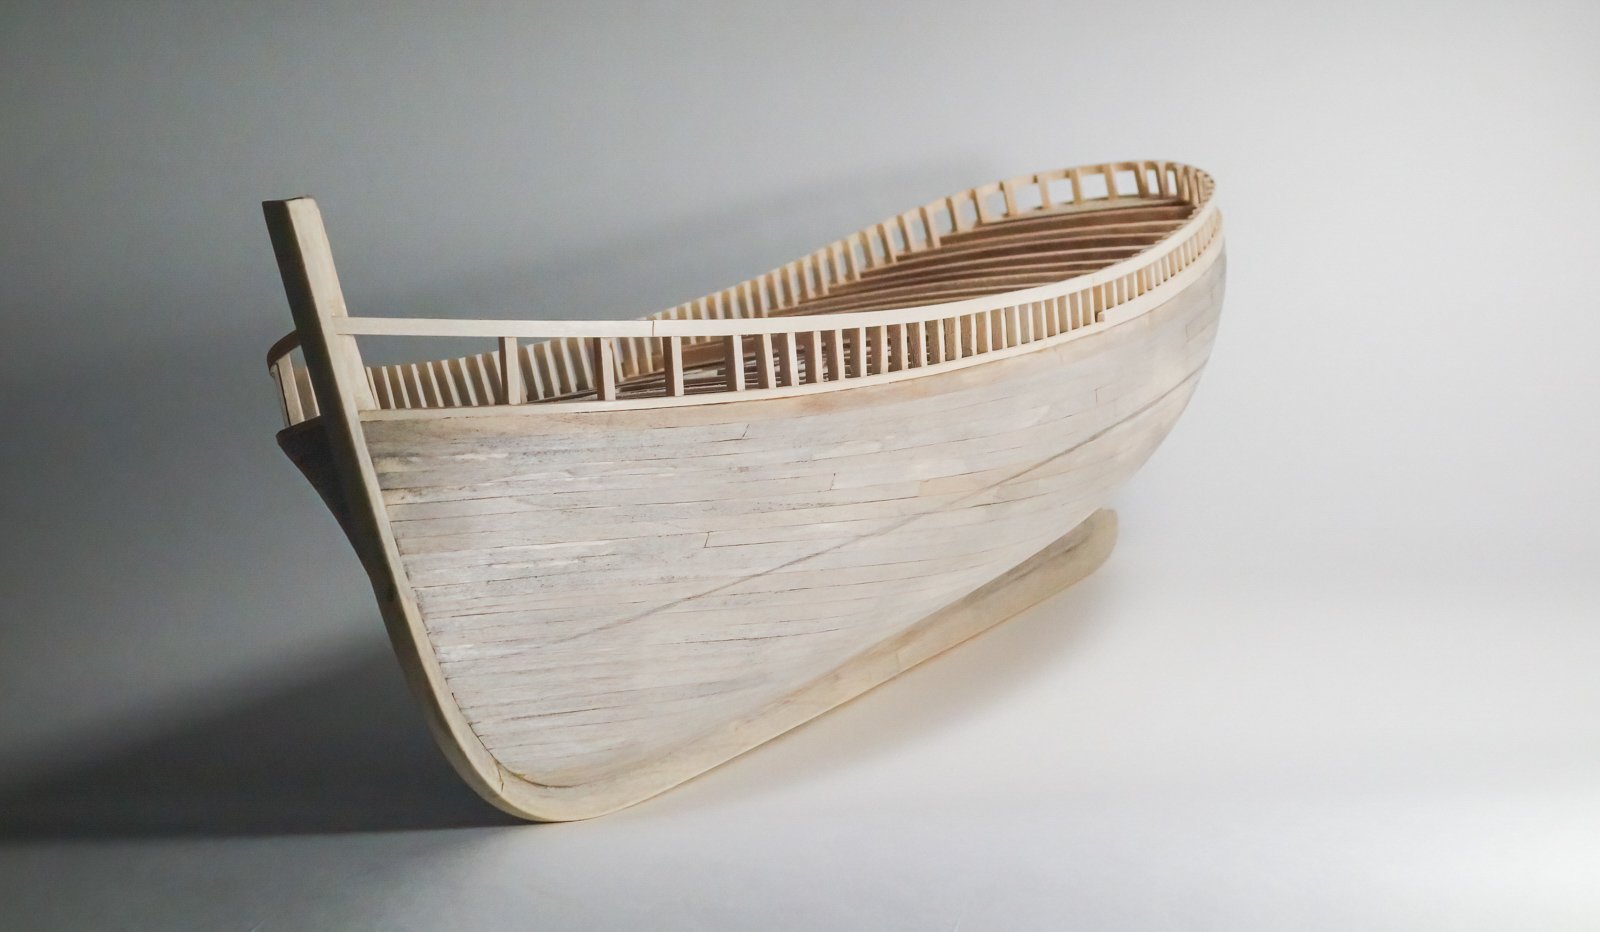
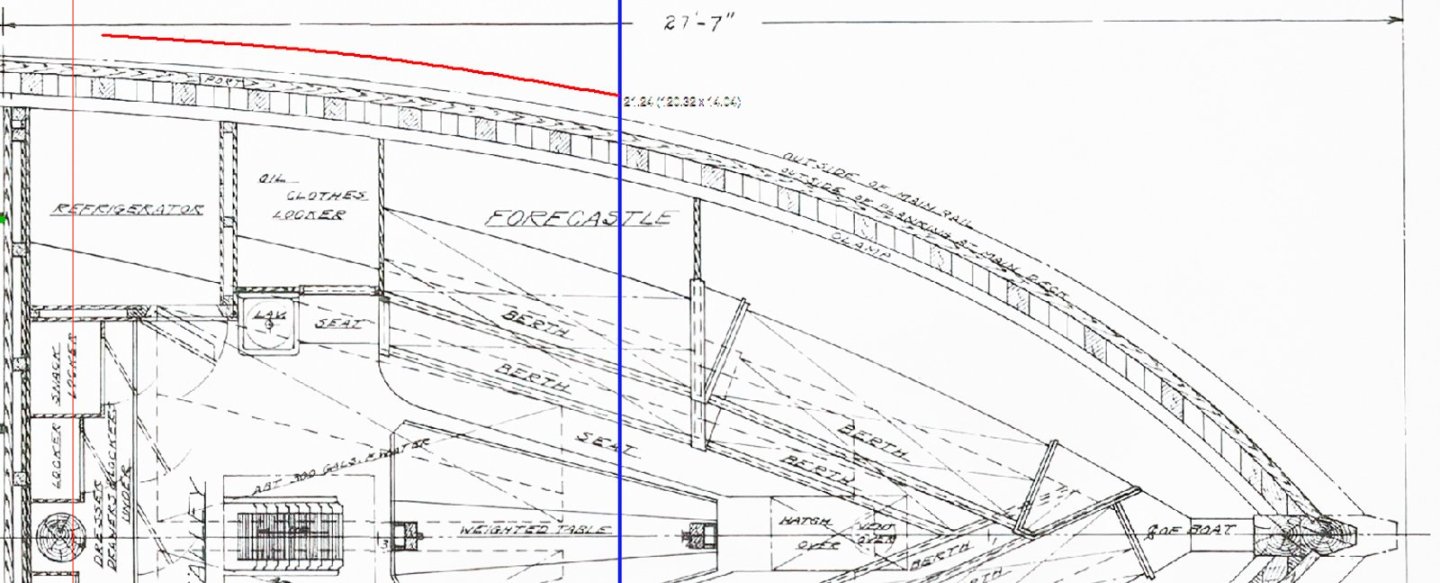
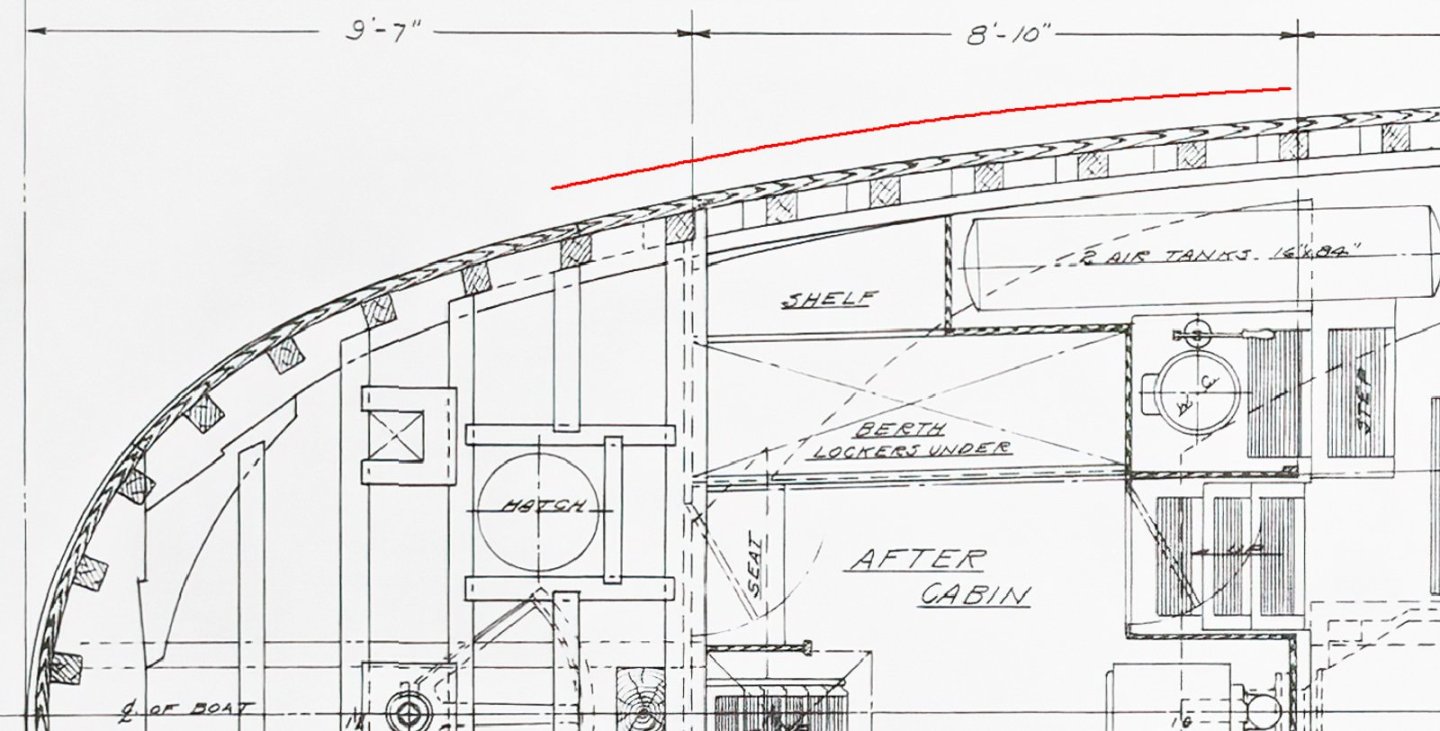
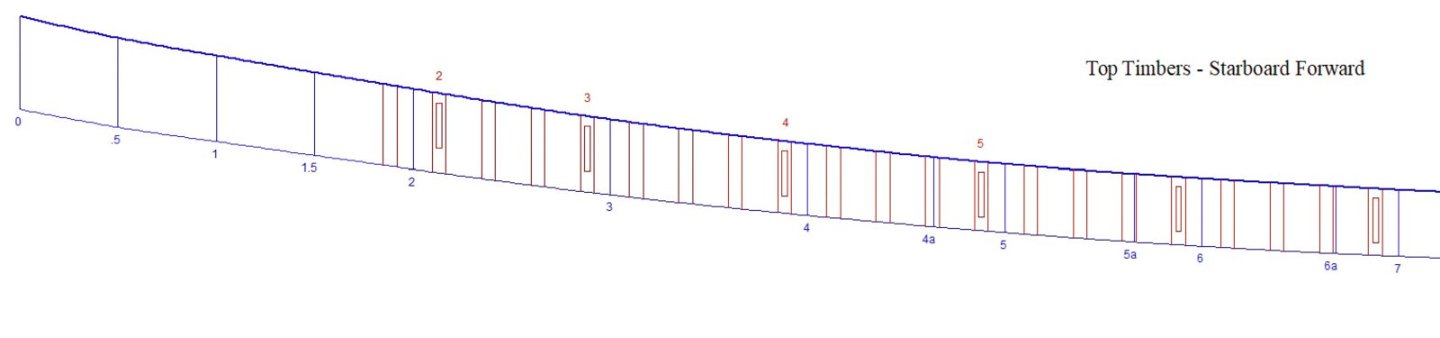
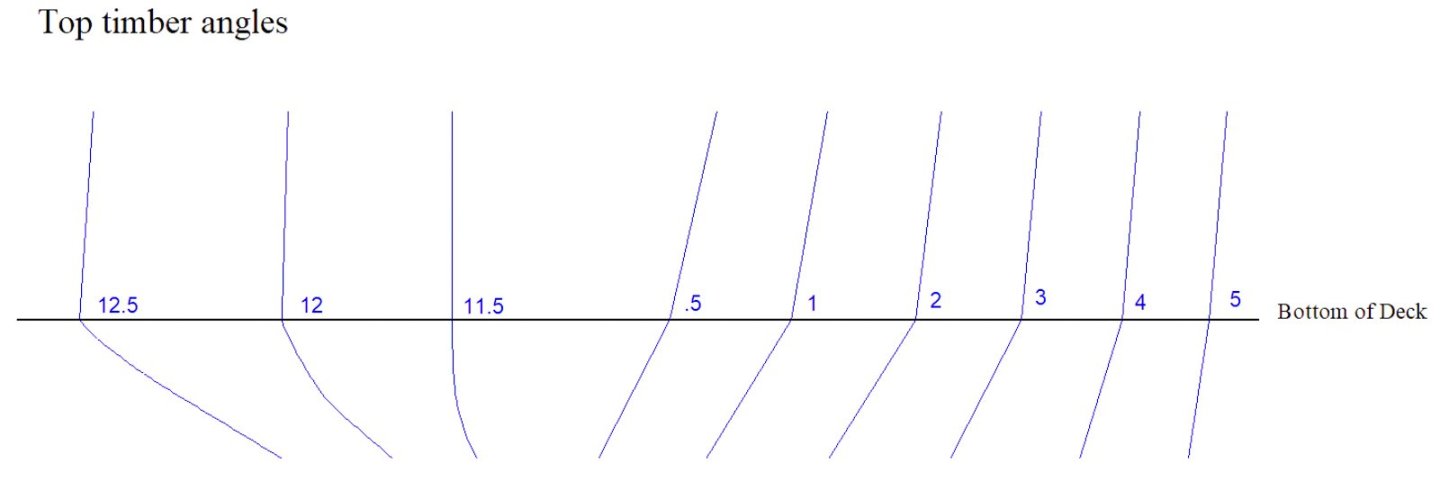
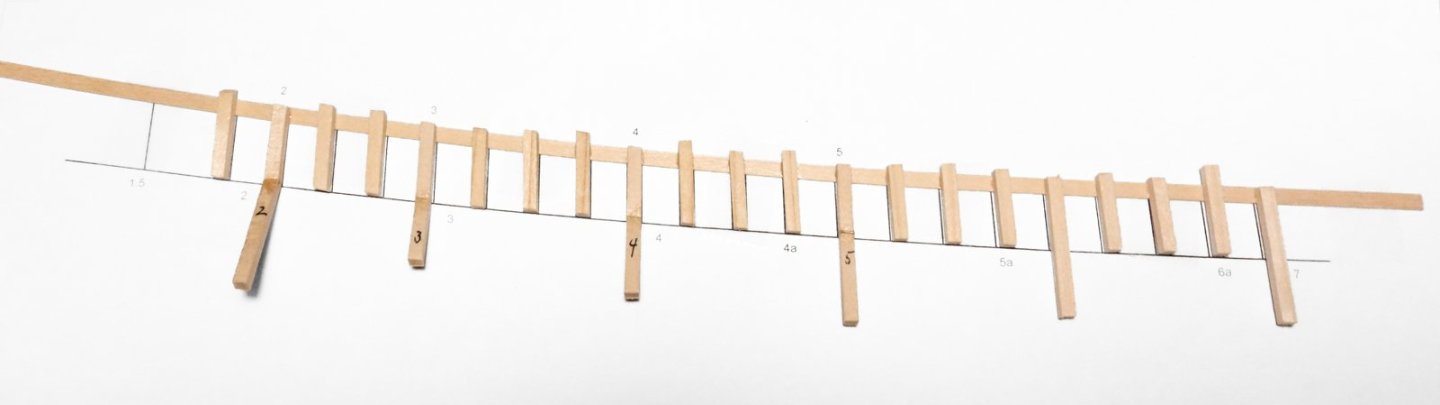
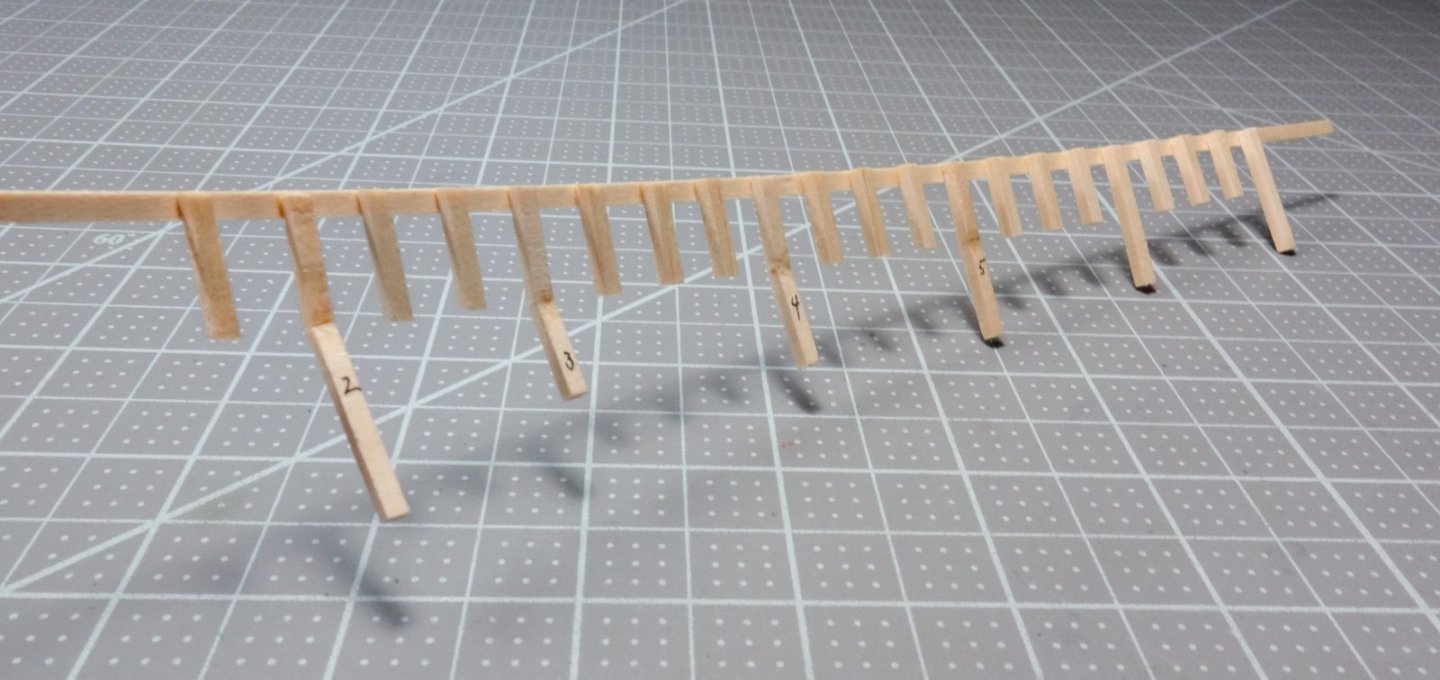
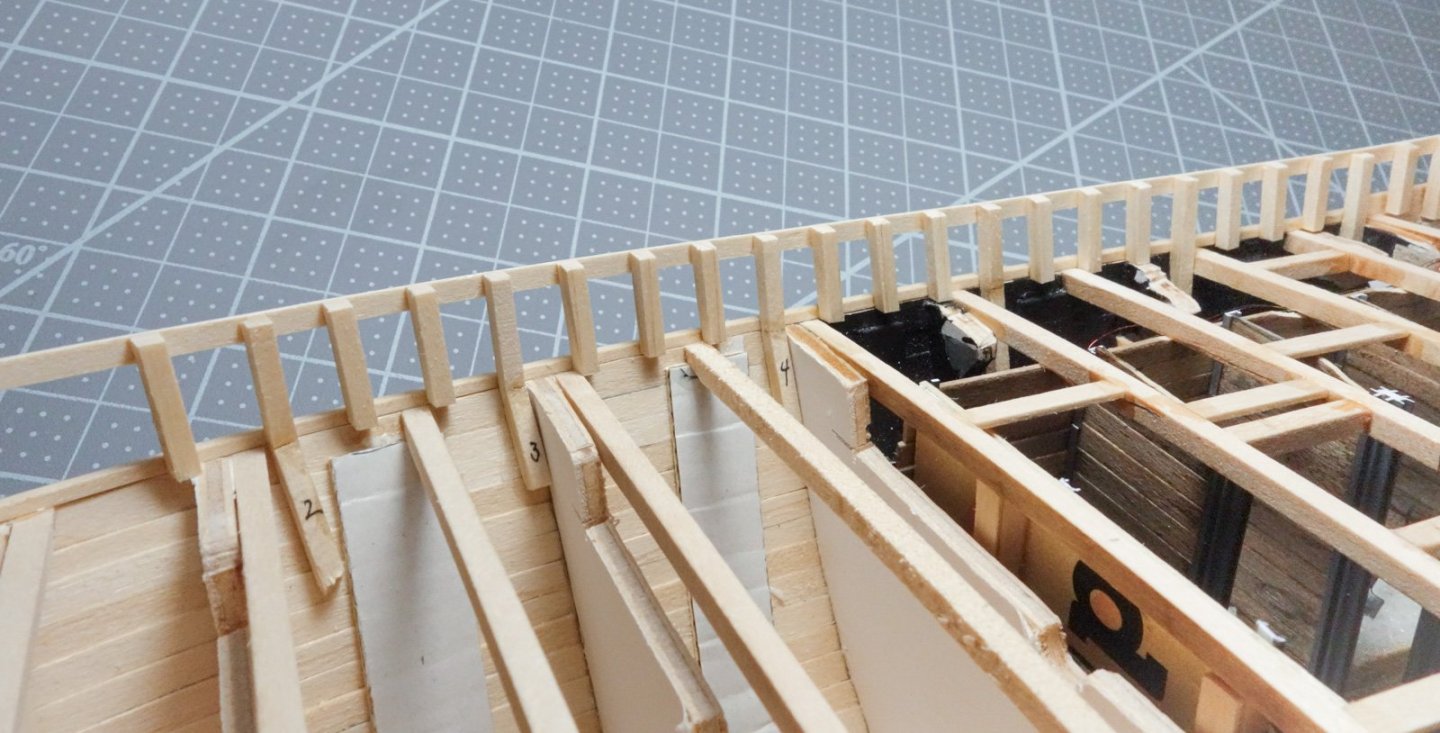
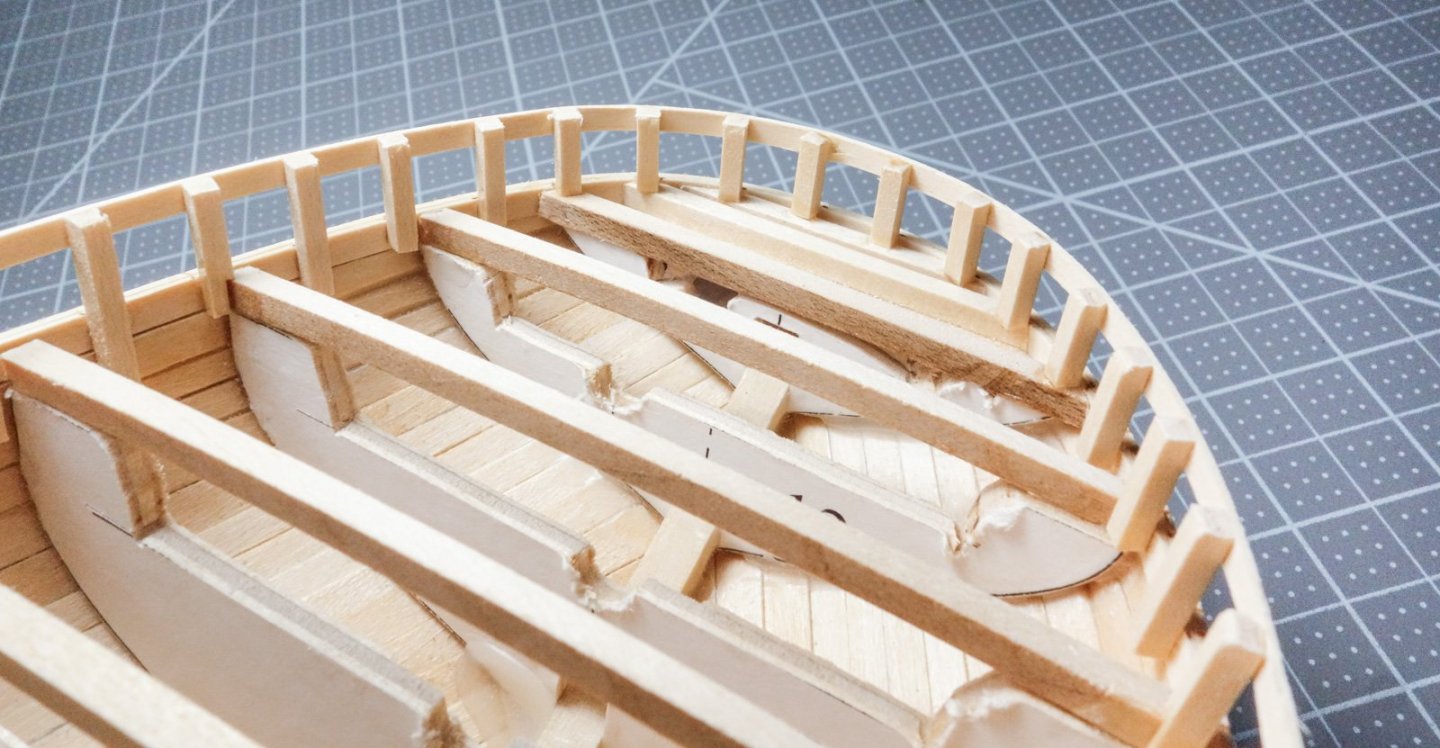
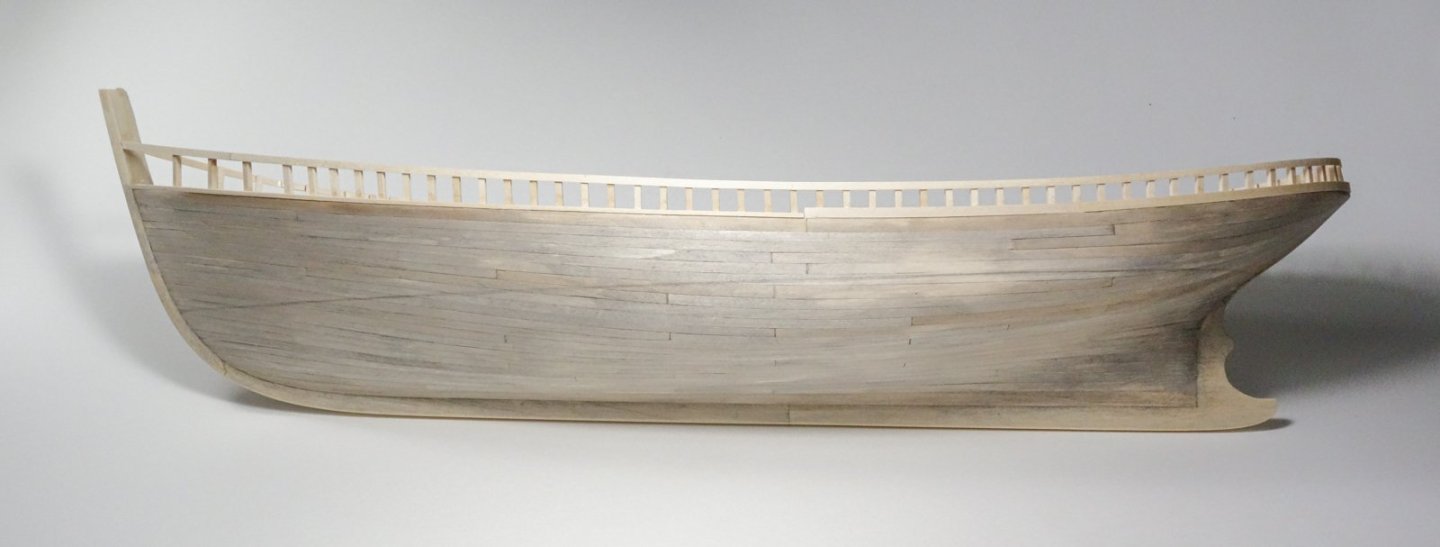
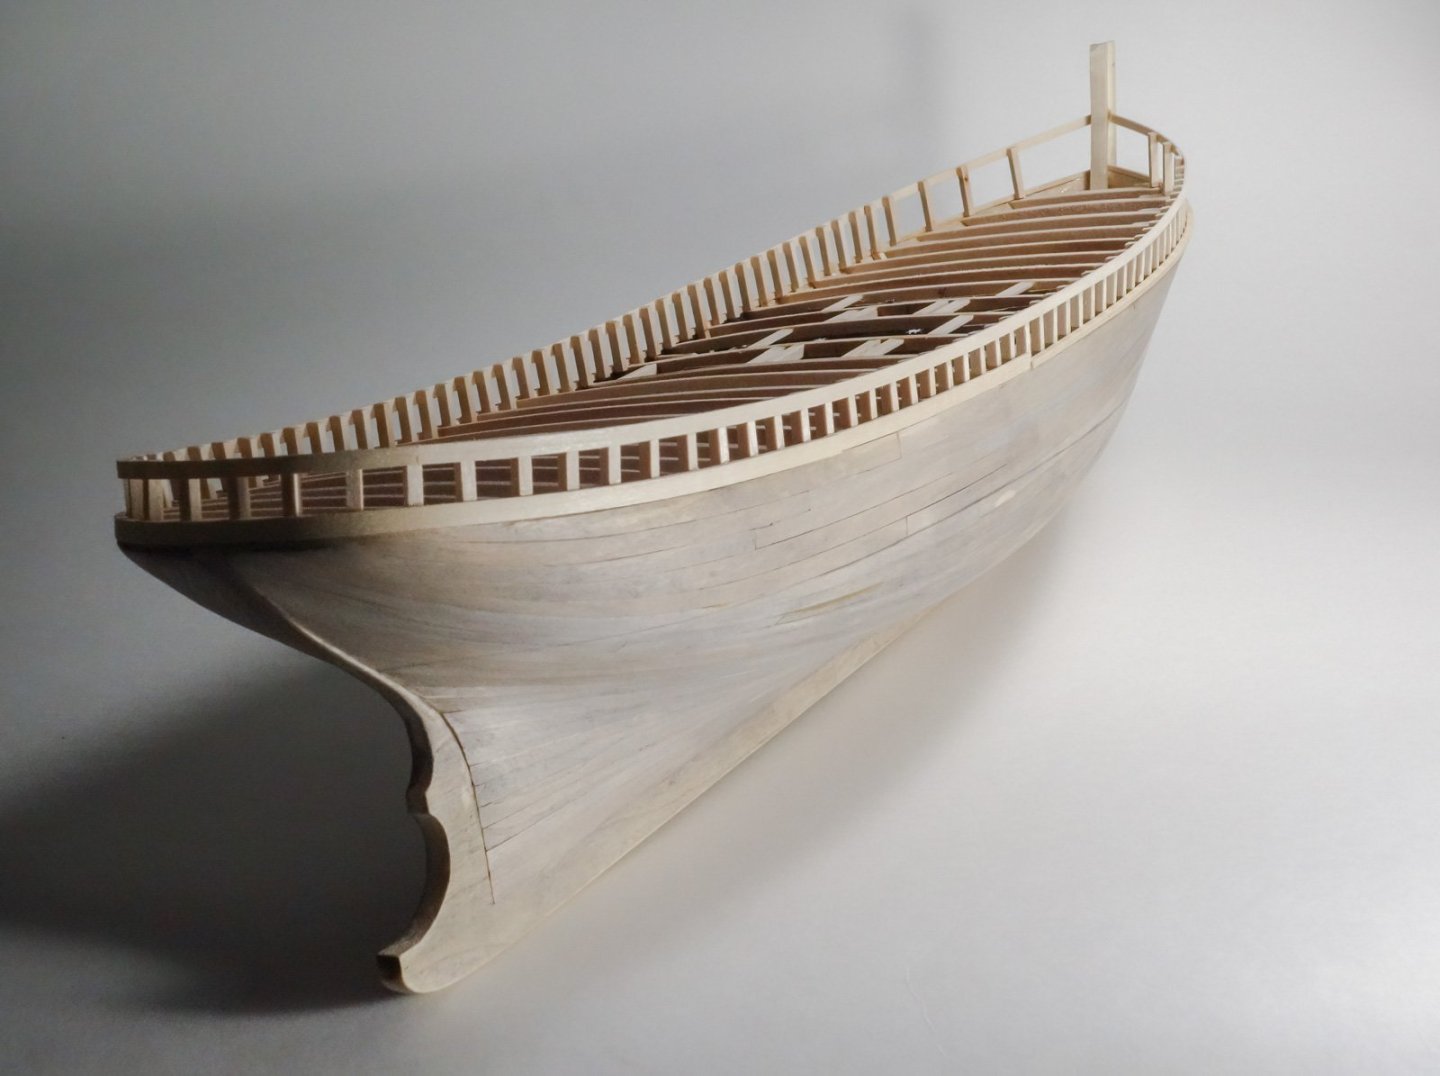
Greetings all, Thanks so much for the wonderful comments, the thumbs-ups and for finding the time to visit this build. Bulwark Stanchions Before work could begin on the stanchions for the bulwark, I first had to finish up from the last post by adding five more deck beams where the span between existing beams was too great. With that done, I started on the stanchions which the drawings refer to as the “top timbers.” This boat has 106 top timbers and are spaced about every 18” (45.7cm). In full disclosure, there are several details of these timbers that I didn't model because I felt there would be little return on the effort invested. First of these details is a taper of the timbers from 4.75” (12cm) at the deck to 4” (10cm) at the underside of the rail. In 1:48 that's a difference of .016” (.39mm), so I used wood that doesn't taper and scales to 4.5” square instead. Also, the drawings call for chamfered edges on the inside facing corners - very nice, but no. The most glaring omission is that I didn't bevel the outside and inside faces as they approached the stem and stern. In the image below, the top timbers below the red line are obvious enough that I should have beveled them, but I didn't. Forward of the blue line will be a raised “whaleback”, so those extremely beveled timbers are all hidden. This is the profile of the whaleback (green) visible above the main rail (red). And the same thing aft, but there are no beveled timbers as they round the stern and there is little discernible bevel moving forward through midships. If it sounds like I'm constructing a justification for not beveling any of the top timbers, you're onto something. I made four off-model stanchion bulwark assemblies. One each for the port and starboard bulwarks forward of station #7 and two more for P/S aft of station #7. I created a template for each assembly based on the distance between bottom of deck at side and bottom of main rail. The top timbers are at a right angle to the waterline, not the rail. The angle of bend at each body plan station is found. The upper waist strake for the bulwark section is bent to the proper arc and then attached to the template with double-sided tape. The top timbers are then glued to it. The section of top timbers is affixed to the hull. Note that a strip of wood equal to the deck thickness has been glued to the upper most hull strake. The bottoms of all the top timbers are glued to its inside edge. The final eight timbers at the stern were placed individually. The scant number of timbers in the bow area were placed willy-nilly to temporarily hold the waist strake in its proper orientation until the bulwark is complete and the whaleback structure starts taking shape. Next up – finish planking the bulwark, installing the inside rail stringer and fitting the covering boards (oh boy!). Be safe and stay well. Gary


-
Excellent progress on the base, Glen. I particularly like the front row of pilings, those sticks really look fantastic! Gary
- 235 replies
-
- 5
-
-
-
- Banshee II
- Bottle
- (and 1 more)
-
Beautiful, precise and clean work, Valeriy! Once again. Gary
-
Great progress, Keith. I really like the slide hammer and a nice start on the donkey - not wonky at all. Gary
-
Gunboat Philadelphia 1776 by tmj
FriedClams replied to tmj's topic in - Build logs for subjects built 1751 - 1800
I enjoy unusual build subjects, so your Philadelphia gunboat caught my eye. Best of luck on this interesting model. Gary