MORE HANDBOOKS ARE ON THEIR WAY! We will let you know when they get here.
×


FriedClams
-
Posts
1,368 -
Joined
-
Last visited
Content Type
Profiles
Forums
Gallery
Events
Everything posted by FriedClams
-
 Thanks for the info, Paul. I'm going to give it try soon. Gary
- 201 replies
-
- 4
-

-
- Oyster Sharpie
- first scratch build
- (and 1 more)
-
Nice work on the cabin, Paul. I was wondering how you like working with the Alaskan cedar? Never tried it myself, but something a little harder than basswood would be nice. Gary
- 201 replies
-
- 4
-
-
- Oyster Sharpie
- first scratch build
- (and 1 more)
-
Wonderful work, Keith! Gary
-
Keith, I must be experiencing the first stages of dementia. Back on page three, post #61, I explained how I repaired two recessed planks by adding on additional wood to the surface and then sanding it back to flush. I did this to a number of areas on the hull, but the planks I was using to demonstrate this process were these two very same planks. They are indeed repaired, and it was that repair that saturated the wood with CA. Good grief - this getting old business is not easy and at times downright troubling. Thank you, Mike, for the kind comment Gary
-
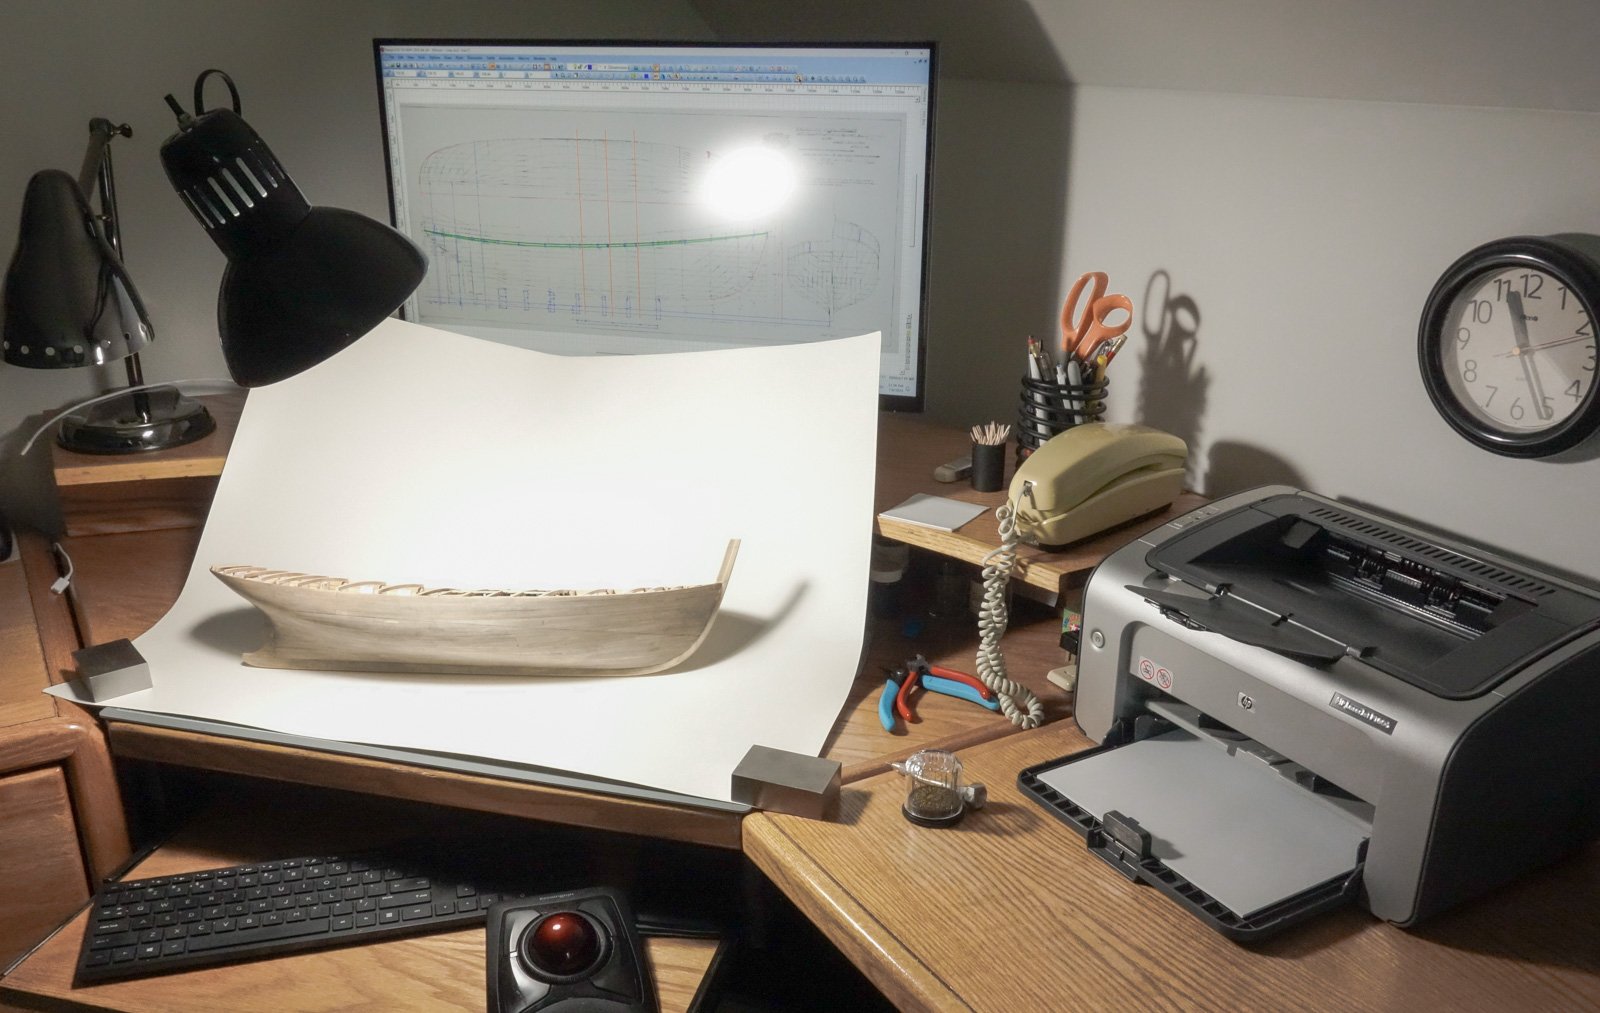
Thank you, Tom, Paul, Keith B, Keith A, Andy and Rick for the nice words! And thanks to all for the visits and the "thumbs up". Thanks! I have a Sony RX 100 that a bought about eleven years ago and use for all the posted photos. It's a fixed lens pocket camera that has features you would only expect to find on a DSLR, like RAW capture. It takes great images even in bad lighting and can focus inches away from the subject. It makes taking a decent photo easy. If you mean the third and fifth hull plank down where it is attached to the stem - no, that's a spot where I got CA smeared onto the surface when I was forcing those planks to submit to my will. After the hull was fully planked, I washed it with india ink/alcohol to give it little age, but the solution couldn't absorb into the wood where CA had penetrated. In fact, all the lighter colored splotched or streaked areas are due to this. In the end, the hull will be painted, weathered and I wouldn't be surprised if there is chipped and flaking paint here and there exposing some of that aged wood underneath. Not sure yet. Thanks for observing that, Keith, because if it had been recessed - now would be the time to fix it. I agree, Andy. A utilitarian design for sure, but I think the designer had an aesthetic eye just the same. Gary


-
Congratulations, Gary - beautiful model. Gary
-
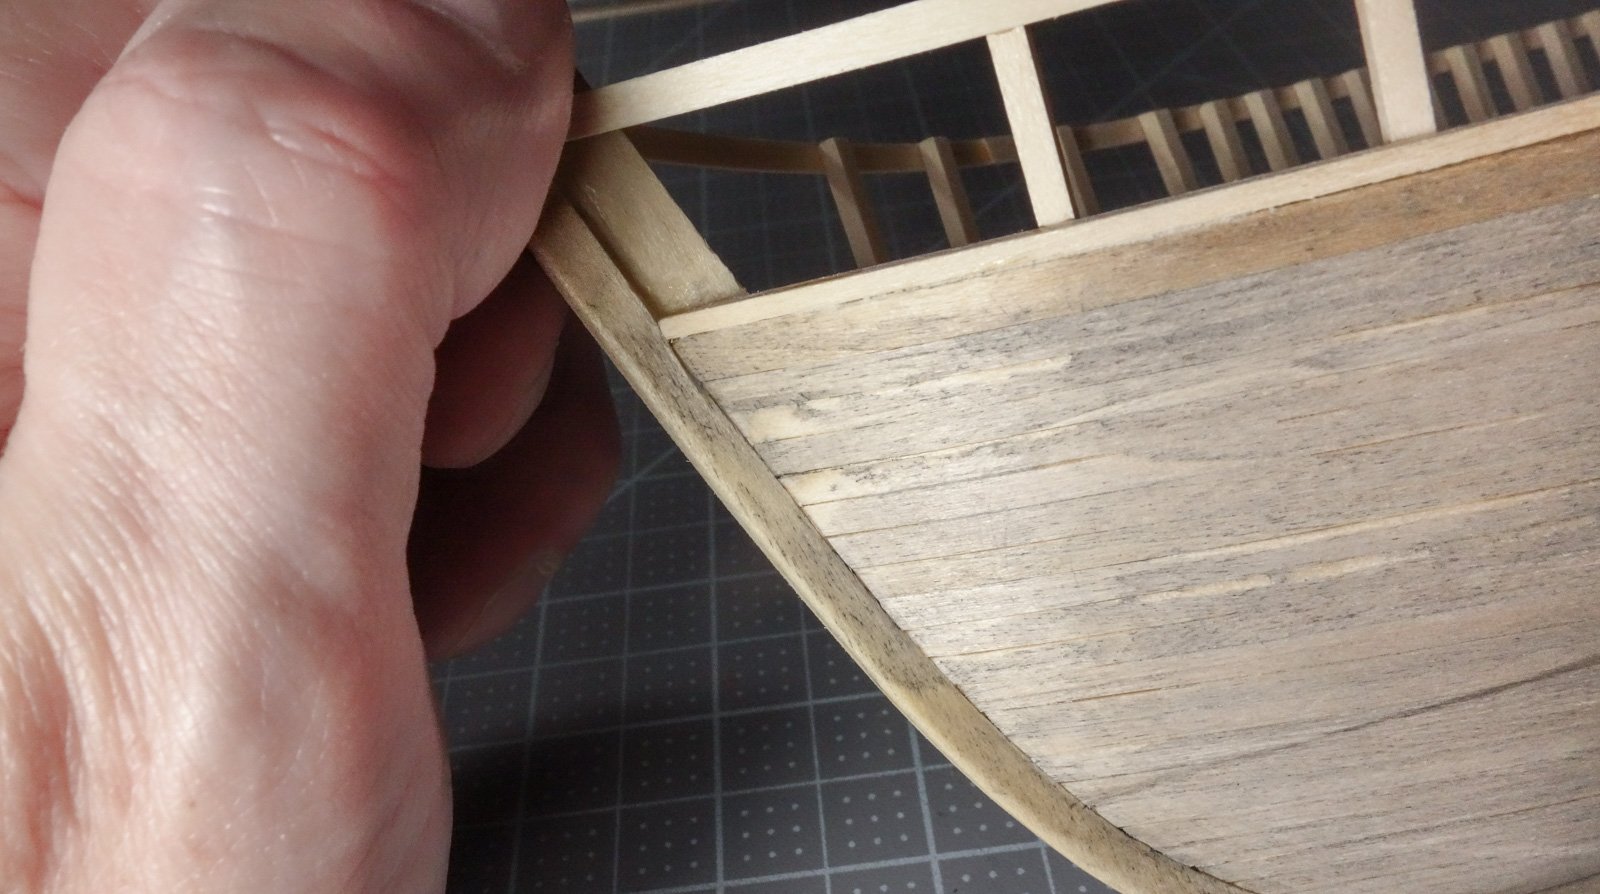
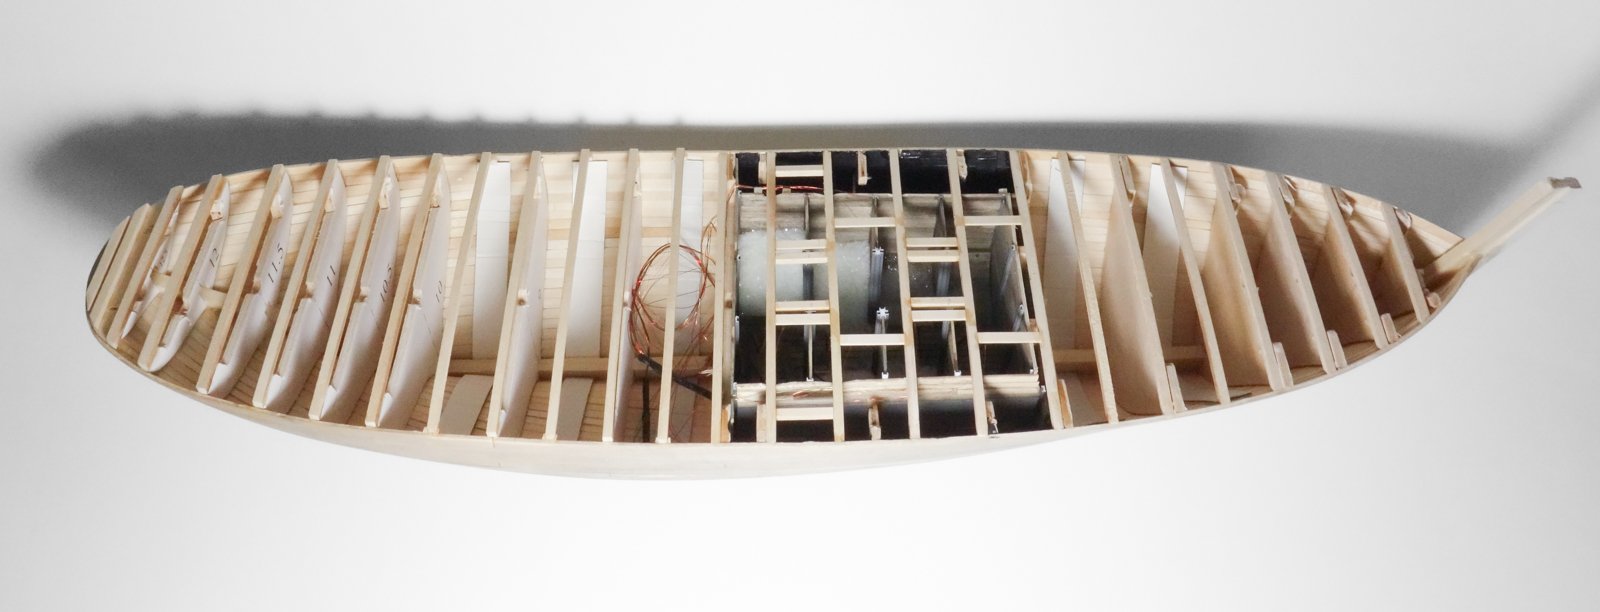
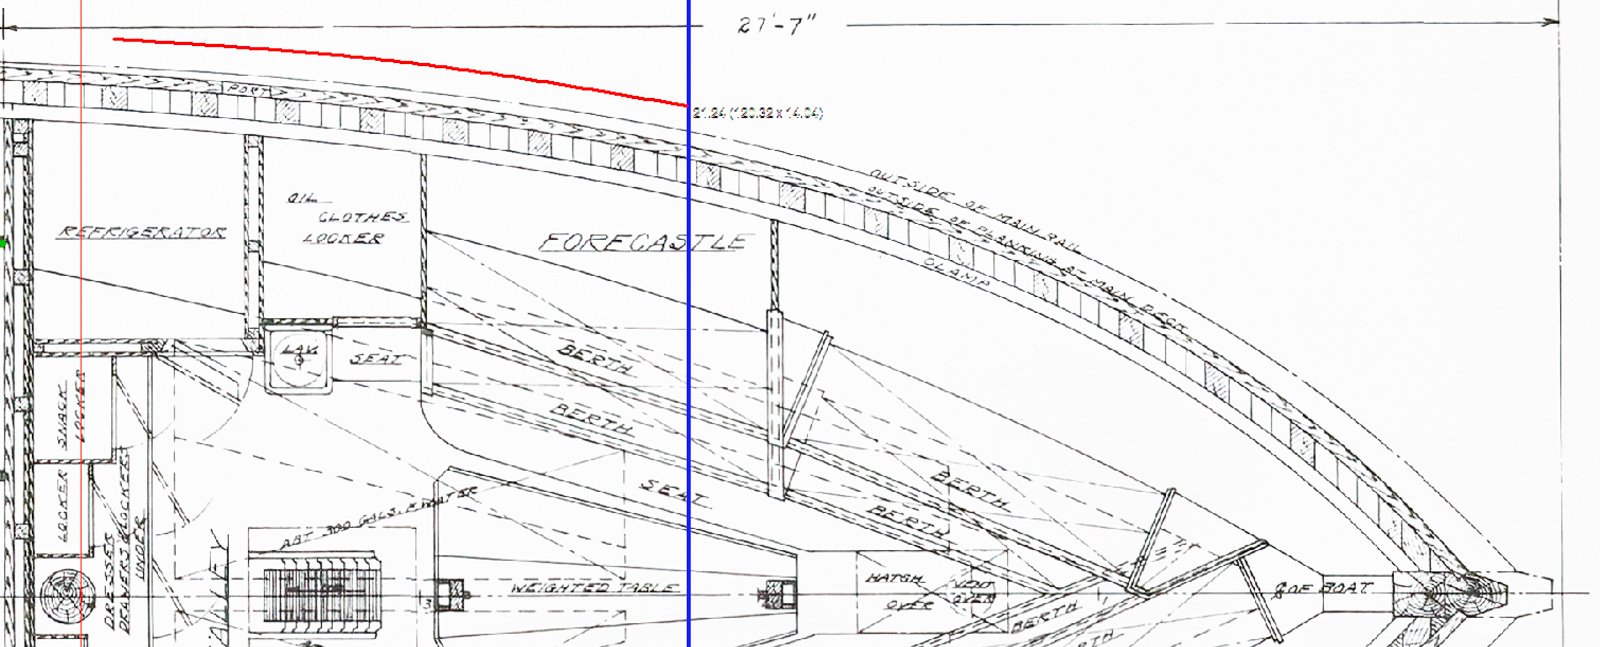
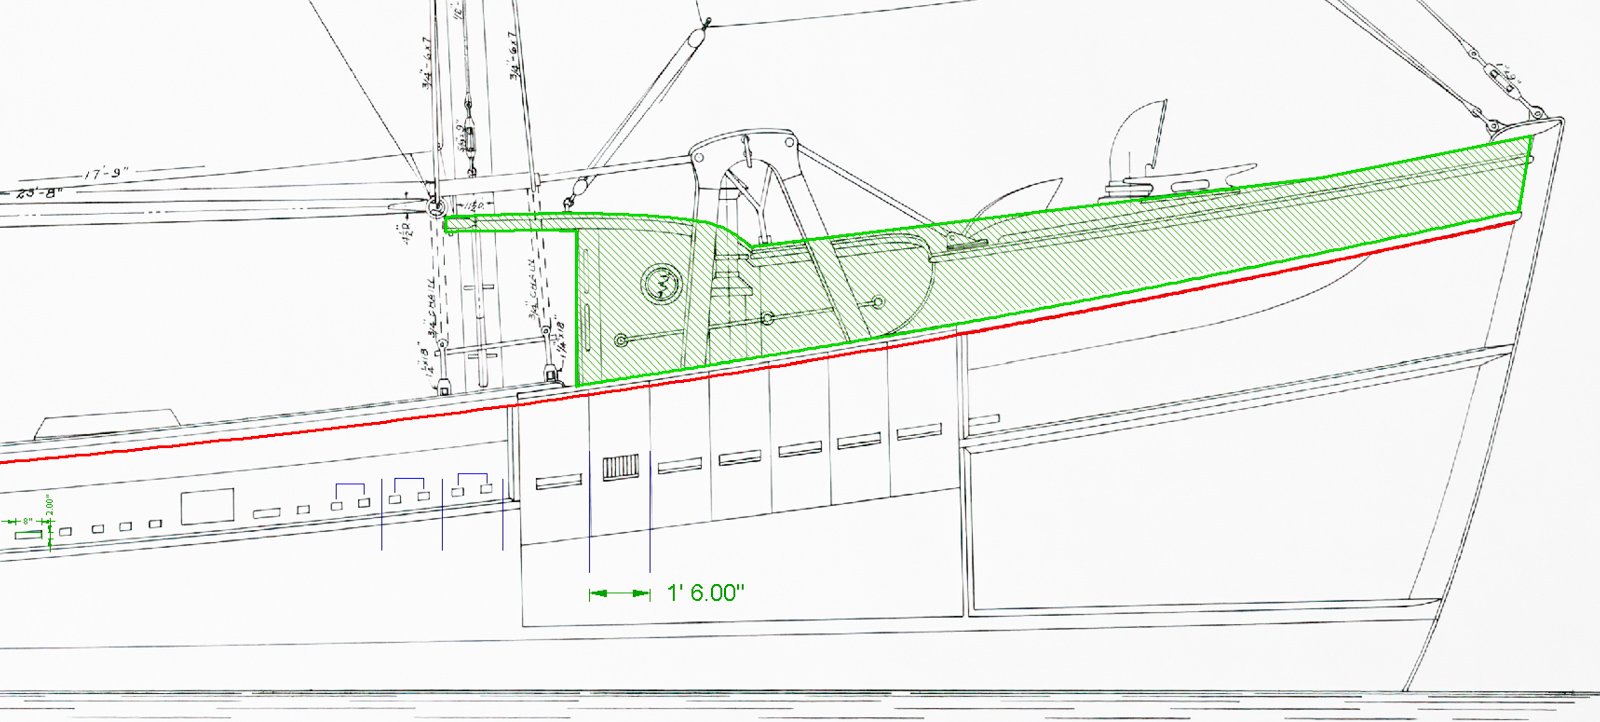
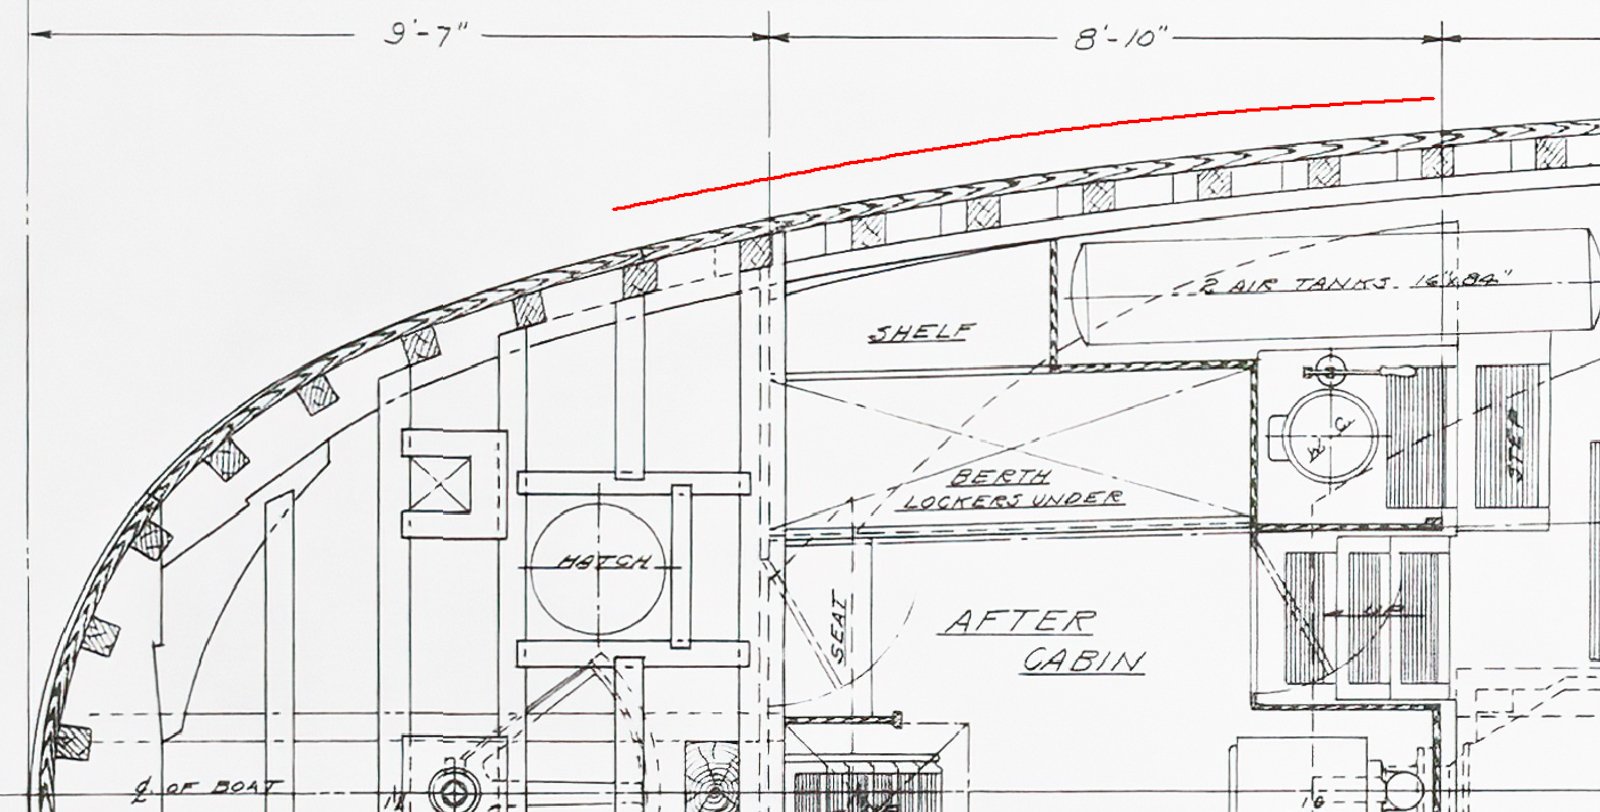
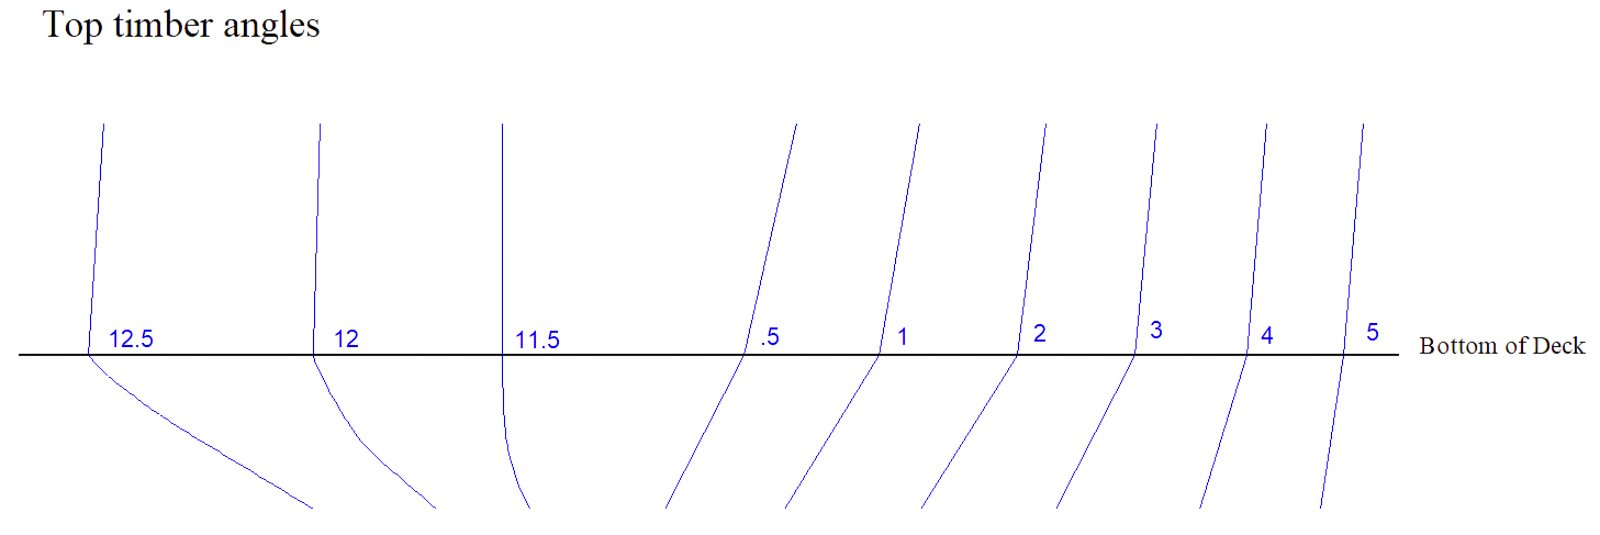
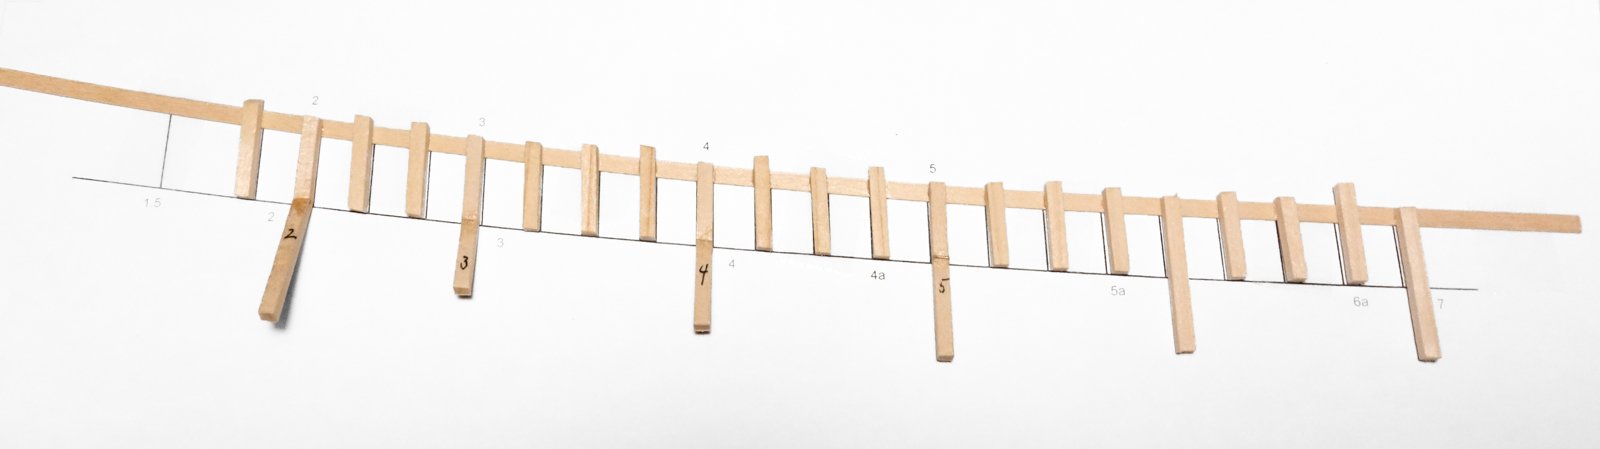
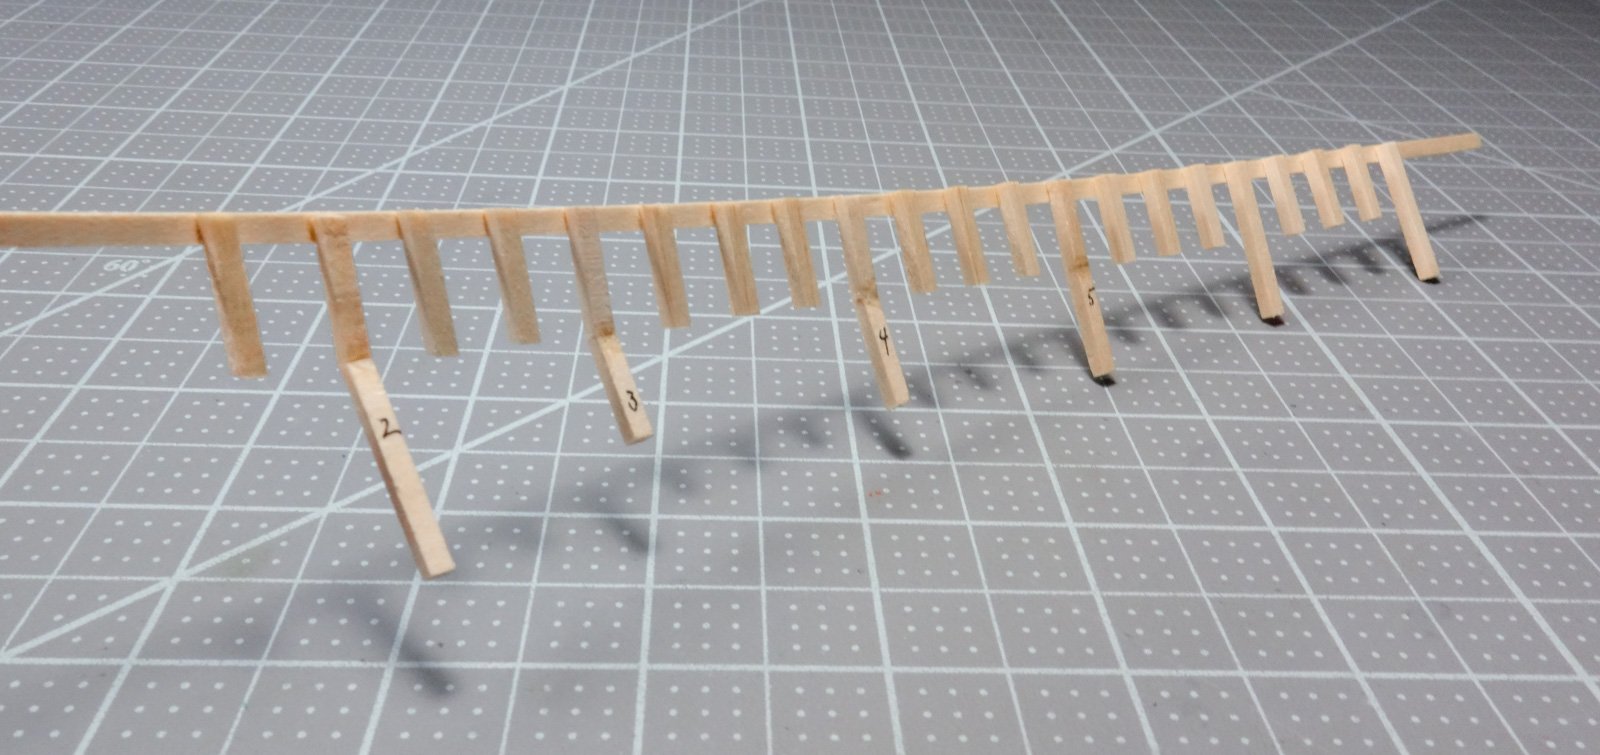
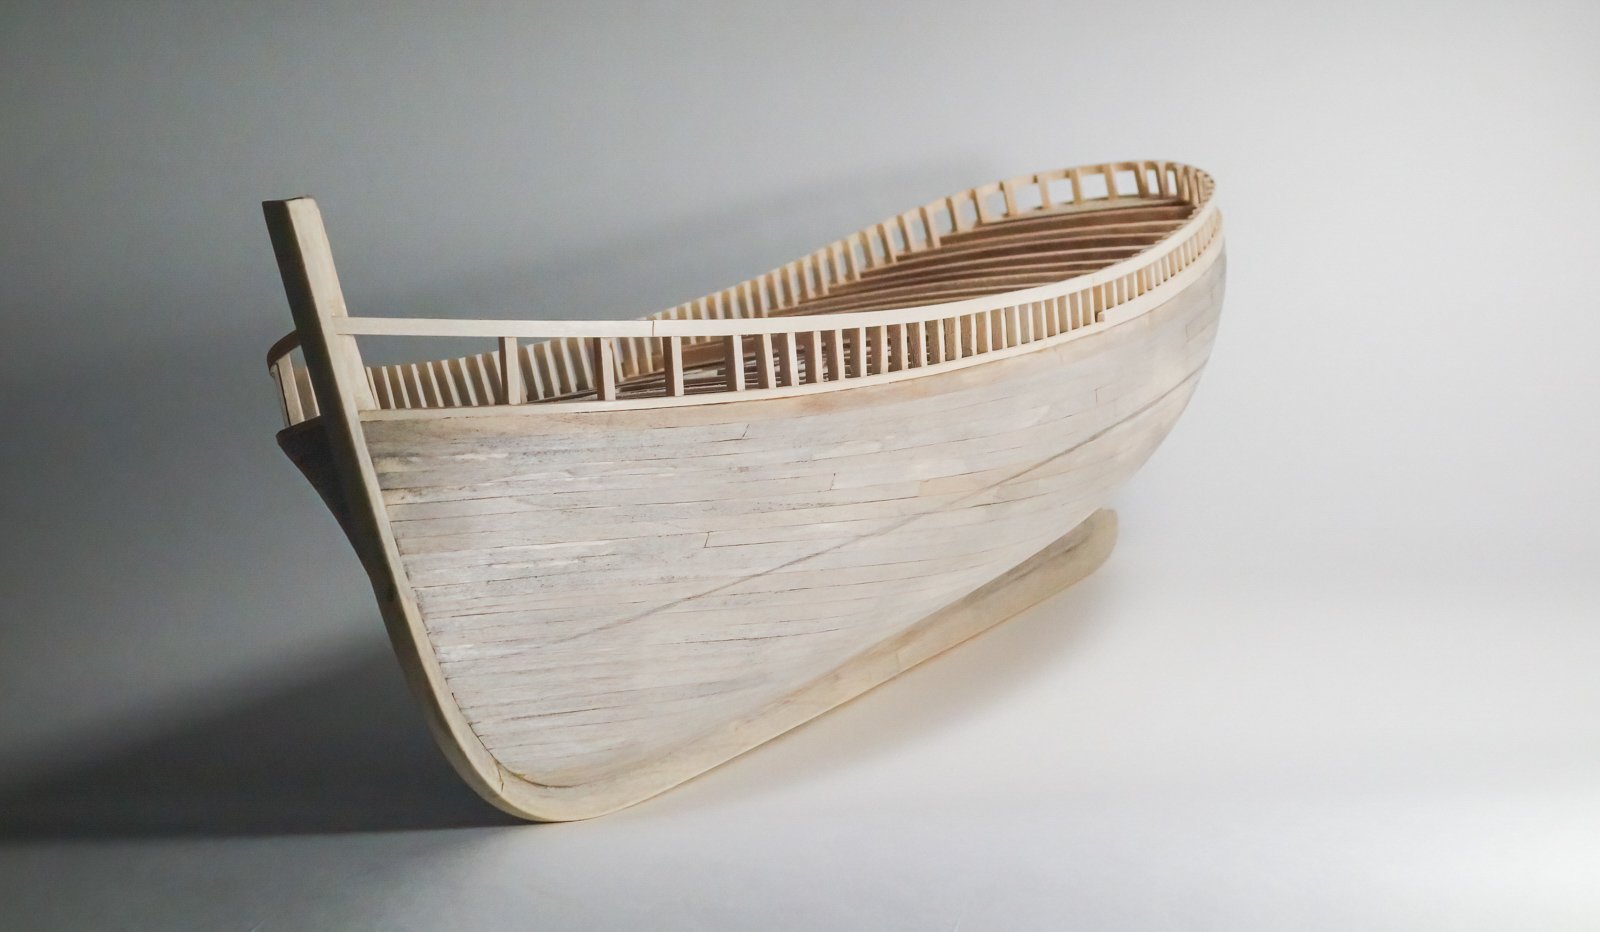
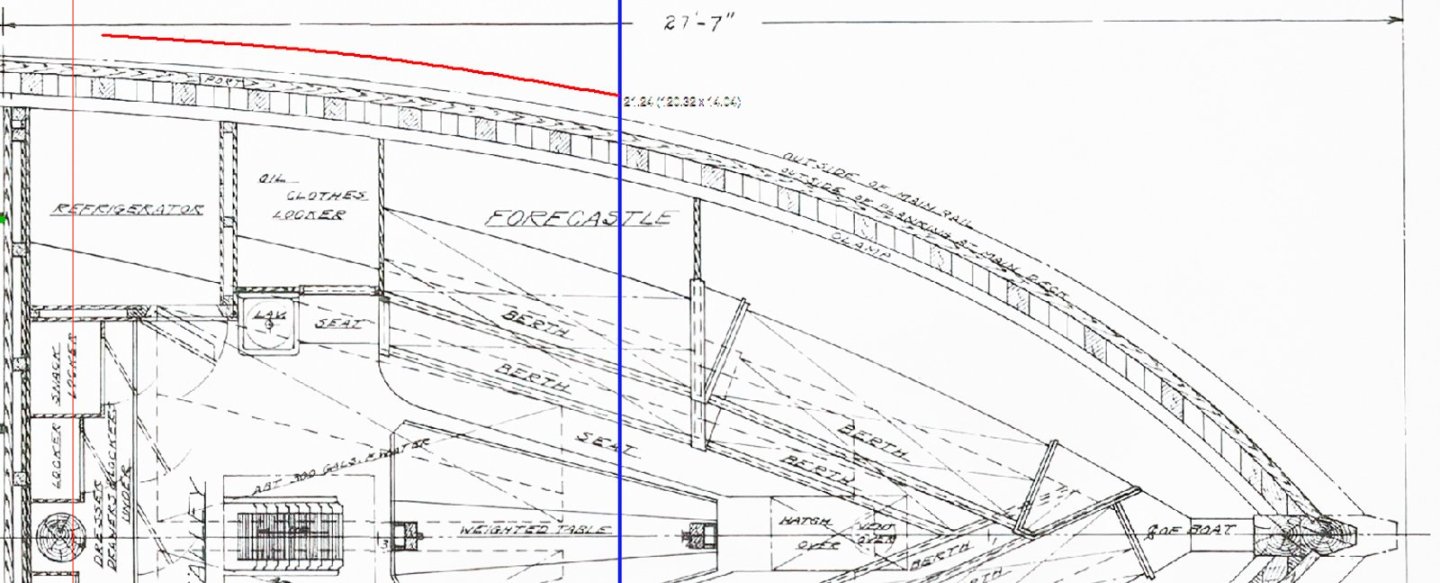
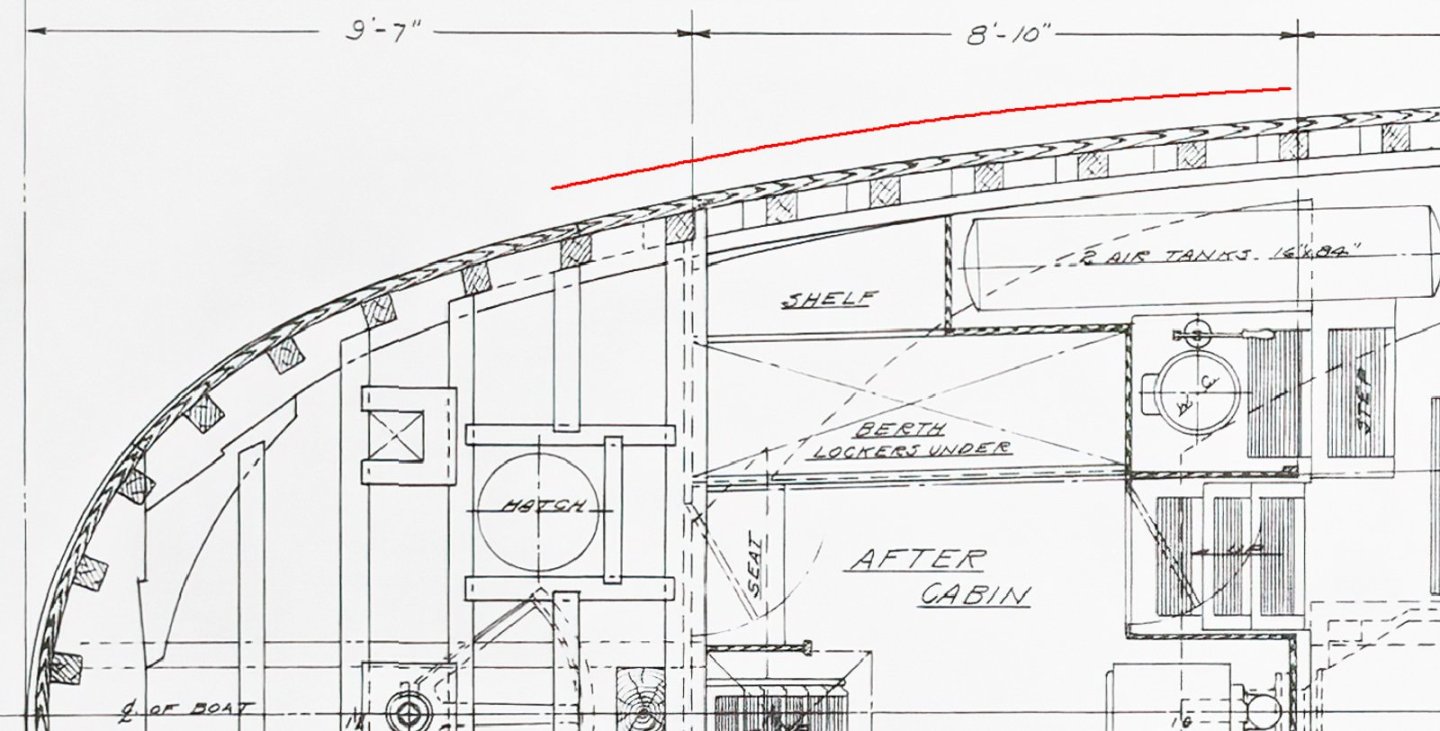
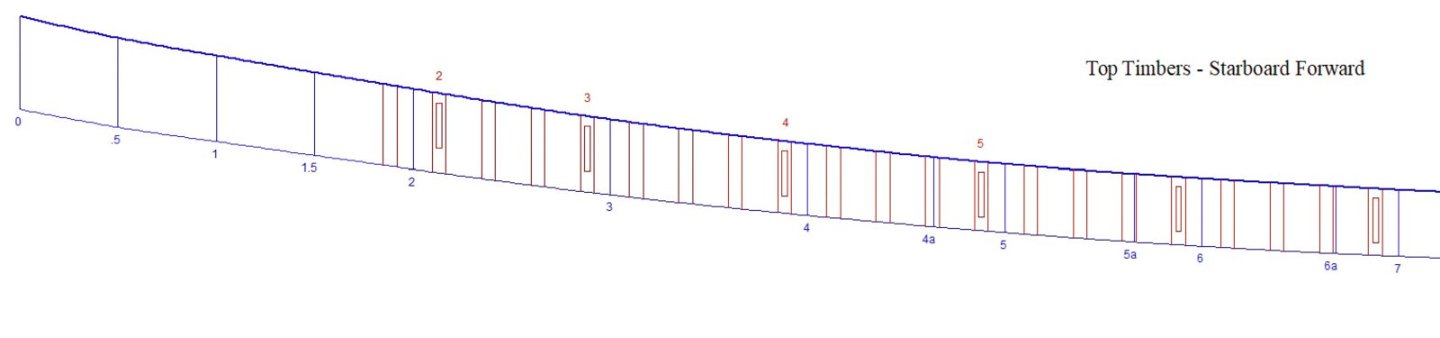
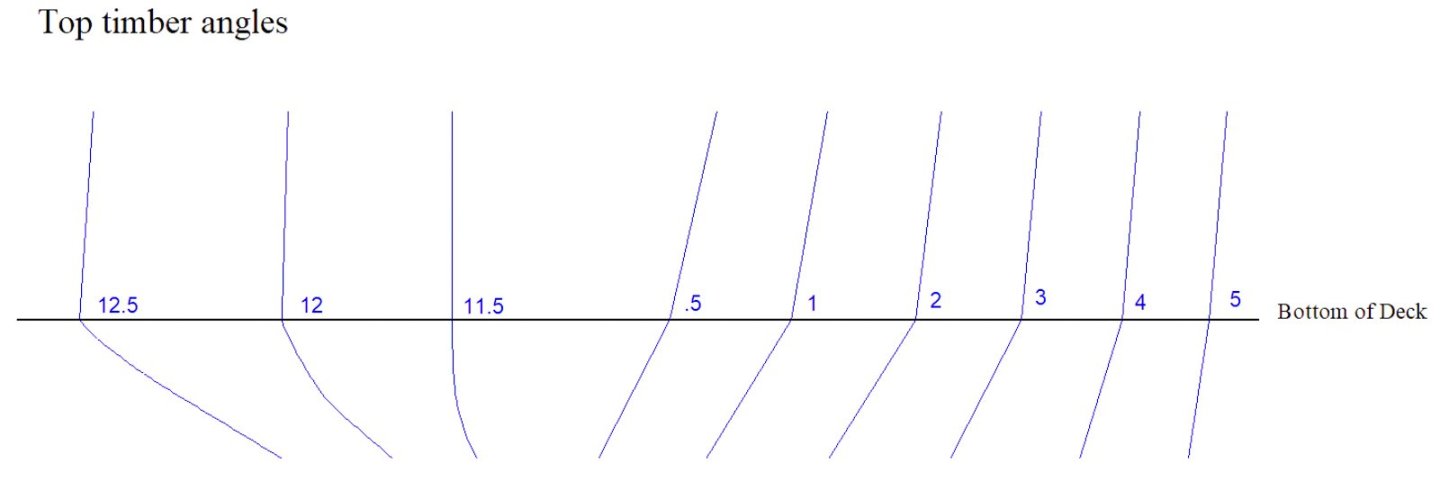
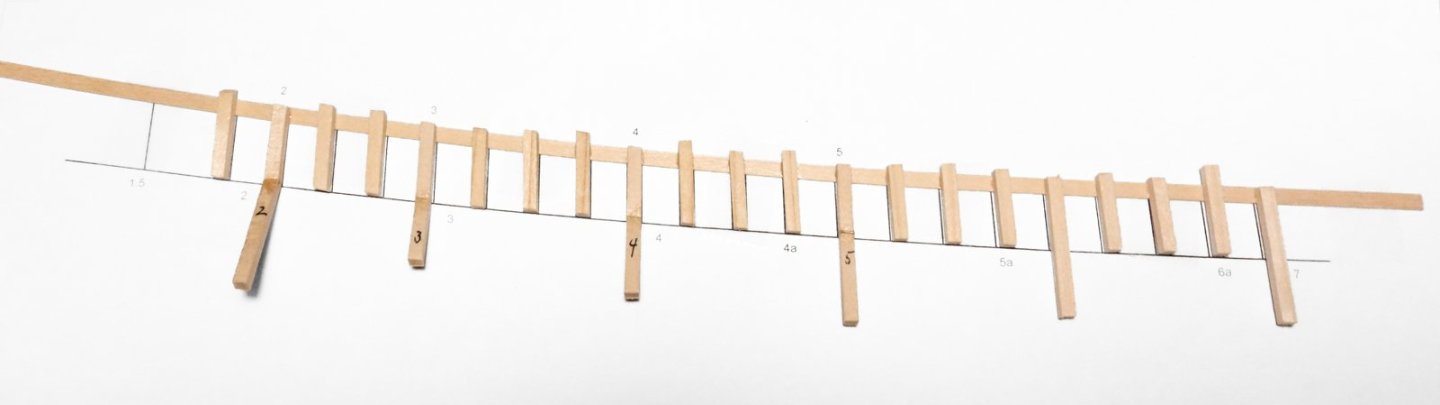
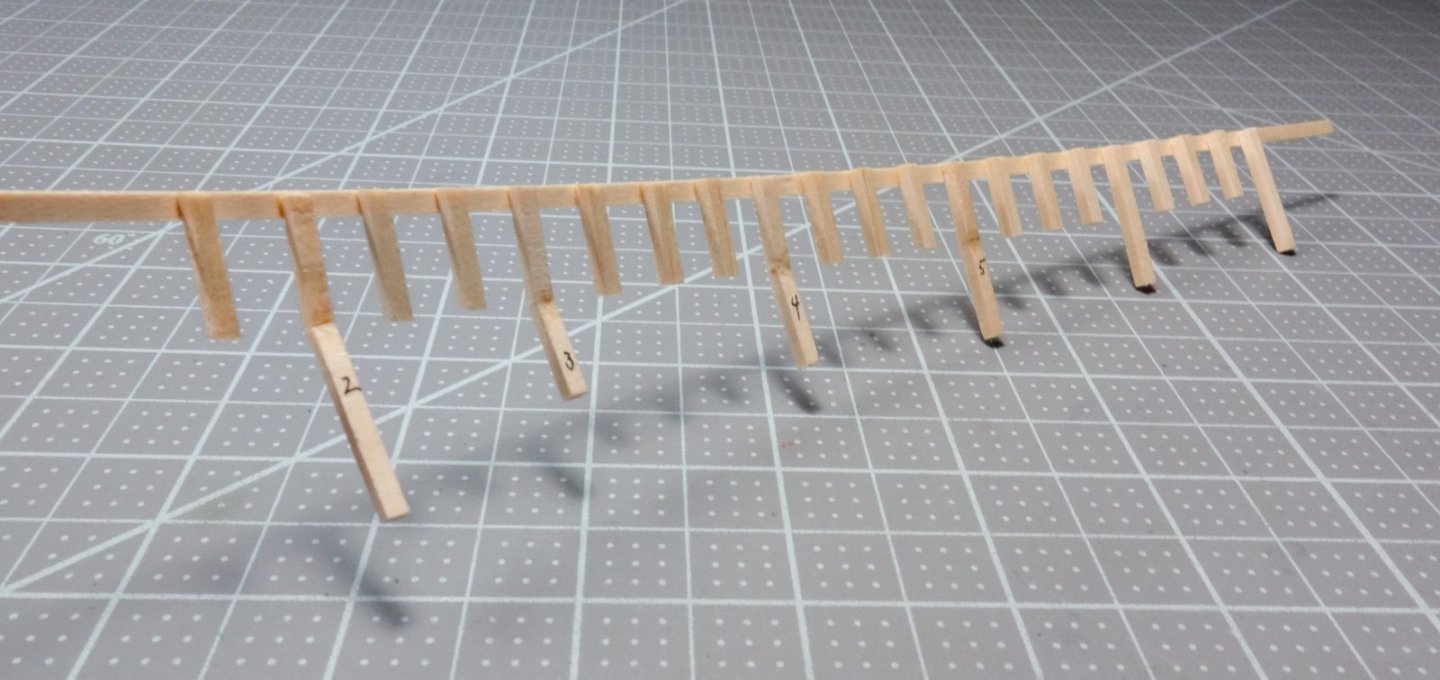
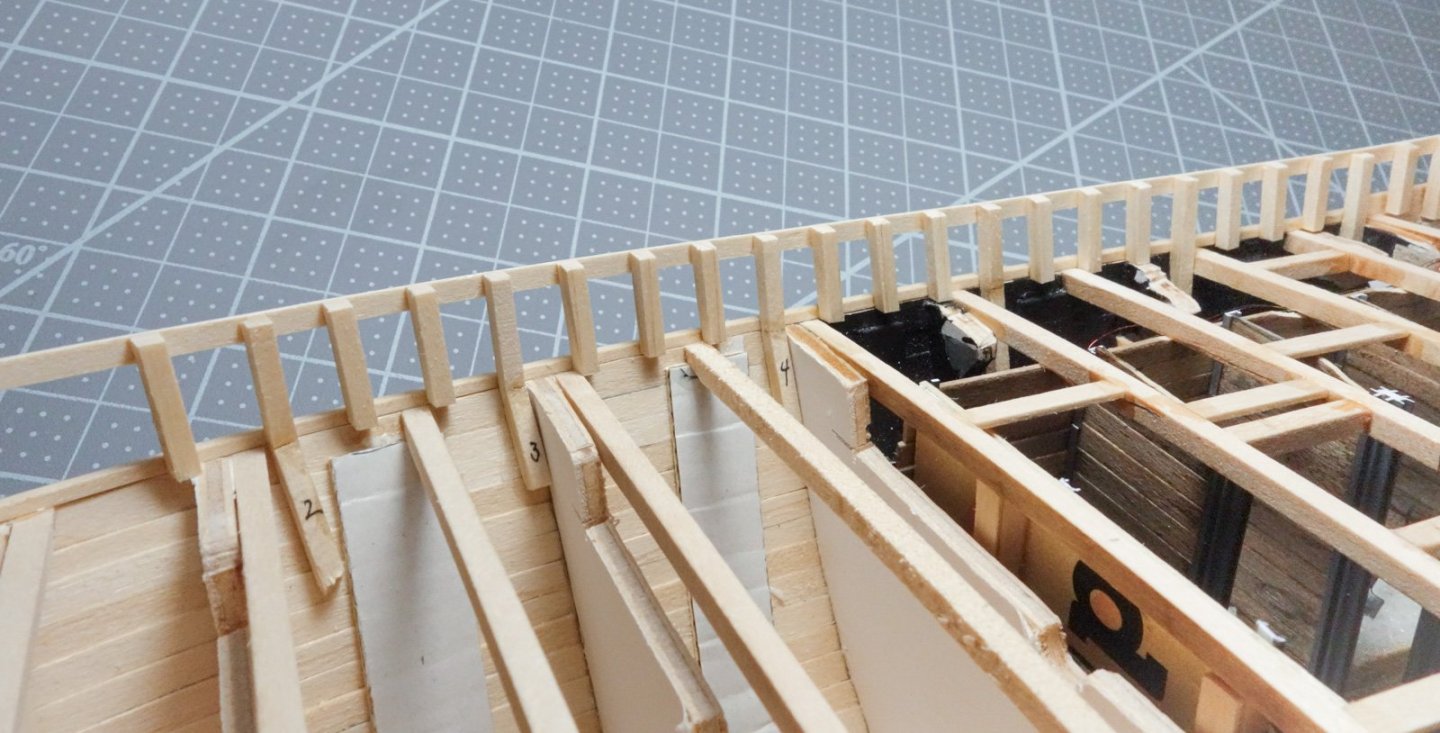
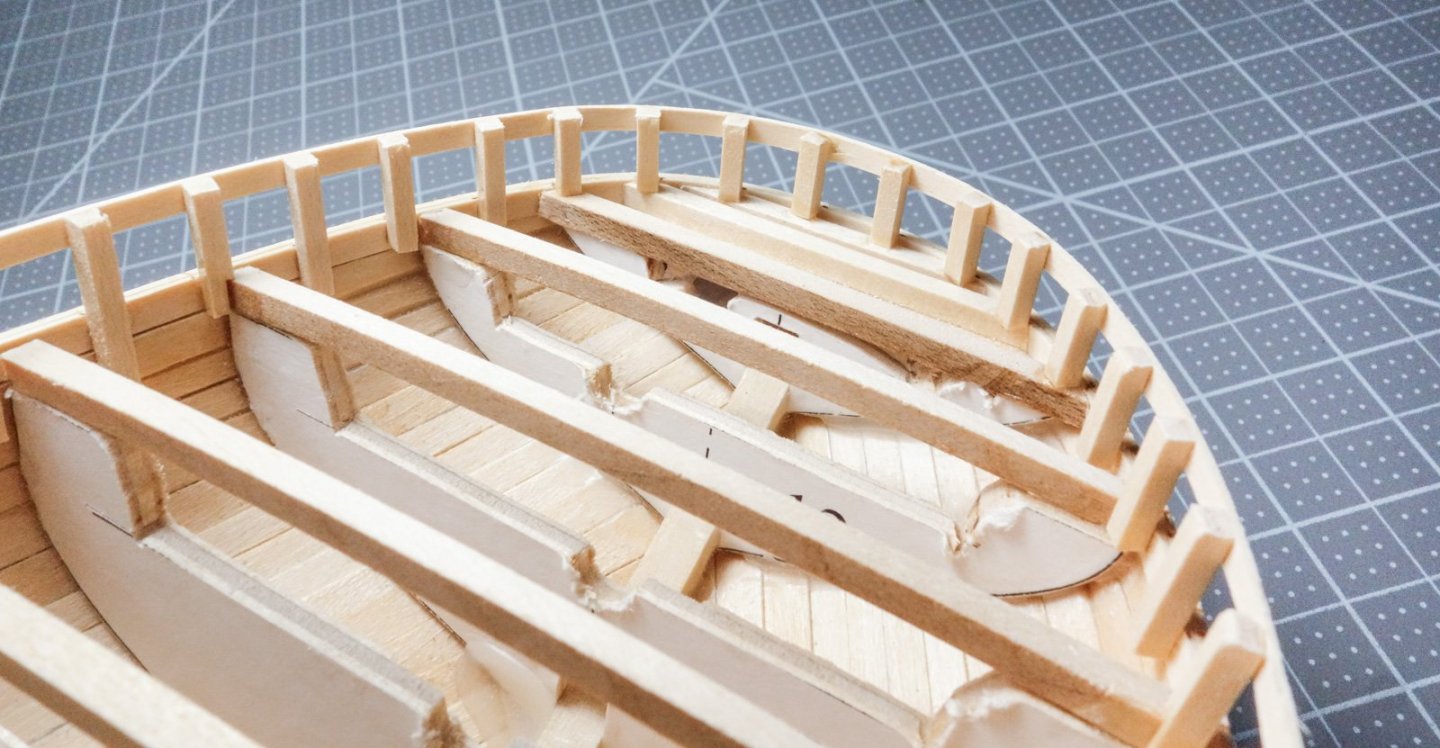
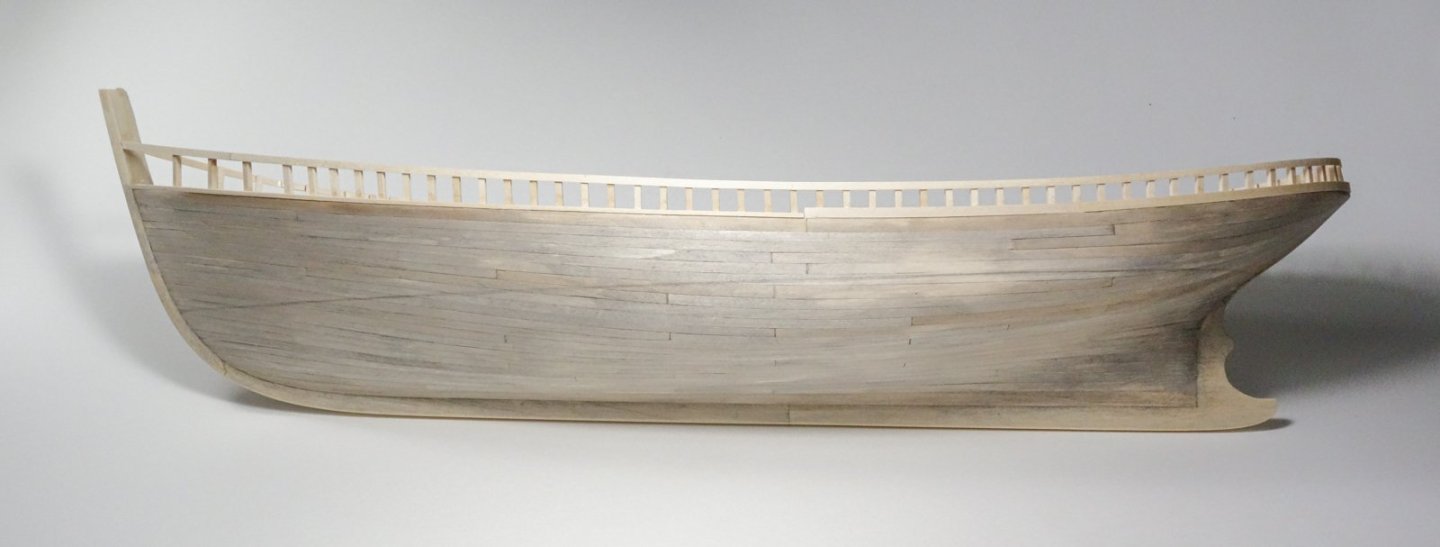
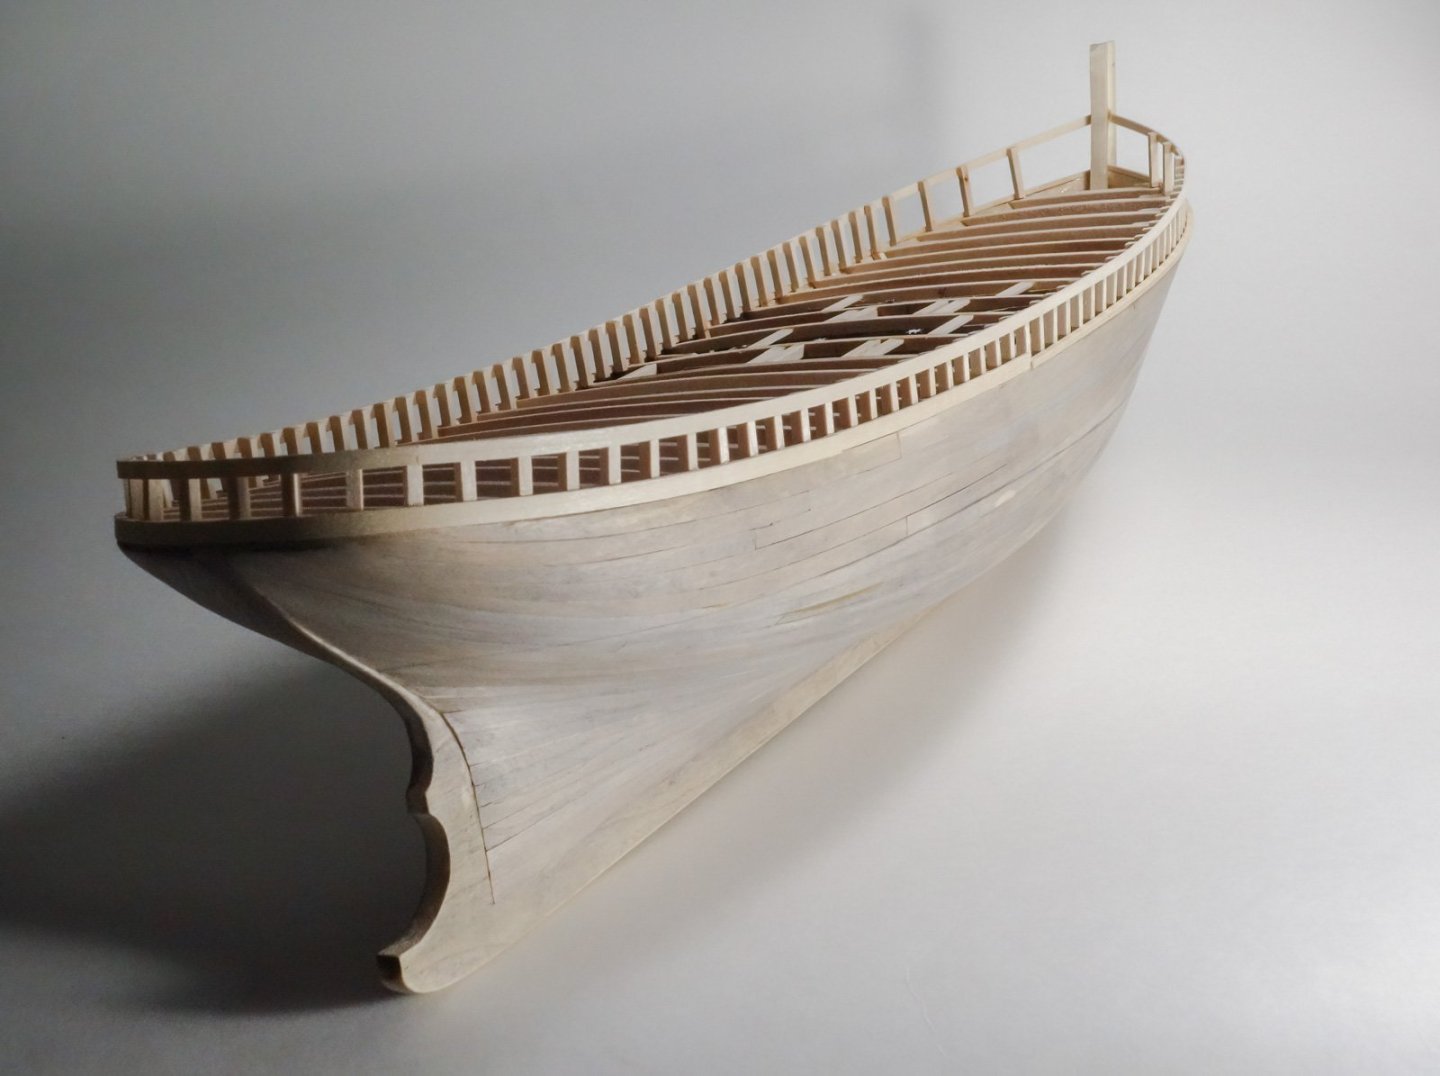
Greetings all, Thanks so much for the wonderful comments, the thumbs-ups and for finding the time to visit this build. Bulwark Stanchions Before work could begin on the stanchions for the bulwark, I first had to finish up from the last post by adding five more deck beams where the span between existing beams was too great. With that done, I started on the stanchions which the drawings refer to as the “top timbers.” This boat has 106 top timbers and are spaced about every 18” (45.7cm). In full disclosure, there are several details of these timbers that I didn't model because I felt there would be little return on the effort invested. First of these details is a taper of the timbers from 4.75” (12cm) at the deck to 4” (10cm) at the underside of the rail. In 1:48 that's a difference of .016” (.39mm), so I used wood that doesn't taper and scales to 4.5” square instead. Also, the drawings call for chamfered edges on the inside facing corners - very nice, but no. The most glaring omission is that I didn't bevel the outside and inside faces as they approached the stem and stern. In the image below, the top timbers below the red line are obvious enough that I should have beveled them, but I didn't. Forward of the blue line will be a raised “whaleback”, so those extremely beveled timbers are all hidden. This is the profile of the whaleback (green) visible above the main rail (red). And the same thing aft, but there are no beveled timbers as they round the stern and there is little discernible bevel moving forward through midships. If it sounds like I'm constructing a justification for not beveling any of the top timbers, you're onto something. I made four off-model stanchion bulwark assemblies. One each for the port and starboard bulwarks forward of station #7 and two more for P/S aft of station #7. I created a template for each assembly based on the distance between bottom of deck at side and bottom of main rail. The top timbers are at a right angle to the waterline, not the rail. The angle of bend at each body plan station is found. The upper waist strake for the bulwark section is bent to the proper arc and then attached to the template with double-sided tape. The top timbers are then glued to it. The section of top timbers is affixed to the hull. Note that a strip of wood equal to the deck thickness has been glued to the upper most hull strake. The bottoms of all the top timbers are glued to its inside edge. The final eight timbers at the stern were placed individually. The scant number of timbers in the bow area were placed willy-nilly to temporarily hold the waist strake in its proper orientation until the bulwark is complete and the whaleback structure starts taking shape. Next up – finish planking the bulwark, installing the inside rail stringer and fitting the covering boards (oh boy!). Be safe and stay well. Gary


-
Excellent progress on the base, Glen. I particularly like the front row of pilings, those sticks really look fantastic! Gary
- 235 replies
-
- 5
-
-

-
- Banshee II
- Bottle
- (and 1 more)
-
Beautiful, precise and clean work, Valeriy! Once again. Gary
-
Great progress, Keith. I really like the slide hammer and a nice start on the donkey - not wonky at all. Gary
-
Gunboat Philadelphia 1776 by tmj
FriedClams replied to tmj's topic in - Build logs for subjects built 1751 - 1800
I enjoy unusual build subjects, so your Philadelphia gunboat caught my eye. Best of luck on this interesting model. Gary -
For what it's worth, Keith, I like Druxey's idea of a double layer solution. On a previous build, I used 1/64" aircraft ply for the planks on a lapstrake boat and found the material to be very flexible yet tough as nails. Gary
-
Excellent job coloring the sacks, crates and other accessories, Eric - they look great. I particularly like the coal bin and the fact that it's the real thing from your property is an added plus. Your model has a nice organic rustic feel to it - very realistic. It suggests the rough service these working boats performed without over doing it. Looking forward to the final display. Gary
-
What he said! Beautiful work, Paul. Gary
- 201 replies
-
- 6
-
-
-
- Oyster Sharpie
- first scratch build
- (and 1 more)
-
Beautiful hull, Keith - very nice. Gary
-
Sweet work, Gary - love the wheel rims. And everything else, too. Gary
-
Excellent start, Keith - terrific work! As already stated, you're moving quite fast on this barge construction. This suggests to me you are really enjoying the build, which is great and as it should be. I look forward to future updates. Gary
-
Congratulations on starting a new project, Rob, and what a beauty she is. I've popped in and out of your previous builds, but this will be first I've got in on from the beginning. With your passion for clippers, I know this will be a great ride. Good luck. Gary
-
Congratulations on setting her in the bottle, Glen. Interesting process and your videos make it understandable. Terrific work! Smoke, eh? Gary
- 235 replies
-
- 4
-
-

-
- Banshee II
- Bottle
- (and 1 more)
-
Congratulations on finishing this wonderful model masterpiece! This log has been a real tour de force in miniature modeling techniques, so thanks for demonstrating these and the unique materials that you used such papers, etc. A beautiful model display and I look forward to the "glamor shots." Gary
-
This is complex model building, Andy, and what a great job you're doing. Your detailed CAD work really illustrates what is going on in the stern and of course the on-site images of the full-scale reconstruction are always a treat. "The good news is that the Trust have been successful in getting a further National Heritage grant to complete the replacement of the deck, which means Vigilance will now have a fighting chance of another 100 years afloat! Excellent! Gary
- 174 replies
-
- 3
-
-
- Vigilance
- Sailing Trawler
- (and 1 more)
-
Well, Mr. Black, you have made my day. This is a fantastic project, and I can't wait for you to get started. This driver along with barge and dock will make an amazing and interesting display. Best of luck on this new project! Gary
-
Your paddle wheel turned out great as well as the connecting rods and cams. I think caving to peer-pressure on the connecting rods turned out to be a good call. Beautiful work, Eric - especially for being such a young lad! Gary
-
I haven't read all of your earlier SIB logs yet, but I've seen a few of them now and as great as they all are, Banshee II is fast becoming my favorite. You mentioned that one of your goals is to get better with each build and in my humble opinion this model is elevated work - bravo Glen! Can't wait to see it surrounded by glass. Gary
- 235 replies
-
- 4
-
-
-
- Banshee II
- Bottle
- (and 1 more)