tlevine
-
Posts
2,033 -
Joined
-
Last visited
Content Type
Profiles
Forums
Gallery
Events
Everything posted by tlevine
-
Malazan, do you have a first name? For the central keel portion, a simple 90 degree scraper will suffice; think single edged razor. Remember, the idea is to give your planking a secure notch to fit into. Technically, the exact angle will change along the entire course of the keel but that isn't critical until you get to the deadwood area (aft) and the bow area. Once you do that area, go to the notched areas on the stem and deadwood. Use a French curve to guide your Exacto knife as you slowly cut into the wood. (Very inexpensive curves can be bought at craft stores or Amazon (https://amazon.com/Pacific-Arc-French-Curve-Set/dp/B073V4ZRJL/ref=sr_1_9?crid=1RYU13670RPMZ&dchild=1&keywords=french+curves&qid=1633618939&sprefix=french+%2Caps%2C256&sr=8-9). After you have those areas done, connect the V-shaped and notched areas by carefully removing small amounts of wood with your knife, finishing it with a sanding stick (a scrap of wood with sandpaper glued onto it). As I have said elsewhere, practice off the model. A sheet of basswood from Menard's is cheap.
-

Planking Question
tlevine replied to Malazan's topic in Building, Framing, Planking and plating a ships hull and deck
Based on your post in the Half Hull Project sub-forum, let me add some comments. On that hull, I spaced the bulkheads close together to allow you to easily plank with prototypical planks of 15-25 feet. As this is a Continental ship, there was access to taller, wider, old-growth trees than in Britain at that time. The bulkheads are also thick enough to provide sufficient gluing surfaces. Also, I usually put a tiny bead of glue on the long edge of the plank to secure it to the adjoining plank. If you are spiling, it is very difficult to run an accurately cut plank the entire length of the hull. If you are building a kit with two layers of planking, it makes sense to run the first layer the full length of the hull and then "correctly" plank the second layer. Most importantly, practice off the model. Once you are comfortable, then go back to the model to cut the rabbet. I think you will discover that it is not as difficult as you fear. -
Don't stress over it. May I suggest practicing with some scrap wood? Go to your local craft or home improvement store and buy a sheet of basswood. Draw the shape of the hull on the basswood and either with a coping saw or an Exacto blade, cut on that line. It does not need to be perfect as the two pieces will mate together. You now have two sides of wood to practice on.
-
Thanks for the information, Mark. Just pulled the trigger. For those of you on this side of the pond, you can buy it through Amazon.
-
If anyone has the original Sea Watch version and this new version from Pen and Sword, I would be interested in knowing the difference between the two. I already own the Sea Watch version.
-
2022 MODEL SHIPS CALENDAR
tlevine replied to kurtvd19's topic in NAUTICAL RESEARCH GUILD - News & Information
And then there are aural and nasal speculae...

-
Folks, the bottom line is this, the NRG leadership investigated this last year. The Guild not interested in publishing this manuscript. Mr. Davis has not even been on MSW for ten months. There is no need for further discussion.
-
Beautiful as always, Karl. What is next?
-
soldering brass cannons
tlevine replied to rich-mar's topic in Metal Work, Soldering and Metal Fittings
If you are using silver solder, a soldering iron is of no use. You need the higher heat only attainable with a torch. Most silver solder paste has flux in the paste; actually, the flux is what makes it a paste. -
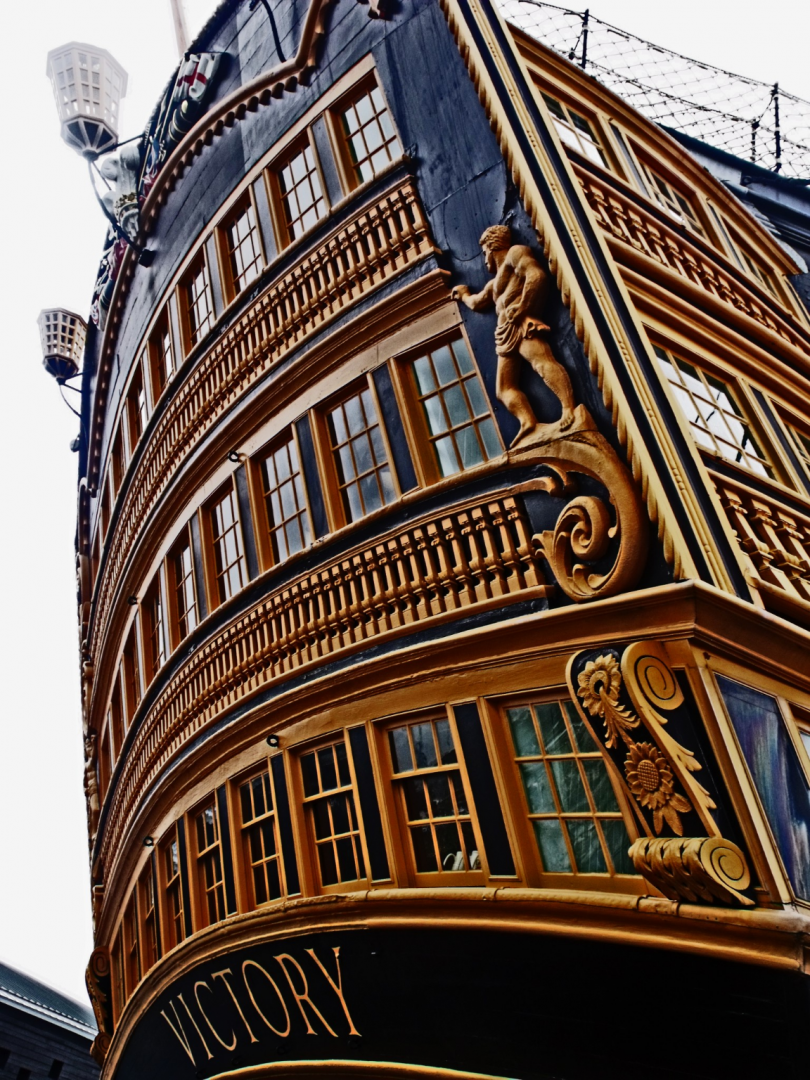
Don, your work is great. I have a question about the paint scheme on the quarter galleries. You show ochre paint extending onto them. When I built her several years ago, my research showed that they were completely black, as seen in the attached photo. Is this an era-specific schema?
- 218 replies
-
- 5
-

-
- Victory
- Caldercraft
- (and 1 more)
-
Welcome. Never be concerned about your skill with English. We are all here for the same reason... love of our hobby.
-
Greetings From Beaverton, Oregon
tlevine replied to datadiscovery's topic in New member Introductions
Welcome, Pete. If you are a member of the NRG, in addition to MSW, let one of the mods know so you can have the logo added to your name. -
Swan-Class Sloop by Stuglo - FINISHED - 1:48
tlevine replied to stuglo's topic in - Build logs for subjects built 1751 - 1800
My suggestion is to follow the construction sequence as written in TFFM. That's what I did with Atalanta and never regretted it. -
Love it!
-
Thanks to everyone for the likes. Thank you, druxey. Your explanation was much more explanatory than anything I would have said. The fashion piece was a pain to fabricate because of the compound curves. But by following the little-bit-at-a time approach, I ended up pleased with the result. As you can see in the picture, the model does not have a fashion piece. In fact, the aft ends of the hull planks are unusual; typically the lapstrake would have gradually diminished to a smooth surface.
- 277 replies
-
- 10
-
-
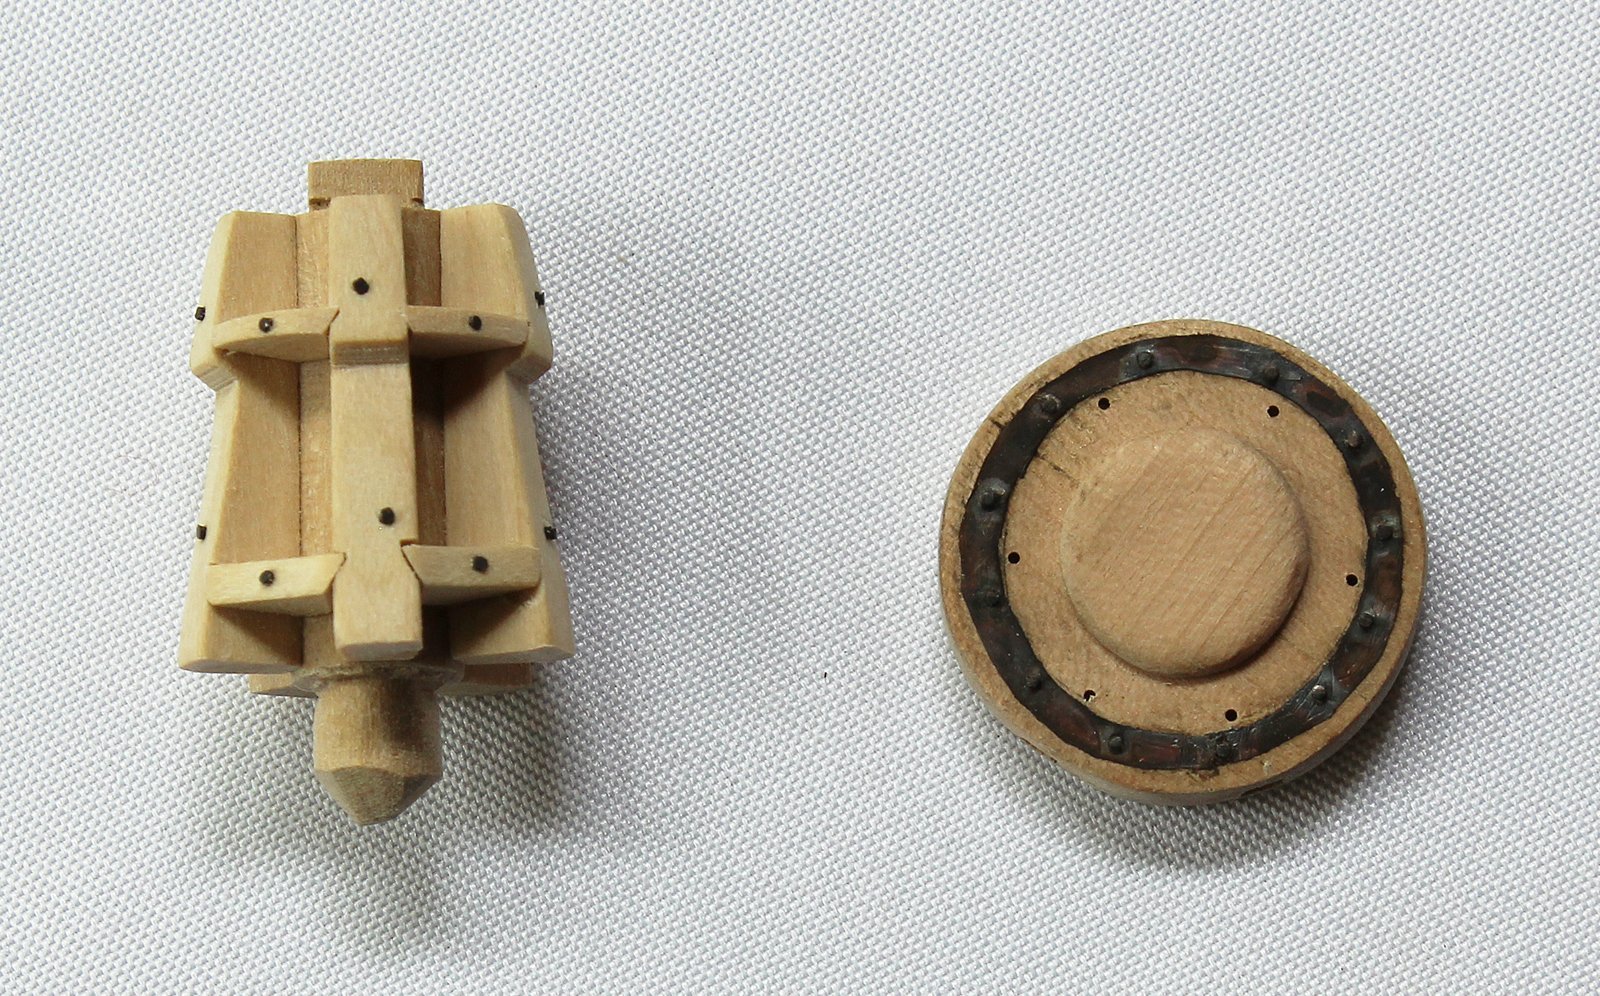
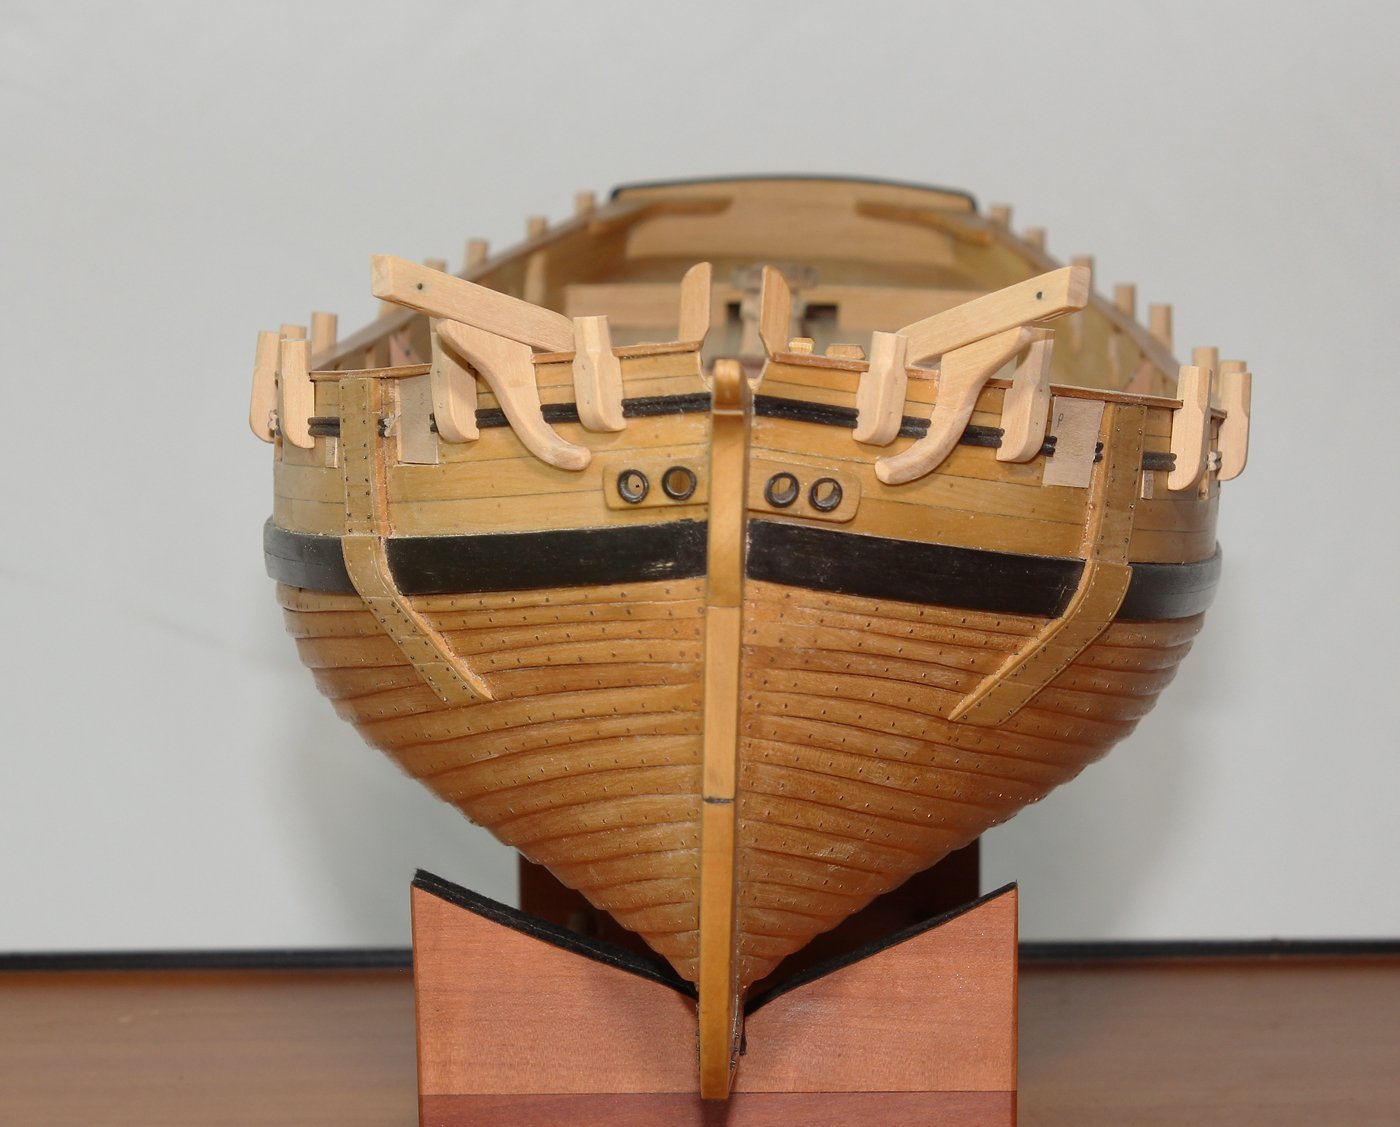
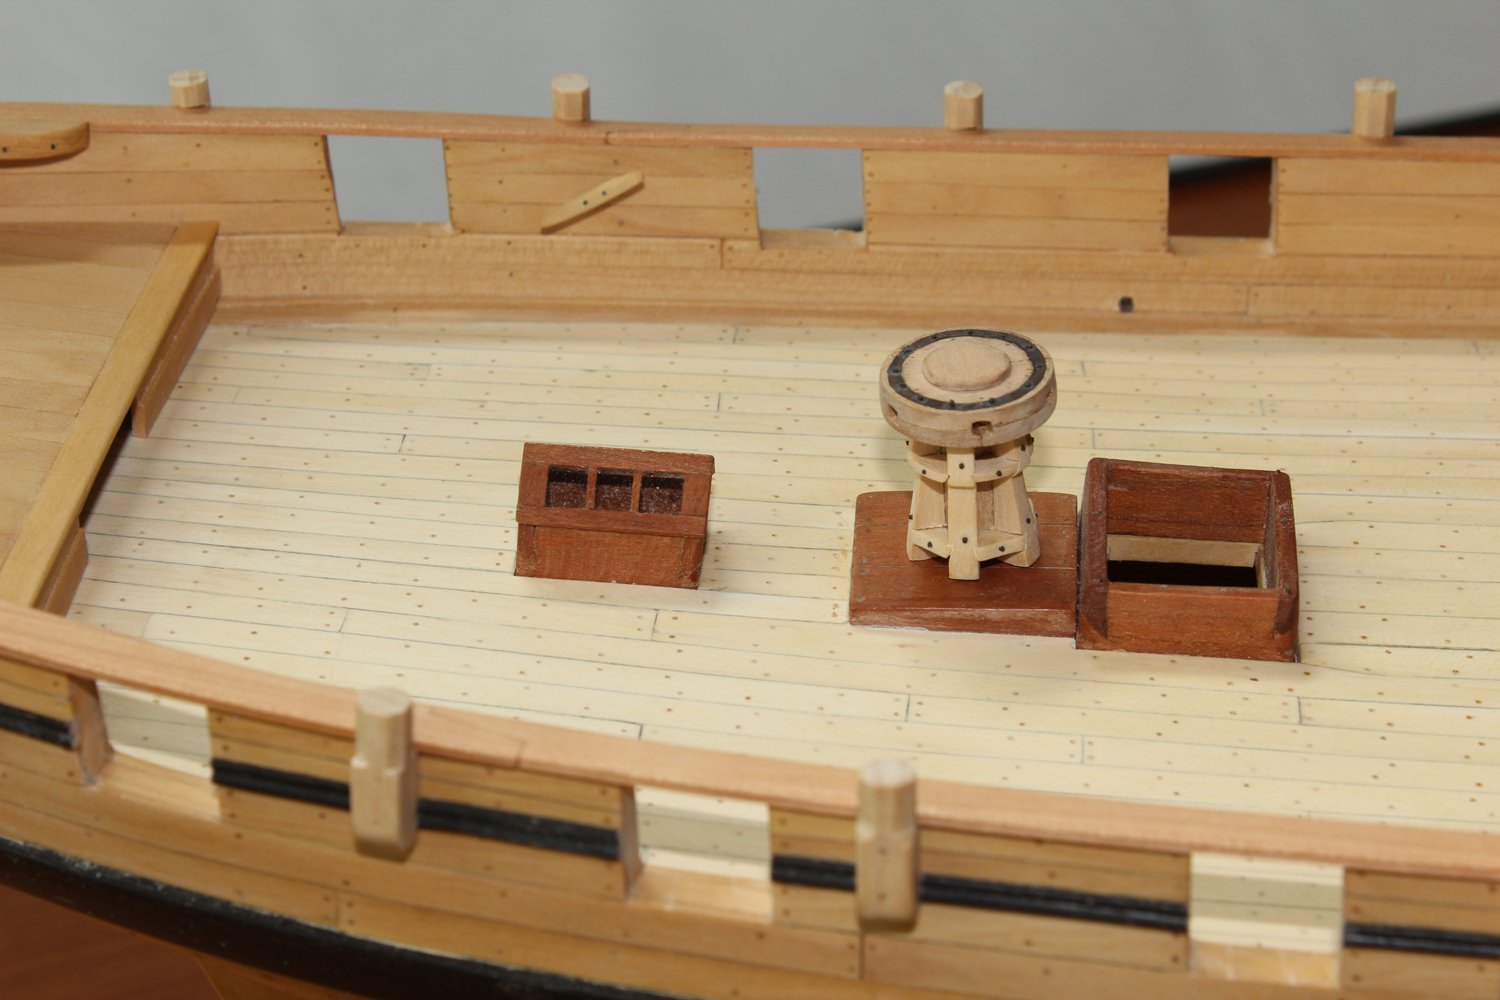
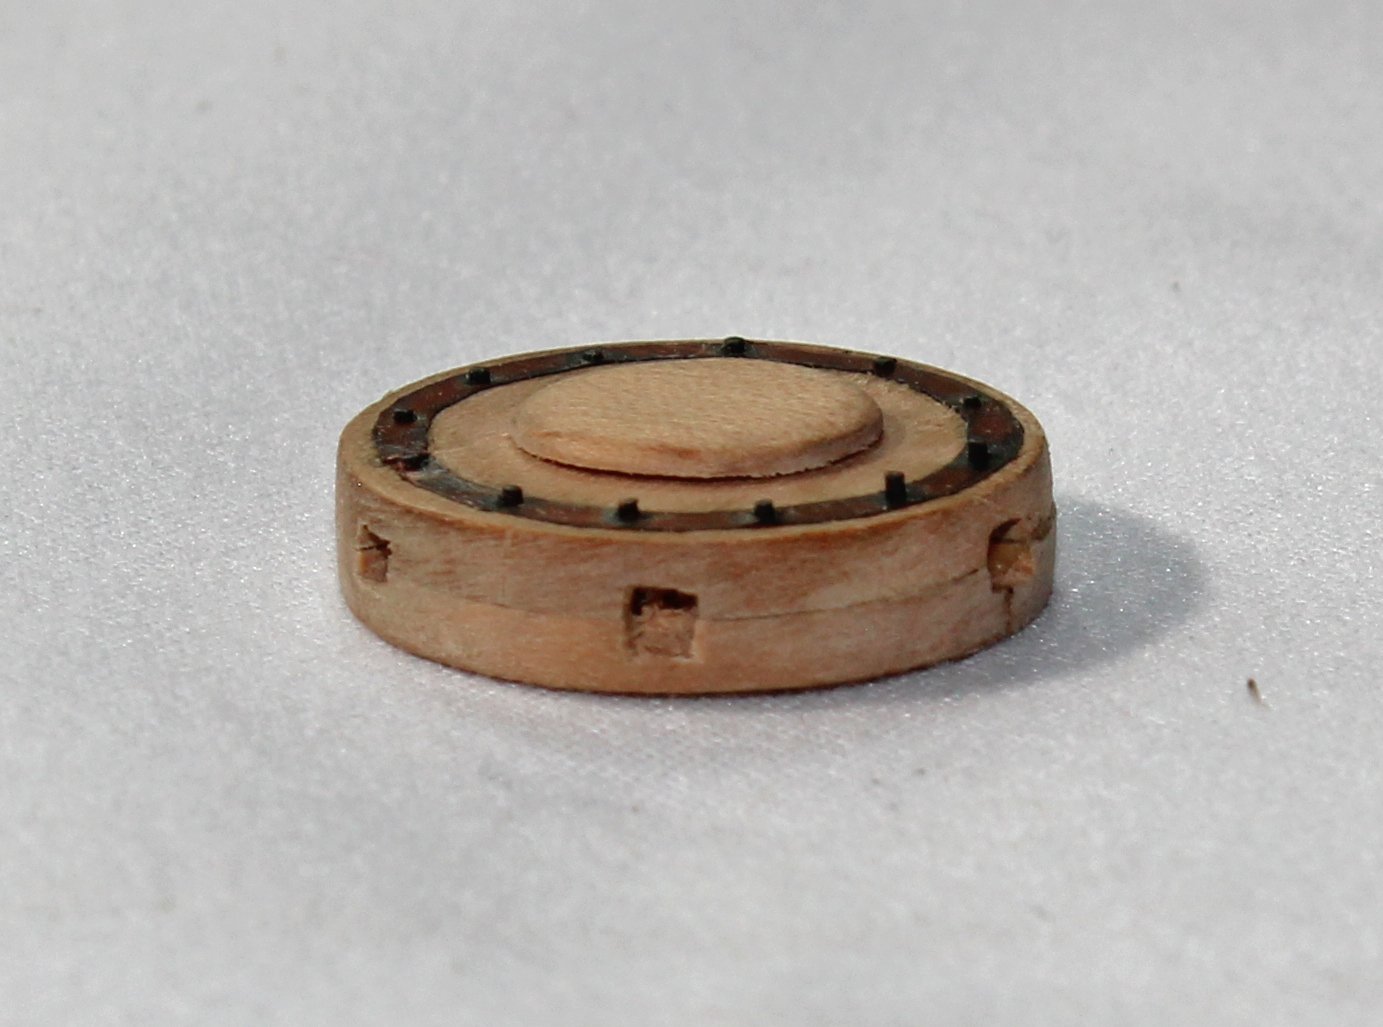
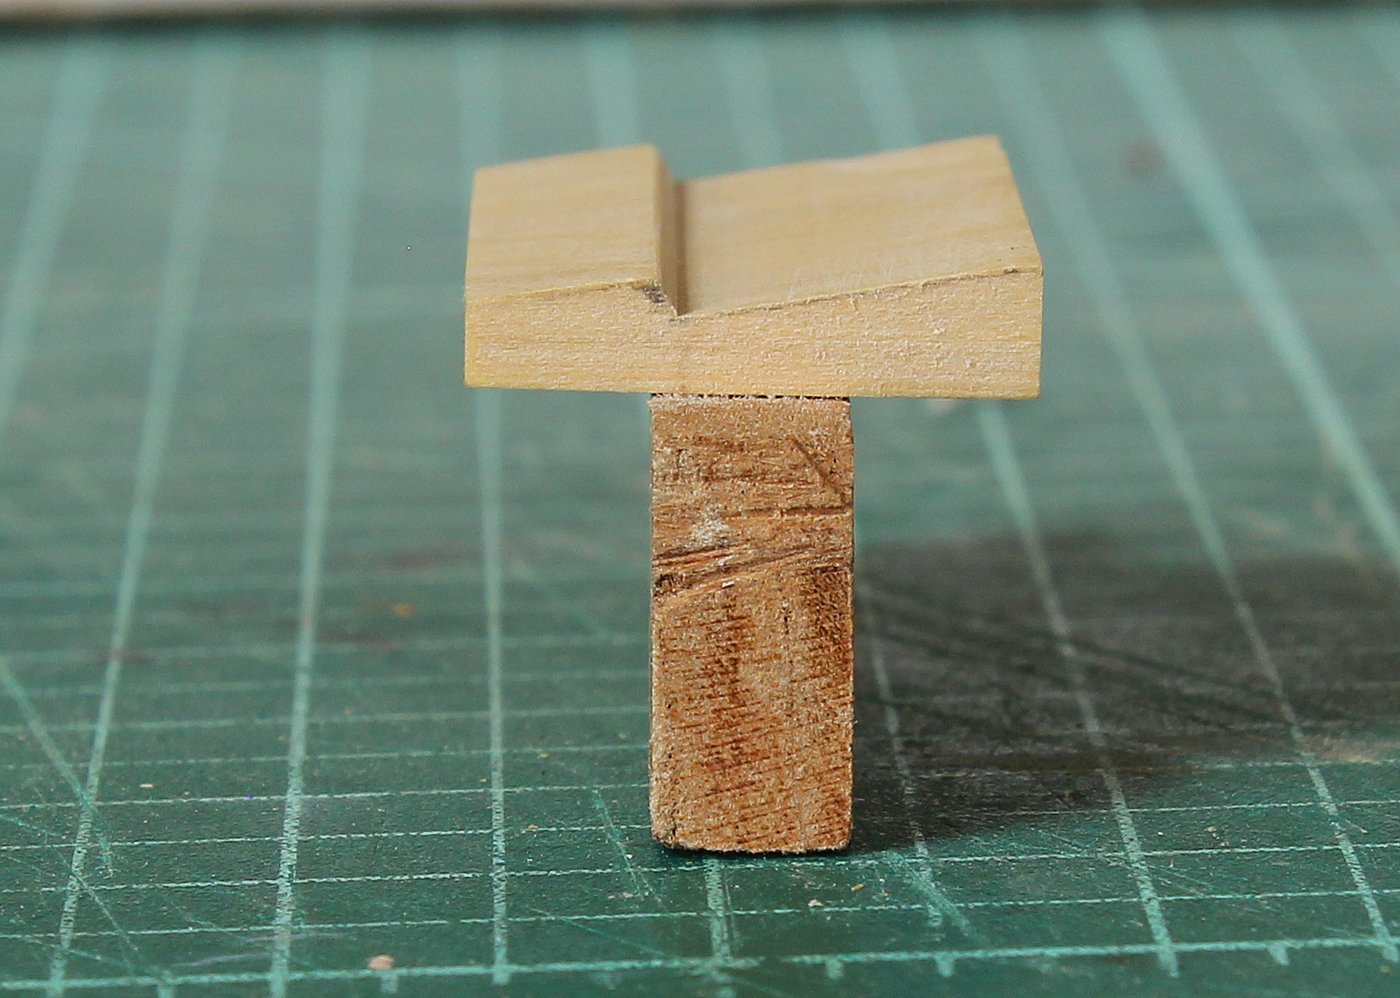
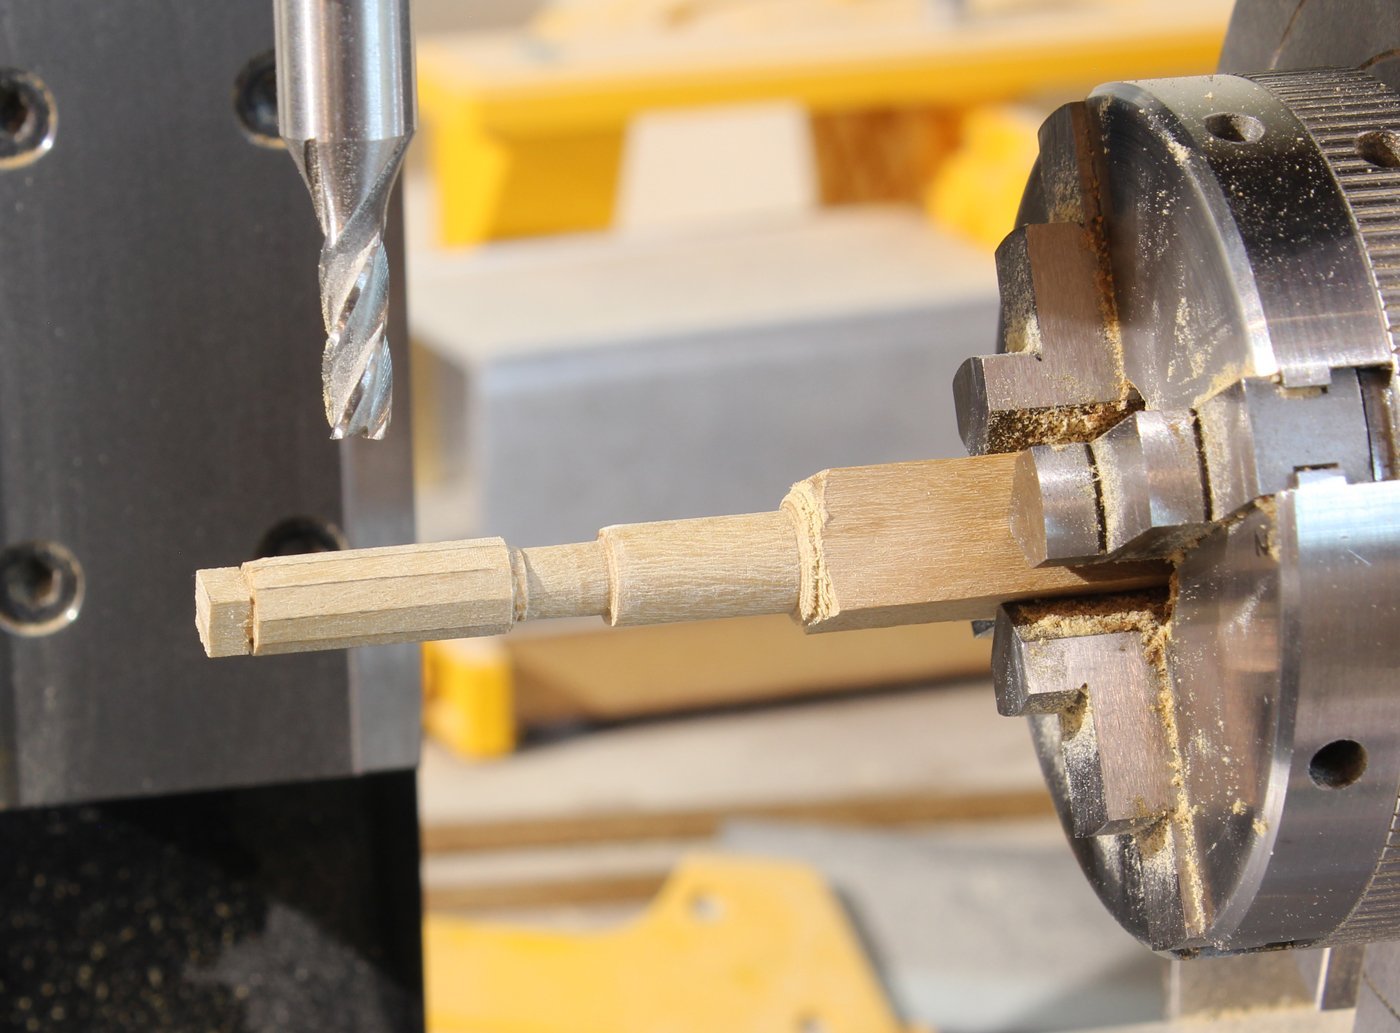
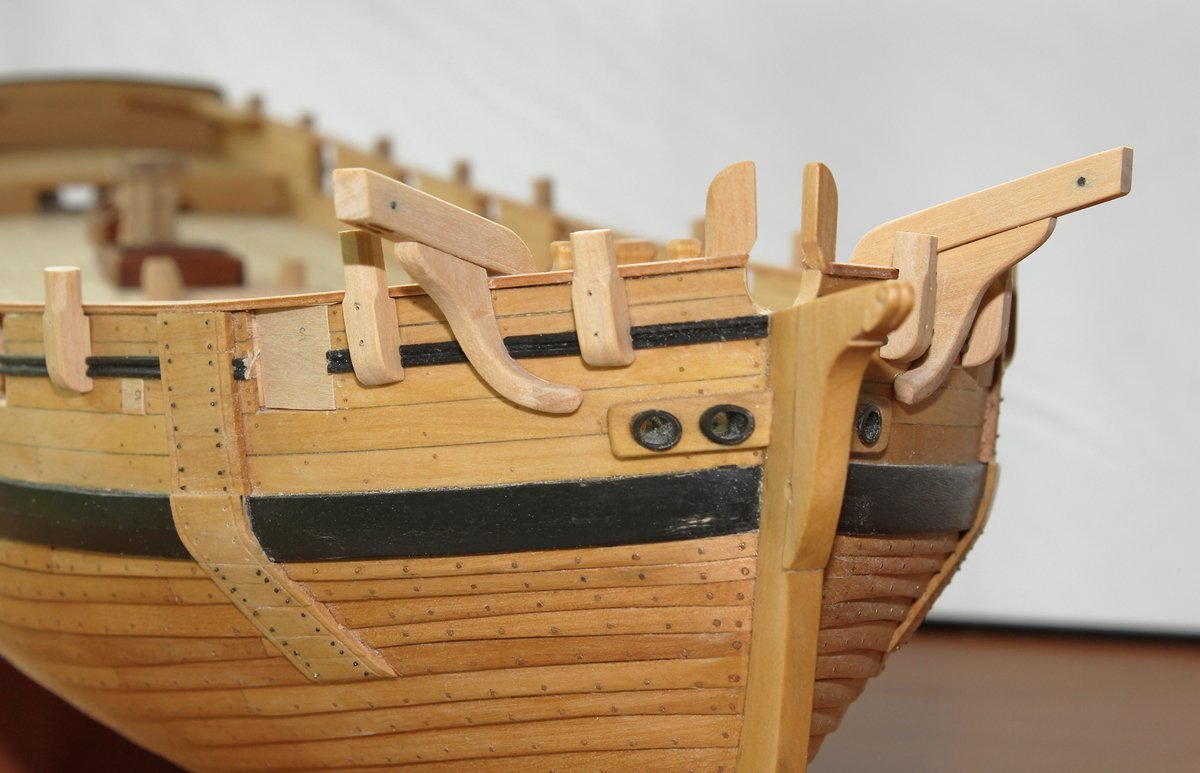
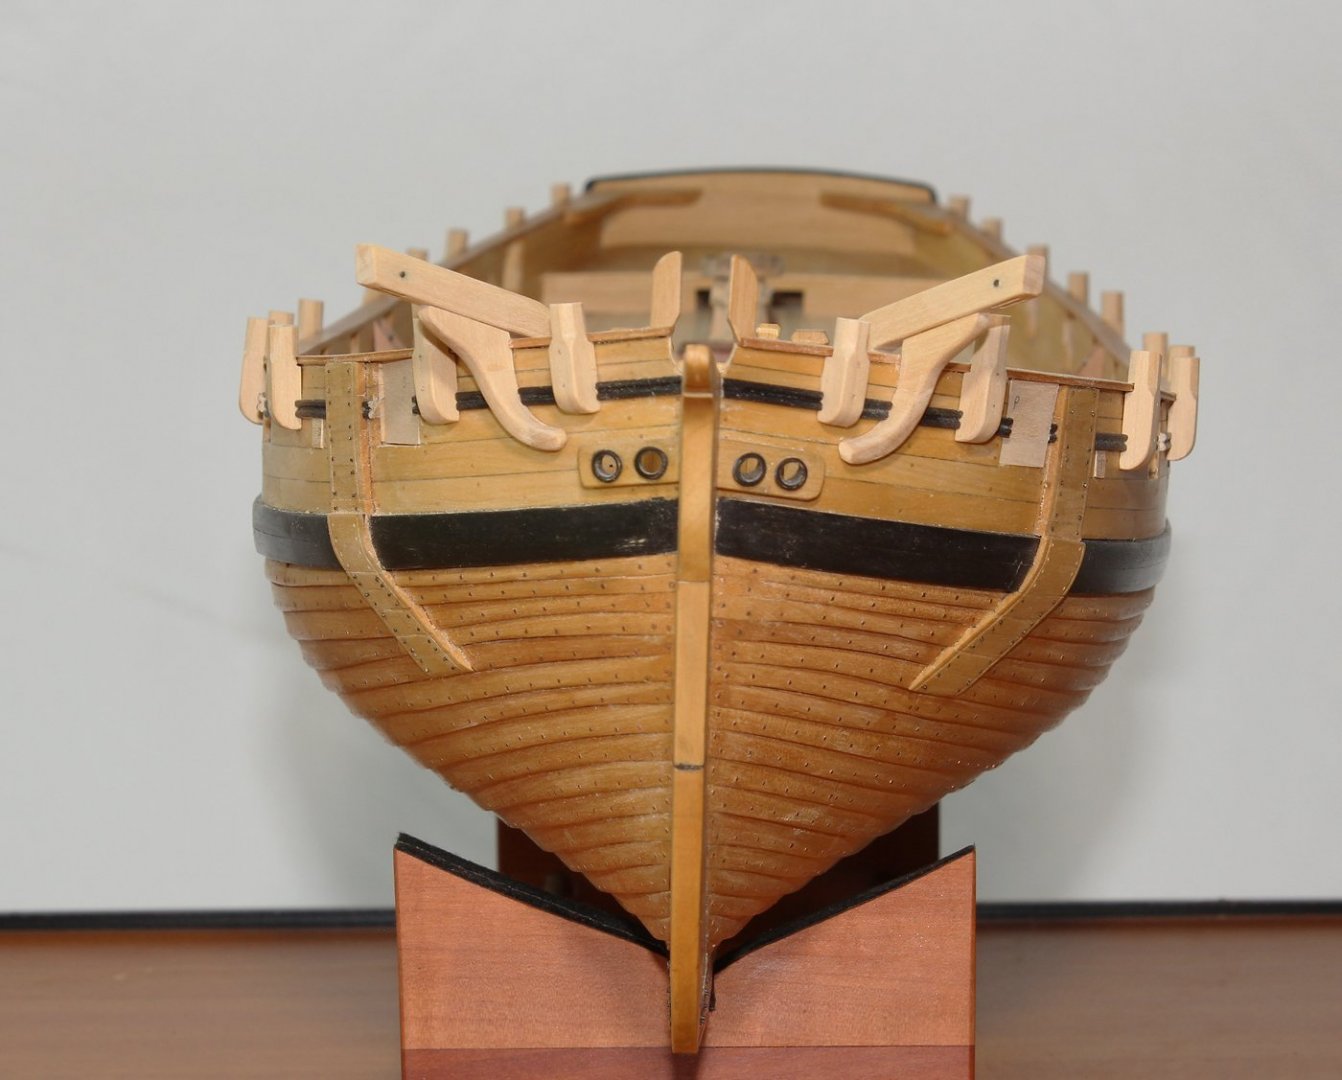
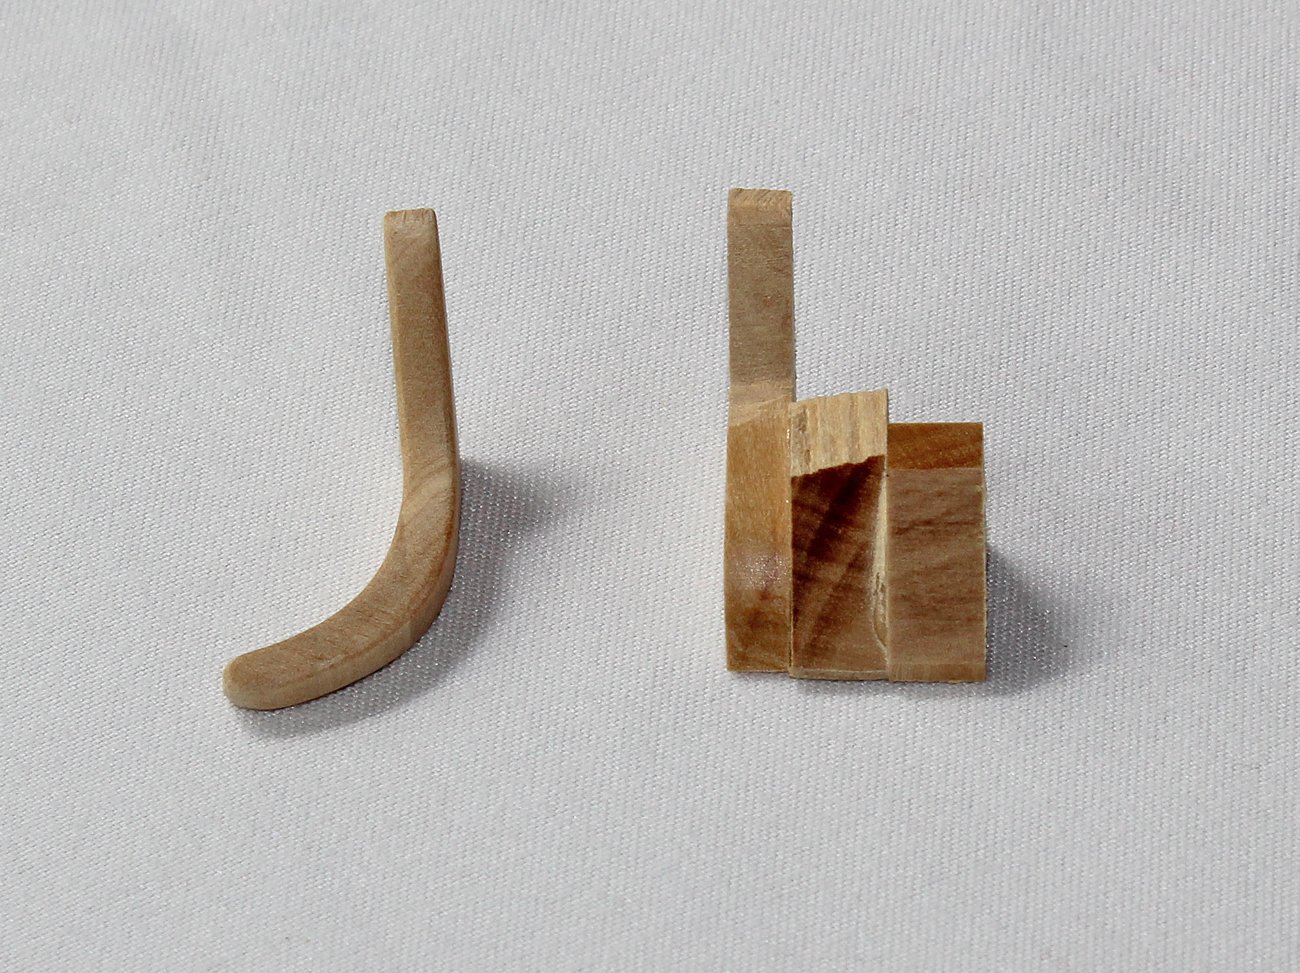
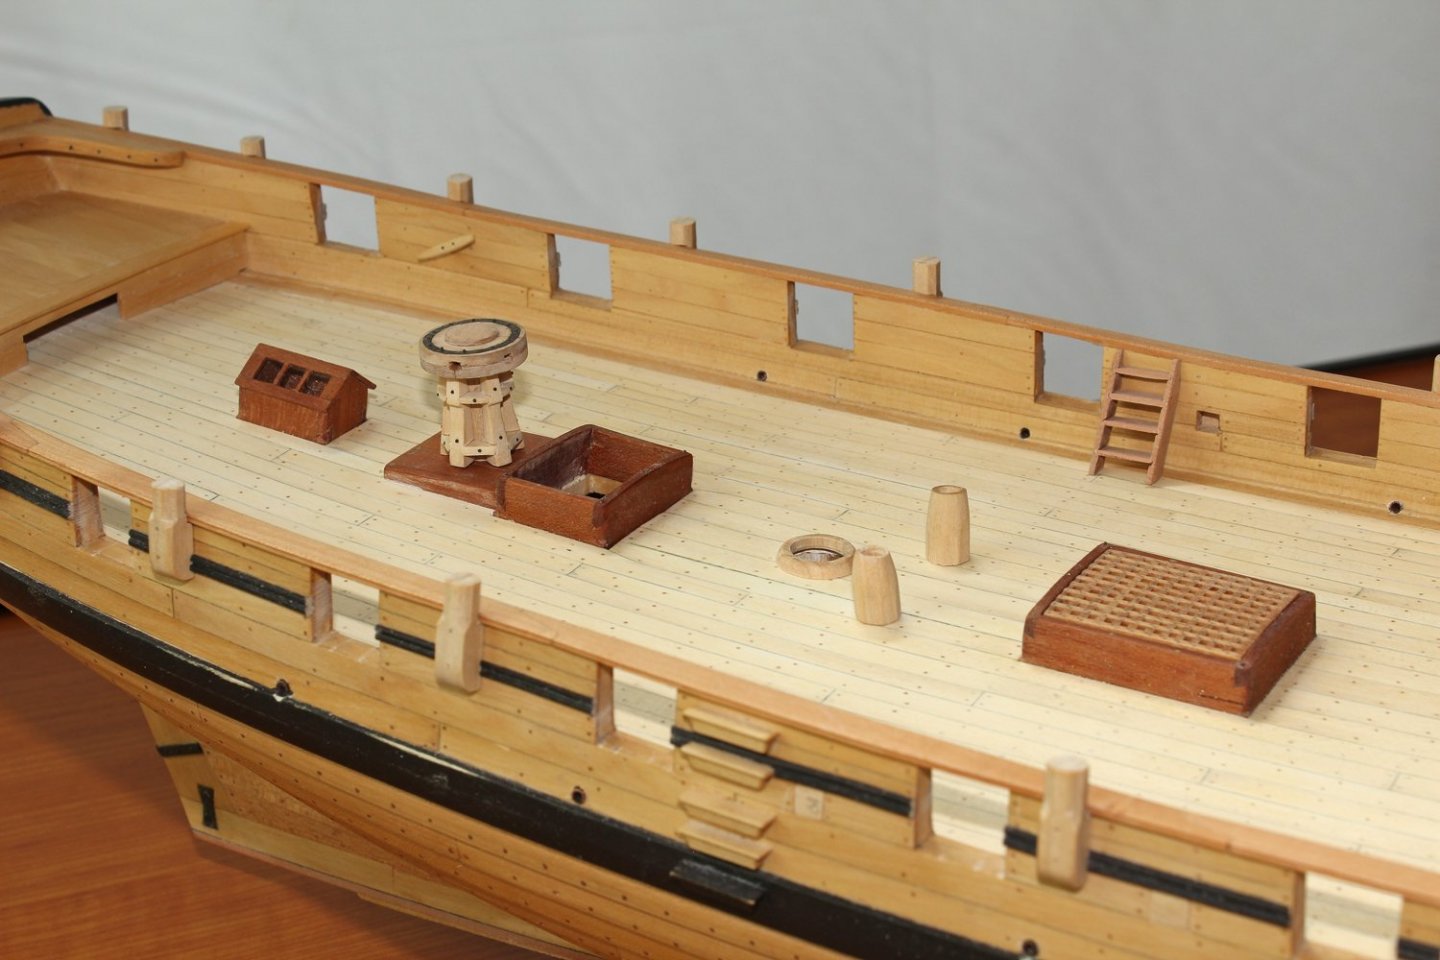
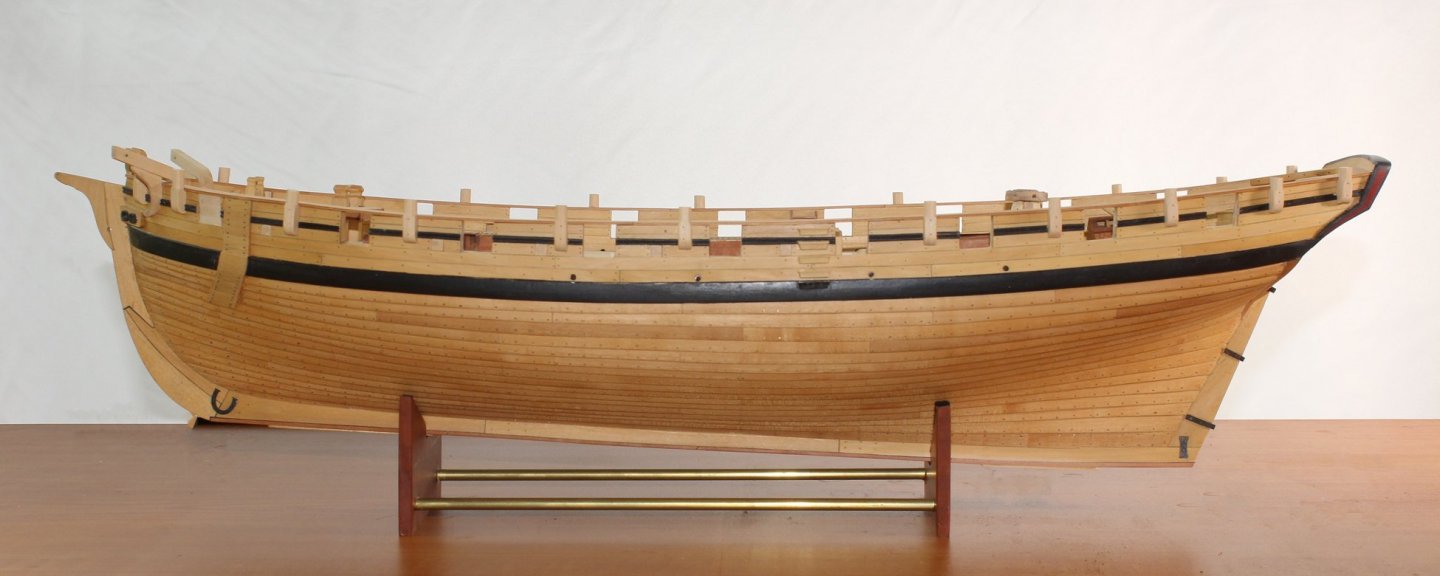
It has been almost two months since my last post but I have been busy doing small projects. Having recently completed a capstan in 1:16 scale, it was time to duplicate my efforts at 1:48. If you have purchased the Capstan Project, I used the approach outlined in the advanced version. The capstan on a ship of this size and from this era has five whelps and six bars. I turned the spindle in a lathe and then used a mill to make it ten-sided. The pencil marks are to help the edges stand out. The whelps were glued-up as a sandwich; the thickness was the maximal thickness of the whelp. The sandwich was then glued to a block of wood, which was put into the mill vice. The face was milled and the whelps were separated by soaking in isopropanol. I made a few extra to allow for mistakes. The whelp is wider at the bottom and on its face. The final shape was achieved with a sanding stick. The drumhead was made from four semicircular pieces and a cap. I used thin adhesive-backed copper sheet as the iron ring. I used liver of sulfur to give the copper a patina. After the whelps were glued to the spindle, the chocks were made and installed and the bolts were installed. The iron ring looks much better than the photo would suggest. And the final result... The next item I needed to address was the decorative molding. The plans show the molding at the level of the bottom of the gunports. The model shows the molding halfway up the gun ports. The plan shows the bottom of the oar ports raised by the width of the molding. The model shows them at the same level as the gun ports. As it turned out, I (accidentally) built them at the same level, as shown on the model. If I left the molding where it is seen in the plan, it would have gone through the oar ports. So my choices were to rebuild the upper works to lower the oar ports or raise the molding, as seen on the model. I went to the RMG site and looked at other models with oar ports; they were most commonly positioned at the same level as the gun ports. Therefore, I decided to move the molding instead of the oar ports. The ship has eleven swivel gun mounts on each side, although she only carried eight guns. These were located per the plan. They were notched to fit over the rail. Bolt holes were drilled. The metal work will be installed later. The cathead and cathead knee were made next. The cathead was sawn from a single piece wood. Two sheaves were installed. The cathead knee was made up of three pieces, as seen in the picture below; the final shape was attained with sanding drum and disc. The cathead and knee were then temporarily installed. No finish has been applied to either the swivel posts or the cathead. As you can see in the third picture, the tops of the swivel posts have not been shaped yet. They will be horizontal across ship and will parallel the shear when seen from the side. Also temporarily fitted are the first oar port and gun port covers. They will all be hinged horizontally. Other small items which have been installed are the cleats (three per side) and the mast coats. The entry ladders, pumps and capstan are temorarily in place.


-Warship-Brig-Sloop-14-guns-1a.jpg.ac7b3c0252e9b36bea34f3920ccf6ab1.jpg)
- 277 replies
-
- 20
-
-
Looks very nice. Your setup is a lot fancier than mine. I got lucky and found that the block of wood that holds my end mills was just the right height for the vice and live center.
-
The grating looks great. As far as which wood to use, I would suggest using whatever you have a few scraps of. Even at 1:16, they don't use up a lot of wood. (Or at least that is how I decided.)
-
NRG VIRTUAL WORKSHOP - AUGUST 21
tlevine replied to kurtvd19's topic in NAUTICAL RESEARCH GUILD - News & Information
Thanks for being there. -
Thanks for joining us this morning. The redo looks much better. Just remember, isopropanol goes on the model; ethanol goes down the hatch.
-
Looks very nice. You will also find that the boxwood is easier to make grating out of, especially at smaller scales.
-
NRG Capstan Project
tlevine replied to tlevine's topic in - Build logs for subjects built 1751 - 1800
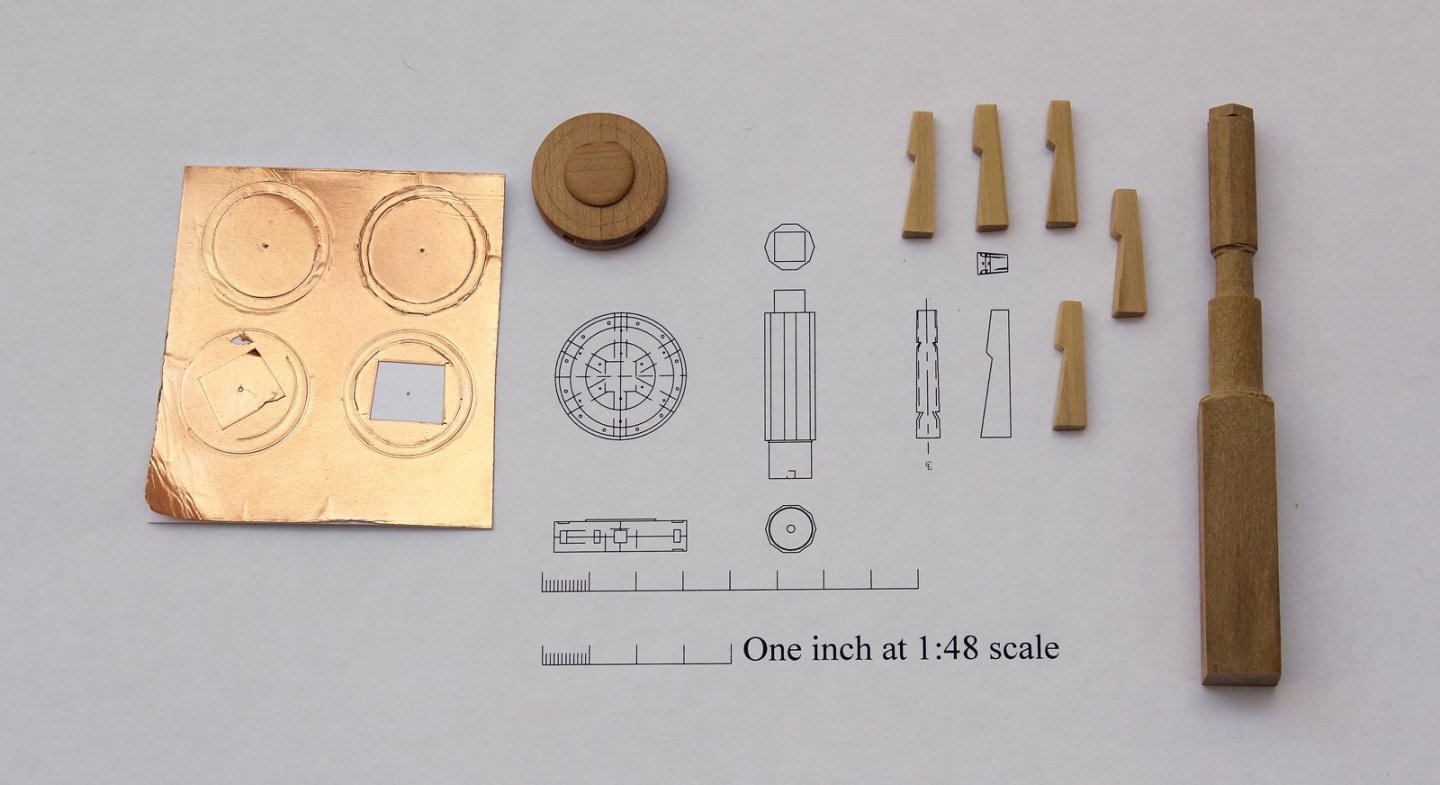
Justin, three sheets have changes in them. The changes are referenced on the pertinent sheets. Intermediate version- Part 104 on sheet 13, Part 012 on sheet 15 and sheet 23. Advanced version- Part 104 on sheet 13, Parts 012 and 013 o sheet 14 and sheet 23. -
They look great...better than mine! I admit that my milling skills are not the greatest. I hope I do not disappoint you on the 21st. The last part of the presentation criticizes my first "real" model...and I am not very charitable to myself.
-
Although I own an electric plank bender, it rarely sees any use. I have switched over to a heat gun designed for circuit board manufacture. The heat is directed to a small area and there is no scorching of the wood.
-
The bad drawing has been modified. I am having others look at it for confirmation.