HOLIDAY DONATION DRIVE - SUPPORT MSW - DO YOUR PART TO KEEP THIS GREAT FORUM GOING! (Only 36 donations so far out of 49,000 members - C'mon guys!)
×


lb0190
-
Posts
686 -
Joined
-
Last visited
Content Type
Profiles
Forums
Gallery
Events
Everything posted by lb0190
-
 We lived in Lancaster Calf for 11 years, it's also hazardous to your wallet . .
- 2,191 replies
-
- 2
-

-
- confederacy
- Model Shipways
- (and 1 more)
-
If I were to compare Morope to Chuck's Syren rope, I would compare the following characteristics, color, cost, side by side looks, stretching, size, and unraveling. I strongly believe anything Chuck endorses is top grade, but it would be interesting to hear the opinions of a few people who may have conducted a side by side comparison.
-
Sjors, The platforms look very good! Thanks for posting the pictures.
-
Status update - (sorry Sjors no pictures I finished five rows of planking on the port side, band A. When I started on the next row at the stern I realized how poorly I installed that aft plank on row five. This location was where the panks start taking that axial turn to lay flat horizontally. Somehow I missed twisting the plank, resulting in the plank not laying flat on bulkhead P. After considering several ways to fix this, I finally decided I simply need to remove the plank and replace it. Progress will stop late next week for a week or so. We signed up for a last minute cruise that does a round trip through the Panama Canal. It's a repeat for us but well worth repeating.
-
Hi Rich, I agree with Patrick - absolutely awesome! In respect to your comments to rigging line,I'm going to strongly consider using Morope. A friend uses that brand on all of his builds and it looks great. I do not know how much it will cost, but if it's not cost prohibitive that's the route I want to take.
-
AJ, your off to a good start. Thanks for the photo update.
-
Rich, I'm glad to hear the good news. You now have an adventure that will make time fly for the next year or so. I'm looking fwd to seeing pictures of your build.
-
Hi Ajromano, WELCOME to the Niagara club! Here, you will find plenty of help and friendly advice as you build your ship. Enjoy the build and do not get into a big hurry.
-
Beautiful work Augie. I like the tree nail method as well as the results!
- 2,191 replies
-
- 1
-
-
- confederacy
- Model Shipways
- (and 1 more)
-
Sjors, Your ship looks very impressive!
-
Good morning Augie, I may have to follow your lead and order some wood for my next build. I would like to use boxwood for my MS long boat.
-
Good morning Bob, Your build is looking clean and sharp.
-
Hi Joe, Thank you for the compliment. I buy my Emory boards at Walmart. The must be at least 25 in the package. They have a different grit on each side. I try to use my jewerler files or an Emory board cut to size for those tight places. Sometimes, like you, I find gluing a piece of sandpaper to a board fits the bill for some locations. Take care.
-
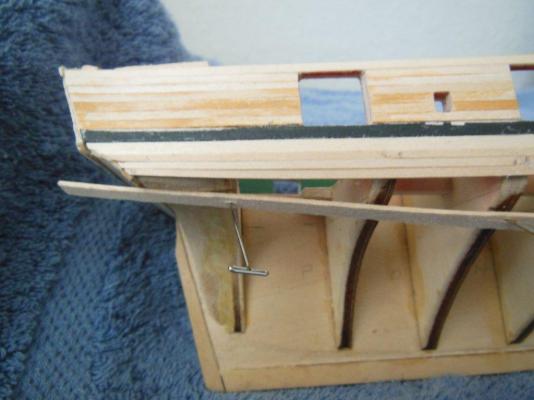
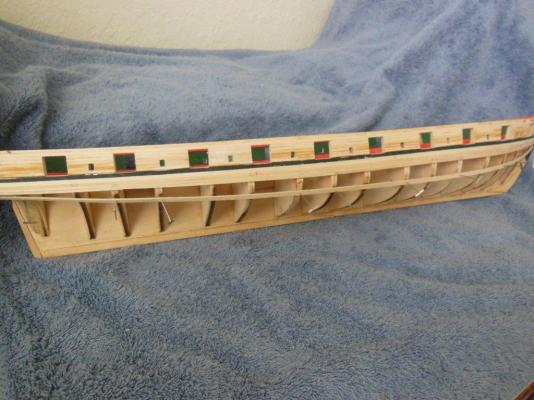
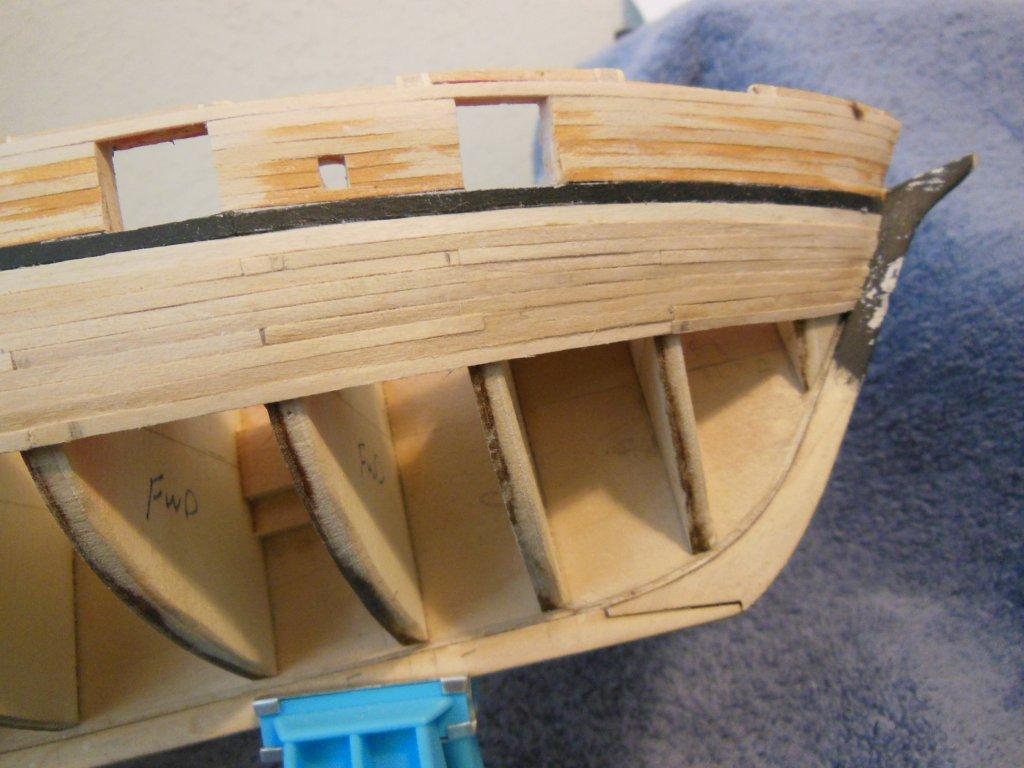
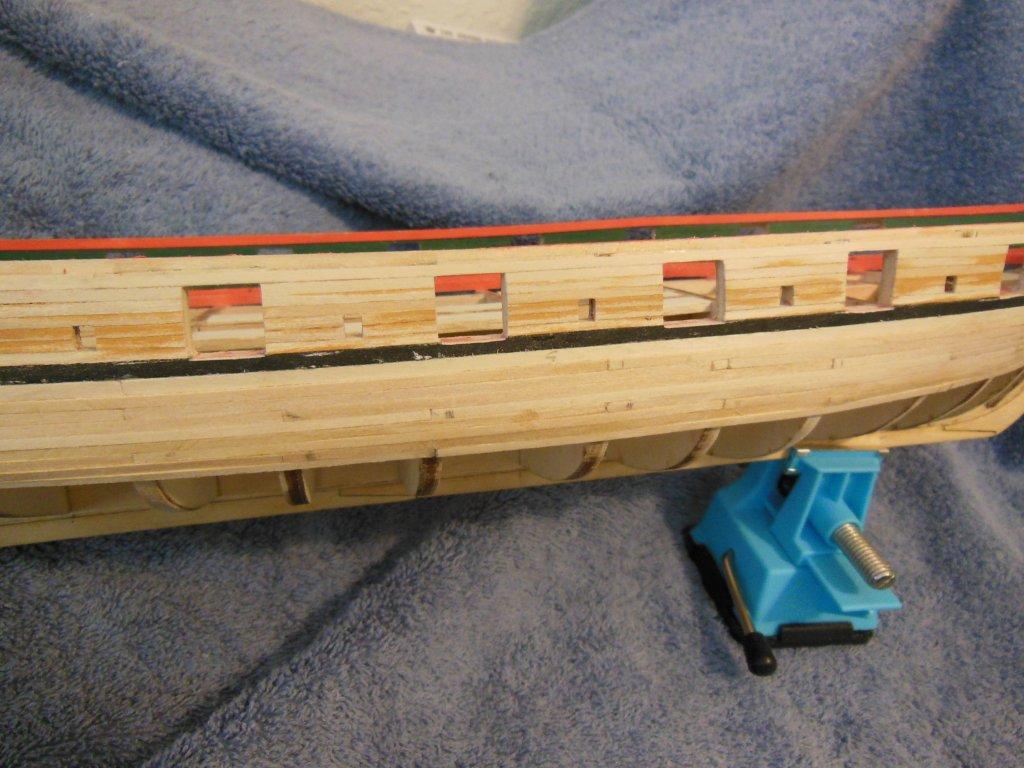
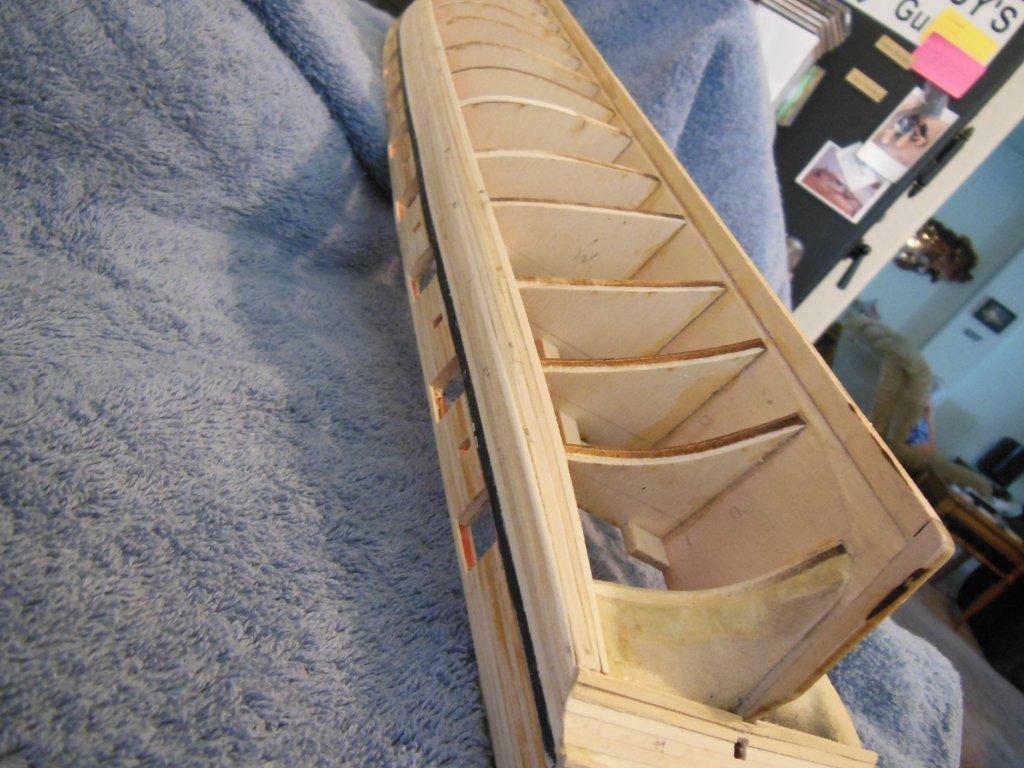
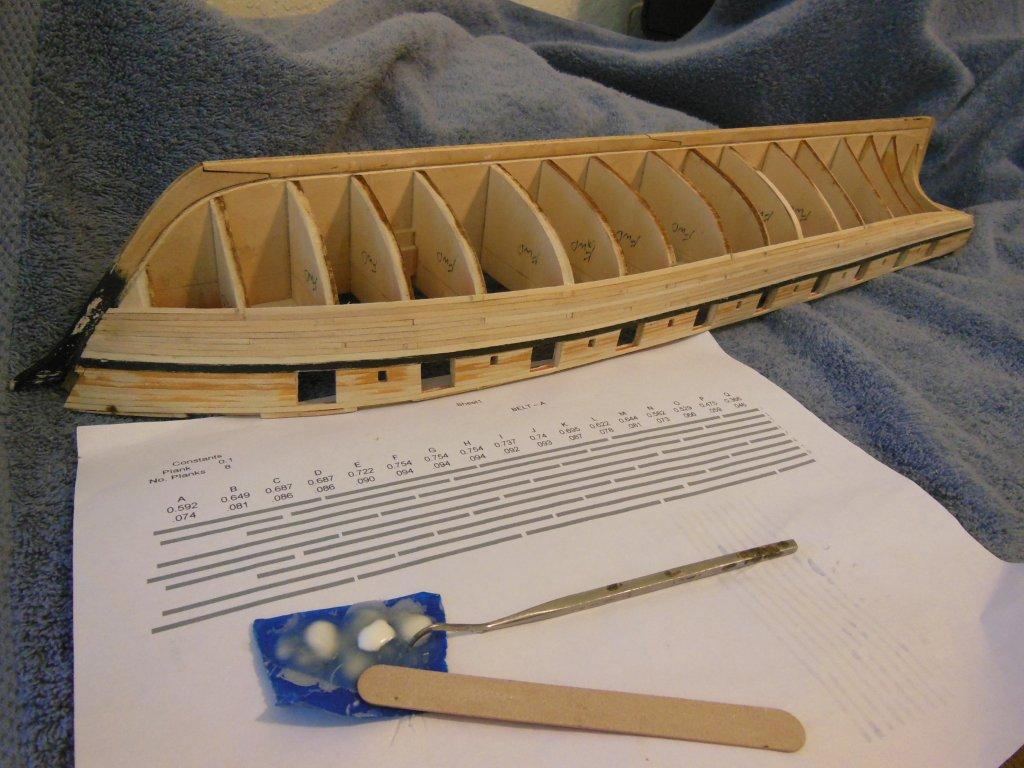
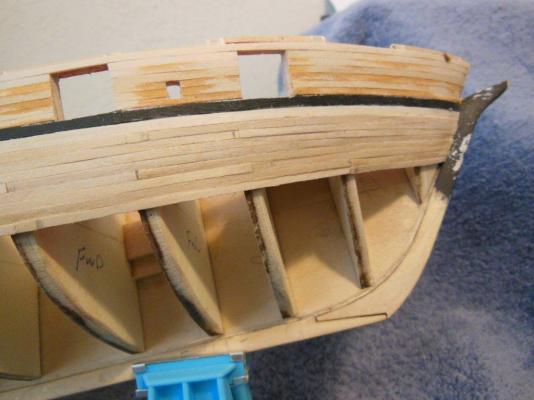
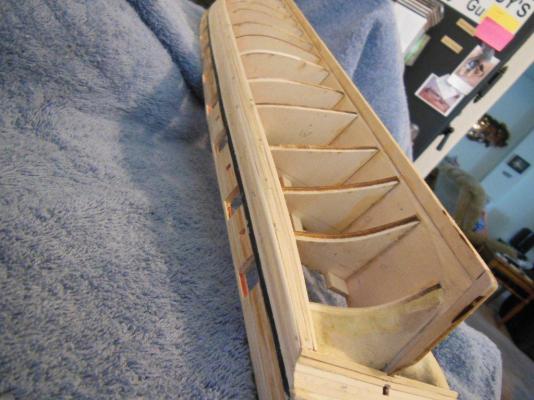
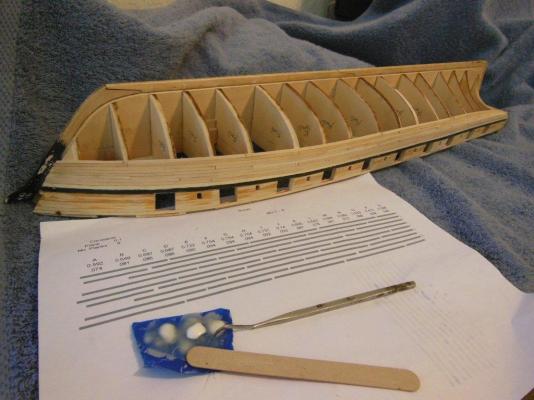
Starboard side, Band A is finally planked. I still need to sand and seal the backside with diluted PVA. There are a couple of spots, primarily near the stern where the planks start to twist that may or may not sand out to a decent shape. If they sand out to where I have a gap between the planks I'll add filler material. I'm keeping my fingers crossed that will not be needed. As most of you know, the hull is single planked and will be painted. I'm taking the opportunity to try and plank this ship as if it would be stained to see the grain and plank sides/butts. I figure it's a good learning opportunity with an easy way put if it does not turn out very well. Here are the steps and sequence I used Cut planks to length with maybe 1/32” extra length to trim in during final fitting. Pencil mark aft outside end of plank so I always know which side is which. It can be confusing later on in regard to which side is out and which end goes aft. Having a visual reference point helped. If one end of the plank needs a angled shape, file this end to shape first, trim in the other end during final fitting. File needed width of plank for the full length. I normally file each end, to the needed width first, then file between the ends to get the entire length to the needed profile. Chamfer the lower inside corner of the plank so it butts up better. Soak, bend and dry the plank to the needed contour. Verify the installed mating edge (upper plank) does not have any residual dried glue that would interfere with the new mating plank. File/clean up if needed. Apply glue to the edge of the above plank, all bulkheads for this plank and of course the mating ends. I use a dental probe to grab dabs of glue from where I placed a small amount on a piece of tape or paper. Clamp in place using modified wood clothes pins for the majority of clamping needs. Tools/Items I Used PVA & CA Glue Tape to dab glue from, using dental probes. This keeps me from getting too much glue on the wood and everywhere else, including me. Dental tool to apply PVA glue Electric Plank Bender Small miter box & saw Lessons Learned Make sure fairing is complete and right for the area I'm working in. A few spots needed additional sanding that was not realized until I tried mounting the plank. Make sure planks are 100% dry before gluing in place. I had one plank shrink on me that required some rework. Be aware when the planks need to twist and pre-bend the plank accordingly.-another oooops. Once the temporary planking batten is in place, verify it matches the correct/same height location on the stern and bow for both sides, then pencil mark it's location on all bulkheads, then remove the batten. I tried keeping the batten in place earlier, but it got in the way and I kept knocking it off. Pencil marks work just as well. Next planned steps: Coat inner side of installed planks with diluted PVA for extra strength. I may do a little preliminary sanding on the installed planks just to see if I have any issues to address. Look to see if there are any gaps or voids between the planks and bulkheads. If needed, I'll use a medium CA glue for filler. Start on port side Band A planks, using same process as starboard, but hopefully incorporate a few lessons learned.


-
Hi Popeye, Your rigging and ship looks impressive. I have a magnifier just like yours and would not consider working on my Niagara without it.
-
Hi Andy, The rigging looks absolutely amazing. I'll definitely be reviewing your methods again (along with many others) once I start this process on my ship.
-
Hi Augie, I've been silently watching and can only echo the same compliments offered by others. She looks amazing...
-
Hi Rich, It sounds like your making great progress!
-
Fingers still crossed here also... We're hanging in there with you Rich.
-
I consider carrying a gun the same as wearing a seatbelt. You do not put on a seatbelt because you know your getting into a wreck. You hope you will not need it, but you cannot predict when you will.
-
Thanks Joe! The funny thing is that I knew that, but it was tucked so far back in my memory I've completely forgotten. :d
-
Hi Ulrich, Thanks for sharing. Approximately how long do the plank benders last until burnout?
-
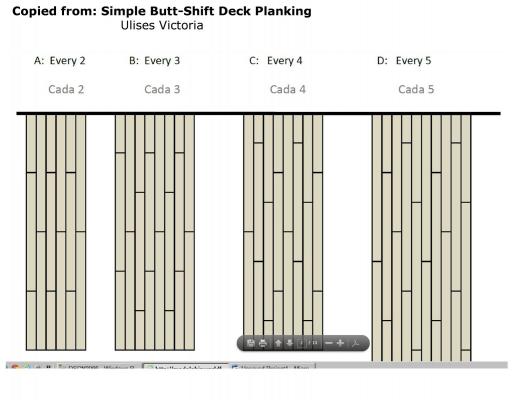
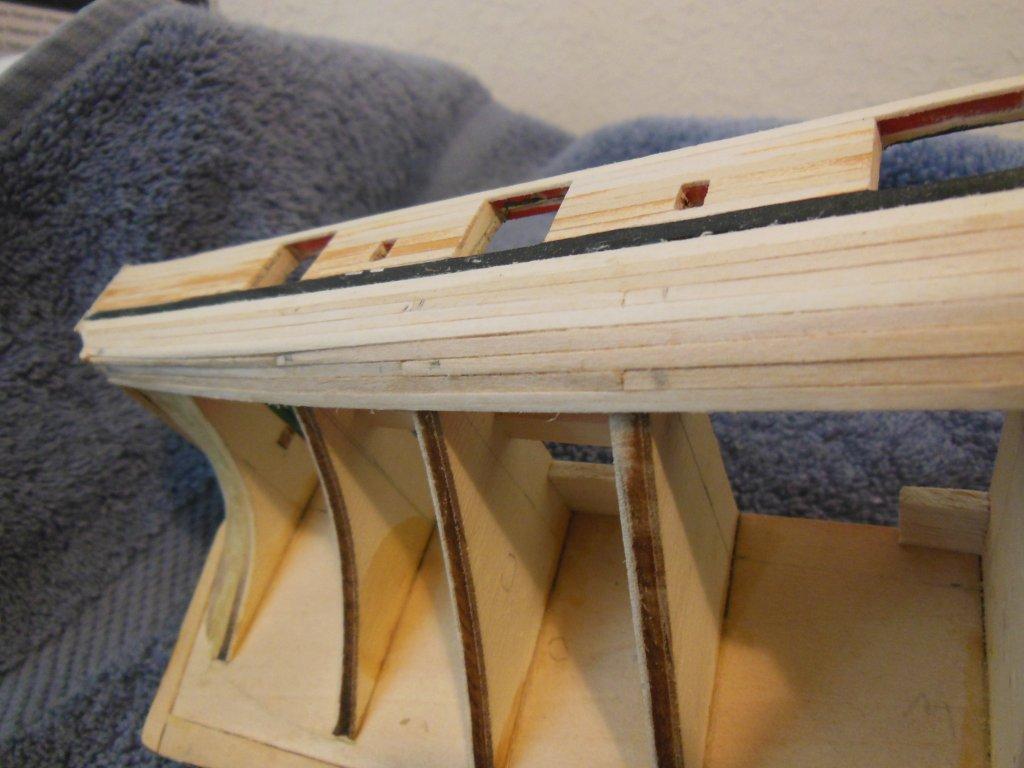
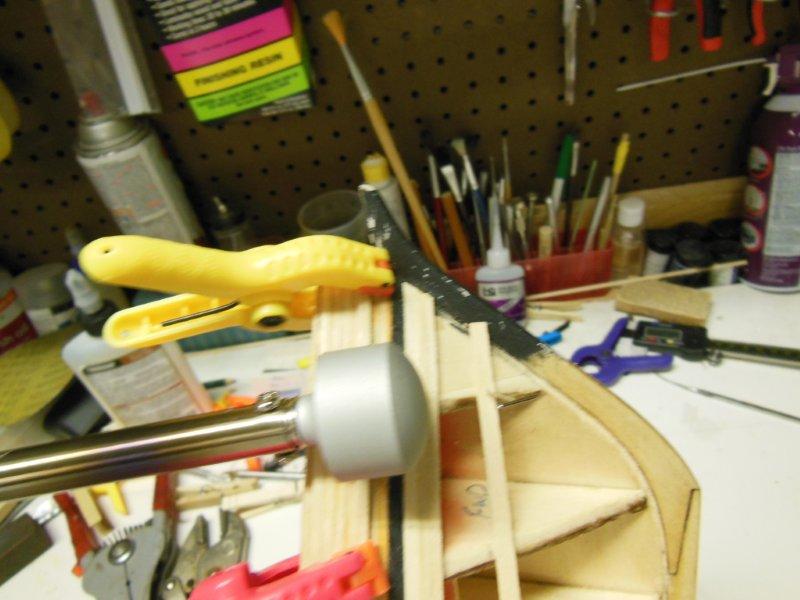
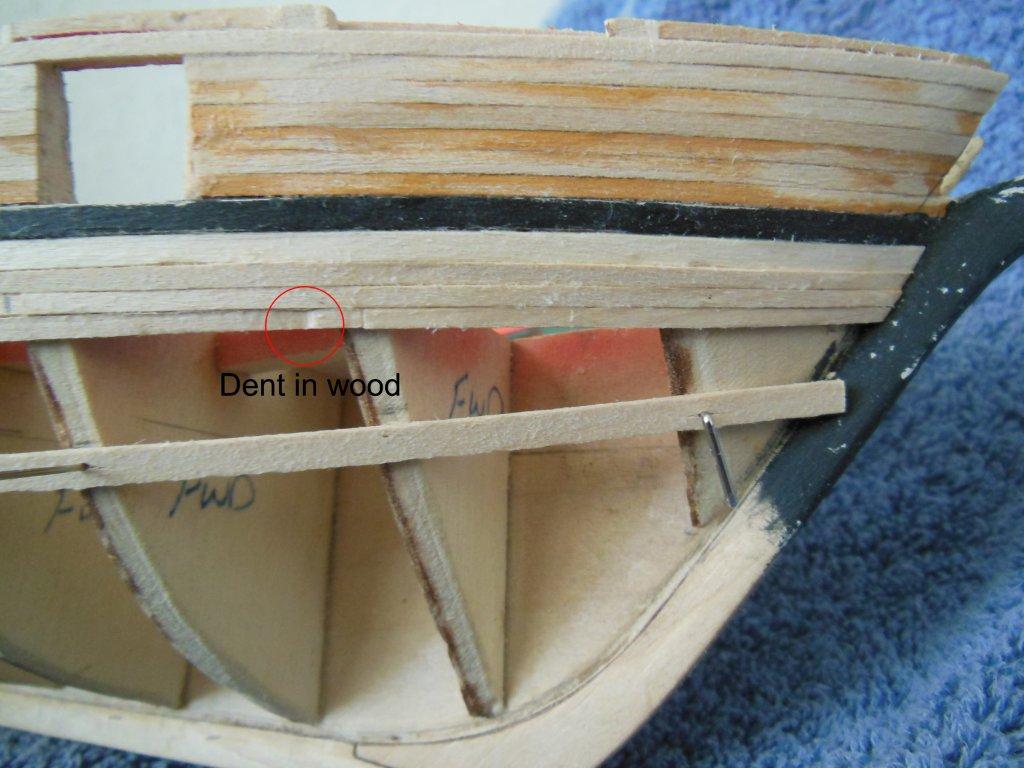
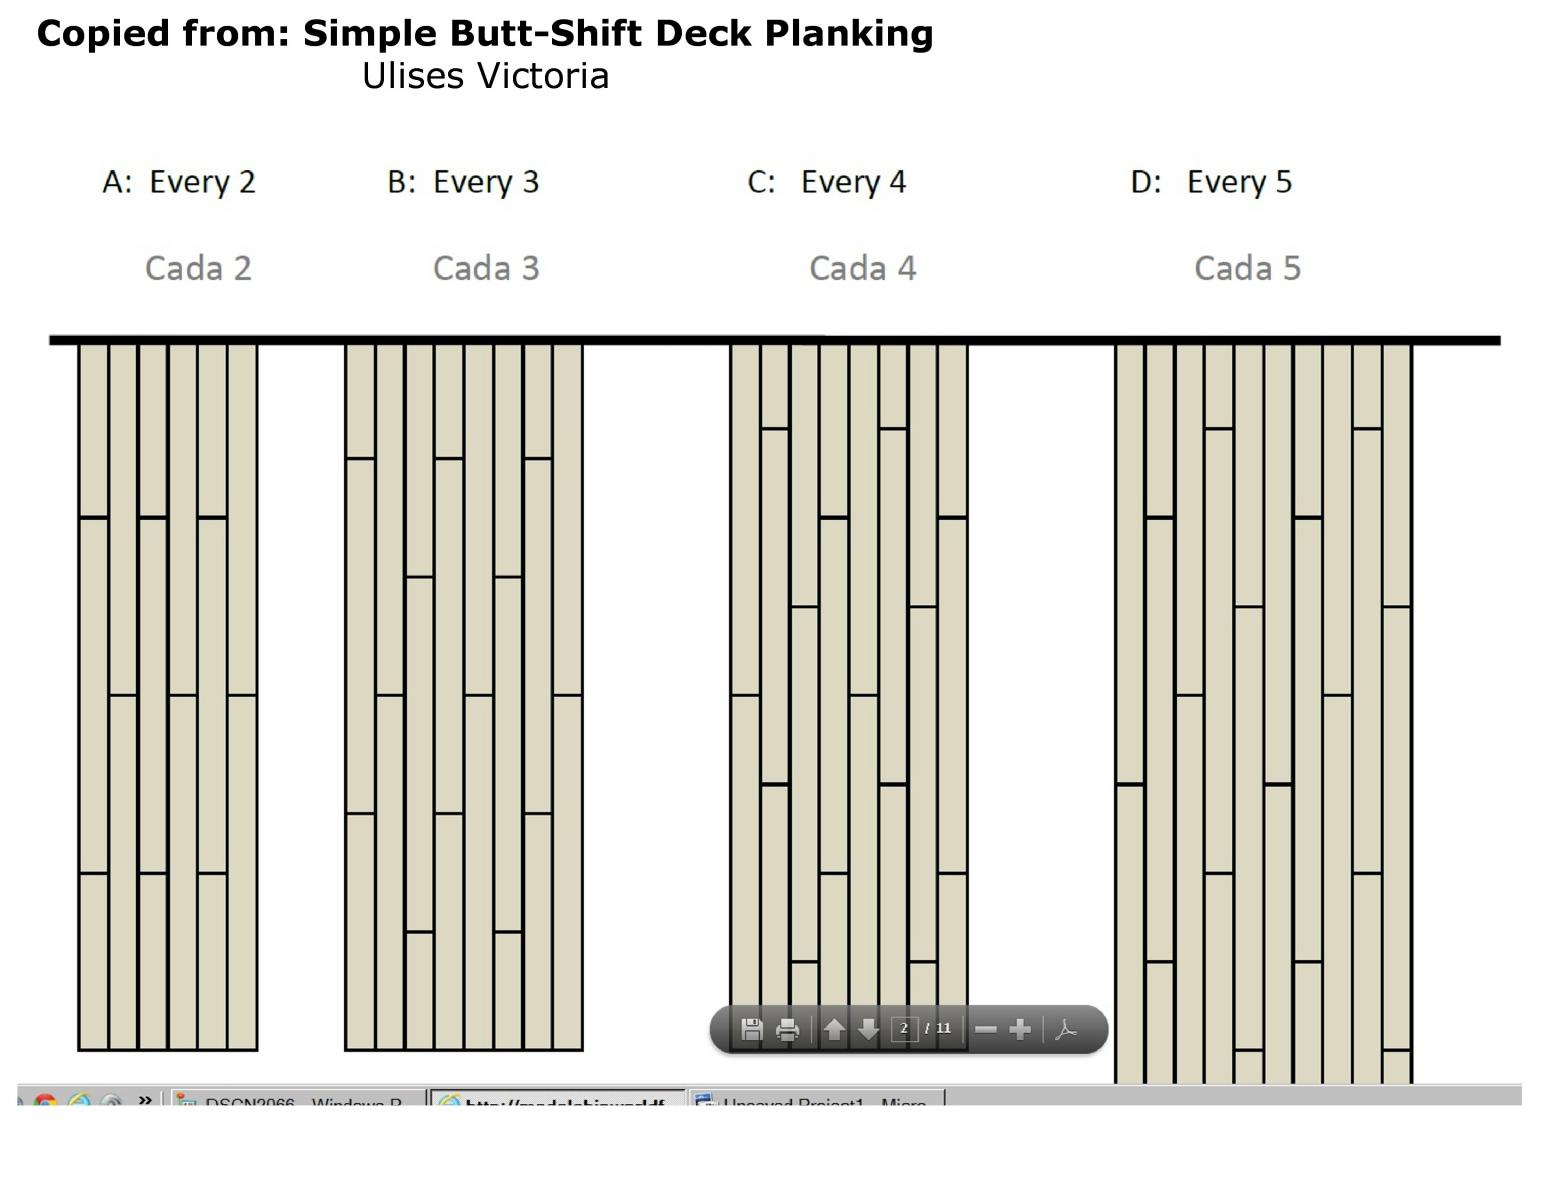
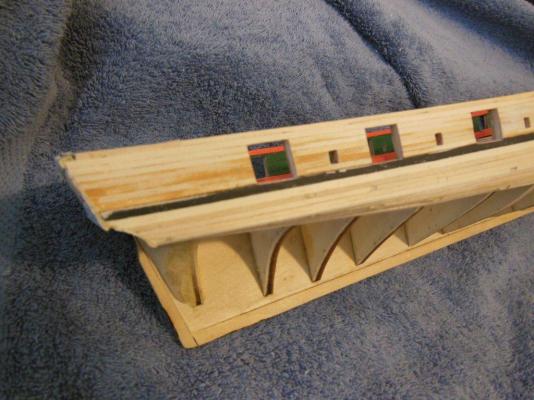
I've finally felt well enough to do a little work in the shop. I cannot believe I have not posted any progress since August 19. Before I type anything else, a big THANK YOU to all who kept my spirits up and kept me informed on their build, as well as entertained while recuperating. I enjoy watching and learning from each of your builds as well as the banter that goes on. Well.., it's time to get back to model ship building: I have a few rows of planking completed on the starboard side for band A. The as received planks for Band A are ~0.097” wide by 0.0625 thick. The variation in the width of the planks from the supplier was a bit of a surprise to me, but I can live with it so long as I measure and sand carefully. The min to max width needed for this band, from Stem to Stern ranges from 0.046” to .094”. I'm using a three-butt-shift (photo below on butt-shifts) which may not be very visable once I airbrush the hull. In the photo of the bow you will see where I indicated a dent in the wood, caused by a clamp and probably too much water soaking time. The dent looks deeper than what I can sand out, so I'll try to steam the dent out with a new planking tool I recently picked up. I purchased an electric plank bender from Model Expo. I posted a few pictures and my initial thoughts on this tool under “Building, Framing, Planking and plating a ships hull and deck.” It's not much progress, but it's in the right direction (three steps fwd)...