


Derek C
-
Posts
333 -
Joined
-
Last visited
Content Type
Profiles
Forums
Gallery
Events
Posts posted by Derek C
-
-
Hello fellow MSW members

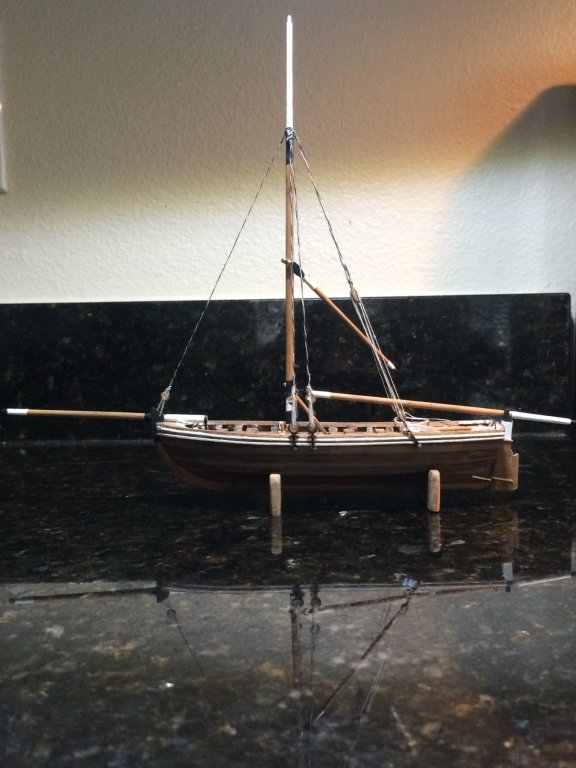
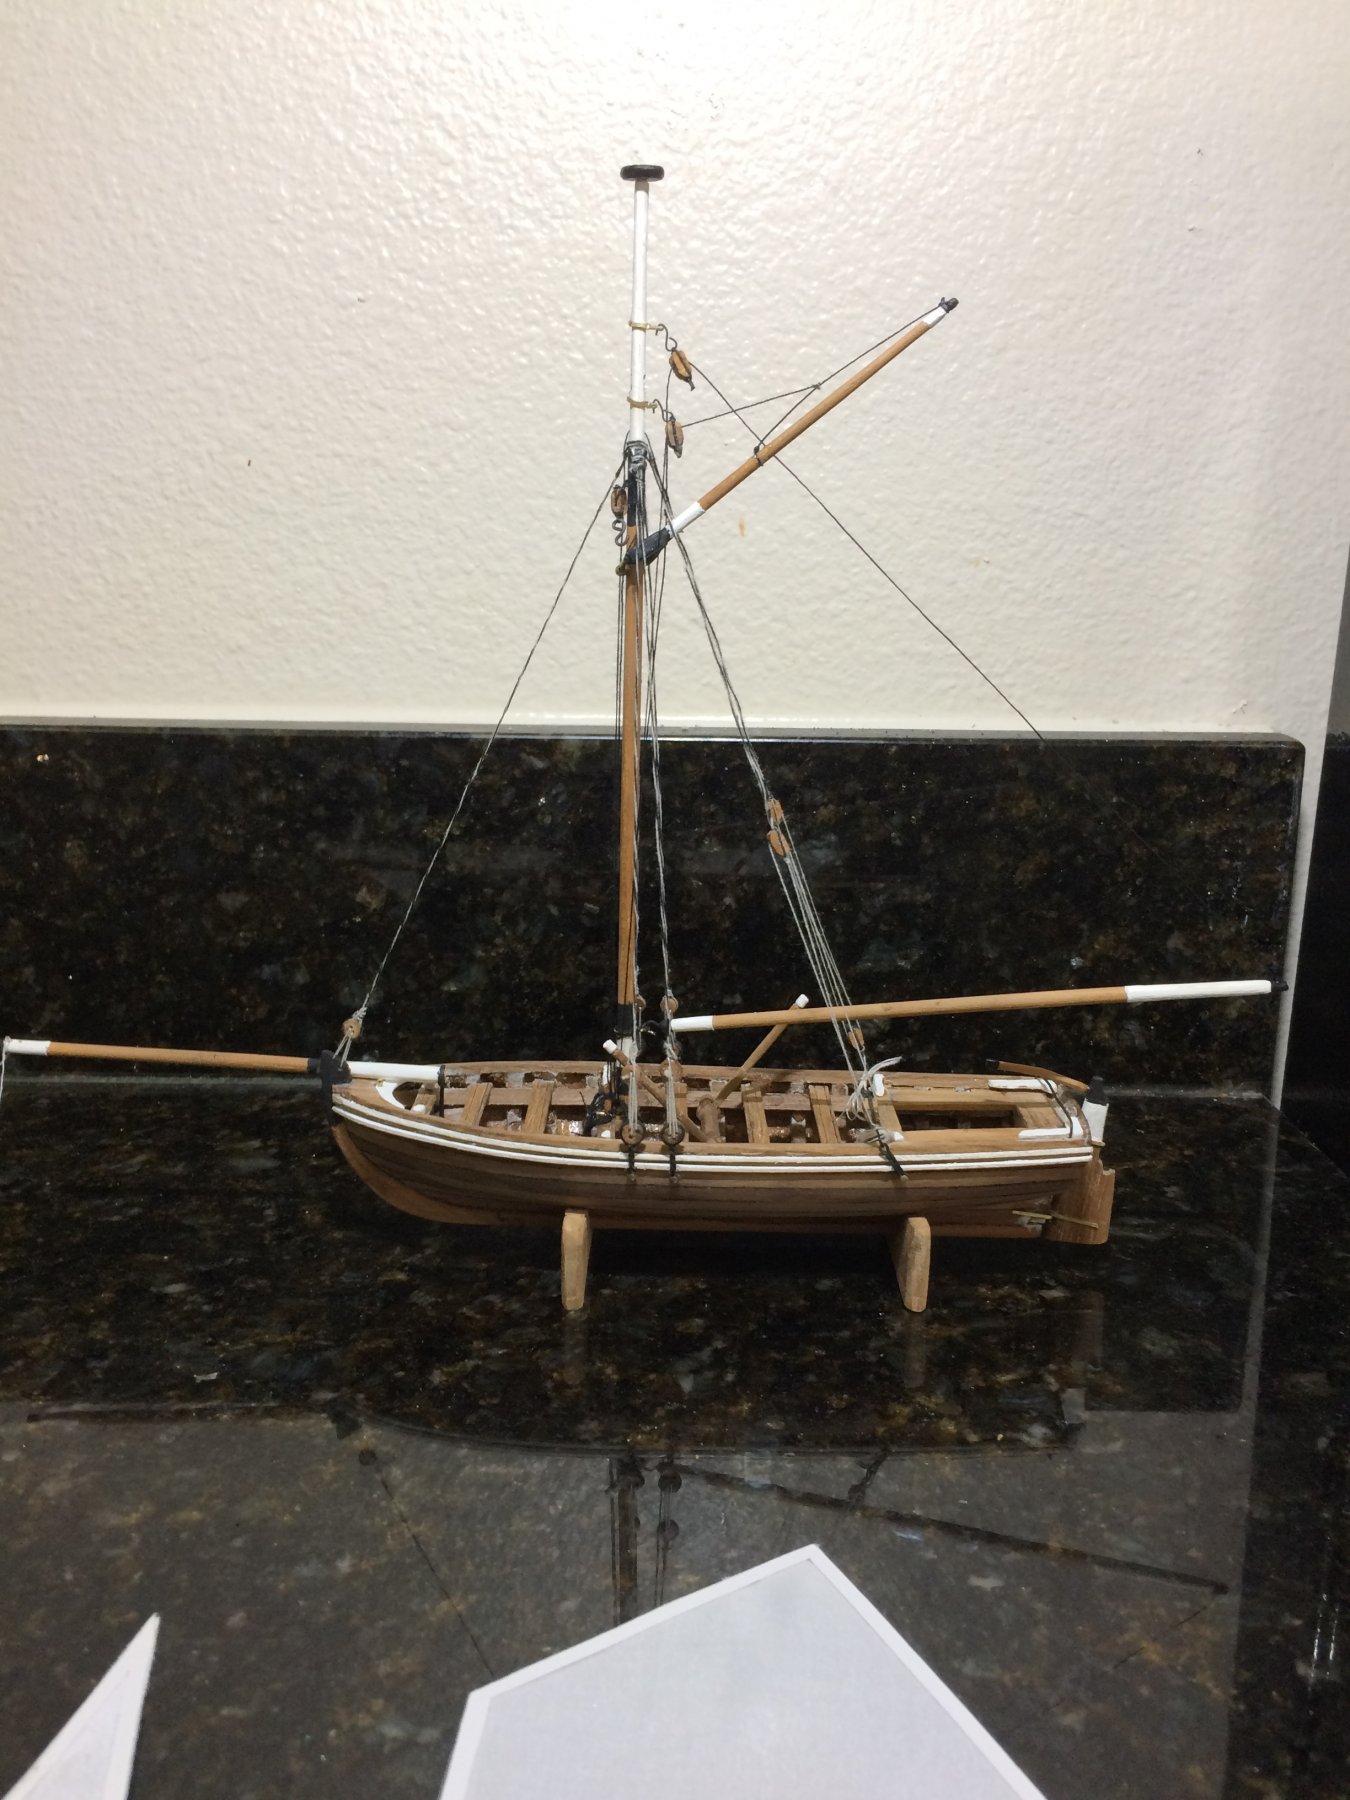
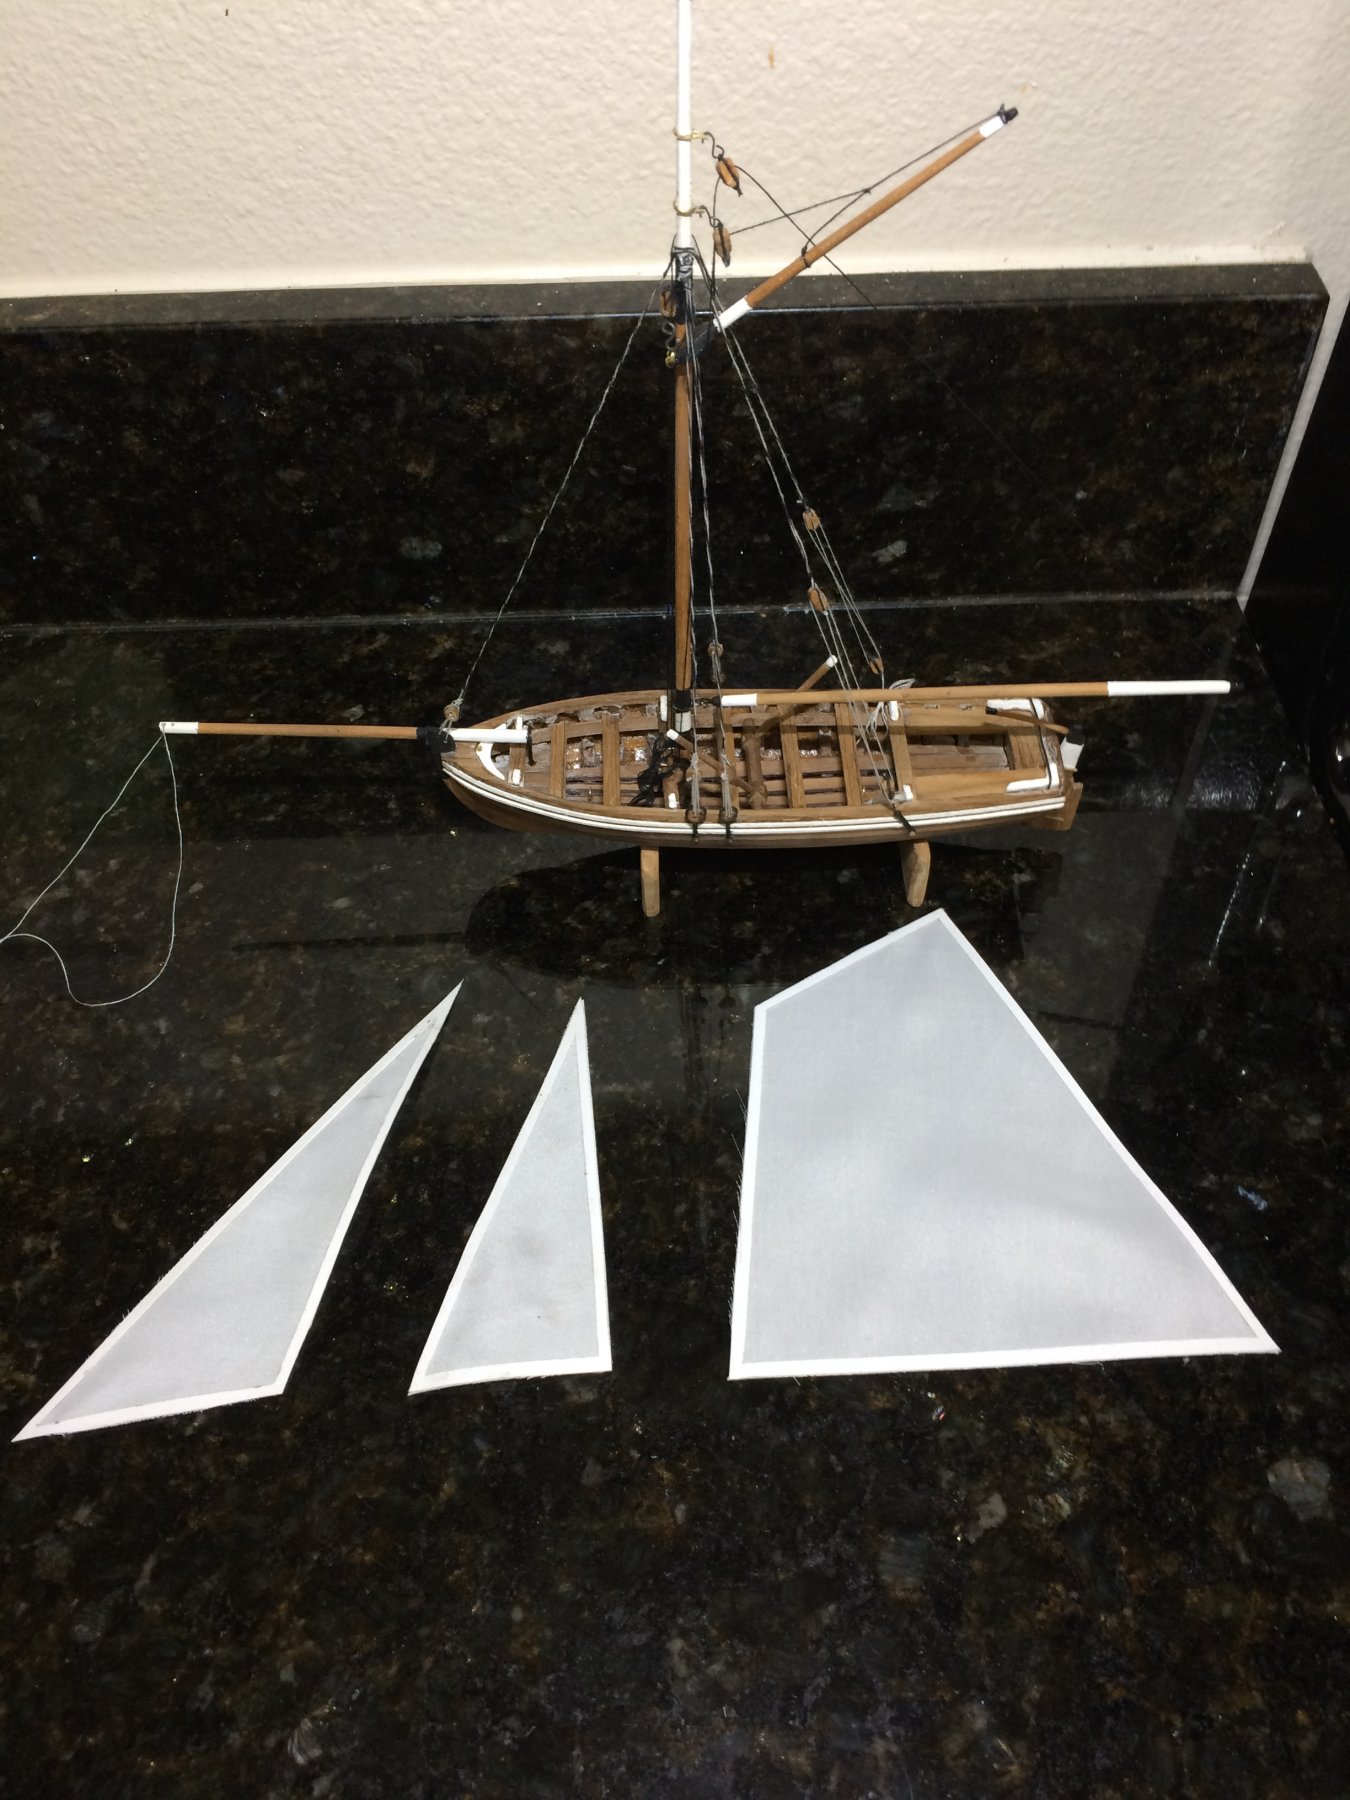
i haven’t posted in a week , not because I haven’t been working in the shipyard but because what I was working on was kicking my butt !So I thought I’d give a update .I have finished the rigging and started on the sails and I quickly found out that my sewing is the most horrid thing I had ever laid eyes on ! I have posted pictures of what I’m happy with after six or seven attempts
 . I still have plenty opportunity to screw these up as I still want to add a black seam of thread around the sails and make the anchoring points . I plan on attempting this process today after I apply a coat of clear to the boat I will begin my sewing nightmare again lol


-
Coming along very nicely B.E.

- mtaylor, Blue Ensign, Nirvana and 1 other
-
 4
4
-
-
-
-
-
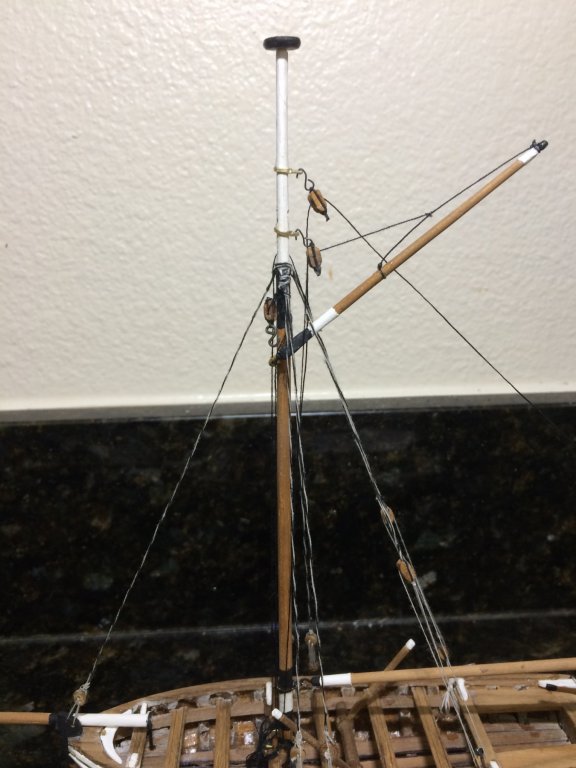
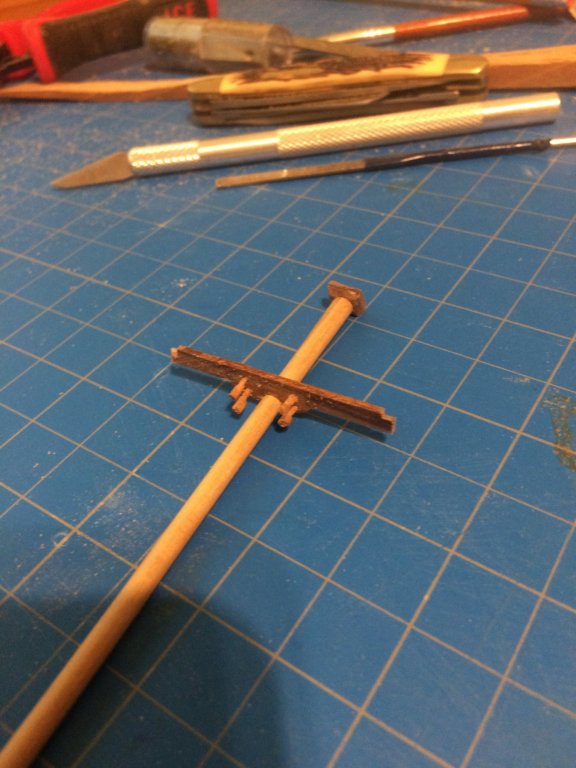
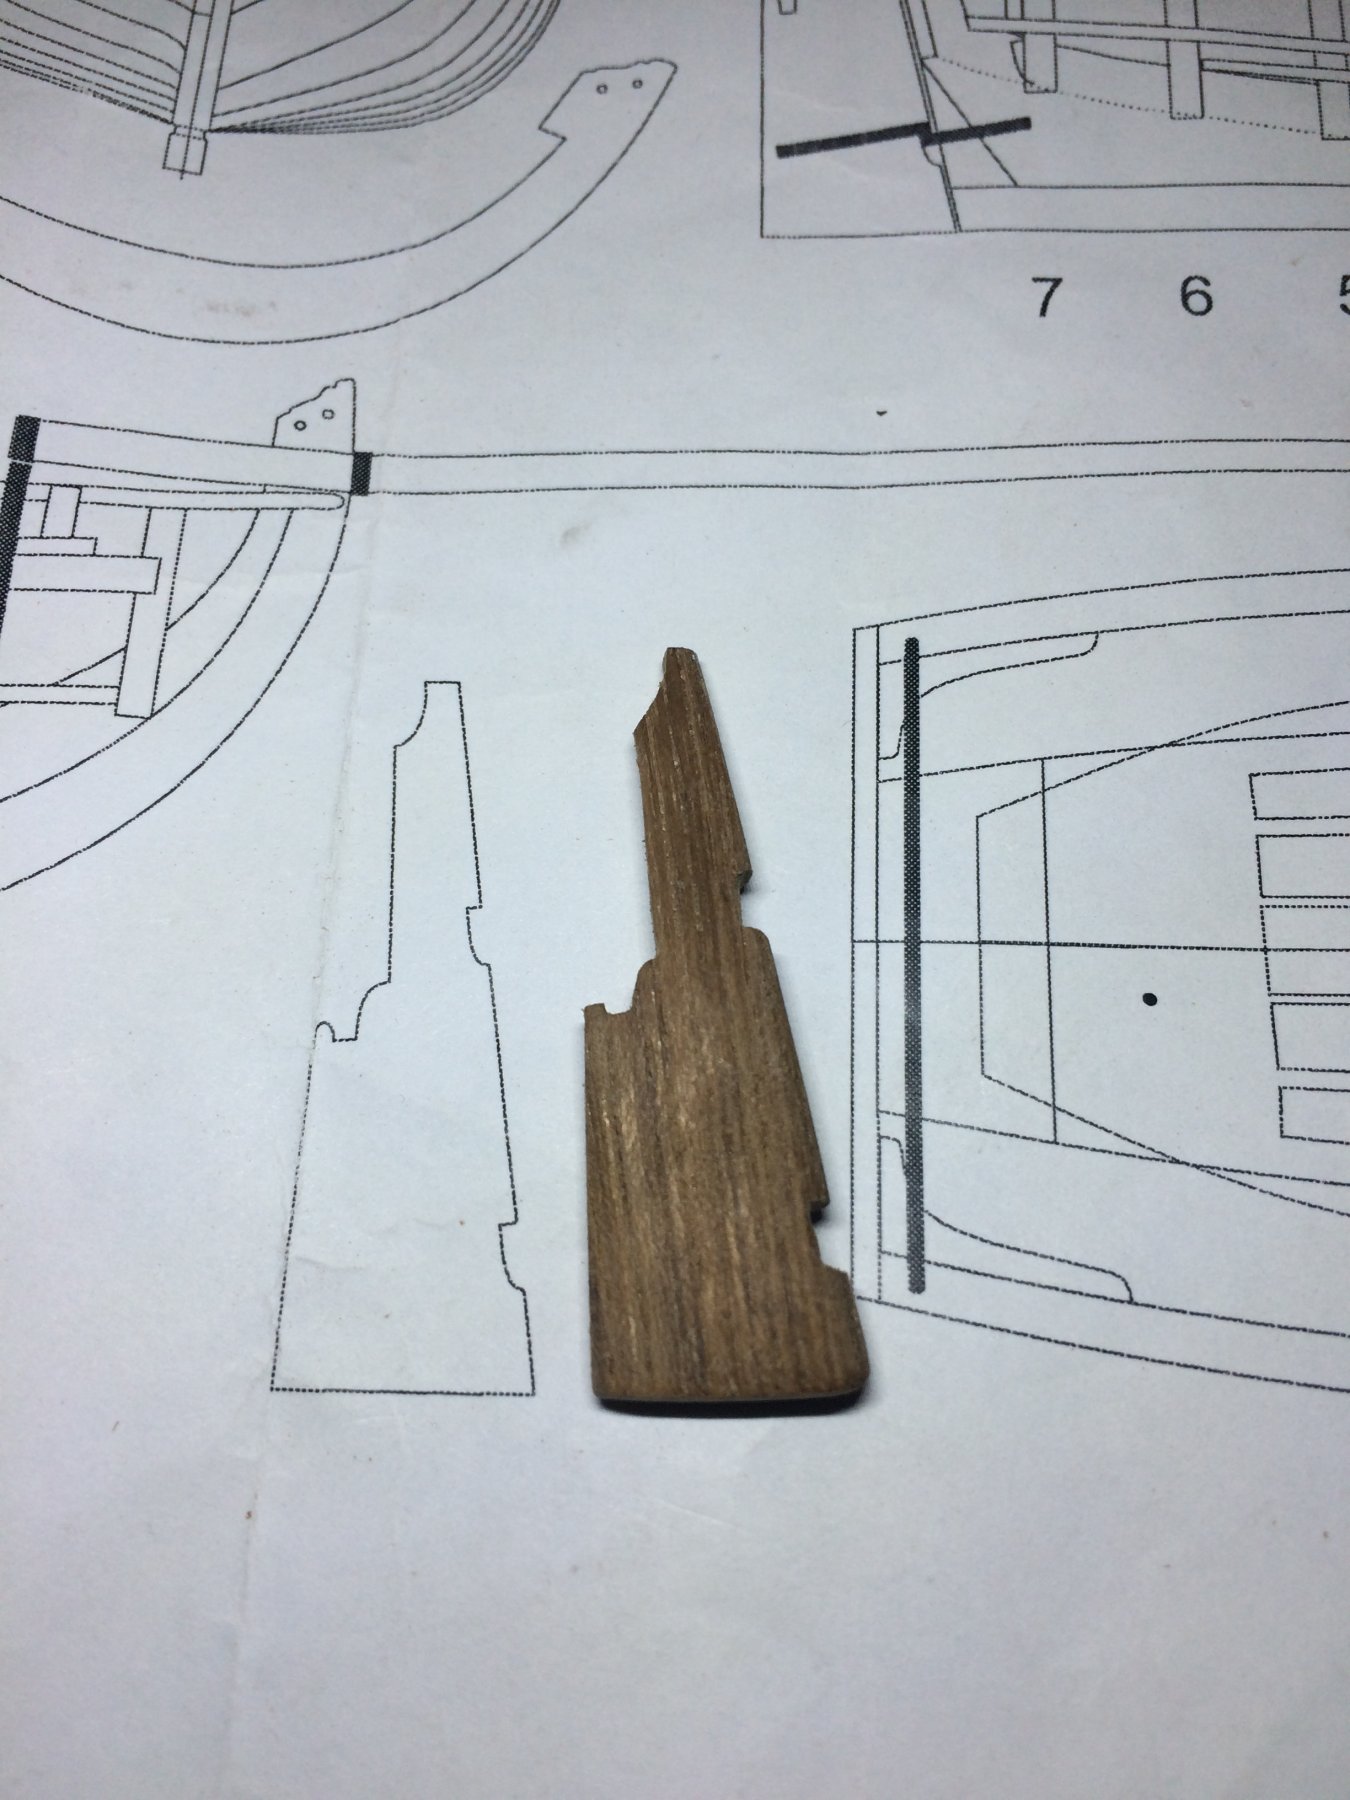
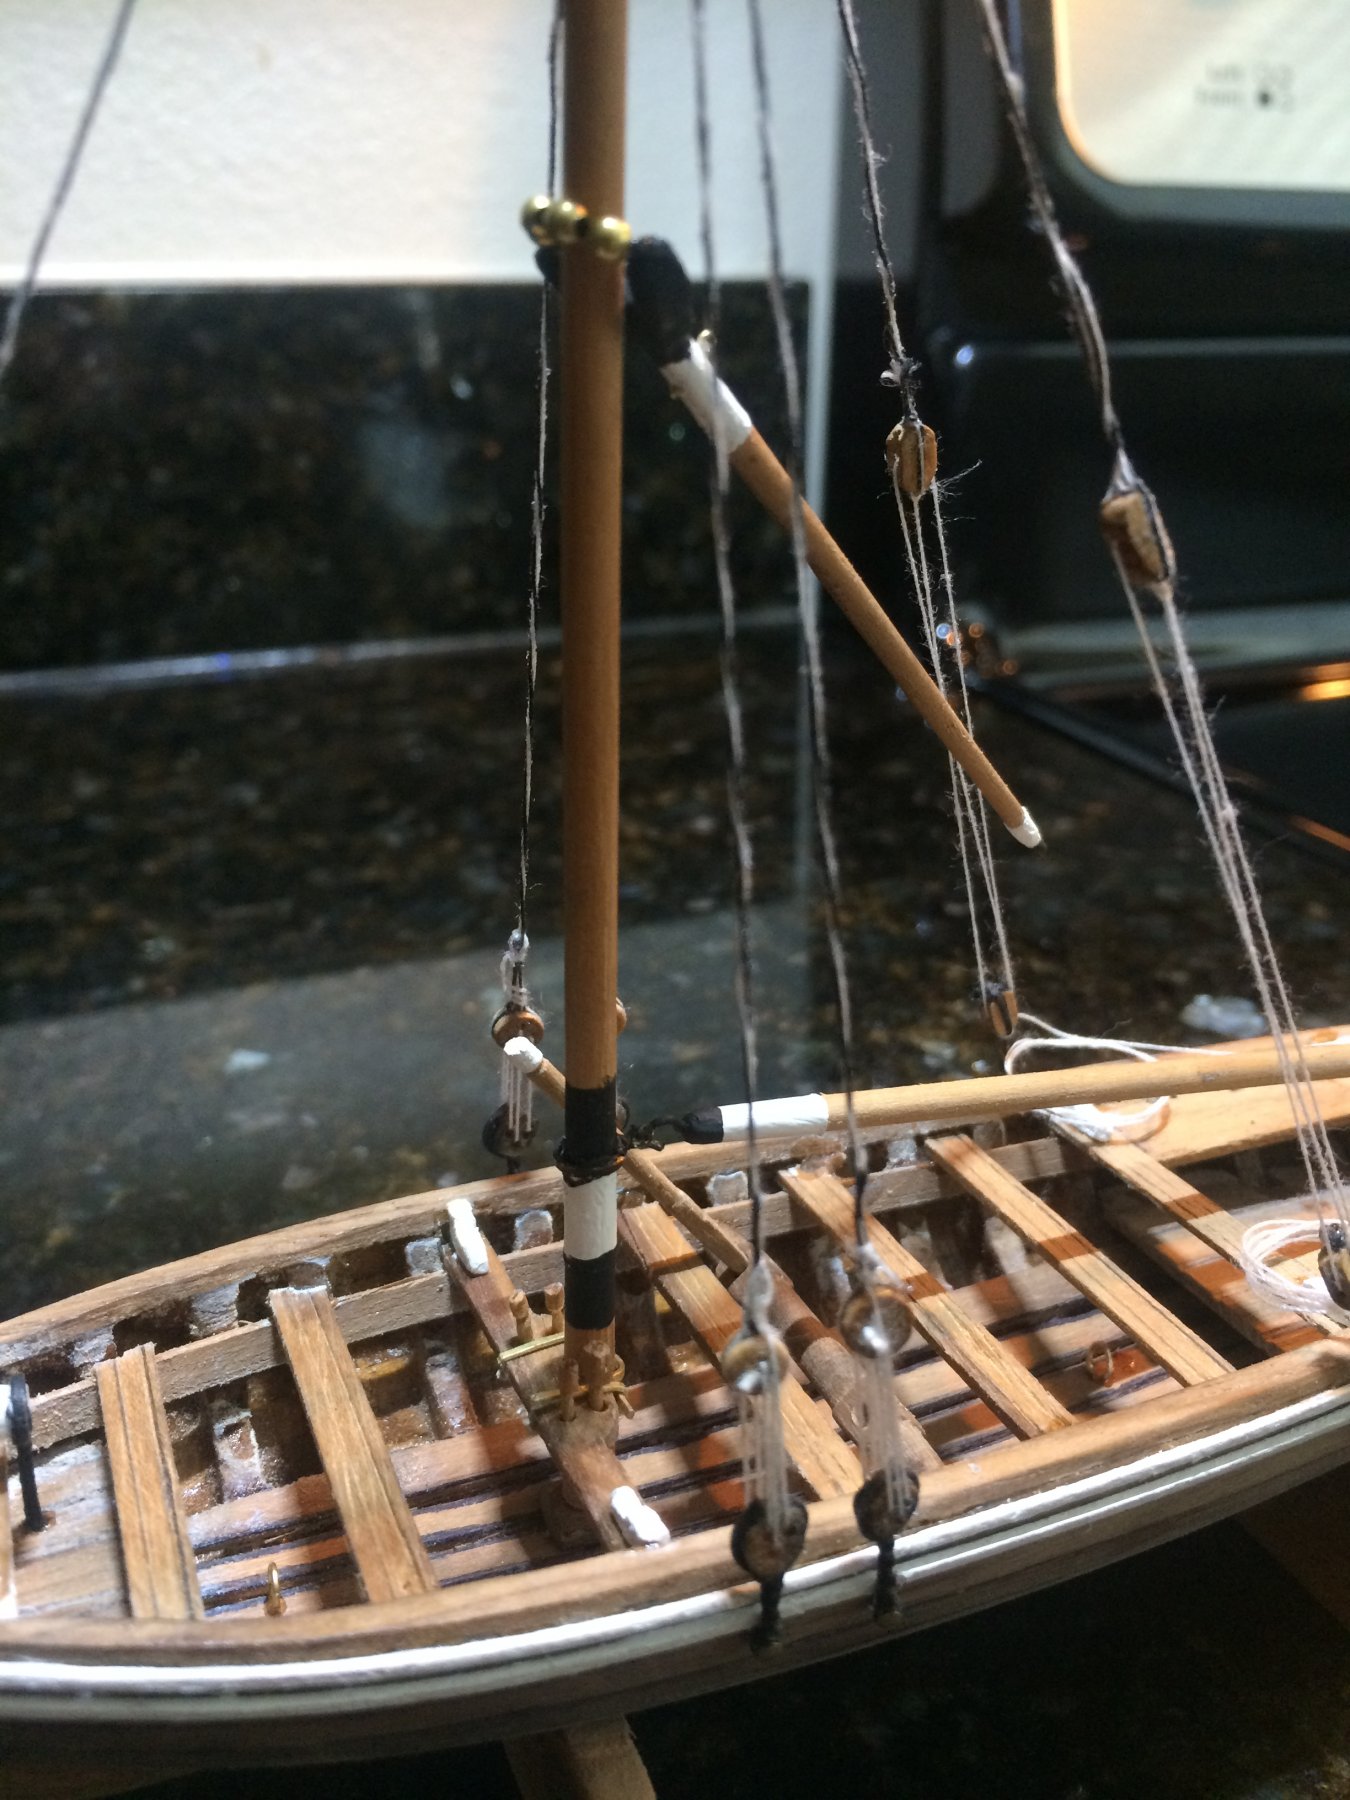
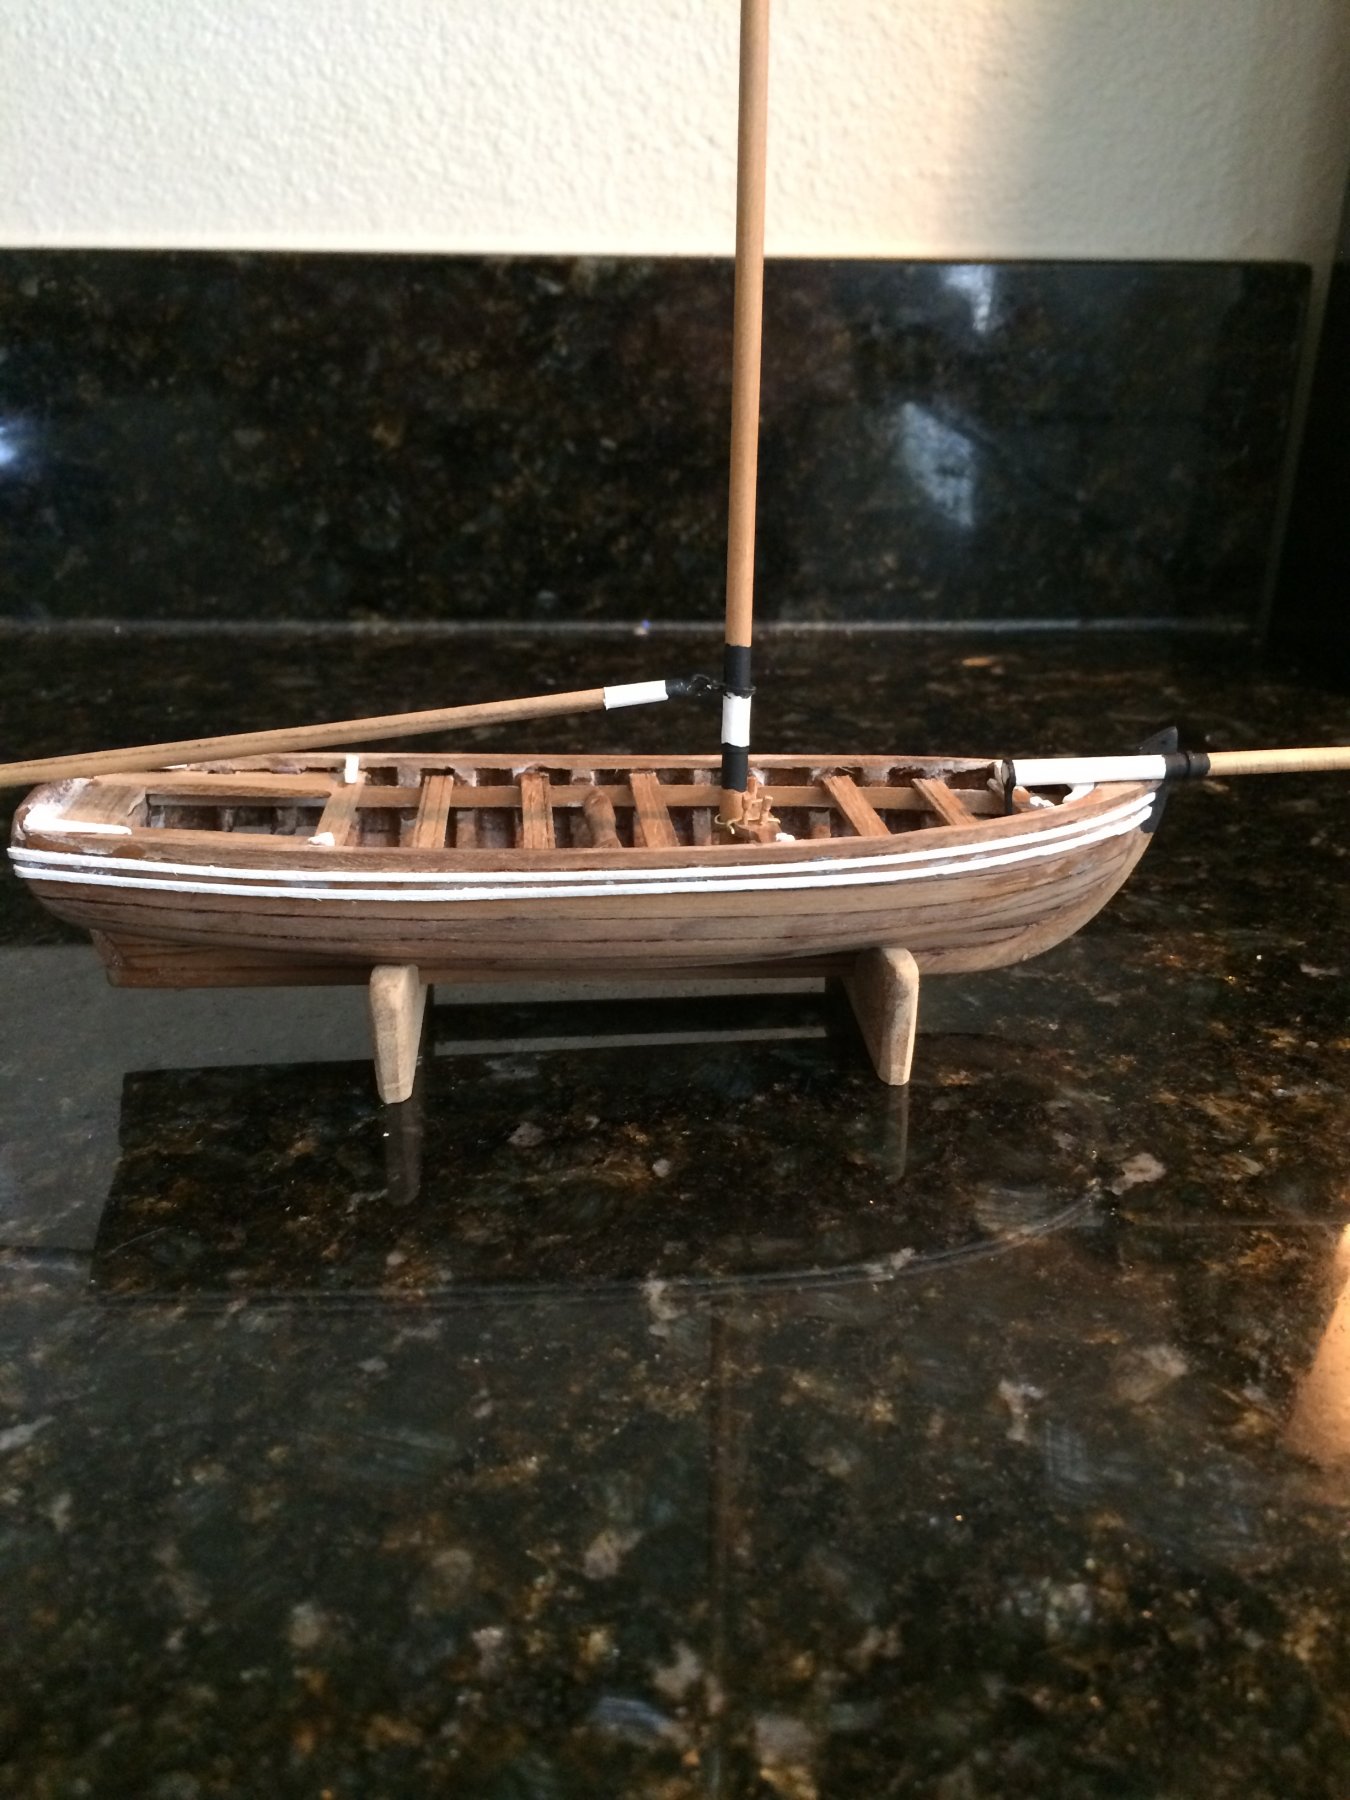
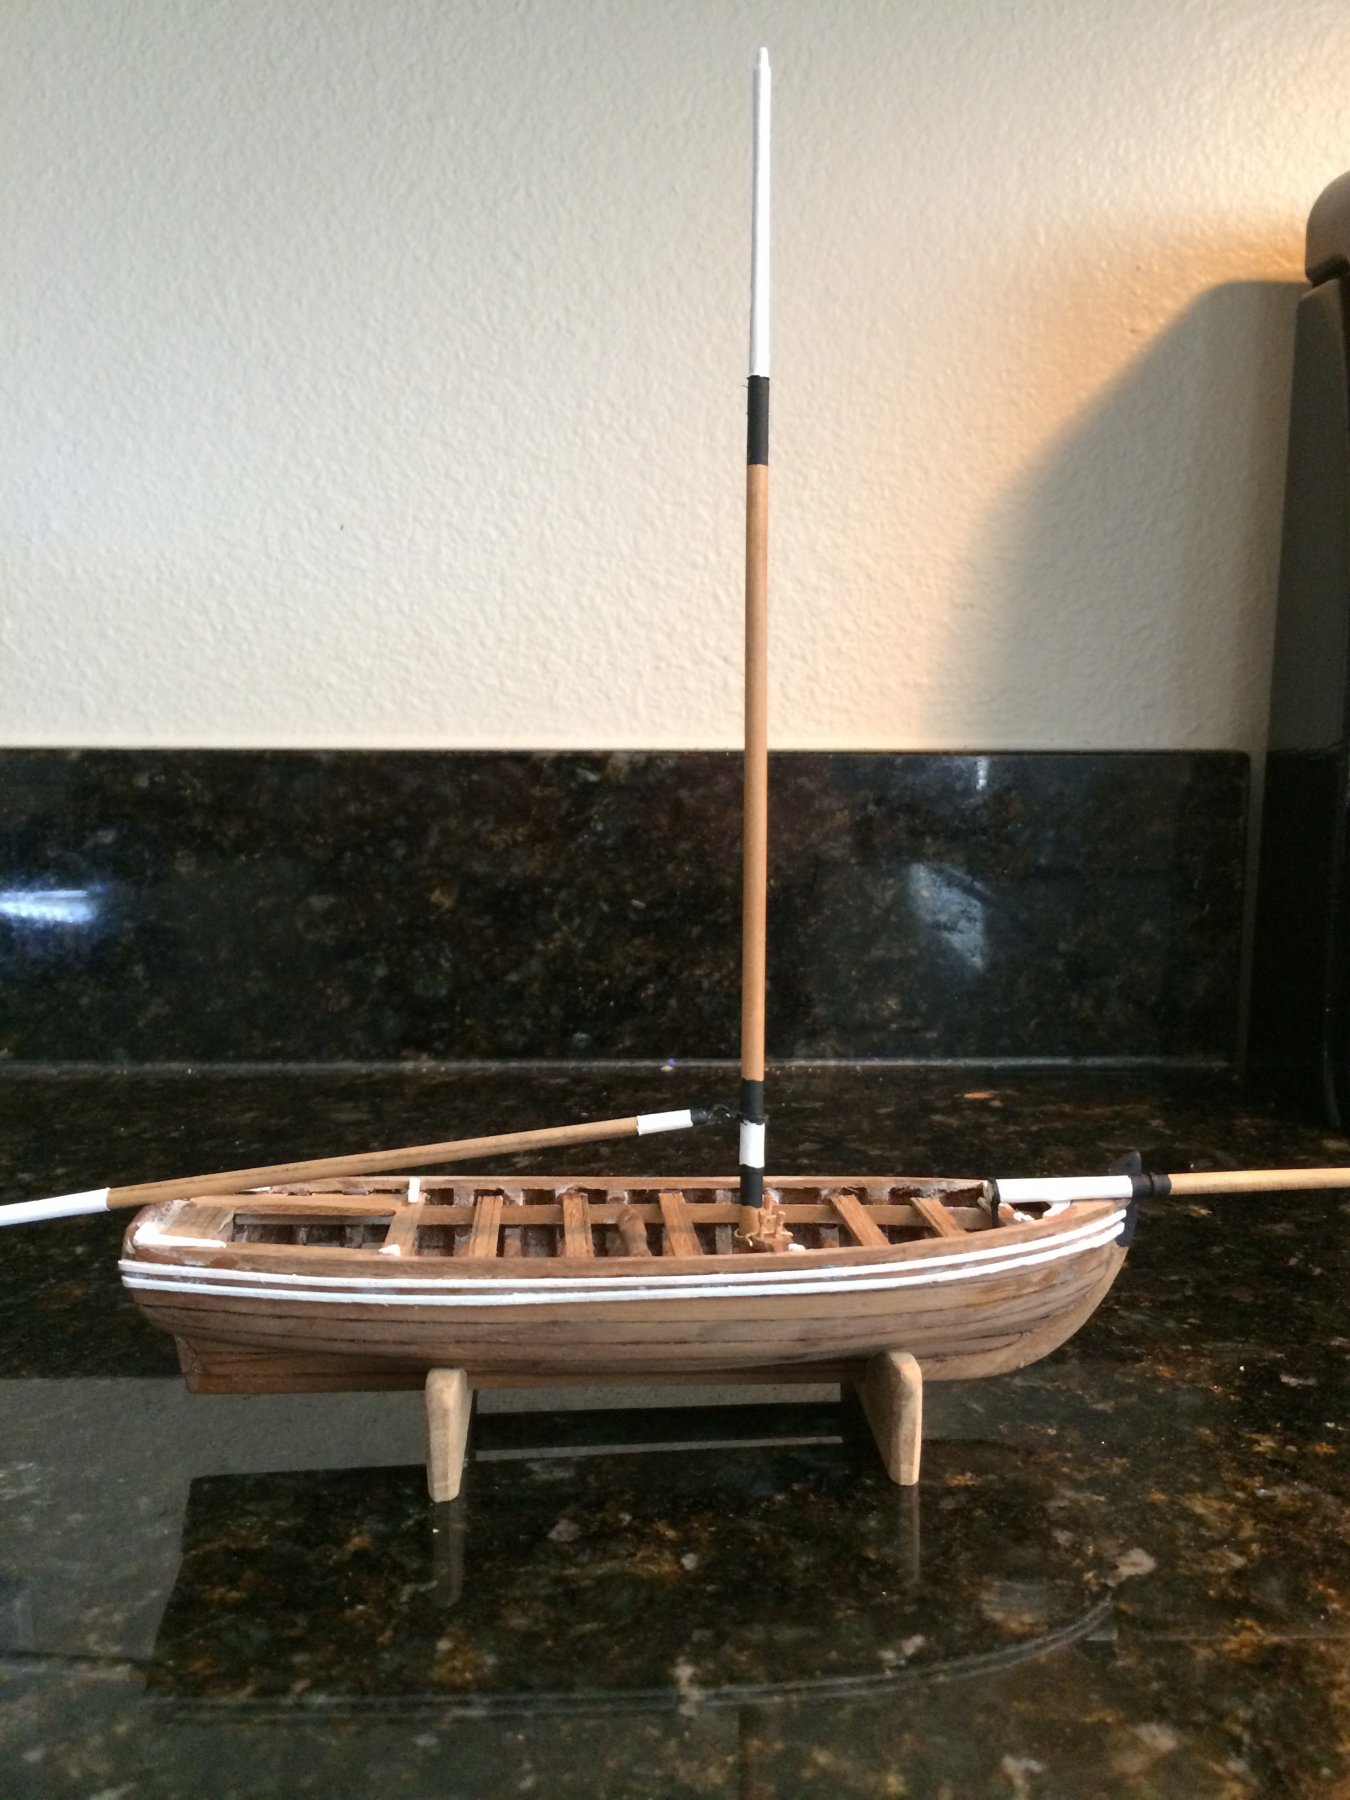
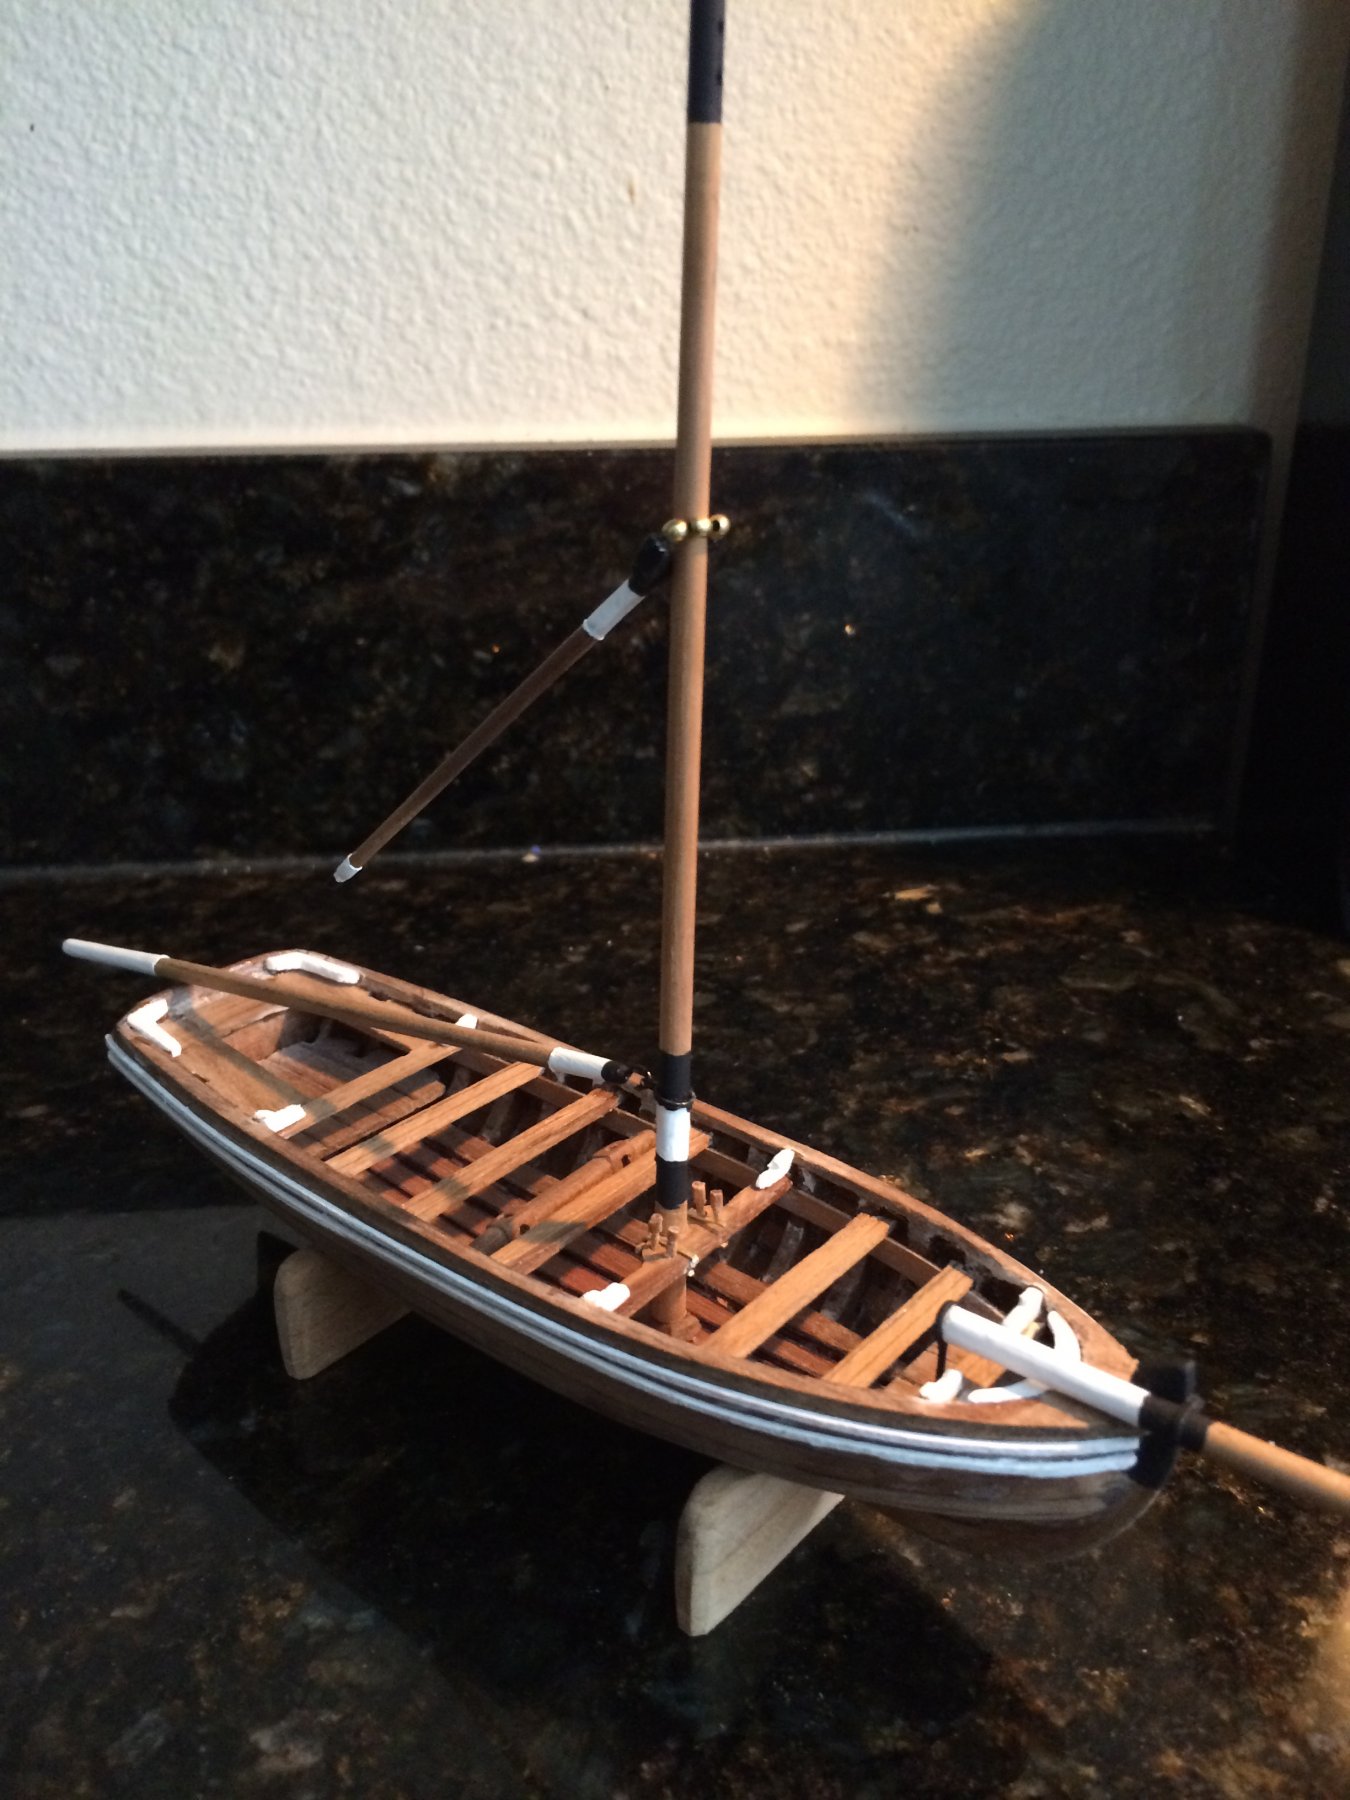
I made the rudder today, I used a spare I had from the kit version of this boat as a template I started by tracing the template then sanding and filing until I got it to match


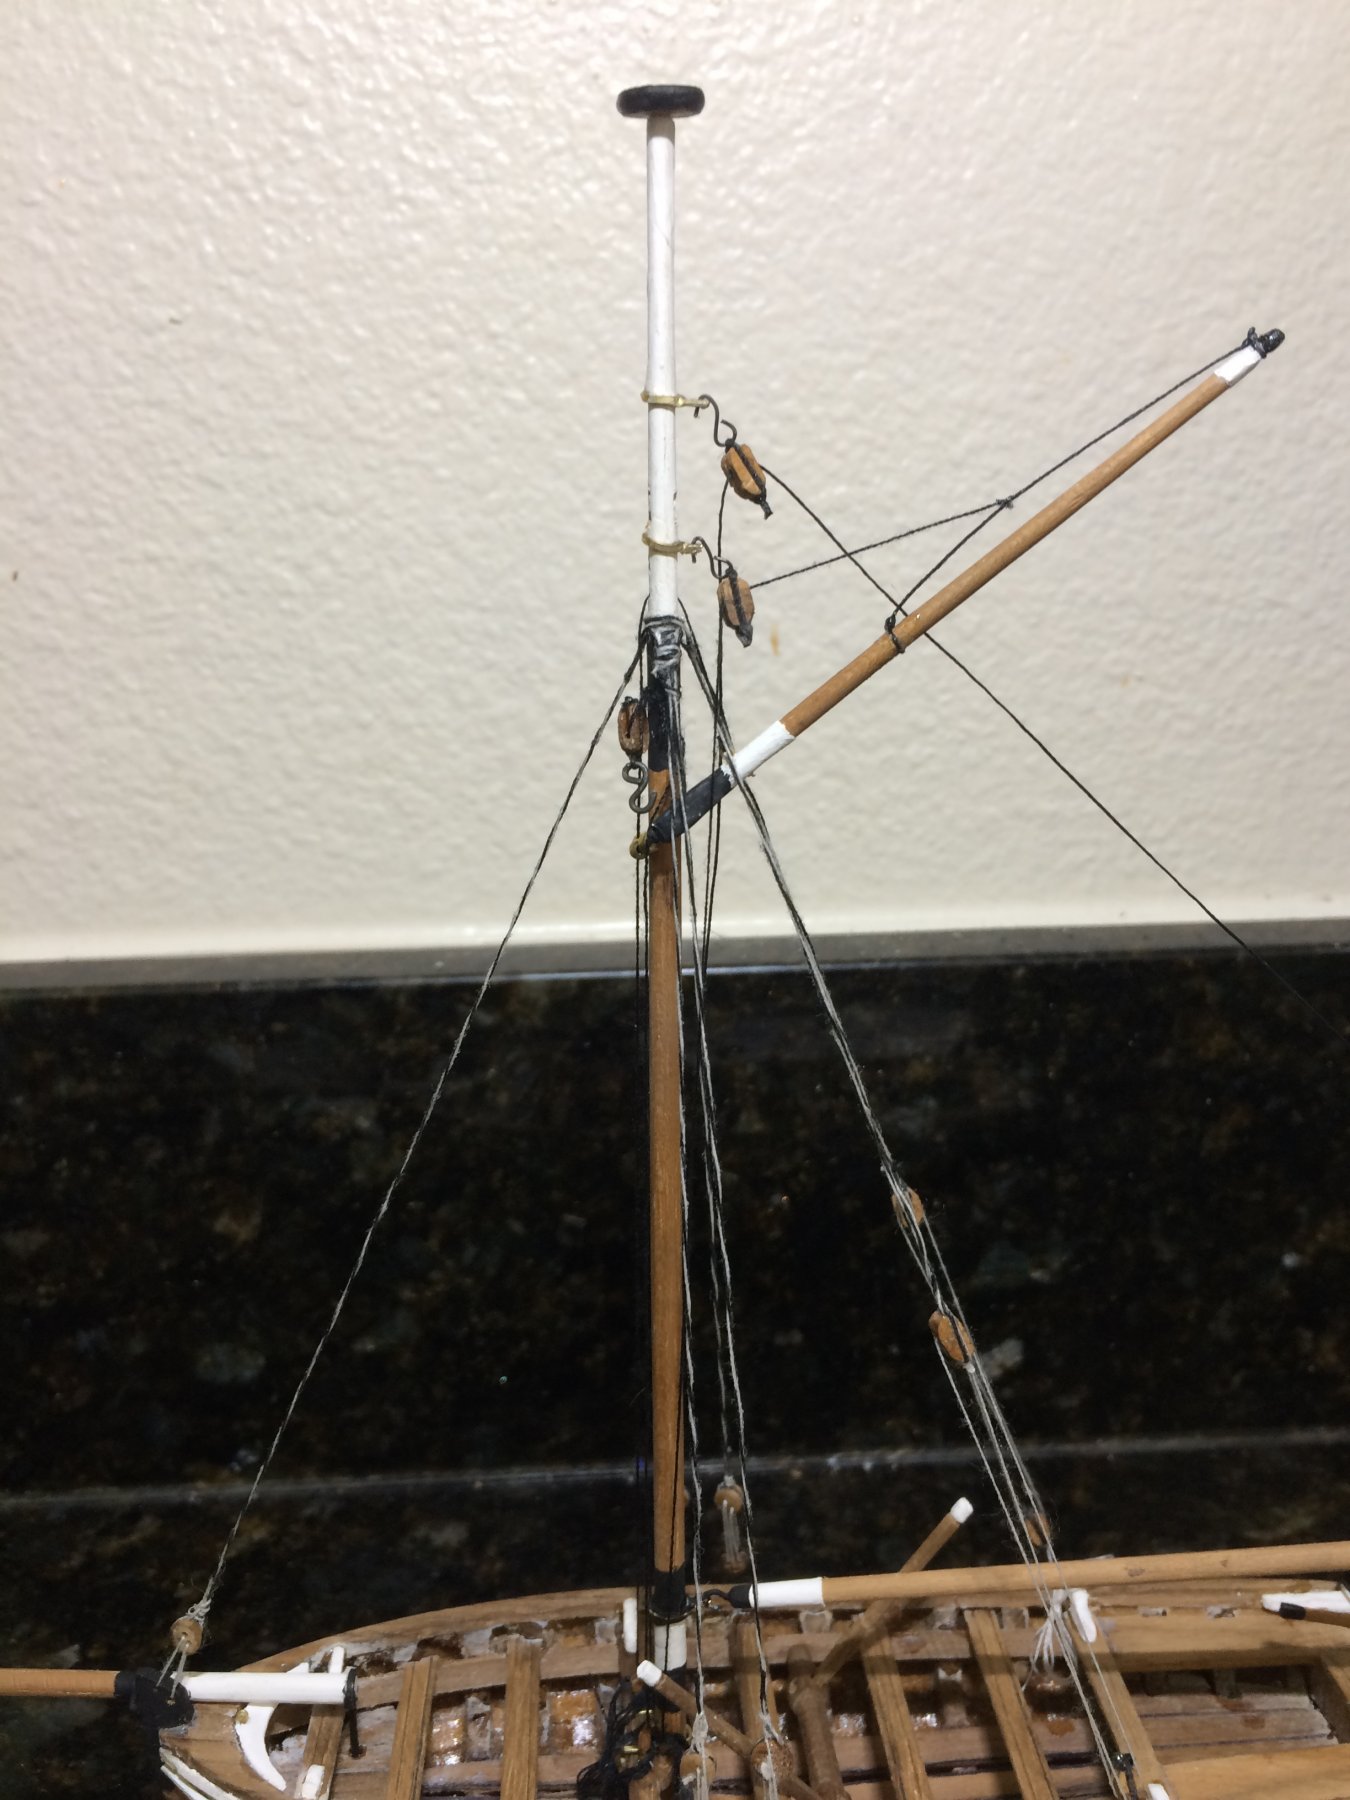
Then I mounted the rudder and got the stays rigged


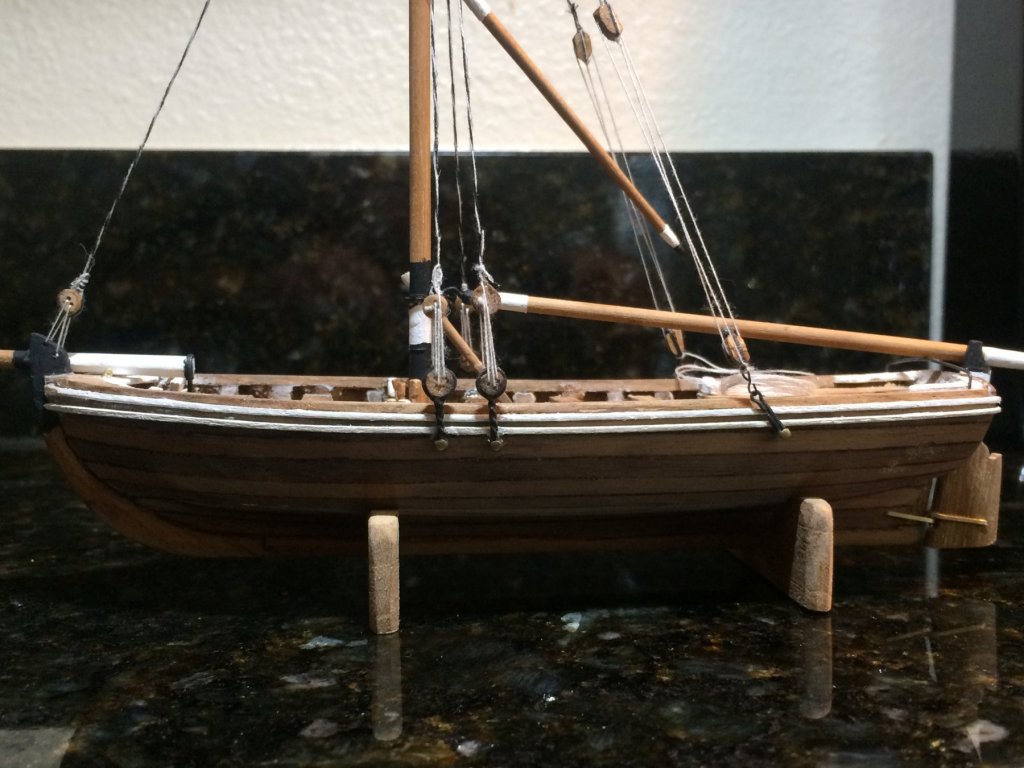
next I will rig the boom and gaff and start to mock up the sails. I have read that there are a couple different rigging plans for the sails One for a short gaff and one for the gaff in the plans I used for this build. I will do a bit more research on this before I commit to either way.not that I have kept the build period correct using the colored rigging on the stays.
- Tigersteve, Tom E, IgorSky and 3 others
-
6
-
-
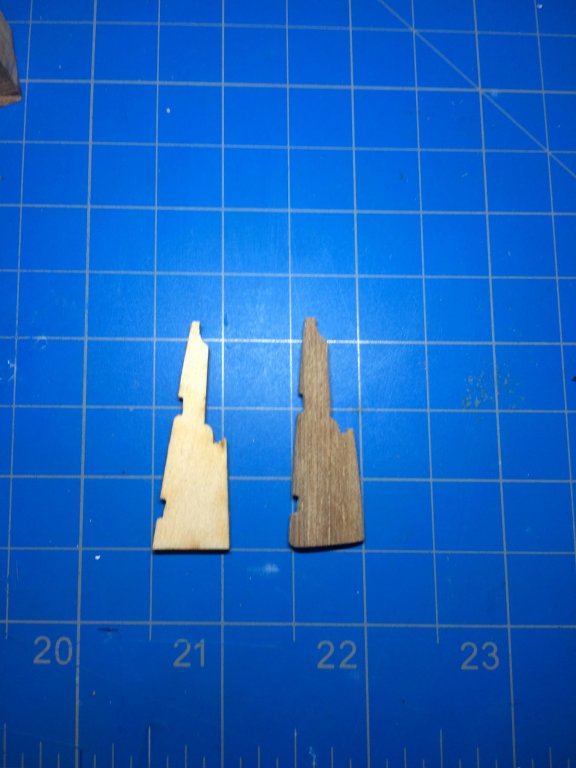
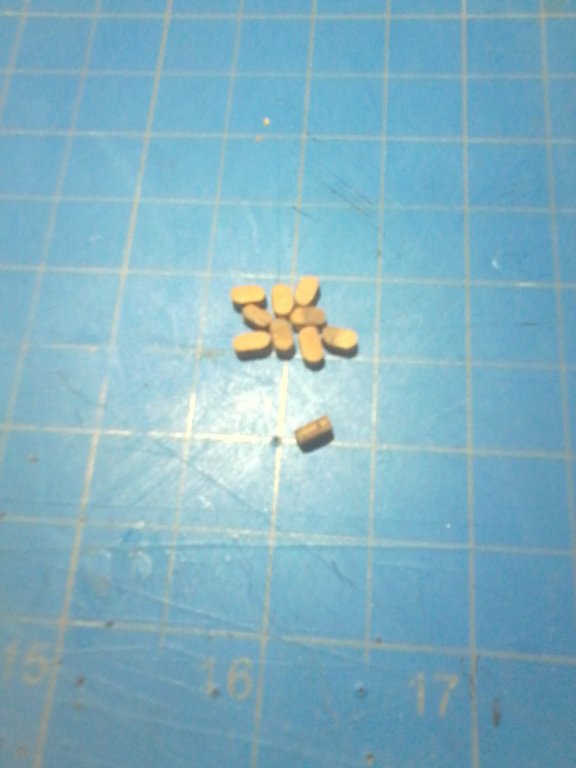
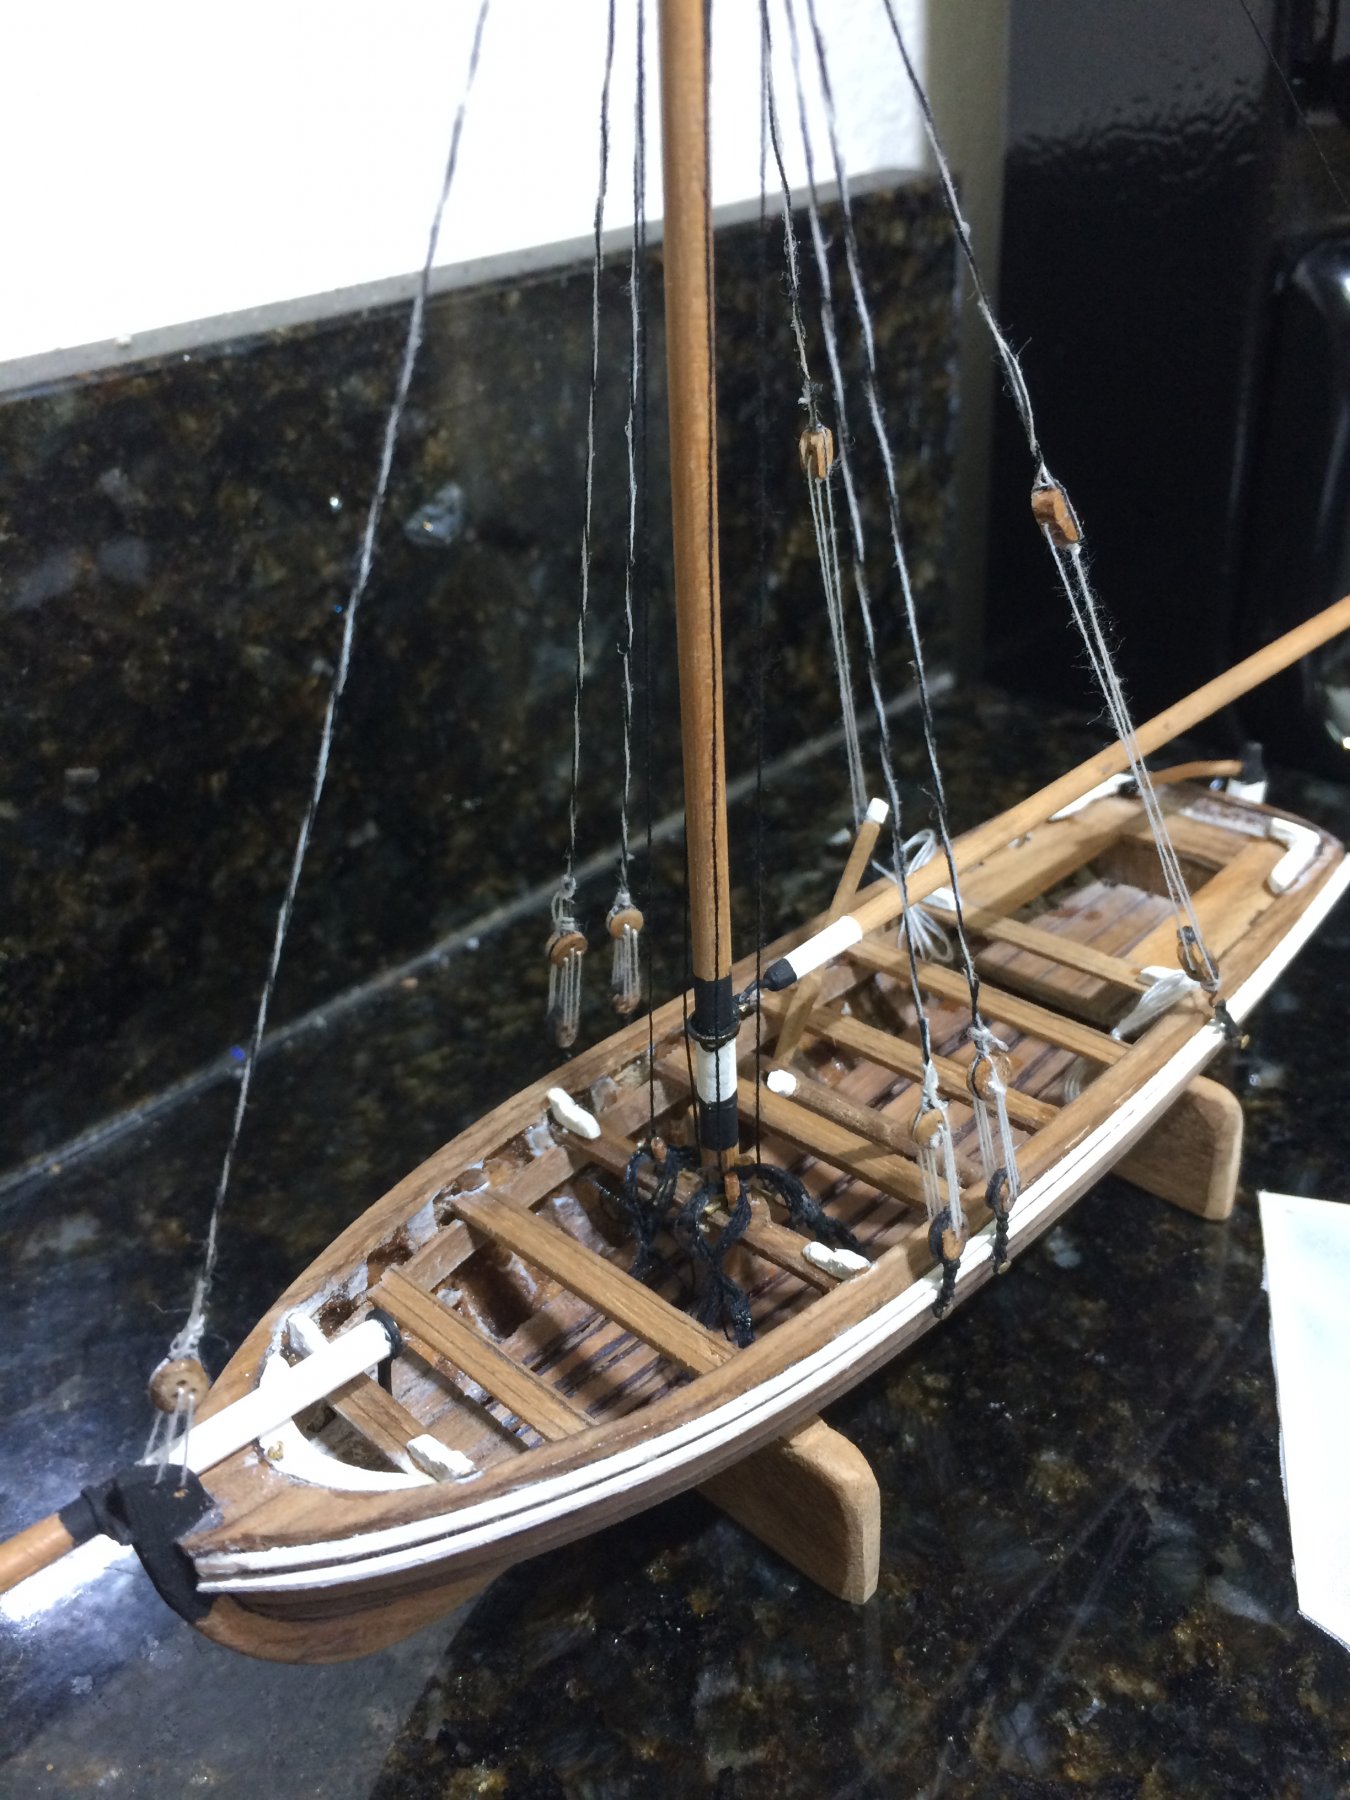
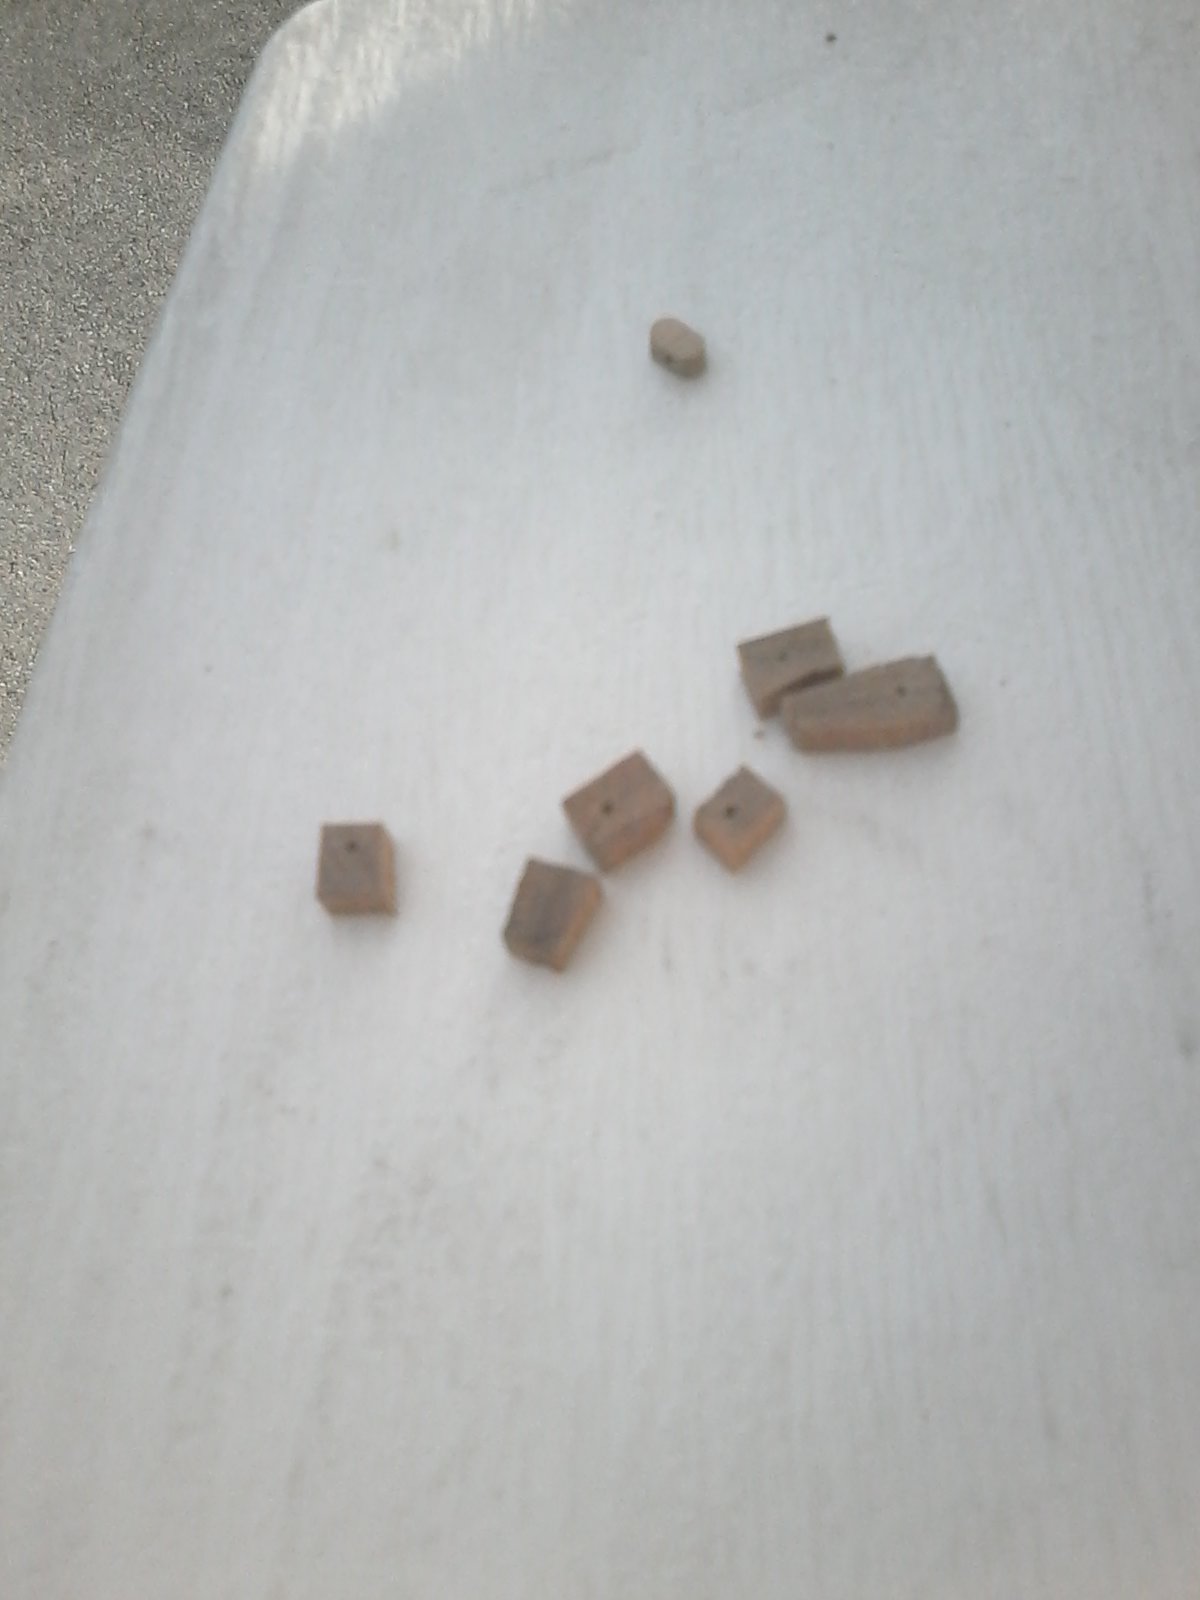
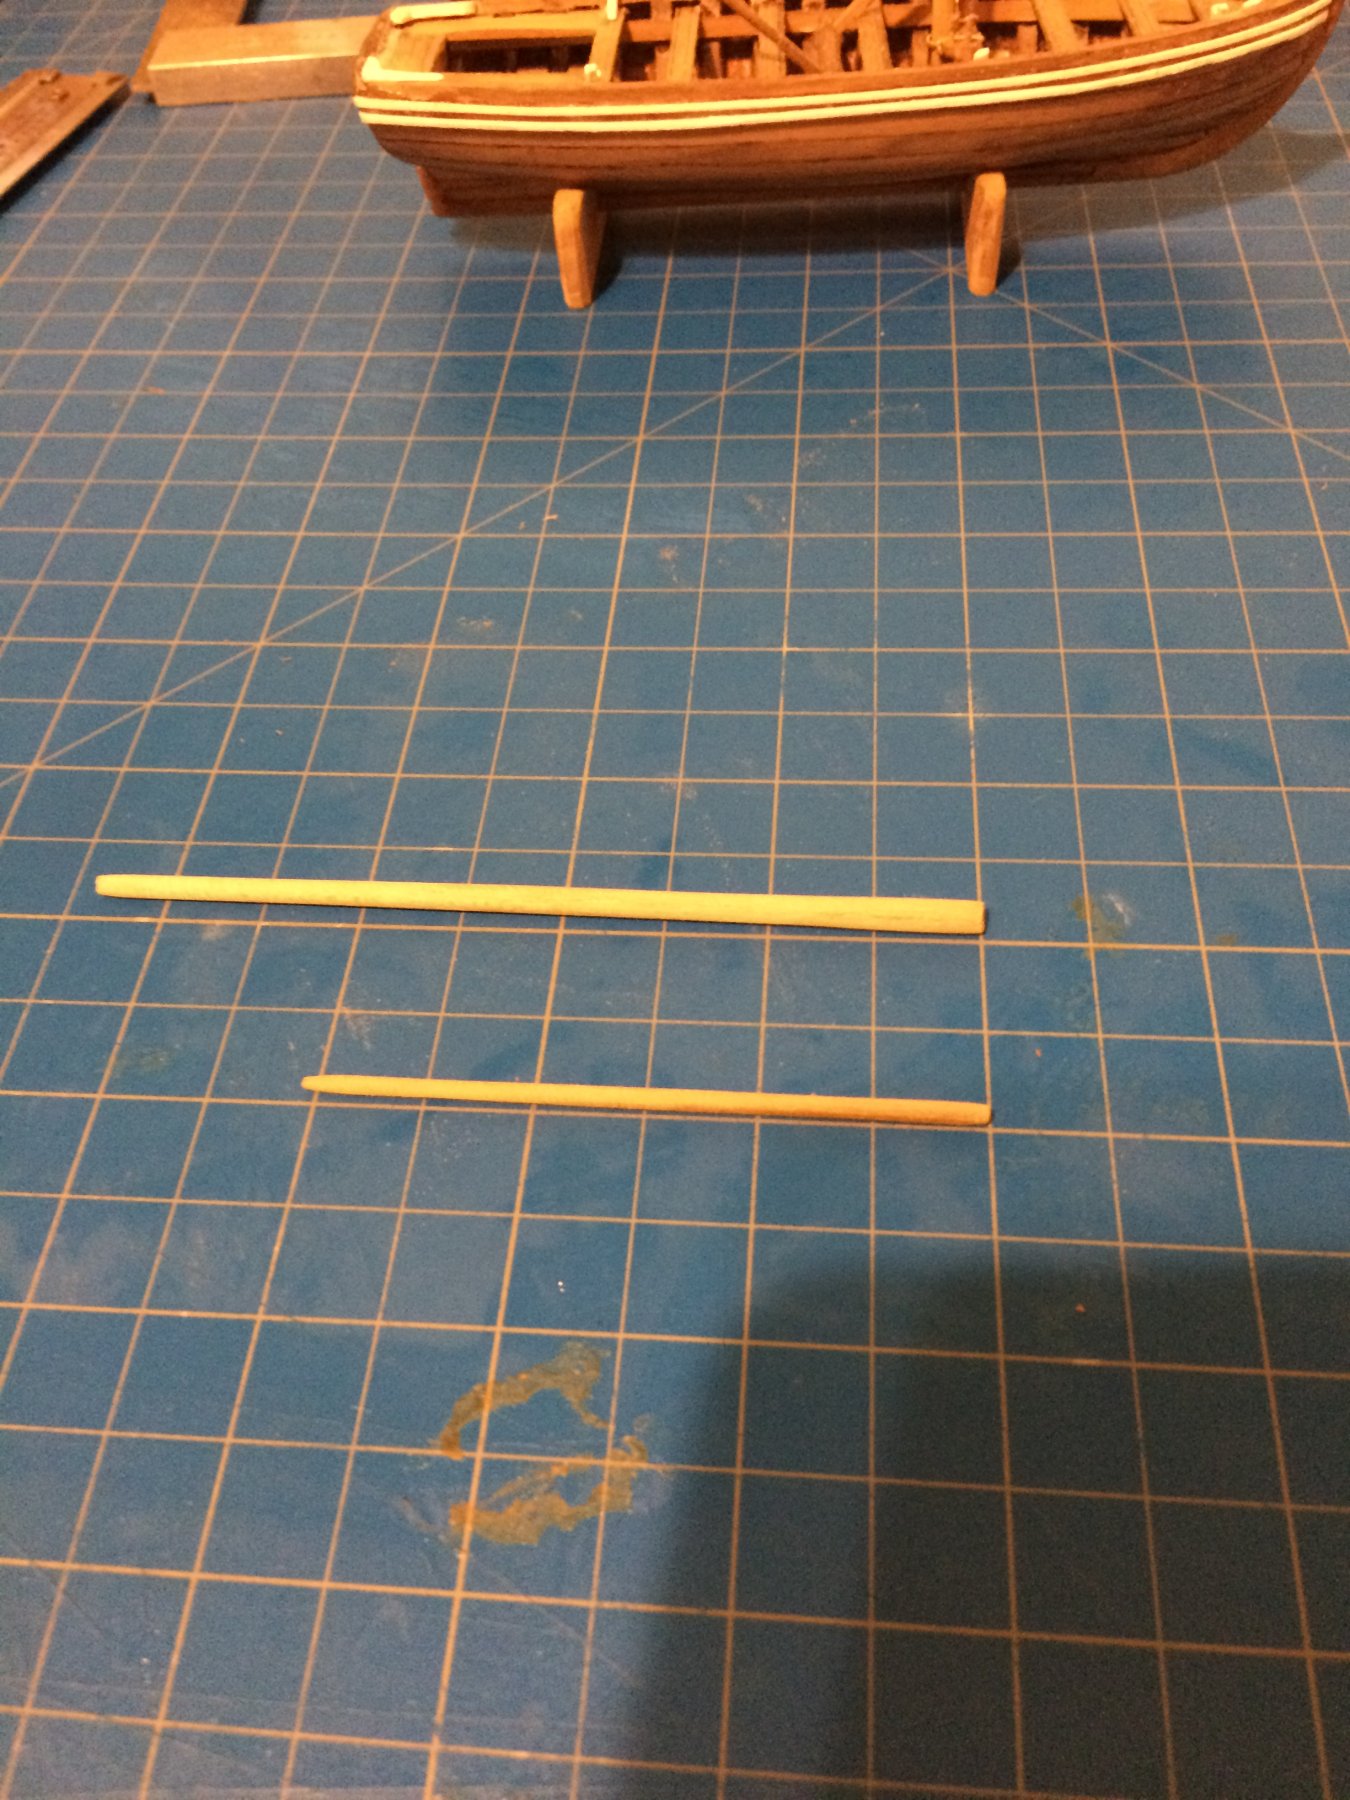
I cut , drilled and shaped all the 1/8 "blocks I need for the rigging today and for some reason building the blocks went so much better than the dead eyes.
I started of with a piece of wood cut to 1/8 " I then cut out pieces to aapproximately the size I needed and drilled the holes for the rigging

Then I sanded and filed until I got to the size and shape I was looking for . Then I filed in my grooves. I used a block I had left over from the ms kit to use as a example but now that I went back and saw chucks technique in his log he put two holes in his and they look sweet so I will have to go back and fine tune these
I am getting close to doing rigging and making the sails I need to start thinking about acquiring something to make the sails out of . I need to go back and find the forum I got the sail and rigging plans from and see if they mentioned anything about the materials used . If anyone has any suggestions please speak up
Thanks
Derek
-
Planking looks real nice B.E. 👍🏻👍🏻
- Blue Ensign, Martin W and Nirvana
-
3
-
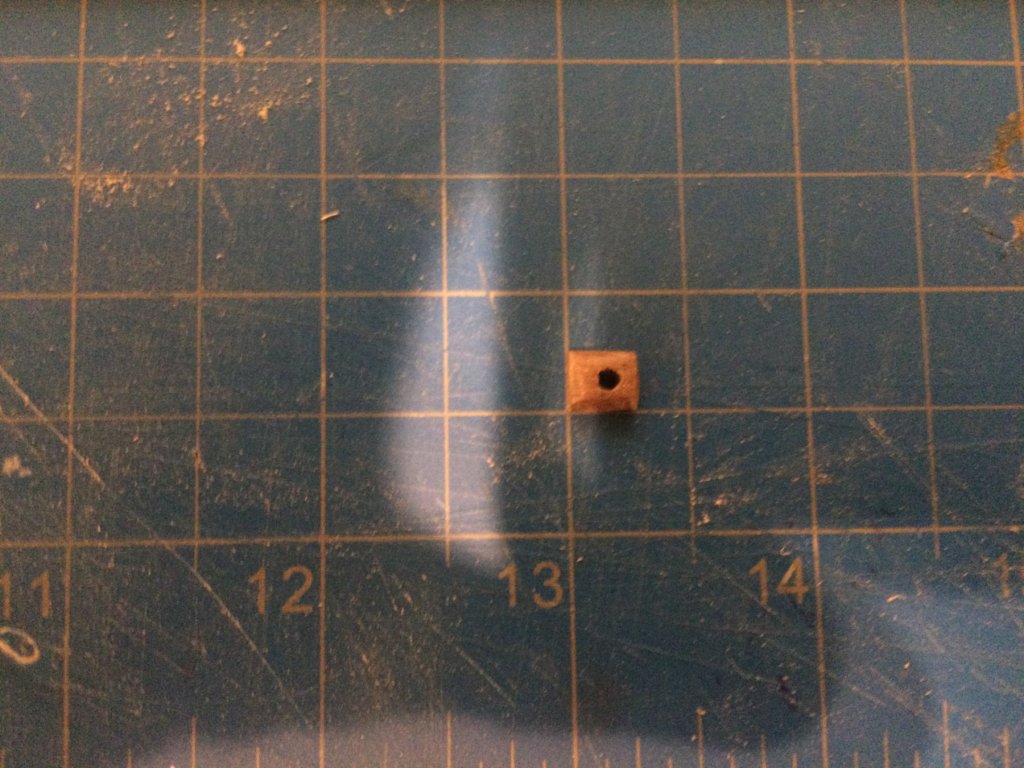
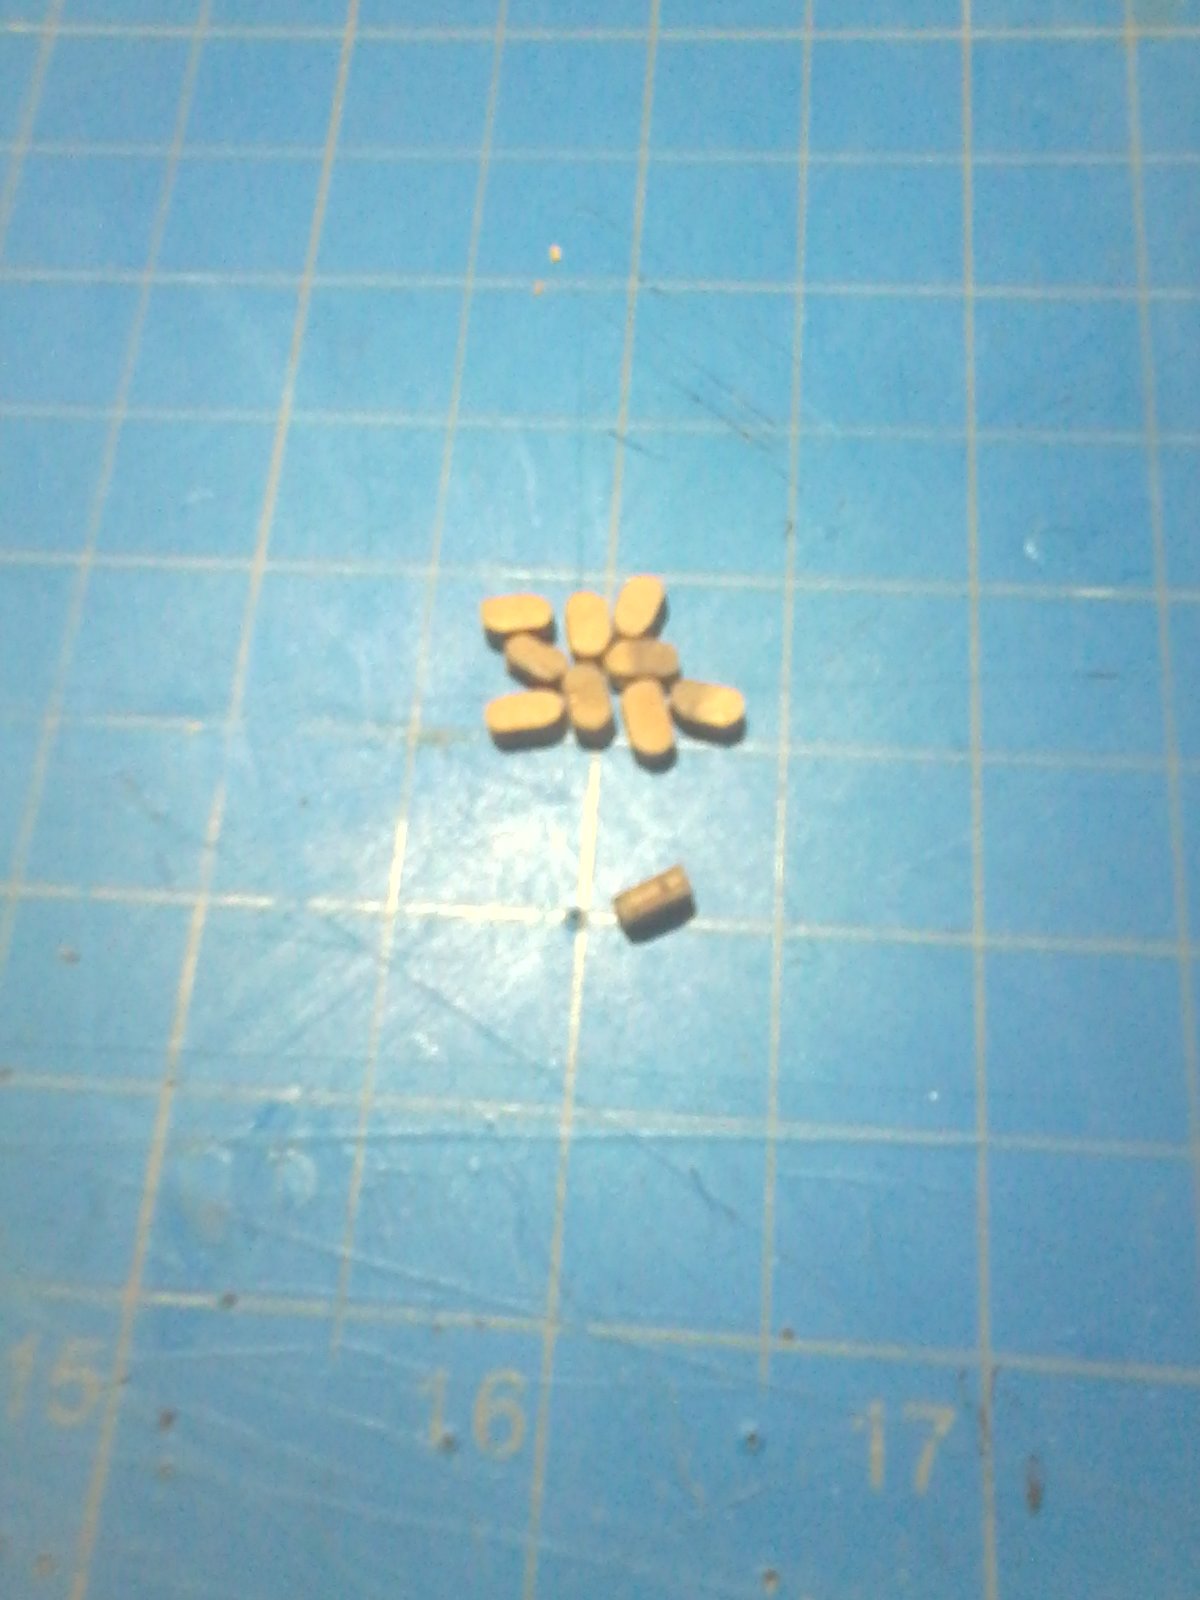
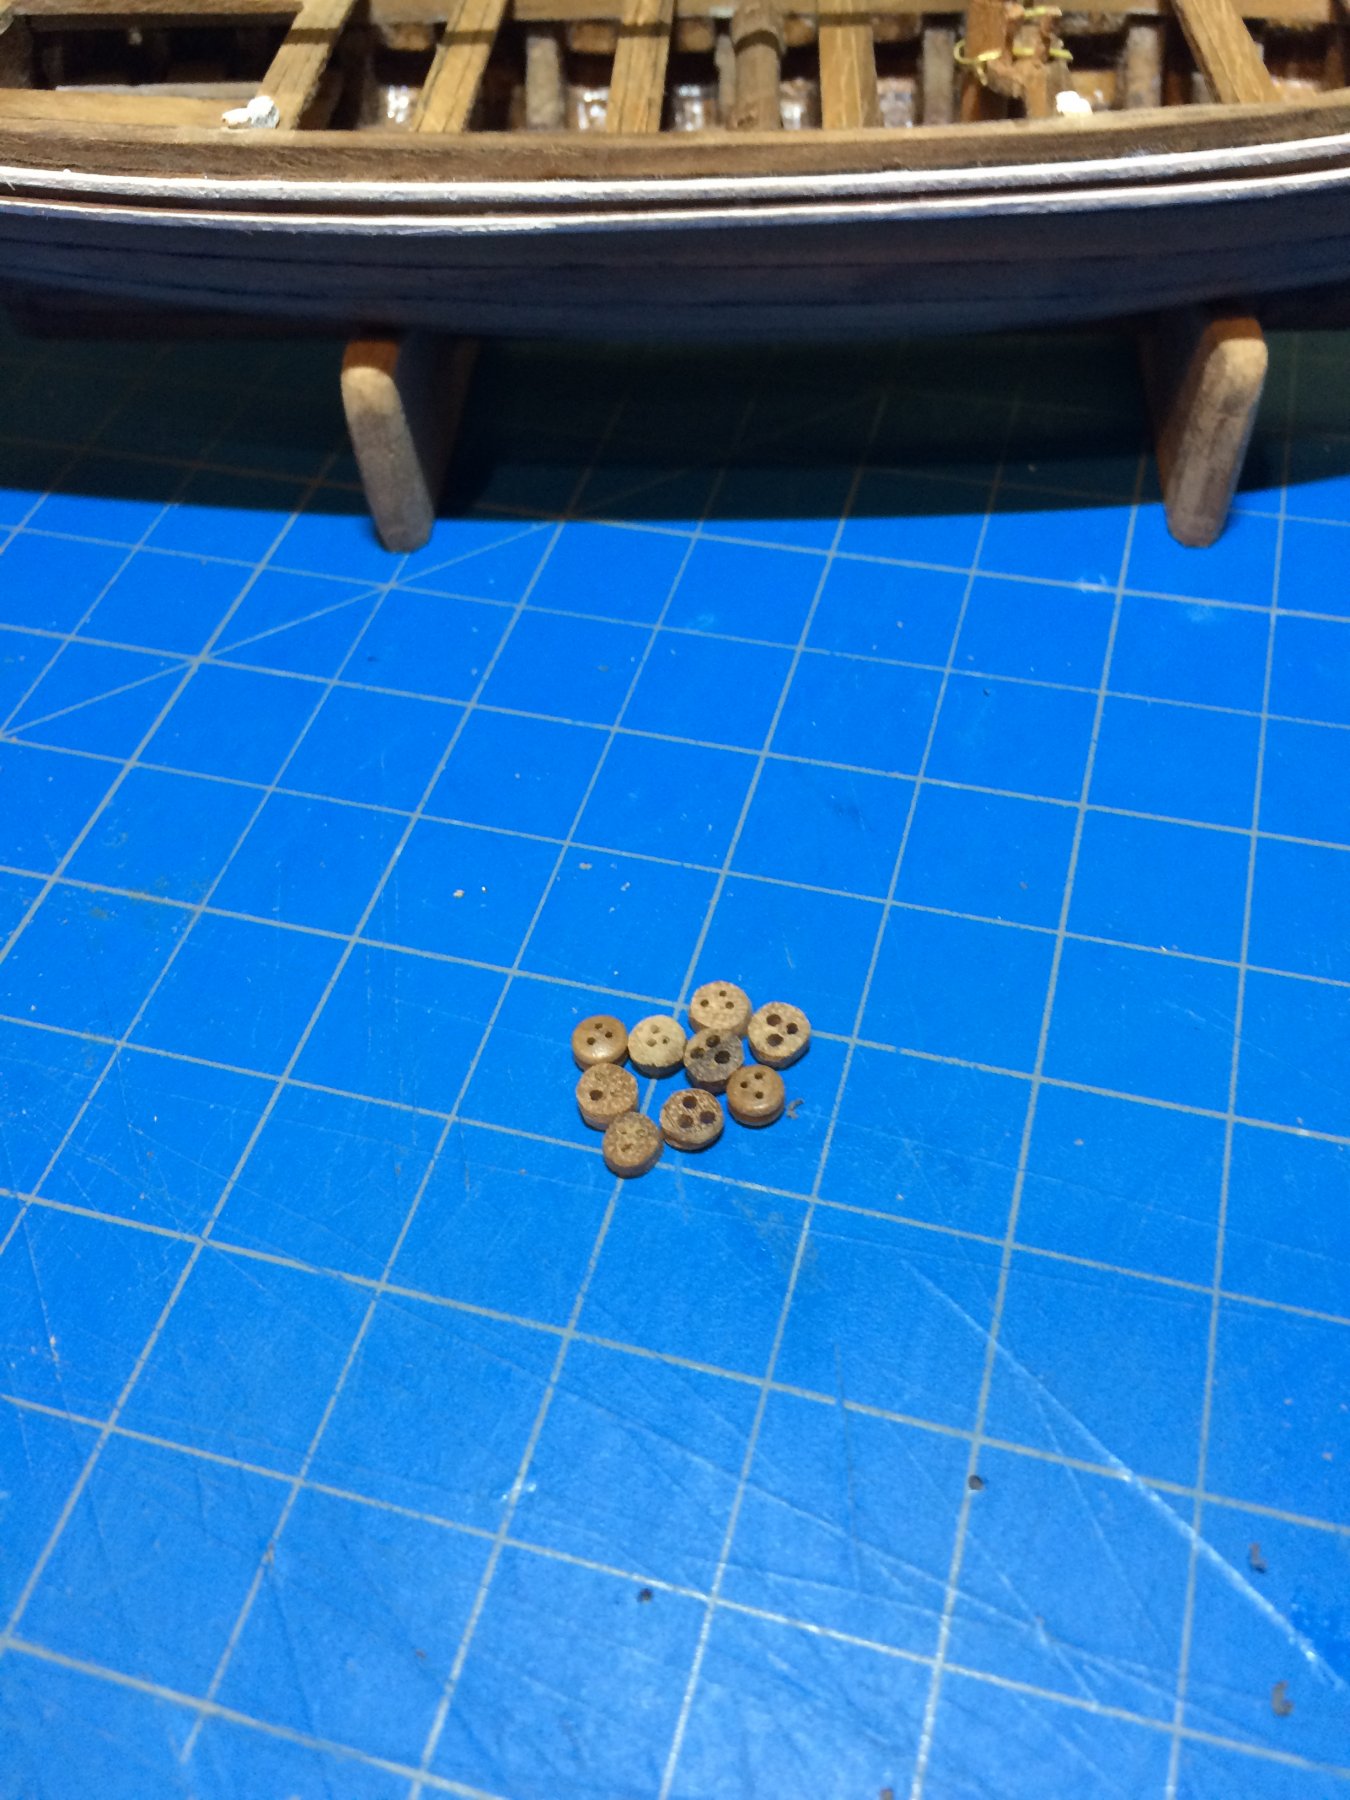
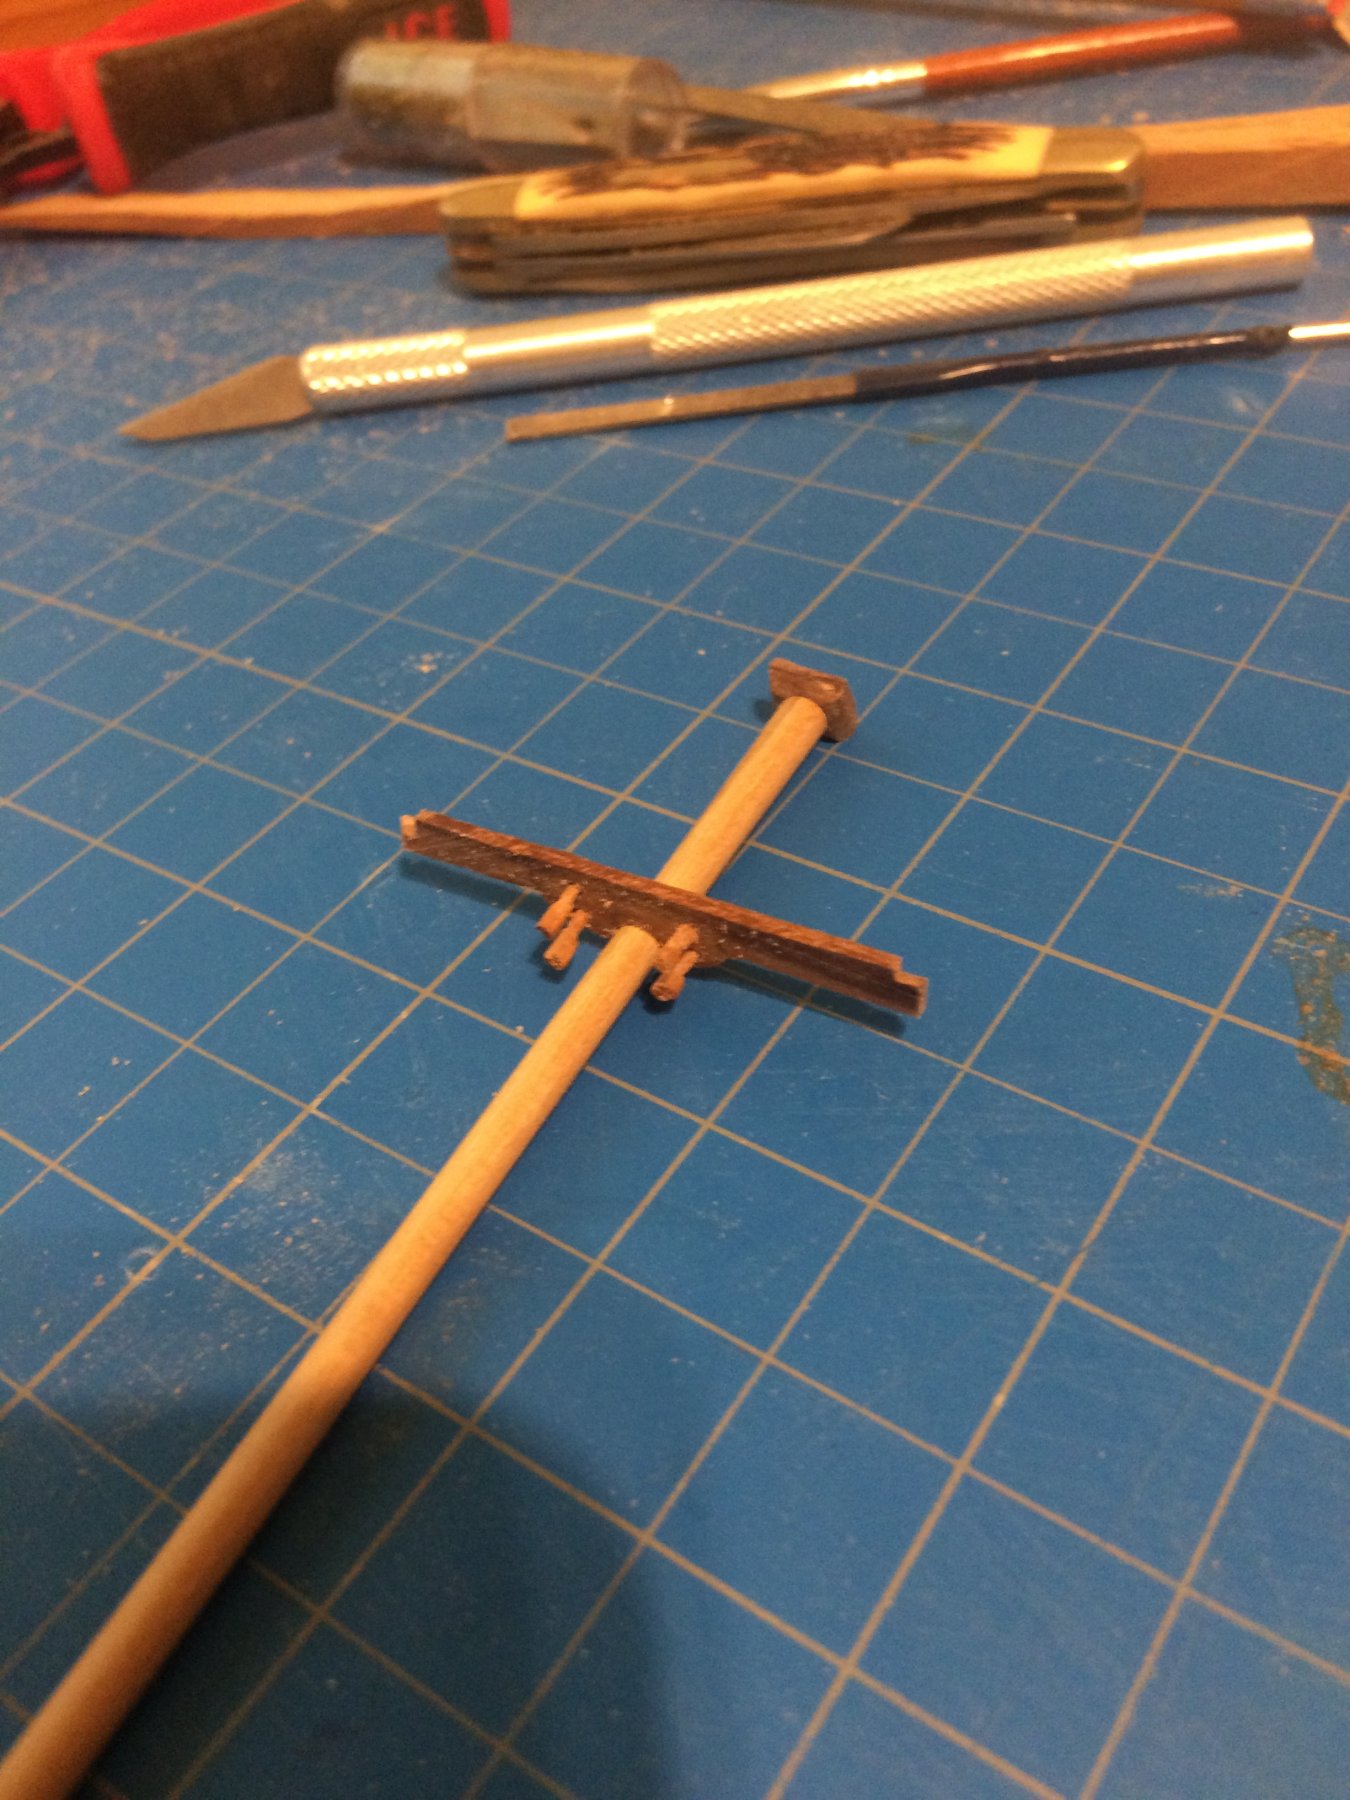
I made the dead eyes and chain plates, not the best but if I never have to make dead eyes this small again it will be to soon
I needed 9 total but I bet I made 20 and got 9 semi successful ones out of them . I started with a small square and cut out the general shape then finished them with sanding and filing.
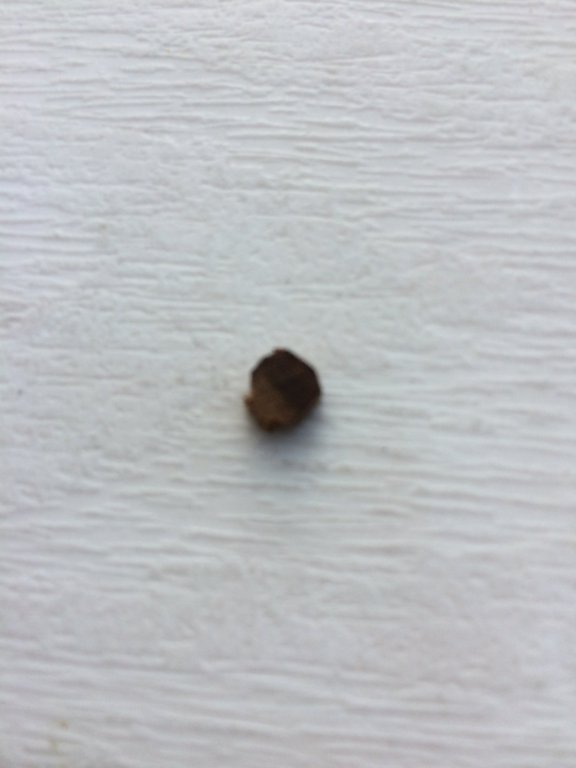

Then I used a small brass nail " the same diameter of the nails I will use to mount them once there done "with the head cut of to form the 1.5 " long piece of 28 gauge wire to make my chain plates .
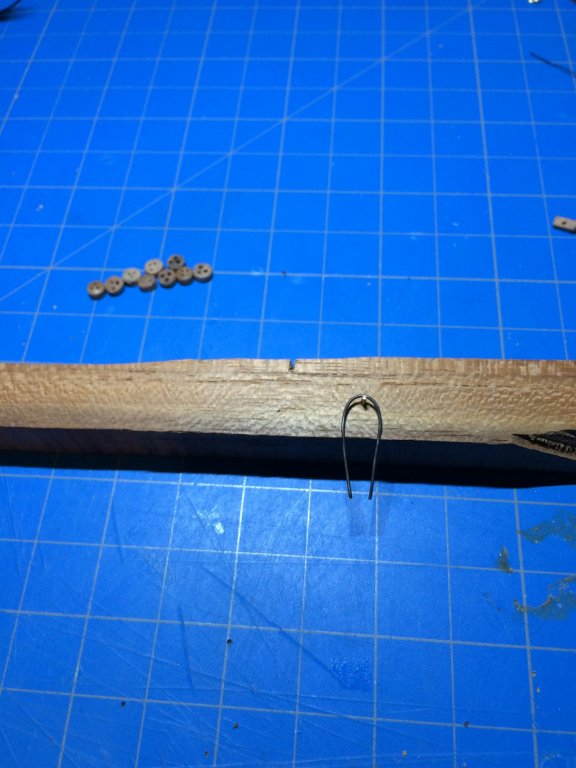
I then twisted th wire until the desired length and added the dead eyes using a drop of glue to secure them into the chain plates.

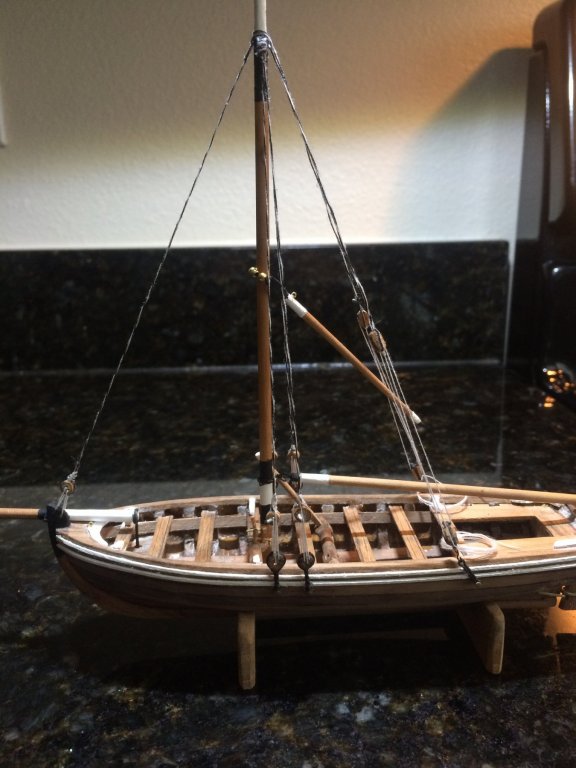
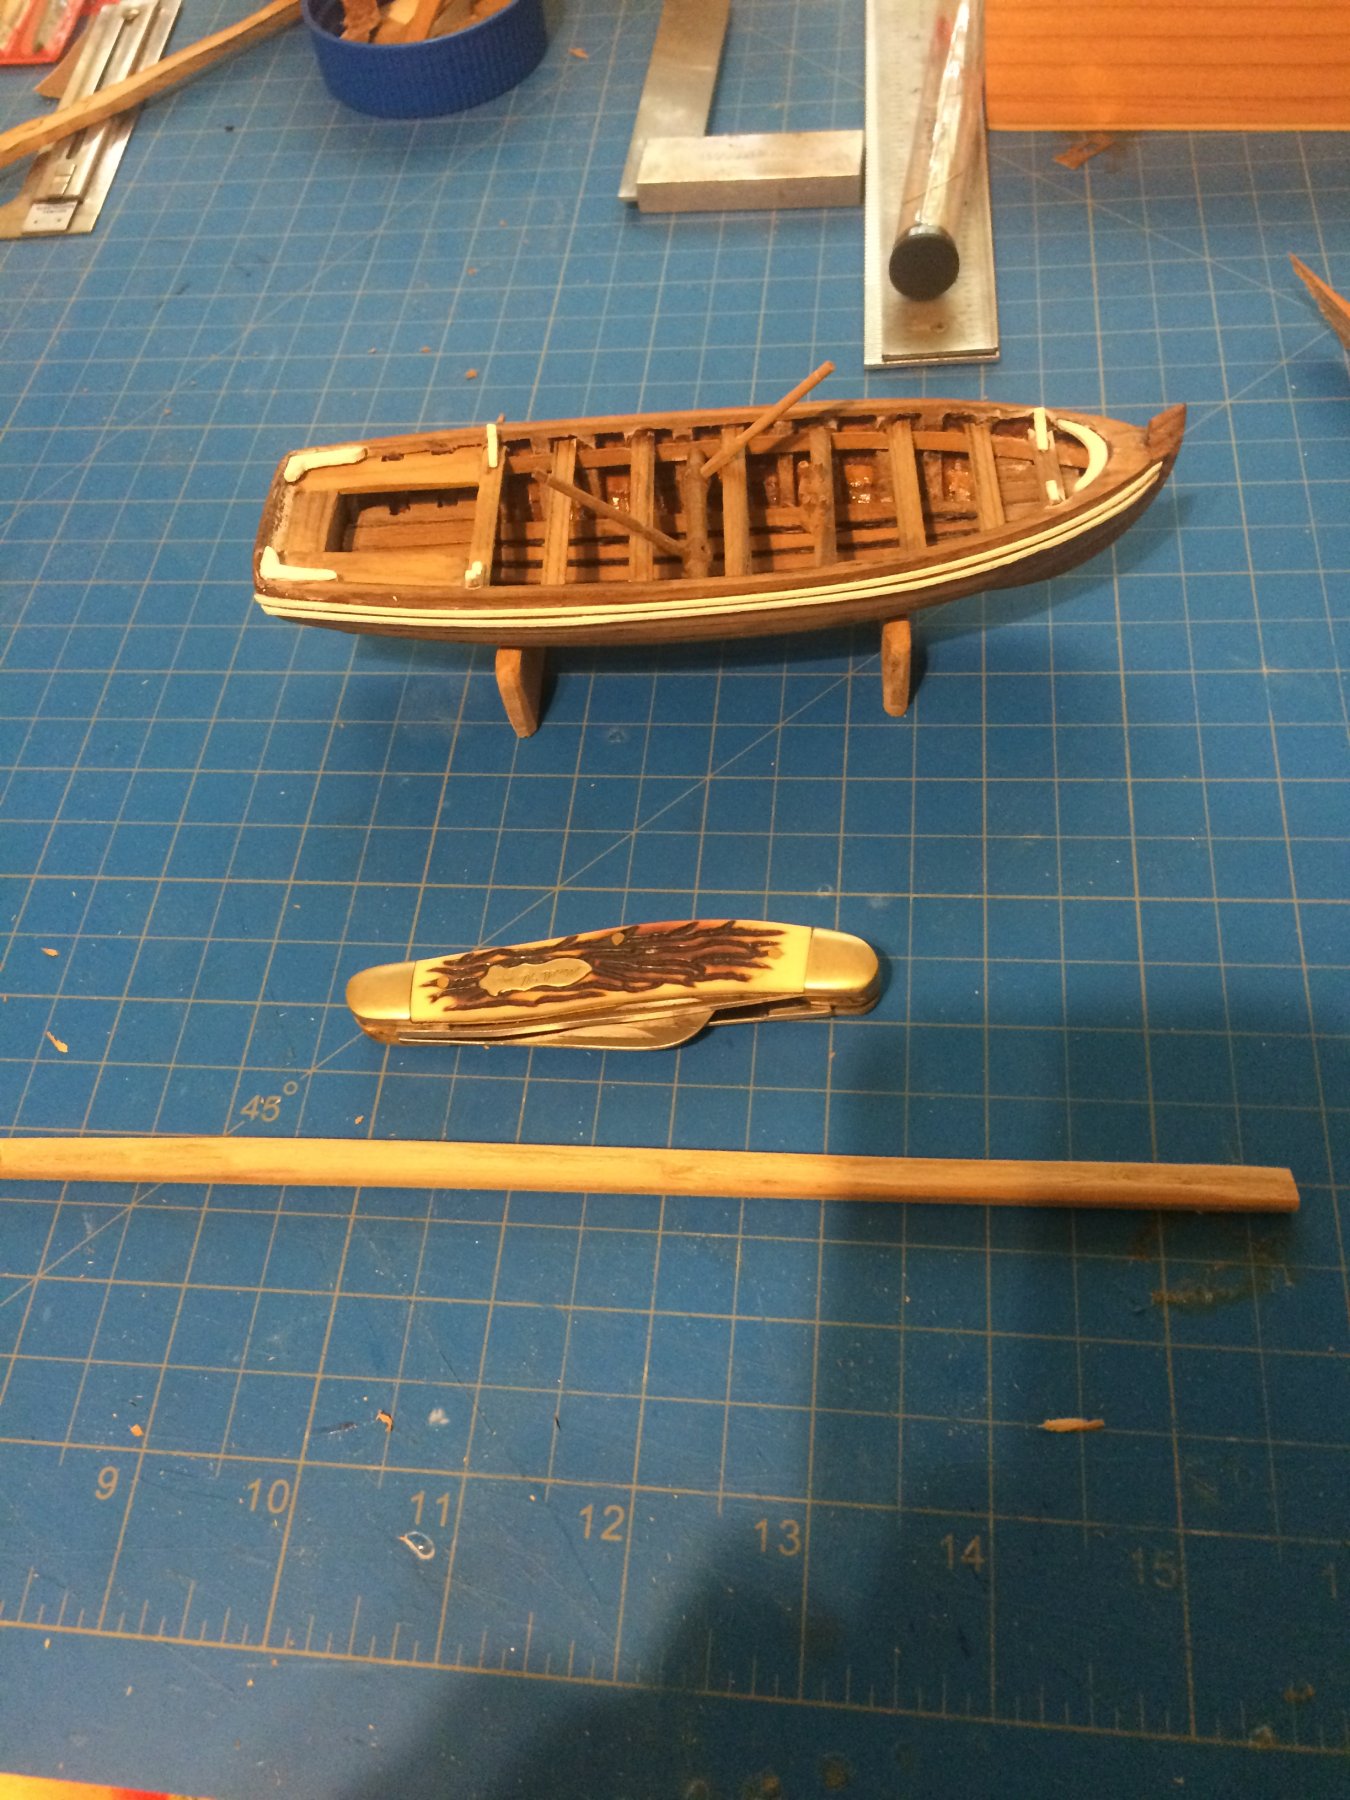
i also finished the gaff and applied the paint . I used white and black to accent pieces of the boat . Trying to leave as much of the natural teak showing . I plan on using a two part clear coat used on autos for the final finish


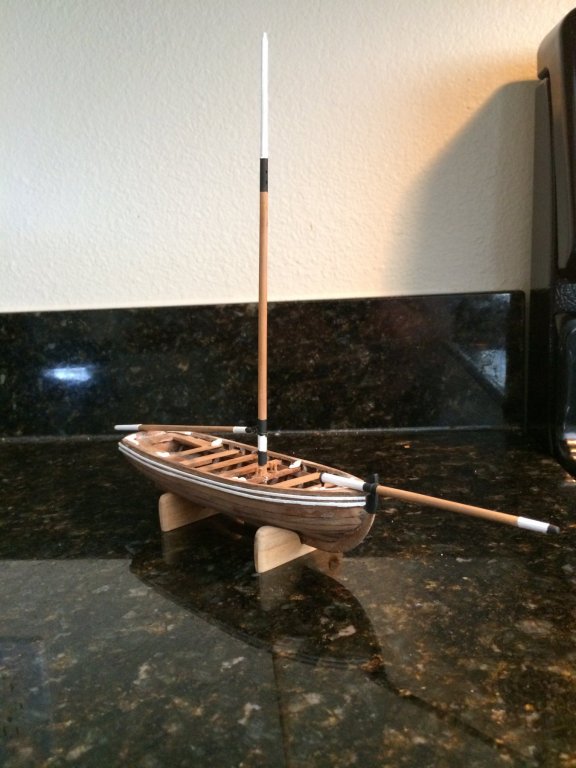
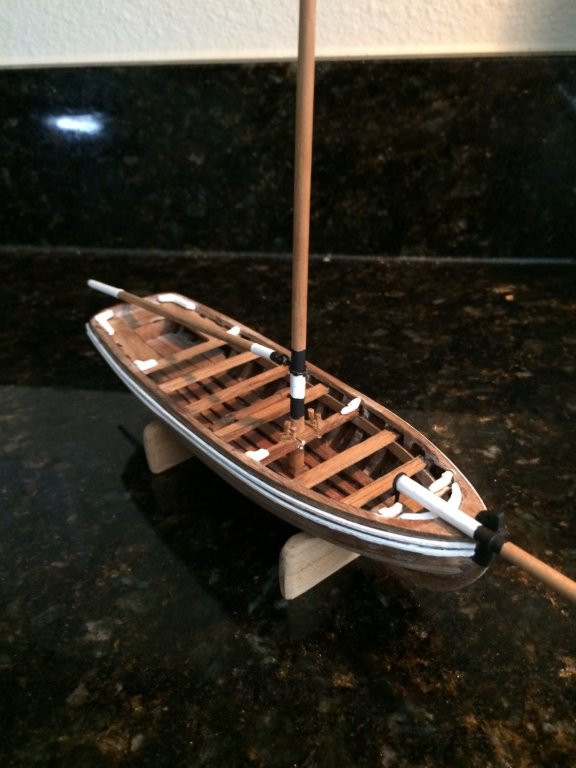
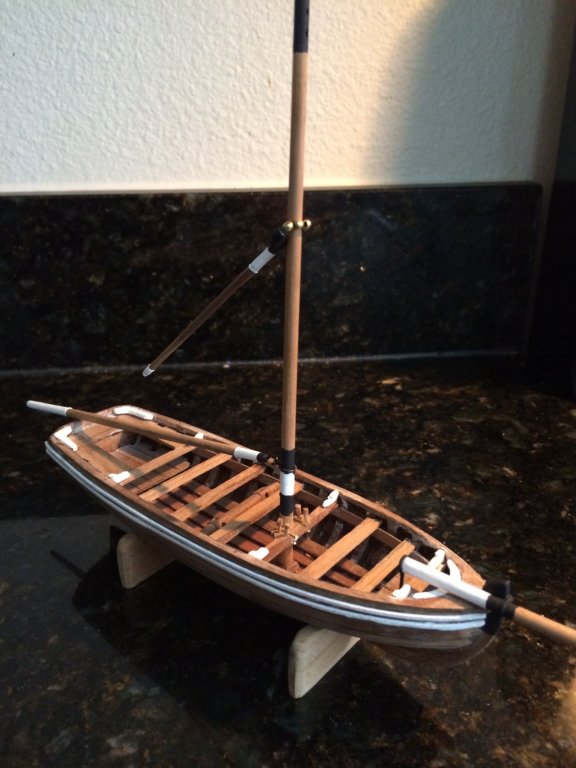
i am pretty pleased with the way she is looking for my first scratch build model
- Tom E, Tigersteve, alde and 4 others
-
7
-
-
-
-
Looks real nice Bluto
-
Looks real nice Steve ! Planking with hard wood is difficult I have found out , but yours came out sweet.
-
I'd go red handles and paddle leaving the center natural
-
-

I have also retained plans for that boat from a website, a few years ago and seeing this post I had to go digging to see if I could find where I filed them lol . I did find them but maybe I lost some because they don't make since to me. I have never done a paper or card model in fact I'm only on my second wood model now , I had done many plastic kits when younger but nothing like what is seen on MSW. When you start your log I will follow along maybe it will help me understand what I have
Good Luck
Derek
-
😳 wow ! Simply marvelous Nek0
- mtaylor, FrankWouts and Nek0
-
3
-
-
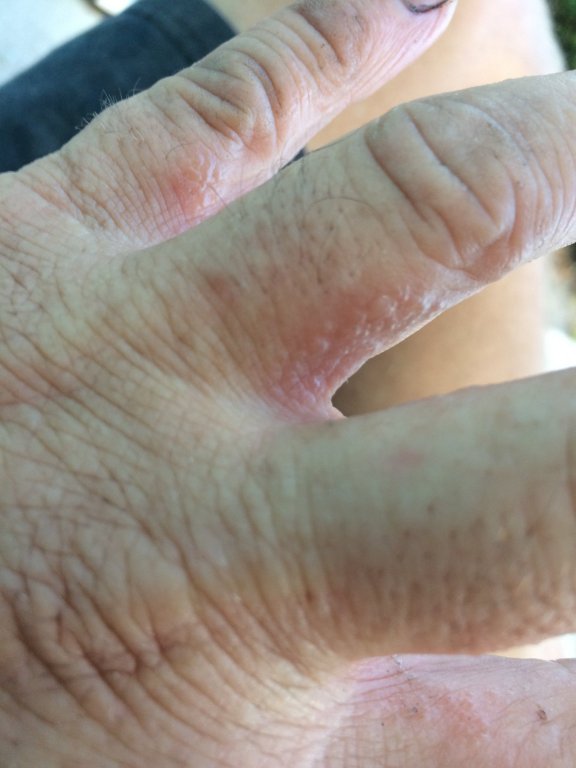
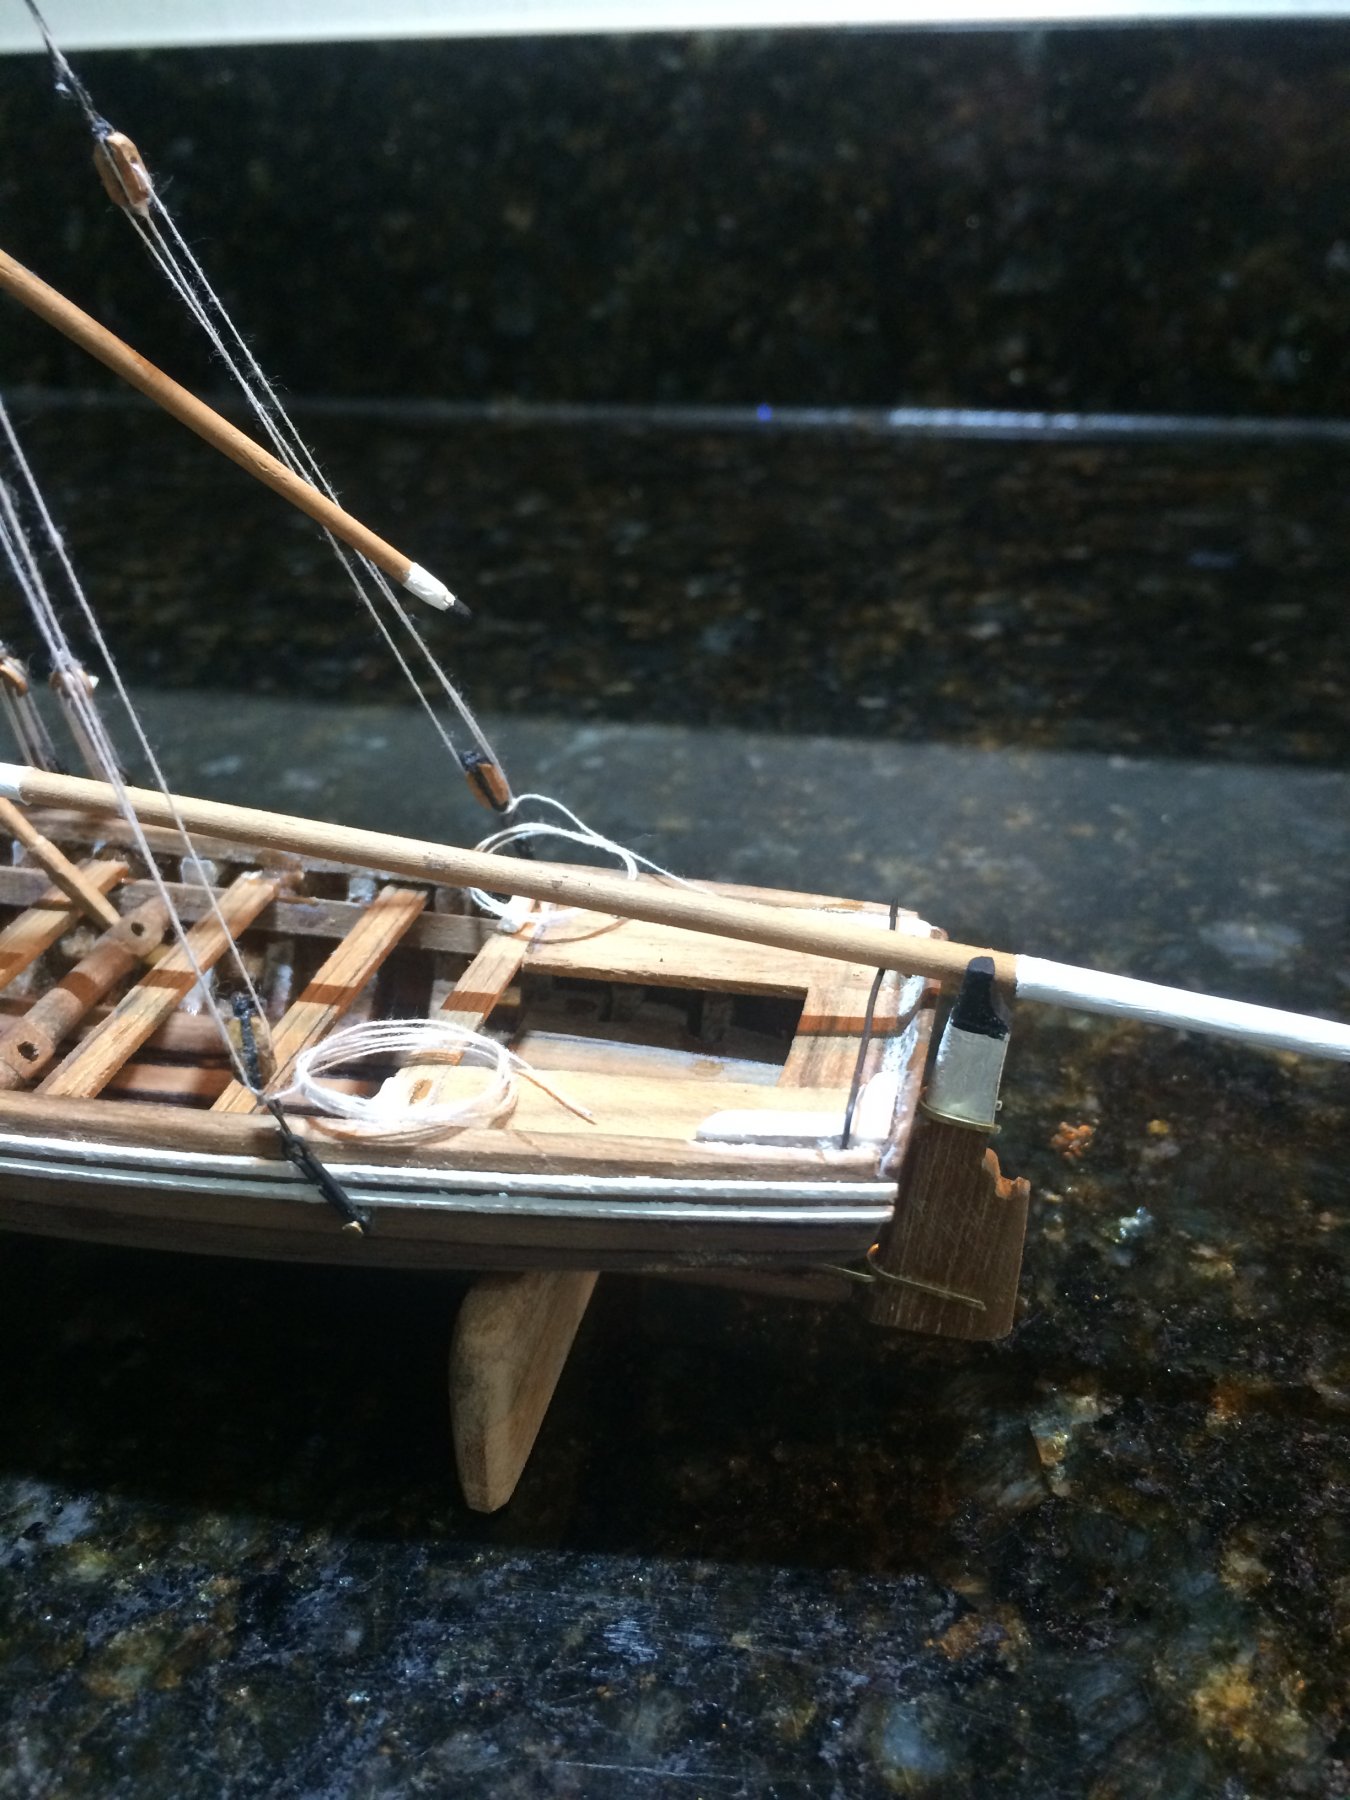
I made the bow spirit, and almost finished gaff last night .

But with all the sanding I did yesterday . I woke up this morning with a nasty rash between my fingers 😲 Apparently I bit to much of the oil from the wood sat a tad to long on my unprotected skin . So here is a P.S.A. ..... when working with teak be sure to use a good respirator and cover up as much as you can stand lol 😂
- Tom E, Ryland Craze, IgorSky and 2 others
-
5
-
-
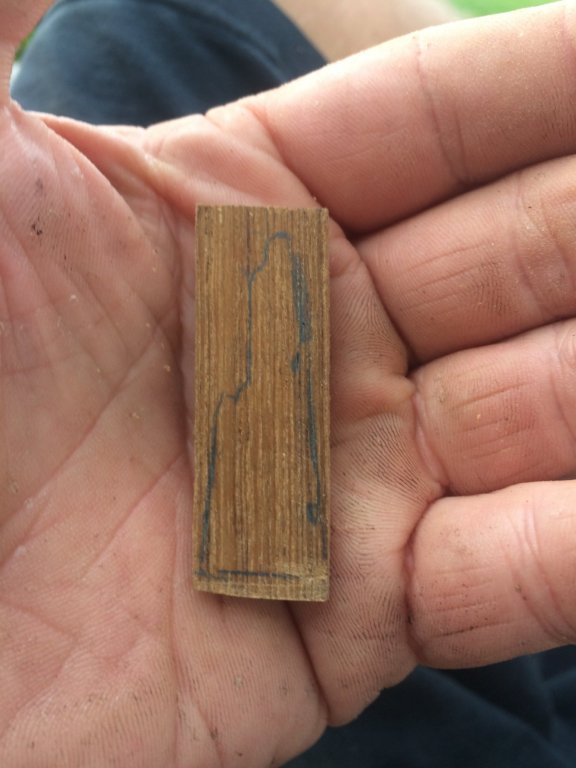
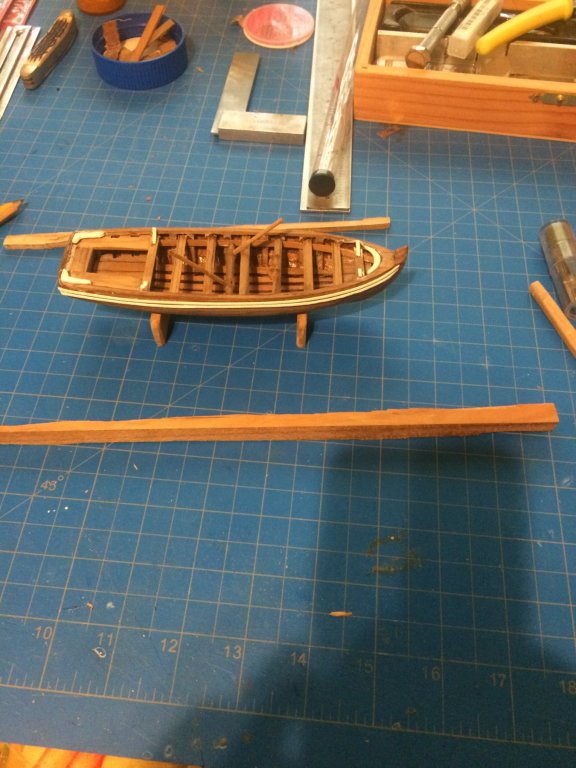
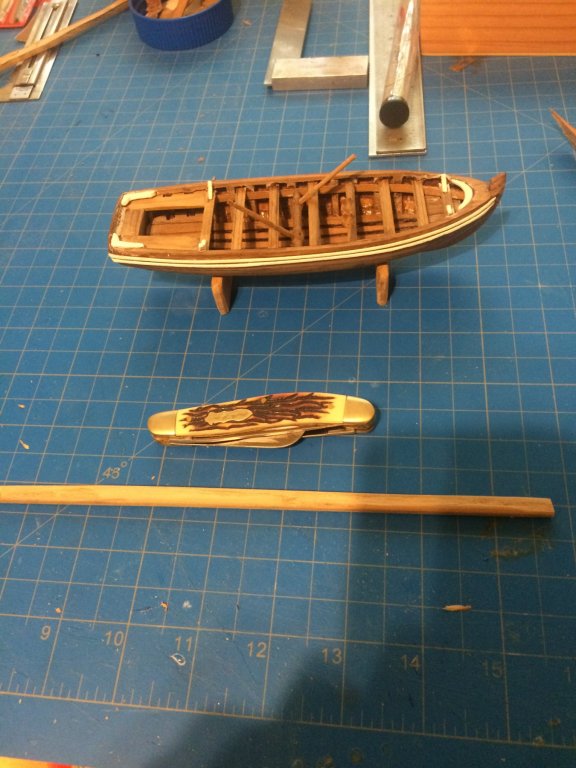
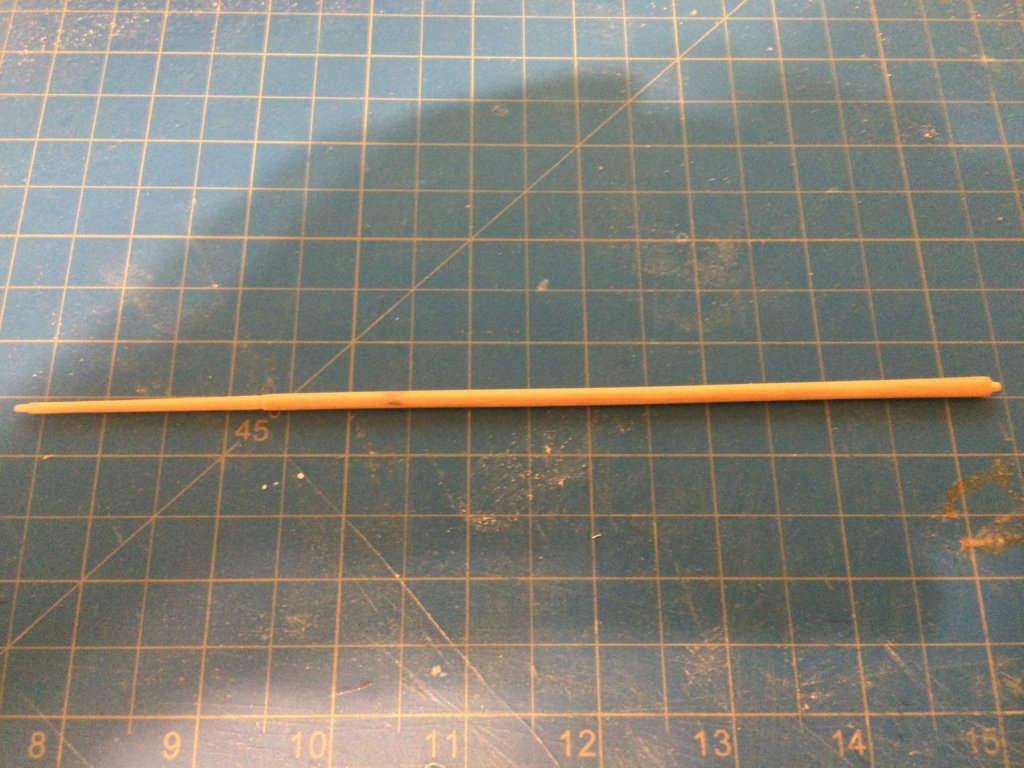
I got the mast and mast step done . I had a scrap piece of teak that I had broken earlier in the project so I used that to make the mast . I used my pocket knife to get the general shape and size I was looking for then finished it if by hand using 120 grit sand paper and a couple hours of sanding. The teak is very hard and takes time to sand . I guess I could have used power tools but it was a nice day to sit outside and whittle up a mast .


New to forum
in New member Introductions
Posted
Hi Jim