
josh44
-
Posts
112 -
Joined
-
Last visited
Content Type
Profiles
Forums
Gallery
Events
Posts posted by josh44
-
-
As is usual for me, I plan to go light on the miniature details, since that is a weak point for me. Am hoping that a well-planned design, with simple construction will win the day. I still have a lot to learn.
 Applying primer to a sanded hull.
In general, i dislike drilling dozens of timy holes in the yards and masts, so am trying to minimize that process as well.
 Simple attachment of the yards to the painted brass masts.
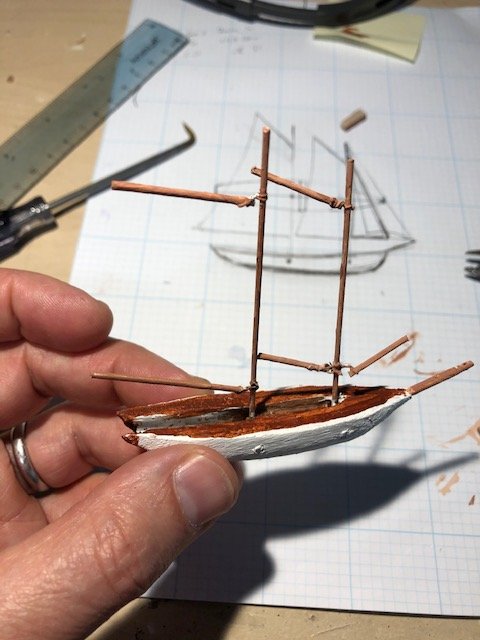
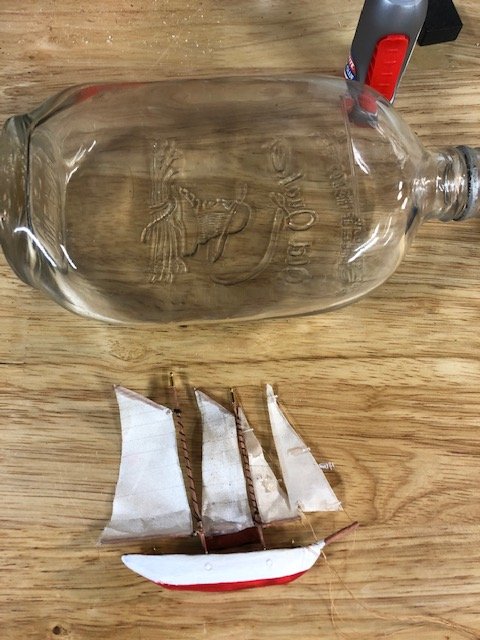
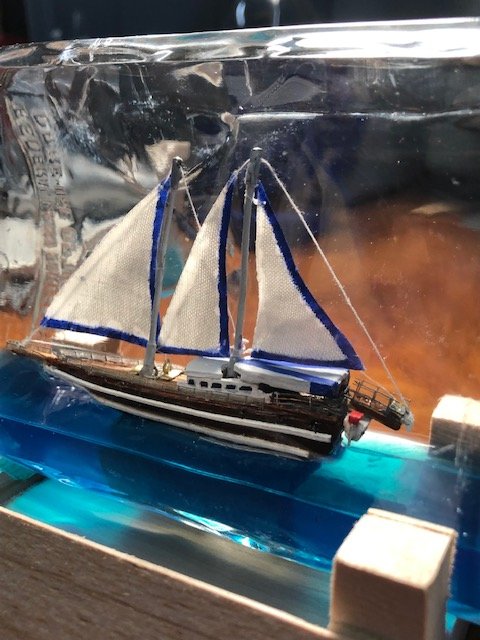
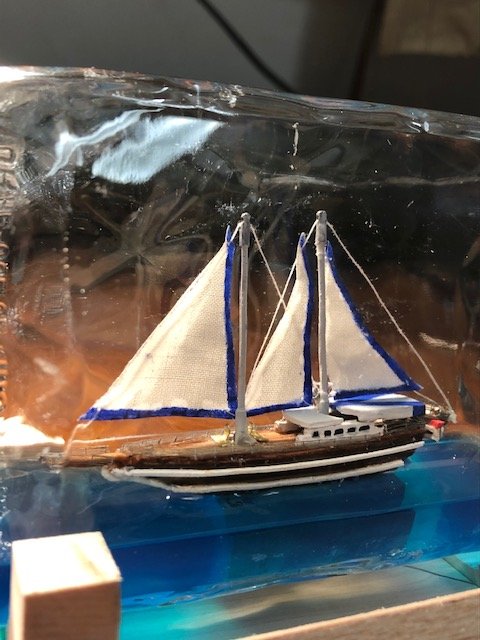
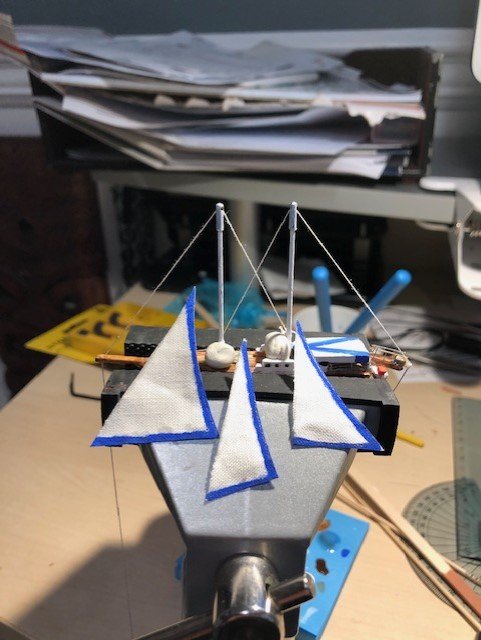
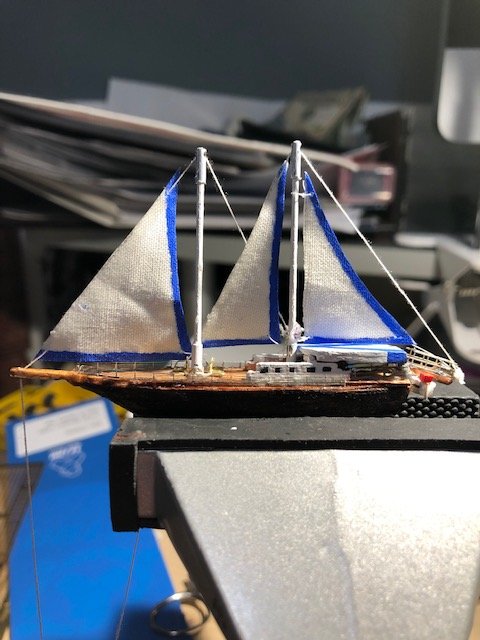
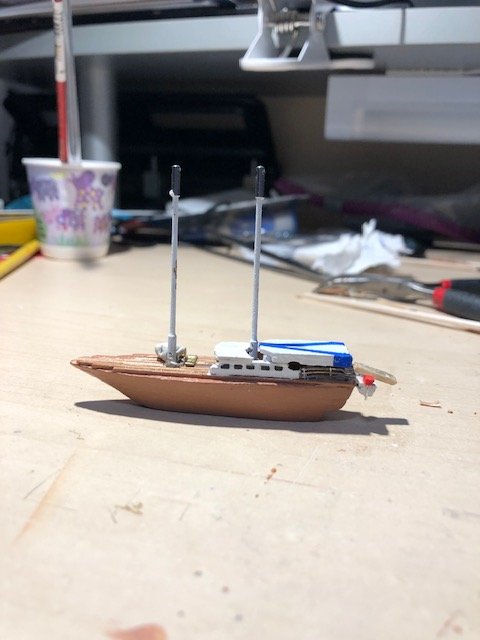
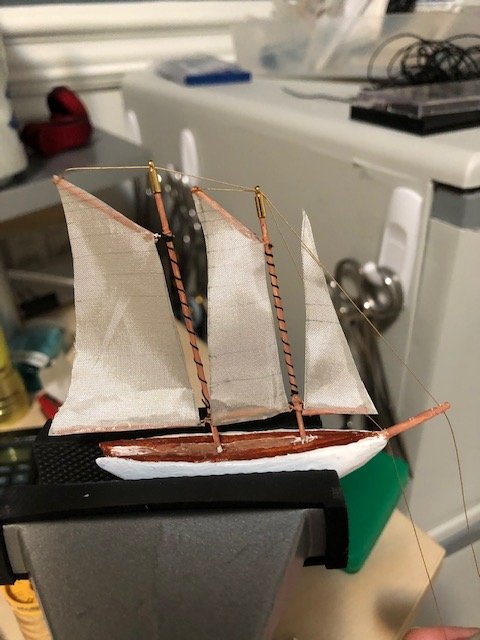 Fast forward to 3 / 4 Sails up, with the only decoratiove flourishes I will add: the mast lines, and the highly functional bead cap ends atop the masts.
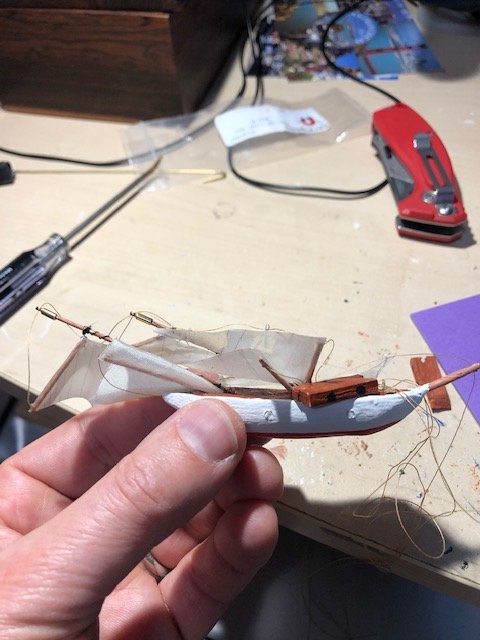
 I cut the deck house in two, to allow for the masts to fold back. I will drop them down after launch. This is where trouble starts: I think I'm clever by threading the line from the foremast yard down through the fore deck house. This will come back to haunt me.
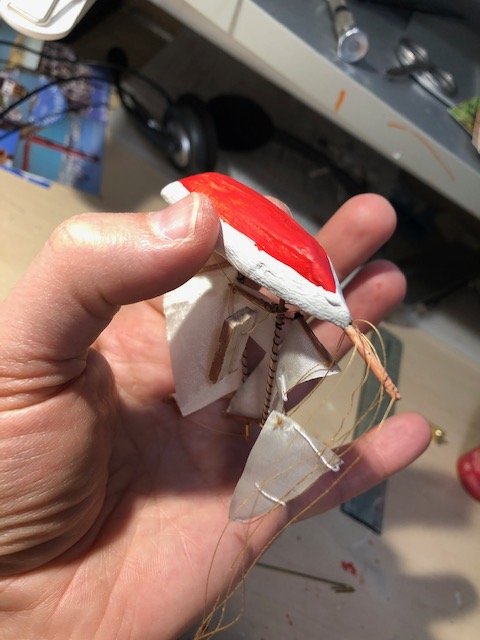
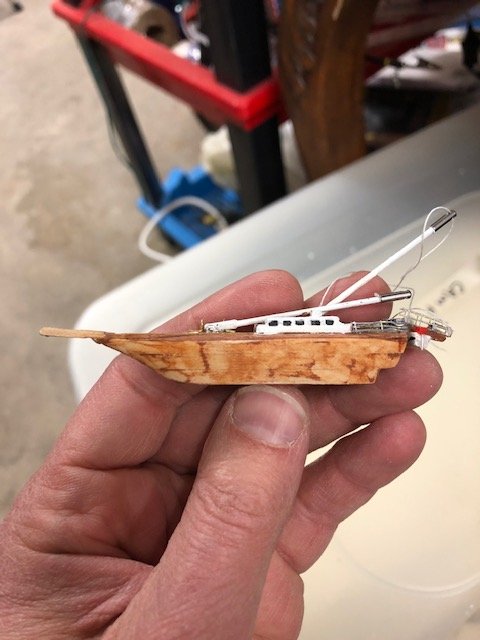
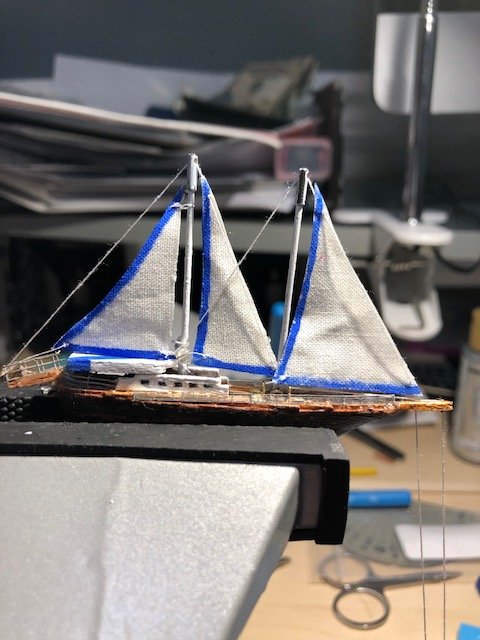
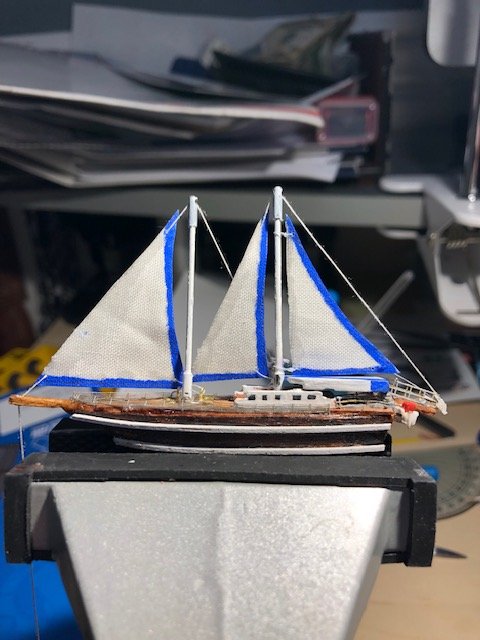
 Folds back well! And despite lots of sanding, layers of primer, and clear latex primer, I still cant get that smooth sheen.
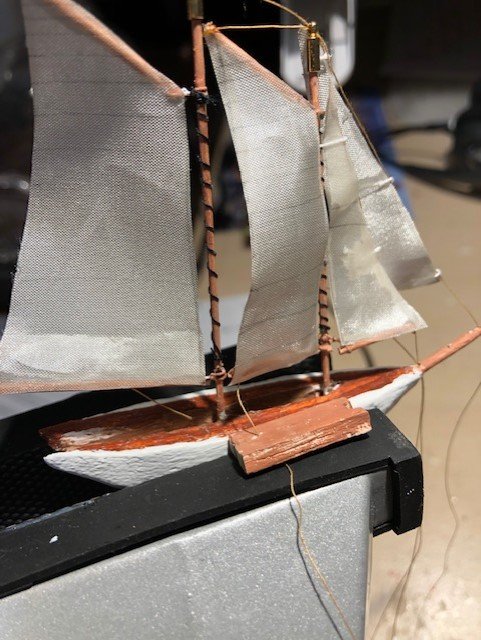
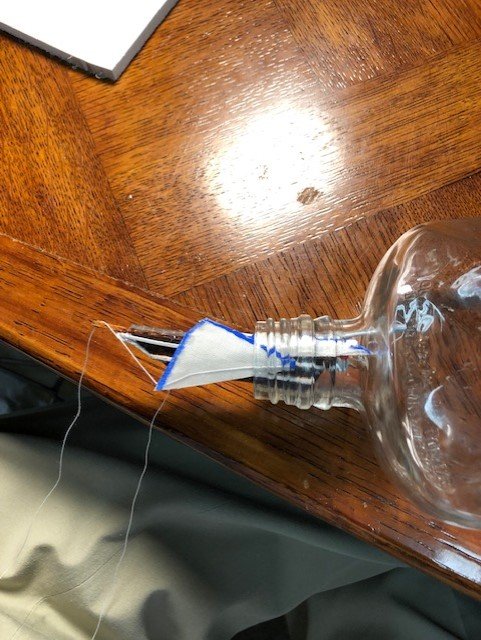
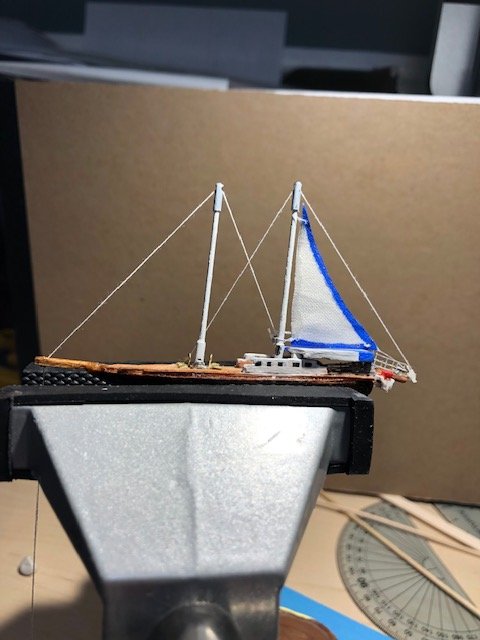
 Attaching the staysail and the jib was tricky. I needed them secured to rigging of course, but the rigging had to be able to 'run' when i folded down the masts. So i made little loops.
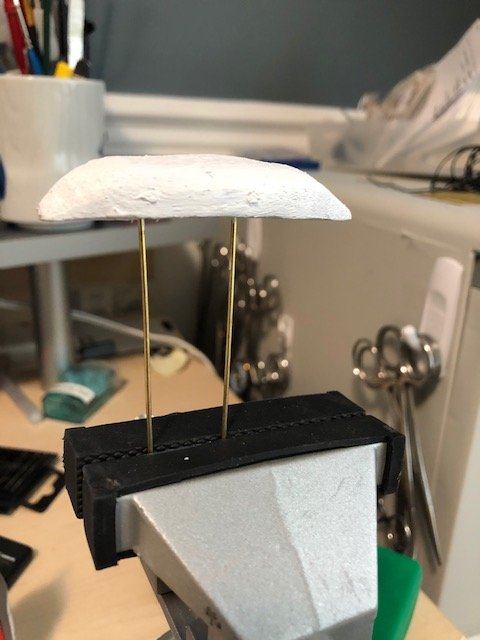
At this point I'm still debating upon how to mount the ship inside the bottle: Dry pedestal mount Vs clear mount with slilicone sea. I opt for the latter, but need something to raise the ship up from the bottom of the bottle's inside convexity.
I opt to try 5 lucite rods, which i drop in and glue to the bottom, making a little raft of clear support.
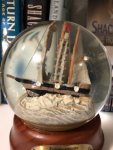
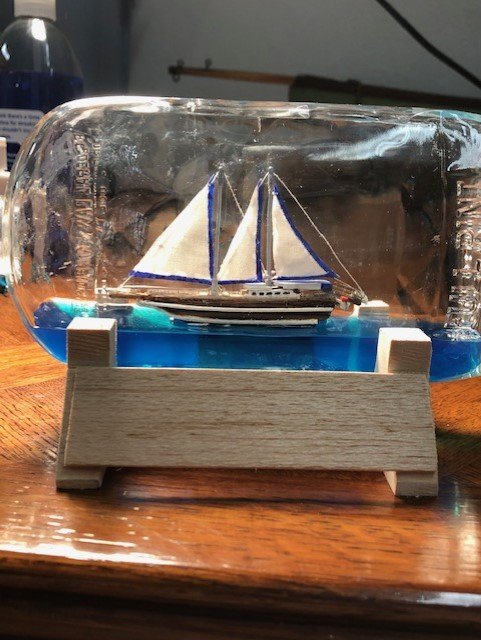
As seen from the bottle's mouth.

 and side.
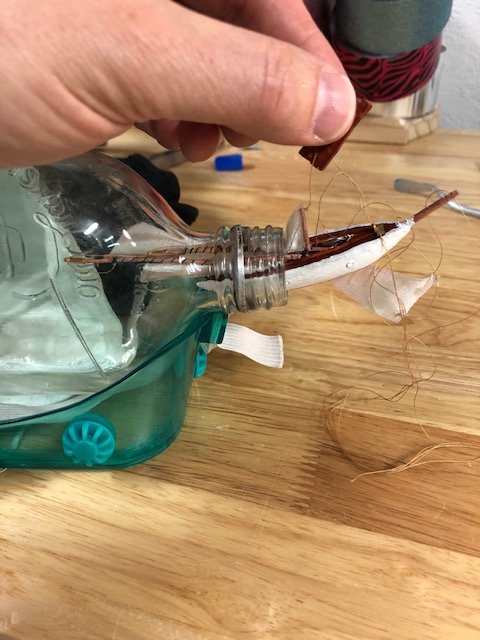 She heads in easily enough - am happy with the new axle system for folding the masts.
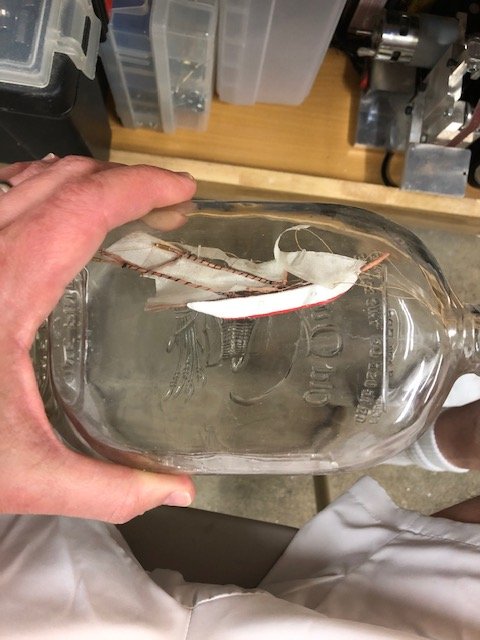 And she rests easily away from the lucite base.
However, i rushed the next part, which lead to near disastrous results.
Next: Lost in Uncharted Waters & Salvation

-
9 hours ago, thegrindre said:
Say, have you guys thought of cutting up tea bags to use for your sails? I've seen empty tea bags by the dozens over on ebay. They're cheap and thin and easy to shape with diluted white glue.
Have not heard of that but I just took one from the cupboard. Seems promising.
Am always looking for new tips and tricks to elevate the process; for sure my use of satin and muslin sails has not lesad to ideal results.
Will try the tea bags next - thanks!
- mtaylor and thegrindre
-
 2
2
-
Part I: RETURN TO THE SHOP
I took off about a year in between Ship in Bottle projects. I completed the restoration on my Dad's Santa Maria model, and was able to upgrade the workshop a bit. Mostly, I needed to take a break, and rebalance my free time.
Over a year ago, I promised a nurse colleague named Caroline that I would make her a ship in a bottle. This was hanging over my head during my hiatus, so I was happy to return with this gift project for her.
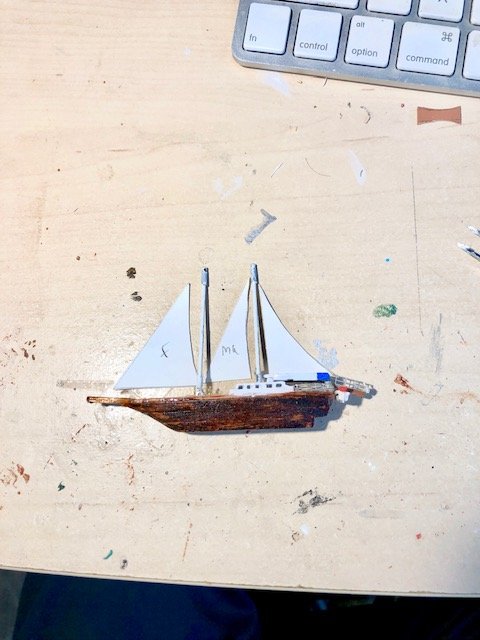
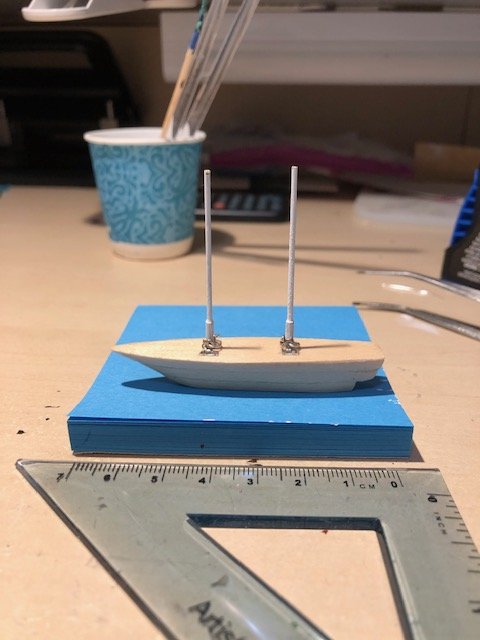
I found a smart looking schooner yacht named Caroline. She's a Malabar IV model. And I believe she is still for sale!!

I always start with the hope of achieving crisp lines and smooth sails. I'm kidding my self, but that's my goal.
I was concerned that over the past 12 months or so, I would have forgotten many of the tips that learned over my first dozen or so SIBs. That may be so, but in return I also brought a fresh perspective, and the gumption to try new things.
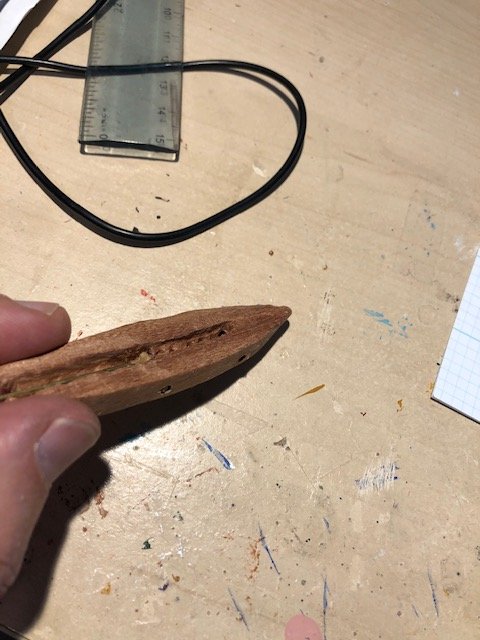
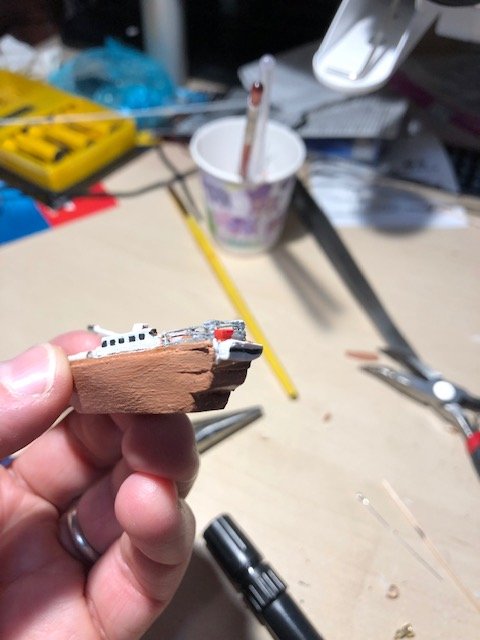
For this project I returned to solid hull blank - not saggital cuts.
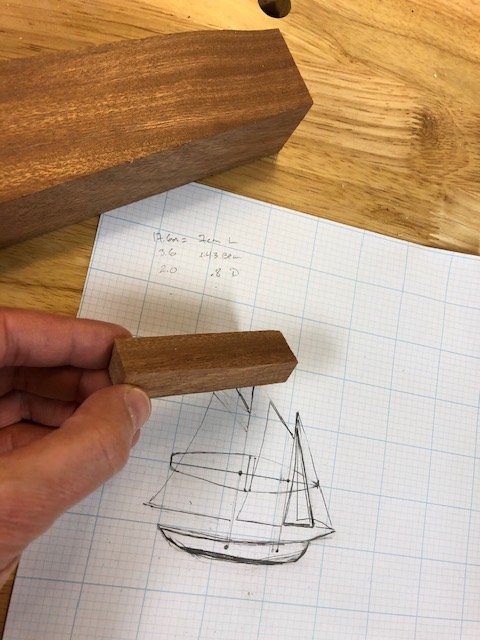
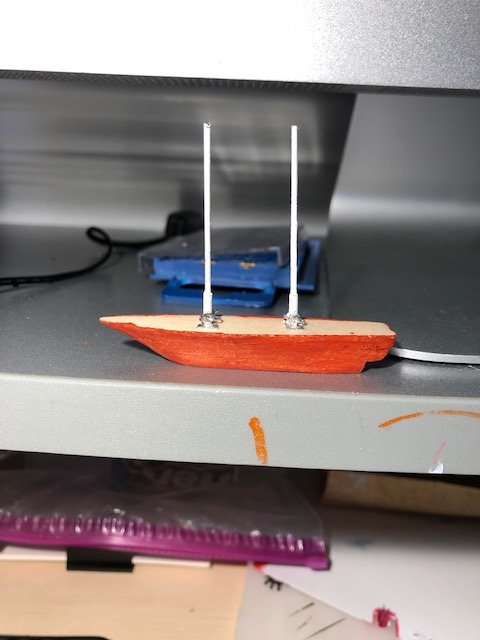
I got some nice wood scraps from a mill nearby - I think its cherry but I dont know for sure. Certainly an upgrade form the bass wood I had been using.
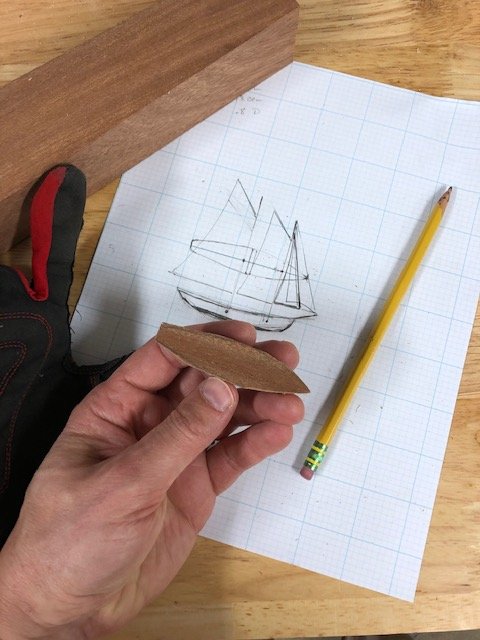
For my birthday last year, eldest brother bought me a mini belt sander, which came in super handy for the shaping of the hull. Upgrade #2!
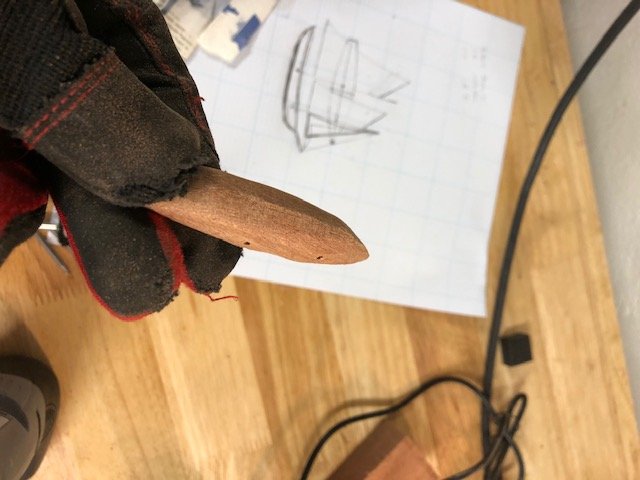
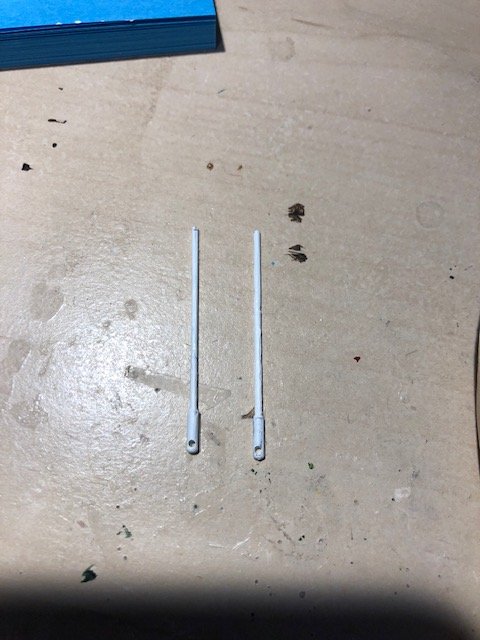
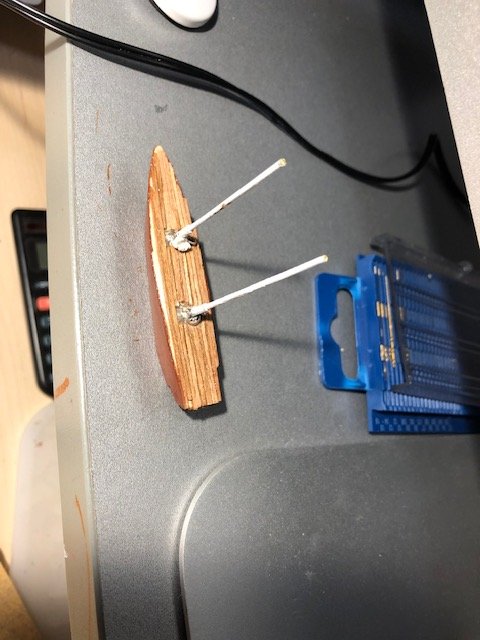
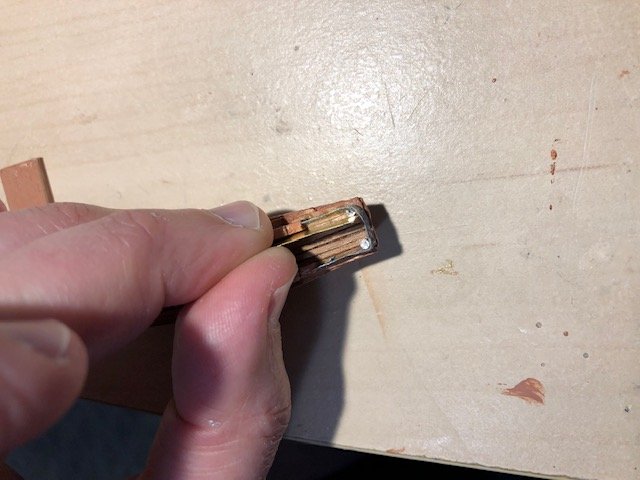
In the past I fashioned mast hinges out of beading cord ends. This time I tried something new: drill across the beam, and insert an axle attached to the mast.
The idea was that the two masts would fold aft, all the way down, for launch into the bottle. This would require a channel aft of each mast in which they would lie (with their sails and rigging) during insertion.
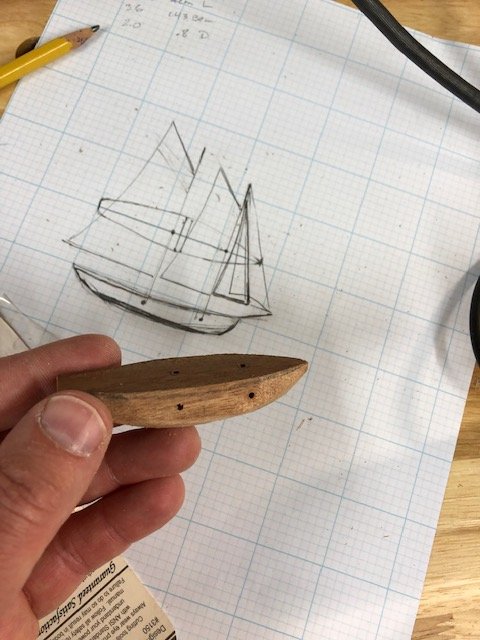
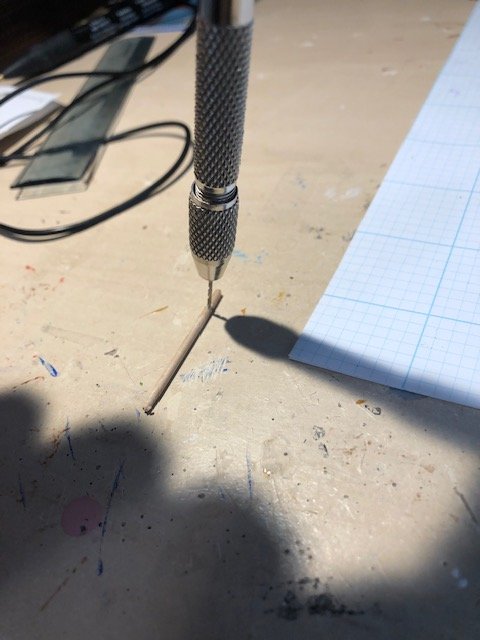
Here's one of the axles being drilled to hold the mast
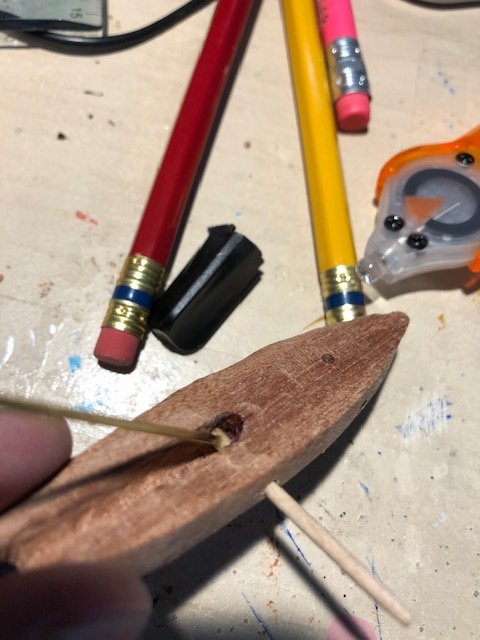
And here is a still of the brass rod 1.19mm sitting in the wooden axle.
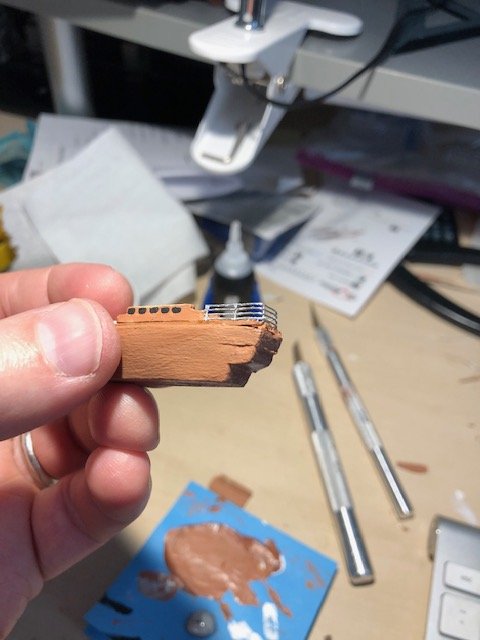
Here i'm testing the main mast as it folds down
And here are both masts, folding aft into the channel as I had hoped
So far so good!
Next: The Calm Before the Storm
-
-
12 hours ago, Louie da fly said:
A very nice restoration of a model which I'm sure has - and can now continue to have for a long time - a lot of sentimental value to you.
It's certainly a very dramatic and impressive transformation from the original condition to the finished product.
Steven
Thank you! Yes, am excited to present it to the family!
-
-
-
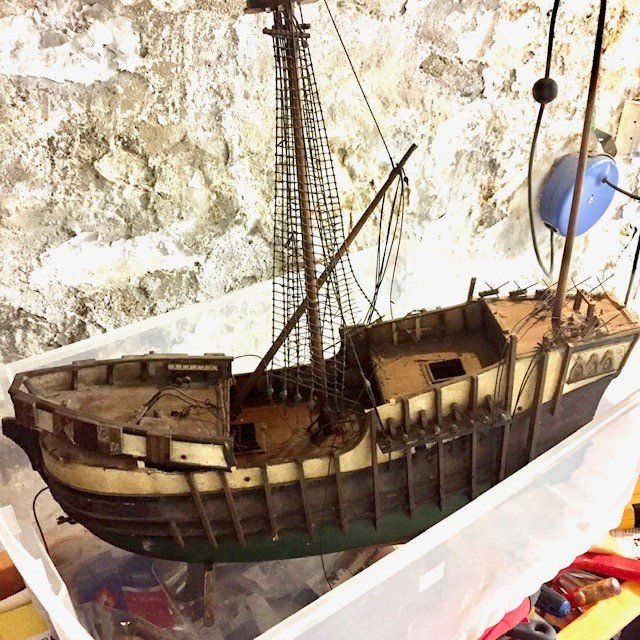
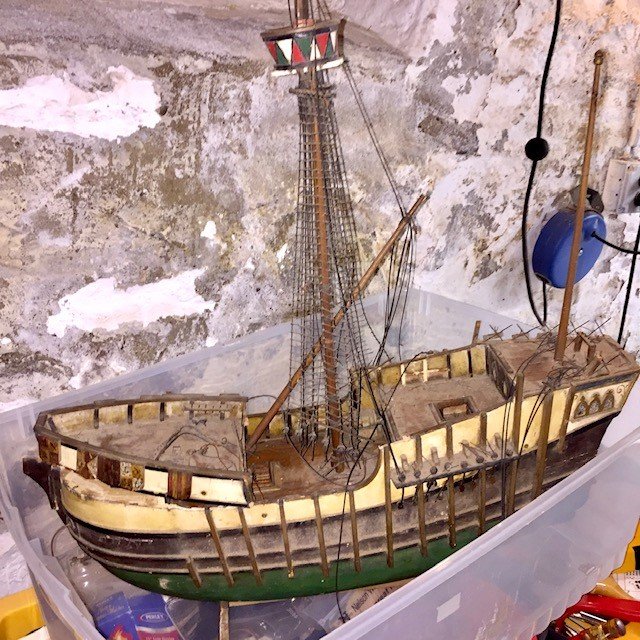
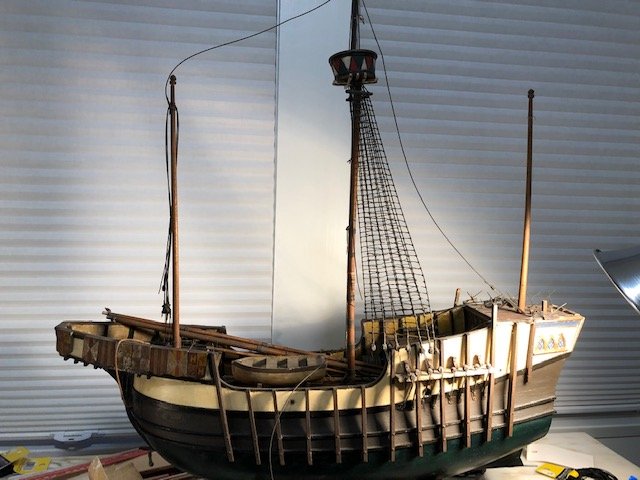
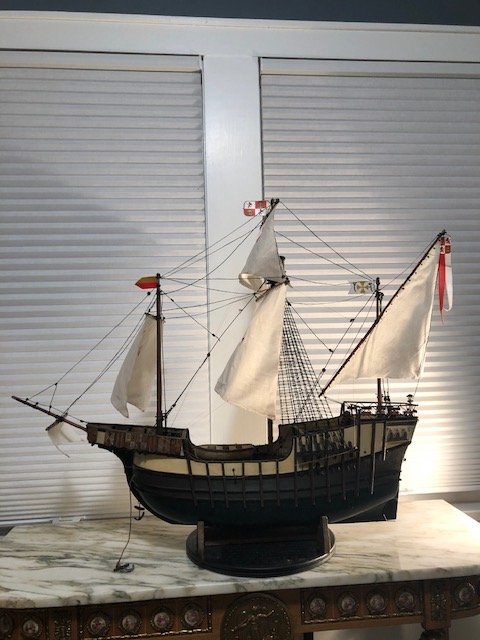
Its been about a year since my last post; I've been taking some time off. I had gone full throttle on the SIBs for over a year, and neglected the Ship that launched them all for me. So I eventually decided to complete the restoration on the old Santa Maria.
The true provenance of this model isn't fully known: My father, born in 1936, once told me that he built the kit as a boy, but he doesn't rememeber how old he was, or how old the kit was, for that matter. Having survived many moves long before I arrived, I remember the ship presented herself to me only in states of worsening decrepitude. As a boy I remember the tangle of fallen masts and sails, and a big dead moth that resided within that mess for years. She sat like that for decades, with most, but not all, parts junked on the deck.
Finally, in preparation for a move in the summer of 2017, we were given an ultimatum: Restore the Ship or let's throw her out!
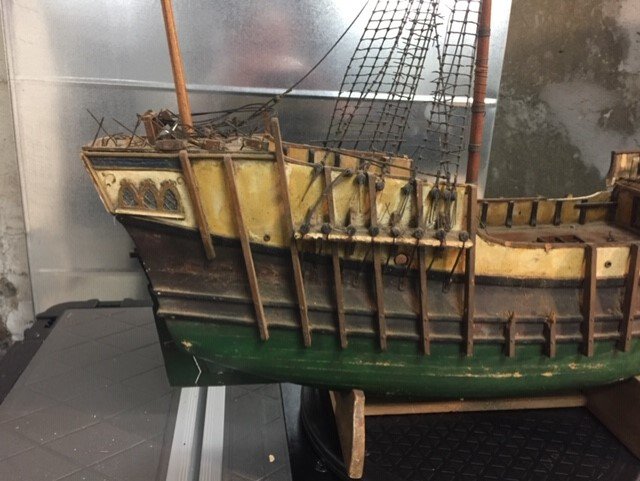
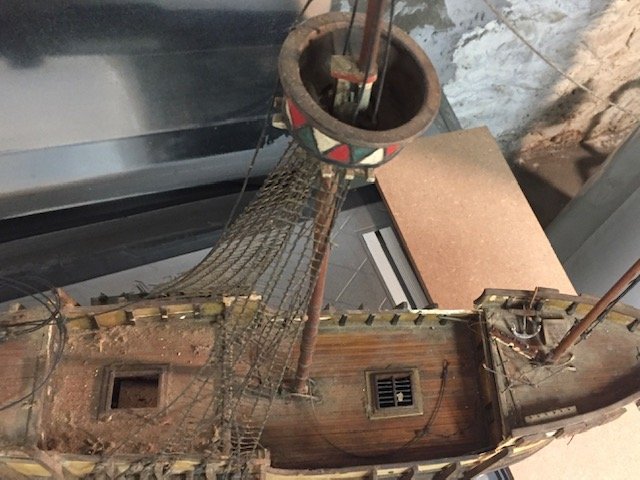
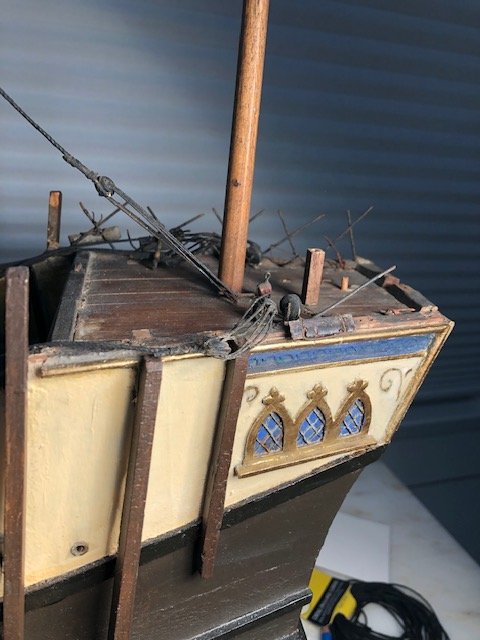
These next shots of her, cleaned up as much as possible, prior to work.
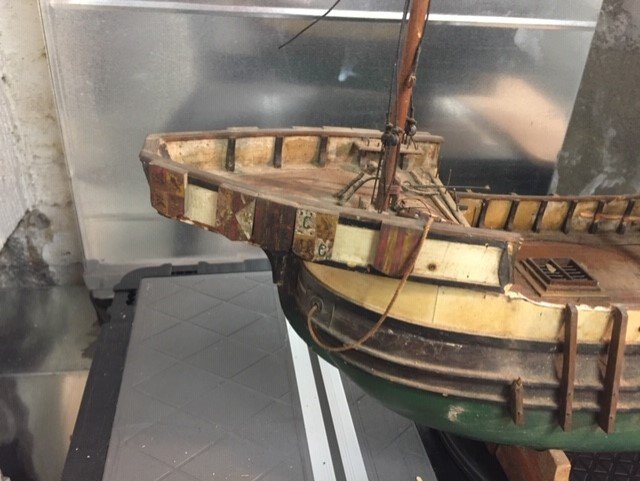
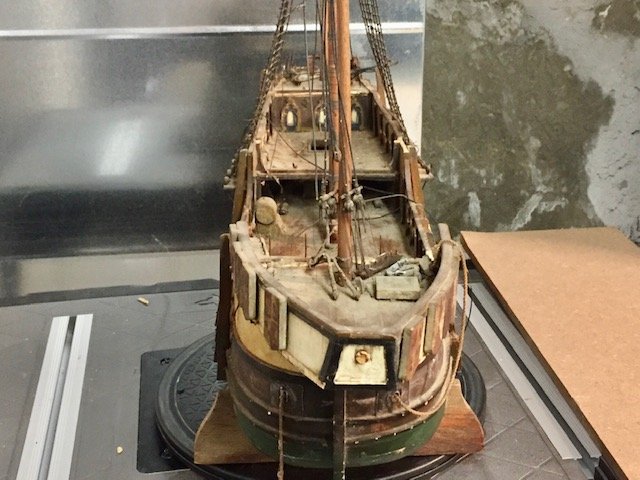
 The Stern has seen better days.
Since this restoration took place over many months - and years in fact- and since part of it took place prior to my membership in MSW, I didn't photograph the restoration in an ongoing manner. In fact, half way through I decided to just show the finished product. Eliminating the need to capture every moment of improvement was much easier for me; and quite franky, since my techniques were largely crude, impulsive, and totally uninformed by any nautical wisdom, I don't think I am depriving anyone of any great techniques. I would be happy to respond to any questions about the hows and whys, and most answers will include: balsa wood, bass wood, cyanoacrylate, acrylic paint, waxed thread, hand drills, and more cyanoacrylate.
I started with the hull and all the ribbing - all the easy stuff - just to see how it went.
 After a few months of hull work. Fortunatley, all masts and spars were present and intact!
 Many vertical ribs were replaced.
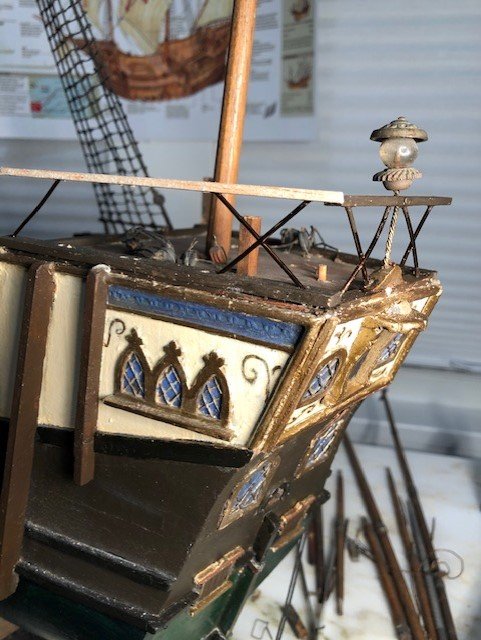
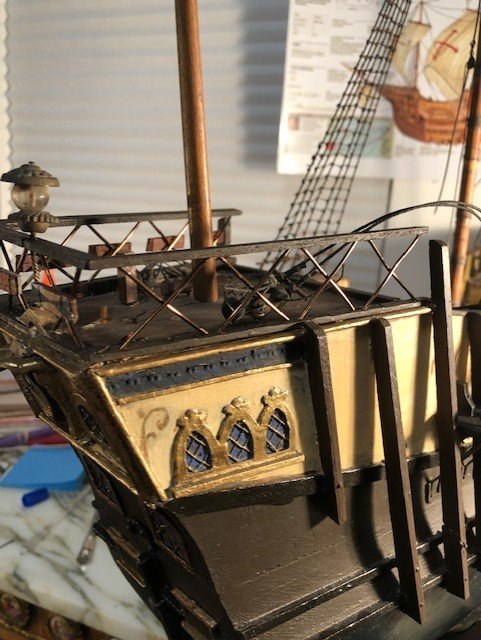
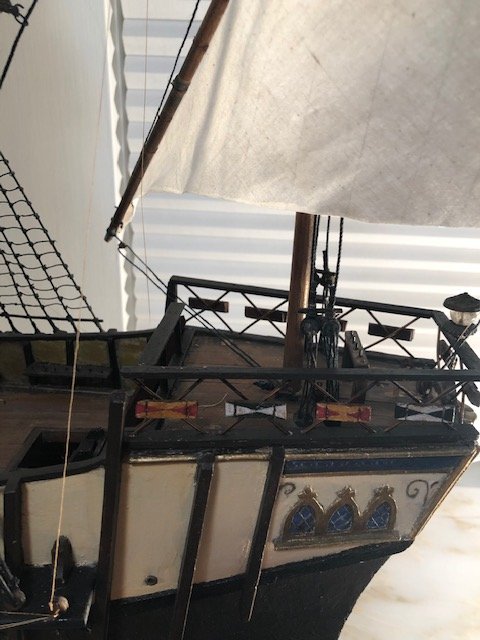
 Painting the stern windows and gilding.
 Quarterdeck cleaned and restored as much as possible.
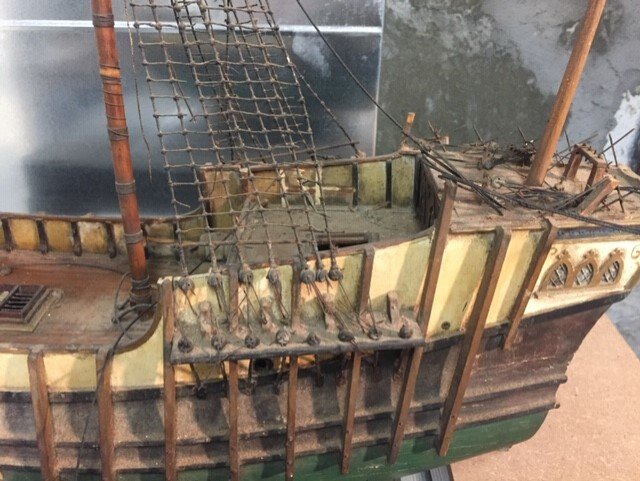
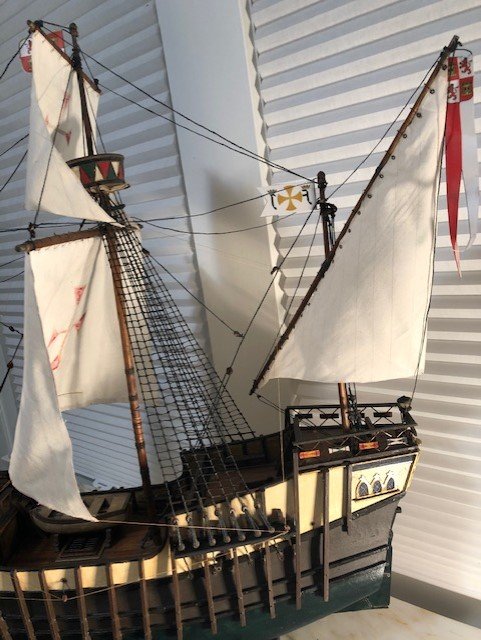
Rebuilding the poop deck was what intimidated me the most, and it was unease with this next step that made me take a 2 year break and switch gears towards SIBs in 2018.
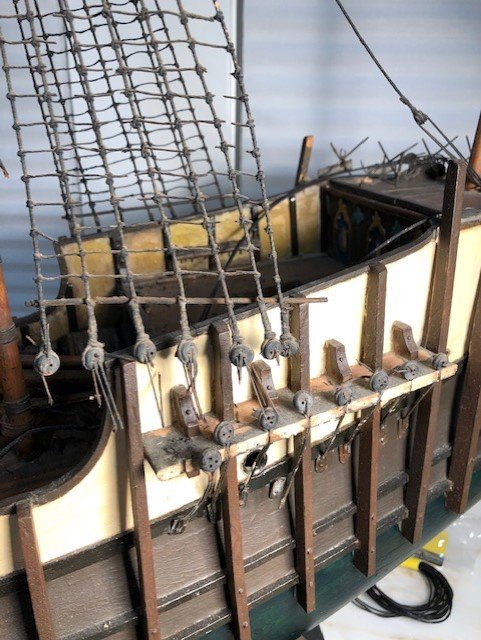
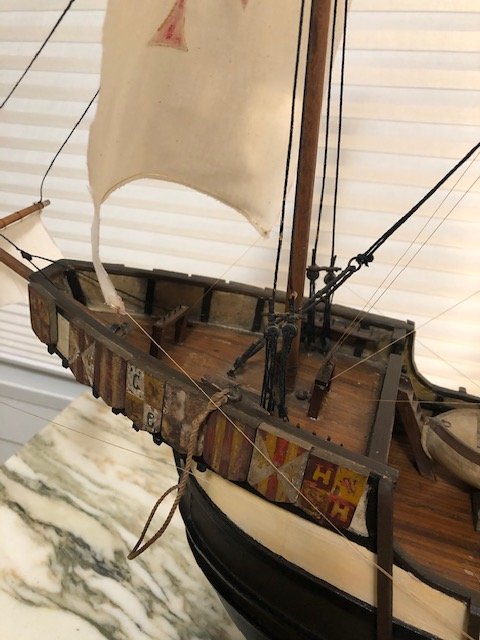
 I wanted to respect the original design: It looked like a wire railing, so I tried to replicated that even though most renditions suggests an all wooden rail. Who knows?!?
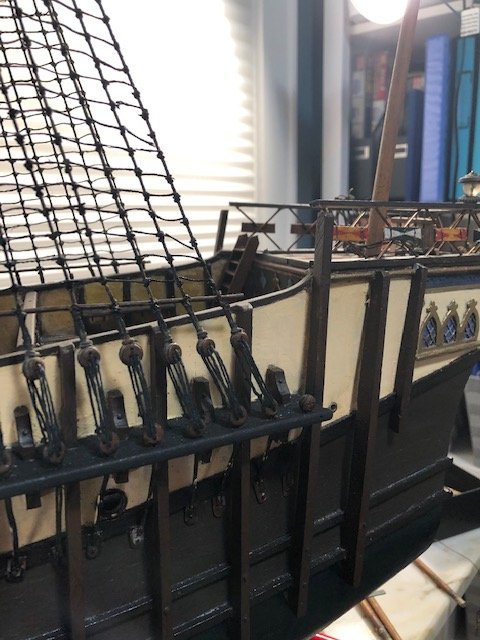 Shileds on the wire poop deck rail were largely destroyed, so I had to be very creative.
At this point in the photos I really skip forward all the way to the sails.
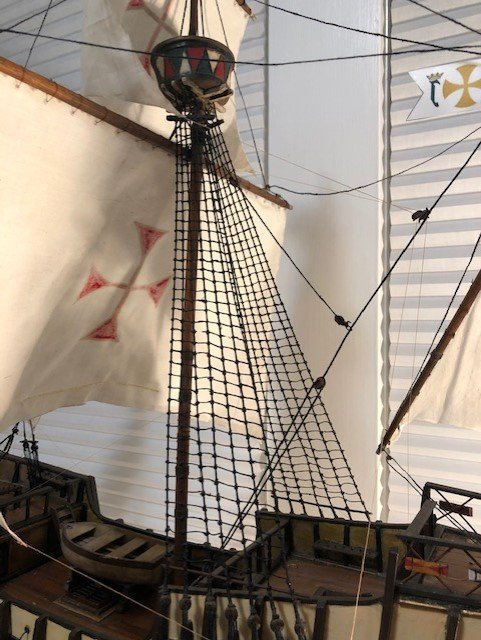
Suffice it is to say, I reworked the shrouds and ratlines first.
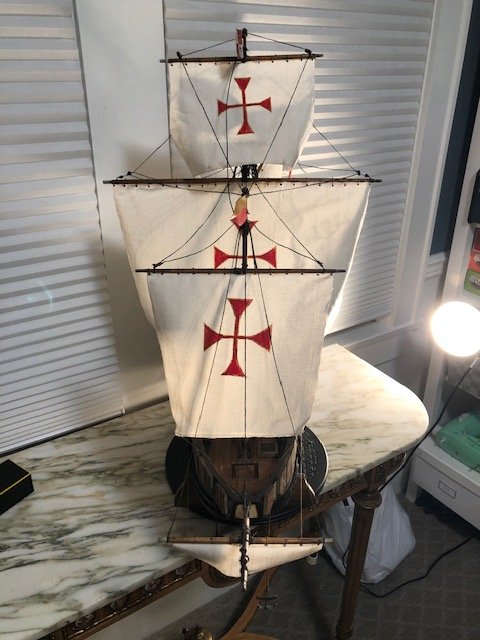
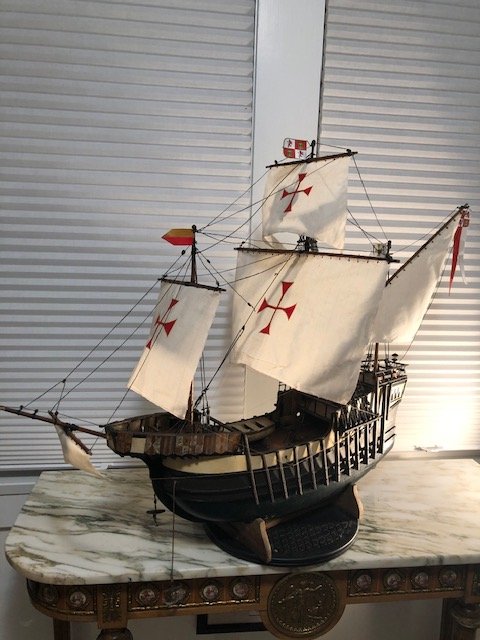
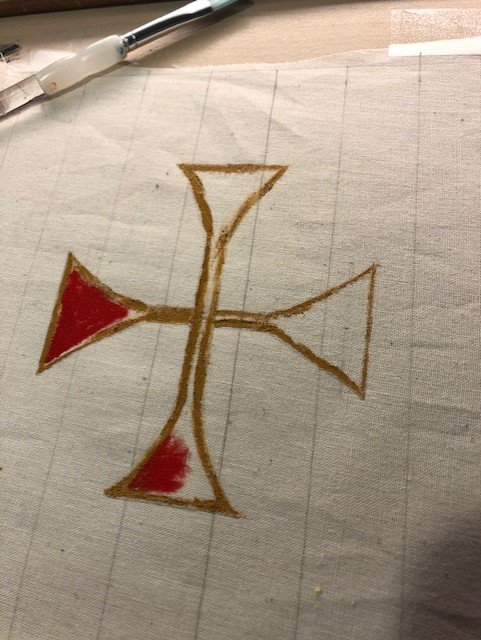
For the sails, I bought some muslin of pleasing color, texture and heft.
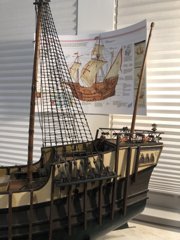
I extrapolated the design from online pictures.

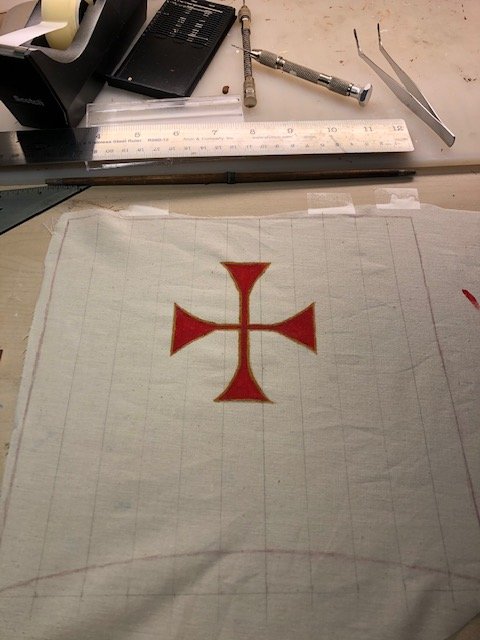
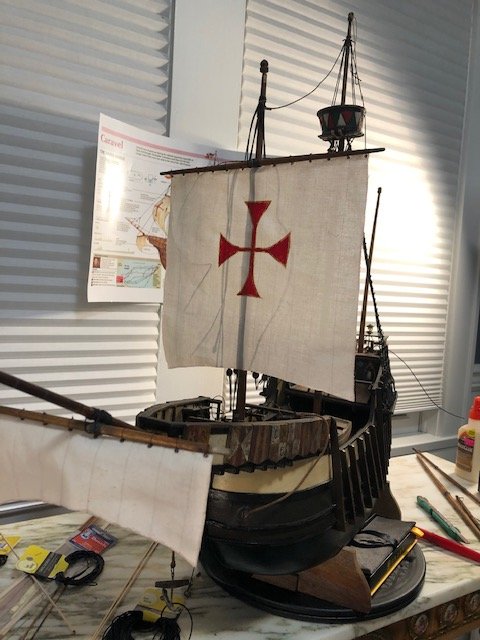
I wish I took more pictures after all the sails were up. They hung there flat and dull.
It wasnt literally untill the last 2 days, when I chose to fills the sails with wind, that the model came alive!
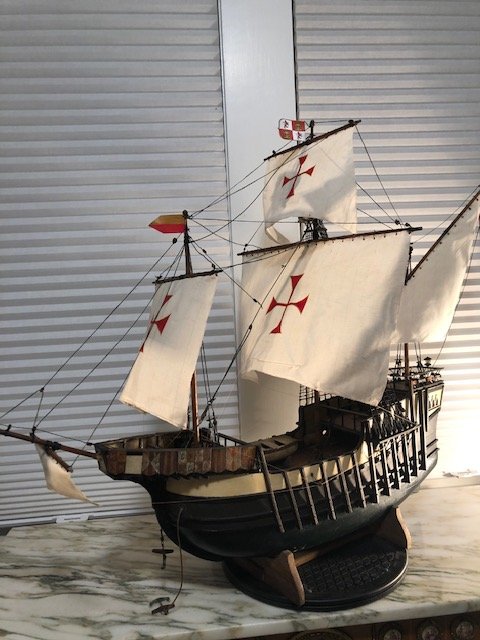
 Dont mind the doll's head, my daughter uses it for braiding practice!
Thank you for reading!
- mtaylor, Louie da fly, woodrat and 3 others
-
6
-
-
Hi, I am restoring an old Santa Maria kit ship, probably form the 1940s or earlier - according to my father.
Most all of the new stuff I did from scratch.
I'd like to post it: Should it go under the KIT posts or SCRATCH posts?
Here are 2 before shots, and 2 shots during rrestoration.
Please advise. thanks!!


-
-
-
-
On 5/22/2019 at 3:49 PM, FriedClams said:
Keith Black and Alexander - Thank you so much for kind comments - I appreciate it.
Thanks for the supportive comments Keith. Perhaps I may post a compilation of techniques in the forum "Tips & Tricks" once this build is complete, but I'm not sure how much overall interest there would be in it.
Thanks, I'm pleased you're enjoying the log and happy to have you looking in.
And thanks to everyone stopping by and hitting the like button.
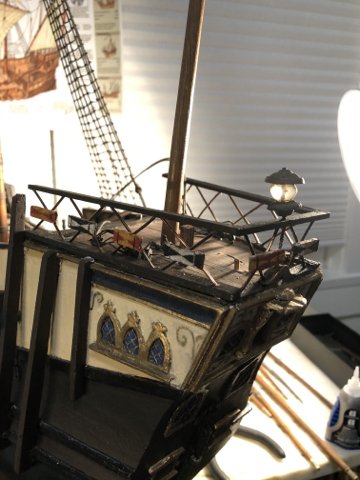
Pilothouse Interior #2
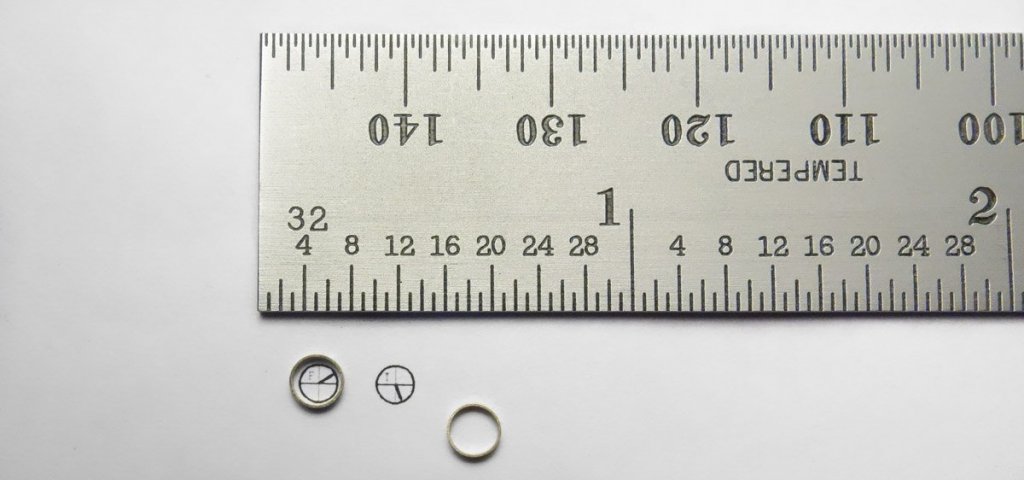
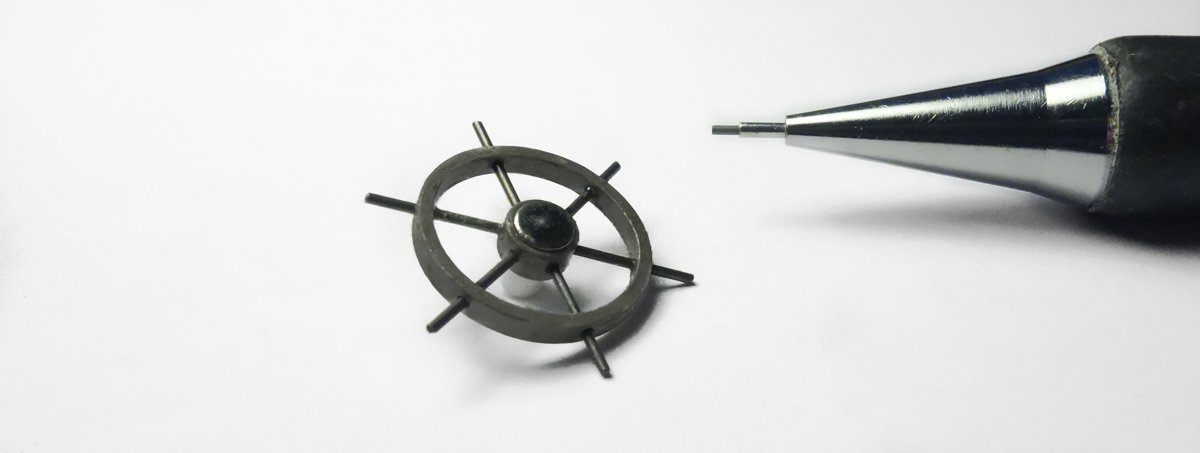
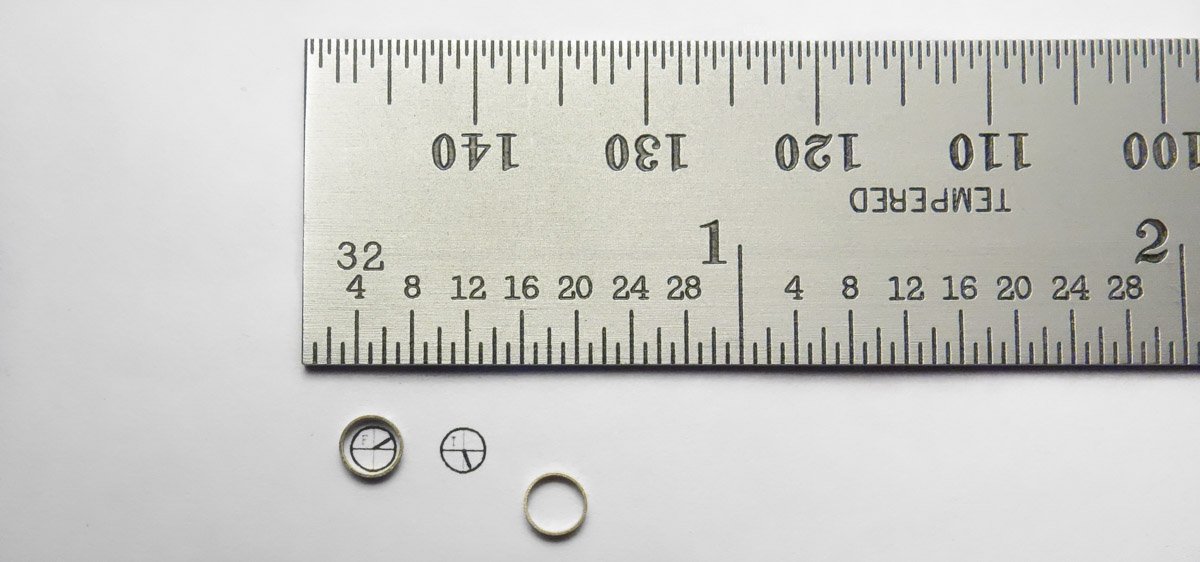
The navigation and control area on this boat is compact and simple. Besides the ship’s wheel, there is a compass, throttle/clutch control and a couple of instrument gauges.
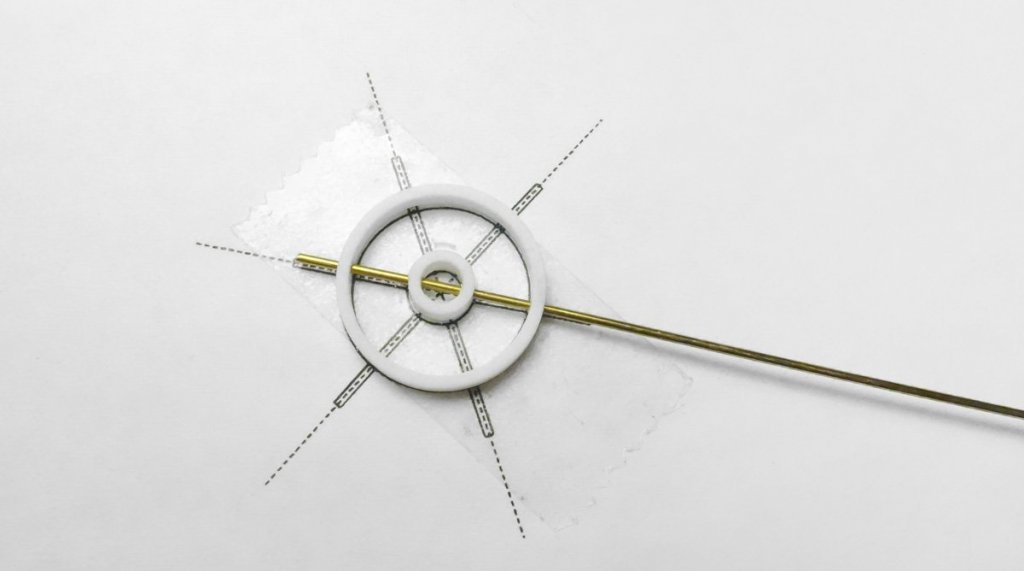
I begin with the wheel which is 36” in diameter including handles. Photos of these boats show both traditional wooden wheels and simpler steel wheels. I chose to go with steel because in all honesty, it is much easier to make. It is put together from styrene and brass wire. The styrene is painted with enamel and the brass is blackened.
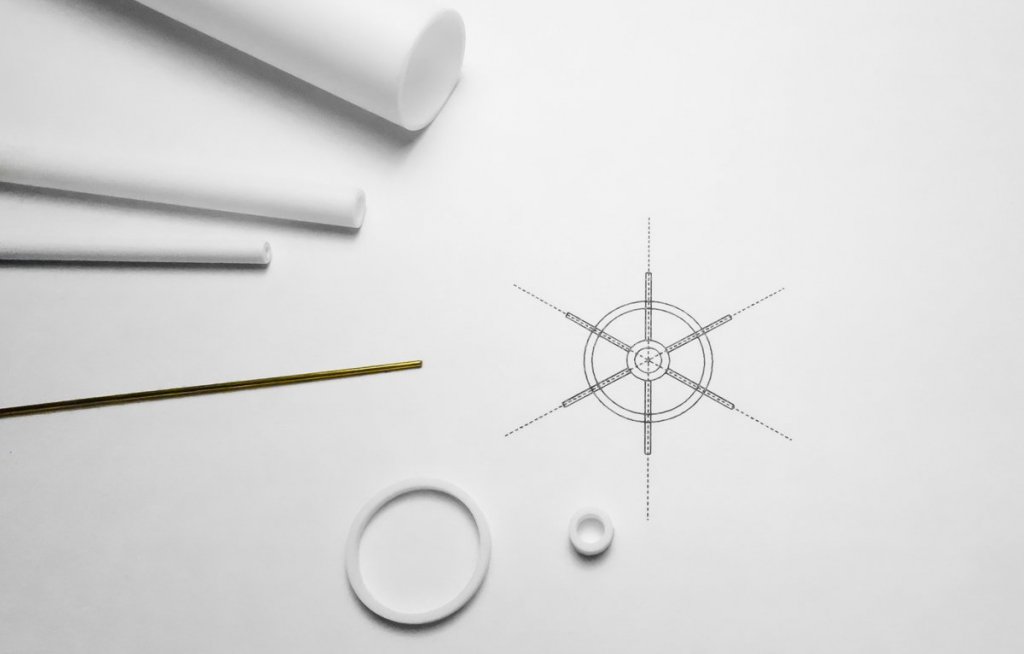

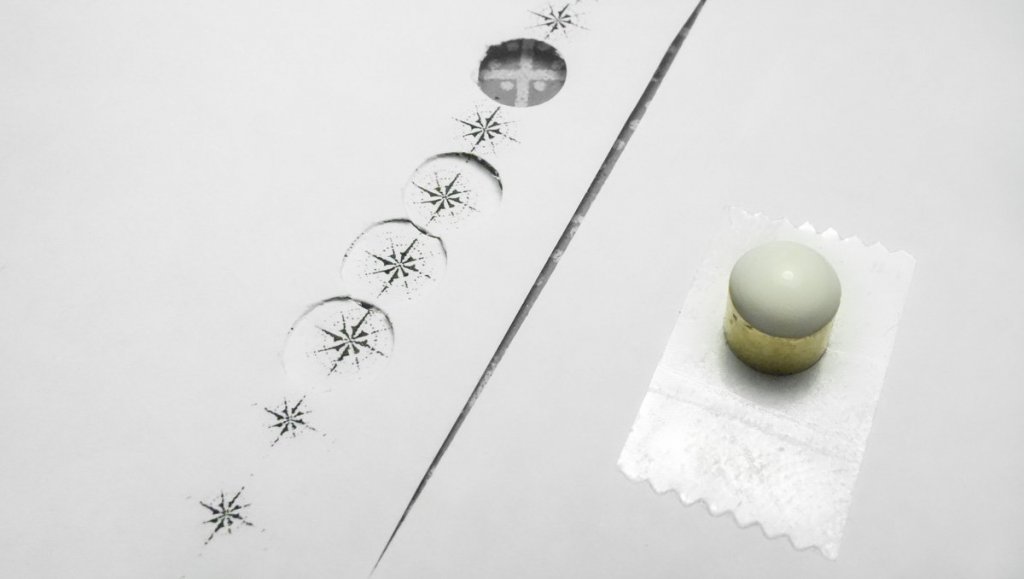
The compass is made from ¼” O.D. brass tube. A styrene plug was inserted to hold a printed image of a compass rose at a point just below the rim of the compass. A couple of drops of Gallery Glass are placed on the surface which when dry will provide a clear “lens” for the compass.
If you’re unfamiliar with Gallery Glass, it is a craft store available product that has a number of modeling uses. It comes in different colors and dries clear like stained glass. It doesn’t dry hard like epoxy, but more like hard rubber. The colors can be mixed and typically leave no air bubbles - but it does shrink and more than one application is often required. It is non-conductive so you can encapsulate LEDs to insulate the solder joints and produce the color output you want at the same time. If you repeatedly dip the end of a fiber-optic into white or clear and each time letting it dry in the vertical, you end up with a scale light bulb.
The two gauges are produced in a similar way by placing a thin slice of 1/8” brass tubing over an image and adding a drop of Gallery Glass to the center. The Gallery Glass adheres to the paper and brass and all that needs to be done is cut the paper away from around it.
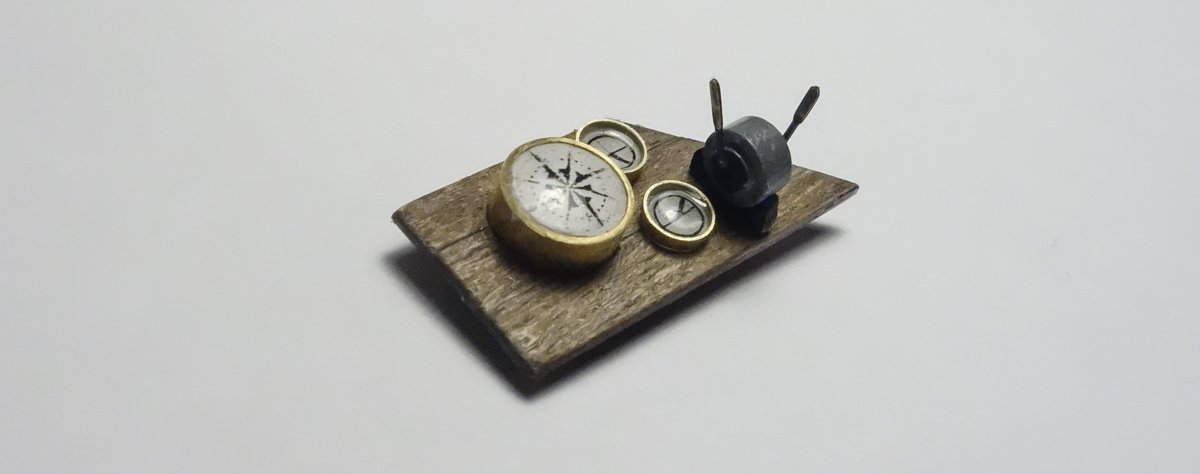
A throttle/clutch control is made up from styrene and brass.

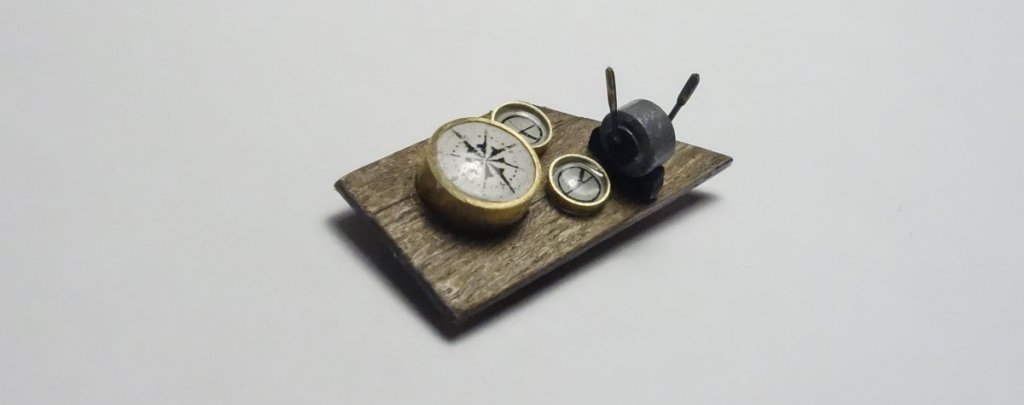
The gauges, compass and throttle are attached to a console top.
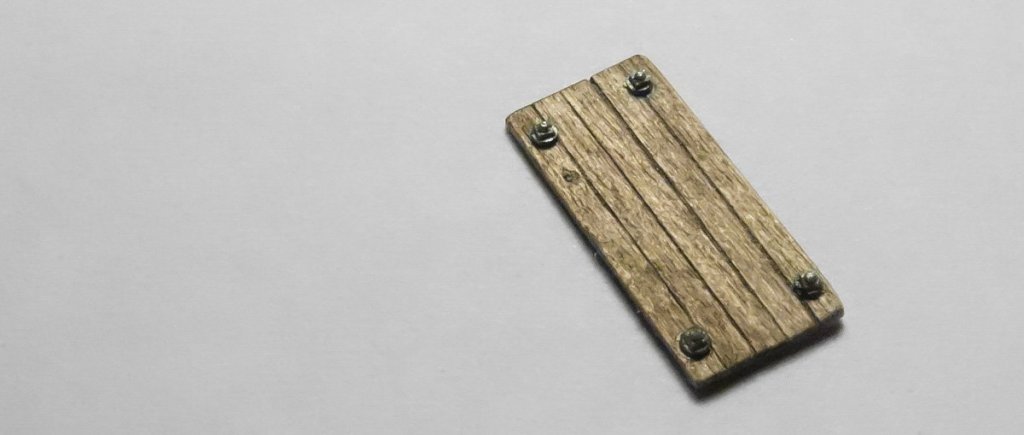
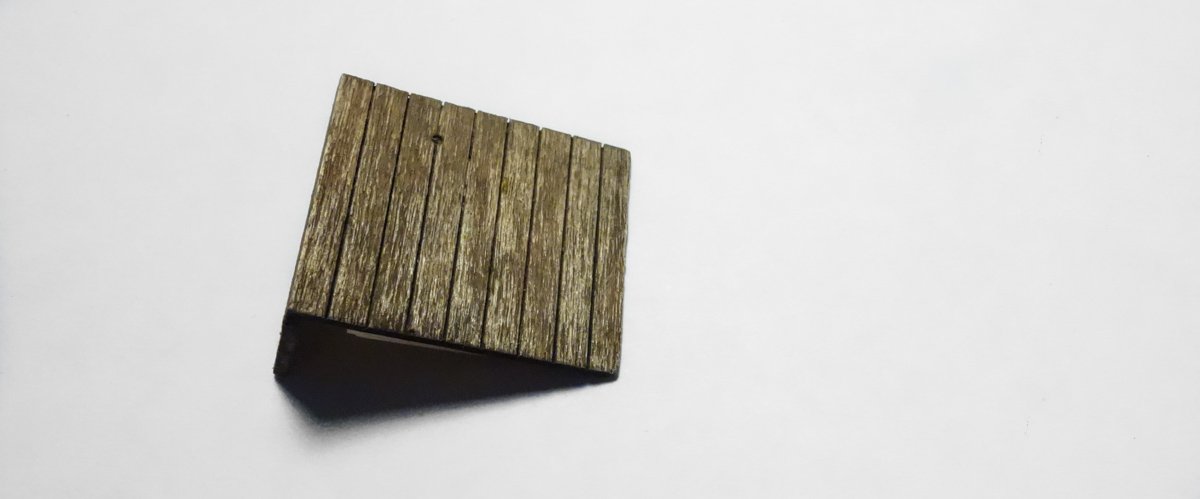
A console bottom is made...

… along with a bolt-on access panel. The nut/washers are styrene.
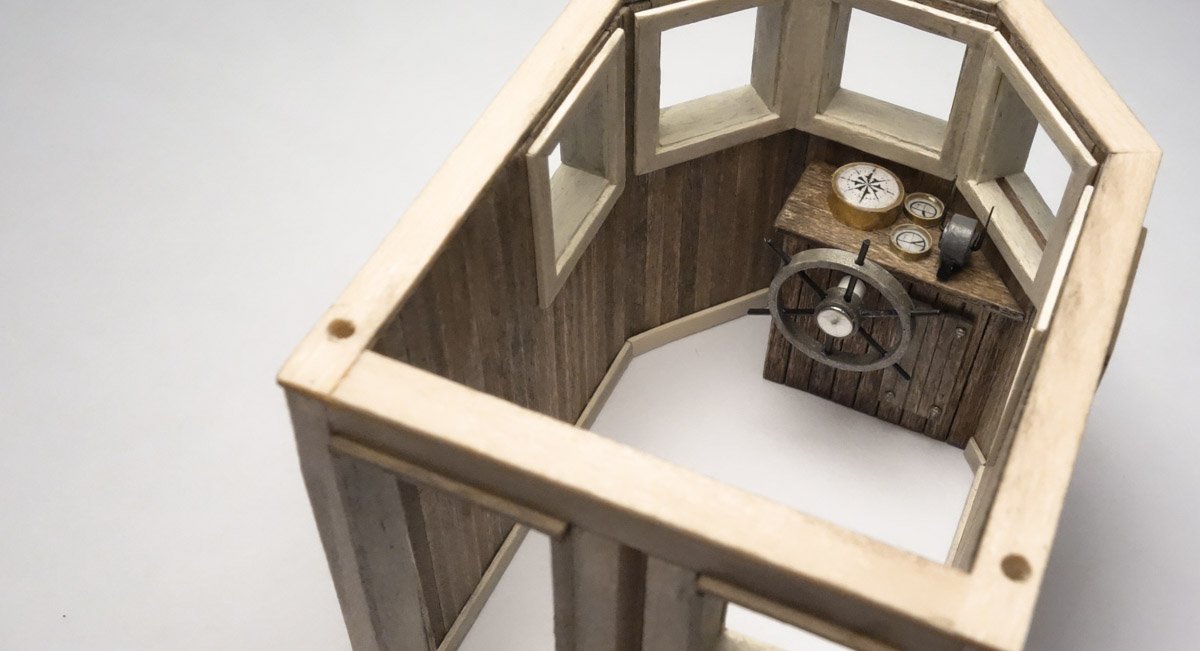
Everything is combined and glued into the pilothouse.


Thanks for stopping by.
Gary
Wow! Gary, this work is so beautiful. An Incredible mix of distressed wood with crisp instruments. Really inspiring. Thank you!!
- Retired guy, druxey, Moab and 13 others
-
16
-
12 hours ago, popeye the sailor said:
fantastic additions Patrick
") I knew it!.........the yacht must be owned by the Knights of Ni
I knew it!.........the yacht must be owned by the Knights of Ni ")
Let’s not forget about the Knights Who Say, “Ni!”—Sorry I couldn’t resist.
Strong work, Patrick!
Happy memorial day weekend, from across the globe.
-
2 hours ago, Omega1234 said:
Hi Josh
Nice job! I especially like the sails and how they make the whole boat ‘pop’. The use of magnets on the superstructure is also a really nifty idea. I might just pinch that idea for my models one day, too.
I hope your niece liked the boat.
All the best!
Cheers.
Patrick
Thanks Patrick!
The tiny magnets are fun to play with. Also the Bondic plastic welding helps a bunch, and less messy than the CA.
The “share-ware” mentality of this site is tremendous!
That will be my last luxury yacht for a while - I will leave that to you!
-
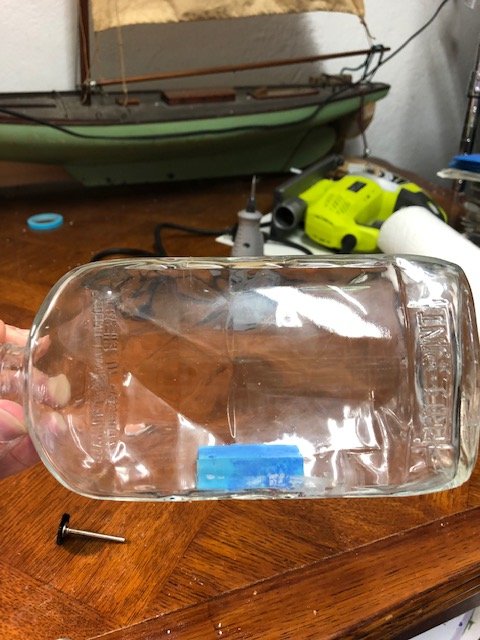
Getting ready for the launch:
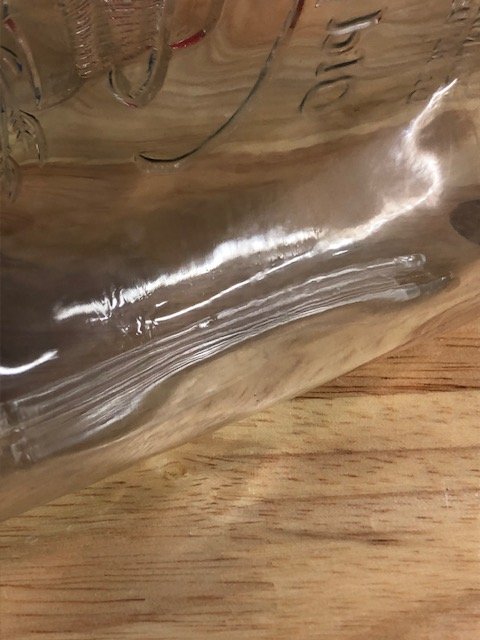
I cleaned the bottle till it sparkled (but still never comes out good enough).
 I played with a wood base, easier than rods, painted the color of the sea. This would come back to haunt me in the end!
 The ship folded down easily, as she was designed to do so.
Here is a clip of her going into the bottle. Some people find this fascinating. Looks like a moth to me.
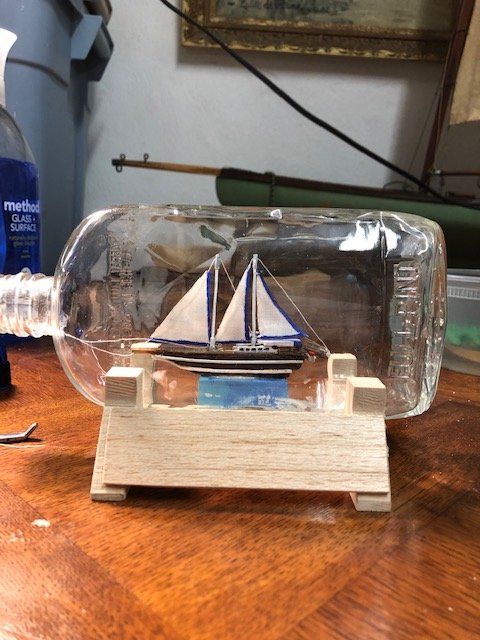 After she gets glued to the based, and rigging is glued in place.
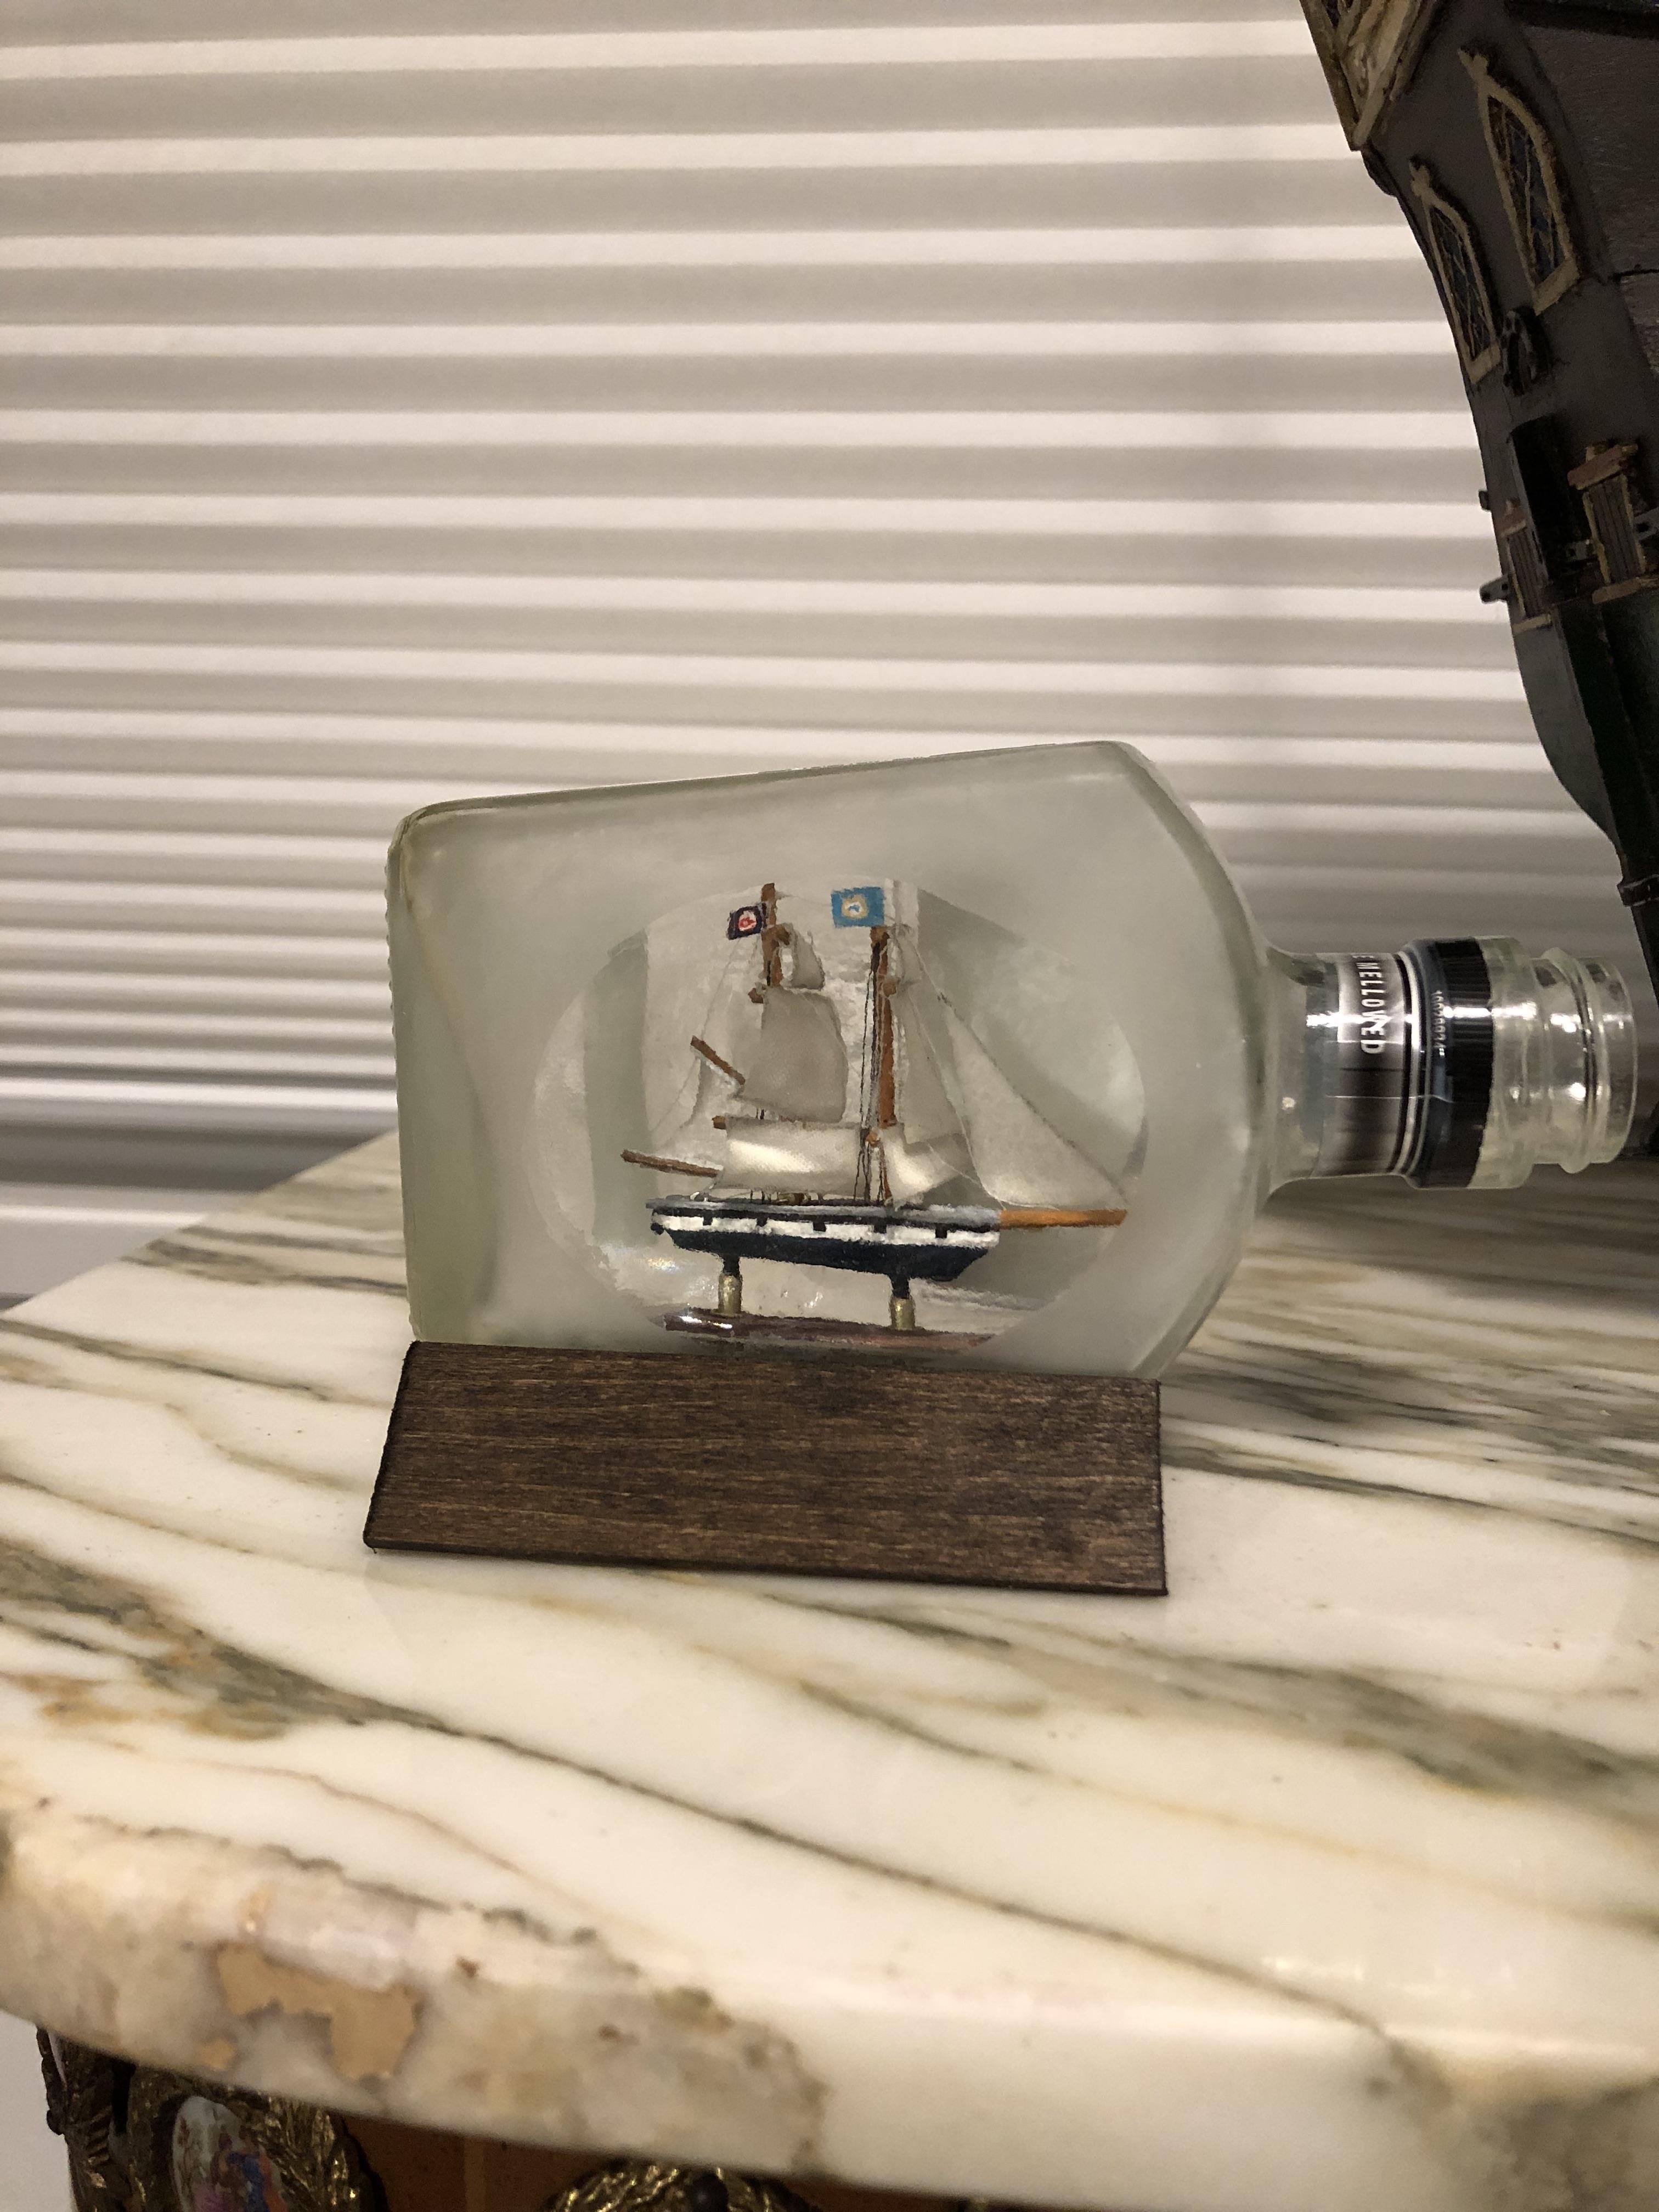
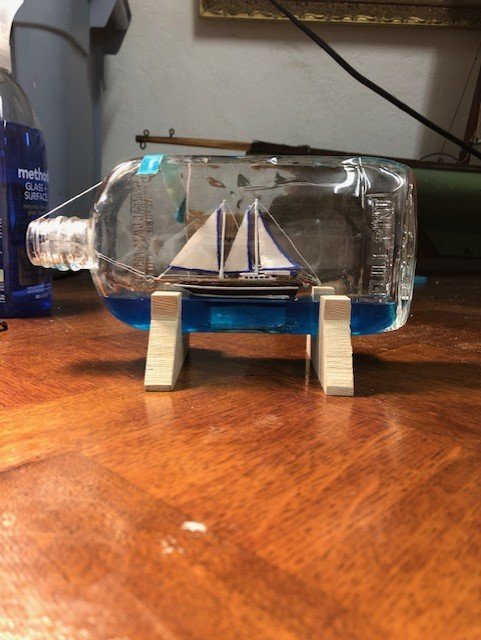 Silicone sea a la Igorsky. Just, not as dramatic as his. Also I was really hoping for the block base to disappear in the deep blue. Not so!!!
(My kids asked me if that is the titanic at the bottom of the bottle
 )
)
 Anyway, what do they know!
I didnt want to fuss with spars, or shrouds or more standing rigging - I wanted to keep this one clean.
The cabin rooves were attached with magnets in the bottle, and after the masts were glued - the masts had to fold down for bottle insertion first.
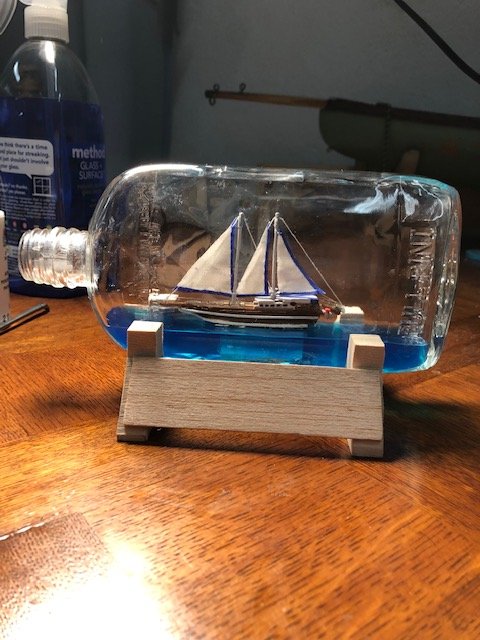
 I havent stained the stand, or placed the brass plate yet. I will give The Princess Lila to the real Lila after that.

Thanks for reading!
- Omega1234, GrandpaPhil, prutser and 1 other
-
4
-
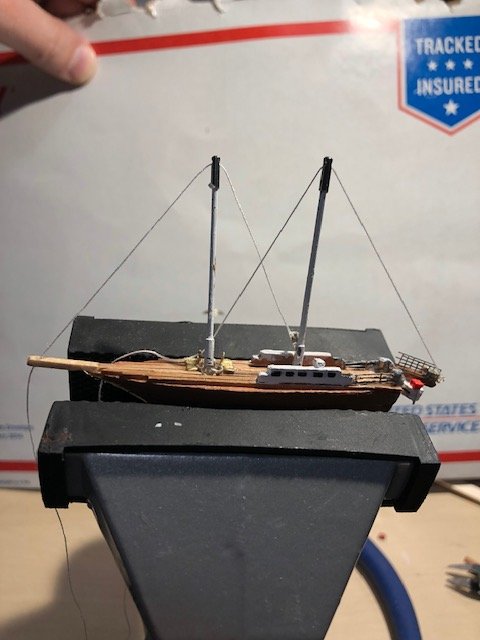
After being completely awed by a post by Fried Clams on his Stonington Dragger, I decided to scrape down the acrylic paint on the hull and try some india ink. Being an impatient SIB builder, evrything is a bit rushed.
 Still some of the original acrylic and latex Im afraid.
I mixed brown and black.
 I like the color and authentic feel, but still too rough and splotchy. Next time ill apply it miixed with alchohol and NOT AFTER i scrape off 5 layers of paint and varnish!
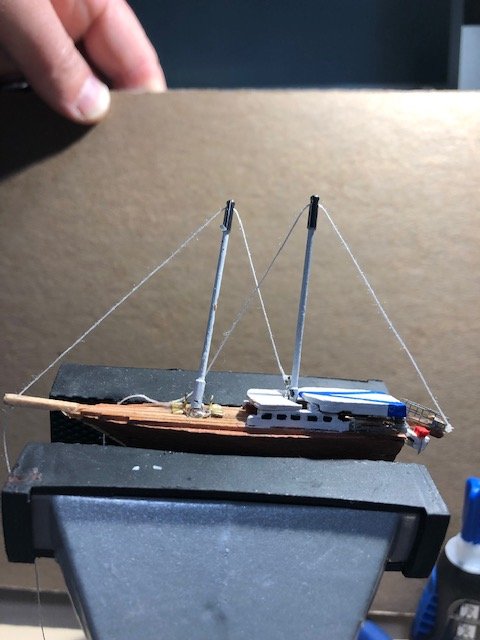
 The sails came out better than expected. These are what will make the ship Pop.

I started with silk for the running rigging, in case i needed to glue the sails on. For the standing rigging i use wireline, which does not take glue so well. In retrospect, i could have used the nylon fireline for everything. Maybe Ill change it later..
 With some 1/700 Photo etched railing on the port side.
 and on the starboard side.
And because i cant leave well enough alone
 I attached some mahogany strips as ribbing. These are 3/64'; i wish i has used my 1/32" strips. Oh well - "NEXT TIME": the most useful expression in SIB building!
Next post I expect to have the Launch and finishing touches. Thanks!
- mtaylor, GrandpaPhil and Omega1234
-
3
-
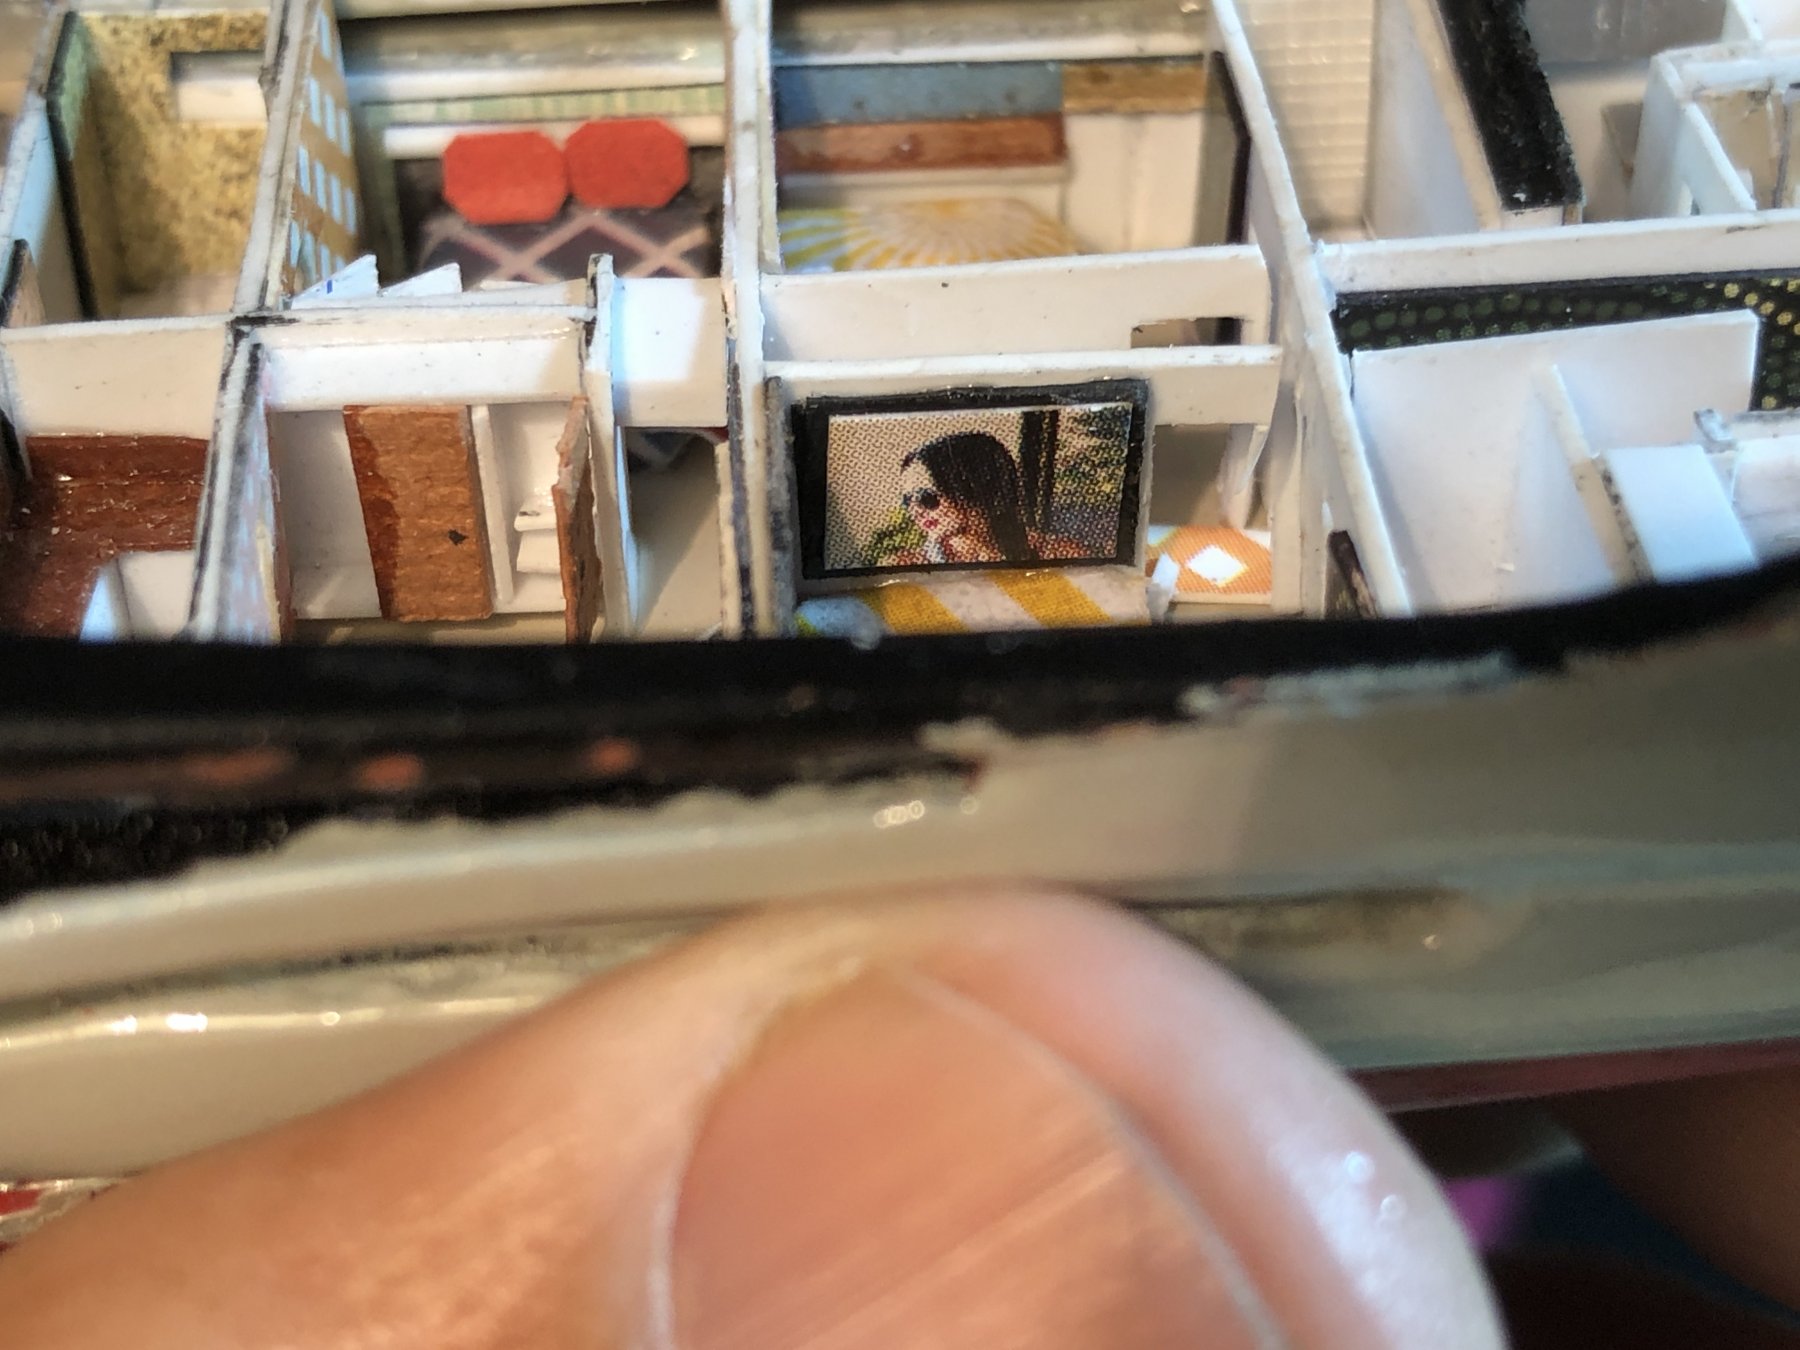
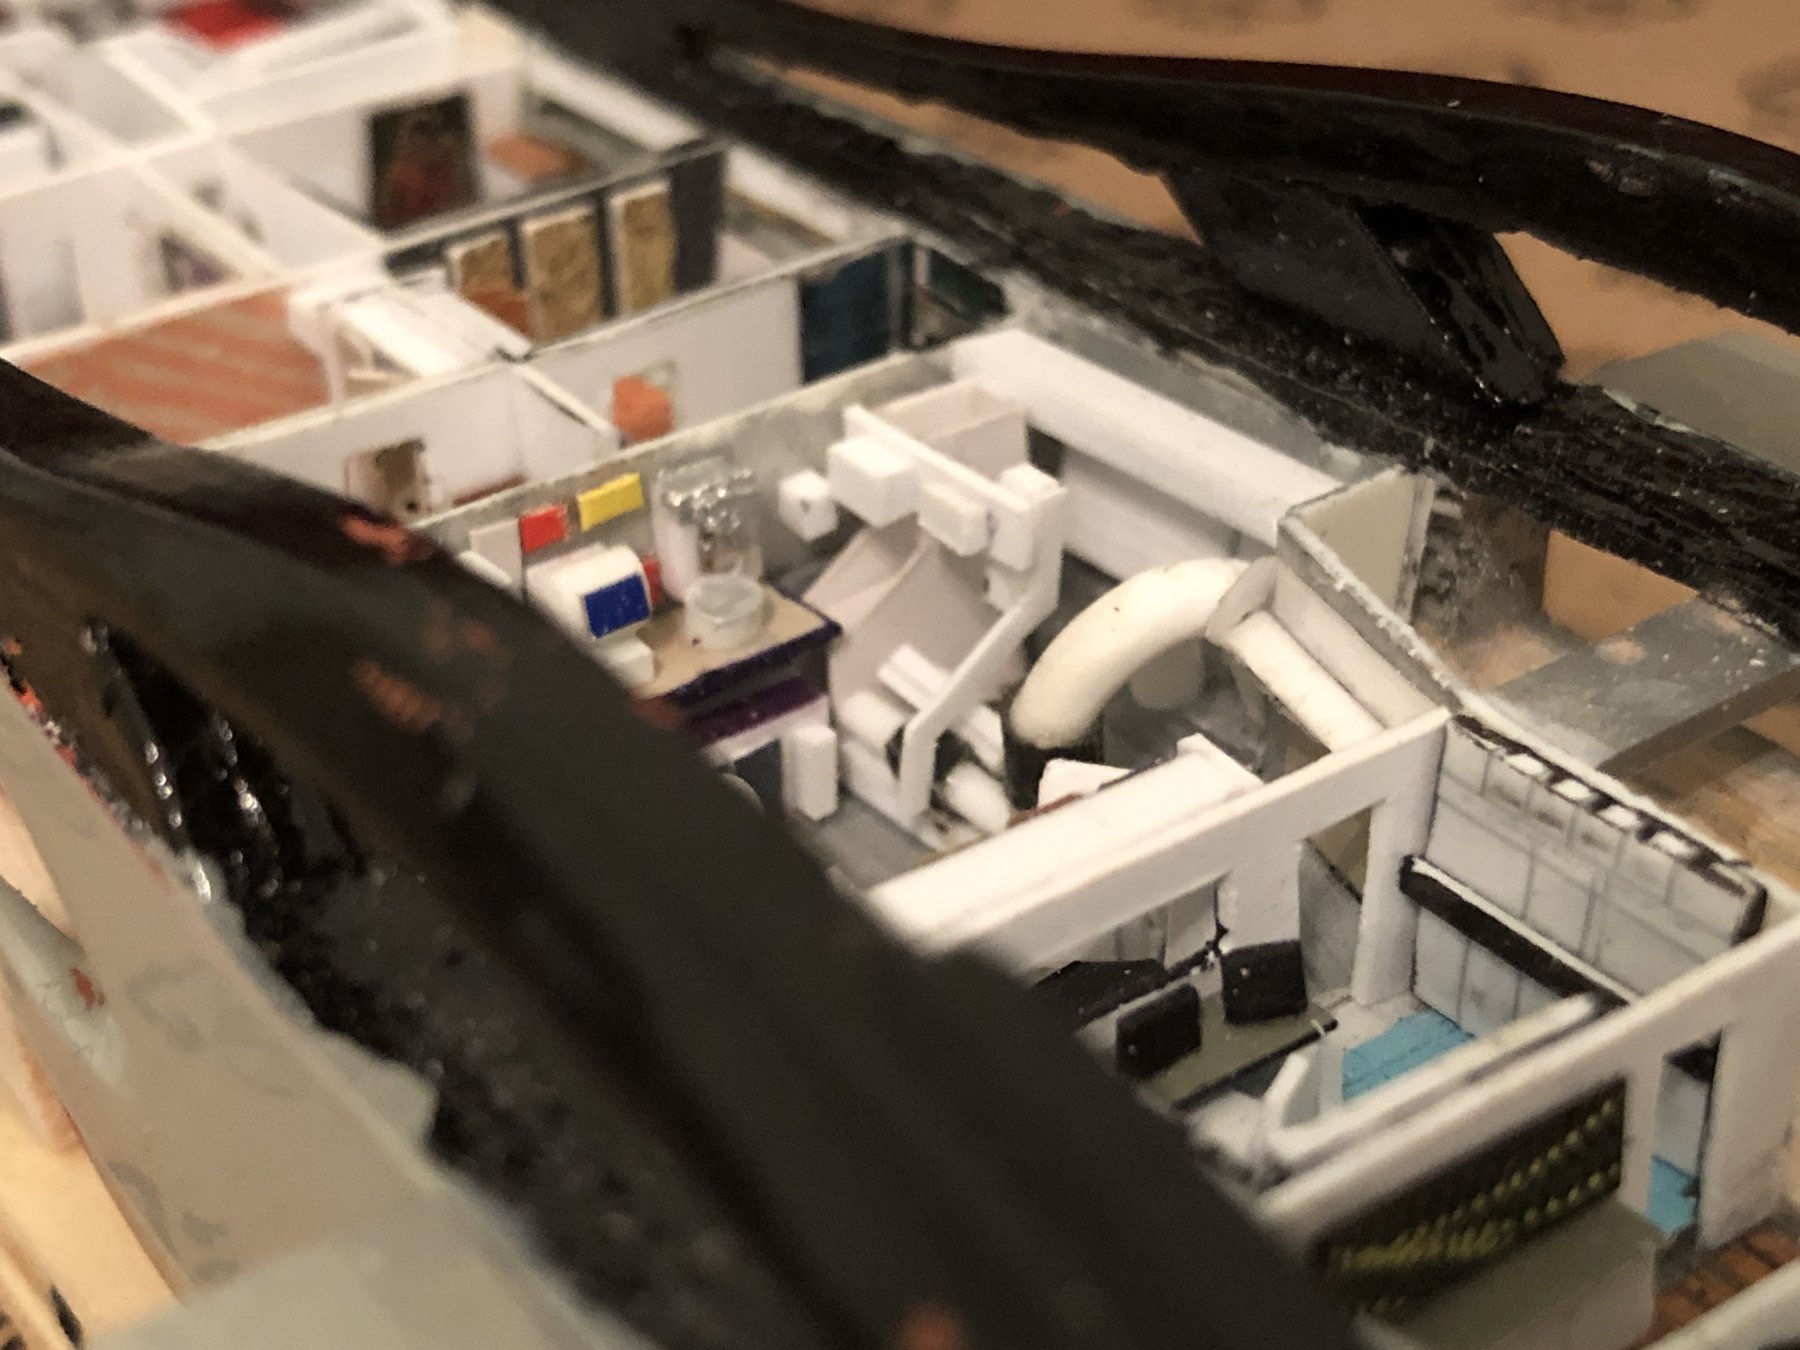
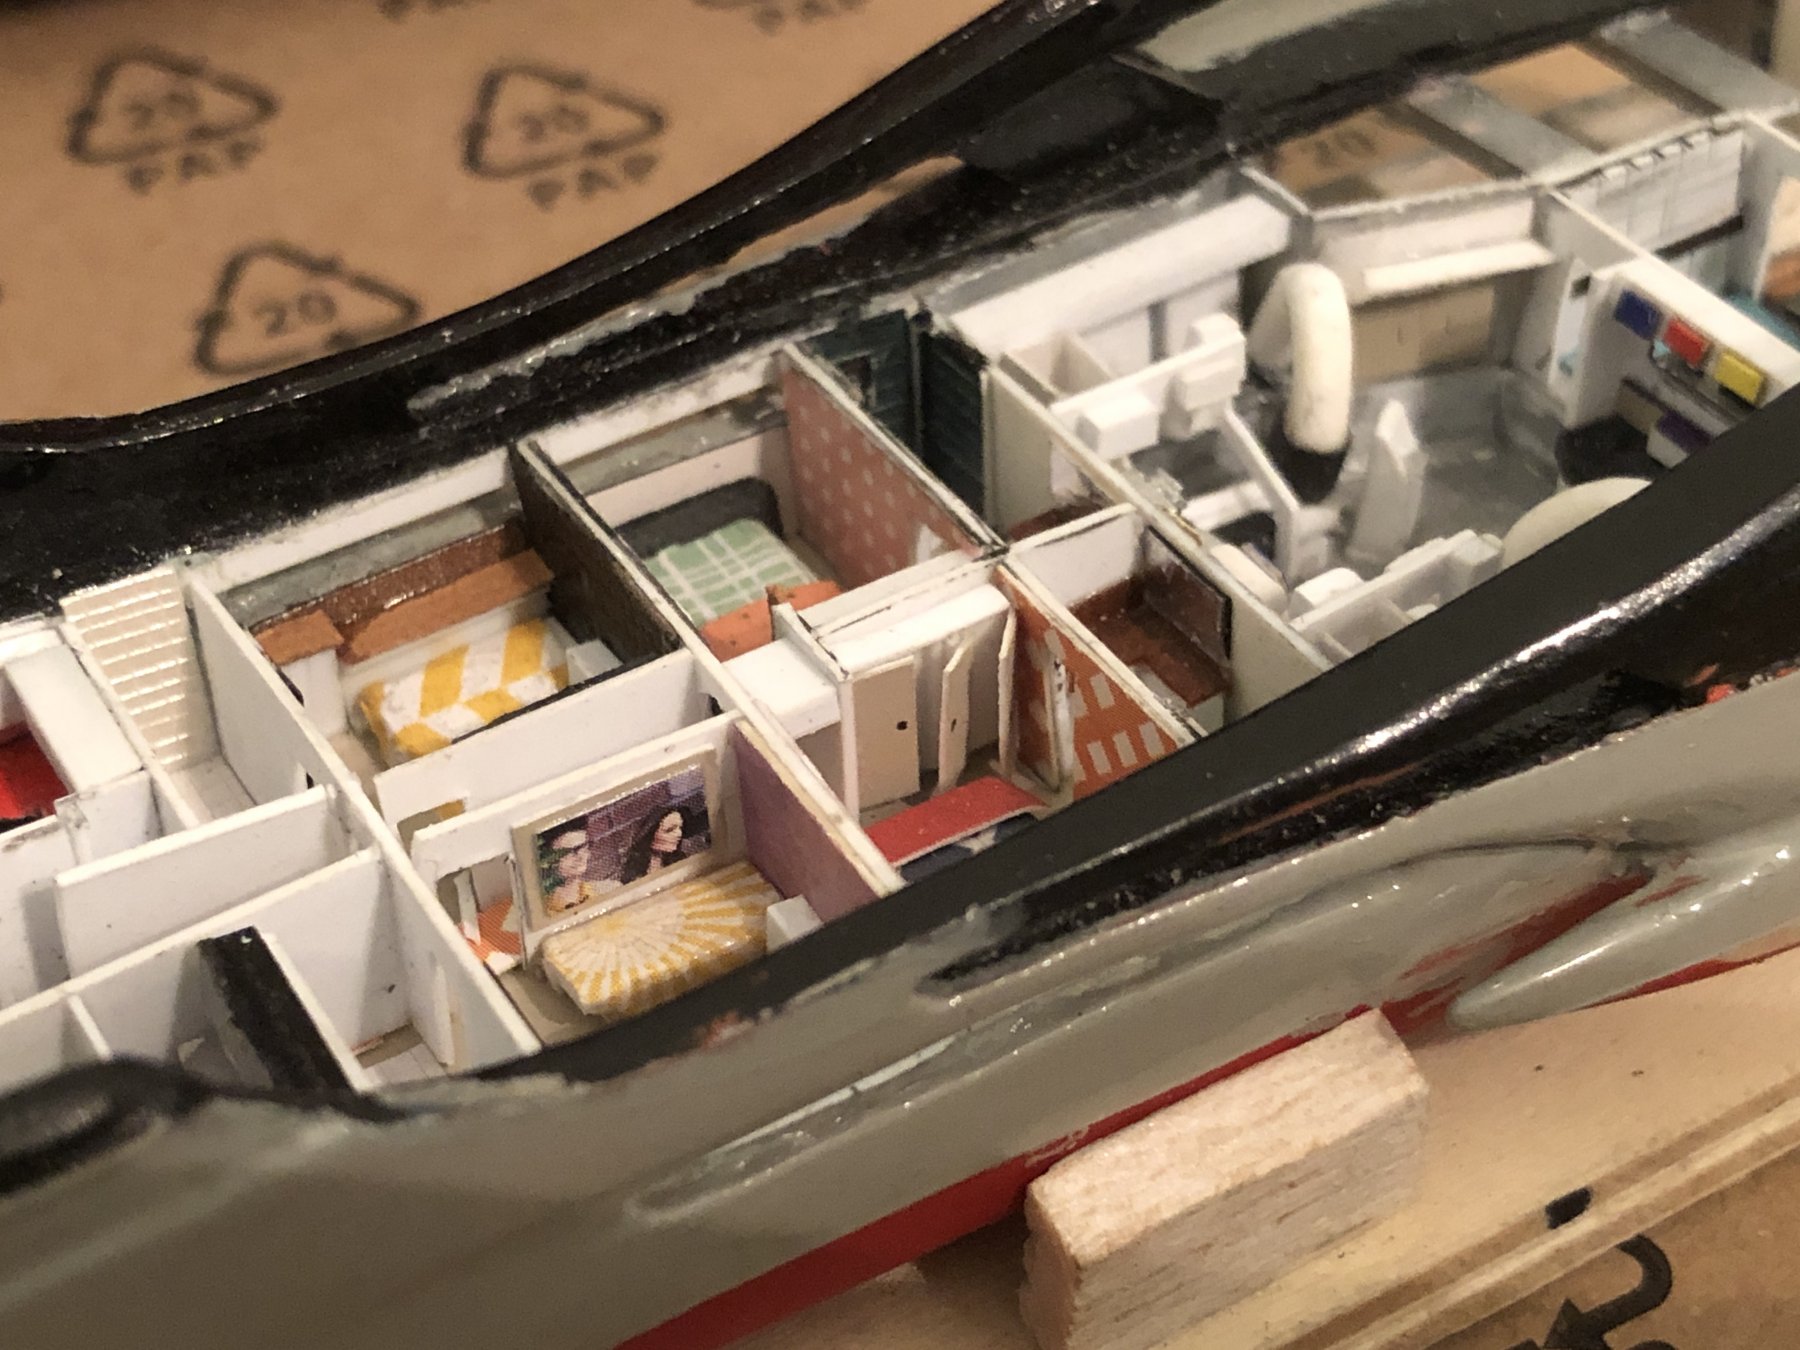
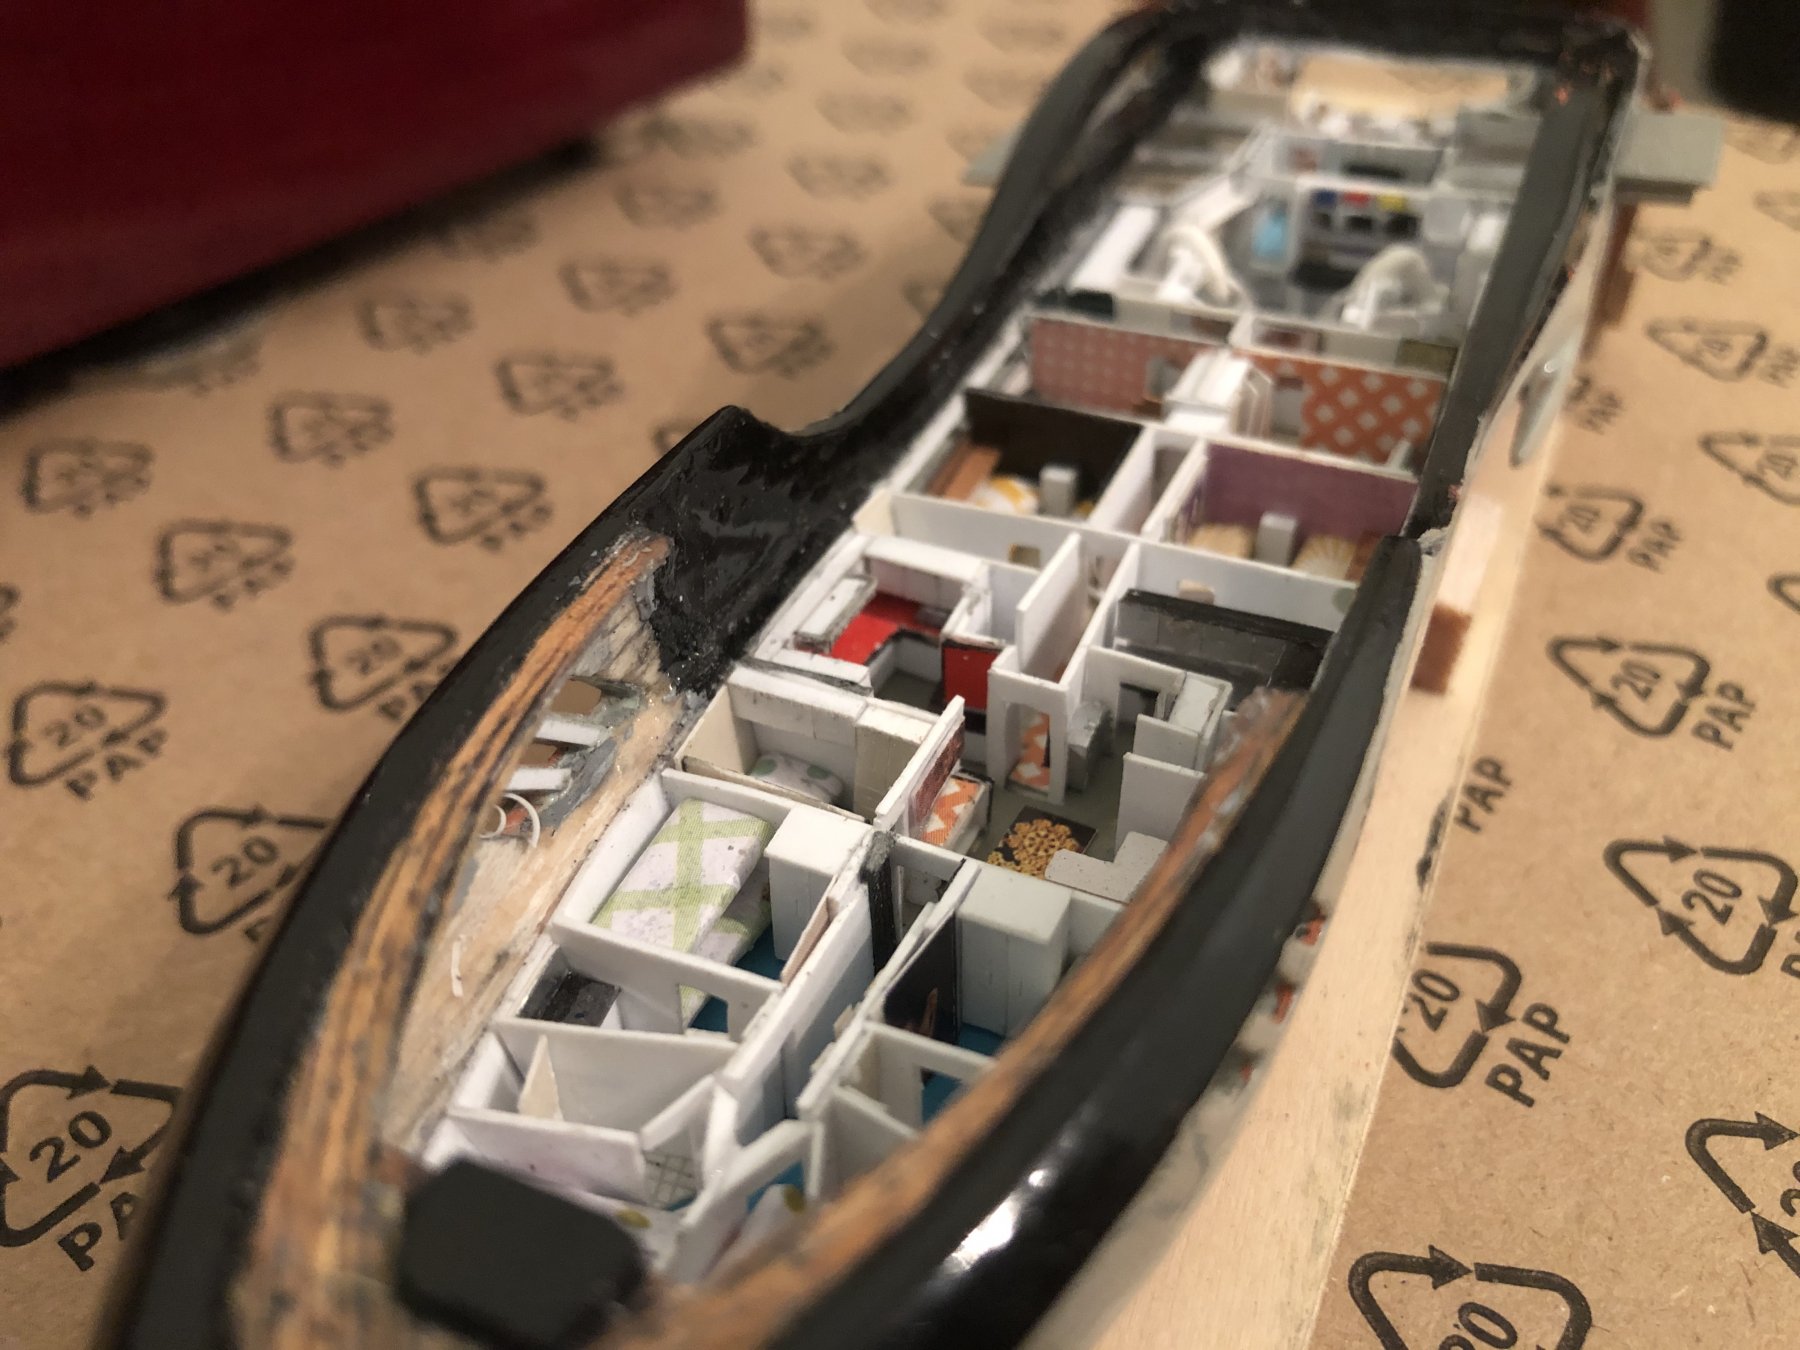
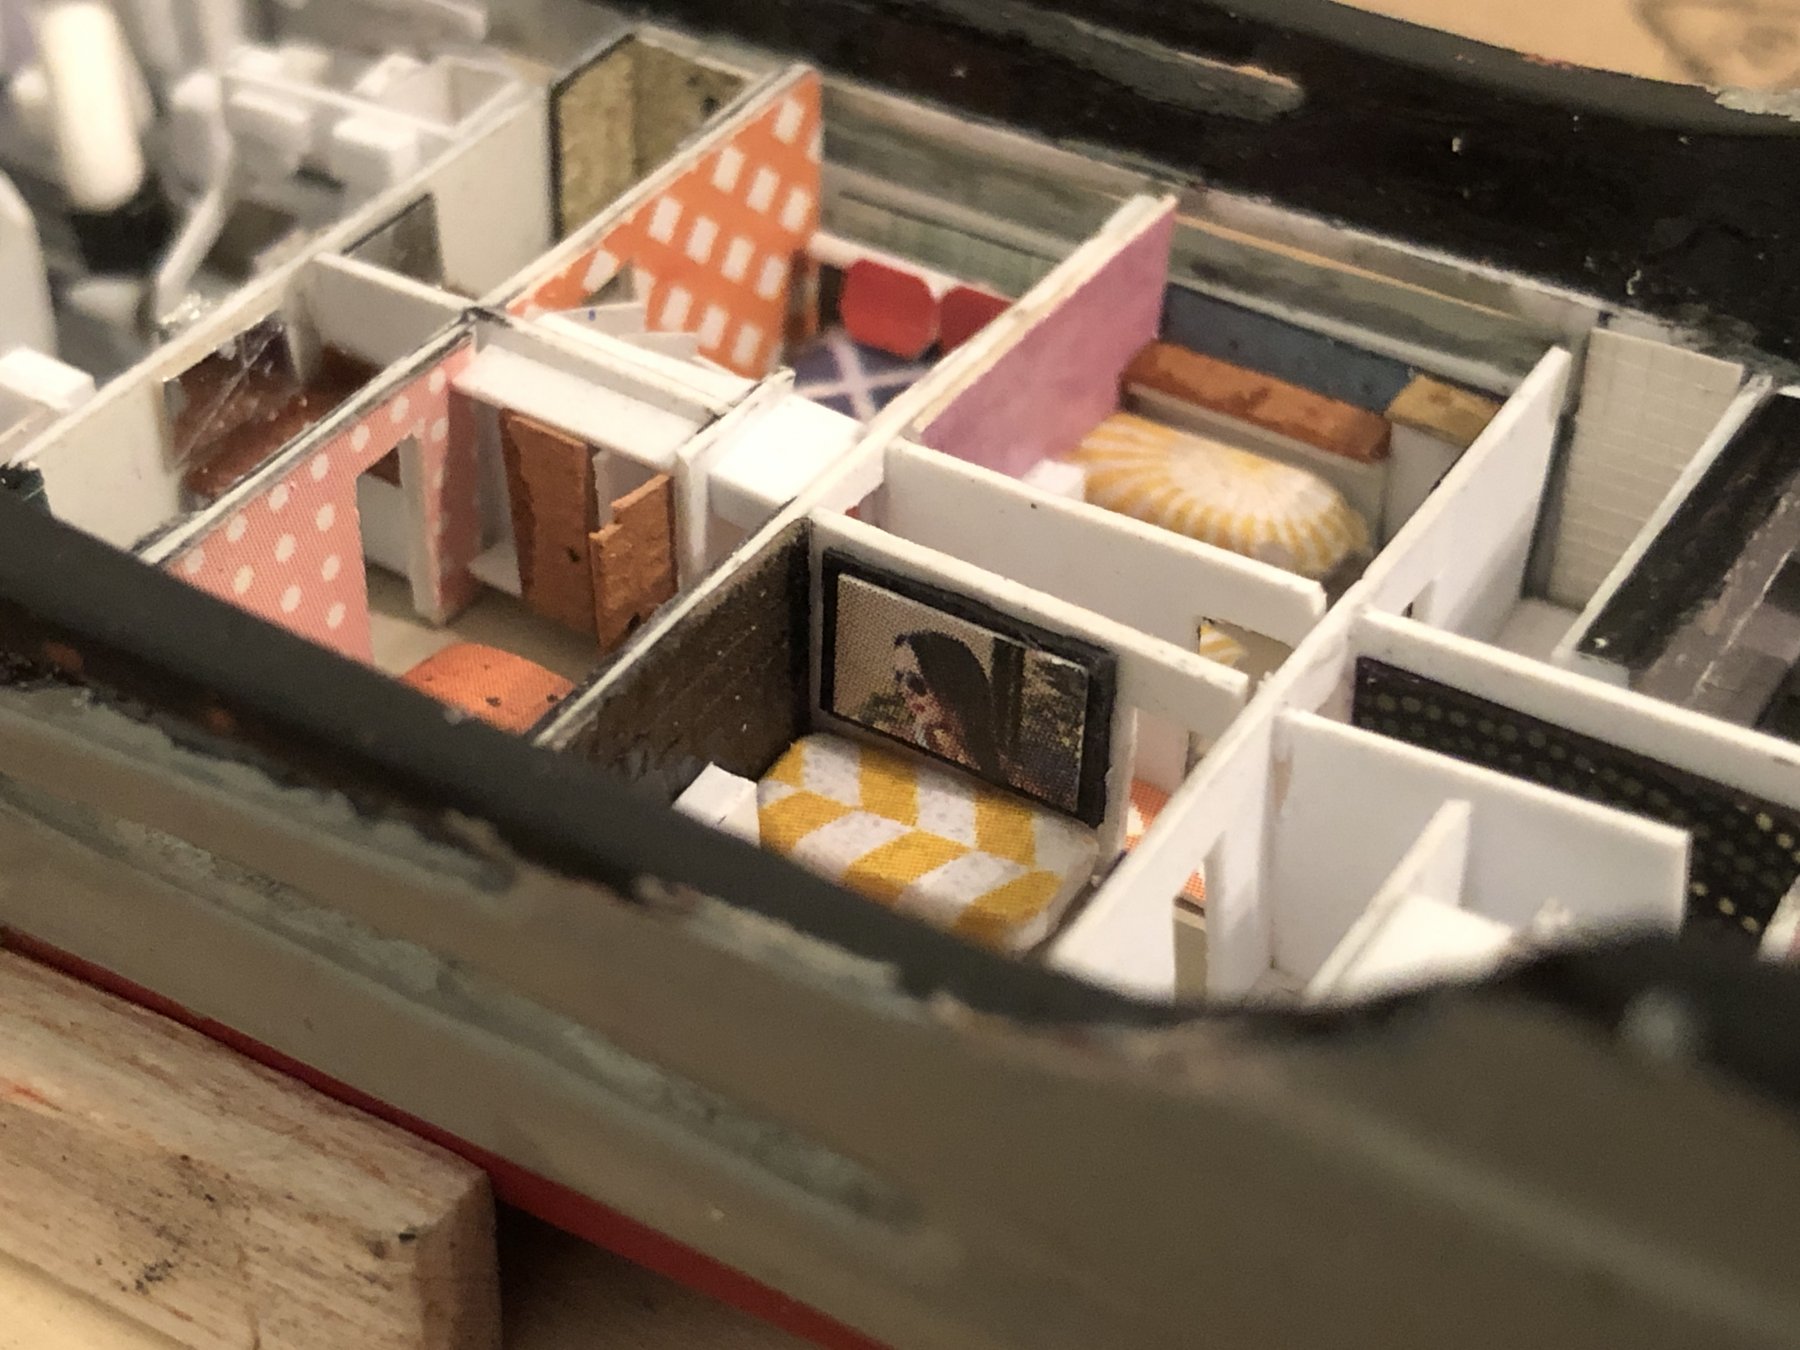
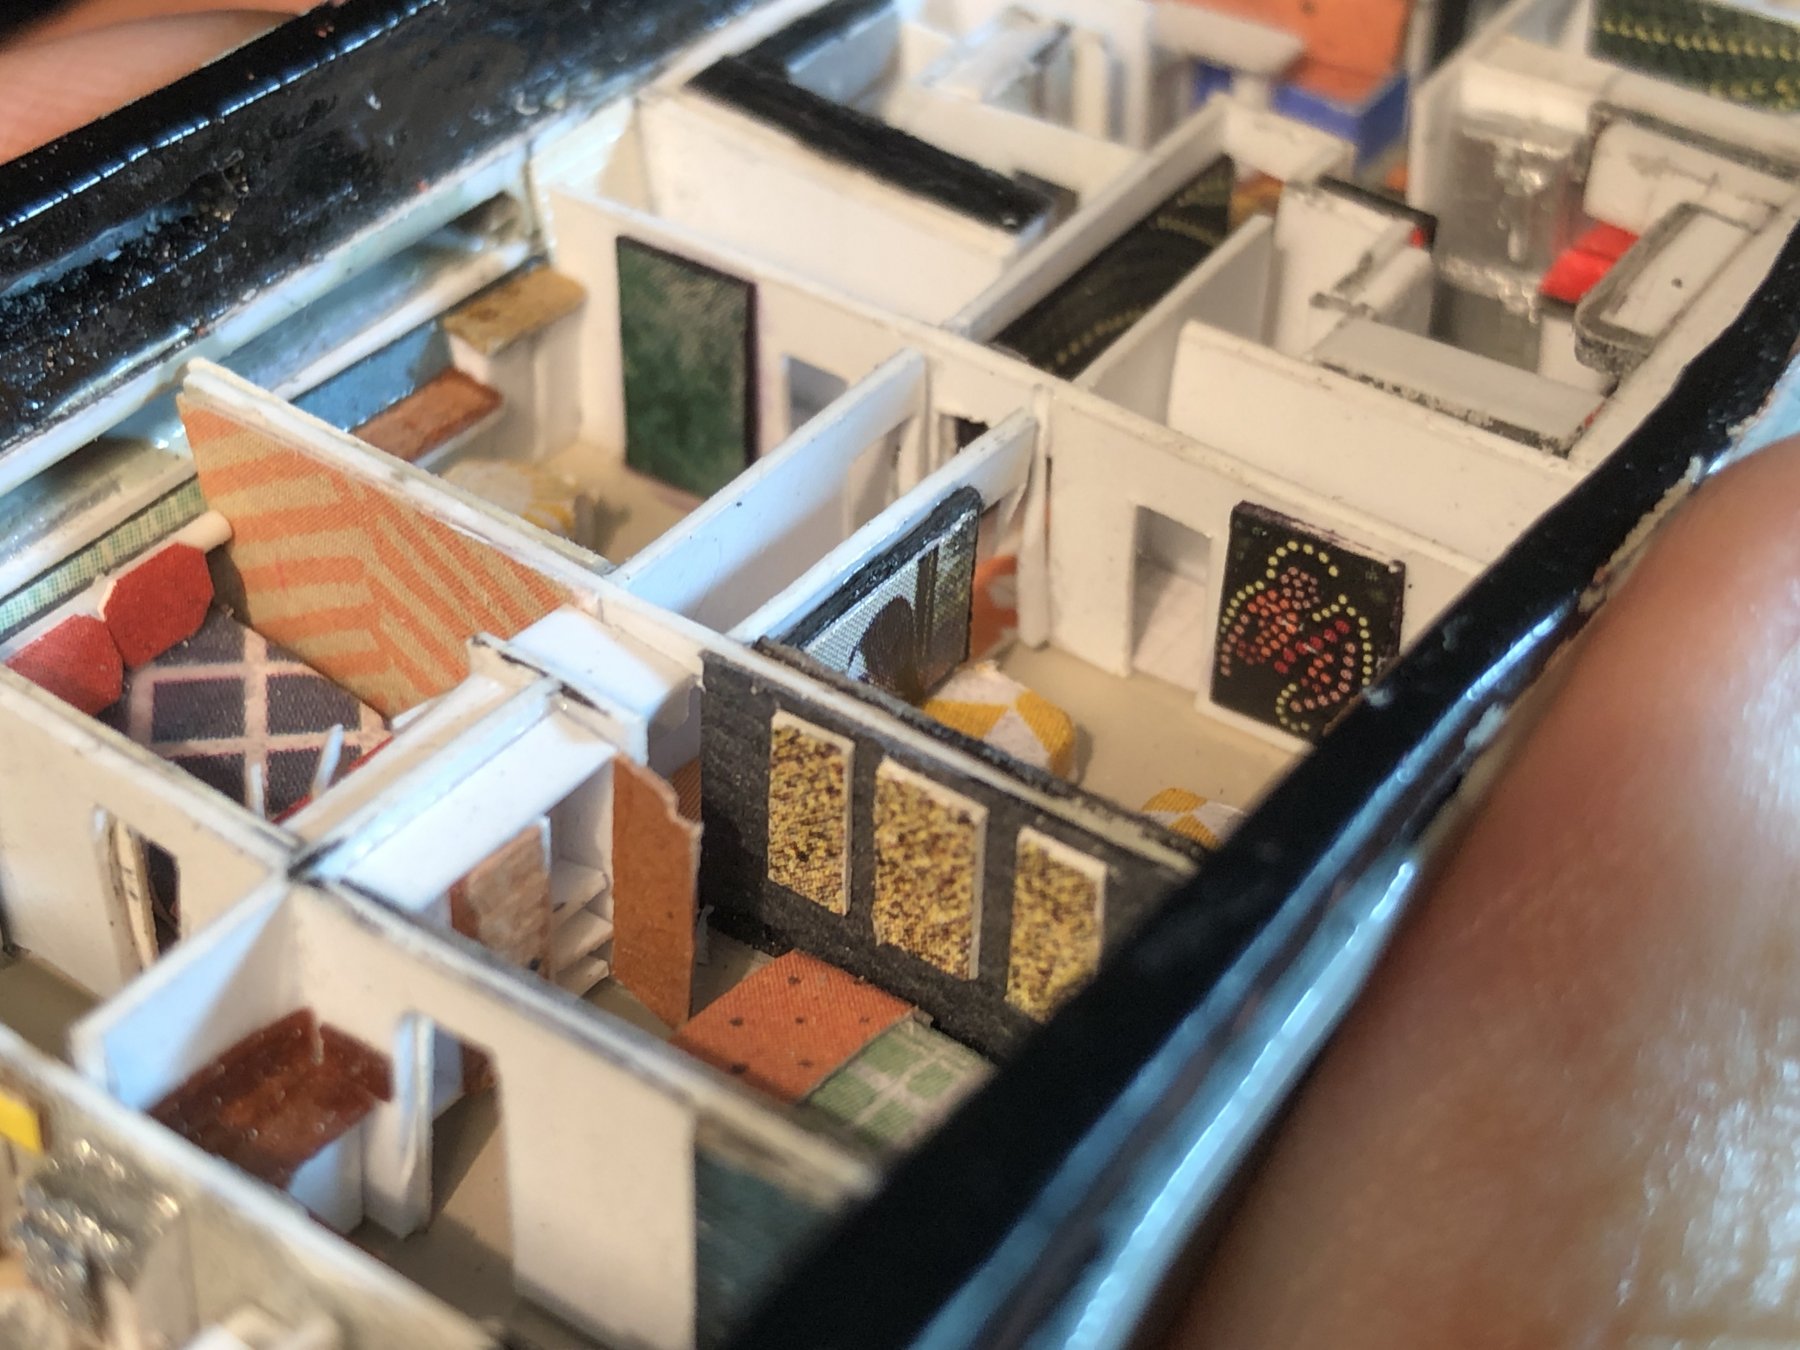
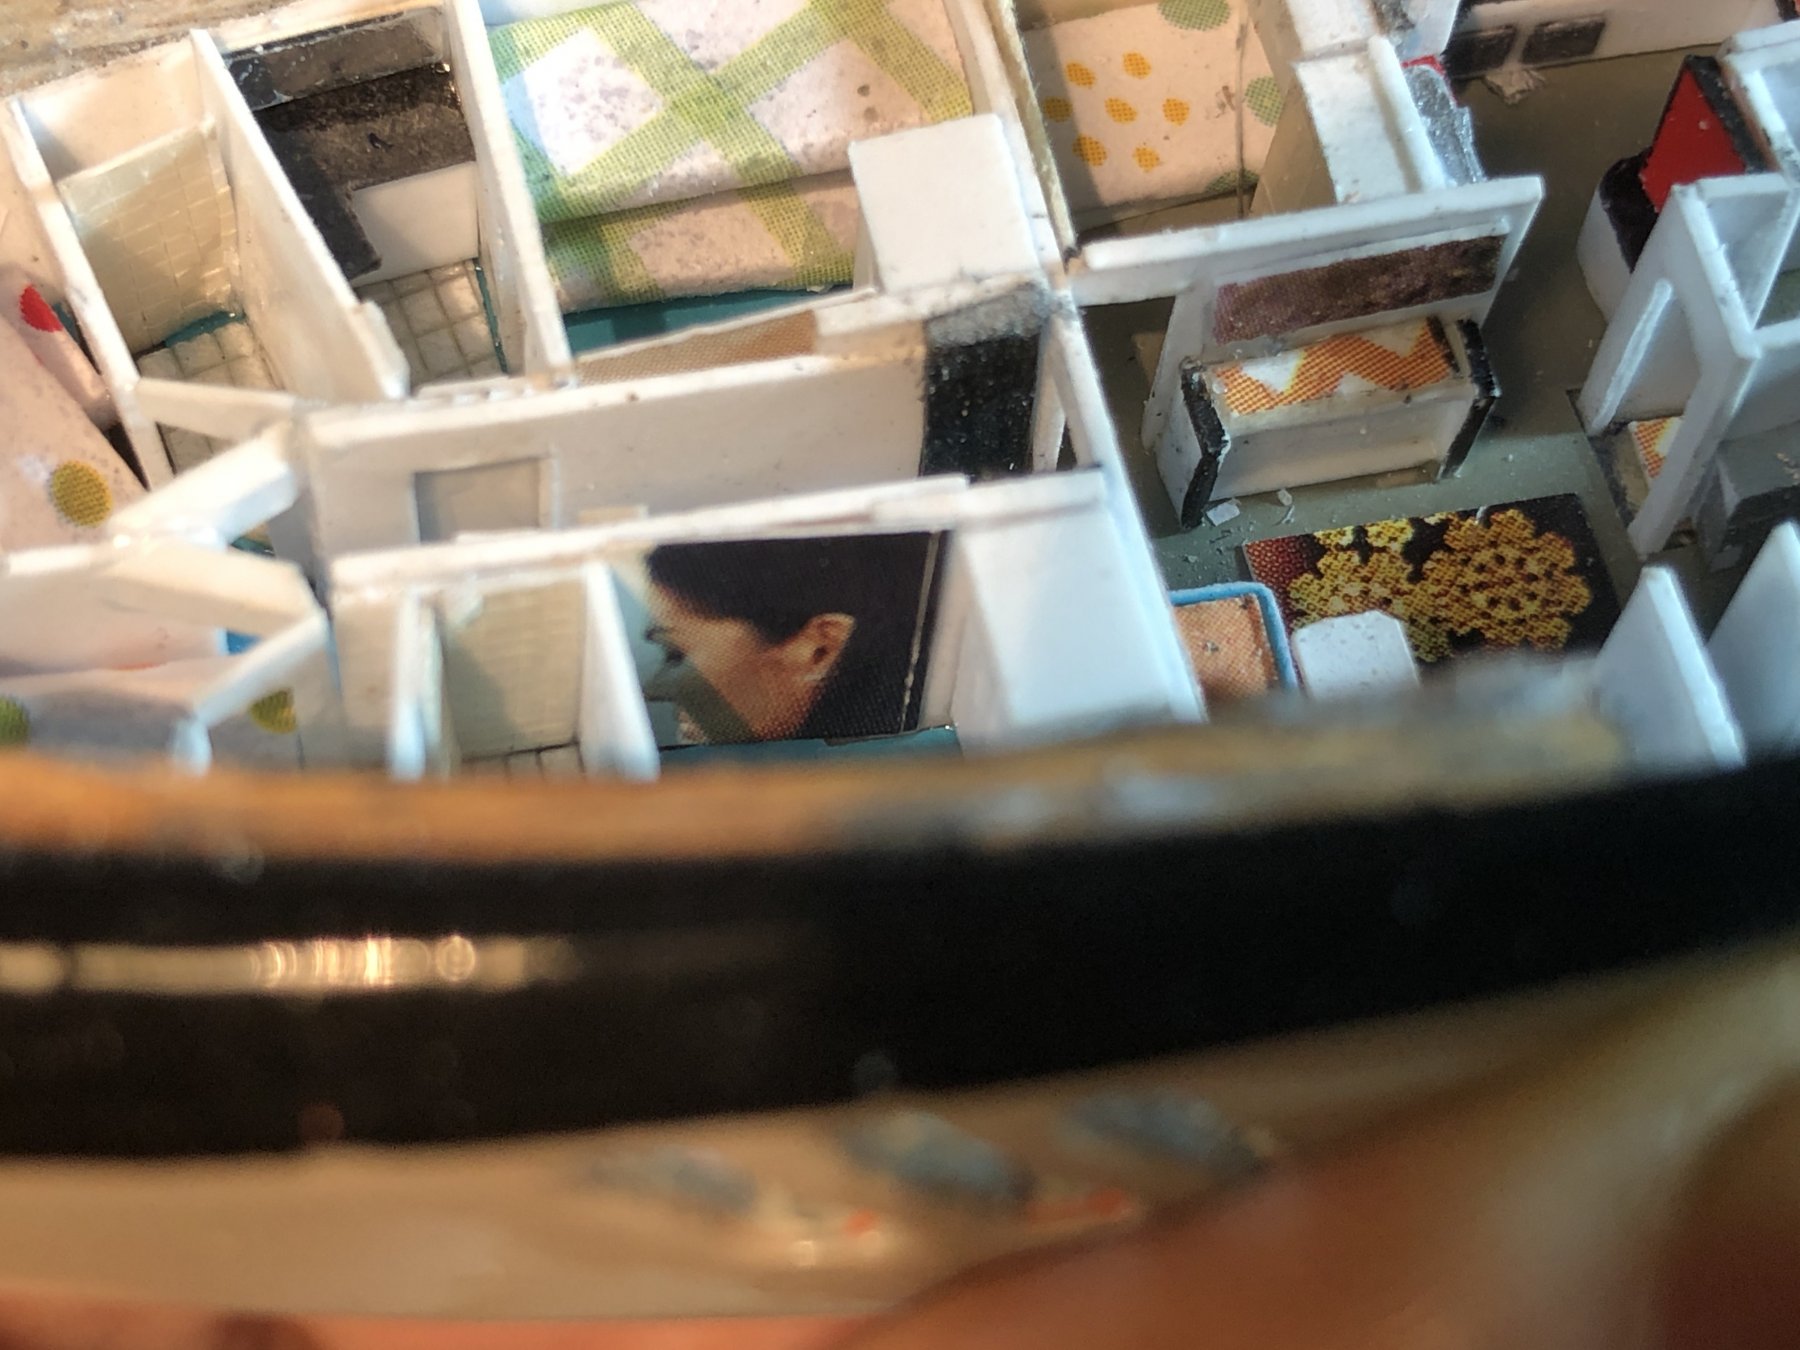
7 hours ago, Omega1234 said:Hi folks. Well, well, well...Genesis’ owner just happens to be a serious art-collector. You know, the real arty-farty type.So, in keeping with that theme, I’ve adorned the Lower Deck’s cabins and passageways with quite a few paintings and wall-hangings. I reckon it brings the whole Lower Deck to life. I hope you like it too.Oh, and once again...damn these close-up photos. They accentuate each and every blemish and error. I swear that the detail looks great from 2 metres away😏 ( rather than close-up).Have a great weekend.CheersPatrick

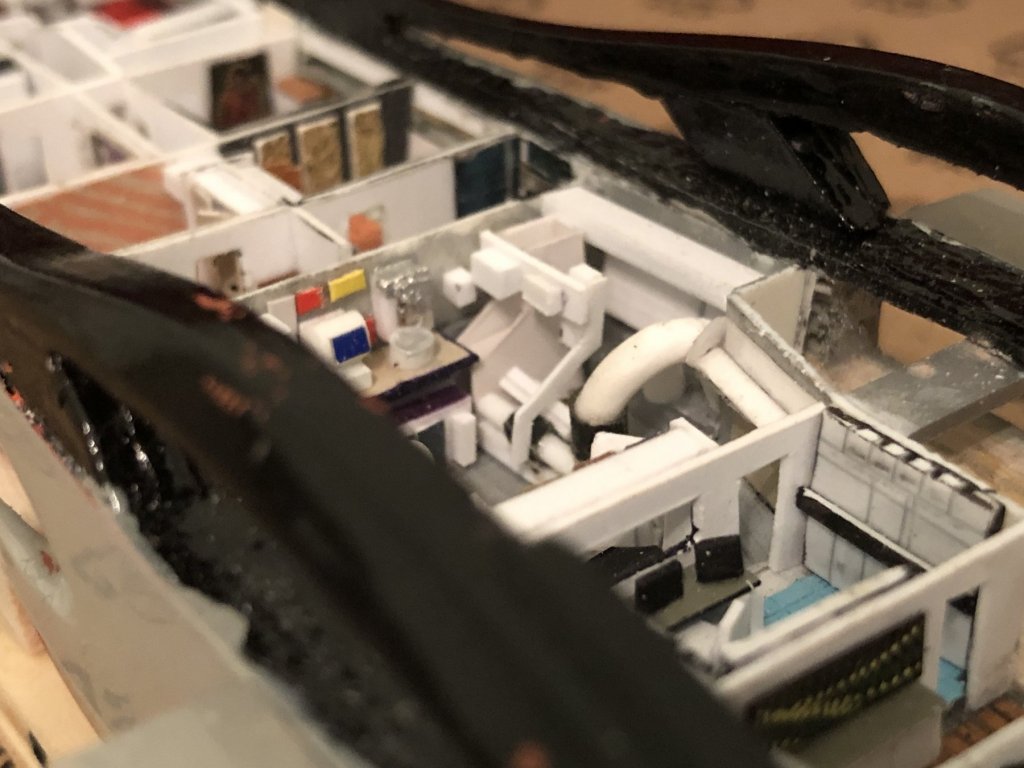
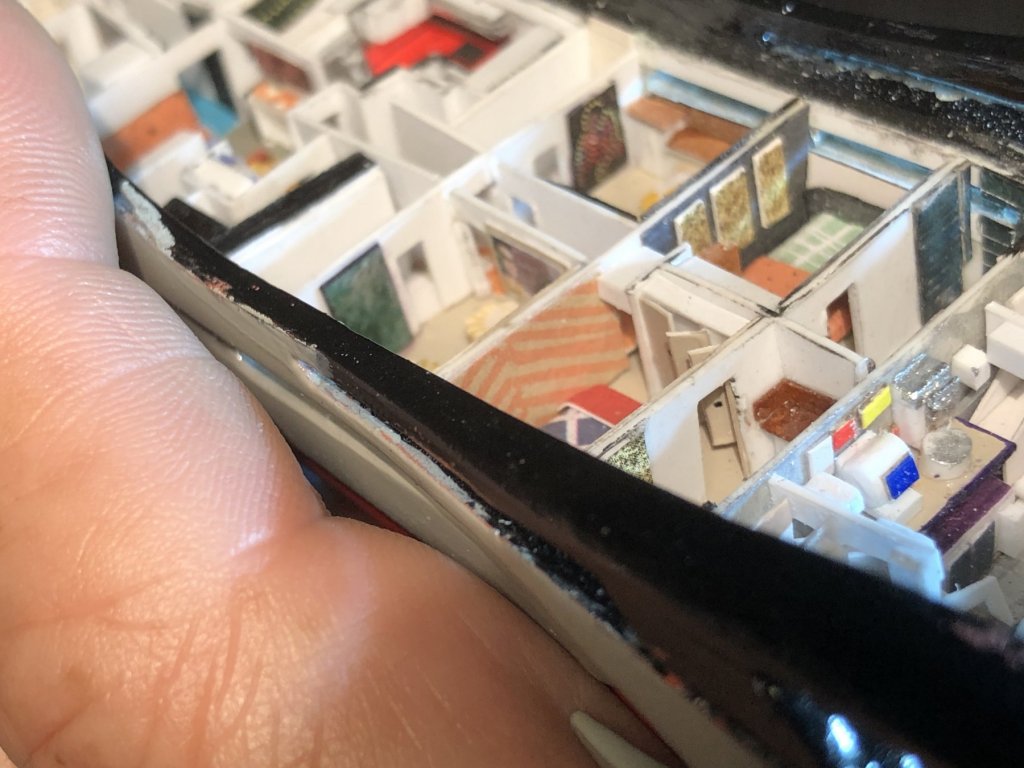


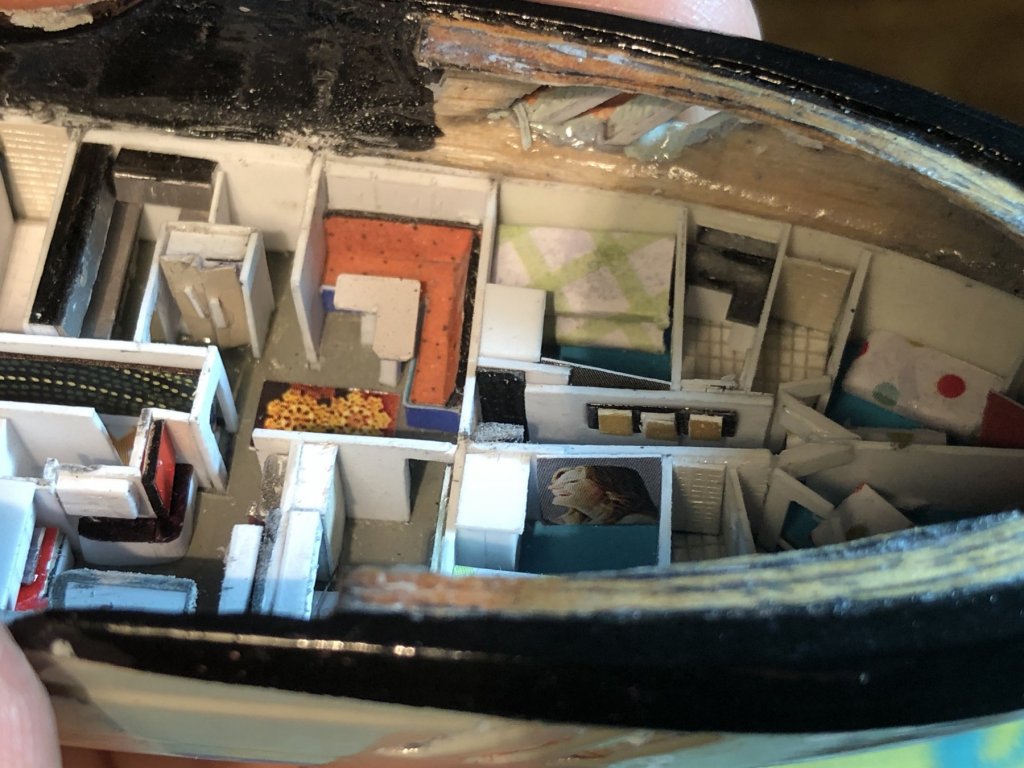
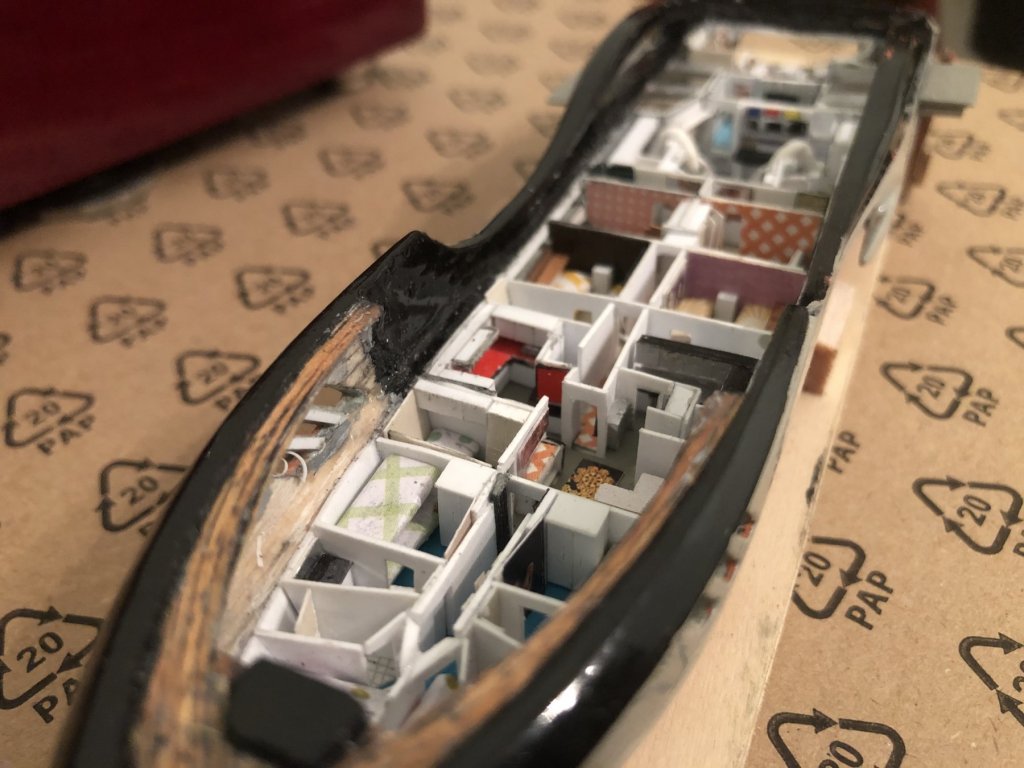


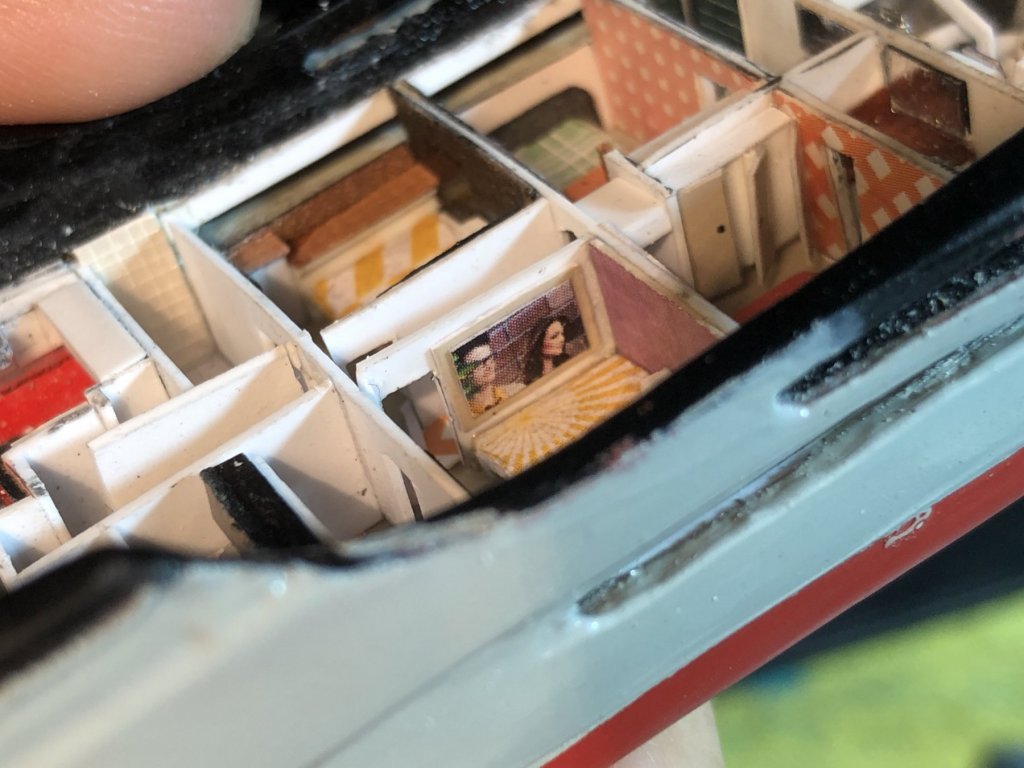

Patrick, It looks like your yacht owner scored a Jackson Pollack triptych and a Keith Haring. Nice job!
- mtaylor, FriedClams, CaptainSteve and 1 other
-
4
-
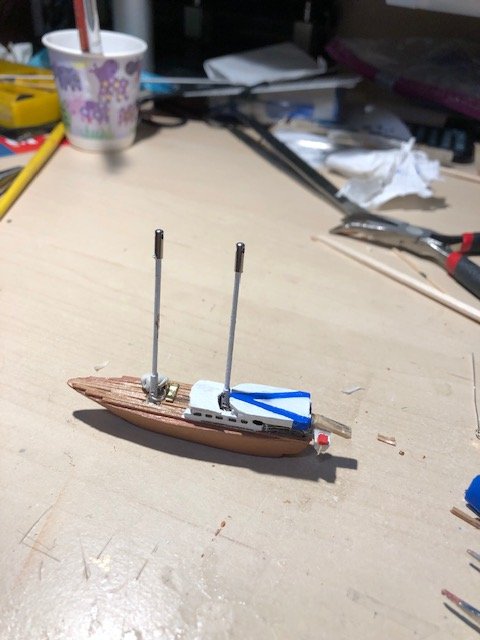
The fore and main masts were made with brass rods and cord ends, painted white.
Hinges for the masts as in the Annie, Alaska, and Flying Dutchman.
I didnt like the distressed, grayed hull on the real Lila, and I kept trying to find a good color

Man, did I struggle. Still do.
 I laid down a mahogany strip deck - not too fancy at all.
 Found a bunch of great photo etched rails online.
Once again I tip my cap to Igorsky for the idea.
 teensy tinsy magnets at the stern railing
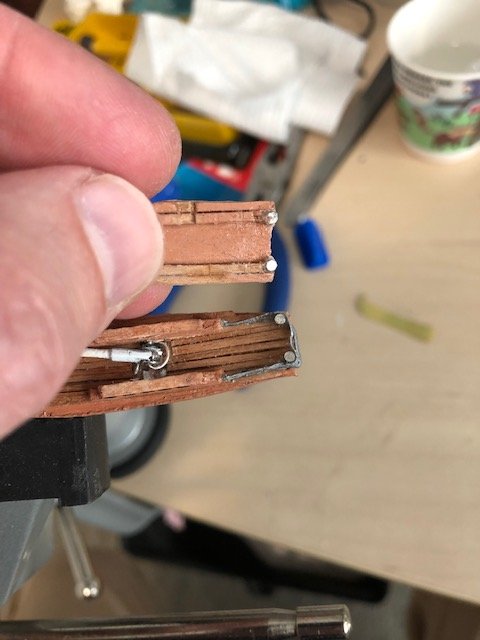 Will magnetically attach the sun roof -
but only AFTER the ship is launched in the bottle, and AFTER the sails are lifted! Like so:
Now, the rigging on this I found to be fairly hard to plan.
You wouldnt think with the simple design. But with the sparse, clean sail plan, I needed to reconfigure the rigging a bit more than I typically do.
First I needed to make and attach the stern's little motor boat and gangplank; this came out better than most of my miniatures.
I also embellished the sun roof with a design that will complement the sails.
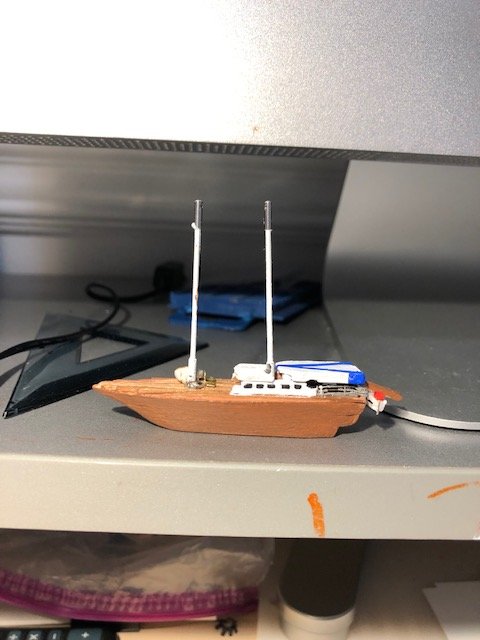 Struggling with another color, but I think it'll do.
Because the masts are 1.19mm brass - and I havent yet figured how to drill top dead center in them - I eschewed the typical drill holes for rigging and yards. Instead I glued or plastic welded bead ends and cord ends as pass through and tie holes.
Add a bow plank sprit, some more photo etched rails to the stern plank, and here we are.
Ok... Its still looking more like a tug boat than a Turkish Yacht, but for the first time, I am feeling optimistic about this taking shape!!
- GrandpaPhil, Omega1234 and mtaylor
-
3
-
Fantastic!!
But Wait, Igor - in reviewing your post from april 11, - did you really weave that tiny basket on a pen cap ????
-
-
Hello All,
After the last SIB built wihtout any running lines, I really began to miss the the hinges and the rigging.
This next build will be a Bat Mitzva gift for my niece Lila (twin to Max - he of the FORTNITE Pirate Ship), and will the last in this particular series of gifts!
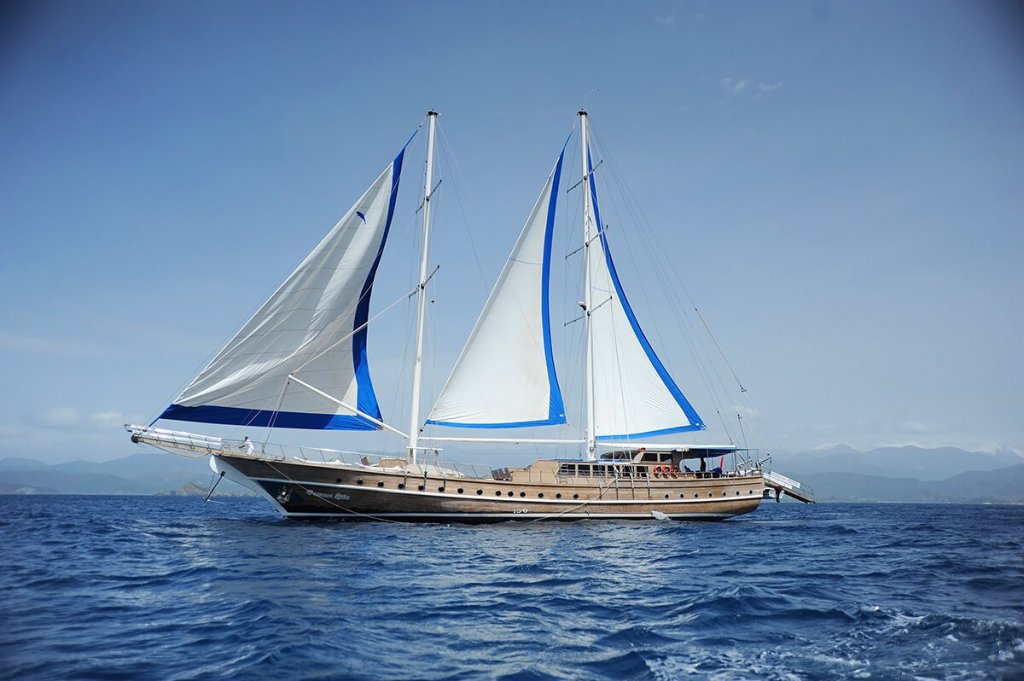
I found a gulet called the Princess Lila, a luxury yacht, available for charter in Turkey and Croatia.
A gulet is a traditional design of a two-masted or three-masted wooden sailing vessel from the southwestern coast of Turkey. I believe that this is a ketch.
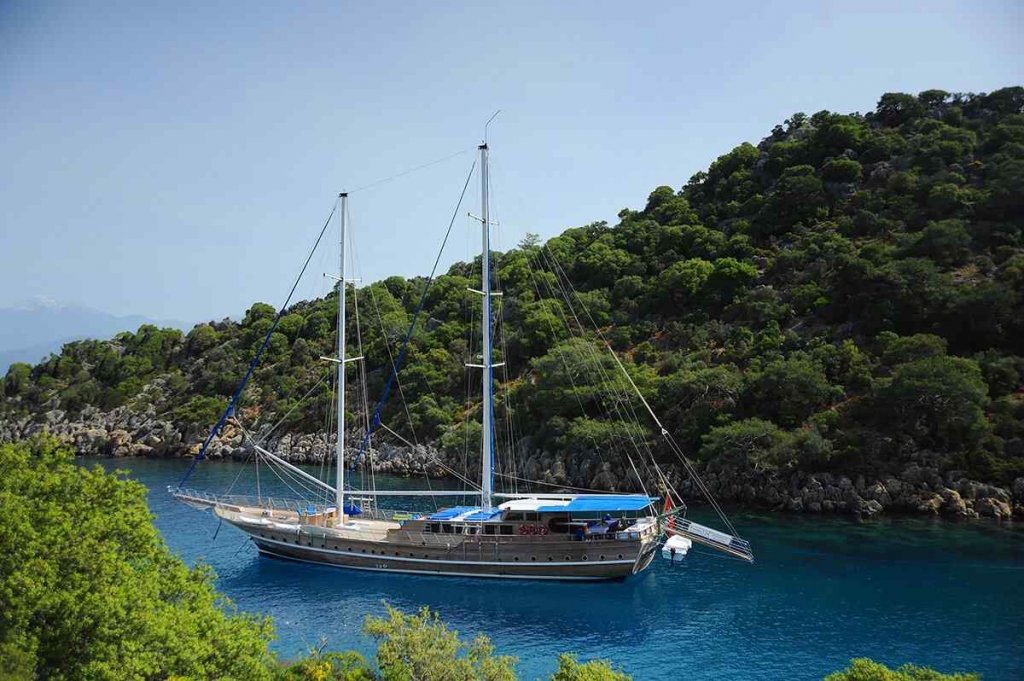
I also saw the Gulet Queen Lila, but the family here liked the looks of the Princess better.
As is typical for SIB building, I pick the inspiration (or recipient), then the ship, and then the bottle to match.
I really like this old Kessler's whisky bottle, with the fancified diamond glasswork!
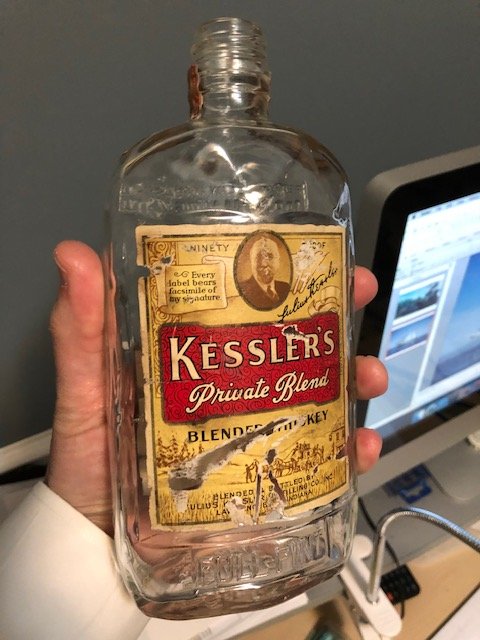
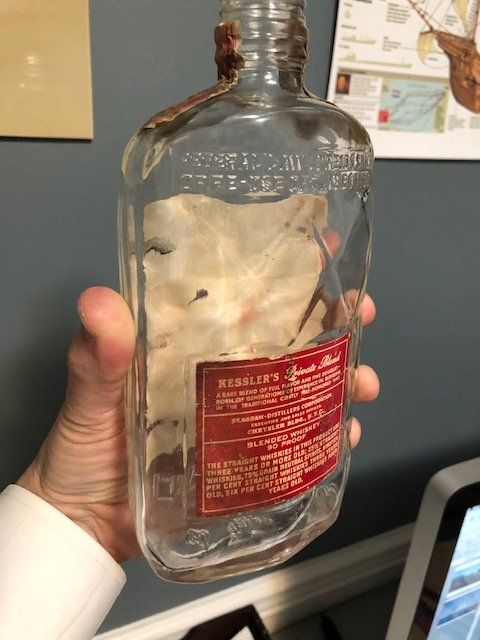
I typically remove the back label, but try to leave on the front and any other labels to demonstrate the bottle's heritage or provenance. That was my plan here.
The Boss, well, she did not approve of me keeping on any such ratty things for our niece, and admonished me thusly, "She's a 13-year old girl, not a 50-year old man! Take off all the labels. And make sure that thing is crystal clear!" She's right, of course.
Although I made saggitical slices for the USS Alaska, that was really roughshod. This time I planned them out a bit more properly. Still a bit rushed but not too bad for this impatient SIB maker.
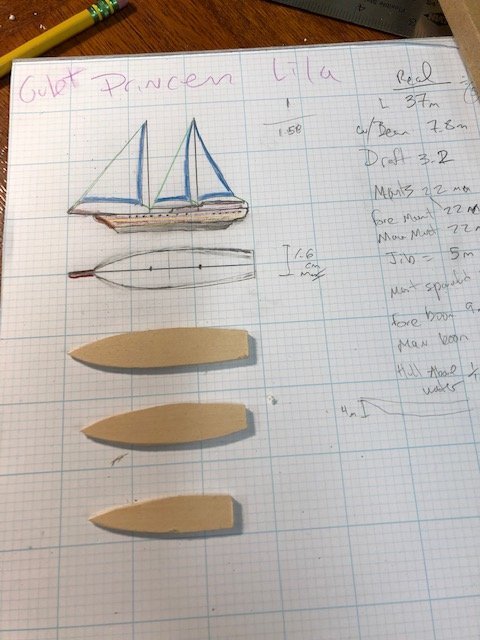
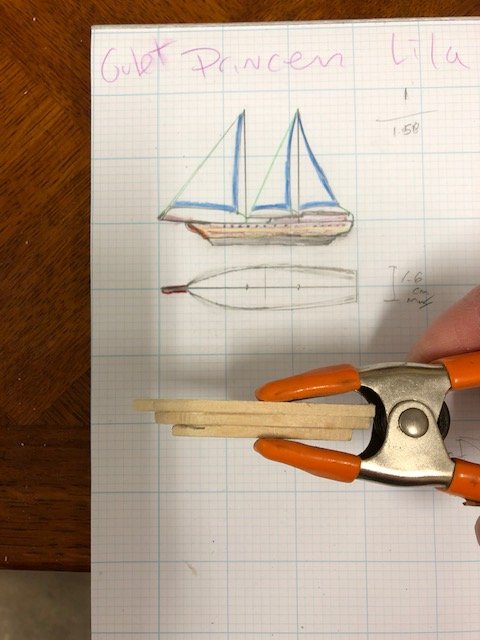
These saggital cuts are what are used in the italian and japanese kits, the latter being my favorite. The american kits just hull blanks for whittling and sanding. I had been doing the blanks, but I think after this Gulet, I have been converted to the slices. It allows for a more finessed hull shape during the sanding phase.
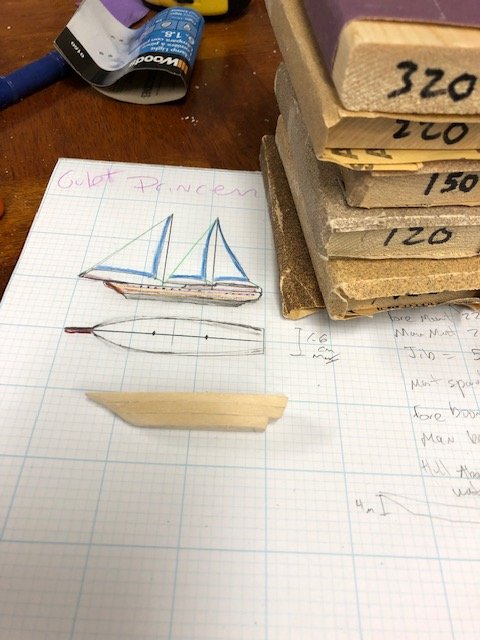
Next: Hull and deck fabrication
- mtaylor, GrandpaPhil, Omega1234 and 1 other
-
4
-
12 hours ago, mtaylor said:
I think he will love it. Just don't tell him it's spaghetti and meatballs instead of an octopus.
Thanks Mark,
that's a good call - in the world of fortnite, i think the crazier the better!
- mtaylor, CaptainSteve and Omega1234
-
3


Schooner Caroline by josh44 - BOTTLE - 1/240 scale - Finished
in - Build logs for subjects built 1901 - Present Day
Posted
Thank you, Mike!!