vulcanbomber
-
Posts
396 -
Joined
-
Last visited
Content Type
Profiles
Forums
Gallery
Events
Everything posted by vulcanbomber
-
Looks brilliant Danny. I've made paper model aircraft, but inspired by your build, I've only gone an ordered a loco to try. A Modelik T448P diesel in 1:25. Ordered the laser cut wheels, frames and grating with it as well!
-
She does look lovely. You have done an excellent job building her.
-
Hi Bitter End, Sorry to hear about your relationship and I can sympathise with your lack of enthusiasm for your build, most of us have been there at some point or another. When you are ready to return, we will all be here for you. You will always be part of the MSW family! Caroline
-
Lovely looking model of the Agamemnon. I am one of the few people who actually enjoy tying ratlines and yours look very neat and tidy. Good work!
-
Nice work on the sails and rigging. I added figurines, I think it brings a ship to life and adds a bit of extra interest.
-
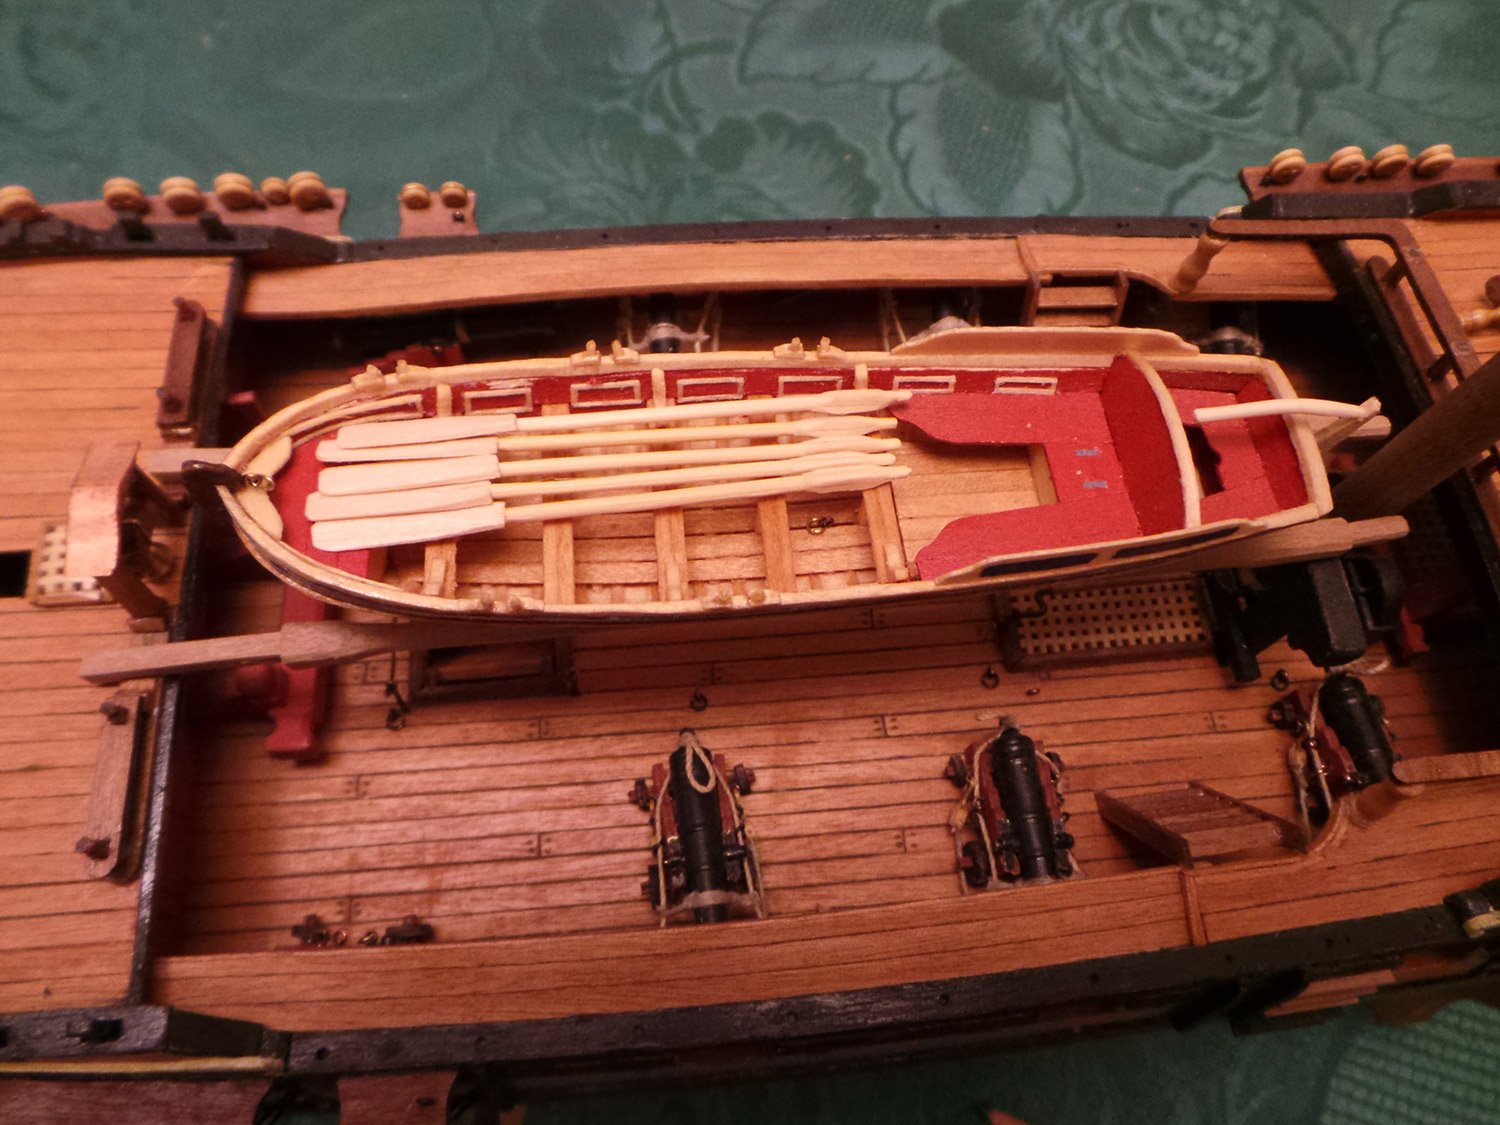
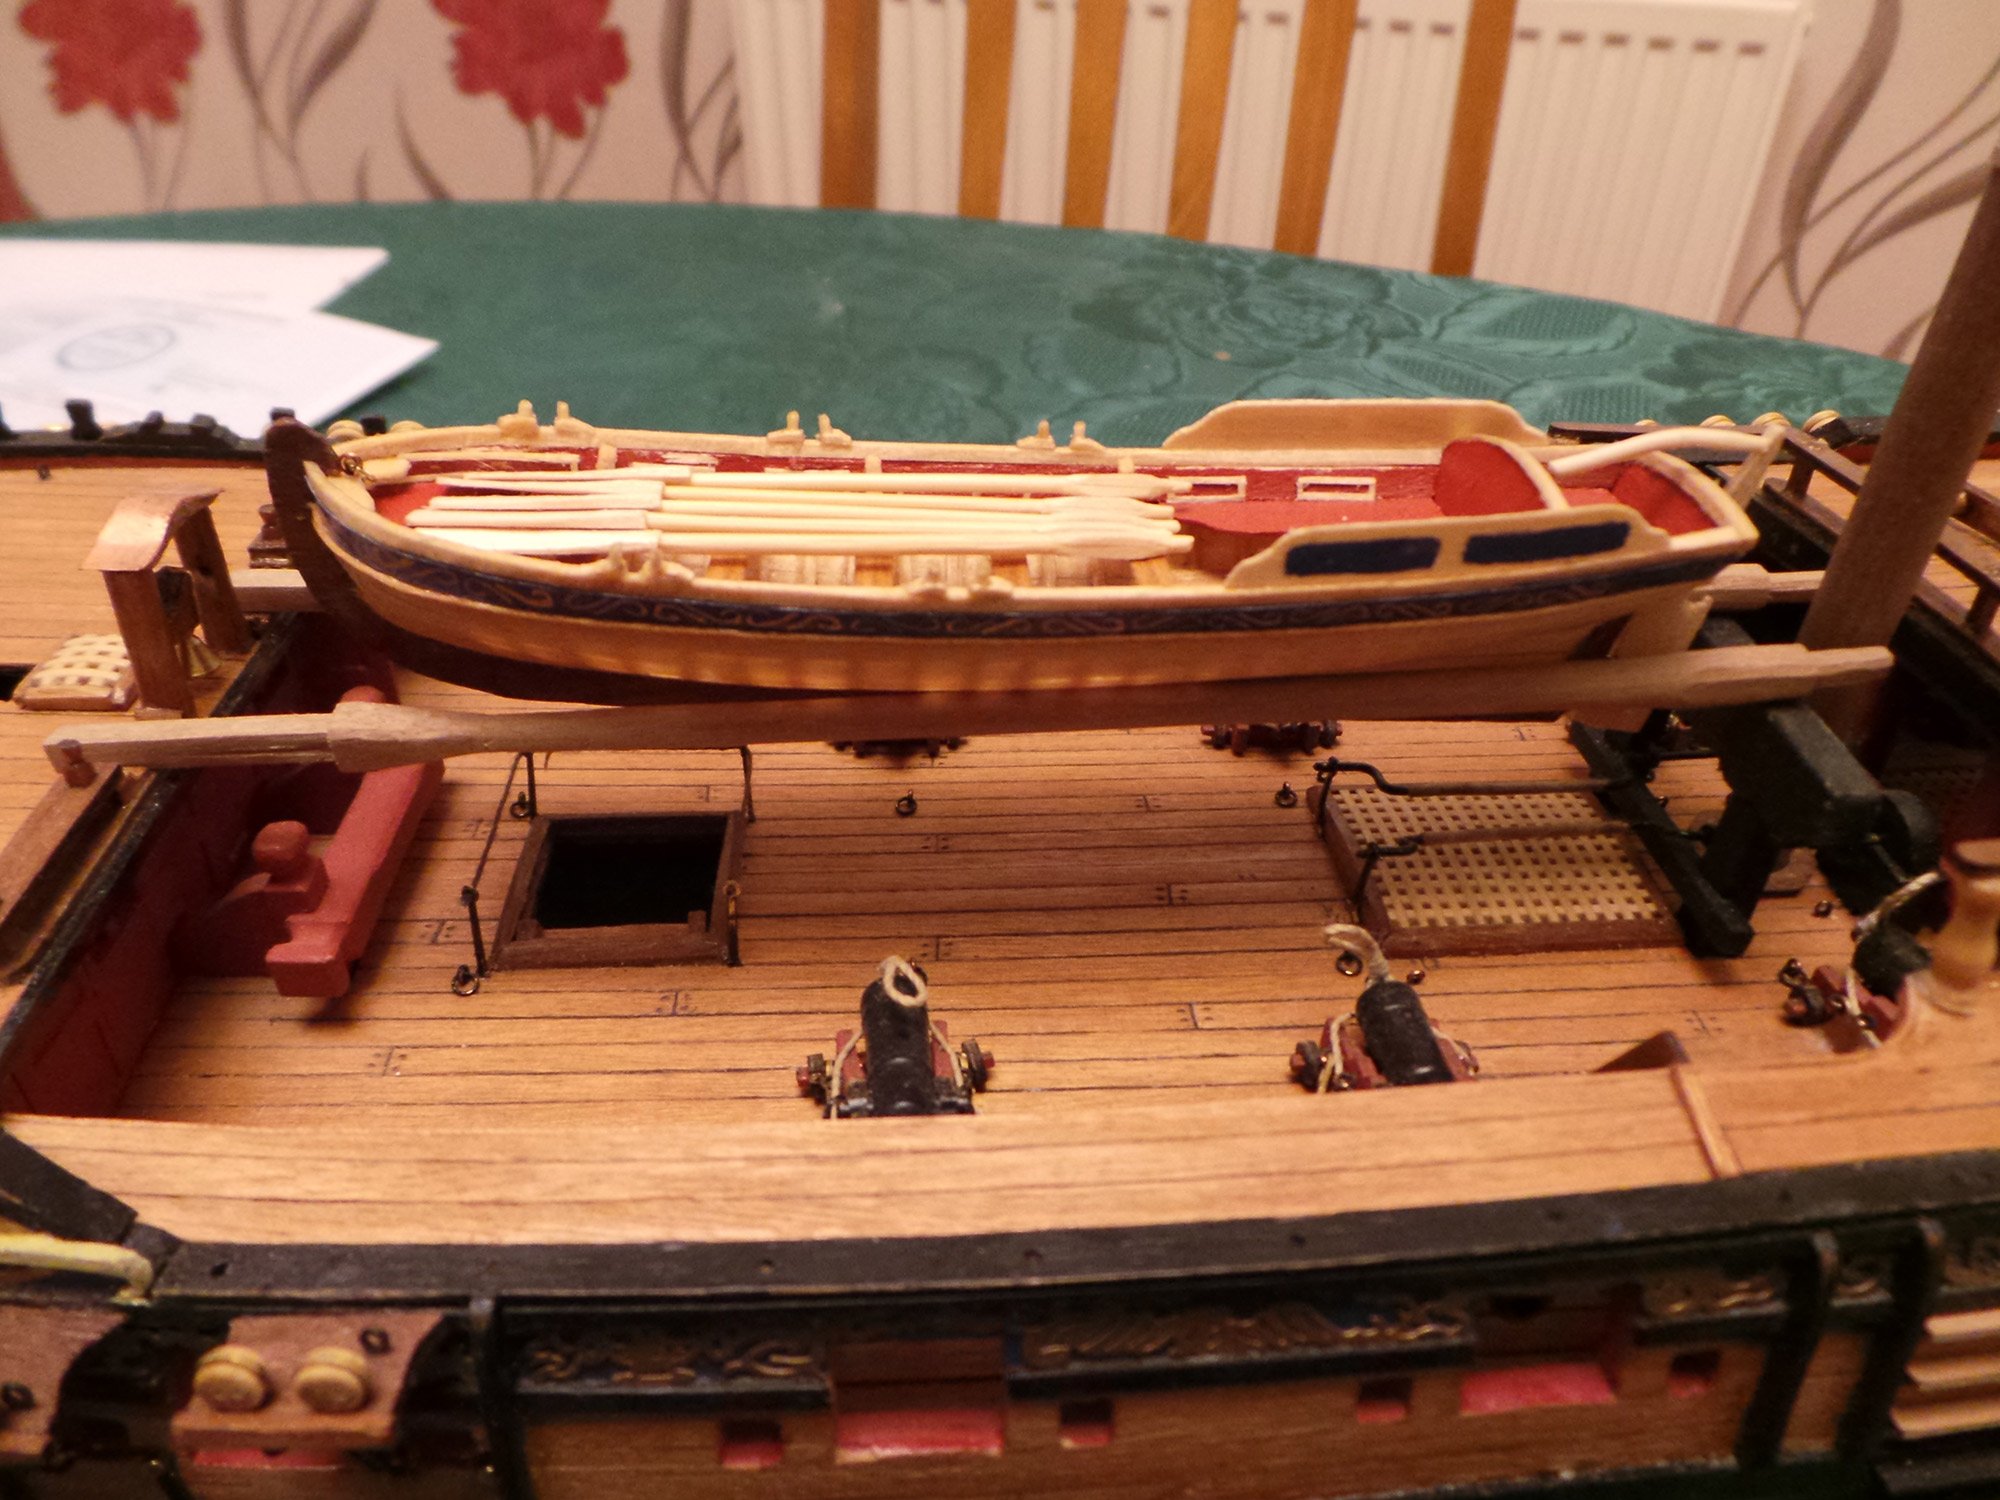
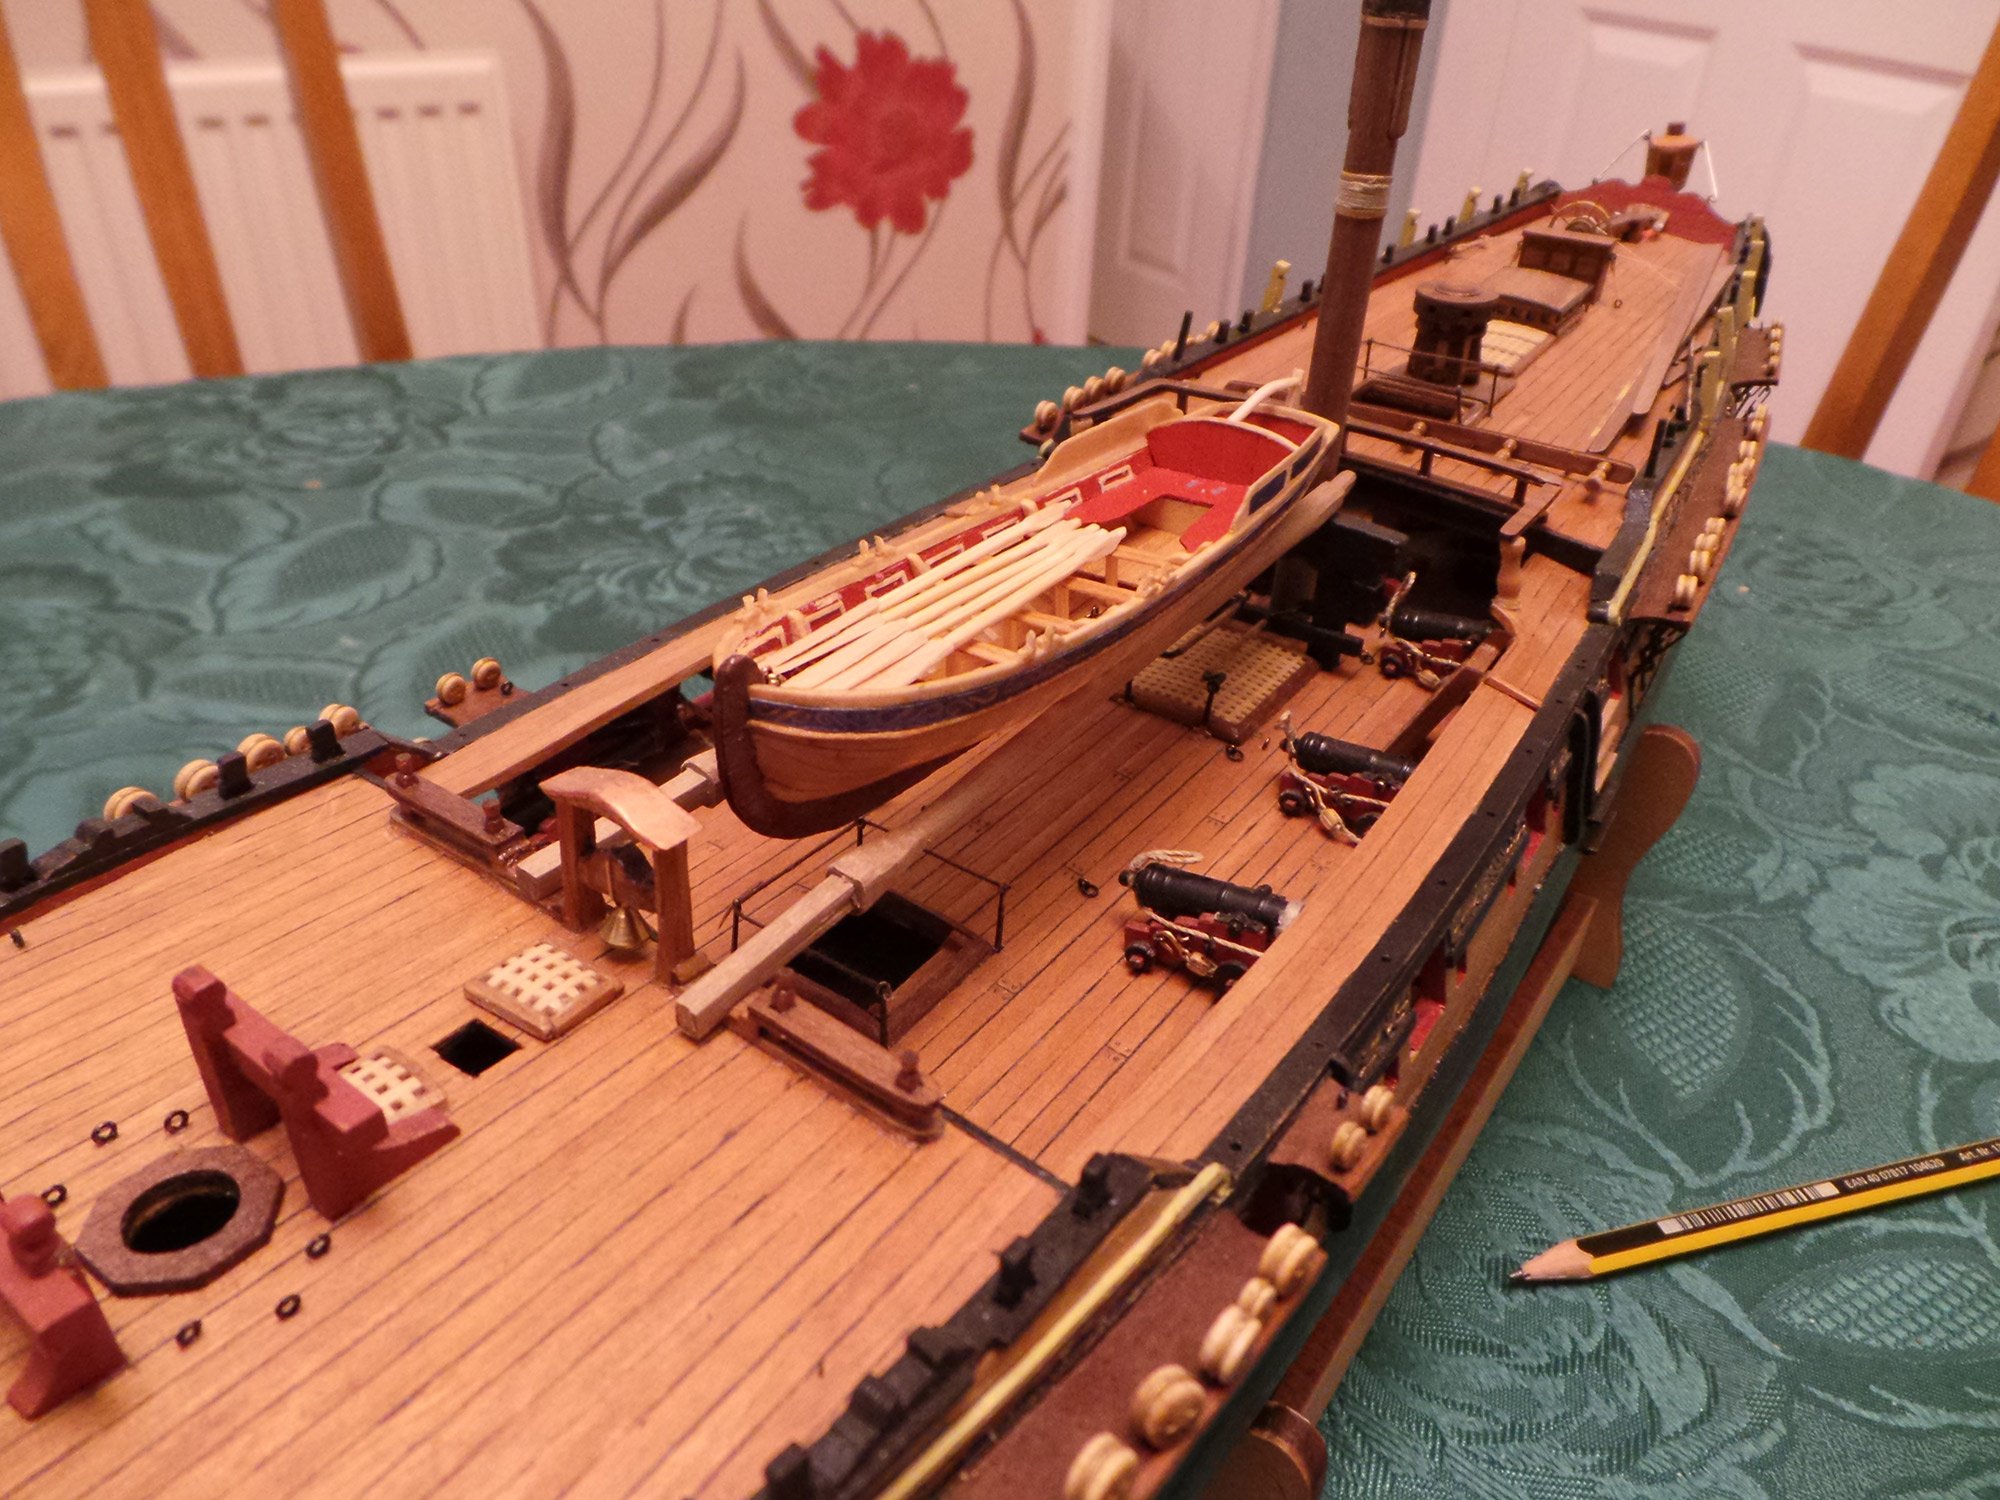
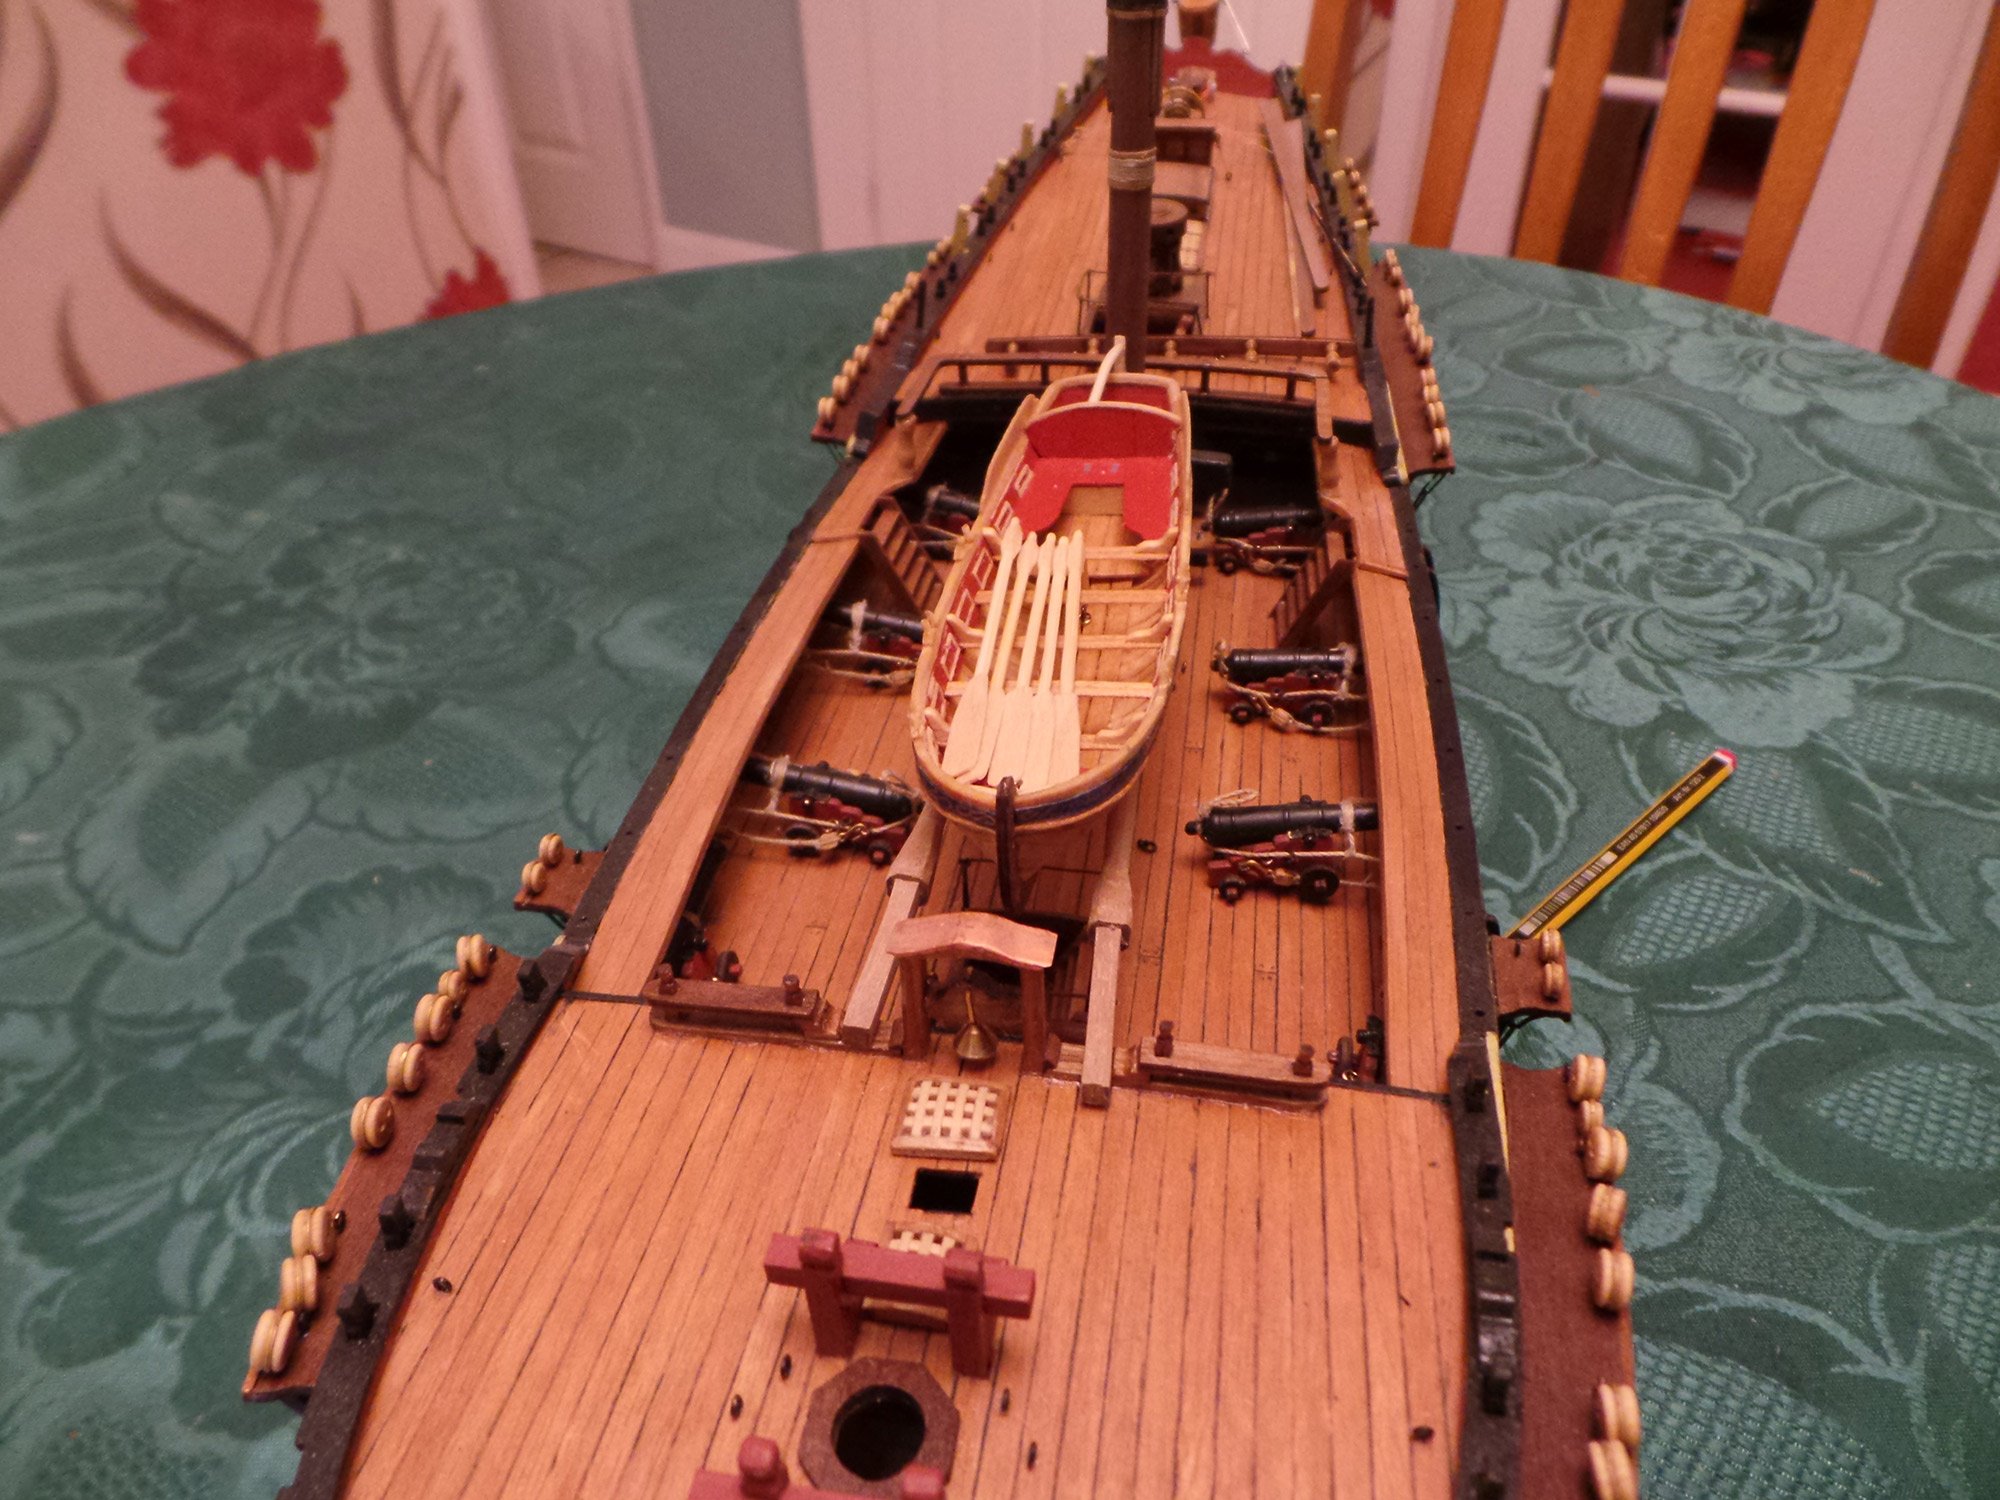
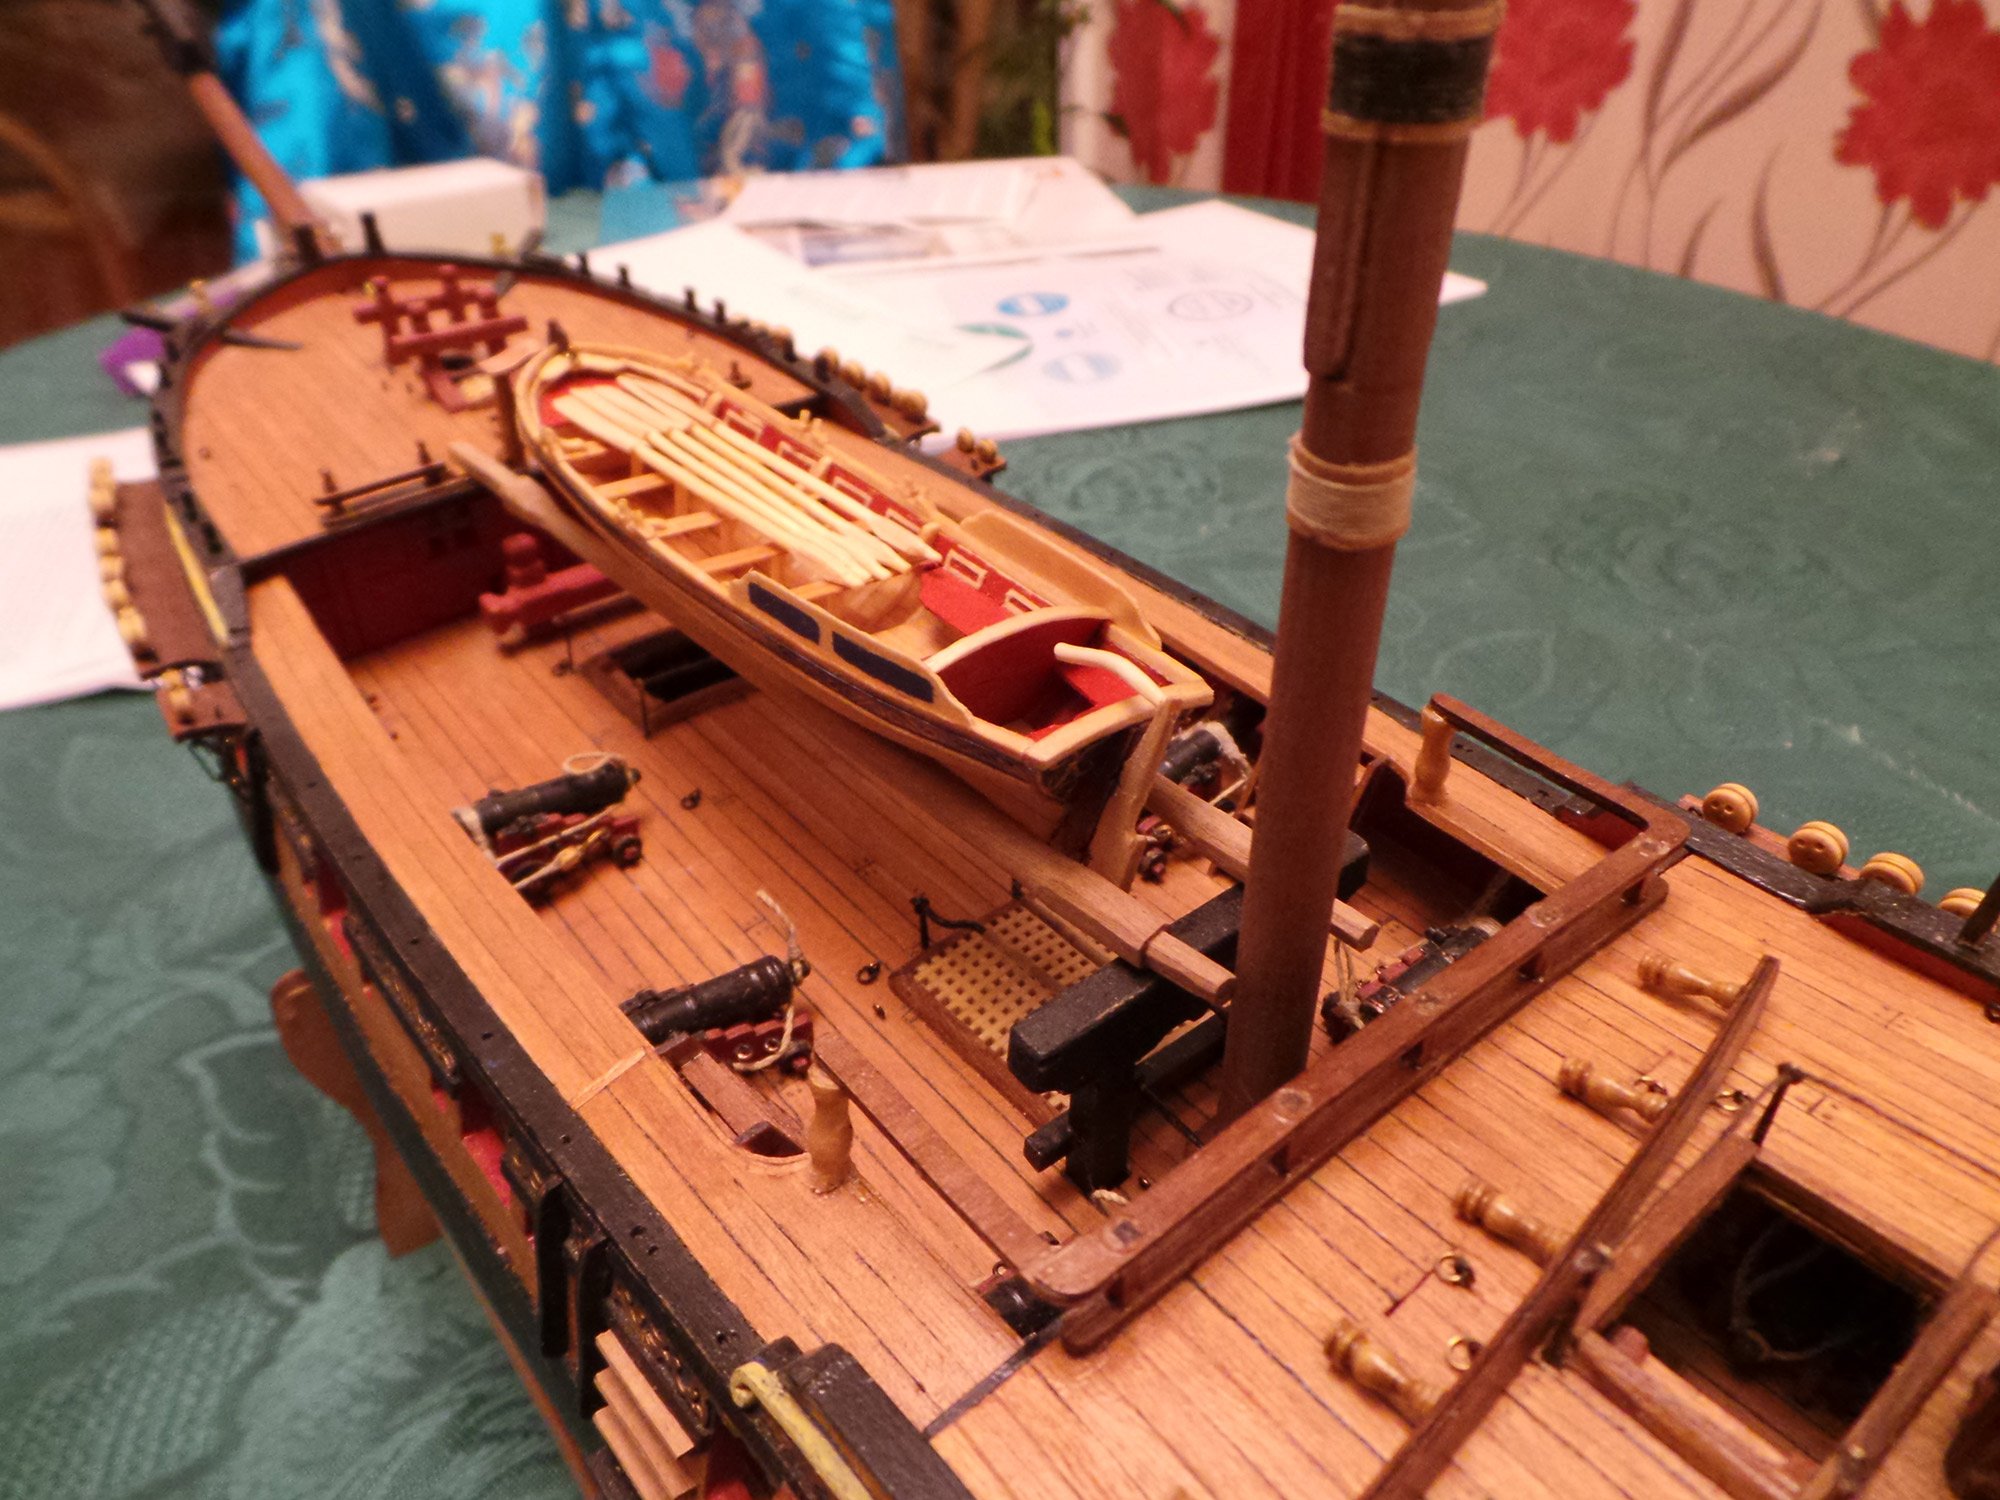
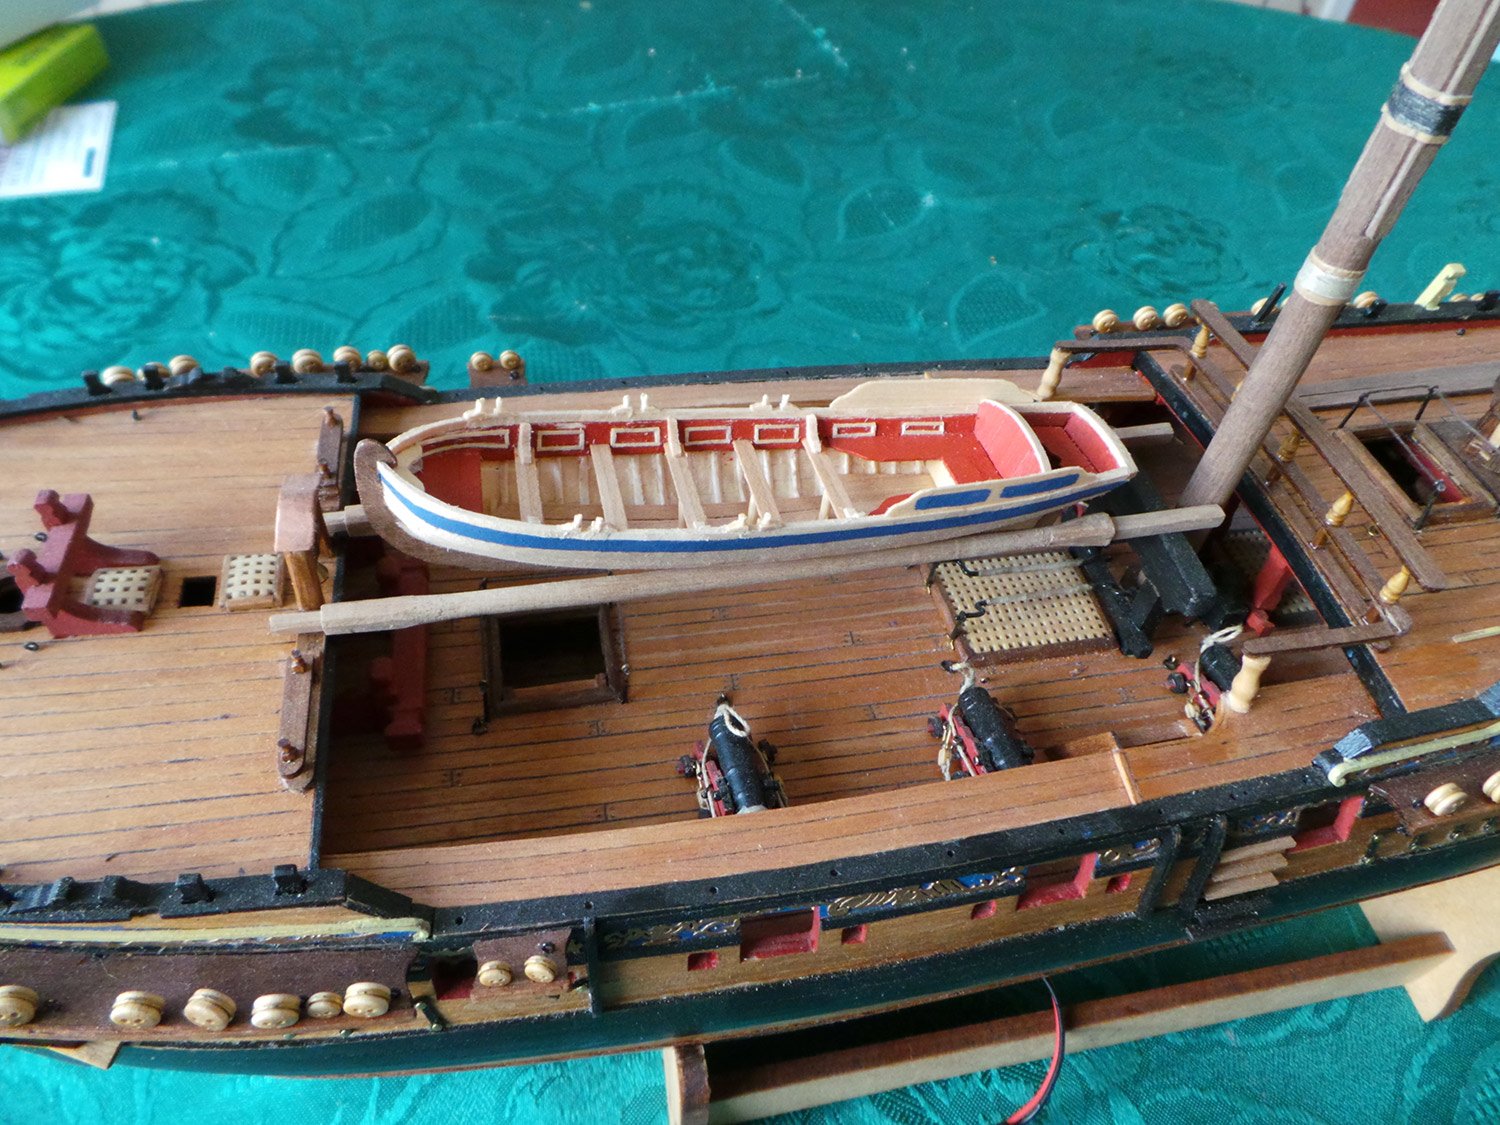
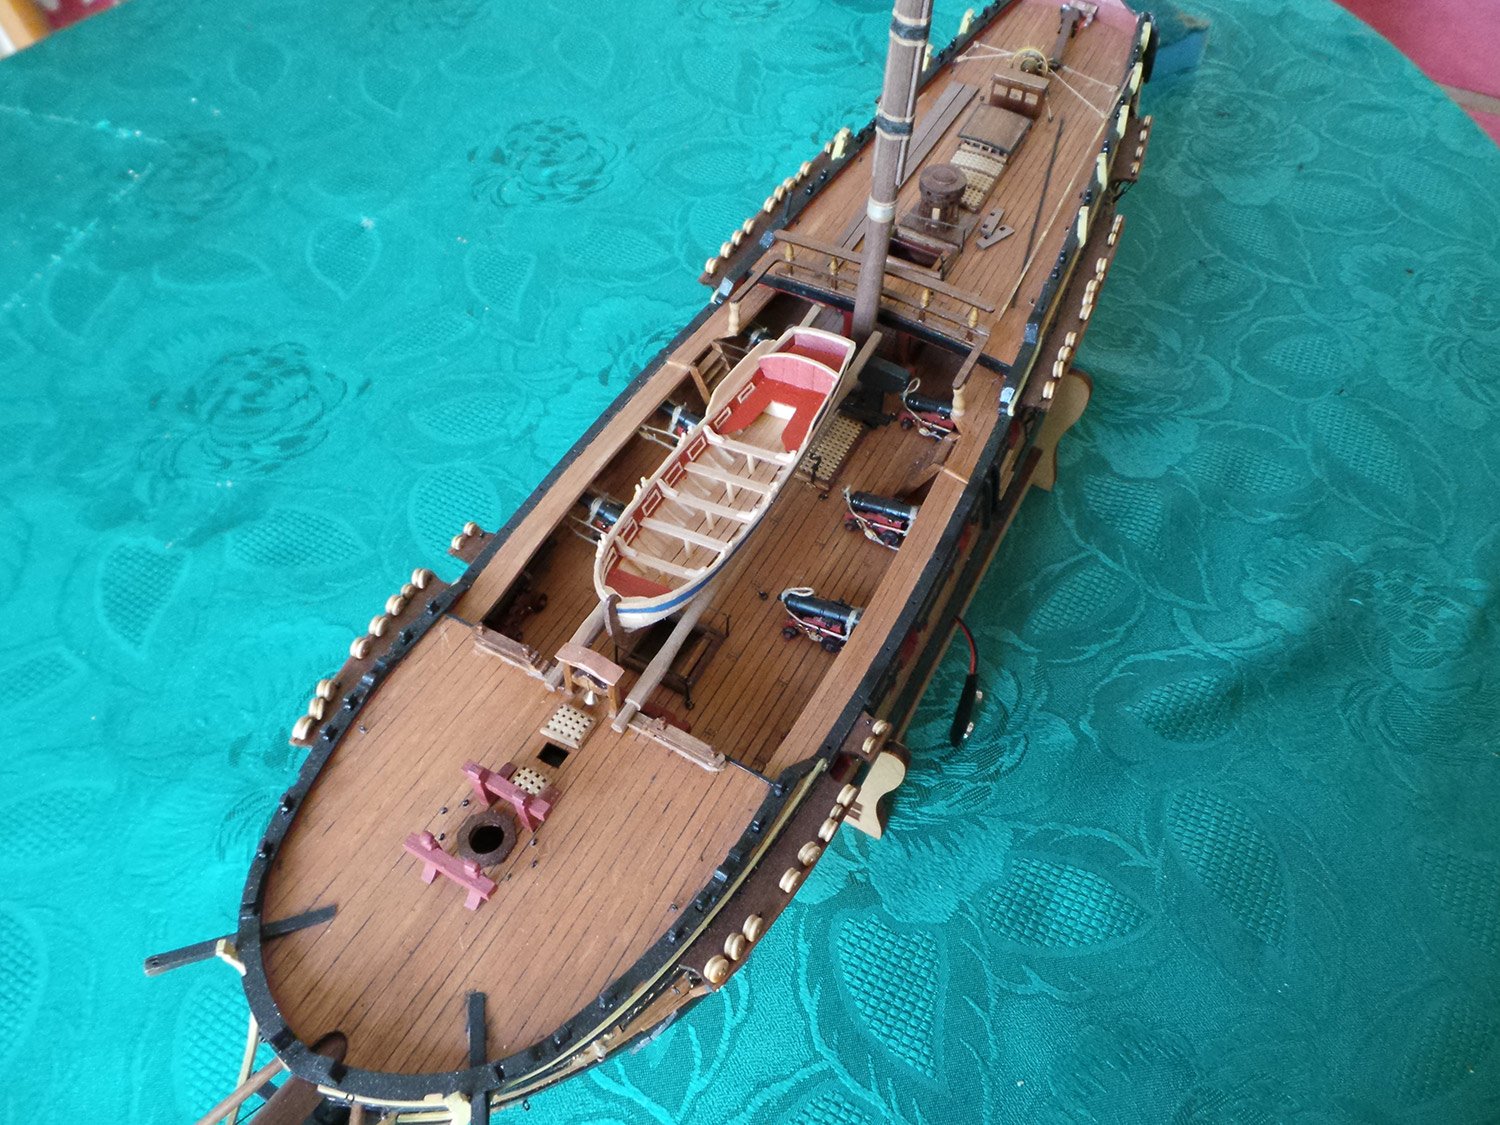
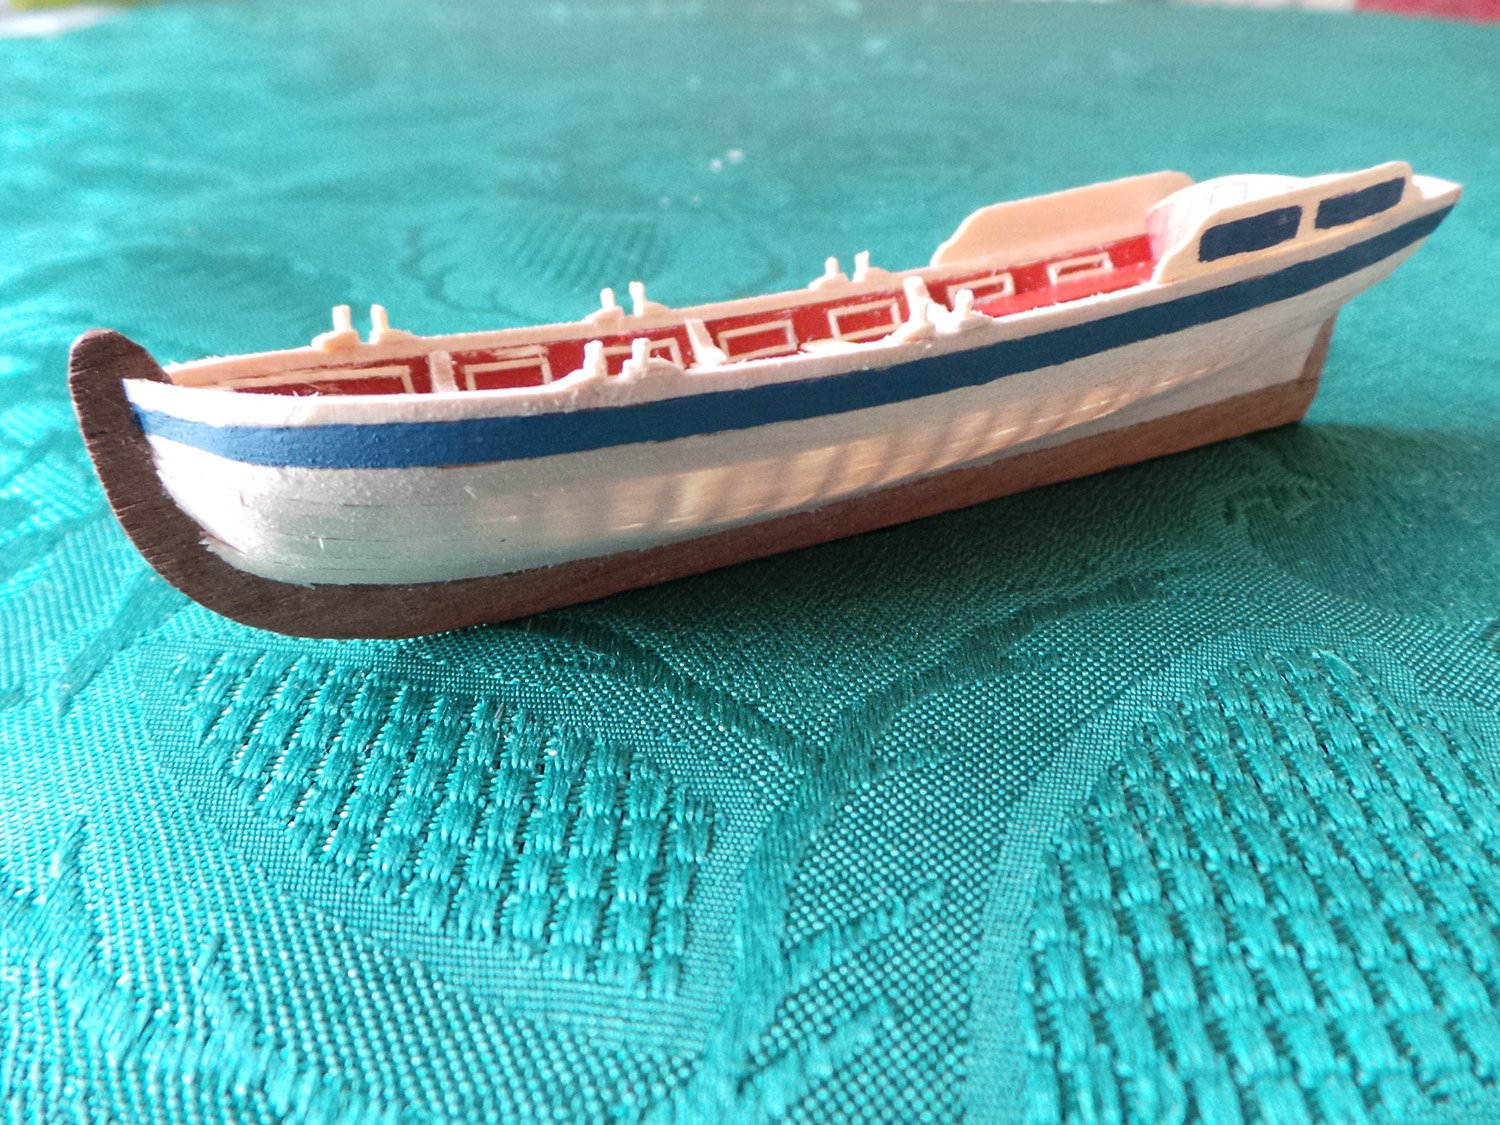
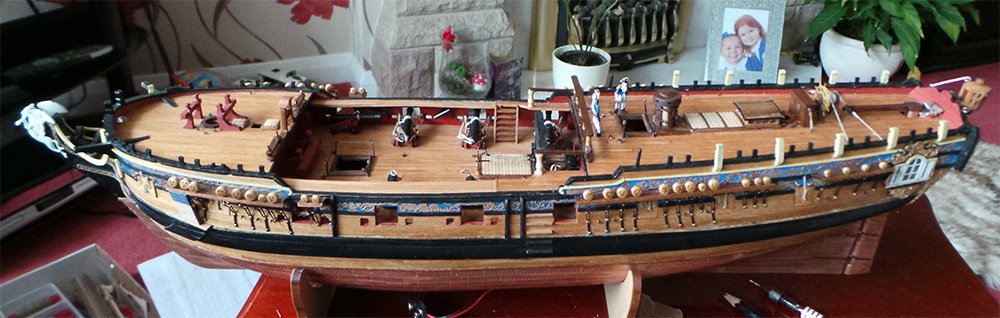
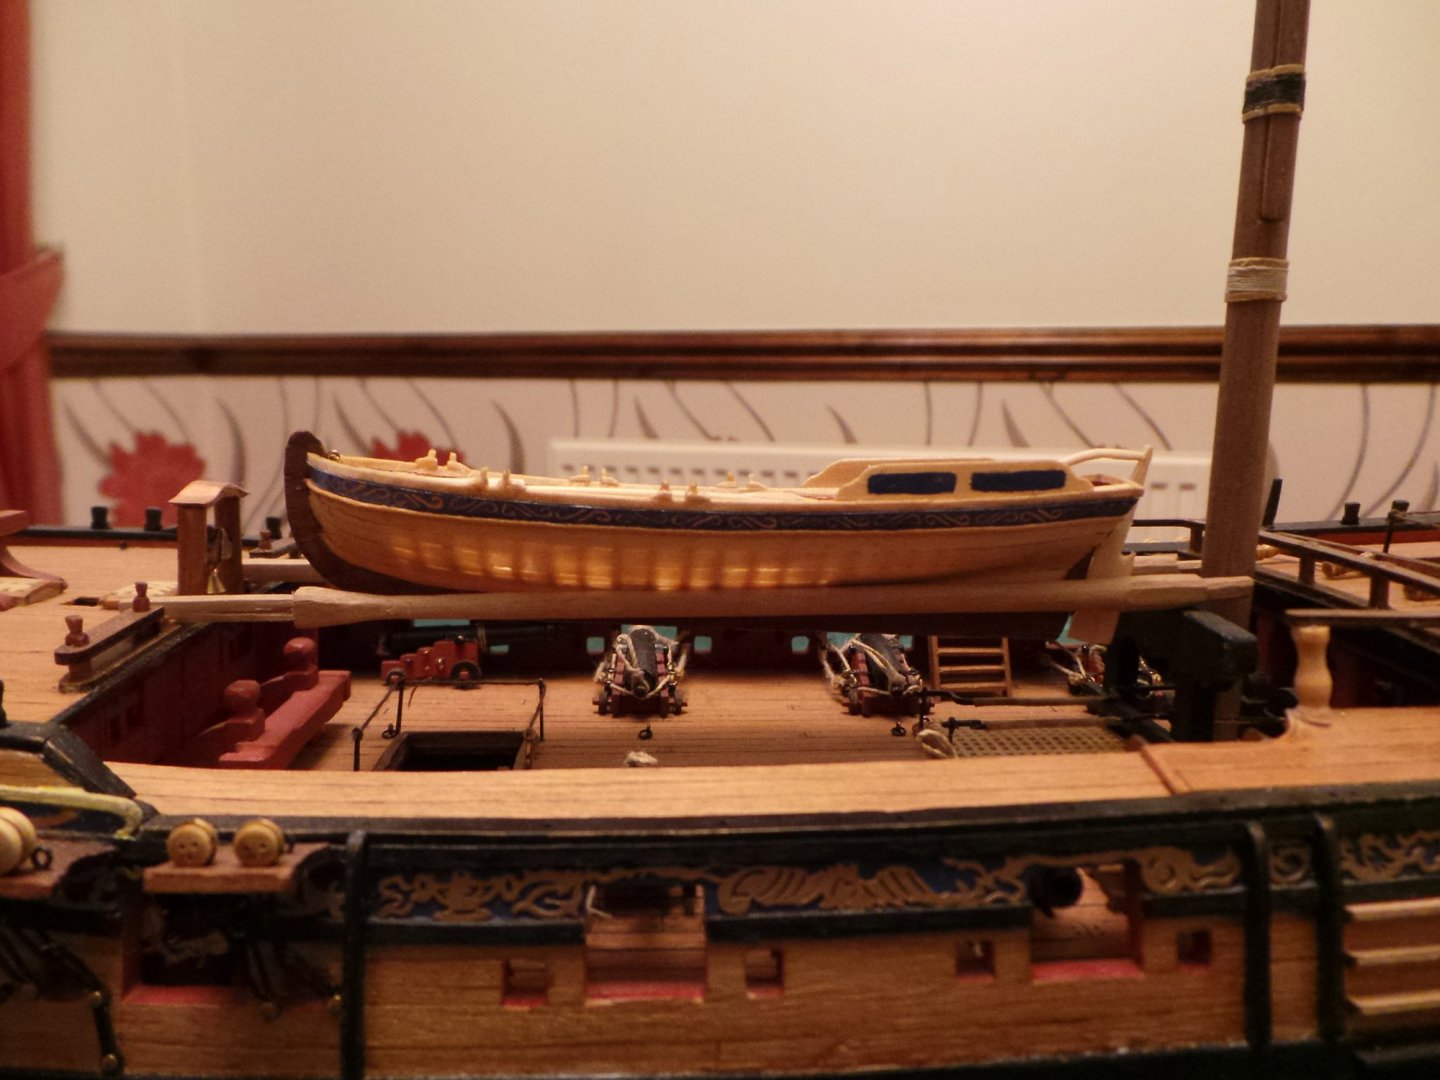
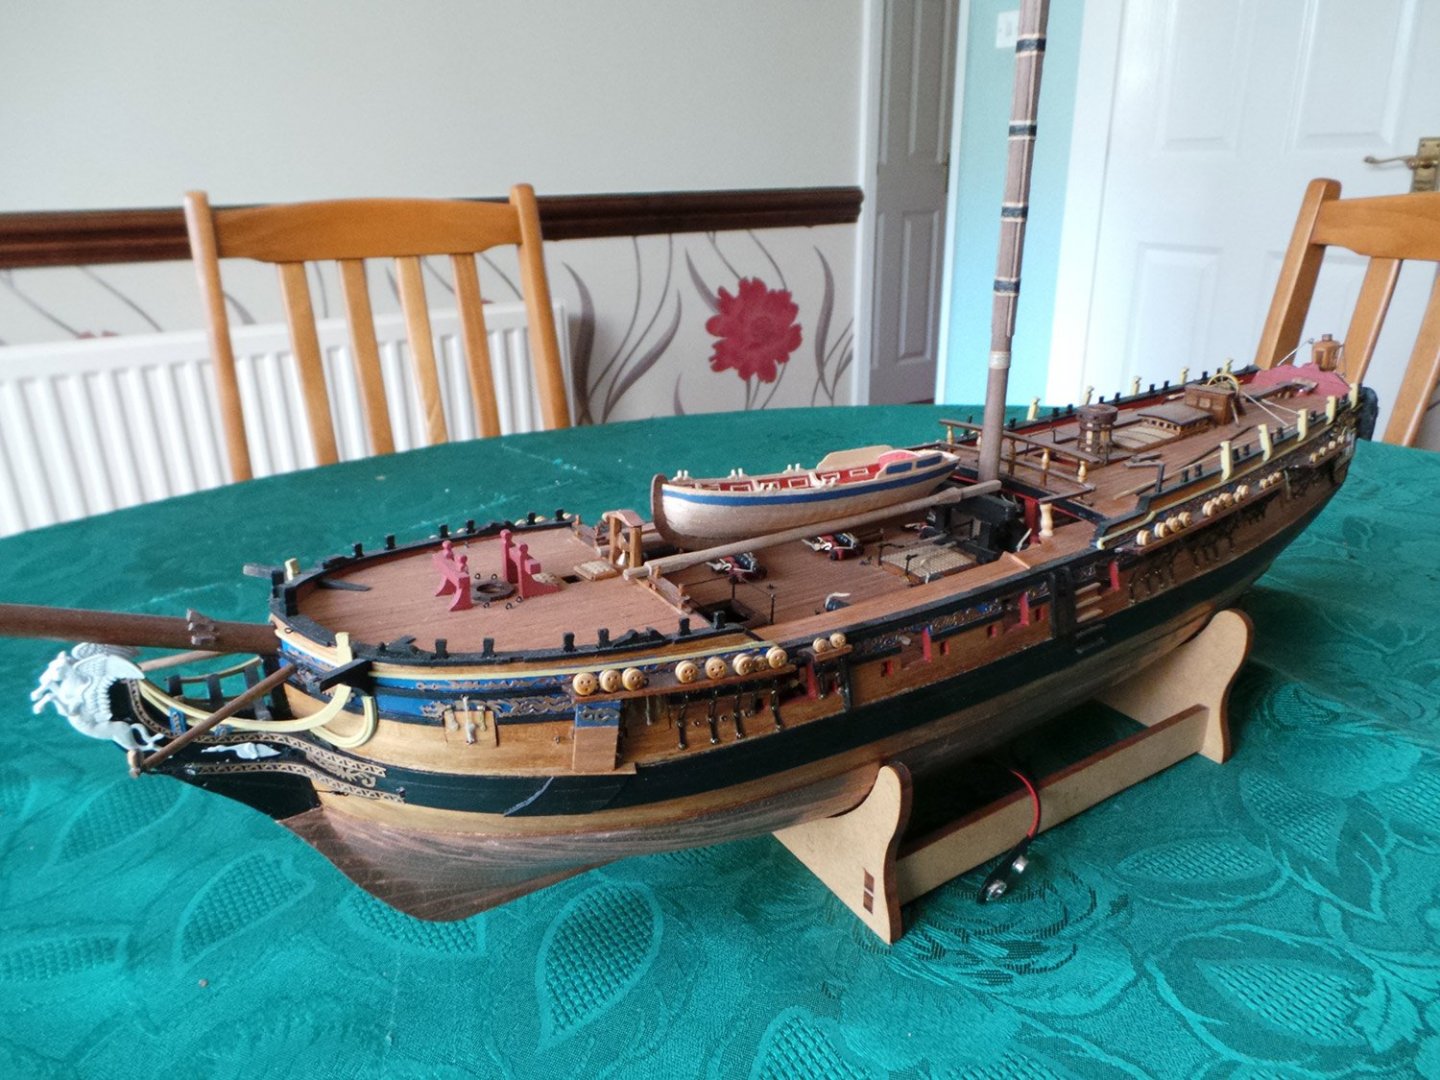
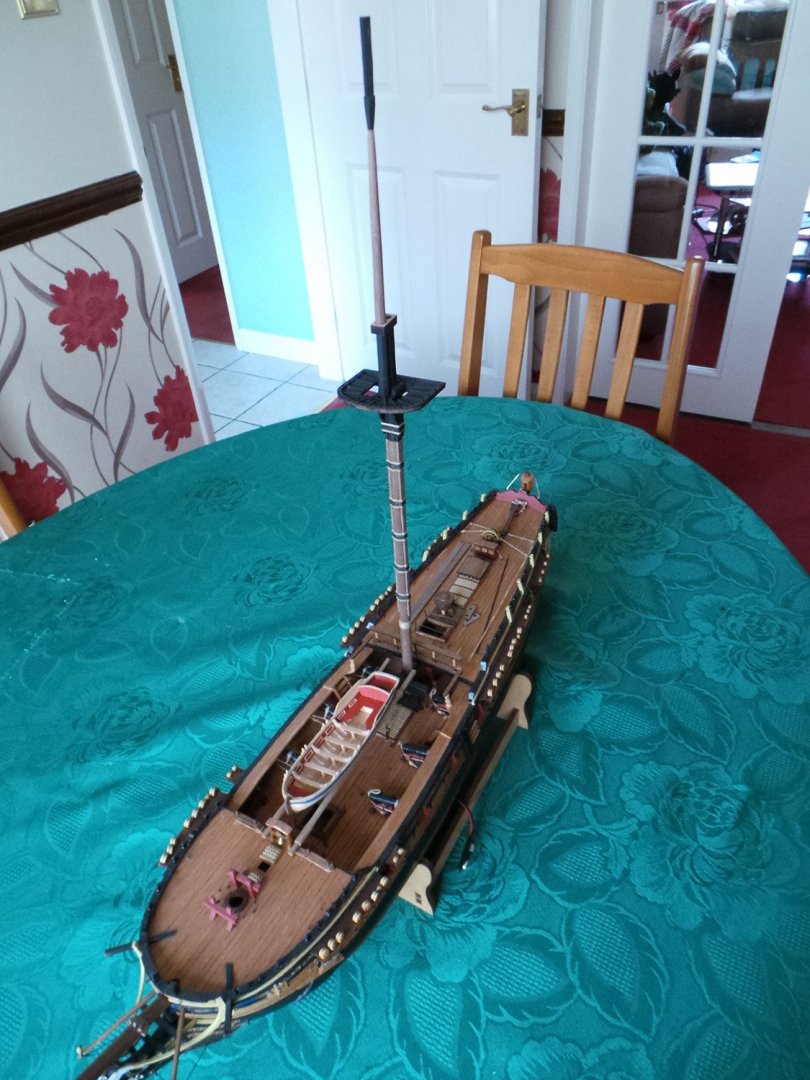
Here she is in her place on board Pegasus. Next to do is the long boat. I will probably start that at the weekend and will be made in the same way as the pinnace.


- 161 replies
-
- 11
-

-
- pegasus
- victory models
- (and 1 more)
-
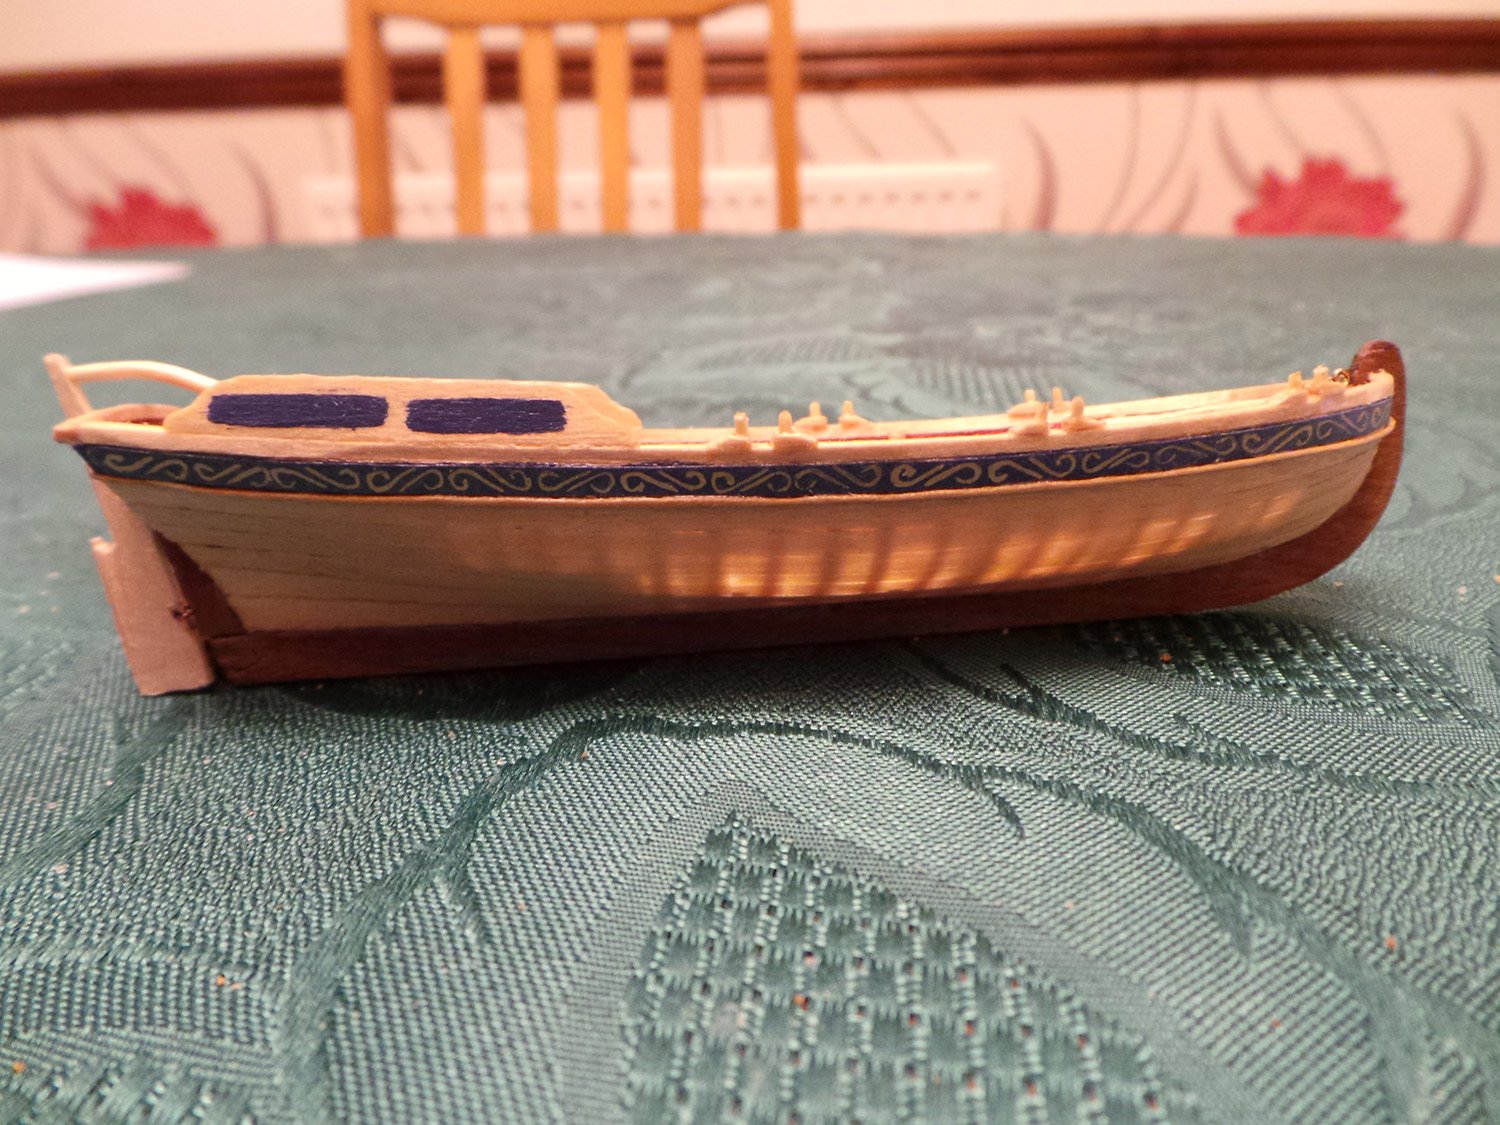
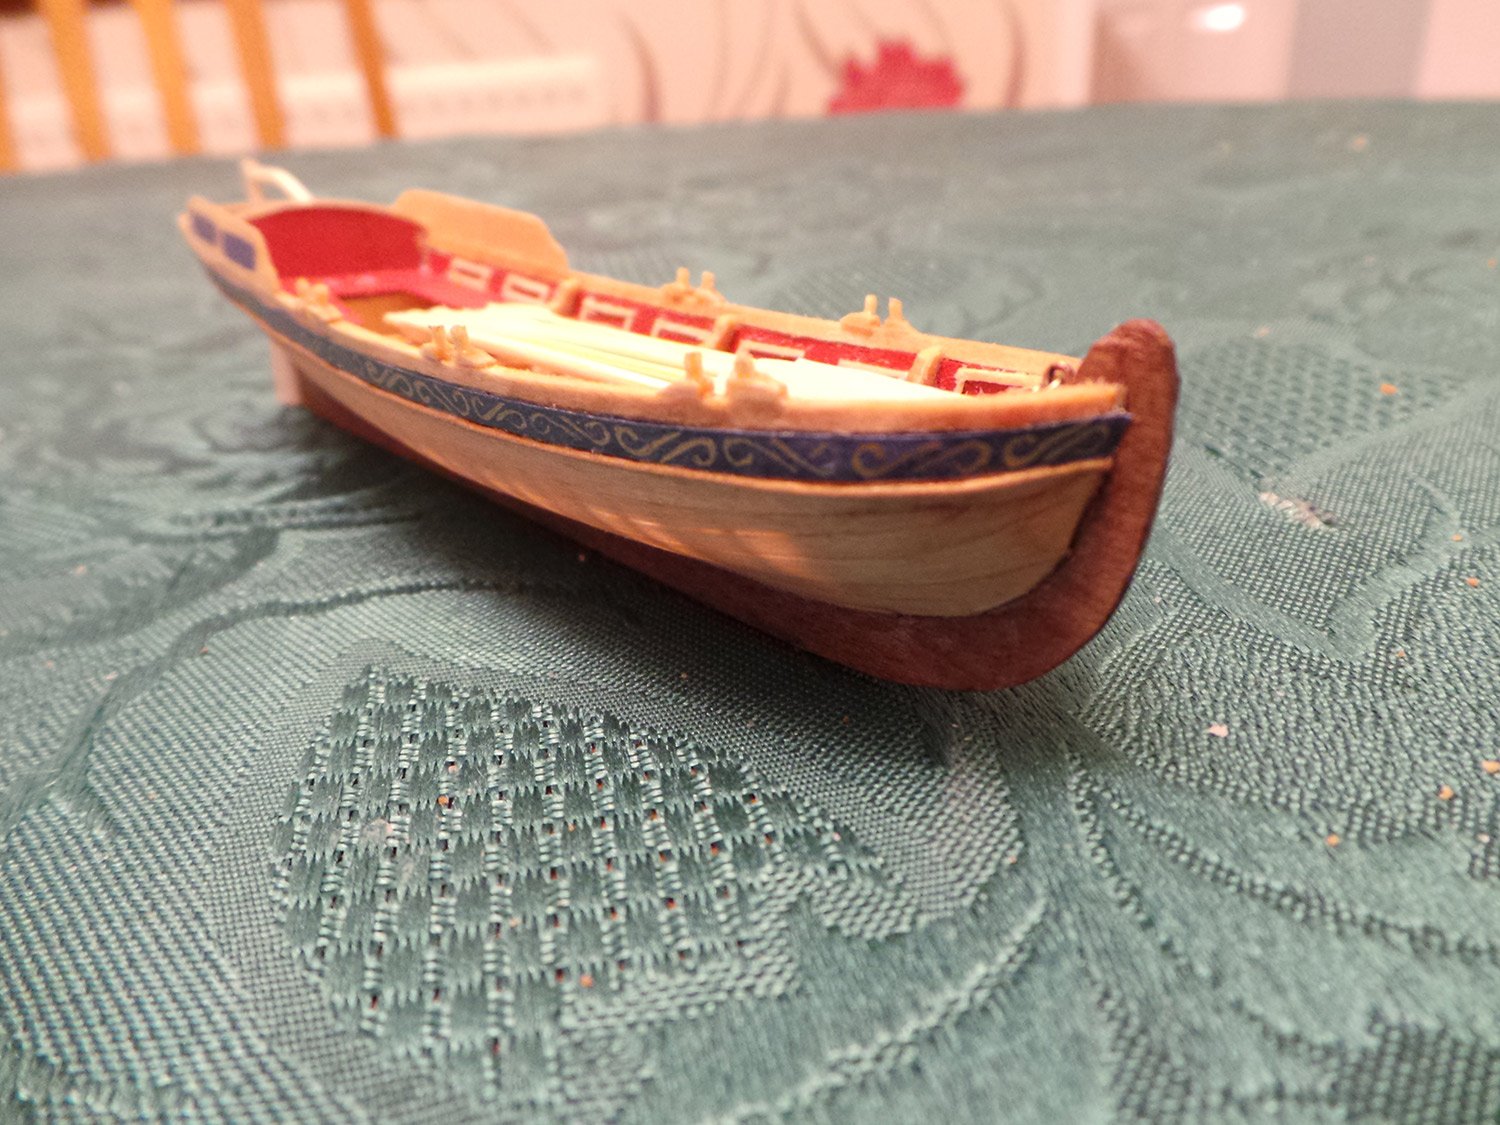
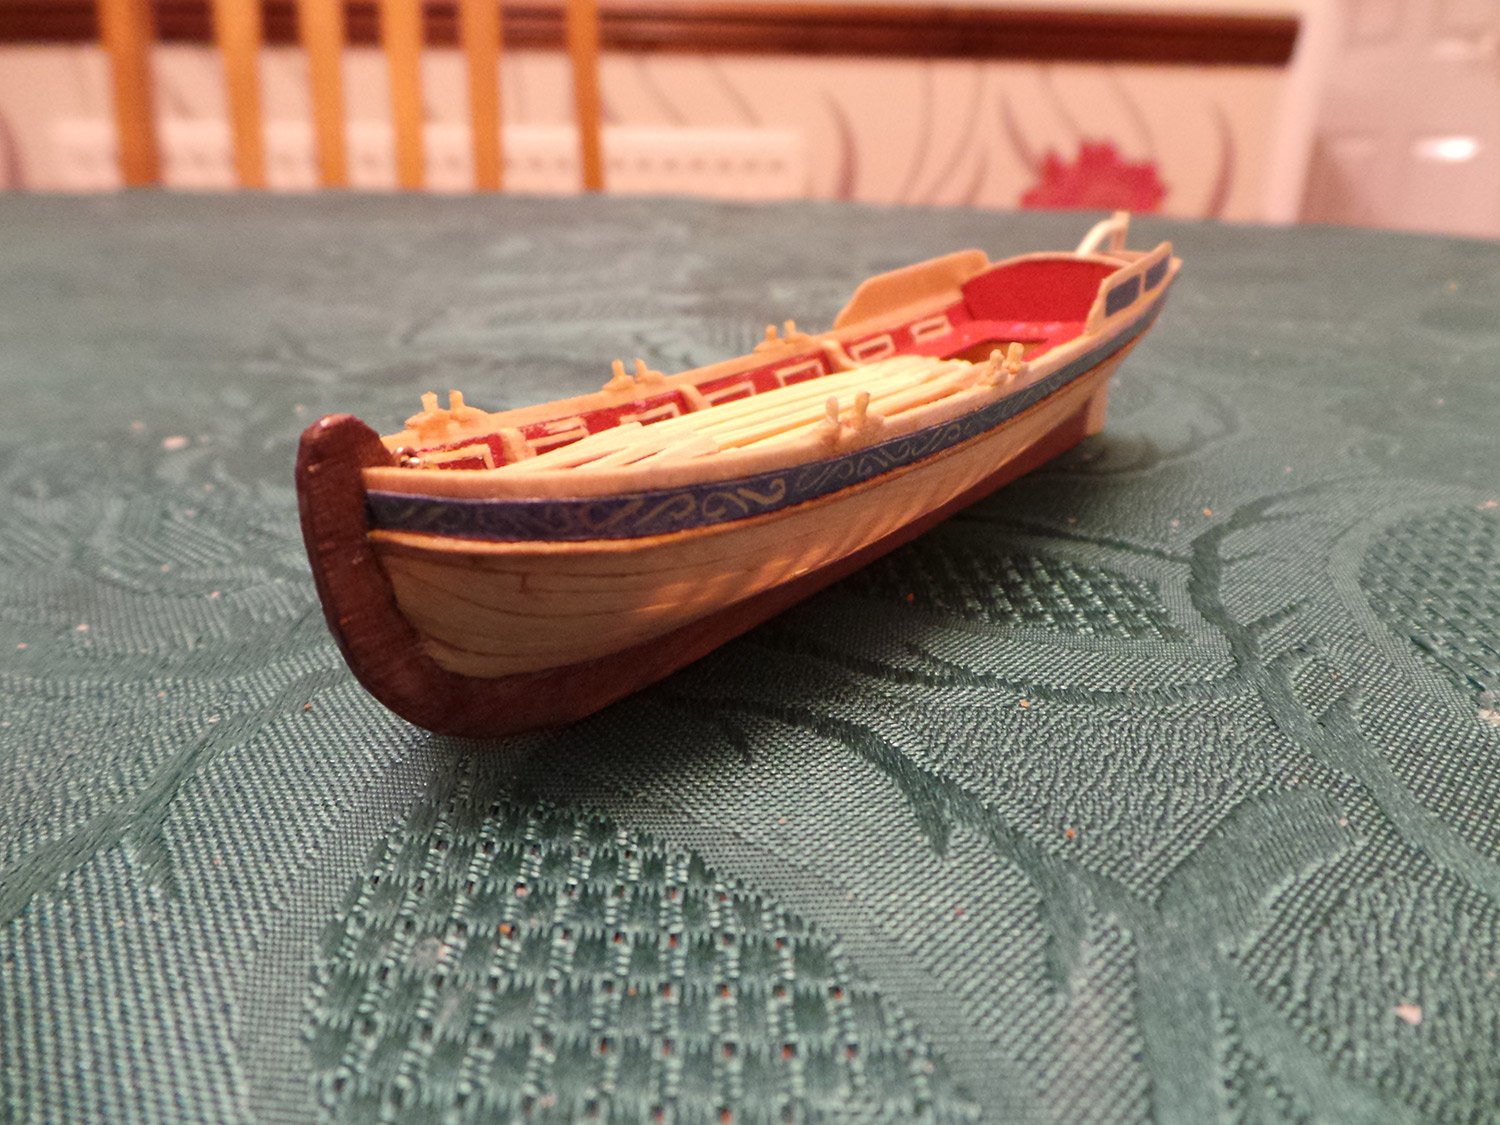
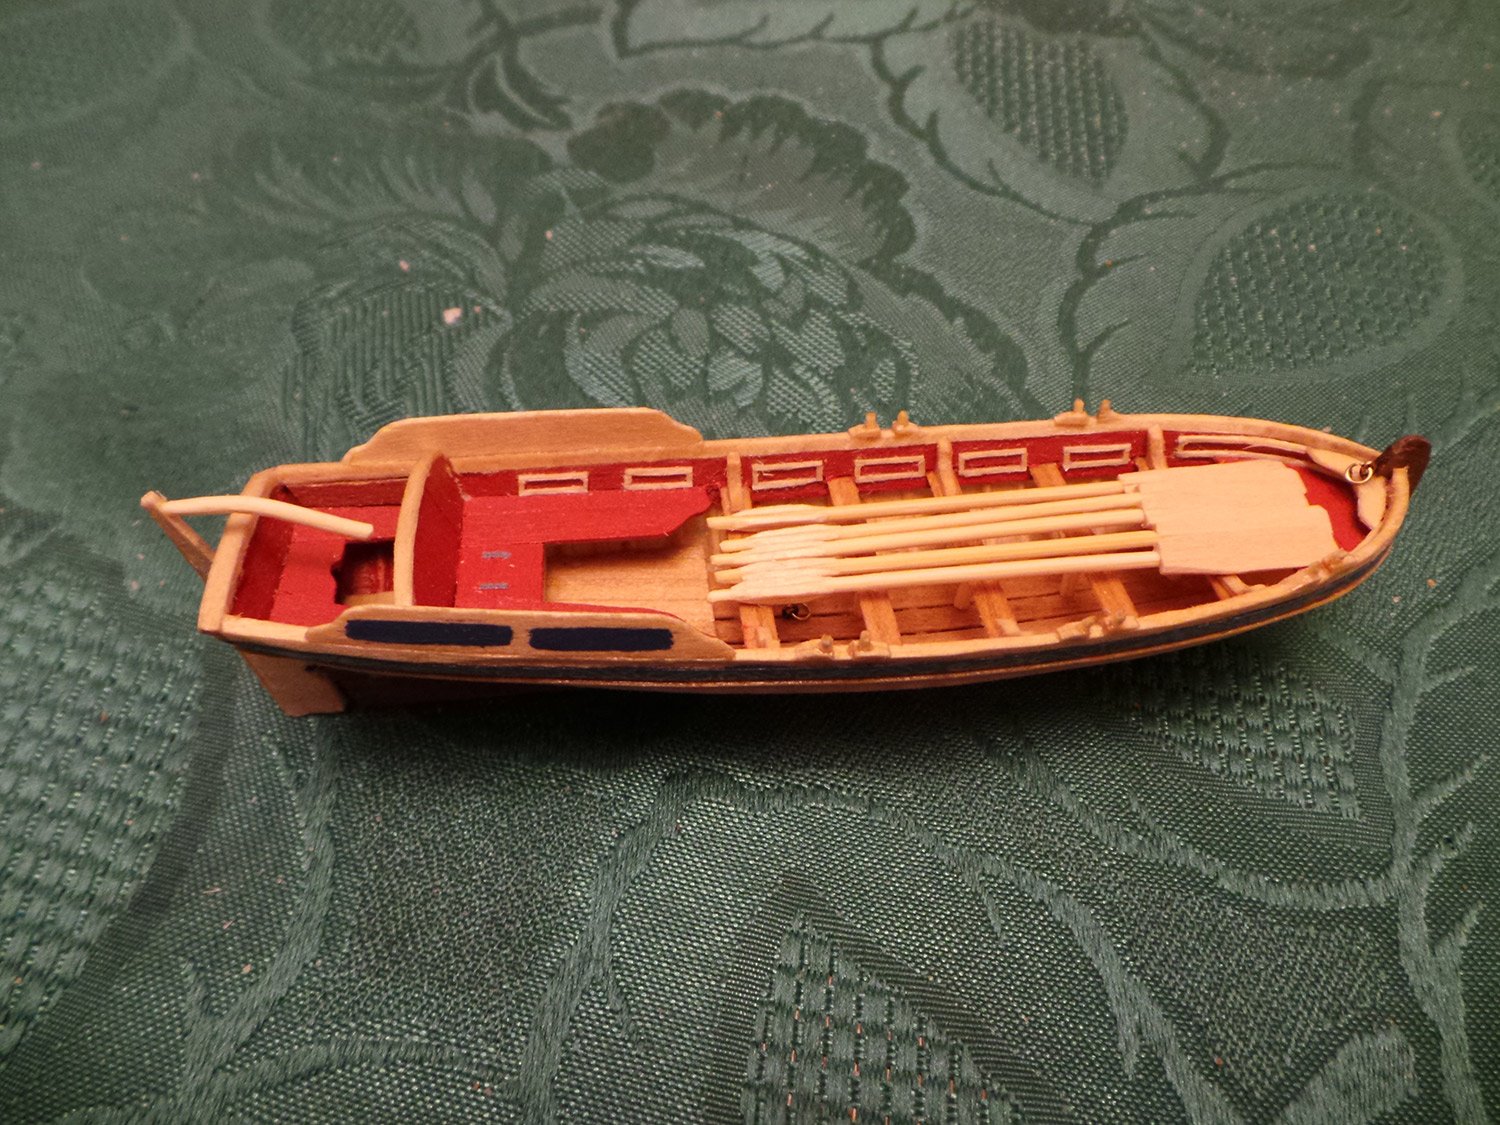
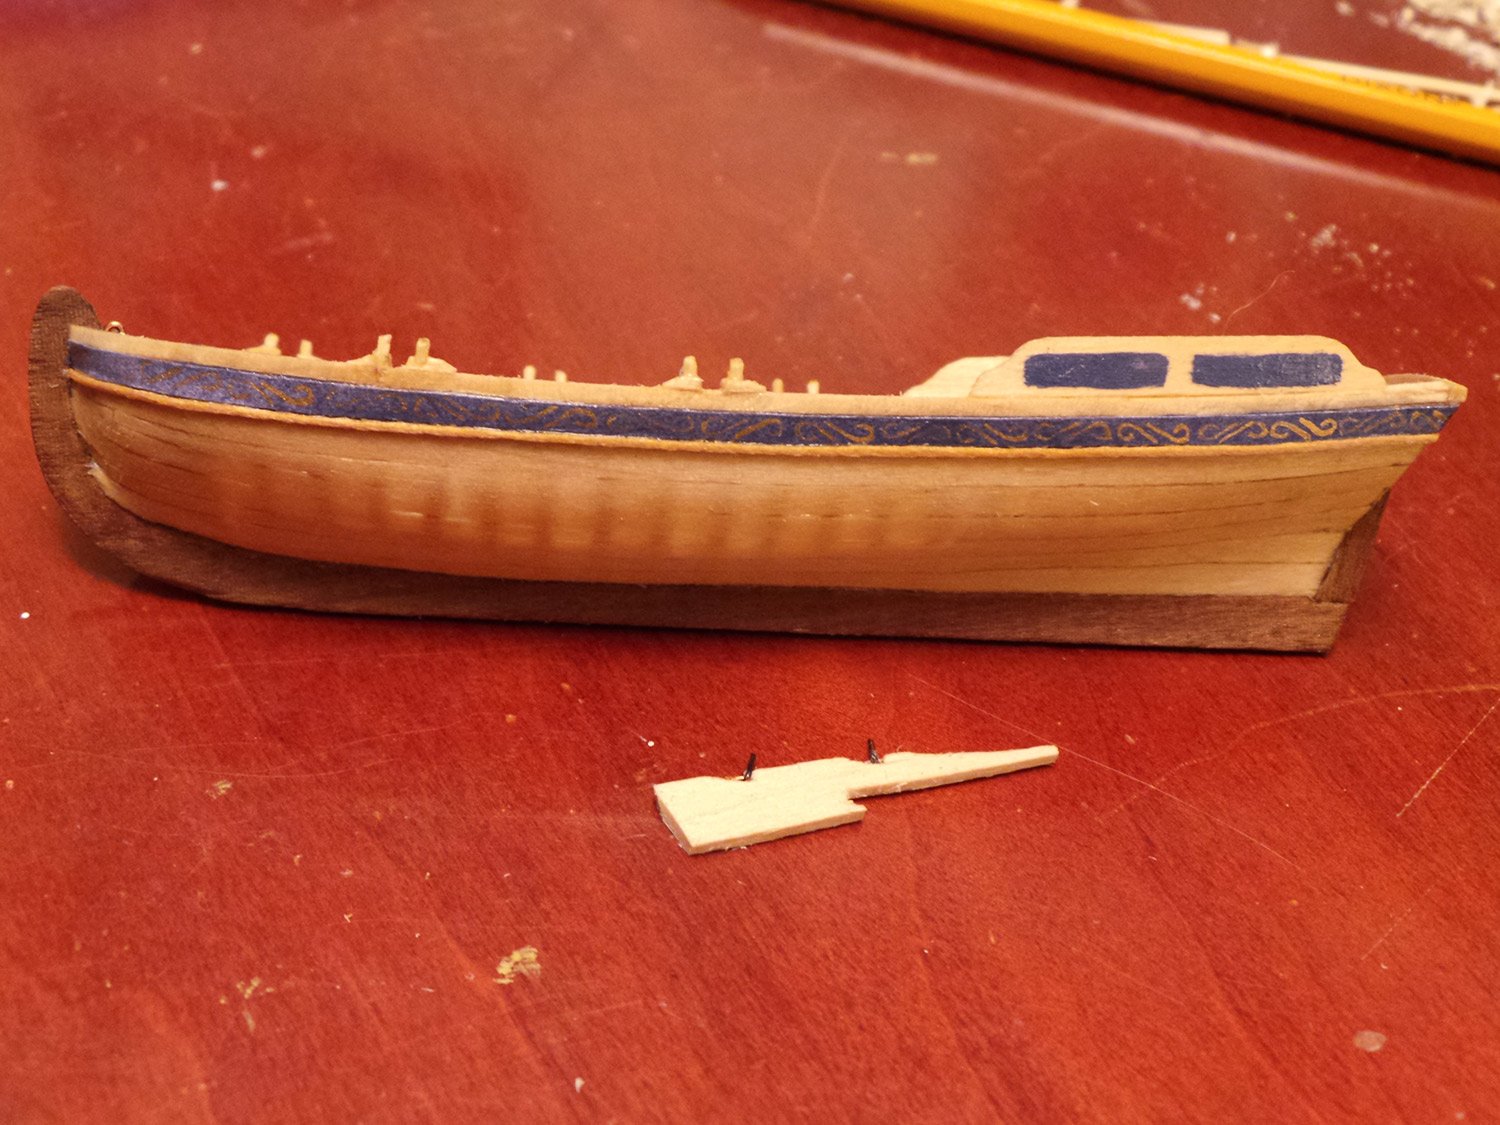
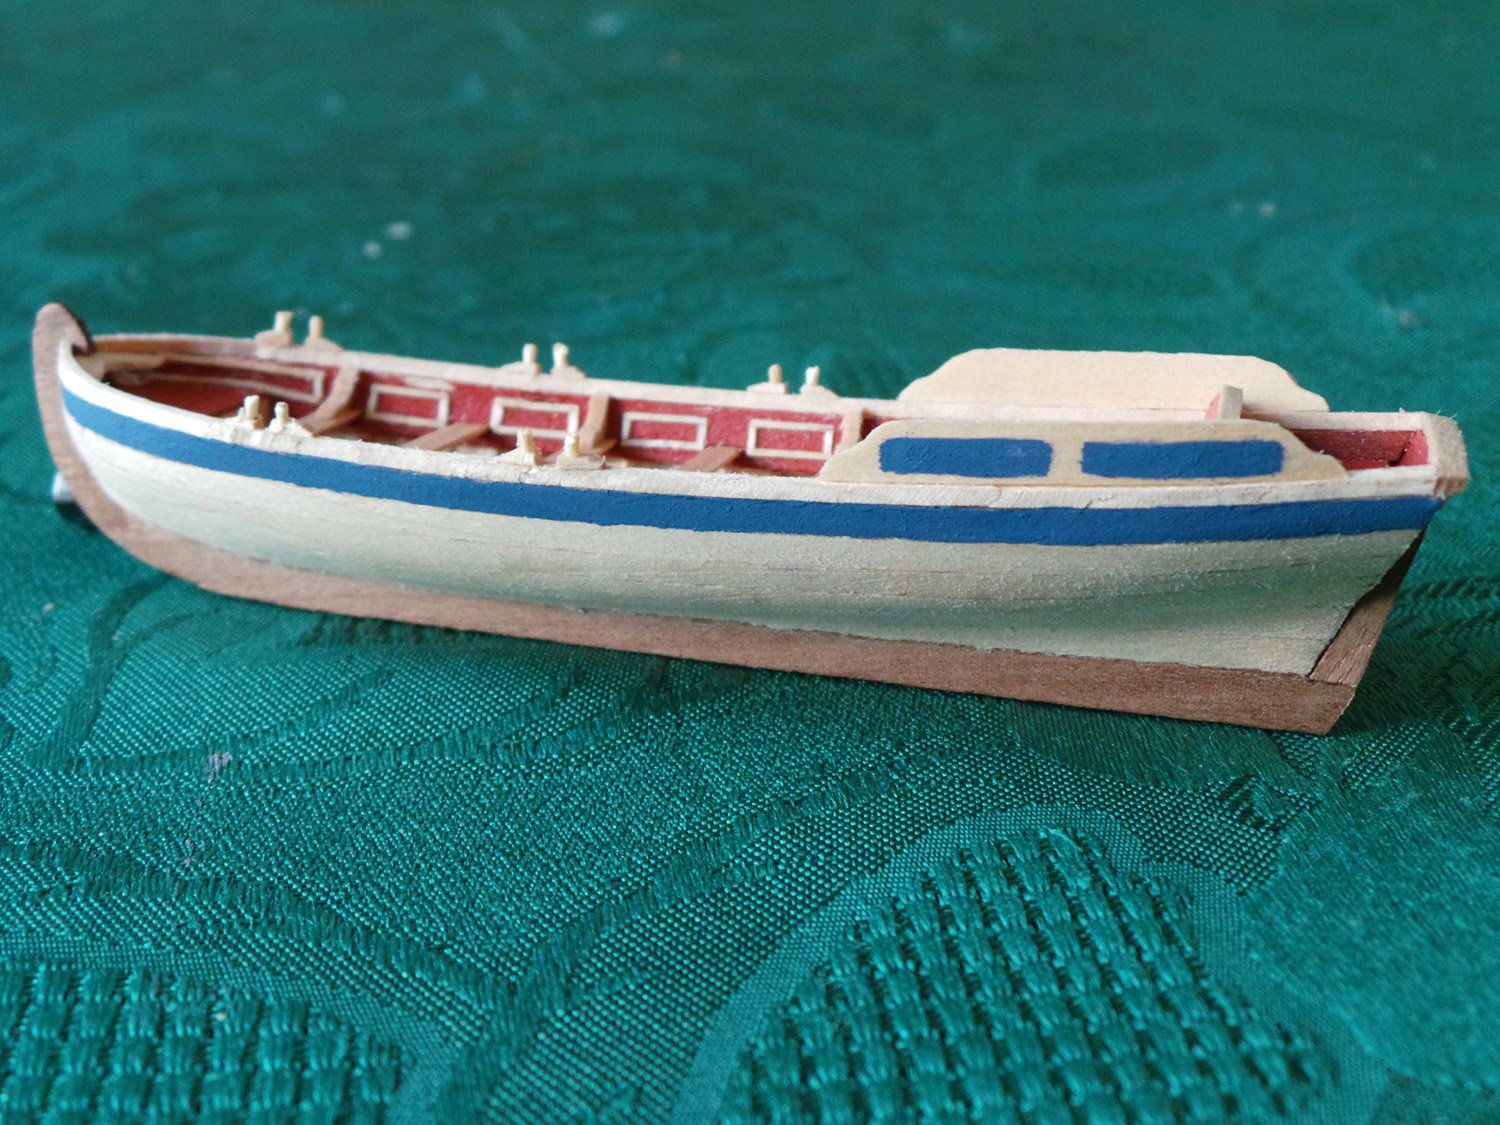
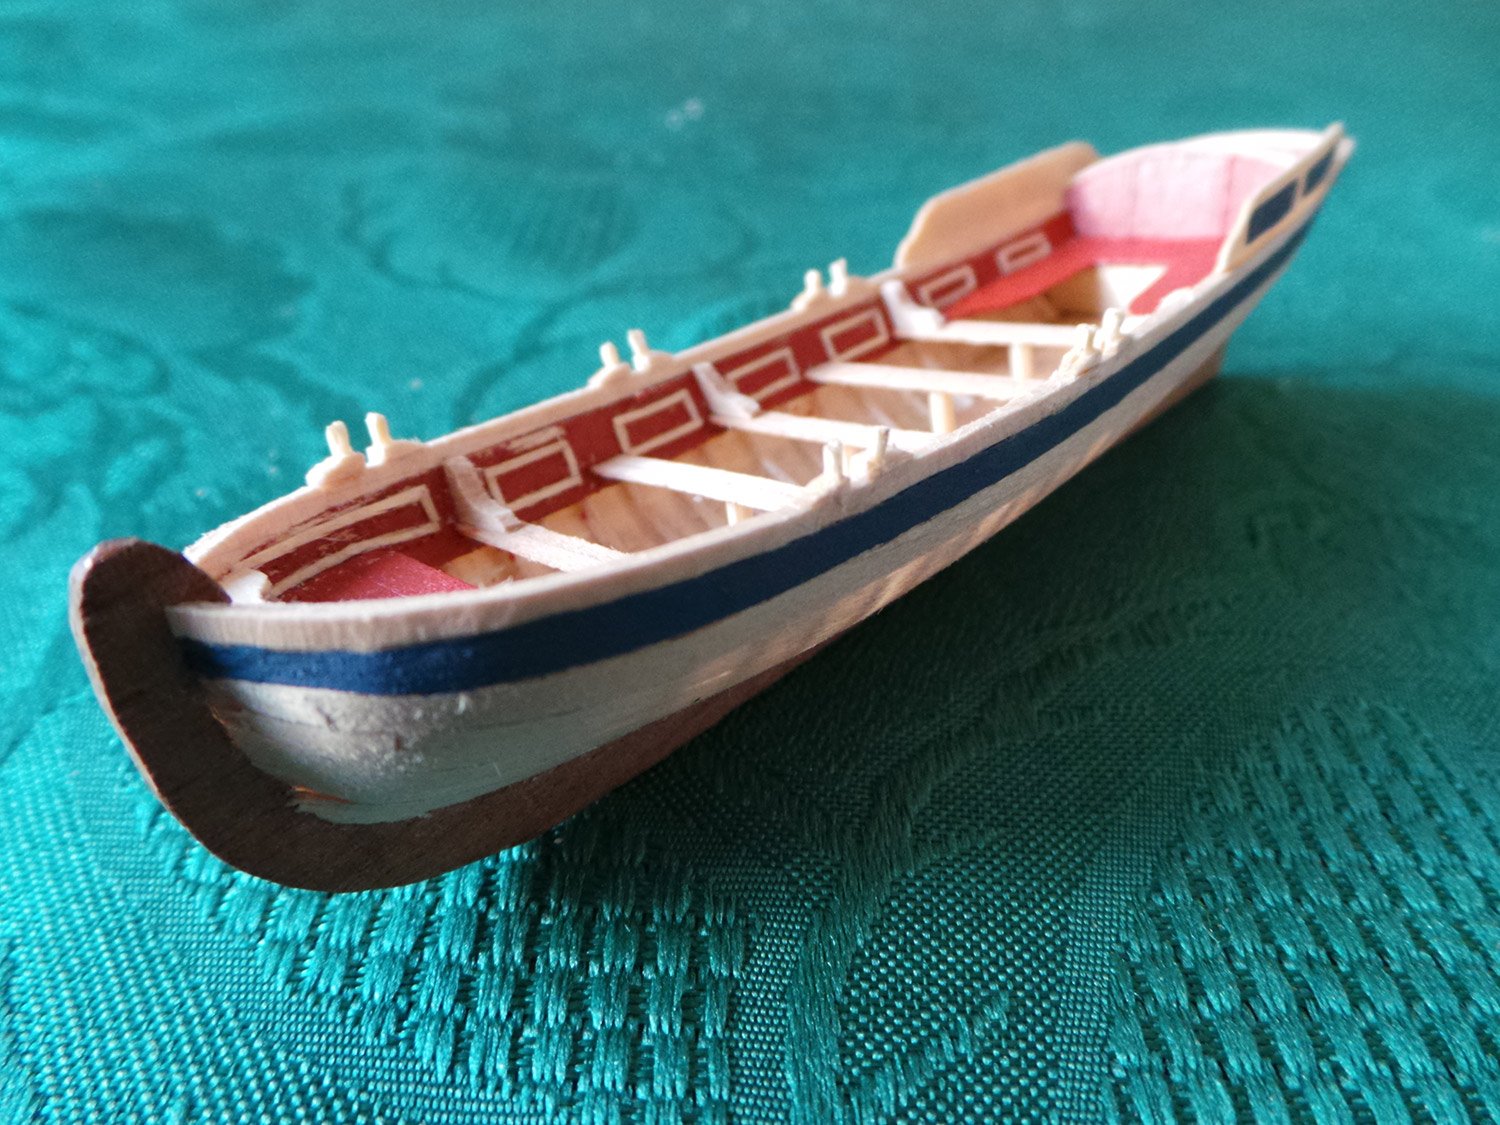
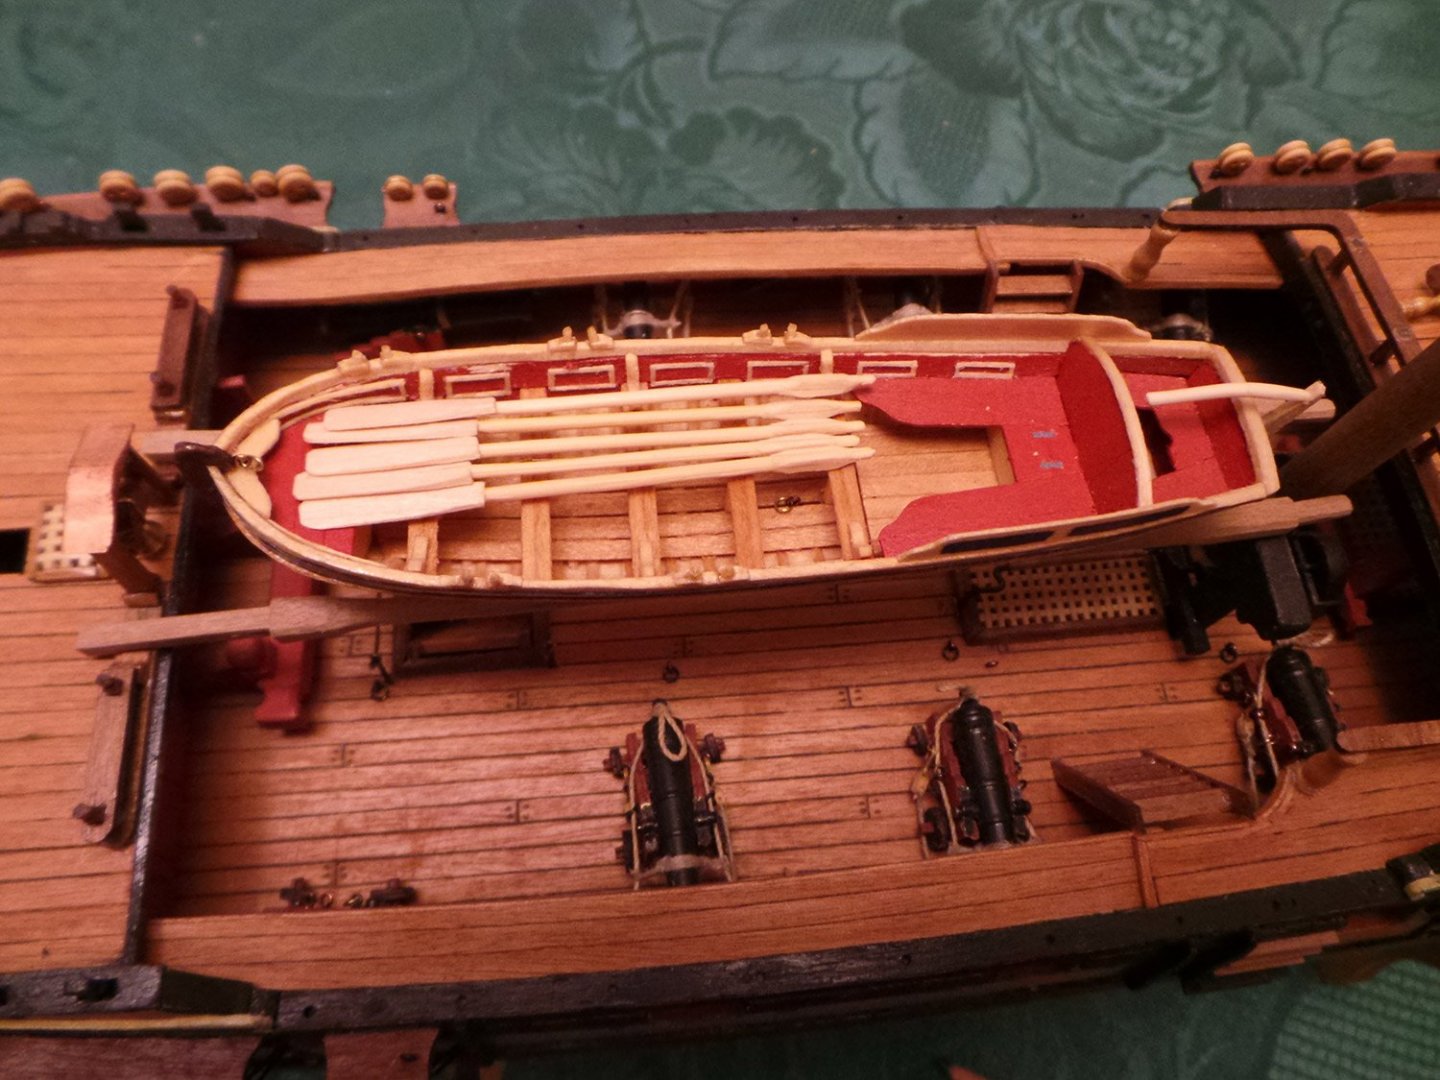
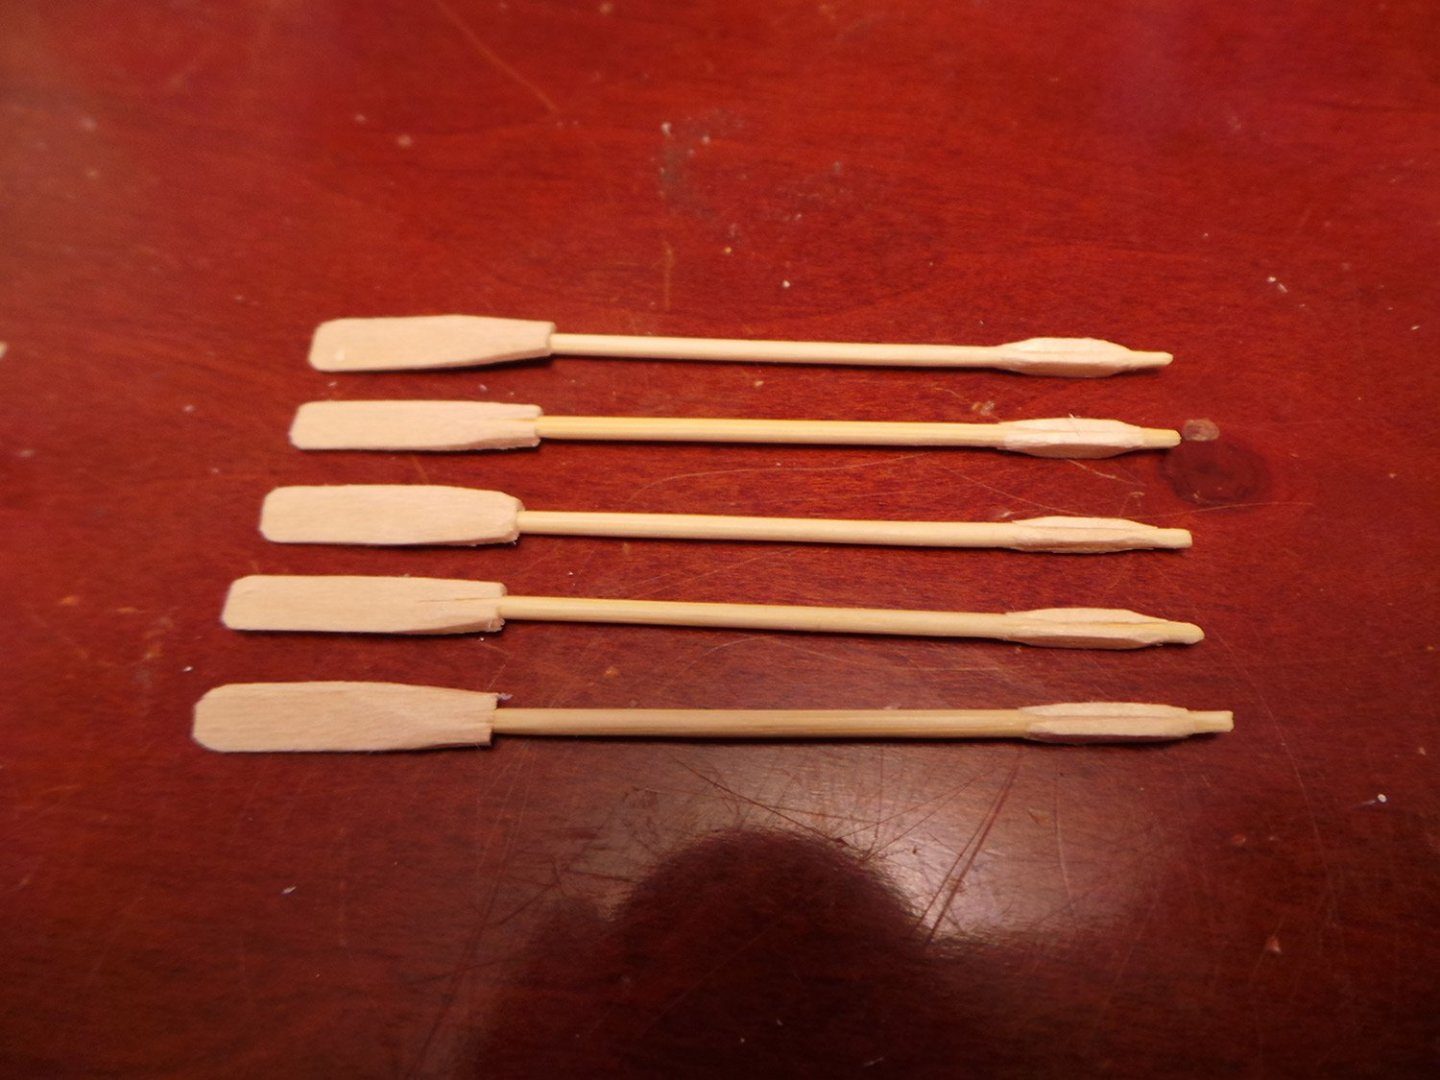
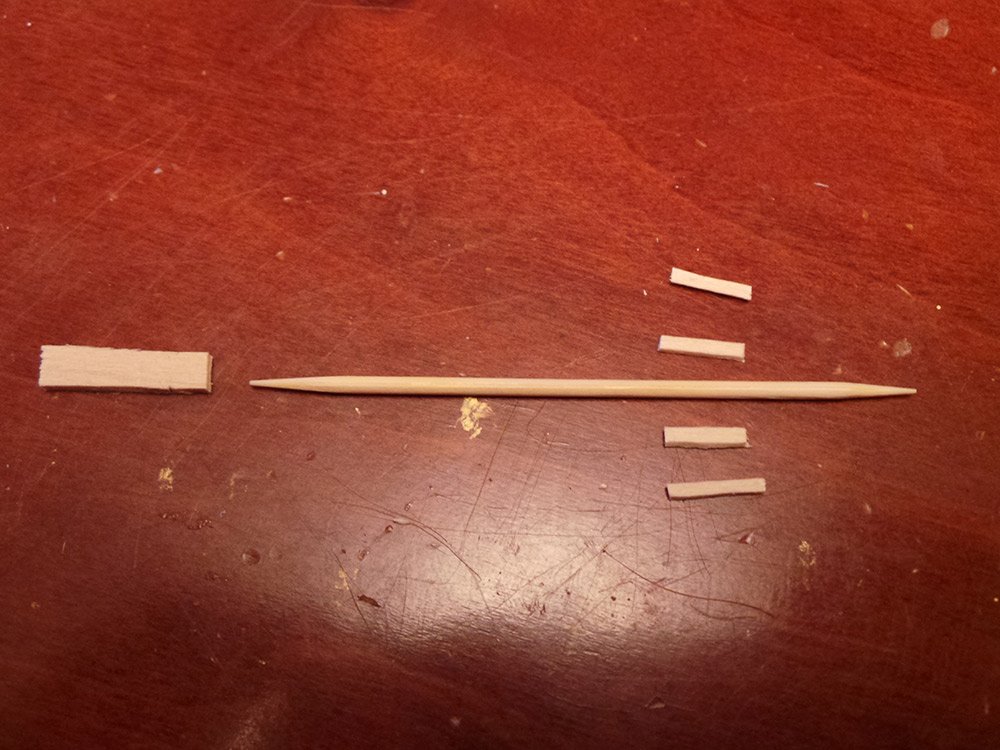
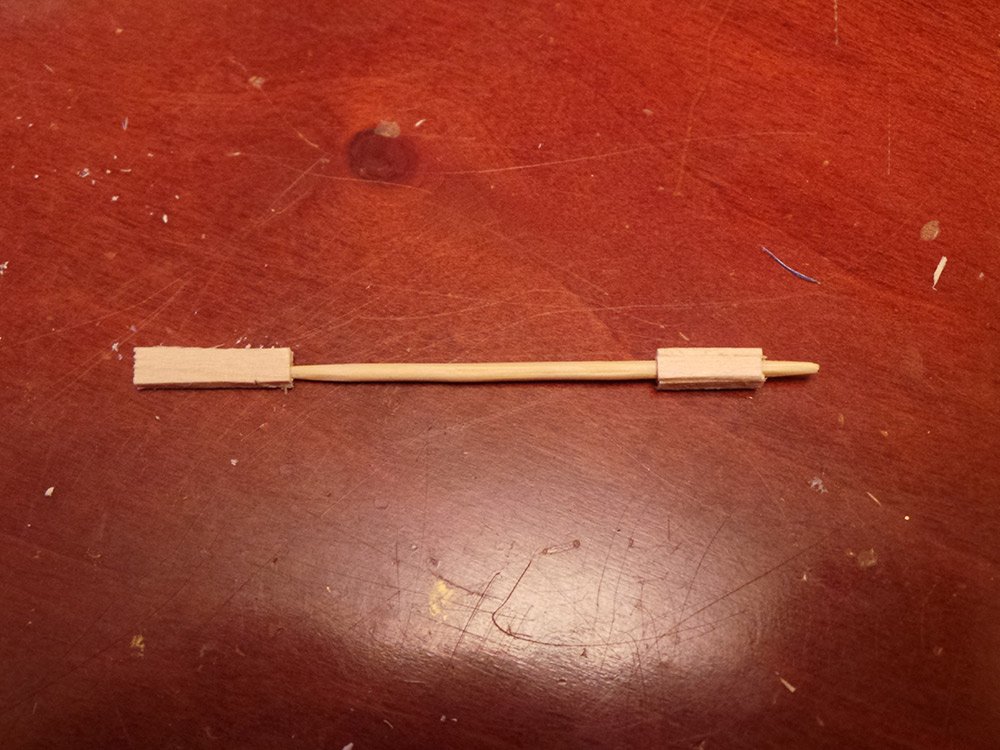
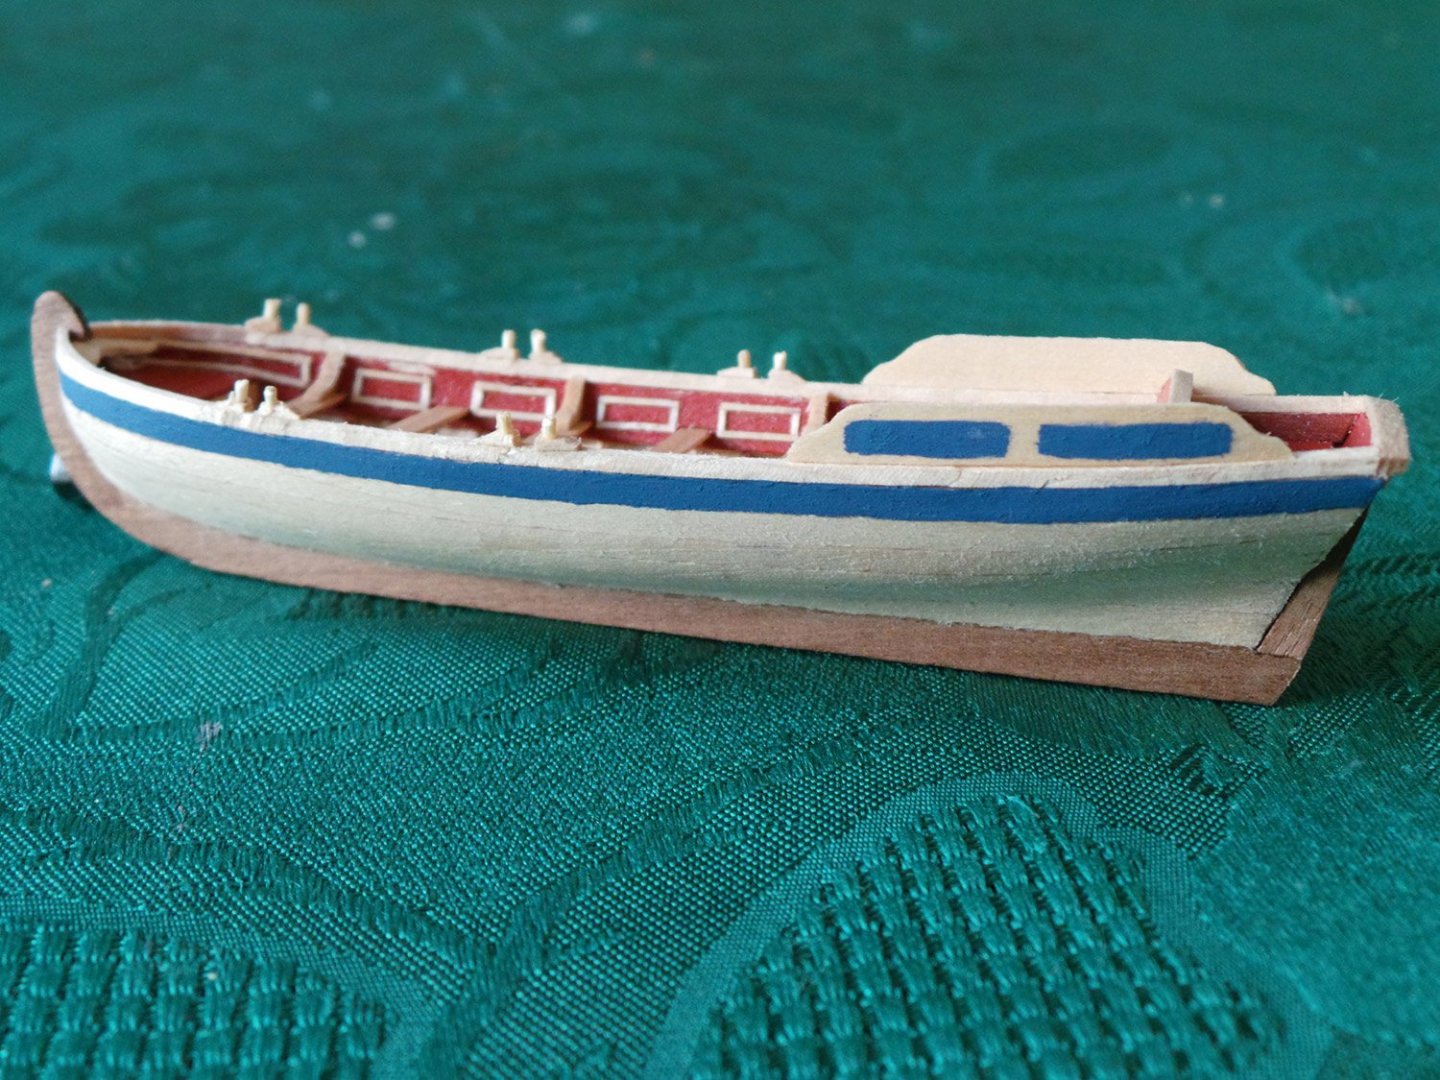
Thanks for the likes and comments. Finally my set of very fine brushes arrived and I got down to painting the gold scroll work on the frieze. I took me several attempts to get it looking good. Then I made the rudder and attached it. Next were the oars,Tricky little things, but I'm pleased with the way they came out. The blade was made from some 1.5mm boxwood, the shaft was a wooden cocktail stick and the grip made from some small strips of boxwood glued to the cocktail stick and reduced to create the squared section. The finished oars


- 161 replies
-
- 6
-
-
- pegasus
- victory models
- (and 1 more)
-
Yes, you are correct, Bitter End is asking about the counter piece, it does need to be made flush with the bulwarks/ gunport ply piece so the hull planking covers over the ends of it. The glue I use for the planking is good old white wood glue with flat head drawing pins to hold in place while the glue sets.
-
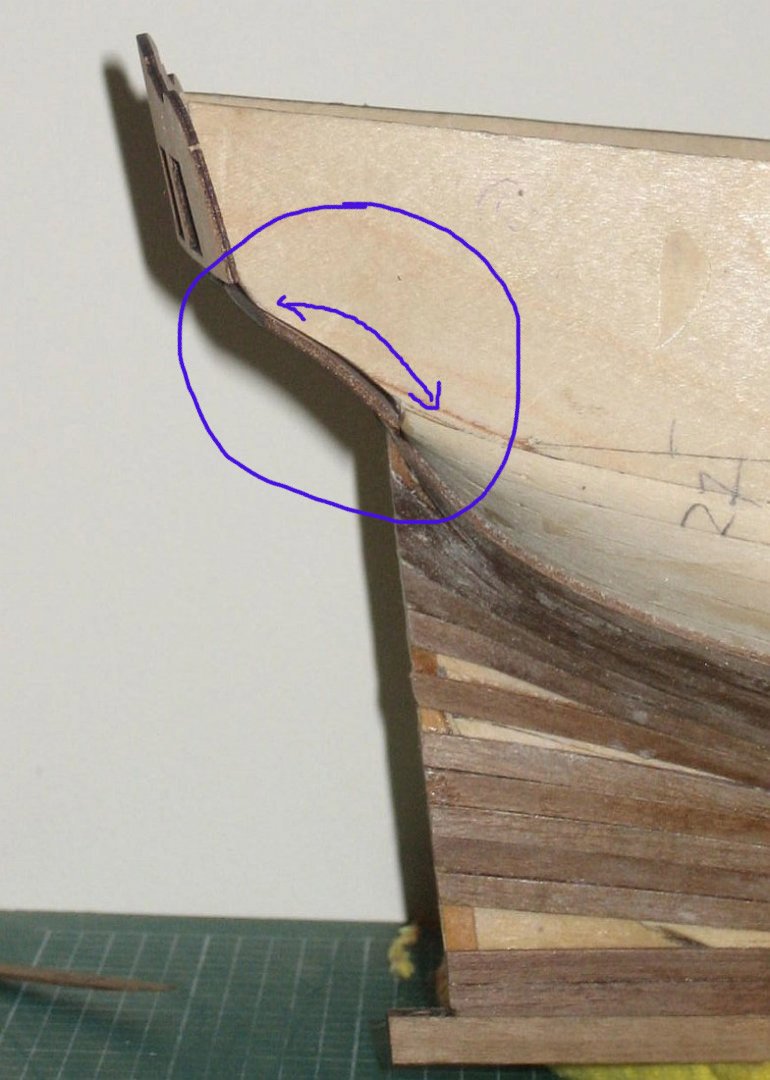
That is much better now the hump has been sanded. Spy is correct, you really need to get that stern counter curved as best you can, otherwise the decoration that is added further on in the build will not fit well. It can be trimmed so its level with the bulwarks, I didn't plank it as mine was actually a nice piece of walnut and I liked it as it was. Also the wale is important to get right as well. The second attempt looks better, but a word of warning for a future step: the quarter badges (the windows on the side at the stern) sits on top of the wale, if the wale is too high the quarter badge wont fit. This is a problem most Pegasus / fly builders encounter. It might be an idea to use the quarter badge base ( I can't remember it's piece number, but looks a bit like this. ) and then you can test it against the wale's top line to make sure all is okay and it fits between the wale and edge of the bulwark. See my pic:
-
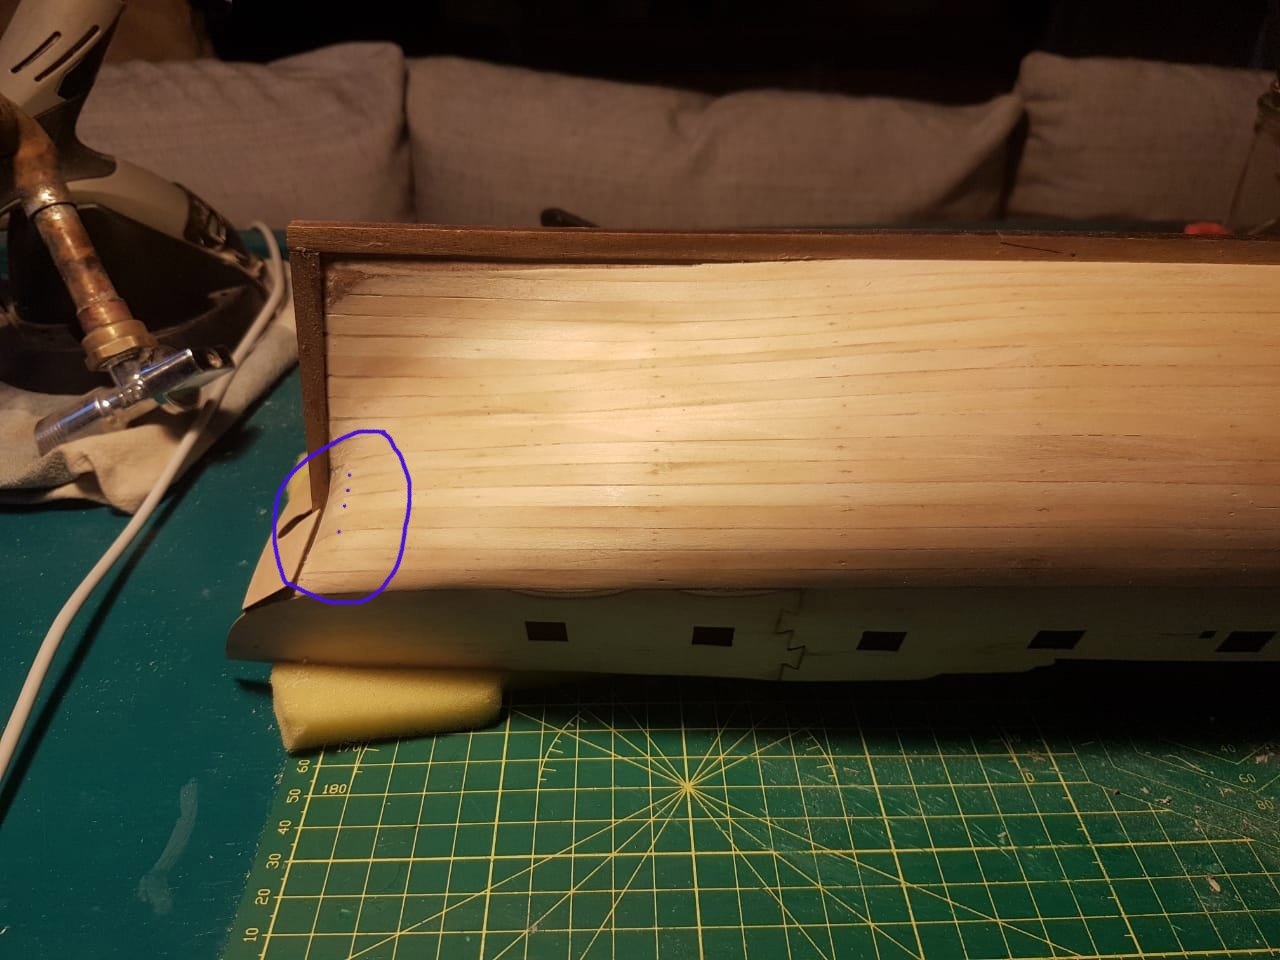
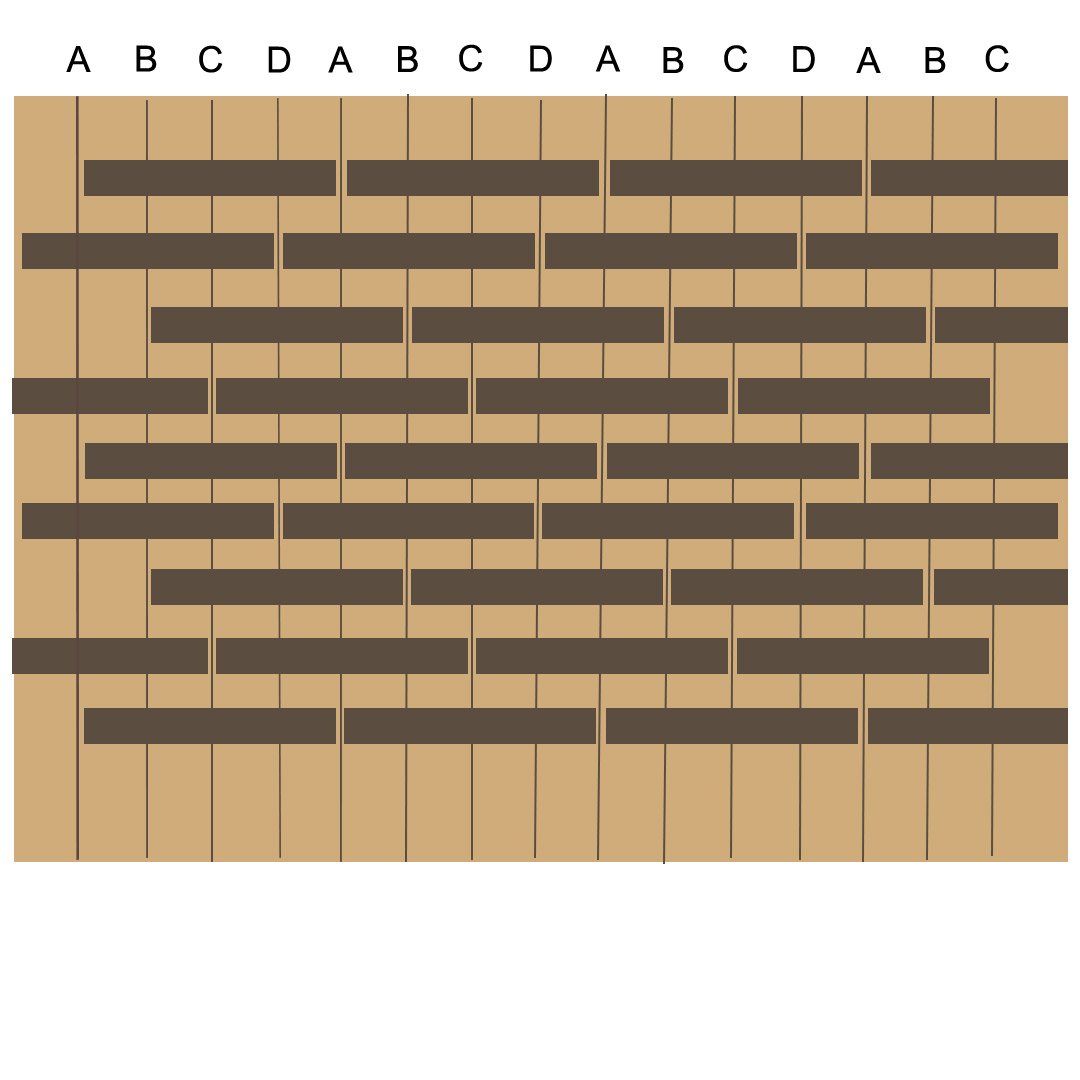
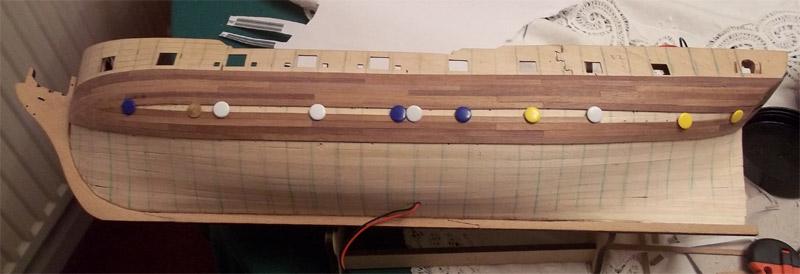
That is a remarkably good hull you have there, especially as a first attempt. I do agree with Spy that it you do have a bit of a sharp bend at the last bulkhead at the stern, if you can take the 'bump' down a bit more (shown in the blue circle and dotted line), you will find it will be easier for second planking. Also the stern counter (the piece of wood at the stern) curves, Spy's picture shows it quite well. Planks were generally between 20 -25 foot, depending on what was available at the time. I chose 24ft as my length of plank and scaled down they are 114mm. The pattern I used was a 4 butt shift pattern. This is how I proceeded: I marked the hull with vertical guide lines about 28.5mm apart along the complete length of the hull I placed the first guide line in the middle of the gap between the 5th and 6th gunport and then worked to the left and right. Make sure the lines are vertical to the waterline, ( I put the Pegasus in her cradle, which gives more or less the correct position and then used a homemade 'plumbline' - a piece of thread with a blue-tack 'weight' on the end to give me a vertical guide. Next mark the lines 'a' 'b' 'c' and 'd' repeating them to the end of the guide lines. Here is a diagram of the planking pattern I used. To find the starting point, I marked the position of the wale (Top and bottom edges) onto Pegasus. The location is shown on the plans. Once this is marked, I put the first line of planking following the top line of the wale (bottom edge of the plank on the top wale line) and I proceeded as follows: Place the first length on guide lines A-A, repeating along the whole length. Next row down the lengths are placed on guide lines D-D (planks are set 1 column BACK from FIRST row butts) Next row down, the lengths are placed on B-B (Planks are set 1 column FORWARD from FIRST row butts) Next row down, the lengths are placed on C-C (Planks are set 2 columns FORWARD from FIRST row butts) Next row down is a repeat of the first row. You should now have 3 rows between your butt joints on guide lines A-A. Continue following the pattern. You can either do straight runs like Spy, or a run similar to mine, the choice is yours! I hope this helps you and doesn't confuse you to much.
-
That is a very good attempt at first planking. It will make a good solid base for the second planking. The hull needs to be really well sanded, one reason for the thicker planks; it is surprising how much sanding it can take. Spending time and getting the hull nice and smooth now will make a good base for the second layer as any dips and bumps will be more noticeable when the second planking is done. You can use either wood filler or PVA mixed with sawdust, either works well. The stern will need to be sanded down quite a bit, Spyglass shows a good way of getting an idea of how much material needs to be removed, by temporarily fixing the stern post you can use a strip of the second planking as a guide, the second layer should just be at the same level or slightly proud of the stern post, but not too proud otherwise you might find yourself sanding it off when the final planking layer is sanded smooth.. You will probably find the second planking will probably follow a different pattern to the first as the strips are a lot thinner and not quite so forgiving as the lime planks. You will see on my Pegasus that the second is different. The first six were straight rows, after that the following rows ended against the first band, this was to prevent the planks from clinkering. I used scale lengths for the second planking and mixing the different colours to get an interesting effect which I enjoyed doing, but you can follow the same process using full length planks. The strips themselves will show you where they want to go, as they are not so flexible and won't take much bending laterally before splintering of snapping, let them show you! As you can see mine had a gap that was filled in. You can get a good idea of how my bands of planking were shaped at the bow on these two pics. The six under the bulwarks were straight and not shaped, you can see where the following five or six runs meet up to the sixth band of planking. As they went along the stem, they were also tapered, but not as much as on the first planking. The stern, you will probably need a couple of stealers, but these are not difficult, the planking itself will dictate where these will need to go, it's basically a case of filling in a couple of gaps with a triangular piece! If you want any more close ups of my second planking, just ask away and I will take some for you.


-
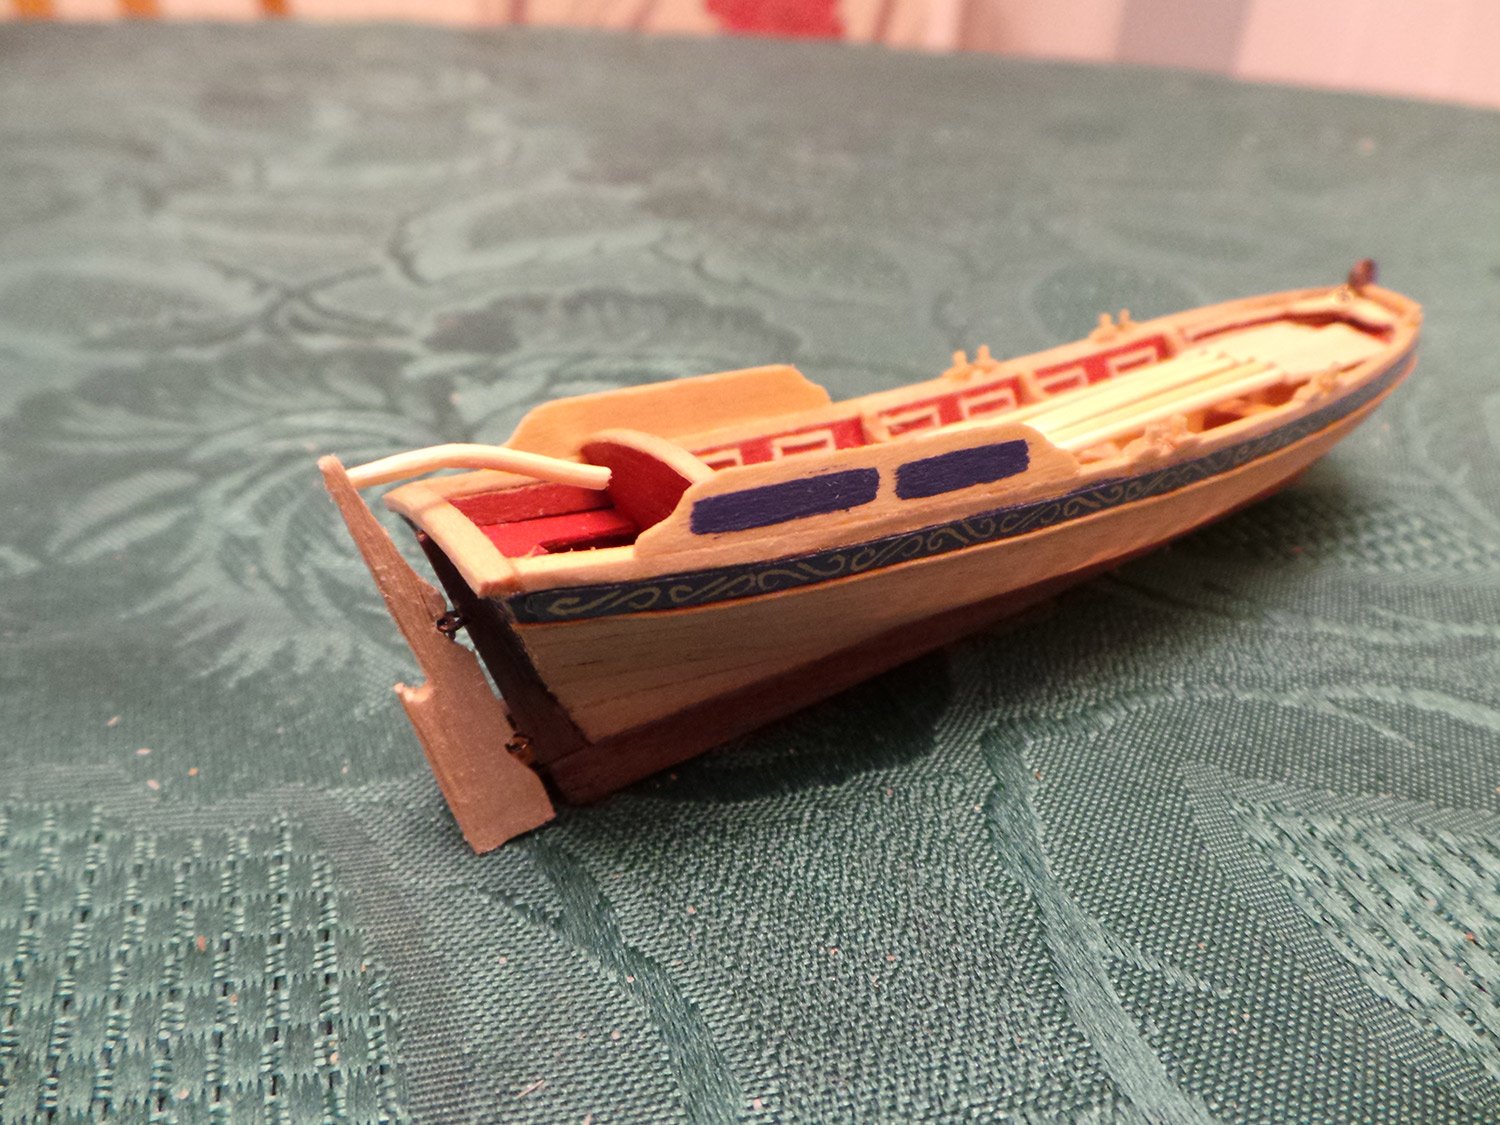
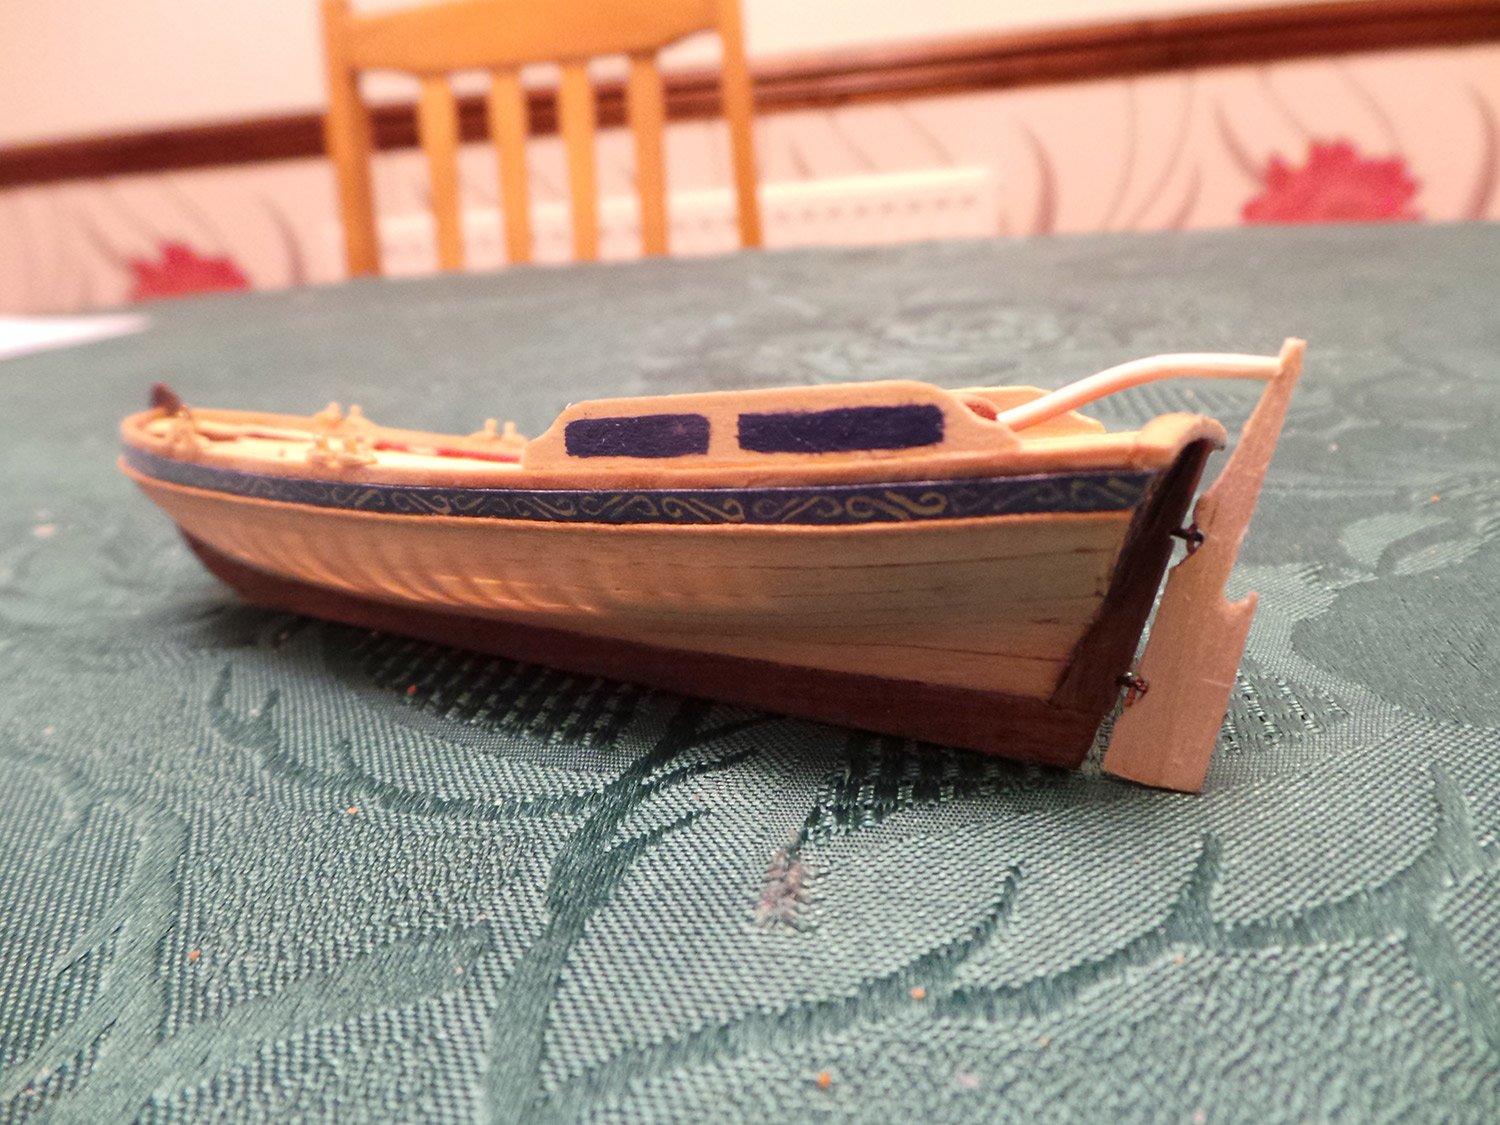
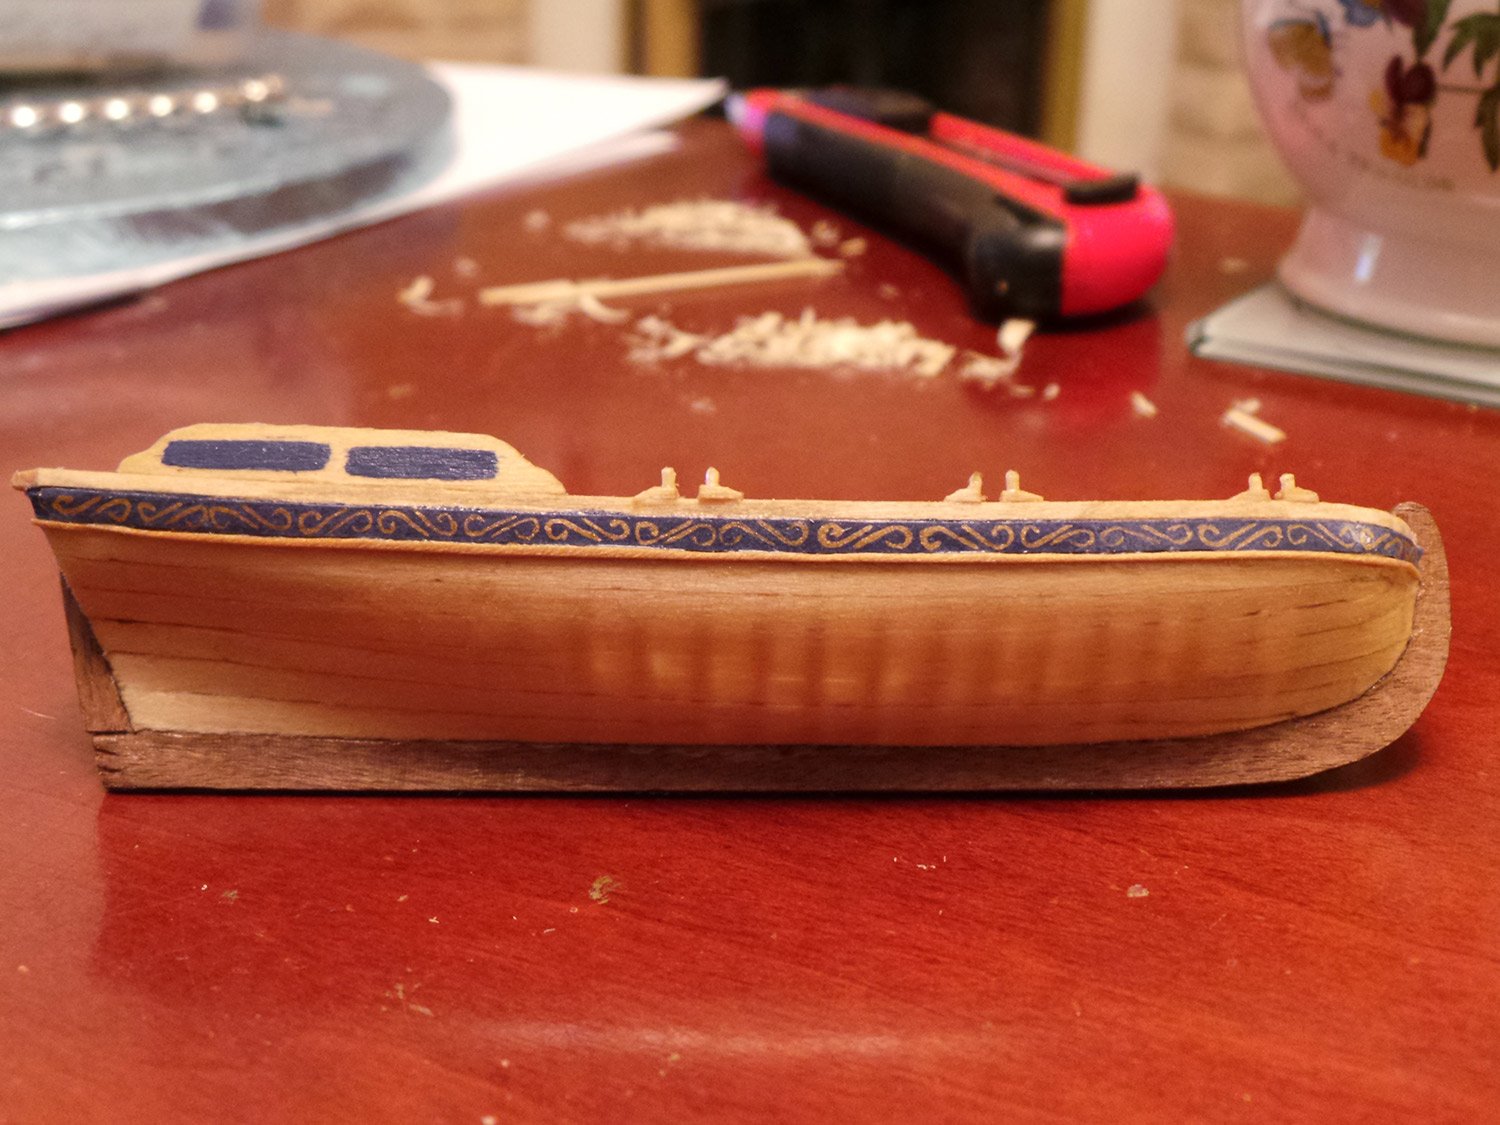
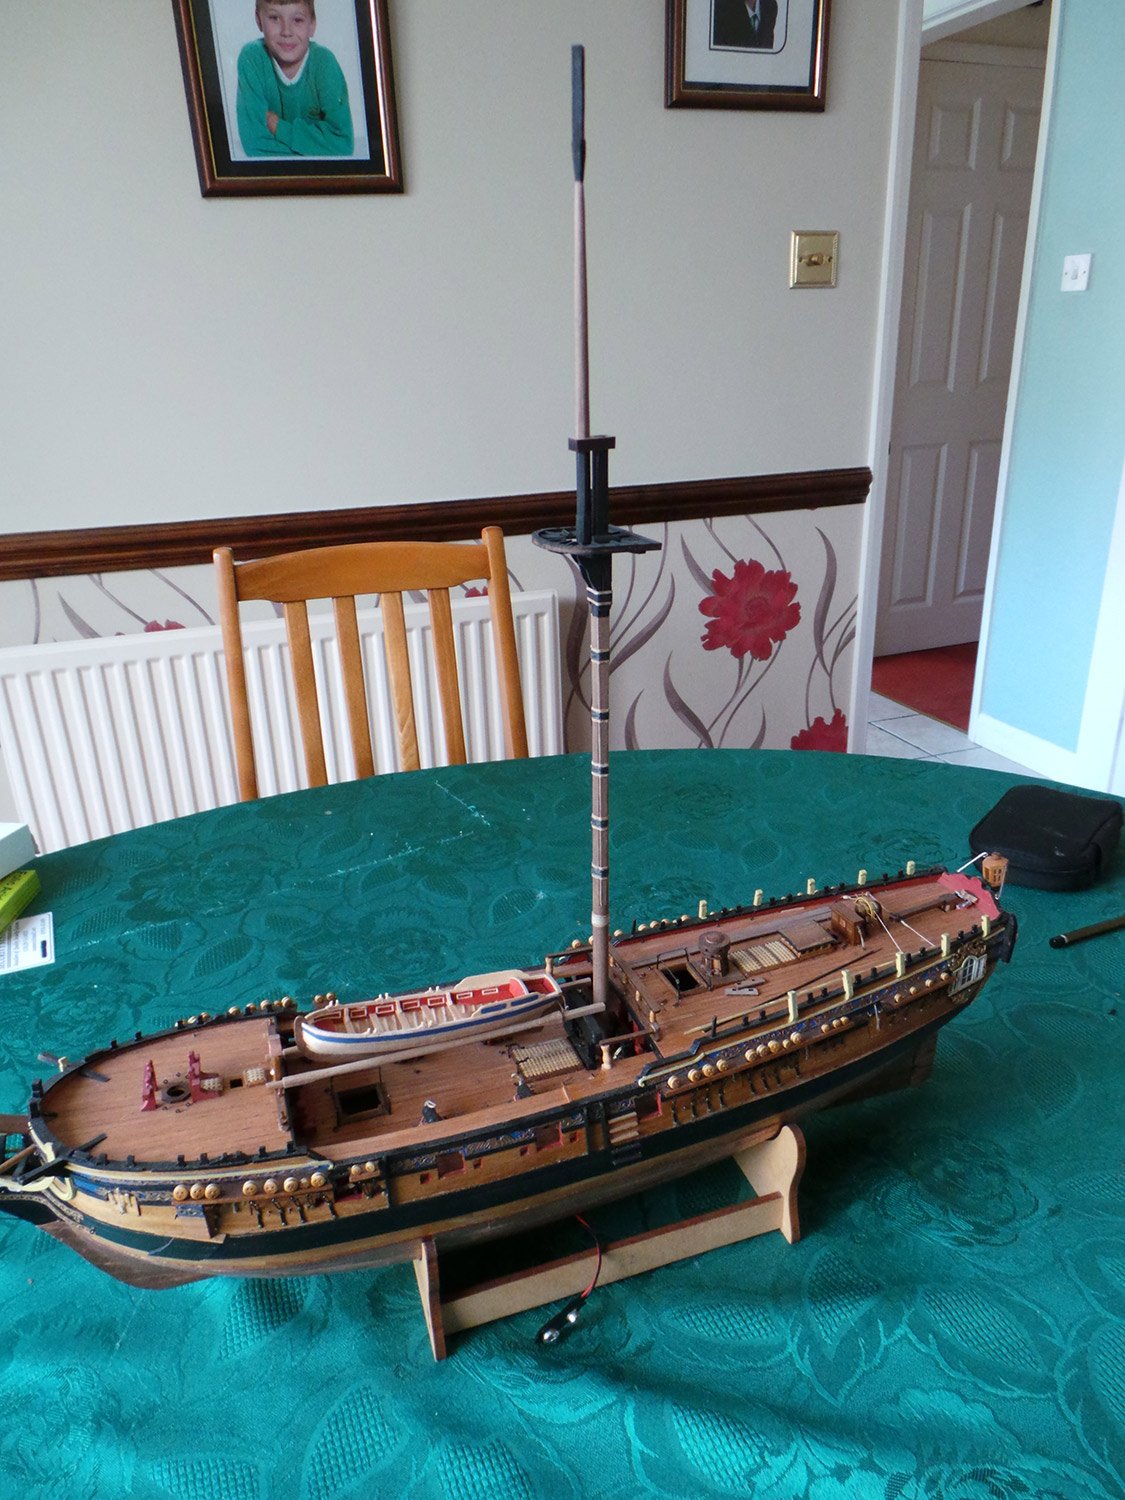
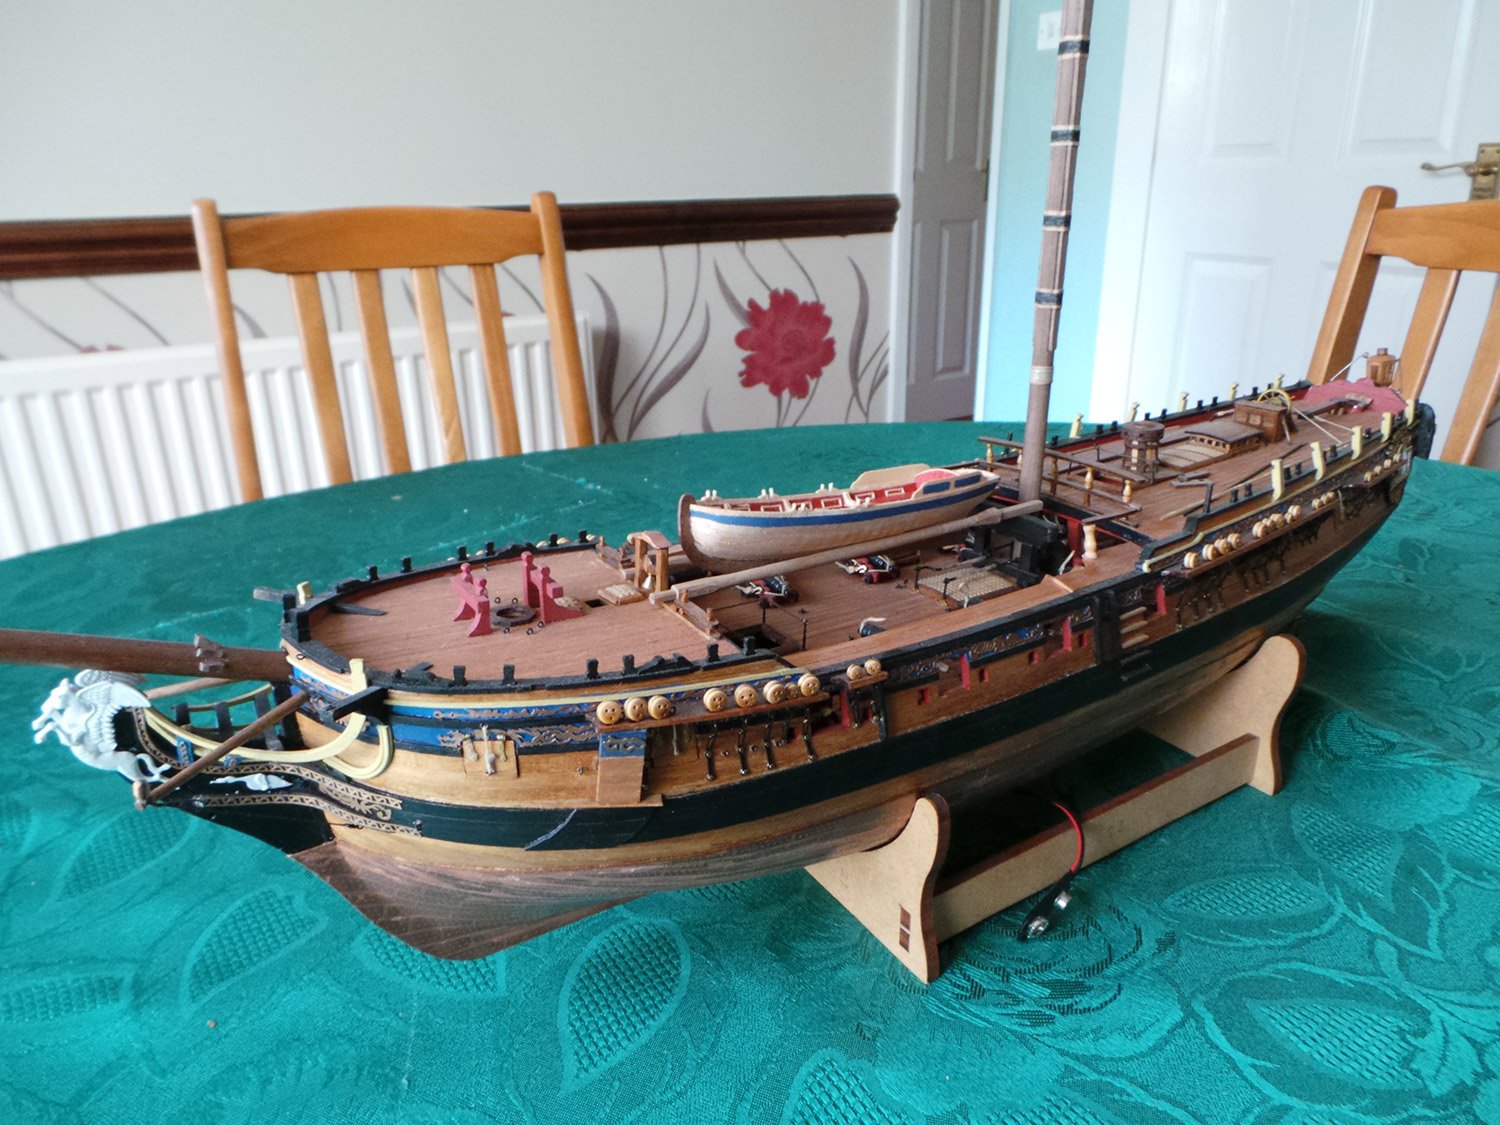
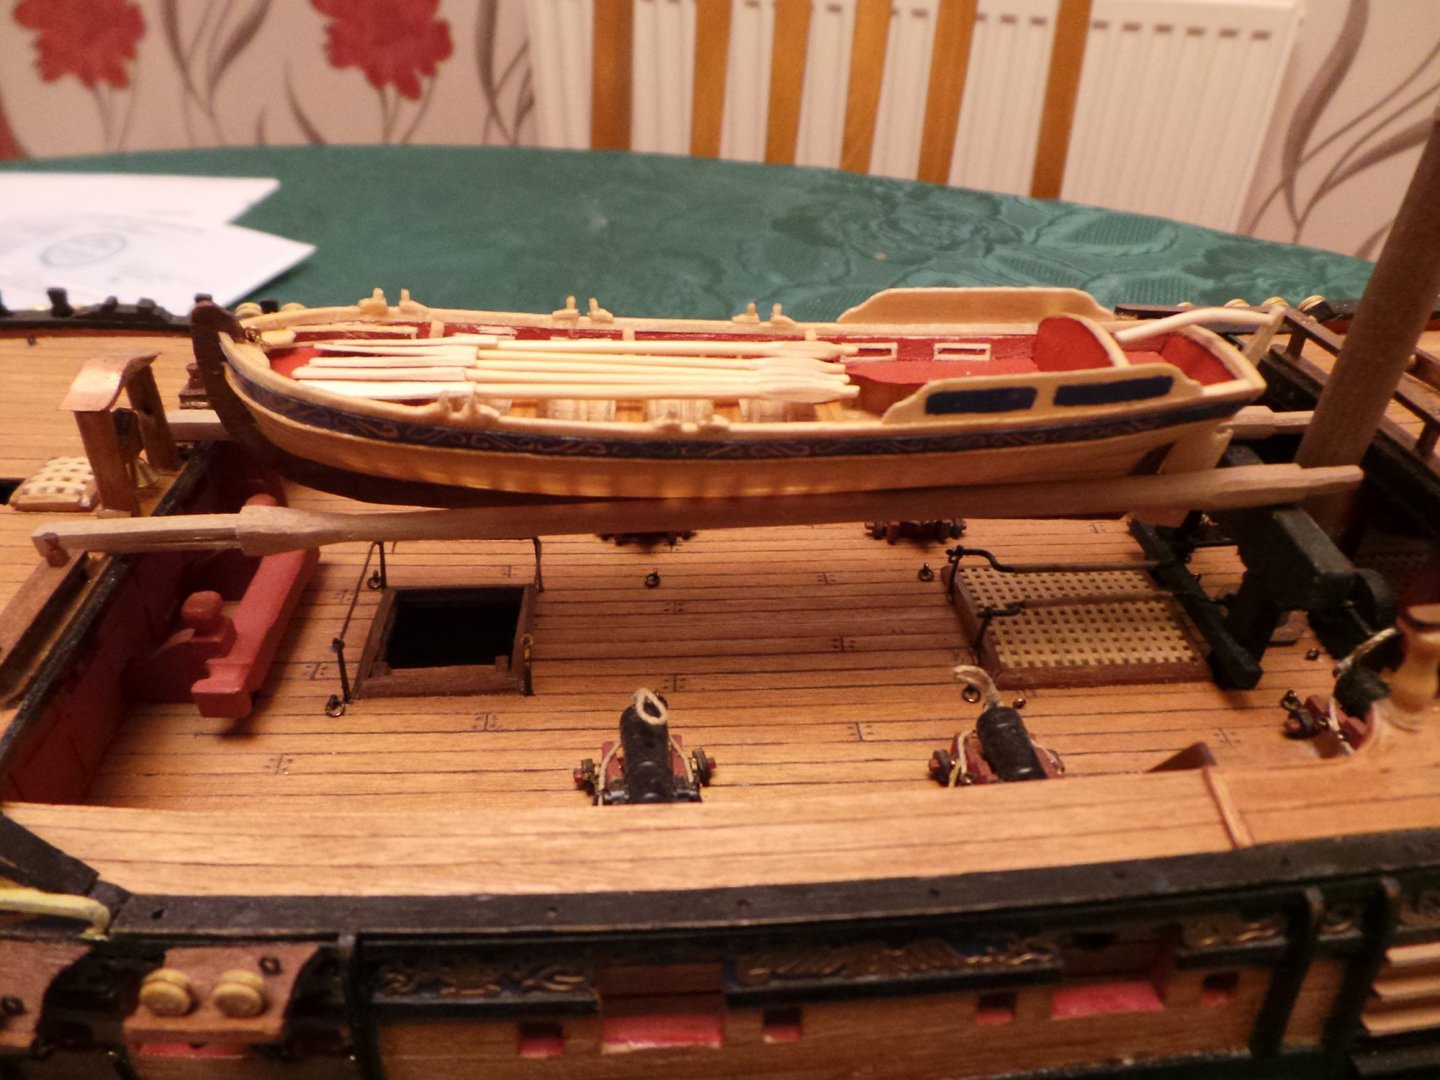
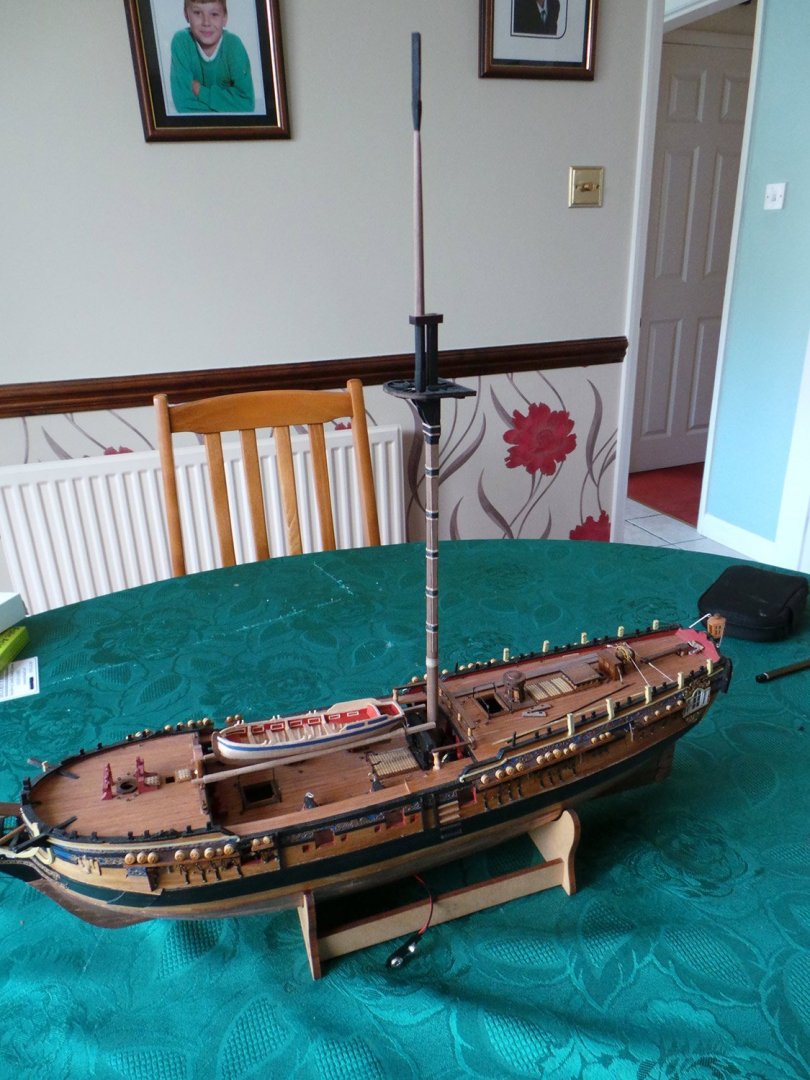
Thanks for your comments John and Mugje. Thanks also for all the likes. Pinnace update. Fitted thole pins, ruder post and knees. Painted blue background for the frieze. Now waiting for some fine brushes to arrive for the scroll work; as the ones I had, have been used by my son and didn't get cleaned properly and they now resemble Boris Johnson's hair do! Here are some pics of the Pinnace on Peggy. I have also made the main mast and top mast for Peggy.


- 161 replies
-
- 9
-
-
- pegasus
- victory models
- (and 1 more)
-
Lou, you'll make me blush!! Bitter End, I'm glad my photo's helped. I'm happy to help however I can.
-
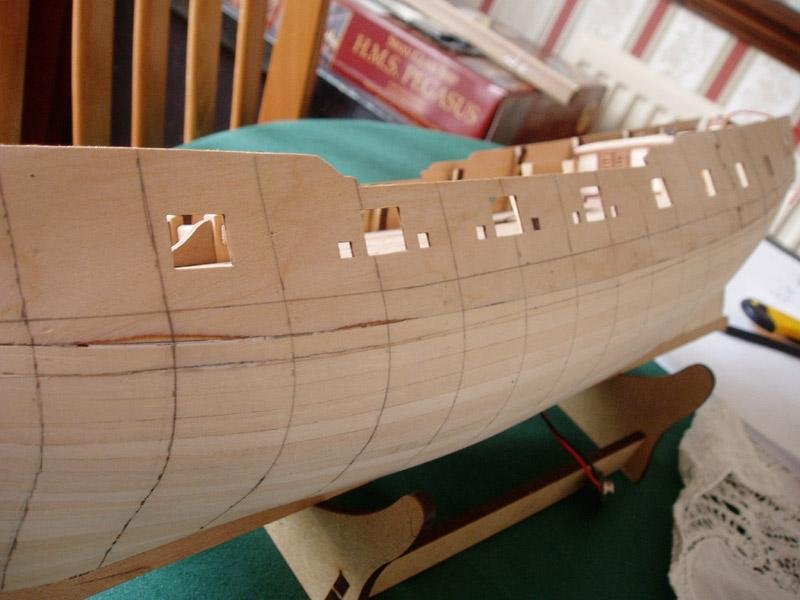
On the Peggy, you can use full length strips, they don't need tapering at the stern, but for following the curve at the bow, tapering is necessary. If you look at my build log, I have photos of the first planking under way showing the kind of tapering I did at my bow. There are lots of photos showing the bow and stern planking, so it could help you. Don't be afraid of it, the planks themselves will tell you how much they need tapering (one thing to note on tapering - make sure you taper the same edge on each plank - i.e don't taper the top edge on one plank, then the bottom edge on another- this helps eliminate gaps, as no matter how hard you try, it is difficult to cut perfectly straight!). The first 2 planks under the bulwarks didn't need tapering and ran straight to the stern, my next plank needed a bit of tapering, lay the plank up tight to the previous one and gently bend it up towards the bow, don't force it, let it lie naturally, any overlap you see - this is where you need to taper it. I use an oversize length; then you have another go at getting the tapering right, if the first one doesn't go as planned! Here's a few photos of my bow planking under way (you can also see that the very top and bottom of the bow didn't need tapering, just the middle):
-
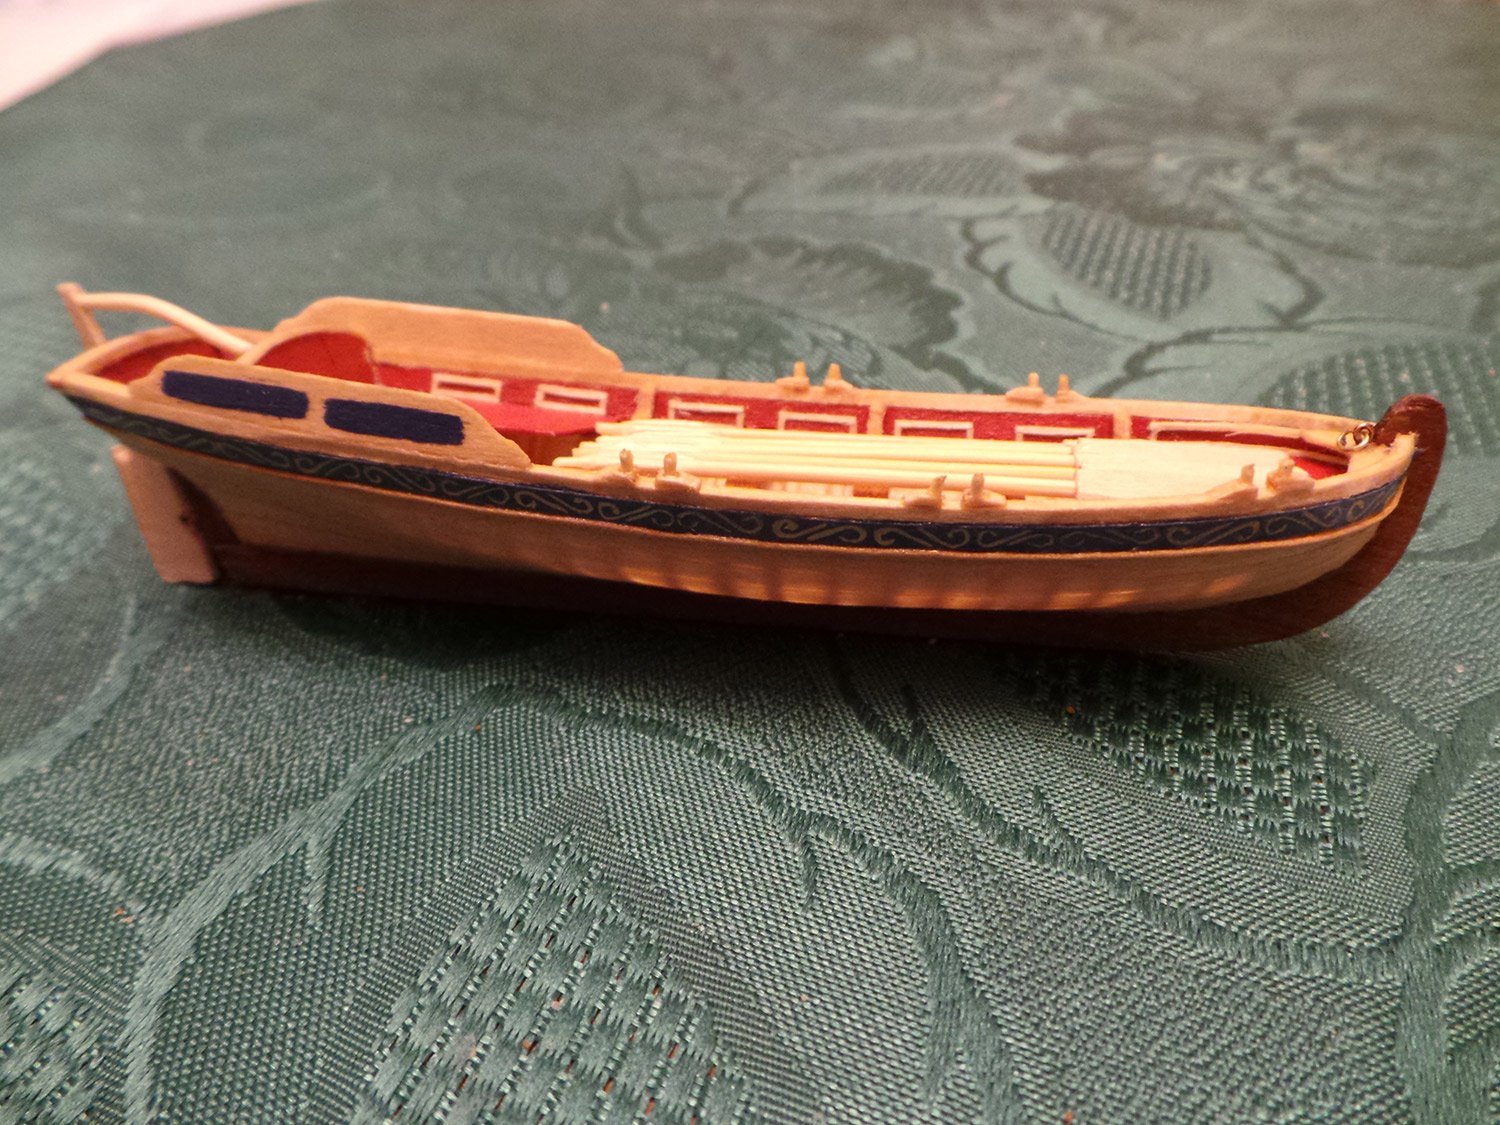
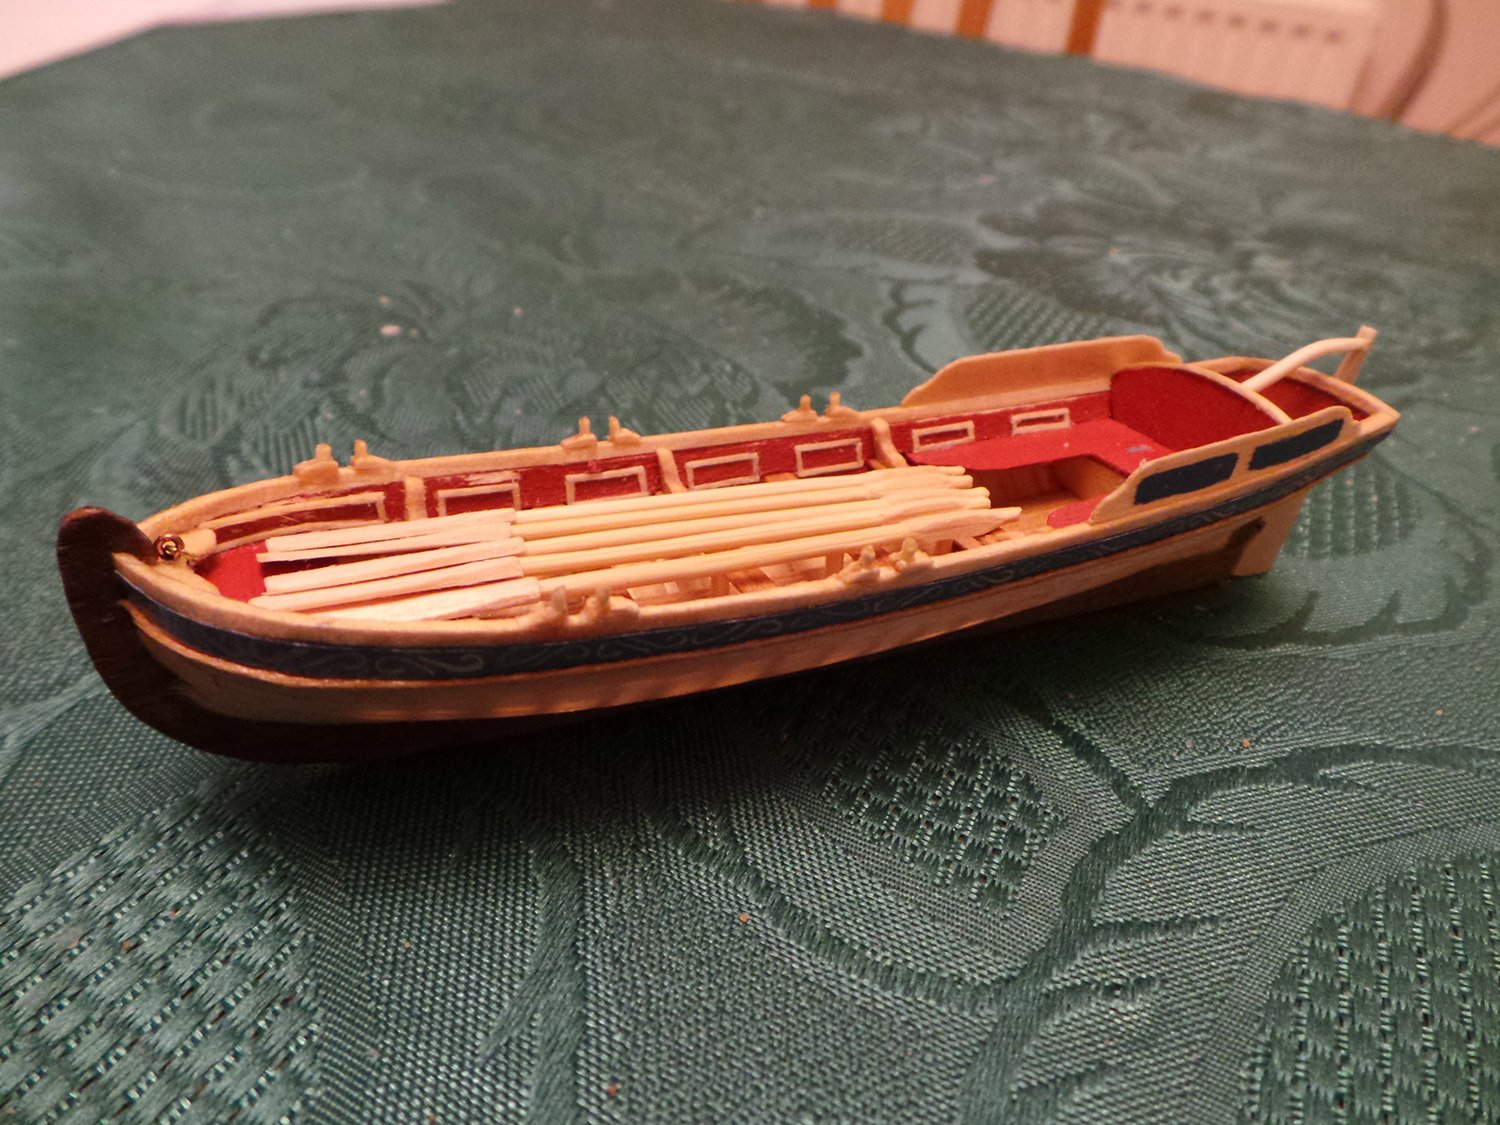
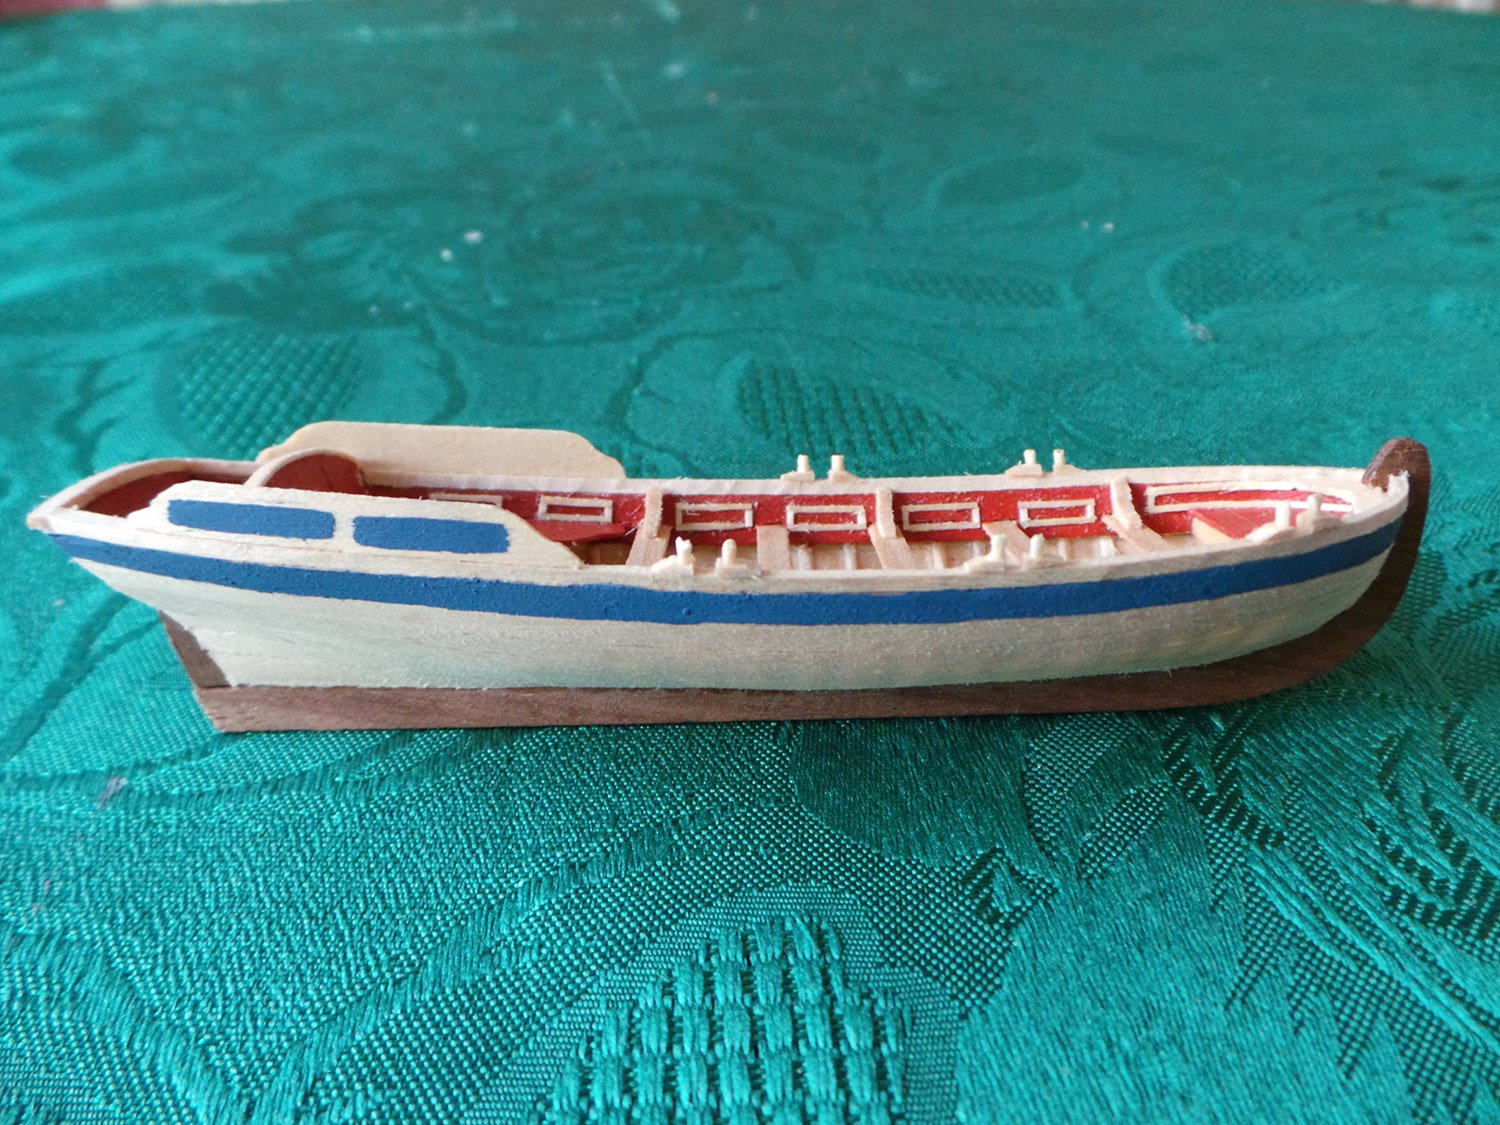
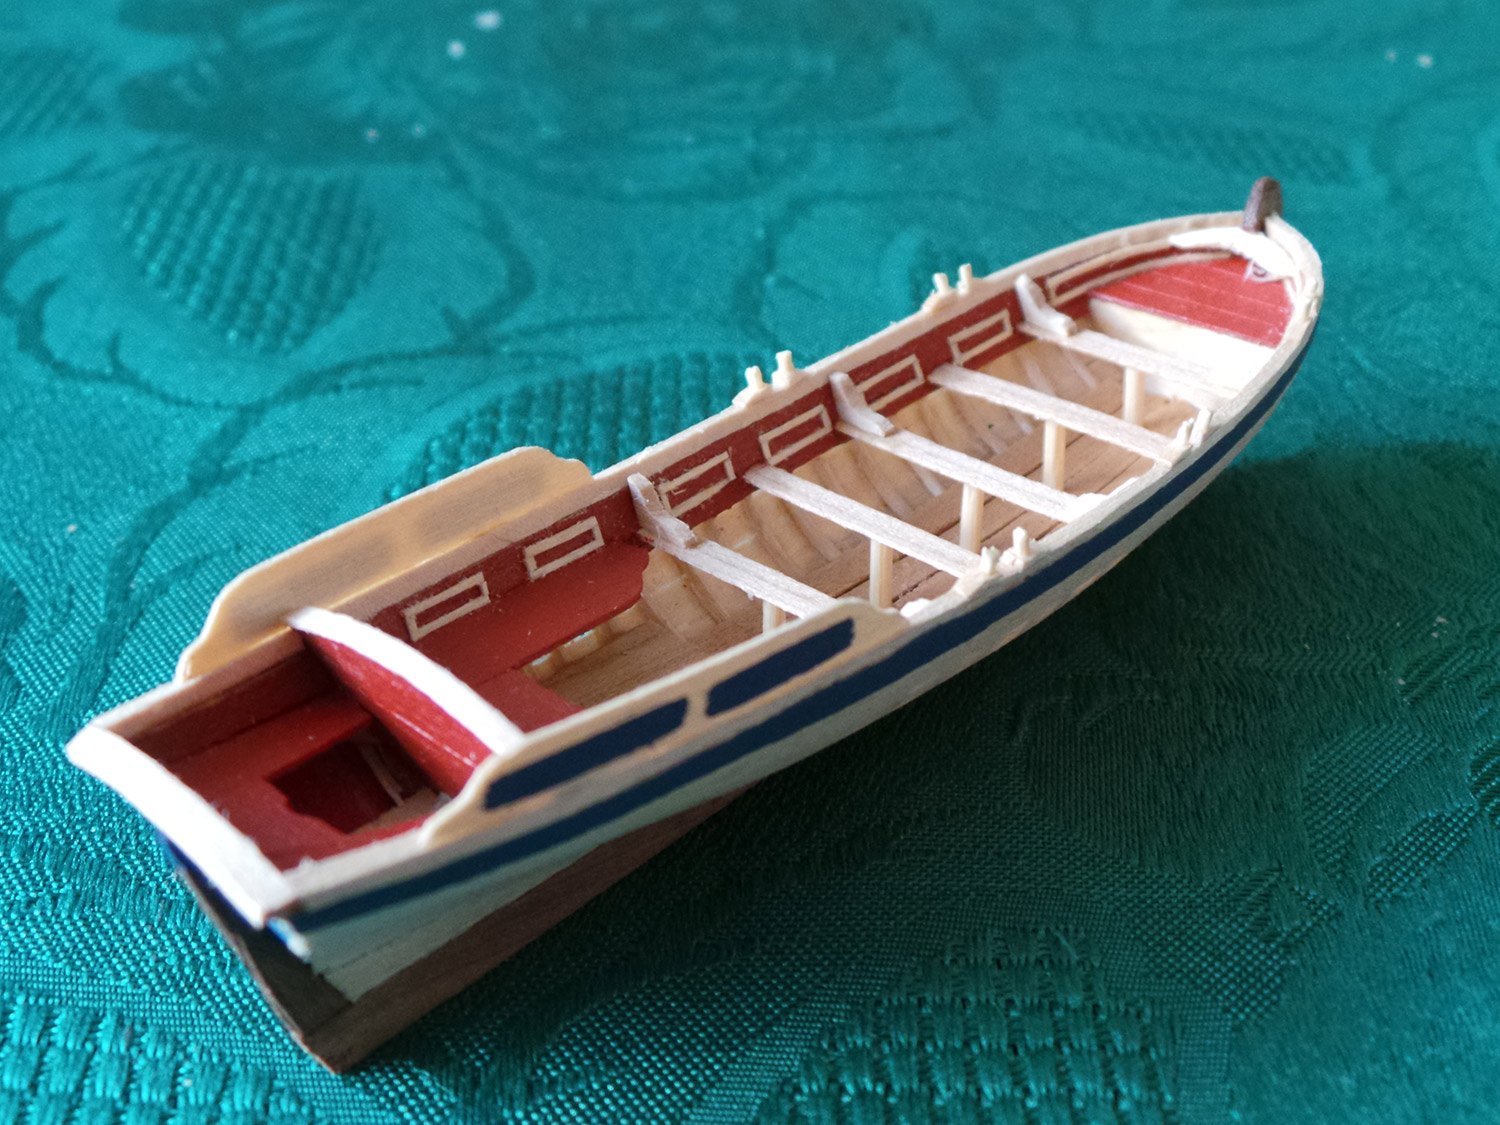
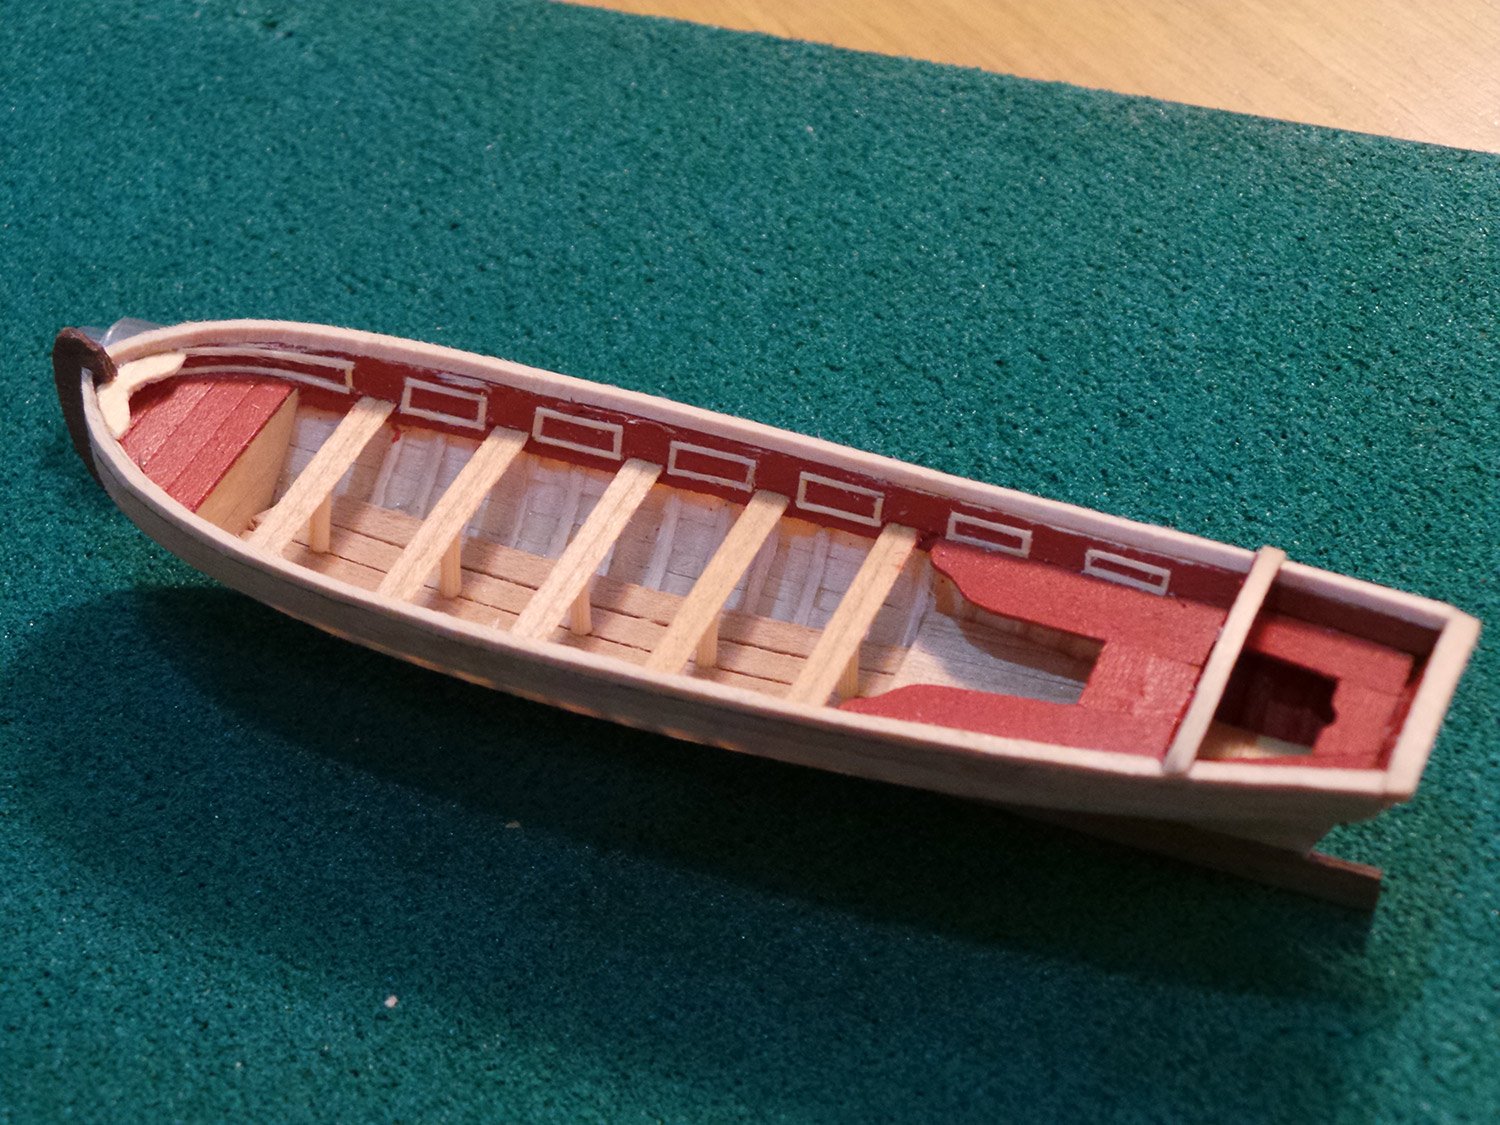
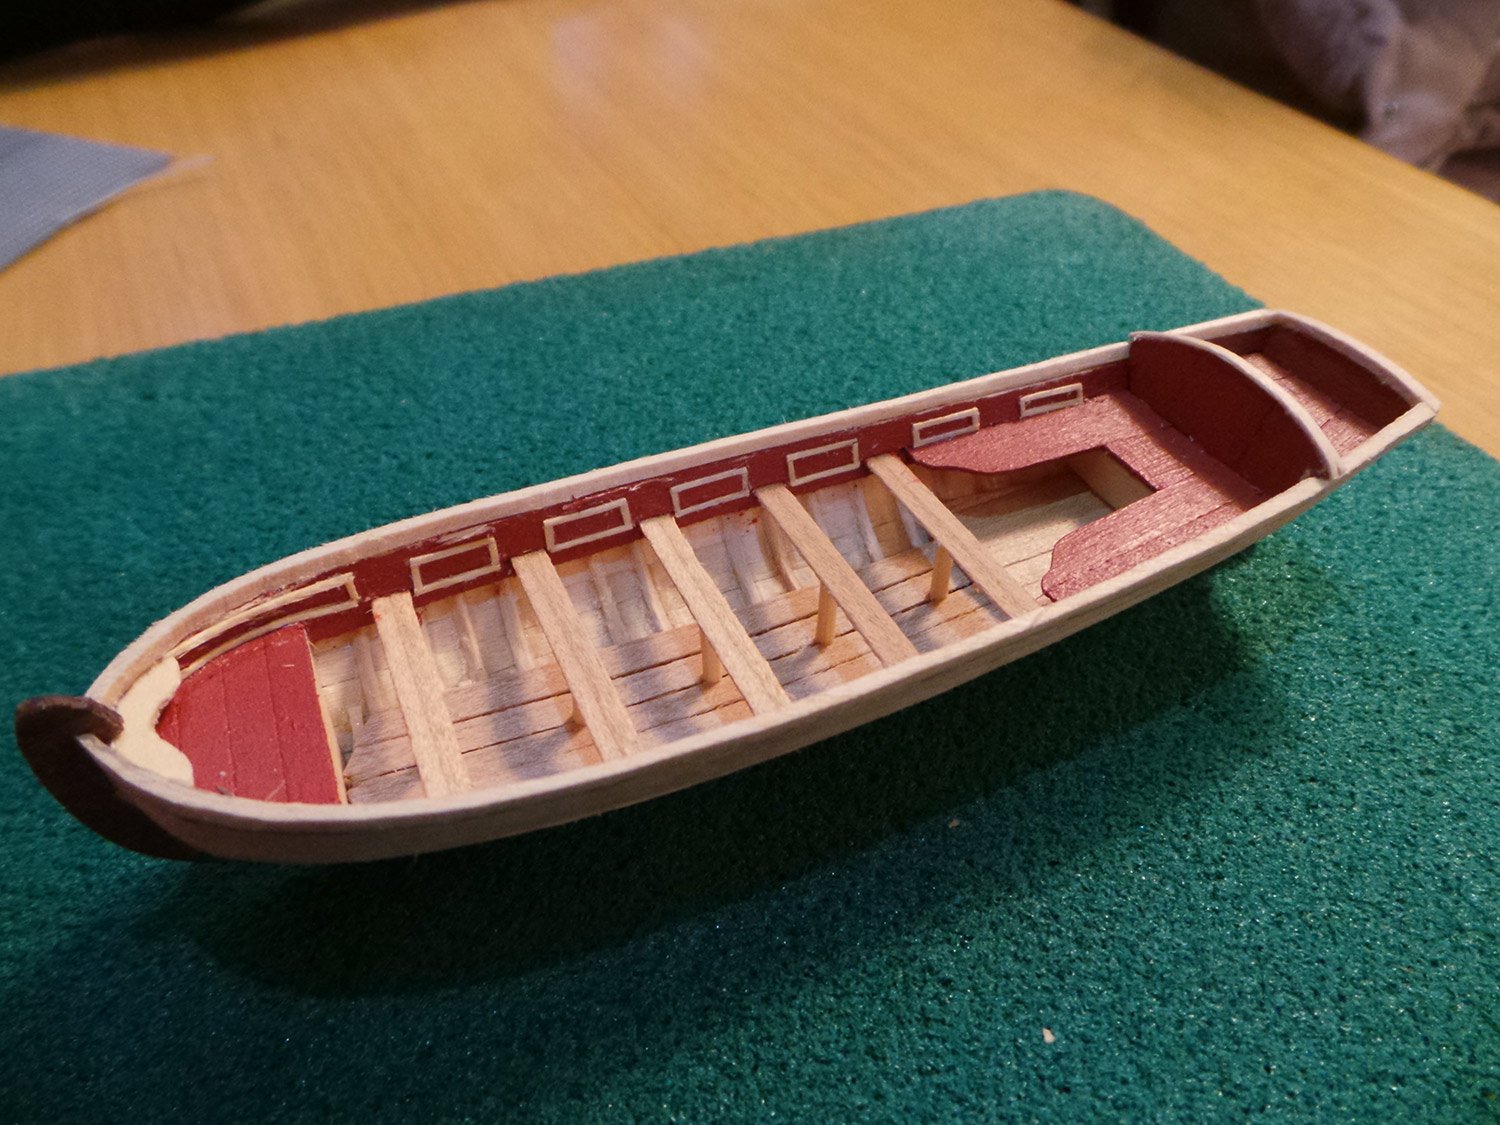
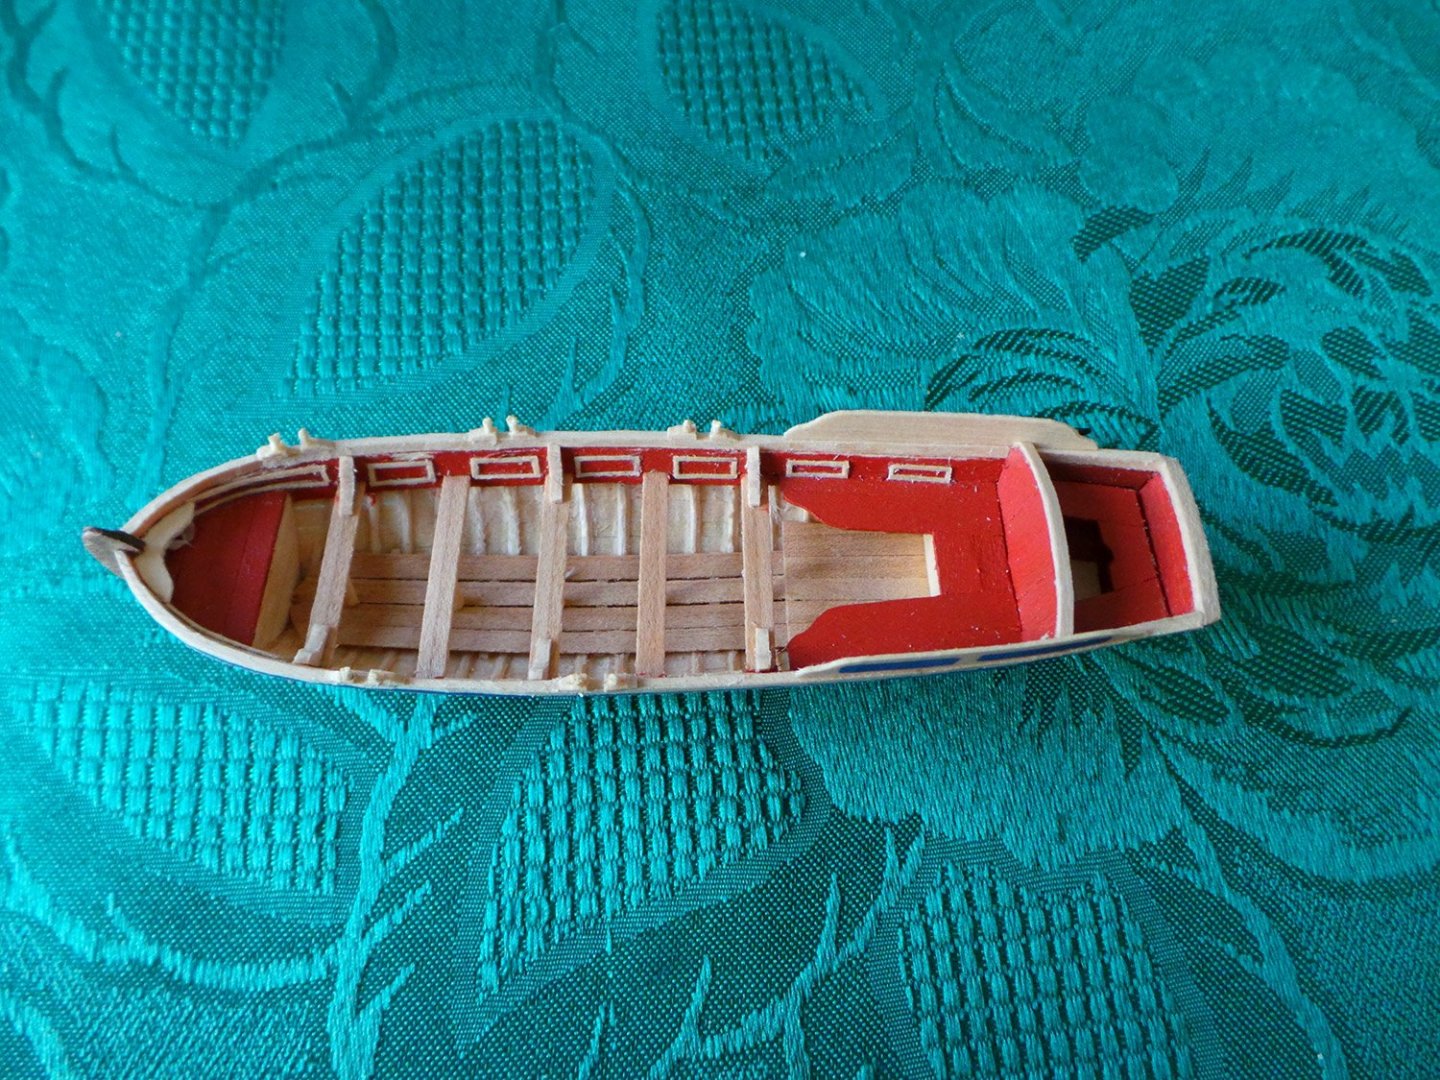
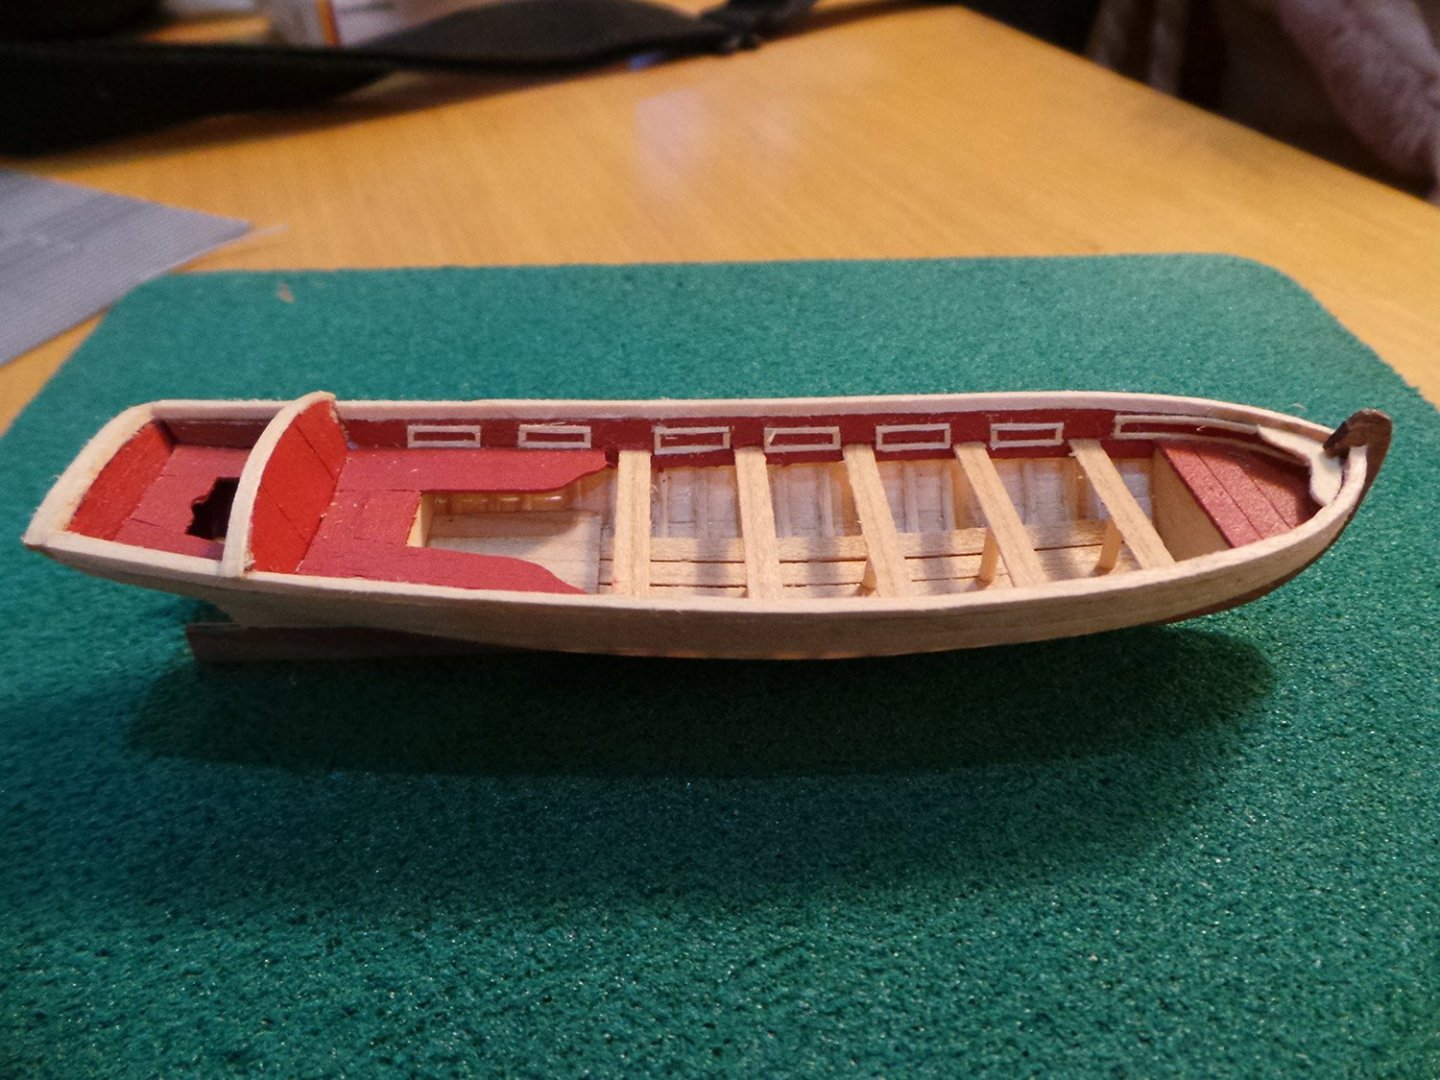
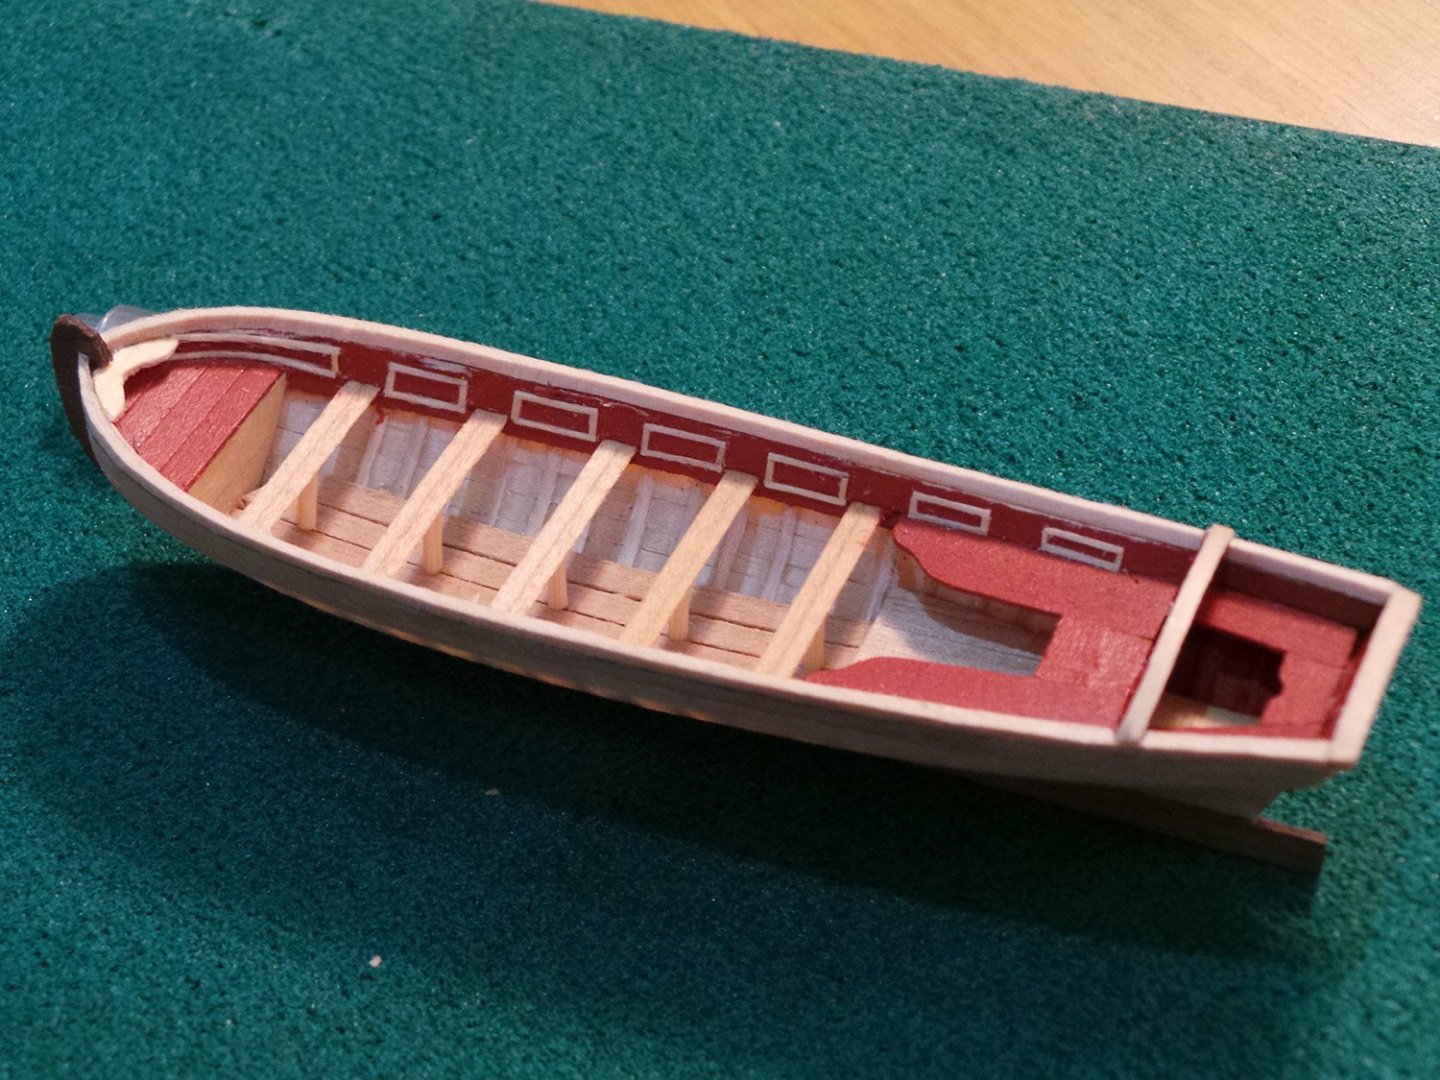
More progress, the planking above the thwarts installed and decoration added. Capping rails fitted and the breast hook. Helmsman's seat also done. Next onto the hull decoration, fitting the rudder post and rudder and making the oars. The end is in sight!


- 161 replies
-
- 12
-
-
- pegasus
- victory models
- (and 1 more)
-
So much detail in the brakes alone. I don't know how you manage to see the tiny parts let alone assemble them!
-
Yes, more than enough to plank the inside of the bulwarks. I used some of the left over strips of wood to plank the interior of the bulwarks and to create the Captains cabin and the furniture within it on my Pegasus!
-
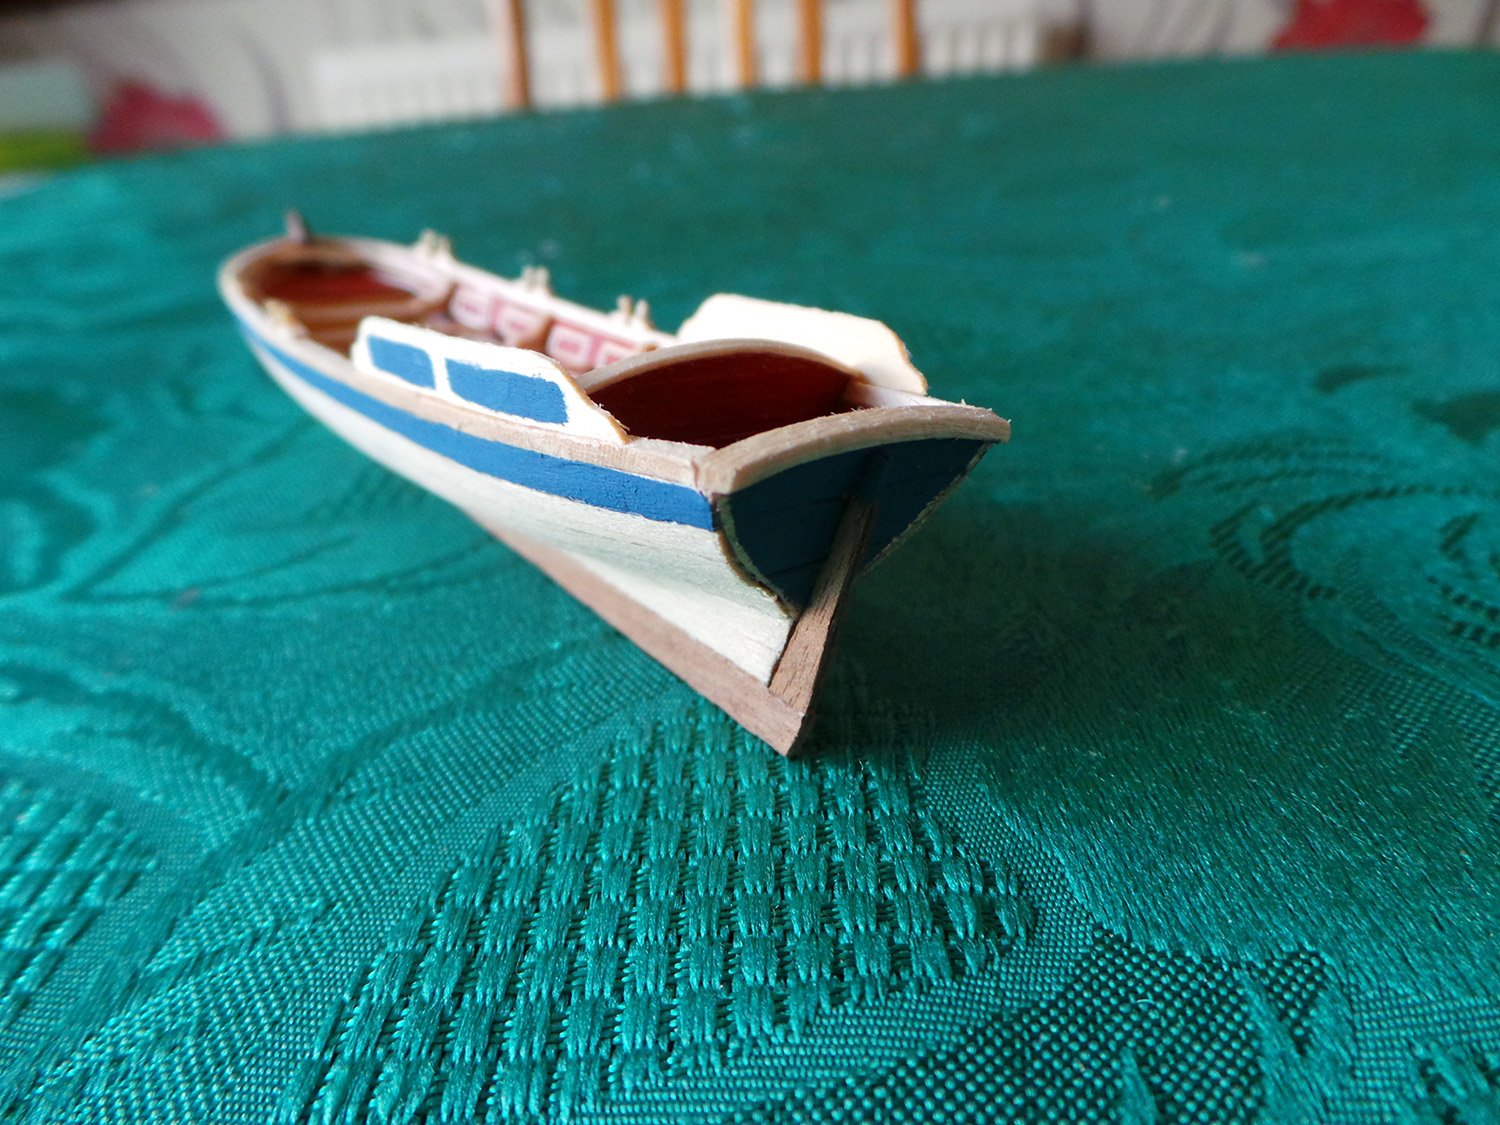
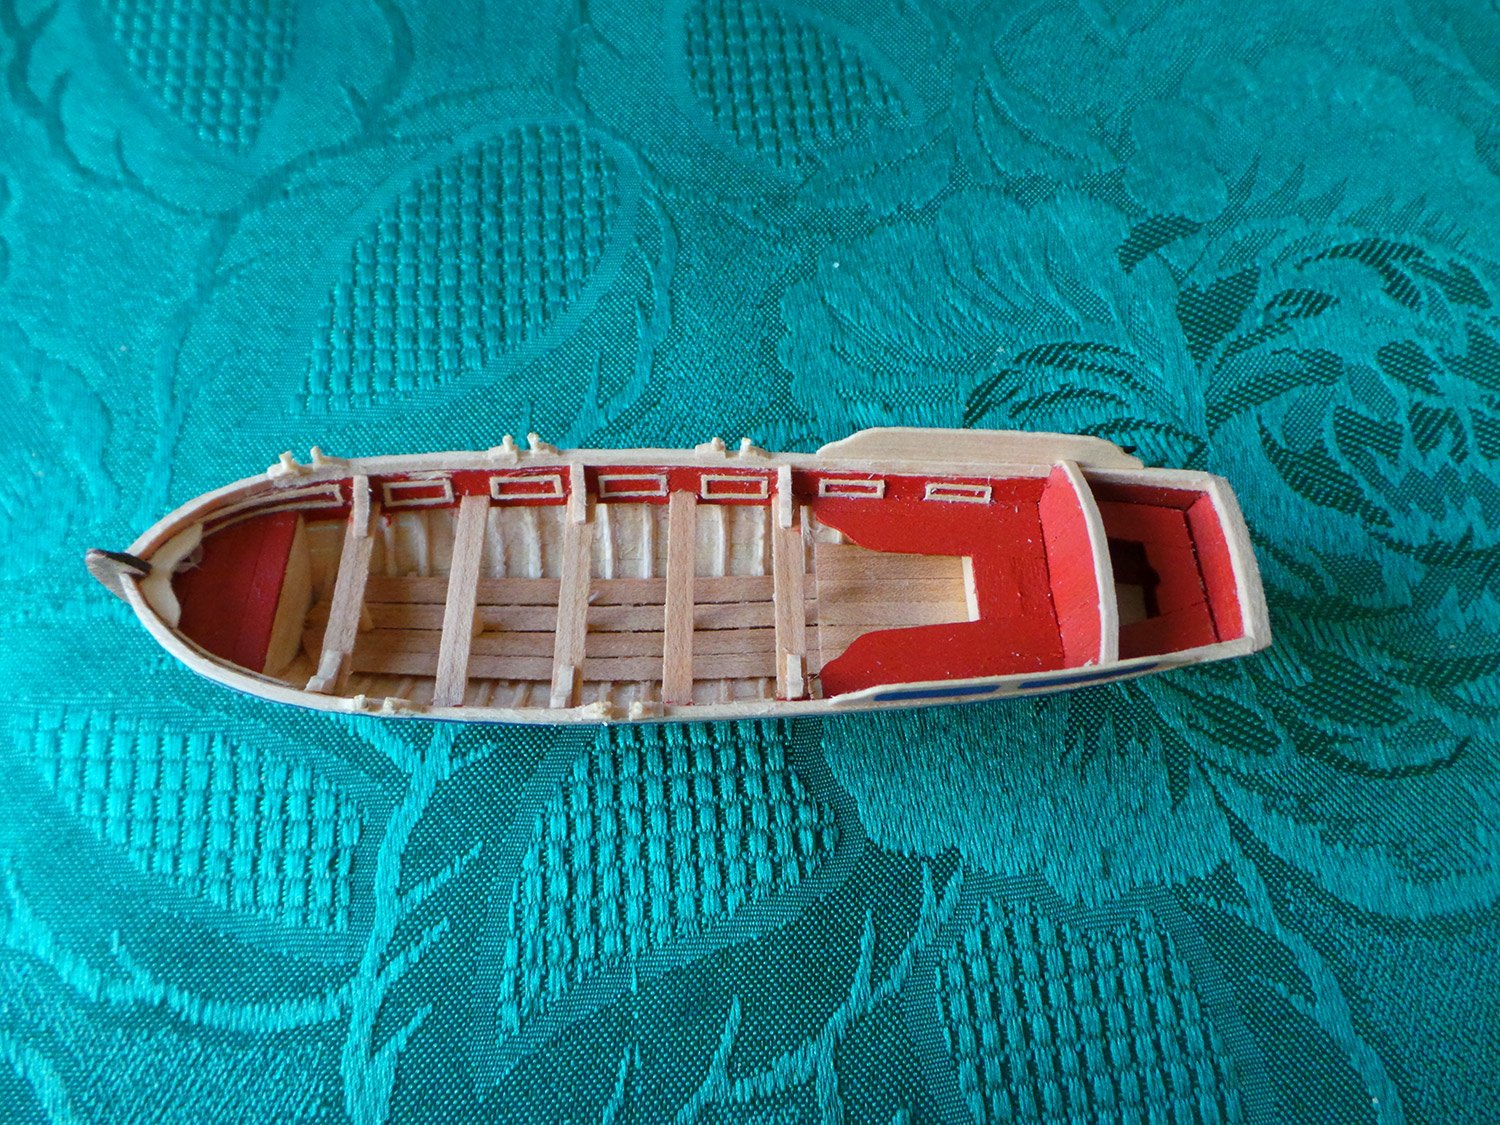
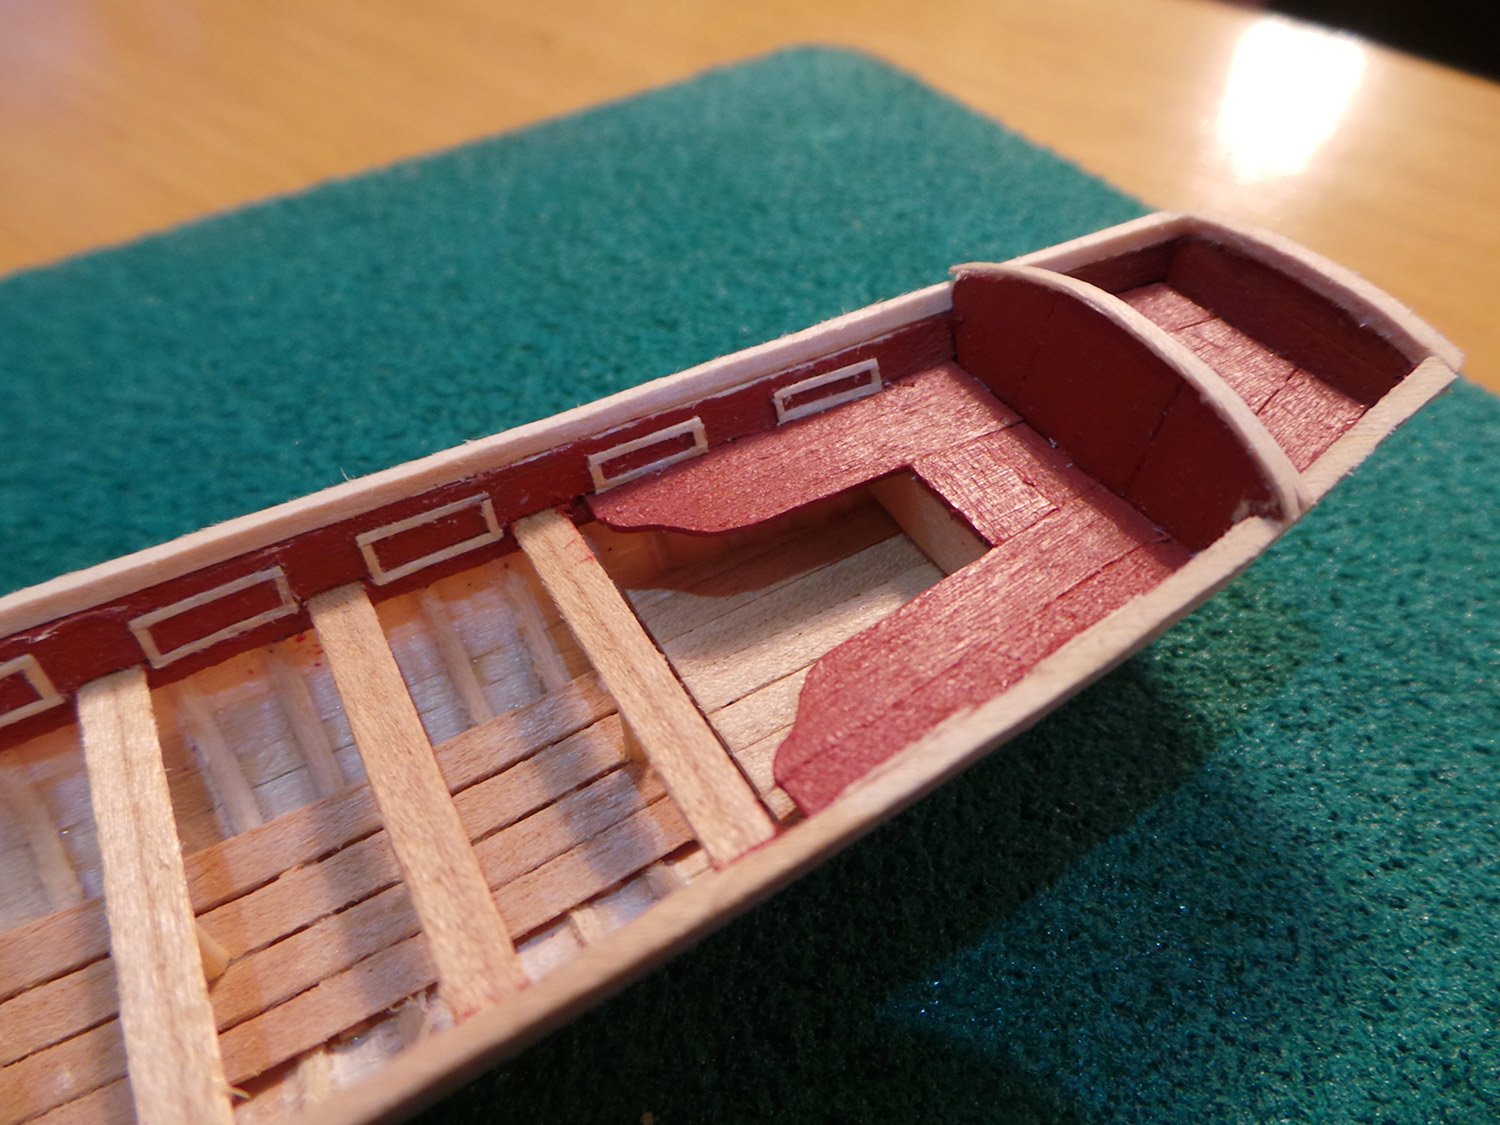
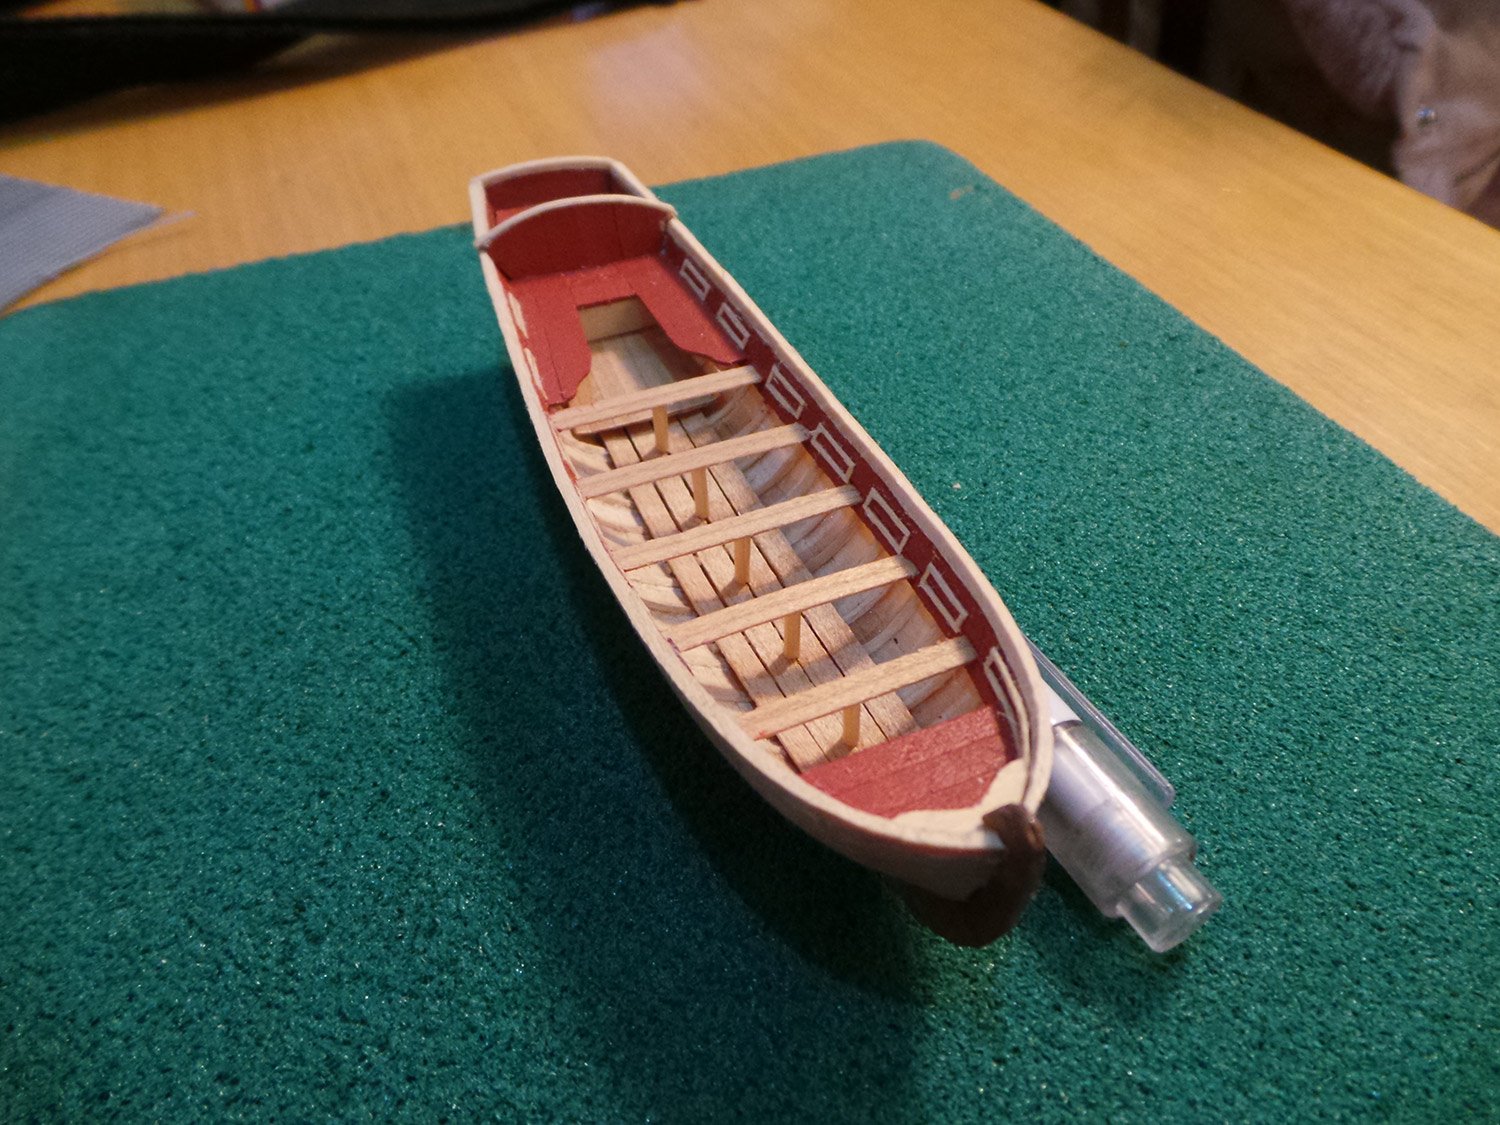
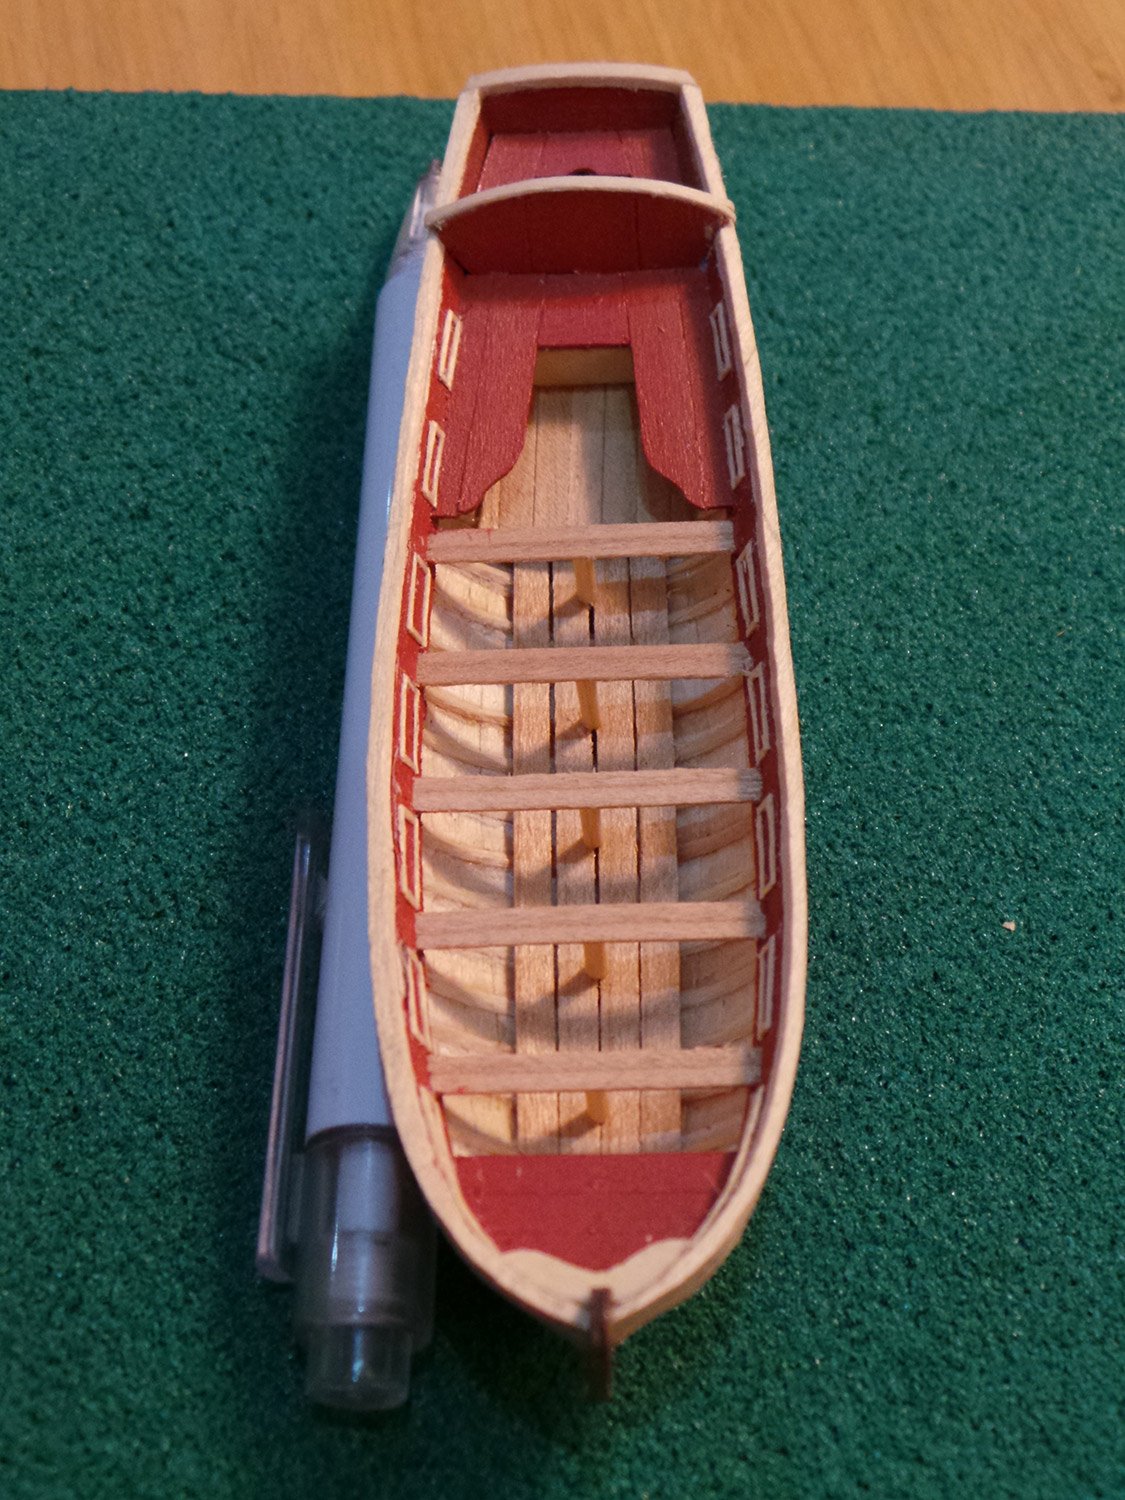
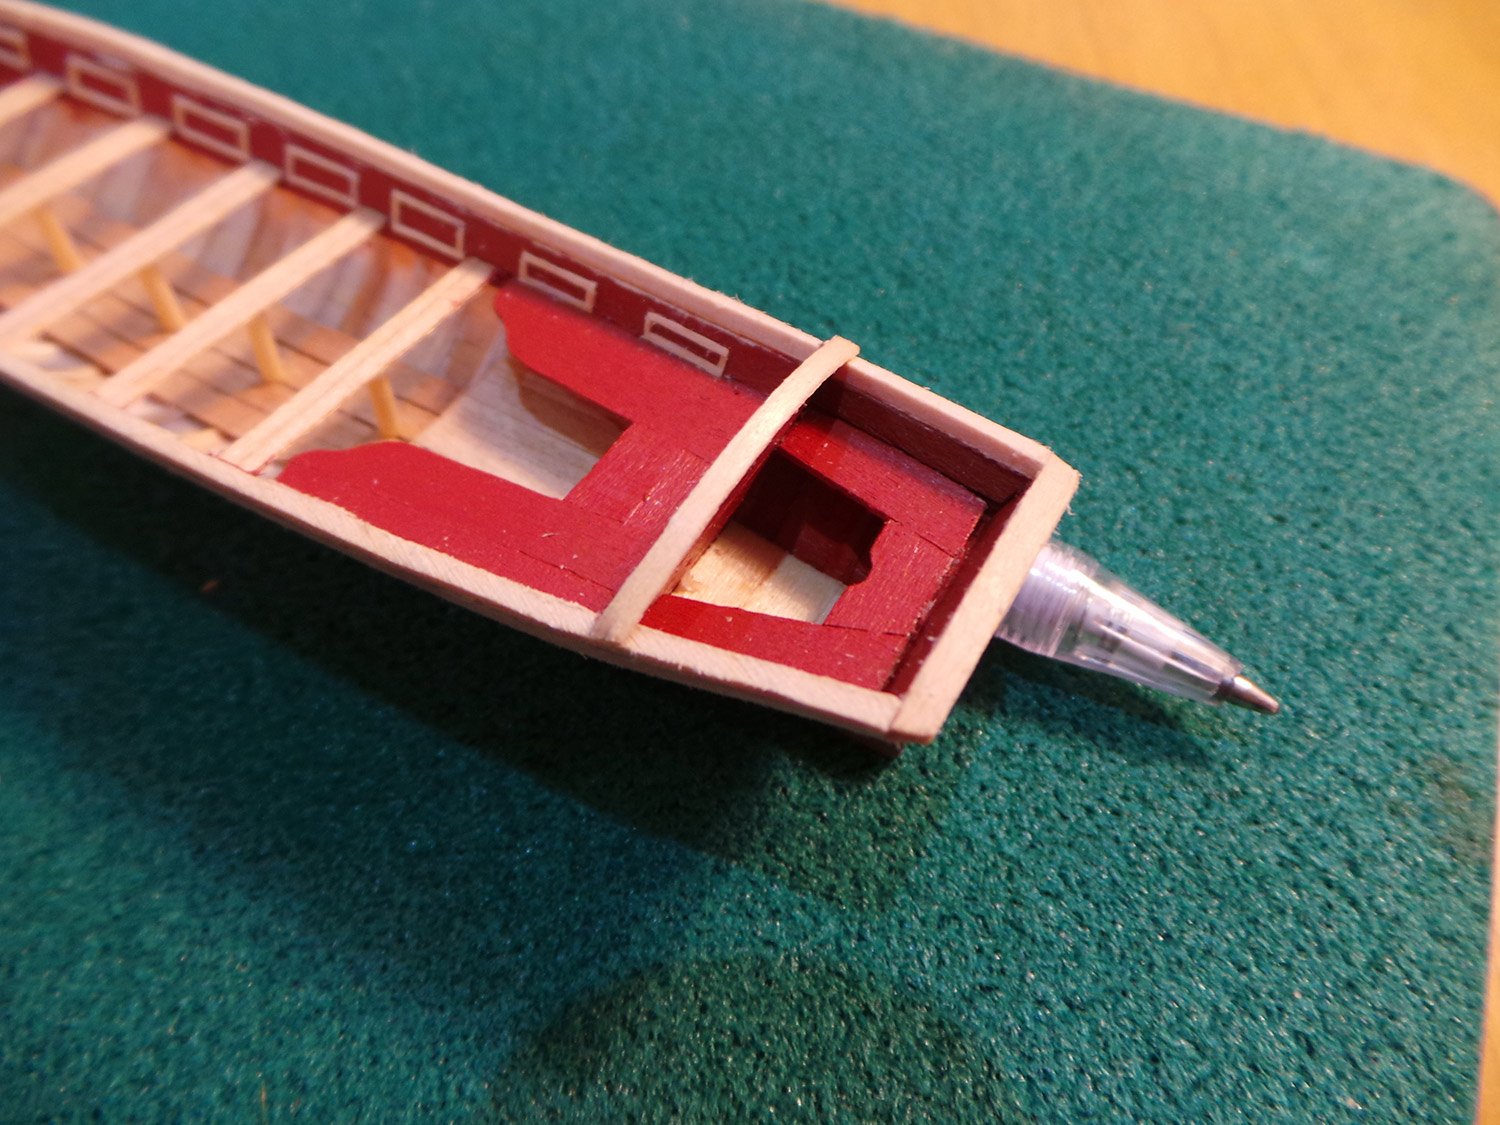
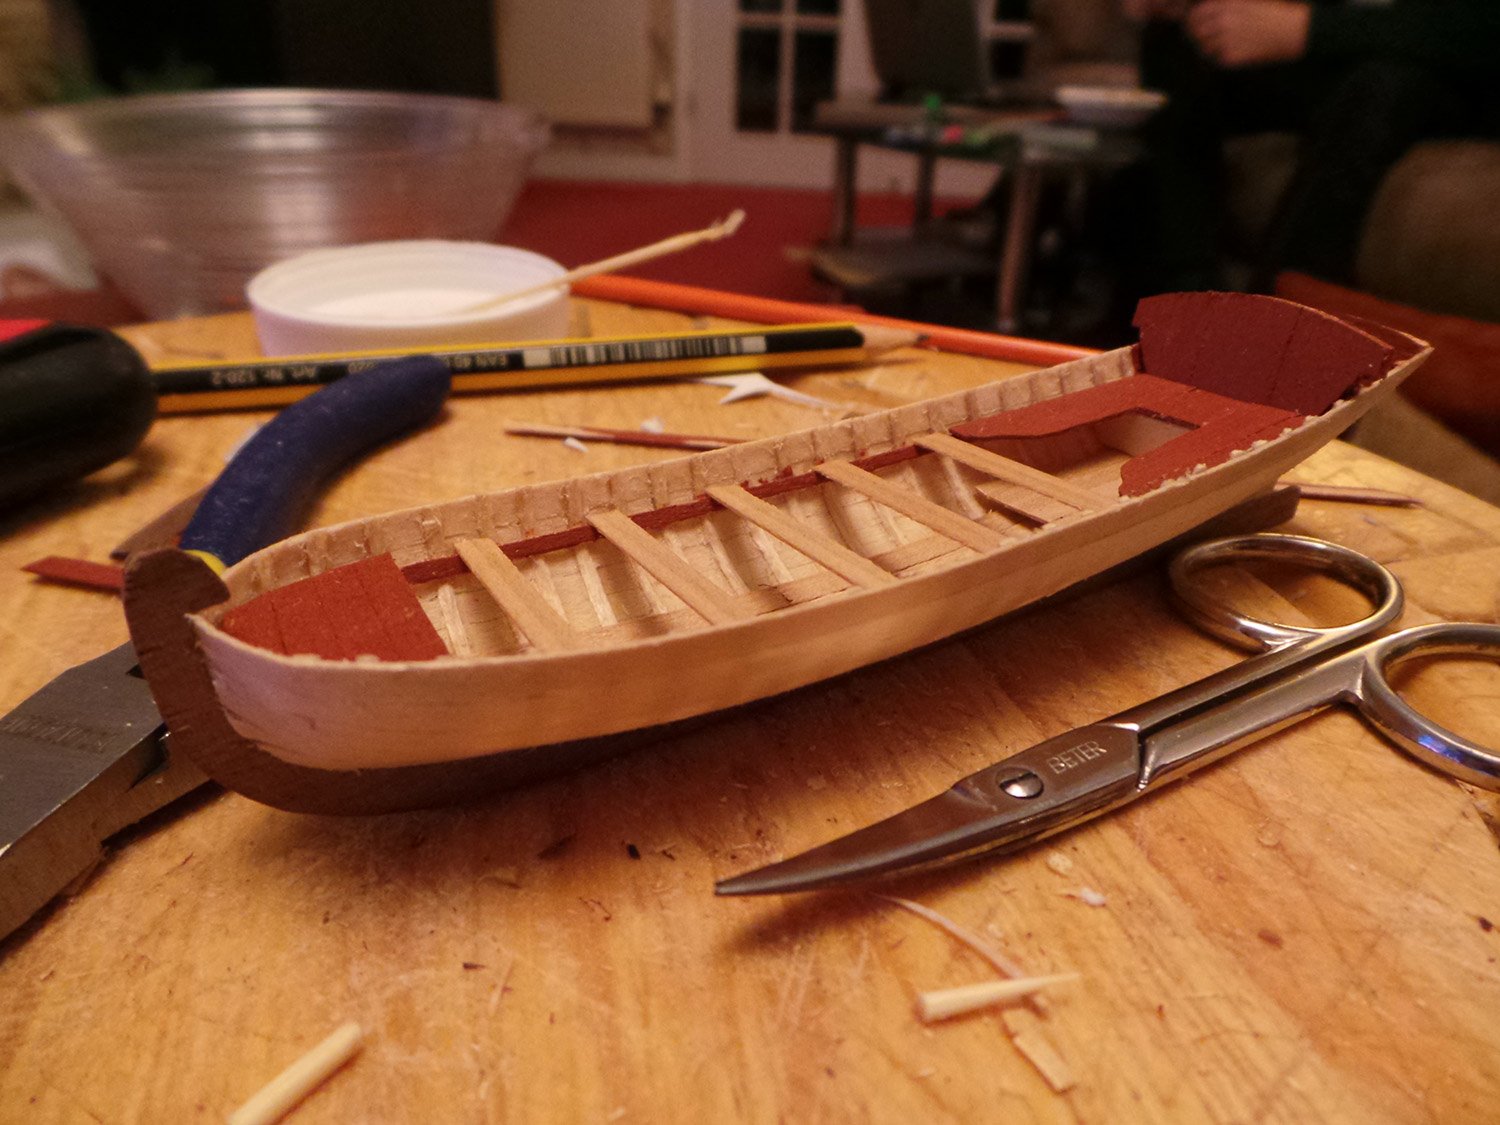
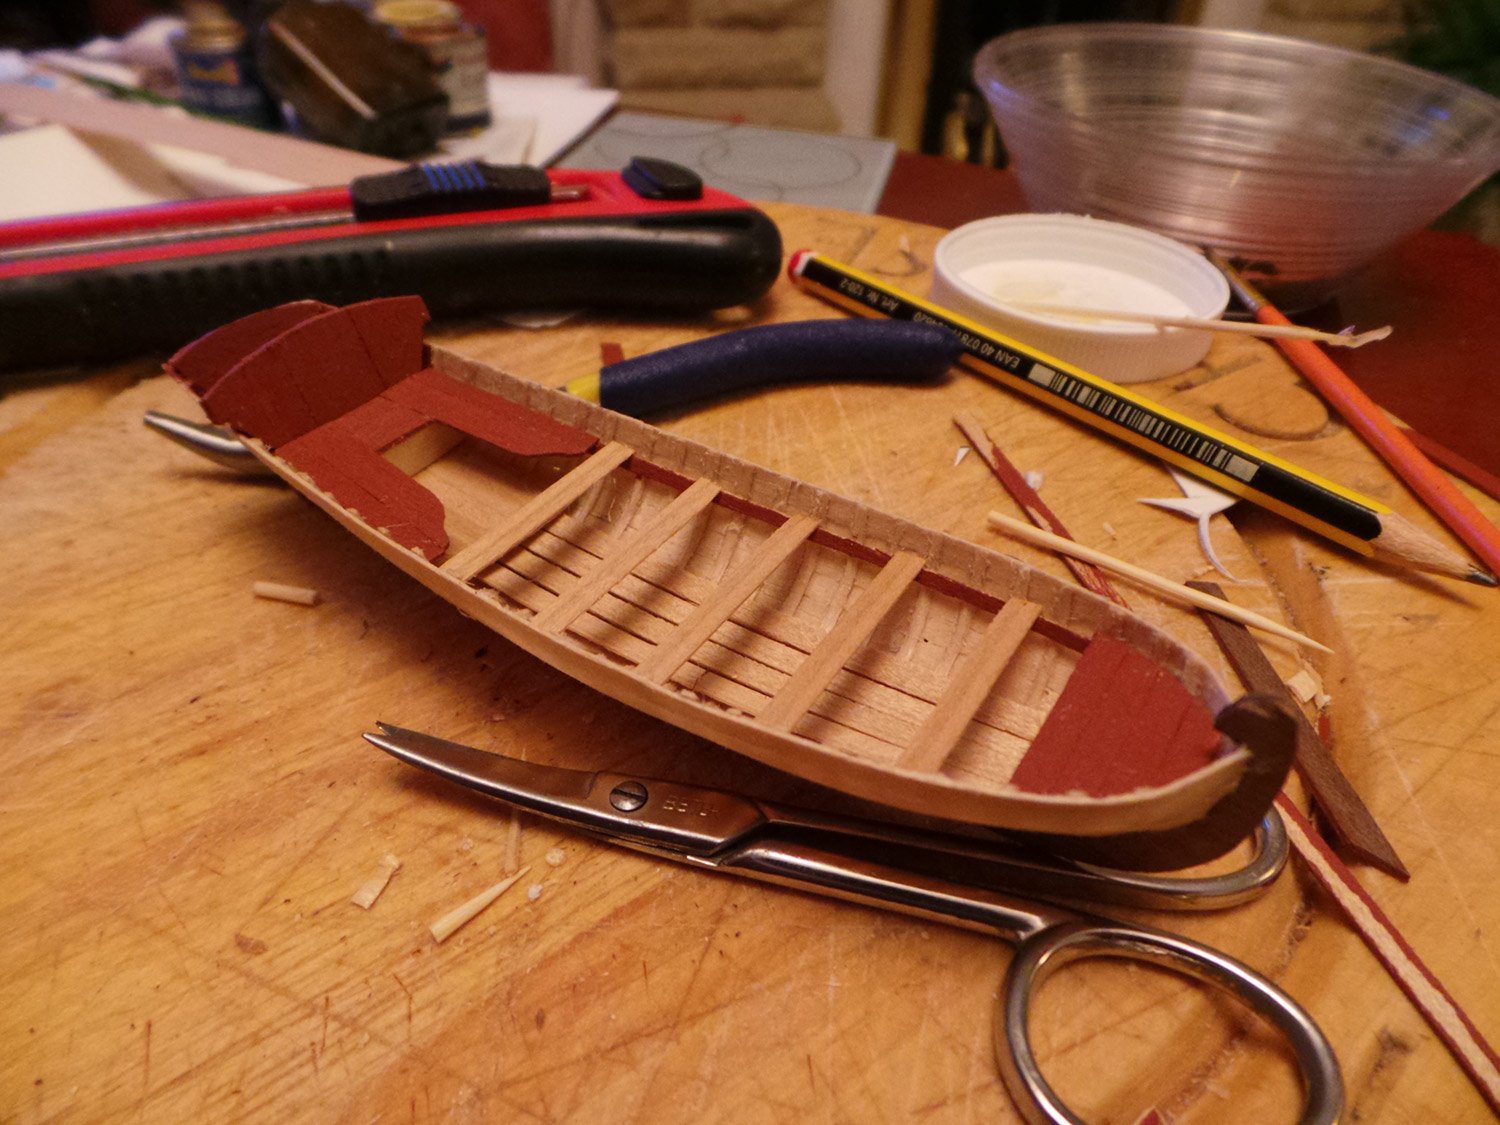
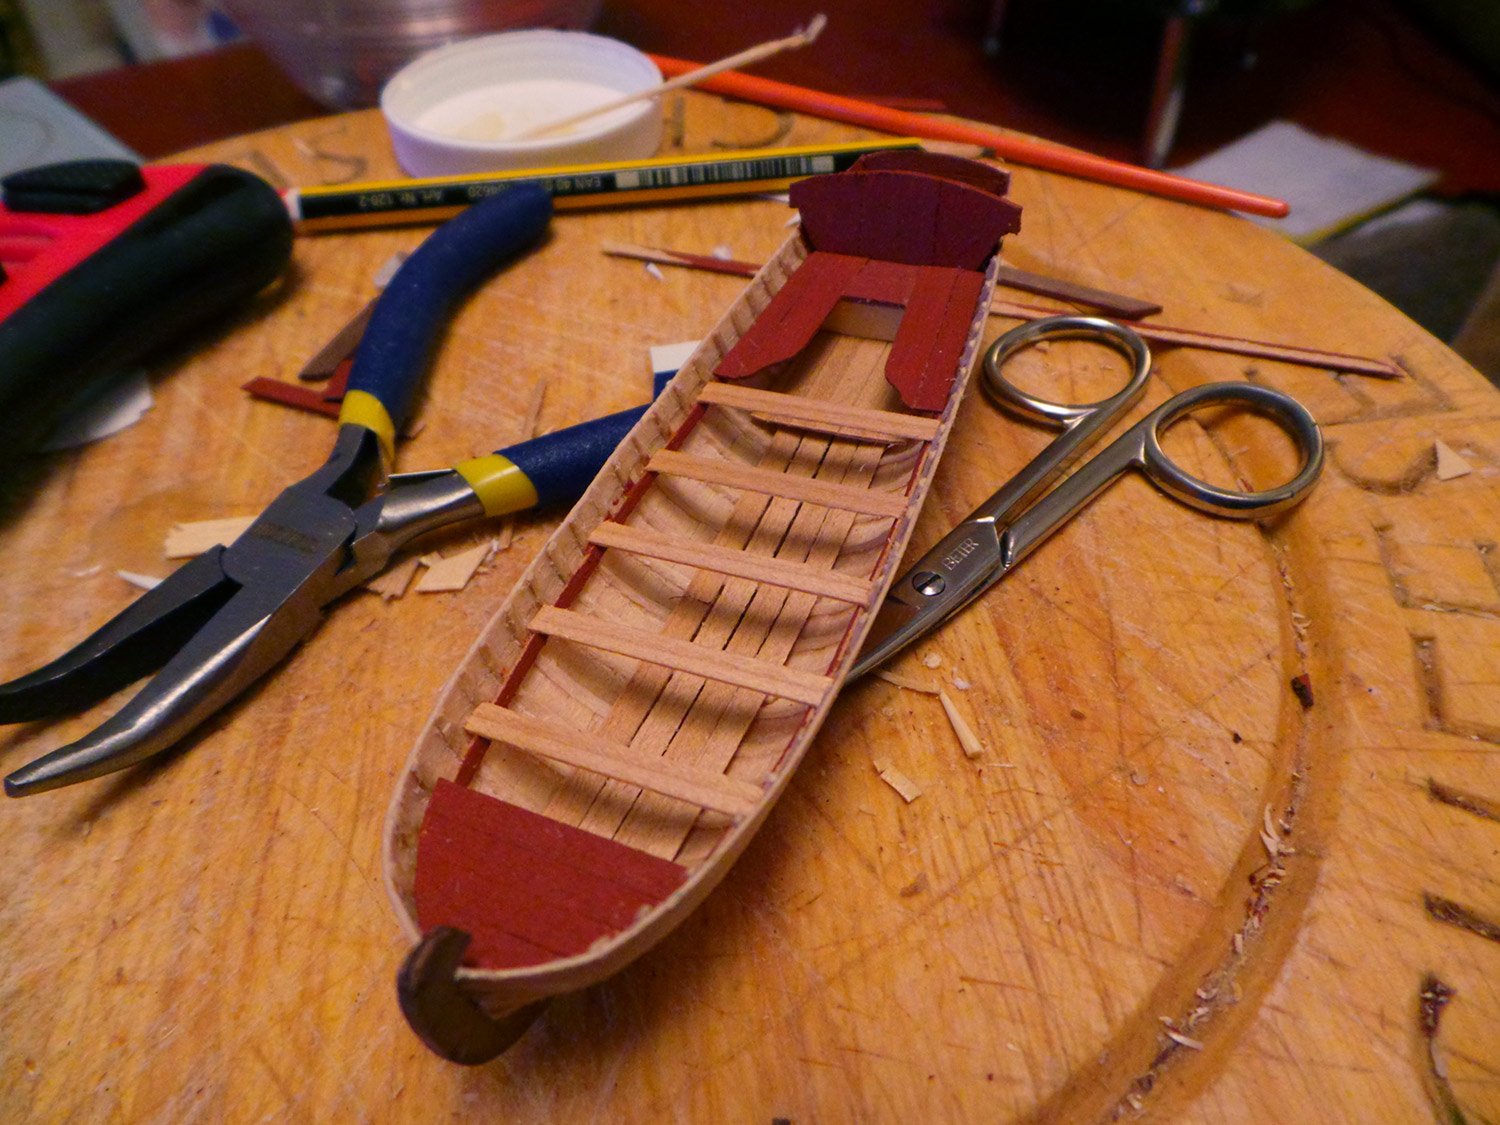
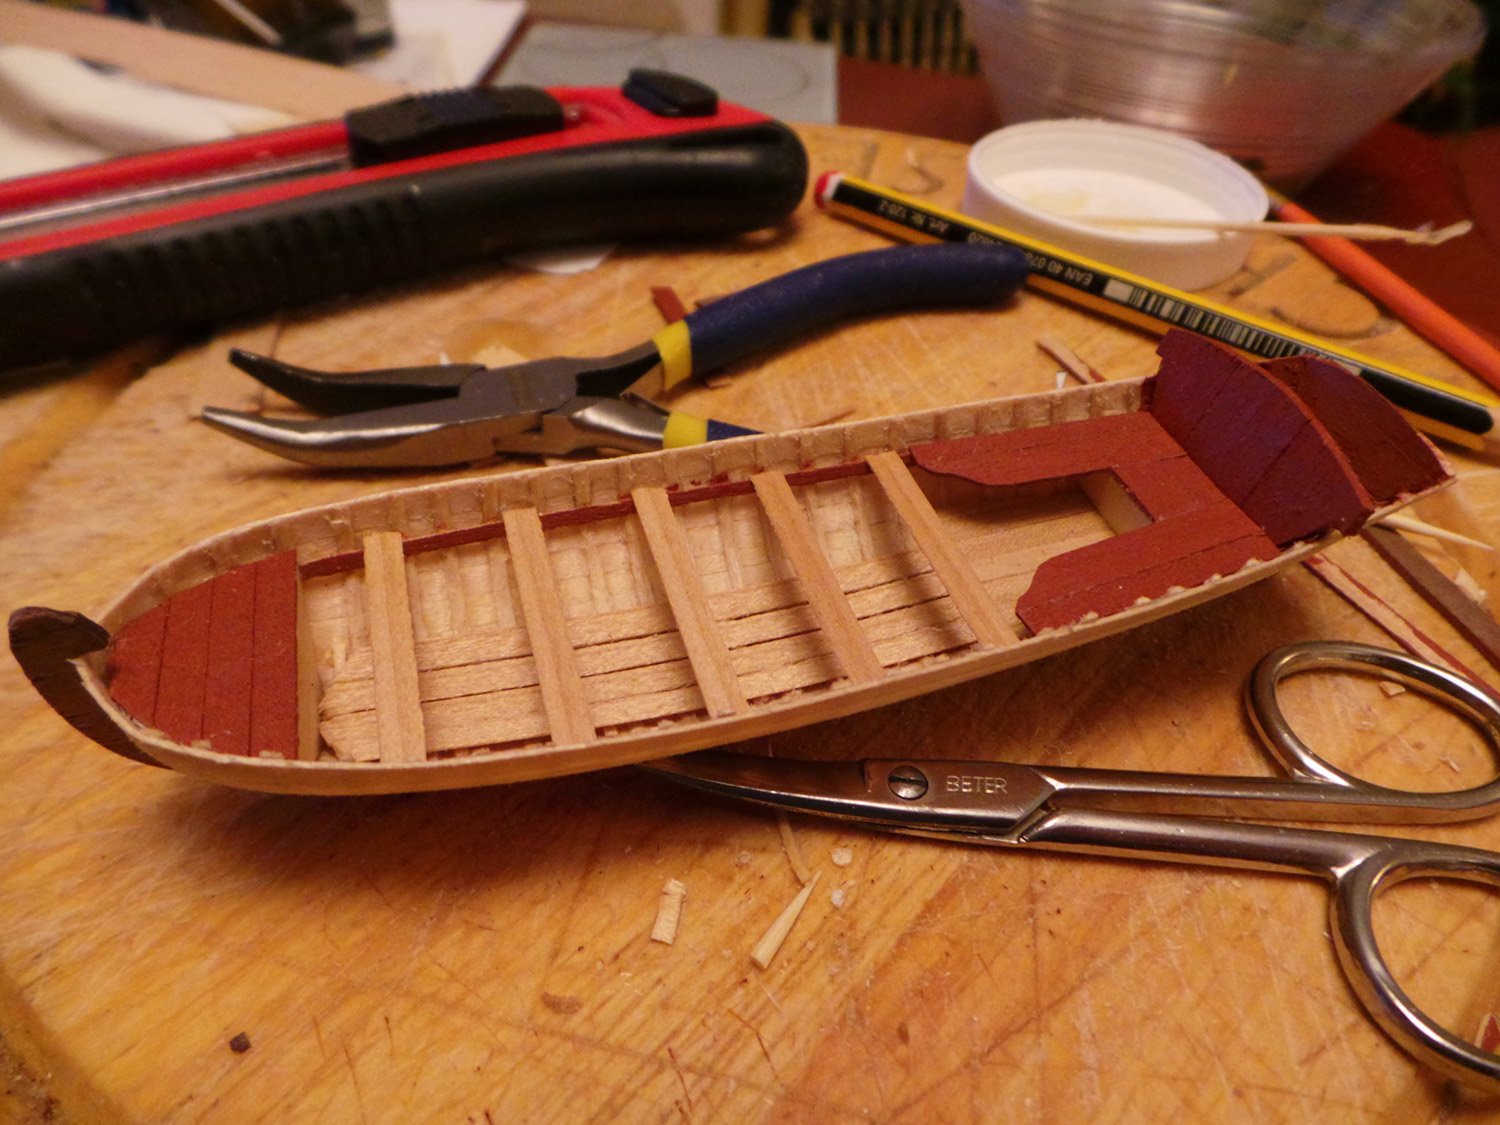
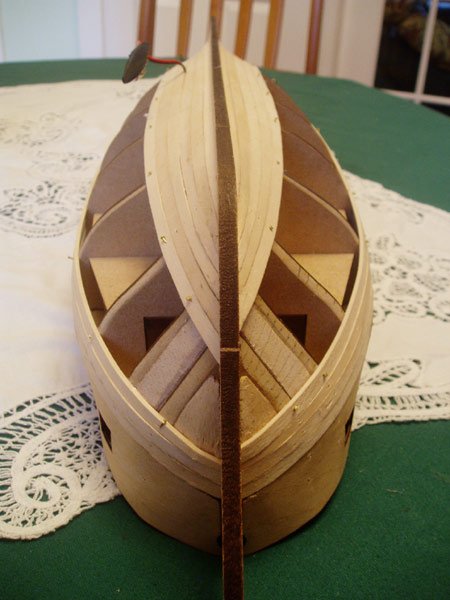
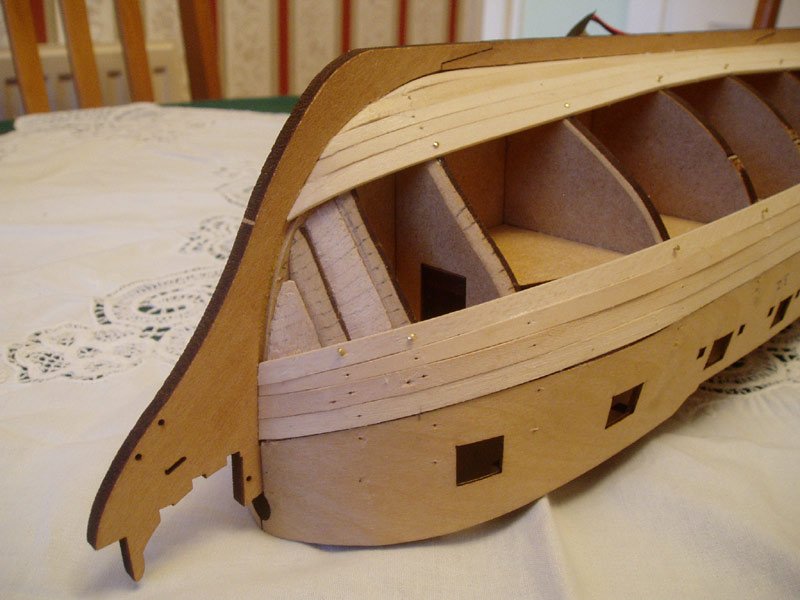
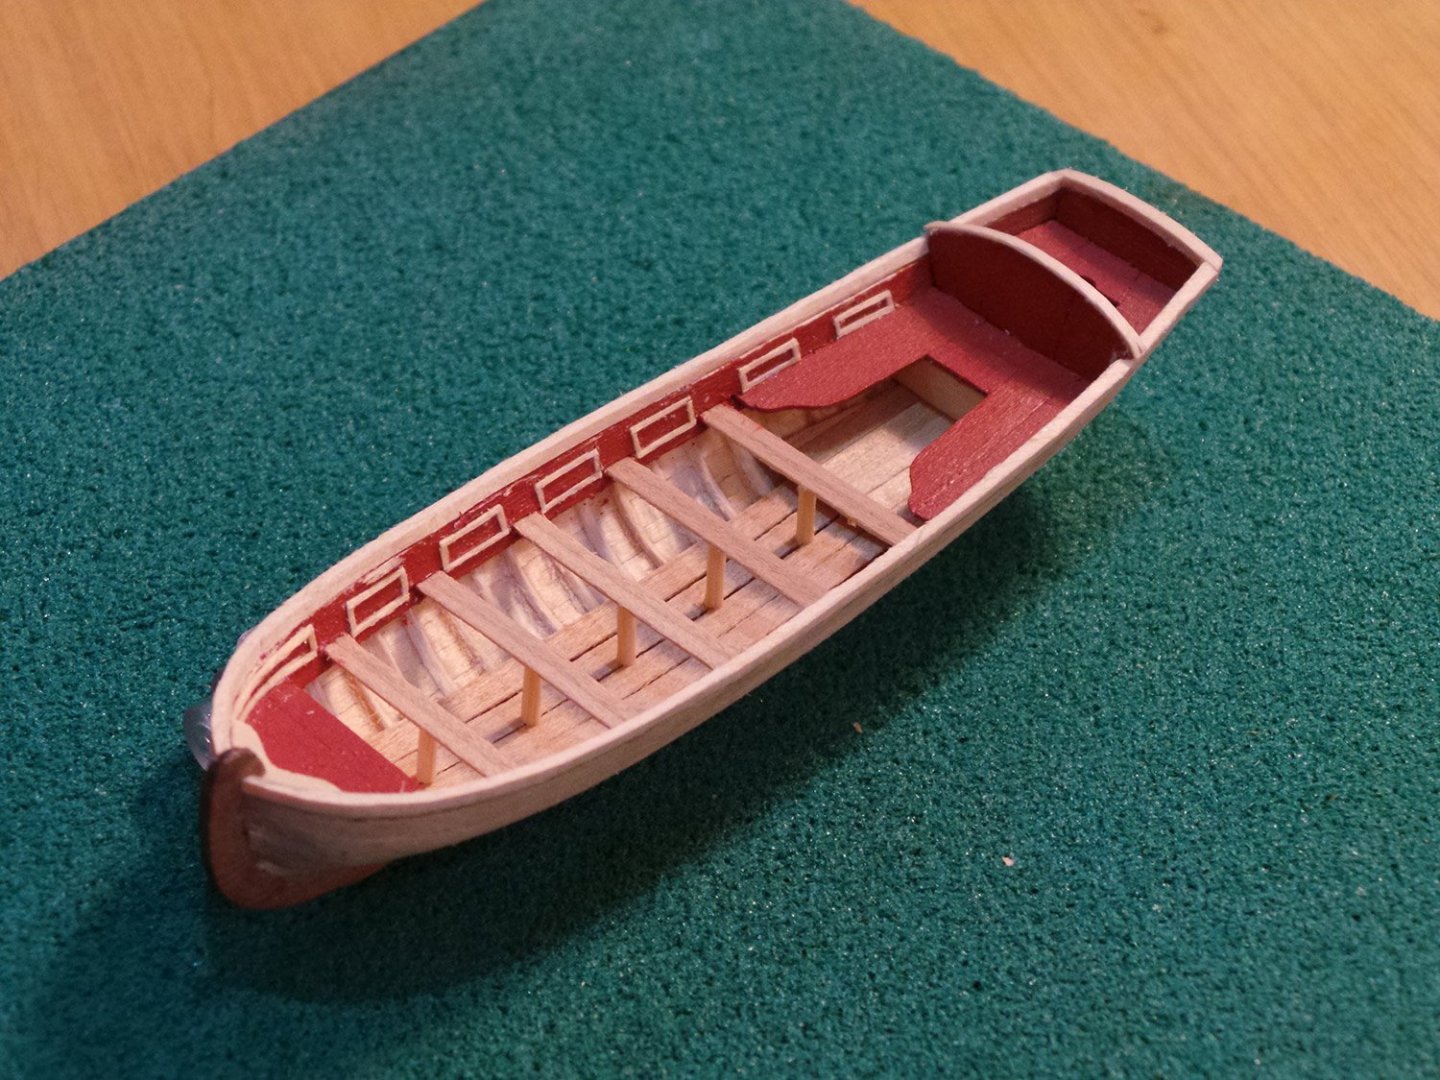
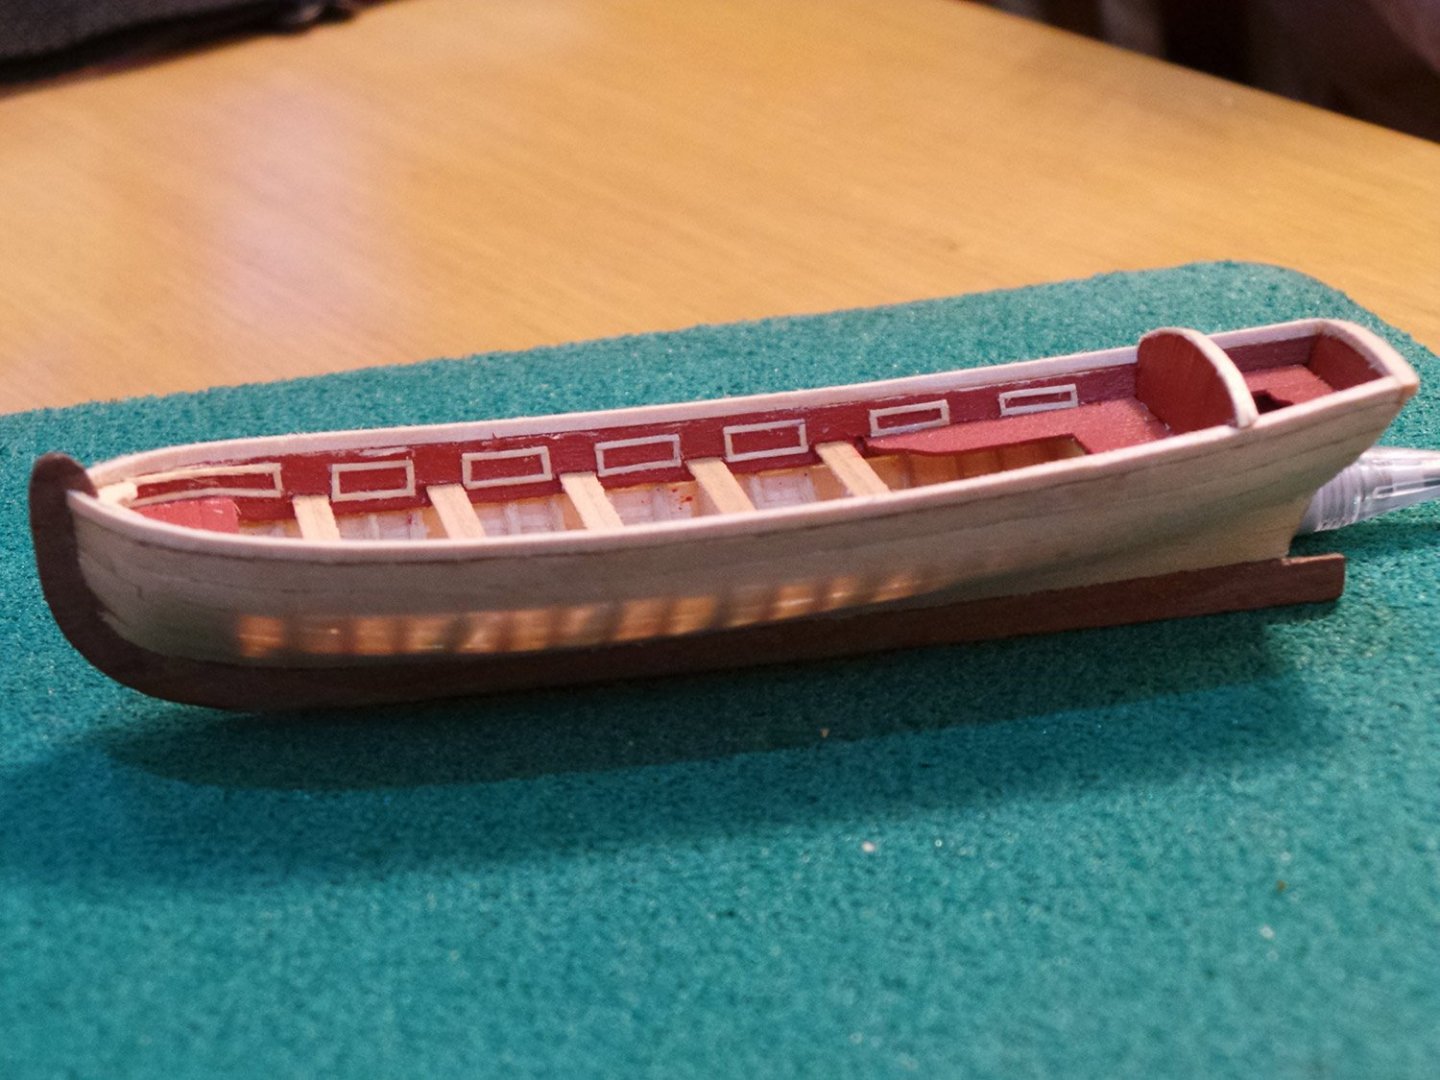
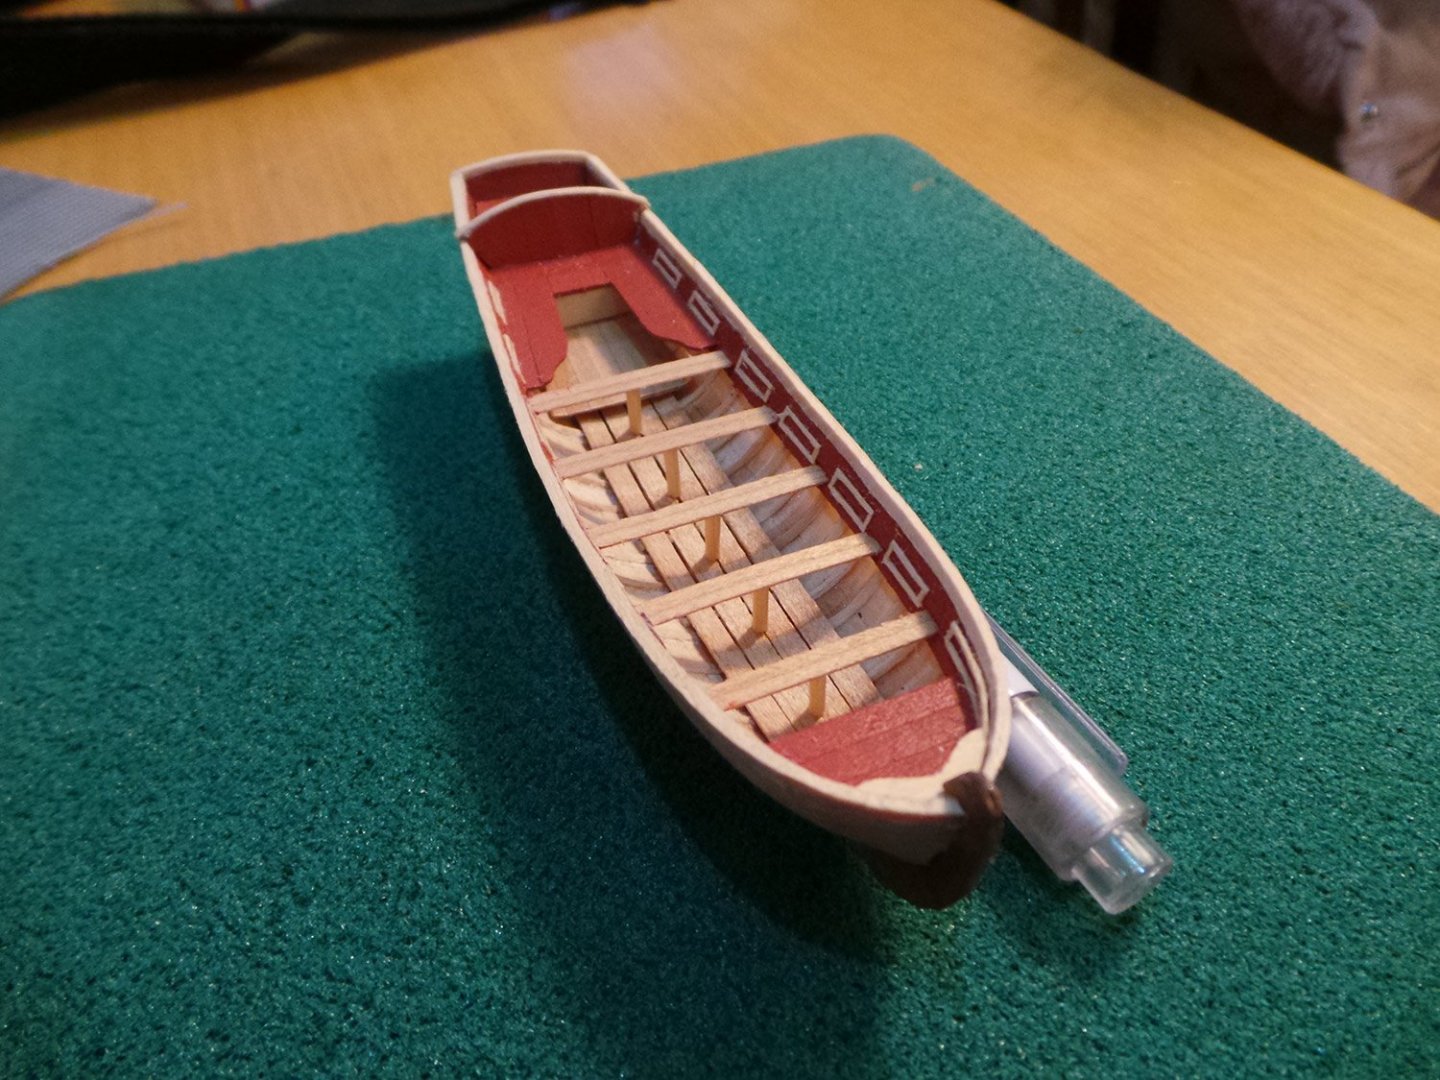
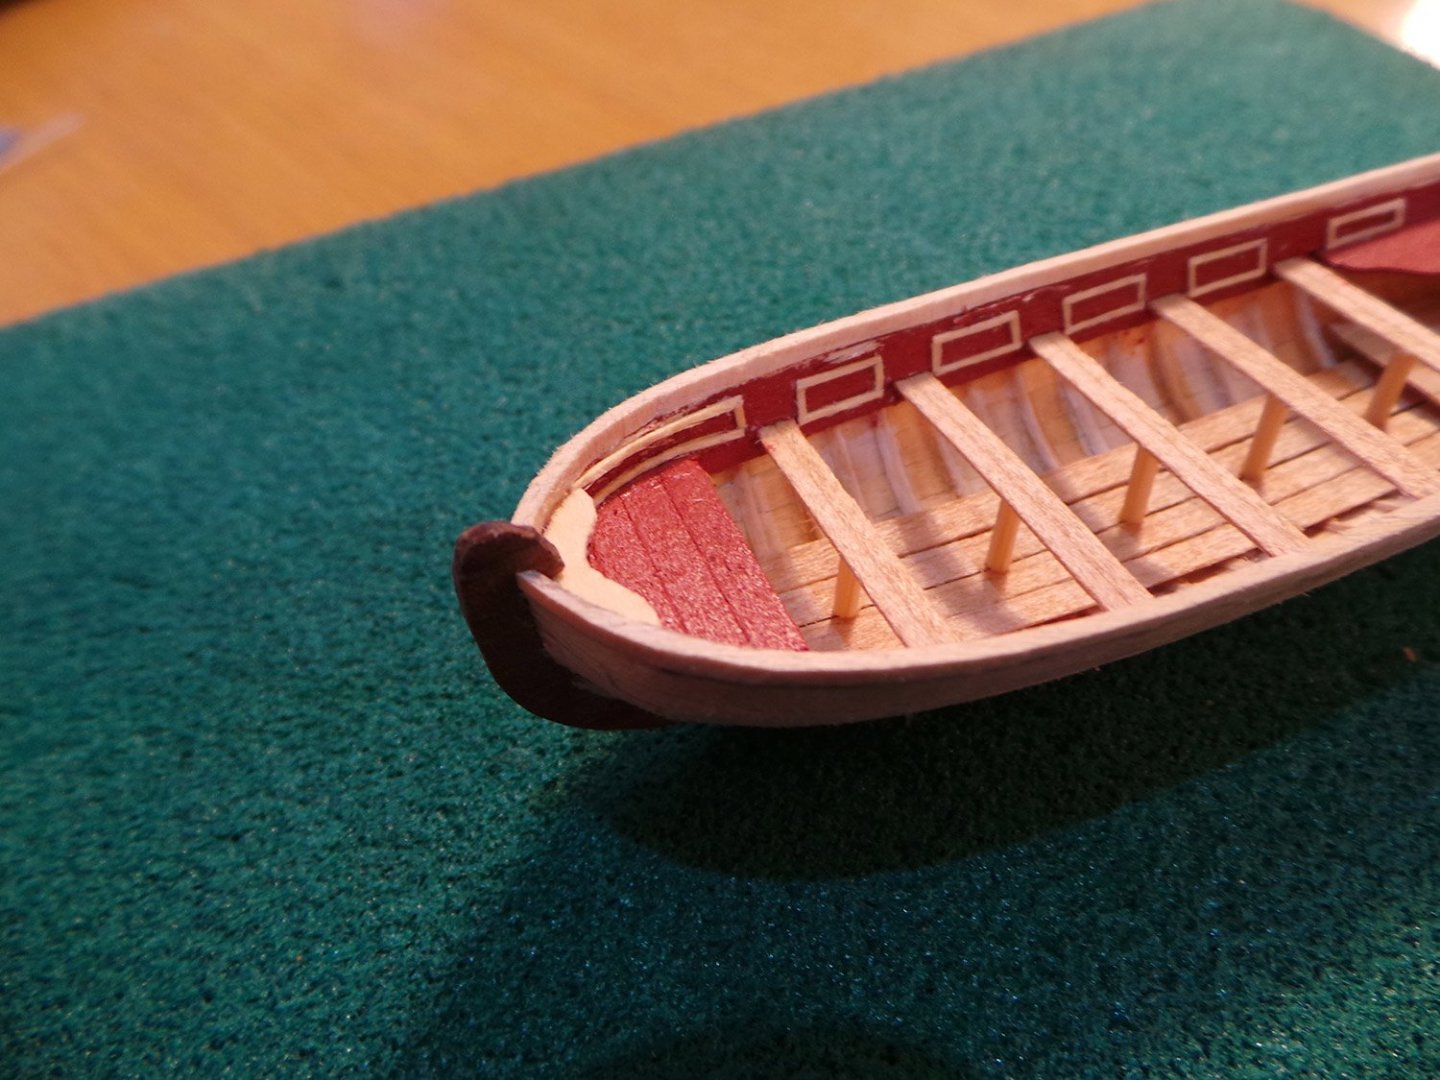
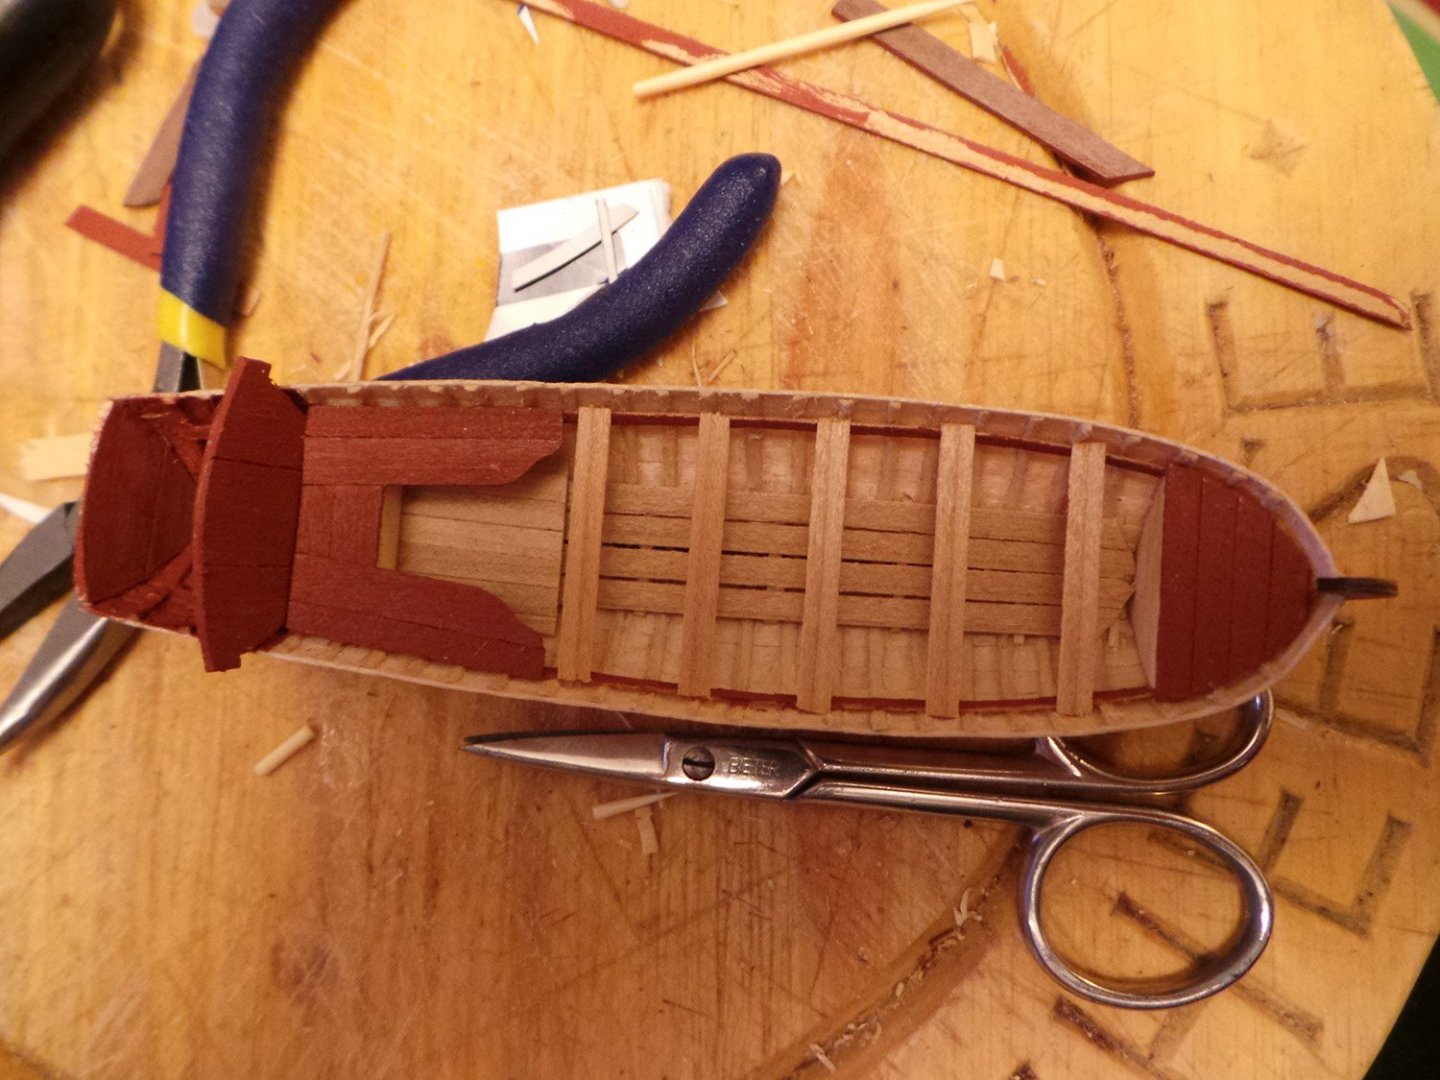
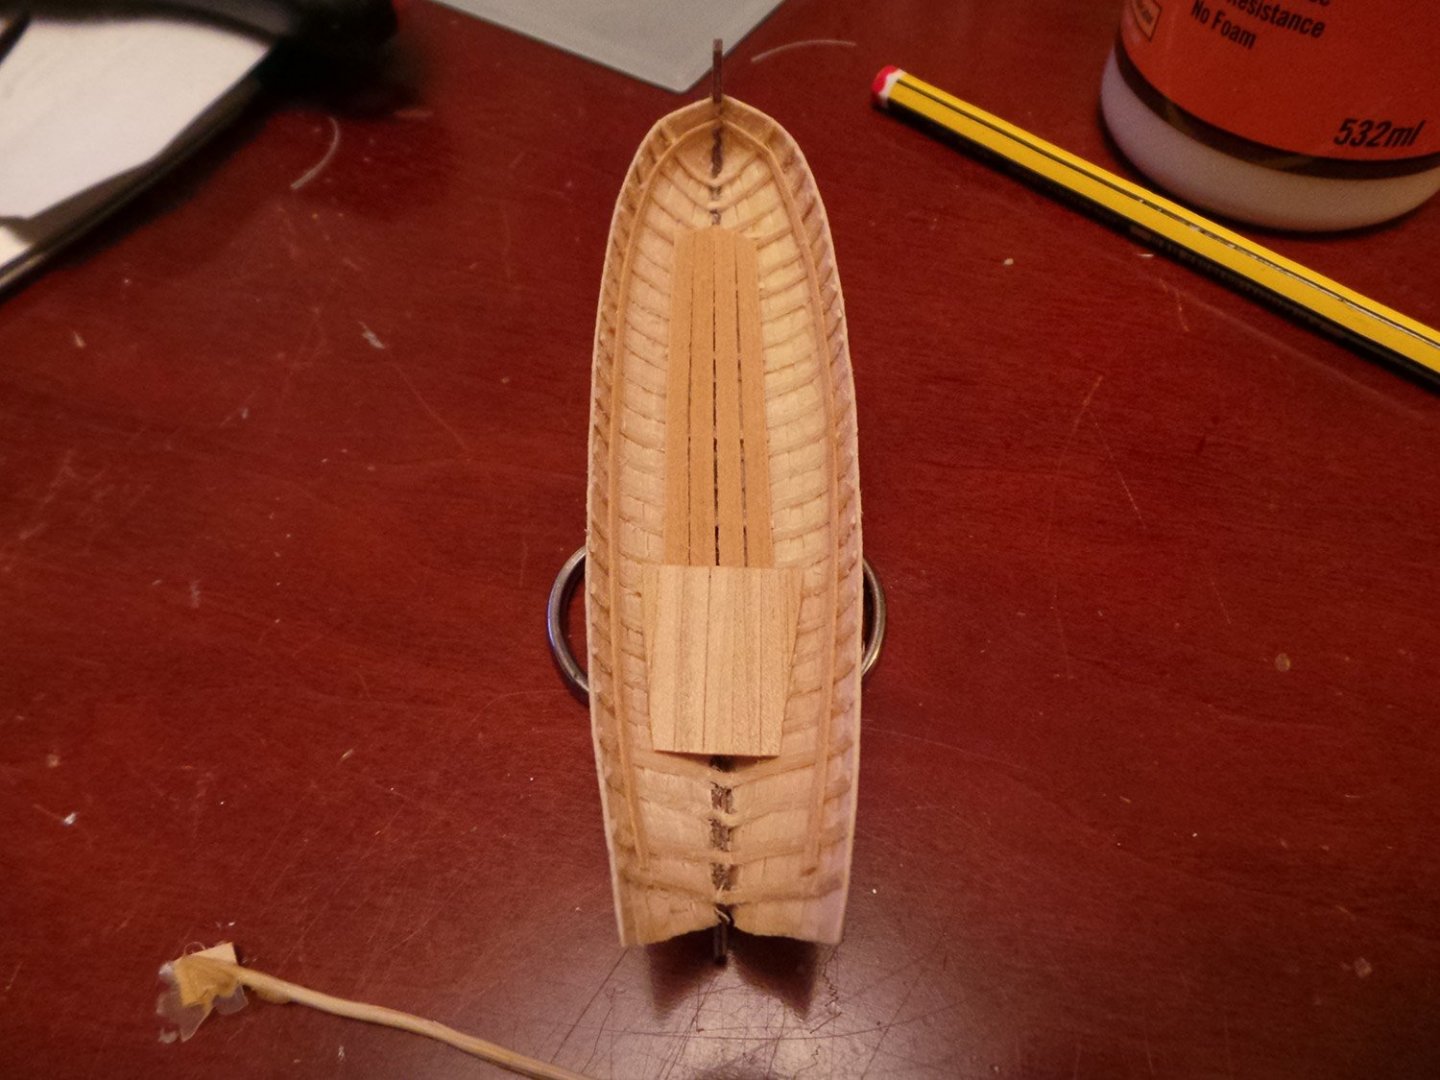
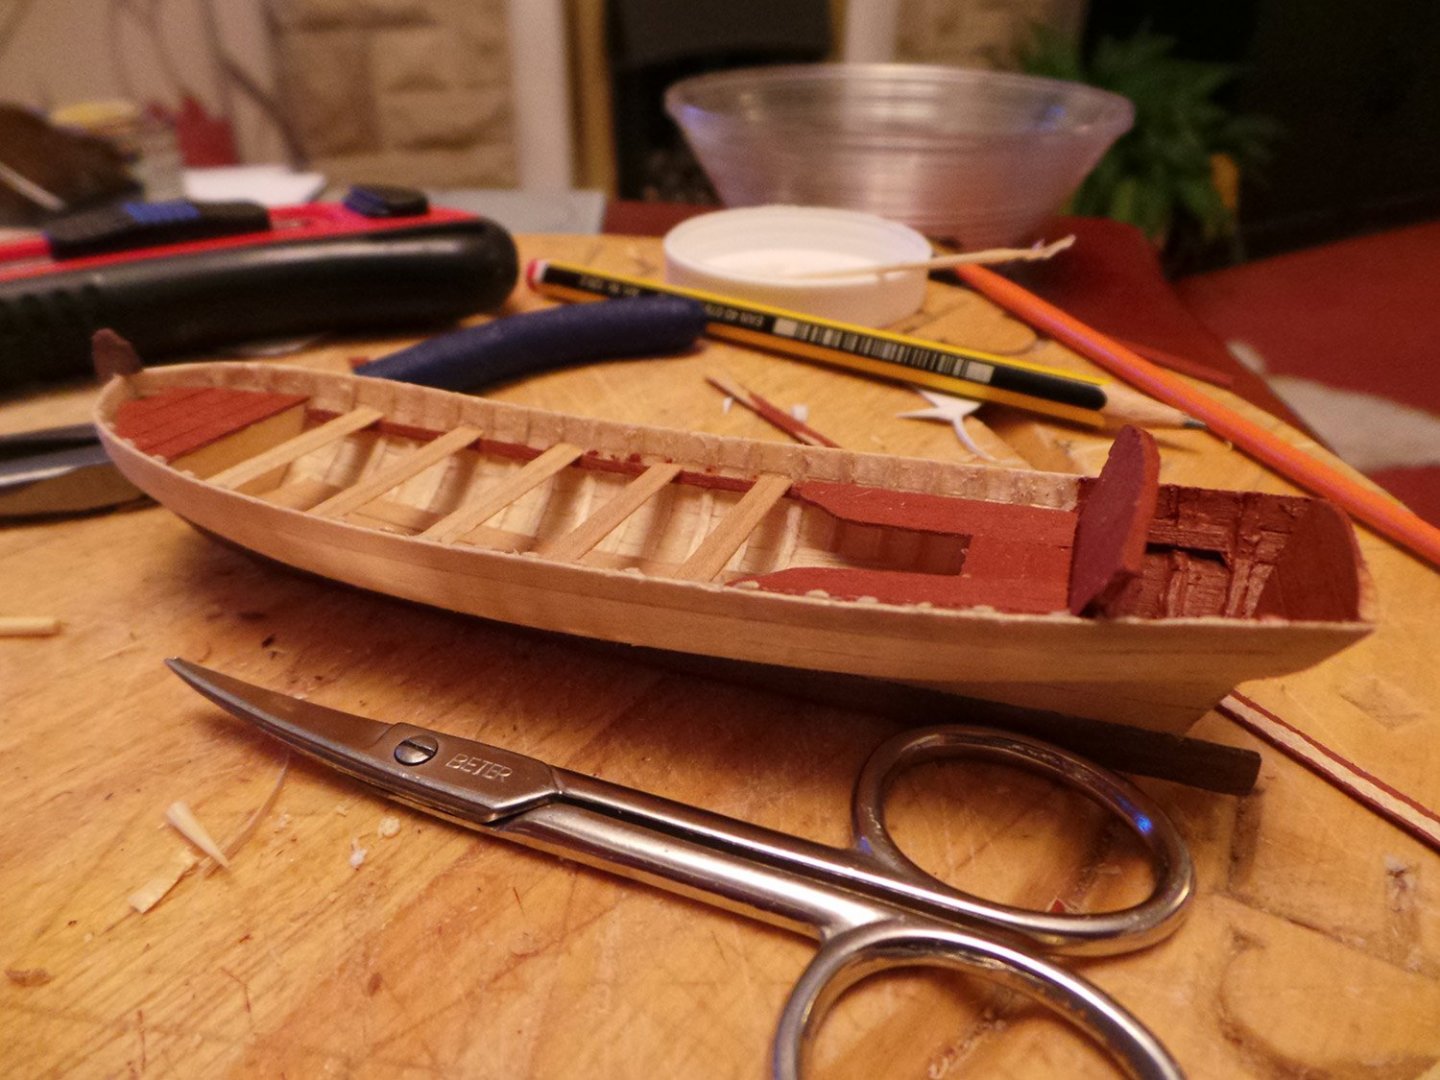
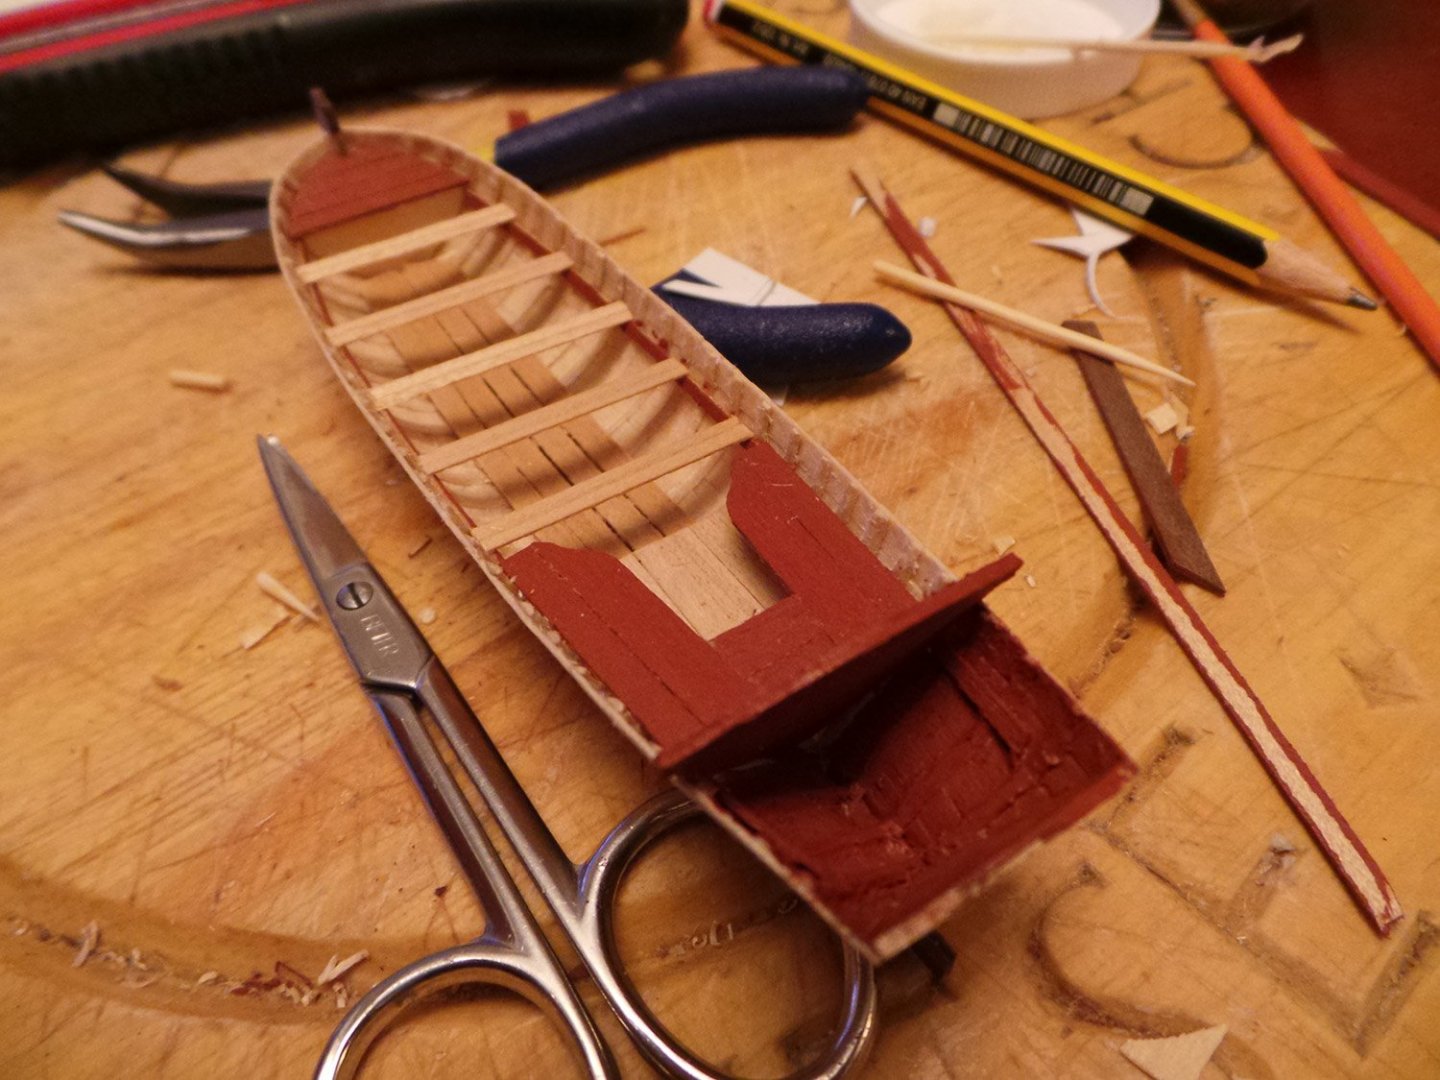
Thanks John, I'm enjoying this mini scratch build! Some more progress. A good clean up of the inside with my trusty Dremel and the interior looked a lot neater. Floor boards and platform installed and risers fitted. Yesterday I made the bow platform and cockpit seat back and fitted the transom. Today I fitted them to the Pinnace, along with the seat and thwarts. I still need to score the locker in the seat and add the hinges and I am cutting a toothpick down to make the stanchions for under the thwarts.


- 161 replies
-
- 12
-
-
- pegasus
- victory models
- (and 1 more)
-
There is really no hard and fast rule of how to proceed, it is mainly down to a matter of personal choice. For my first build (San Francisco) I put off the planking as long as possible and did what other things I could first before having the 'courage' to attempt my first hull planking. On my second build (Pegasus - still in progress) I was happy to do the hull planking and did both planking layers before removing the bulkhead posts and finishing the deck, but I did leave varnishing the deck until I'd done the hull in case glue found it's way on deck, it could then be easily scraped off without damaging a varnished finish. (I didn't thin the varnish down, it was runny enough for me, but experiment with a mock up and see what suits you best.) Again, it's down to personal choice, but for completeness I planked the area on my Pegasus - I know it's there even if it it isn't easily seen!
-
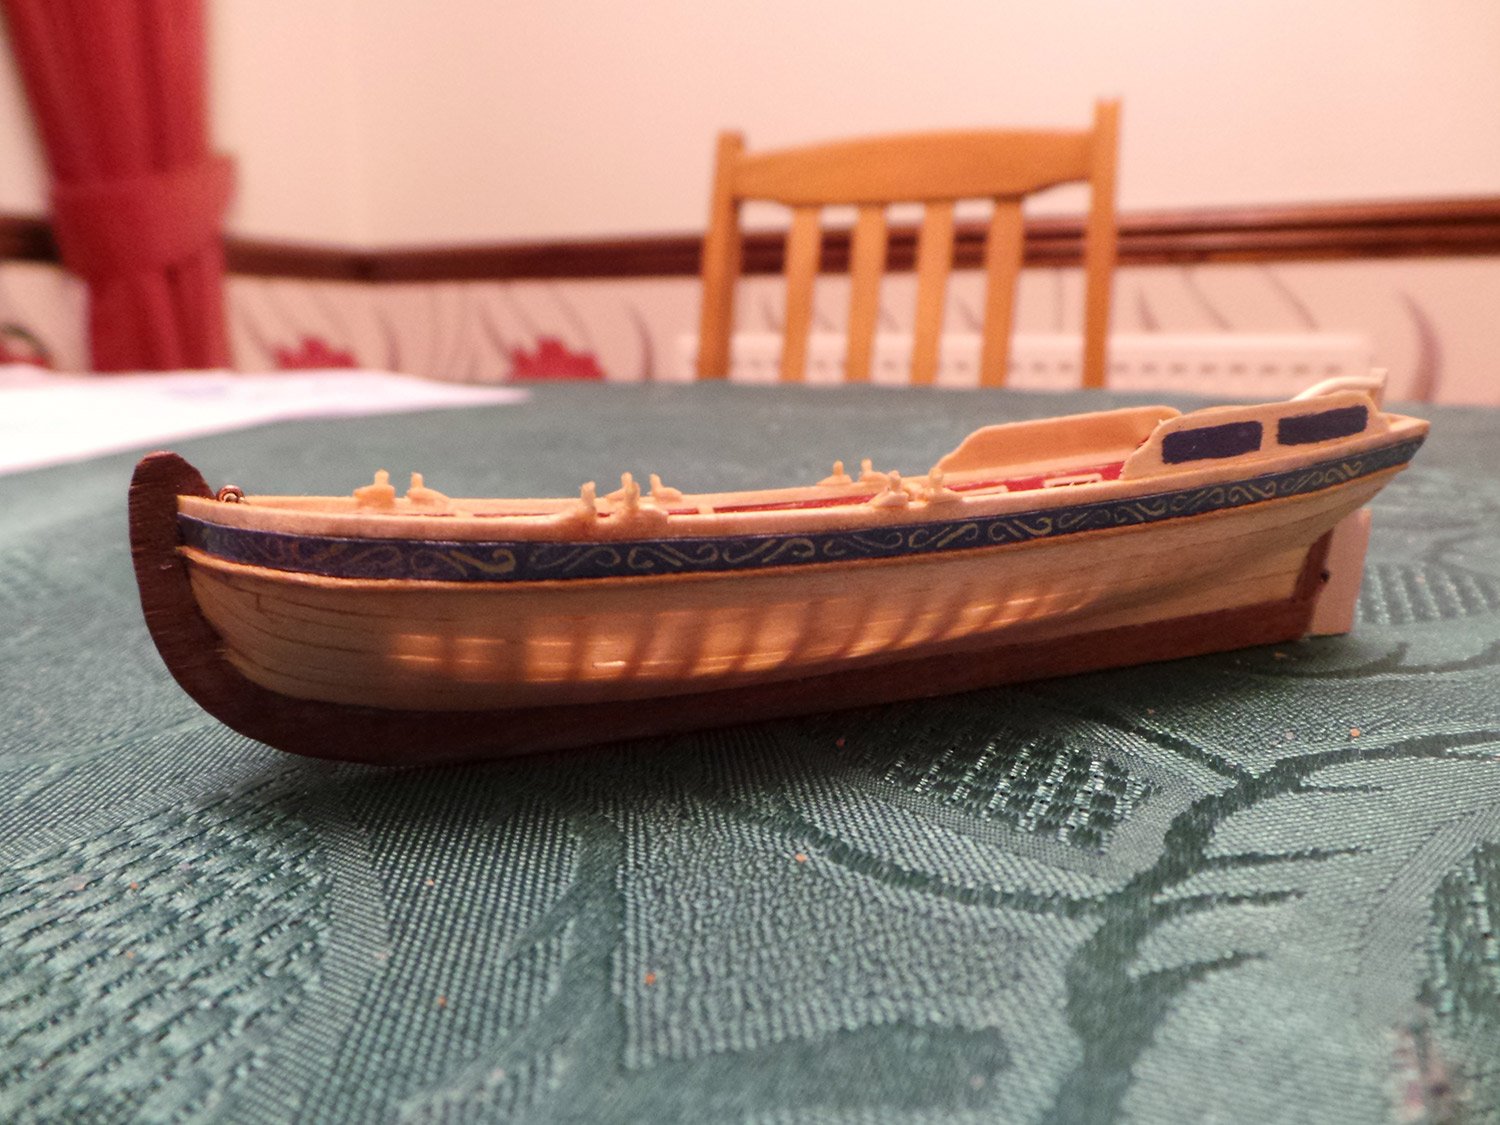
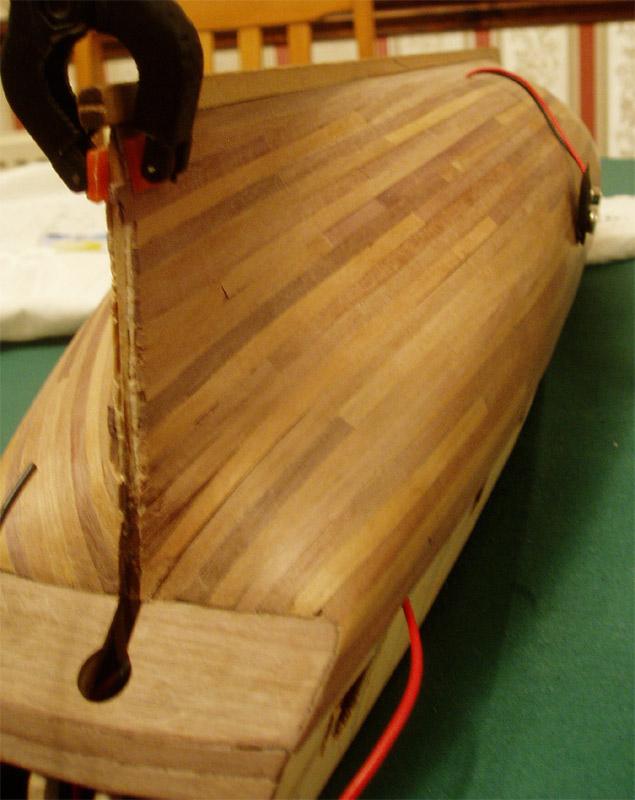
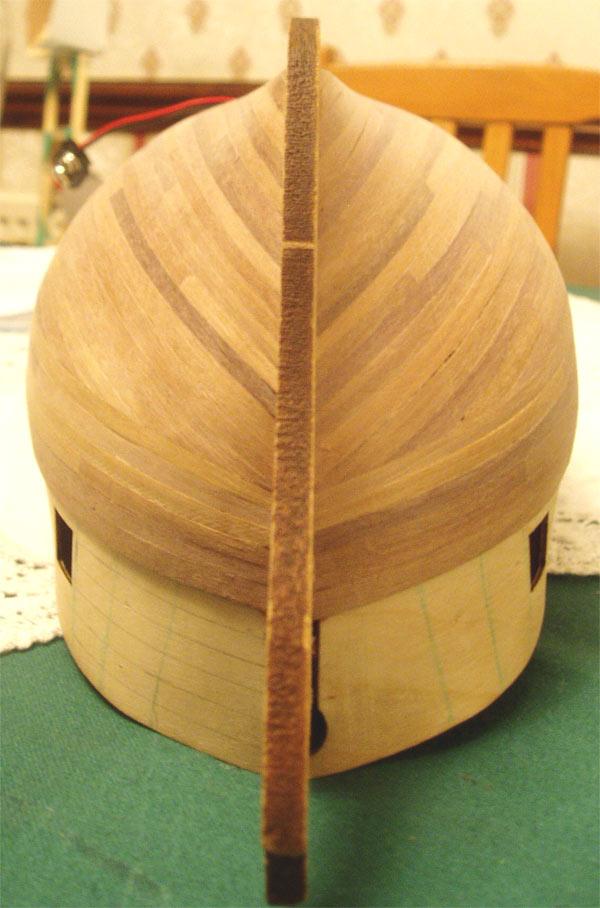
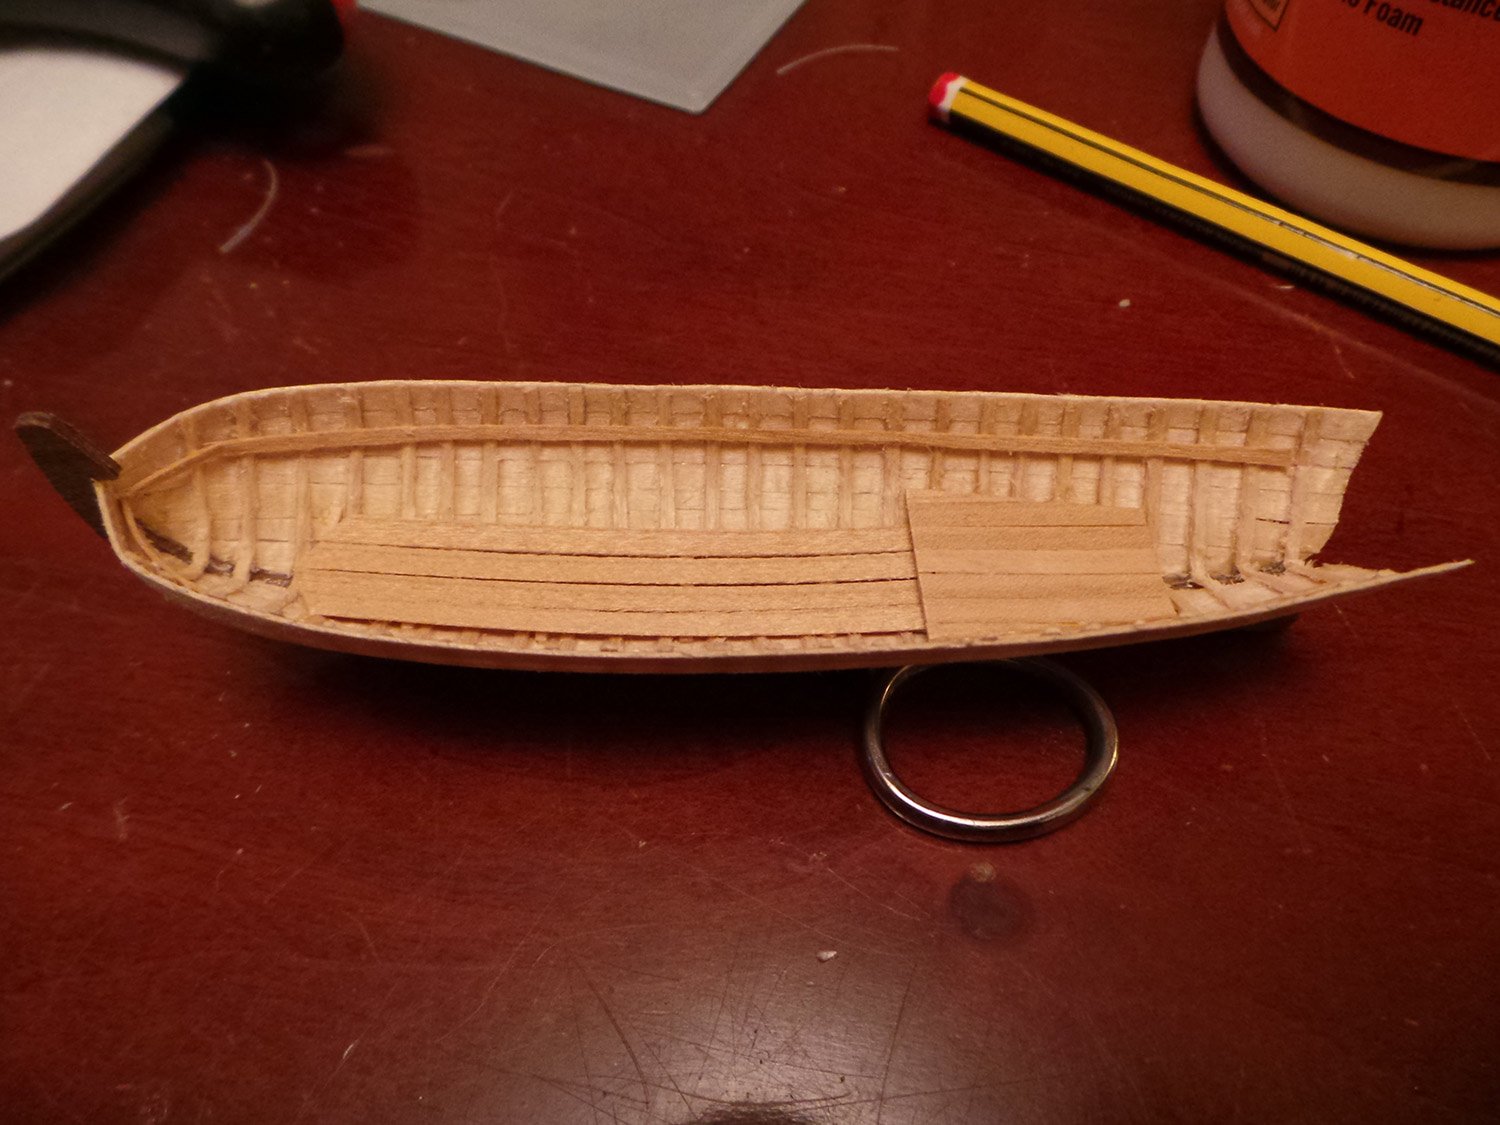
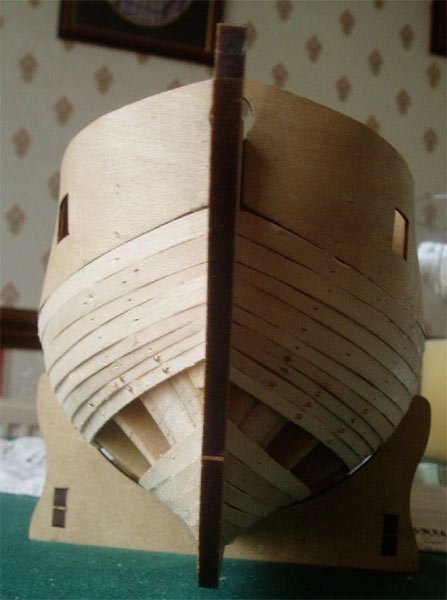
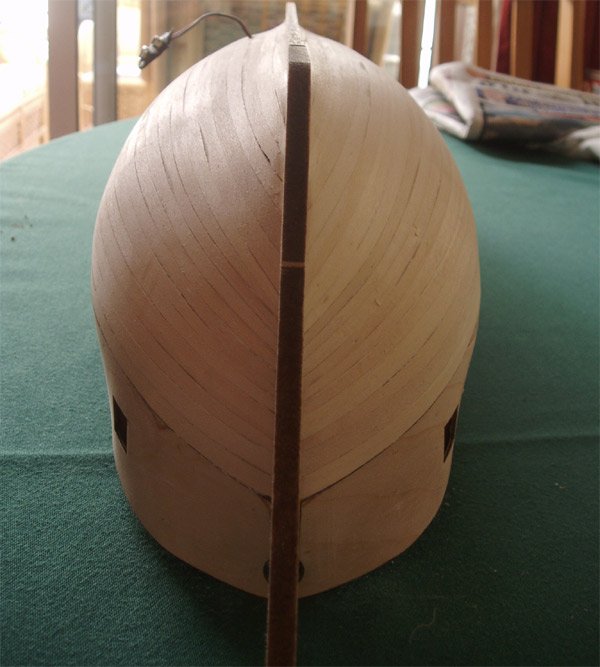
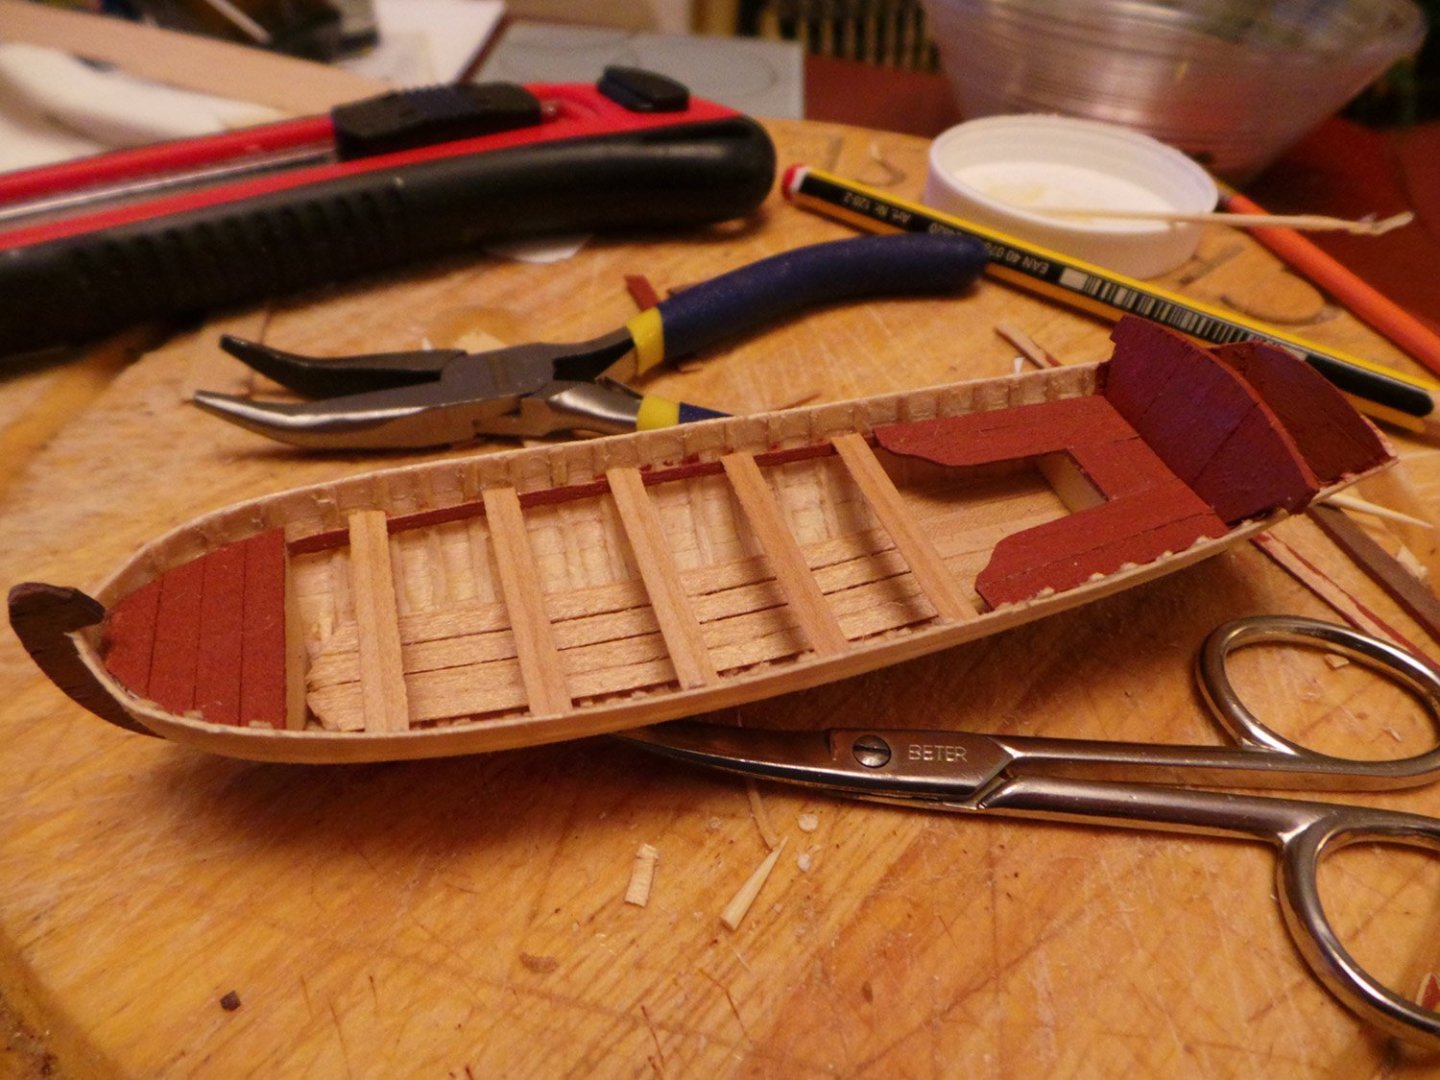
Yes, I'm quite pleased with the result so far. Just need to tidy up the inside and then think about tackling the fittings. Thanks! Its call a plug method. John (Jim Lad) shows how to make a plug method small boat. I put a link to his tutorial in my first post about the Pinnace above.
- 161 replies
-
- 3
-
-
- pegasus
- victory models
- (and 1 more)