
J11
-
Posts
519 -
Joined
-
Last visited
Content Type
Profiles
Forums
Gallery
Events
Everything posted by J11
-
 Thanks @Old Collingwood, there in good shape also and the detail on them is excellent for the tiny paint work. I am impressed with how detailed they are being so small. Revell did good mold work for these also as just a small amount of clean up for each one to fine tune them.
 -
@Richmond, nice older kit you have there. What year is it 60's?
-
Thanks @CDW, fortunately my sweetie had gotten the mirco brushes for me last Christmas. They work great and highly recommend them if one is to do this type of detailing. Cool thing was I got two sets!
-
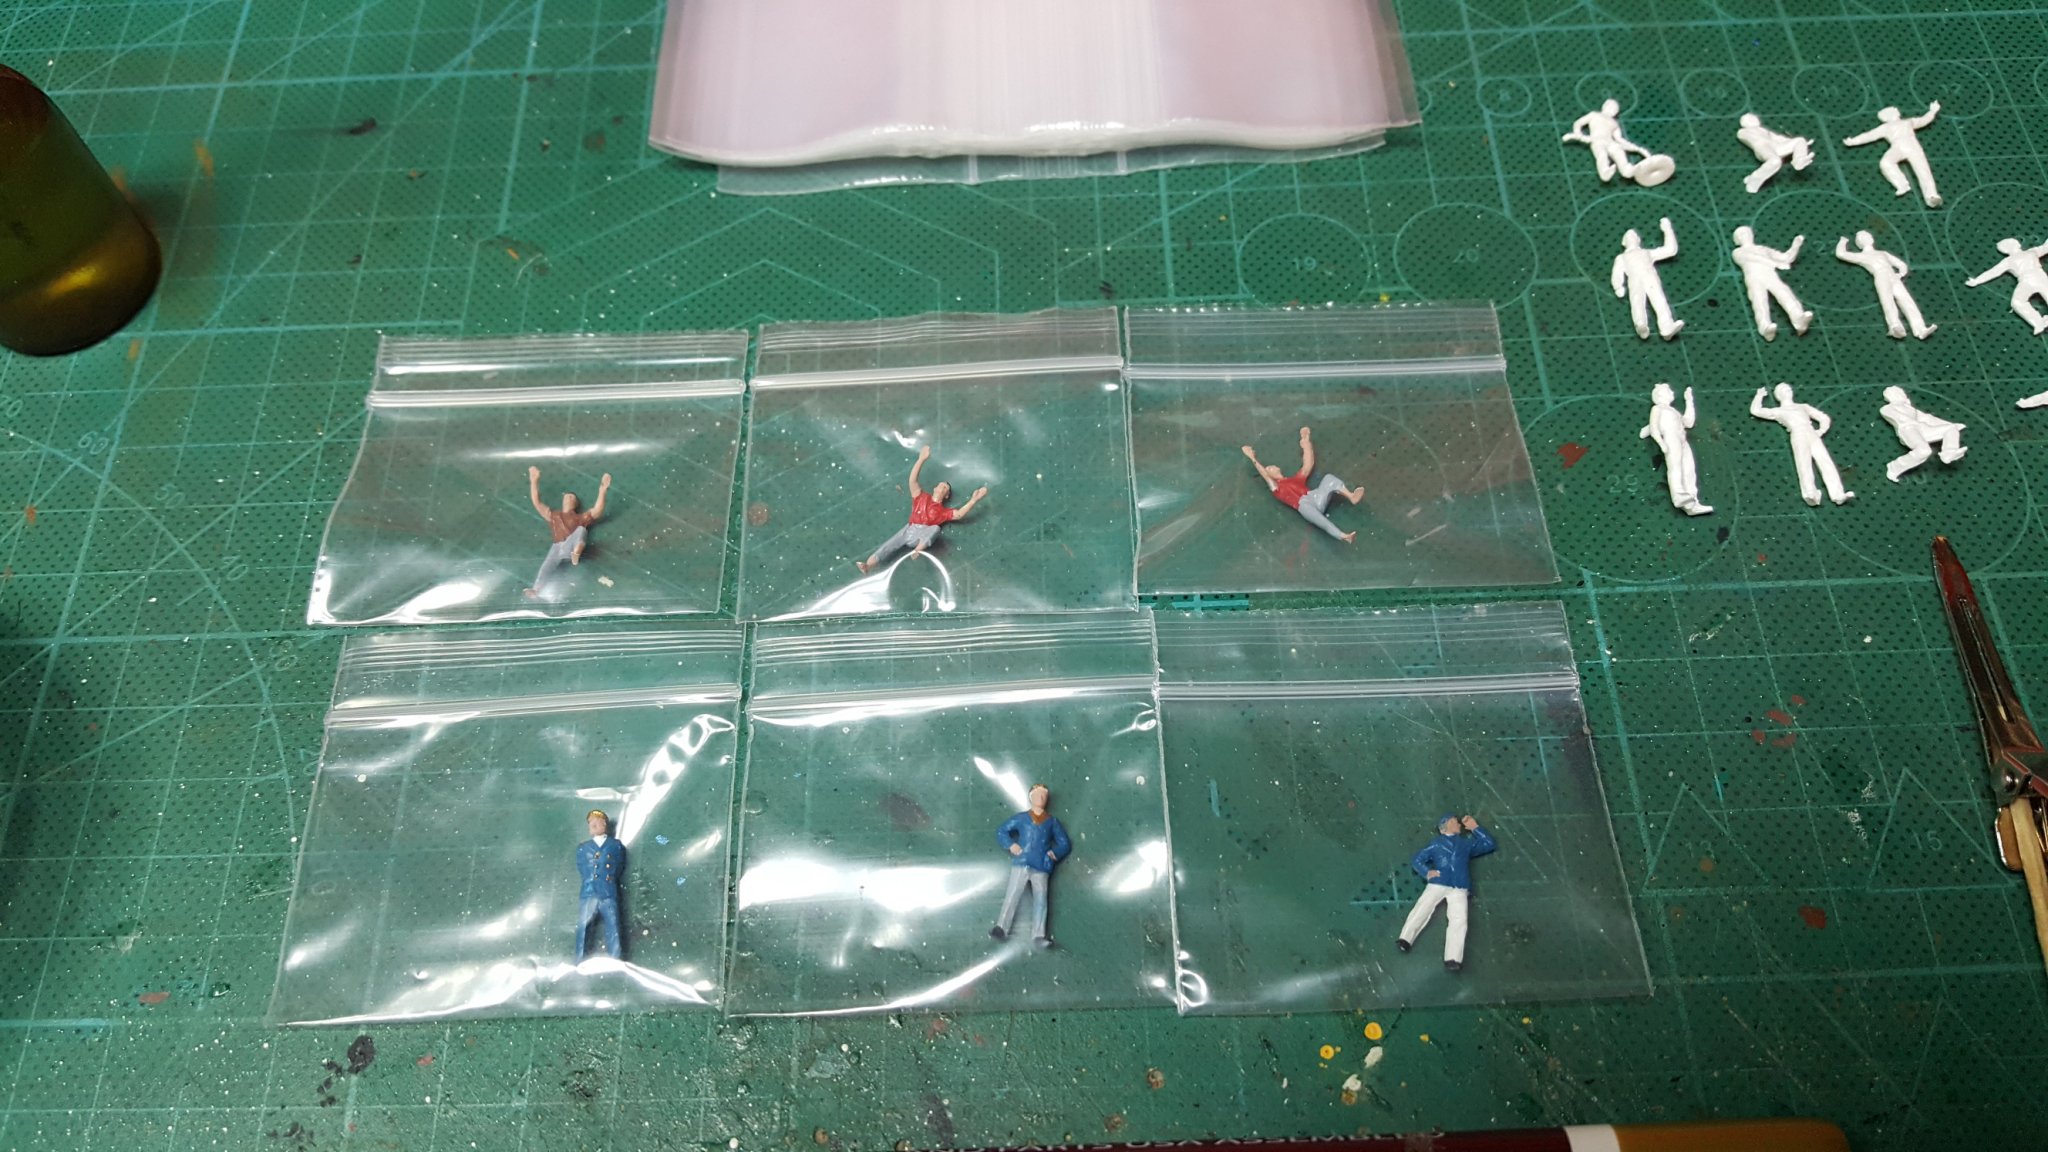
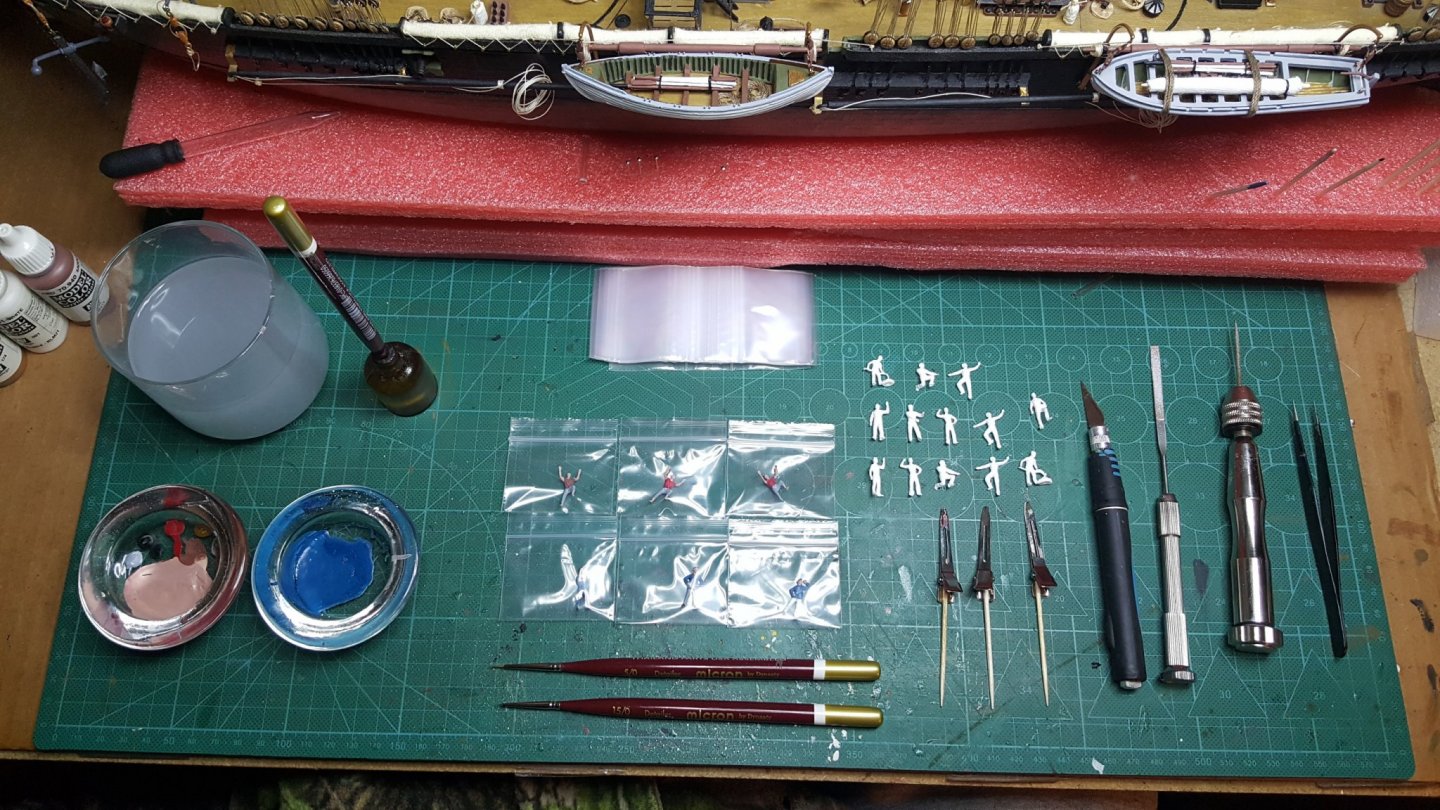
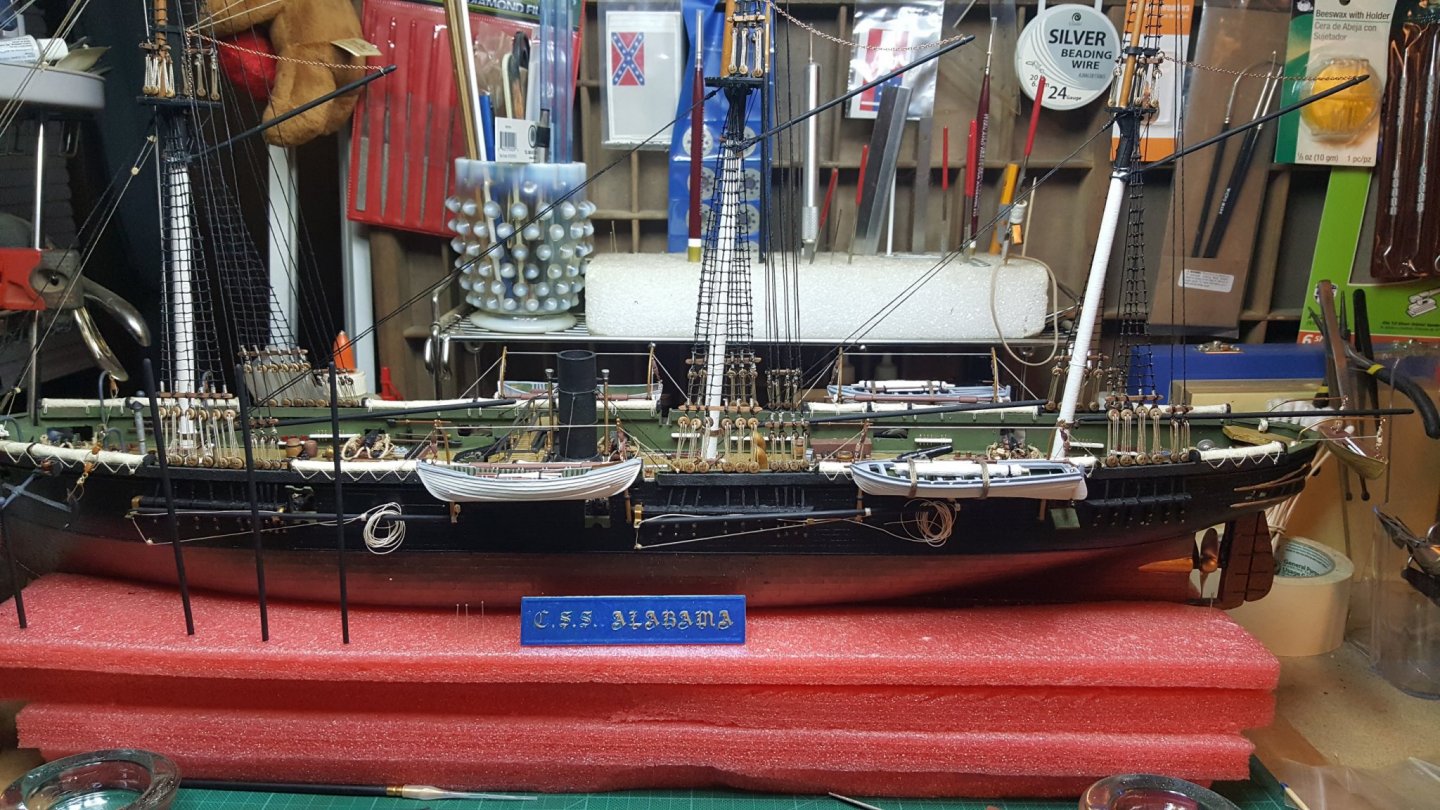
CSS Alabama has a captain and officers. Slow and precise work for the crew painting with as much detail as possible to enhance the model. I figure a couple more days and the crew will be done and I will mothball them in individual packets so not to destroy the delicate paint work and keep that pesky dust off. Getting great practice for the Vasa pieces when all of those have to be historically painted. For the Vasa pieces it will probably be three or four months to complete them as I have been going over the coloring detail for the build. Wow! What a colorful ornate ship she was. Some members here have done such exquisite work on the Vasa builds that it's like having your own private tutor to produce the model. I compliment all of them for sharing the builds and technics in producing such artistic representations with many thanks for reference material to work from. If I can get the sail making down pat; by George the Vasa will have them too. I guess you can tell I'm itching to get her started as I am hoping for a couple needed saws and sanding equipment to work on her. (Christmas presents) Hint, hint Santa Claus (Sweetie??) He he he .....

- 383 replies
-
- 11
-

-
Very clean work, truly a family heirloom in the making.
-
I feel you should keep your double roof and add smaller bent trim around the lower roof shelves for detailing. Then sand very gently and precisely the added bent smaller trim into shape and add a little wood filler per needed. The basis of what you have is great to work with adding the smaller wood bent trim pieces for definition. Could blend them in nicely with what you have.
-
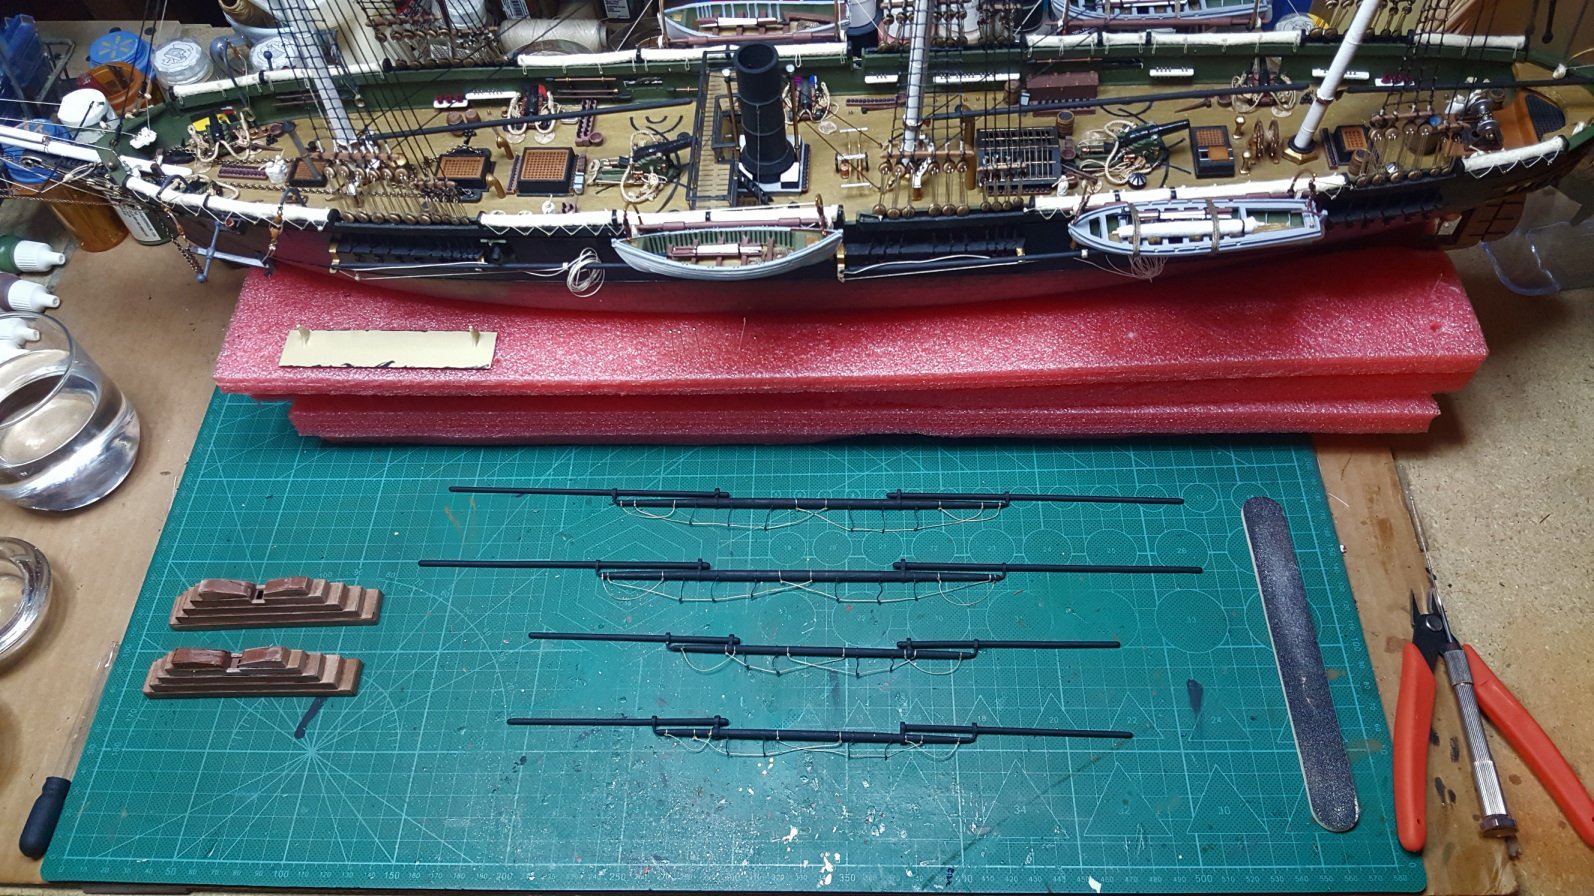
Working on boom assemblies and finished with lining the bases with walnut, the bases will have to dry for awhile and then I'll add the tung oil and post them when they dry. Will be a couple of days for them to dry. Be working also on painting the miniature men for the ship and hopefully I have them done in a couple of days. Thanks for all the likes and appreciation with compliments. Bunch of parts have been ordered and will probably be here this week and can start on the sails and rigging of them, so I'm new at the sail making with model span and hopefully will turn out ok.

- 383 replies
-
- 12
-
-
Look forward to the completed model images. Impressive work Jesse!
- 1,306 replies
-
- 4
-
-
- syren
- model shipways
- (and 1 more)
-
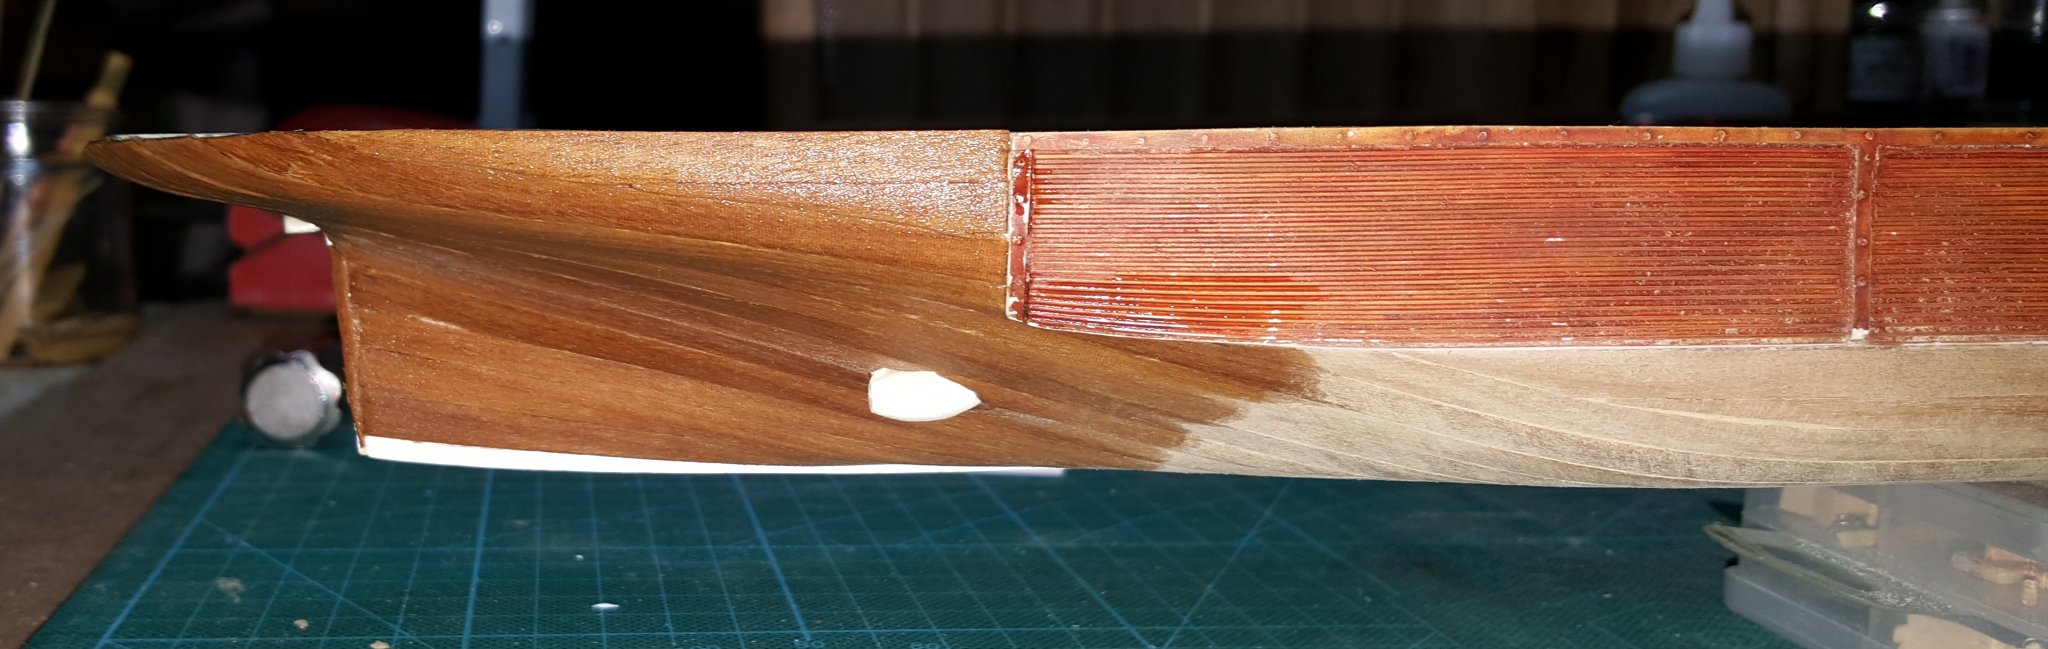
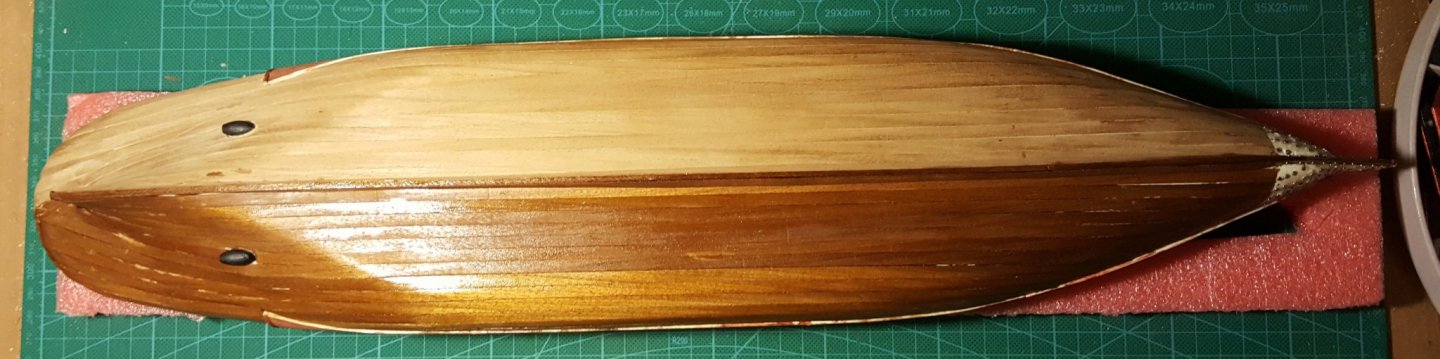
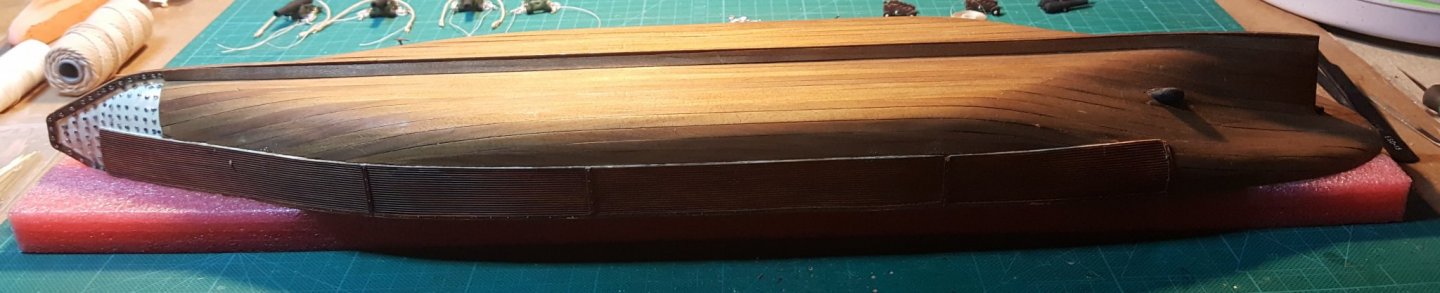
Thanks @Old Collingwood, here's a couple images of when I lined the CSS Arkansas with cherry. Turned out really nice and then added tung oil and worked perfectly. I'll be coating the bases with tung oil also.


- 383 replies
-
- 11
-
-
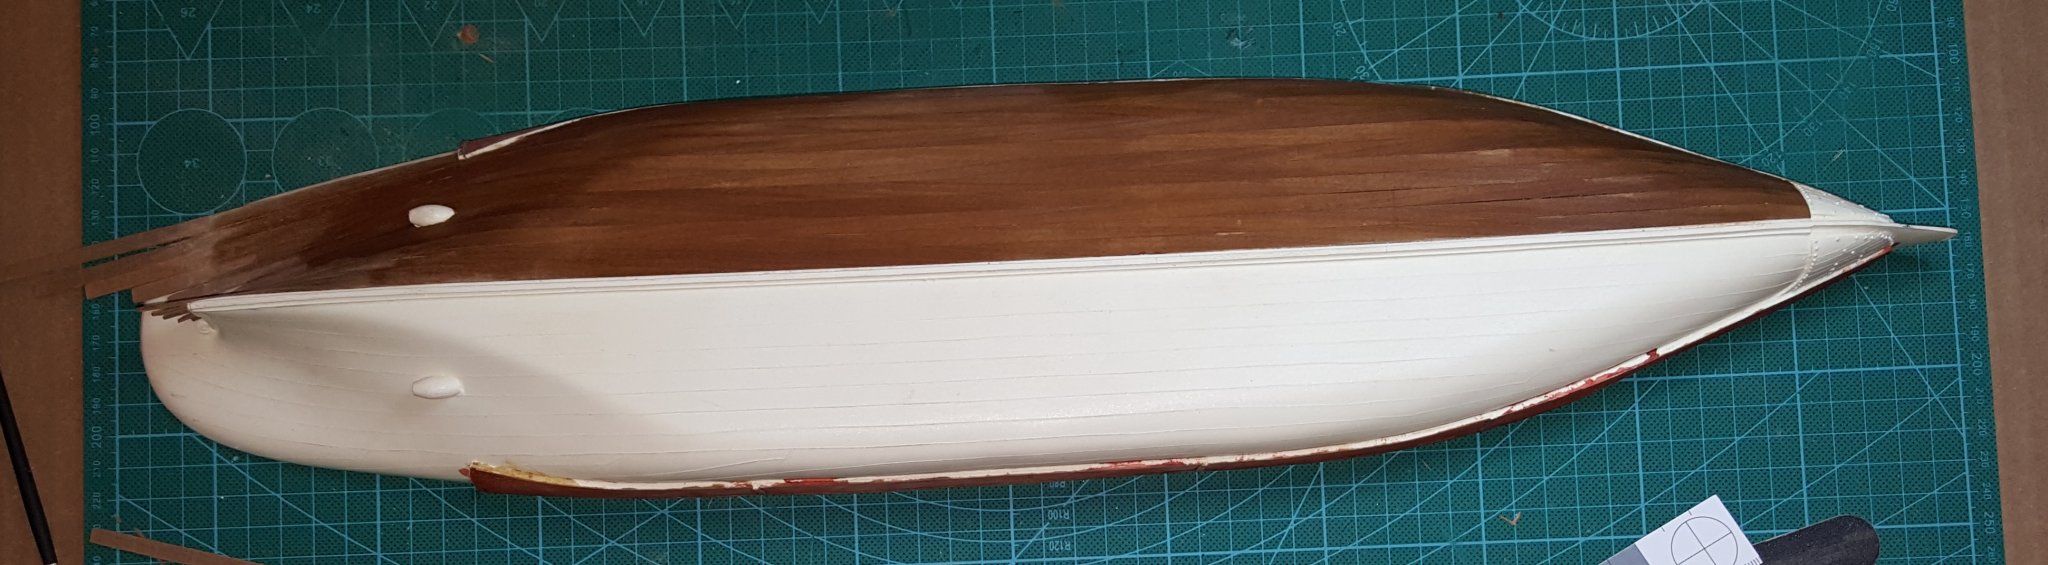
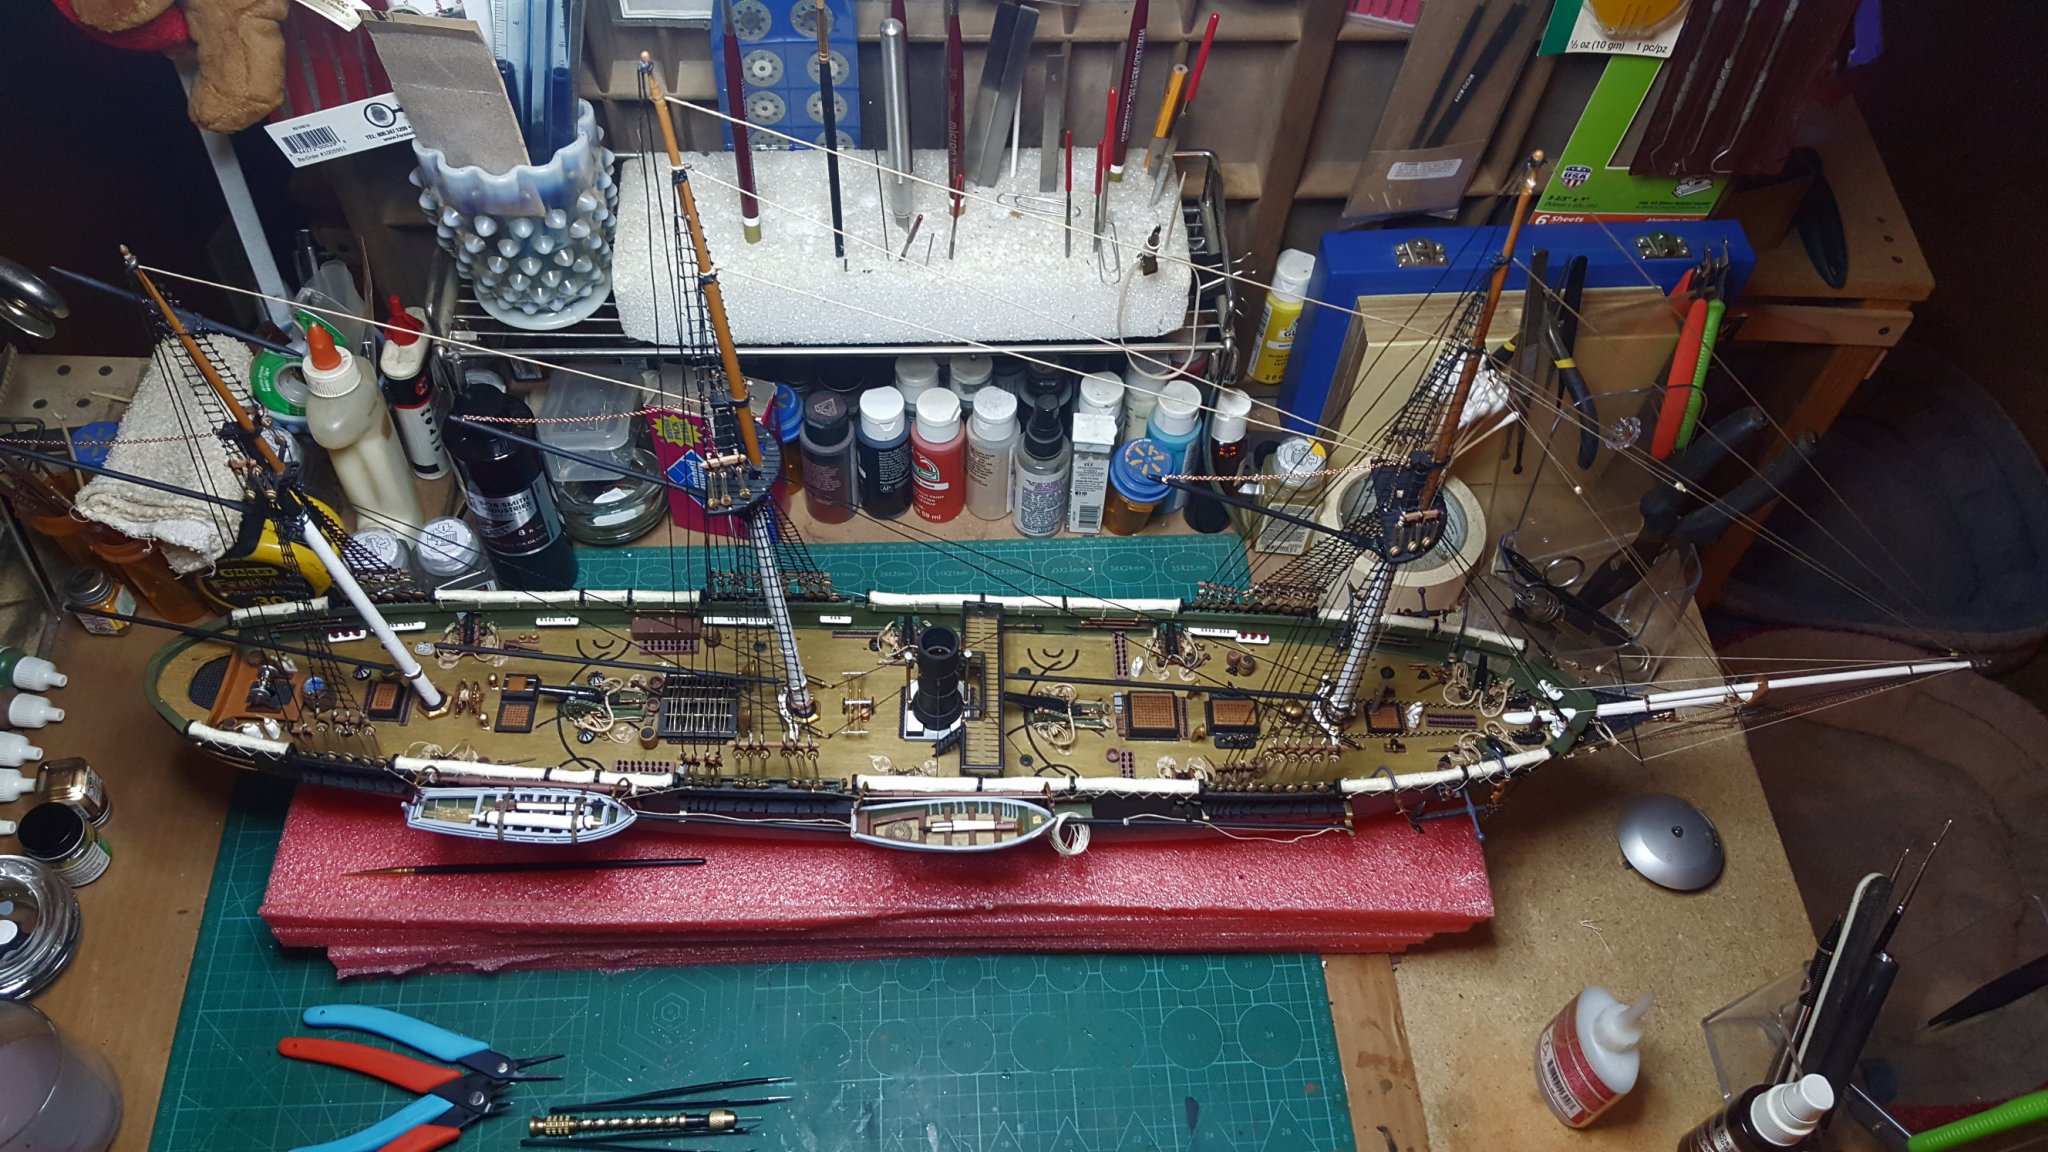
Giving some closeups of the dingy along with adding walnut to the Revell bases for added detailing since I'll be using them for the mounts. Working with title plate also (work in progress)

- 383 replies
-
- 12
-
-
Nice clean detail parts ... nice.
-
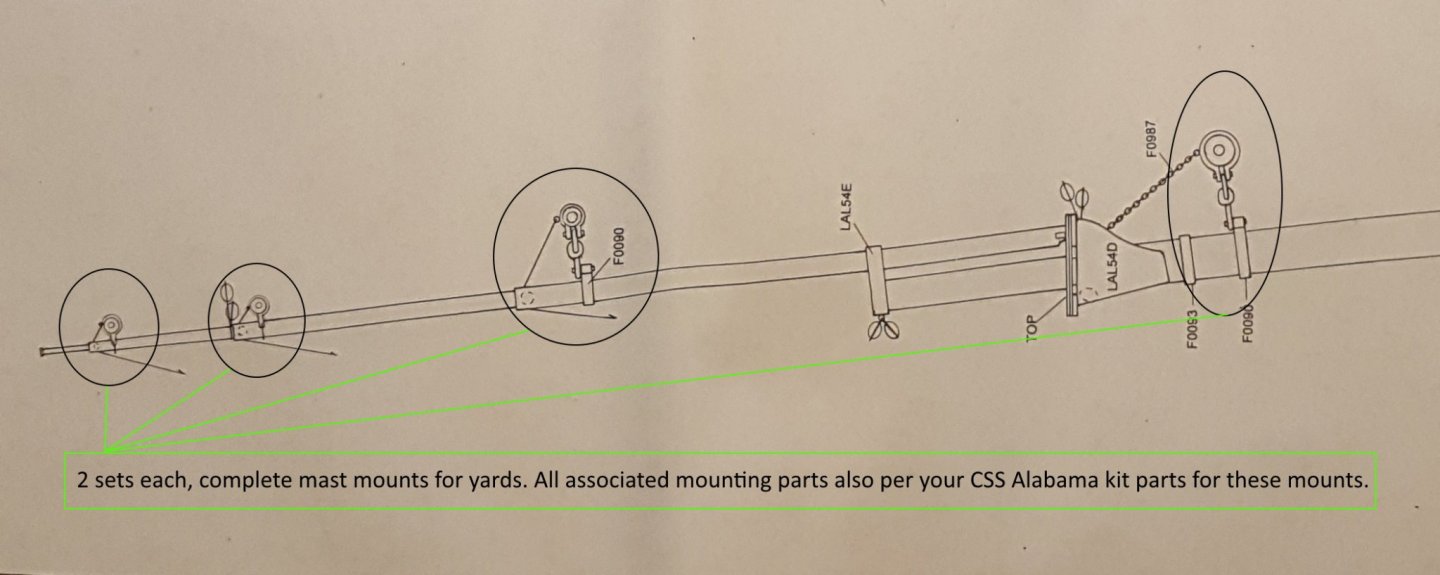
MrBlueJacket,
I have sent a request to the info email from your web site for part information and pricing along with a attachment. Sadly I am a bit confused as to all the parts associated with what I am needing for my CSS Alabama (Blogs here at MSW), so I sent a attachment but might not have been clear enough on what I needed. Here's the attachment for what I need as my scale is 1/96. If you can help me out a little and let me know what parts are associated with the mast mounts and the prices with shipping will be glad to pay for them asap. I am getting the information off of your CSS Alabama plans which I did purchase and have helped tremendously with the build.
Thanks for your time in this request!
Parts needed are in black circled:
-
-
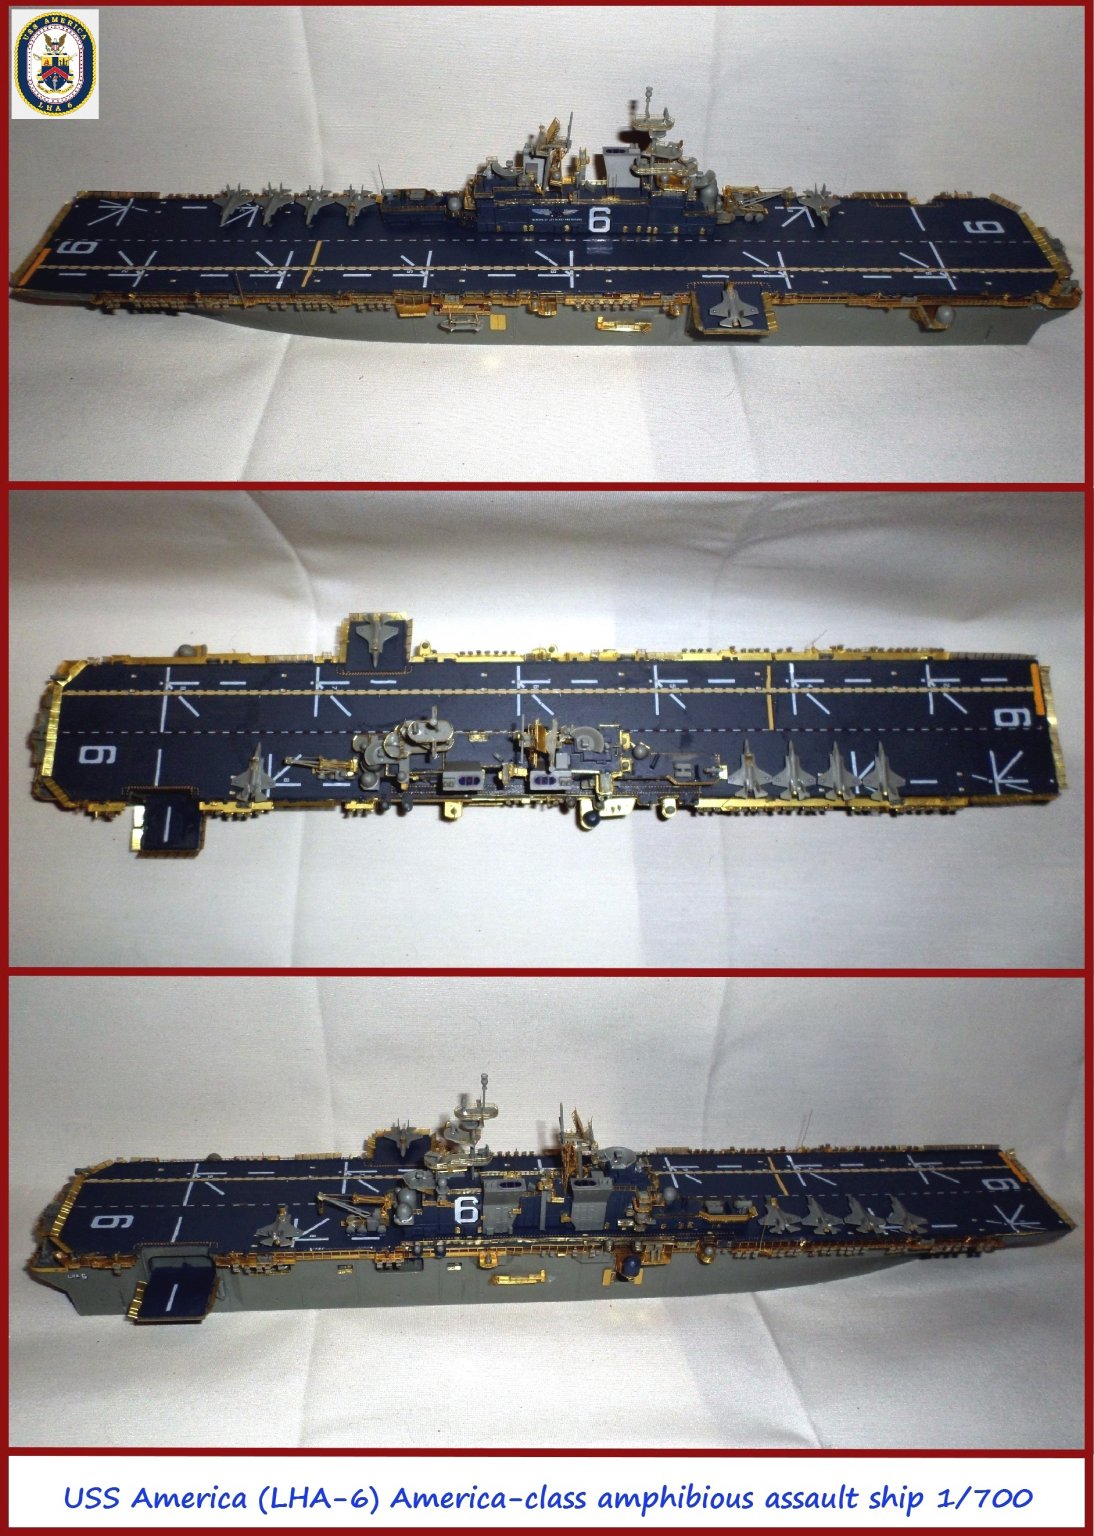
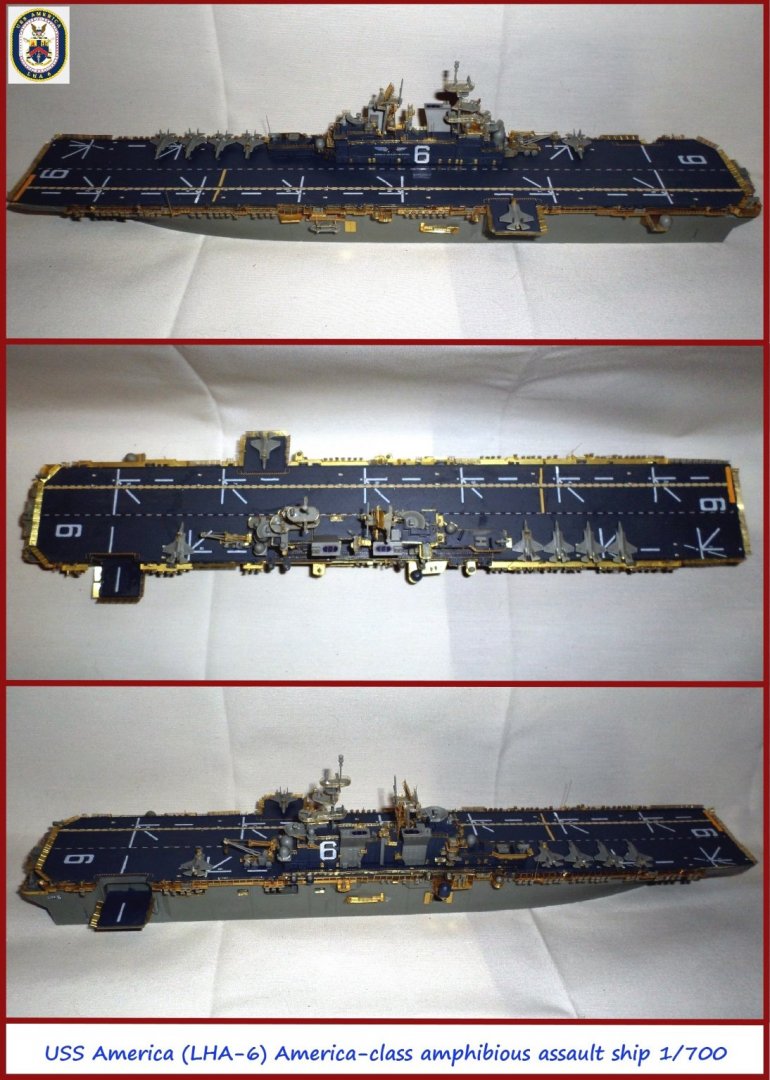
Here's a new video, which is dear to our hearts: USS America Sailing With A Whopping Two Dozen F 35Bs Embarked Aboard to South China Sea And of course my model representation ---
-
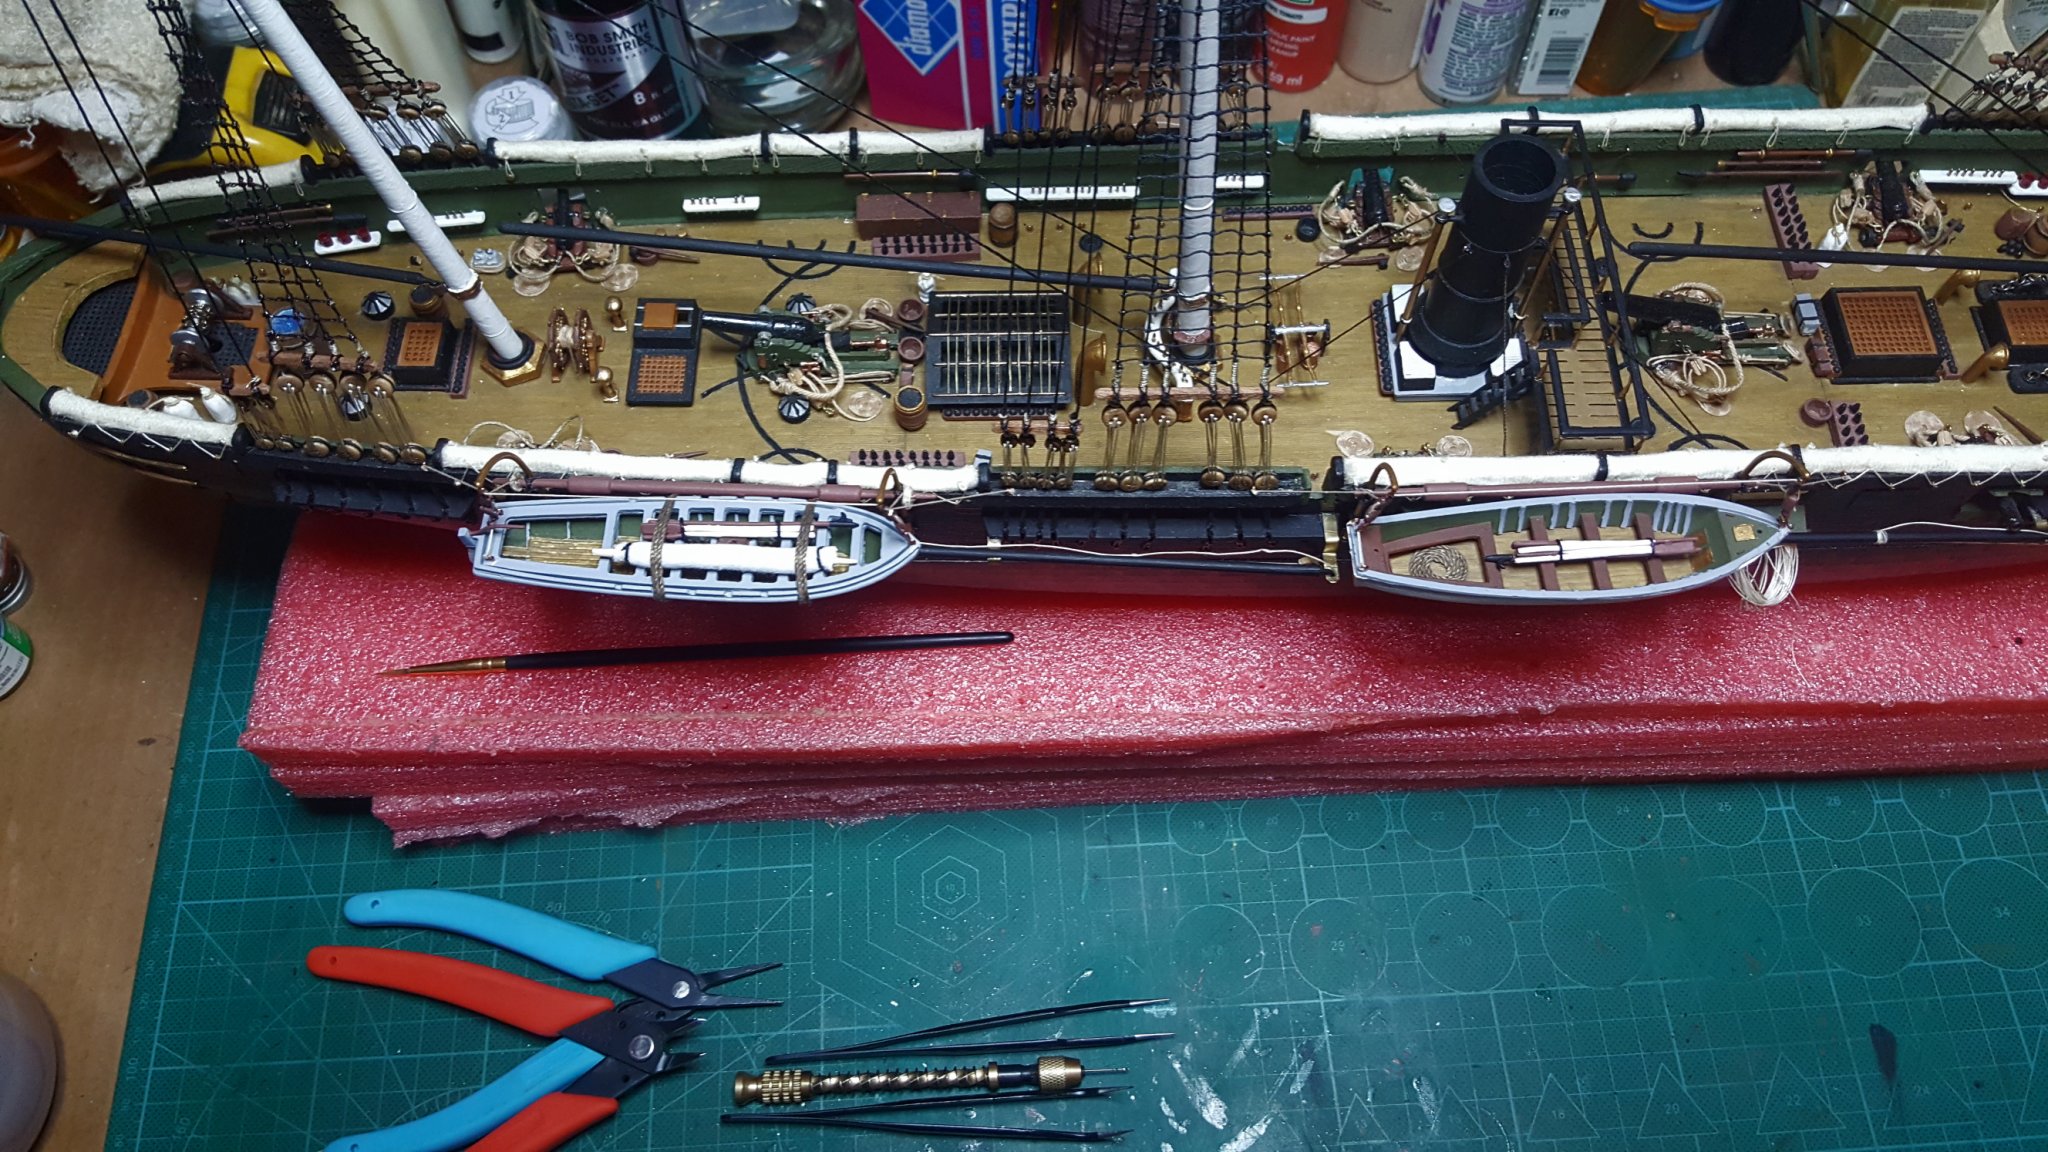
Thank you @Old Collingwood. Here's a couple of images for the dingy and other small boat installation which is finally finished.


- 383 replies
-
- 14
-
-
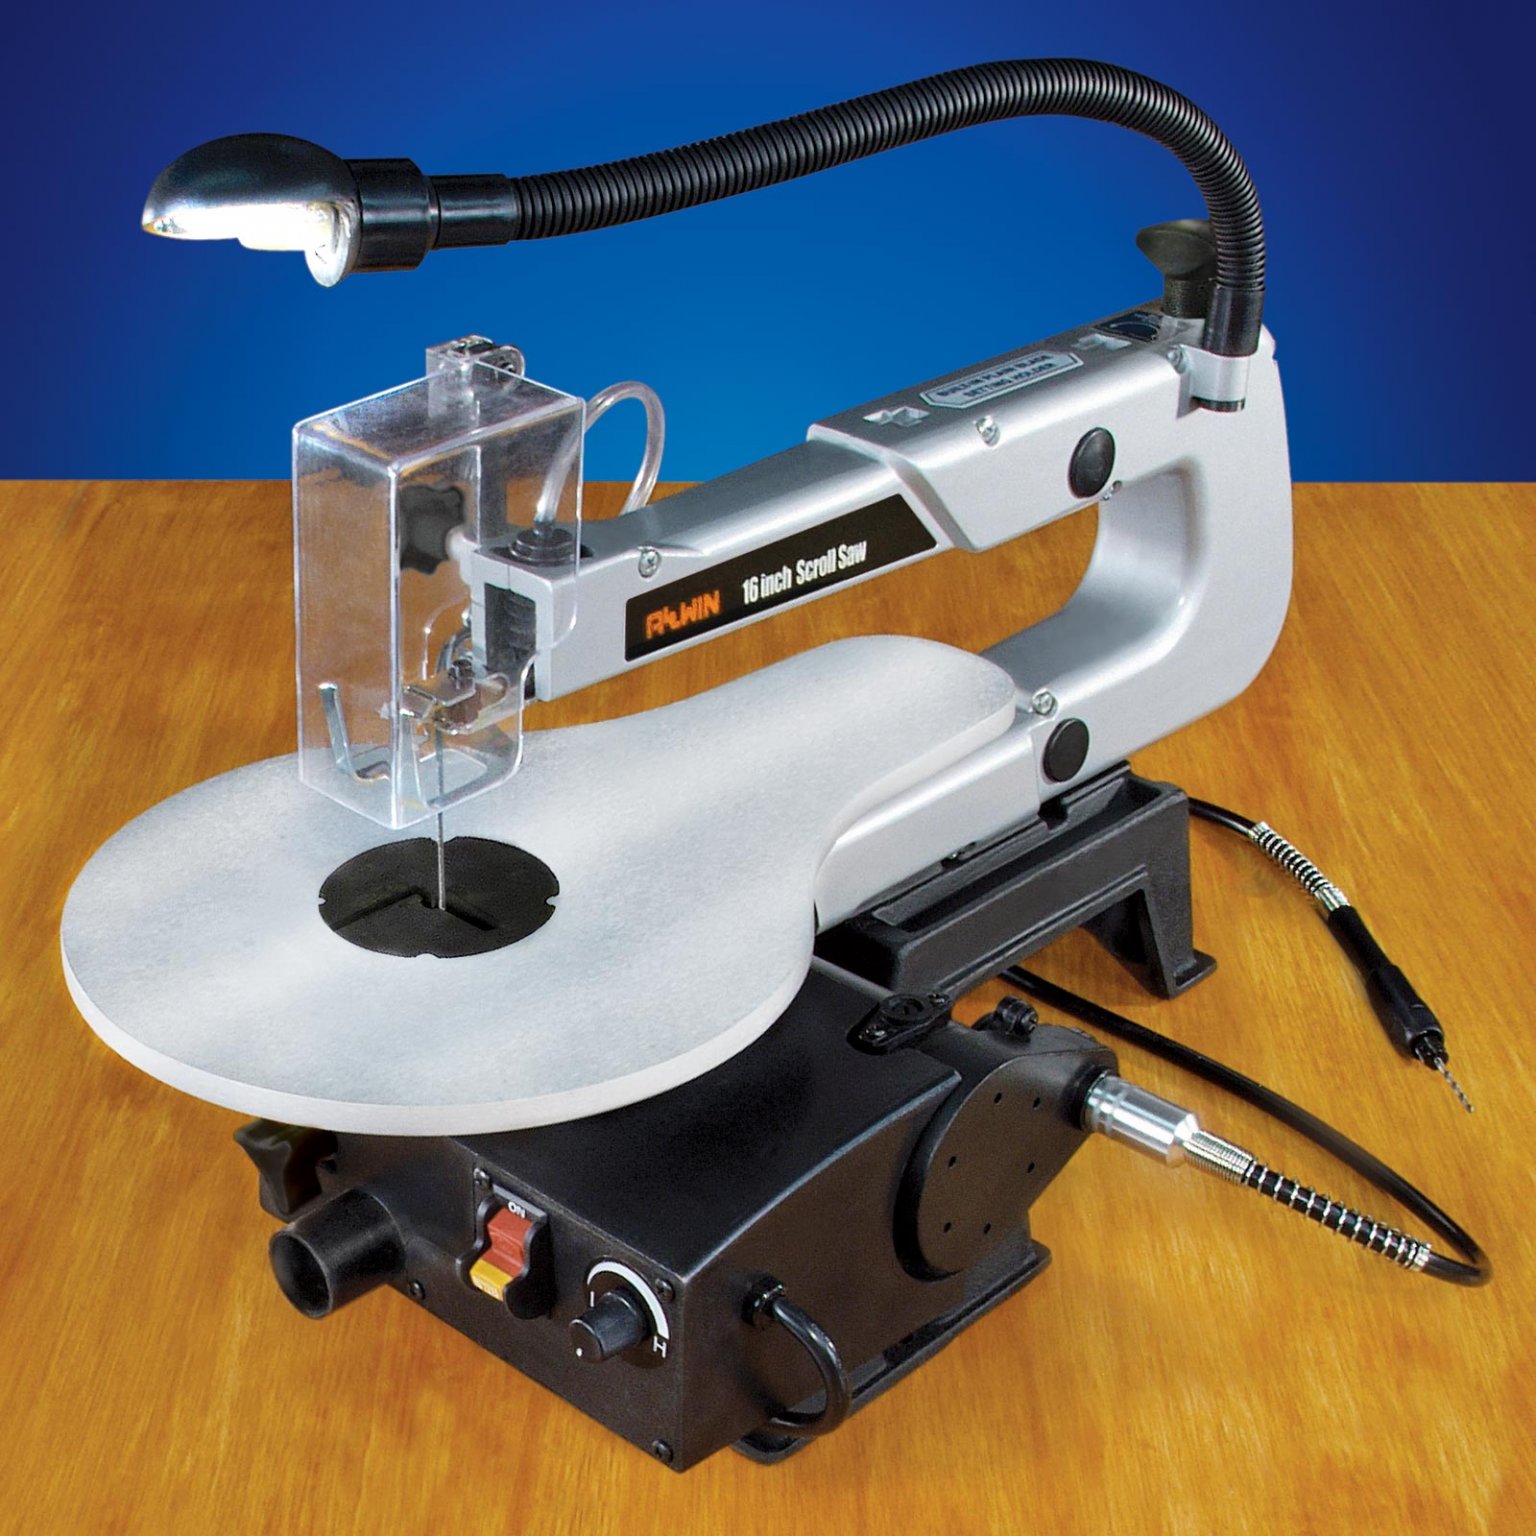
@Bob Cleek, appreciate the information and was exactly what I was needing. As many of us I have multiple kits and the saw would be a family heirloom in producing the quality parts for many of them. So I'm on the hunt and again really appreciate the input as my older saw is gone bye-bye and haven't bought one in years, they have changed from my old craftsman.
-
Here's the scroll saw I'm leaning towards: https://www.micromark.com/16-Inch-Scroll-Saw-with-Flexible-Shaft-Attachment Then this one: https://www.homedepot.com/p/WEN-1-2-Amp-16-in-2-Direction-Variable-Speed-Scroll-Saw-3921/308458373

-
Thank you @Hubac's Historian, for the reference material and will use it along with some of the other members build blogs on her. Doing a basic scan of his work I am indeed impressed by what he completed in his craftsmanship and quality of the build. This will help tremendously. I do have my work cut out for me along with choosing a quality scroll saw which I have to pick up as all the cutting on this kit will needed. Any suggestions on a quality saw for this type of work which is versatile?
-
It's the Billings boat NR 490 kit. Don't like all the plastic that came with it but I'll make do. Plus I have been researching for extra's along with other plans for her. It will probably be a bash kit, but I'll see how it goes.
-
Love that work station and your organization. I also have a limited work station and mines on wheels as to work in the family room being with the family all the time. Great build progress and look forward to your updates.
-
@RickyGene, don't give up because I saw one kit go for 40.00 about two months ago on ebay, so you just have to keep looking. It was a buy it now and the offering lasted about 1 day before it went poof! Plus; I do know of someone whom picked one up at a garage sale for 15.00 and it was still sealed but the box was messed up from one of the first releases. So you never know what you might find. The kit was complete and all parts undamaged. I did pay a decent price for mine, but was in perfect sealed shape, sails didn't even have a ding in them! Then I have added many extra's to the kit and will be adding more to finish her out but I didn't buy them all at once. This way it's easier to get detailing parts spread out over time so not to break my model budget. I have also picked hundreds of dollars of spare model ship parts and ropes for very cheap when on ebay. I see whole old part sets going for great prices. But you have to hunt and wait and then jump on them offers as they come up, so it's a constant treasure hunt. Another option is to trade someone for the kit, so never say never. Glad you are enjoying the build, it's great to have members enjoy your work and always give incentives to do the best artistic work possible on ones endeavors. Just tonight I was going over my Vasa plans and files so to start working out the procedures and material extras I will be working with along with all the colors I will be needing for the painting for her. At 42" in length she will be a large build and drooling to get back into a wooden build which are my favorite to work on. Love that wood work!! I'll try to have some updates by tomorrow for the smaller boats, working on them now and as always thanks for the likes Ya'll and the interest in this build!
-
Look forward to updates on this build. Excellent kit choice!
-
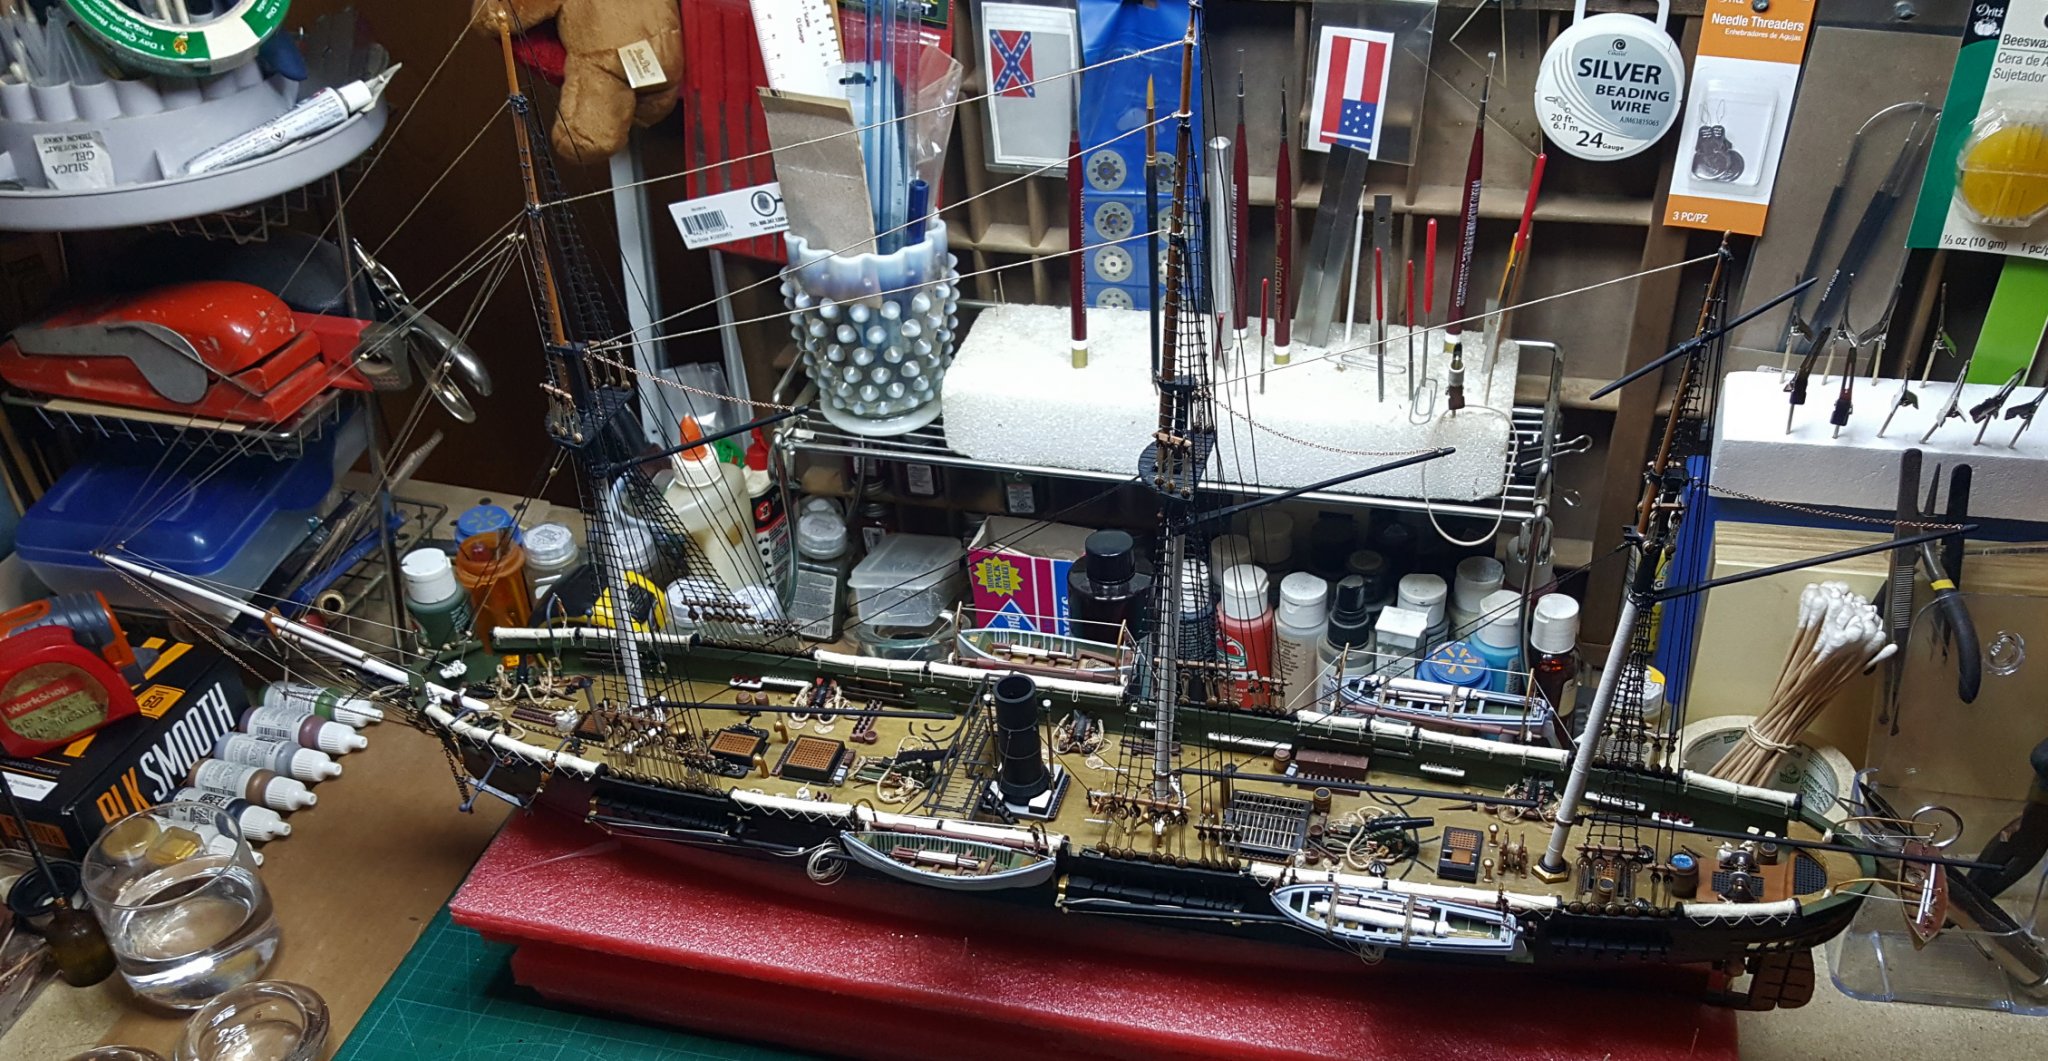
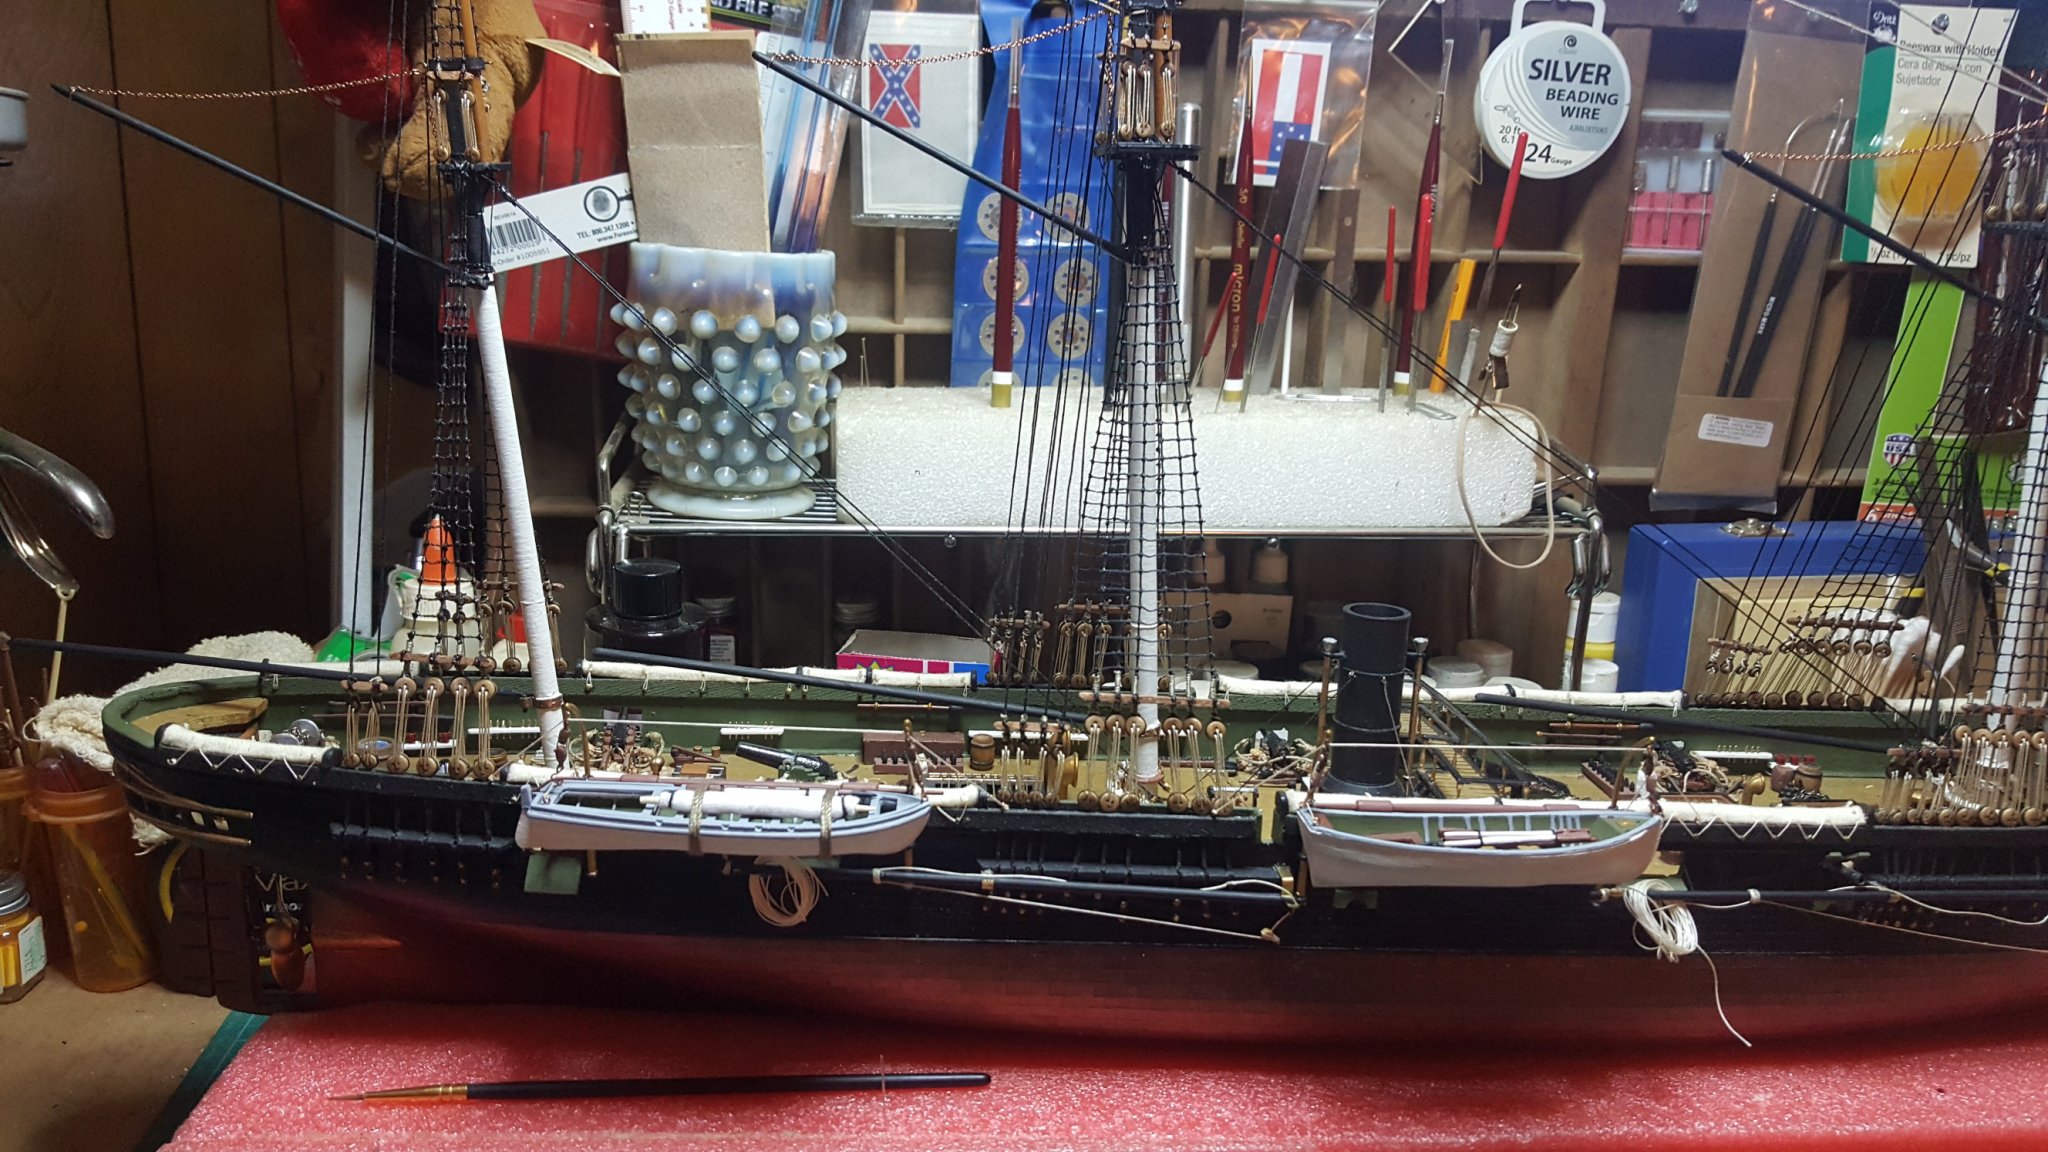
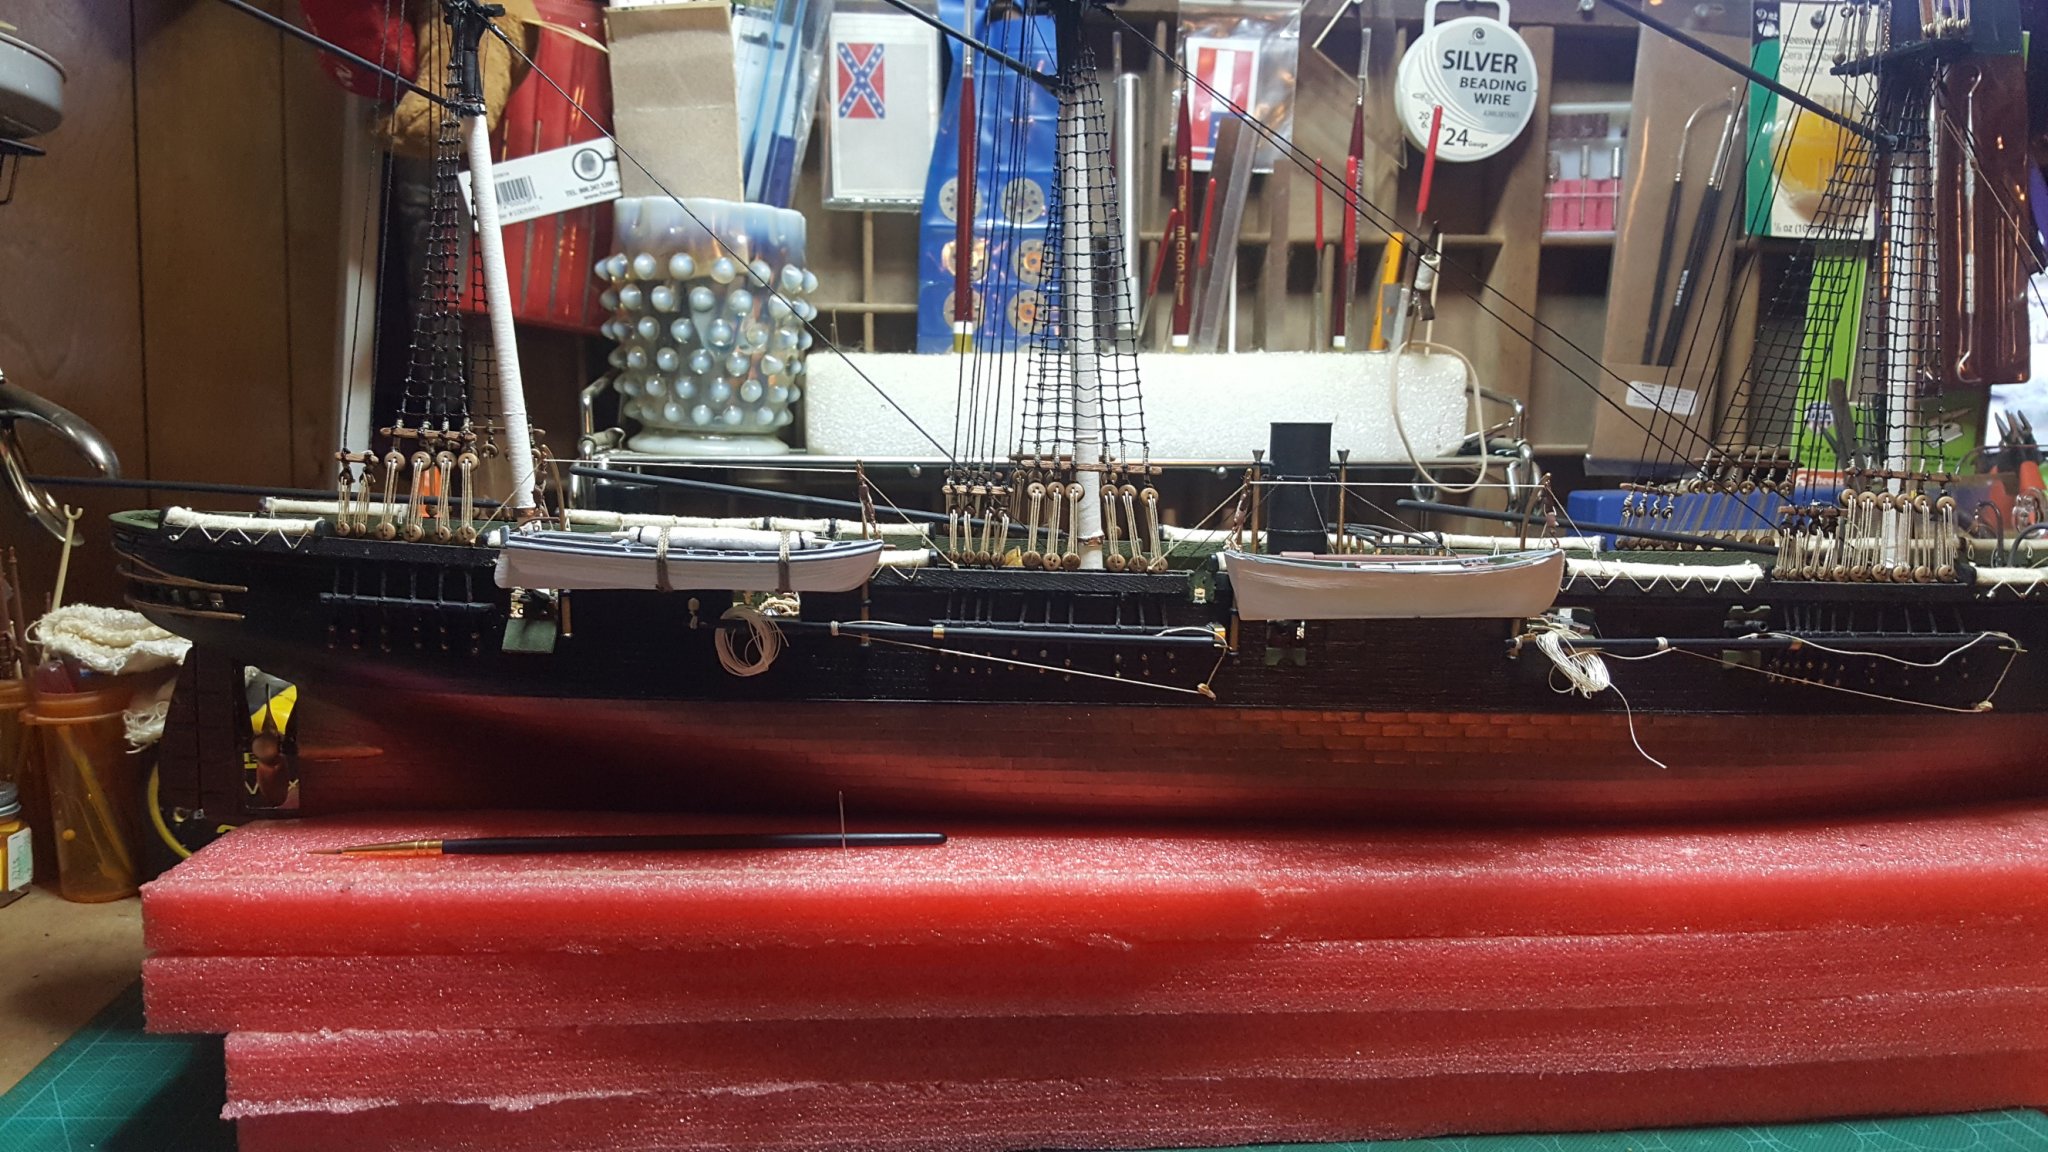
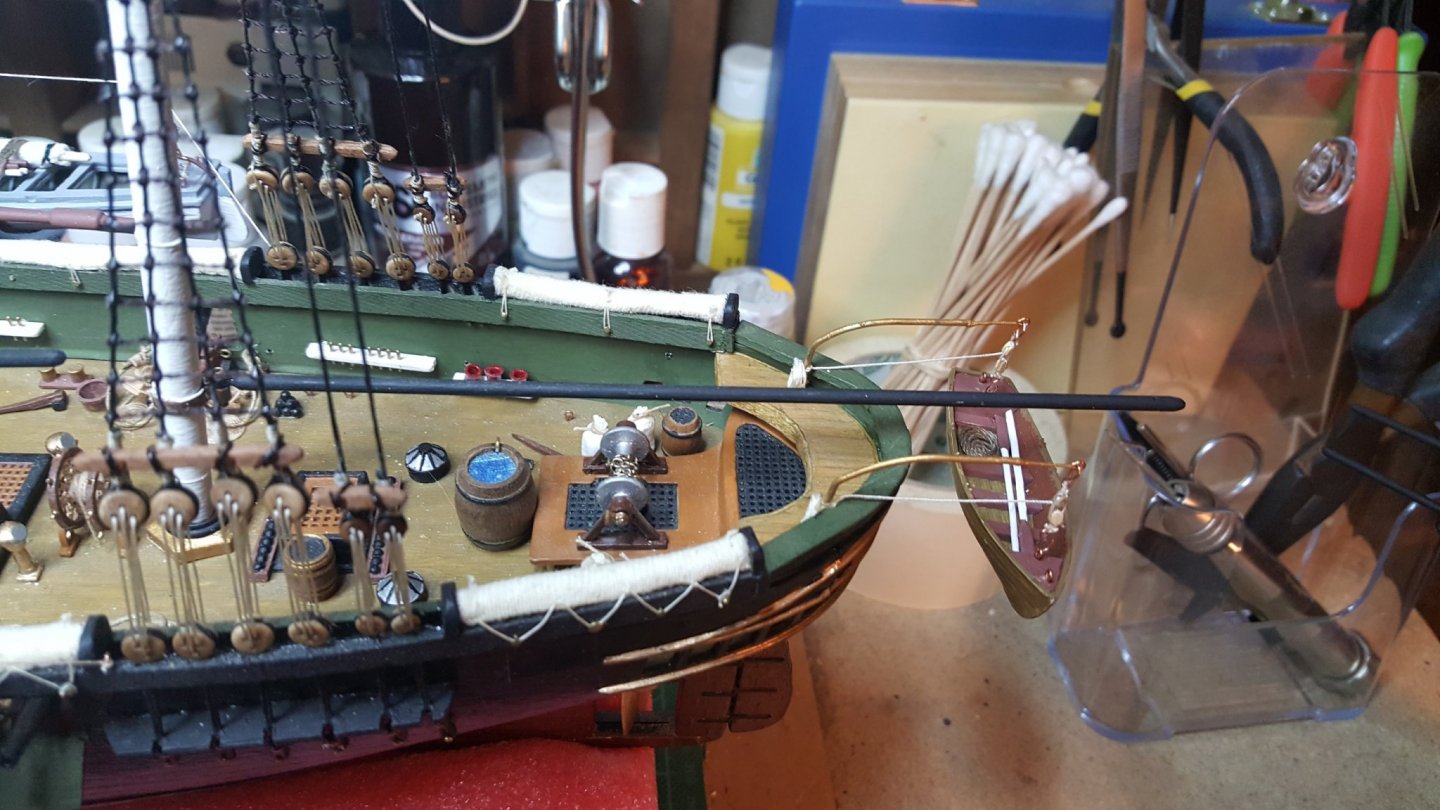
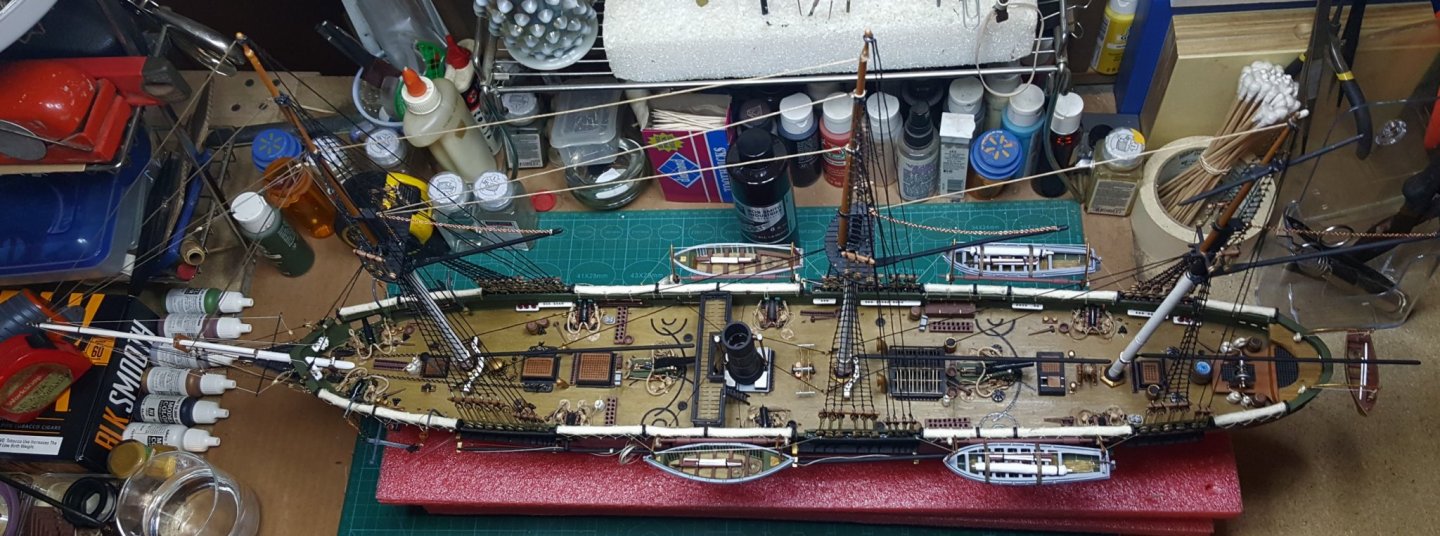
Update for the smaller boat work. Not a bad color contrast, I have also added a small sail on the long boats with the tie downs for added detail along with the oars and gaffs. Should have the other one's done by tomorrow and then start working on more sail patterns with adding block and tackles to the sail masts also. She's starting to take shape and keeping her clean is becoming more challenging as time goes by. Will be glad when she's under glass!


- 383 replies
-
- 15
-
-
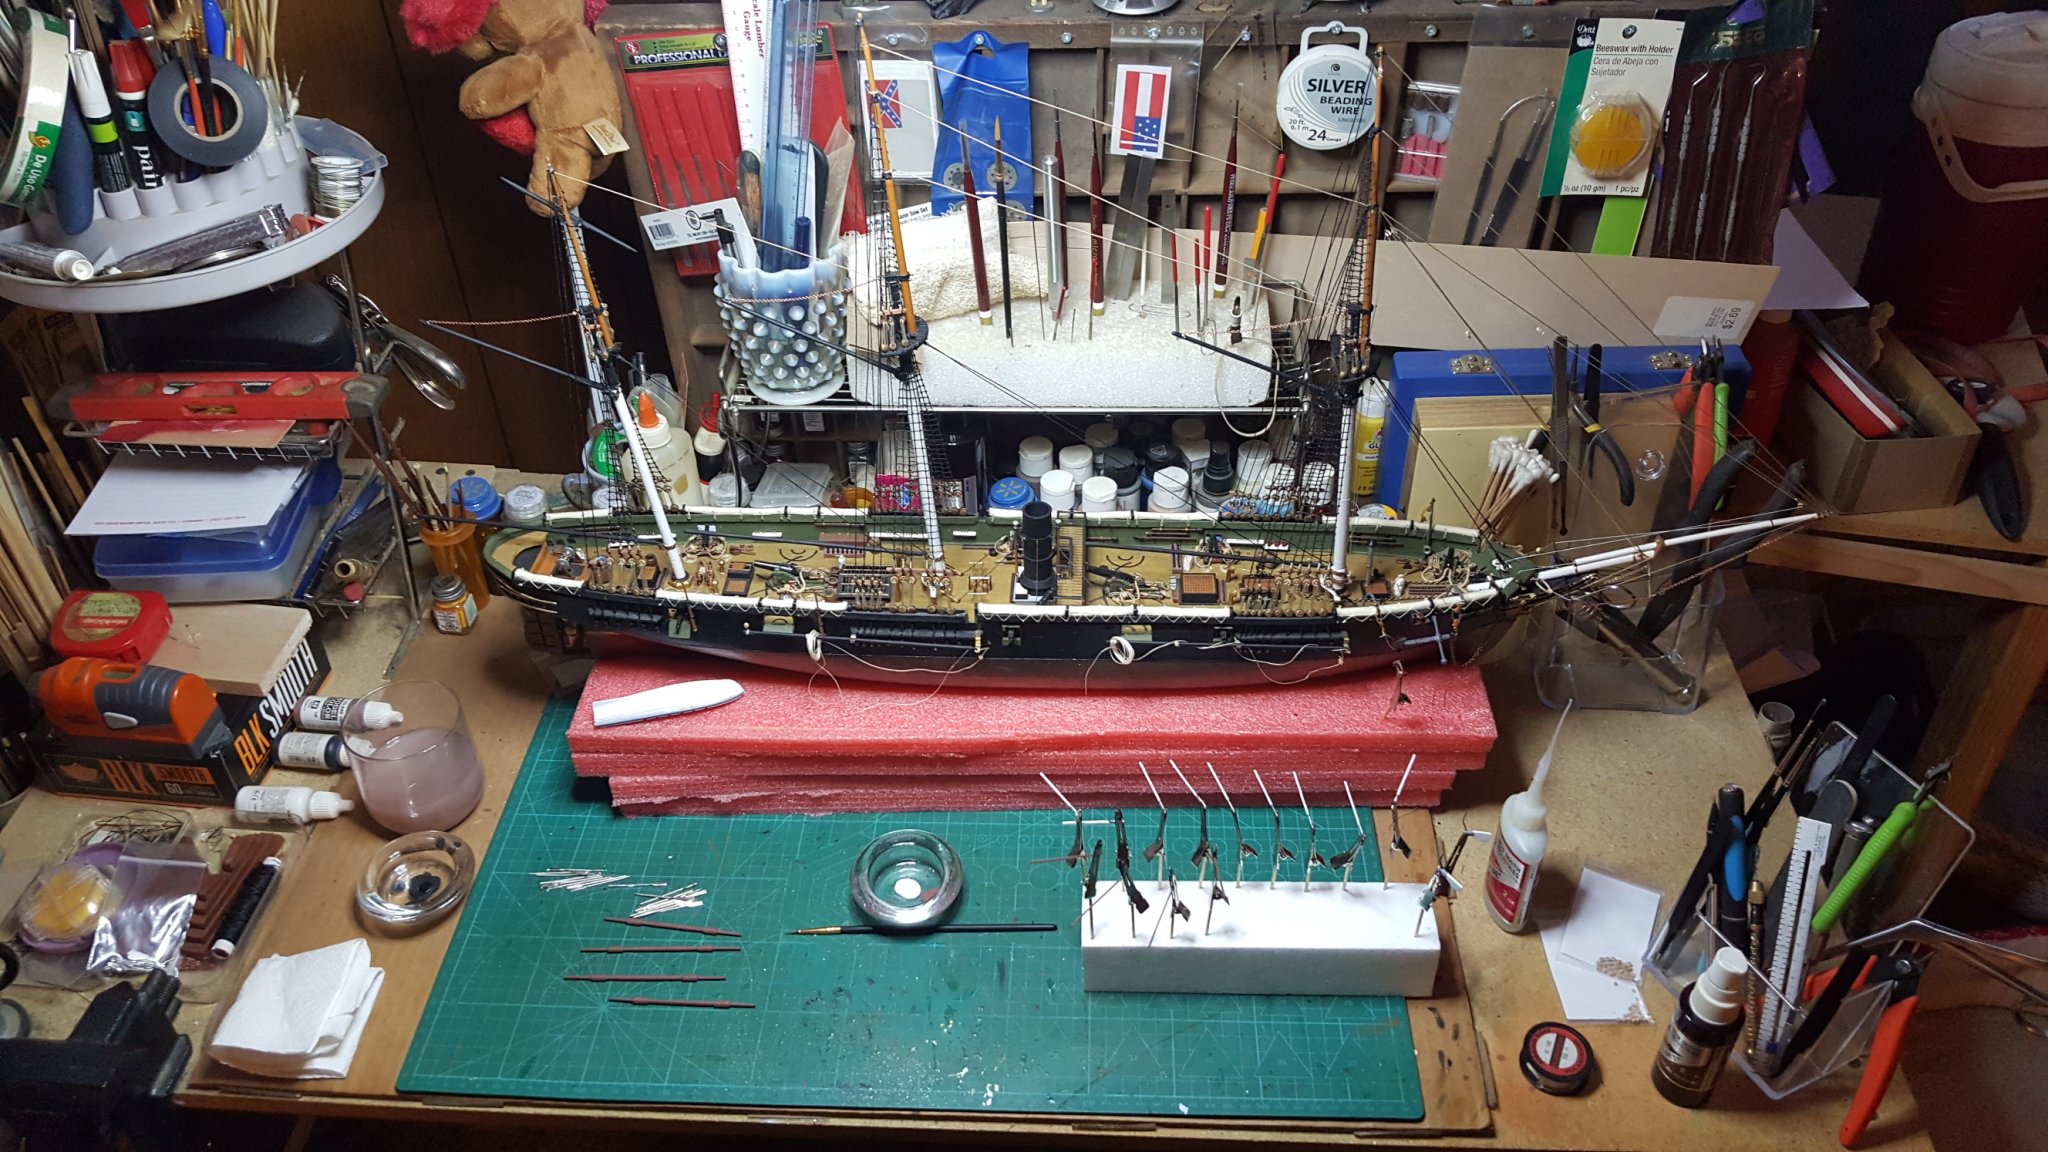
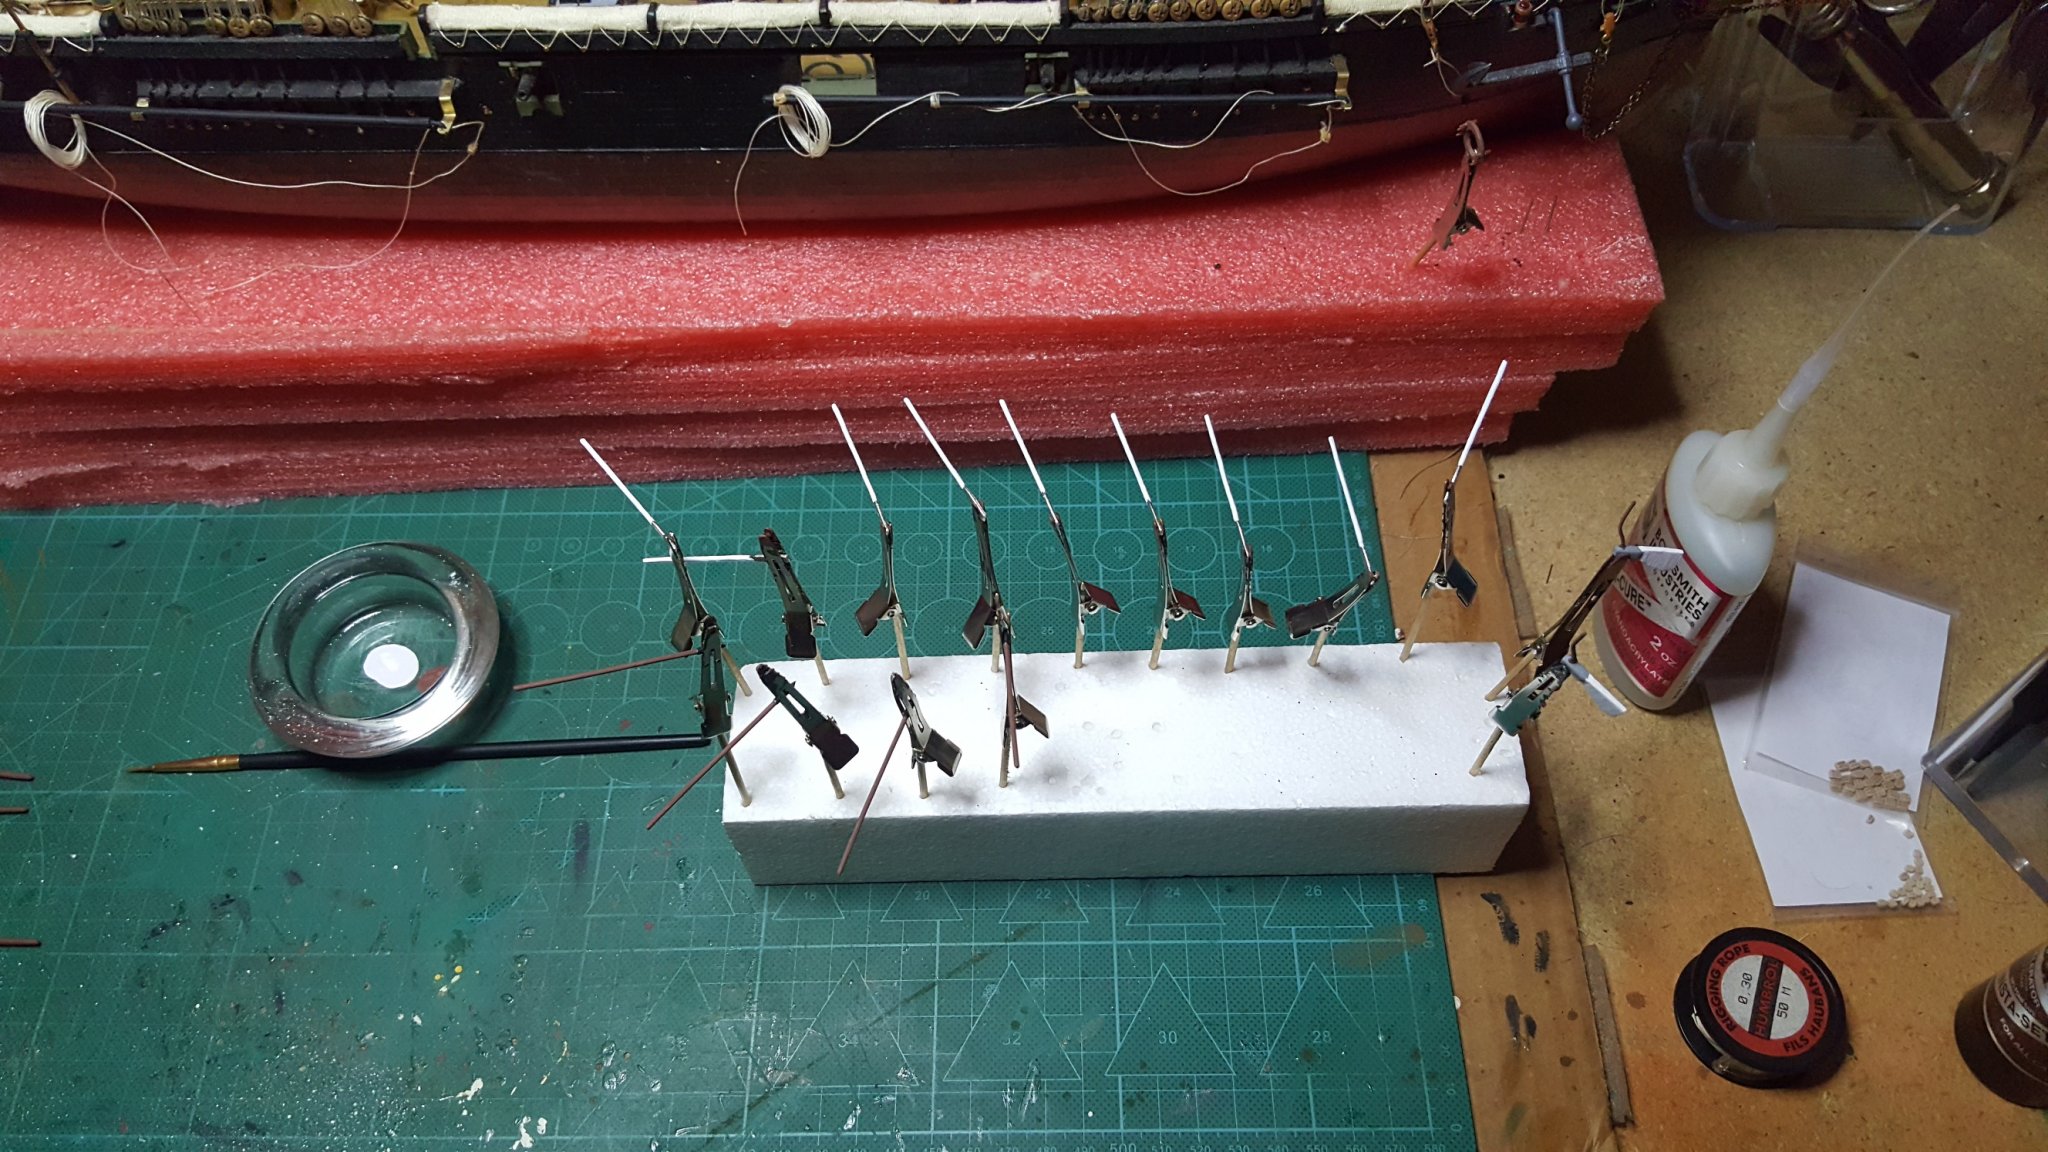
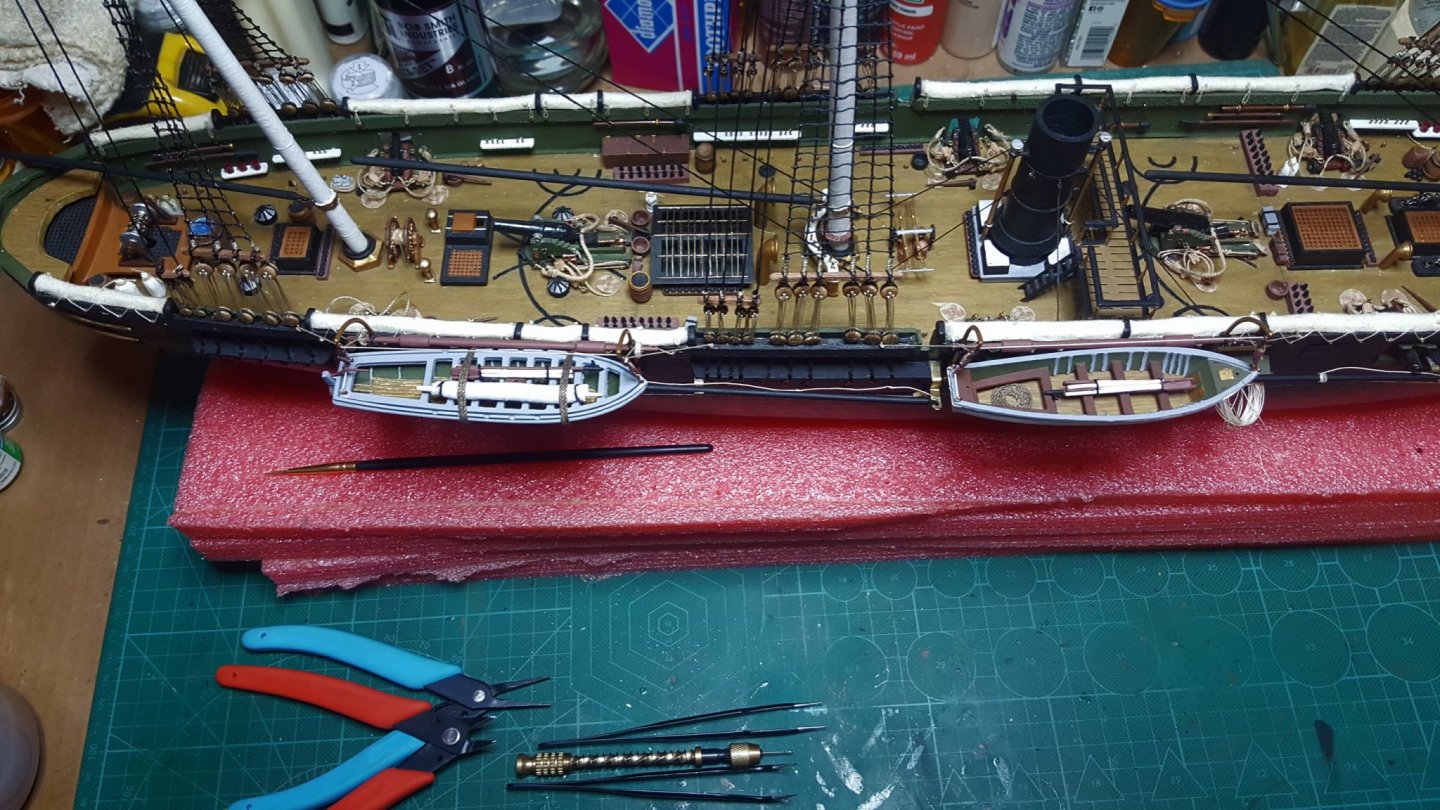
Having to let the main model dry for glue curing on the mast parts and chain parts. So since I have more painting to do for the smaller boats, I am working on the detail piece's and mounting hardware and will install these soon. Research into the sails to attach them onto the masts; I will have to put the sails on before I mount any more sail masts. My goal is for next month to start building the sails and installing them on the masts then one at a time put them on the associated main three masts then gently rig them in place so I don't break any of them during installation. Couple of update images: These are oars, gaffs, and rudders, many more oars to paint. Thanks for all the likes!


- 383 replies
-
- 10
-
-
@CRI-CRI, how many hours are you into this beauty so far?