HOLIDAY DONATION DRIVE - SUPPORT MSW - DO YOUR PART TO KEEP THIS GREAT FORUM GOING! (Only 13 donations so far - C'mon guys!)
×

J11
-
Posts
519 -
Joined
-
Last visited
Content Type
Profiles
Forums
Gallery
Events
Everything posted by J11
-
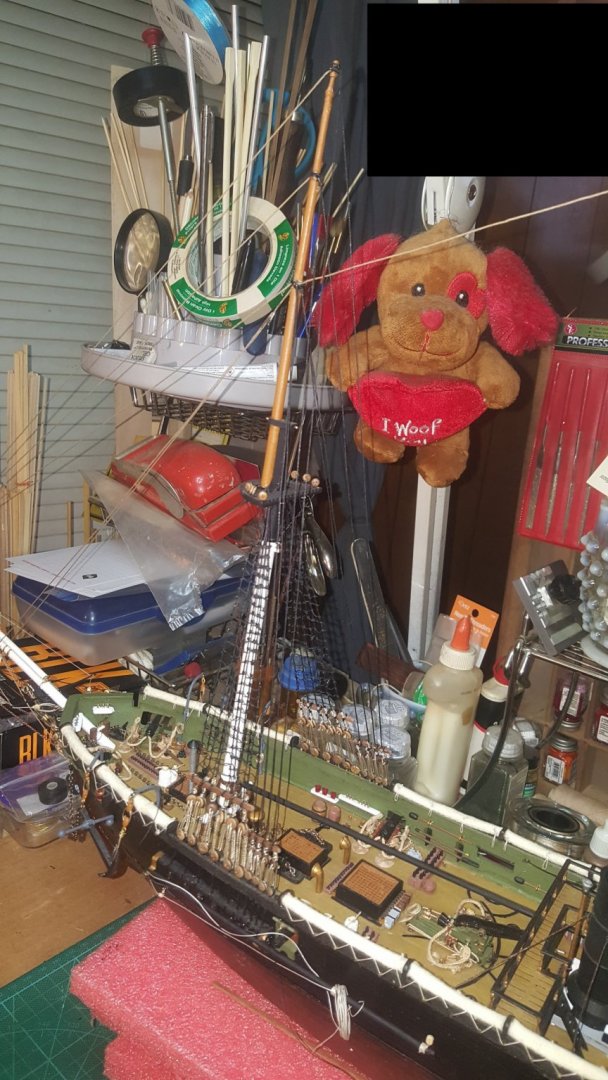
 Quick update: Upper ratlines on the fore mast is finally done and moving towards the main mast work now. I'll post another update as soon as possible, thanks for all the likes and comments gentlemen!
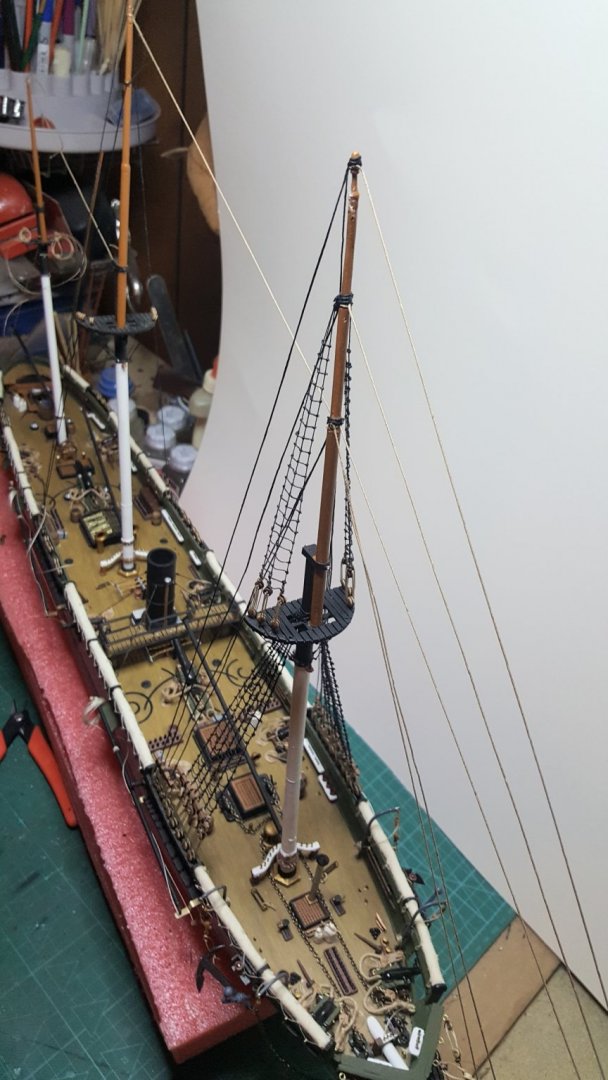
-
Looking great!! Fine attention to detailing, look forward to more updates.
- 61 replies
-
- 1
-

-
- billing boats
- vasa
- (and 1 more)
-
@JToma, approximately how many hours are you into this build? One of my hopes is to get a Constitution done one day, but alas I have 7 more ships to go before I can start one. But never say never!
-
Great looking craftsmanship, look forward to more updates!
-
Bravo on a excellent ship build! Love the detailing and the flag.
-
@Keith Black, I do have this file but it is copyrighted and can't post it. Did so in the past and got in trouble for it. But here are some images of a model which might be helpful. If you do want the file you can buy it here at the NRG Store. Articles from the Journals are available for personal or research use direct from the NRG for a nominal charge. We provide CDs with the entire run of Journals up to 2015 from the NRG Store. Individual articles can be obtained as PDFs.


-
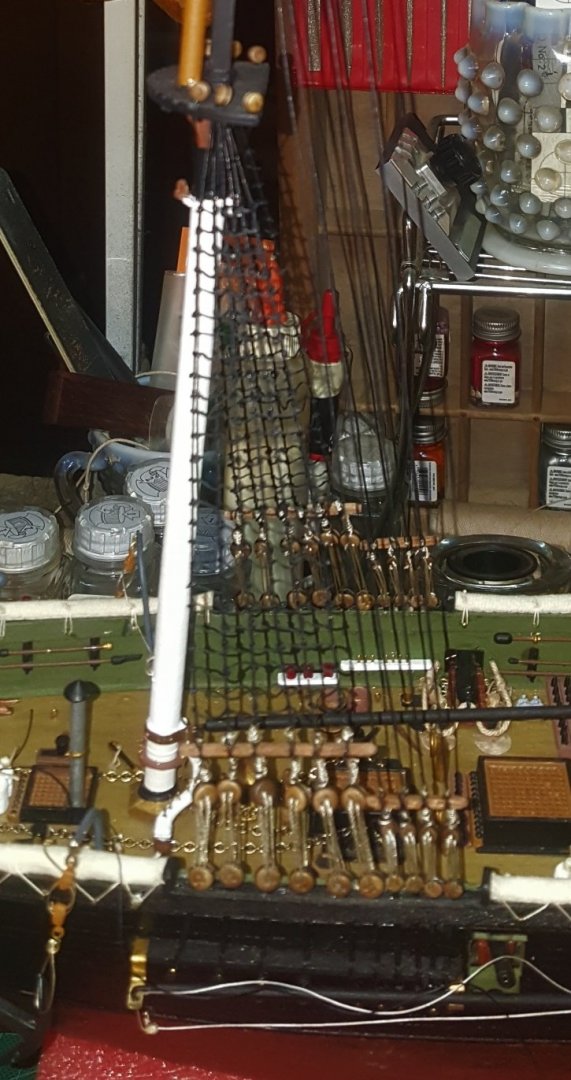
Thanks @Old Collingwood, I am having to be very careful with the tighting on the rats as to much and snap goes the main mast again. At least they look used.
-
Ahoy! Well; got tied up with stuff, but here's a update for the ratline's work. I'll try to get the upper ratlines worked on later and post those also. As I had said before these are slow going as the model is so fragile but persistence pays off and will keep on a tying them knots. Their not perfect but look ok, will post more updates as soon as I can. Here's a site for civil war clip art which is free...Enjoy! https://etc.usf.edu/clipart/galleries/158-1861-1865-civil-war-naval-battles
- 383 replies
-
- 10
-
-
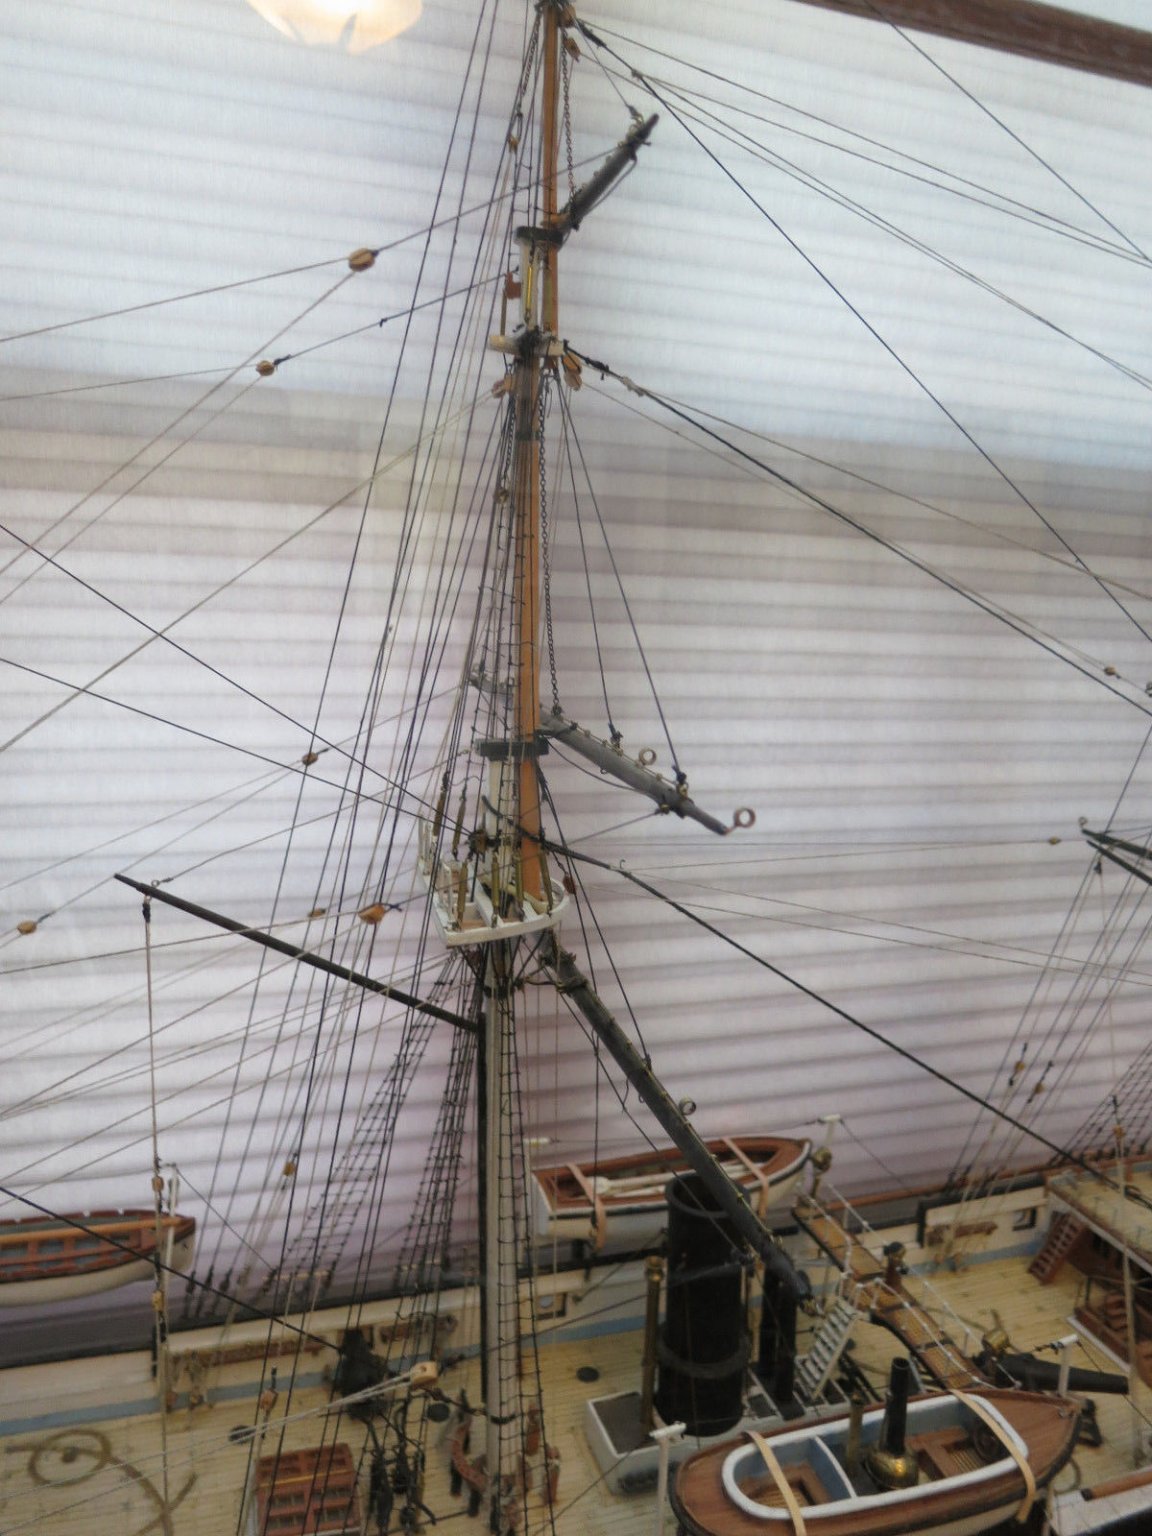
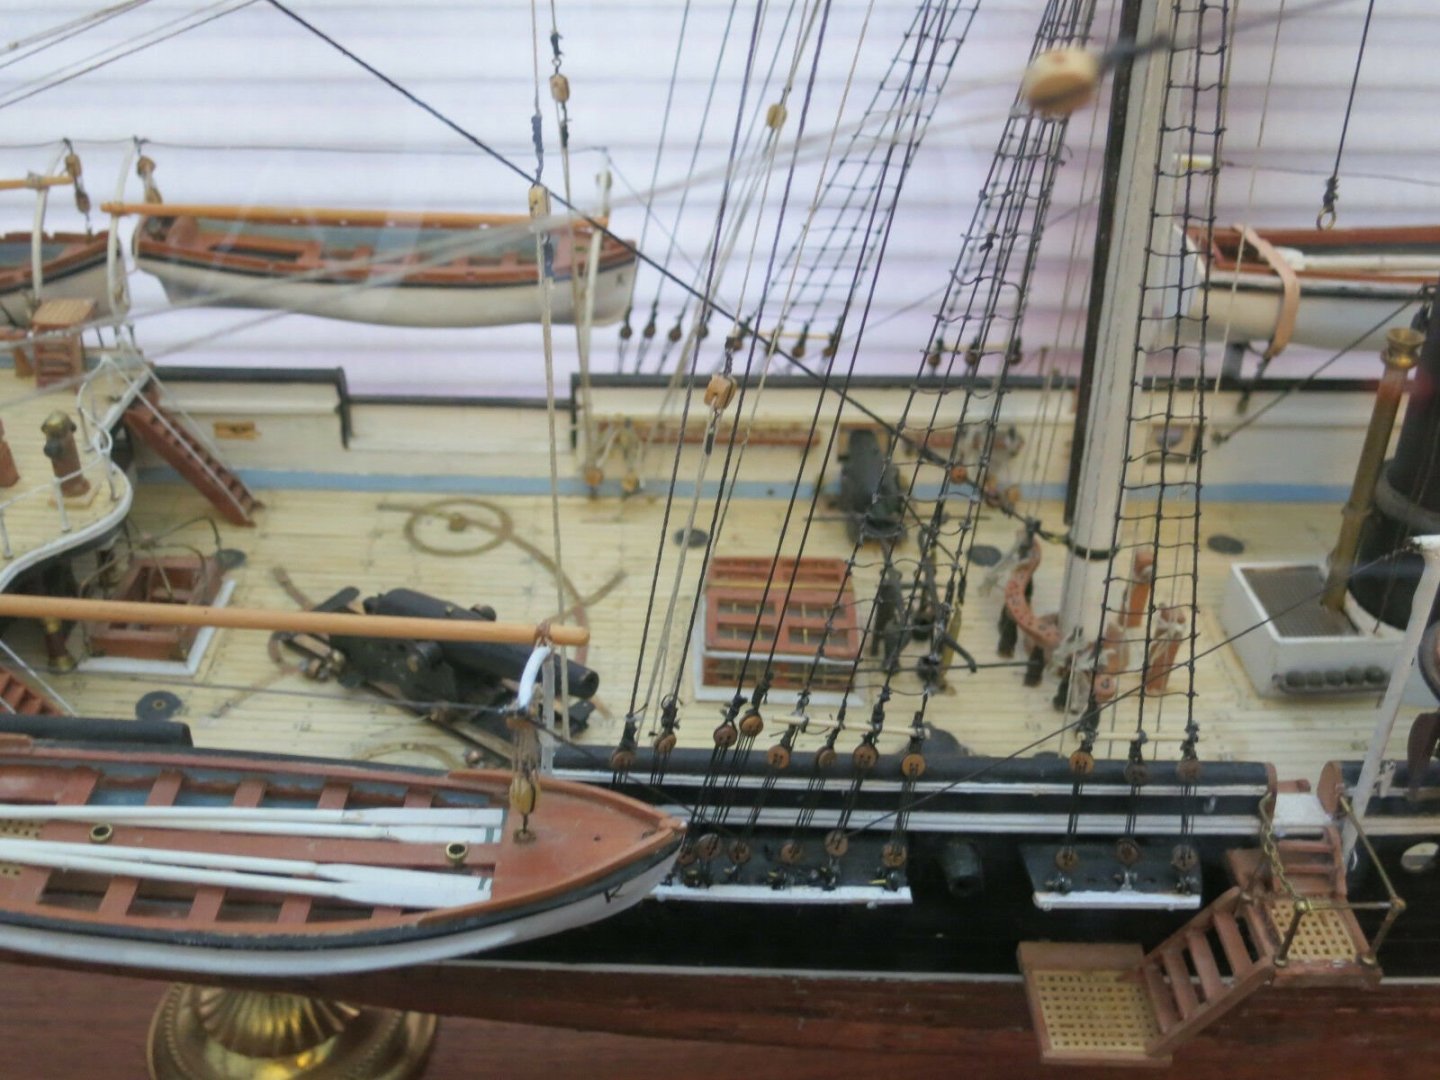
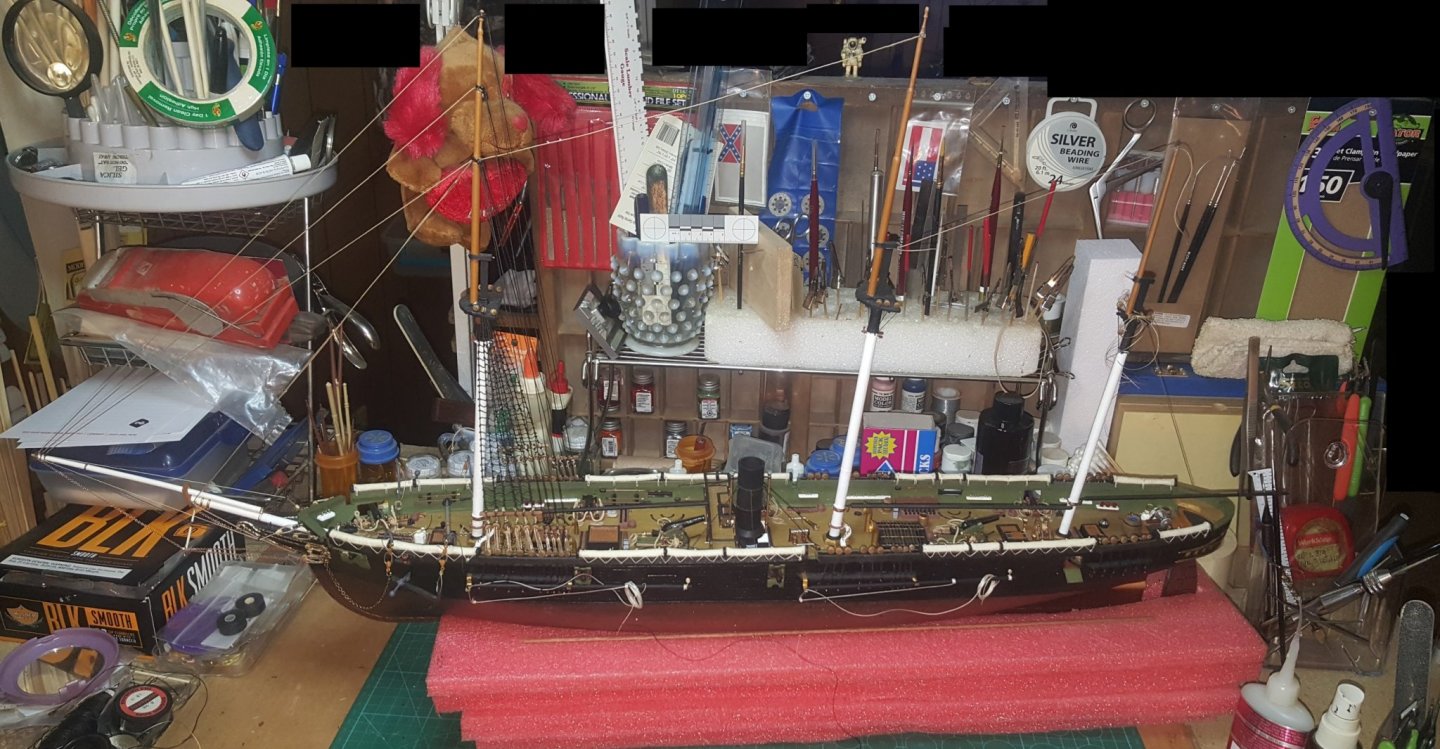
Thanks popeye the sailor, Yep been doing research on them and have come up with some good reference's but not a example book with quality drawings. Found some U-T videos which are also helpful and looking for more. I'll have some updated images by tomorrow as the rigging lines are slow and feels like a turtle doing a race to get them done. Still on the fore mast ratlines, ten done and eight more to go.
-
I envy you PE work, that stuff drives me batty trying to get all the angles correct without destroying the PE parts!! The Arizona is looking great, looking forward to more updates.
-
Gentlemen whats a good reference for rigging knots? I know a few but have forgotten some also. Web site with examples or good example books? Thanks.
-
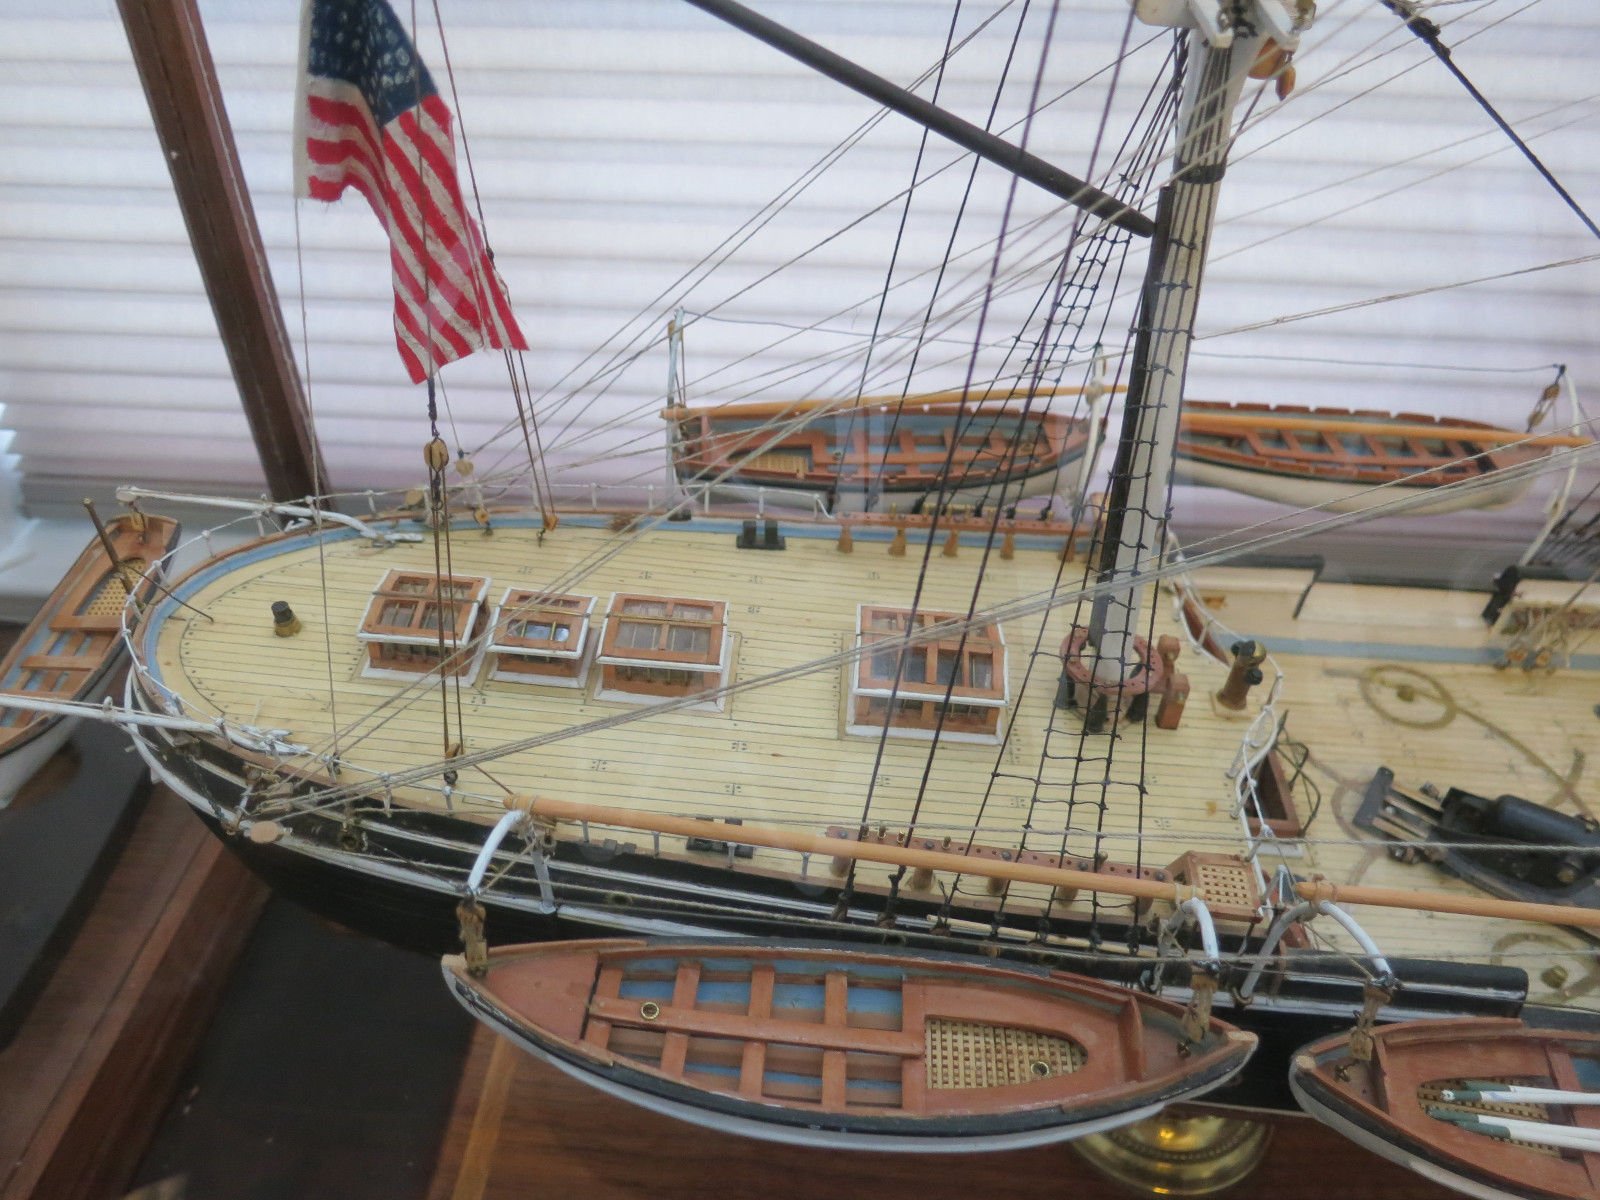
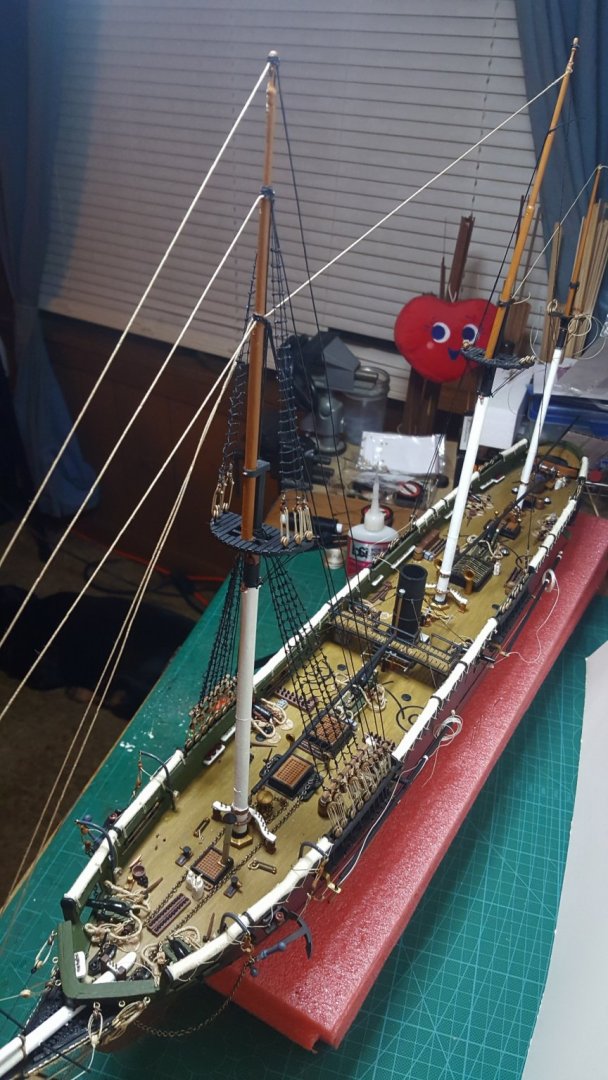
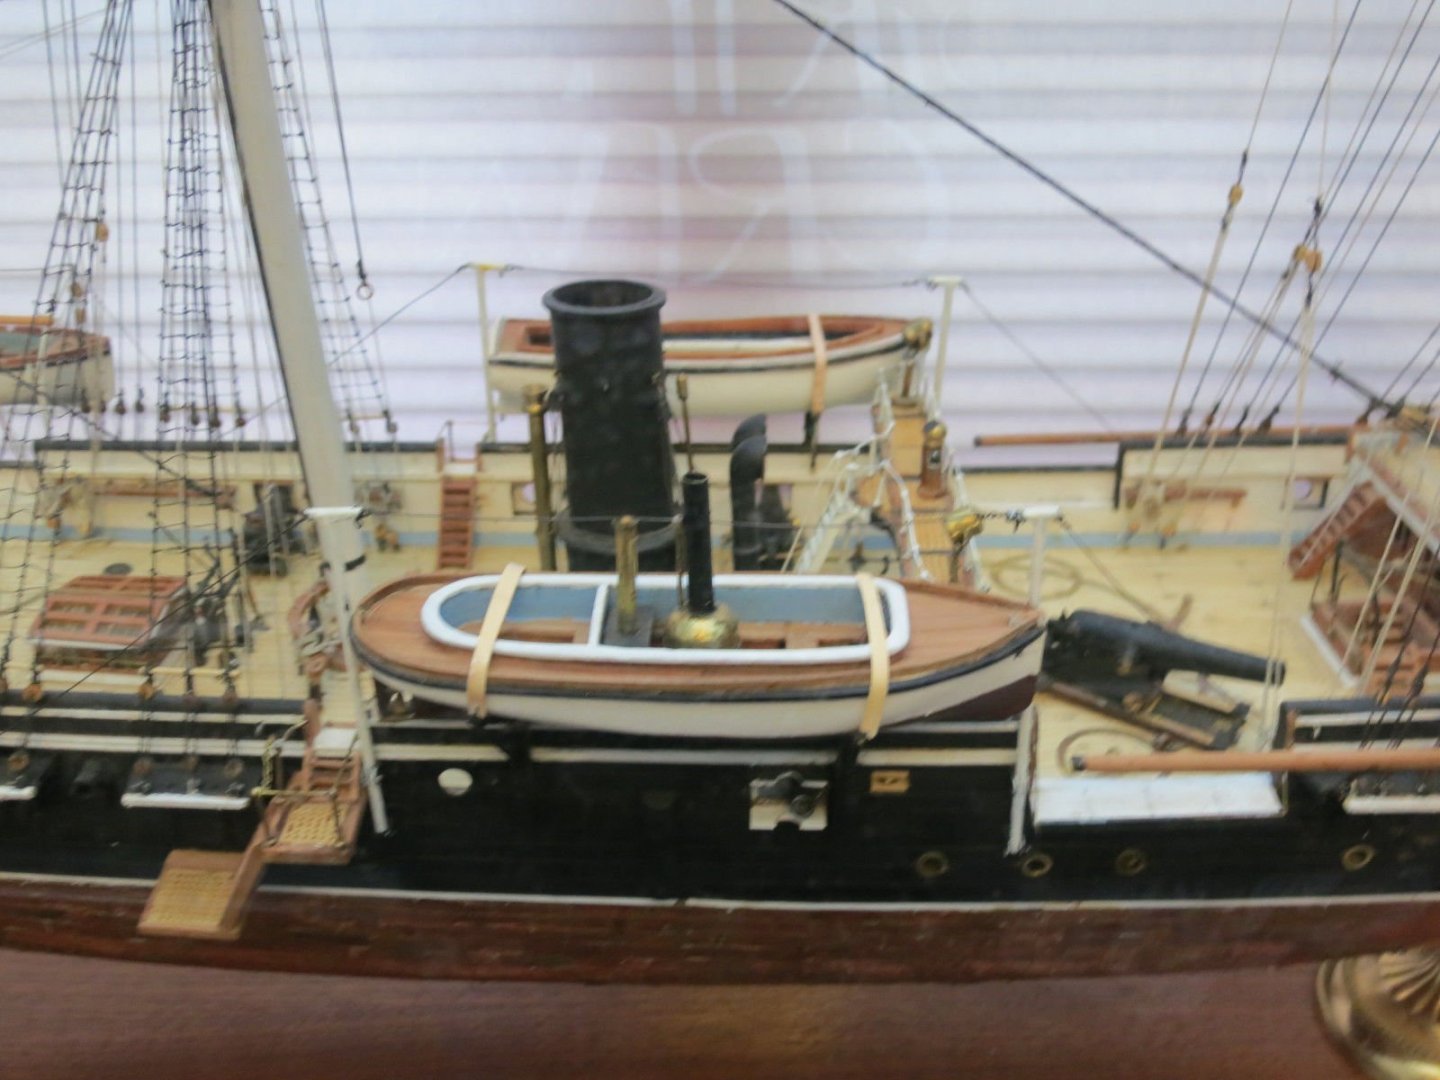
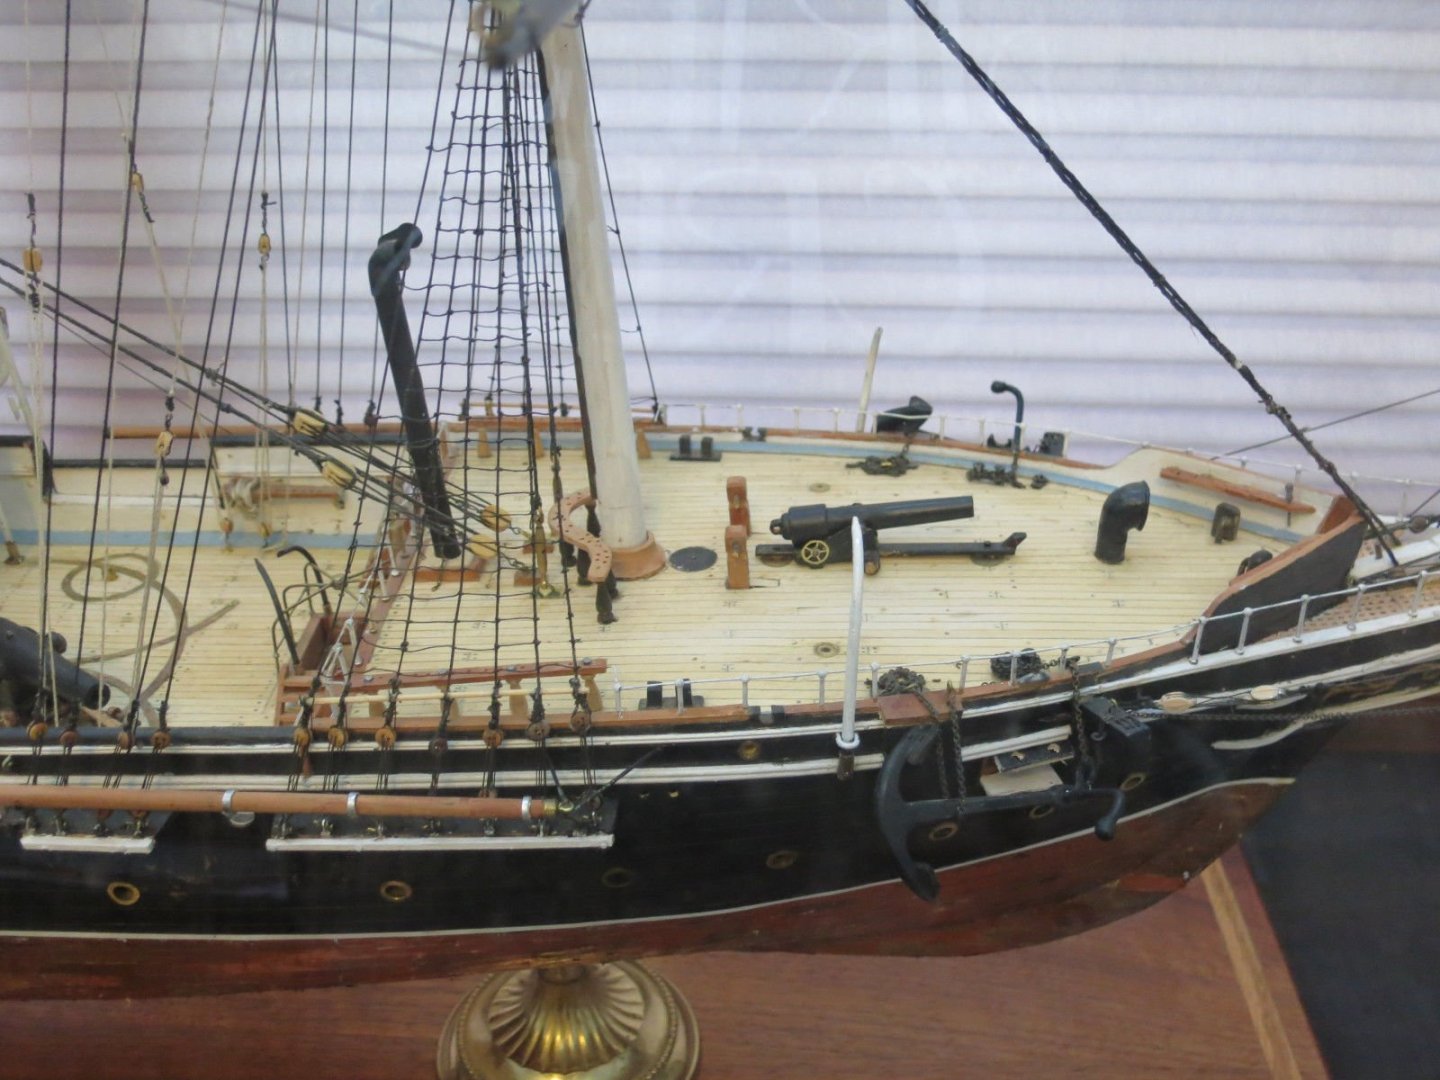
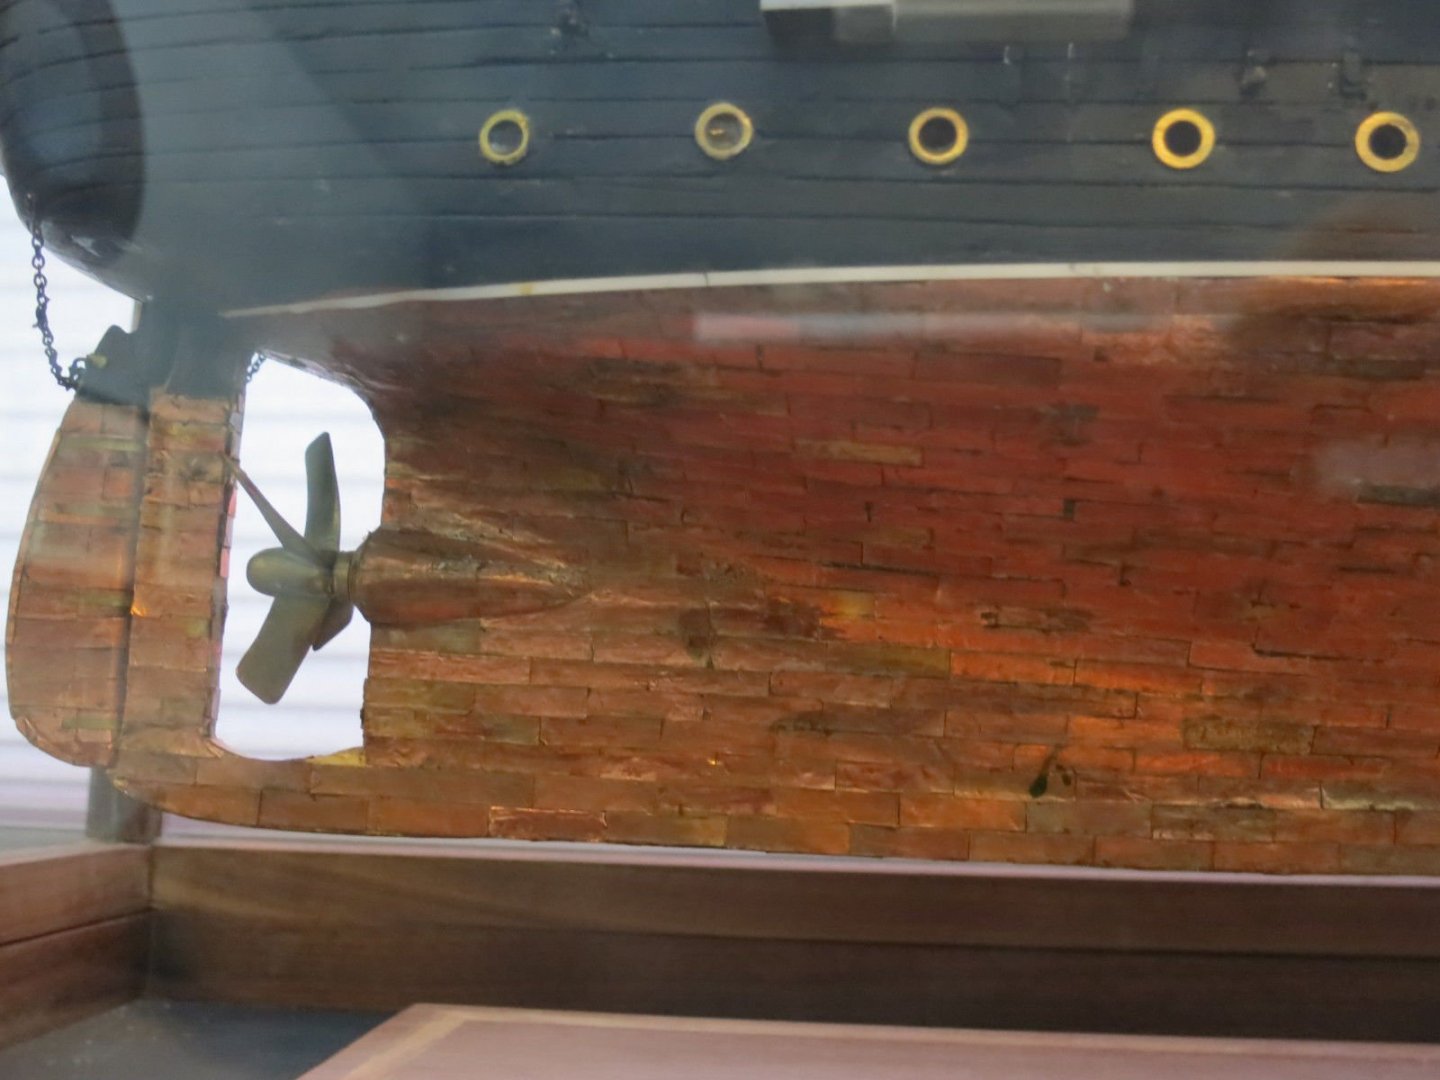
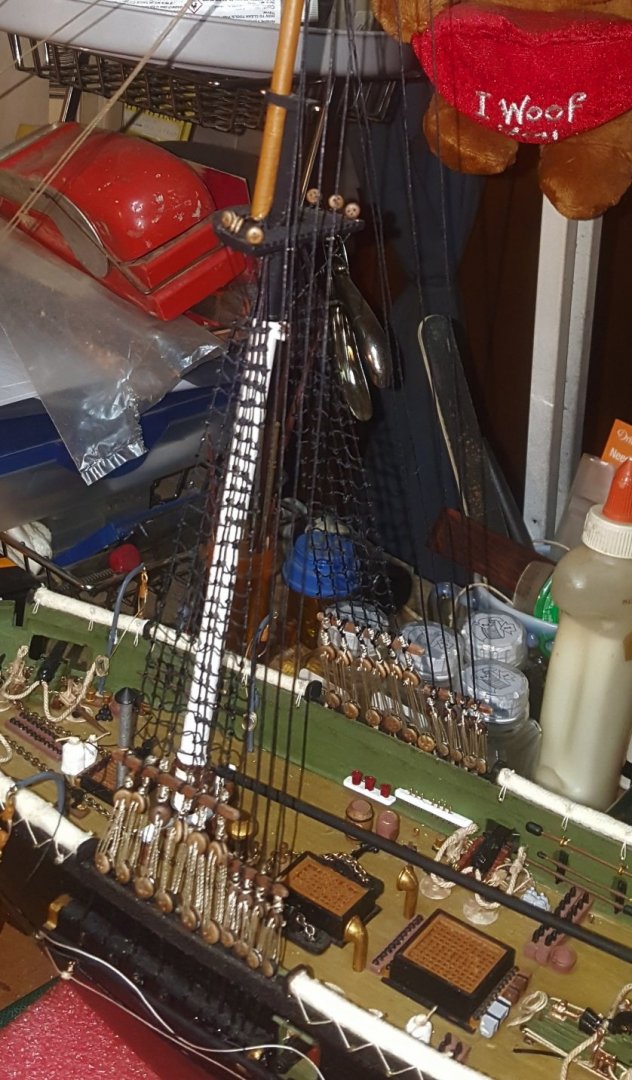
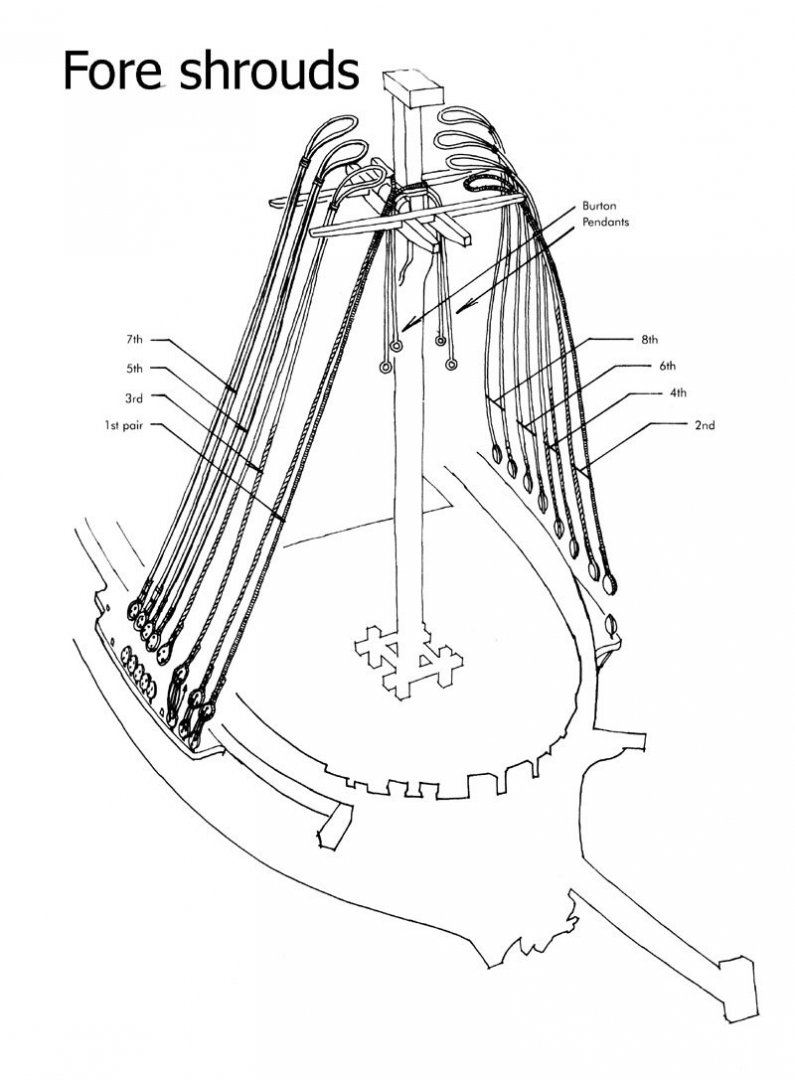
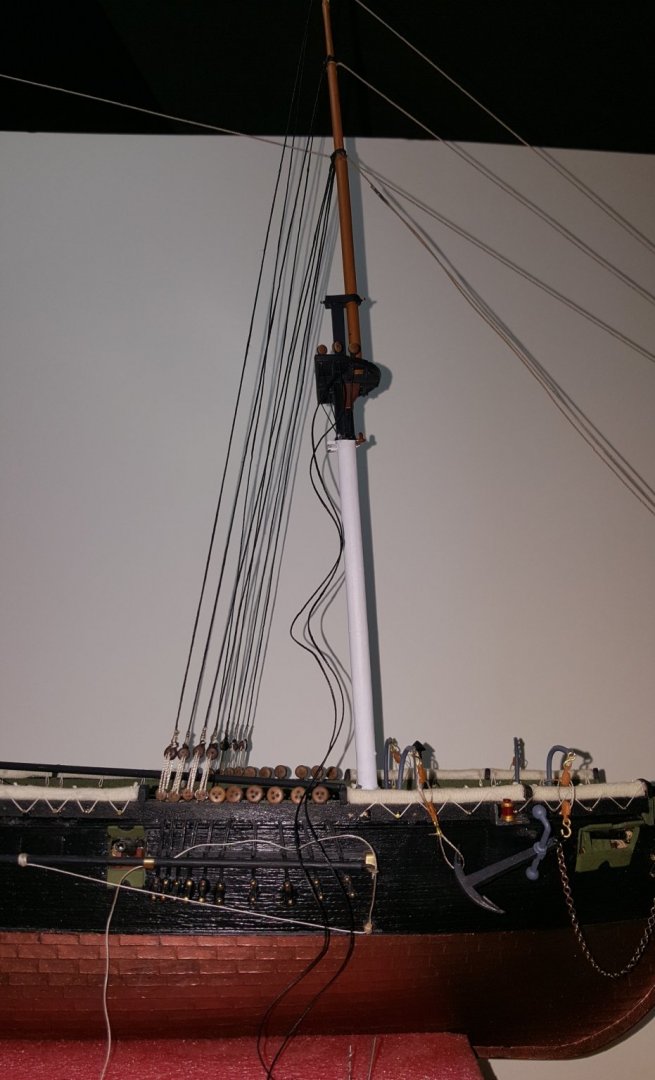
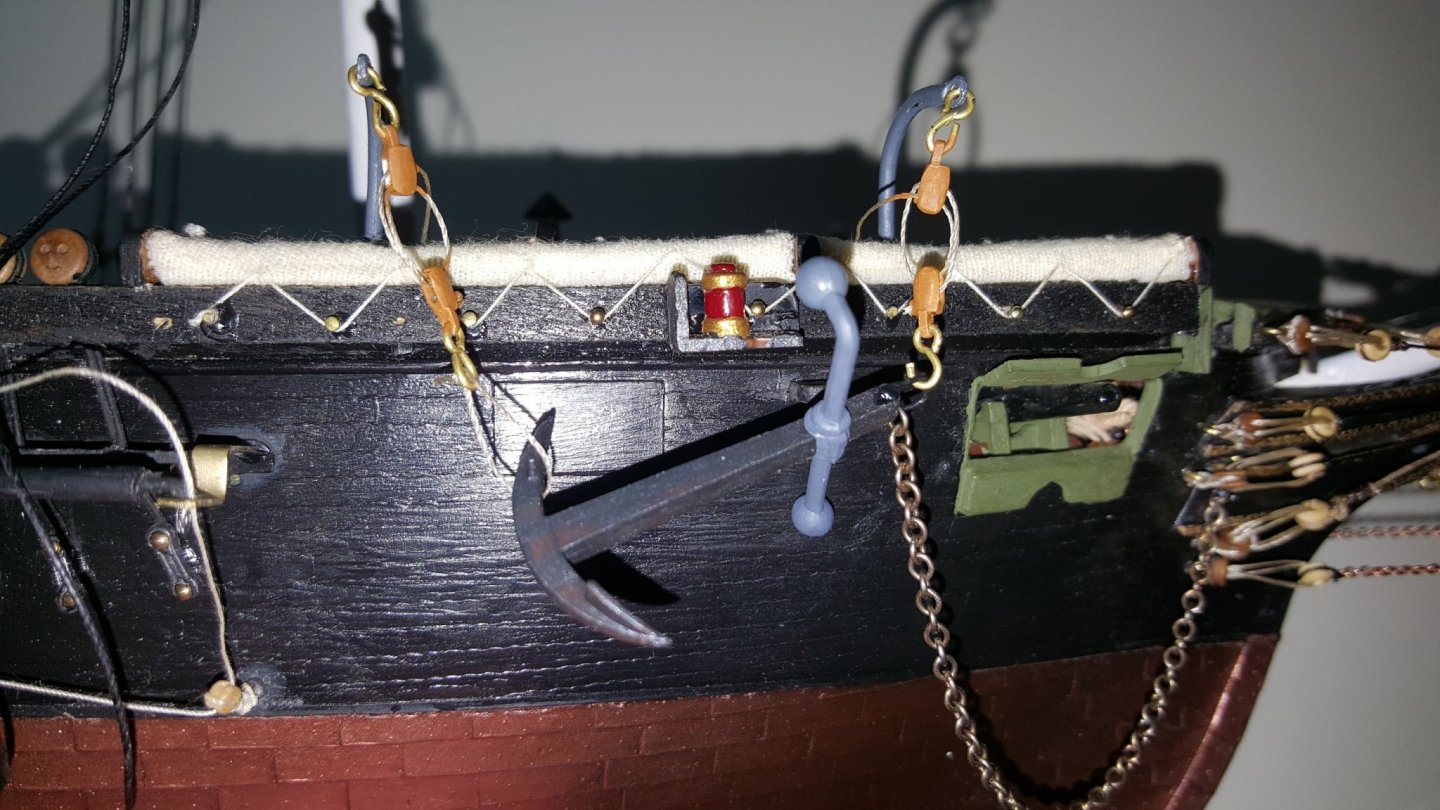
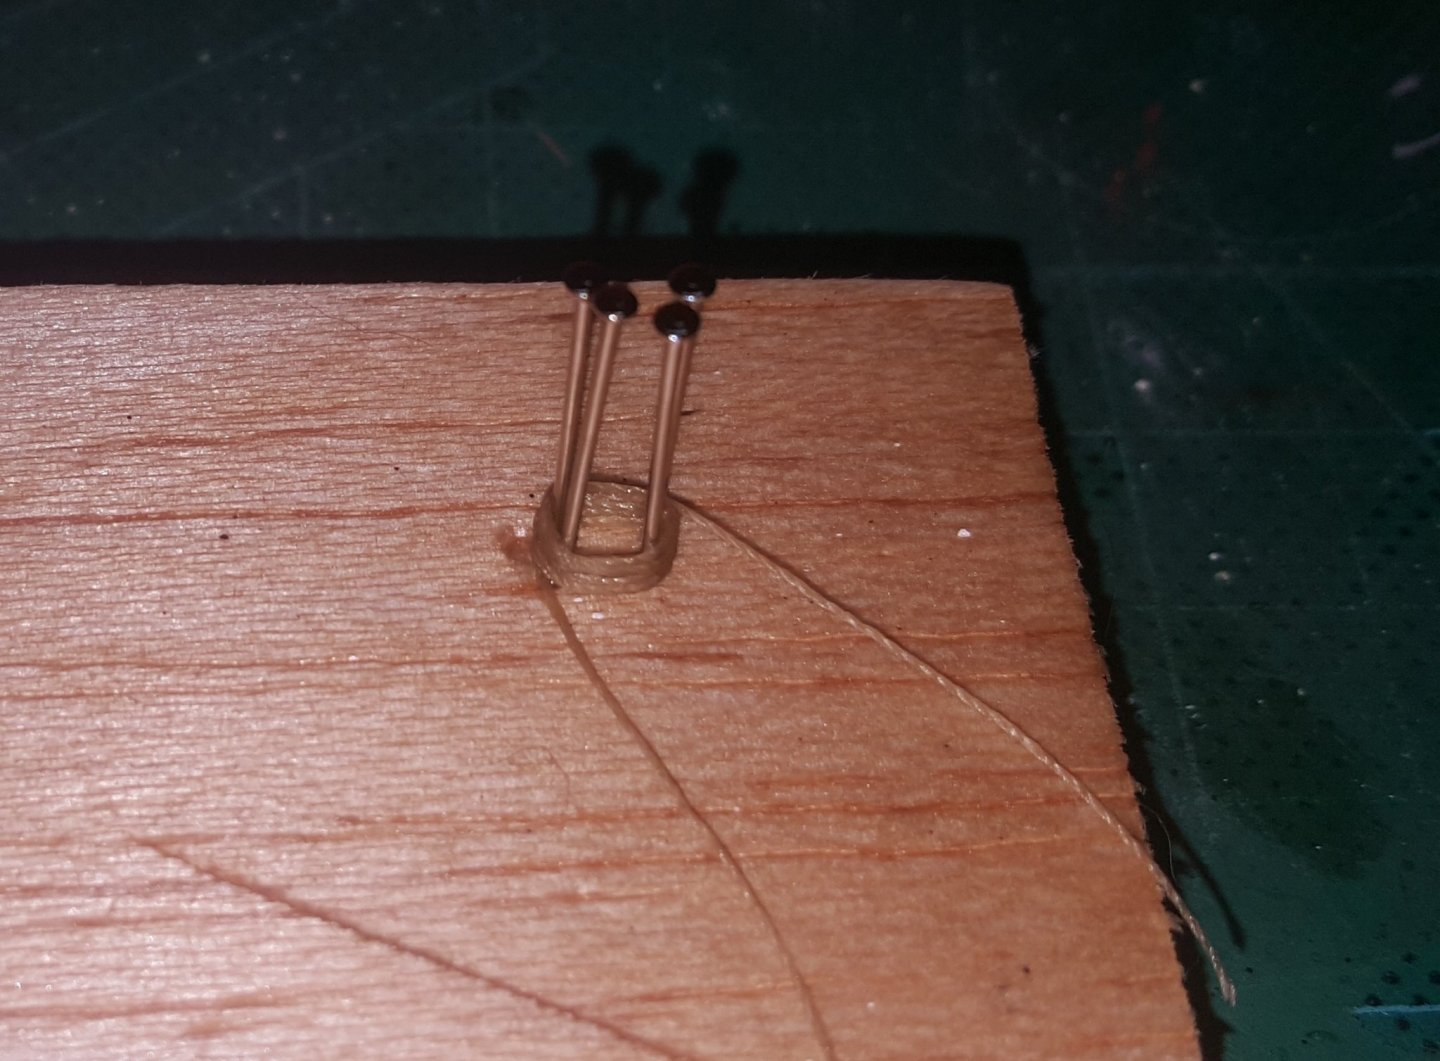
Progress images and a closeup of the anchor work. The fore mast completely broke in two different pieces as I was doing a tightening with the last two port shrouds. Luckily I was able to quickly fix it before anything snapped on me. I'll have to sand down the extra CA and repaint for touch ups but it turned out alright. Waiting for them to dry completely before I start the other shrouds. I'll be following the sequence image below for all of shrouds to produce a nice detailed look on them. I'll have some more updates soon. She's slowly coming along.
-
Vasa by Wiktor.L - DeAgostini - 1/65
J11 replied to Wiktor.L's topic in - Kit build logs for subjects built from 1501 - 1750
Enjoying your blog. The studding work is intense for detailing. I might try to tackle that on my "Vasa" when I start her after my current project which will be a few more months to complete. I assume you just clipped them off level with the planks as you went and then gently sanded them down? Very unique detailing procedure really adds to the rustic historical look of her, simple but very time consuming; excellent work! -
Excellent craftsmanship, look forward to your updates.
-
Here's some updated images for the build. Anchors are finished and have started the rat-lines work. Will be a couple of days for next update as the ratlines are going to take me a couple of days to finish each section. Fragile and gentle work on these rascals.


-
They have gotten interior images of the HMS Terror : https://www.rcinet.ca/en/2019/08/28/arctic-mystery-tragic-franklin-expedition-remarkable-condition-of-hms-terror/ Your work on her is impressive, look forward to more posts.
-
Thanks popeye the sailor, I've been working on the anchors and should have them done today will post a couple of images later on. Then rat-lines work will commence. I'll be making the rope coils also for them (anchors) and will post a image of that also. They had found the HMS Terror here's the link, great condition. They should raise her, what a museum it would make!! https://www.rcinet.ca/en/2019/08/28/arctic-mystery-tragic-franklin-expedition-remarkable-condition-of-hms-terror/
-
Truly a inspirational work of art!! Congratulations!!
-
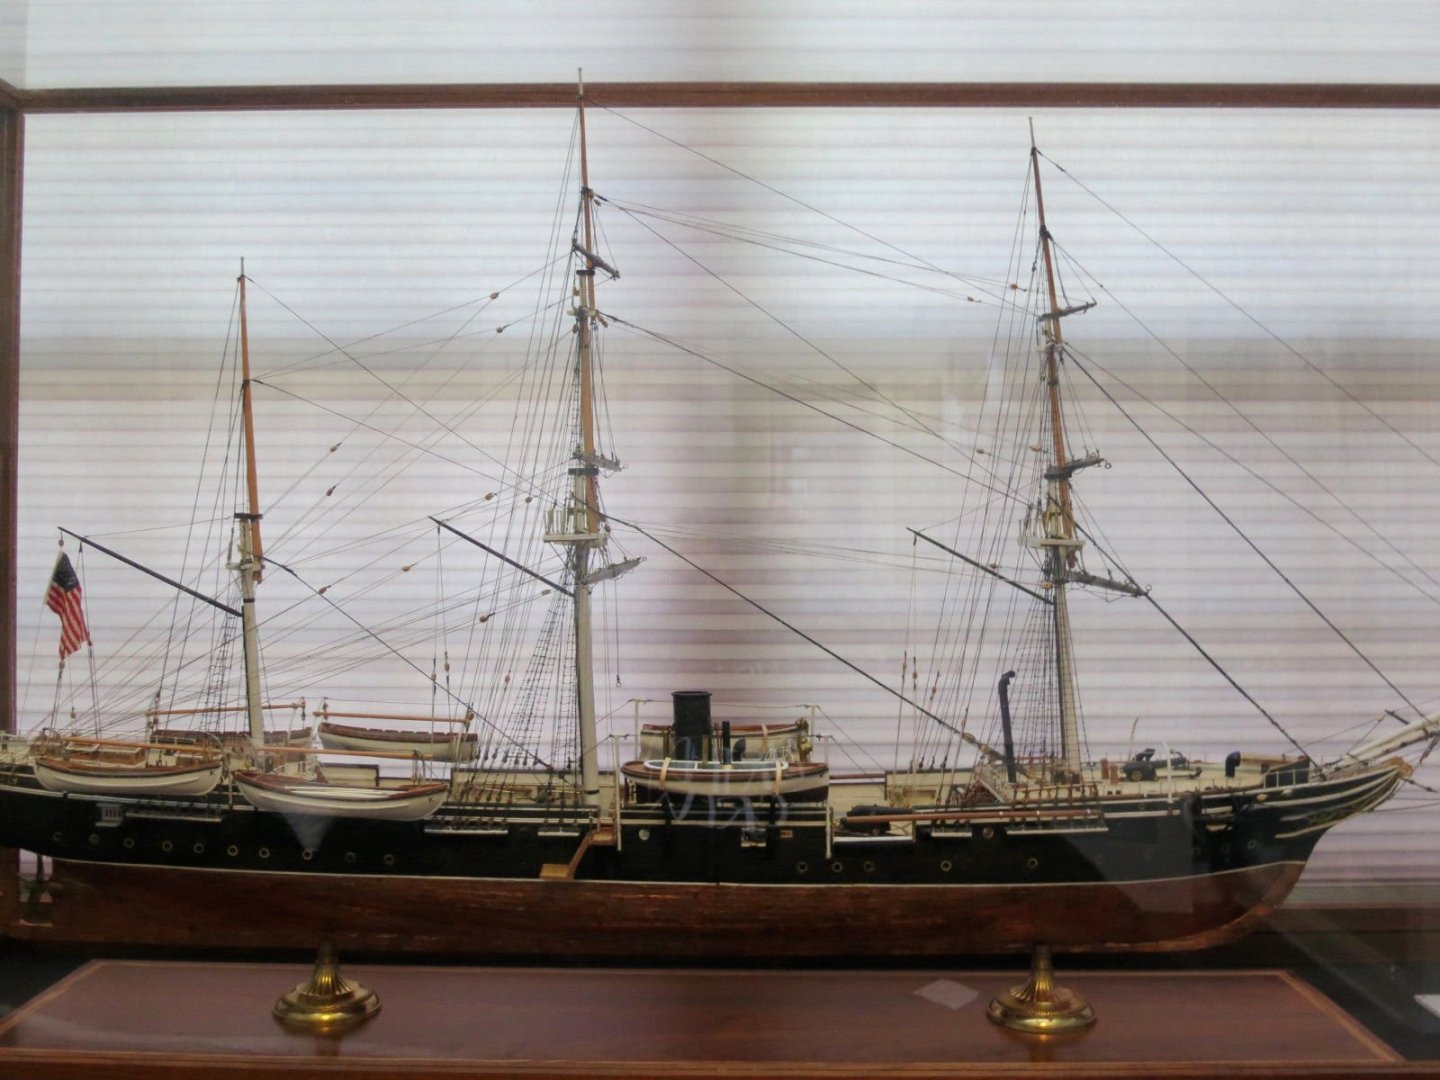
Absolutely Wonderful !! Your craftsmanship and quality to detail will help me tremendously when I start and work on my "VASA". Many thanks for posting all the images and detailing work; almost step by step for instructional procedures.
- 146 replies
-
- 3
-
-
- deagostini
- vasa
- (and 1 more)
-
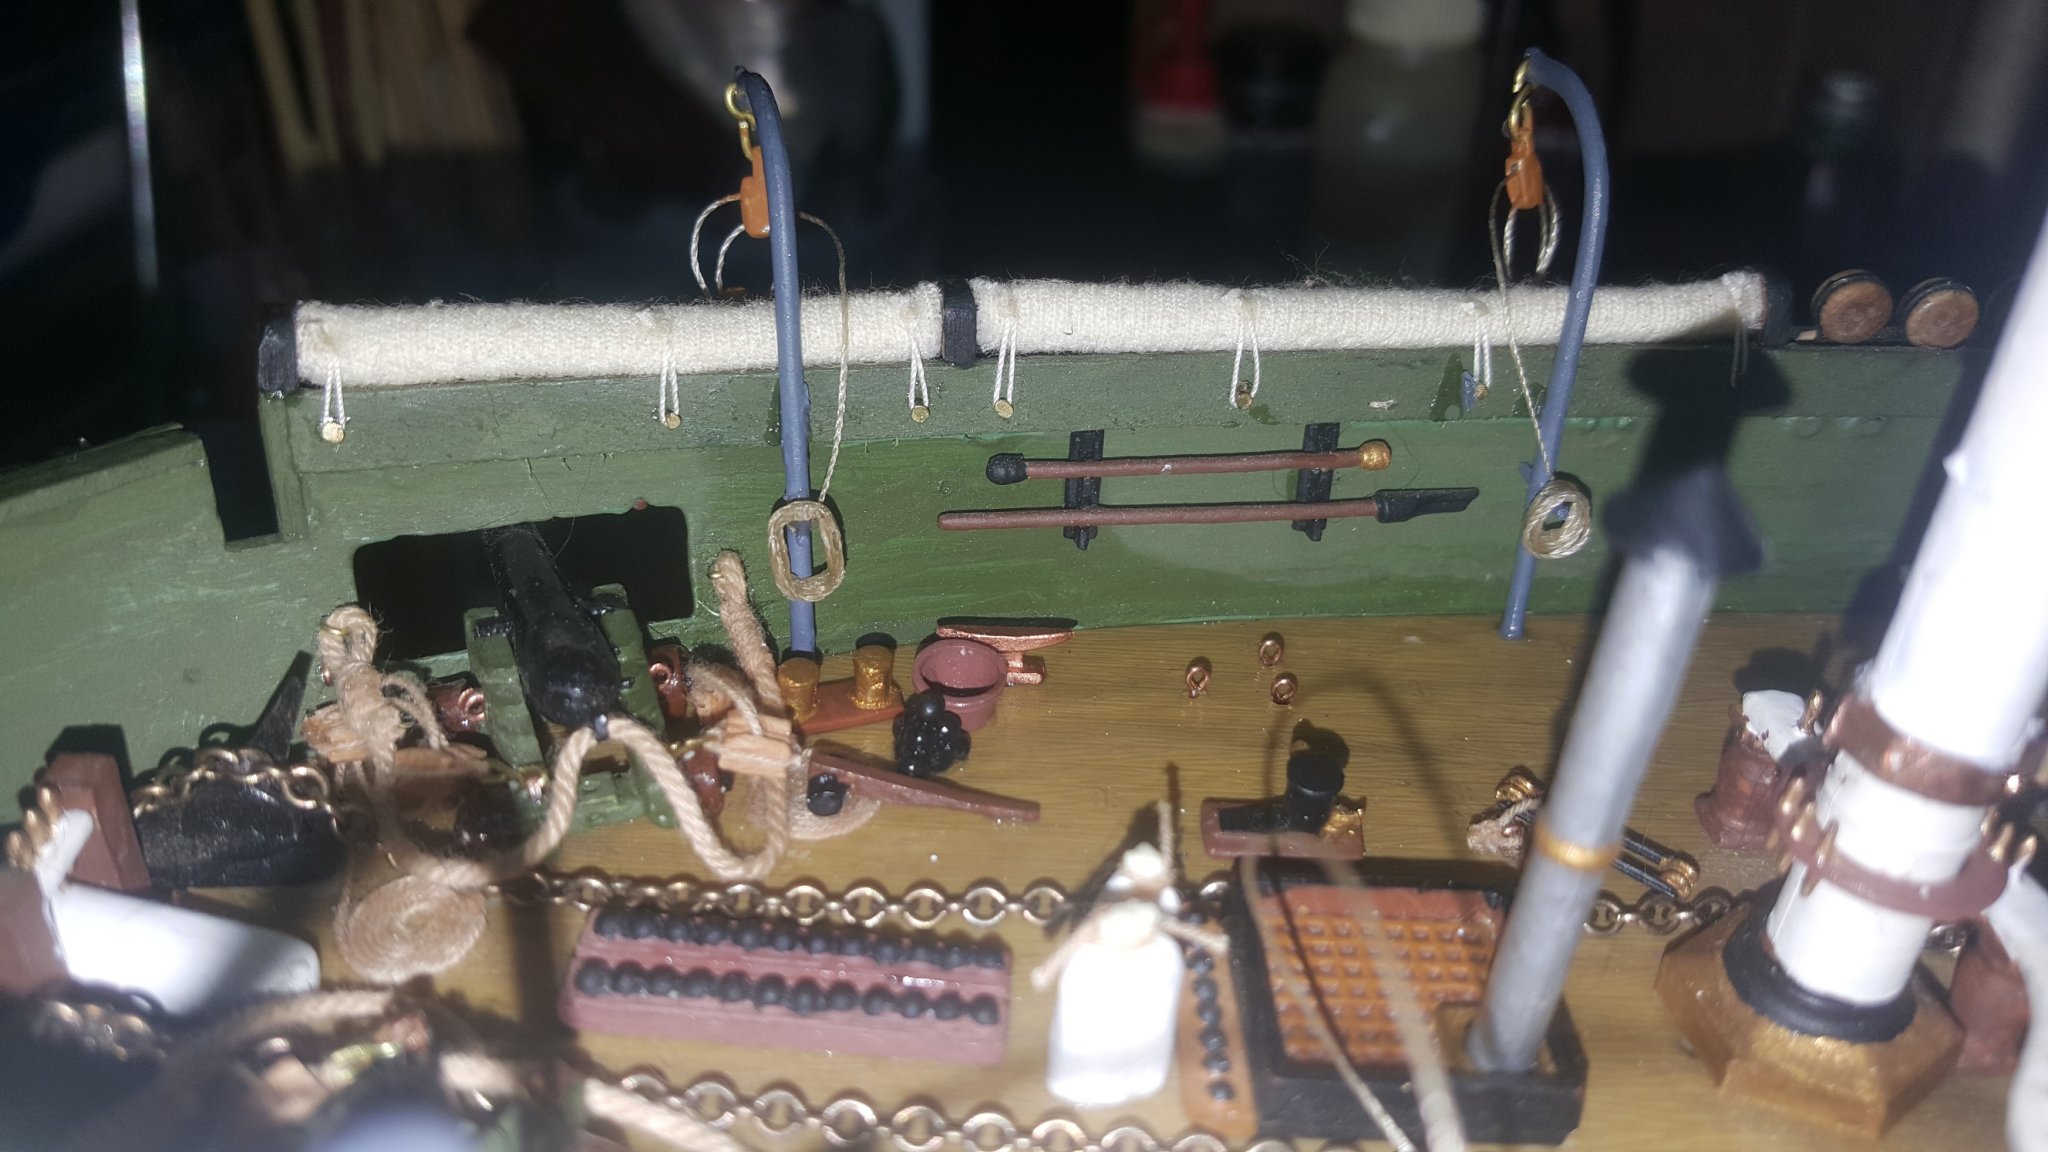
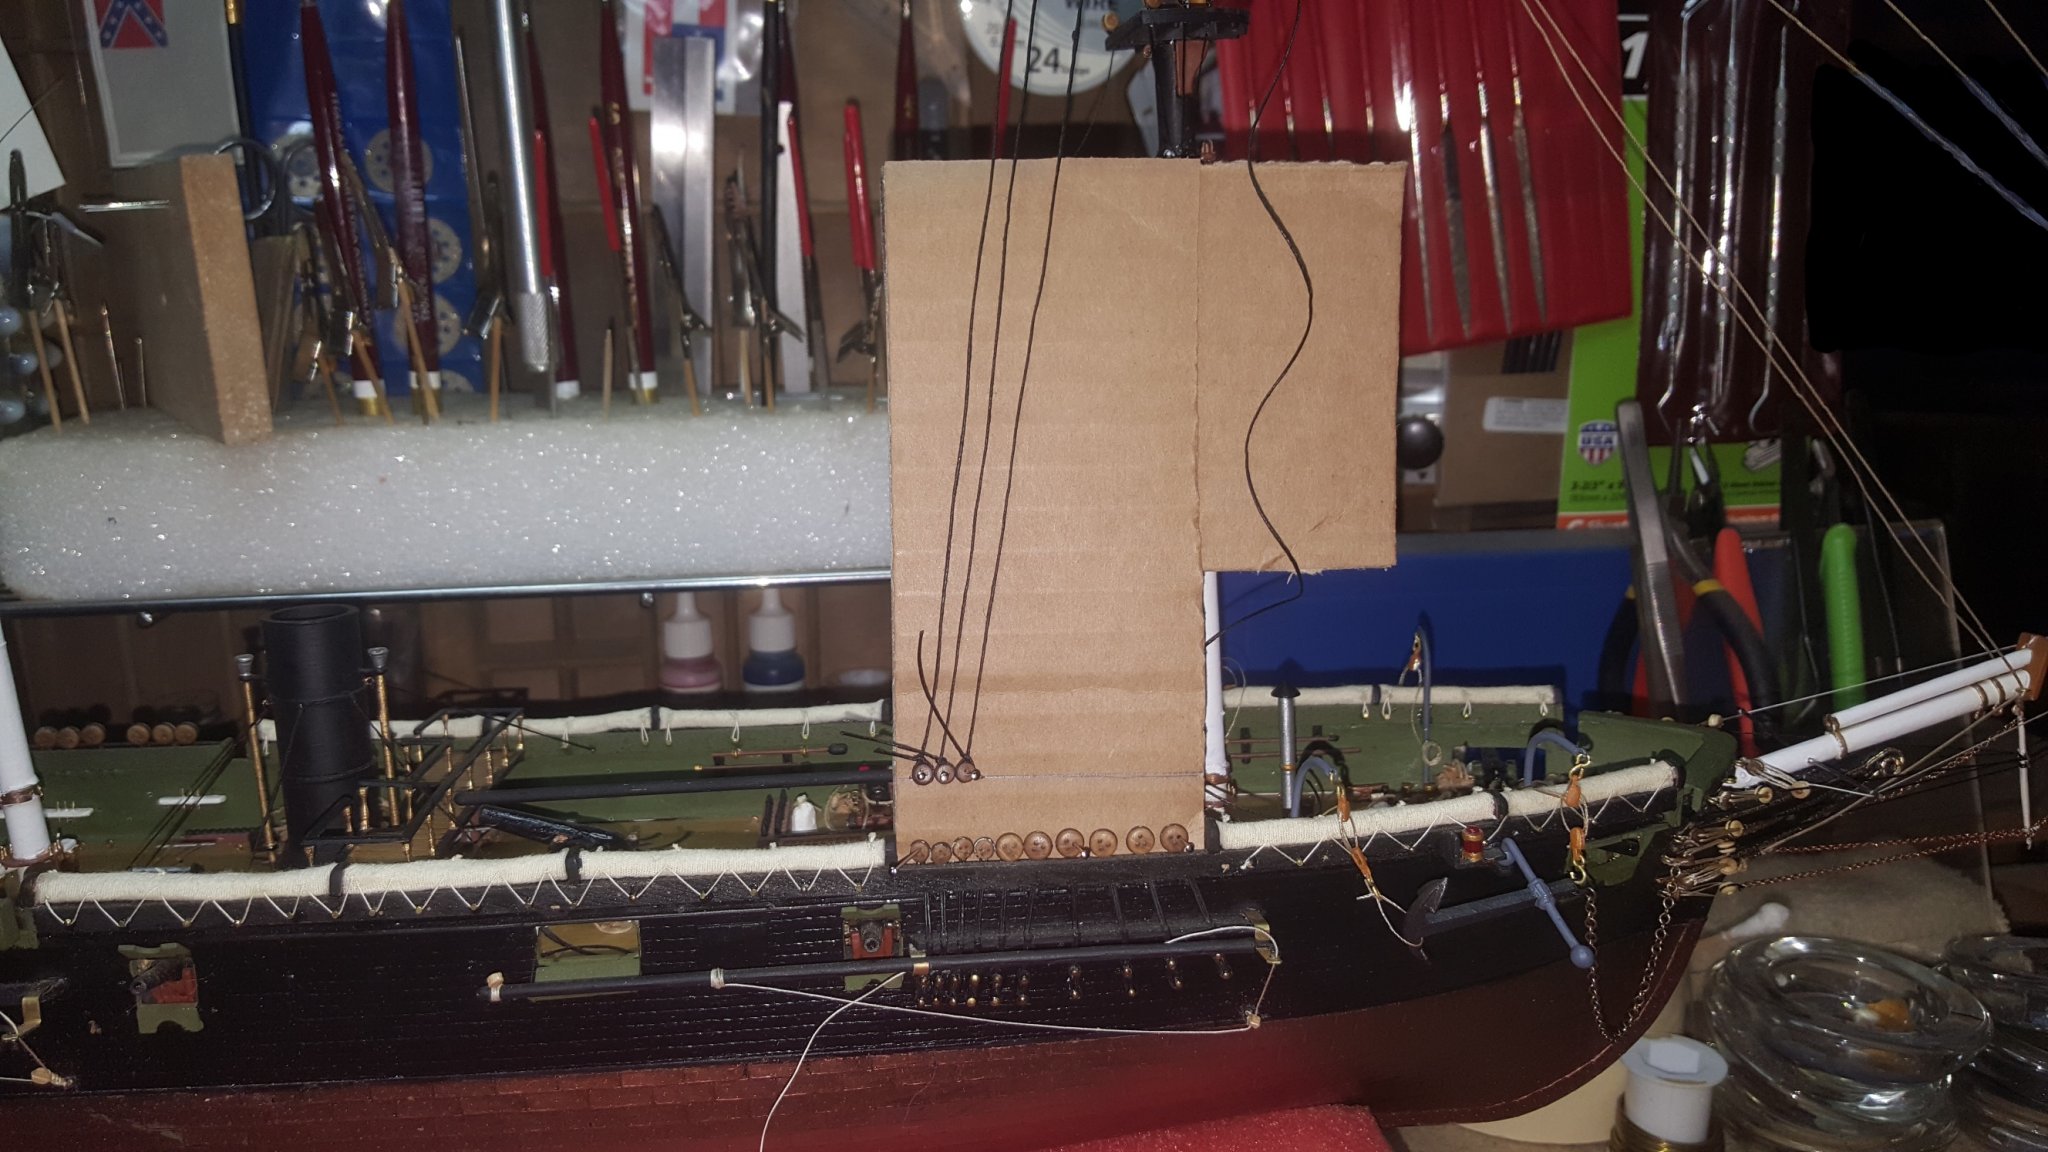
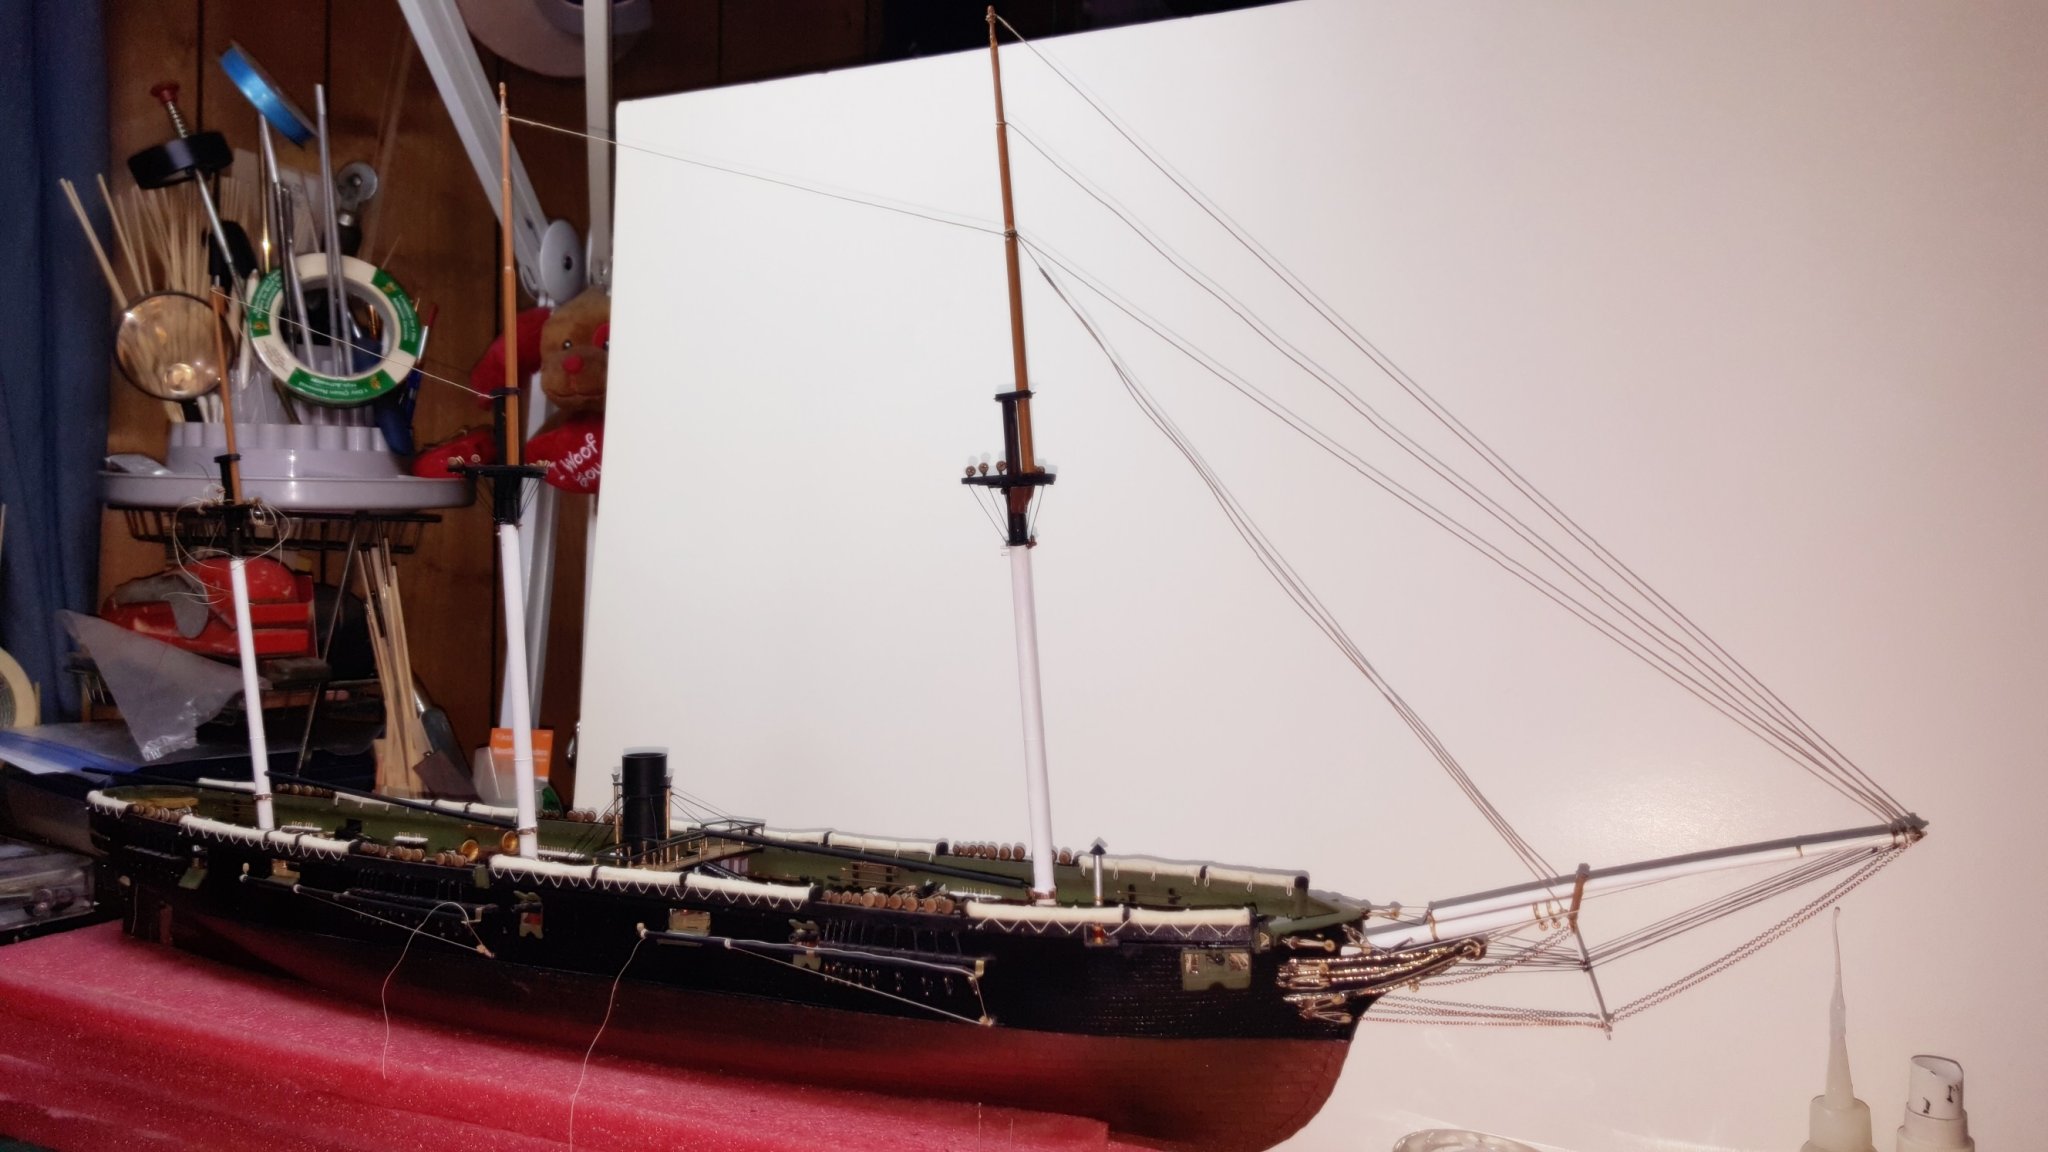
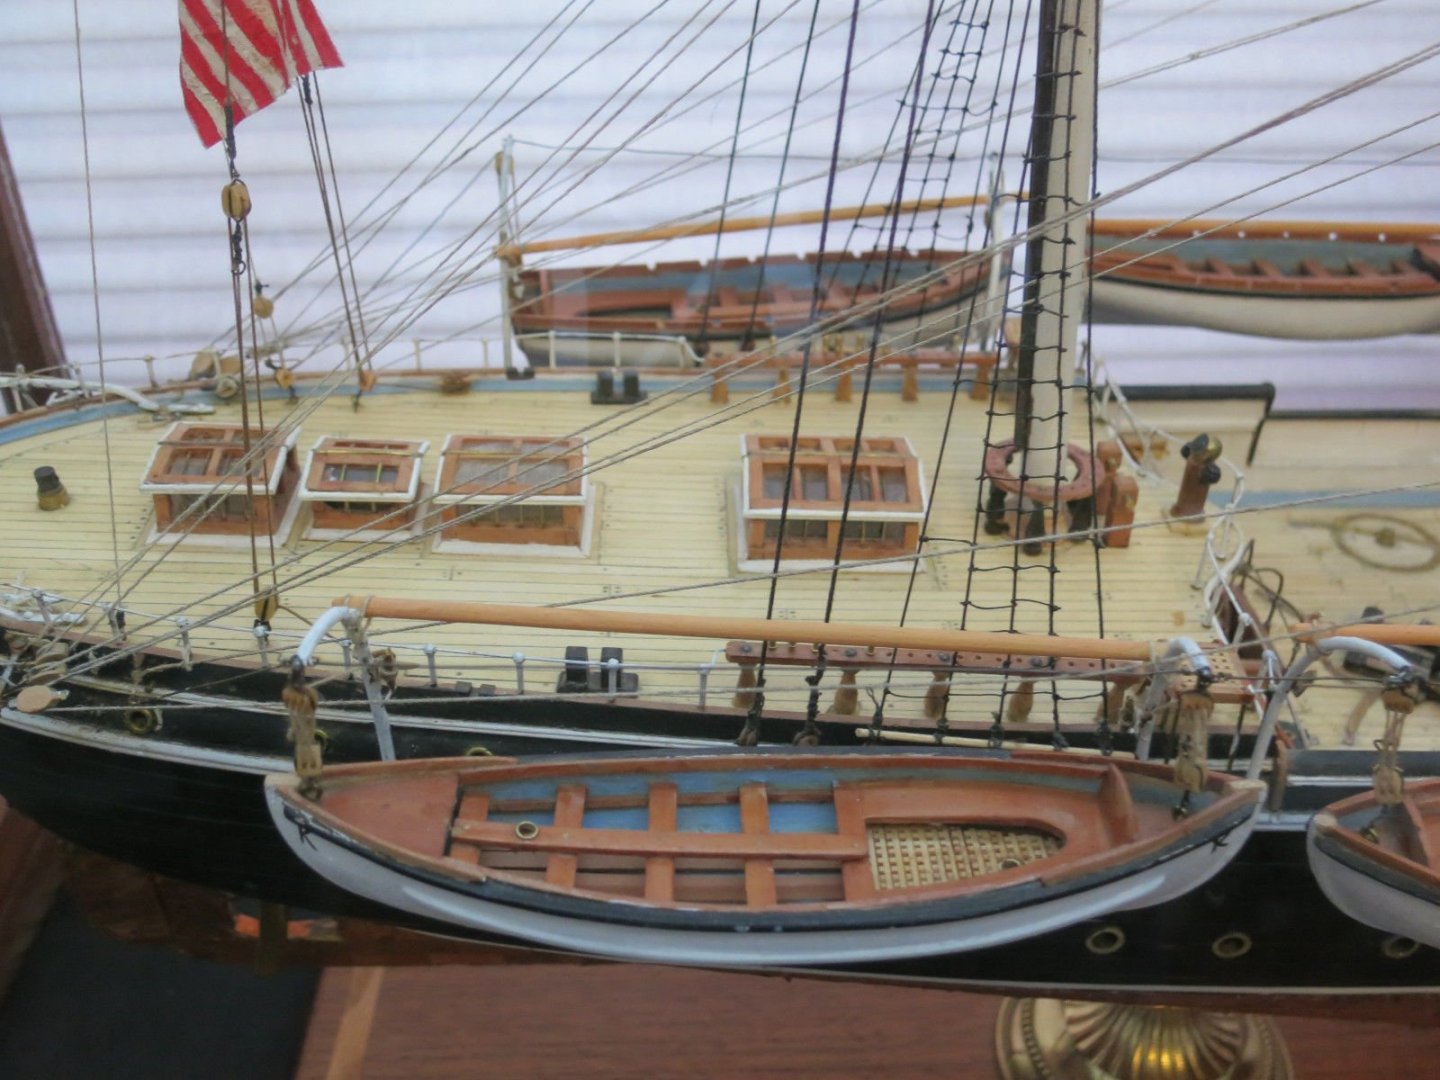
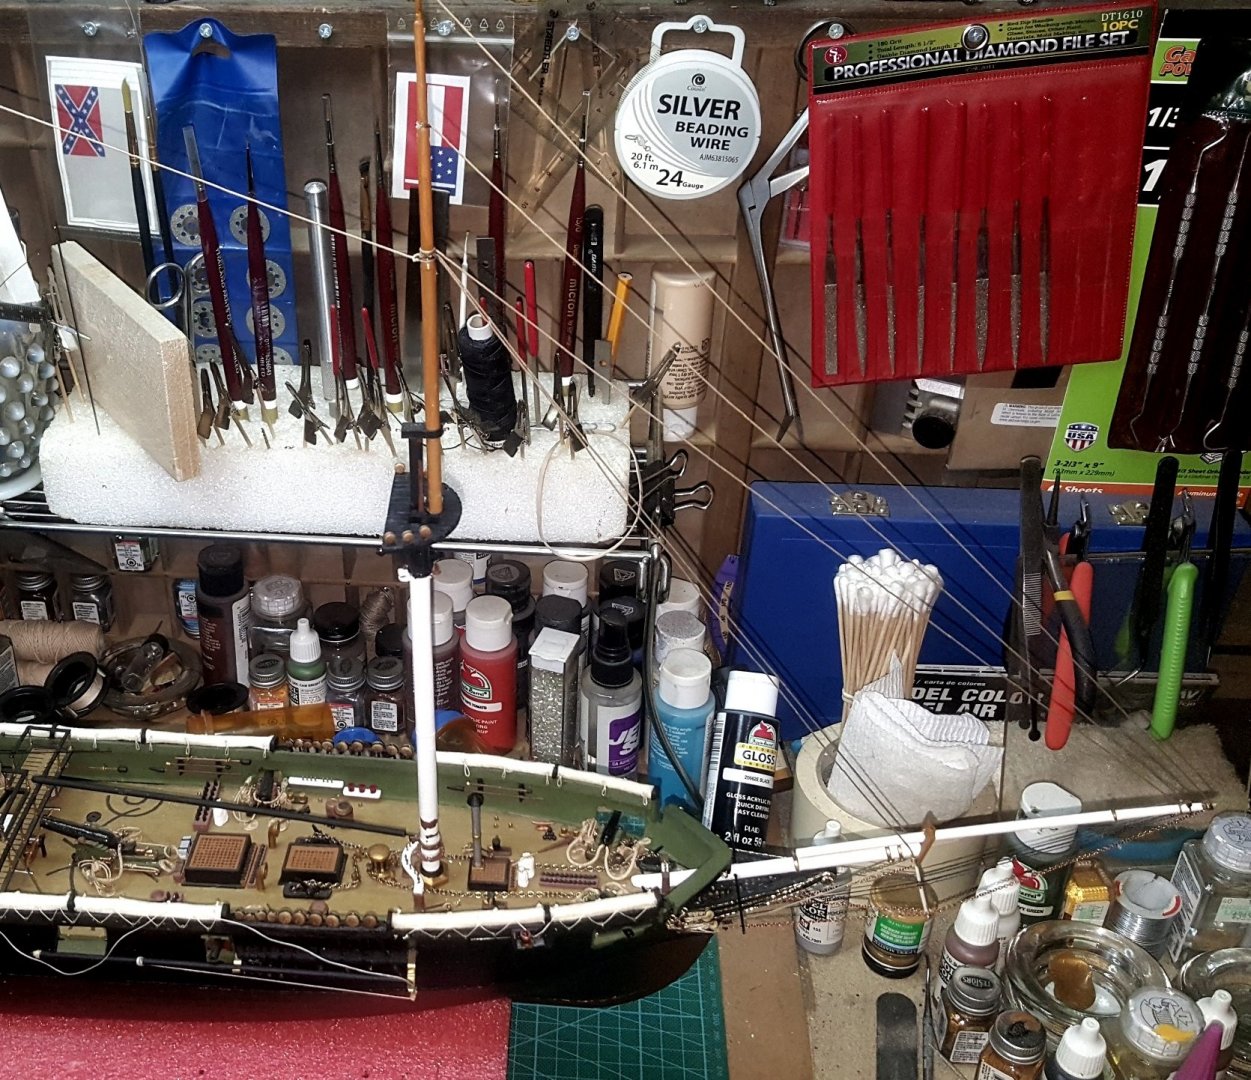
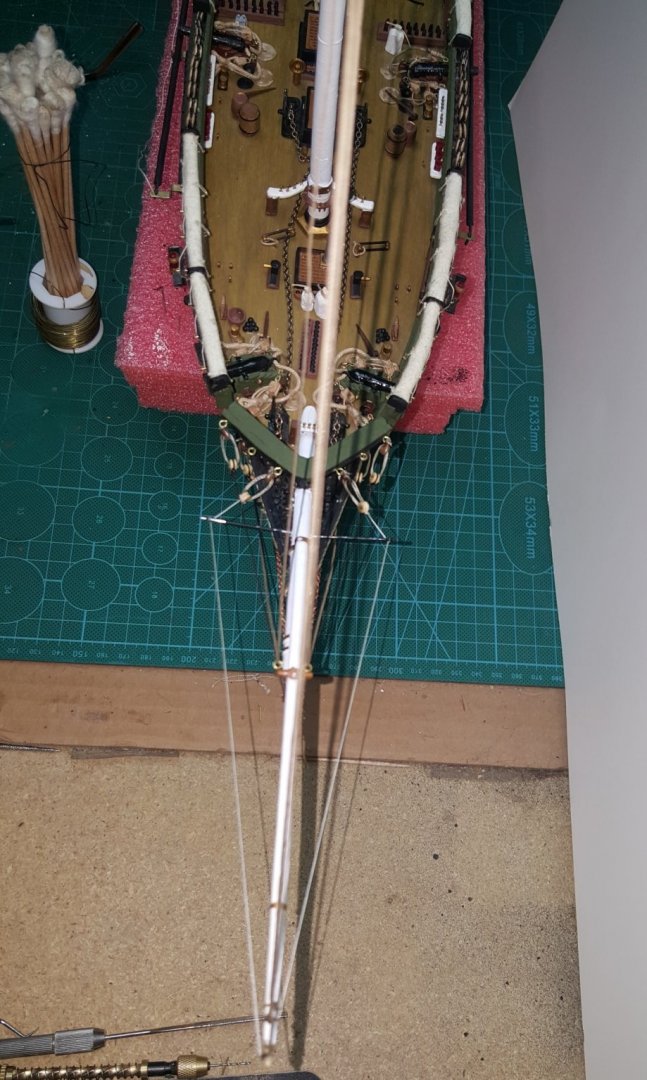
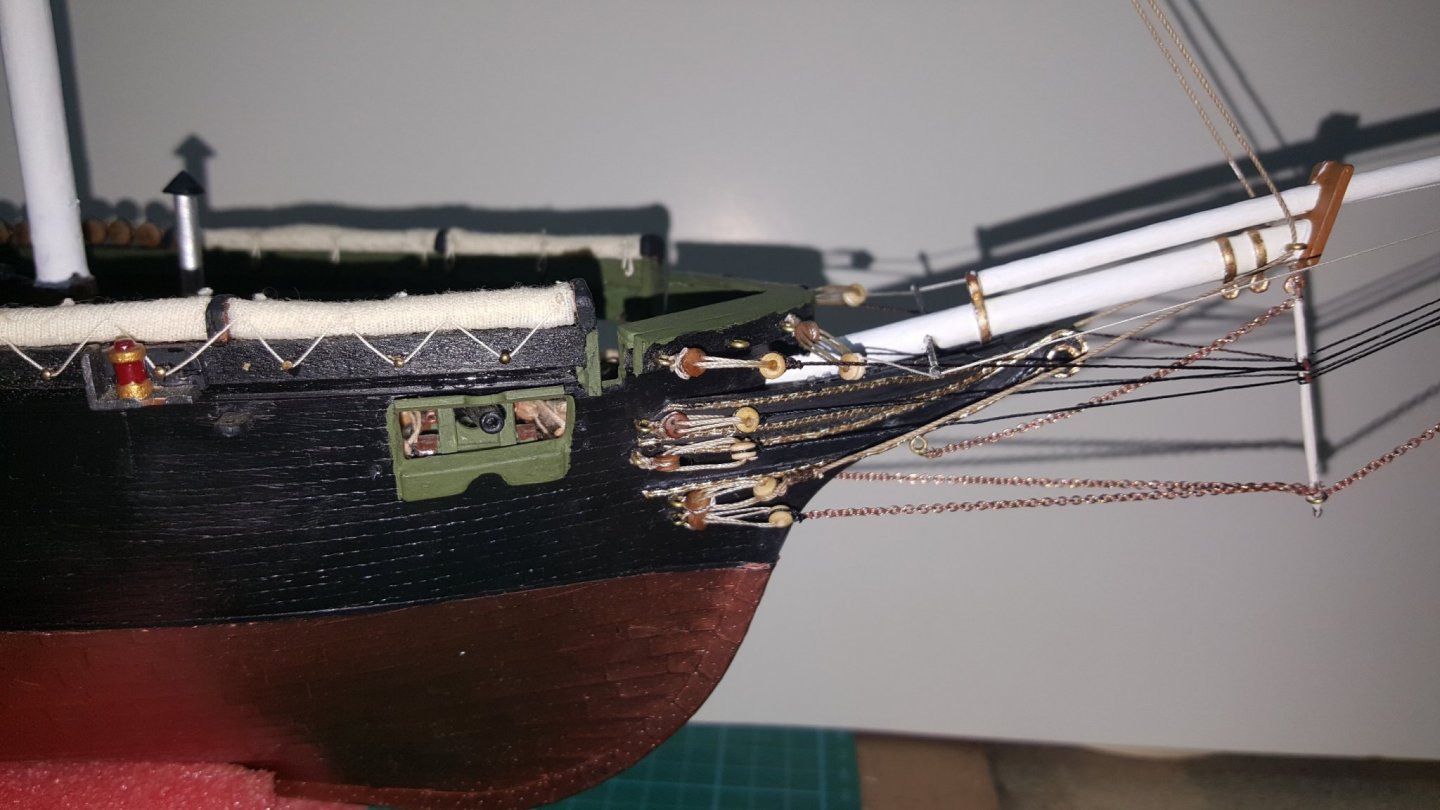
Thanks @CapnMac82 This information will be useful for the reef points along with determining the sail material to use. Really appreciate all the help with these sails as I haven't done them before but with members help it will be easier and make this a very unique CSS Alabama model representation .... one of a kind!! It will take much more time to complete but in the long run will be well worth the competed model. I have redone the fore mast for a better angle and with rat-lines being installed they will secure the angle a little better for all the masts. I'll be working on Rat-lines today and at this scale will be using two different rigging sizes for them. Here's some images on the corrected angles for the masts and the Bow-spirit also has been straightened out now. These rigging lines are drooping a little; so when I add the rat lines I have some play to finish tightening them down. Here's also the before image showing the straight mast which had to be corrected, and had to bend the plastic to make this right as it kept popping back straight.


-
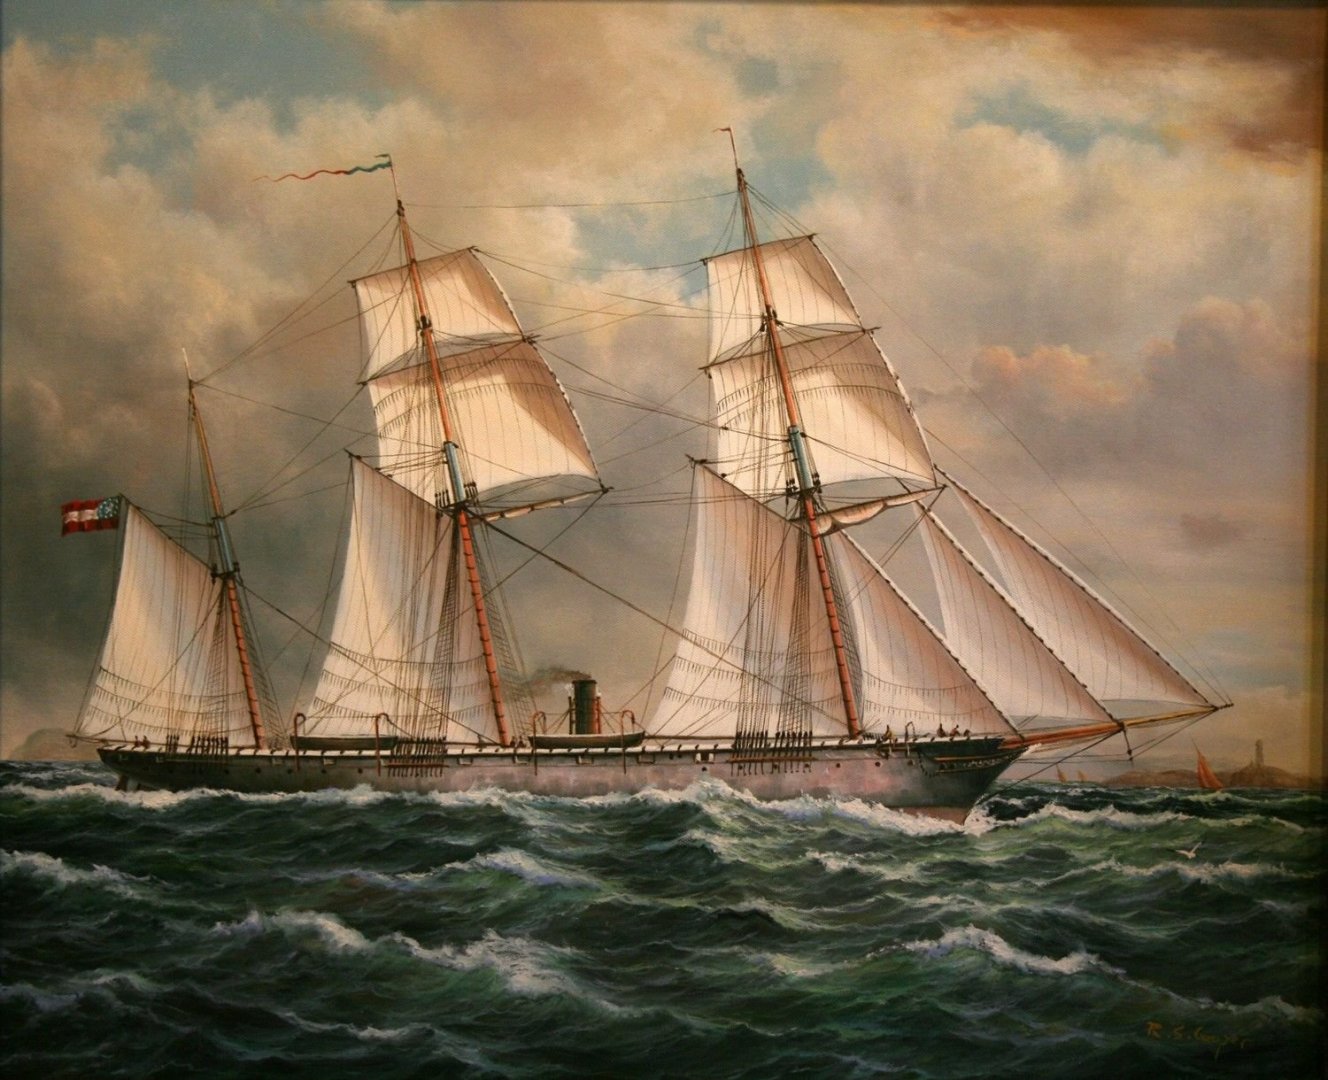
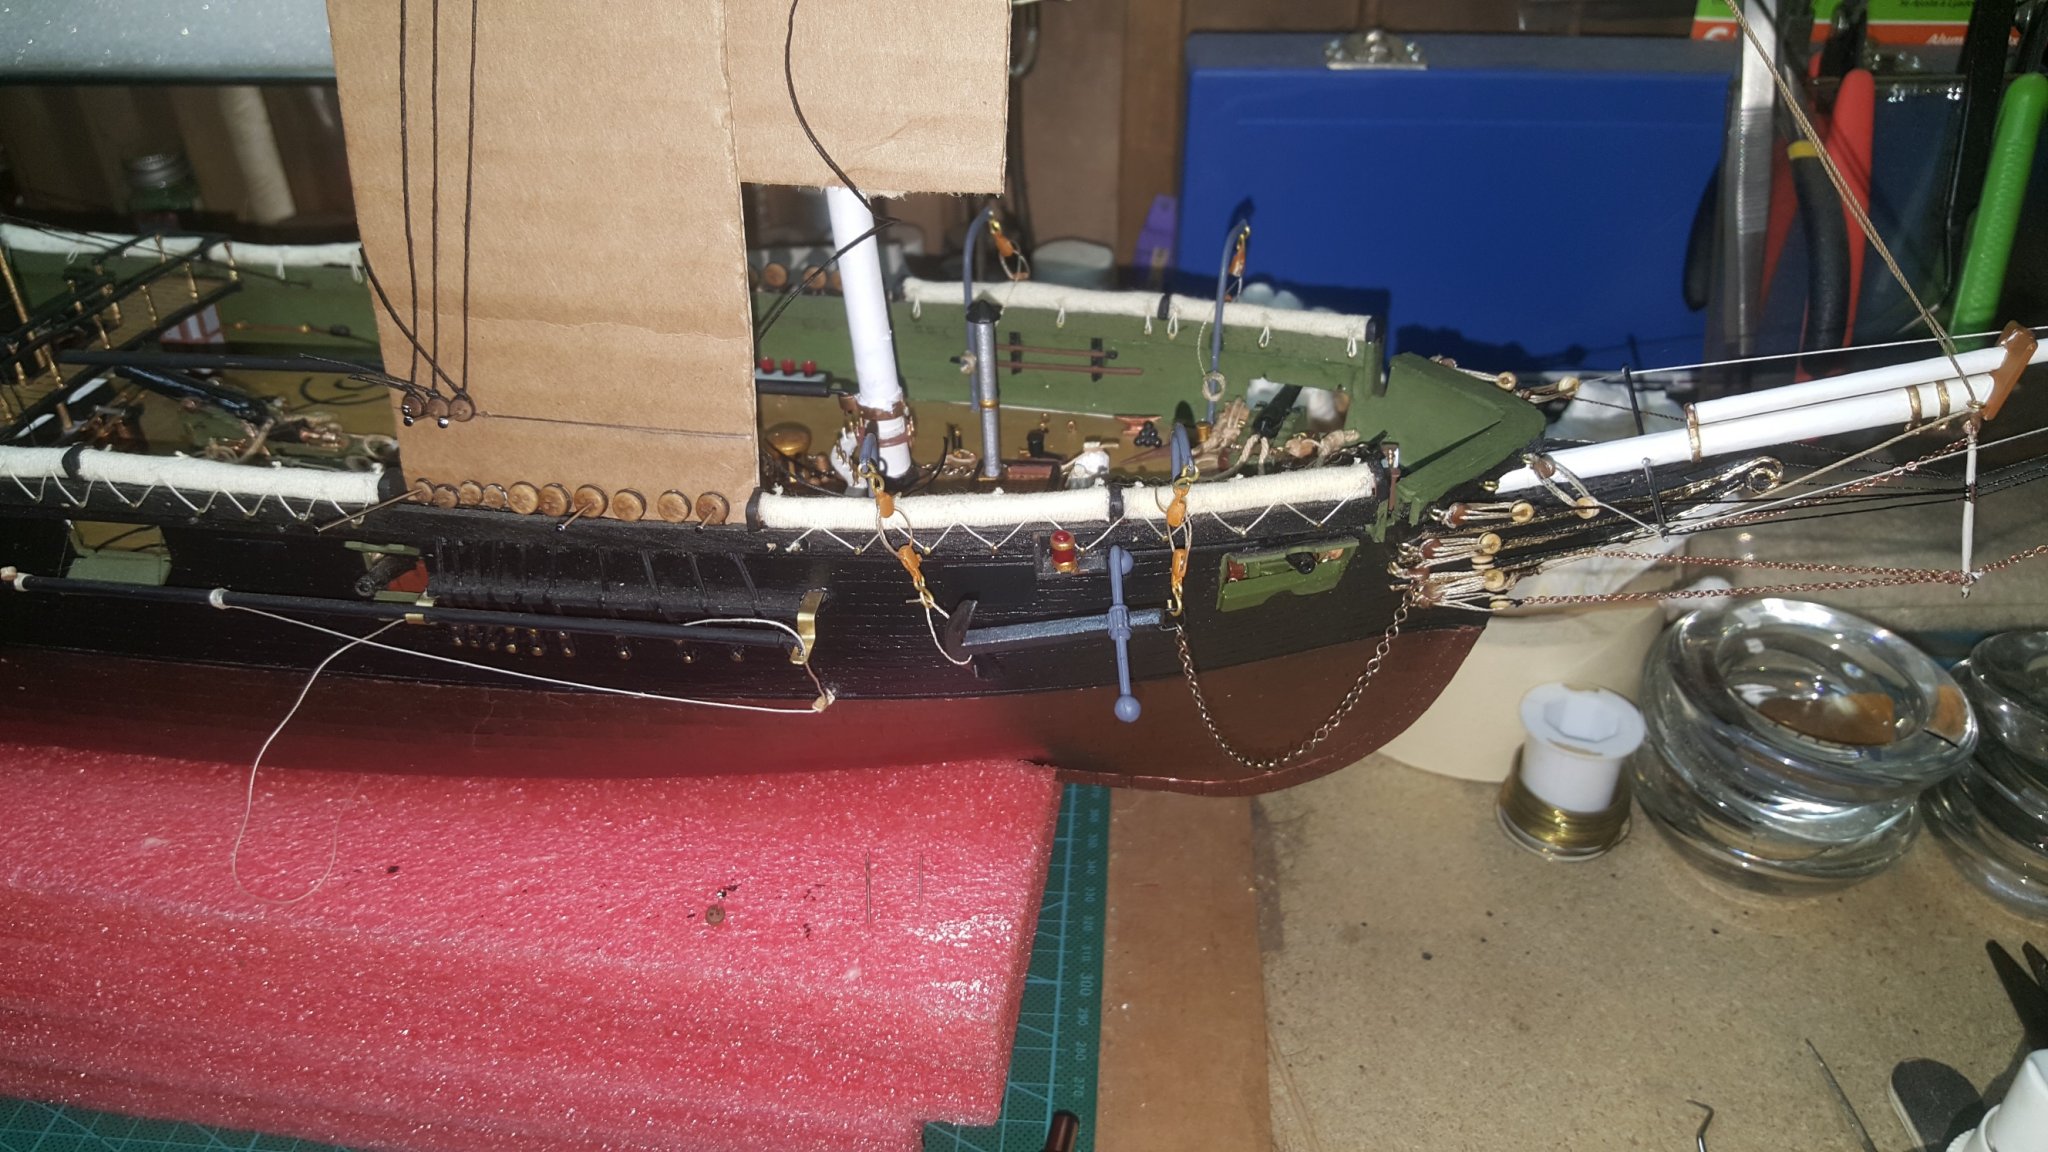
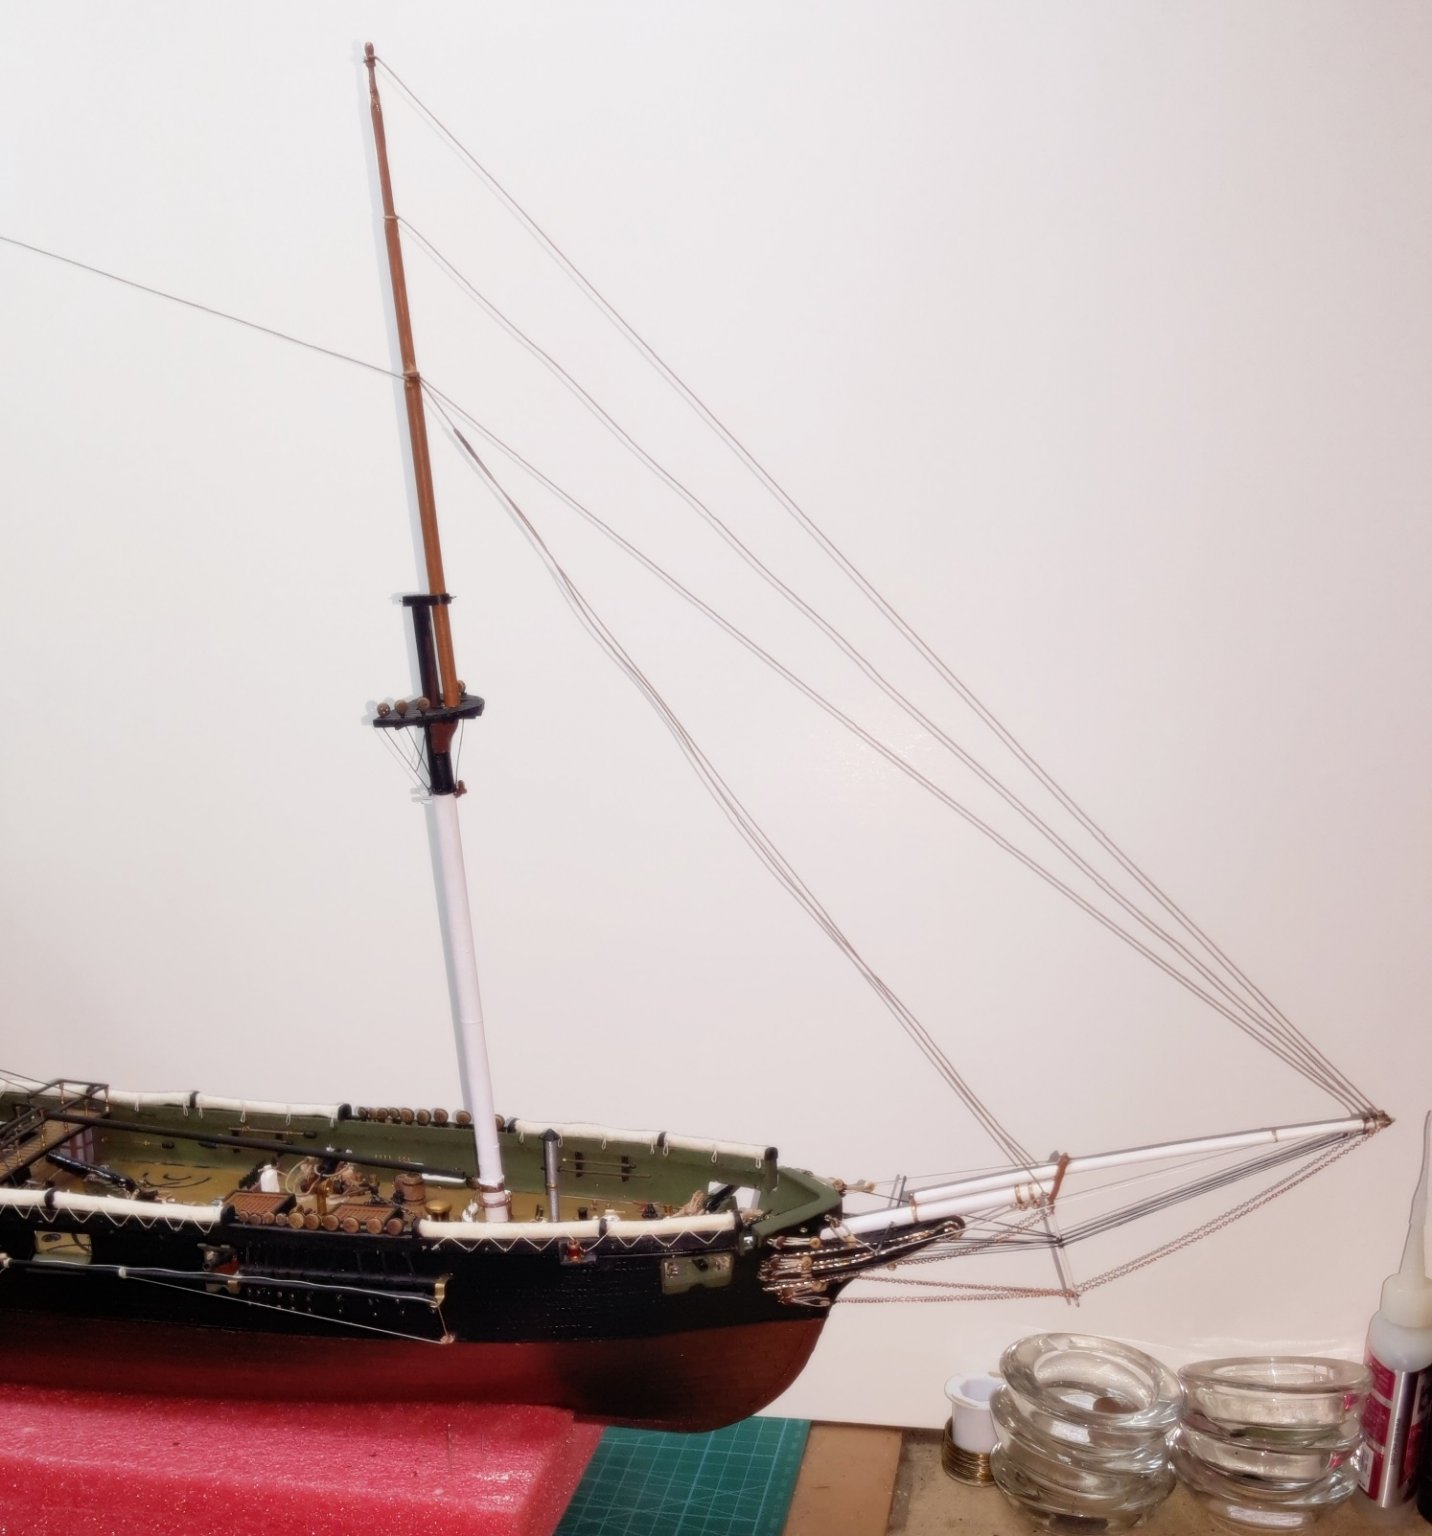
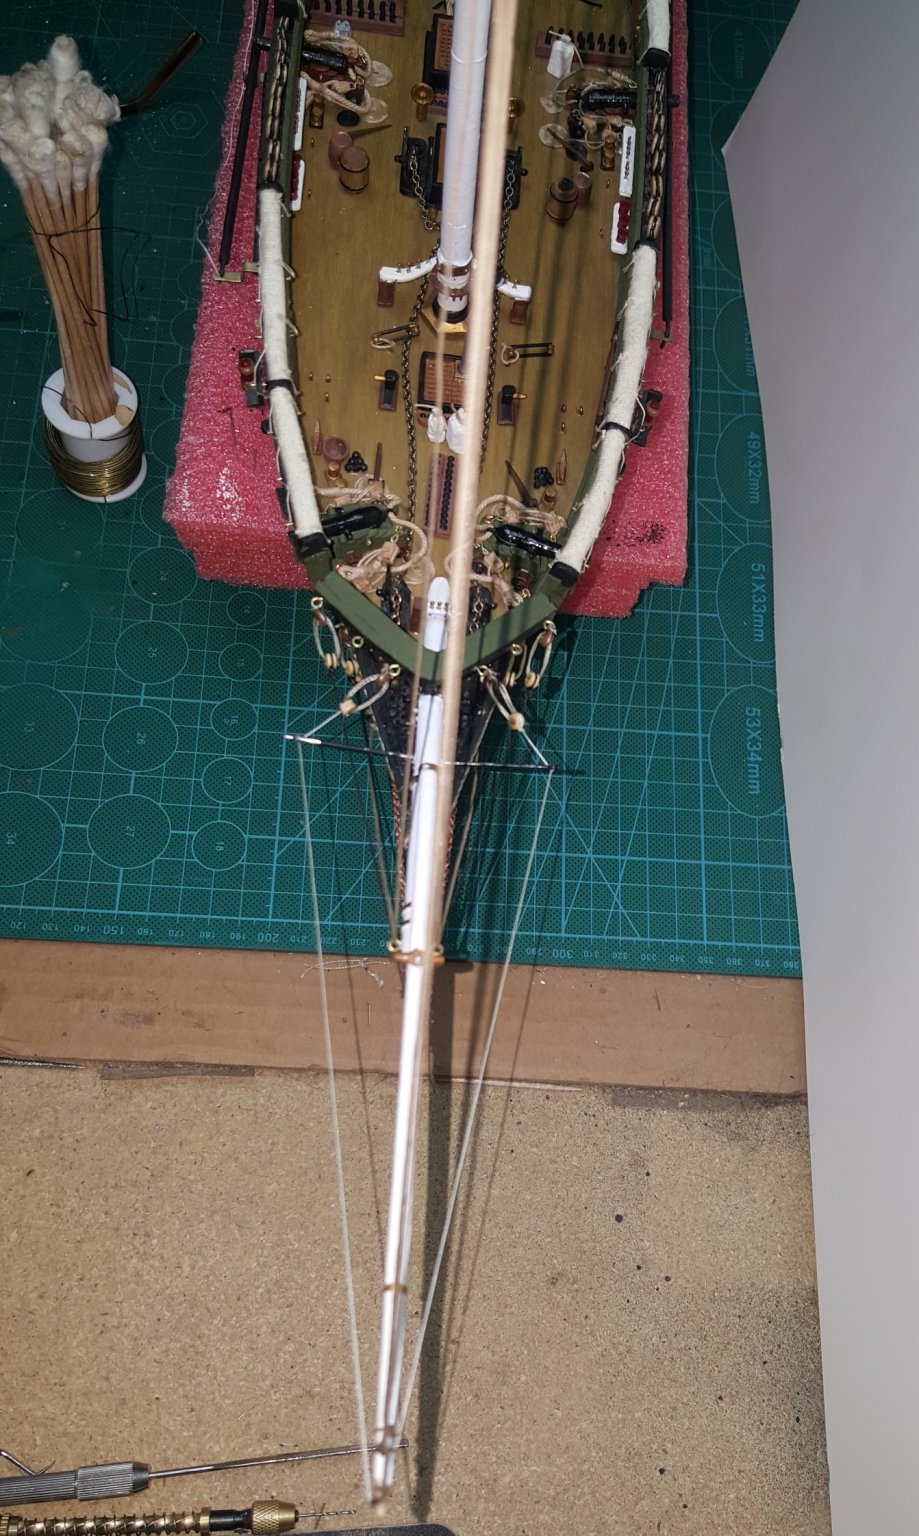
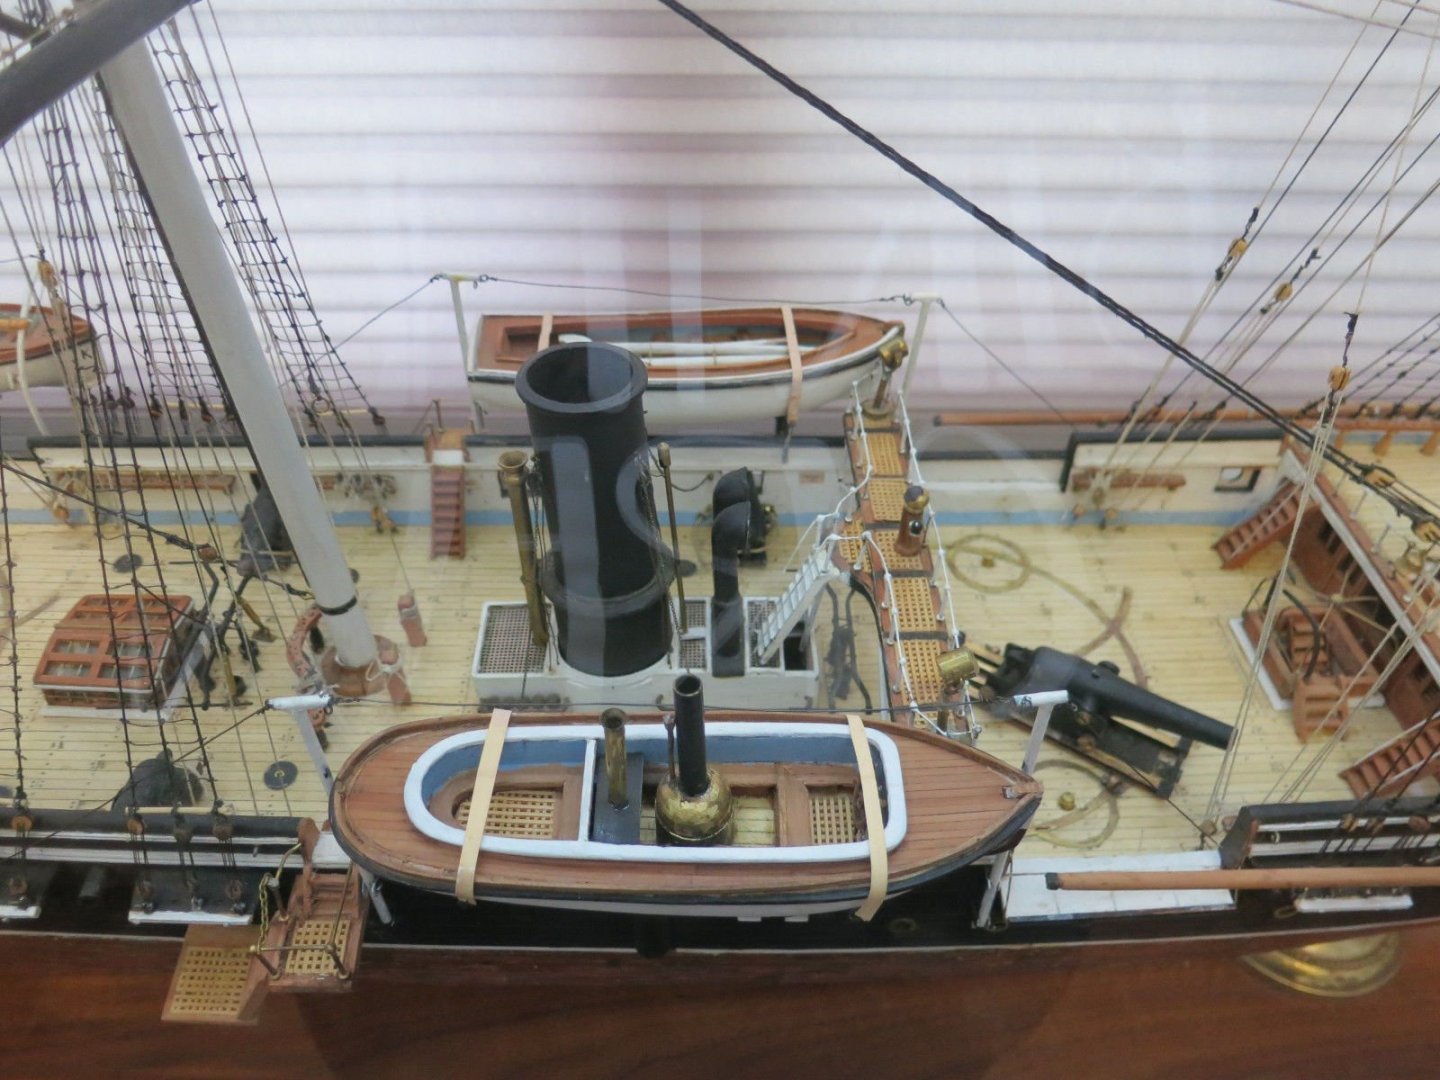
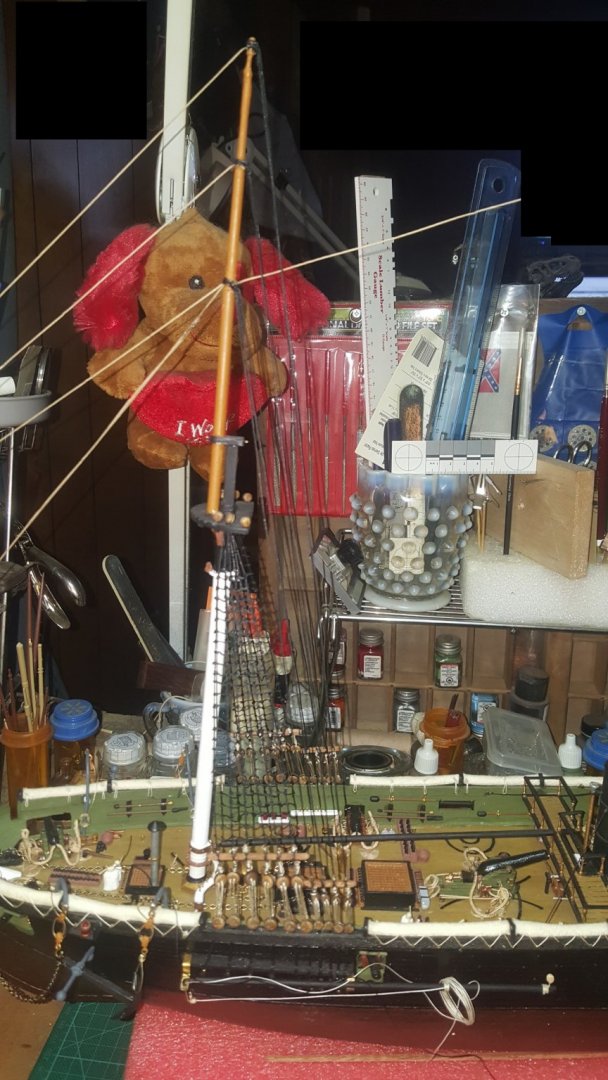
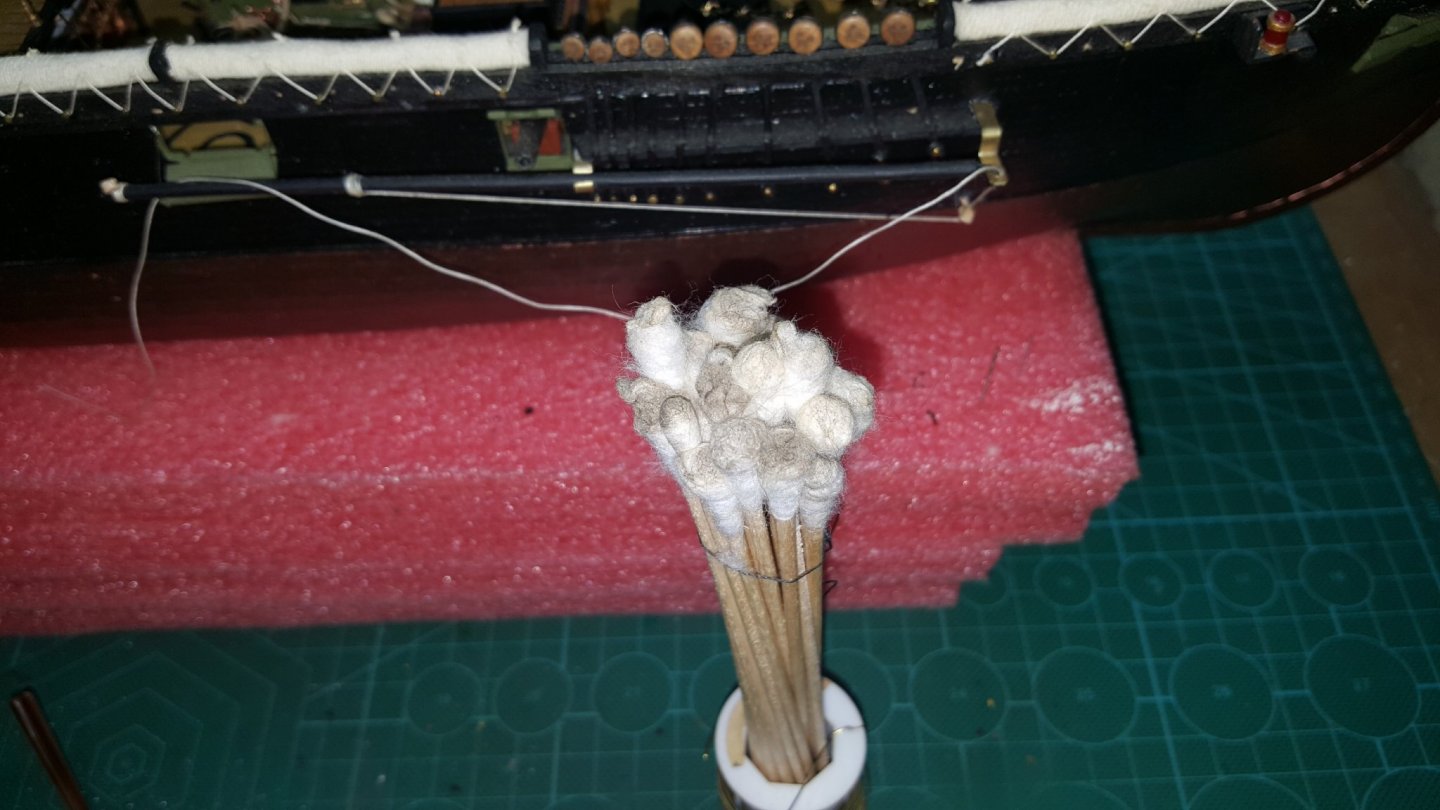
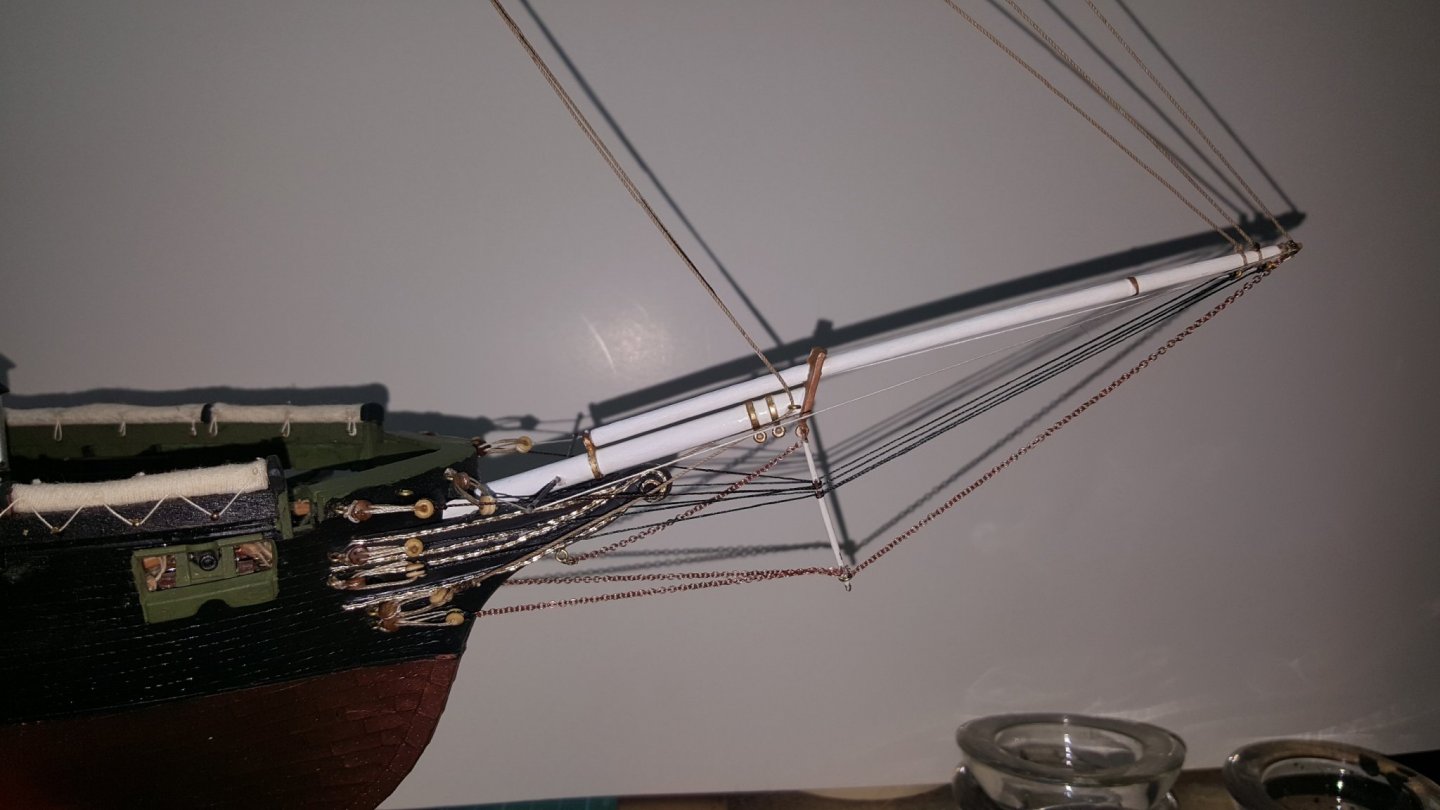
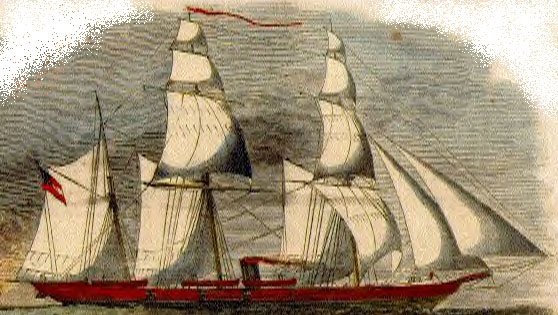
Well as time goes by and model work get dormant you have to "swab the deck" : Works really well for dust and woof's hair that seems to just drop onto the deck. Here's a couple of closeups on the Bow-spirit almost finished, just a little touch up paint. Then anchor chains and some putty filling which I'll work on today. I'll get that bend out also as the plastic just love's to bends with the slightest of tightness on them, the main mast was mounted at a angle and will have to redo it also because of plastic bending and the deck warping when the other lines were taught making it straight. Arrgghh; plastic can be a pain but it is what it is. Here's also a old woodcut of the Alabama showing the four sail spars for the fore and main mast:
-
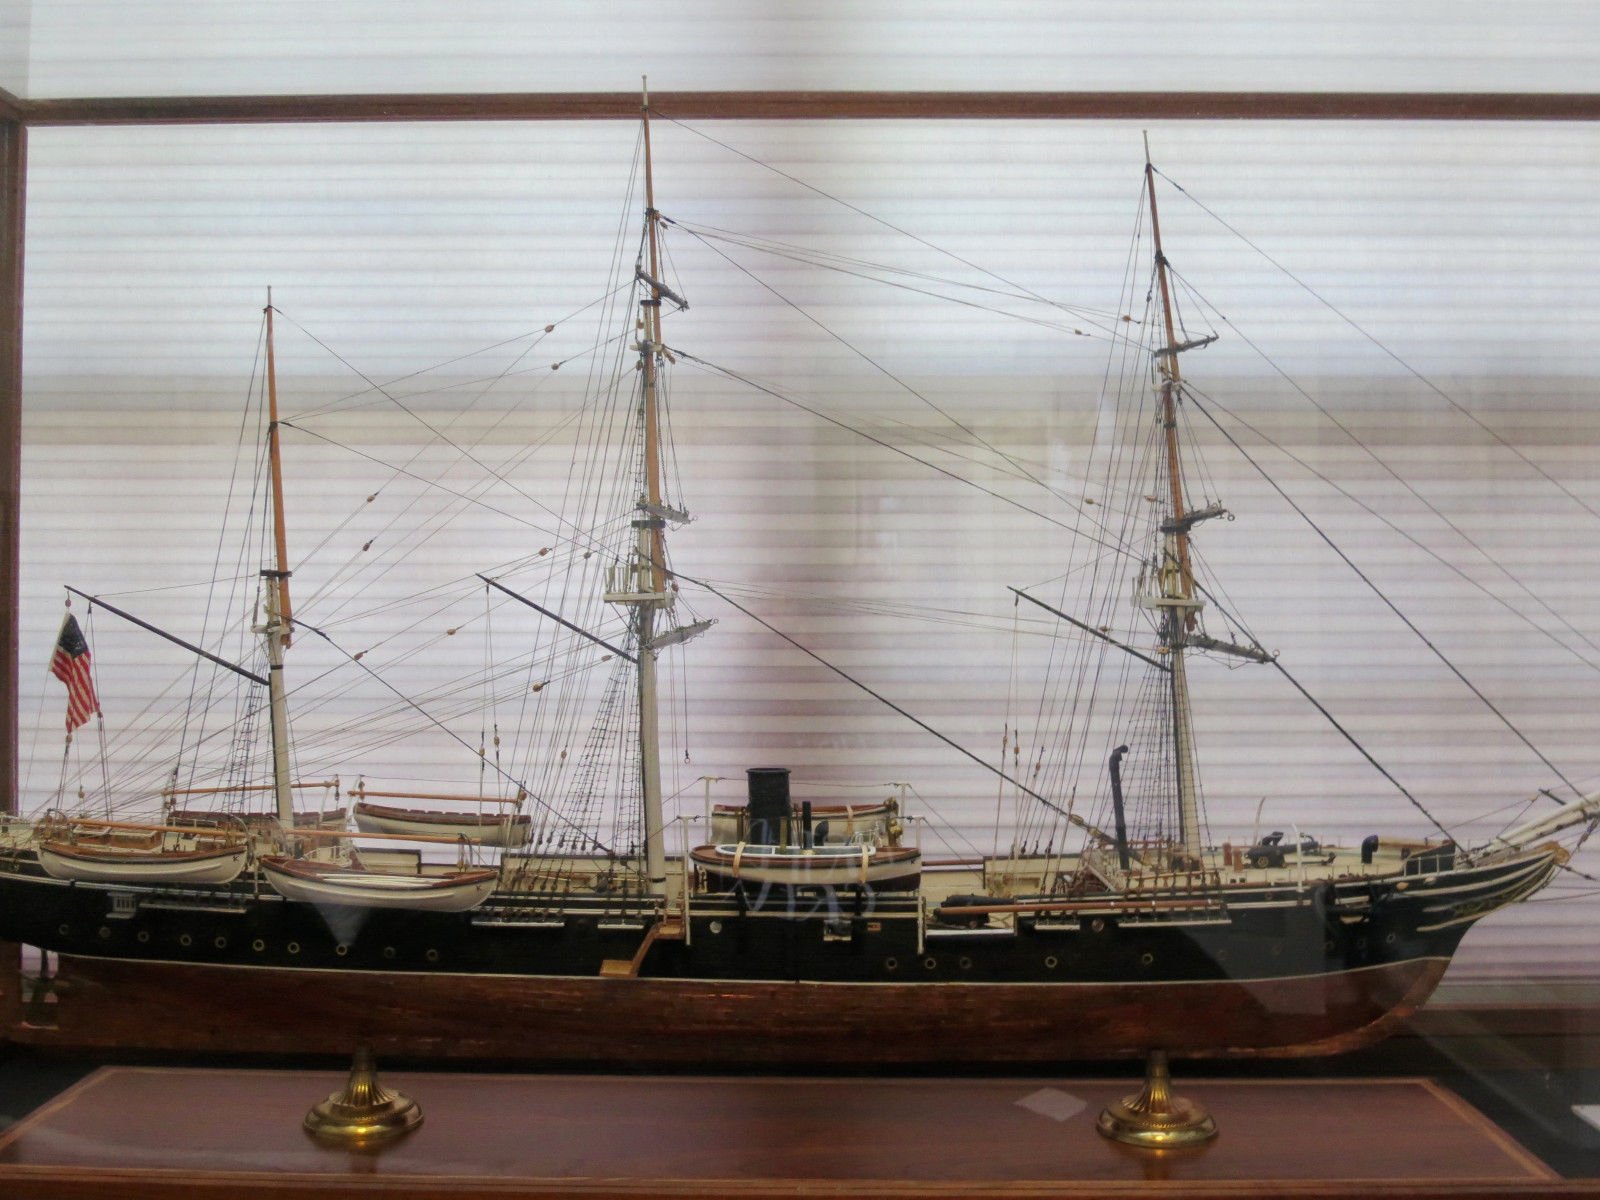
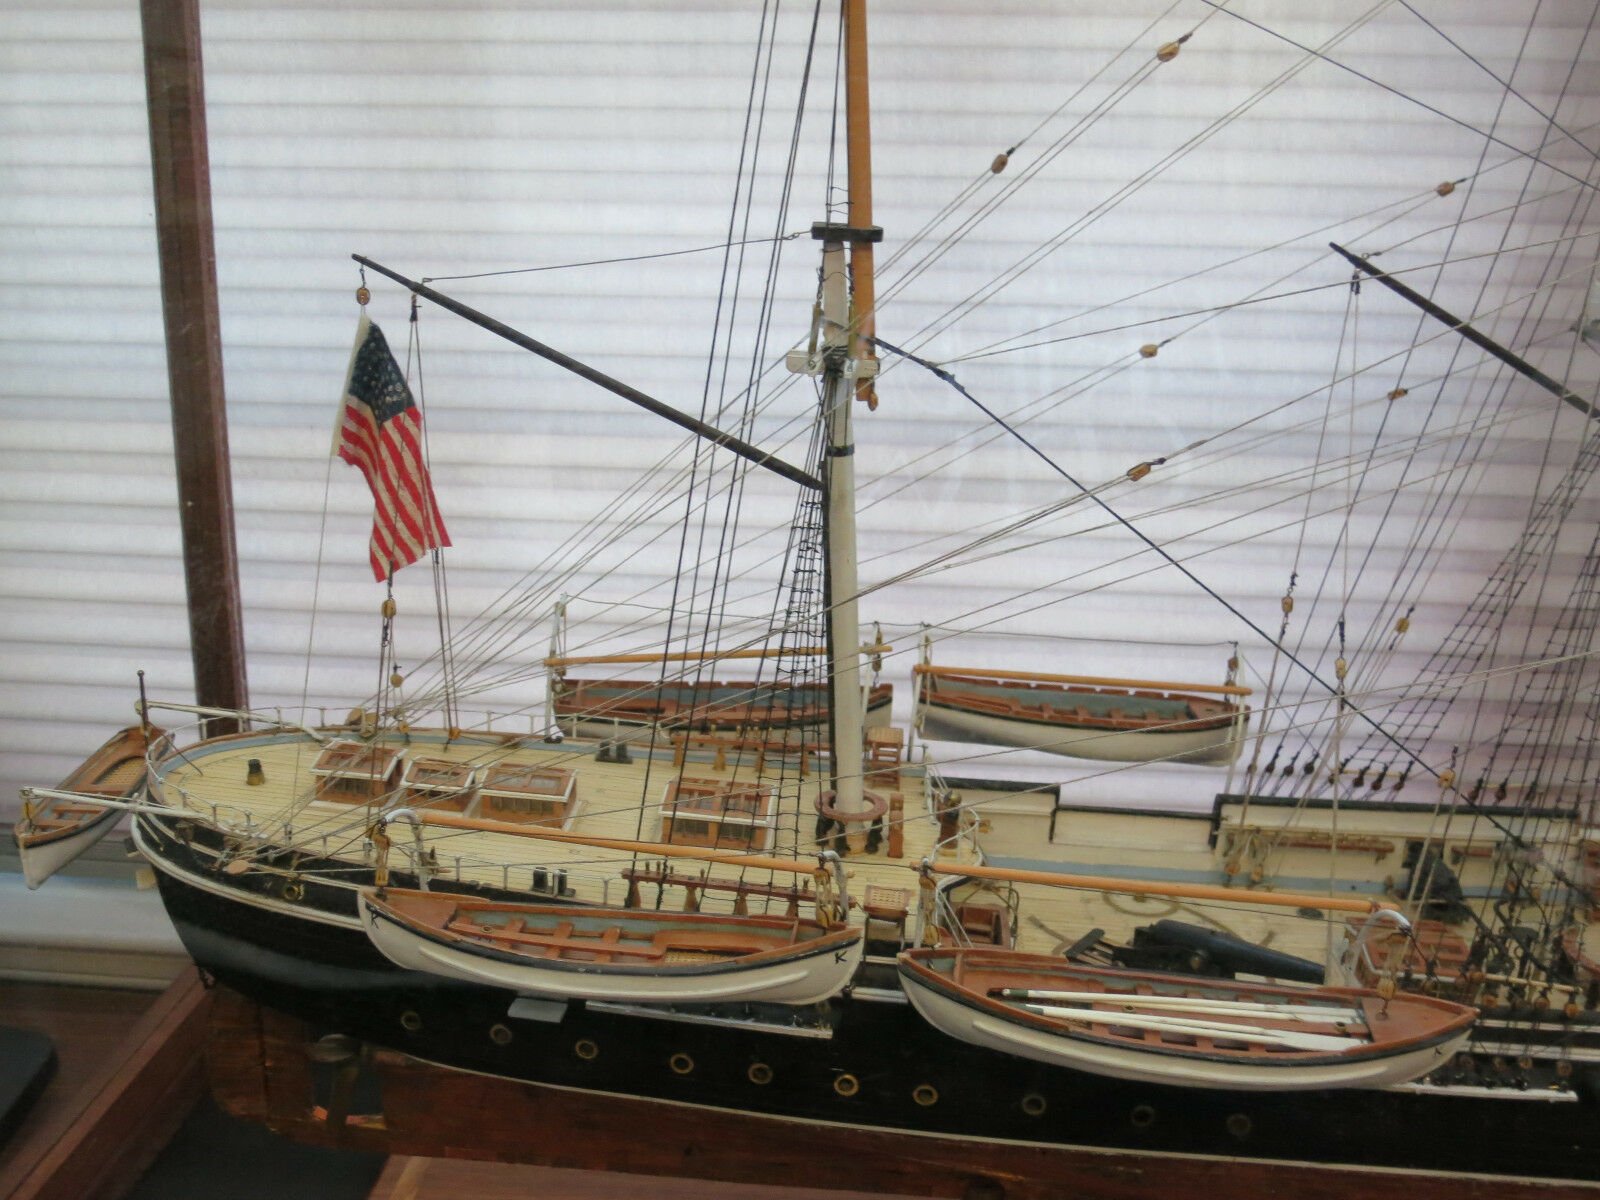
Here's a reference image of her actually showing more of the reef points, modelspan seems very easy to work with and will have some ordered soon. Working out the procedure of installation of the sails and rigging: Build the booms and gaffs. Make the sails based on the plans. Attach sails to the booms and gaffs as appropriate. Install and rig the booms and gaffs. Add the additional rigging for each sail. Touch up paint. Add bee wax as individual rigging lines are installed. The question I have now is do all the sails normally have reef points? Instead of the example shown? Also it seems like the studding boom sails will all have reef points from my research.