HOLIDAY DONATION DRIVE - SUPPORT MSW - DO YOUR PART TO KEEP THIS GREAT FORUM GOING! (Only 66 donations so far out of 49,000 members - Can we at least get100? C'mon guys!)
×


JerseyCity Frankie
-
Posts
1,338 -
Joined
-
Last visited
Content Type
Profiles
Forums
Gallery
Events
Everything posted by JerseyCity Frankie
-
It's totally worth your time to make a custome scale ruler for your model. One that shows ten foot intervals with five foot demarcations between. I find using these on my model makes a LOT of issues clear and puts the size of the ship and all it's components into a litteral perspective. To make one you need the scale that is often printed on the plans themselves but if your kit has none, you have to extrapolate using whichever dimensions the kit does give you. Sad is the ship model that won't give you Overall Length or Beam. google "architects scale ruller" or "engineer scale ruller". Acquiring one of each of these will cost little but come in very handy as one of the many scales provided on one of the 12 surfaces these two tools give you will greatly simplify the problem of finding the proper gauge.
-
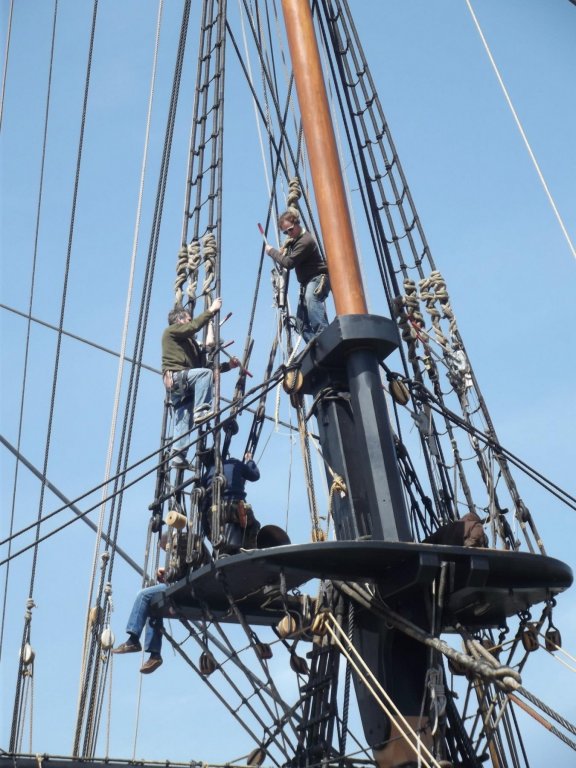
Climbing in the rig is exhilarating! Its the best part about traditional sailing, in my opinion. Nearly EVERY modern ship has mandatory safety harness wearing policies and these will have a three foot long lanyard with a double locking snap hook or caribiner on its end which the climber can quickly and easily clip onto any convenient bit of standing rigging. Typically when going over the futtocks a climber pauses and clips in to a spot above their heads then climbs up with the secure knowledge that if they fall the harness will save them. The problem is that the larger the ship, the greater the distance you must cover. On a smaller ship one may stand at the highest ratline and be able to reach the top with your hand. On big ships you can't and must commit to climbing the futtocks WITHOUT being able to hold onto anything above the level of the top. This is disconcerting. And in situations like this, your safety lanyard becomes paradoxically dangerous since you want to clip into the futtocks, but as you climb up to this point you now are obliged to unclip and reposition your safety lanyard to a higher spot. This makes you more vulnerable than if you had not clipped on in the first place since now you're hanging on one-handed while you re-clip. To deal with this many modern ships have a dedicated safety line running from above the top down to the highest ratline level. Clipping into this allows you to use both hands for the climb but if you do fall, you fall the full length of the safety line + landyard length before you fetch up. I saw this happen to a guy once.
-
Gluing the boltrope onto the sail COMPLETELY AVOIDS out of scale thread and out of scale stitching. I honestly can't think of any good reason to sew the boltrope onto a model sail other than if one is slavishly sticking to real world practice out of a sense of litteral interpretation. But even then the sailtwine passes through not around the boltrope.

-
Nail Polish
JerseyCity Frankie replied to grsjax's topic in Painting, finishing and weathering products and techniques
On a whim I got some clear flat nail polish and I happily use it to seal up knots in Rigging. -
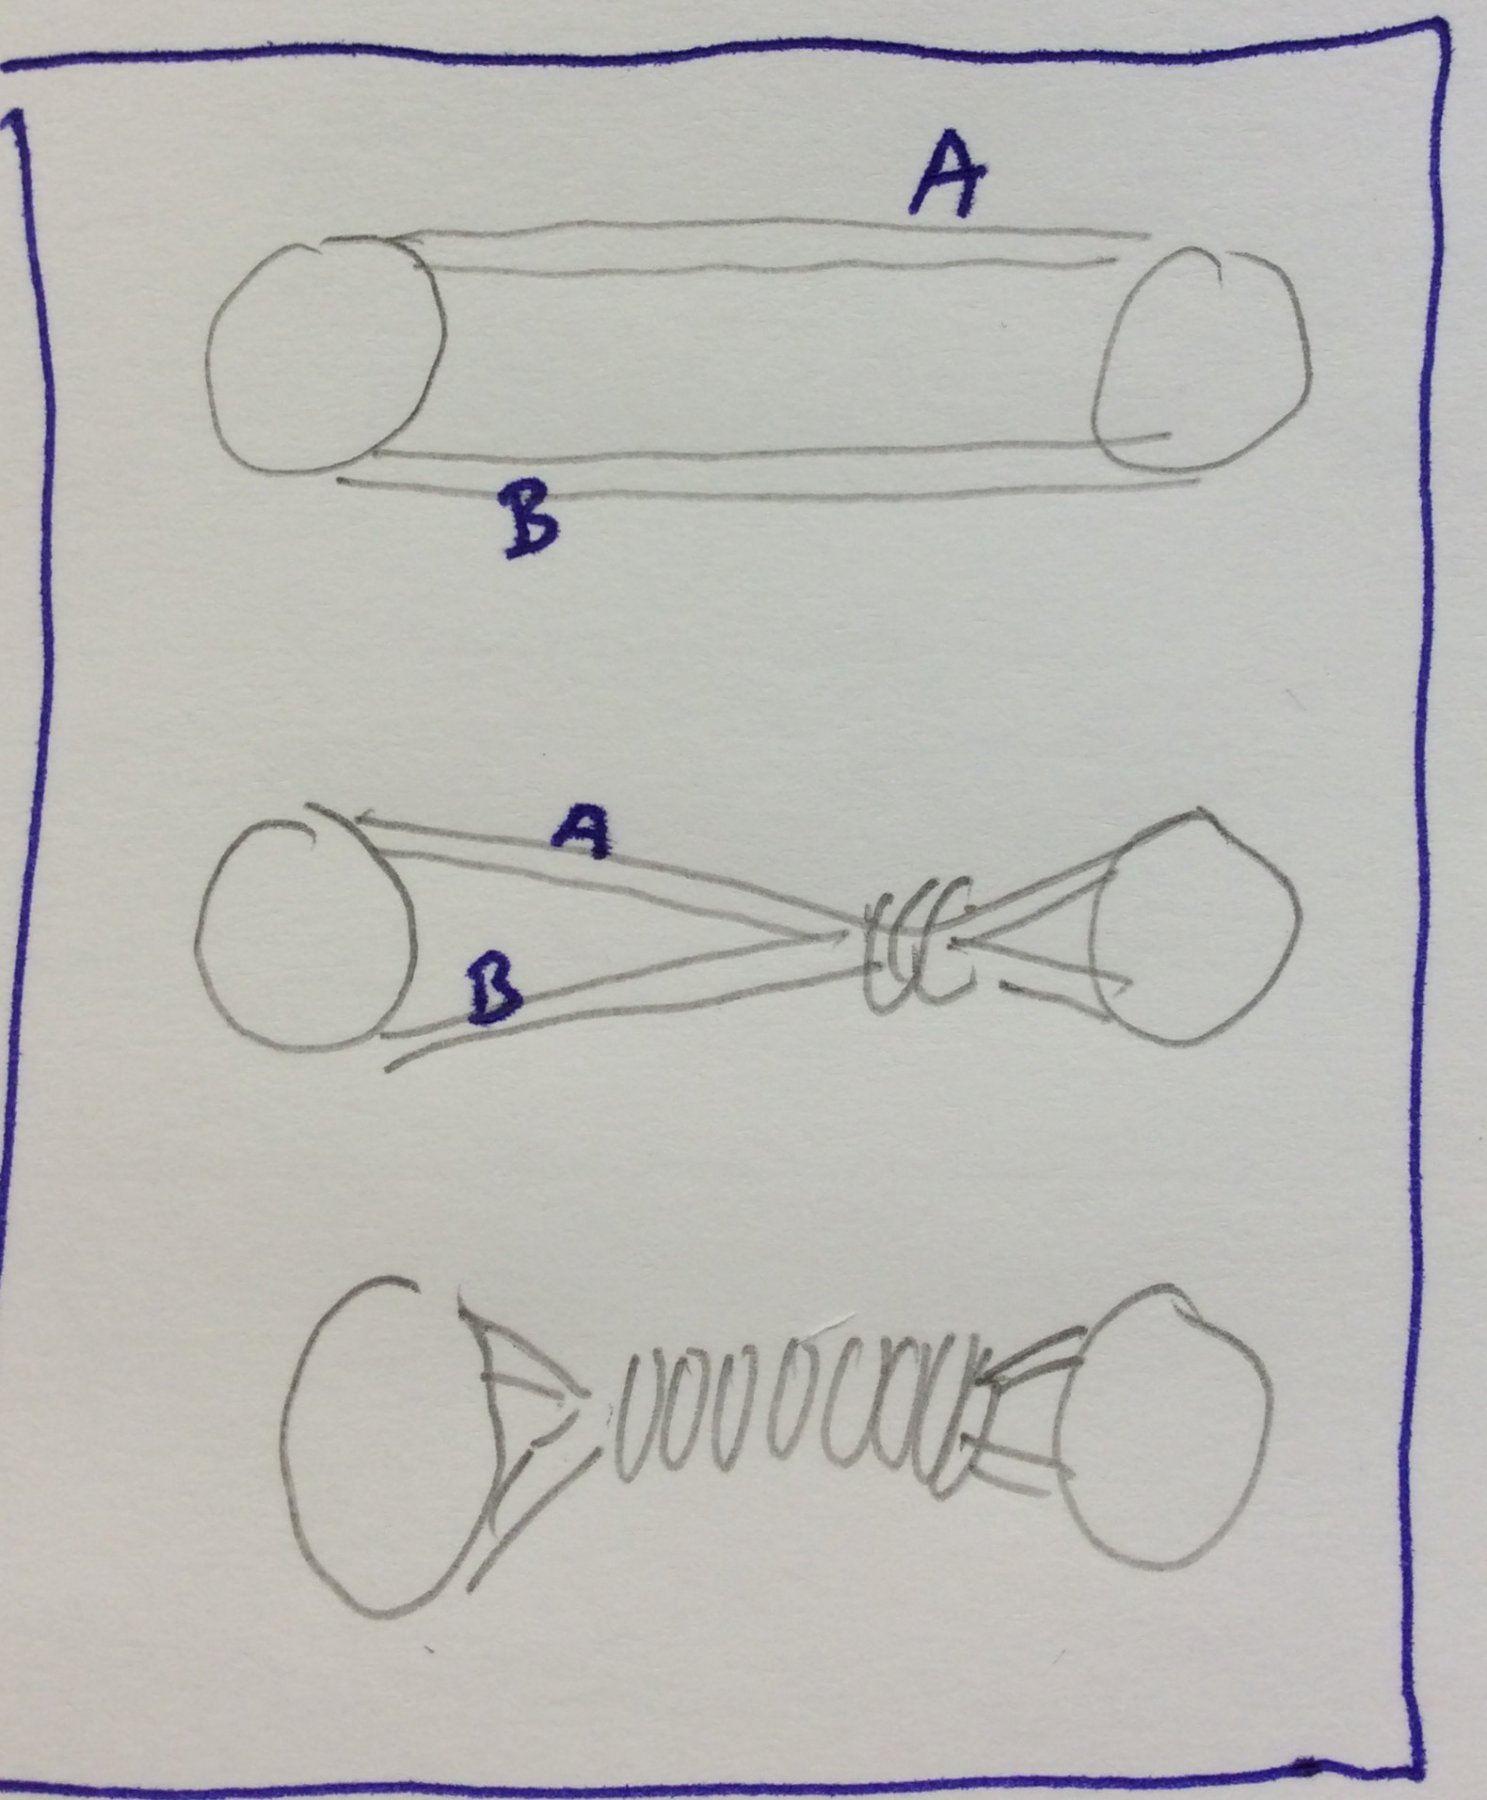
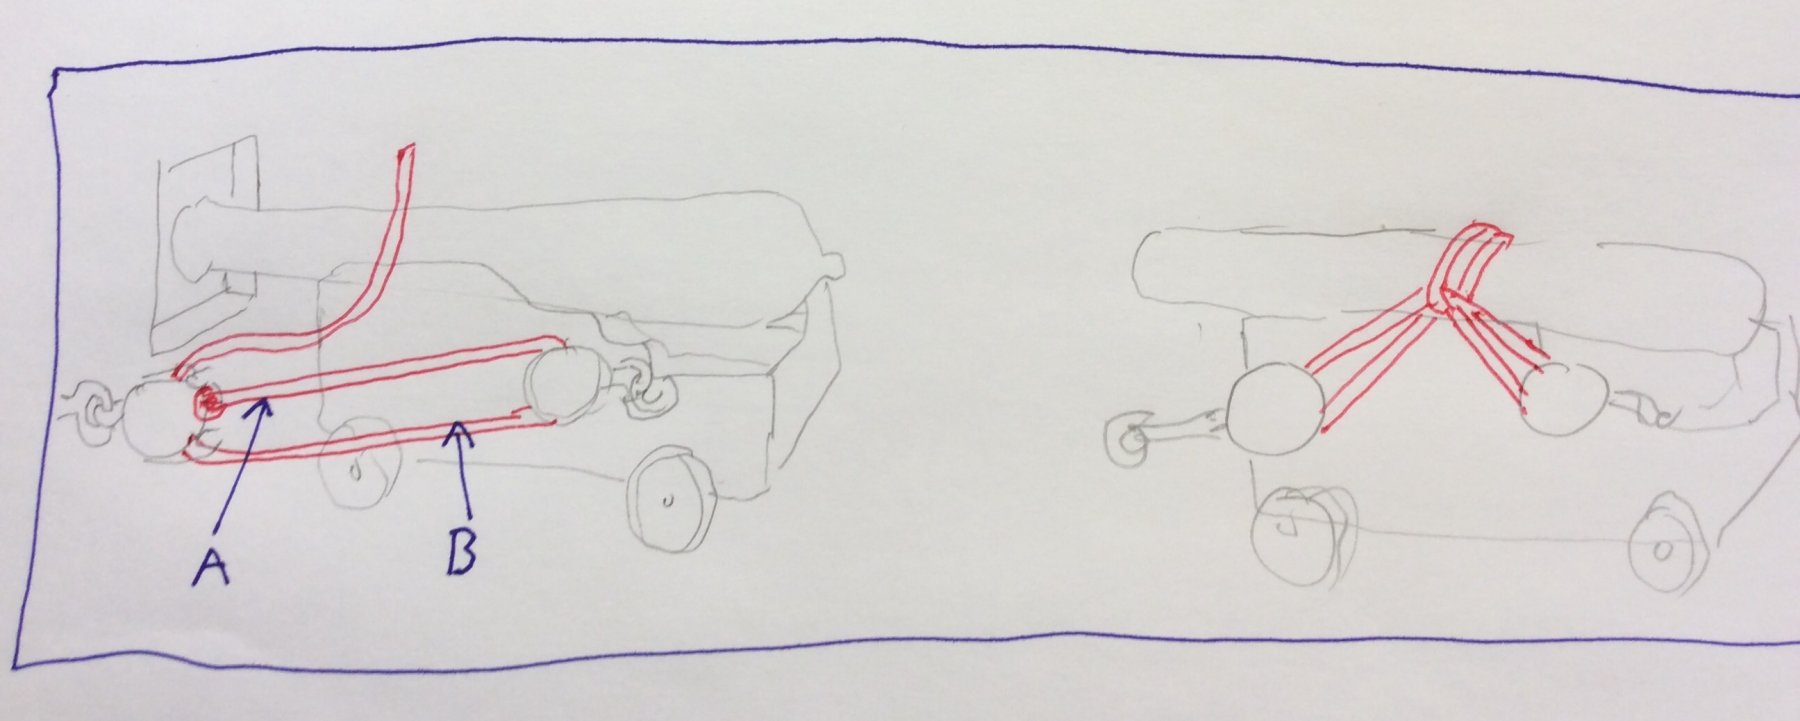
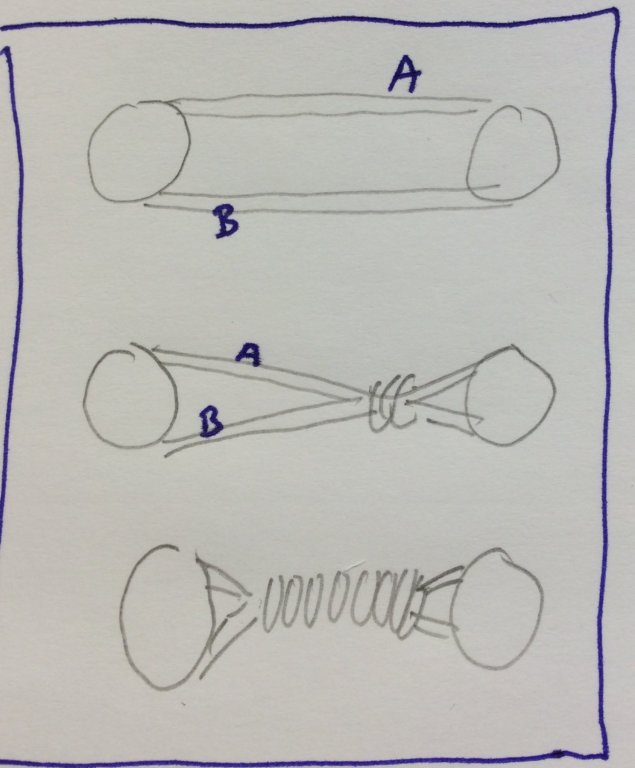
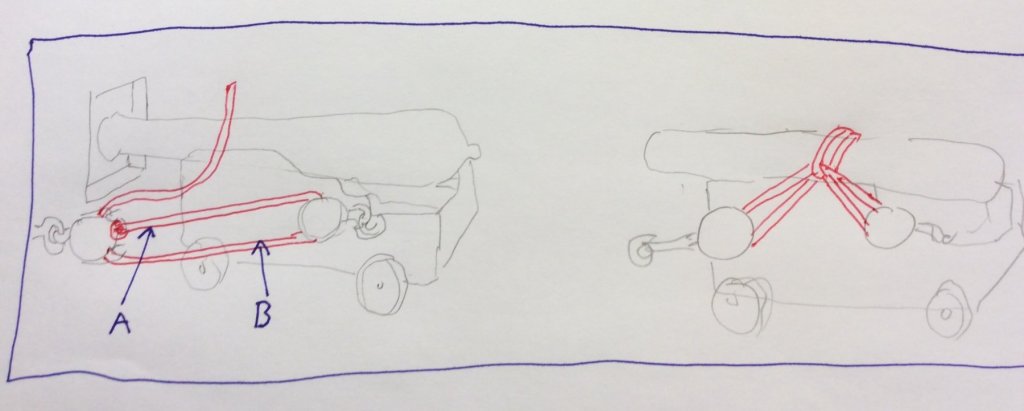
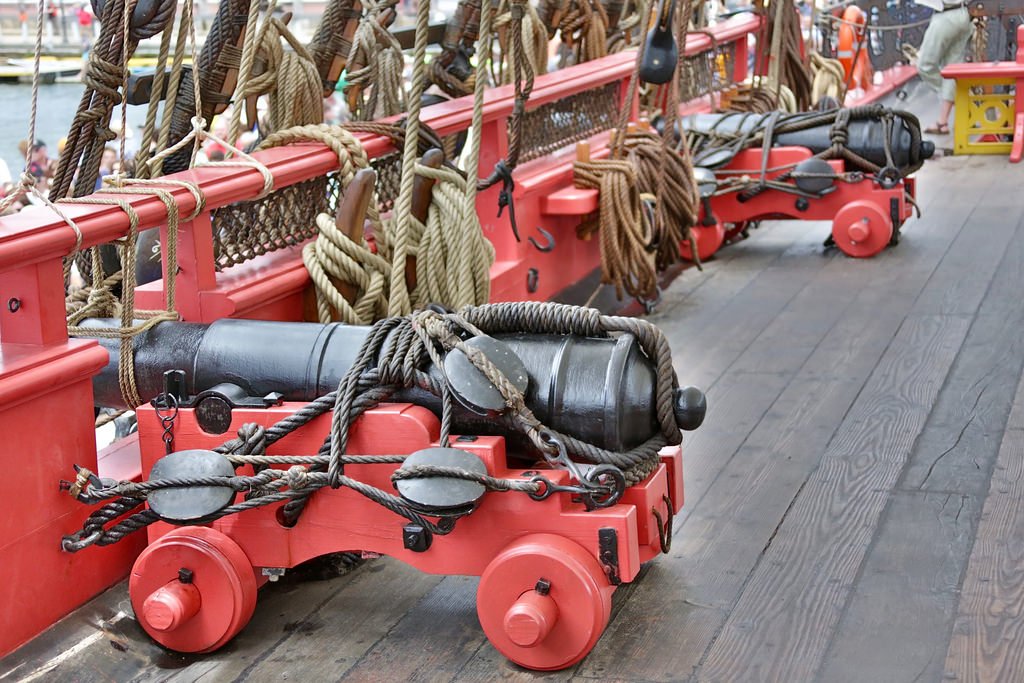
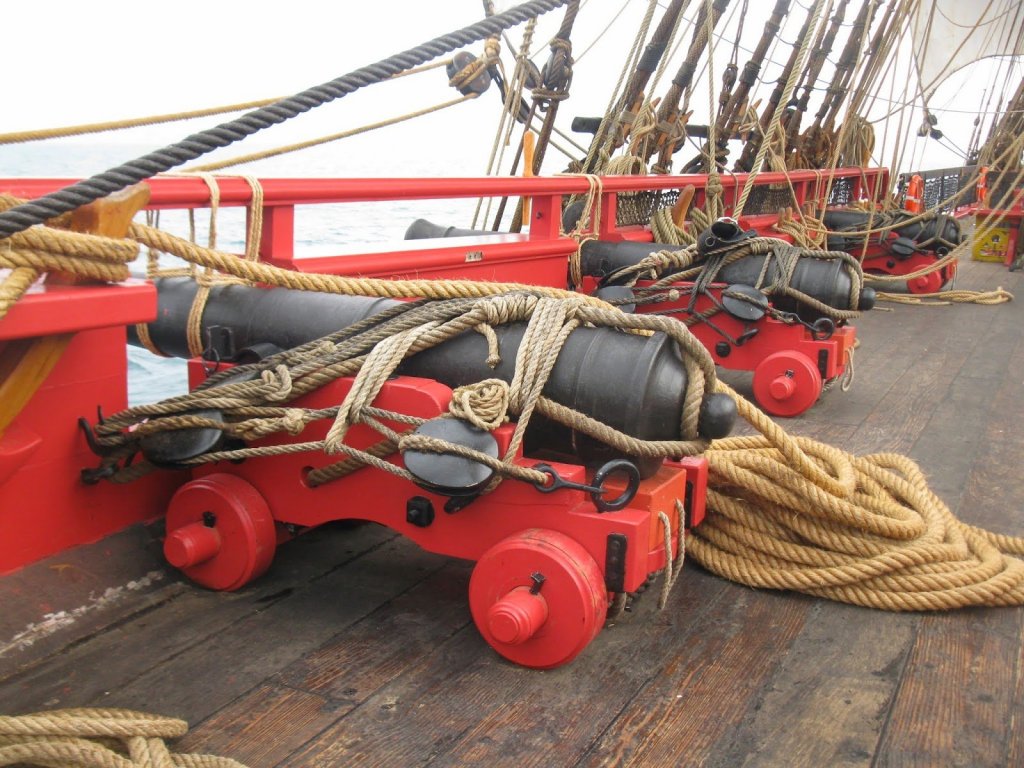
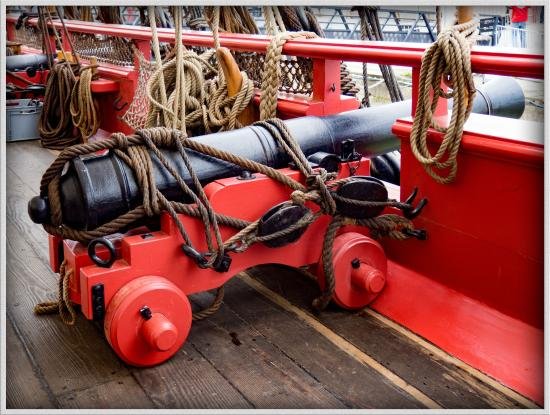
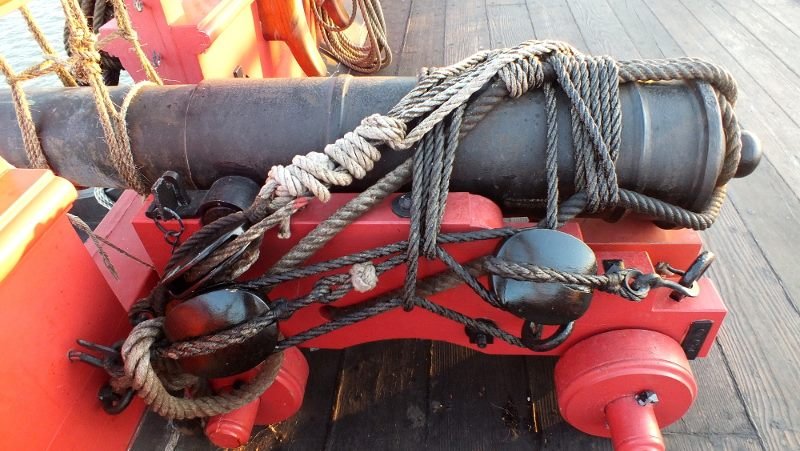
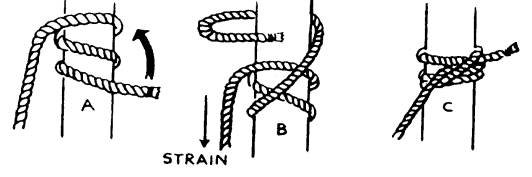
I think people are confused about what Frapping is and what it's intended to do. It's NOT a method of using up extra line. It's a method of drawing two tight lines together and making them both tighter, tighter than mere manpower alone could make them. The configuration of lines on the French guns in the photos is NOT a haphazard unseamanlike jumble, it's a clever calculated method of providing a secure hold on the guns. Here are two drawings illustrating the concept-the First is a simplified schematic showing the concept at work: two legs of a tackle lying between the two blocks are taken up on and made as tight as can be managed through muscle power alone. When the Frapp goes on it pulls the two legs together and this increases the power of the purchas the blocks are providing. More frapping turns put on serve to draw the two legs even closer together, creating tremendous force on the two legs, which were already tight to begin with. The second illustration shows the training tackle on the French guns, the Frapping Turn is going around the near training tackle, over the gun to the far training tackle, then back again, drawing the legs of the training tackle together and thus increasing the strain of the carriage against the bulwark eyebolts, making the gun more secure than muscle power alone could have madde it.. More Fraps ( not illustrated in the drawing but plainly visible in all the above photos) go around the two legs of the breaching rope. Since the breaching rope was kinda slack to begin with, a lot of Fraps are put around the two legs of this line and you can see them in a row across the top of each gun.
-
Www.tineye.com is a good resource for tracking down the source of any image OR finding a better version of it. To get this image I clicked on then saved the picture posted above, went to tineye.com and uploaded the picture with a single click. Tineye comes back instantly with every version of the image available on the web, and convently they give the number of pixels for each choice so you can chose the biggest one. AND they give you the link to the website that has the image.
- 401 replies
-
- 10
-

-
- John Adams
- Alliance
- (and 3 more)
-
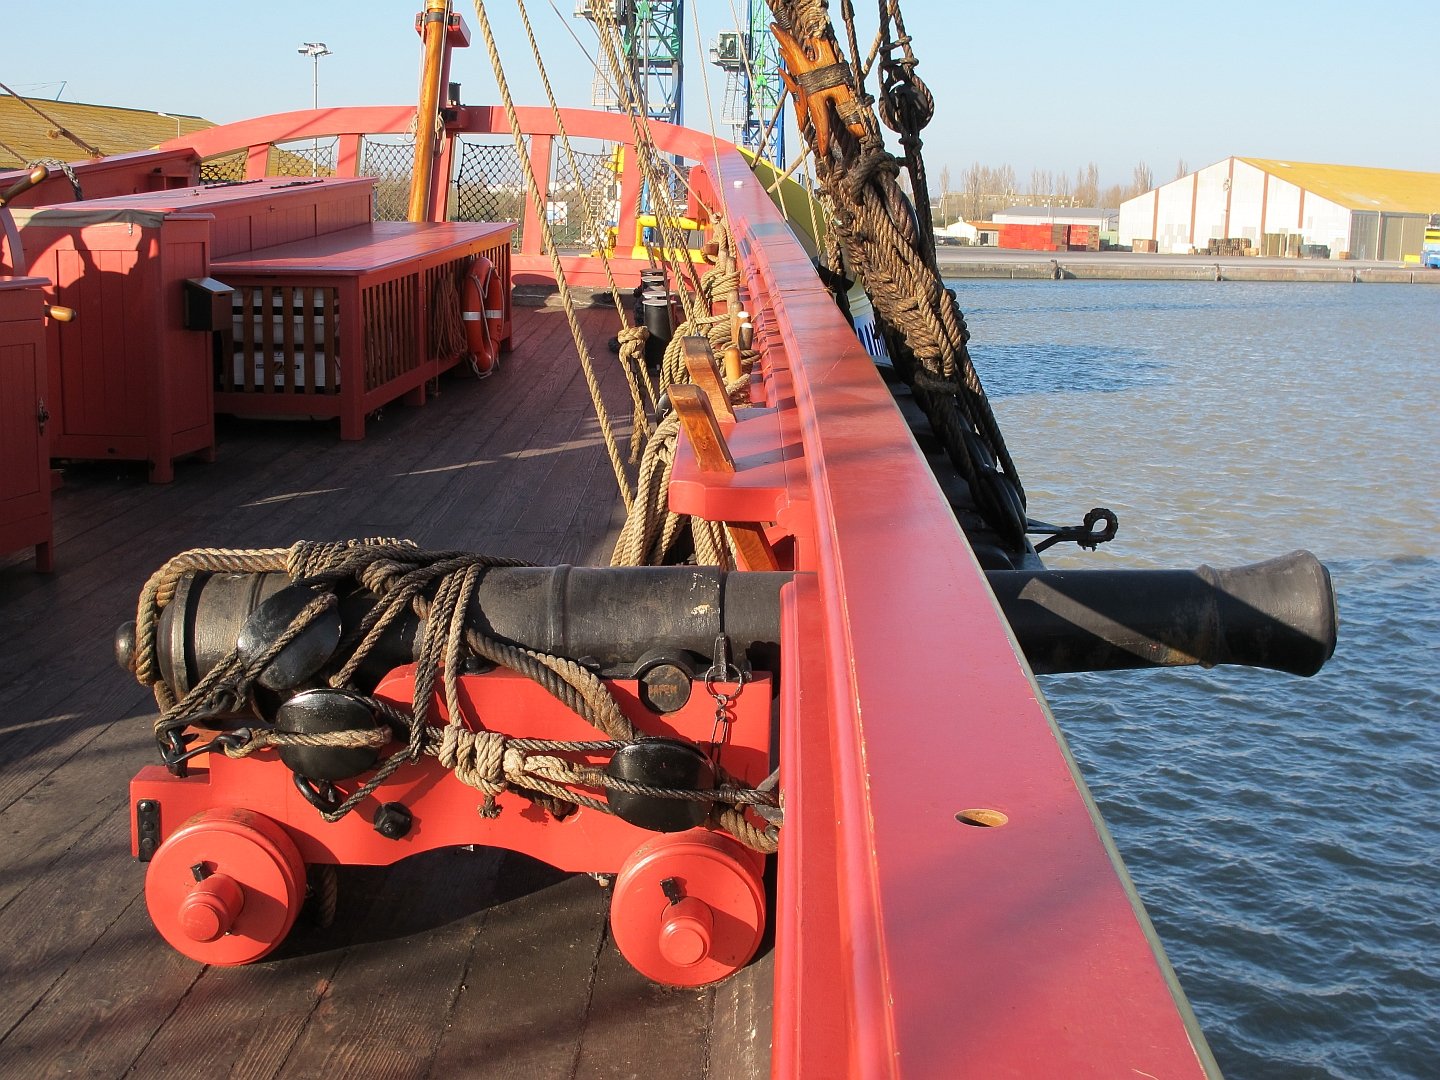
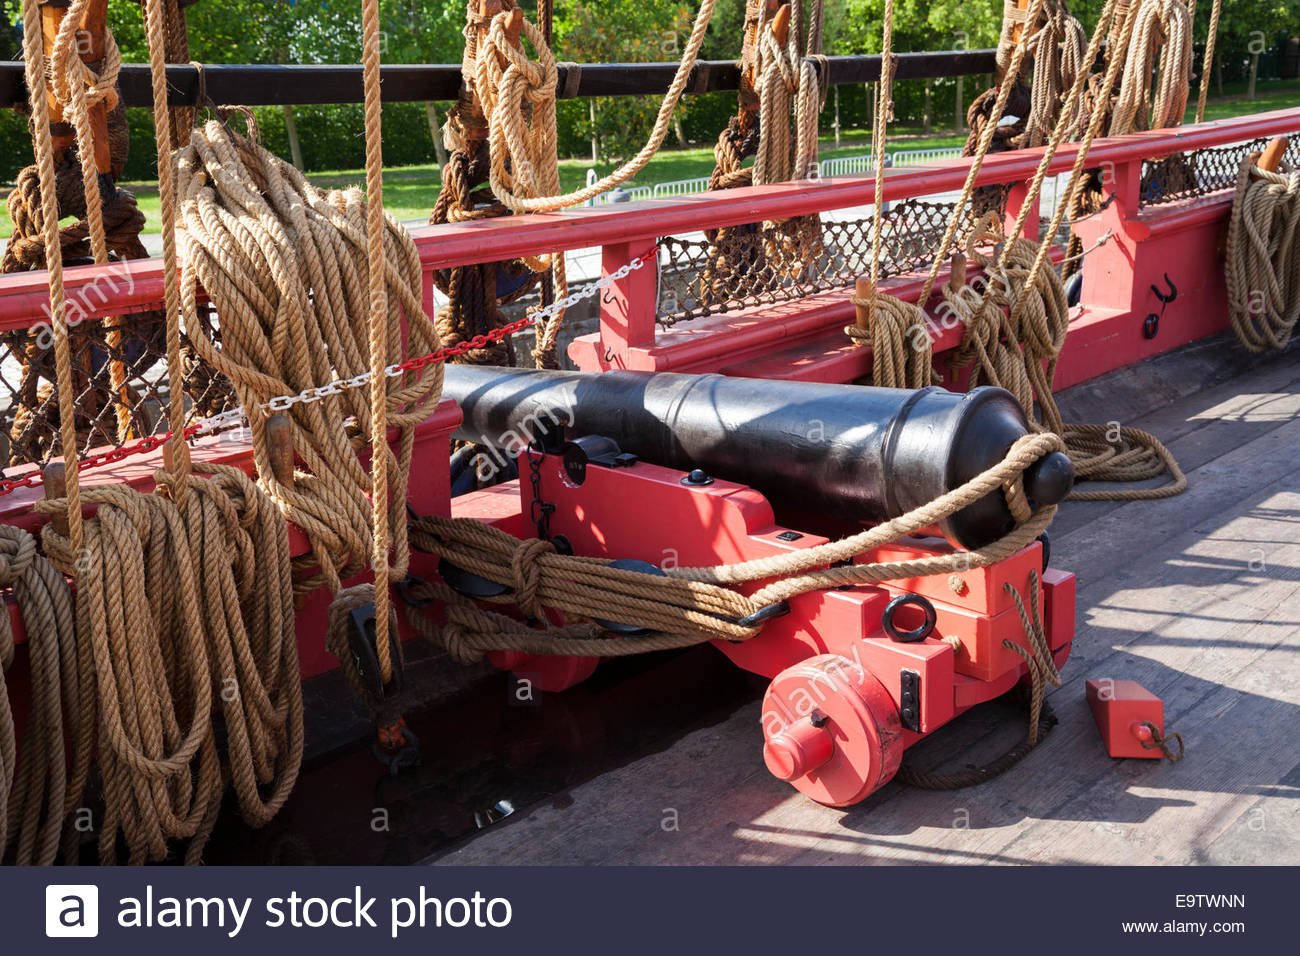
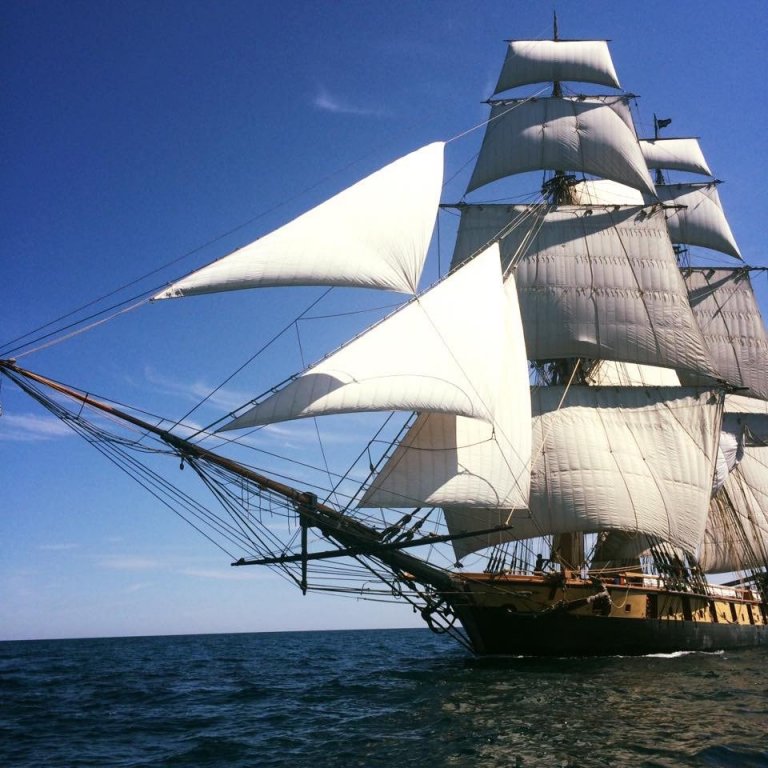
Le Hermione seamed a good candidate for providing images of a non-museum ships gun stowage, she is arguably the most authentic reproduction sailing today and she HAS crossed the Atlantic. In most cases I saw, the crew have taken up on the training tackle and they used the remaining line to lash the gun to the cairage. Their technique is not elegant but it does appear practical while at the same time keeping all line off the deck.


-
I'm skeptical This frapping of the hauling part of the line is a method used at sea. Photos abound on the internet of gun tackle demonstrating this frapping but my theory is that these examples are all Museum ships open to the public. Some curious Museum visitors have a tendency to play with the rigging if it isn't secured in one way or another and I believe this frapping is a strategy to defeat this behavior, not a reflection of actual use. Certainly a tackle can be belayed to itself, but sailors would use any of several known knots that would belay the line in a way in which the line could also be instantly cast off. Nobody at sea is going to render the falls of the tackle THAT difficult to un-belay by taking turns around something with its ENTIRE LENGTH. CERTAINLY not a Halyard! it takes too long to render all that line around and around. Also, if we can go back to speaking about Halyards, I would be very surprised to learn that any haliard wouldn't be provided with a sturdy and reliable bit of hardwear to belay onto. Balaying a tackle to itself is more in the nature of a temporary means of securing a lighter load, a Halyard on the other hand is always going to be under heavy strain when belayed, is always going to belay in precisely the same place every time, and must be able to be INSTANTLY cast off. Thus the ship would have a pin or a cleat or a knight head or kevel dedicated to the line.
-
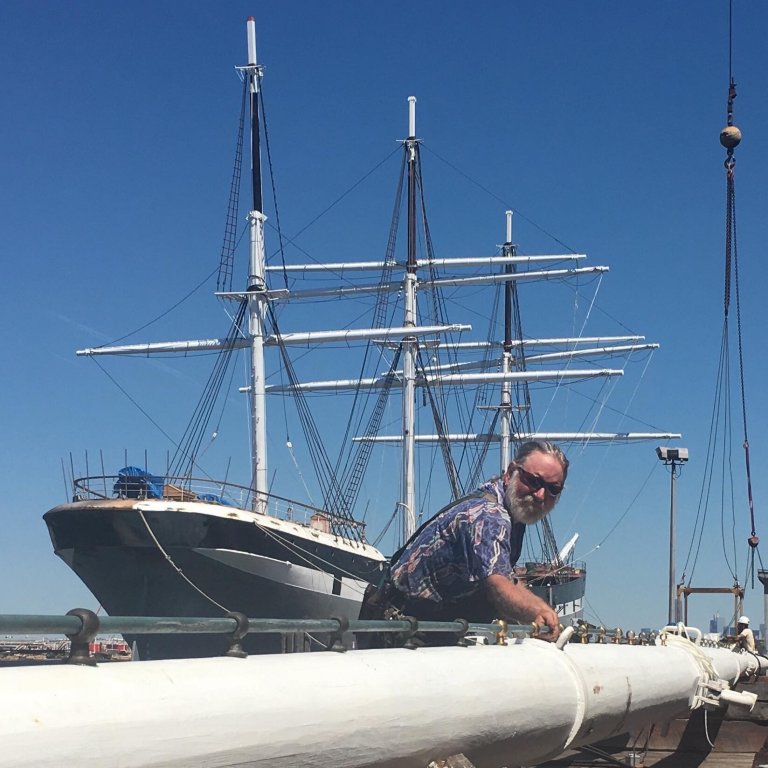
Wavertree jack stays with a Master Rigger for scale. Solid steel. The hardwear it's being rove through is bronze and they are known as Falcons, they aren't eybolts but rather spheres with a threaded screw attached to drive them into a wood spar.
-
To keep the fabric in one position I have found it necessary to use one chemical or another to stiffen the fabric in the shape you want. Over the years I tried white glue and I tried laundry starch but neither of those held the material rigid. Then I found a product at a craft store called Stiifen Stuff and this I used on my sails on my cutter Le Renard model. Later I found an even better product made by Golden paint company, a water based acrylic product that worked great and I used that on my HMS Victory model- check out that build log it's ALL ABOUT sail manufacturing and little else. FINALY On my last effort, my Yawl Dulcibella, I used two-part epoxy. And I describe that technique in my log too.
-
Ashley's Book of Knots
JerseyCity Frankie replied to Bob Blarney's topic in Modeling tools and Workshop Equipment
It has been, since the day it was published, the best knot book ever written. It's been decades since it's release in the late 40's (I think) and hundreds of knot books have come and gone, but Ashley remains firmly in first place. No other knot book has ever come close. Having said that, it's not necessarily the knot book you need. It's got over 2,000 knots in it so Ashley wasn't able to provide complete step by step instructions, although all the knots are illustrated. Many will be fine with less comprehensive knot books and online resources. The Girl Scout Handbook has a terrific knot section, for instance. -
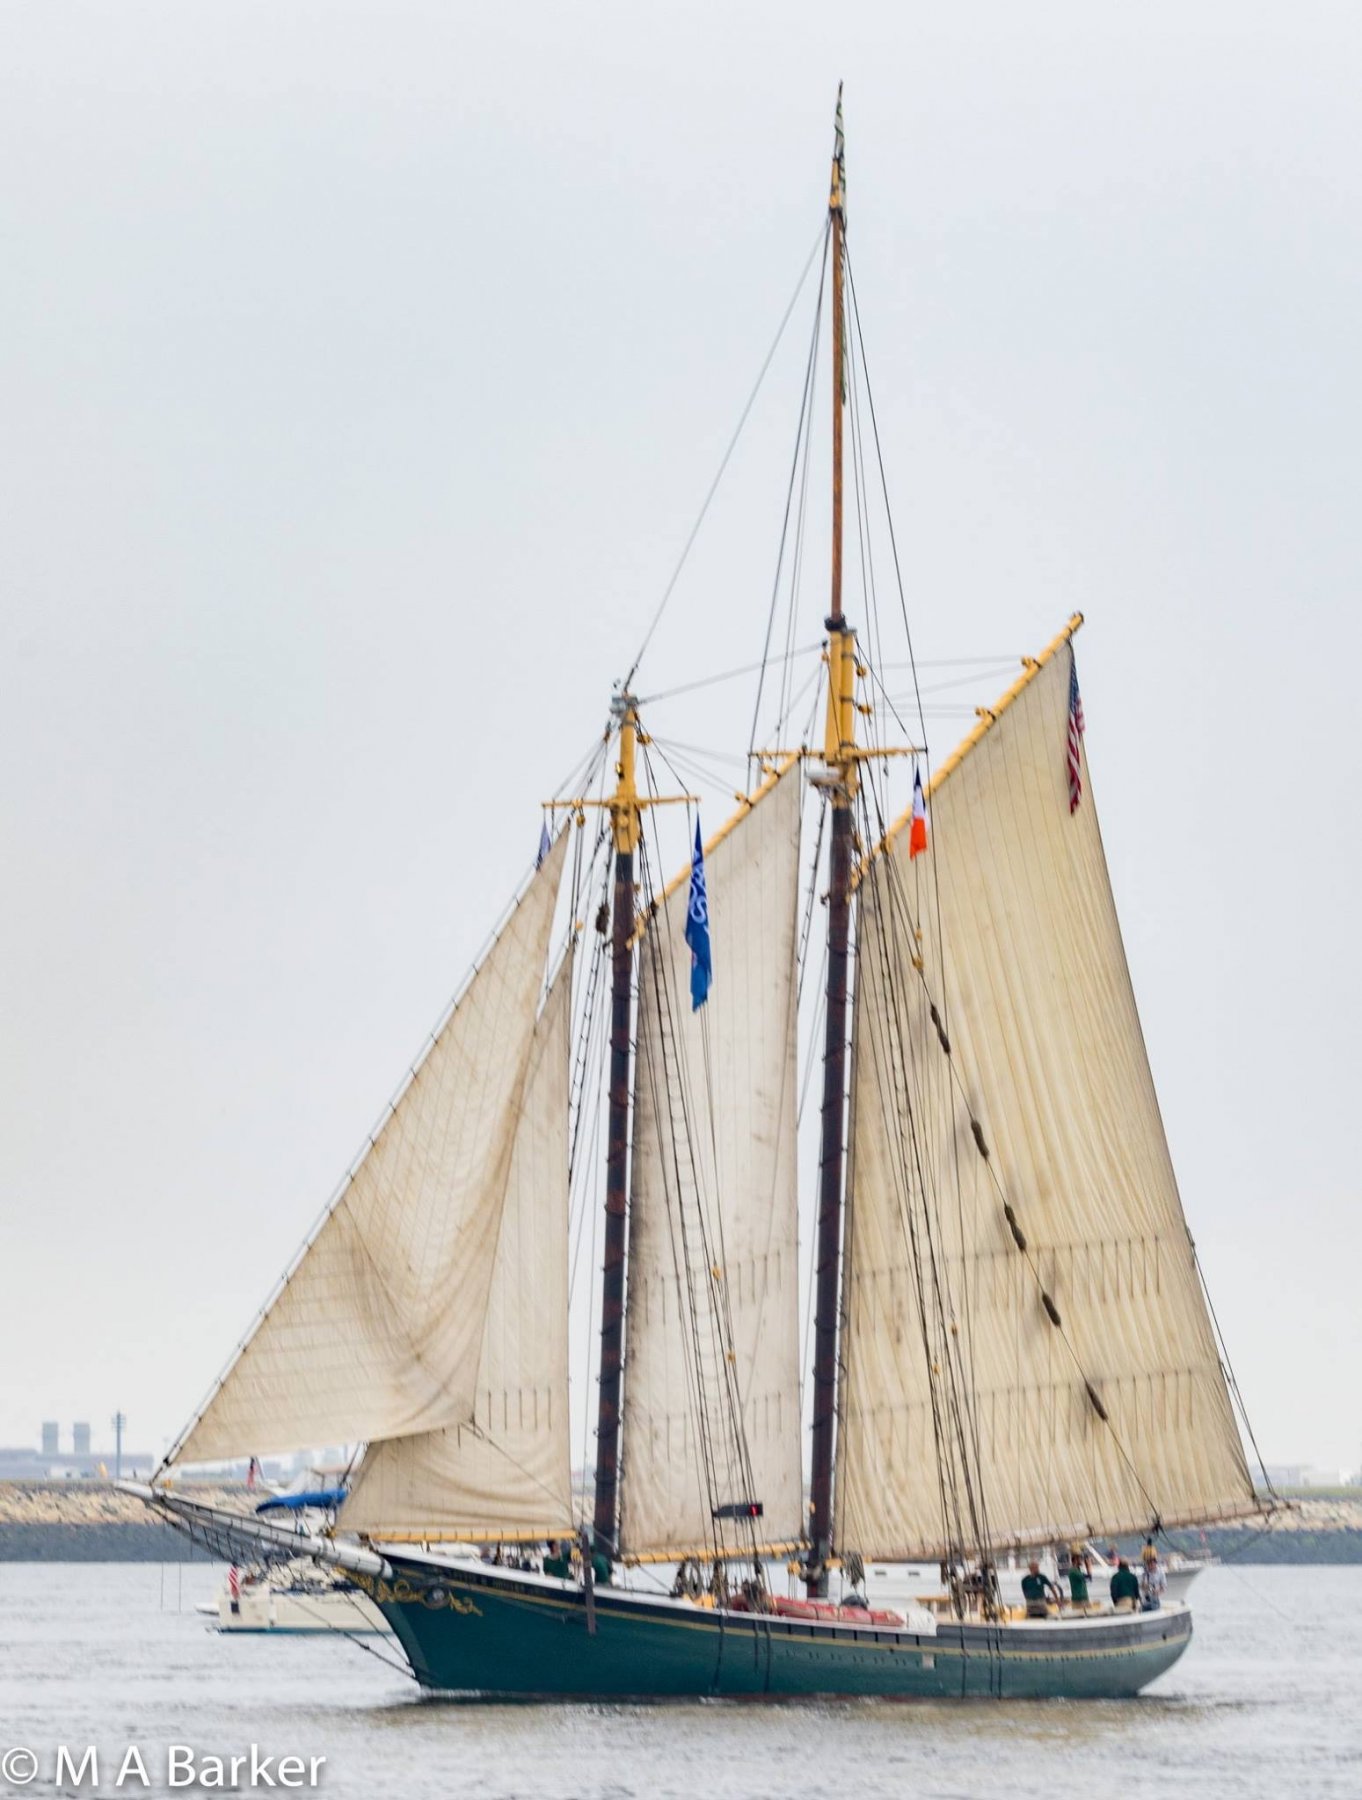
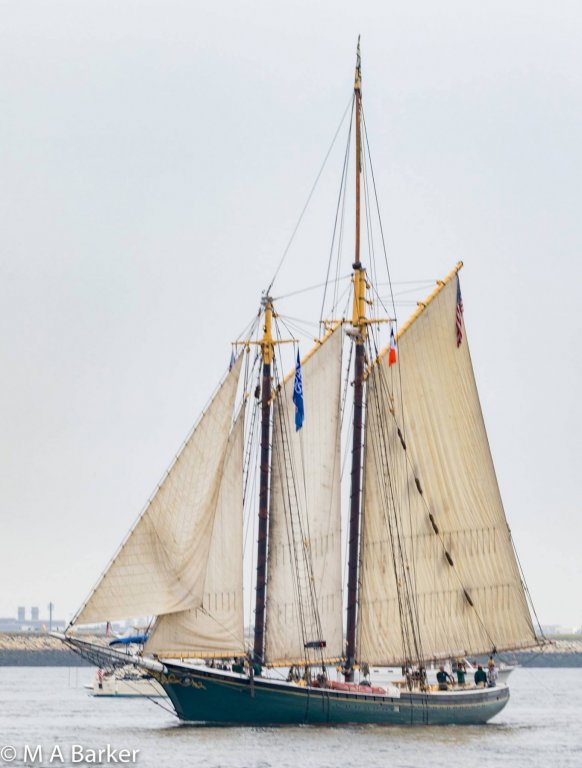
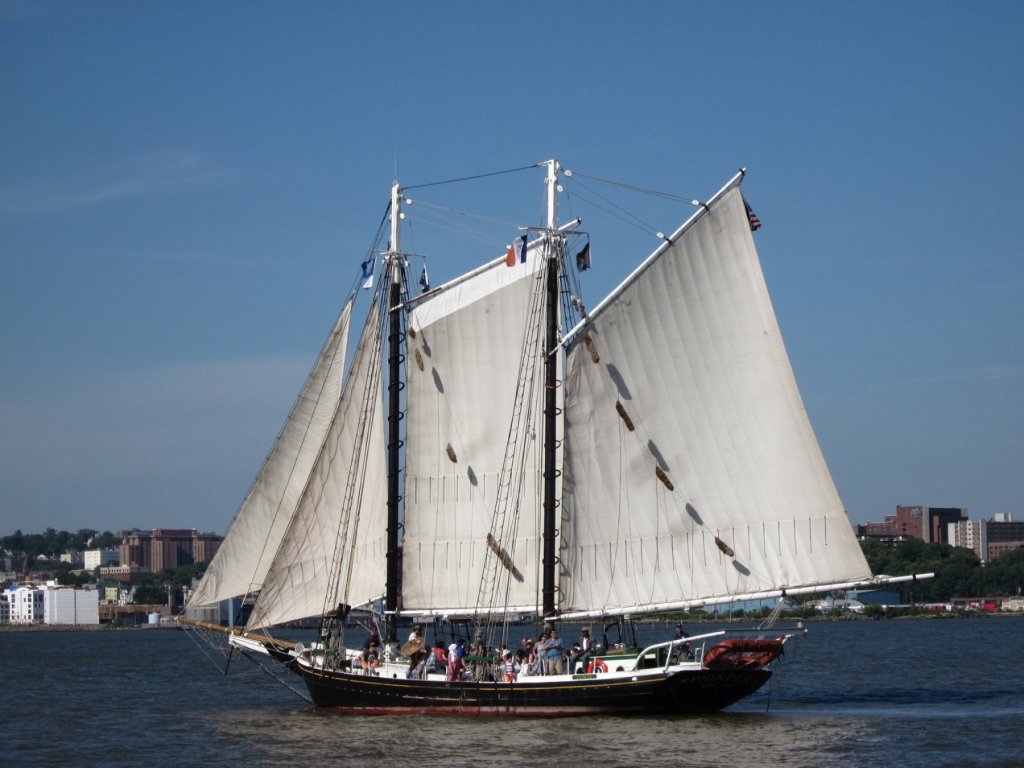
This beauty shot just popped up on Pride of Baltimore's Facebook page.
-
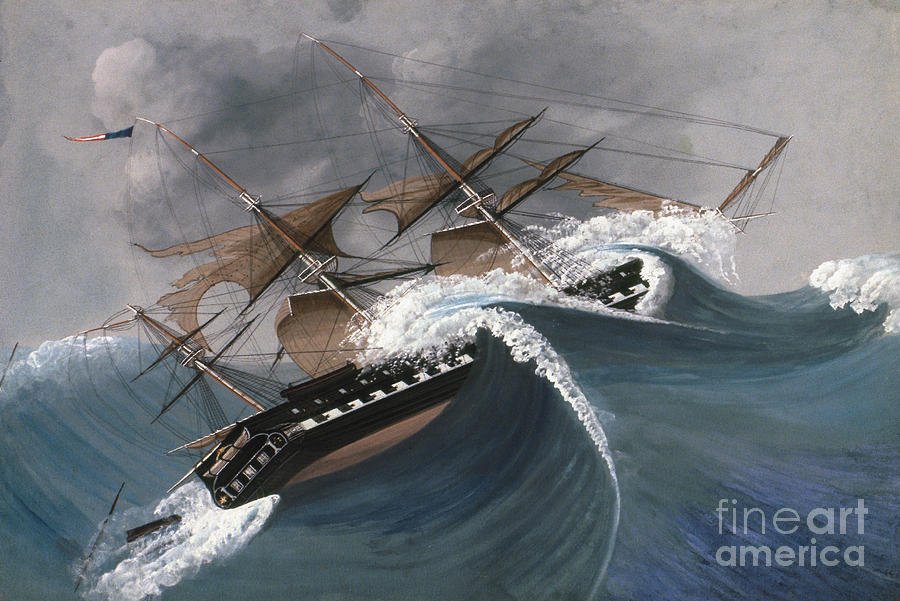
Off Hats! Old Ironsides BY OLIVER WENDELL HOLMES, SR. Ay, tear her tattered ensign down! Long has it waved on high, And many an eye has danced to see That banner in the sky; Beneath it rung the battle shout, And burst the cannon’s roar;— The meteor of the ocean air Shall sweep the clouds no more! Her deck, once red with heroes’ blood Where knelt the vanquished foe, When winds were hurrying o’er the flood And waves were white below, No more shall feel the victor’s tread, Or know the conquered knee;— The harpies of the shore shall pluck The eagle of the sea! O, better that her shattered hulk Should sink beneath the wave; Her thunders shook the mighty deep, And there should be her grave; Nail to the mast her holy flag, Set every thread-bare sail, And give her to the god of storms,— The lightning and the gale!
-
A question about the Jeers
JerseyCity Frankie replied to Sailor1234567890's topic in Masting, rigging and sails
The Falls of the Main Jeers Belay to the Main Jeer Bitts at the base of the Main mast. And you're correct, there is no pin for them the 7" diameter line is too thick. This line would likely pass through a lead block on deck then get belayed directly to the vertical element of the bitts with some kind of hitch. At 75 fathoms the falls would be about 450' long! The Jeers are used on the very rare occasions when the course yard needed to be lowered to the deck and I can imagine entire voyages where this would never become necessary. But you had to have the option to do it should the need arise. I'm more or less certain the huge coils of line would be hidden from view below decks, likely in the cable tier.- 1 reply
-
- 1
-
-
Bowsprit 'Steps' not Step
JerseyCity Frankie replied to piratepete007's topic in Masting, rigging and sails
The pitching motion of the ship is felt more strongly the farther one moves from the "center" of the vessel. So if a ship is pitching through an arc of 30 degrees, someone standing midships on deck near the main hatch is going to feel the motion but their body won't be rising and falling through space very much. But out on the Bowsprit, that same person is going to feel their body moving through a much greater arc, up and down. The tip of the jibboom could be passing through 50 feet of space, each time the vessel pitches, up up up then down down down. And if you have to make your way onto or off of the head rig, you are going to want any possible aid for your footing. -
I know on the schooners I sail on the State flag is always on the Starboard side of the mainmast and the city is on Port. Even if you are offshore it's good etiquette to have the appropriate flag flying. The ensign flys from the main Gaff Peak. There are flag hailyards on the foremast but those fly the flag of the Museum that owns the schooners and an education organization that is associated with the ships.

-
Clueline, Tack and Sheet Question
JerseyCity Frankie replied to 6ohiocav's topic in Masting, rigging and sails
In modeling, the issue of " how do I display running rigging when I've chosen not to include sails" is a common issue. But including the running rigging without the sails is a state of affairs not found on actual ships, nobody has the clew, Sheet and tack hanging in space under a naked yard. On an actual ship, when the sails are taken off, the rigging comes off too. looks like the Niagara uses their cat heads for the tacks since they have no boomkins? That is where I would put them anyway. I looked but could not find many shots with the Fore set but here are two. Unfortunately neither shows the lines perfectly.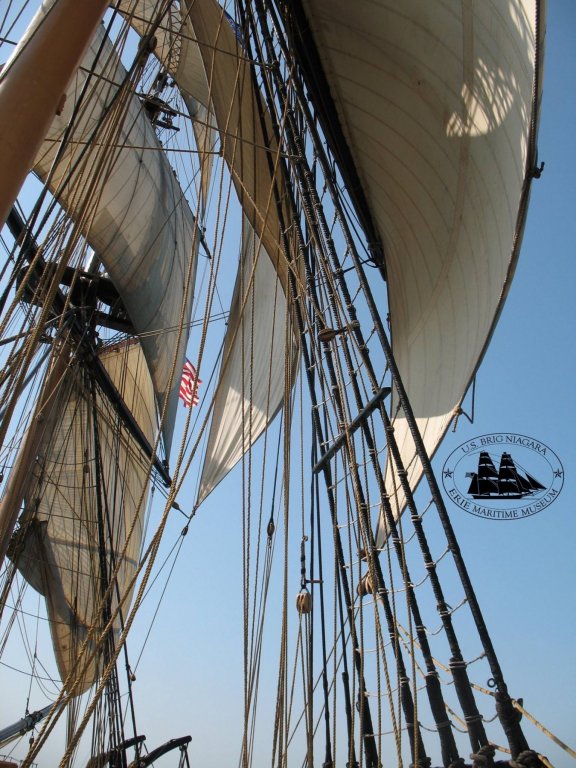

-
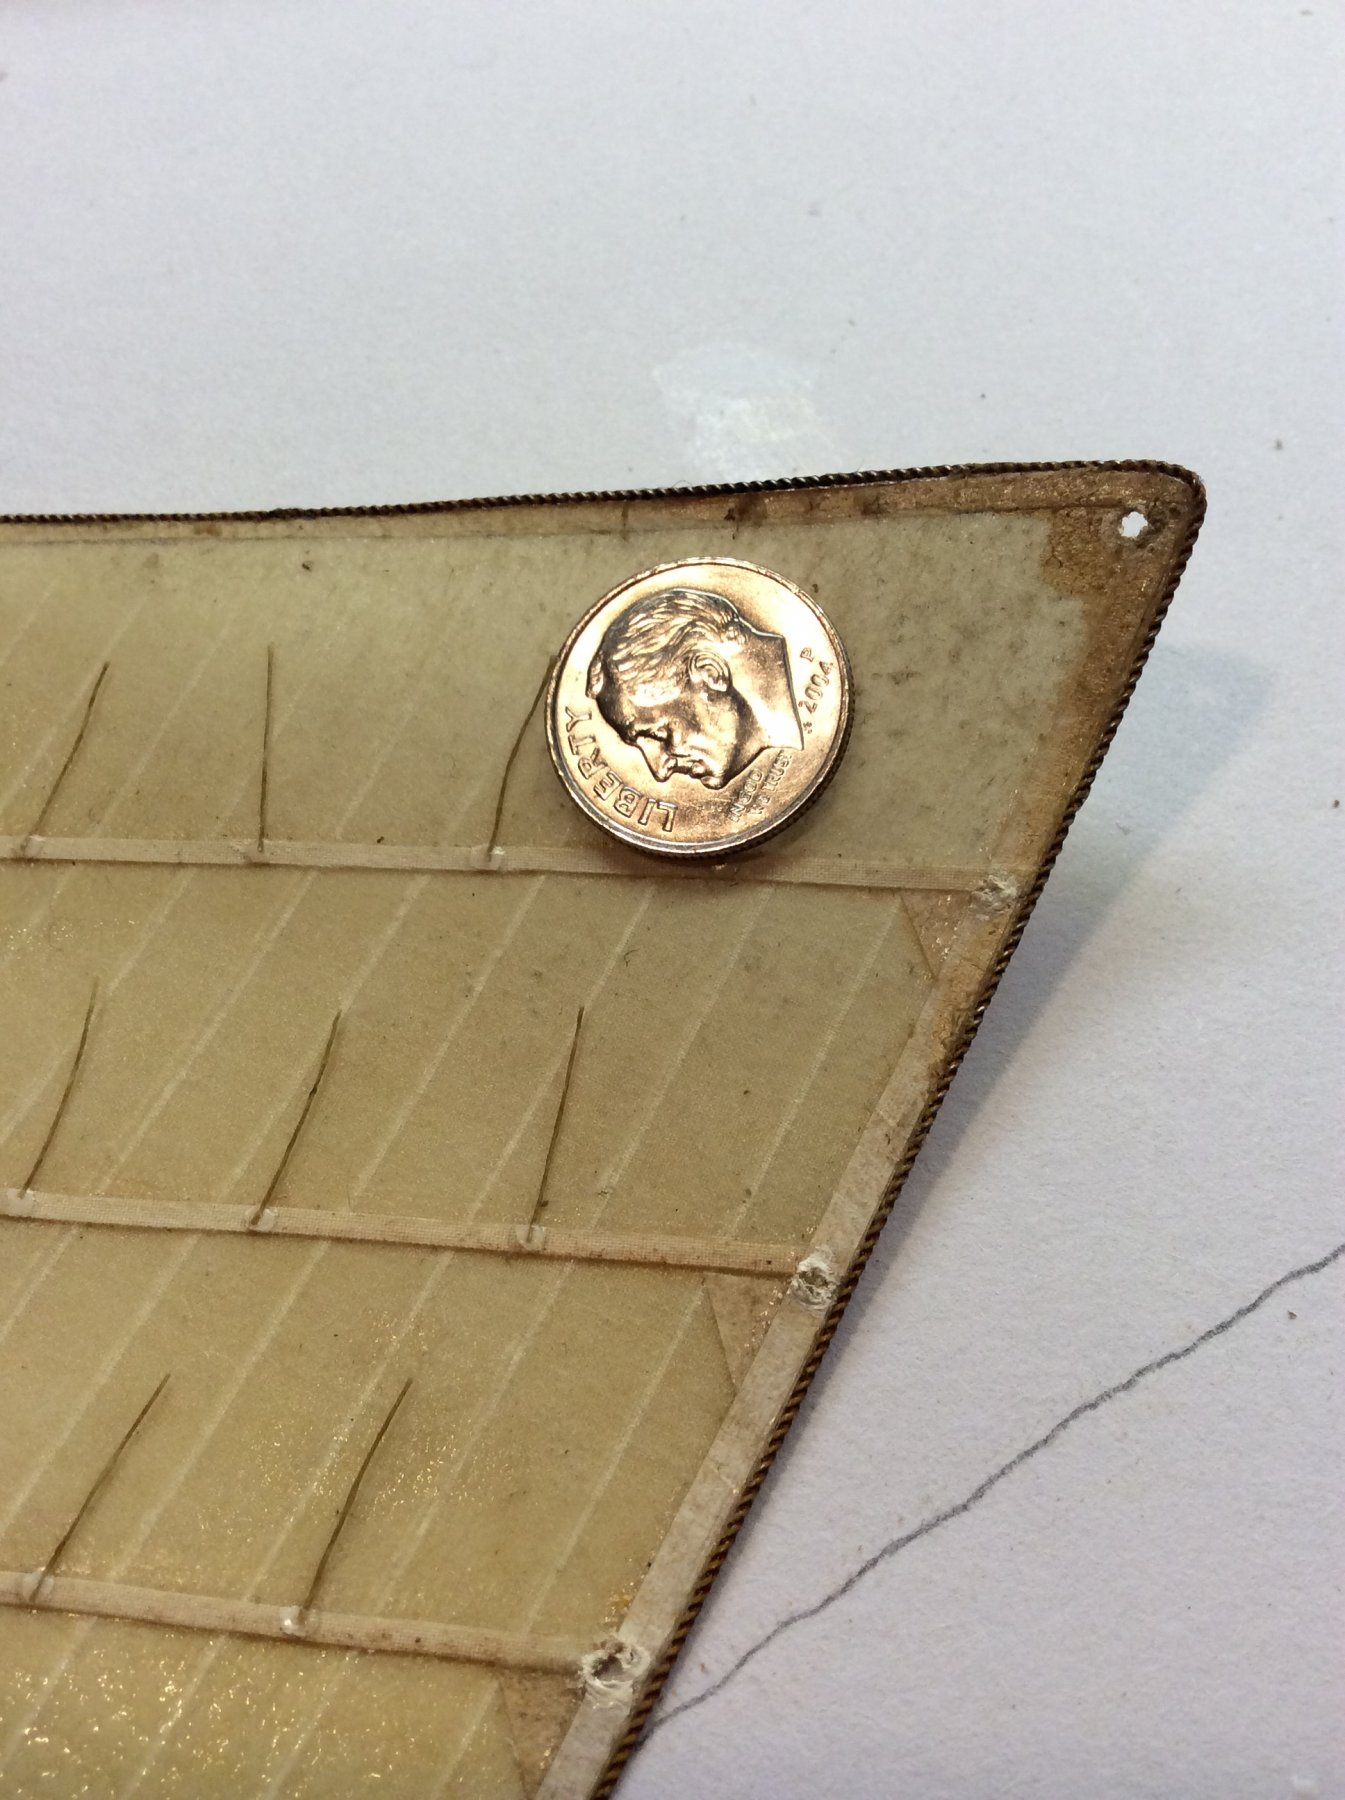
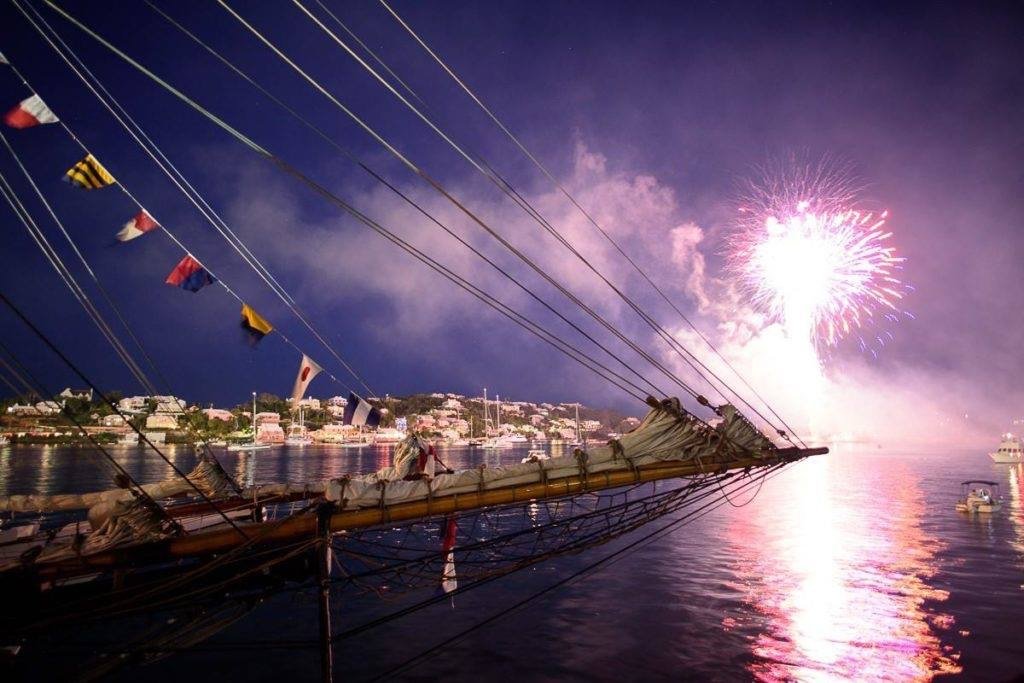
Not obvious in the photo Is the technique used to get the sail to look and behave this way: on a hanked on sail like these headsails, the sail remains attached to a the stay at the Luff of the sail and the rest of the sailcloth is a chaotic floppy pile of material after the sail is dowsed and it has all slid down the stay. Sailors go out on the headrig ( that's why there are footropes there) and pull the Clew of the sail all the way Aft, trying to stretch the foot of the sail along the center of the Bowsprit or Jibboom. then they "Flake" the sail by forming long folds , like an accordion, stretching from the Tack of the sail to the Clew, each fold the same width and as wide as the spar will allow. Starting with the material closest to the foot, and folding their way "up" the sail as they go, neatly stacking each flake atop the last one. Since the sail is triangular, each successive flake is shorter than the one beneath it, the boltrope on the Leach of the sail is then visible as a zig-zag across the top of the stack of flakes marching from Aft to foreword , each flake has one hank at its forward end where it is attached to the stay. sometimes the very first flake is made abnormally wide so it hangs down at the feet of the sailors as they form the rest of the more narrow flakes and stack them on top. This is "the skin"and once all the rest of the flakes are folded, the "skin" is taken up and folded over the top of all the flakes and tucked neatly under the flakes ( like tucking in a bedsheets) on the opposite side. This forms one smooth skin over all the rest of the folded sail and the sailors try to smooth out every wrinkle in the Skin in order to make its surface PERFECTLY SMOOTH. And this is done to impress all who view the sailwith the superior seamanship of this particular crew but also it perfectly sheds water which would otherwise collect in any folds and possibly start rot to set in.
-
Just wondering if this is the Model Shipways kit? Your build log doesn't say in the title and couldn't find it on the first page.
- 732 replies
-
- 1
-
-
- constitution
- model shipways
- (and 1 more)
-
It's odd that in my copy of Anatomy of the Ship Bounty on page 100 is the comprehensive running rigging diagram and line number 215 is the Peak Halyard but I can't find an indication of the Throat Halyard anywhere. It's true it would be hard to see being located up tight under the top and up against the after part of the Mizzen, but there is no arrow pointing into that location. Peak and Throat Halyards are usually paired together, you can't have one without the other if they are to be used for lowering the Gaff. But I could imagine a Peak Halyard rigged alone on a Gaff fixed in position on the mast as lowering the Peak of a sparred Fore and Aft sail is a quick way of depowering the sail, it ruins the arodynamics of the sail simply by folding down the Peak and it allows you to turn away from the wind easier as it negates the weathervane effect the Spanker has on steering. and on page 112, the key to the numbered lines from page 100, the Peak Halyard is there but no mention of Throat Halyard. but what you do have is a three part listing for a line called "the Derrick" line number 214 consisting of the "Span, strapping and Lashing". Which almost sounds like it could be the Throat Halyard. BUT, I can't find the number 214 anywhere on the rigging diagram. Although there is a pin for it in the Starboard Mizzen rail in the Belaying plan on page 106. In my mind, anything called a "Derric" is a crane for lifting stuff and I'd expect to see it where it could be positioned over the main hatch. But I could imagine someone thinking a Spanker Gaff could look like a Derrick as they would both be at a near 45 degree angle? anyway the brails for the spanker are clearly documented in the book so furling the sail would keep the Gaff aloft in position not lowered to the deck. But then how do you reef the sail? A reef band is clearly shown on the sail drawing of the Spanker. Nobody can reef the sail if you can't lower the entire Gaff suficently to allow access to the reef band from the deck. Is this just ANOTHER example of poor documentation? I'm sure somewhere in the actual ships log there must be many notations of how this sail was handled bug I've not the time or patience to go digging!
-
I should have mentioned those two photos are of the actual Brig Niagara. This IS how the ship is configured. I would be very surprised if the Sling weren't leathered but certainly served over its entire length. There are a LOT of photos of Niagara, all over the web and more photos are litteraly appearing every day as she sails from city to city during her sailing season.
- 843 replies
-
- 3
-
-
- niagara
- model shipways
- (and 2 more)
-
The Sling goes down through that smaller rectangular hole on the forward part of the top. Here are two photos I found showing the Sling emerging through this hole on the underside.

- 843 replies
-
- 4
-
-
- niagara
- model shipways
- (and 2 more)
-
By the way, I mentioned knots above. In my opinion the best knot for a temporary and adjustable knot to tie on say, a backstays, is the Rolling Hitch. Take the backstays down to the lower deadeye or whatever then around and up and tie a Rolling Hitch back on itself. It's a knot that will hold where you put it but one which you can easily adjust by sliding back and forth on whatever you hitched it to, without having to losen or untie or make any adjustments to the knot itself. You need to leave the backstays and all other standing rigging you want to be adjustable longer than necessary in order to have enough extra line to tie an adjustable knot in the end. The Rolling Hitch is ludicrously easy to learn and tie.
-
USS Constitution (Mamoli 1:93) What to do?
JerseyCity Frankie replied to Techsan's topic in Wood ship model kits
To me it looks like you lack only the anchors and boats, both of which you can scratchbuild. For the spars and rigging, buy aftermarket blocks they may be better quality than the kit parts and ditto the wood for the spars. Certainly you can obtain better rigging line than the kit would have supplied. Maybe your lack of kit parts is will actually prove to be a factor in producing a better model? It will certainly force you to become a more independent solution finding model builder, and that's a very good attribute. -
i use a couple of methods. In each case you should unspool all the line you will need since whatever preparation you use, it can't penetrate stuff still on the spool and you will only effect the outer layers. I use one of two methods: most often I wet the thread with water ( a lot of water the thread should be dripping almost), stretch it between two points then I rub a small rag with acrylic paint over the thread,running it back and forth. If the color is too dark remove some of the paint by rubbing the line again with a rag soaked liberally with water. You can, if you work quickly, remove most of the paint if that's what it takes. Let it dry stretched so kinks won't form then coming again if you want it darker. It's done and dry within an hour. The other method I use is diluted acrylic in a tin can and I soak the unspooled thread overnight. A pain in the futtocks to untangle and stretch to dry but maybe more consistent color throughout the thread. Also strong coffee will empart color on white thread this way but will never get very dark. The color of acrylic paint I use is Burnt Umber or Raw Umber. Any brownish earth tone will work but black works too if thinned enough. In all honesty a brown magic marker can work but probably will age weirdly on the model.