JerseyCity Frankie
-
Posts
1,338 -
Joined
-
Last visited
Content Type
Profiles
Forums
Gallery
Events
Everything posted by JerseyCity Frankie
-
Sail design for 18th-century longboat?
JerseyCity Frankie replied to Cathead's topic in Masting, rigging and sails
I'm looking on the National Meritime Museum site but the only longboat model of the period I've been able to find on that Museums website is the one depicted above, object number SLR0330. http://collections.rmg.co.uk/collections/objects/66291.html Does anyone have a link or a photo or a contemporary two-dimensional artwork depicting other instances of the impossible Sheet/Tiller arangement? I would like to see other examples of this oddity. As it IS an impossible set up -the boat as rigged can not function as a sailing vessel- I'm finding it vary curious that there are apparently more examples of this configuration from contemporary models and artwork. What it suggests ( if these are not artifacts arising from folow-on restorations) is that contemporary models can't reliably be used as 100%faithful examples of actual contemporary practice. This would throw a great deal of rigging research under the bus. -
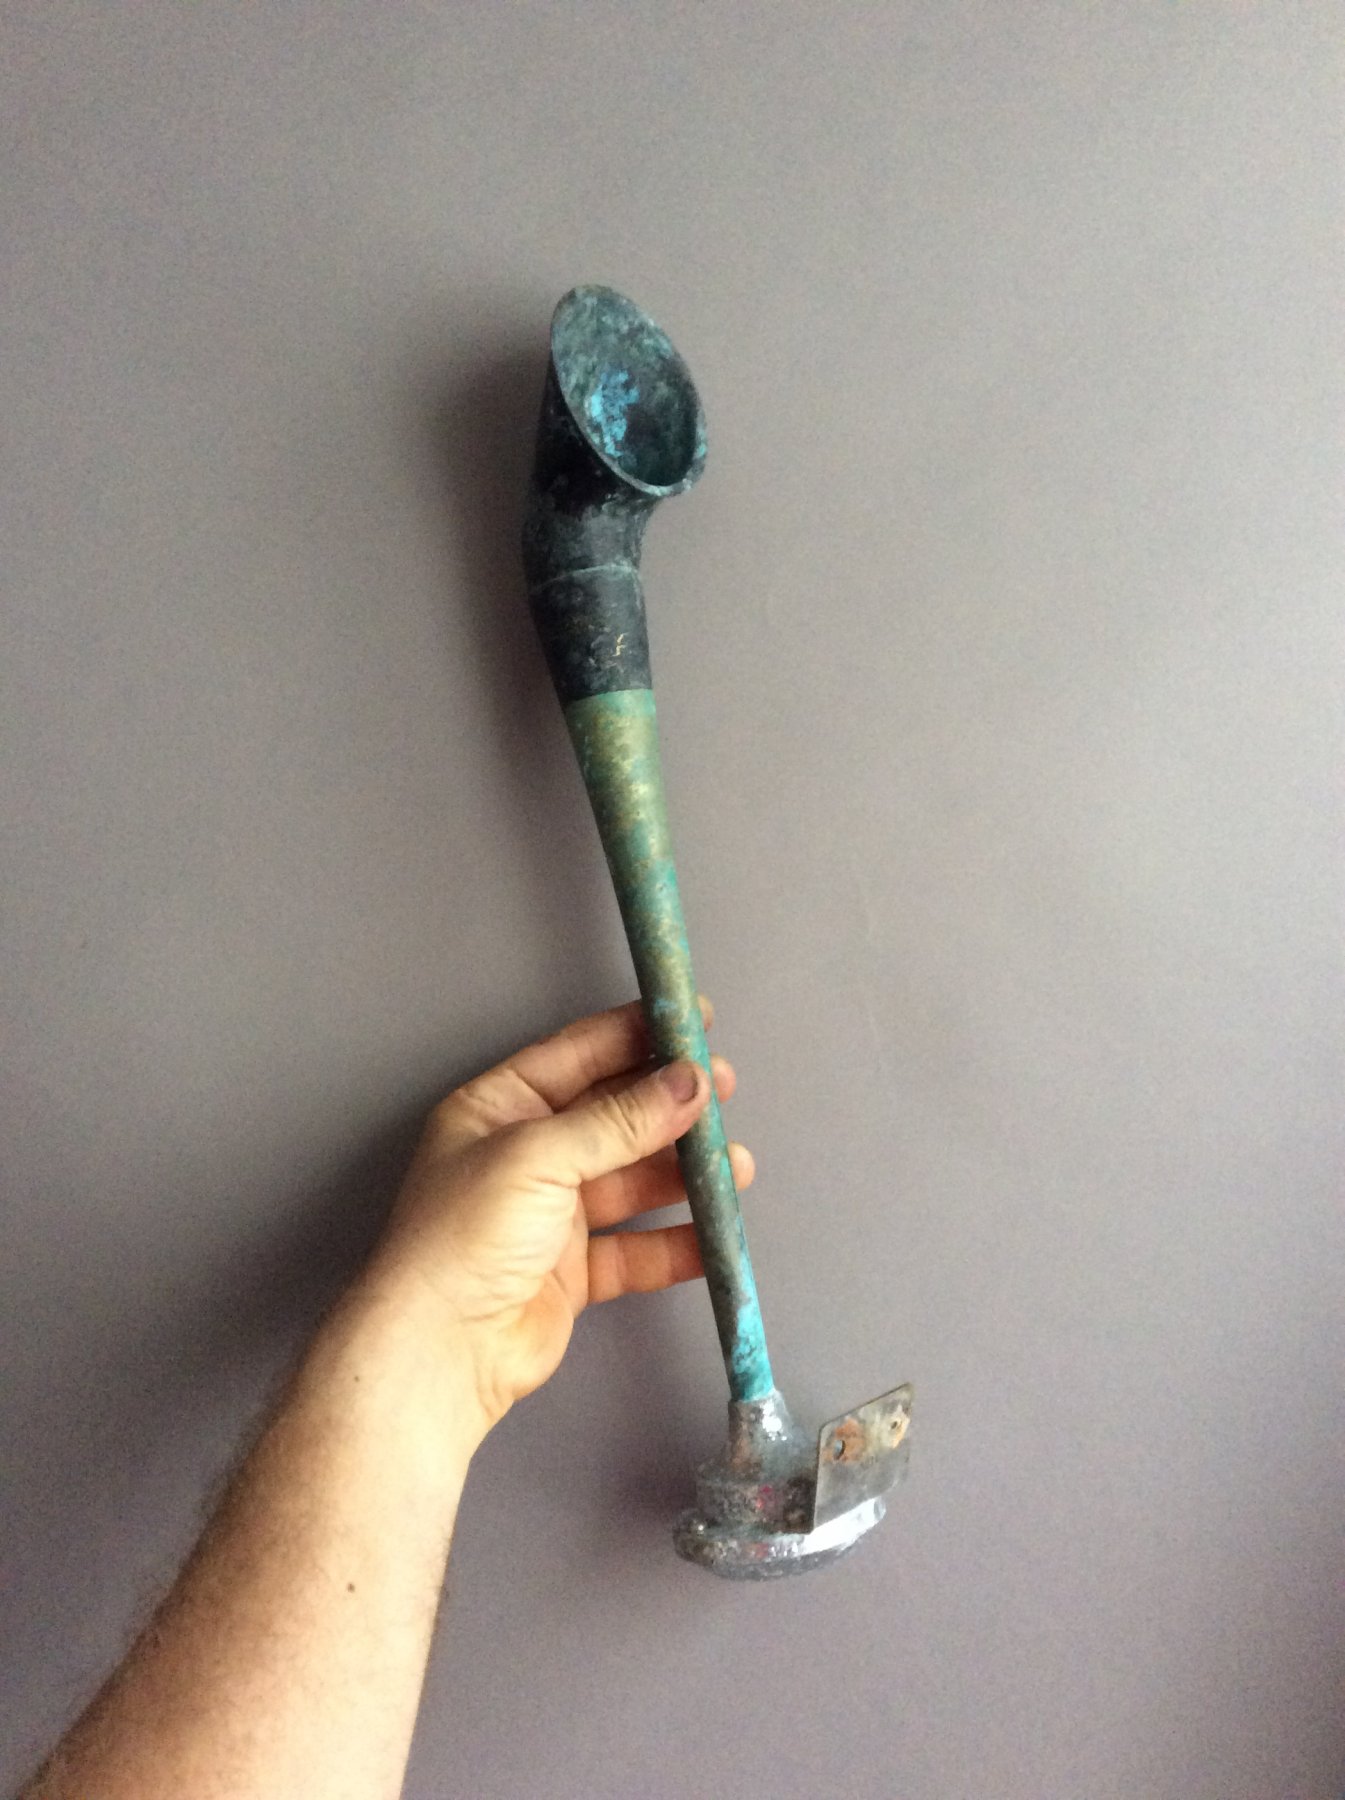
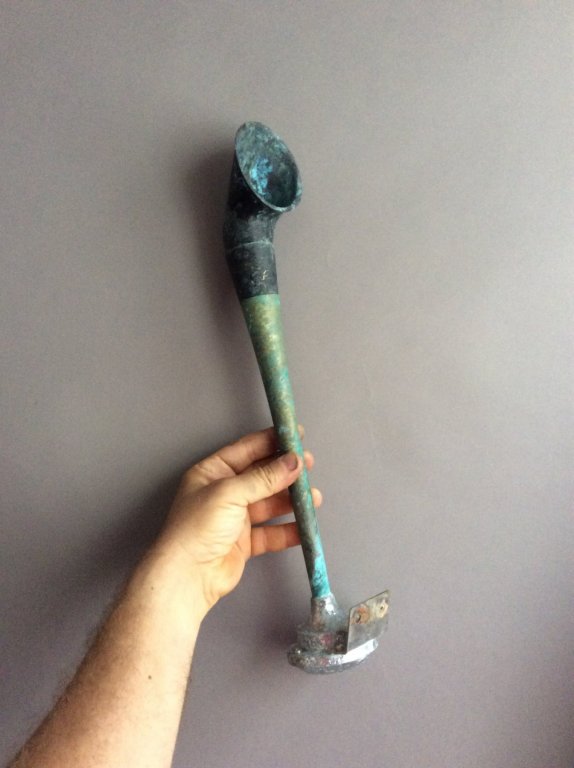
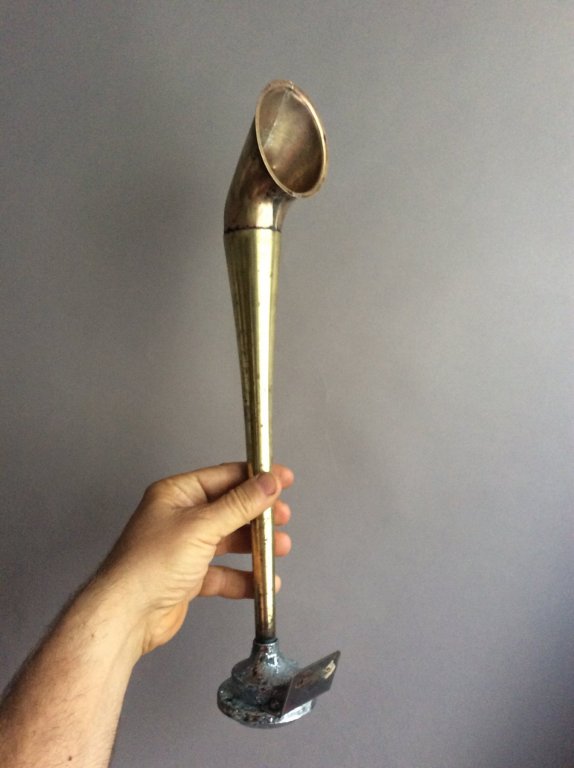
Try white vinegar, just soak it in it. It took a thick coat of black paint off this boat horn I found in the trash, the paint curled up and died after soaking overnight.
-
Sail design for 18th-century longboat?
JerseyCity Frankie replied to Cathead's topic in Masting, rigging and sails
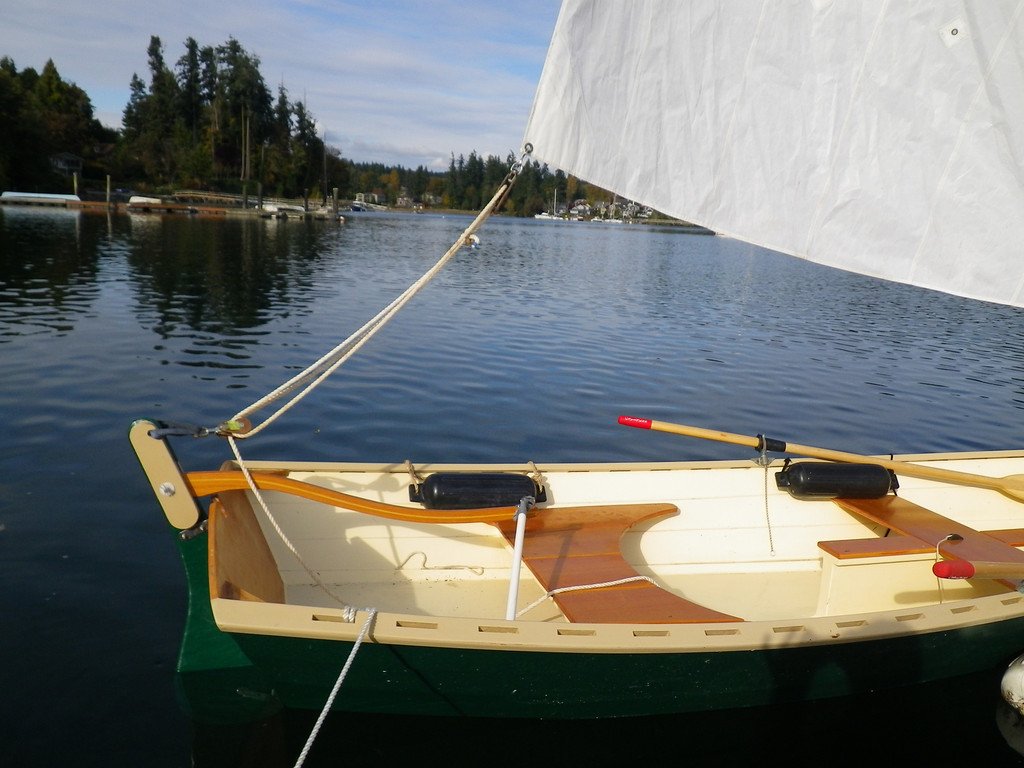
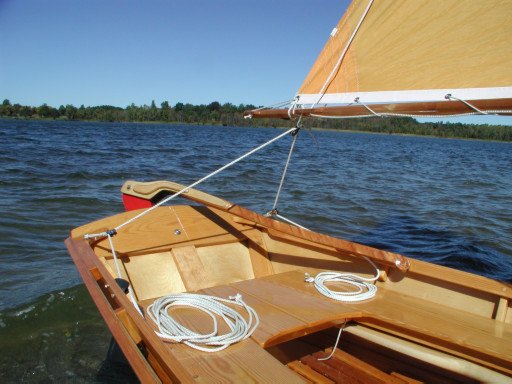
Since this topic of "sheet-fouls-tiller" got onto my radar I'm seeing this problem on a LOT of models. The problem is always the same: the sheet is located in space in the same area through which the tiller will have to sweep, and vice versa. this is a sailing impossibly. You can overcome the problem, obviously, by moving the sheet out of the way: locate it Forward of or Aft of the Rudder and tiller. This is a problem in small vessels since there isn't any room, everything is crammed all the way Aft. The most common solution is to have a two legged Sheet: there is a block on the boom but there are two blocks making up the rest of the tackle- one to Port one to Starboard- the sheet has two ends on deck and the fall of the tackle describes a triangle with the apex on the Boom and the other two corners as far off to either side as is possible, under which this triangle the tiller is free to sweep. Another solution is to have an offset tiller. A clever way to have your cake and eat it too. A very rare solution is to have the lower Sheet block fixed to the ruddder head itself. But you can't have a horse for the Sheet with any part of the tiller ABOVE IT. You can however certainly have a Tiller UNDER the Horse. Your tiller can be "U" shaped with the bow passing under the Horse. I dug up some photos off the internet: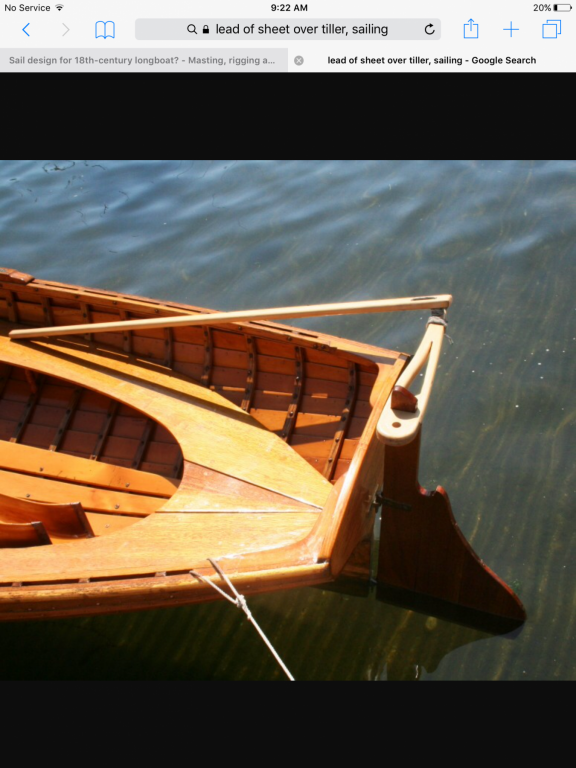
-
I'm intrigued by the mention of an article about ship Models scanned by MRI. Is the article online, could you post a link?
-
I LOVE the diamond deck lights! Very clever thinking outside the box.
- 164 replies
-
- 1
-

-
- Model Shipways
- Finished
- (and 1 more)
-
Speaking of the run of the mainstay: I would seriously consider dispensing with the Fore and Aft Mainsail on the Fore, it strikes me as being implausible. At least in how it's depicted in photos of the Constructo model I see online. It's possible I'm wrong but my feeling is that this Sail can't be tacked OVER the Mainstay and that on half of all tacks the sail would be chafing HEAVILY on the Mainstay. Also the way the braces for the Square Foresail are run to the Main Masthead, the Fore And Aft Mainsail Boom would be heavily chafing those Braces too. I doubt anyone would rig a vessel with all these built in issues.
-
When sail is taken in the headsails are folded as neatly as possible, like an accordion along the top of the spar and then they are lashed in place by passing those "Jib stops" once around the bundle of sail and tied with a reef knot. The stops just hang beneath the bowsprit or jibboom when the sail is set. They are only long enough to pass over the top of the bundled sail and have a knot. They are spaced about four feet apart from each other along the spar for the length taken by the furled sail.
-
Topmast crosstree dimensions.
JerseyCity Frankie replied to Bluto 1790's topic in Masting, rigging and sails
Here is how I THINK you can arrive at the dimension you're looking for: look to the t'gallant shrouds, these are the ones that pass through the tips of your crosstrees. If they were to continue down to the hull on a mathematically straight line-after passing through the tips of the crosstrees- they would hit the channels on the same for-and-aft line as all the rest of the standing rigging lower deadeyes on the channels. So the imaginary line I'm describing is the Hypotenuse of a right triangle that uses the mast and the deck as the other two legs. You should be able to make a simple diagram using tracing paper over your plan, OR measure off the model itself if you have the mast components ready and you can measure them. -
Congratulations on your model and I'm very glad you went to the great trouble of modeling the sails! The color of the sails, in particular, is very convincing.
-
John LeCarre has great appeal if you like O'Brian. He hasn't a nautical bone in his body but in my opinion his stories unfold and his characters participate in the narrative in a way that an O'Brian fan may appreciate. He's the only author I've read that comes close to the sort of idiosyncratic patchy narrative line and charchter development that O'Brian uses. Plots that skip around, ensambles of charchters who appear again over the span of multiple novels, personal romantic lives impacting charchters as they are engaged in a world seldom explored in literature. And very very British.
-
On the list of ship features that have a lot of wiggle room for interpretation, hatch covers would be very high. You could leave them off altogether and this could be completely plausible since this is how cargo materials and equipment get into and out of the ship. You could cover them in canvas-the easiest modelbuilding solution. Modern reproduction and restoration traditional craft often have more elaborate doghouses and hybrid structures built into hatchcovers to make ascending and descending the ships ladders more civilized or to meet code requirements. These structures range anywhere from a small sliding panel up to impressive works of cabinetry incorporating skylights and little doors.
-
Harpin
JerseyCity Frankie replied to piratepete007's topic in Building, Framing, Planking and plating a ships hull and deck
My mind went to the word Catharpins, rigging associated with the lower shrouds intended to pull the confluence onder the top in sharper. No curvature involved here, with that association though. -
Things go badly when model rigging line is too tight. Certainly standing rigging shouldn't droop MUCH, But it should not be made as tight as it's possible to tighten it. Also, what you will discover as you rig is that tension set into one part of the rig at the beginning of the work is going to trouble you later over on another part of the rig.It's best to get ALL the stays and backstays on the completed masts BEFORE you set up all the tension. You are going to have to tune the rig at the end to get all the masts in line and not leaning one way and another, and you won't be able to make any adjustments if you cement every rope end in place as you work your way up. Tie the stays and backstays with knots you can untie and adjust at the final stage of rigging. THEN make them permanent only after you have sighted down the centerline of the model AND gauged the rake of all the masts. This advice will seam overblown as you are working on the lower rigging. But as you go higher the thinner spars are very flexible and they WILL bend in ways you do not want them to so keep all your tensioning options open until the last minute.
- 8 replies
-
- 12
-
-
Blocks, making and supporting.
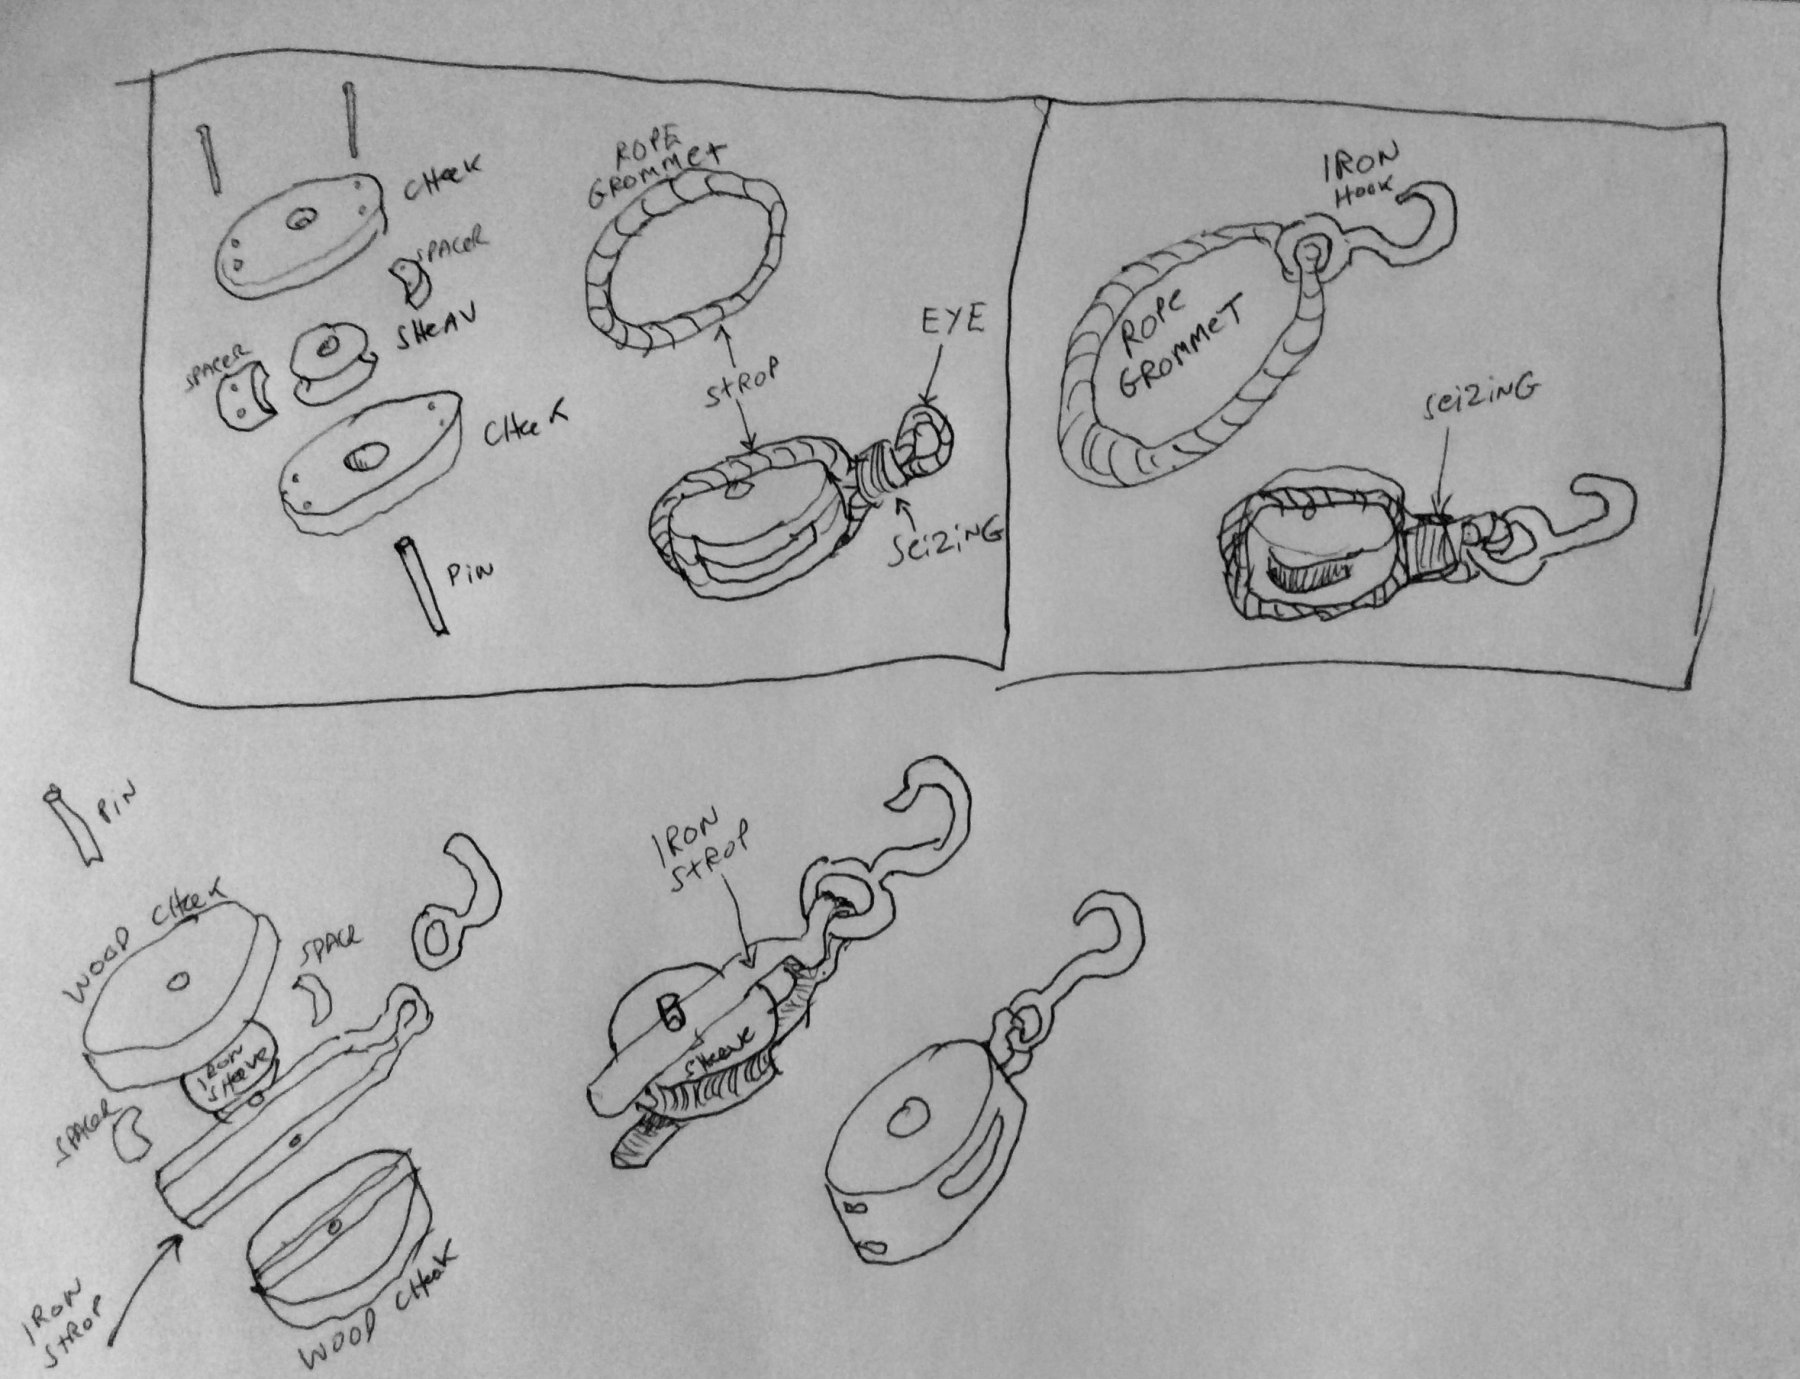
JerseyCity Frankie replied to M.R.Field's topic in Masting, rigging and sails
There are rope stropped blocks that have a fiber line Eye seized into one or both ends of a block and these can also have an iron hook if the grommet that makes up the rope strop is first worked with an iron eye in it before the block is assembled. Then there are internaly stropped blocks which have flat bar stock as a strop. Only the bent end emerges from the block. Again an iron hook can be incorporated at the outset into the blocks structure. Not all blocks will have hooks on them. I would say well less than a third on a typical rig. Hookless rope stropped blocks are fixed with seizing and hookless internaly stropped blocks are fixed with shackles. There's a LOT of block variations within both types I've described but this is the general picture. I do not know when internaly metal stropped blocks came in but certainly it was before the 20th century, going by old photos.
-
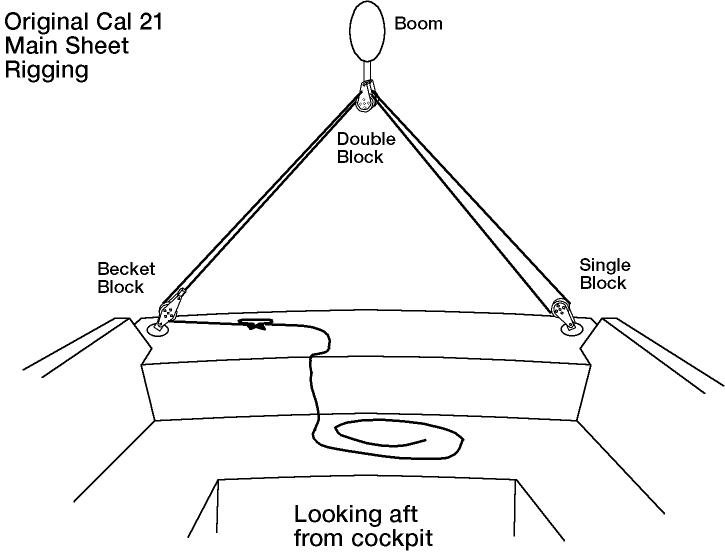
In the deck view drawing there are some bigass cleats set right into the deck at that location so if it was me I'd take the sheet through the bulwark sheave right to that after most cleat.
-
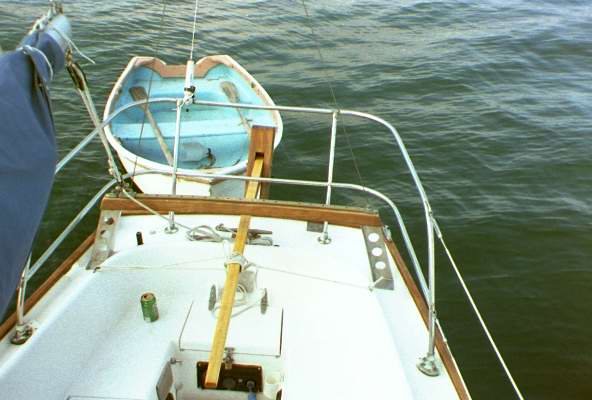
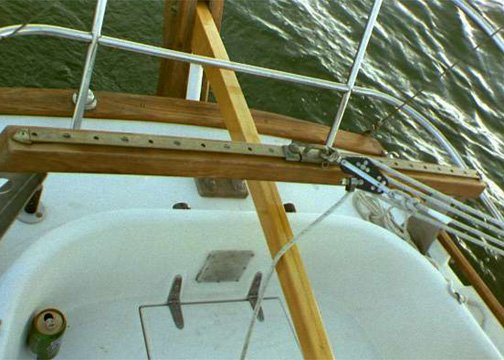
Bowsprit shrouds and eye bolts in the deck...
JerseyCity Frankie replied to M.R.Field's topic in Masting, rigging and sails
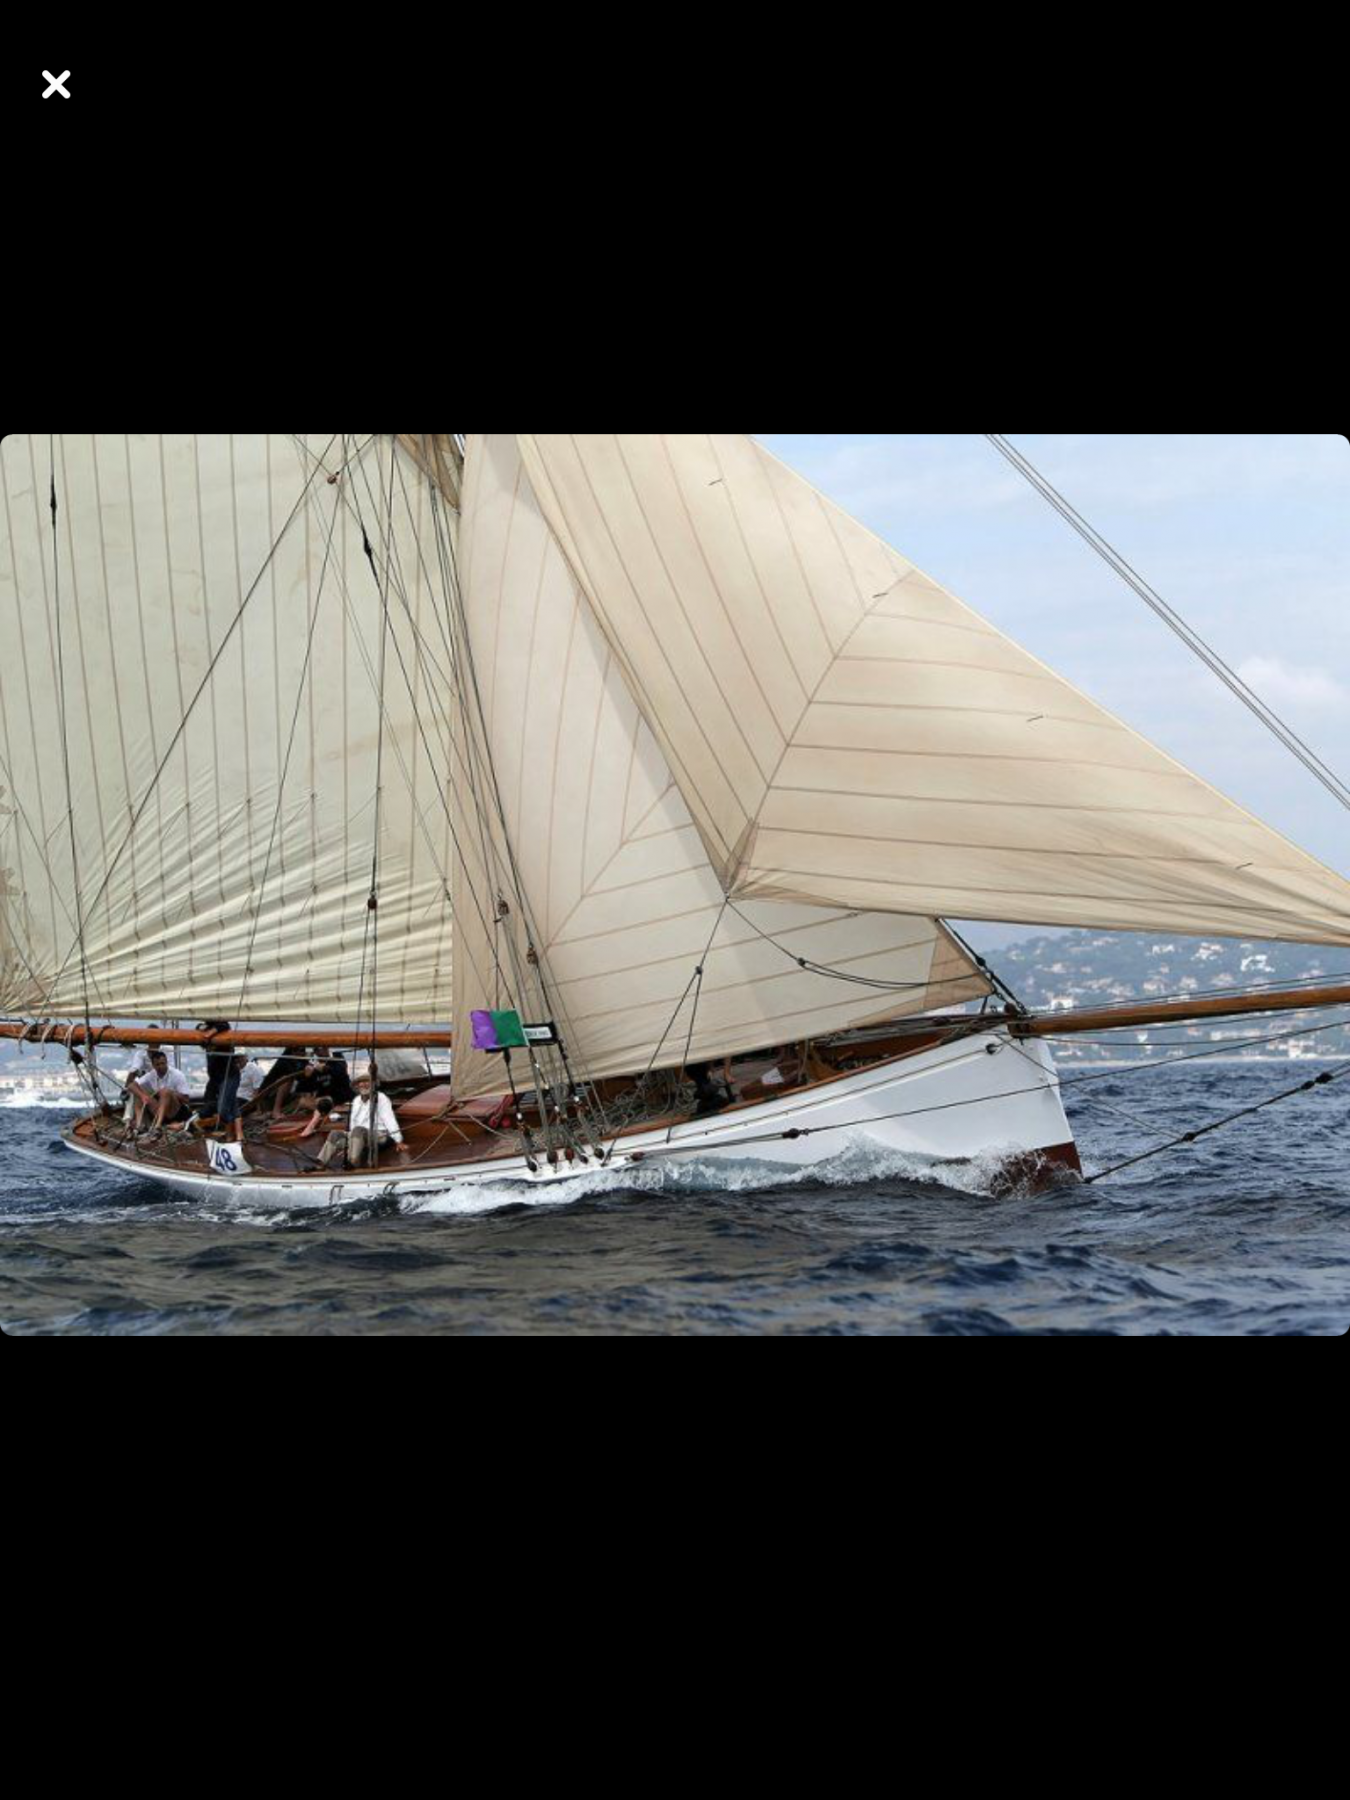
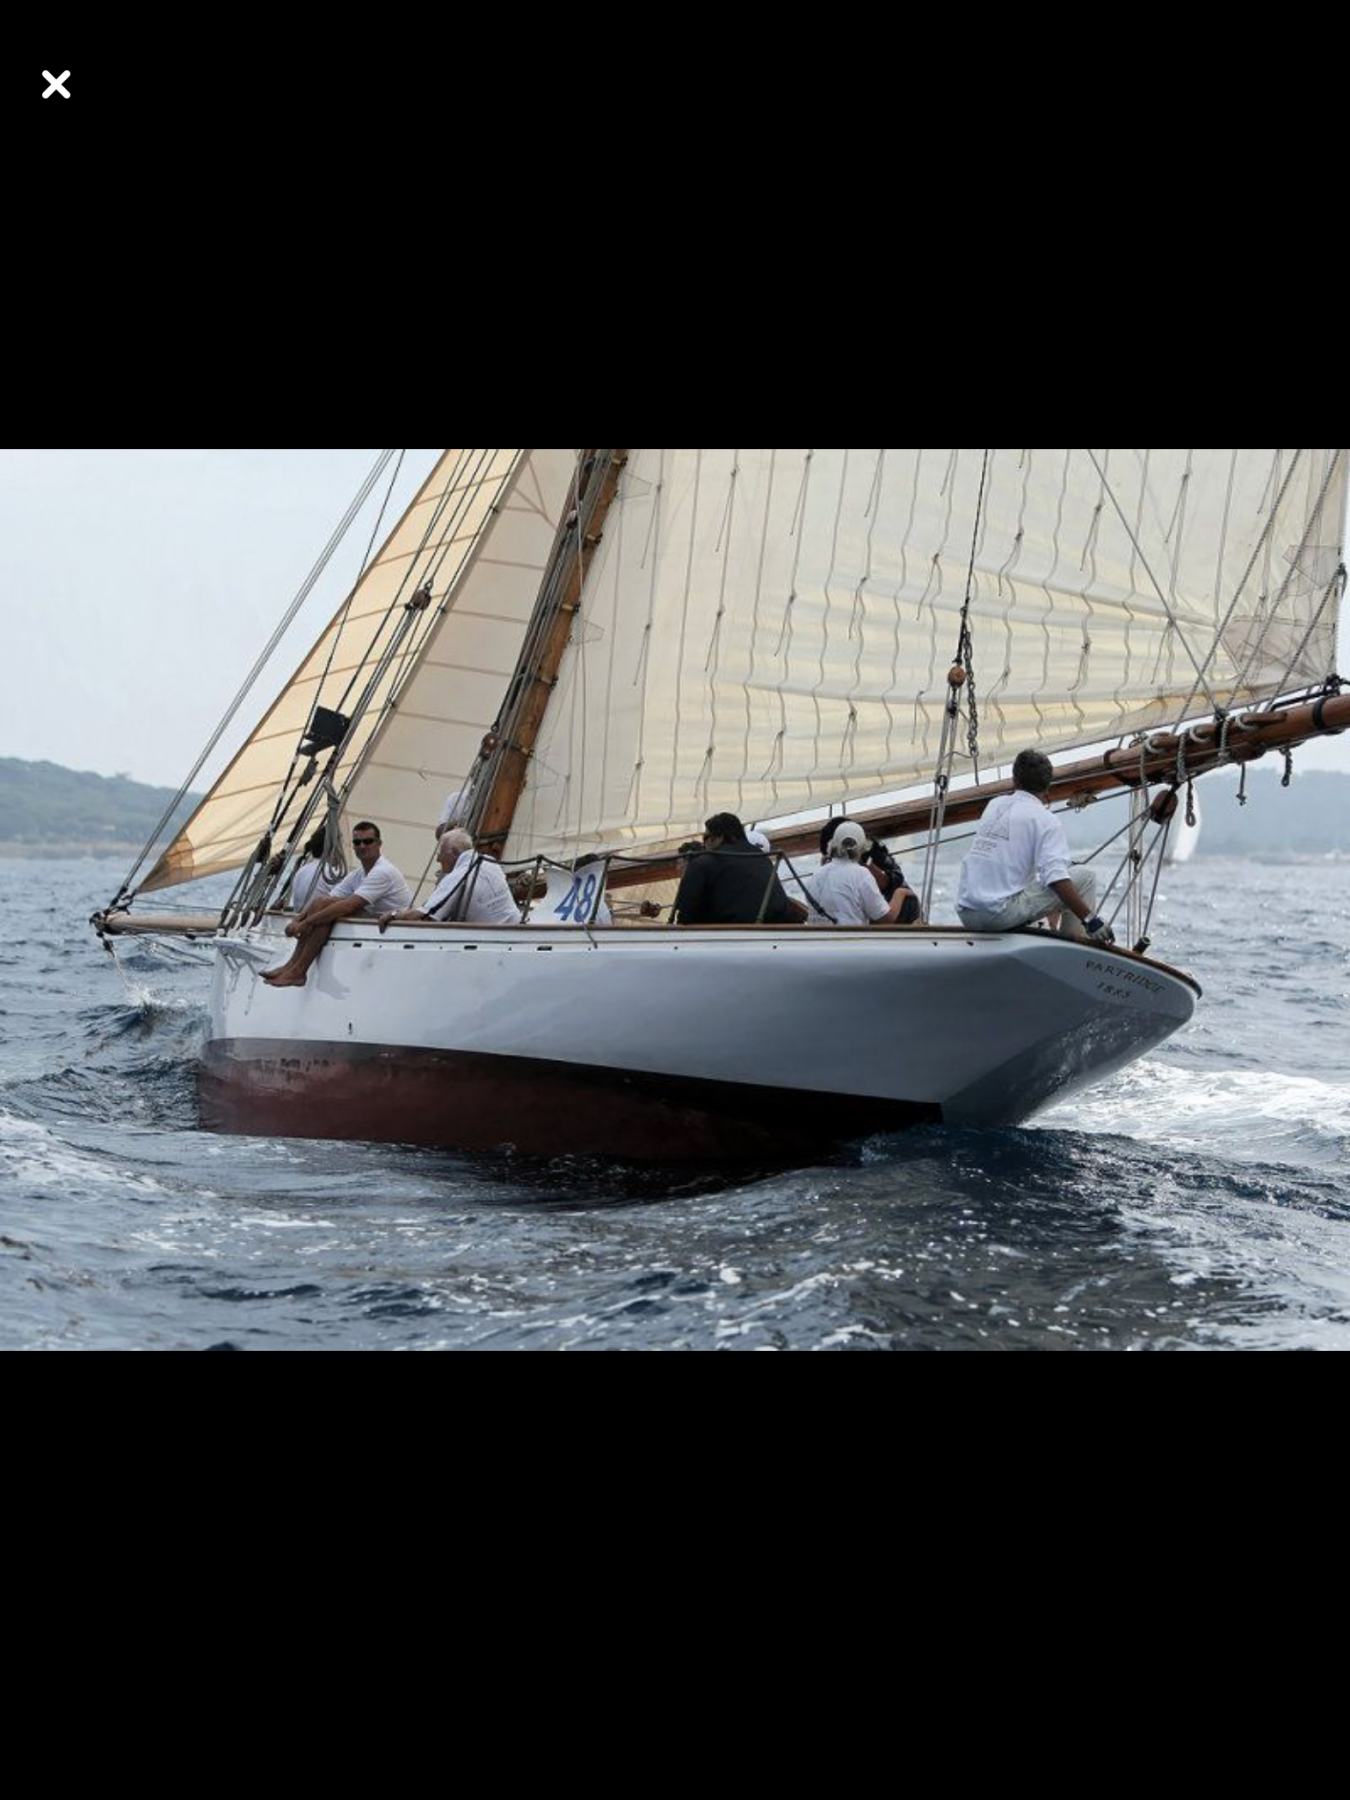
There is a Facebook page called "Gaff Rigged Boats World Wide" and there I found these shots of Marigold and Partridge. Plus a cool video of Partridge that stirs the blood.

-
Bowsprit shrouds and eye bolts in the deck...
JerseyCity Frankie replied to M.R.Field's topic in Masting, rigging and sails
I would say don't give up so quickly. Also at least one of the sister yachts you mention above is still sailing, you could email the owners and tell them what you are looking for. Another resource is the Wooden Boat Forum, you have to sign up but it's free. Those guys know a great deal about raditional rigged wooden vessels and I've found them helpful on MY LATE 1800's wooden yacht model Dulcibella: http://forum.woodenboat.com/index.php -
Bowsprit shrouds and eye bolts in the deck...
JerseyCity Frankie replied to M.R.Field's topic in Masting, rigging and sails
yachts were in fact a VERY popular subject for photography, in the late 1800's as now, and photos of them are easy to find on the internet. Will you find photos of YOUR vessel? Perhaps. Perhaps not. Will you find photos of similar vessels that will provide you with information you can use? It's a certainty. There are hundreds of museums with vast archives of photos and more are being digitized and uploaded to the internet every year. Many people are interested in these photos and are collecting them in places online like Tumblr Facebook and Pinterest. Here is a collection I go back to from time to time as it's always being added to: http://lazy jacks.tumblr.com/. -
Bowsprit shrouds and eye bolts in the deck...
JerseyCity Frankie replied to M.R.Field's topic in Masting, rigging and sails
the nice thing about solving Rigging mysteries when making a model is that you can always fall back on practical realities: A bowsprit shroud has a particular function so there are minimum requirements for how it will be configured: it has to be strong, it has to be fixed securely, it has to be adjustable. A nice thing about modeling a yacht from the late 1800's is that there is plenty of photographic documentation and surviving examples. It's true there is t much in terms of rigging books that cover this era for pleasure craft, but there is still a tremendous amount of material on the internet. -
"How important is knowing the ropes? Thoughts on the ethics and practice of conserving ship model rigging." By Davina Kuh Jakobi, Chicago, IL May 31 2017
JerseyCity Frankie replied to Justin P.'s topic in Book, Monograph and Magazine reviews and Downloads. Questions and Discussions for Books and Pubs
I'm picturing an imaginary medium sized museum with ten deteriorating models in storage. The board votes to address the fact that the models are rapidly deteriorating. Their duty to the museum is to take steps to assure the future of the collection so they hire you, as a professional, to stabilize the models so that they may be exhibited in the future. You, using your philosophy, only repair rigging that is actually parted or is cut at one end. Inside some of the cartons, no longer attached to the ship, are seven or eight long lengths of rotted rigging that came off the model. You can't tell where they originally were attached. Regardless of how you address the repairs, using your guiding principle of not replacing original rigging if it's still attached to the model, you deliver your restored models to the museum, your job is done. But within a month more rigging is coming loose on the models as the rigging continues to deteriorate. The models are NOT going to survive intact into the next decade, maybe not even into the next year. Your principle of not removing original material from the model only made sense for the brief amount of time between your deliver of the model until the next bit breaks off. You have NOT prepared the model for any sort of future at all. What exactly DID you do for that museum? -
"How important is knowing the ropes? Thoughts on the ethics and practice of conserving ship model rigging." By Davina Kuh Jakobi, Chicago, IL May 31 2017
JerseyCity Frankie replied to Justin P.'s topic in Book, Monograph and Magazine reviews and Downloads. Questions and Discussions for Books and Pubs
Nah I still disagree with your insistence on keeping the rotting rigging. There are certainly examples in museum restorations in which large percentages of original material are replaced. The works of Albert Pinkham Ryder are a good, if extreme, example. His paintings are deteriorating faster than other contemporary works by other painters due entirely to the materials he chose to incorporate into the work. If your strict " no replacing of historical material" idea were applied, his paintings would literally fall off the rotted canvas they were painted onto. Also I disagree with your statement that a restorer wouldn't be able to reproduce the original rigging or replicate exactly how it was originally laid out or constructed. This can absolutely be done. -
"How important is knowing the ropes? Thoughts on the ethics and practice of conserving ship model rigging." By Davina Kuh Jakobi, Chicago, IL May 31 2017
JerseyCity Frankie replied to Justin P.'s topic in Book, Monograph and Magazine reviews and Downloads. Questions and Discussions for Books and Pubs
A model that has not had its rotting rigging replaced is simply going to keep deteriorating. Also, prior to falling into the hands of the conservator, the models physical properties were altered and deformed by the rigging as it shrank. Wasn't the restoration begun because of this damage? The shrinking rigging is very often the sole cause of the damage that has befallen the spars. Allowing the original rigging to keep negatively effecting the rest of the fabric of the model ALSO comes with ethical considerations. -
Nobody actually does this on any of the ships I've been aboard: too much work. I've only seen an actual physical example a handful of times and in each case the person who had done it was simply doing it because it's one of the things the old rigging books include-they do if once just to have done it once. In truth if the line won't fit into the block without being tapered? The line is too thick for the block anyway.
- 1 reply
-
- 2
-
-
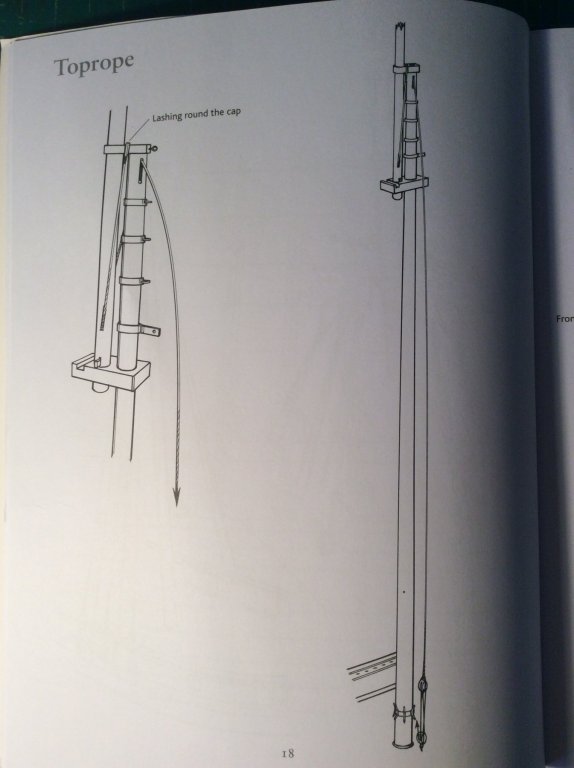
I'm going to post a dissenting opinion of this book and warn model builders to keep a strong sense of skepticism in their model building minds when taking information from it. Peterson says he's based all his rigging on only three unidentified models for the three rigs he is describing. Red flags should pop up right there. That's not a strong base to build on. Although there are many detailed illustrations in this book I see inconsistencies and inaccuracies on almost every page on every drawing. How much of this was due to Peterson not understanding what he was seeing and how much is due to the models themselves having built in inaccuracies, we will never know. But my point is that there are SURELY a lot of inaccuracies in the book. sadly, there aren't easily available alternatives for the subject matter he is dealing with. There SHOULD be a real Rigging book available for those interested in rigging these great smaller vessels. I'm surprised these books don't already exist.but this book is NOT the source it should be for accurate information. There are Schooners Cutters and Lugers sailing today, there shouldn't be any reason we can't have a book that is perfectly accurate. if anyone wants discussion on examples I've found of bogus information in the book I would be happy to go into detail. But I will point out just one example so as not to make this too long. Page 18 is devoted to the Toprope. It's the line used to set and strike the Topmast. He's depicted it with a tackl rove to disadvantage SPLICED onto its hauling end. This line is now too short to allow the spar to lower to the deck AND with the block rigged in its end, it can not be unrove. The spar can't reach the deck since you will two-block at the odd masthead sheave with the spar only halfway down the mast. Even if you could reach the deck, you couldn't move it away from the base of the mast since you can't cast off the tackle. In actual practice a Ships Toprope is not left in place but rather it's only rigged when setting or removing the Topmast, so it shouldn't even be on the model. It does NOT require, nor can it have, tackle on its end for hauling, as in actual practice the line is taken to the windlass. With the tackle rove upside down, hauling the spar aloft is made unnecessarily difficult and shows someone didnt understand the use of blocks and tackle. The block spliced to the end of the too short line completes the picture of a giant inaccuracy. The idea that Peterson devotes an entire page and two drawings to this suggests to me that he was not being carefull when planning the book, he should have caught this mistake or at least explained that it was an eccentricity of the source material, if that's what it was. It's damaging to our shared understanding of rigging that this book is out there in the world full of so many inaccuracies, allowing model builders to unwittingly perpetuate mistakes. This is one of the worst examples in the book but believe me: there are MANY other issues with this book.
-
"How important is knowing the ropes? Thoughts on the ethics and practice of conserving ship model rigging." By Davina Kuh Jakobi, Chicago, IL May 31 2017
JerseyCity Frankie replied to Justin P.'s topic in Book, Monograph and Magazine reviews and Downloads. Questions and Discussions for Books and Pubs
My advice to anyone reading this and contemplating the restoration of a ship model is NOT to attempt to retain as much of the old Rigging as possible. The rigging on an old model is the first thing to go as it's made of efemeral material. It gets brittle and has lost its strength and by the time it's in your hands the rigging is falling to pieces. If you "restore" a length of line on a model that has snapped, your repair job will only last as long as it takes for the next stretch on the same length of line to part. In my view, if any part of a length of model line has parted, the ENTIRE length should be replaced. If your goal in restoring the model was to stabilize it for a future in a collection, you aren't doing other conservators any favors by returning this model to the collection as it's rigging will continue to deteriorate-the repair of that one broken section will NOT prevent the rapidly increasing rate of decay that has already been underway on the model and is sure to continue.