JerseyCity Frankie
-
Posts
1,338 -
Joined
-
Last visited
Content Type
Profiles
Forums
Gallery
Events
Everything posted by JerseyCity Frankie
-
How to tie a rope to handrail
JerseyCity Frankie replied to Ferit's topic in Masting, rigging and sails
Cleats maybe? More pins? The reason I’m not believing that running rigging is ever intended to be made off on a railing, a railing bare of any fitting to accommodate belaying, is because of the frequent adjusting the lines require. It’s POSSIBLE to make running rigging off on a railing, but it isn’t seamanlike or practical. my advice is to try to find ship models on the internet that match the time period of your ship and see if you can spot how the rigging on the railing is made off. Or, just tie the rigging to the rail and not worry about it or if it’s acurate or practical! It’s your model and sometimes annoying details detract from the overall fun of building. -
This notion that you have to actually sew sails is false.in fact I usually advise against actual sewn seams due to the fact that the stitches are always grossly out of scale. If you think about the diameter of your running rigging-often represented by sewing thread on the model- then sail twine would have to be microscopic in order to be in scale with the running rigging. White Glue works fine on fabric.
-
How to tie a rope to handrail
JerseyCity Frankie replied to Ferit's topic in Masting, rigging and sails
What was said above is true: Nobody is belaying running rigging on a railing. That is simply not realistic. Any running rigging, any line that must get coiled due to its length, is never going to be “tied in the beight” to anything. Running rigging needs to be adjustable, handled under tension, and for that you need a proper belay utilizing a pin or a cleat or some other disigned-for-the-pourpos fixture like a staghorn or nighthead. Riggers would never provide a bare railing as a way to belay the line, they would provide a way to belay properly. If you have running rigging that has to come to the deck near the rail, I believe you will need a pin cleat or other belaying aperatus on or near the rail. Or failing that a Lead Block on or near the rail to take the line elsewear to be properly belayed. -
How to tie a rope to handrail
JerseyCity Frankie replied to Ferit's topic in Masting, rigging and sails
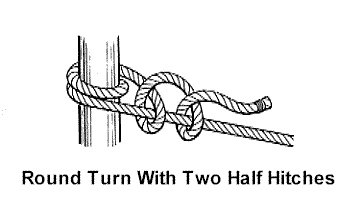
The Clove Hitch and the Round Turn And Two Half Hitches are more like what an actual sailor on a real ship would use but are more bulky on a model.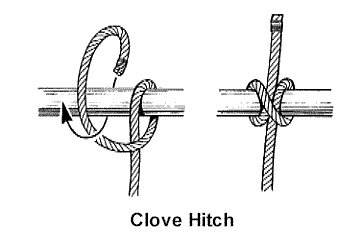
-
How to tie a rope to handrail
JerseyCity Frankie replied to Ferit's topic in Masting, rigging and sails
The knot that is smallest is the Overhand Knot.
-
Tagalents when lowered to the Topmast Cap are easier to reach for the crew when they lay aloft to furl tgalentsails. The tgalent shrouds don’t need to be rattled with ratlines if the crew never need to assend higher than the Topmast Cap. The weight of the crew furling out on the yards need not be supported by the Tgallant Mast itself now either, the wheight rests on the beefier Topmast. With yards lowered there is very little gear on the tagalant Mast.
-
Breast backstays have always confused ship model builders and the reason why, I think, is that the most common way of diagraming the rigging is the side-view elevation drawing that depicts the ship as seen from the side. The disposition of the breast backstays assures that they are difficult or impossible to see since they are directly in line with the Mast on these drawings and the lines which represent them fall right over the lines in the drawing that represent the Mast. I’m certain that these very common pieces of standing rigging wind up being completely omitted from many rigging diagrams due to this issue- the people copying the diagrams don’t notice their presence and thus leave them out. From that point on, everyone examining these follow-on flawed drawings remain unaware of the omission.
- 1,144 replies
-
- 1
-

-
- snake
- caldercraft
- (and 1 more)
-
Photos. Always helpful. I’ve not seen your stern decoration but I look at shots of the actual Ship and note there is a central raised circular plaque. My advice could be to cut this circle out of your decorative piece then attach the Port and Starboard wings of the decoration so their outer edges land where the plans indicate. Now all you have to do is make up the difference at the center. And I imagine this can be done with paint? Then glue the circular plaque on over the repair. I imagine this approach would be a lot easier than replicating the whole piece.
-
question about sail position
JerseyCity Frankie replied to Warnerade's topic in Masting, rigging and sails
The lower yards are called the Course Yards and they are more or less fixed in position and always remain at the same height above the deck regardless of sails on them being set or furled. The yards ABOVE the Course Yards are nearly always “Hoisting Yards” meaning they are hoisted up (using hailyards) when sail is set on them and then lowered down again when sails are furled. (Split topsails and split tagalents partially break this rule). The upper and lower positions the hoisting Yards can occupie are more or less determined by the masts they are attached to via their Parrels: the yards are hauled up as high as possible and lowered down as far as possible. A shocking number of ship model builders don’t understand this and one often sees models with furled sails with all the yards hoisted high into their upper positions, a condition they wouldn’t ever realy be in on actual ships. Some model builders build their ships “bare polled” but position the yards high. There is ample room to debate this practice. Another trap to fall into is misunderstanding the Lifts on hoisting Yards. Many smaller spar upper yards have lifts that don’t run, they are fixed lengths of line that can not be adjusted from the deck, they are only tight when the yards are in their lower positions and when the yards are hoisted up, the lifts droop dramatically. (Topsail Yards however have lifts that do run) Many model builders don’t understand these lifts and depict them as being tight with the yard hoisted. -
The model depicted wasn’t on public display. It’s across the street in their vast storage facility.
-
Aren’t we lucky we’ve got the worlds best hobby? I feel sorry for other people that don’t build ship models!
- 359 replies
-
- 11
-
-
- prince de neufchatel
- model shipways
- (and 1 more)
-
“Without turning it into a hedgehog or something..”. Lol!
- 193 replies
-
- 4
-
-
- wilhelmina vii
- fishing
- (and 1 more)
-
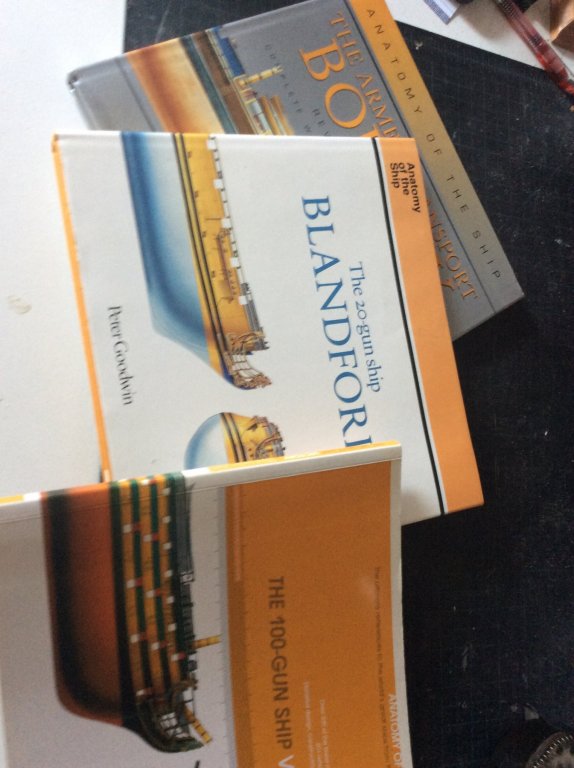
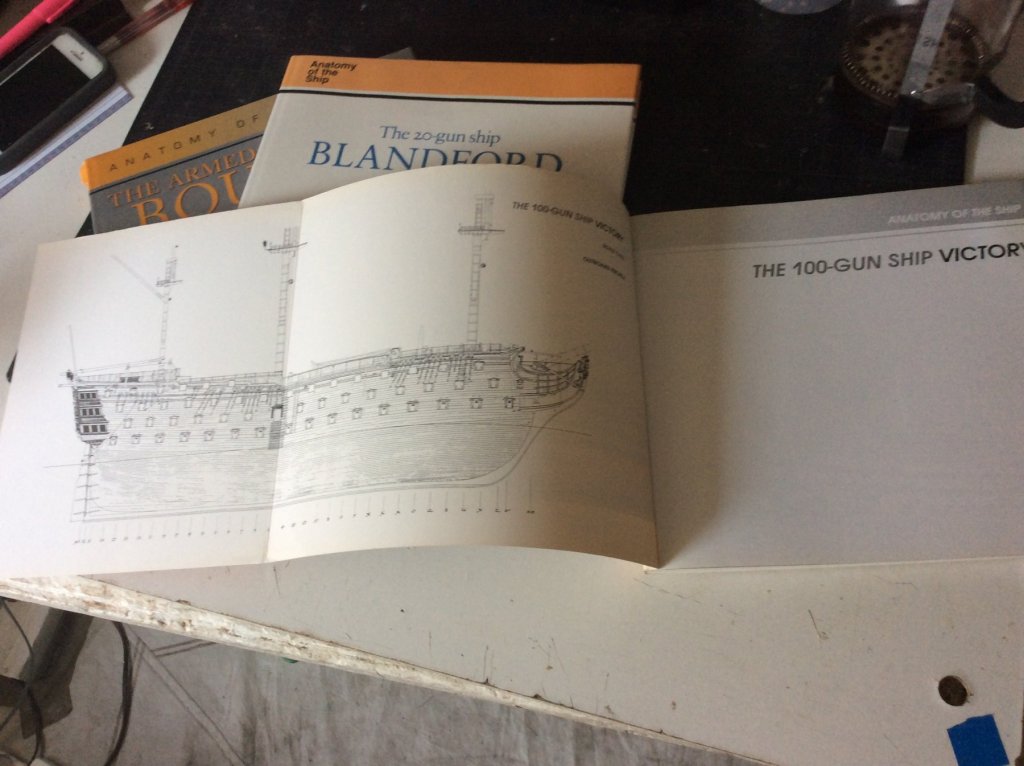
I’ve got three formats of AOS books. Some are hardcover with Silver background on dust jacket and these solver dust jacket editions conceal a large format ship schematic on its inner jacket surface! So cool! Imagine my surprise then, when I purchased some other AOSbooks, these with white backgrounds on their dust jackets and these jackets had NO hidden drawings on their reverse side. Then I purchased a softcover HMS Victory AOS edition and these had gatefold covers, covers on front and back are folded in half and reveal larger hull drawings. So my advice is to try to get a silver background AOS book. My silver ones are from the year 2001 and, REMARKABLY, I could find no publication date on my two white background AOS books.
-
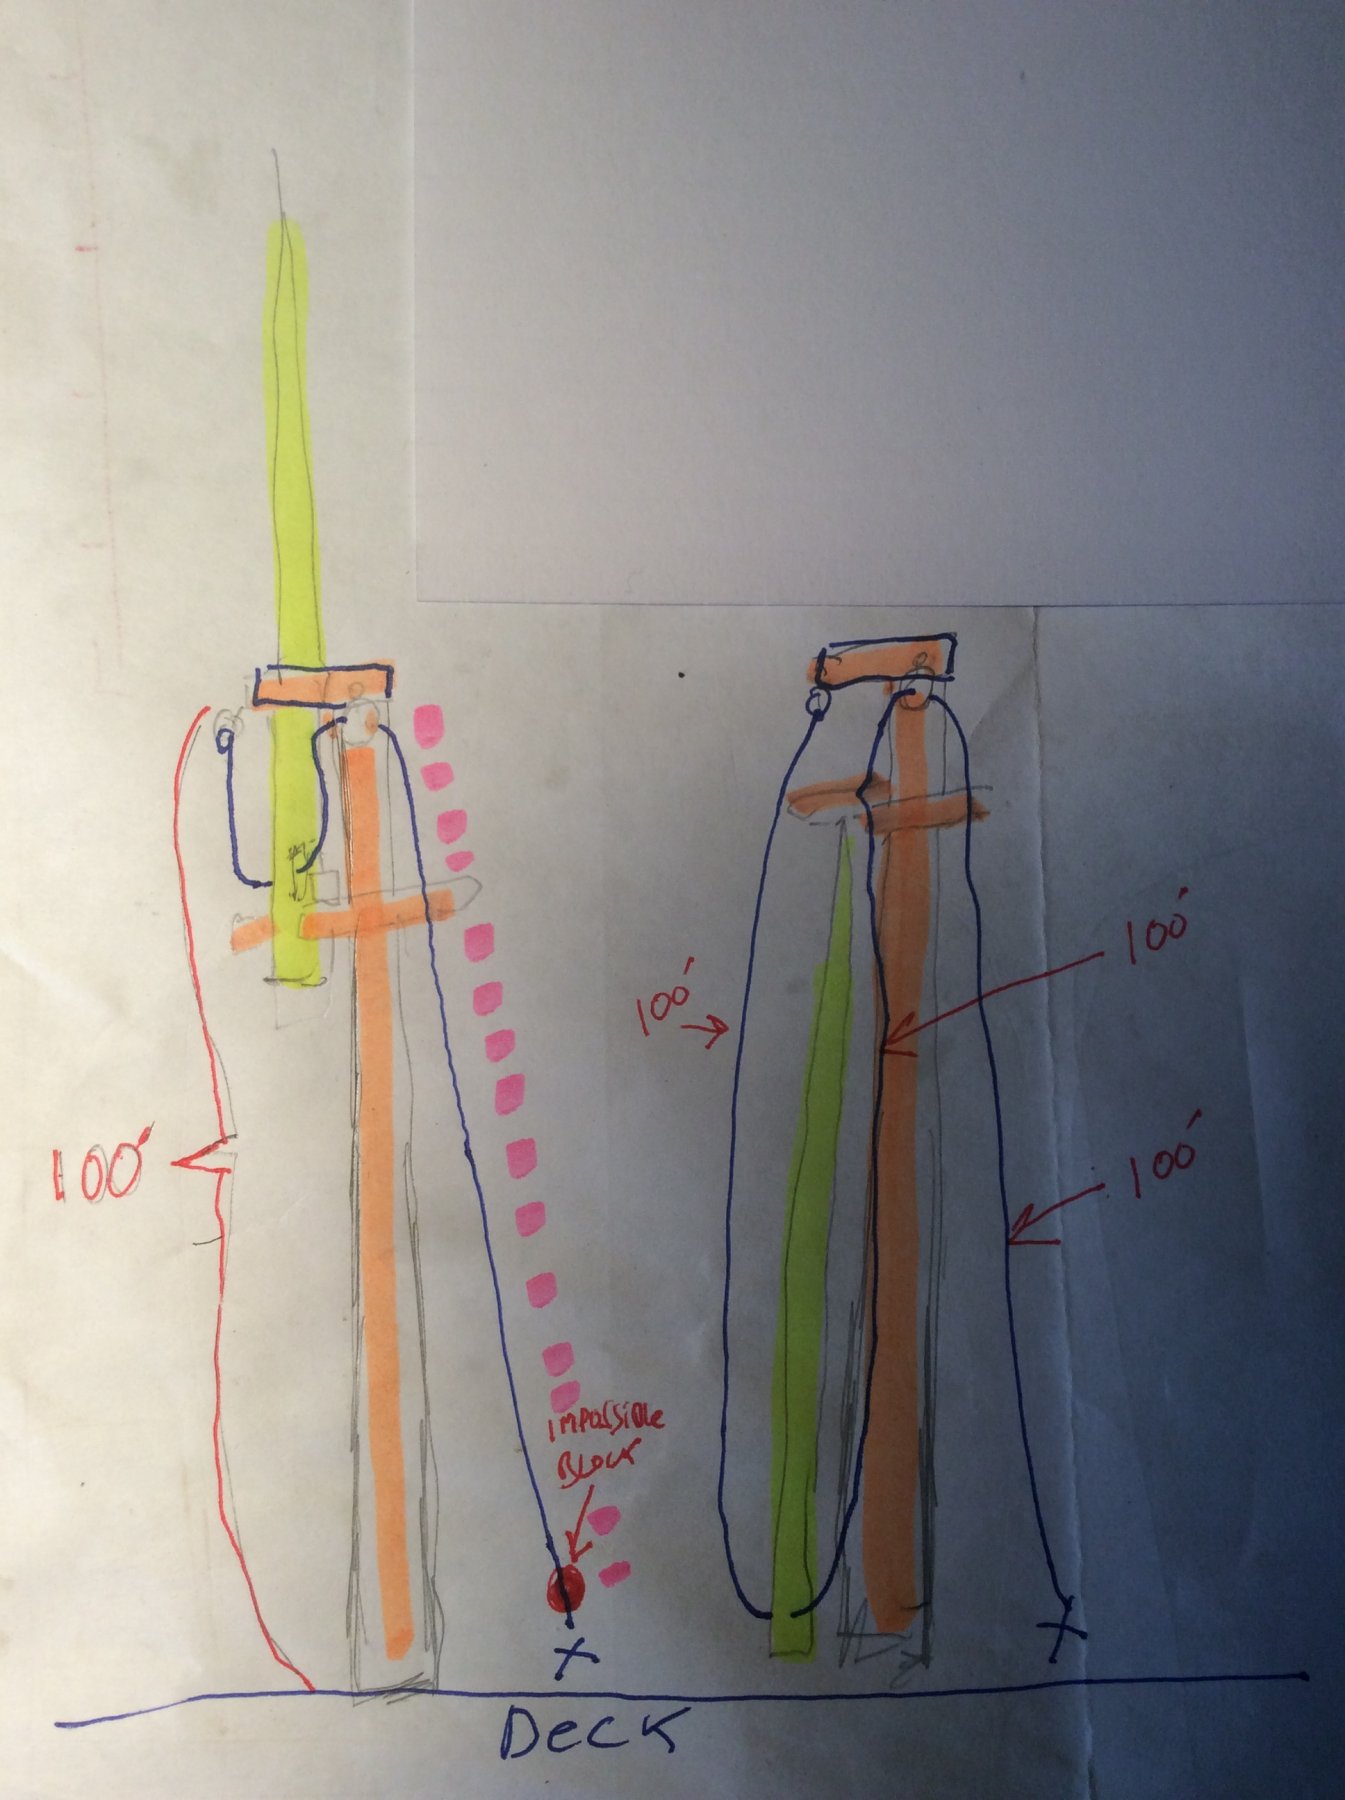
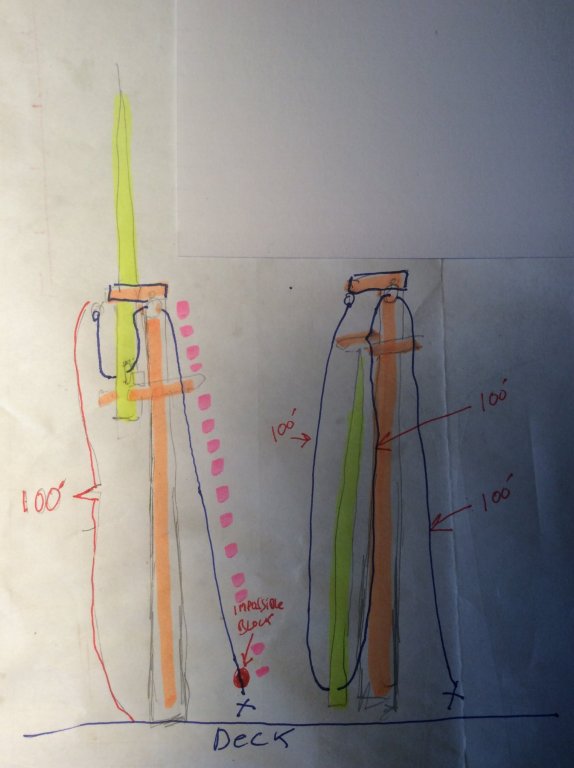
Pretend the lower Mast is 100’ to the cap. With the Topmast fidded and in place the TOPROPE is fixed to the starboard side of the cap, runs through the sheave at the Topmast heel, back up to the lead block on the port side of the cap, then 100’ down to the deck. Paint the TOPROPE red at the point it’s belayed on deck to mark that portion of the rope. Now lower away. The Topmast has descended to deck. In order to get there, 200’ feet of TOPROPE had to run through the leadblock at the cap, with 100’ more feet to still get back to belay on deck. The TOPROPE had to be AT LEAST 300’ long to appear as it does in the second drawing. The red painted portion of the Toprope would have passed through the leadblock when exactly 50’ of the Topmast had descended need to the deck. If there was a block at that point on the line, the Mast could not descend any farther. Theres a chance a rig that includes tackle on the Toprope isn’t INTENDED to lower the Topmast all the way to the deck. A Toprope with tackle on it could be intended for use only in HOUSINGthe Topmast, that’s only INTENDED to get the Topmast halfway down. This was common enough and done in bad weather to reduce windage aloft in storms.
-
I’m a huge fan of Lees but I gotta say, In my view it isn’t possible to have tackle attached to the toprop if it’s used to lower the Mast to the deck. Any block and tackle that starts out at deck level won’t be long enough to allow the Mast to reach the deck as the toprope must be in length AT LEAST twice the distance from the crosstrees to the deck. Start with the Mast fidded aloft, the toprope can’t have a block on it’s hauling end since the block would hit the sheave in the heal of the Mast at a point precisely halfway to the deck.
-
Would love to see your build log.
-
Congratulations on your sails and their wind blown appearance! I know that the effort it takes to get the sails to appear full of wind adds a great deal of time and effort to the model, much more time than if you had simply hung cloth from the spars, but I feel it is worth it for the visual effect it gives to the model.
-
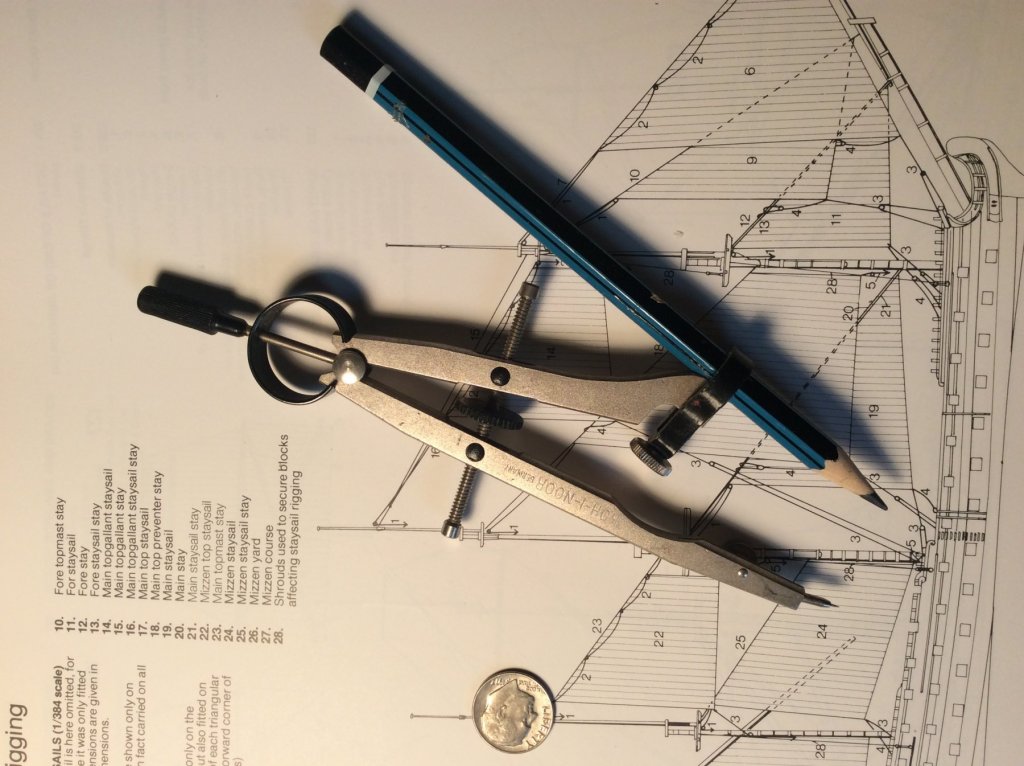
Often the question, or variation on the question, “what are the most essential ship model tools” comes up. X-acto is the king, I think we all agree. But I’d say a decent compass is a close second on the list of Esential Tools. the discussion of available designs of compasses and dividers is valid and I hope others will put up photos of their favorite compasses and dividers. Maybe there’s a particularly good model we can discover that way? The point of expense is also valid, every one of us has a different amount of discretionary income. There are some tools that are simply too expensive for some of us. I do feel that the joy of life is in part made up of owning all the particular tools to pursue ones interests! The hunt for these tools is part of the fun. I’ve often said that if I ever discovered a single source for all the nautical books I’ve ever wanted or needed to own, in one location for a price so affordable I could instantly own them all, it would take a great deal of joy out of my life since there would then be no worlds left to conquer. No reason to enter another used book store? No thanks! I kinda feel the same way about tools.
-
Hull filler.
JerseyCity Frankie replied to bluenose2's topic in Building, Framing, Planking and plating a ships hull and deck
Dry wall sparkle certainly fills voids but there is an issue with gluing to cured drywall patching stuff: glue sticks to it just fine but the material itself is chalky and a plank glued to it is only attached as firmly as the chalky material is strong. You can pull the plank right back off and it tears out the tiny bit of patching material it was actually glued to. I discovered this on a recent planking job and I wound up having to saturate the drywall patch with thin supper glue to stabilize it enough to hold a plank glued with white glue. I switched to Dap brand Plastic Wood which behaved much better and I was happy enough with. -
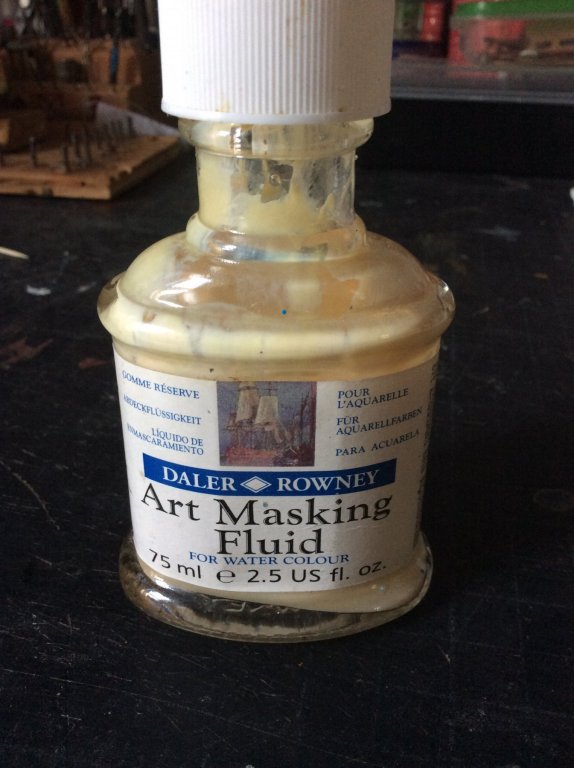
Daler Rowney makes a liquid masking product called Art Masking Fluid. I thinks it’s just RTV rubber. It behaves like rubber cement and smells like ammonia. paint it on and it resists any paint that goes over it, it dries fast then rubs off with your fingers very easily. It’s likely no good for sharp straight lines since it’s very gloppy but perhaps you could use blue tape as a pre-mask mask and get a straight line that way? (Edit) and hey look! I just noticed there’s a tiny picture of a square rigged ship on the label!
-
I’m familiar with Keuffel and Esser, they used to have a manufacturing plant in the town adjacent to my home in Jersey City, Hoboken, N. J. The Hoboken historical Museum put on an exhibition of the history of K &E a few years ago, on display were hundreds of K&E instruments of every description. It was a great exhibit! http://hoboken.pastperfectonline.com/bysearchterm?keyword=Keuffel+%26+Esser+Co. but I am fed up with proprietary lead-holder compasss, as I said. I find them to be too much trouble. You are right though, I should admit defeat and just live with the necessity of stocking a tiny transparent tube of rediculous short bits of lead. But I feel it shouldn't be a daunting engineering challenge to fix a pencil to a compass frame, after placing men on the moon I think we can handle that much. Would LOVE a K&E proportional divider but they are very dear on eBay. A quick glance shows them at $95. to $200. , too expensive for a cheapo like me.
-
You will have to imagine me shouting comically “One hundred and thirty seven dollars”?!?! Lol, too expensive. I’m too cheap to spend $100 for nearly anything in my life!
-
Transport of a ship
JerseyCity Frankie replied to pilidk's topic in Modeling tools and Workshop Equipment
We can all be very glad of an accident of history: the waist of most sailing ships has very few delicate protuberances. So it’s relatively easy to pass a securing strap or ribbon across the center of the deck and the bulwarks prevent it from squashing cannons or whatever. So many models can be snugged down via a single strap athwartships and this provides more security than relying entirely on the pedestal mounts or cradle the model sits on at home. -
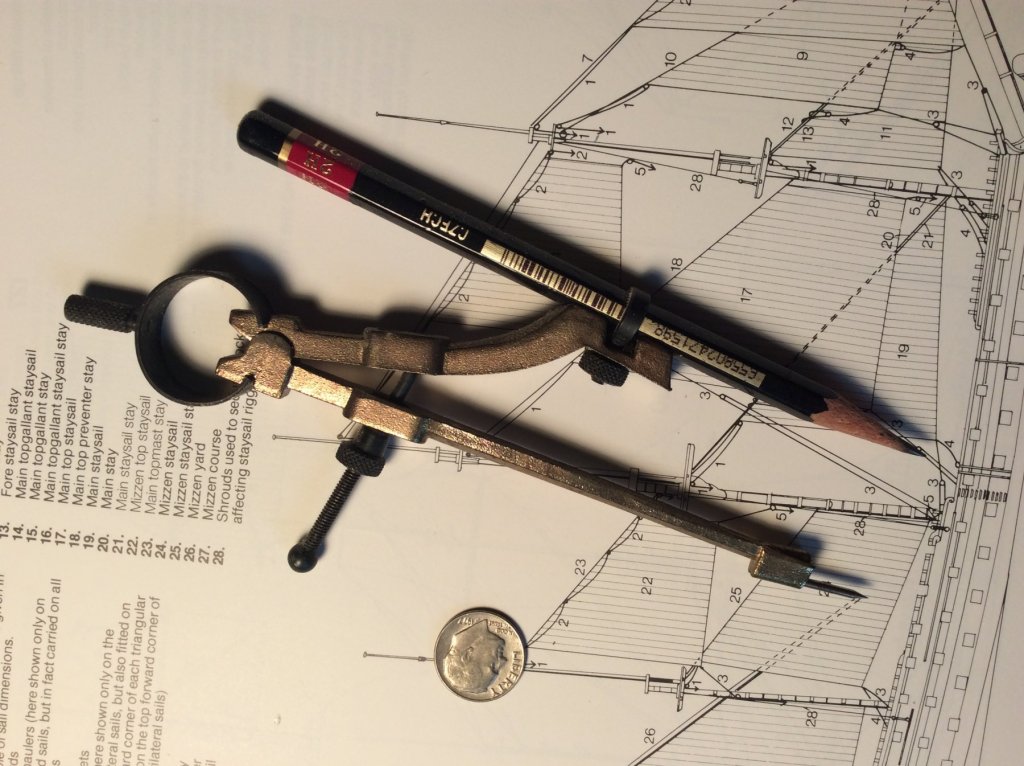
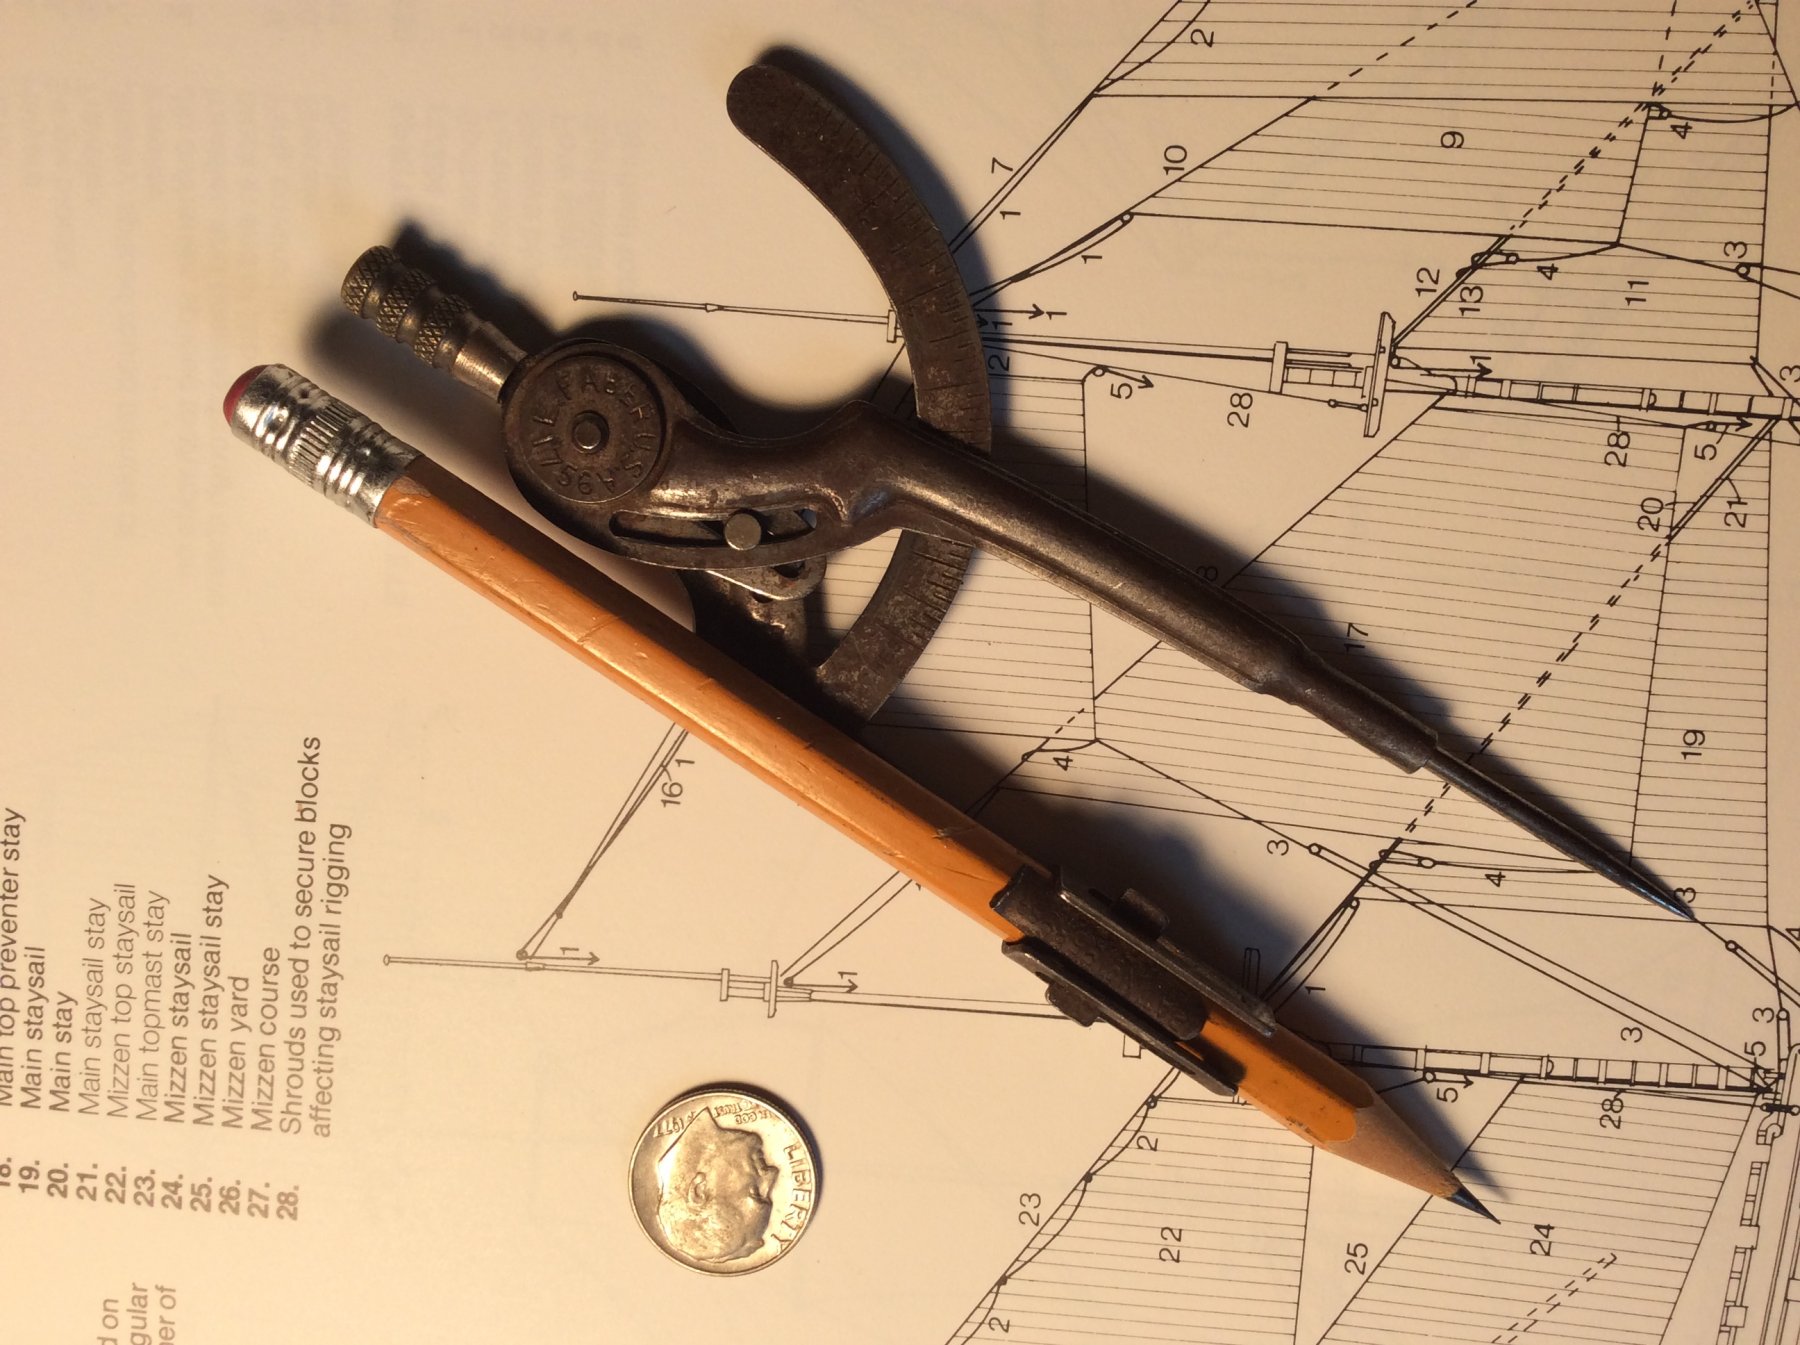
I’m looking for “The Perfect Compass”. I’ve never found one that suited my specifications for “The Perfect Compass”. The world is encircled by inadequate compasses. If you drew a pie chart, using a disappointing compass, you could show that there’s only a tiny slice devoted to “serious compasses” and the rest of the pie is made up of cheap dollar store flimsy compasses, often made of plastic. the “serious compasses” are nearly as bad as the cheap flimsy ones in terms of performance. My requirements for a compass are simple. I need it to stay in the adjustment I set it to. Most compasses “open up” as you draw the circle and you only notice when the two ends fail to meet at the completion of the circle. 80% of the time I’m using my compass as a divider, for measuring, and this tendency for the tool to lose its adjustment mid-use means I’m treating the tool like a glass of nitroglycerin as I move it from the thing I’m measuring to the place I’m recording the measurement, I never trust the compass to remain fixed and unaltered. For this I guess you have to hav a Screw-adjusting Compass. the other requirement is that I want the compass to allow me to use a pencil in it, not tiny awkward proprietary bits of naked lead I have to keep in stock and endlessly fuss with. You can certainly find compasses that accept an ordinary pencil. and you can certainly find high-end compasses that are Screw-Adjusted. But apparently you can’t get both features in the same quality instrument. This one is my favorite, as you can see it’s ancient. Modern versions are available but the metal they use to make them is so malleable it’s FLOPPY. I had high hopes for this one but the plastic sleeve that holds the pencil is elastic! The pencil isn’t really fixed and unmovable. Same problem with this one. Everything is fine but for the means of attaching the pencil, the pencil flexes in the joint. Sigh.