JerseyCity Frankie
-
Posts
1,338 -
Joined
-
Last visited
Content Type
Profiles
Forums
Gallery
Events
Everything posted by JerseyCity Frankie
-
Rigging Question (Probably first of many!)
JerseyCity Frankie replied to Bluto 1790's topic in Masting, rigging and sails
I have Lees Masting and Rigging. And although I don't have Rigging Period Ship Models, I do have another book by Peterson, Rigging Period Fore-And-Aft Craft.and I gotta say, The Petersson book is a train wreck. So much so that I wouldn't trust him for anything else. I see problems on every page of his book. To be fair, he claims he's taking ALL the rigging details for a given topic from a single individual model he selected from a museum collection (models he does not deighn to identify) so maybe the fault is with the models he selected as his subject? Still, my advice: bight the bullet and buy the Lees book. It's my opinion it should be on every sailing ship modelers bookshelf as a basic text they will refer to again and again. In sharp contrast to Peterssons book, Lees epic tome is exhaustively comprehensive on every aspect of Rigging every line has its own place in the book. Lees traces variations in configurations over time and he provides transparent background on his sources. There is no comparison between the two authors.the Lees book will become your best source for very specific Rigging information on Rigging details small and large. -
Nice. I'm looking through all the Niagara build logs to find the ones with sails bent on and so far yours is the first I've seen. I'm surprised to find that apparently most Niagara builders are content with bare poles. I would think that with SO MANY Niagara builds that there would be a greater proportion of ones with sails attached. Far from it!
-
Using highly toxic substances.
JerseyCity Frankie replied to bluenose2's topic in Metal Work, Soldering and Metal Fittings
Ugh. I hate when this happens. I was wrong about at least one of my above assertions: I just googled "sawdust causes cancer" and found that there ARE documented instances where prolonged exposure to sawdust of oak and few other species CAN cause various types of cancer. But the article I read said these were cases found in the industrial furniture manufacturing industry. So presumably this happens only after (I'm guessing) longtime exposure to huge amounts of dust. hopefully this means not all oak should be considered a cancer danger or were all in big trouble. -
Using highly toxic substances.
JerseyCity Frankie replied to bluenose2's topic in Metal Work, Soldering and Metal Fittings
Unless you can show proof otherwise, I think it's alarmist and wrong to attribut the cause of any cancer, fatal or otherwise, to exposure to wood. Can you site a case of wood exposure causing cancer, in any field? I have NAVER heard of such a thing. Certainly there are caustic woods just as there are individual sensitivities and allergies to woods. But wood doesn't cause cancer. Back to poisons in chemachals used in hobbies: do you know of an instance of a poisonous chemical found in a material used in the hobby industry that DOESNT already have a warning on its label? If you do (and I doubt it) then you could make a case for trying to raise awareness about a hidden danger. But there IS awareness already, we all KNOW that solvents and other hobby products like them will require careful handling and extra precautions. If your true concern is for the health of model builders, the dangers you should address are whatever factors can be shown to be causing health issues within the hobby. But here is what I think you will find: there ARE no hidden health risks unique to model building, building models does NOT heighten anyone's risk of death or sickness. if you can prove otherwise please site an actual documented case and prove me wrong. The health of model builders is being negatively impacted by the same factors effecting the entire population: heart disease, obesity, smoking-the same well known factors were are all well informed of. And looking at poisonings in the whole population, most of them are due to medications, NOT the use of products found in our hobby. -
Using highly toxic substances.
JerseyCity Frankie replied to bluenose2's topic in Metal Work, Soldering and Metal Fittings
Are there any documented cases of ship model related poisonings? Or ship model specific injuries? I've never heard of any. Broadening the question, are there any documented cases of model building injuries of any kind? I'm sure there are power tool related accidents, power tools cause a lot of injuries every year. The first time I used an exacto as a kid making a pinewood derby car I cut my hand pretty bad. But is there any data available on health incidents specifically related to ship model building? On a personal level, I worry most about eye injury when using a dremel. Poisoning is not on my radar at all, but then again, as mentioned above, I'm not drinking any of the liquids I'm using, I'm a mature adult. Let's not get hysterical about chemical poisoning if it can't be demonstrated that there is an actual history of ship model related poisonings. A quick google search yielded this data rich website: http://www.poison.org/poison-statistics-national -
Possibly interesting find by an utter newbie
JerseyCity Frankie replied to Dylanmserra's topic in New member Introductions
You should fix it up yourself! For less than ten dollars you can pick up a copy of Rigging of Ships in the Day of the Spritsal Topmast. https://www.ebay.com/itm/302317861302 which is the perfect Rigging book, well illustrated, for this era. -
Don't get discouraged. But there are a lot of specific smaller tasks involved in rigging the mast of a sailing ship. My advice is to break it down one step at a time. Everyone here is delighted to help you but you will have to meet us halfway and ask specific questions. Descriptions of each part you are talking about will be important since there are specific aspects unique to each task. "Eyehole start with knot but don't know where to finish" isn't helpful since you are not being specific enough for us to understand which part you are talking about! Complicating matters at first ( but making it MUCH SIMPLER later) is the fact that everything on a ship has a specific nautical name you must learn. It's daunting having to learn the names of everything but if you can't use the nautical name you have to either give a lengthy deescription that identifies the part OR you have to provide photos with circles and arrows. But keep in mind that everything you see in the instructions has a simple explanation and you are perfectly able to accomplish the tasks you are facing. AND it's fun.
-
It's as nice a place to live as we could hope for any model, barring the Smithsonian or National Maritime Museum. Congratulations.
-
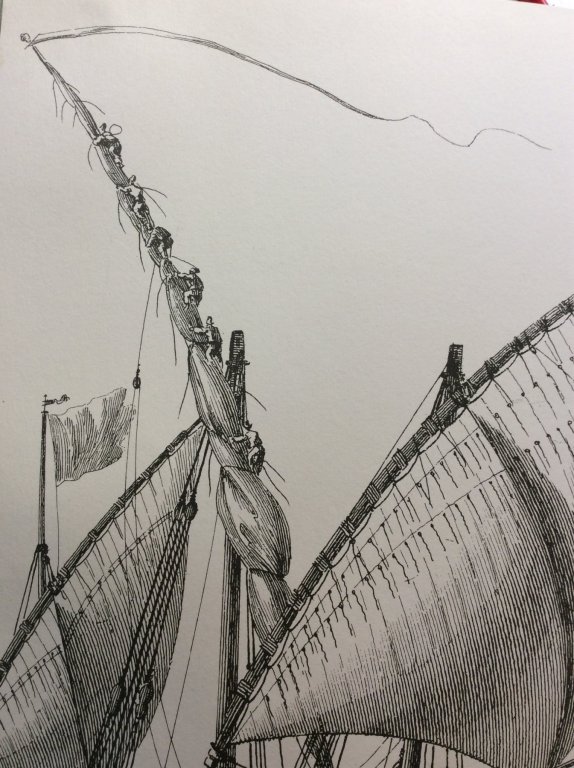
Yah the crew would have to keep the brails quite loose when underway or they would negatively effect the shape of the sail. But it's still going to be better having the brails since without them the furling would be quite tough. But check out this engraving of guys furling a lateen sail:
-
It's sad how kit manufacturers can't be bothered to work up comprehensive plans. In many cases just a few arrows dotted lines or small inset detail views of a particular aspect of one area or another could remove so much uncertainty. On the photo above you wrote "tied off on the grommet or run back up other side to the yard" and my two cents is that it's the latter. These are brails in my opinion and they are not for adjusting sail shape while sailing, they are for gathering the sailcloth to the spar for furling. So if you want to gather the material a line that goes all the way around the sail and back to the spar will gather the material. If the line only went to the grommets, only the grommets could be drawn to the spar, leaving all of the bunt or center portion of the sail flapping in the breez.
-
Tools You Can't Live Without
JerseyCity Frankie replied to Justin P.'s topic in Modeling tools and Workshop Equipment
Can we assume everyone has exactos and tweezers? After that I have to say I'm amazed how often I'm drilling stuff with the Pin Vice. Nearly every time I sit down to work I'm using it. -
Drilling holes for masts
JerseyCity Frankie replied to 1213brett's topic in Masting, rigging and sails
No amount of care is too much care when you are drilling for the masts into a solid hull. I recommend the template mentioned above too but also drill with a much smaller diameter bit first and test your hole with a thinner spar to see if it's correct. You can make corrections if needed as you gradually work up to the diameter you need for the actual mast you will use. I find also that if you place the model so you can stand above it and work down on it helps a lot too. -
I debated writing this but then thought it couldn't hurt: sandpaper. Use it! I don't want to name and shame anyone, but there is a huge proportion of finished models displayed on MSW on which the detailed photos of deck fittings or mast details show a lack of adequate sanding and surface prep. It looks like a lot of builders punch out the laser cut parts and incorporate them directly into the model without sanding to an adequate degree. I KNOW that close up photography of small parts reveals flaws not visible to the naked eye but some of the model photos I see show that a lot of small wooden parts are going onto models without enough sanding taking place, the surfaces are often covered in irregular globs bumps and spikes. since most kit models are basswood, it helps to recognize that the biggest drawback of basswood is it's fuzzyness. In other respects it's a great material but at the near-microscopic level fibers at the edges are very stringy, they don't break off neatly at the surface of the wood but cling on randomly as fuzz. Paint or varnish going on over this fuzz only serves to make the fuzz bolder and stick out in hardened spikes and that's what I'm looking at in these detail photos I'm seeing. I'm going to make another plug for the use of a Sanding Sealer. Available in any hardwear store, one can should last your entire modeling career. I use a water based Minwax Sanding Sealer. It paints on like thin acrylic paint, completely transparent. When dry it has the effect of darkening the wood just a bit. Is that so bad? The surface you get has hardened and feels shellacked. When you go over it with fine sandpaper those annoying stringy grainy fibers break right off at the surface in a way that reminds you of those old animated cross sectional shaving razor commercials in which each hair is lifted and cut perfectly at its base. You get a smooth surface where the grain is still visible but not in the form of huge peaks and deep valleys, a surface that can withstand the scrutiny of close-up miniature photography.
-
thin wooden mast reinforcing
JerseyCity Frankie replied to BETAQDAVE's topic in Masting, rigging and sails
I find bamboo to be the go-to material for small wooden spars. The long and tough fibers that run along its length behave like rebar in cement. It resists breaking from any angle, unlike most woods that will fail along the grain on one side or another. Unlike most other woods, you can keep on reducing diameter to a very thin, yet still resilient, thickness. I find tapering bamboo spars to be so easy I'm surprised anyone feels it presents any difficulty. I've had success tapering with a small block plane and/or via sandpaper. If you have never tried tapering with your spar chucked into a drill and using sandpaper on it while it spins you have missed some great fun. Wear eye protection. Drawplates I have never had success with, they are expensive so I only ever purchased one from Micro Mark years ago and it was a lemon. Perhaps there are more effective ones out there but I'm not inclined to pay to find out. -
The Yankee Whaler by Clifford Ashley is a great primary source for all whaleship and whaleboat information. Ashley sailed on a whaling voyage and was also a very good writer and draftsperson and his whaling book gas everything you need, he describes everything and the book is lavishly I.lustrated with photos drawings and paintings. Also it's not a bad idea to skim Moby-Dick too as Melville also had a real-world sailing background and Moby-Dick contains a lot of whaling facts and poetic meditations on whaleboat equipment and use.
-
I simple technique is to use ordinary pencil graphite. Test it on something painted with the same black color first. Crush some pencile lead until it's a powder then rub it onto the object. If you don't like the effect it should be very easy to remove.
-
Rediculouse assumptions and what is with this outrageous "I can see shipwrecks from low earth orbit" nonsense? Science got us pretty far, and the space program represents a milestone in human achievement that shouldn't be sullied by allowing dingbat nonsense to ride its coat tails into something like legitimacy. Shame on anyone promoting this nonsense masquerading as nautical archeology.
-
thin wooden mast reinforcing
JerseyCity Frankie replied to BETAQDAVE's topic in Masting, rigging and sails
If you can stomach the idea of abandoning literal interpretation of materials, you open the possibility of substituting metal rod painted to look like wood. My HMSVictory was plastic anyway so I had no qualms about using metal rod to replace the amazingly bendy thinner spars in the Heller kit. -
Securing stays to mast caps
JerseyCity Frankie replied to ahb26's topic in Masting, rigging and sails
The structures the stays attach to are "bails" in my opinion, iron "u" shaped objects fixed with bolts through the top of the masthead, with the stays attached to the bow of the "u" on the centerline. This arrangement allows for the topmast to be struck without removing the stays (Spring stay? Triatic stay?) as the topmast is not part of that structure and can pass freely behind them. -
Check out my build logs for HMS Victory and Yawl Dulcibella. I'm a "build sails for ship Models" nerd and I go into the topic obsessively on the logs.
-
a lot can be conveyed with strips of paper glued to the sail. Paper is thinnest of all and conforms well. I've also had success using a white ink pen and drawing the details onto a sail. If you think how thin the actual fabric on the real sail would be, it's hard to keep sail construction details on a model in scale- anything you glue onto your sail is going to be very very thick compared to the real sail. On the other hand the thickness of a sail, which one can only see one side of at a time, is hard to perceive and as long as you don't get too crazy you can get away with a lot. i do feel though that folding a ribbon over the cut edge (called bias tapeing in garment sewing) is adding thickness unnecessarily. Bias tape does remove the problem of a frayed edge but if you are adding a bolt rope to the edge of your sail anyway, is it needed? If the sole pourpose of bias tape is to control the frayed ends, you could avoid the frayed edge altogether with careful cutting as mentioned above. I found that starching the fabric with cornstarch first makes for perfect xacto or razor cuts with zero fraying.
-
I think it's a case of removing material slowly with an exacto knife. Dremels are great but they take off material very fast and an exacto is slow but accurate. A trick you may find helpful is to make a series of vertically drilled holes into the material that will be removed. With a very smal drillbit. Drill as many holes as you can as close together as possible but NOT directly adjacent to the line demarcating what you want to keep, drill close to this line but not on it. Now the material to be removed has been pre-digested a bit and the exacto will have an easier time removing the waste wood. Mark the shank of your drillbit with a piece of adhesive tape corresponding to the depth you want to cut down to and then keep your eye on that tape as you drill.
-
Alternative Line Material
JerseyCity Frankie replied to David Rice's topic in Masting, rigging and sails
Ignore the white, it's too slick. Not suitable for ship Models. -
Alternative Line Material
JerseyCity Frankie replied to David Rice's topic in Masting, rigging and sails
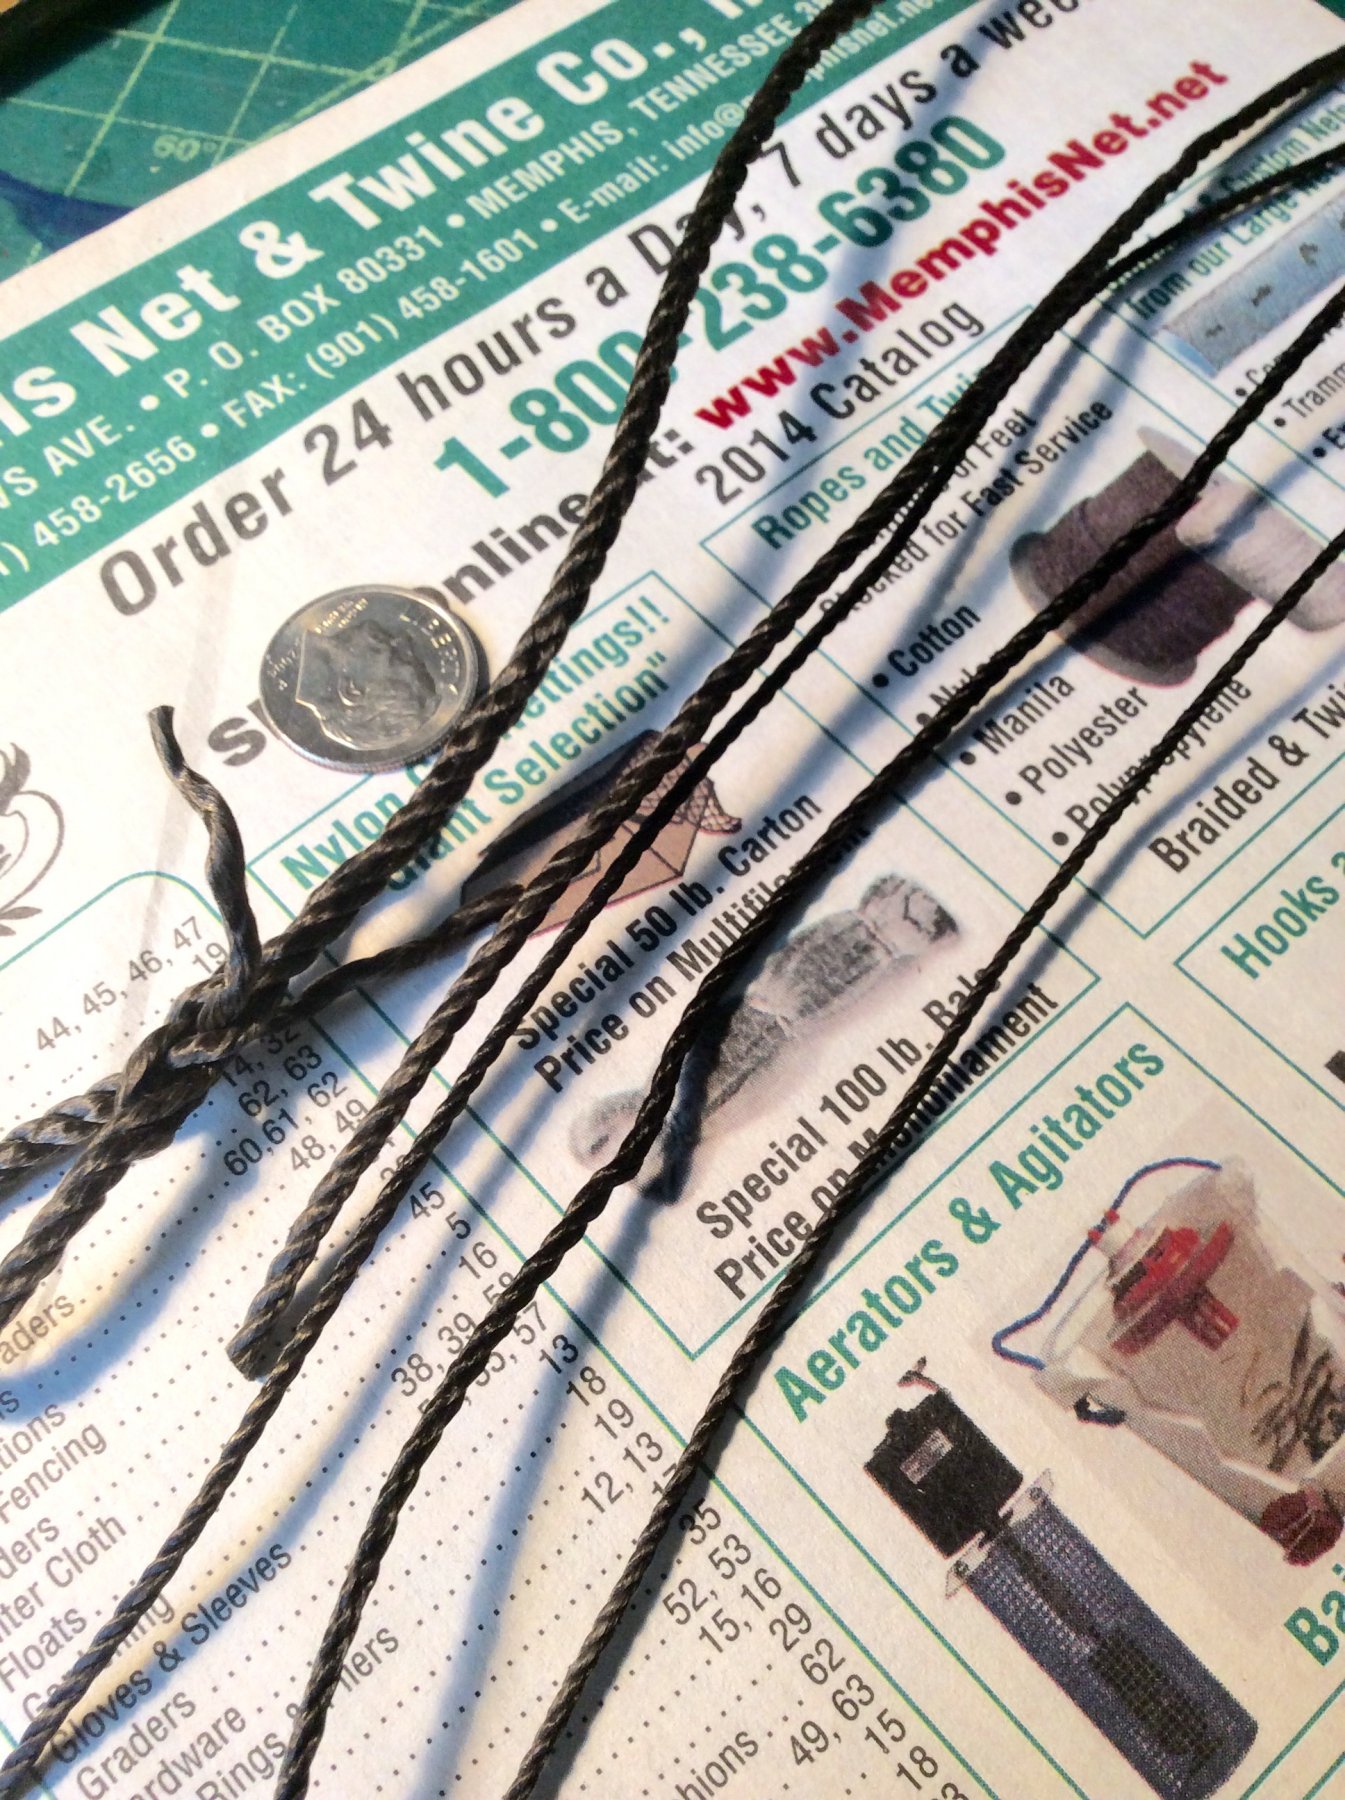
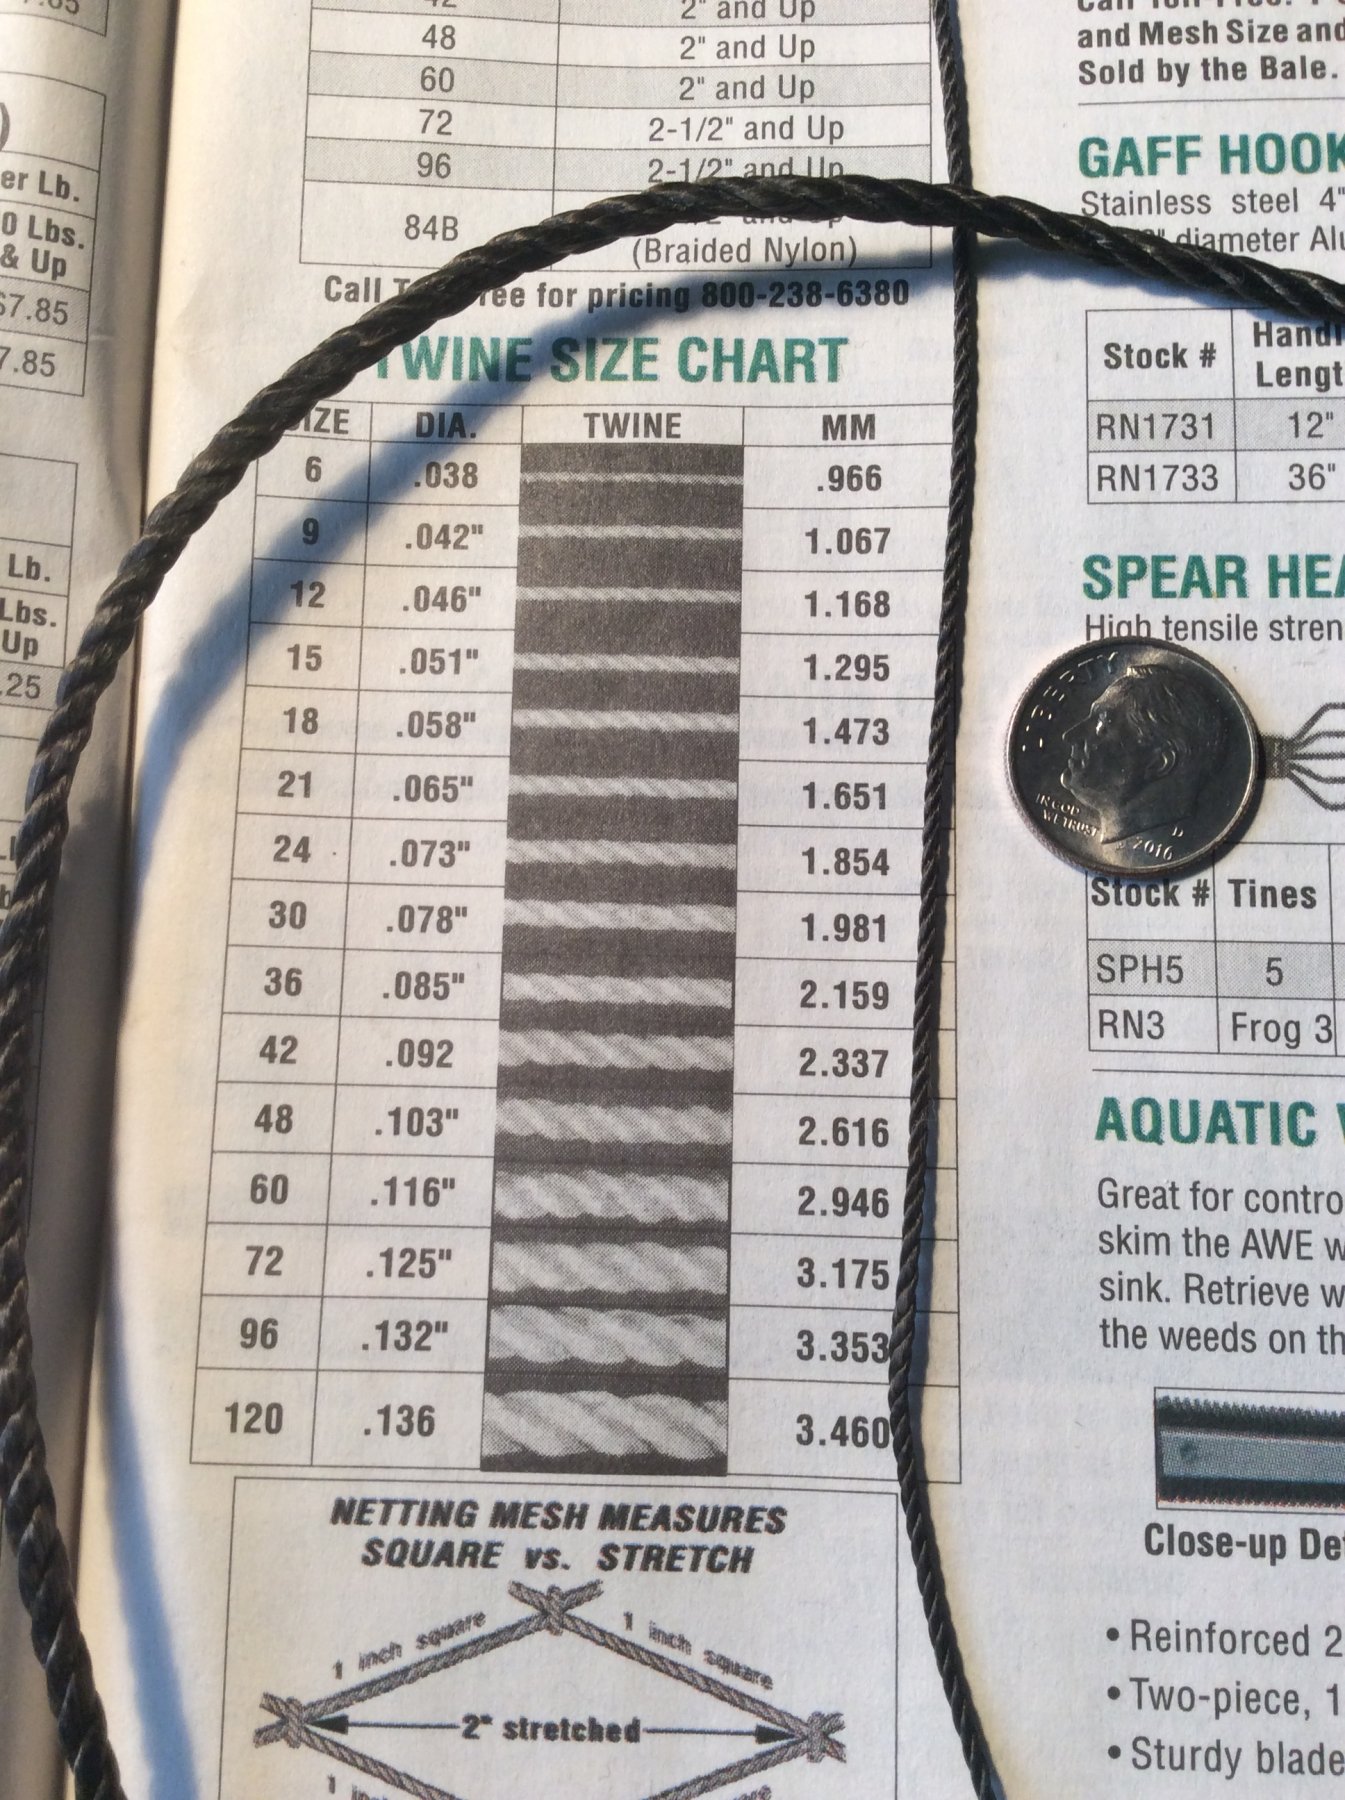
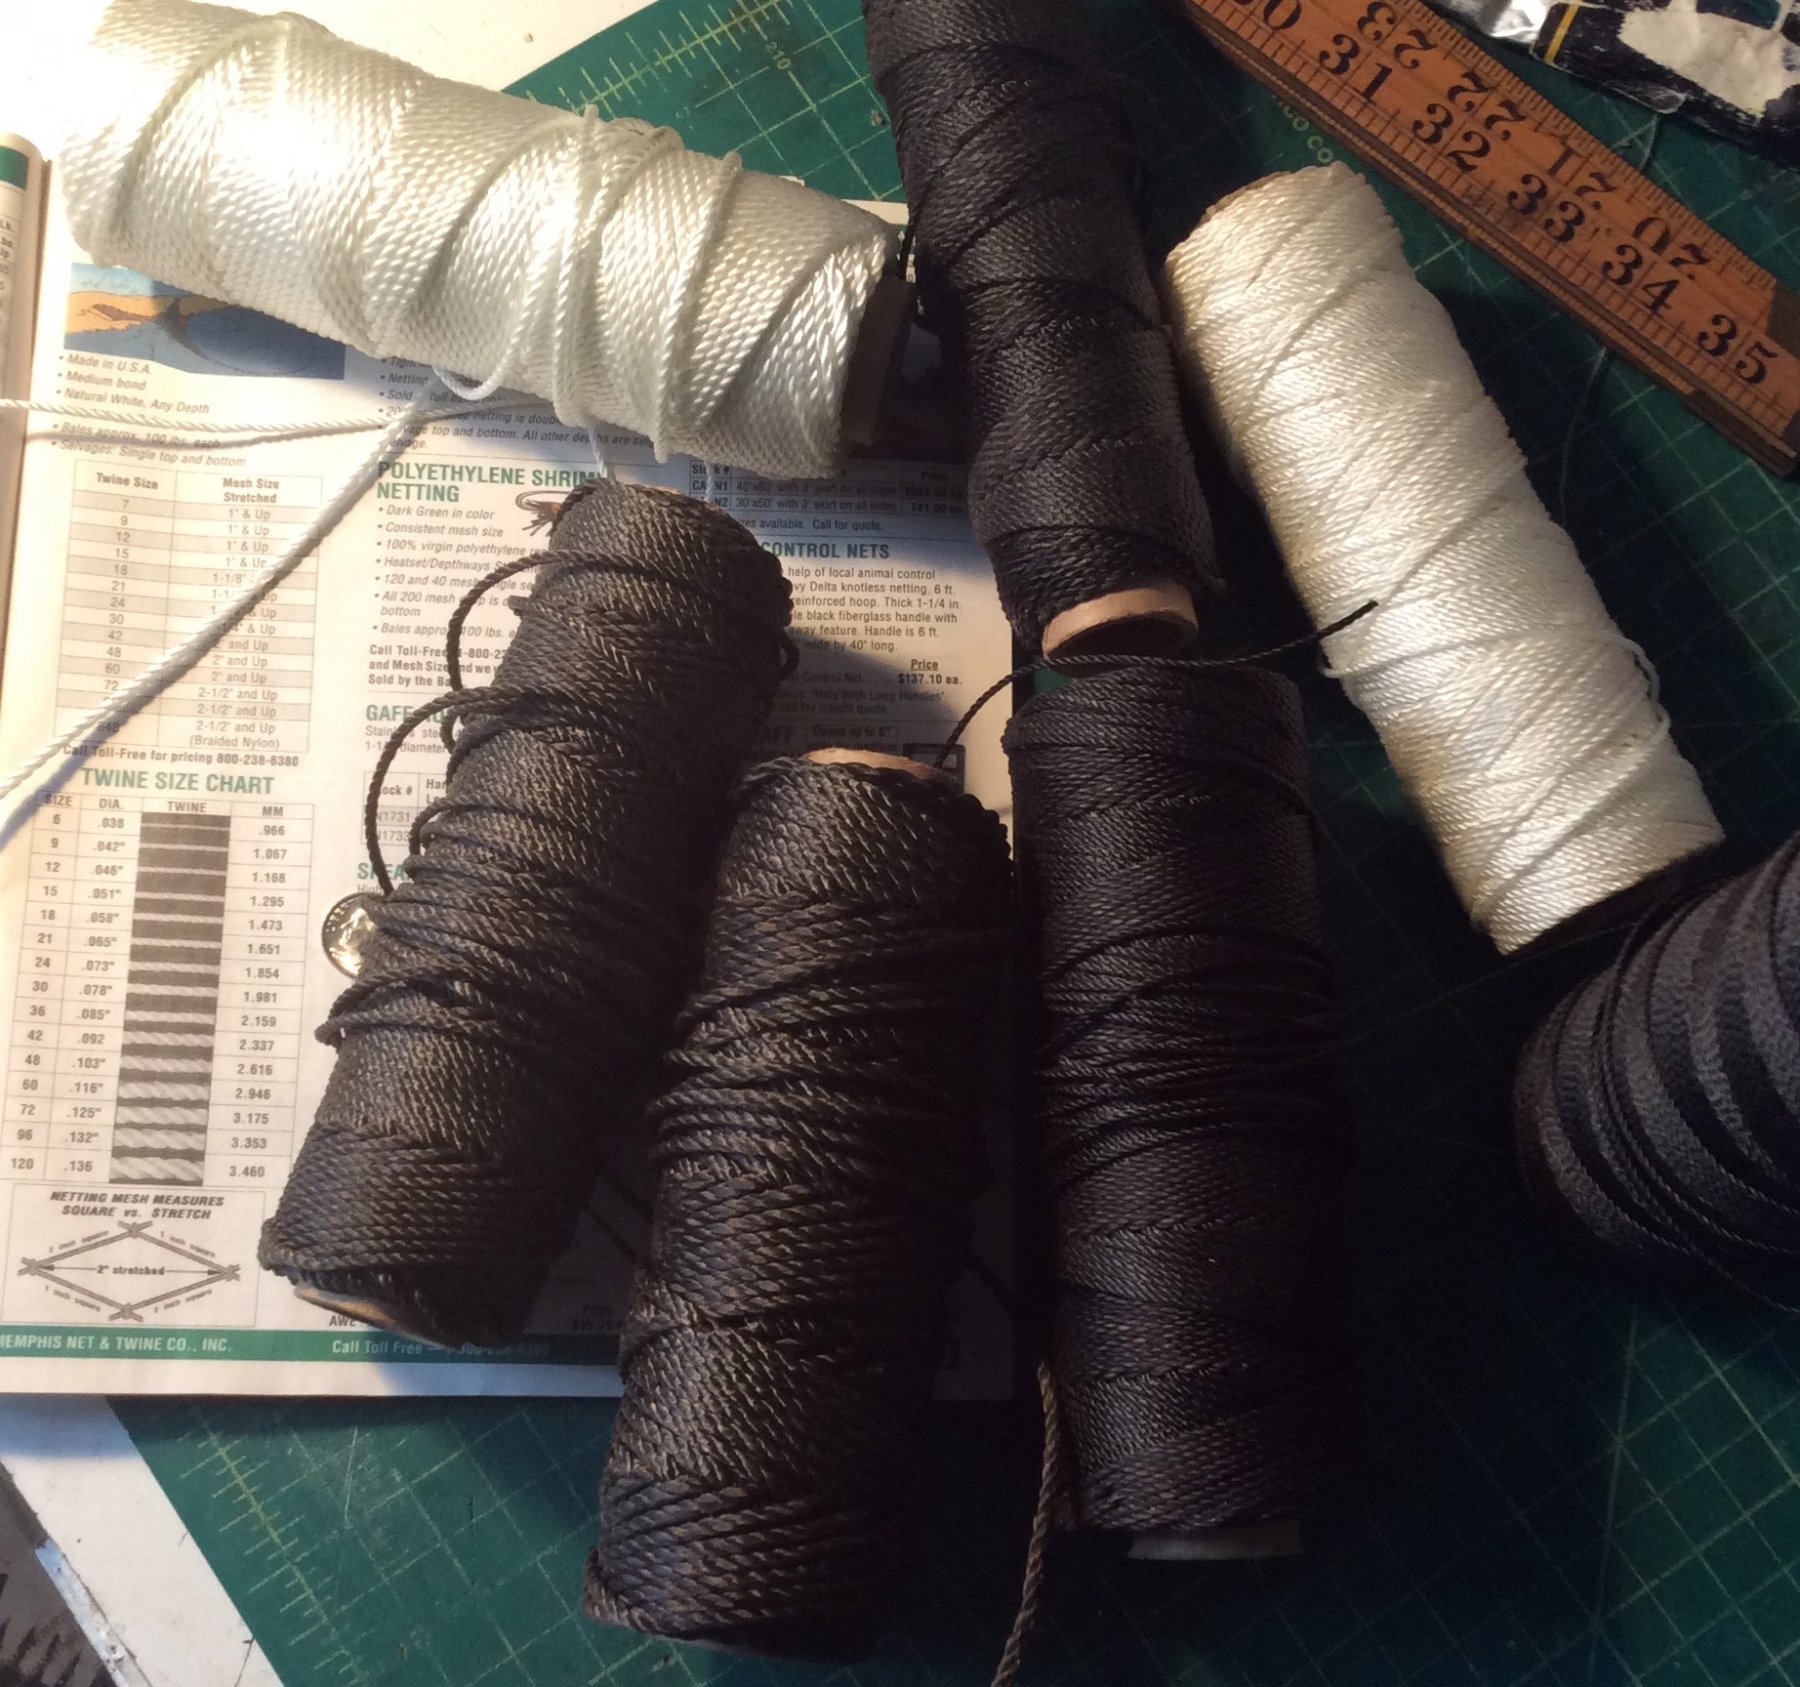
I should mention here also that Tarred Nylon Sein Twine is literally what's holding most of today's tall ships together. It's the material most often used for every seizing or lashing on every traditionally rigged boat afloat. Every served eye, every end of every ratline, is made up or attached with this stuff. Every sailor has a piece in their pockets at all times. If you see someone using a marlingspike or heaver aboard a ship, THIS is the material under the tool. It's the perfect material for the job. The very very light coating of tar is not enough to render it sticky and the smell is not apparent but it's just enough to make this stuff hold knots better than anything else. here are some photos with the Memphis Net Catalog. I don't own every diameter but I'm showing from thickest to thinnest # 60 #36 #24 #18 and #9 , over the diagram on page7 of their 63 page catalog. Www.memphisnet.net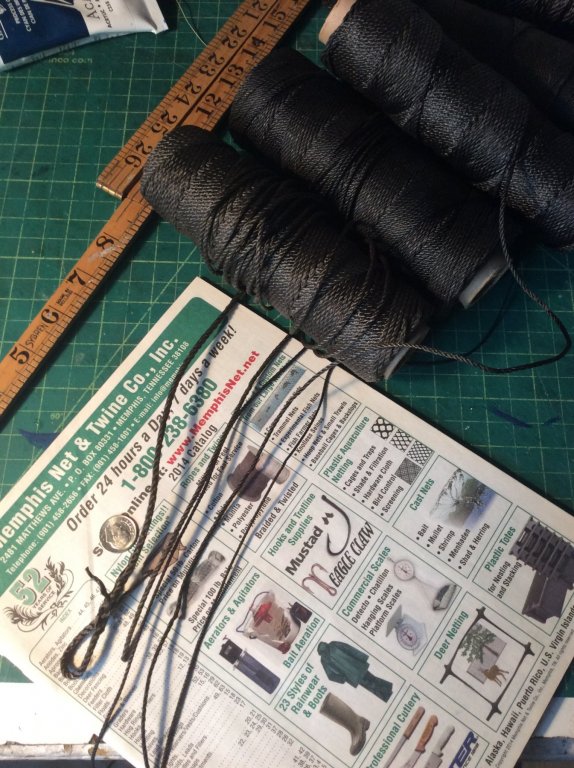


-
Alternative Line Material
JerseyCity Frankie replied to David Rice's topic in Masting, rigging and sails
Tarred nylon sein twine is certainly the best string anyone could ever want! Memphis Net and Twine is the name of the company I get mine from, the brand in your photos is unfamiliar to me but looks identical. When you consider what hardwear stores now charge you for cotton string of indifferent quality and the limited diameters to chose from (two), spending a little more to get a much larger amount of higher quality string with a choice of many diameters makes perfect sense.