JerseyCity Frankie
-
Posts
1,338 -
Joined
-
Last visited
Content Type
Profiles
Forums
Gallery
Events
Everything posted by JerseyCity Frankie
-
The bow view and the stem do, actually, kinda resemble William H Macy just a tad bit.
- 145 replies
-
- 1
-

-
- model shipways
- charles w. morgan
- (and 1 more)
-
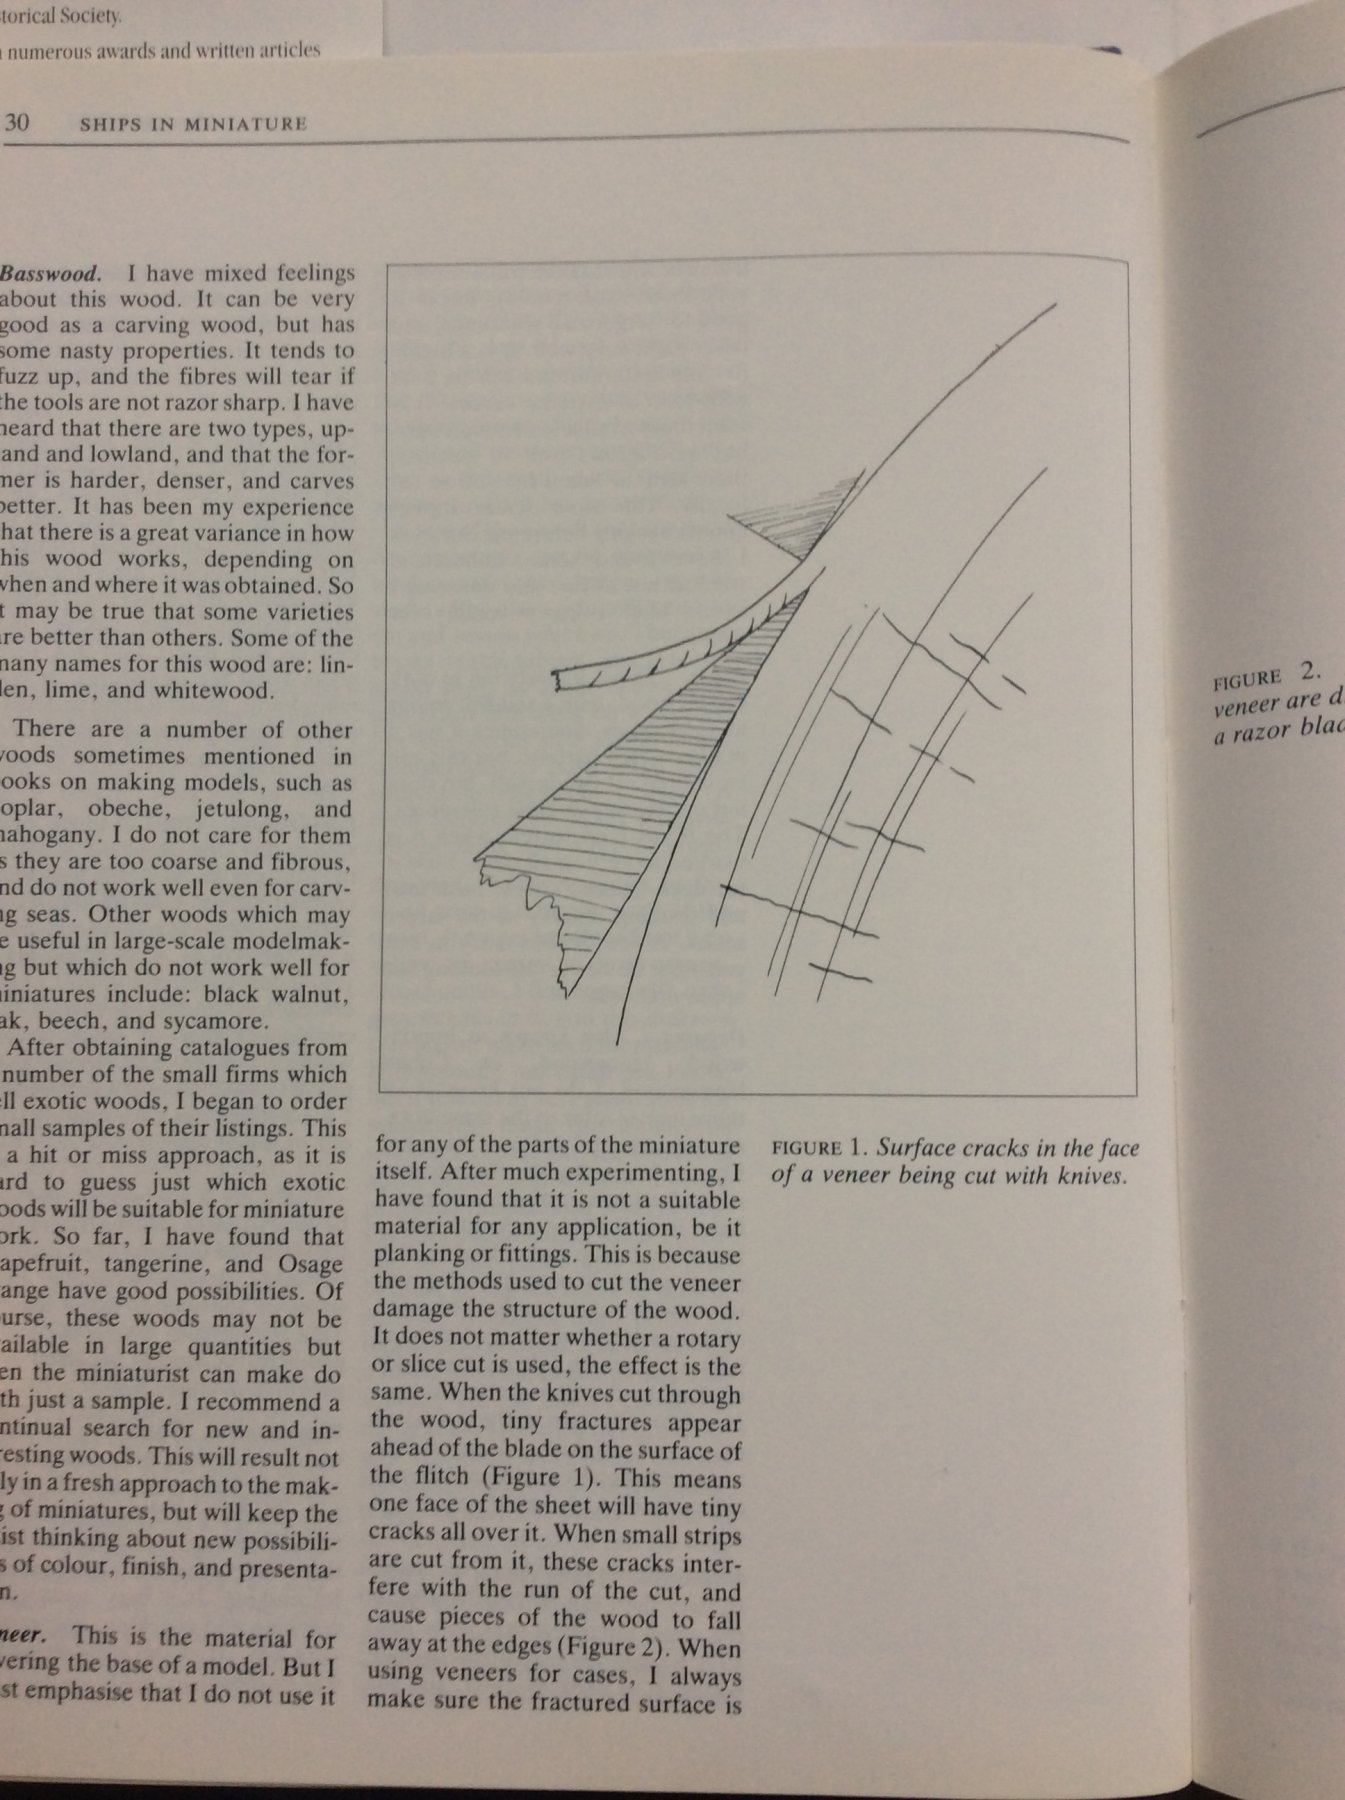
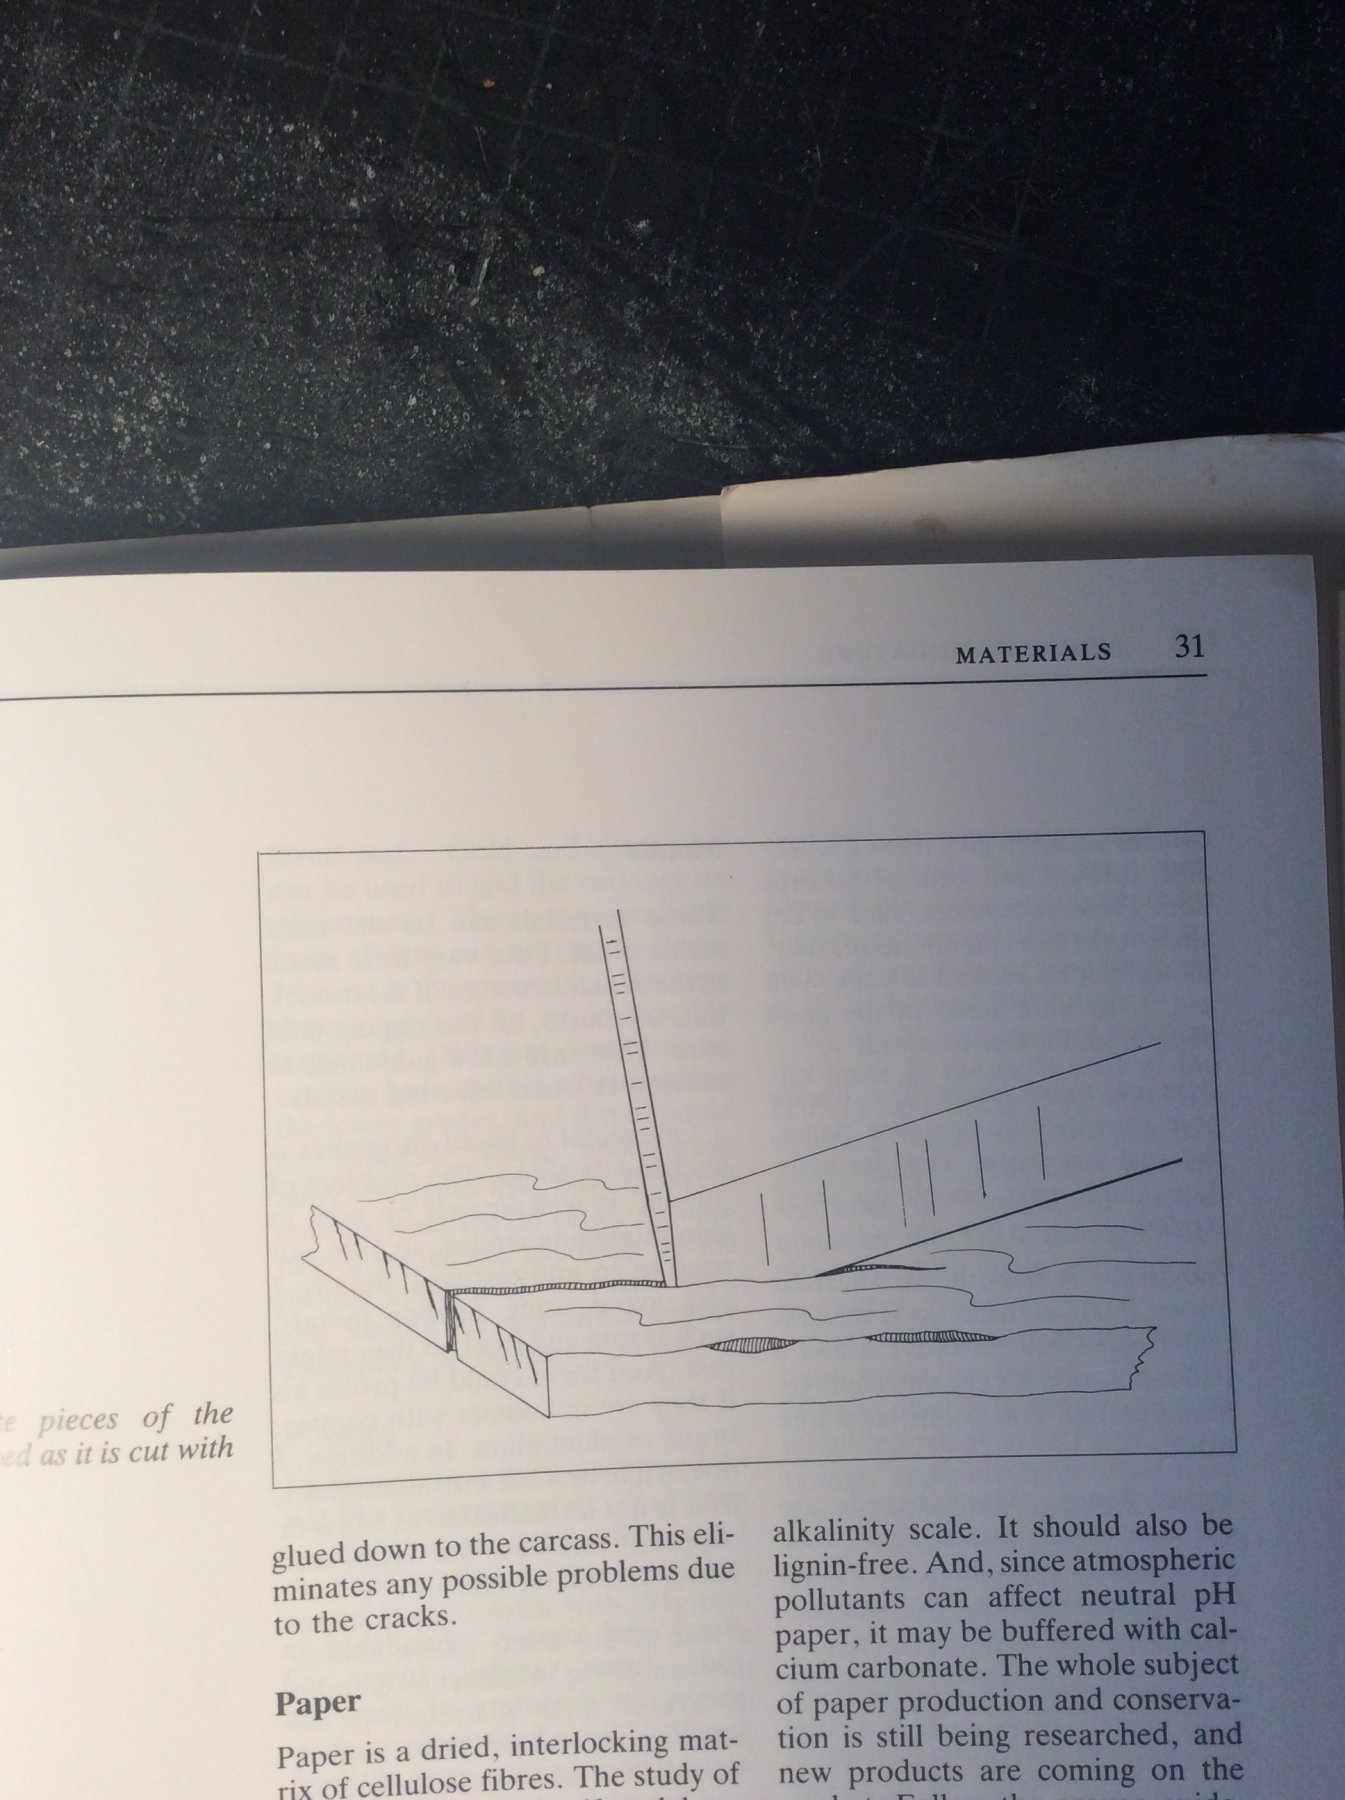
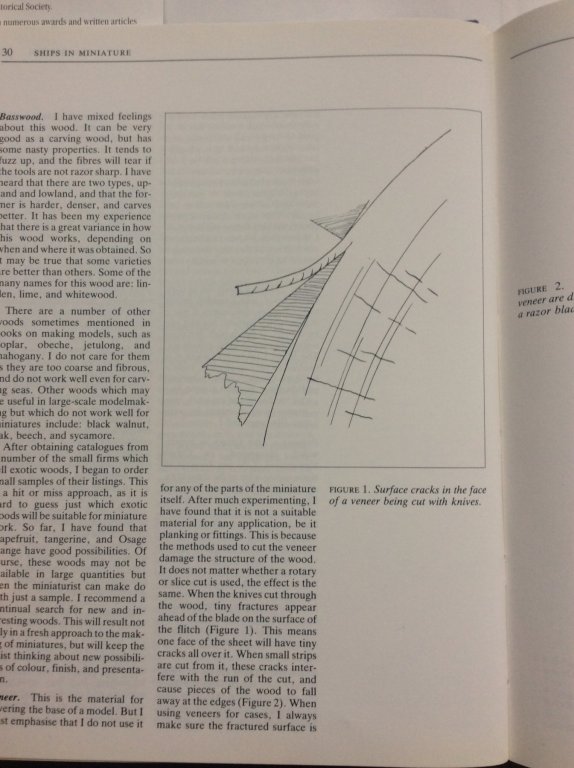
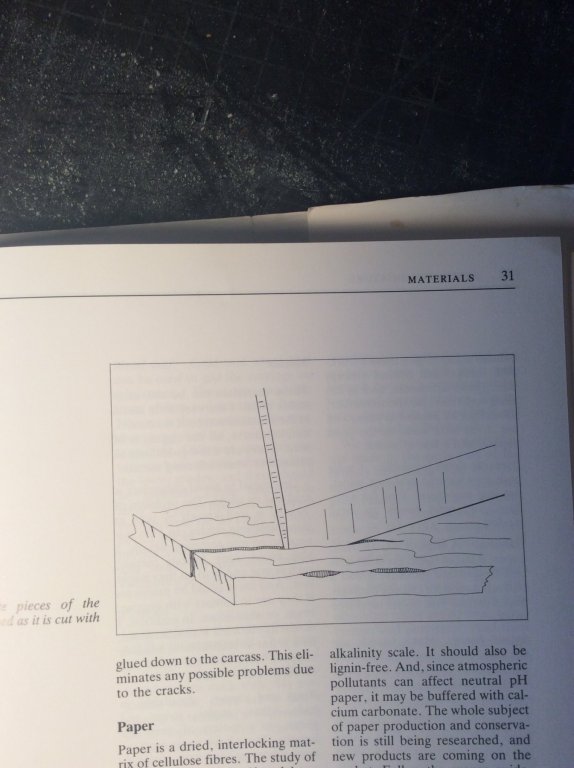
Maybe try ironing it flat with a steam iron? Steam bending is a thing. As mentioned above, veneer is shaved off a spinning log so it’s “real” shape is the diameter of the log, it doesn’t want to get flat and stay that way. Lloyd McCaffery covers the issue in his book Ships in Miniature, here is his illustration. He points out that in th process of making veneer, the cutting blade is continuously forcing the wood fibers to shear as the veneer is bent back away from the log by the cutter. These tiny cracks are what keep catching the x-acto blade and making it wander. McCaffery states he won’t use veneer on the model, only the case and the base. But his model timbers are typically incredibly tinny.
-
For the sake of trivia: Panama Leads are fully enclosed fairleads found on large modern oceangoing ships. They are an oval ring the dockline passes through, closed at the top. When ships enter the Panama locks and the water level drops, the ships are now well below the level at which they entered. The docklines that were once leading over the fairleads and DOWN to the edge of the locks now lead UP to the edge of the locks. The closed oval prevents the docklines from lifting up and out of position.
-
Do you find, looking into the Niagara box, that there is a tremendous amount of extra wood strips? I’m at a similar stage in my Niagara build, all the planking is done. True, there’s going to be a few feet of strip wood used in spar details, but nothing even close to the big bundle of unused strips that remains in my kit box.
-
I’m doing watercolors myself, from time to time. I had done watercolor at college and used Arches paper. The Arches brand paper available today is different, it used to have a lovely sour smell when it got wet. Now it is different and also appears to take the paint differently too. what brand of paper are you using? I’m trying to settle on a typ I can live with but so far nothing appeals to me, they all absorb/don’t absorb the paint differently.
-
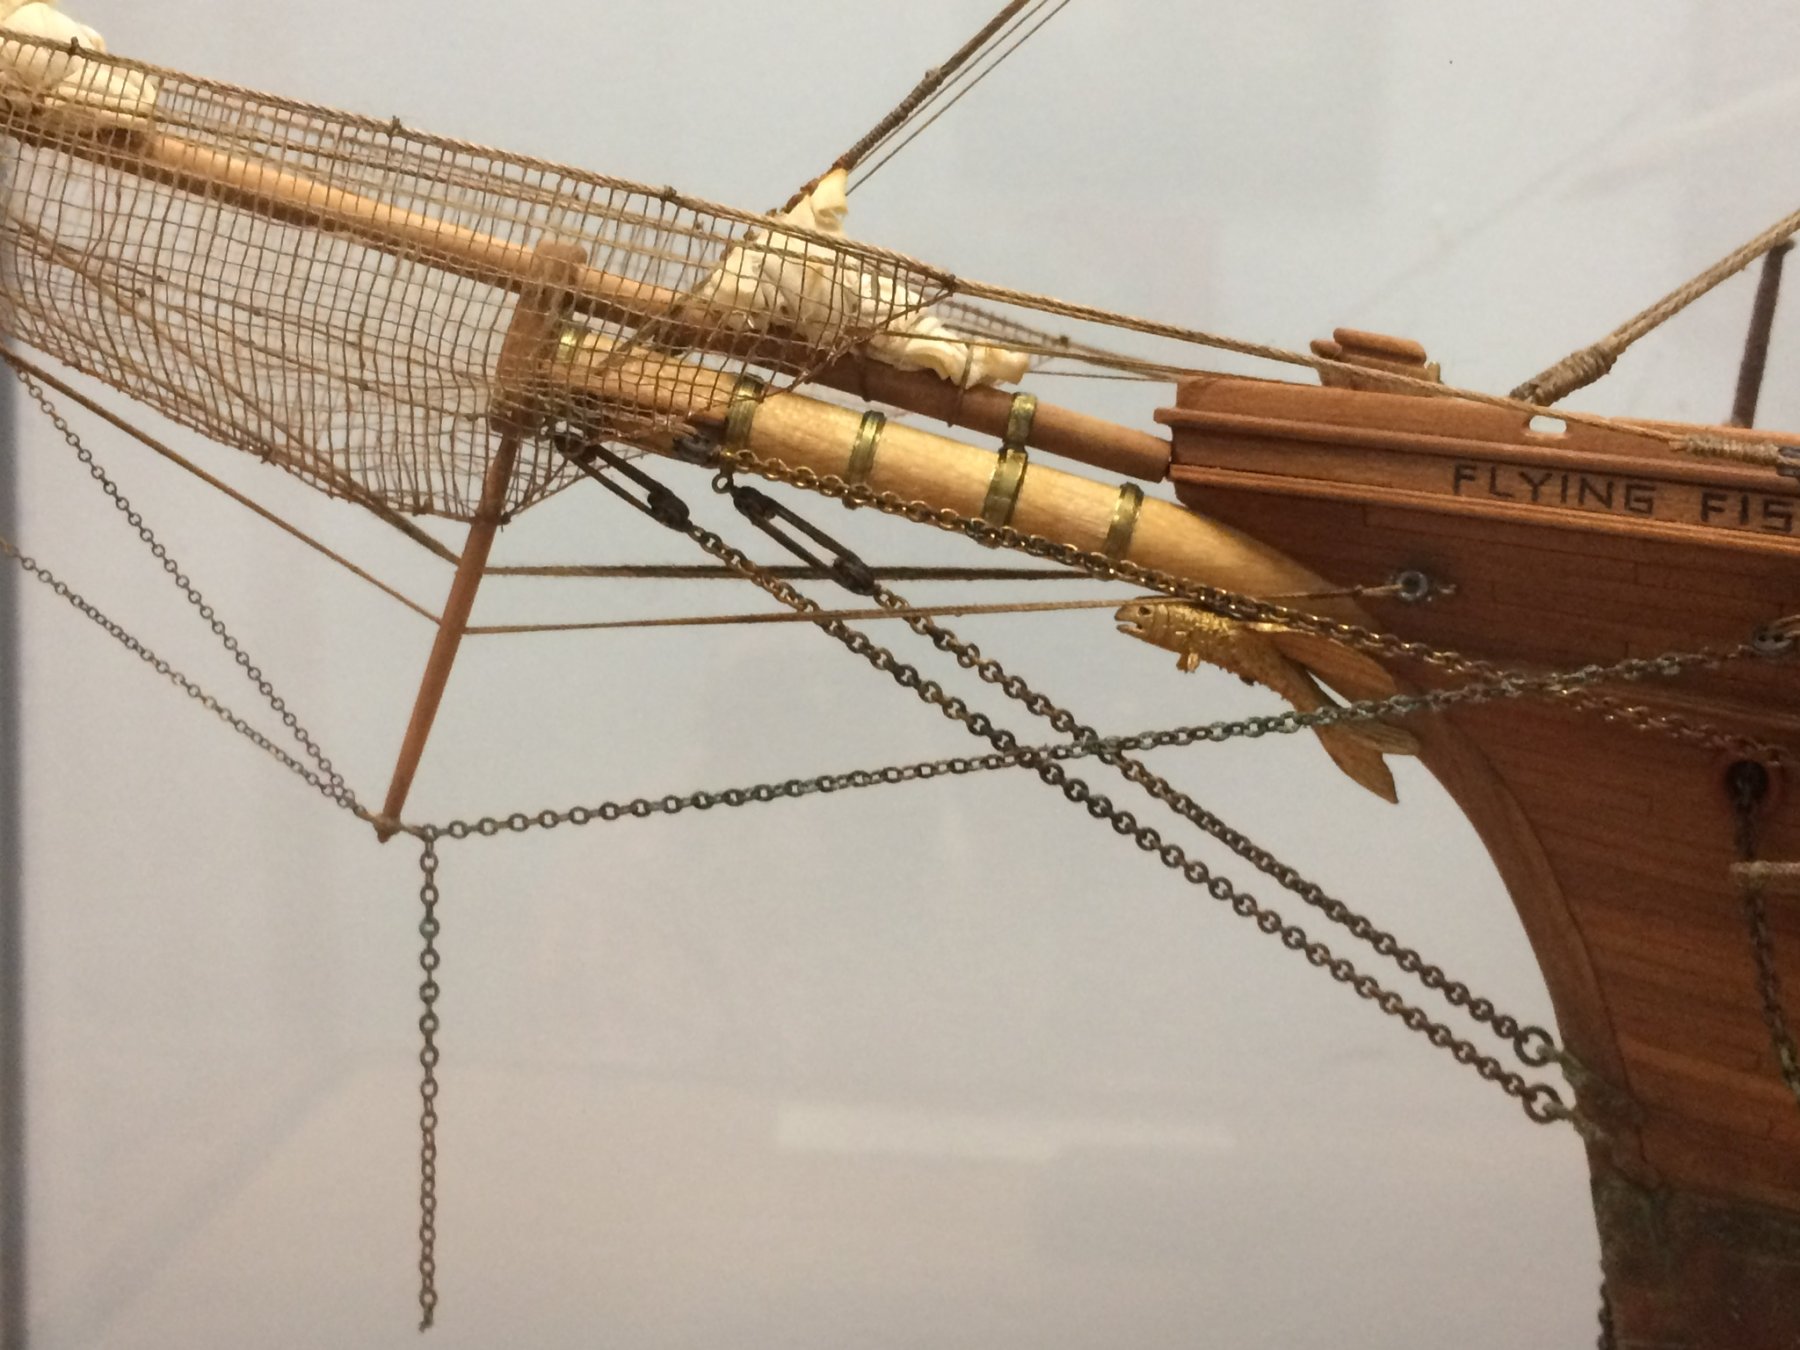
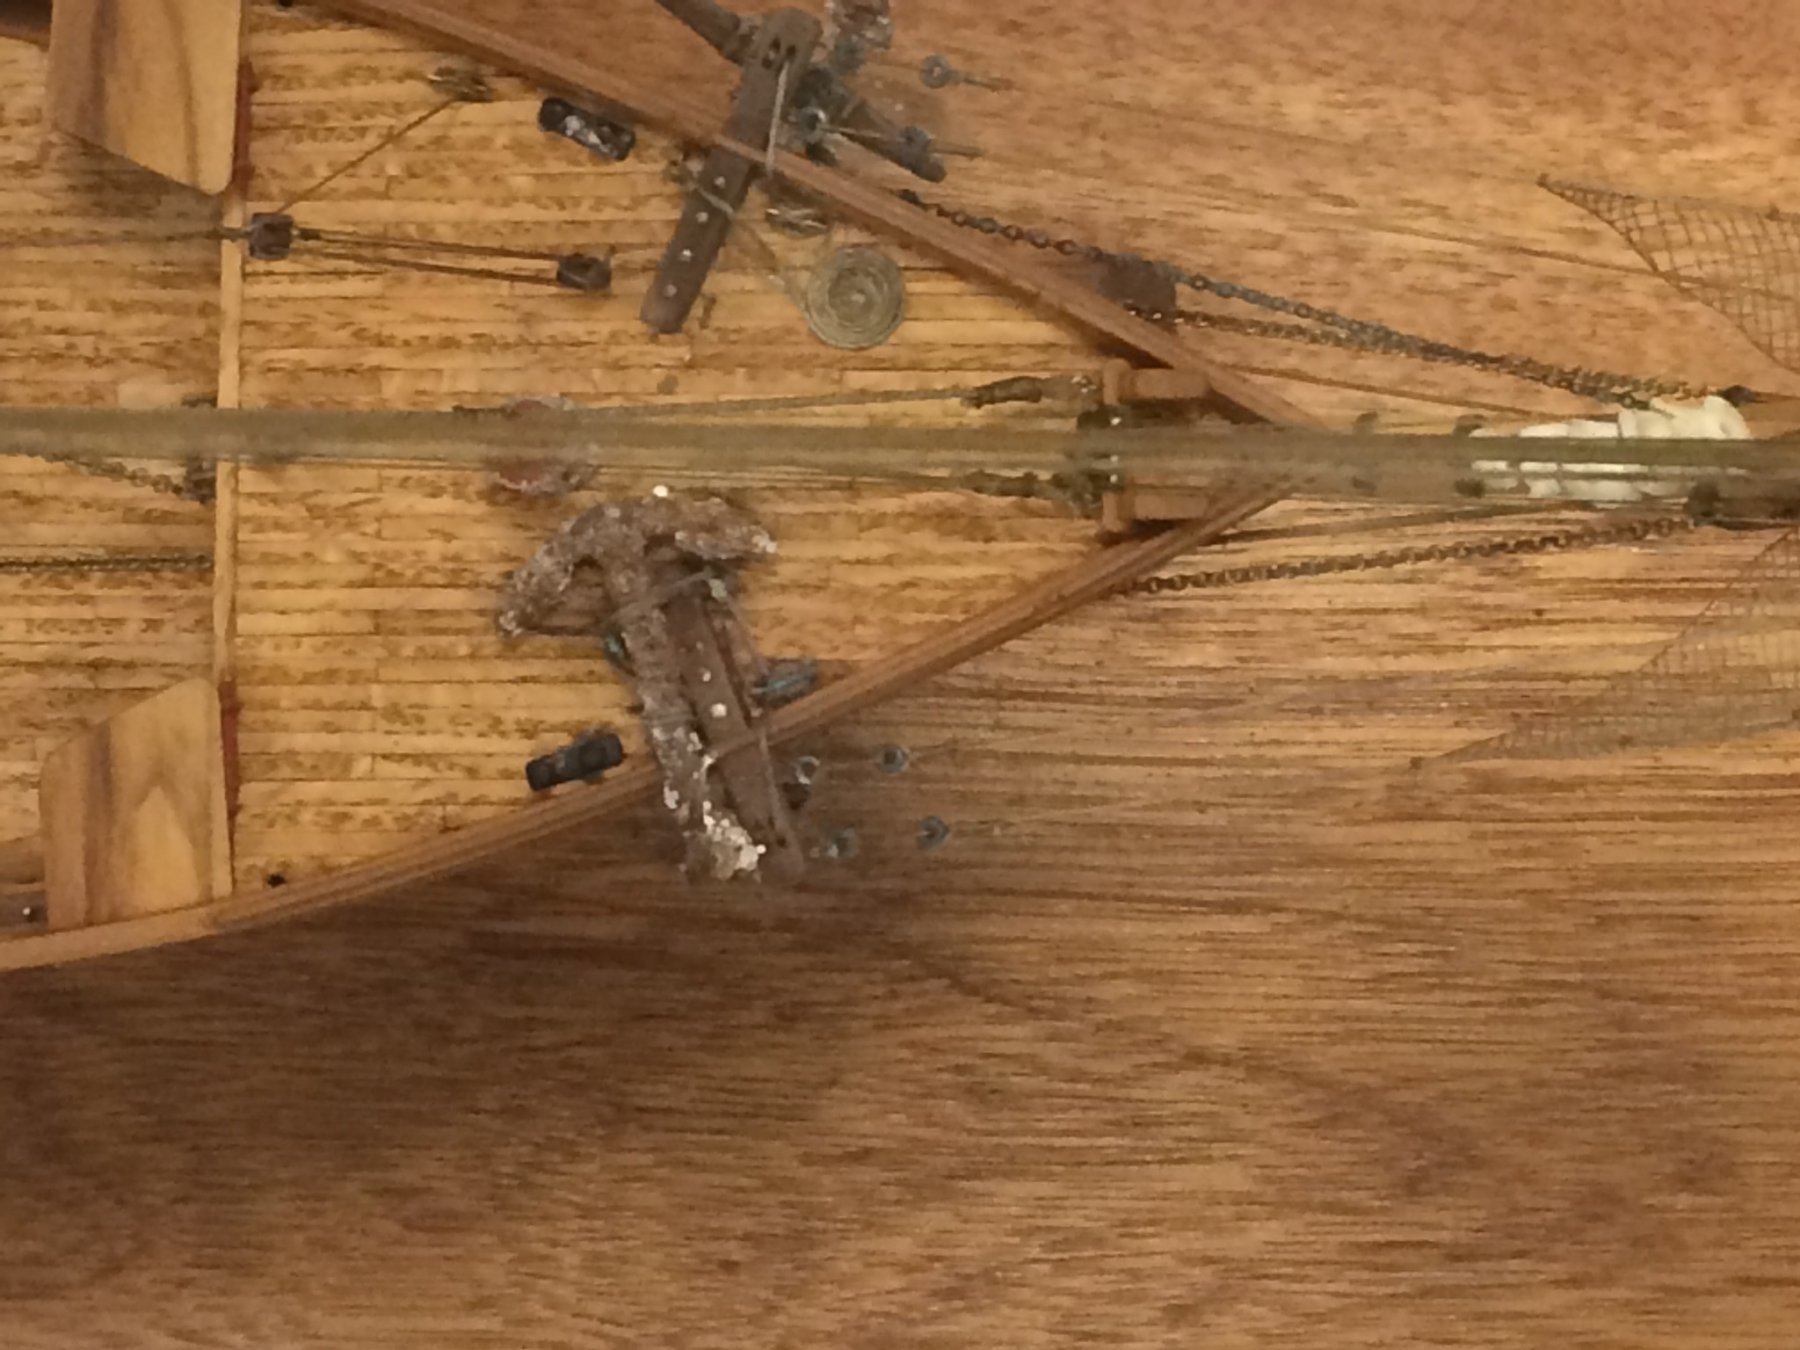
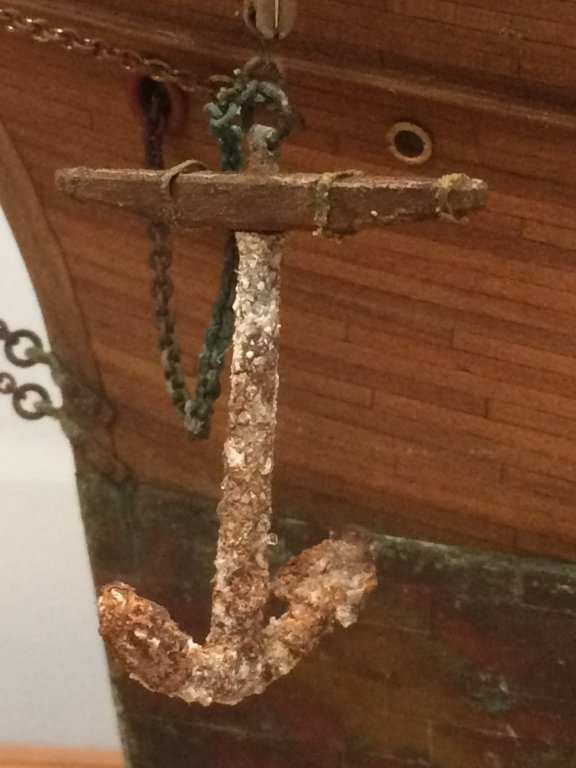
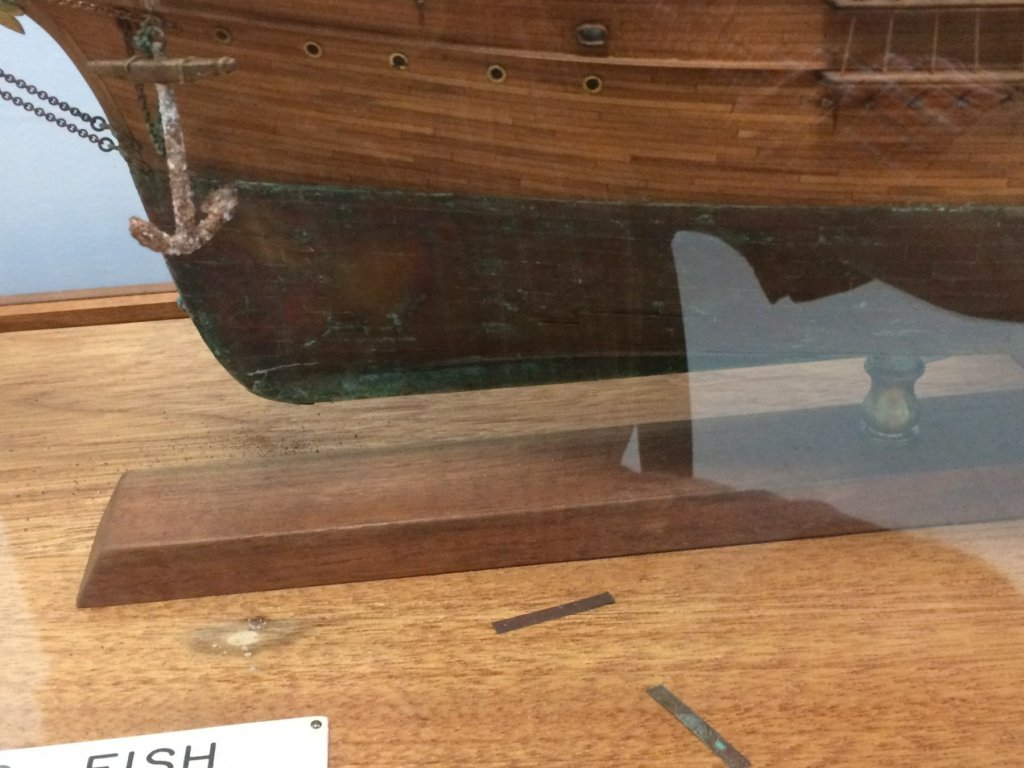
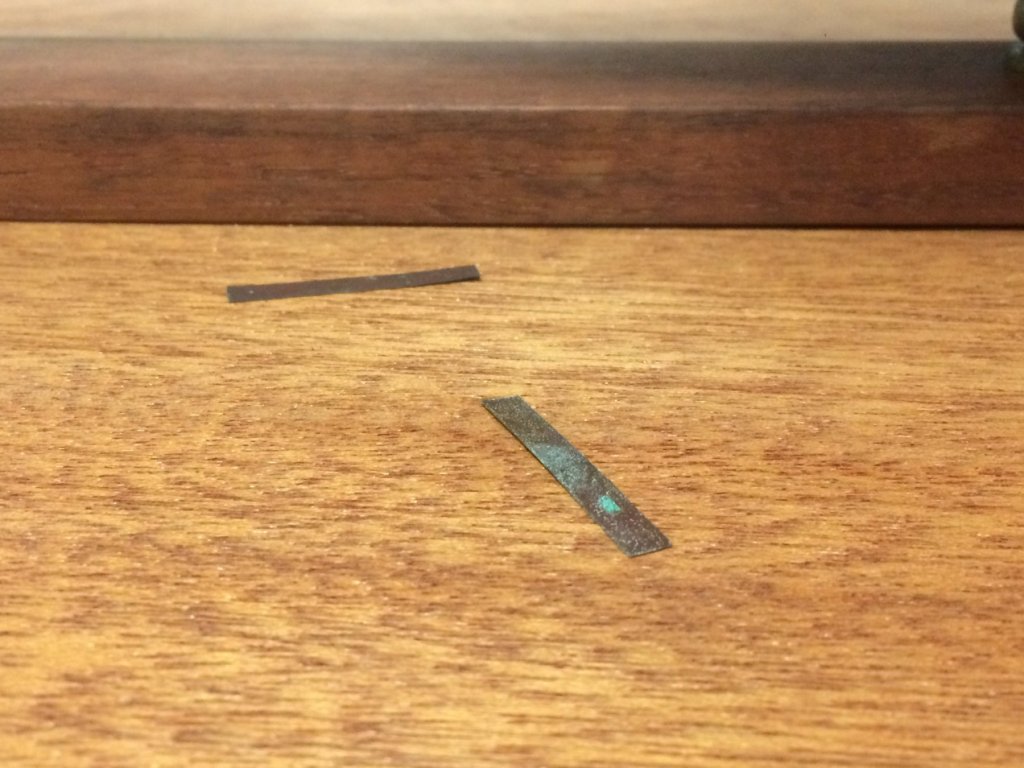
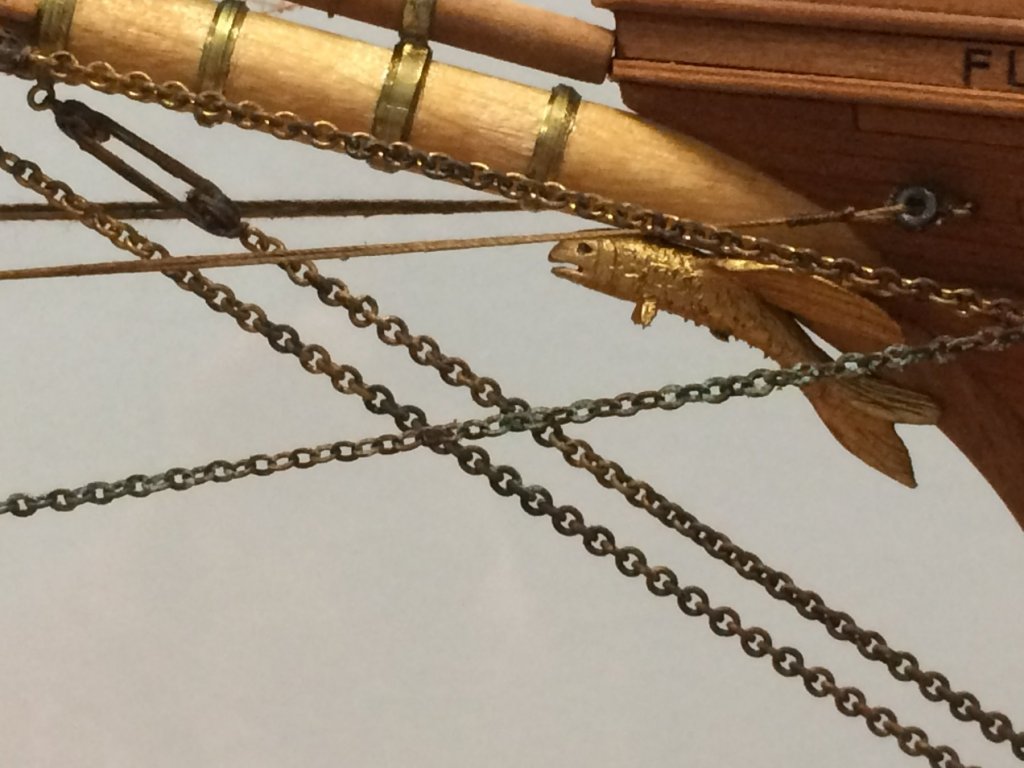
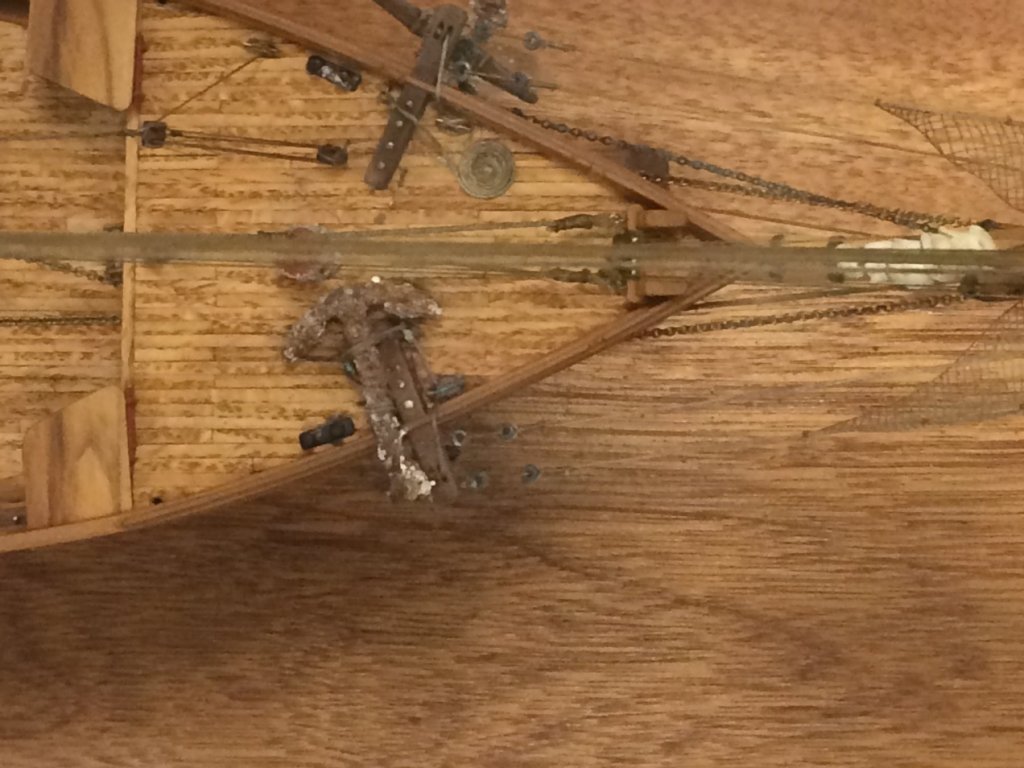
Recently visited the Mystic Seaport Museum in Mystic Connecticut and saw this superb model of Flying Fish. The cased model was excellent, great construction detail and rig. The unpainted model was aging very nicely, except for the anchors which were blooming with scale and deeply corroded. That old white metal corrosion again. In other cases I’ve seen painted anchor bursting like stuffed animals, white fuzz emerging from cracks in he paint caused by the expansion of the metal. In this case the corrosion looks like brownish orang bubles. The base under the Bow was discolored from material dripping off the anchors. Also two copper hull plates had come off. Oddly, the figure head appears fine, sugesting it’s made of stronger stuff. Real gold?

-
kit review 1:65 HMS Terror - OcCre
JerseyCity Frankie replied to James H's topic in REVIEWS: Model kits
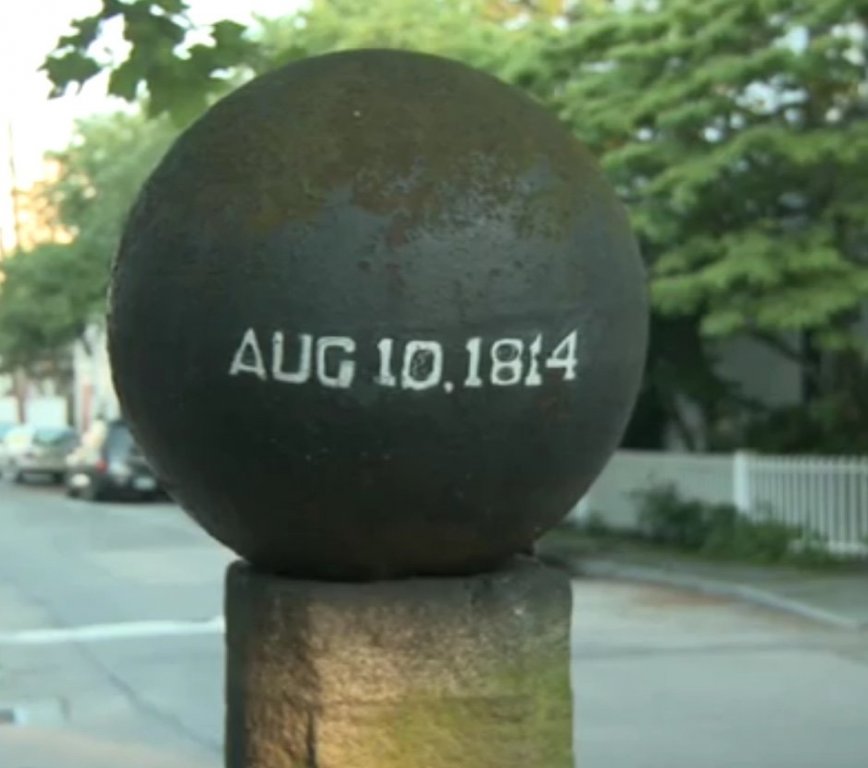
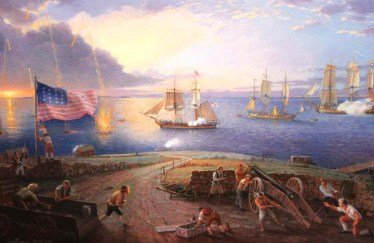
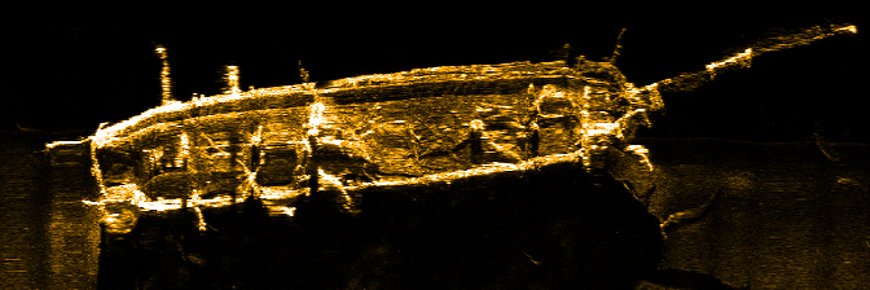
It just so happens that today (August 10th 2018) is the 204th anniversary of the Battle of Stonington, a battle in which HMS Terror participated. Stonington CT is directly adjacent to Mystic Ct, home of the superb Mystic Seaport Museum. The sunken wreck of HMS Terror was recently located.
-
Cool old sail ship request for info please
JerseyCity Frankie replied to Muskies's topic in New member Introductions
I agree this is a gift shop model. It looks like someone recently put some time into freshening it up. The “rigging” is new and the base it sits on looks like it was repourposed from something else. As a Gift Shop Model it’s value is low. As mentioned above, they are produced quickly and inexpensively and don’t look like any particular ship even though they will often have the names of real ships painted on them. The “details” on Gift Shop Models reflect the available resources at hand when they are built and have little or nothing to do with the details of actual ships. For instance the rows of windows in this model don’t reflect any actual ship, the builder was simply sawing out windows to add “detail”. there’s nothing unethical or “wrong” about folk art Gift Shop Models. They fill a vital nich since they make ship models available to those that can’t afford a “real” one. Ethical issues crop up though when Gift Shop Models are hyped as representing more than what they are, it’s not uncommon to see Gift Shop Models described as being “Museum Quality”. -
Copper Leaf
JerseyCity Frankie replied to Kurt Johnson's topic in Painting, finishing and weathering products and techniques
I’m curious about this too. But I have a caution for using it: it’s very delicate. If you have never seen gold leaf before, google it and you will be surprised: the sheets are so thin they are lifted by static electricity on a paintbrush. They eisily blow away on the lightest puff of air. The material has less structural integrity than ANYTHING and disintegrates into the tiniest bits with any handling with any tool. You can not lift a corner with your fingers, this just tears off the corner and what is pinched between your fingers has already disintegrated. ive used the imitation gold version of this product on my Niagara brackets. I was able to glom sufficient quantities to cover, but I was unable to get the sheets on smooth and without bumps and wrinkles. what I am saying is: applying leaf is a skill that will take time to acquire. The issue for coppering a hull will be the consistency with which you can lay the sheets on smoothly without bumps and ridges. On the other hand ALL OTHER actual copper coverings are grossly out of scale? I would say it’s worth pursuing leaf as a coppering solution, it’s REAL COPPER and as thin as is possible to achieve, but it’s not going to be a walk in the park getting it onto the hull. -
Signal flags/pennants
JerseyCity Frankie replied to Ed Mostowicz's topic in Masting, rigging and sails
Flag halyard line is the smallest diameter line in the rig, by a wide margin. It’s like modern day Clothesline, It won’t require a pin, just a very very small cleat. Adhering to the “the higher up in the rig- the farther aft the belaying point on deck” rule, the cleat will usually be located aft of the aftermost running rigging belaying point for that mast. Somewhere on the bulwarks. But often the cleat is on the aftermost shroud. -
I was kidding myself for five minutes about a case for Niagara. That Bowsprit! Too long. I think a case would have to be the same size as one of the diagram sheets that came with the kit, 27”x39 x @18”. Too unwieldy for my apartment. I agree the yellow color requires a lot of careful consideration to hit just the right note, so too does that “Buff” color of the caprail and masts. I wound up using “flesh” color. Congratulations on getting the exterior planking and some of the spar work done!
-
Rope-Stropped Blocks for Boom Vang
JerseyCity Frankie replied to Julie Mo's topic in Masting, rigging and sails
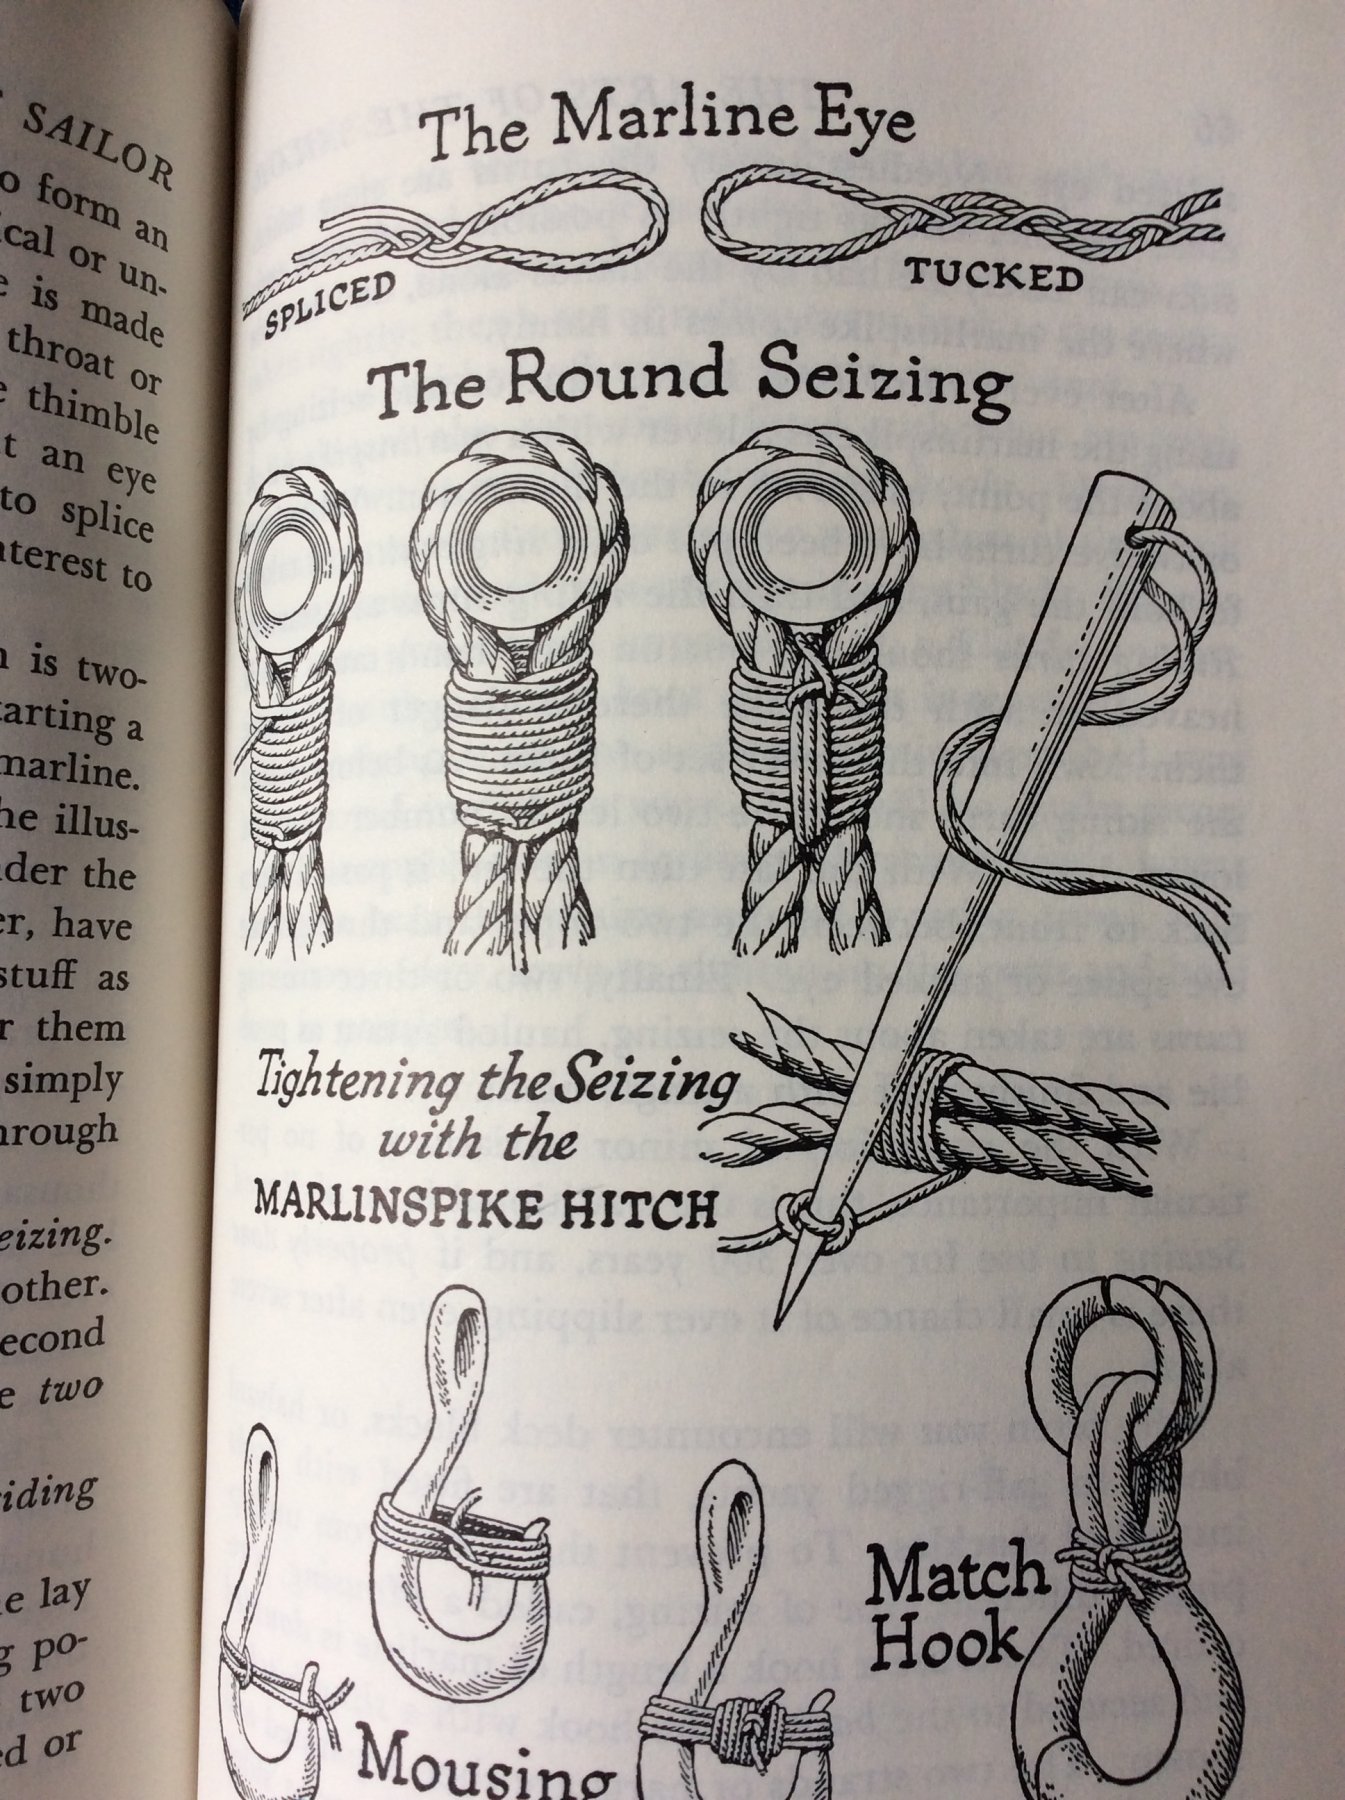
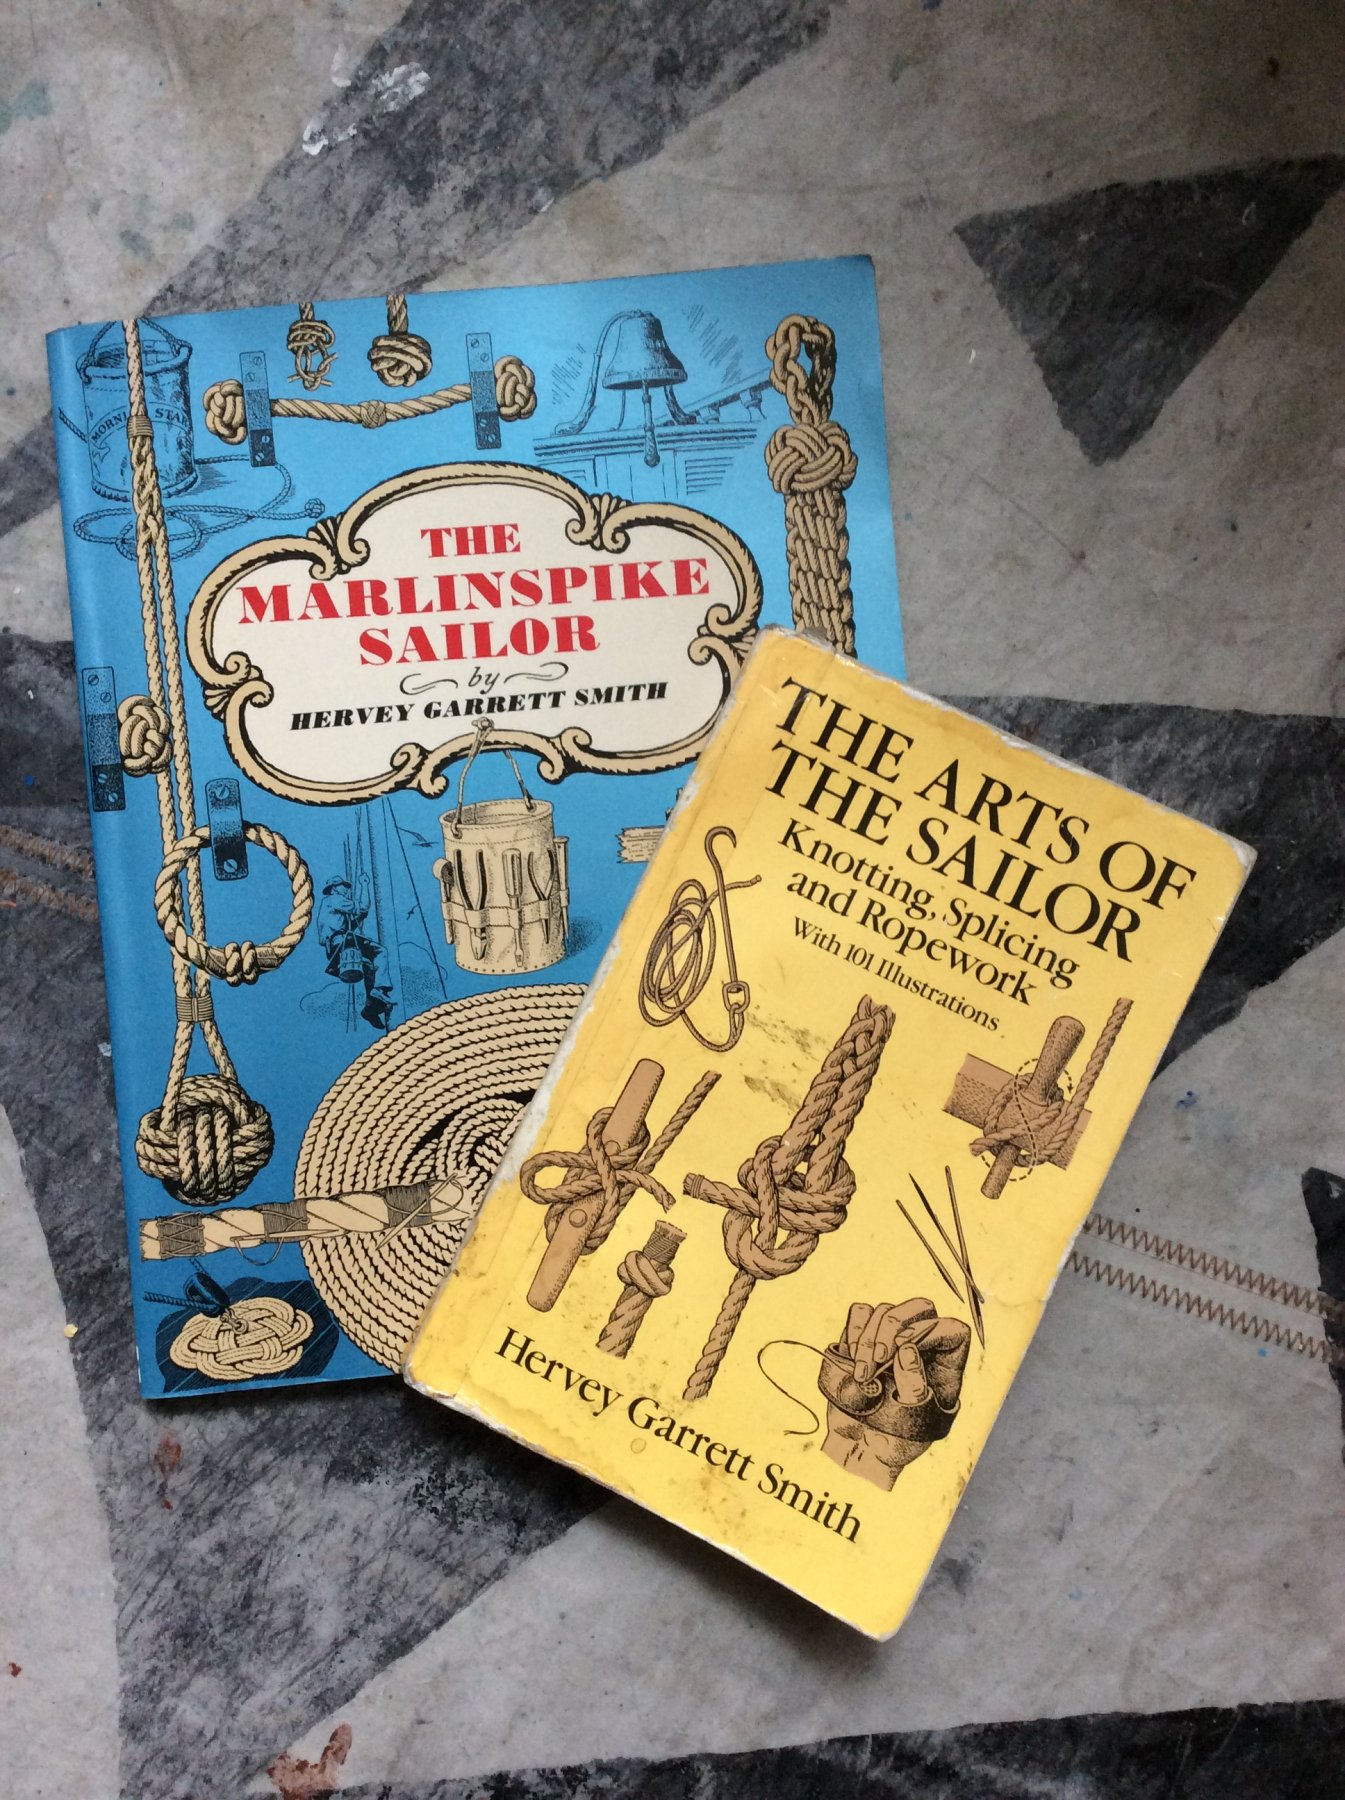
It’s hard to find good books on the subject of Marlinspike Seamanship but there are two classics and a modern contender: first and best is The Ashley Book of Knots. By Clifford Ashley and comprehensive on the subject of knots and cordage. Kinda pricy. But worth every penny! then there are Hervey Garrett Smiths two books, which are realy the same book but one has additional material, The Art of the Sailor and The Marlinsspike Sailor. These books have the best illustrations of any knot book and cover several rope related craft projects that are fun and easy to build make or tie. Very inexpensive and if you are stropping blocks for fun, you’re going to LOVE this book. Finaly Brion Toss’s Complete Riggers Apprentice. Excellent text and illustrations covers every marlinspike concern any yacht owner could need to know about. This book will have sailing related material you won’t NEED to know but I include it because it’s got so much worthwhile info in it and a very good knot tying tutorial for the basic sailors knots. Here’s Brion Toss taking you through the steps of tying the Round Seizing: Here’s Clifford Ashley describing how to use a Spanish Windlass to close the neck on a rope strop. Here’s Garrett Smith describing the use of the Marlinspike as a lever for putting the turns of a Round Seizing on supper tight.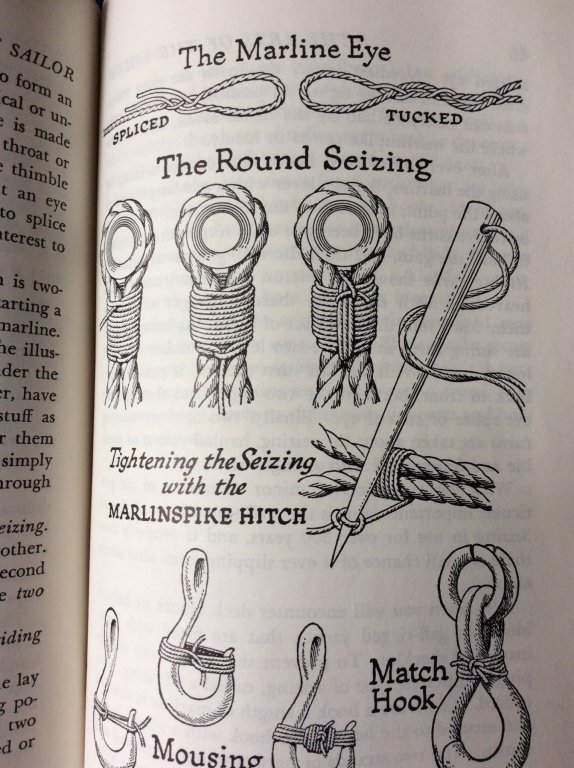
-
Congratulations! I missed the entire log and only noticed it when it made its way to the front page Completed Models Gallery. Arriving late to the party, but I have to say that this is one of the best build logs I’ve seen AND it’s one of the most well built and presented models I’ve seen too. It’s flawless. Every one of your photos is well shot cropped and lit. All the details of your model appeal to my sense of “how a model aught to look”. I love the subject, I love the execution, I love the presentation, and I’m very impressed with the finished results. There can’t be many better Rattlesnakes out there, maybe none?
- 481 replies
-
- 3
-
-
- rattlesnake
- model shipways
- (and 1 more)
-
Rope-Stropped Blocks for Boom Vang
JerseyCity Frankie replied to Julie Mo's topic in Masting, rigging and sails
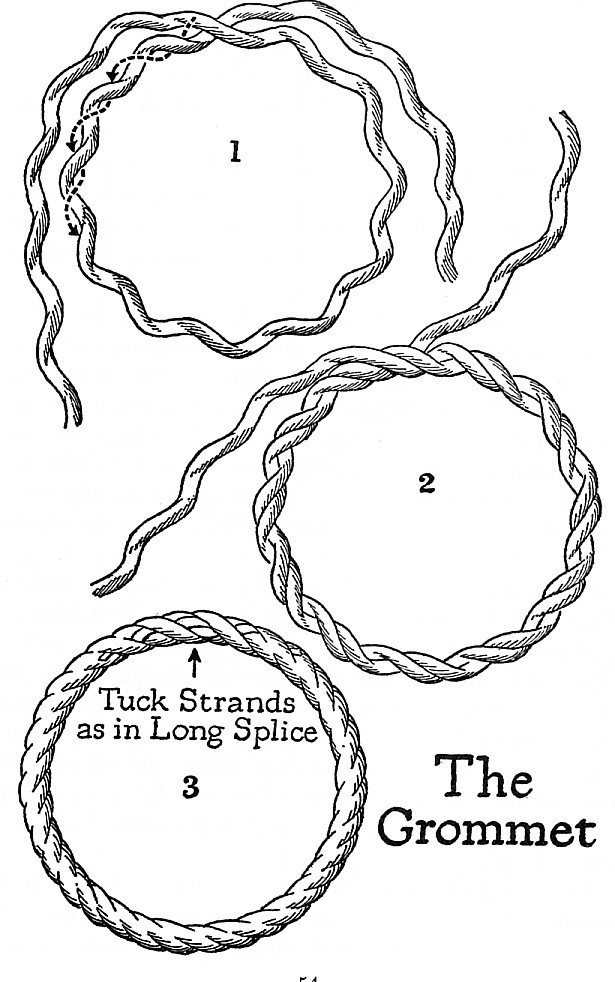
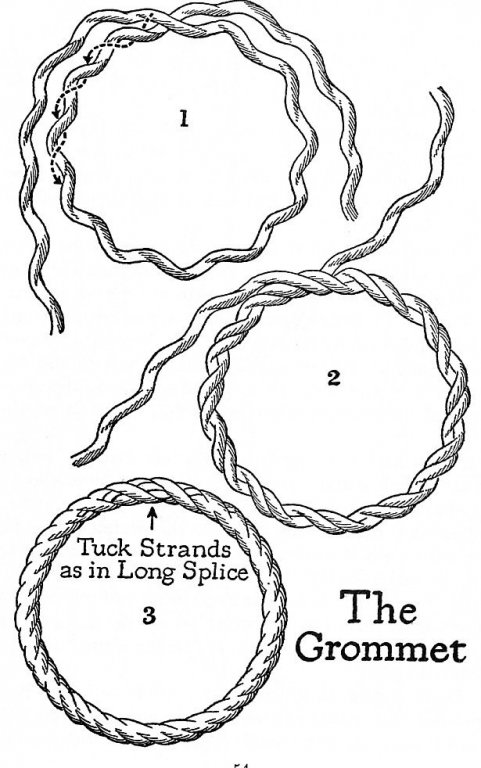
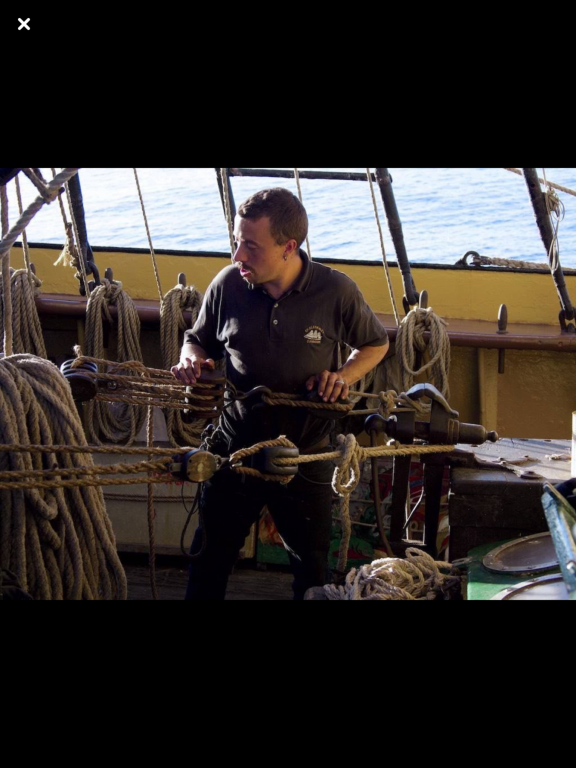
Rope stropping blocks, for functioning rigging, is difficult. The difficulty is in having the strop as tight as possible around the block, so tight that no force encountered on the ship could ever cause the block to slip out of the strop. It’s very easy to put a rope grommet over a block and seize in some eyes, but it’s difficult to do this in a way that keeps the strop as tight as it needs to be. the Strop is a circle made of rope. Most often it is a Rope Grommet (which is one strand of rope laid up upon itself three times) but it can also be a length of rope that has its two ends Short Spliced together. here are some photos I collected of the process: The first photo shows a double block with the strop around it and a Spanish Windlass made of two belaying pins and an iron rod being used to close the neck of the seized eye. The blue and white thin strapping through the sheaves and in the Spanish Windlass is Dyneema, a nearly indestructible man made material. It’s holding the block in place. The part of the strop out of frame of the photo at the top will have a block and tackle on it pulling the strop as tightly as possible. The Spanish Windlass closes the eye and at the point this photo was taken they have not yet put a seizing on at the neck of the eye. here is a nice diagram showing a single strand being laid up into a Grommet: Here is a guy on Picton Castle with two blocks being stropped. Note all the tackle in use to pull the Grommets as tight as possible, rest assured he has made that line as tight as humanly possible, the bench is bolted to the deck. His left hand is on one block and the other is between the camera and his crotch. At this point he’s ready to seize the eyes. He will construct a Spanish Windlass as shown in the first photo above, to close the eye prior to seizing the neck. The tackle holding the strop tight is not removed, the seizing of the eye happens with the strop as tight as possible. So it is VERY DIFFICULT to close the eye, and you could not close it without the Spanish Windlass. This photo makes it clear that the diameter of the Grommet must be carefully planned ahead of time to make sure the proportions of the eye and block are correct. Too small and the eye is too small, too large and the neck is long and you risk the block wiggling out eventually in the future.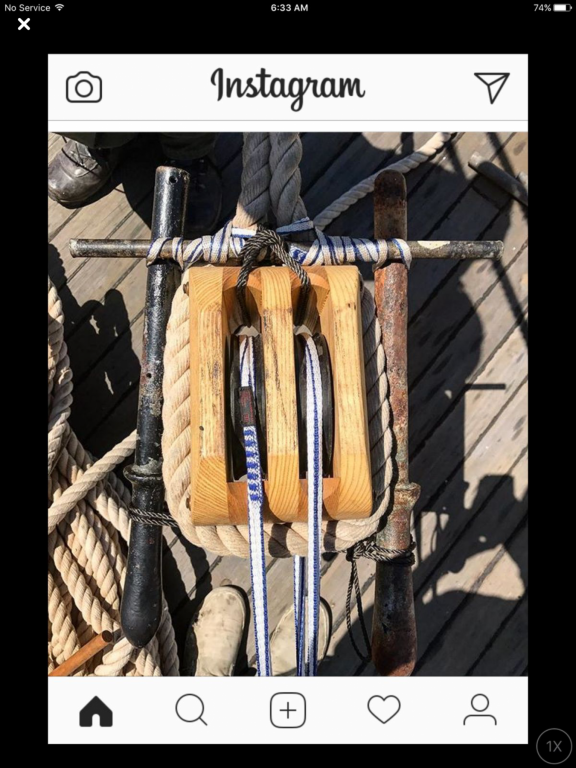
-
Rope-Stropped Blocks for Boom Vang
JerseyCity Frankie replied to Julie Mo's topic in Masting, rigging and sails
I can’t let this go by without saying that this guys book is FULL of ridiculous rigging innacuracies and this example is probably the worst one. NOBODY is ever going to rig a purchase as this illustration indicates. As in NEVER, it simply doesn’t exist. The second block and tackle hanging under the existing block and tackle is preposterous. I put this very image on a Facebook rigging page , everyone had a laugh, and then Brion Toss weighed in on it, then put it on his own website. Honestly: this guys book is a trainwreck. Here’s Brion Toss commenting on it: http://briontoss.com/index.php/2018/03/14/extravagant-purchase/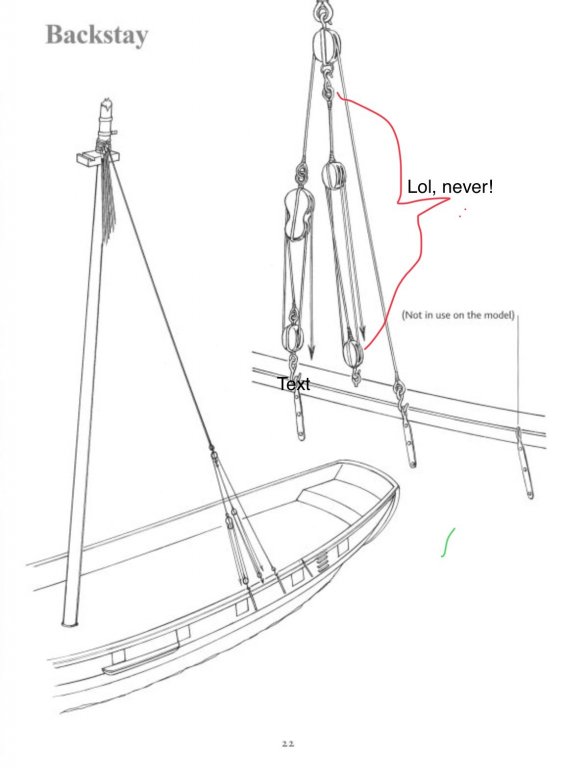
-
Cutting the rabbit FIRST is CLEARLY the best method. Like an imbecile, I followed the instructions and glued the keel,on THEN laboriously cut the rabbit. I can’t fathom why the kit instructions ask you to do it the most difficult way?
-
Acrylic paint vs acrylic ink
JerseyCity Frankie replied to DelF's topic in Masting, rigging and sails
Never heard of Acrylic Ink. But I treat rigging with thinned Acrylic Paint all the time. My technique is to string up long lengths of line from two hooks as far apart as I can manage so I can do long swaths all at once. First I soak the line so it’s saturated with water, this allows the color to penetrate. Then I mix up my color, with a lot of water, on a palate prior to scooping it up with a palette knife and plopping it on a square of wet rag. This rag I fold in half over the line I’ve strung up and I walk along the line, scrubbing the rag back and forth onto the line, working the color in. When you reach the end of the line, get a fresh rag, this time saturated with only water, and repeat the rubbing process. This second treatment thins the paint you’ve just applied and it is now that you can remove color if to your eye the results are too strong. Rubbing hard enough with the second rag, you can almost reverse the process and get back to a clean line, depending on how hard you squeeze and how much water you use. So in this way you can control the appearance. The line dries quite rapidly so do not pause between steps. Once the acrylic has dried you will never remove it. With this technique you can make white line solid black,or, you can lightly stain a pristine line to have a color more in keeping with hemp or Manila. -
Tying Off Standing Rigging.
JerseyCity Frankie replied to Rory Manton's topic in Masting, rigging and sails
If you make your own eyebolts by twisting wire around a cylindrical object you get the benefit of being able to determine the size of the eyebolt ( most kit-supplied eyebolts are very large) AND the shank of your eyebolt, being made of twisted wire, has more texture and will grip the wood better than the typical nickel or brass plated kit supplied eyebolts which have a very slick nonpourous surface that is difficult to glue. -
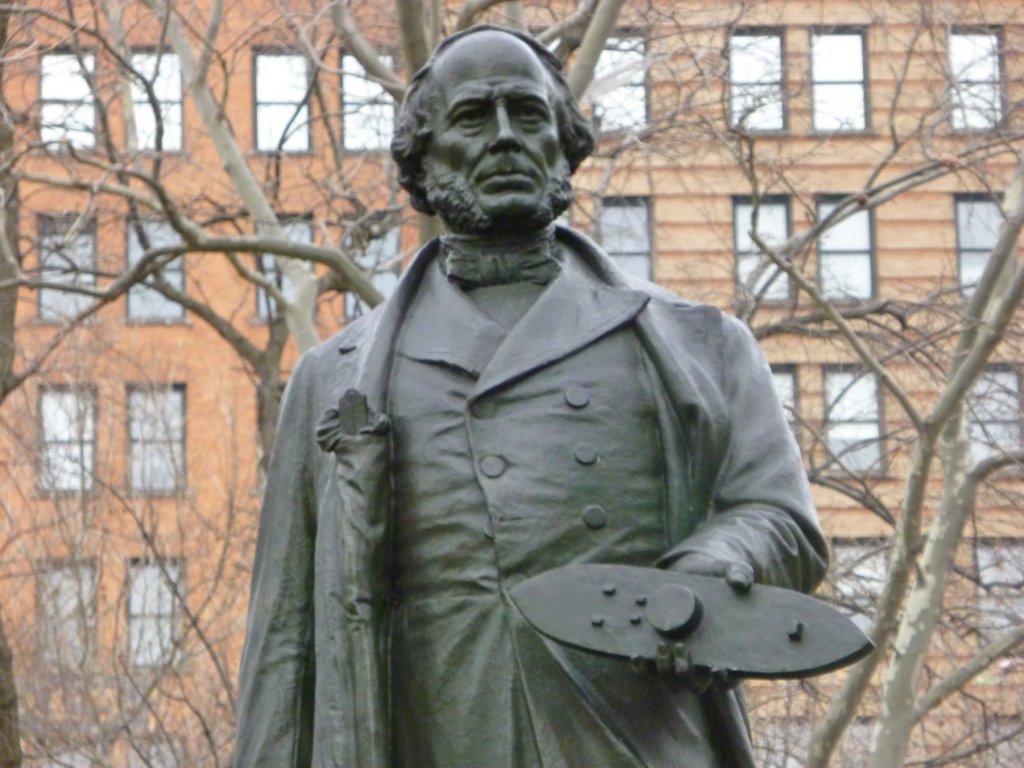
There’s a nice bronze memorial sculpture of Ericsson in New York City’s Battery Park in which he’s depicted holding a scale model of the Monitor. Ericsson lived in Hoboken NJ for a while, just North of where I am in Jersey City. -just a few miles away from this location on the NJ side of the Hudson River.

-
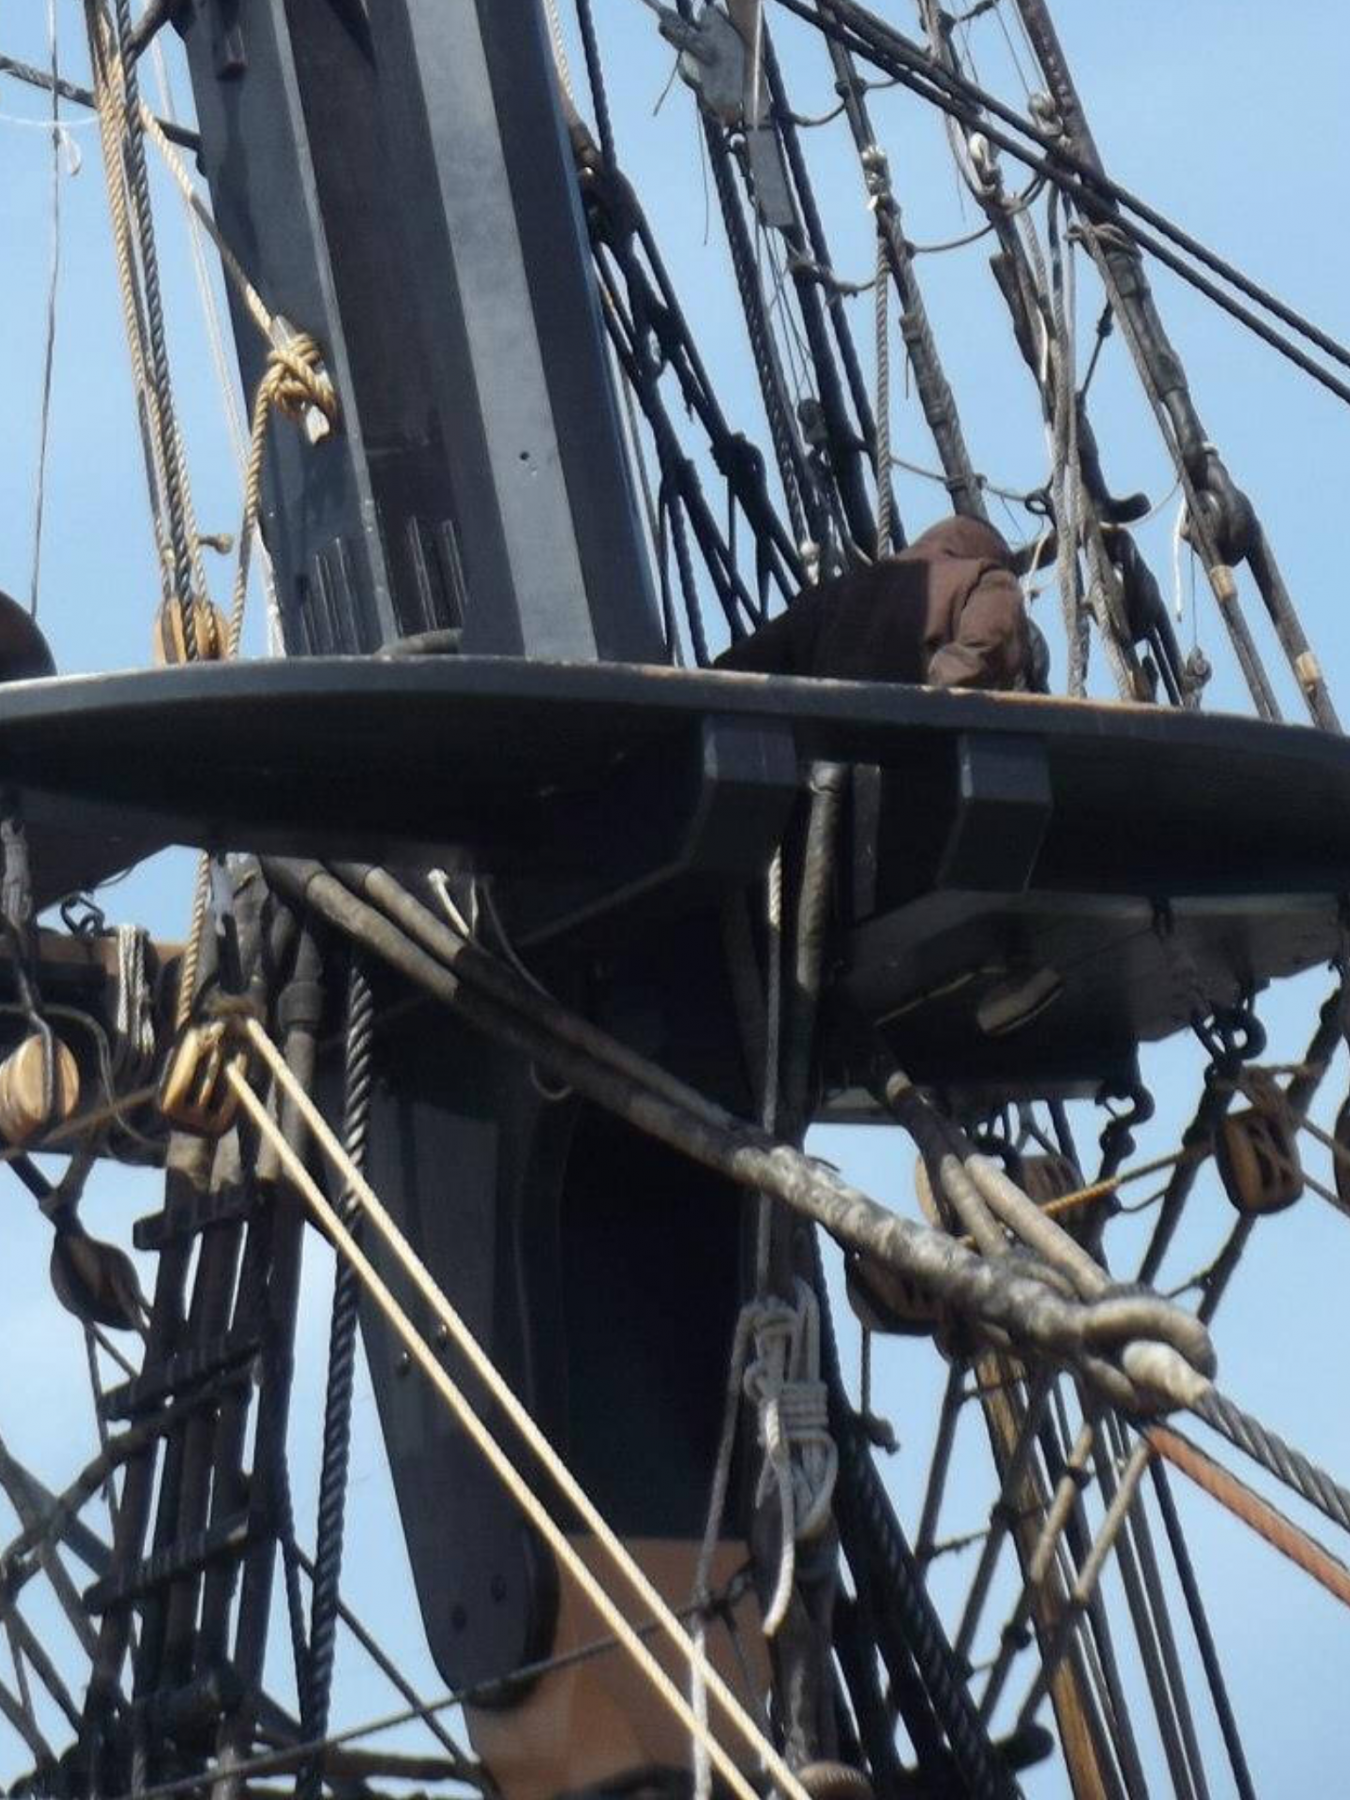
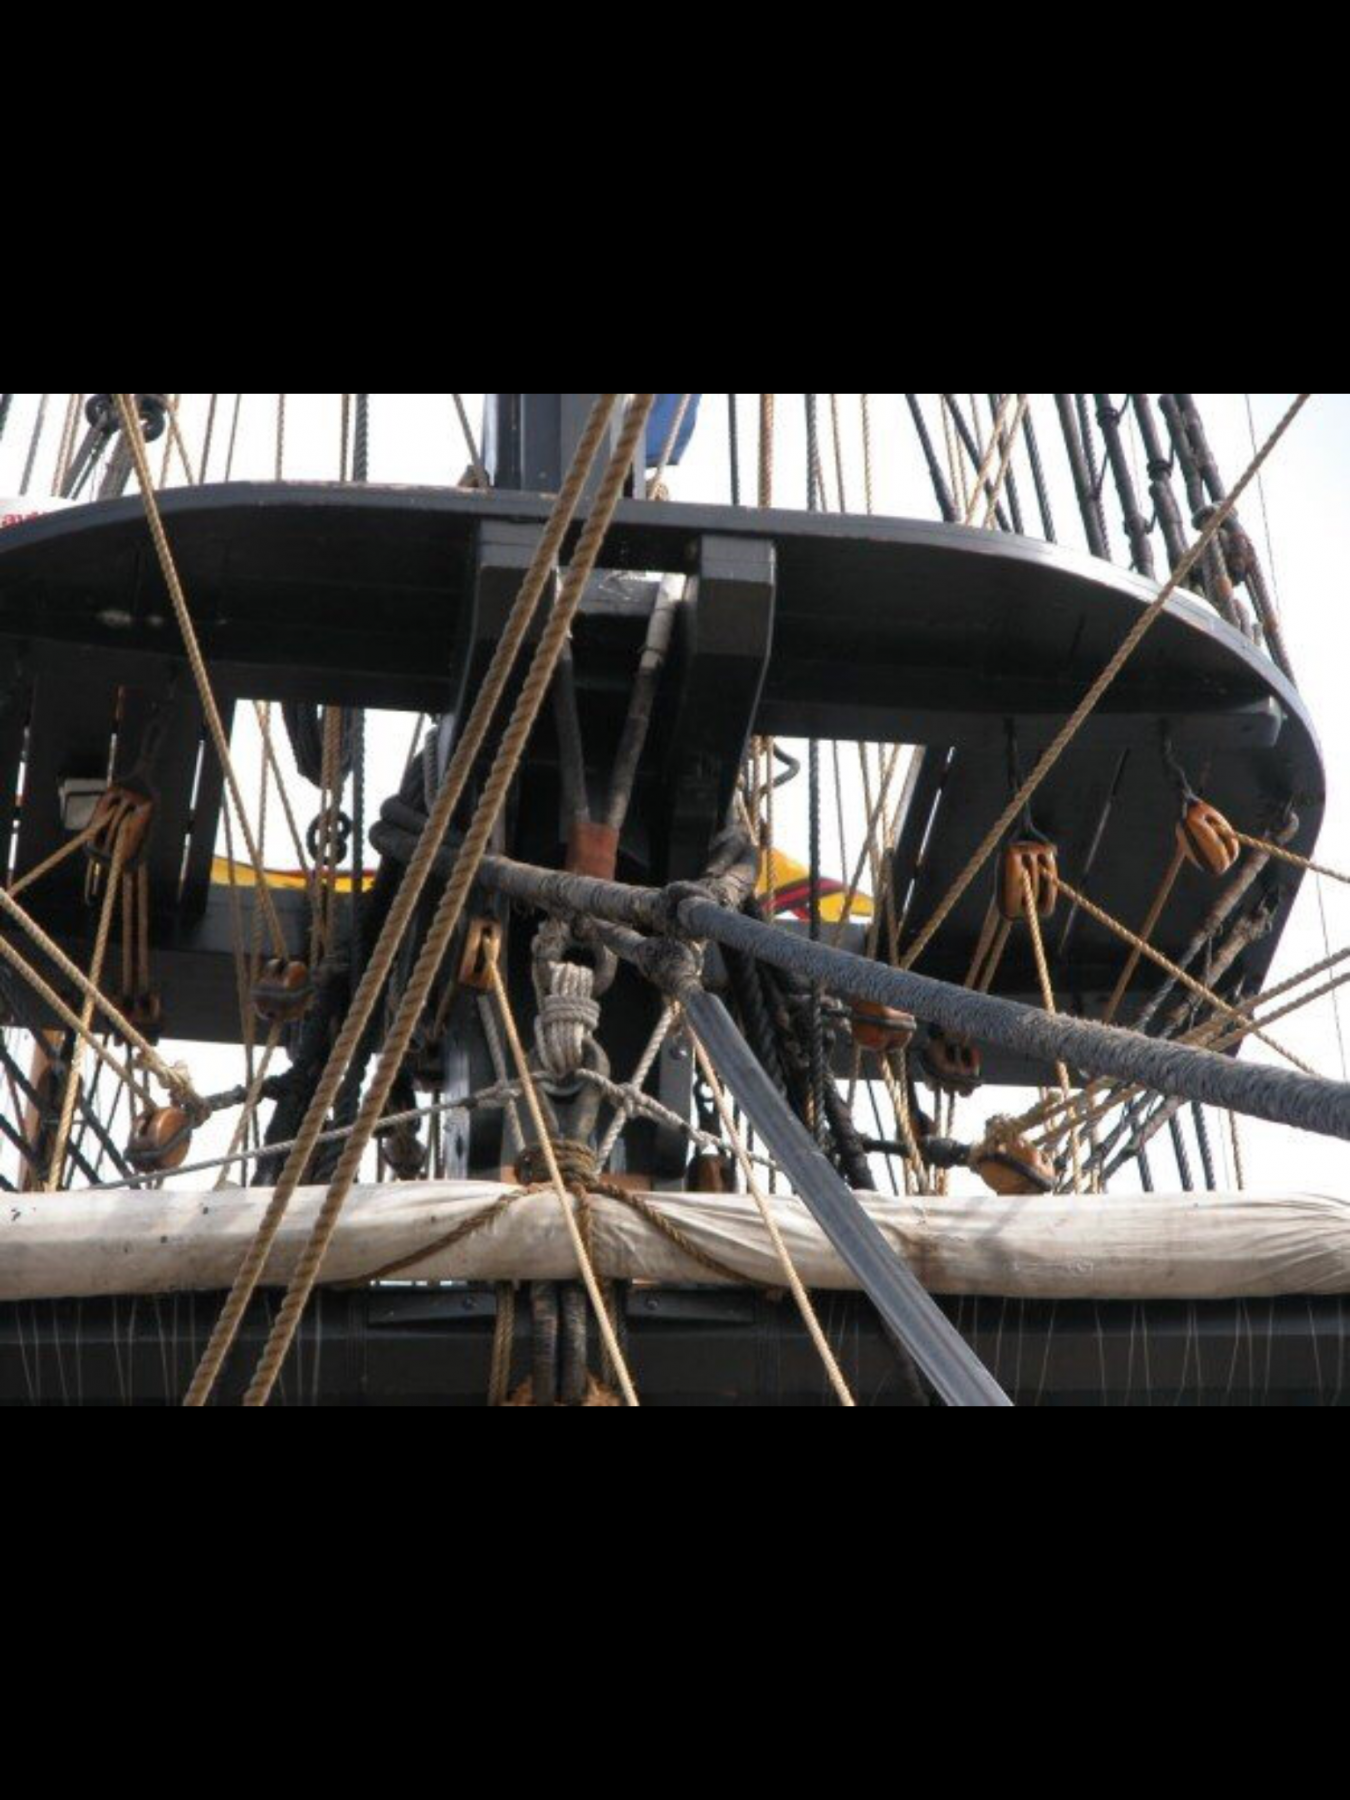
A side effect of a dramatic Mast Rake on a square rig is that the location of the Sling of the course yard needs to move farther forward in order to avoid having the yard laying directly on the Mast. The hole in the top to accommodate the Sling on the Brig Niagara, for instance, is way up forward near the forward rim of the top, far enough out so that the yard suspended below is free and clear of the Mast.


-
This websites got tons of Niagara photos, all sharp and clear: https://www.fourmilephotography.com/FlagshipNiagara
-
You are going to find this guys photography website helpful, I think: https://www.fourmilephotography.com/FlagshipNiagara ive been collecting photos of Niagara for assisting my build and one photo I liked had a watermark from his website, when I went to check it out it felt like I’d struck gold.
-
Some questions about shrouds
JerseyCity Frankie replied to Vinnie's topic in Masting, rigging and sails
The Art of Rigging, by George Biddlecombe, is an easily and inexpensively obtained book covering the shrouds and much else. I would not be surprised if you could get an eBay copy for under $5. Including shipping. Its got a comprehensive glossary and covers every important bit of rigging in excruciating detail. Not many illustrations though. Another good book to have is Wolfram Zu Mondfelds Historic Ship Models. Again, very inexpensiv. Mondfelds book has lots of illustrations on every page and covers broad swaths of gear rigging and techniques from all ship eras. You won’t regret owning either book.