JerseyCity Frankie
-
Posts
1,338 -
Joined
-
Last visited
Content Type
Profiles
Forums
Gallery
Events
Everything posted by JerseyCity Frankie
-
Putting a loop on block ends
JerseyCity Frankie replied to Antonio Vasquez's topic in Masting, rigging and sails
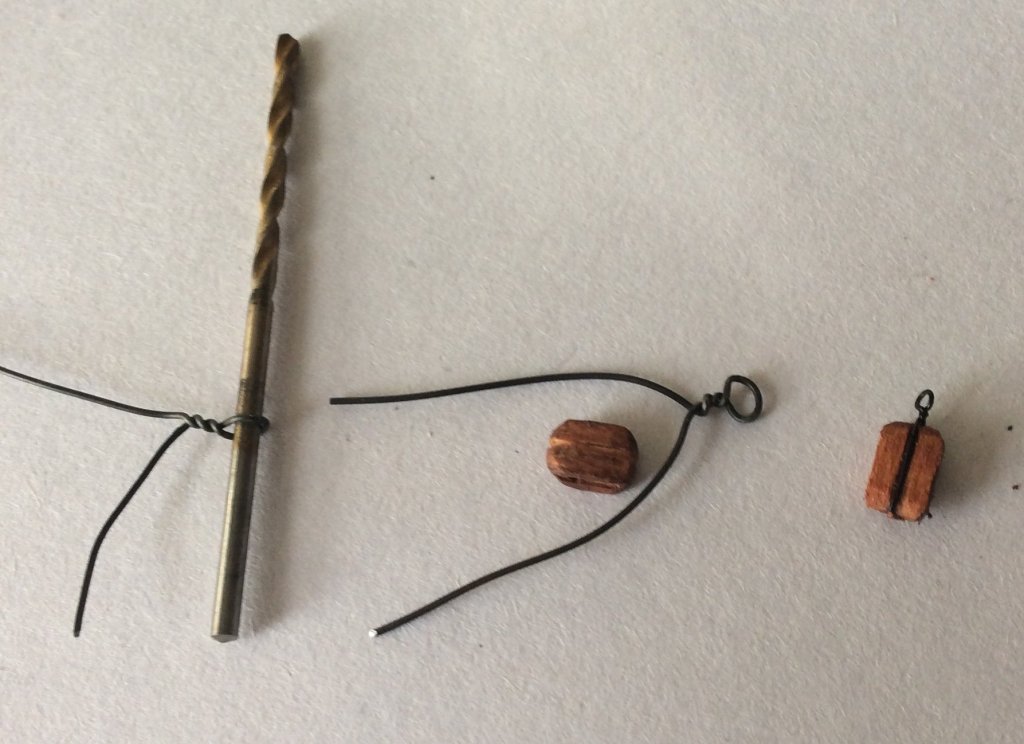
Here’s some photos illustrating wire stropping used to mimic rope stropping. In the lower left of one shot are two thread stropped blocks, which took a considerably longer time to produce but would be considered more “literally” “authentic”, meaning they’re more of a true miniaturization of a real rope stropped block since their strops are made of fiber line. But the wire stropped blocks look very good in comparison despite “faking” the material used in a strop. The other photo illustrates how rediculously easy it is to form a loop in wire. I’m guessing you can turn out three or four wire stropped blocks in the time it takes to strop one fiber line stropped block.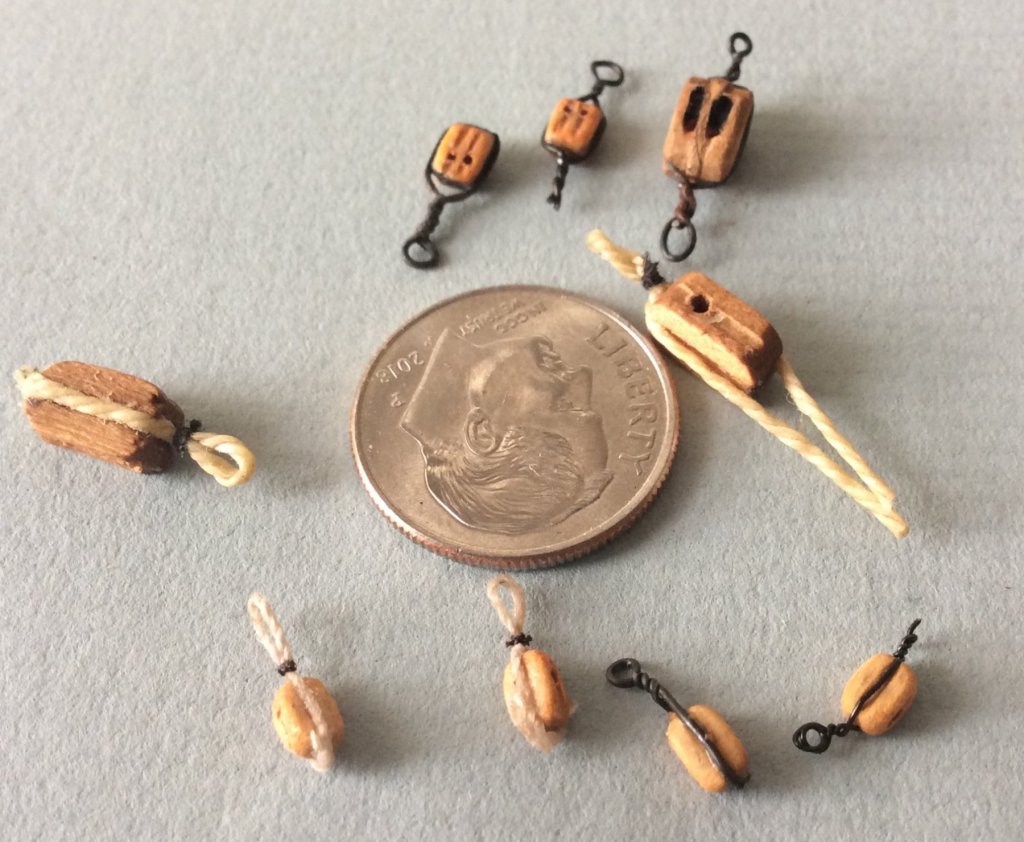
-
You can use the search feature. Also you can post bottled ships to the scratchbuilt section using the suffix “bottle”.
-
I’m in Jersey City across the river, I build ships in bottles too.
-
Putting a loop on block ends
JerseyCity Frankie replied to Antonio Vasquez's topic in Masting, rigging and sails
On smaller models, those with very small blocks, my advice is to use wire to Strop the blocks, not thread. Forming an eye in wire by twisting is very easy in comparison to trying to tie loop knots in thread and few will be able to notice it is wire not thread. Black Bead Stringing Wire can be purchased online or at craft stores. -
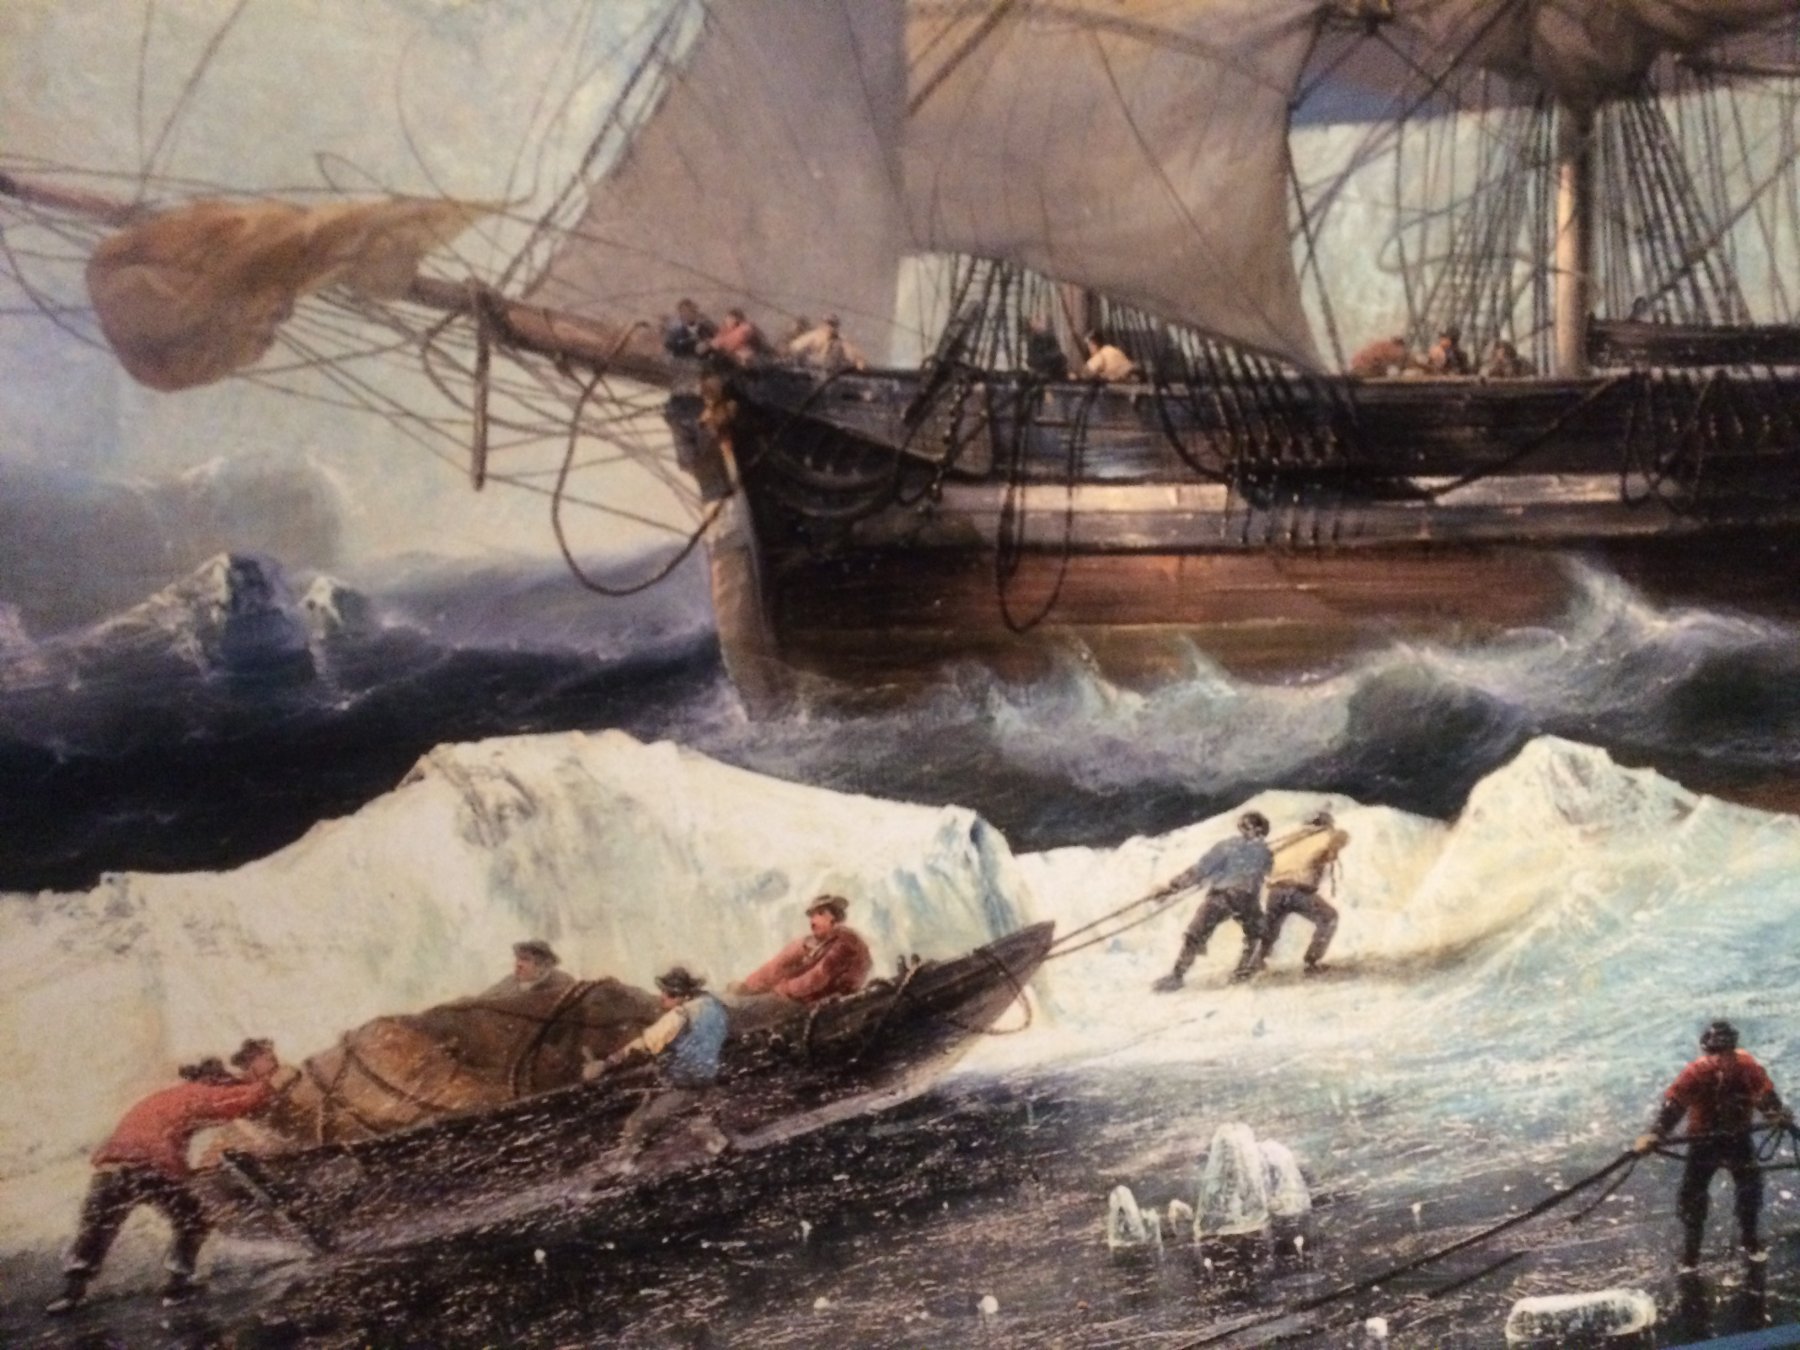
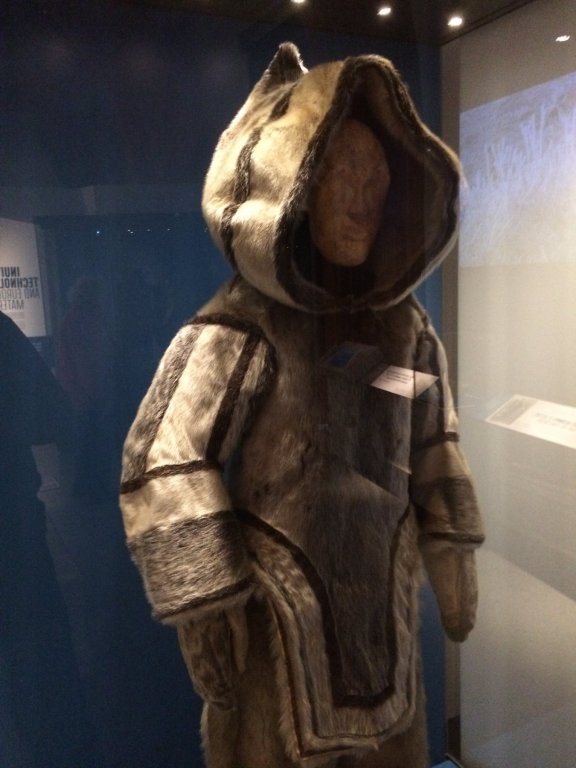
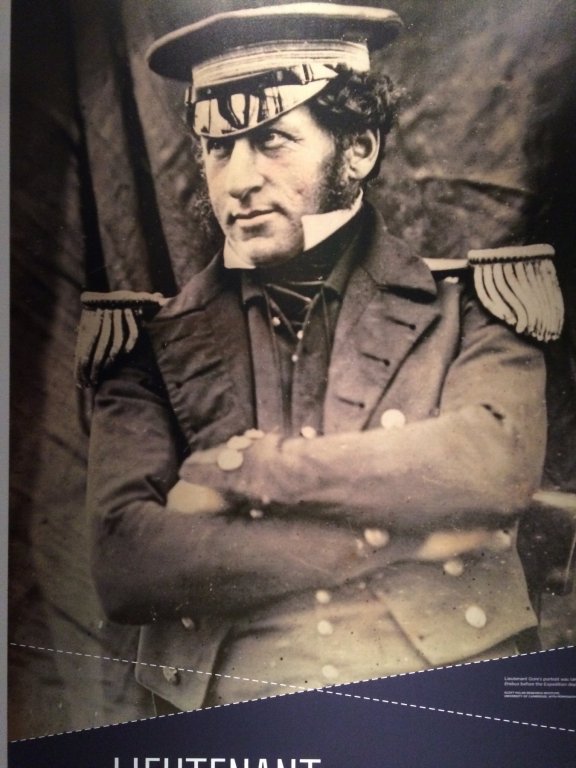
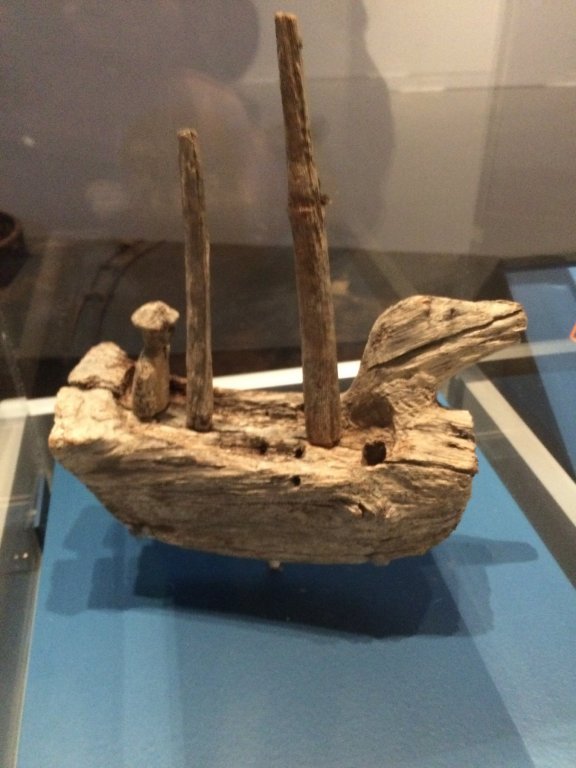
I just returned from the Mystic Seaport Museum and they’ve got a great Franklin Expedition exhibit that’s full of artifacts and this nice model.


-
Another way to make shackles
JerseyCity Frankie replied to vaddoc's topic in Metal Work, Soldering and Metal Fittings
Solder is an alternative material. It’s so soft you can crimp the ends with pliers. The downside is it’s not strong and can easily be distorted. On the plus side it’s color is a near match for a galvanized shackle. -
Footropes on Spritsail Yard
JerseyCity Frankie replied to ah100m's topic in Masting, rigging and sails
Two adjacent footropes on a tiny spar? Maybe not for a narrow Jibboom on a small vessel. But here’s a shot I just saw today on social media, taken on Bluenose II, that illustrates the need for port and Starboard footropes in most circumstances on headrigs. Note where the crewpersons feet are located then imagine someone on the opposite side trying to use the footrope she’s using. Possible maybe but extreamly uncomfortable.
-
It’s tough to paint accurate sharp tiny little triangles on small scale ship models. And yellow is always a difficult and temperamental color when you try to cover a darker color, it’s never opaque enough. If you try to use paint my advice is to paint the yellow and green (or other brighter colors) White first, then apply the other colors over the white after its dry. Looking at an existing model photo I found online I can see your problem! That’s going to be a chore. If it was me I would skip using paint altogether and use cut paper instead. But if you’re dead set on using paint I suggest you paint the decorative area entirely in yellow, then mask off with a lot of triangular pieces of tape, then paint the green.
-
Footropes on Spritsail Yard
JerseyCity Frankie replied to ah100m's topic in Masting, rigging and sails
constitution has footropes on her spritsail yard today. Brig Niagara does not. footropes on the Jibboom or Bowsprit need to be in pairs since the crew will need access to both the port and Starboard sides of the spars during any kind of maintenance. And when furling the headsails, after the hailyards are let go the canvas will spill to the leeward side of the headrig and that big bundle of canvas will blanket the footropes on the side it comes down on so you need port and Starboard footropes to allow the crew to get out there and furl while standing on the windward footropes. -
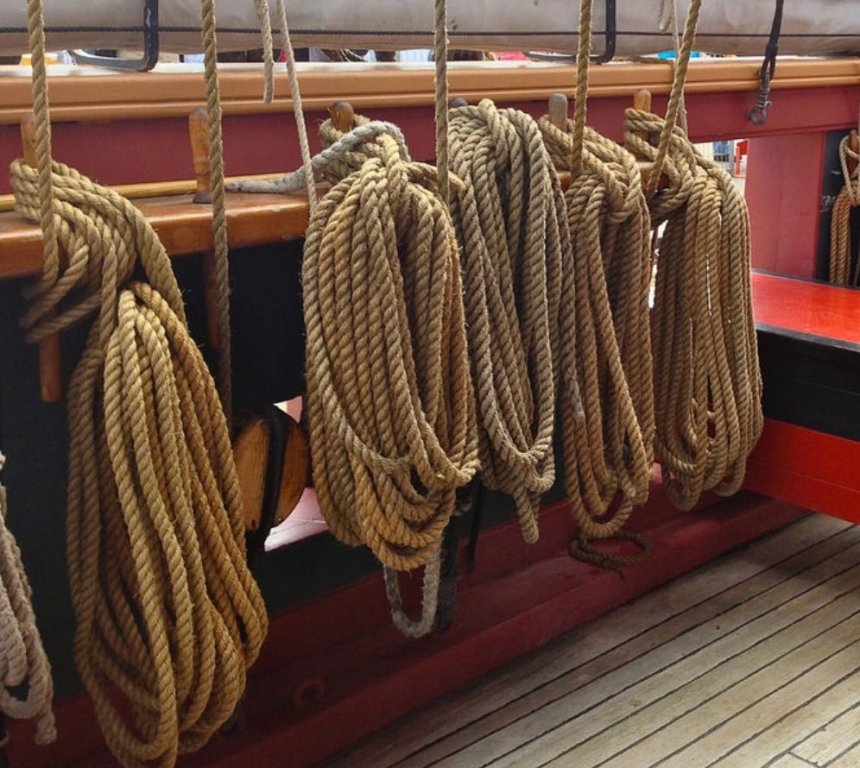
I too have been vexed by trying to map out these extra eyebolts. Many of them are for running rigging and are for fixing the lower blocks and standing parts in tackle arrangements. You can see the blocks fixed to the edge of the deck in many photos of the real ship. Annoyingly, some of these blocks are hidden behind coils from the pinrails.


-
when sails not used
JerseyCity Frankie replied to scottcchambers's topic in Masting, rigging and sails
If you’re wondering about the Braces, they are ALL going to be fairly tight. In port the crew want the ship to give a neat appearance and will put time and effort into squaring the yards as close to 90 degrees as possible. If any braces anywhere in the rig are slack the yards they’re on will swing. In one of the photos above, the nearer of two ships has her yards braced up hard so that the other vessel can raft up on her, but all the Braces will still be tight for the same reason:if any are loose the yards will swing. Underway with sails set, the leeward Braces will be tighter than the windward ones, to keep the sail trim. -
Regarding this common depiction of the hauling end of the tackle wrapped around and around the falls of the tackle: I don’t believe this represents real world use. This is my opinion based on my own experience-not with cannon but with tackle on ships in general. This laborious and unnecessary technique of tightly wrapping is bad for the rope and too time consuming to do and undo. Sure I could see a few frapping tuns used around the fall, which would keep the fall from fouling on stuff, but the entire line? No. Extra length would be gasket coiled, as extra line not intended for use for extended periods always is aboard ship. Im certain that the photos depicting this practice are all taken on museum ships which are open to the public. In the context of a museum display which can be accessed by the public it would make sense to isolate the entire length of the tackle falls under turns of the hauling part of the line as this prevents kids or miscreants from tugging on or otherwise misusing the museum artifact. Believe me: if there was a free hauling part available on any tackle anywhere on any museum ship, hundreds of people each day would be doing their best to haul on it! But on a real ship the tackle won’t need that kind of insurance represented by the elaborate wrapping.
-
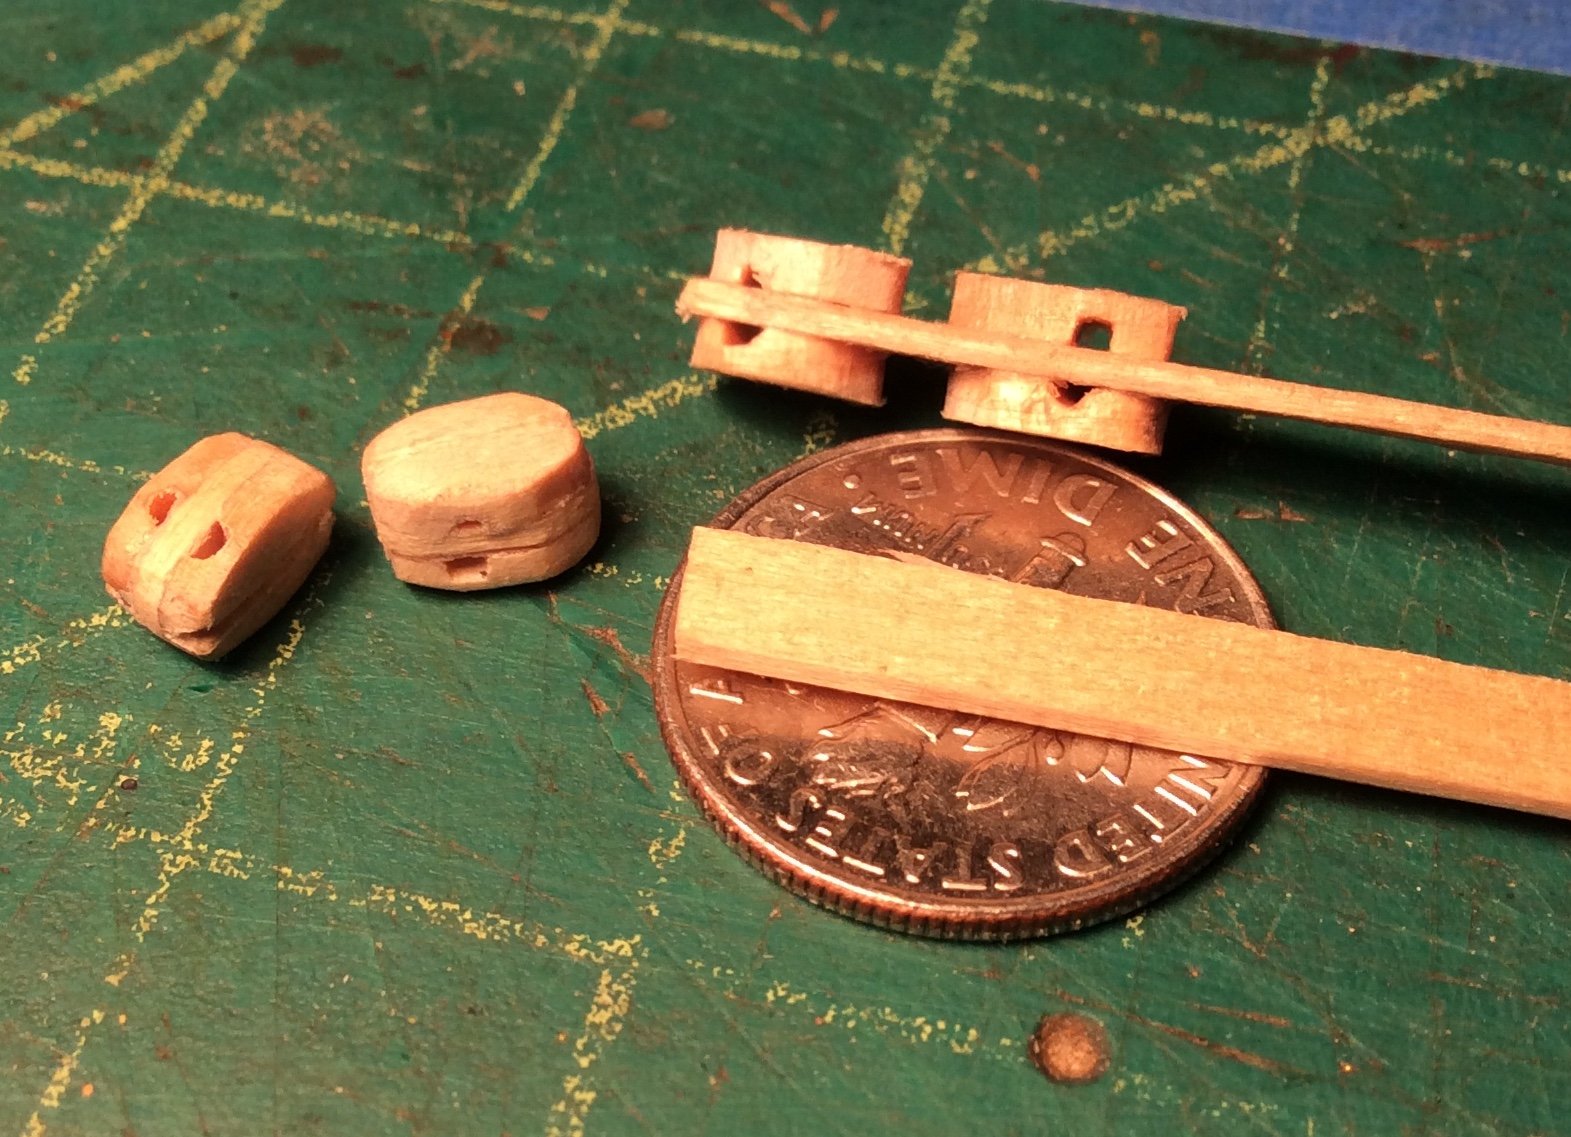
I wasn’t happy with the kit-supplied double blocks for my Model Shipways Niagara model. The kit supplies only two sizes of double blocks and apparently this is ok for most of the rig but the big sheet blocks on the main required bigger than the kit allowed for. There would be only two needed so I made them by laminating stripwood.

-
Error in kit and asking for advise
JerseyCity Frankie replied to Ulises Victoria's topic in Masting, rigging and sails
who are the people drawing up these kit plans, and how did they get hired? Again and again we see kit plans that are tragically flawed or contain inaccuracies or unworkable arrangements of essential gear, as in this example. Some of these kits have been around for a very long time and there’s been opportunities, no doubt, to correct the plans. One would think that making adjustments to the plans would be the easiest and least expensive improvement for a manufacturer to implement mid-production run on a kit? -
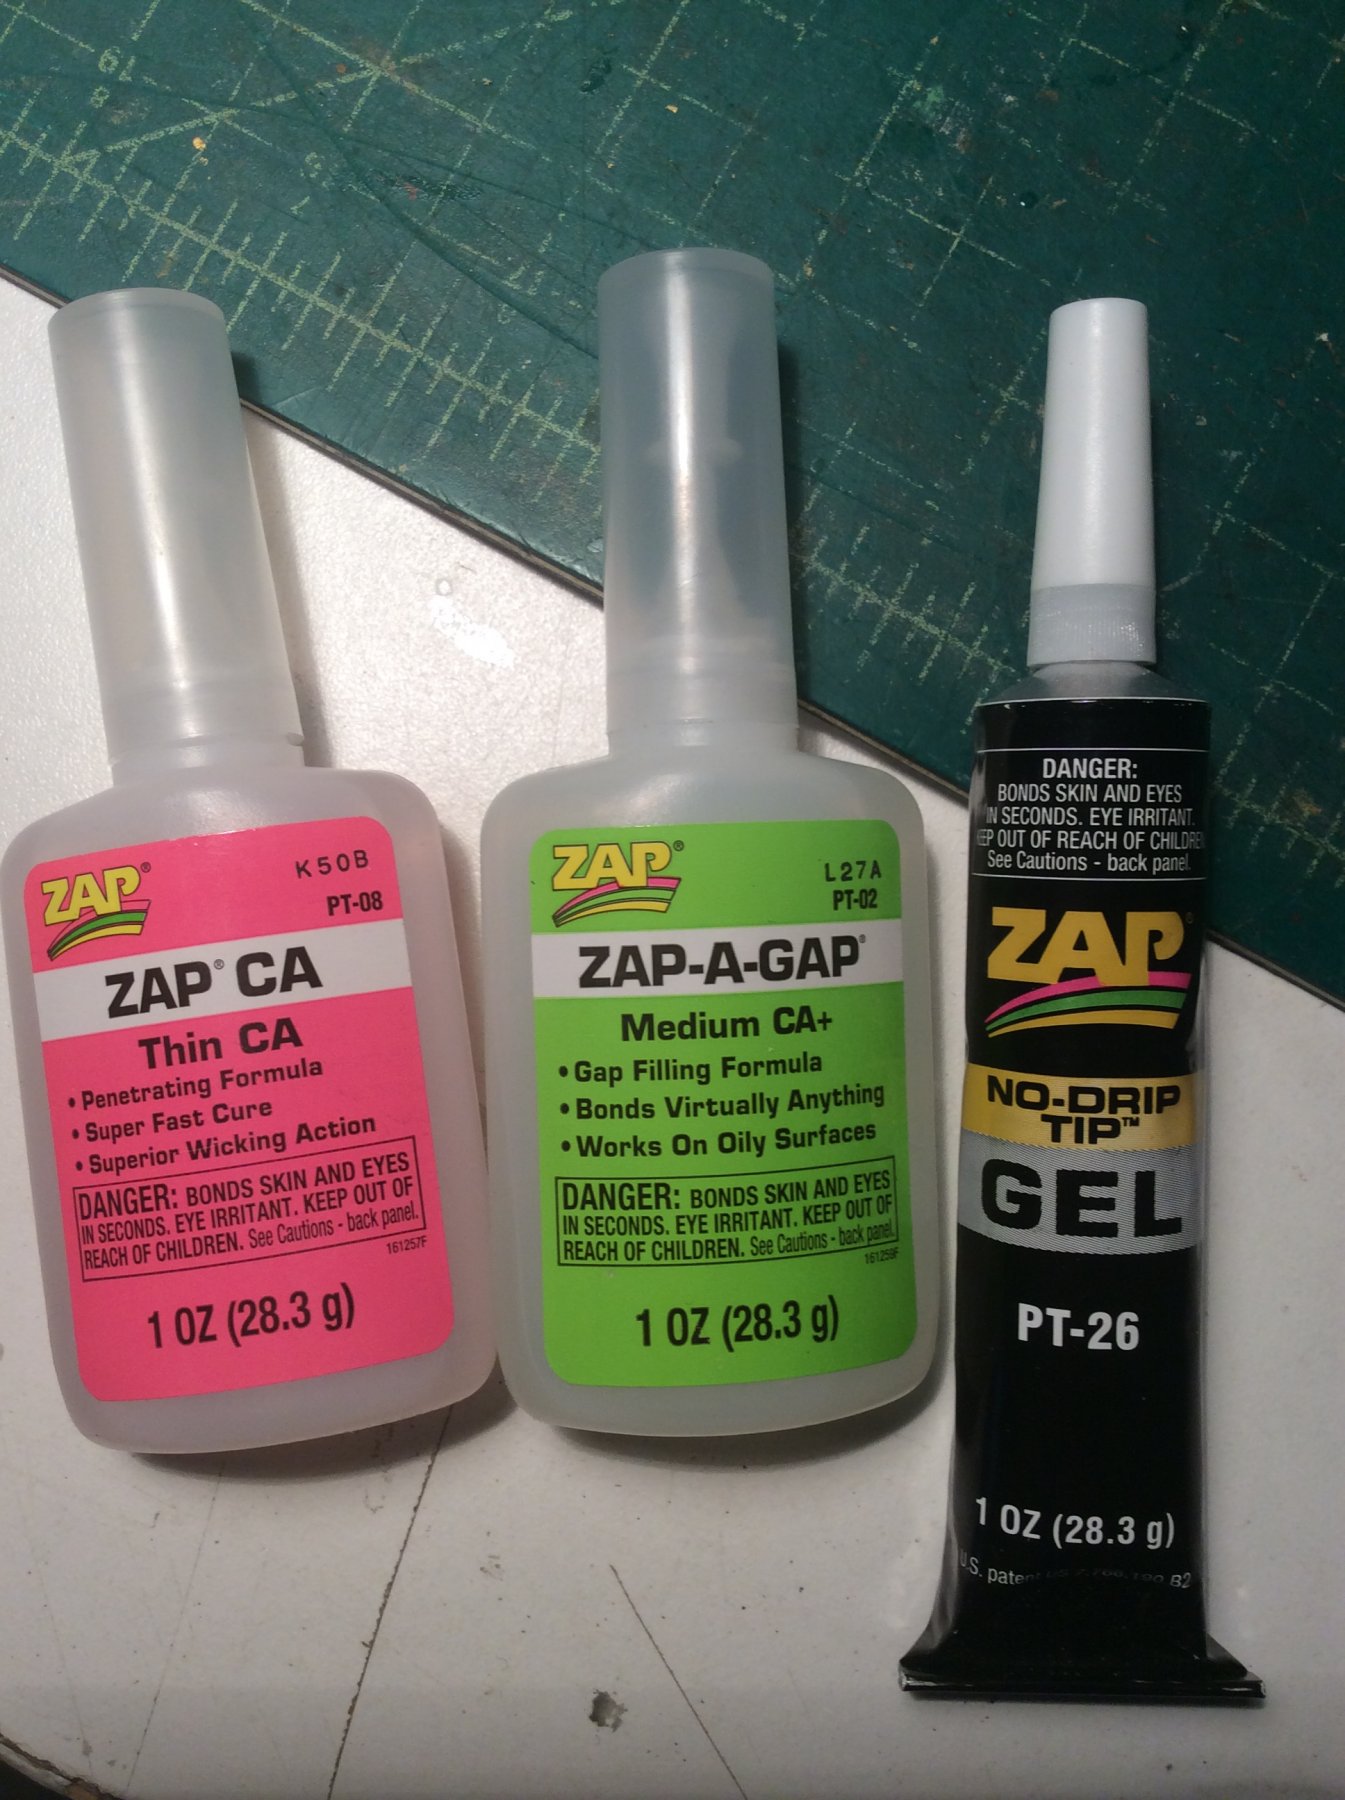
CA adhesive, which one do you use?
JerseyCity Frankie replied to Modeler12's topic in Masting, rigging and sails
Went to buy the Zap brand “medium” and “thin” CA this week at the Art Suply store and this new product “gel” was there in a squeeze tube. Have not yet given it a try.
-
Boom rigging question
JerseyCity Frankie replied to Antonio Vasquez's topic in Masting, rigging and sails
If the kit instructions don’t make it clear, lash the studingsail booms last. Everything else on the yard will be under the studingsail booms so why make it hard on yourself? -
We’re you cosplaying an admiral from 1812?
-
The ship in the color photo is the El Galion, a modern vessel with significant authenticity issues, in my opinion. I would caution anyone to second guess anything you find on that ship.
-
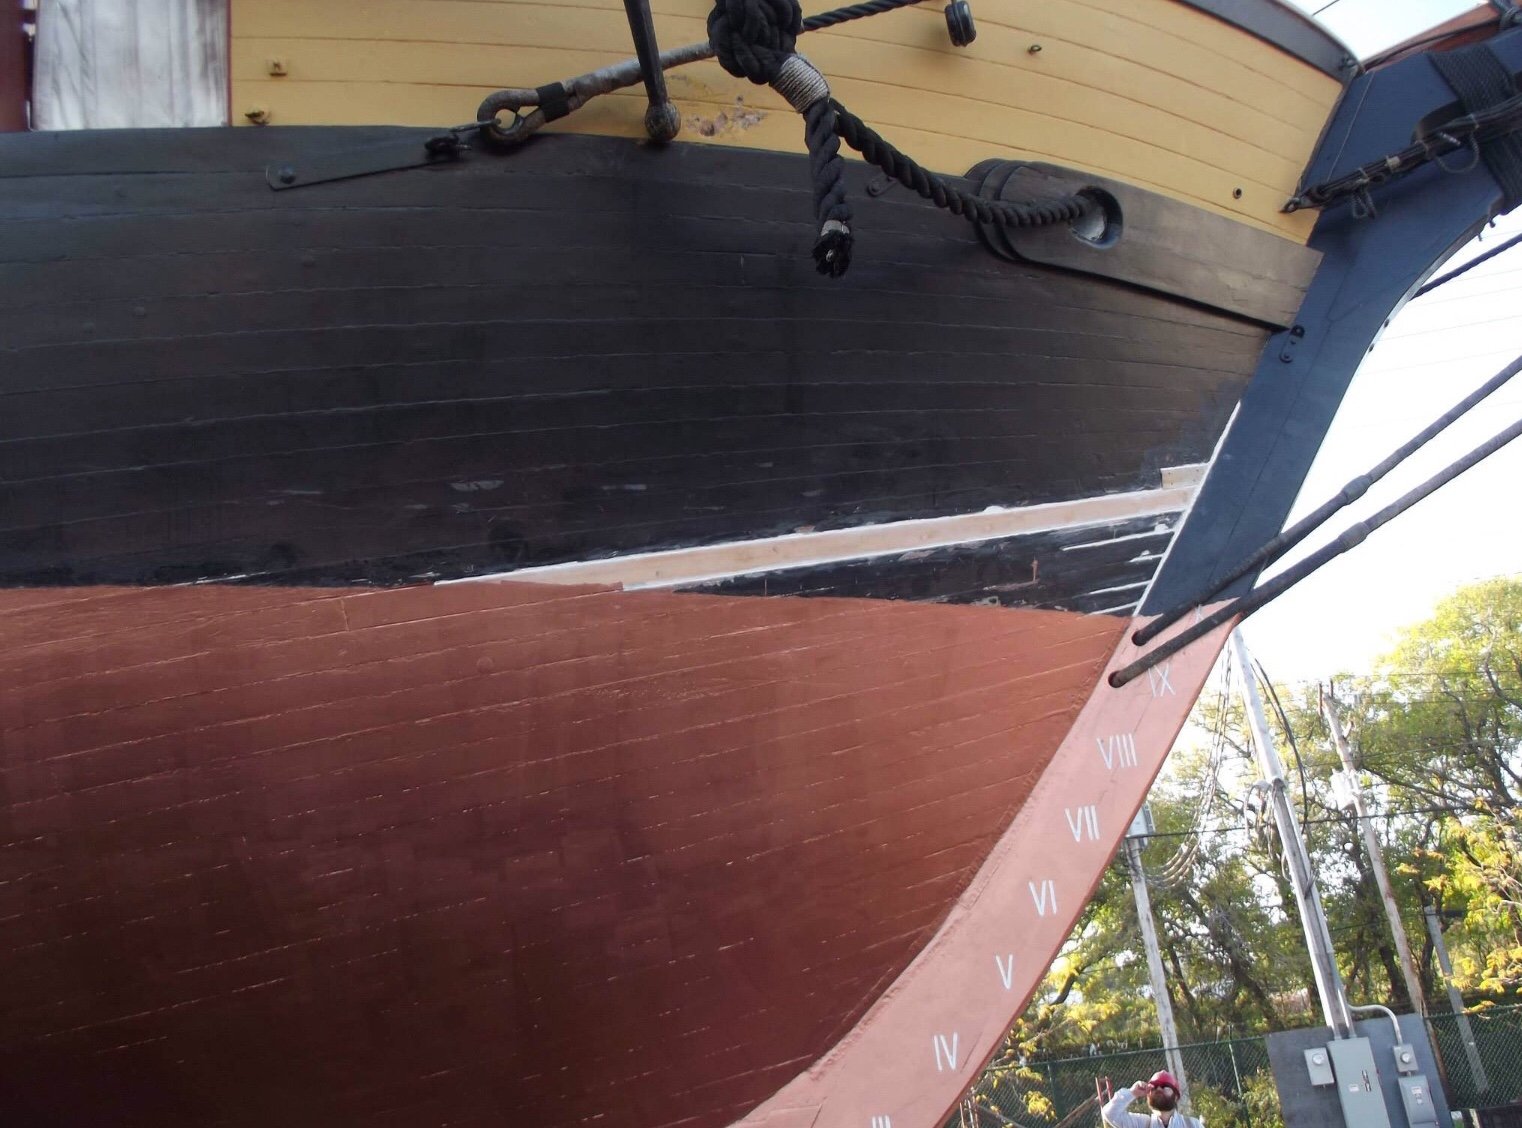
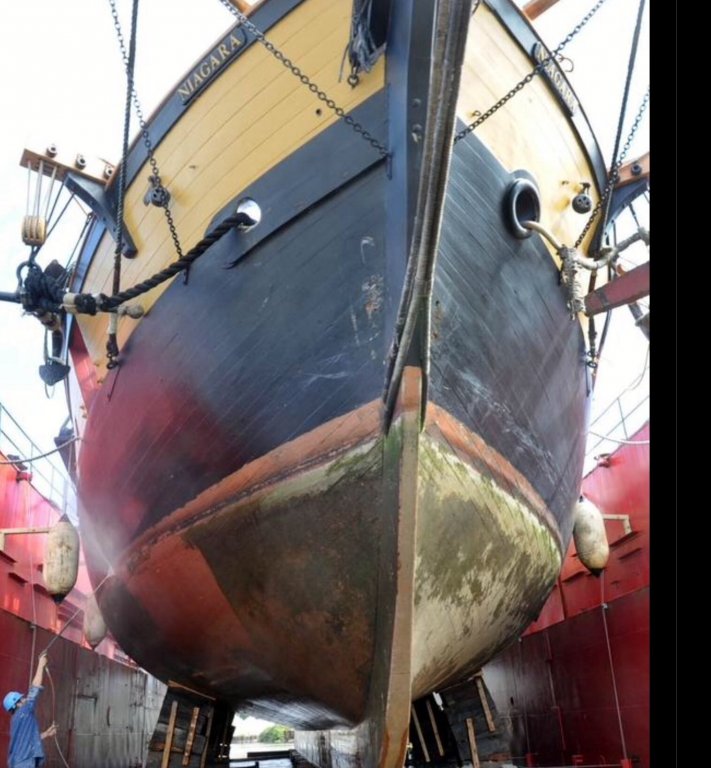
Team Niagara! I’m building the Model Shipways Niagara kit too. I’m building mine as the SV Niagara sail training ship of the present day, not the 1812 version the kit is aiming for , so I’m using this exact color on my hull of the modern antifouling paint in the above photo. My hull planks go in and out of visibility in various places on the hull but they are mostly faired smooth. Regardless of the color you go for, the planks could be visible or not, In my opinion. Niagaras hull is very shallow draft and curves inward right away from the waterline which makes it difficult to view. The second photo shows the marine growth, likely one years worth.

-
I love this subject, Scottish Maid is a very worthwhile vessel to build. Congratulations on overcoming your planking problems the results you achieved from such a rough foundation is amazing! We’ve got the best hobby ever, don’t you think?
- 87 replies
-
- 1
-

-
- scottish maid
- artesania latina
- (and 1 more)
-
I bet it was cold in Canada this morning! Congratulations on your Victory it looks great. Rigging! The other half of ship model building and my favorite part!
-
I can’t imagine anyone would do all the intense labor to form every individual copper sheet so as to fit the topography of the klinker hull. I doubt you could put a flat piece of copper over the planks and then hammer the copper over its entire surface, hammering it into shape to fit perfectly. I Imagine if you attempted this on a real hull your results would be very inconsistent and maybe you wind up damaging the hull too?
-
odd lateen yard rigging
JerseyCity Frankie replied to marktiedens's topic in Masting, rigging and sails
I’m with Allan above, the complex series of spans with blocks on them are what I find familiar (if silly) on older ships with lateen yards. seized intersections like net? Never seen that before, except on net. it strikes me as very odd that the kit manufacturer could get this detail wrong but you have not identified the kit, the manufacturer or the scale. I can imagine a circumstance, if the model is smaller in size, where the kit manufacturer was unable to source blocks small enough to fulfill the need on this bit of gear on their kit, so instead opts for knots in place of blocks for their representation. Just a guess. -
How to tie a rope to handrail
JerseyCity Frankie replied to Ferit's topic in Masting, rigging and sails
For better certainty maybe the specific lines in question should be identified? Knowing the task of the line in question will determine the best way to belay it. -
I saw a fantastic plank on frame model at Joint Clubs in Connecticut one year, jet black whales which I thought were mahogany but the builder told me it was black shoe polish. Looked better than paint. Absolutely convincing, a deep measureless black with no brushmarks.