JerseyCity Frankie
-
Posts
1,338 -
Joined
-
Last visited
Content Type
Profiles
Forums
Gallery
Events
Everything posted by JerseyCity Frankie
-
Smoke damaged ship
JerseyCity Frankie replied to Karen's topic in Painting, finishing and weathering products and techniques
Soot, if the smoke damage you’re describing is soot, is nearly impossible to remove, sadly. I once attempted to remove greasy soot from painted metal that was adjacent to an area that a welding torch was used on. The black greasy coating resisted every solvent I had and couldn’t be removed. Perplexed, I googled “soot removal” and the only advice I could find was to try to “brush it off”. I surely hope your smoke damage isn’t soot! -
Nobody ever wants to take a crack at the HMS Polyphemus, lol. She was an entirely fictional experimental double-ended frigate that Patrick O’Brian made the primary vessel in the second or third novel in his series. Our hero is given her as a command simply because virtually nobody else wants it. It’s sailing qualities are so bizarre it sometimes moves backwards. Still, a good subject for a scratch build in my opinion.
-
What is this type of rig called.
JerseyCity Frankie replied to BANYAN's topic in Masting, rigging and sails
I say this is a three masted topsail schooner. In order to be a schooner she needs two or more masts with a fore and aft rig on the lowers and the main taller than the fore, the image at the top of this thread satisfies those requirements. In order to be a barque of any kind she’d need a full unambiguous square rig on the fore, which she does not have. The crux is the foremast when you’ve got a Gaff Lower AND a square course. Some use the criteria of a fidded tgalent being the thing that turns a mast like that from a schooner formast into a barkentine formast but I’m sticking with the gaff rigged fore and aft sail on the fore as the criteria that swings it solidly into schooner mast territory. I’d argue that the definition of a mast has more to do with the primary lower sails rather than the way the mast is configured way above the topmast. -
Too expensive on eBay, but stil....

-
Painting basswood with Sanding Sealer before you begin to work on it does a lot to combat the fuzziness of the basswood fibers. If you’re like me you’re too cheep to buy better wood to work with but there are still other species of wood more suitable to carving if you look around. For instance older wooden rulers and yardsticks are made of pretty tight grained wood, the older measuring sticks were actually made of boxwood!
-
Who was member #1 I wonder, and what year was that membership launched?
-
Transom angle
JerseyCity Frankie replied to Vstoy68's topic in Building, Framing, Planking and plating a ships hull and deck
If your kit came with a plan of the ship you could use a piece of paper carefully folded to check. You need the side view or Elevation of the hull. Maybe it’s on the sail plan too? Put the edge of a piece of paper so it lines up with the lines of the deck, holding it so it won’t slip. Then fold up one corner of the paper till the edge on the folded part matches the transom on the drawing. You can then use this template to test the angle on the model. -
“The days of sailing vessels “ is too broad a term. Also consider that at any given era in history, thousands tens of thousands or hundreds of thousands could be engaged in the same occupation, worldwide. You shouldn’t assume that all engaged in the same endevour would all have the same emotional makeup. You need to be much more specific.
-
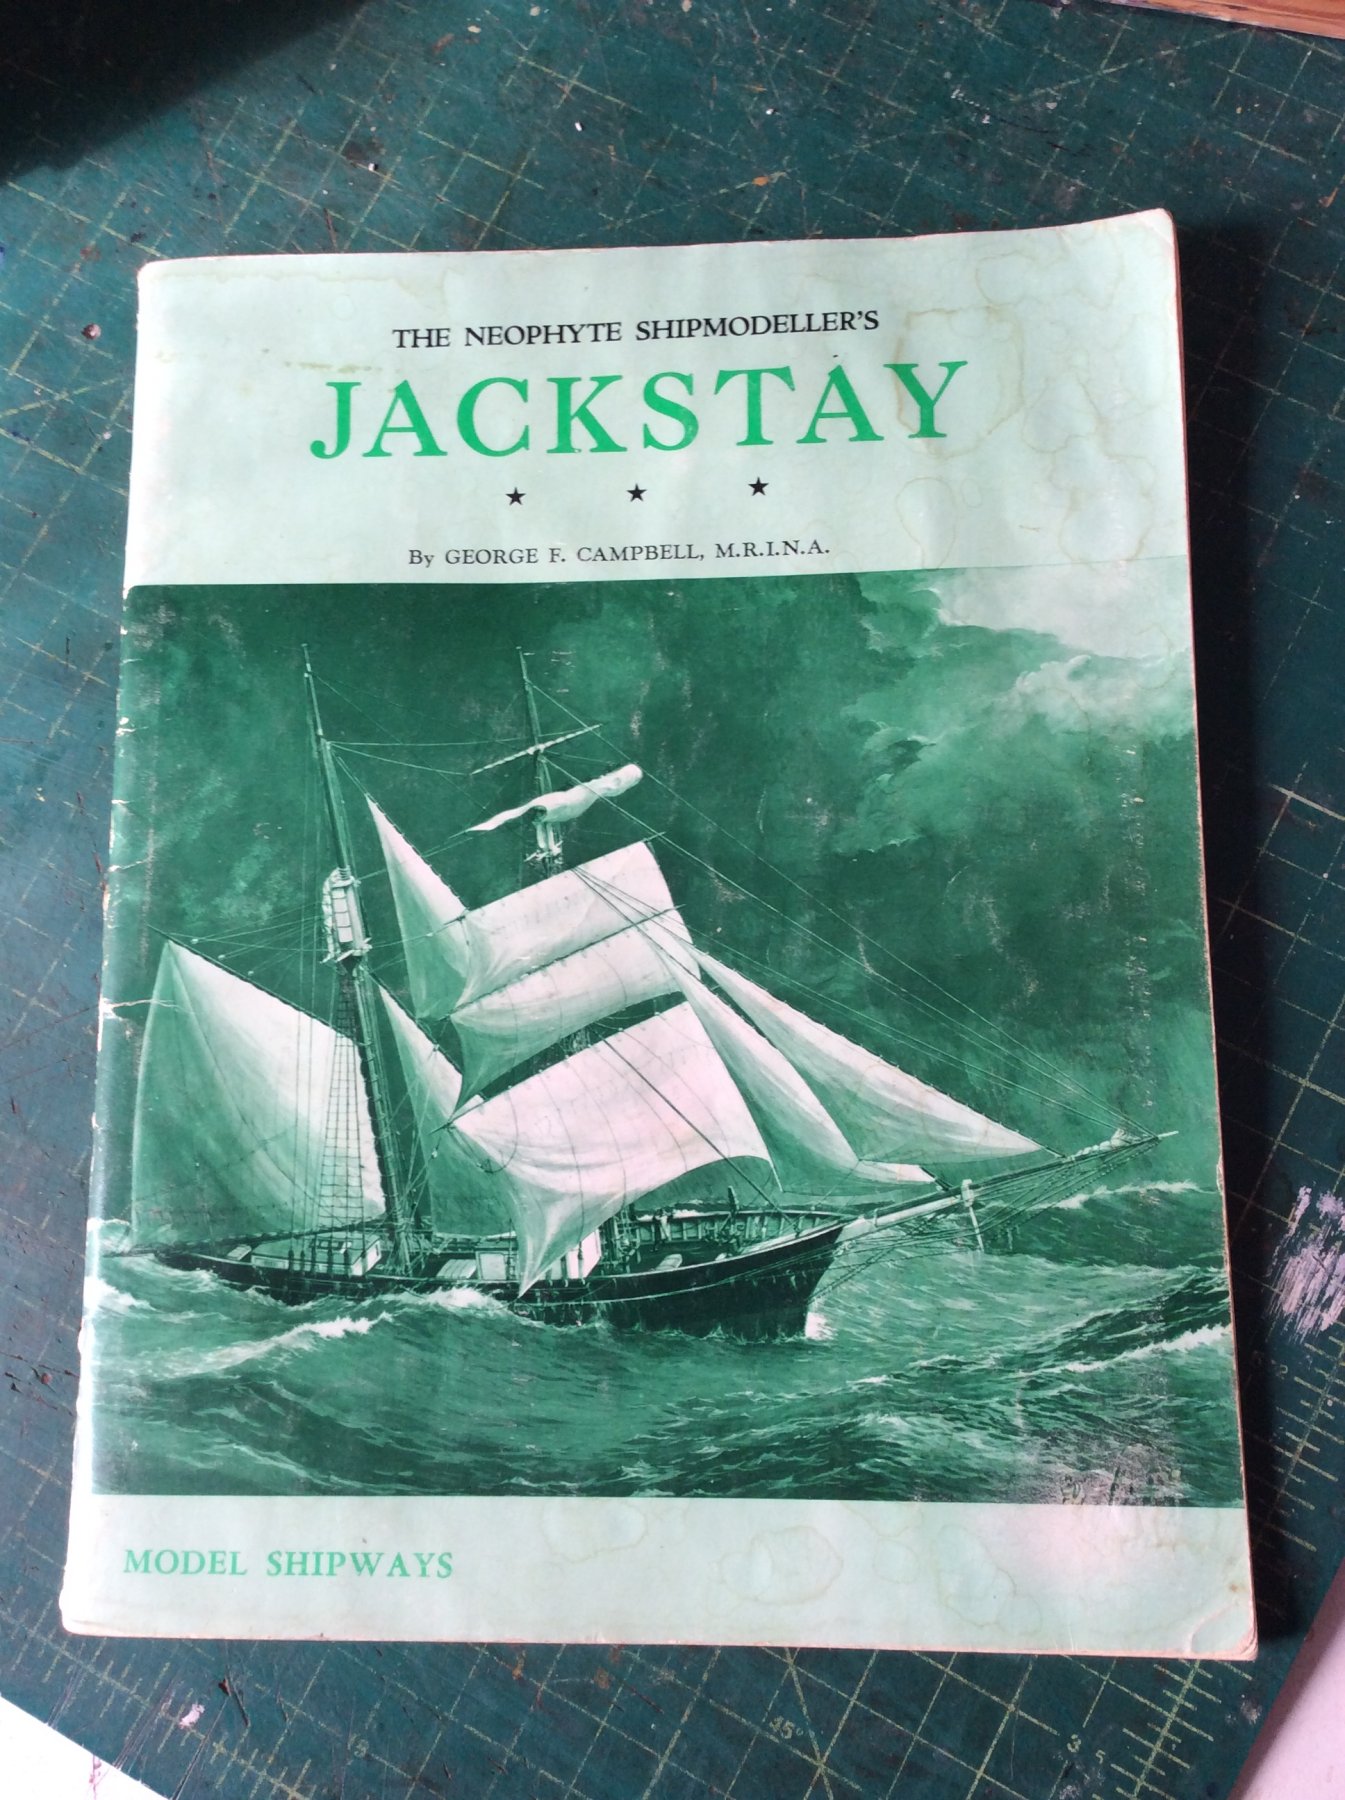
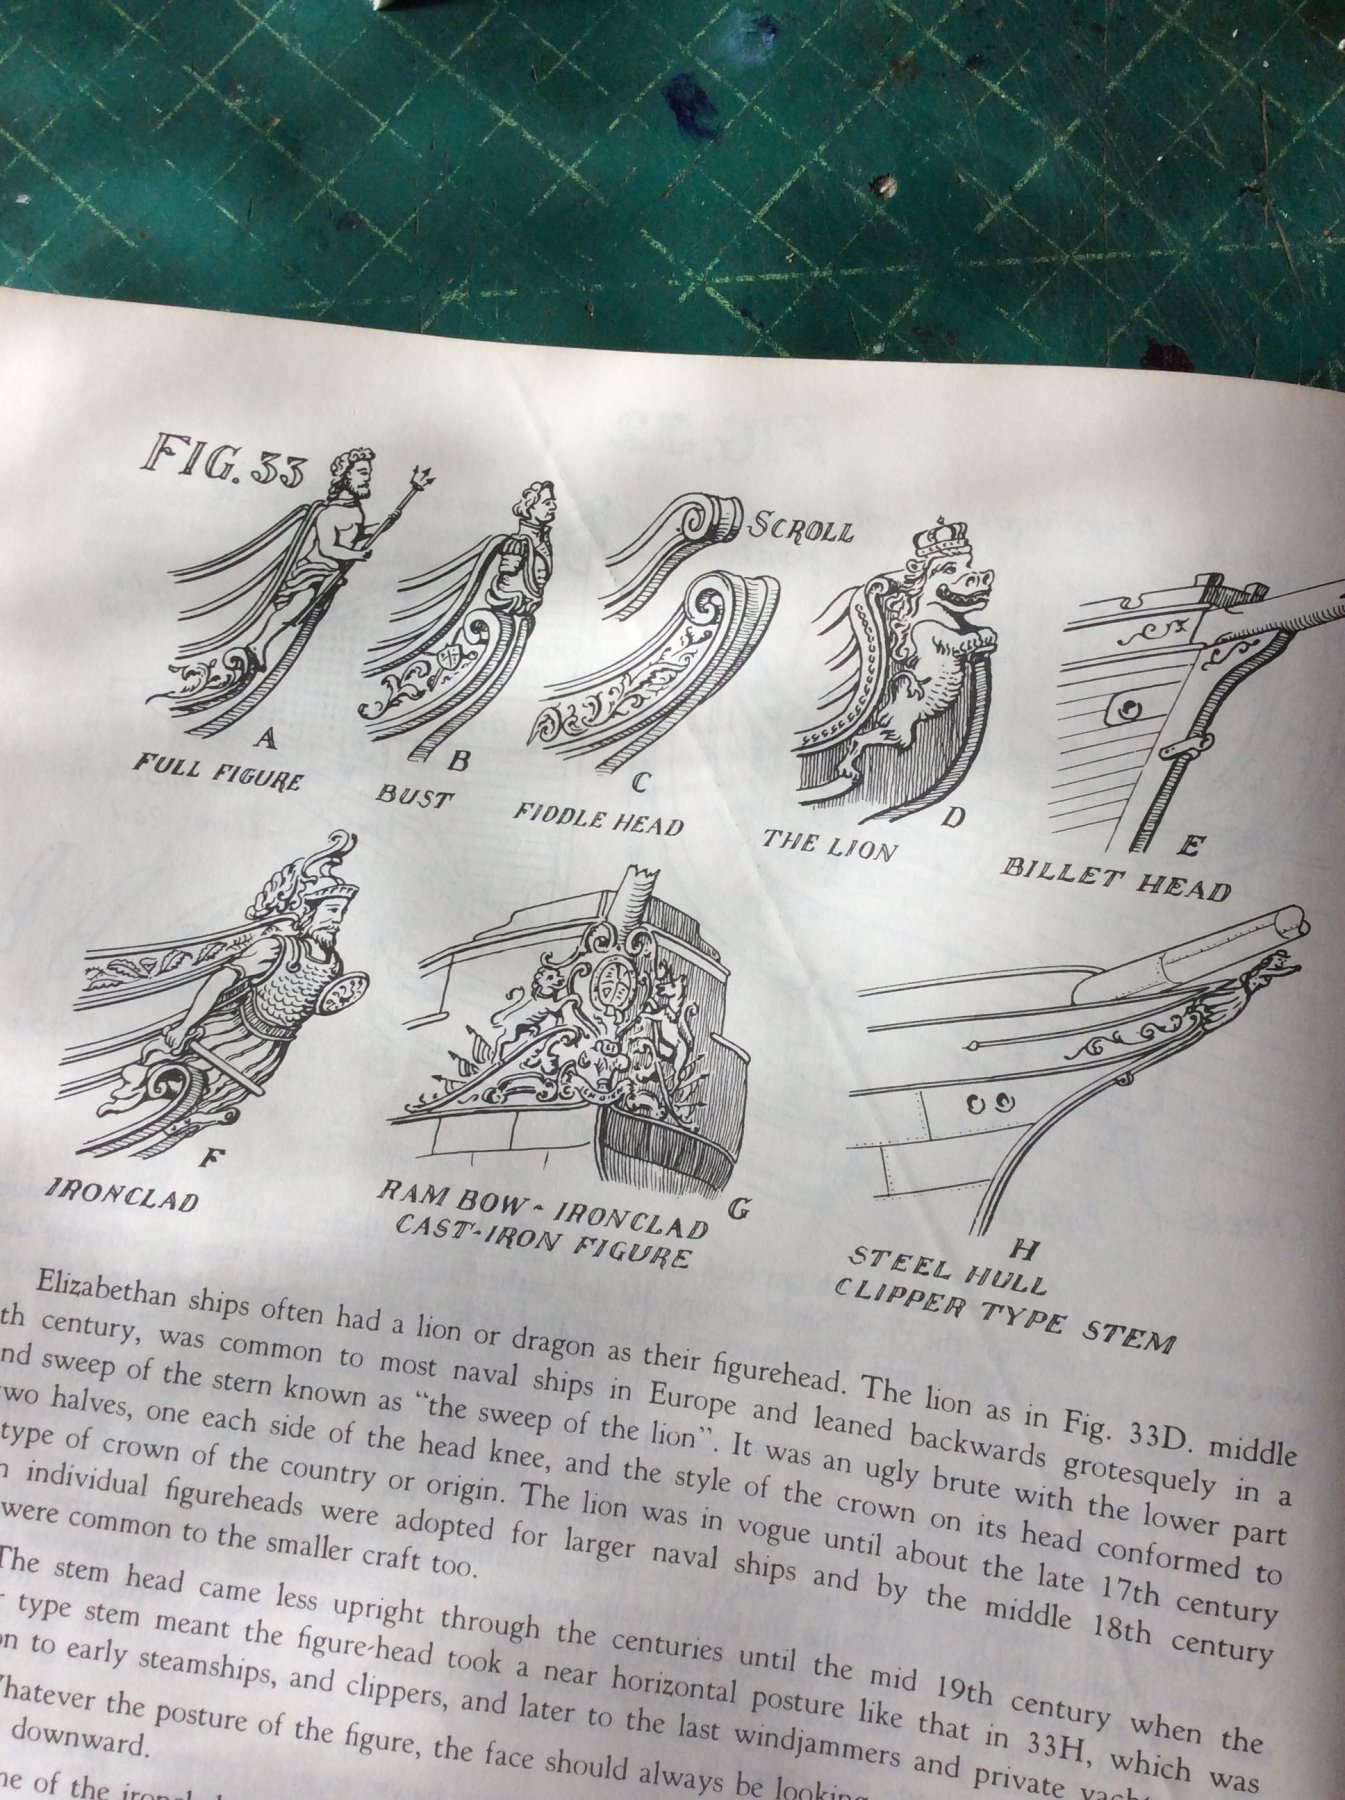
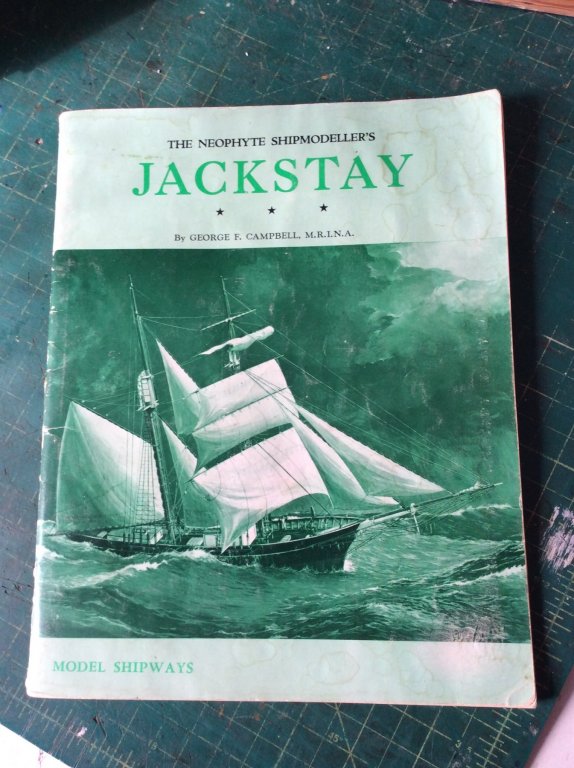
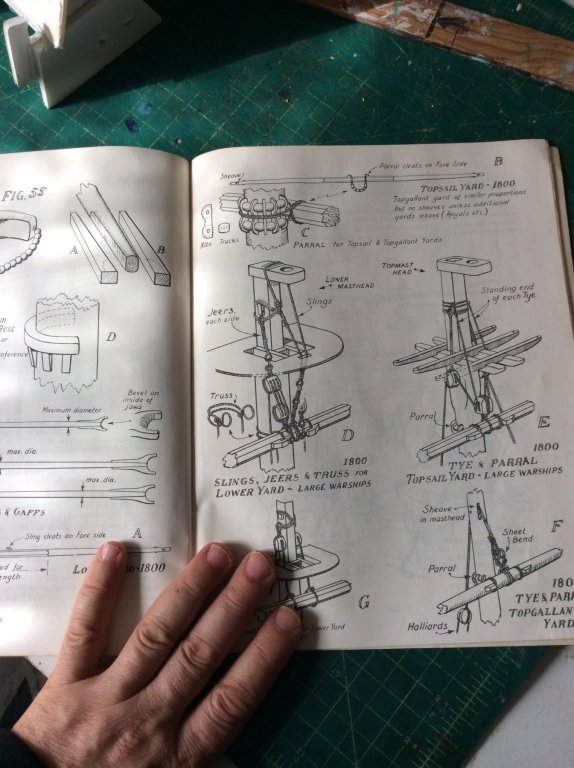
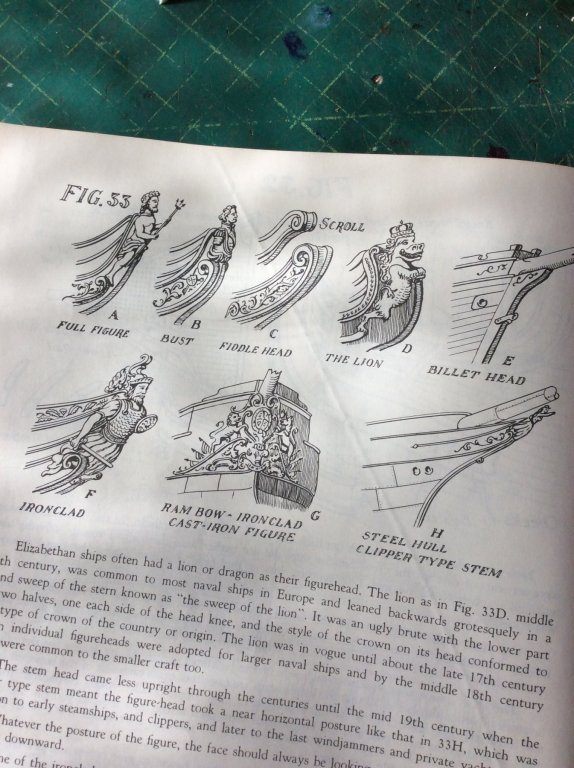
I believe the topic was book recommendations? ....... the Neophyte Shipmodelers Jackstay by GF Campbell is my recommendation. This slim volume is a good place to start if you want to invent the wheel for yourself and begin learning ship model building from the very beginning. The reason it’s perfect for the beginner is that it has some of the best clear uncomplicated illustrations you will ever see. Plus it doesn’t go down the rabbit hole in any one issue, it stays simple and covers the basics in a straightforward and efficient style. It covers all the necessary topics yet remains uncomplicated. Finally it’s inexpensive and easily obtainable in the secondhand market.
-
You should be very proud of this HMS Victory Model, it looks really good. Particularly the color of the ship and the overall texture of the rigging. The colors of the deck hull and fittings are very convincing and look very natural. I know there’s now a lot of push/pull about the historic color of the hull stripes but for me Victory will always have the buttery yellow colors you have selected.
- 1,319 replies
-
- 6
-

-
- caldercraft
- Victory
- (and 1 more)
-
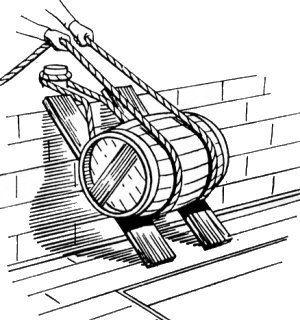
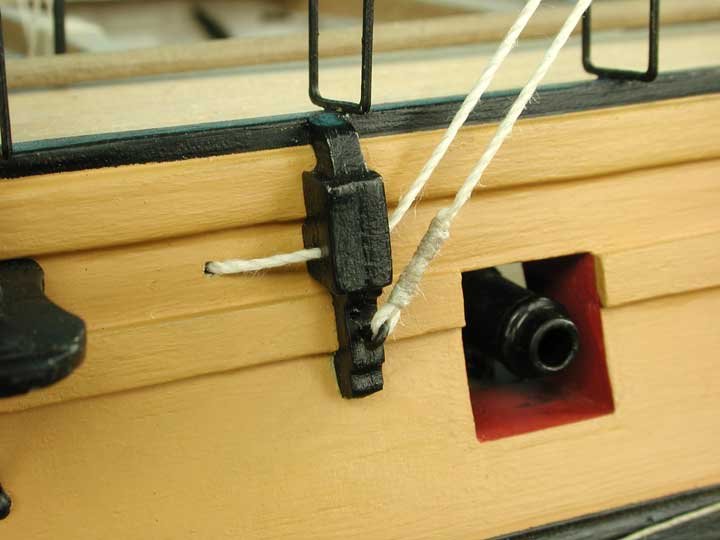
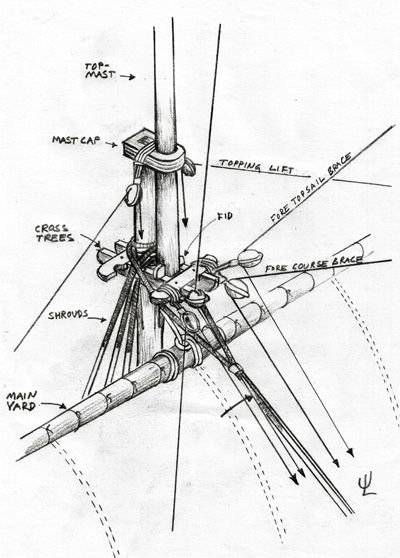
The Chestree has nothing to do with the anchor, they are fairleads for the Tacks. There should be a hole bored through them from fore to aft for the line to reave through, and another hole bored through the hull adjacent to them that leads the Tack inboard to the Gundeck where it belays on a kevel or huge cleat.The two vertical paralel wooden “fenders” are actually used for Parbuckling casks and barels aboard, the barels role up the ships side and the two wooden tracks give a smooth surface to roll on. Here’s a simplified example of how it works. I scincearly hope the boat dropping off the stores rows out from under when they begin lifting. On a ship the size of Victory it must have been quite a task.
- 1,319 replies
-
- 5
-
-
- caldercraft
- Victory
- (and 1 more)
-
Getting a tight finish to a rope
JerseyCity Frankie replied to Marco R's topic in Modeling tools and Workshop Equipment
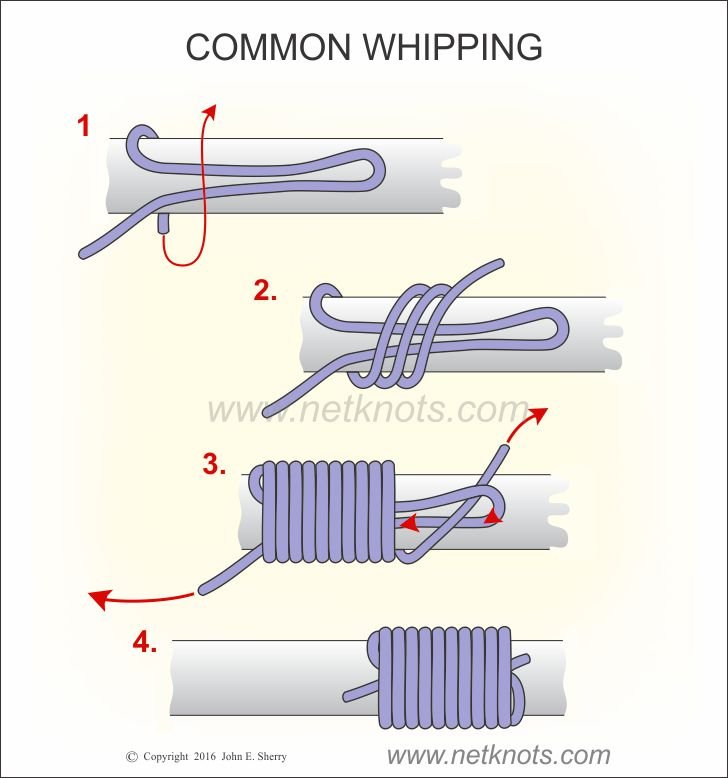
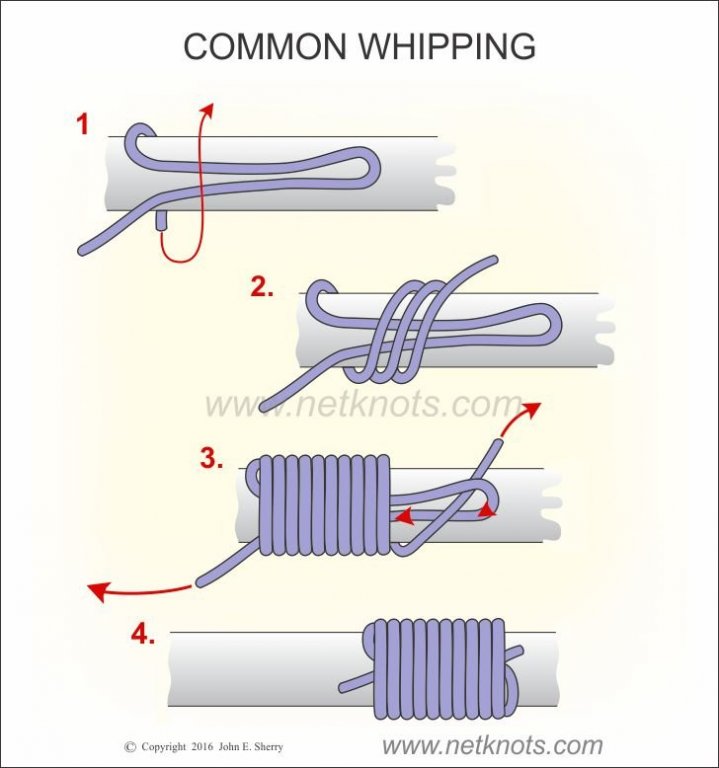
When cut, the ends of the rope are going to Unlay no matter how much twist. Depending on the material you use some rope will unlay more than others. In scale models the Whipping winds up being dipping the end in glue. Synthetic line can be cut with a hot knife and this heat melts the fibers at the cut. But if you want Historical Acuracy you will have to put a Whipping on the end of the line, which is what is done in full size practice. Whipping is done with a needle and thread, look up “sailmakers Whipping “ and “common Whipping”.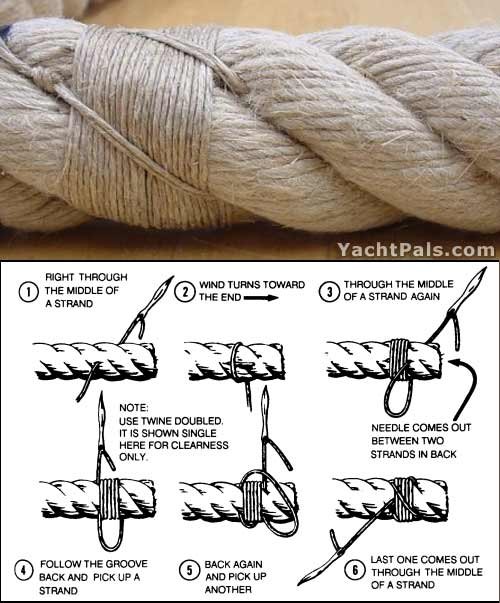
- 14 replies
-
- 3
-
-
- finishing rope
- domanoff
- (and 1 more)
-
Optimal Bowsprit Angle
JerseyCity Frankie replied to Jeffrey Modell's topic in Masting, rigging and sails
This has all the makings of a fascinating lecture. I could imagine someone trying to document the degree of Bowsprit Steeve on every vessel for which data can be obtained and then build a presentation that would show the many influences that would arise over time to guide the shipwrights decisions about the angle. Factors as mentioned above by Henry. Whenever I’ve gotten involved with a sailing vessel I’m always eventually reminded how every individual part of the vessel is subtly effected by every other part of the boat. You can’t isolate anything aboard and say that it’s independent. If you perform some task at one end of the ship it will have subtle effects all over the rest of the boat. -
Optimal Bowsprit Angle
JerseyCity Frankie replied to Jeffrey Modell's topic in Masting, rigging and sails
I imagine the pitching motion of the ship is effected most by waterline length, the longer the waterline length ( or maybe call it Beam to Length ratio) the less pitching. It seams to me that the more modern a ship, the more shallow the Steev of the Bowsprit. And I’m guessing-GUESSING- this is due to the greater hull lengths achieved through time. Older ships appear to have much steeper Bowsprits? However the cutter rig appears to always have a very shallow Bowsprit despite a short Beam to Length ratio. But cutter headrigs are very odd things... -
Optimal Bowsprit Angle
JerseyCity Frankie replied to Jeffrey Modell's topic in Masting, rigging and sails
This is an excellent question! I will throw out also that the pitching motion of the ship must be taken into account. Maximum pitch needs to be known to avoid the jibboom plunging into the sea. Broadly, A sailmaker and rigger would be juggling a LOT of math calculations and these would be driven by the Center of Effort of the entire rig, since the headsails job is to effect this imaginary point in space above deck by countering it-or altering it- with the collective Center of Effort of the headsails. These same considerations would be in play in determining the size and shape of the Spanker, for the exact same reasons. So the factors effecting the Steev of the Bowsprit are also effecting the angle of the Spanker Gaff. The higher off the water the tip of the Bowsprit, the higher the center of effort for the headsails will be. -
I’m a huge fan of the 1974 Albert Finney film. Will you be using that remarkable film as a reference material? The interior scenes were shot on a soundstage but I wonder how closely the art department followed the actual trains appearance? Sad to hear of the passing of Mr Finney. I regard his performance in that film as being one of the most remarkable portrayals of a character in the history of cinema.
-
No need to bend anything. Flip the model upside down on a big sheet of paper or card and trace carefully the outermost extent of all the frames/bulkheads. This line represents the outboard edge of the waterway. On your paper copy you then draw the inner edge of the waterway parallel and inside of the first line, as wide as your waterway is going to be. Note that you really need just one side of the ship as the symmetry should assure that one line works for both sides. Now cut out your paper waterway- it will be a long curved ribbon. Lay it onto the model to see if it fits and if it doesn’t fit perfectly cut it with scissors and patch it with tape until it’s perfect. Lay this pattern piece onto sheet stock (available wherever fine basswood is sold at craft stores) and cut with x-acto knife. Flip the pattern piece upside down and cut the other waterway. Glue.
-
Ive restored a lot of old broken models and they usually come to me with a broken Bowsprit and broken tgallants or topmast. Always the broken Bowsprit, ALWAYS. I used to assume this was from the model falling off a shelf but now I’m not so sure. The first thing I try to do is to simply glue the broken piece back using the existing rigging. Again and again when I try to dry fit the busted spars back into their proper place the rigging is too tight to allow the jointing together of the pieces at the point where they broke. This leads me to believe it’s the RIGGING SHRINKING -over time- that breaks these spars, not the cat knocking the model off the shelf.
-
It’s true all the brass on a ship is going to be regularly polished. But in my opinion there’s WAY too much bright shiny brass on miniature ship models. Particularly what I’m thinking of is the two-tone ship model that has two colors: the dark brown of the varnished wood and the outrageously shiny brass flecked all over the hull and deck. On these models everything made of metal (and many things that are not!) are bright shiny brass. In my view the only things that should be shinny brass are the bell and the actual handrails -not the railing supports not the hinges on the doors, not the pintels and gudgeons, not the block strops or hooks, or the sheaves, not the anchor and certainly not any chain anywhere.....you get the picture.
-
Good to see you decided to put sails on her! I know it’s a minority opinion, but I think a sailing ship model is missing a lot when there’s no sails on her. Yours look great and I know how much additional work is involved in making and bending on the sails.
- 708 replies
-
- 1
-
-
- victory
- constructo
- (and 1 more)
-
Revelle fictional ship?
JerseyCity Frankie replied to William-Victory's topic in Nautical/Naval History
The nice thing about a fictional ship is that you won’t be limited by “reality”. Meaning if you’re building a “real” ship and you find reference material that clashes with your subject’s models construction or parts you have to alter the kit to match the reference material. If you’re doing a fictional ship your only concern is to stay within the state of the art of the timeframe you’re working in. Now you’re free from many constraints. -
mayflower by Artesania Latina
JerseyCity Frankie replied to Aim High 8892's topic in Masting, rigging and sails
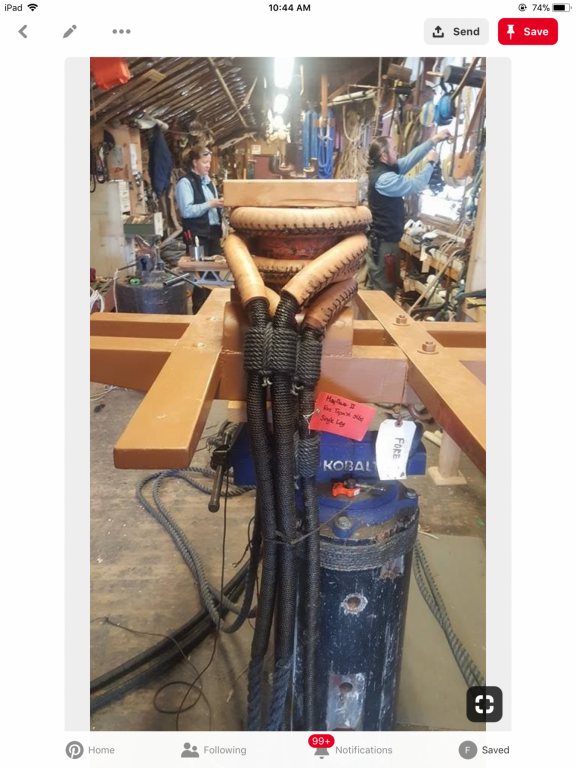
Have you done the shrouds already? The reason I ask is because the backstays are attached to the masthead in the same way as the shrouds, and they go on OVER the shrouds. The shrouds and backstays and forestays all have an eye seized into their ends and the eye slips right over the top of the mast and rests on the bolsters upon the Trestle Trees. Here’s two diagrams I found by googling “topmast shrouds”. You can see the eyes that went over the mastheadand are now stacked on top of the bolsters and trestle trees. This image is fuzzy but you can see in the upper right there’s a diagram showing each individual eye and it’s sequence in the stack of eyes. This drawing omits the backstays eyes because it’s aparently the Lower masthead but the backstays would go over the shrouds and look exactly like the eyes of the shrouds in the drawing. Heres the real thing being set up in the shop. I think this is for the Morgan. The eyes have been leathered.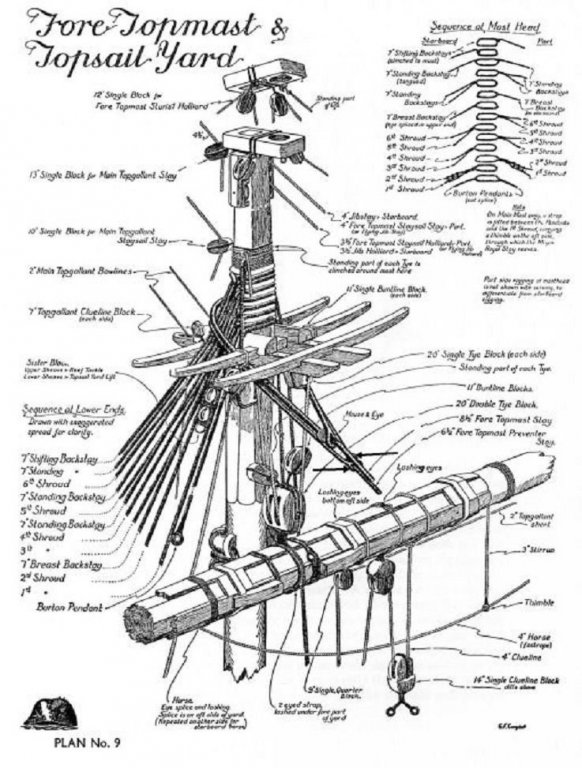
-
Old model shipways USS essex (solid hull)
JerseyCity Frankie replied to Mike Esposito's topic in Wood ship model kits
I agree with those recommending a new modern kit. The wood won’t be dry and splintery and warped, the contents will be intact, the plans won’t be stained with someone else’s coffee rings, etc. a fair comparison of the cost of a new kit over an old one should take into account the amount of unknown troubles the eBay kit could contain. And if you’re going to spend six months to a year completing the kit, the higher cost of the new kit will mean only a few more pennies each day of work. Pennies that are totally worth it. -
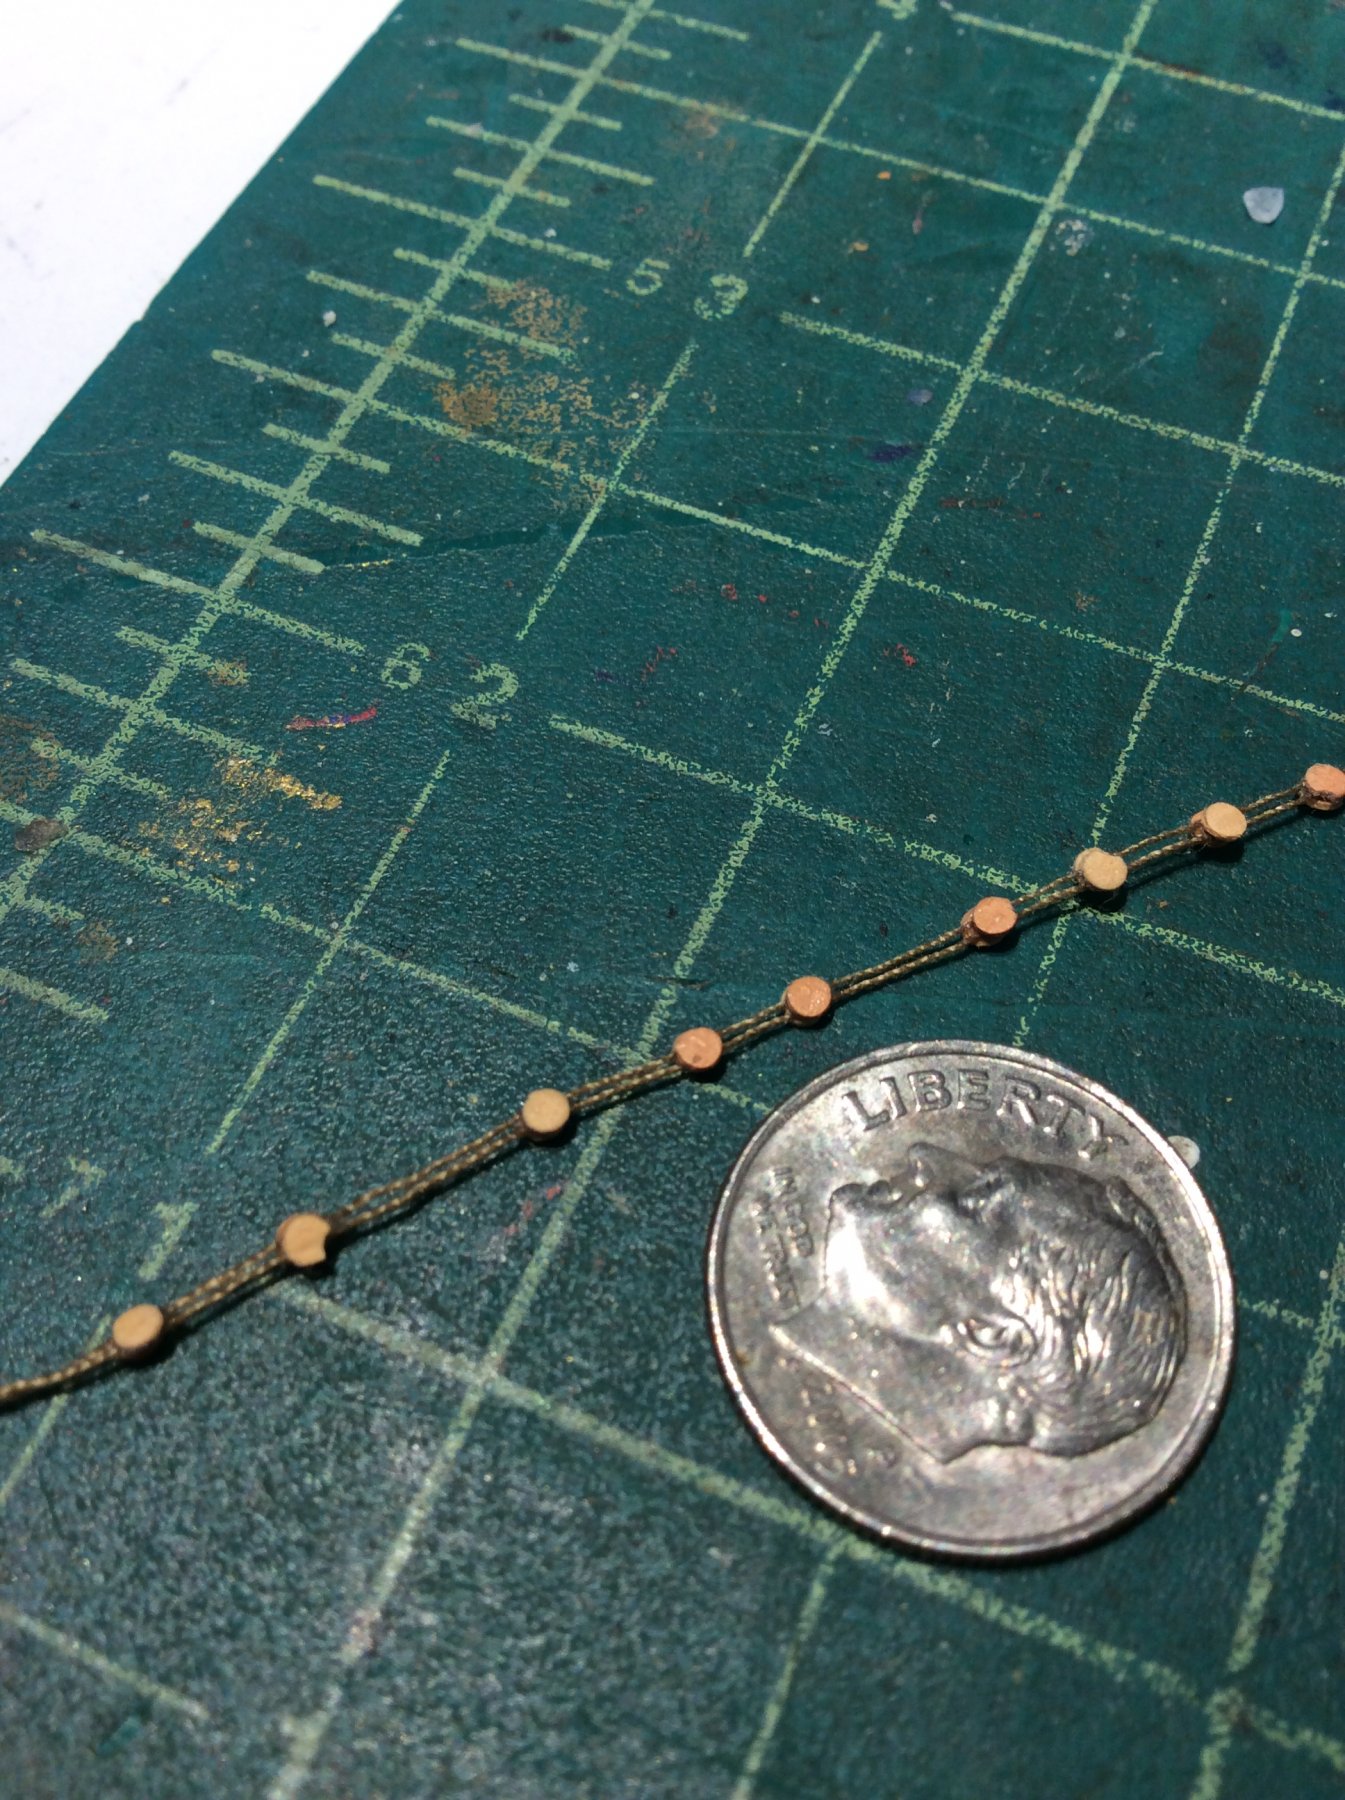
I’ve used this technique a few times: I tape three pieces of thin thread parallel and equidistant from each other in relatively long lengths on a piece of glass. These will wind up representing the falls of the tackle. At intervals I white glue my blocks onto all three pieces of thread. In the photo I used punched paper discs. In absence of a punch cut with xacto. When dry you can cut two of the three threads outboard of pairs of blocks, leaving three between blocks and one emerging from either end.the example in the photo used only two threads but you get the picture.

-
Plastic model cement won’t work gluing plastic parts that are painted. The mating surfaces need to be naked plastic. White glue can be used to glue painted parts together but it’s not an ideal bond. I’m guessing you could get through an entire modeling career using only cyano acrylate (CA) and white glue, between the two of them you can glue nearly everything. But still I think you can never have enough verieties of glues.